
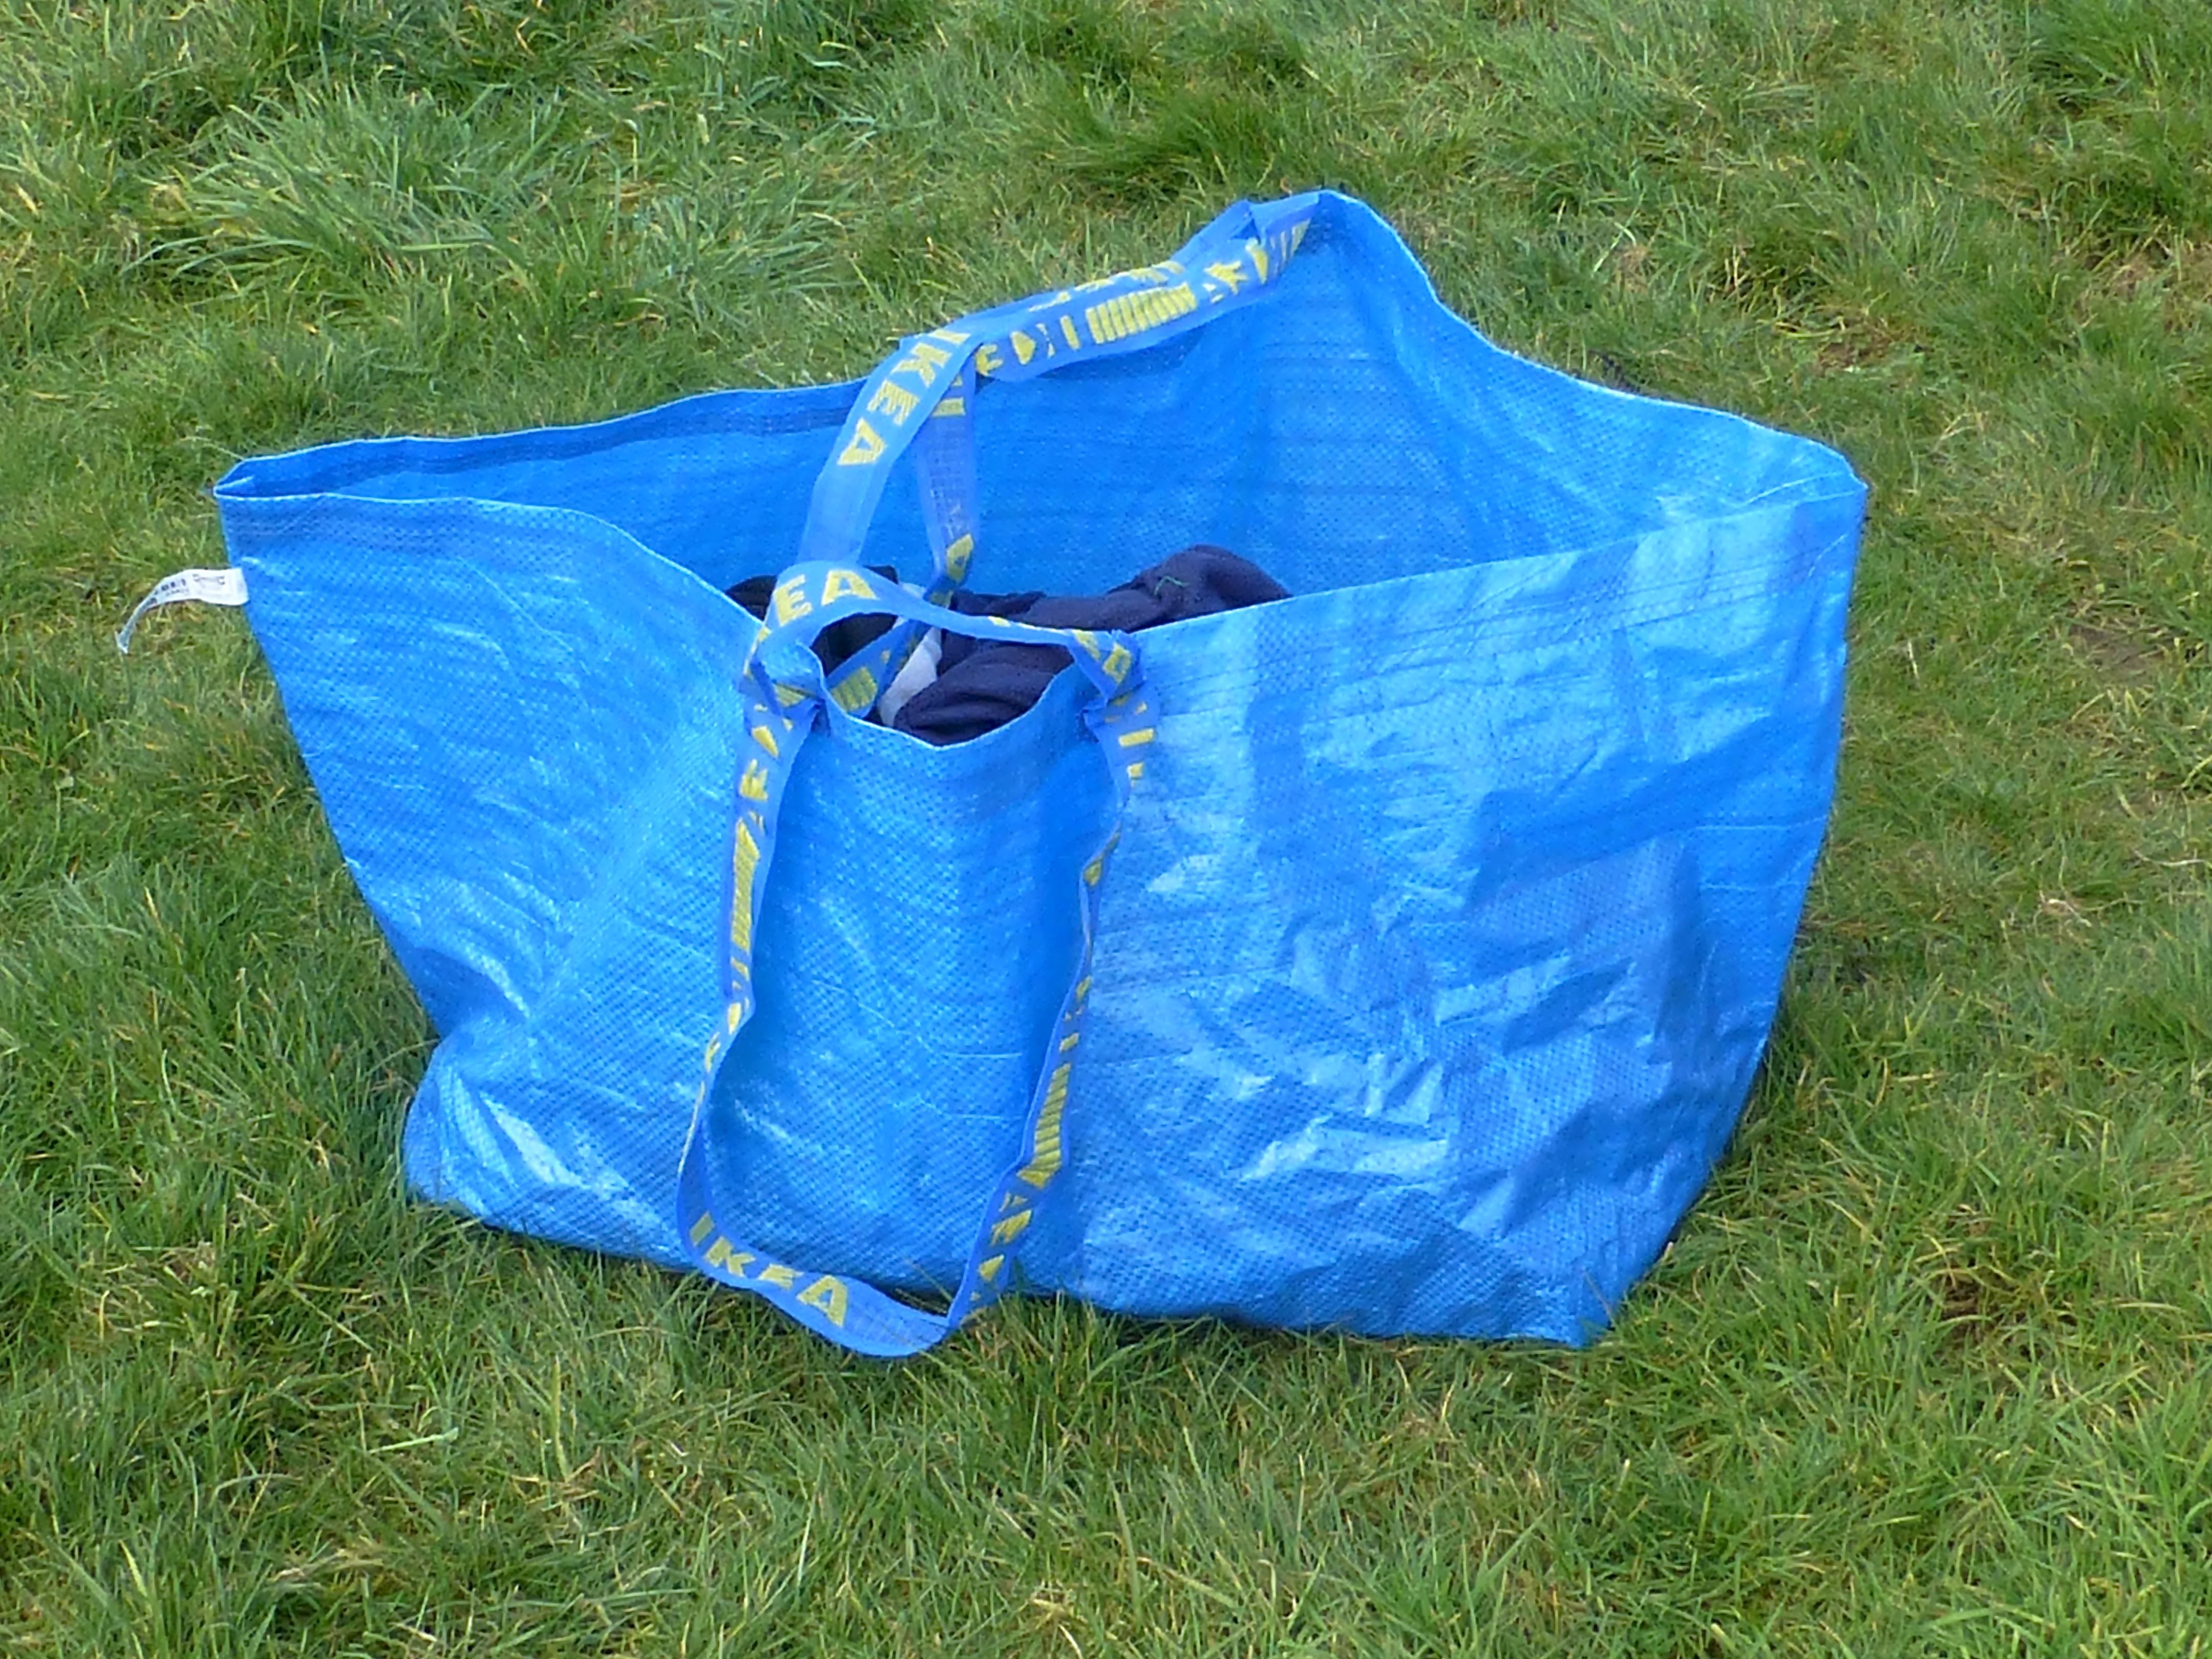
Continuing the theme of ‘One-Hour’ makes (well, it wasn’t really a theme until just now when I realised that this project also took less than an hour to make), I’ve designed a simple pattern along the lines of one of those big blue Ikea bags.
You know the ones; they make great laundry bags, shopping bags, picnic hampers etc., but there’s one major design fault – they’re just so damned ugly!
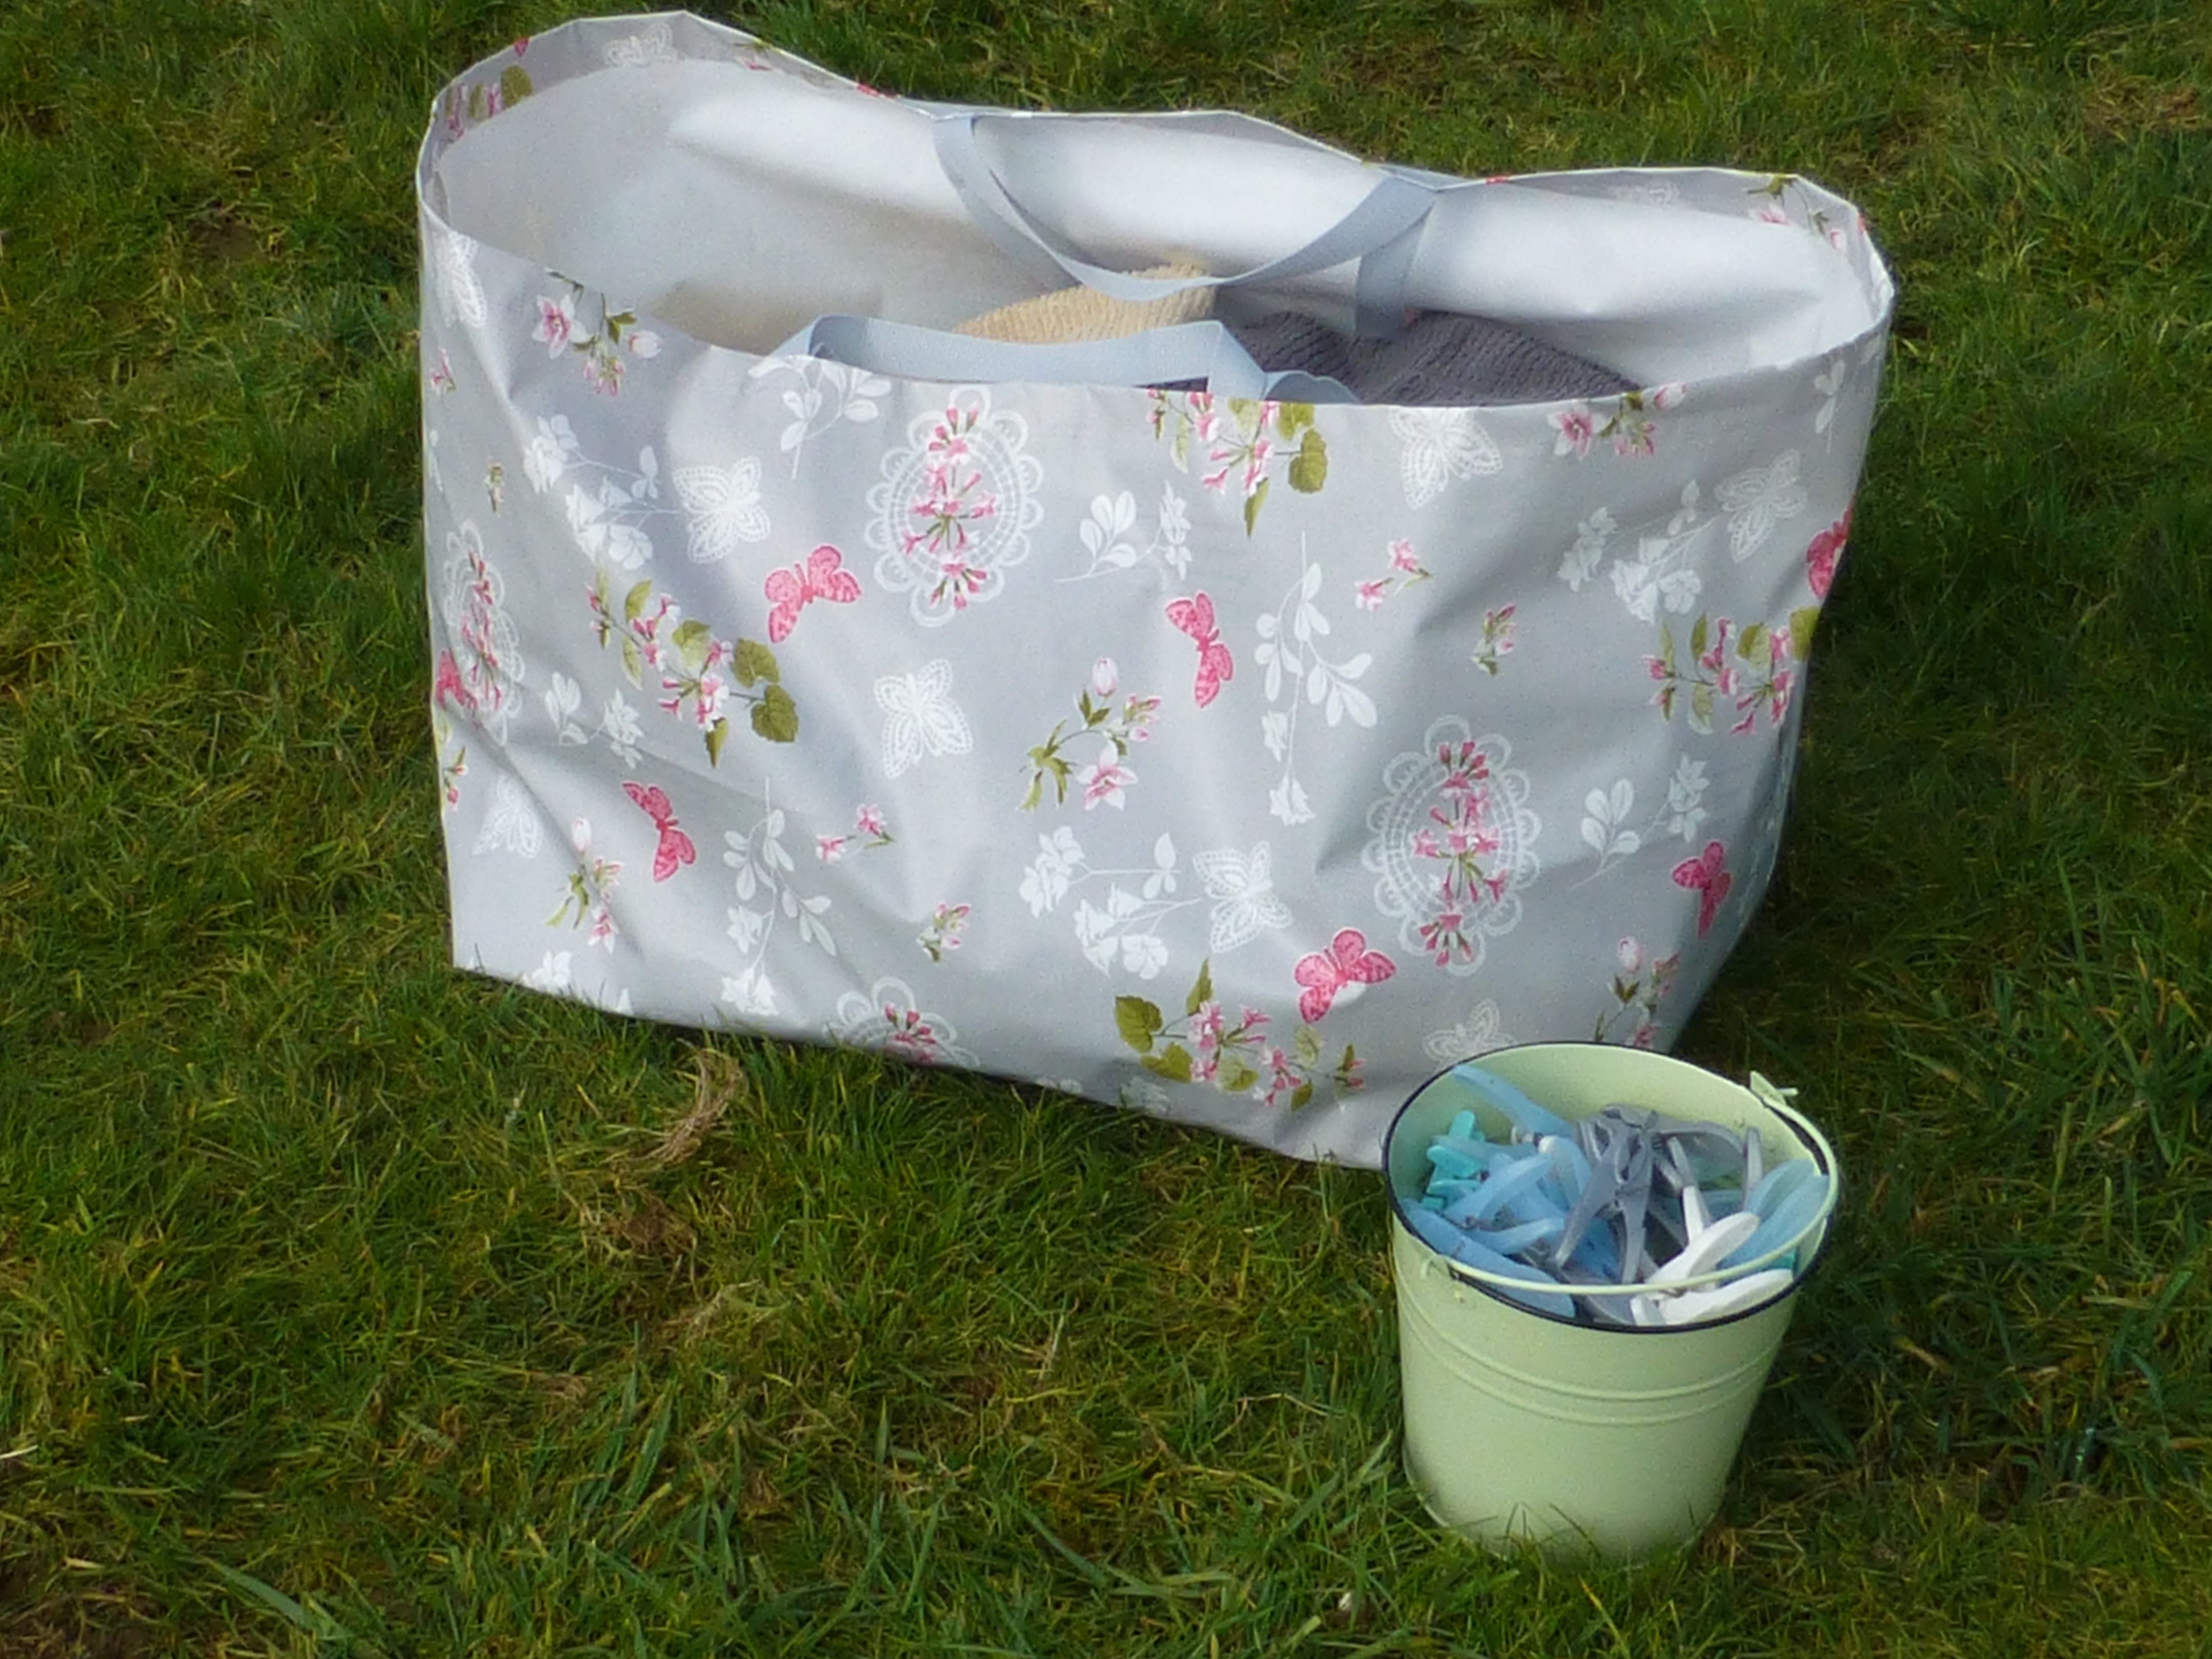
There’s a huge choice of suitable vinyl fabric out there, but I fell in love with this “Butterflies” print and ordered a couple of metres online which turned out to be more than enough.

I did come across a tutorial but it involved printing off a pattern on about twenty sheets of A4 paper, piecing it all together, sellotaping and then cutting out, all of which would take longer than actually making the entire bag!
There had to be a better way so, after hours and hours of head-scratching, making sample after sample and at least a dozen pattern refinements (not really!), here is my somewhat simpler pattern: –
Cut one piece of vinyl fabric 90cm x 120cm.
That’s it.

Now, vinyl is notoriously difficult to iron because, basically, it just melts and welds itself to your iron. So you can either buy it from a shop and ask them to roll it for you or put up with the creases which will eventually disappear. A hairdryer is said to speed up this process.
I didn’t bother:)
The only other supplies you’ll need are 2 1/2m of 2.5cm polyester webbing and some matching thread.


Stitching vinyl needs a little bit of forethought as it can be tricky. Sewing right sides together is no problem but when top stitching you may need to change to a Teflon coated foot or improvise with masking tape on the bottom of your normal foot. Putting a layer of tissue paper between the machine bed and the vinyl works for the bottom layer, with the added bonus of ripping away easily afterwards.
Use clips instead of pins to avoid any tell-tale holes in the vinyl.
A longer stitch length is used too, as a short stitch can weaken the vinyl and it could rip between the stitches.

Start by folding your fabric with right sides together aligning the two short edges and sew a 1cm seam along each side, leaving open along the edge opposite the fold.

Bring the seam to the centre and lay flat to form a corner as below. Mark 18cm from the corner along the seam and draw a line all the way across at right angles to the seam as shown.

Sew along this line.

Trim the excess fabric leaving a 1cm allowance.

Repeat with the opposite corner, then turn the bag right sides out.

Turn down a 2.5cm hem and stitch close to the raw edge.
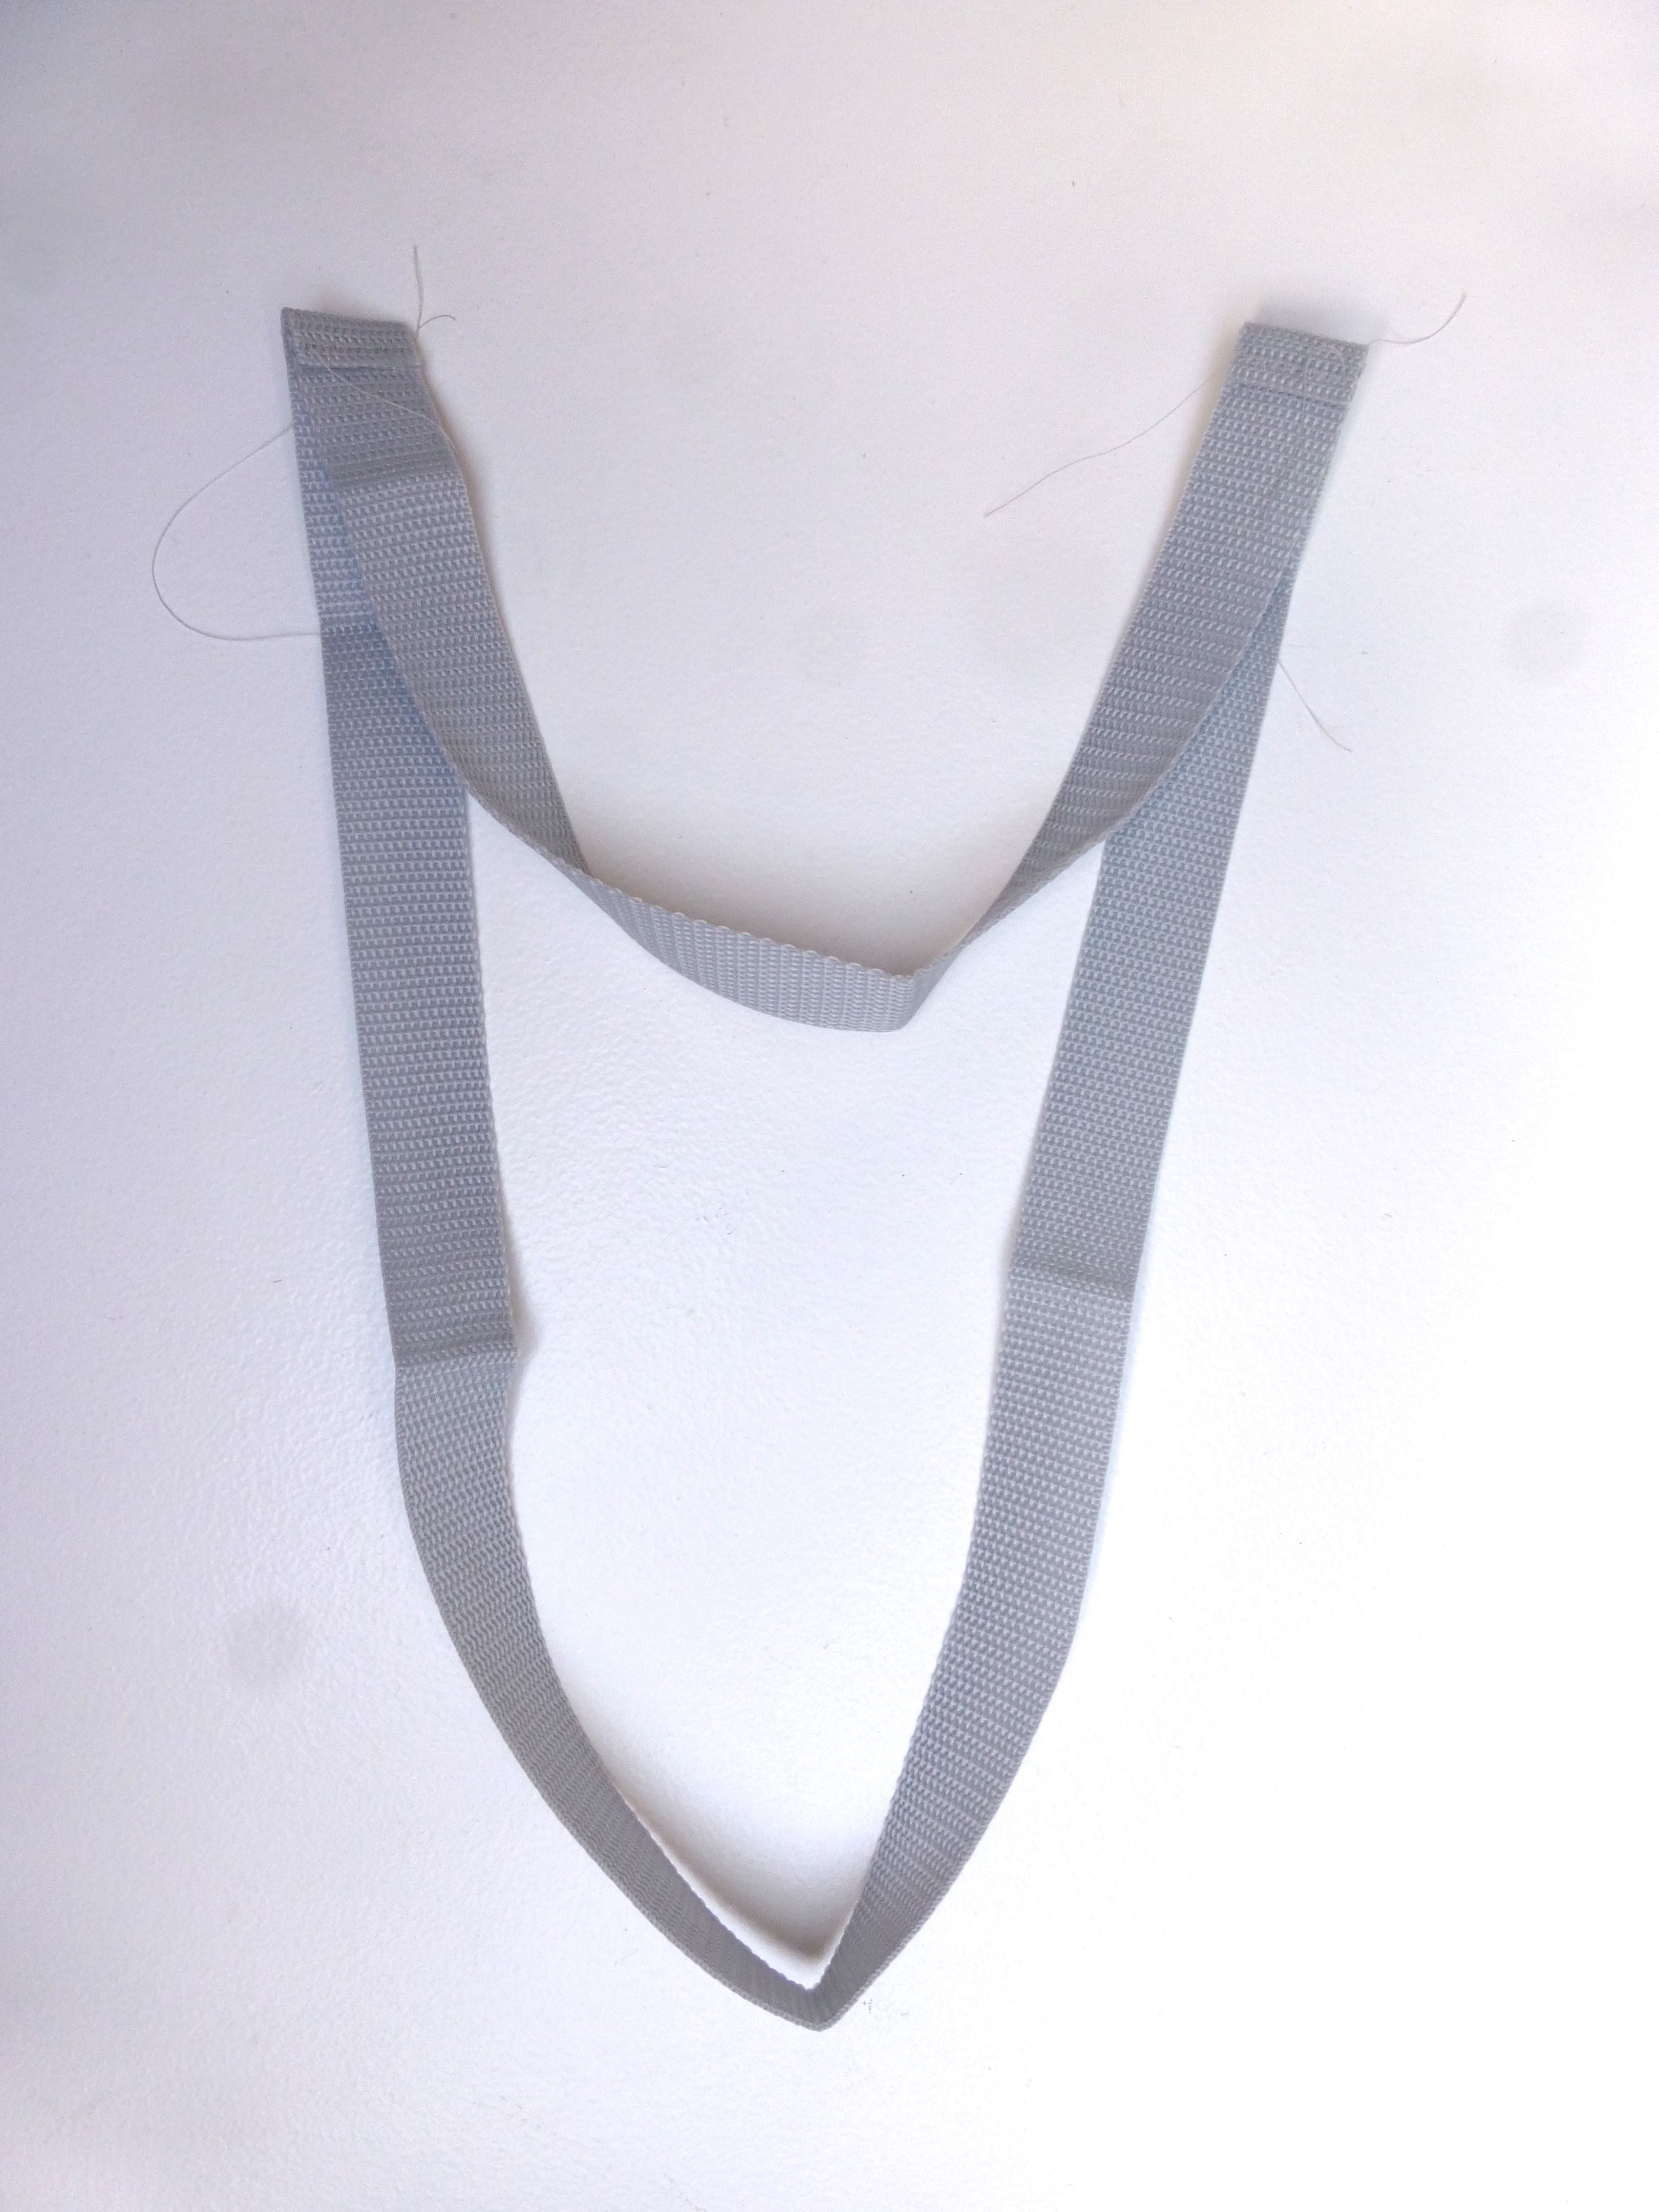
Cut some webbing: –
2 x 35cm
2 x 74cm
Lay a short length of webbing on top of a longer length about 1cm from the end as shown.
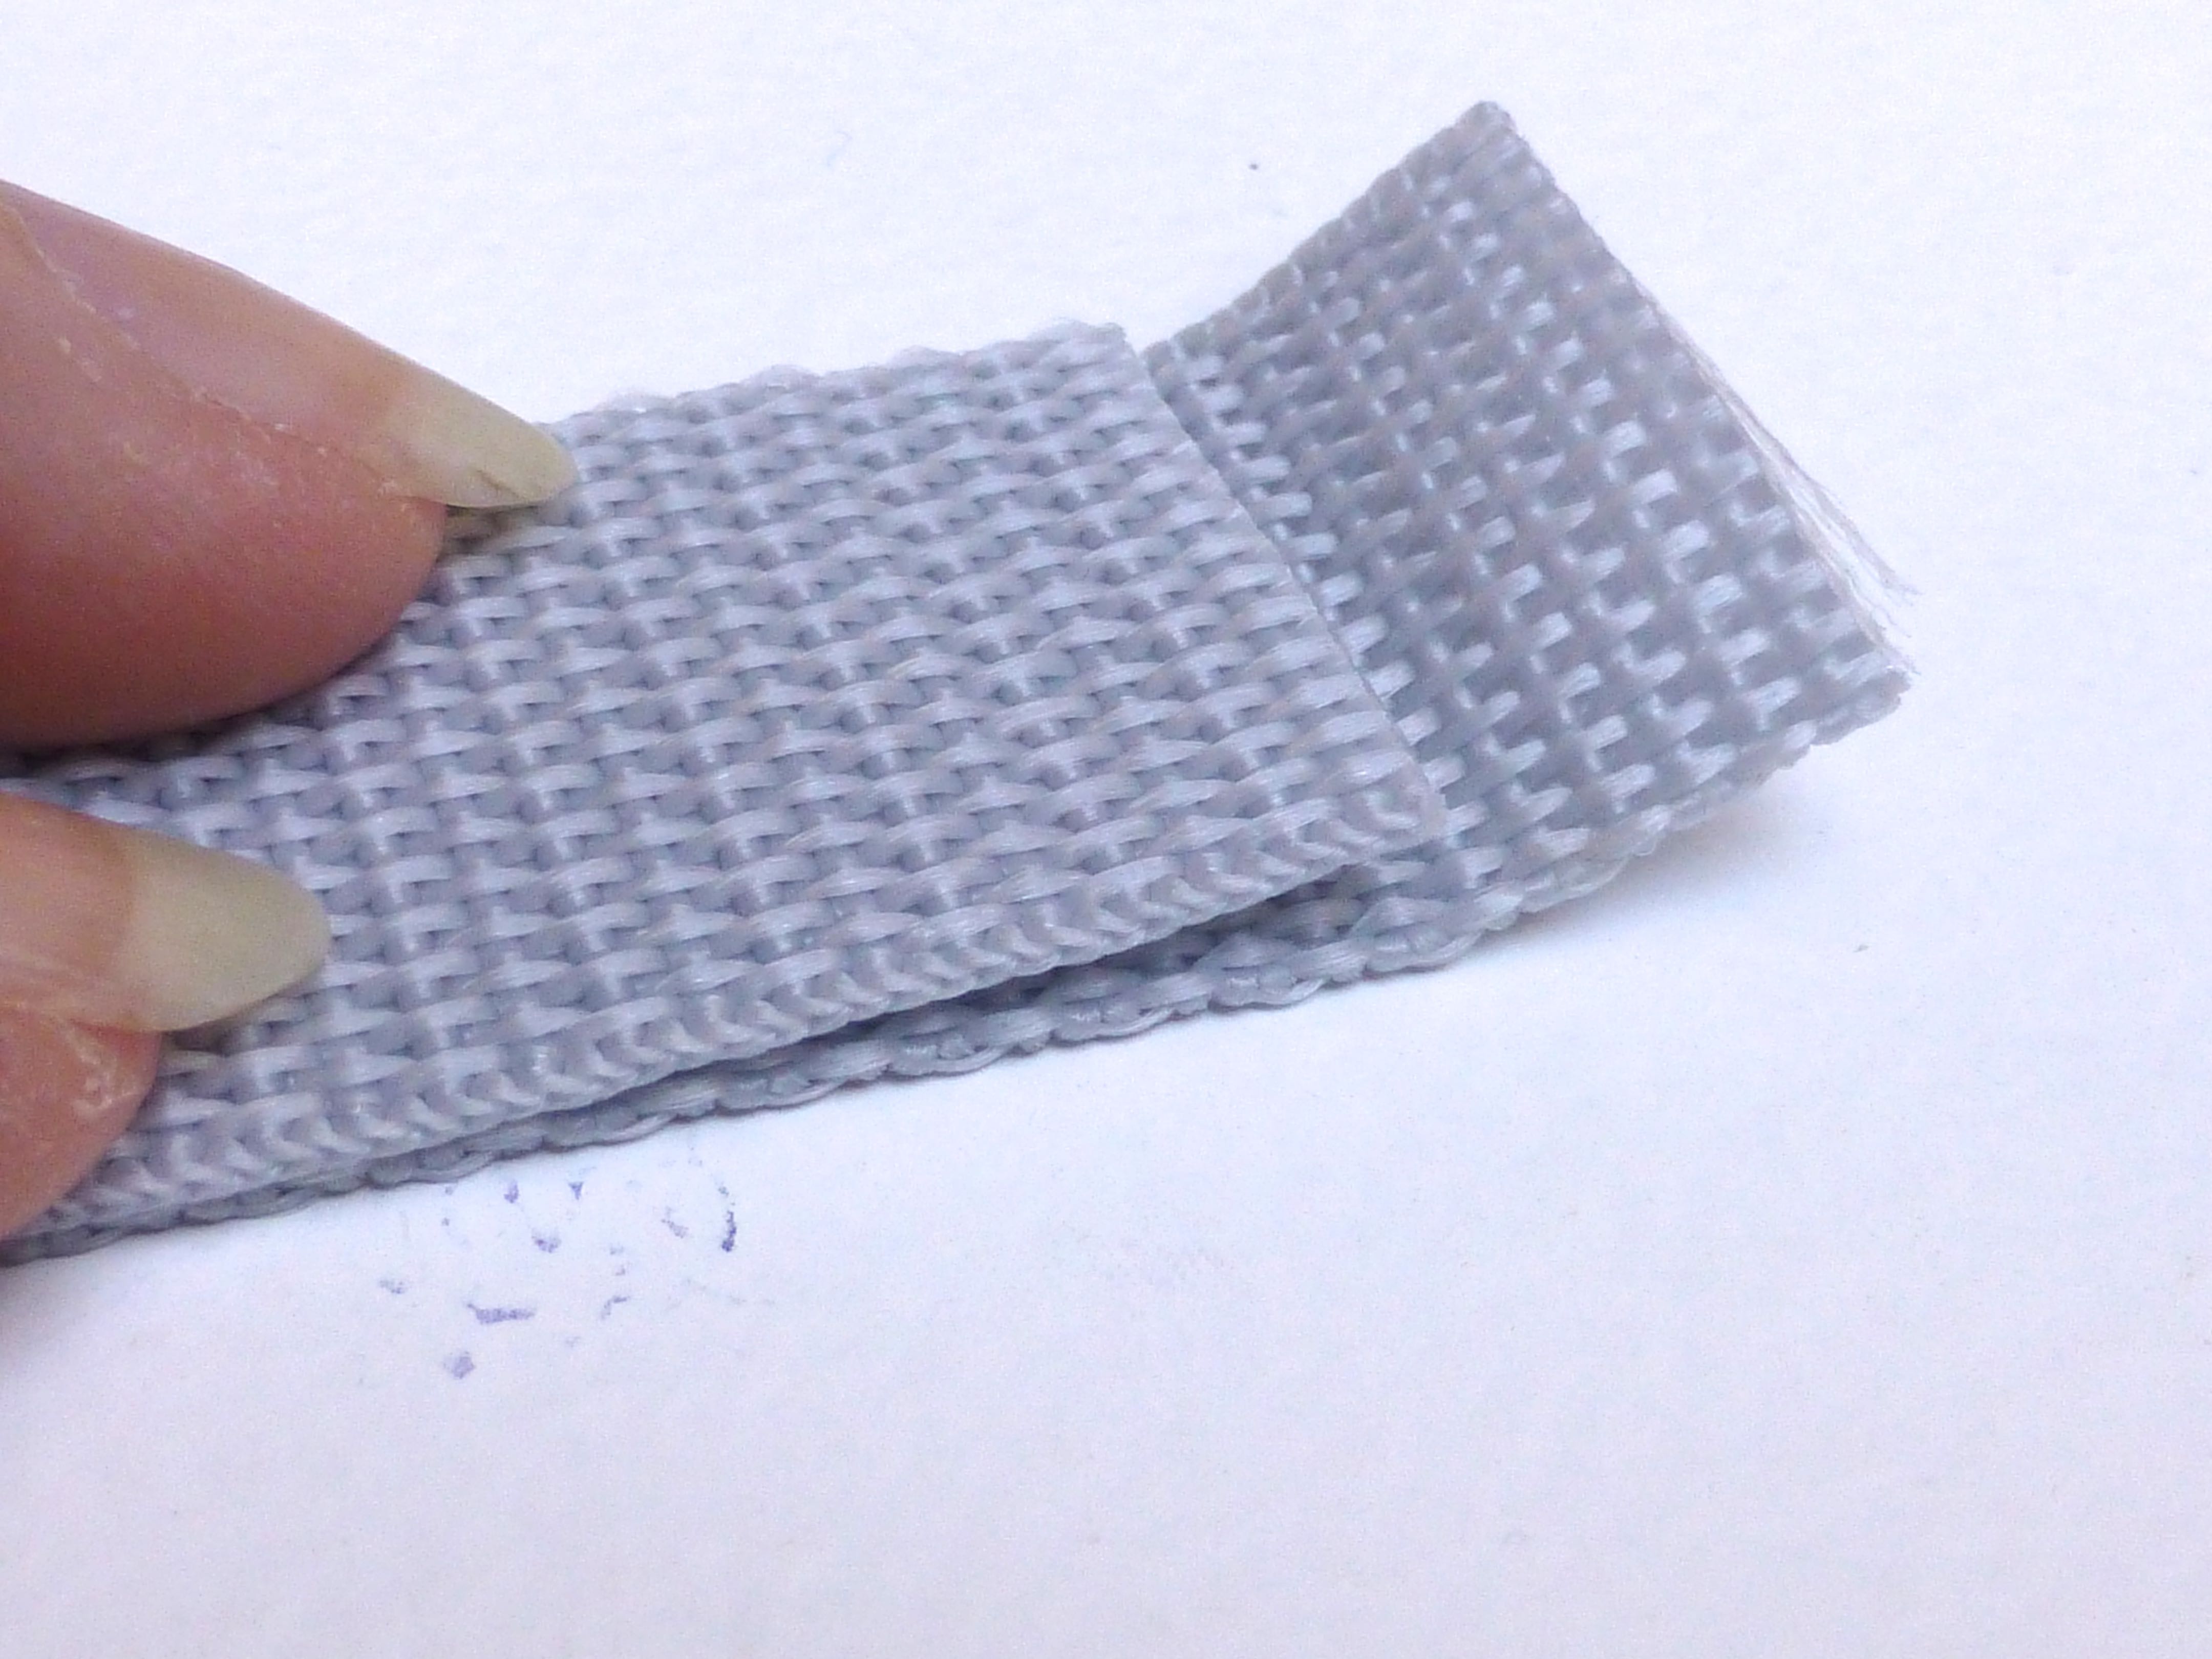
Fold the overhang back over as shown below and tack together through all layers.

Repeat with the other ends of the webbing, being careful not to twist it in the process.
Make the other set of handles in the same way.
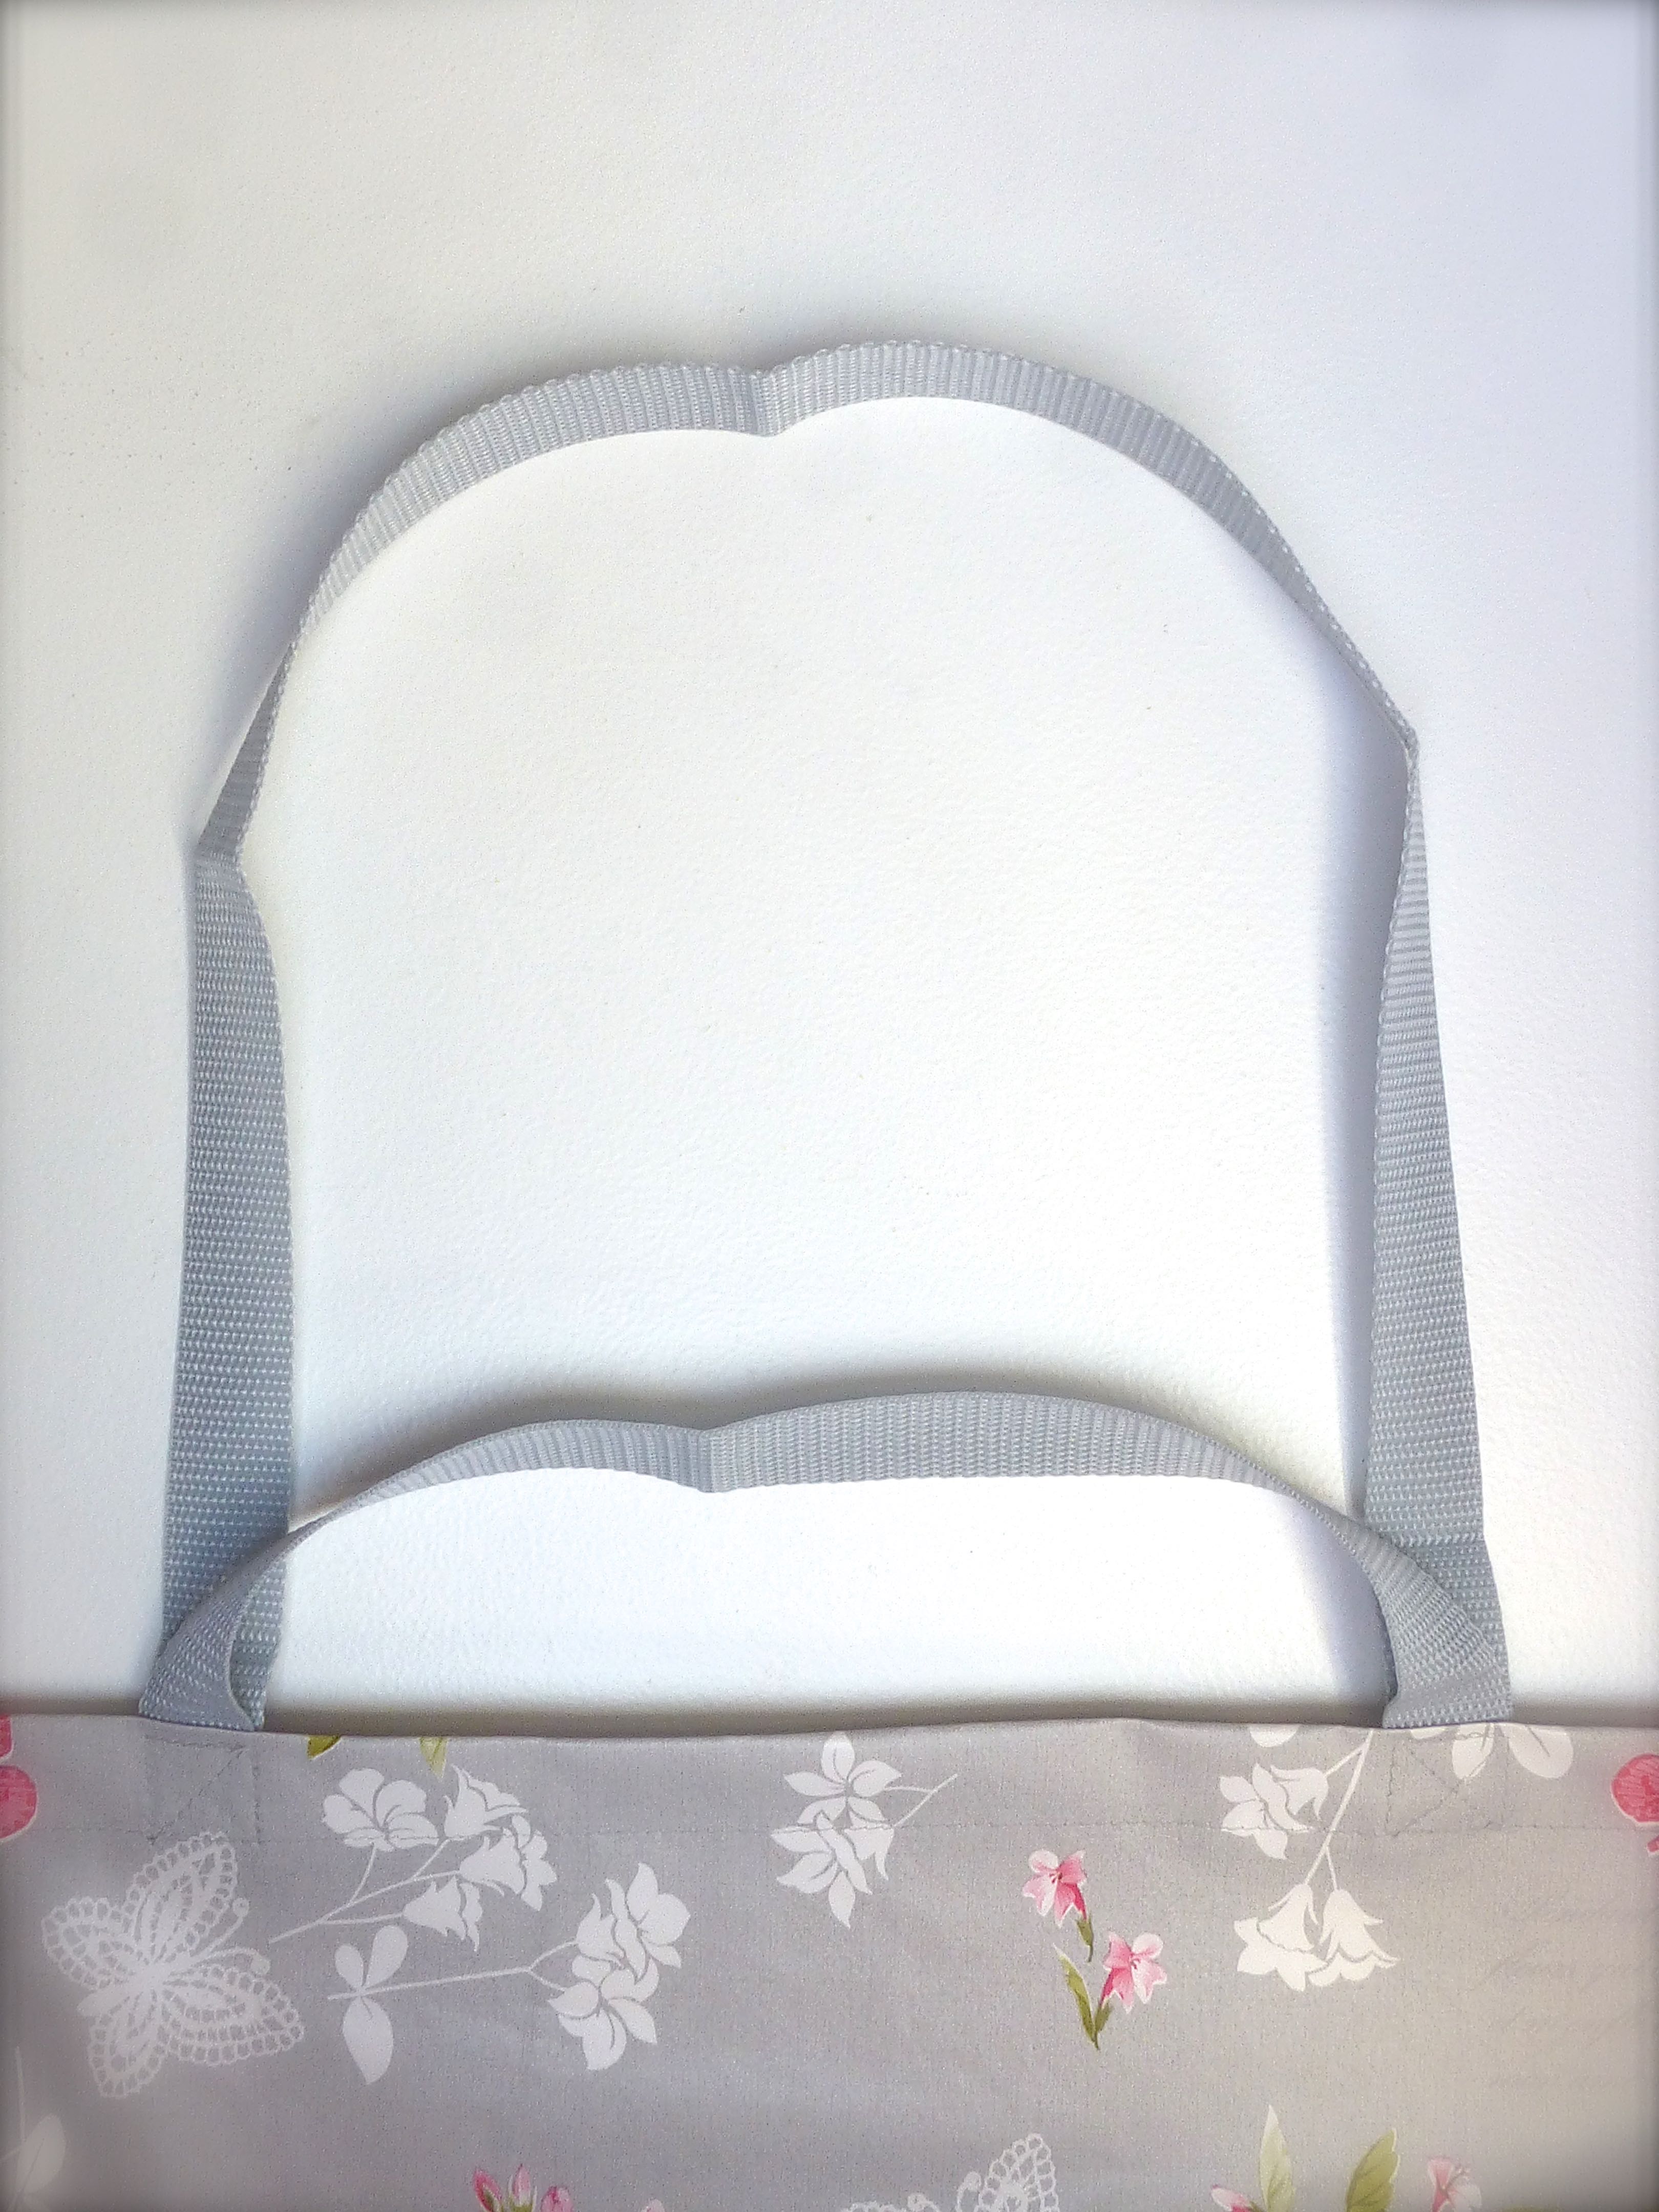
With the raw edges of the handles facing the wrong side of the bag, stitch in place 32cm in from each side seam.


To ensure that there is plenty of strength at the point where the handles join the bag, I stitched a cross within a square as shown in the photo below.

Attach the other pair of handles in the same manner.
Finish with a second row of top stitching around the entire top edge about 4mm in from the first row.

Fill with laundry and go peg your clothes on the line!


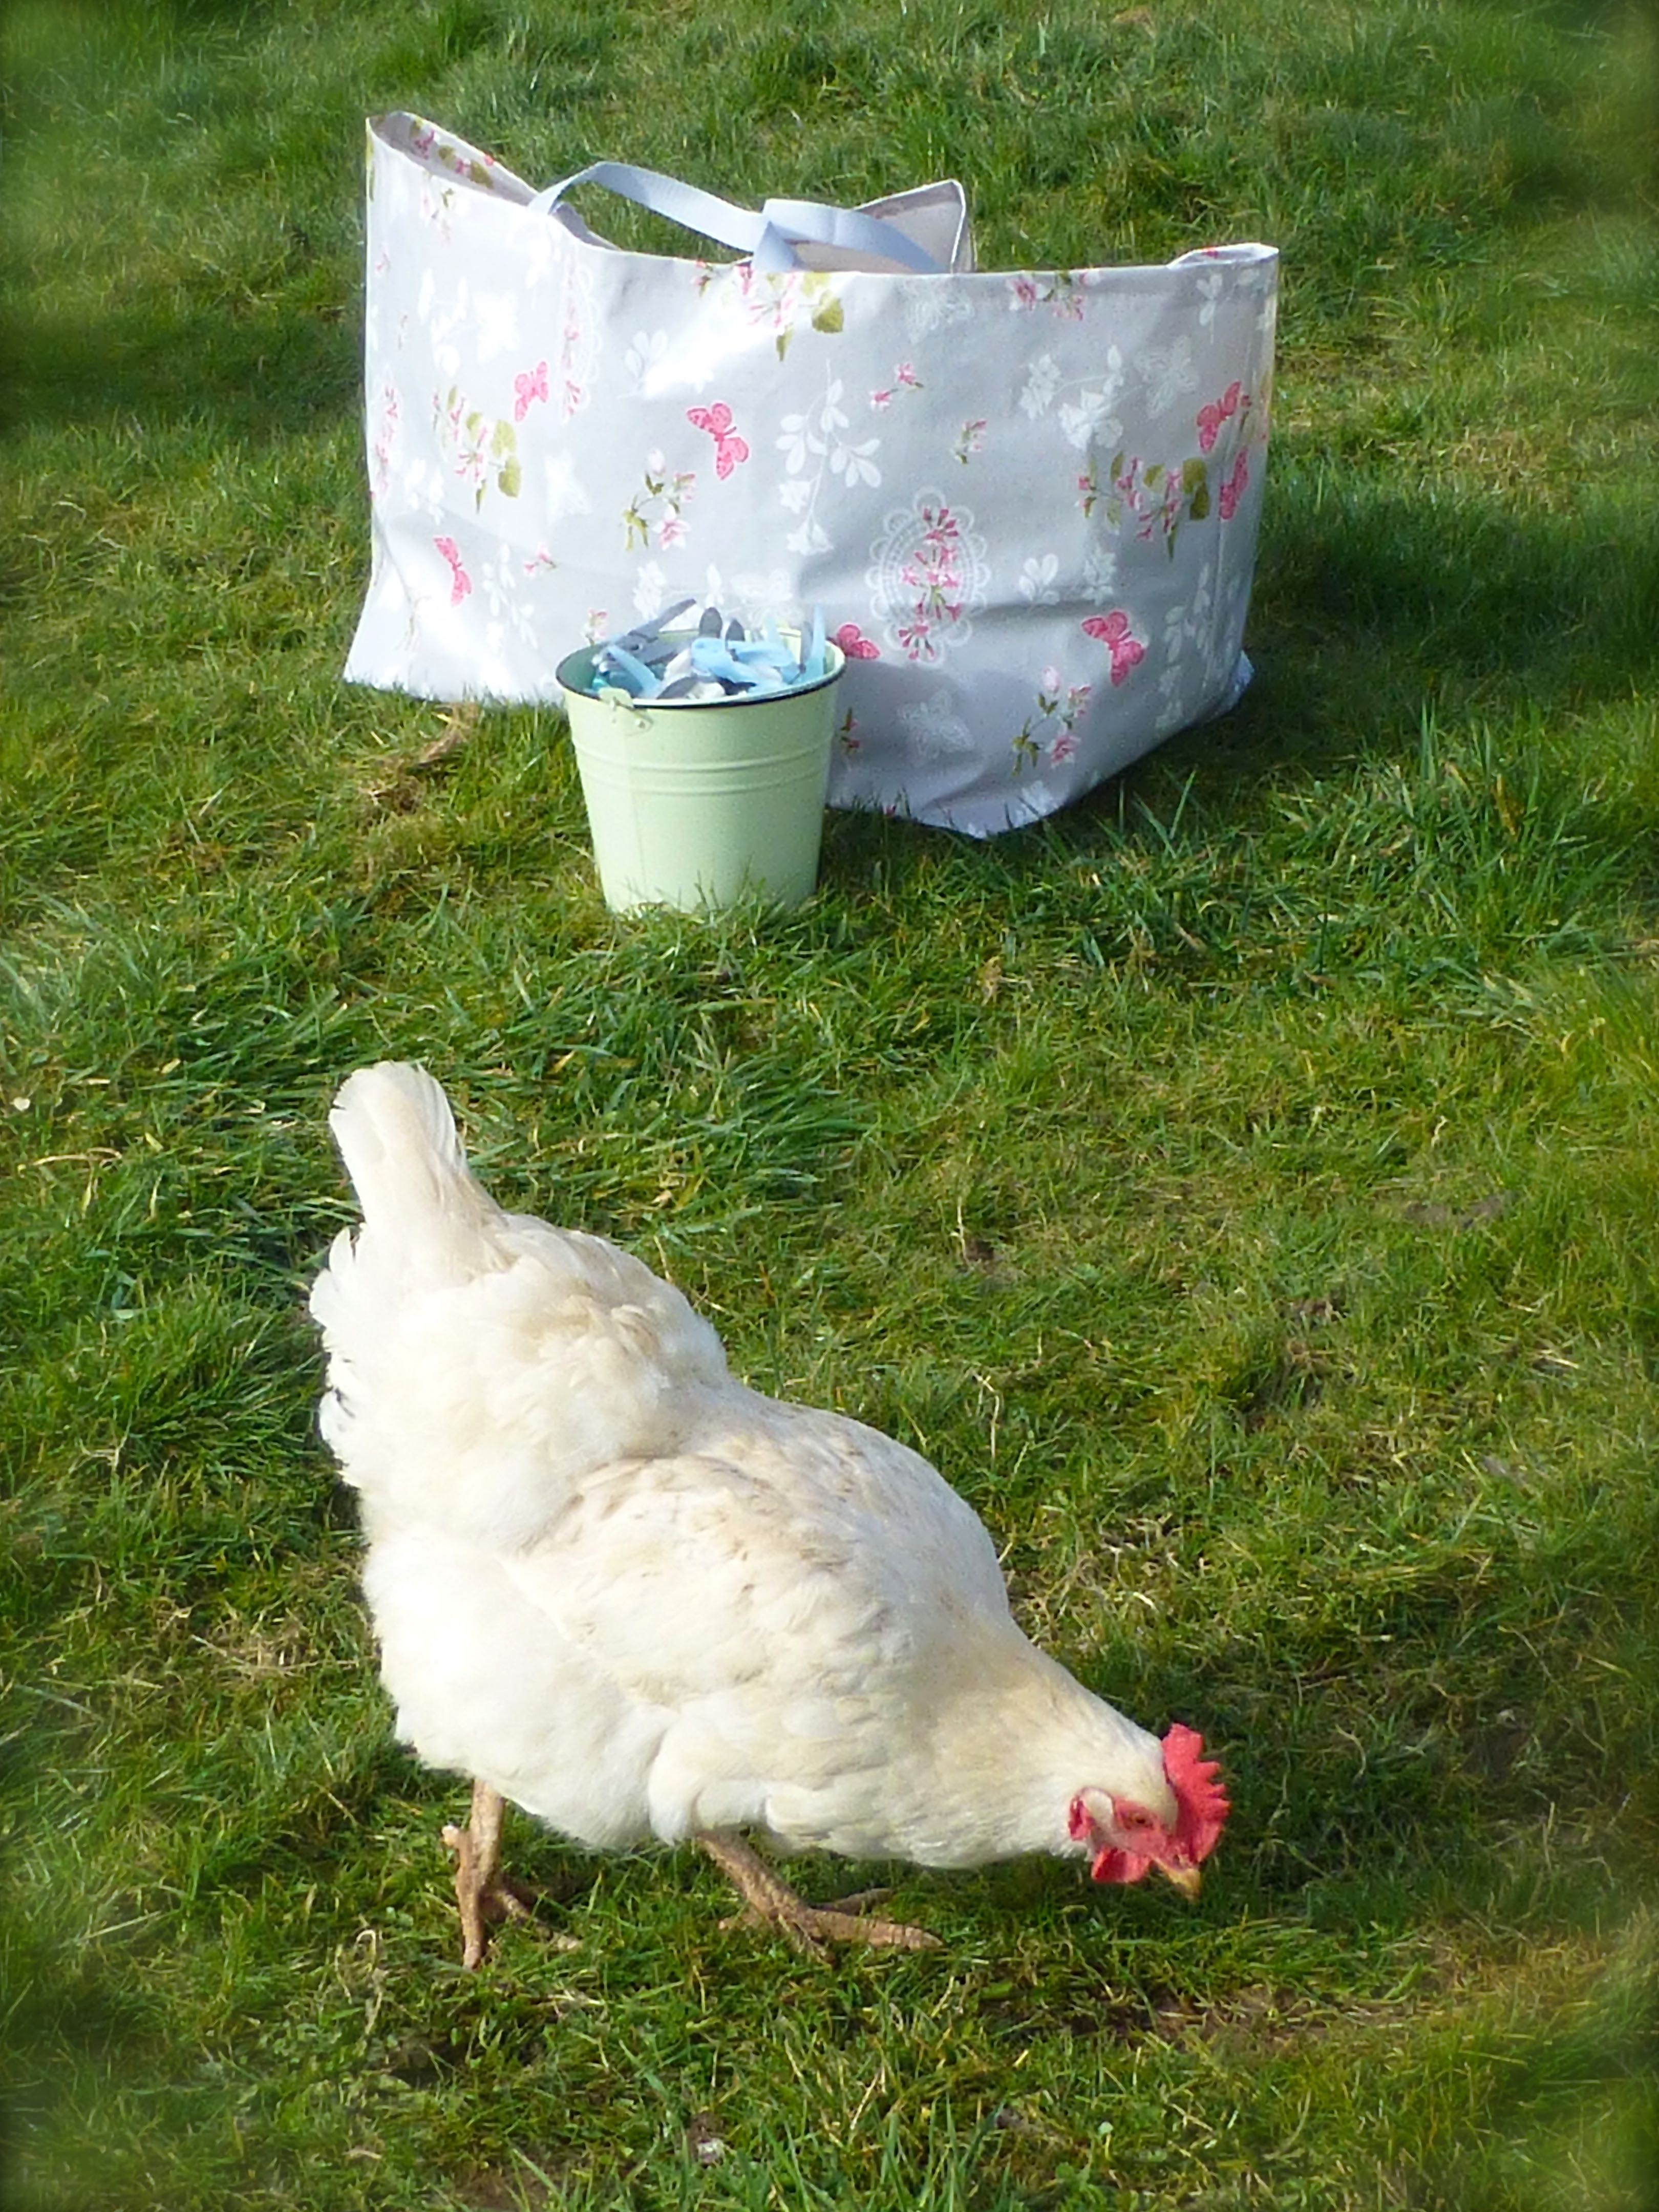


Well, the girls seem to approve of the stranger in the garden!
Anyone tempted to have a go at making an Ikea style laundry bag?

March 2, 2015 at 5:26 pm
I love this!!!! Great easy to follow tutorial. No printing and taping a pattern together….thank you!! Loving your fabric choice and the girl’s are so photogenic… too cute. 🙂
LikeLiked by 1 person
March 2, 2015 at 5:28 pm
Thanks very much, it couldn’t be simpler! If you make one, I’d love to show it on my blog:)
LikeLiked by 1 person
March 2, 2015 at 5:37 pm
That would be great. I have a few projects lined up but I will touch basis with you soon, when it’s completed and I will link to this post in my blog. Thank you for the fantastic inspiration!!!
LikeLiked by 1 person
March 2, 2015 at 5:52 pm
What a super cool project, thanks for sharing xx
LikeLiked by 1 person
March 2, 2015 at 5:55 pm
No problem:)
LikeLike
March 2, 2015 at 5:52 pm
I have quote you : “….but there’s one major design fault – they’re just so damned ugly!” This phrase made me laugh to tears!!!! I can’t agree more!
LikeLiked by 1 person
March 2, 2015 at 5:55 pm
Ops… Errata corrige : “I have to quote…”
LikeLiked by 1 person
March 2, 2015 at 5:56 pm
Ha ha! They are useful, but dreadfully ugly. Not any more!
LikeLiked by 1 person
March 2, 2015 at 5:57 pm
😉
LikeLiked by 1 person
March 2, 2015 at 6:06 pm
Me, me, me! I have an offcut from a PVC tablecloth I am just about to go and measure…..
LikeLiked by 1 person
March 2, 2015 at 6:18 pm
Ooh, perfect! If you make one, don’t forget to show us:)
LikeLike
March 2, 2015 at 7:27 pm
Pretty and practical for purpose! My…your weather looks like summer compared to the snow we keep having up north – I’m looking forward to pegging out soon though 😉
LikeLiked by 1 person
March 2, 2015 at 8:39 pm
Truth be told, I prefer to use the tumble dryer as line-dried things are too hard and scratchy. Also, by the time I’ve pegged it all out, it usually starts to rain and I race to bring it in again:)
LikeLiked by 1 person
March 2, 2015 at 8:54 pm
I know what you mean – sometimes its like drying yourself with a loofah, when the towels have been out for a blow – I’ve never owned a tumble dryer in all my 27 years of marriage ;-/, one day Dearest might see fit to let me invest in one!! Though a fluffy towel might take some adapting to LOL 🙂
LikeLiked by 1 person
March 2, 2015 at 8:58 pm
Towels are the one thing I never hang out for that reason. Although I remember how satisfying a line full of nappies looked, blowing in the wind and being bleached by the sun:)
LikeLiked by 1 person
March 2, 2015 at 10:23 pm
My last comment makes you realise what our poor little babes must have felt sometimes ?! Though they were joyous days way back when, I’m glad I don’t have to go back and repeat them now 😉
LikeLiked by 1 person
March 2, 2015 at 8:34 pm
Another lovely and clear tutorial. Should imagine you could put these to loads of different uses 🙂
LikeLiked by 1 person
March 2, 2015 at 8:37 pm
Most often as a throw-everything-in-for-a-night-away bag:)
LikeLiked by 1 person
March 2, 2015 at 8:52 pm
Or a quick way to tidy up the playroom: shove it all in and hide it somewhere 😉
LikeLiked by 1 person
March 2, 2015 at 8:56 pm
Thank you! This is a great tutorial. Very nice 🙂 (Interesting how IKEA haven’t come up with this idea…)
LikeLiked by 1 person
March 2, 2015 at 9:00 pm
I know, although their bags are only 50p and they would have to charge a lot more for pretty bags. I reckon they’d sell though:)
LikeLike
March 2, 2015 at 9:33 pm
Yeah, but what’s the fun in buying them when you can make them?
By the way, love your choice of fabric. 🙂
LikeLiked by 1 person
March 2, 2015 at 9:23 pm
oh that is just brilliant!….and yes I will be having a play around soon, thanks for a fab tutorial
..best Daisy x
LikeLiked by 1 person
March 2, 2015 at 9:30 pm
You’re welcome – the fun is in the sharing. Can’t wait to see your version:)
LikeLike
March 2, 2015 at 9:55 pm
I love this! It still baffles me as to why Ikea haven’t made prettier bags! I used mine for everything! I really like the fabric you have used for this. This is a little off topic…but does your dog like the chickens?
LikeLiked by 1 person
March 2, 2015 at 10:04 pm
The old one pays no attention unless they come in the kitchen and eat her food, but the puppy loves nothing better than chasing them round the garden if she can get away with it! We have one hen in particular that will chase the dogs though!
LikeLike
March 2, 2015 at 10:07 pm
Oooo! I need some of them, to replace the dozen or so blue ones I have. We use them for when we go camping as well as the things you’ve mentioned. We all have our own for our clothes. Only trouble is I’ve no vinyl in my stash. Dilemma! 😀
LikeLiked by 1 person
March 2, 2015 at 10:13 pm
We use ours for camping too! Vinyl isn’t a stash staple, is it? I had to hunt this down specially with this project in mind. Charity shop vinyl tablecloths would do the job admirably though – if you can find a pretty one:)
LikeLiked by 1 person
March 3, 2015 at 10:35 am
Love it! Definitely tempted to give it a go!! Very useful too.
LikeLiked by 1 person
March 3, 2015 at 10:55 am
Very useful – we’ve all got at least one Ikea bag lurking somewhere, haven’t we? So much nicer to have a pretty one that doesn’t make that crackling noise either!
LikeLiked by 1 person
March 3, 2015 at 4:39 pm
Sure is! Love the fabric.
LikeLiked by 1 person
March 3, 2015 at 10:56 am
Great explanation and fabric choice. I have some that I intend to play with soon.
LikeLiked by 1 person
March 3, 2015 at 11:03 am
Glad the instructions are clear enough – it is very simple. I didn’t even have any problems sewing vinyl with the normal foot, although I put some tips in case other machines struggle:)
LikeLike
Pingback: My Space For Sewing – Revamp Phase 2 | T H I M B E R L I N A
March 3, 2015 at 12:22 pm
A perfect ugly to lovely make!
LikeLiked by 1 person
March 3, 2015 at 1:48 pm
Thanks – it really is so much nicer to look at than those blue ones which seem to be there at every turn in our house!
LikeLike
March 3, 2015 at 3:30 pm
Fabulous! And infinitely prettier than the Ikea bag.
LikeLiked by 1 person
March 3, 2015 at 7:32 pm
Thank you kindly – form AND function. Perfect:)
LikeLike
March 3, 2015 at 7:31 pm
You and your big bags! I don’t like the texture of those IKEA bags – you’re looks a million times nicer. When I get my hands on some vinyl I’ll make one 😀
LikeLiked by 1 person
March 4, 2015 at 3:48 pm
Big bags are just so useful – everybody has at least one Ikea bag that they use for all sorts, don’t they? I’m so happy with my new one – it looks so much prettier as a laundry bag:)
LikeLiked by 1 person
March 3, 2015 at 11:48 pm
This is gorgeous! The IKEA bags are great in their size, but that blue is just, bleh. This is a much better option! I also love that you added the different handle lengths! Options are always good! 😀
LikeLiked by 1 person
March 4, 2015 at 3:46 pm
Thank you! The handle options are what make the Ikea design work, I think. The design didn’t need improvement, just the fabric:)
LikeLike
March 4, 2015 at 3:20 pm
Hi, I’ve been pointed in your direction for yarny advice! I’ve been spoiled this birthday and I am looking to get some special yarn. Usually I get budget or whatever is on sale. I was told that you make gorgeous things, so you must use gorgeous yarn!! Any ideas? PS I’m enjoying what I’ve seen so far of your blog, especially the T-shirt yarn! Xx
LikeLiked by 1 person
March 4, 2015 at 3:28 pm
Lucky you! My favourite has to be ‘Plump’ by Mrs Moon.co.uk – perfect for chunky projects, it’s the softest yarn ever! Don’t rule out Stylecraft’s acrylic with wool though which is much nicer than their budget range. I also love Drops Andes and Drops Paris Cotton. Happy spending!
LikeLiked by 1 person
March 4, 2015 at 4:25 pm
Thanks that’s great, I think I’ll see if I can find any of those. I’m a bit wary of yarn shopping online since I placed an order and everything turned up about 3 shades brighter!! X
LikeLiked by 1 person
March 4, 2015 at 7:06 pm
Oh thats gorgeous. I can never get my machine to go through vinyl. I’ll have to give your making tape trick a try Thank you x
LikeLiked by 1 person
March 4, 2015 at 7:09 pm
Thanks! You could also try reducing the pressure if you have the option on your machine:)
LikeLiked by 1 person
March 5, 2015 at 6:05 am
Love “the girls”, and the bag of course!
LikeLiked by 1 person
March 5, 2015 at 7:21 am
Thanks! They are part of the family – such characters. They came straight over to see what I was doing:)
LikeLike
March 10, 2015 at 10:10 am
Just fabulous! Thanks for sharing – I love it! Marianne xx
LikeLiked by 1 person
Pingback: DIY Ikea Bag No Pattern Needed | sewloveable
June 14, 2015 at 7:15 am
Thanks for the clear directions! I made this using upholstery vinyl, so it’s very sturdy.
LikeLiked by 1 person
June 14, 2015 at 8:48 am
Brilliant! Can you share a photo on my Facebook page? I love to see what people have made from a tutorial:)
LikeLike
June 18, 2015 at 3:52 pm
oh! thank you! so much easier than another tutorial!
i’ll make one as a thank you gift for my son’s teacher who’s always carrying sooo much around 🙂
LikeLike
Pingback: Birthday Gifts – A Purse (Wallet) And Matching Tote | Sewchet
Pingback: Sunday Sevens #63 | Sewchet
Pingback: #stitchingsanta Sewing Update | Sewchet
Pingback: Mini “Ikea” Project Bag – Beads and Barnacles
Pingback: Sunday Seven(teens!) from Settle | T H I M B E R L I N A
July 4, 2016 at 9:14 am
Great tutorial! I wasn’t looking forward to printing and fooling around with a pattern! Straight cuts just make so much more sense. I am making for my granddaughter heading to college in the fall. She will get great use out of this bag!
LikeLiked by 1 person
July 4, 2016 at 10:20 am
It will be perfect for her – what a thoughtful grandmother you are! I’d love to have a photo of the finished bag to show on the blog please:)
LikeLike
November 20, 2016 at 7:22 pm
Love how you made it so we don’t have to print and paste a pattern!
LikeLiked by 1 person
November 20, 2016 at 7:23 pm
Who likes doing that?! Hope you enjoy making it:)
LikeLike
November 26, 2016 at 2:32 pm
Thanks so much for sharing this. I was trying to come up with a way to make an easier pattern than the ones I found. You took care of this for me and I love it. Can’t wait to try it myself. Thanks so much.
LikeLike
April 6, 2017 at 7:38 pm
I love my big blue Ikea bags but you’re right, they’re so ugly! I use one for carting things back and forth to my sister’s (we are chronic borrows of each other’s stuff), one for the beach, one for laundry, two I keep in the car for hauling groceries… they have so many uses. I did see another tutorial but yours seems easier and after inspecting one of my bags I notice is yours is actually spot on to the design. I only am just realizing there aren’t 4 sewn side corners. I have always wanted my Ikea bag to have a closure so I think I will make one bag with 2 or 3 snap fasteners. Thank you so much for this tutorial!
LikeLiked by 1 person
April 6, 2017 at 7:39 pm
You’re welcome – hope it turns out well for you!
LikeLike
October 24, 2017 at 1:08 am
I made two of these out of linen to use as laundry bags.
LikeLiked by 1 person
October 24, 2017 at 8:08 am
Brilliant – such a good idea!
LikeLike
December 17, 2017 at 8:23 pm
I already made 3, thank you very much!
LikeLiked by 1 person
February 13, 2023 at 9:09 am
This was such a useful post! We use the blue IKEA bags for our laundry but the cat has taken to eating them (and any other plastic-y bag he can find). I was given a roll of upholstery fabric and decided I might as well use it to make less appetising bag replacements. The fabric makes for a floppier bag, so I stitched vertically up the corners to give it a bit more structure and now have two bags!
(Also, as quite a beginner sewer, I appreciated how simple your version of this bag is to follow. I too found an online version with a printable pattern, but couldn’t get my head around to even try to make it.)
Thanks!!
LikeLike