
So, I’ve long time held this vision of a bottle green, crushed velvet coat with a dark red lining – as you do.
When you want something that specific you just have to make it yourself because there’s no way you’re going to find it RTW, unless you make a lucky discovery in a charity shop. Then, by the time you’ve paid ‘vintage’ prices, had it dry cleaned to remove all traces of mothballs and replaced buttons/repaired worn lining, it’s probably cheaper to make your own anyway!
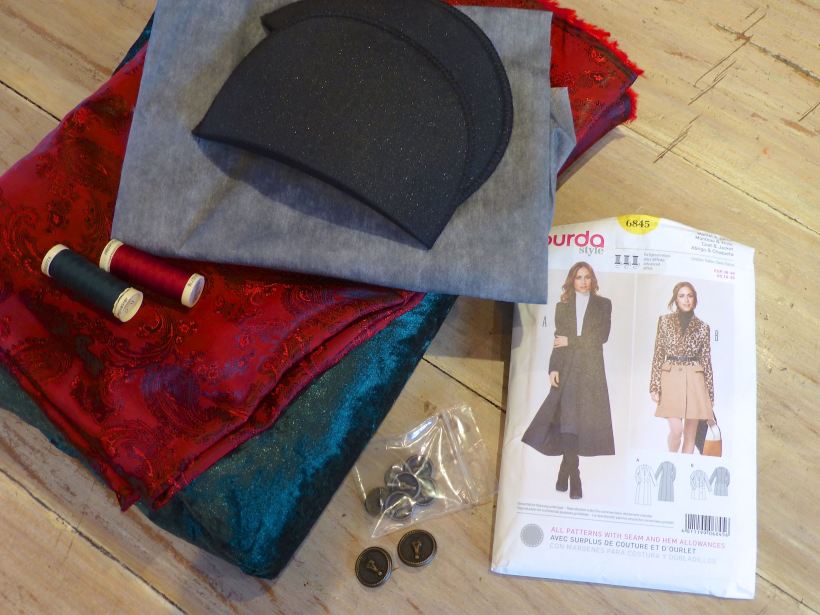
This is the absolutely gorgeous crushed velvet that I chose from Minerva Crafts….
 ……and this is the dark red Paisley lining.
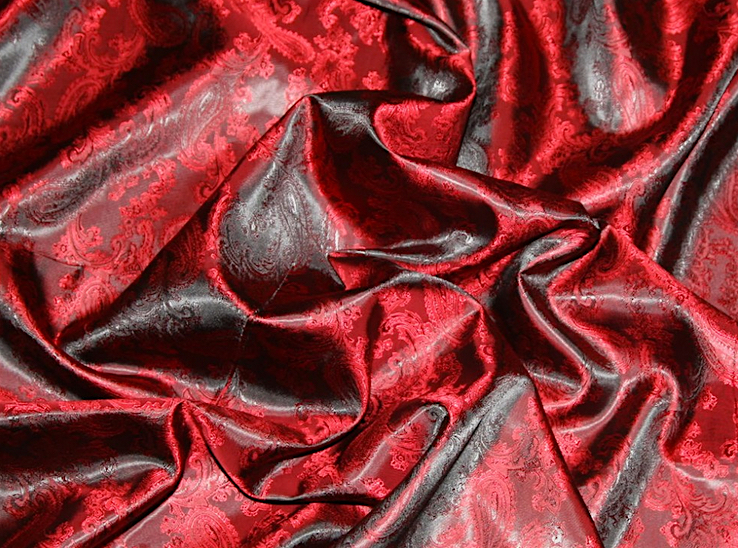
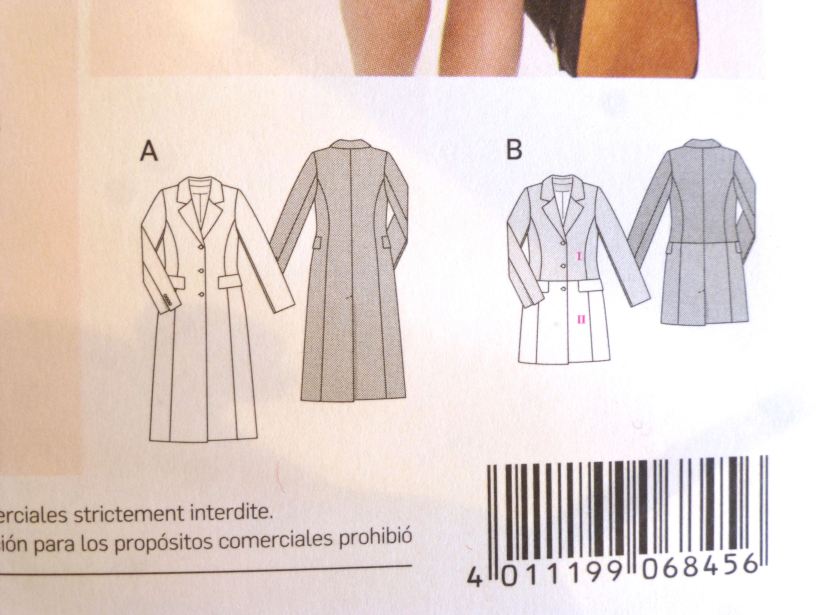
Design wise, the closest I could get to what I had in mind was Burda 6845, although I planned version A with a length somewhere between the two at just below knee length.

Three large and six small bronzed horse head buttons would match perfectly.

Order placed, a few days later this little lot arrived from Vicki (thanks Vicki!).
As I had been quite uncompromising in my choice of fabric, there were a couple of design issues I had to overcome to make this coat work, not least the fact that the pattern called for non-stretch wool fabrics.
Mine was crushed velour with a one-way stretch. And a definite nap.
Luckily, the stretch was widthways against the grain, which meant that the stretch would go around the body and not down the length – perfect. The pattern pieces could therefore be laid out as instructed. I was careful to double check that the nap went downward on all pieces, too.
I also had to use interfacing for stretch fabrics instead of the standard kind.
After checking all the sizing information, I started by altering the pattern pieces to fit, namely, the length – a 2″ shortening in the torso and a 4″ reduction in overall length.

Let the sewing commence!
*Warning: the nature of the crushed velour ensured that no two photos show the true colour. Trust me when I tell you it’s fabulous.
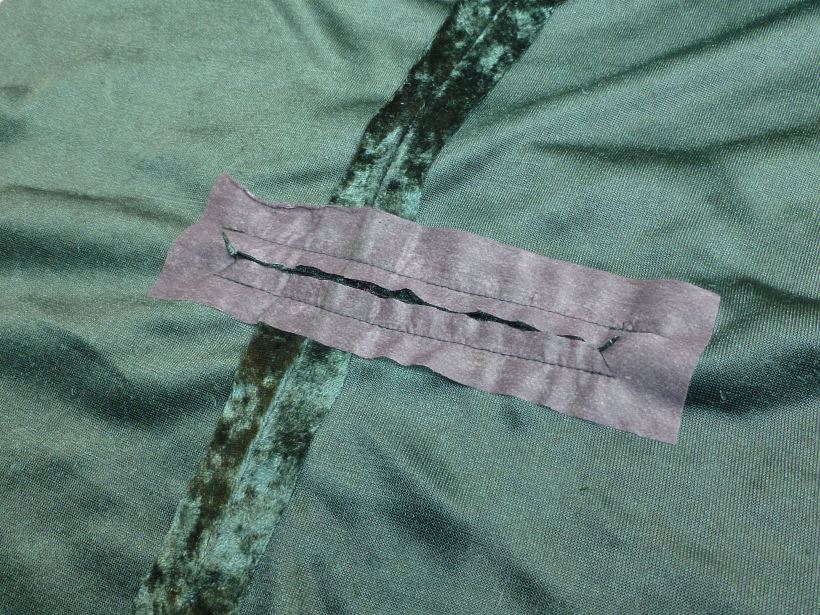
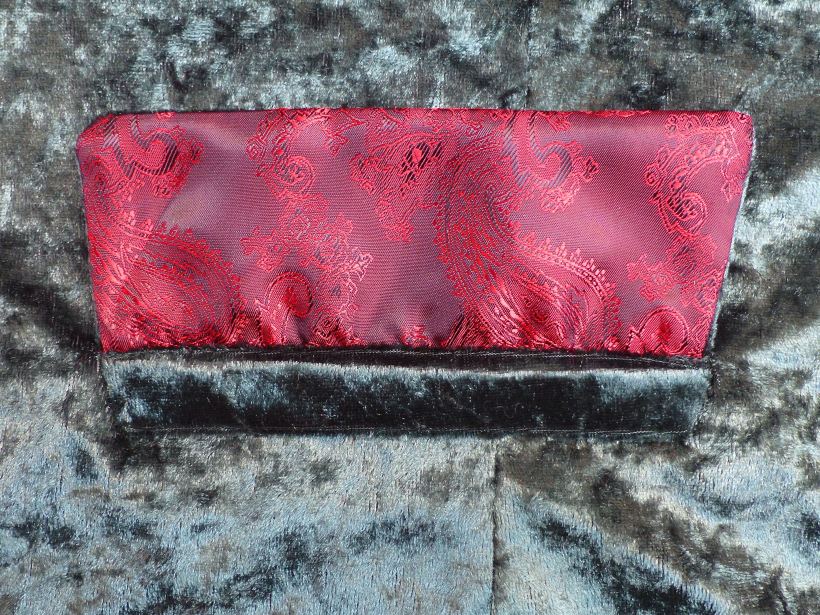
The first interesting bit came in the form of welt-and-flap pockets. Great fun! If you haven’t tried them before – do it!
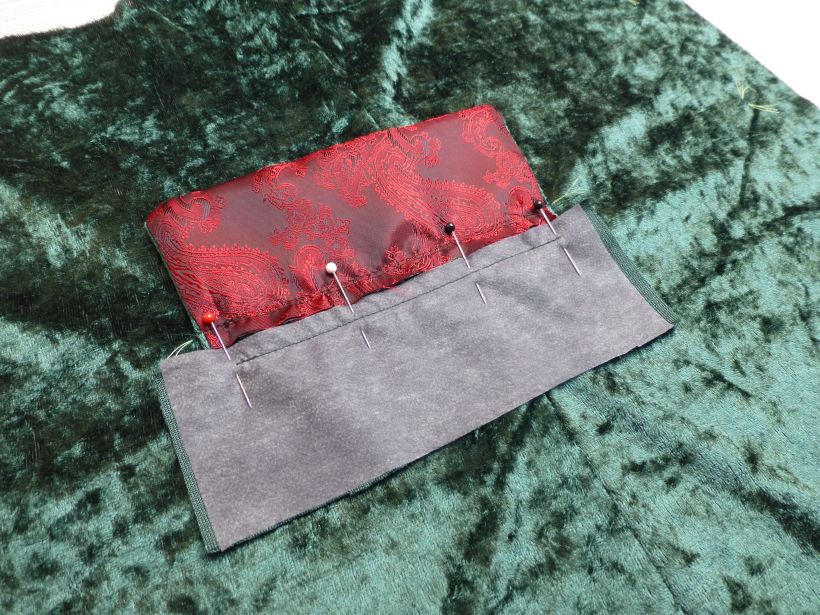

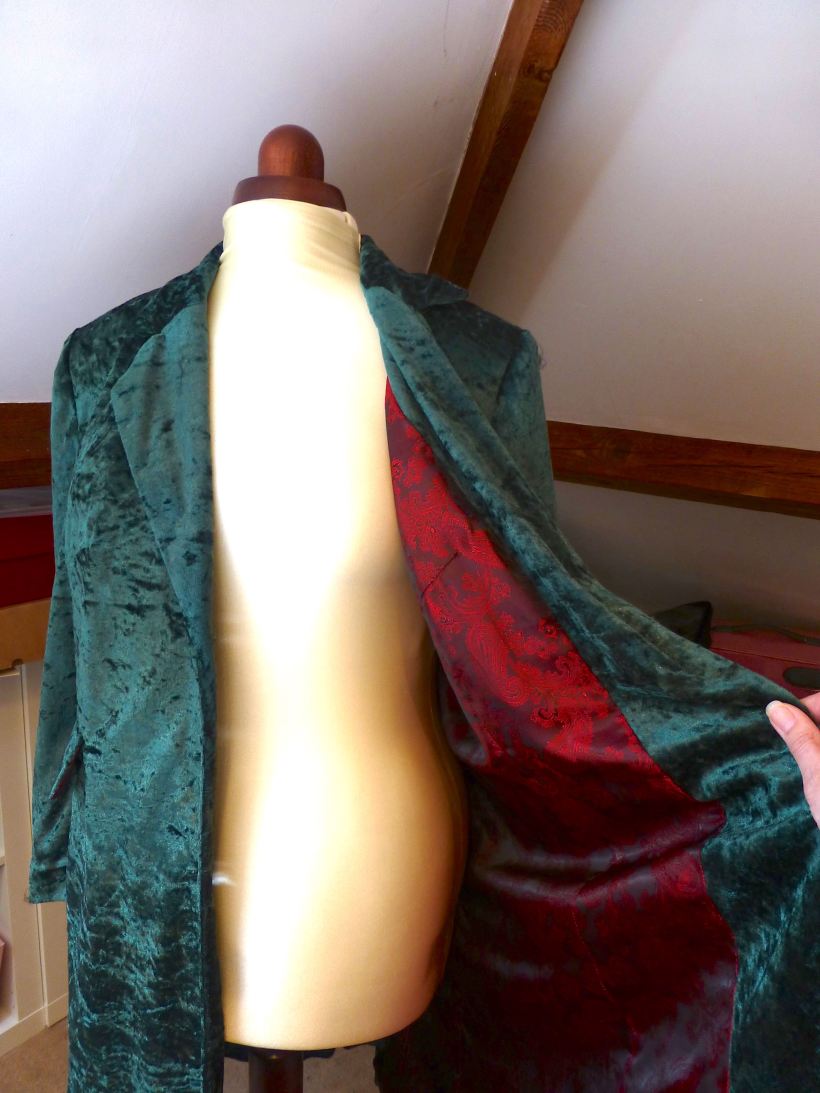
Just look at that lining!
Admittedly, the inside isn’t so pretty, but that will all be hidden under the lining and forgotten forever.

There are no side seams on this coat, but a panel that connects the fronts to the back and sort of wraps around the entire side. Nice.
Main body done, now for the sleeves.

Invisible hand stitching holds the collar in place once you’ve found the roll line and pinned it accurately.

By the way, if invisible stitching isn’t your forté, any clumsy stitches are hidden in the pile of this lovely velour.
Sleeves went in slightly differently due to the seams being constructed in the wrong order – a printing error on the instructions.

For those of you (and I suspect there are many) that have suffered from a lifelong fear of shoulder pads since the power dressing of the Eighties, snap out of it now!
Look at the difference well placed shoulder pads make to the shape of the garment.
No shoulder pads….

….with shoulder pads.

There, consider yourself cured. (You’re welcome).
I was slightly disappointed to find that, having gone to the trouble of making faultless vented sleeve cuffs, they were fakes and no buttonholes were required. The buttons were just stitched on through all layers (once the lining was completed).

I know, I could have made buttonholes regardless of the instructions, but I didn’t.
Do you like the buttons? They’re a nod to country living and the fact that The Boys are so into horses.
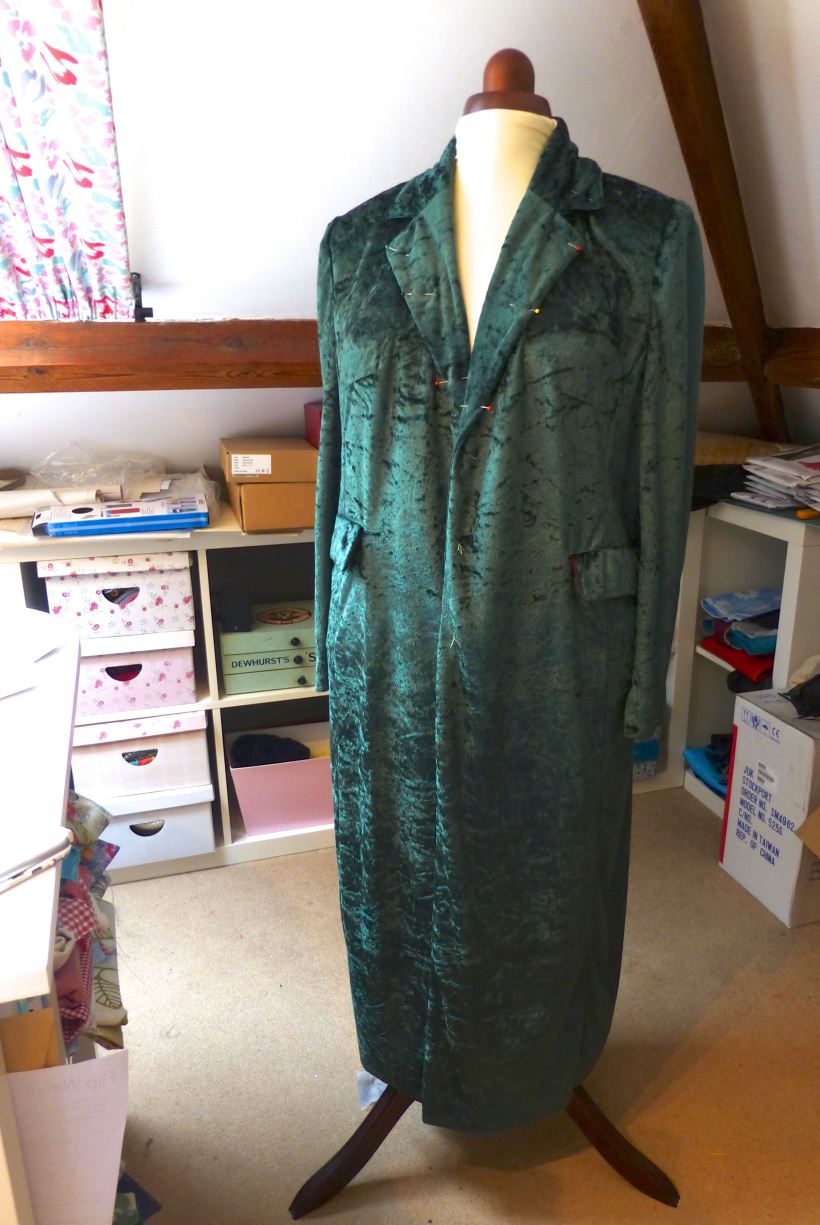
Hmmm, it needs to be about a foot shorter, but I’ll deal with that later.
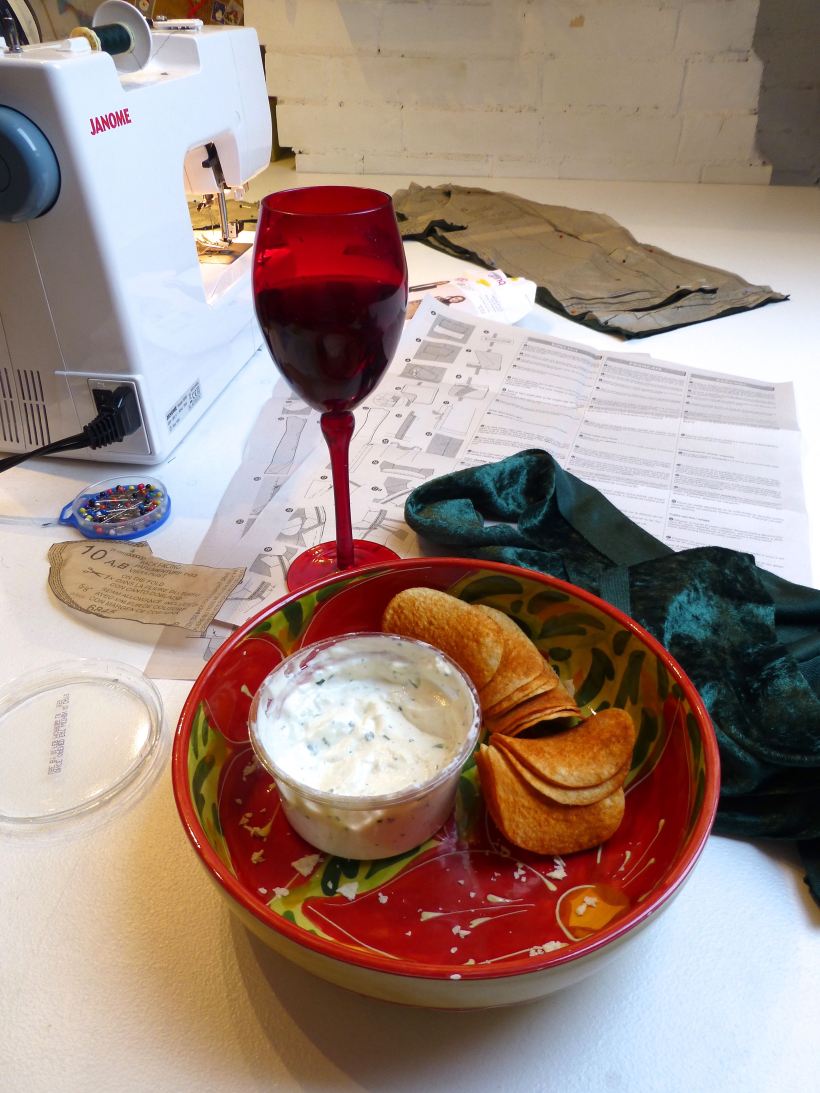
Lovely husband kept me fed and watered (or should that be ‘wine-d’?)at regular intervals over the weekend.
As the lining takes shape it starts to look a bit like a fancy nightie or evening dress.
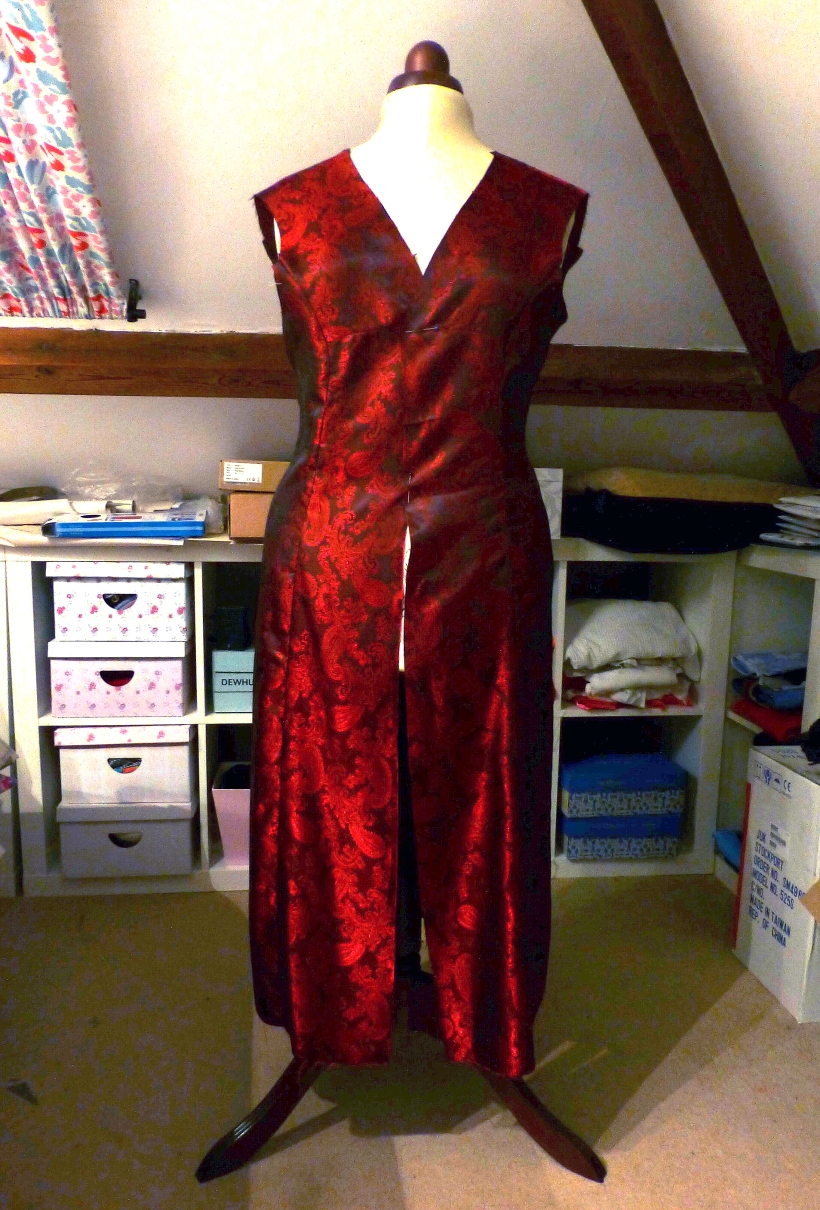
A dressing gown, even.

View of the back showing the pleats in three places down the length. Always a nice touch in linings, it provides a bit of breathing space and ensures you don’t rip the lining when moving.


The back vent, front facings and hems are handstitched, again, invisibly.
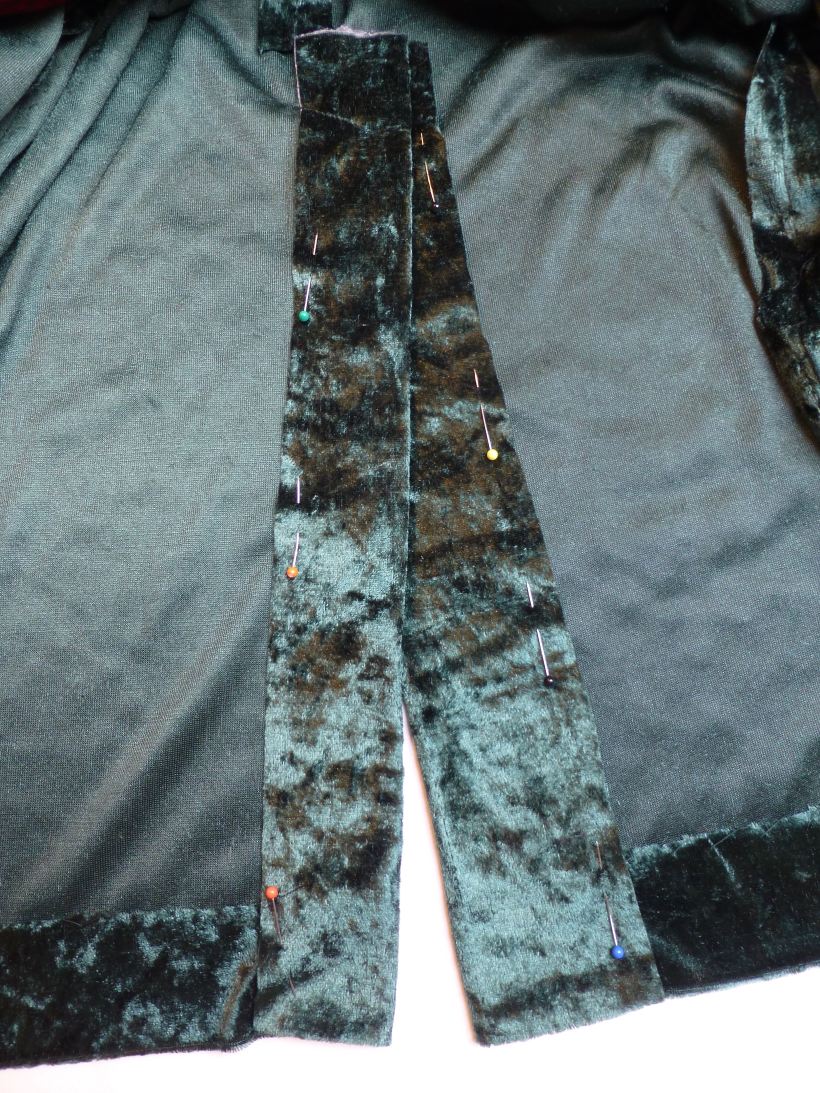
I tend to favour a herringbone stitch here.

Time to insert the lining which is machined around the front opening edges and sewn by hand the rest of the way.
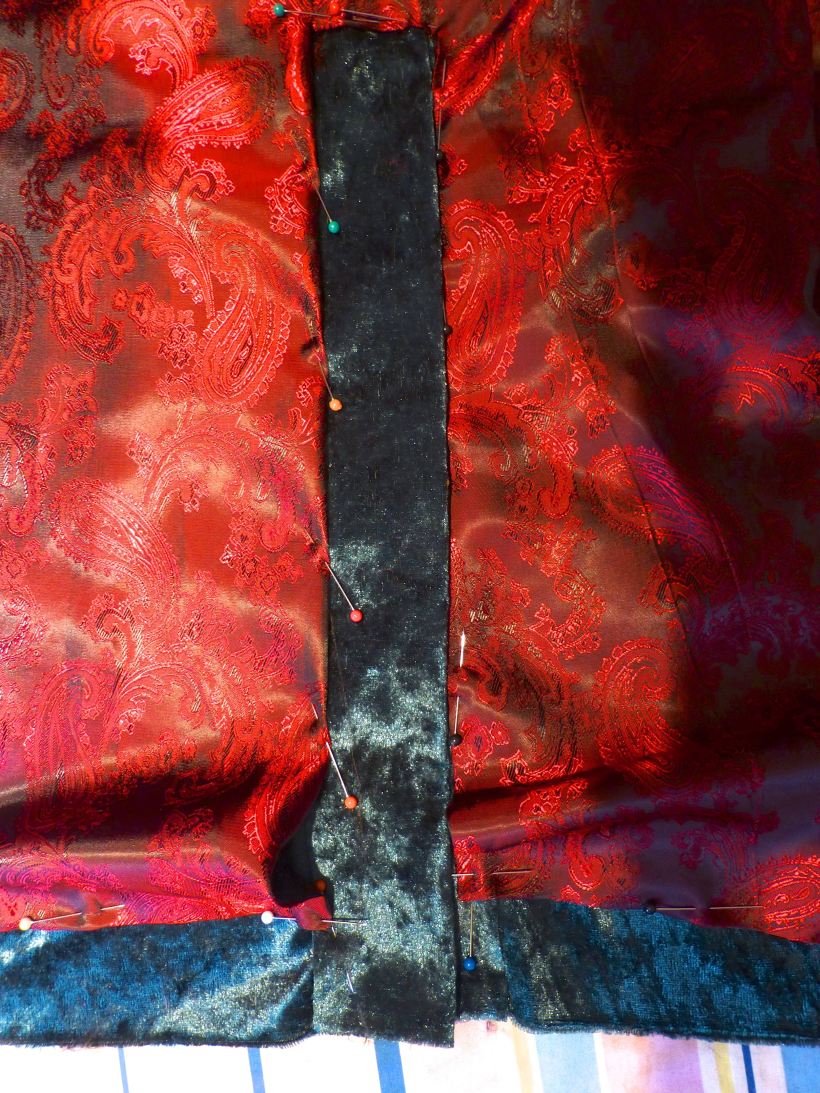
Just look at that brilliant colour contrast!

The lining hems (sleeves, too) all had the usual little overhanging fold for ease of movement which was good to see in the pattern instructions.
My machine can do fully automatic buttonholes which makes life easier.

I always do some test buttonholes in contrasting thread on offcuts before I go onto the real thing.

There – perfect!
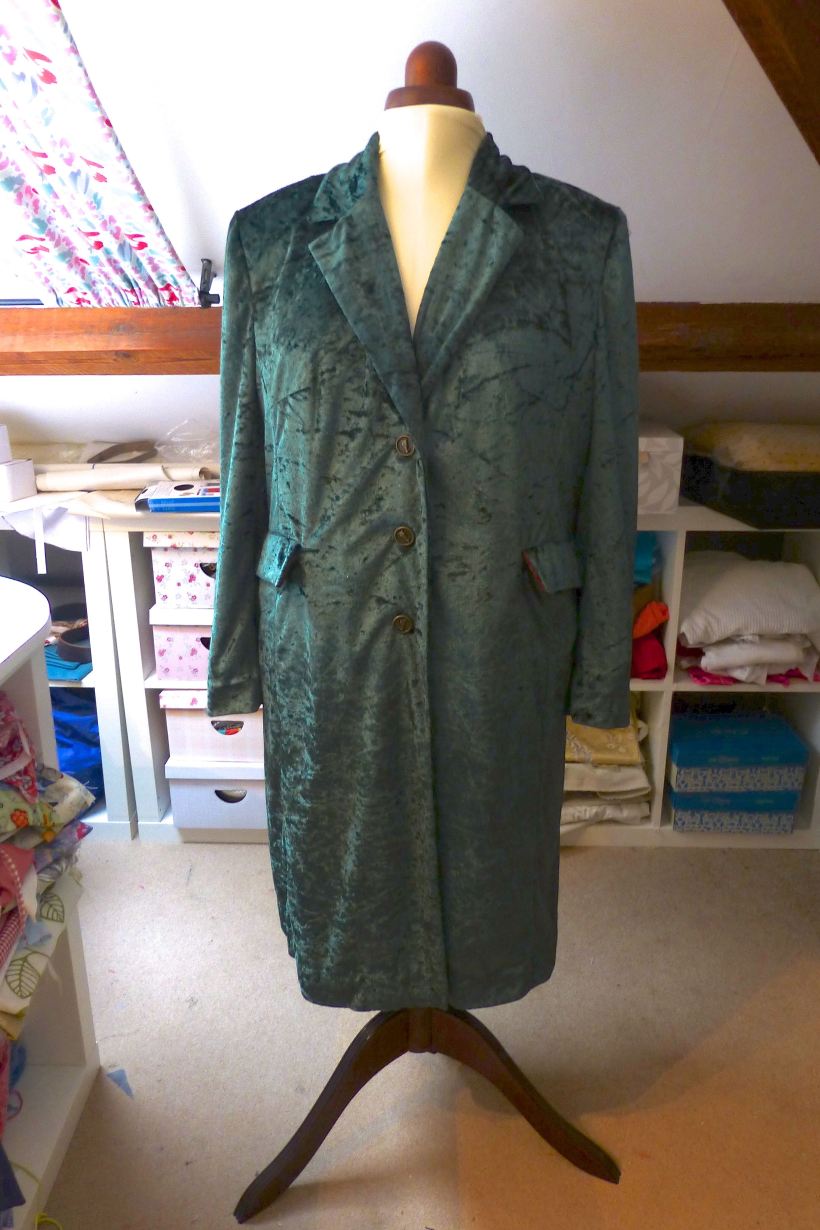
 And finally……TADAH!
I ended up cutting off another eight inches to get the length I wanted.
Oops – these were taken before I pressed the hemline:)

My husband likens it to a smoking jacket with that fabulous red Paisley lining!

I like it because one minute you present a sensible image in the very British Racing/Bottle Green but, with a flash of the lining, you’re a scarlet woman!
So, in summation: –
Fabrics = Faultless. Beautiful. Striking.
Pattern – to be honest, unless you are an ‘advanced’ seamstress as the envelope indicates, I wouldn’t recommend it.
Why?
- I found too many errors in the instructions which, being experienced, I was able to spot immediately (most of the time!), understand and rectify.
- The sizing information was on the pattern pieces instead of on the back of the envelope which, if you are in a shop trying to buy fabric, is inconvenient to say the least!
- The instructions are confusing in places and assume that you kind of know what you are doing.
Having said all that, it’s a great coat, the design is just what I was looking for and the finishing touches are good.
It’s nice and warm,too, but I still had to don a scarf and gloves for a few outside photos as it was bloomin’ freezing!

The hens insisted on getting in on the act, as usual.

And there’s the cheeky flash of red!

I love the Paisley so much that I’ve already got some more in the gold colourway to use in my next project – here’s a sneaky preview!

The moral of the story is to go for it. Just because a pattern suggests a certain type of fabric doesn’t mean that you can’t make something else work with a bit of careful thought.
And as for the mantra “red and green should never be seen without a colour in between” – pfft!

January 21, 2016 at 9:18 am
That is totally stunning. I have never seen such a glamorous coat.
Bowled over.
LikeLiked by 1 person
January 21, 2016 at 10:36 am
Thank you, it will make the dog walking a bit more glam, anyway!
LikeLike
January 21, 2016 at 10:02 am
Gorgeous coat 🙂 I’ve had similar problems with Burda patterns which I must admit has put me off using them except for pretty standard stuff
LikeLiked by 1 person
January 21, 2016 at 10:06 am
I think you just have to read through the instructions and go through the process in your mind to see if it makes sense. If it’s a good design, I’d still make it, but it is annoying knowing you can’t guarantee the pattern is right!
LikeLike
January 21, 2016 at 10:05 am
I love it! What a great vision you had! I think that’s the hardest bit, ie imagining what want. Once it’s in your head it’s plain sailing – unless it’s the pattern from hell like yours sounds. Not sure I could’ve battled on! Lovely pics too. Looking fabulous! 😃
LikeLiked by 1 person
January 21, 2016 at 10:43 am
It wasn’t too bad, but I never read the instructions all the way through first, I just scan them, hence having to backtrack a couple of times. If you know how to make a welt pocket for instance, you don’t really follow the instructions, you just glance at them and get on and do it. I enjoyed the process though, just thought I’d better point out the downfalls:)
LikeLiked by 1 person
January 21, 2016 at 10:45 am
I’m a needy sewer and like my hand holding if it’s tricky, so I don’t tend to push myself. Maybe I should!
LikeLiked by 1 person
January 21, 2016 at 10:46 am
Defo – you don’t know what you’re capable of until you jump in at the deep end:)
LikeLiked by 1 person
January 21, 2016 at 10:11 am
Clicking ‘Like’ for this doesn’t seem adequate! It is completely amazing!
LikeLiked by 1 person
January 21, 2016 at 10:44 am
Why, thank you! There were lots of classic techniques in there to get your teeth into, so it was a really enjoyable make.
LikeLiked by 1 person
January 21, 2016 at 10:40 am
looking forward to seeing this on the school run… flash a bit of red at the headmaster x
LikeLiked by 1 person
January 21, 2016 at 11:33 am
Wow! That turned out SOOOO nice! It looks so unassuming and then BANG! RED! Gorgeous. I’ve read from more than one blogger that Burda patterns can have multiple errors. They generally aren’t on sale in the US so it really torques my jaws to pay full price for a pattern that’s wrong. Don’t they have pattern testers before a release? What’s wrong with those people? I don’t have your skills and I’d of given up on that project at the sleeves – or maybe the hand sewing (hate it).
Now I’m excited to see what you do with the gold. 🙂
LikeLike
January 21, 2016 at 11:39 am
Thanks, it’s a bit different to your average coat, isn’t it? I don’t know if Burda are known for errors, I just mentioned my experience to forewarn anyone wanting to give it a go. The gold is going to be the lining for a fur gilet but, sshhh, it’s a secret!
LikeLike
January 21, 2016 at 12:52 pm
Lovely coat, love the colours
LikeLiked by 1 person
January 22, 2016 at 11:53 am
Thank you, the colours are most accurate in the first two photos. It’s so hard to photograph crushed velvet and shiny lining!
LikeLiked by 1 person
January 21, 2016 at 12:55 pm
It’s gorgeous. That’s one of the great things about making your own clothes, you can make something unique and wonderful and that suits your personality.
LikeLiked by 1 person
January 22, 2016 at 11:55 am
Absolutely – that’s the reason we all sew, I suppose. Certainly not to save money as it’s often more expensive because we’re choosing quality fabrics, not the cheap polyester mix found on the high street.
LikeLike
January 21, 2016 at 1:09 pm
I just want to reach out and stroke it! It looks completely luxurious. As ever in awe of your ability to imagine an outcome and successfully work towards it!
LikeLiked by 1 person
January 22, 2016 at 11:57 am
I must admit, I find myself stroking the arms when I’m wearing it! It definitely feels like a touch of luxury, too. I was going to go for heavy velvet, but I wanted it to be lighter weight and not feel as constricted in it as I would in the stiffer velvet.
LikeLiked by 1 person
January 21, 2016 at 2:27 pm
Once again, I’m bowled over by your talent Sheila! So fab and such character! I love this on you! I also enjoyed the shoulder pad de-scaring thank you! Beautifully proven 🙂
LikeLiked by 1 person
January 22, 2016 at 11:59 am
Thank you, although it’s not talent, it’s just following the instructions – anyone can do it! It does have character, doesn’t it? Hadn’t thought of that, but it certainly suits my quirkiness:)
LikeLiked by 1 person
January 22, 2016 at 2:35 pm
Too modest! X.
LikeLiked by 1 person
January 21, 2016 at 3:17 pm
Wow! It looks so soft and warm! The fabric is beautiful! It looks like an expensive store bought coat, I can’t believe you made it. Lovely. That’s all I can say!
LikeLiked by 1 person
January 22, 2016 at 12:00 pm
Thanks Abi, that’s a compliment indeed!
LikeLike
January 21, 2016 at 6:19 pm
Full of admiration! It looks so lovely on too!
LikeLiked by 1 person
January 22, 2016 at 12:00 pm
Thanks Pauline, it will get a lot of wear:)
LikeLike
January 21, 2016 at 6:43 pm
Absolutely fabulous Sheila! The colours and style suit you so well and I just love those horse head buttons. Whatever will the gold version become I wonder ??? 😉
LikeLiked by 1 person
January 22, 2016 at 12:13 pm
Thank you – I love those buttons, too. Something a bit less obvious was needed for this coat and these were perfect. No.3 Son took a fancy to them and I found one in his coat pocket after looking everywhere for it! The gold is for the lining of a fur gilet:)
LikeLiked by 1 person
January 22, 2016 at 6:47 pm
The gold lining should look lovely, and having re-found your button, maybe you shall have to order extra next time, if it’s anything to do with horses 😉
LikeLiked by 1 person
January 21, 2016 at 7:08 pm
Beautiful! It looks lovely on you.
LikeLiked by 1 person
January 22, 2016 at 12:14 pm
Thank you so much!
LikeLike
January 21, 2016 at 8:42 pm
It looks amazing! You’ve done a great job especially with the fabric you were working with!
LikeLiked by 1 person
January 22, 2016 at 12:15 pm
Thanks, the fabric was not too challenging but is so lovely it was worth a little extra effort.
LikeLiked by 1 person
January 22, 2016 at 12:01 am
The mind boggles. I’m gob-smacked.
Drop-dead, shut-up gorgeous! ! !
LikeLiked by 1 person
January 22, 2016 at 3:35 pm
Wow, thanks Del, that all sounds pretty complimentary to me!
LikeLiked by 1 person
January 22, 2016 at 7:07 pm
You betcha it’s complimentary!!!
LikeLiked by 1 person
January 22, 2016 at 8:39 pm
Sheila, I suddenly realized that you might not know about our old version of What Not to Wear, with Stacy & Clinton (http://www.tlc.com/tv-shows/what-not-to-wear/). Her phrase for when an outfit looks spectacular is “SHUT UP!” and then she hugs the woman. Not wanting to be too repetitive in my compliments to you, that popped into mind. Didn’t mean anything but extreme compliments, and please consider yourself hugged!
LikeLiked by 1 person
January 22, 2016 at 9:36 pm
Ha, no, I didn’t make that connection but assumed something along those lines! More thanks:)
LikeLiked by 1 person
January 22, 2016 at 12:46 am
Your coat is exquisite and you look amazing in it! To be seen in something so glamorous and know that it was your own creation – fabulous! It will be fun to walk in the wind so everyone can see the lining. ;-0
LikeLiked by 1 person
January 22, 2016 at 3:36 pm
I know, that’s the devil in me – I can already heat the gasps of disapproval!
LikeLiked by 1 person
January 22, 2016 at 1:21 am
THIS IS JUST FABULOUS!!!! I love it – what a great colour combination! It looks like you have overcome quite a few difficulties with this one, but it’s certainly been worth it! Have you already worn it out yet? I bet you get loads of compliments when you do!
LikeLiked by 1 person
January 22, 2016 at 3:38 pm
I have worn it but not yet on the school run – therein lies the test! It won’t go unnoticed, that’s for sure, and people are pretty honest with their opinions around here. If I cared, I wouldn’t have made a green velvet coat with a red Paisley lining!!
LikeLiked by 1 person
January 22, 2016 at 3:19 am
I followed every step. I’m impressed that you remembered to take so many progress photos. You’ve made yourself a magnificent coat and the coat of our dreams. Congratulations…and what fun.
LikeLiked by 1 person
January 22, 2016 at 3:43 pm
To be honest, I took the minimum amount of photos as there were so many stages to this coat that it wasn’t possible to document it all – you’d all have been asleep long before the end! I really enjoyed it though, just in case that didn’t come across in the blog post, lol!
LikeLike
January 23, 2016 at 6:00 am
I’m glad you enjoyed it. In the end, that’s what counts.
When I took sewing in high school we had four projects for the year, including tailoring a coat. It was so much different than just sewing. We had to pad stitch the collar which took hours, and learned different techniques to ‘roll’ the collar. I’ve never forgotten that.
LikeLiked by 1 person
January 22, 2016 at 8:18 am
It turned out just as beautifully as I imagined it would be. Gorgeously rich and luxurious. The perfect coat to beautify and brighten any winters day. You are amazing with fabrics and a sewing machine. 🙂
LikeLiked by 1 person
January 22, 2016 at 3:47 pm
You’re right, it does brighten up a Winter’s day, for me, at least! I do love how quickly you can run something up with a bit of fabric and a sewing machine – it’s a little bit of magic!
LikeLiked by 1 person
January 22, 2016 at 4:54 pm
I love how it turned out!! You look beautiful wearing it. I think you picked just the right pattern and fabric! You are a fabulous seamstress.
LikeLiked by 1 person
January 22, 2016 at 9:37 pm
Thank you, I just had this combination in my mind for some reason and am happy with the way it turned out:)
LikeLike
January 22, 2016 at 7:32 pm
Mmm, this looks delicious and you look fab in it! I think I may have gone from a shoulder-pad phobic to a shoulder-pad convert! What a difference! I love the red and green together although when I last tried that combination I looked like a Christmas elf (don’t worry, you definitely don’t!).
LikeLike
January 22, 2016 at 10:06 pm
Beautiful coat and you look great in it! 🙂
LikeLike
January 23, 2016 at 5:02 pm
Stunning! Like something from a fairy tale.
LikeLiked by 1 person
January 24, 2016 at 9:13 am
I suppose it is a bit – like something the Prince would wear when he rescues his Princess!
LikeLiked by 1 person
January 24, 2016 at 6:33 pm
Noooooo! Far too feminine!
LikeLiked by 1 person
January 24, 2016 at 6:57 pm
Exactly. We’re talking Disney Princes here:)
LikeLiked by 1 person
January 24, 2016 at 8:21 pm
🙂
LikeLiked by 1 person
January 23, 2016 at 6:28 pm
This is amazing but I would have loved to have seen a photo with you wearing the hat too! I hope the chickens appreciated the glamour.
LikeLiked by 1 person
January 24, 2016 at 9:14 am
Thanks – no, the hens just wanted their corn and followed me around until they got some!
LikeLike
January 23, 2016 at 7:29 pm
OMGOODNESS it’s beautiful, you must be over the moon with your designer coat 🙂
LikeLiked by 1 person
January 24, 2016 at 9:16 am
Thanks – yes, I am, I love something a bit different and this coat is certainly that:)
LikeLiked by 1 person
January 24, 2016 at 8:44 pm
Different and very beautiful x
LikeLiked by 1 person
February 4, 2016 at 3:27 pm
Wow to the max! It’s amazing, and so very “you”. I love it – another fabulous job! Marianne xx
LikeLiked by 1 person
January 10, 2020 at 12:42 am
Beautiful work!
I’m reading through this pattern right now to try and pick out those errors to minimize work later down the line — did you stitch bust darts in your front pieces? That’s the first step in the pattern instructions, but the pattern piece doesn’t show where to stitch them!
LikeLike
September 20, 2020 at 3:37 pm
Omg ironic to see this….I’m doing the same patter in gold velvet with a teal lining. Can’t wait to get it finished ❤️
LikeLike