Sewchet

Sewing, crochet, crafts, accessories, baking, tutorials,


15 Comments

New Cloakroom – Finished At Last!!

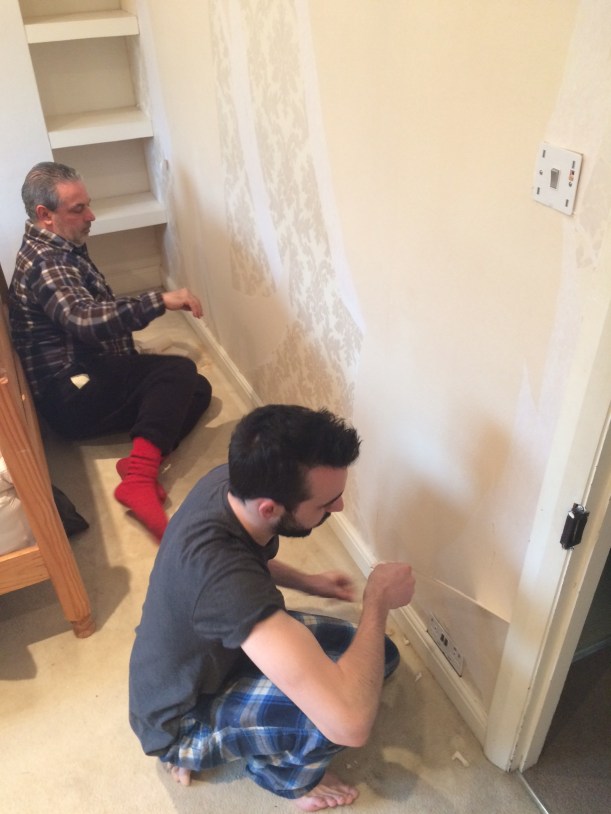
As I have mentioned in my recent Sunday Sevens posts, we are getting the house ready for sale.

I know that doesn’t sound like it’s anything major, but I’m a stickler for detail and have delayed putting it on the market until I’m happy that all the little things have been finished.

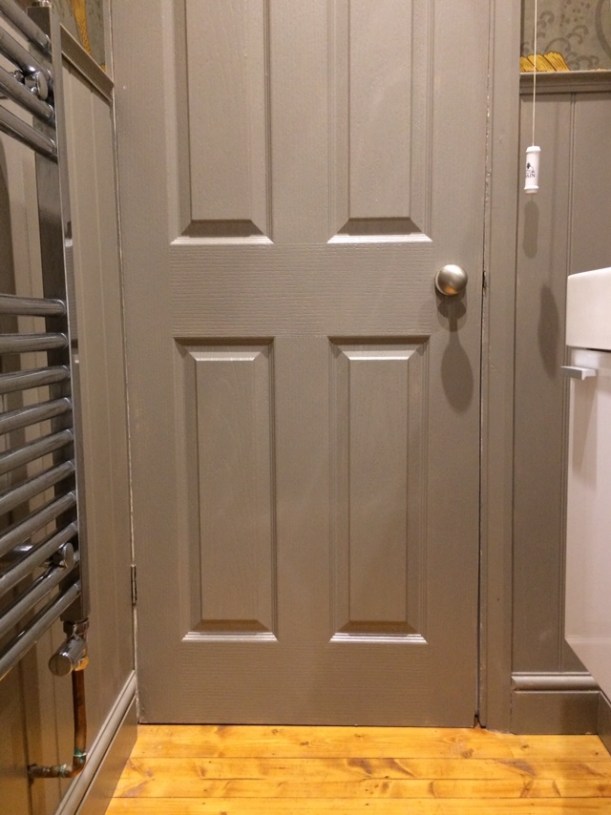
Things like painting the inside of the cloakroom door, for example. In theory, no potential buyer would even see the back of the door as they’ll only poke their head in for a quick glance.

As I said, I’m a stickler for detail.

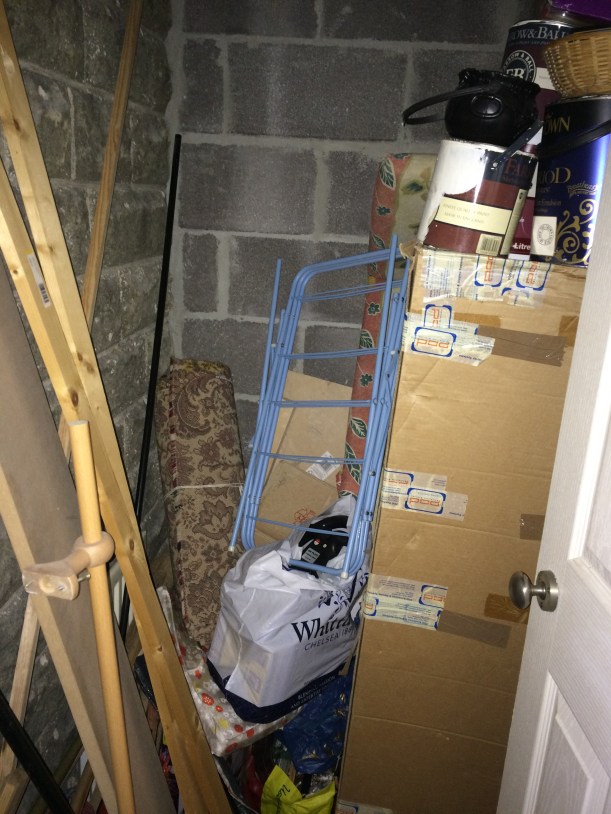
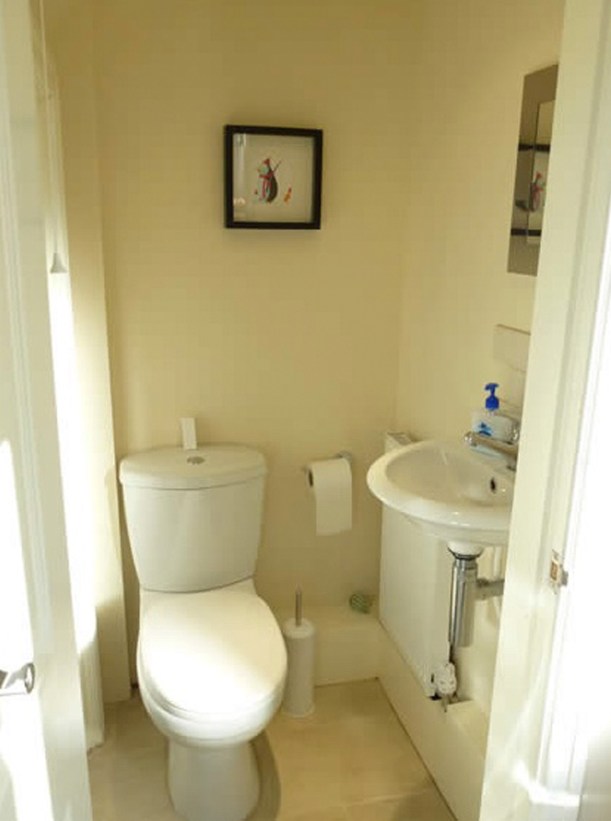
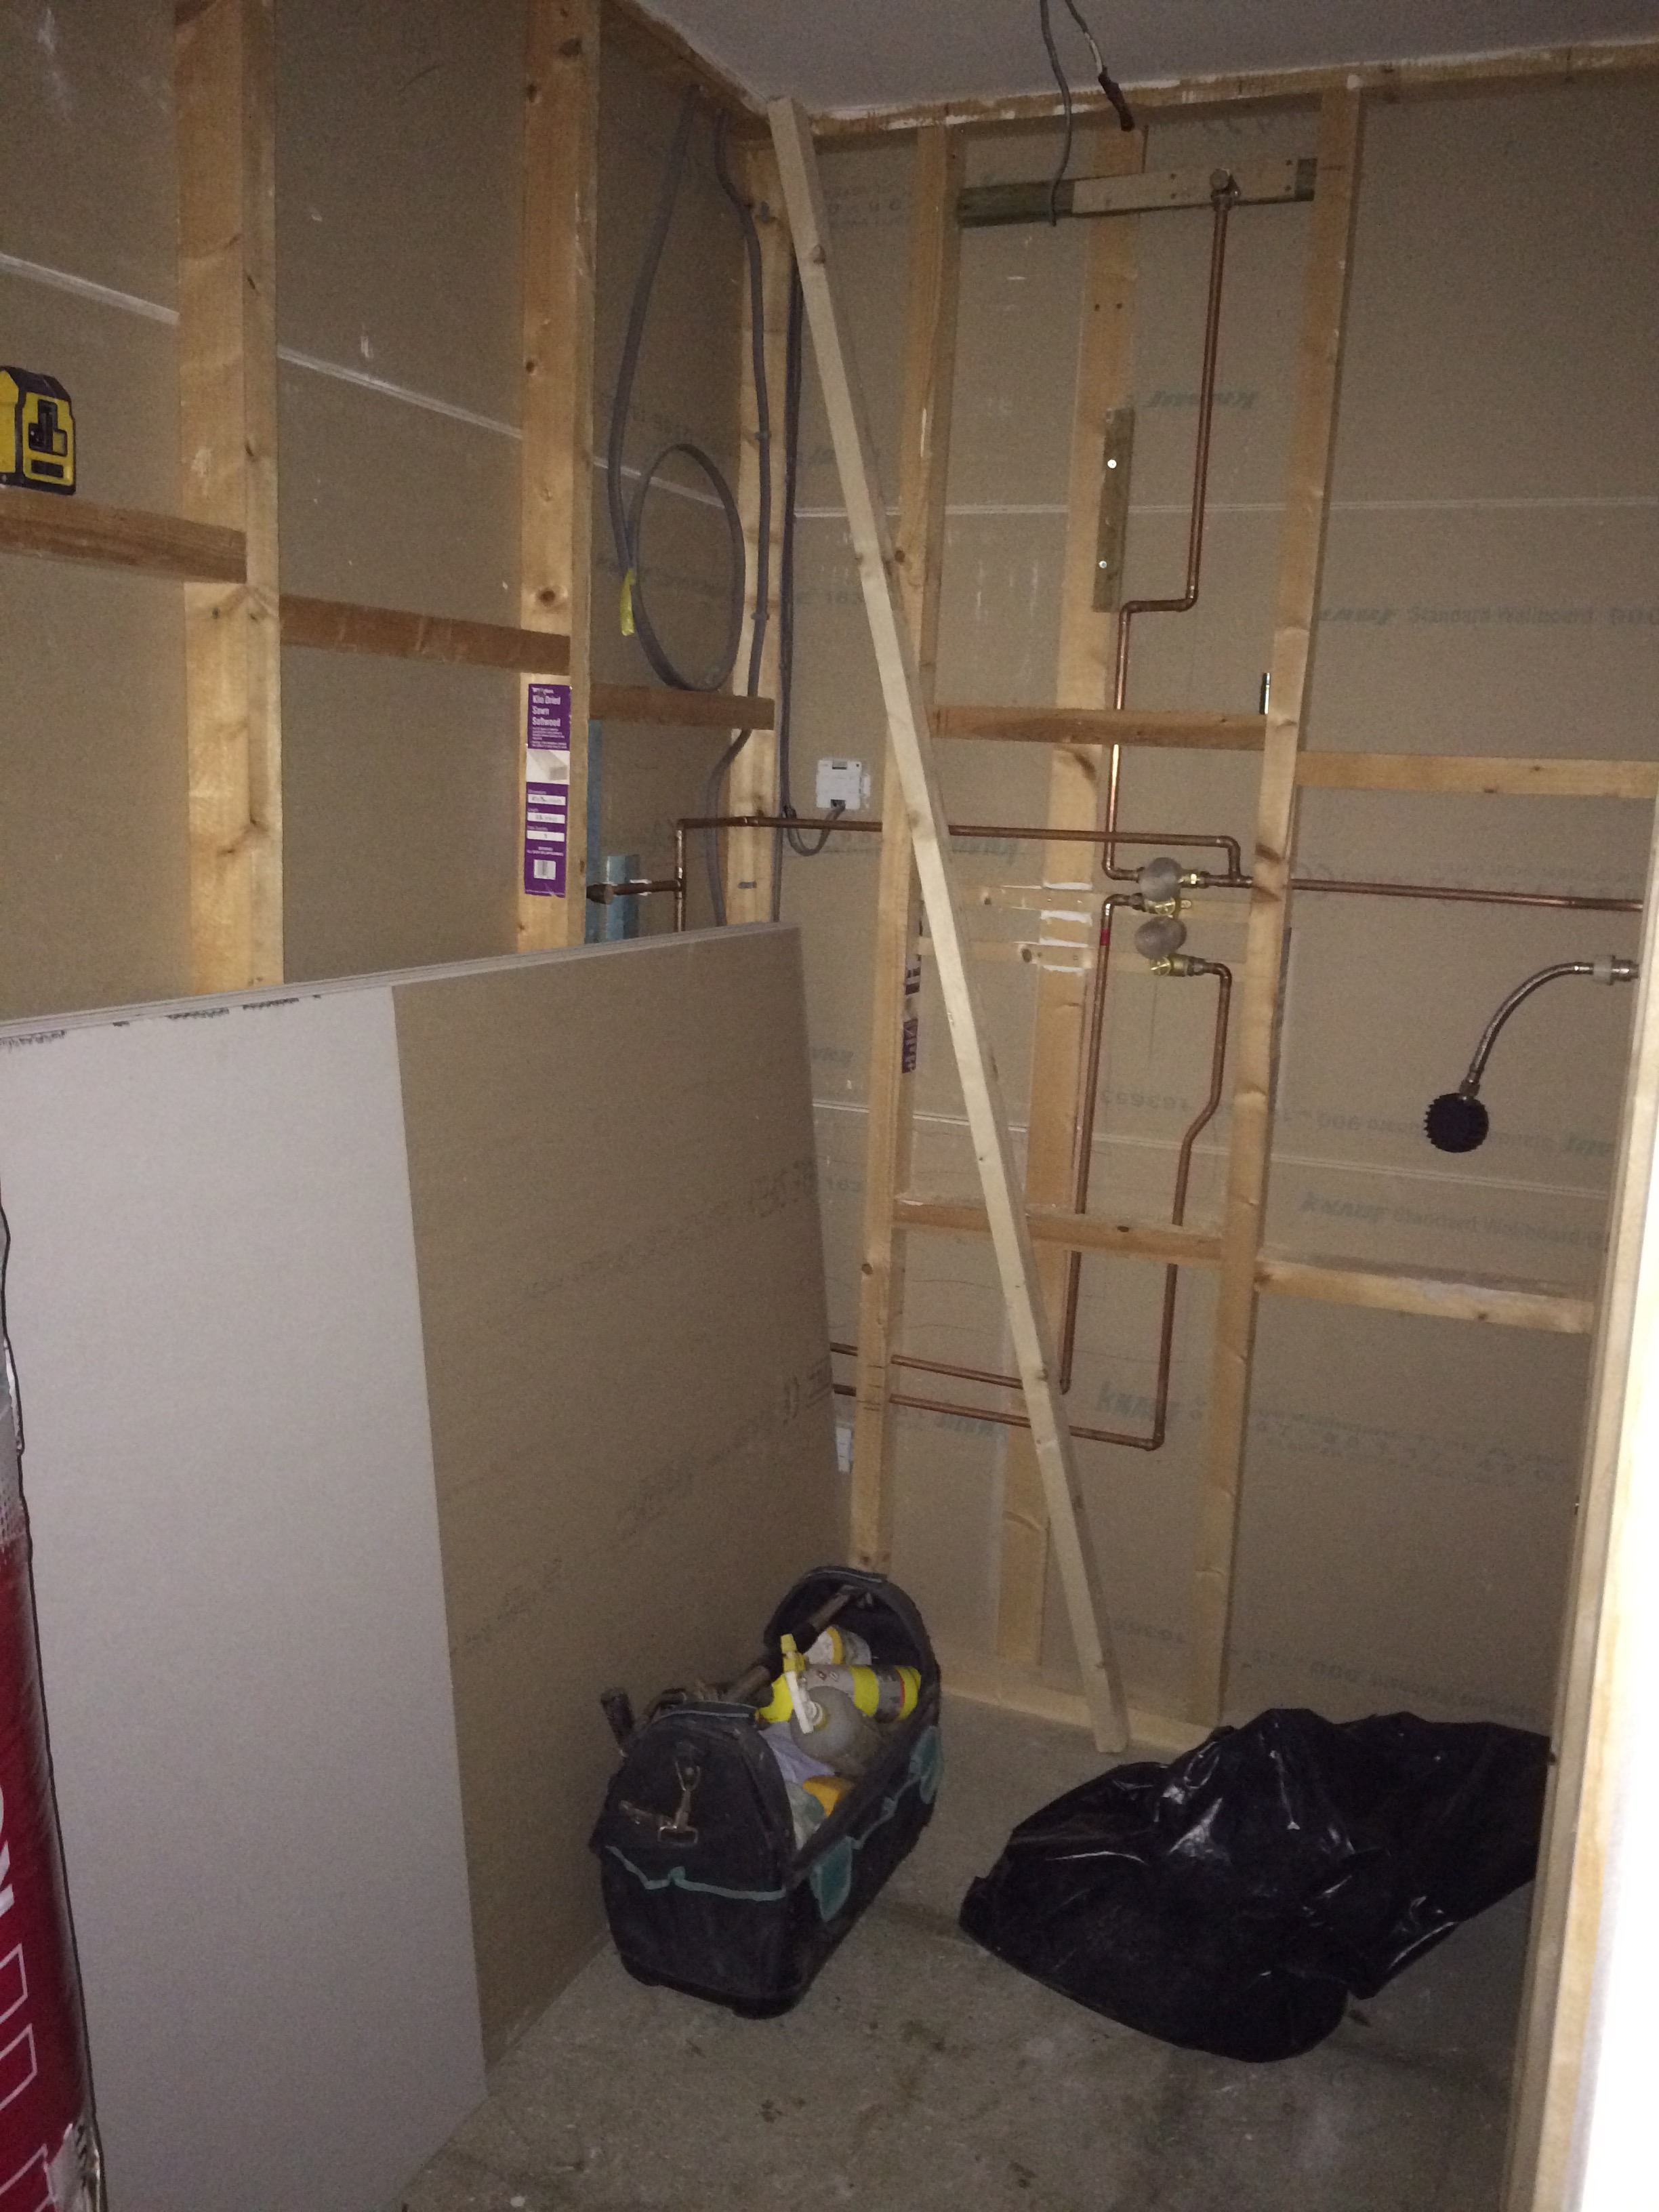
Last year (and indeed, for the previous ten years) this was a Cloakroom-in-waiting, (not so) dressed up as a cupboard/dumping ground, measuring an extremely modest 3ft x 5ft.

before

Now, as it’s the room in the house in which you spend just a few minutes a day, I had visions of going crazy with the décor. I seriously considered going this bonkers!

37001077_10214494278104734_8677040372758609920_n

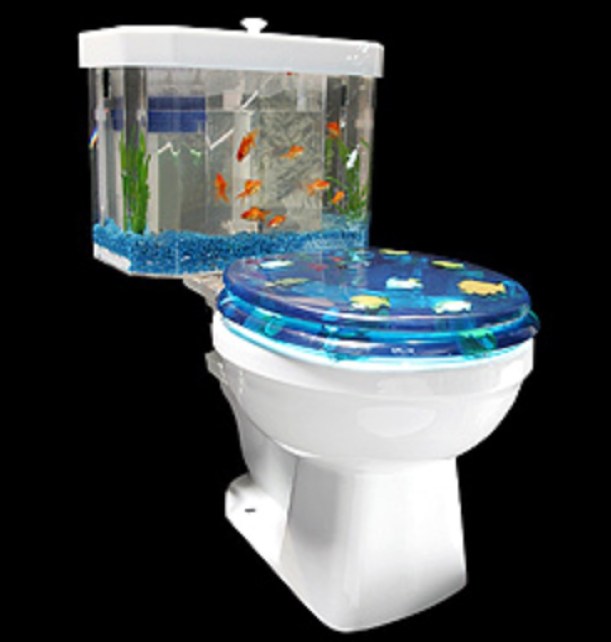
Thankfully, my sensible head kicked in just in the nick of time, as my finger was hovering over the ‘Add to basket’ button. Not the best choice for a house you’re hoping to sell in the near future.

Searching the ‘net for viable options, I came across this image and thought “Wow!”

The space was almost identical to ours and it had the unexpected ‘in your face’ kind of reaction when you opened the door.

inspiration

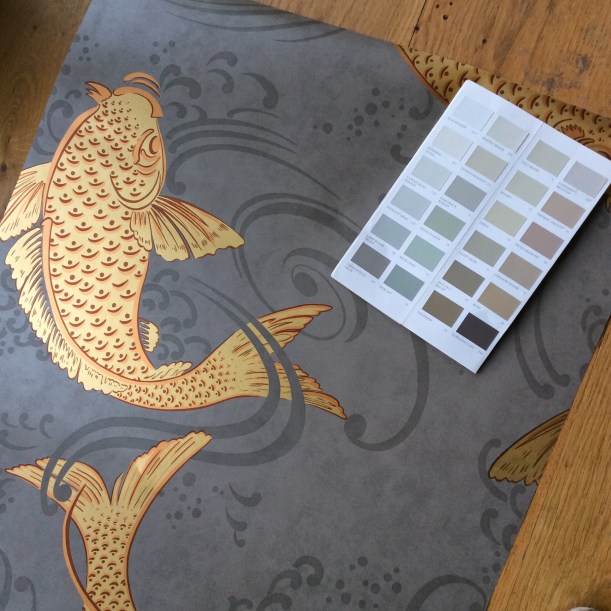
Decision made, I ordered two rolls of wallpaper in the charcoal and gold colourway (there are five different options). At the regal cost of £146, you’d like to think that the fish are real gold leaf!!

I held up the wallpaper against the Farrow and Ball paint chart and was pleased to find that “Charleston Grey” was a pretty good match, so ordered a 5l tin of water-based eggshell for the woodwork.

37092843_10214494280104784_8977699353472794624_n

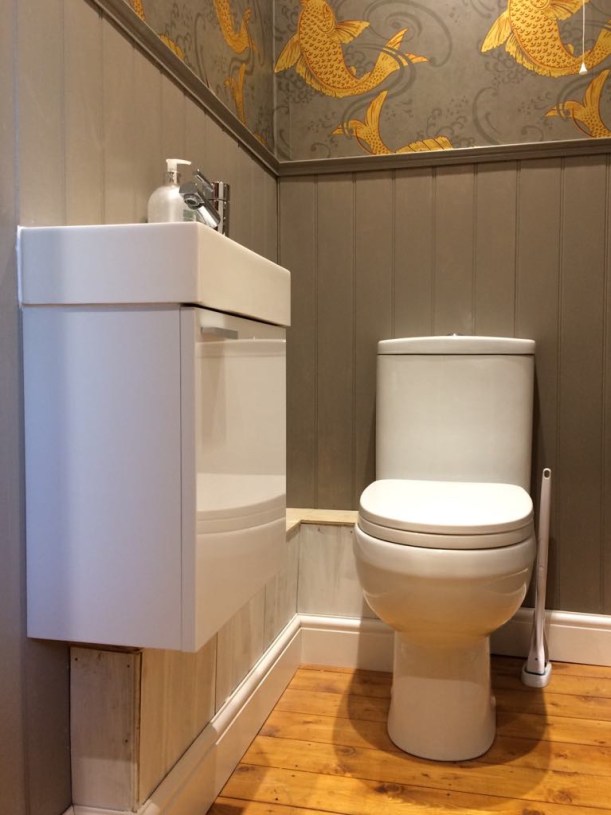
Hubby installed the tongue and groove panelling and it took three coats of paint to get a good coverage – all to be done overnight before the plumbers came back the next day to fit the suite!

37005712_10214494286464943_7479785352434024448_n

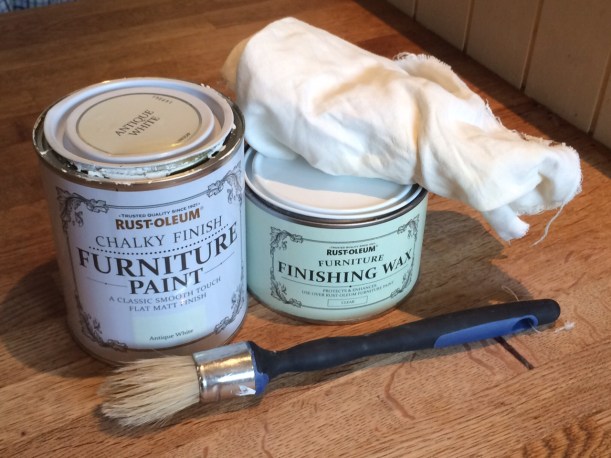
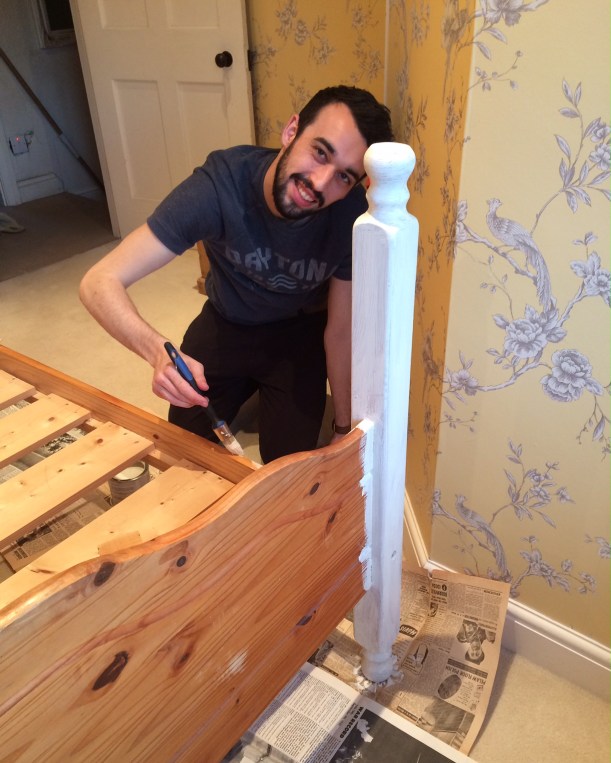
We have a fair division of labour – he does all the construction stuff and I do all the painting and decorating.

37063748_10214494298865253_3684300938819928064_n

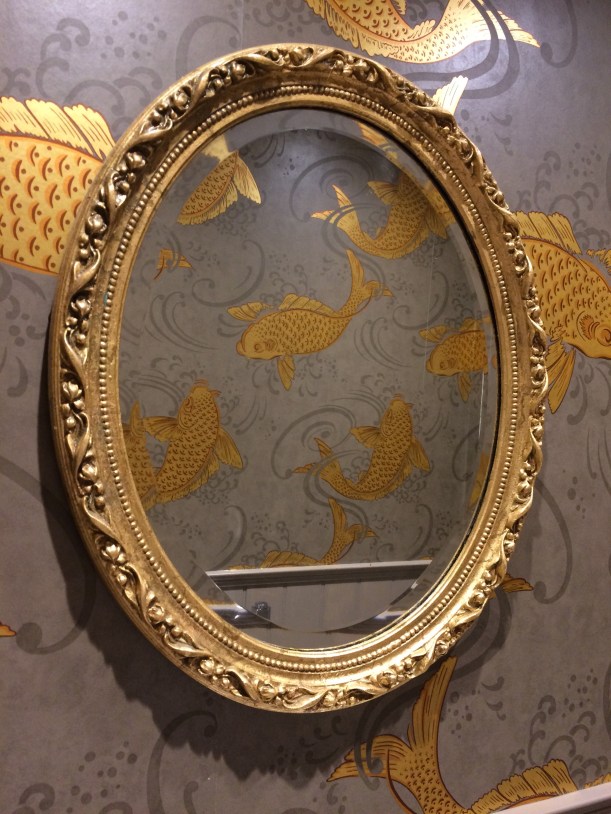
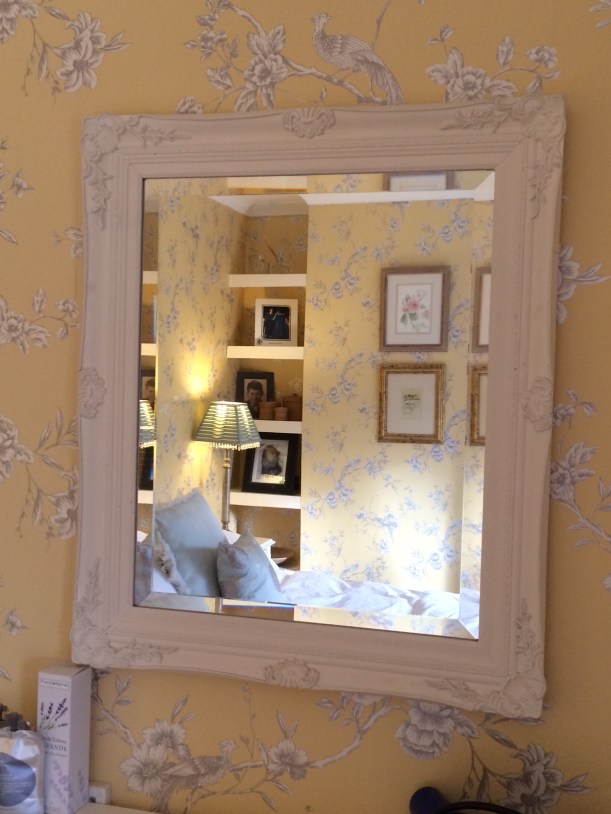
Decorating complete, it was time to gild the old mirror I picked up in a vintage shop.

36992503_10214494296305189_2074902433024180224_n

37082425_10214494288224987_2750661643800150016_nimg_5815

Mirror up and then……..that was it for a year.

Last month I finally persuaded Mr H-L that it really was time to box-in the pipework and add skirting boards. I think it was the phrase “So you’ll have somewhere to put your coffee mug” was what clinched it!

37040381_10214494322745850_4277189099216961536_n

No sooner up than painted.

img_5822

Drum roll please, for the big reveal…..

37047455_10214494317305714_3507848628439875584_n

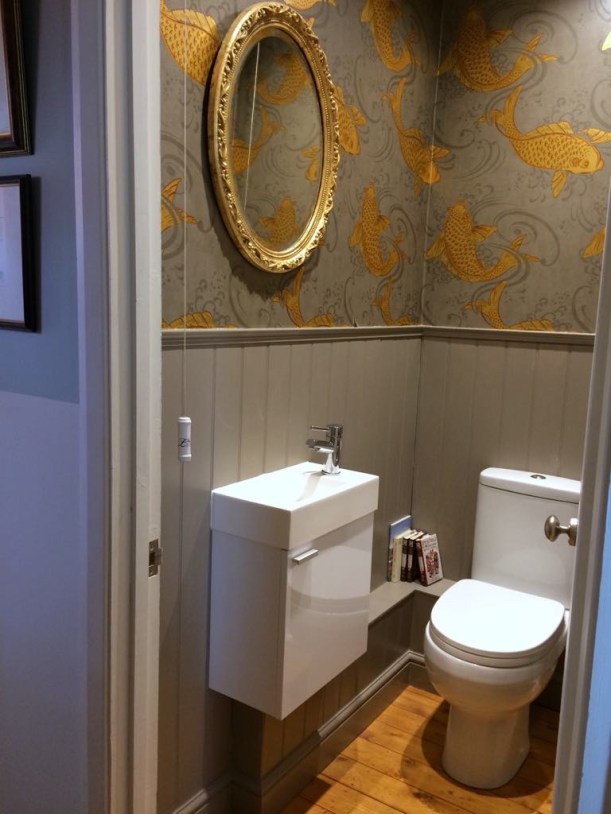
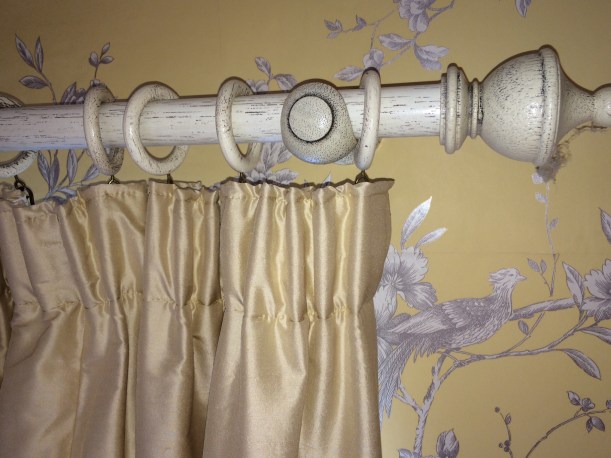
A closer look at the details: –

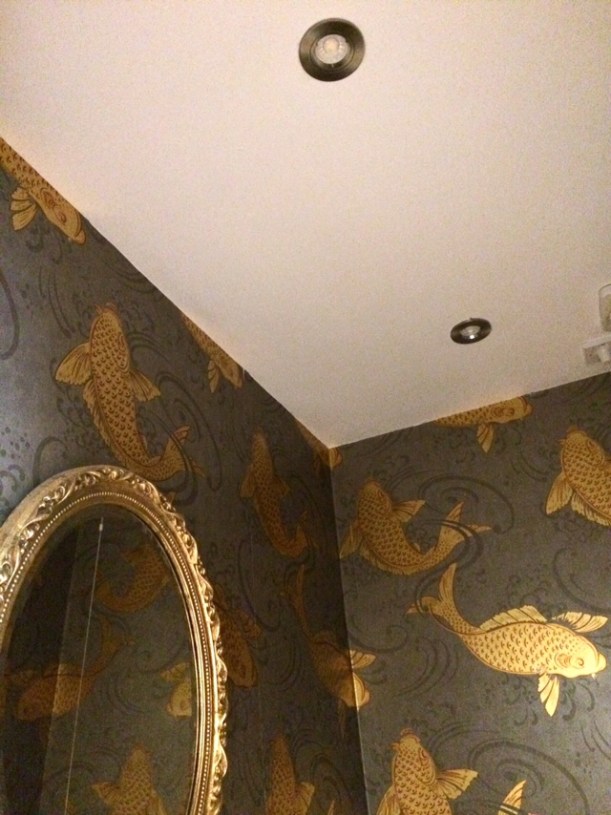
The Oriental style Koi Carp wallpaper.

img_5816

Mr H-L did a bloomin’ good job of installing floorboards that match the ones in the hallway that he did ten years earlier.

img_5823

Downlights are much nicer than a central pendant.

img_5827

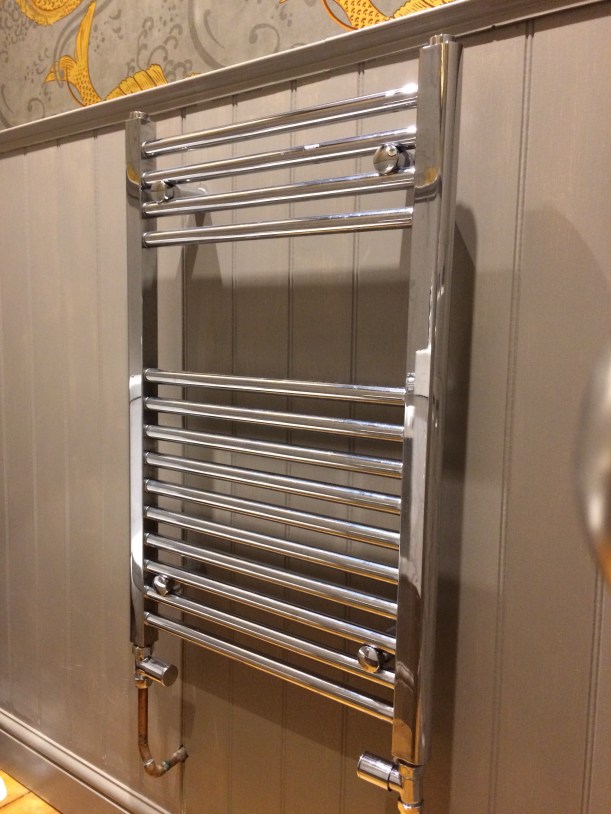
A towel radiator heats the tiny space in Winter.

img_5821

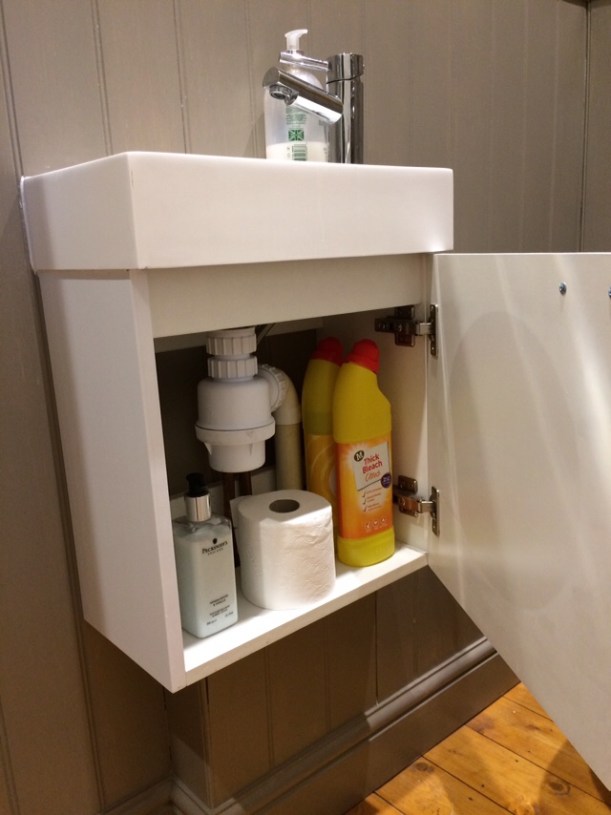
We even managed to find the tiniest of sinks complete with storage for the essentials. The sink measures just 16″ x 9″ and is the perfect solution.

img_5824

A single lever tap was the obvious choice for such a diminutive sink.

img_5825

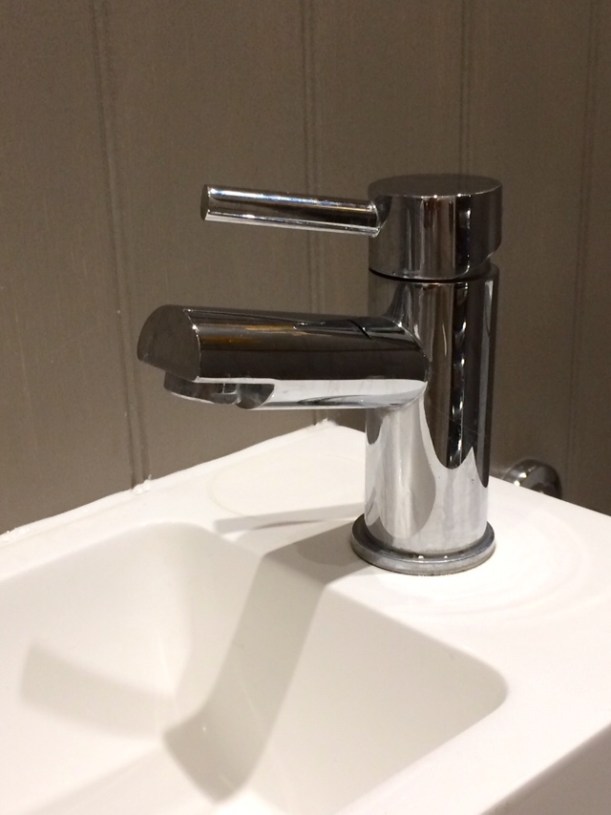
A swivel plug is so much sleeker than the old fashioned chain that wrapped around the tap and dangled annoyingly.

img_5831

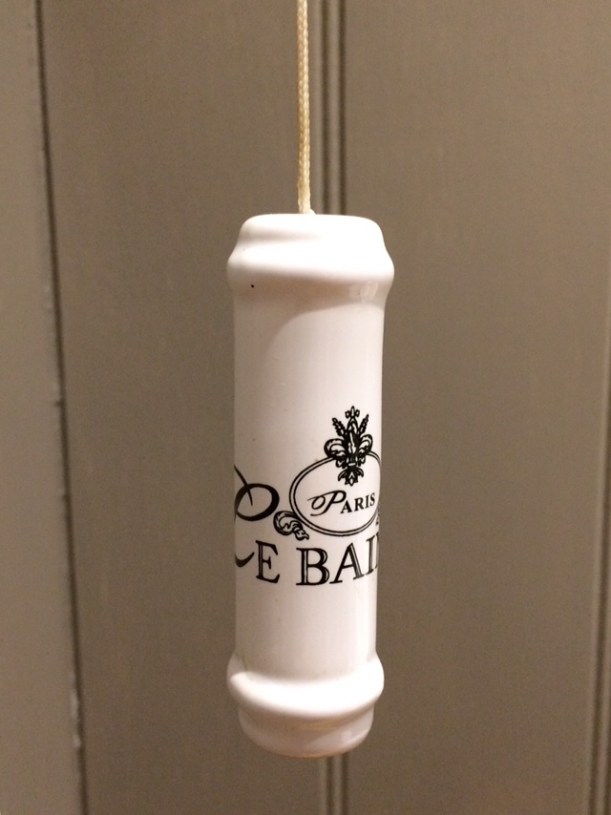
This ceramic light pull is better than the bare cord.

img_5817

Chrome loo roll holder and towel hook match the radiator.

img_5818img_5819

This is the view from the loo….

img_5813

….and when they’re bored of looking at that, I even put a few books in to entertain the men. Well, it IS only men that like to sit on the loo until their legs go numb, isn’t it?

img_5814

For those (like me) who love them, here’s a good old ‘before and after’ comparison:

Finally, I would just like to say that I have never slavishly followed any design inspiration before, but this was so perfect for the space that I shamelessly copied it almost identically, apart from the floor.

compare

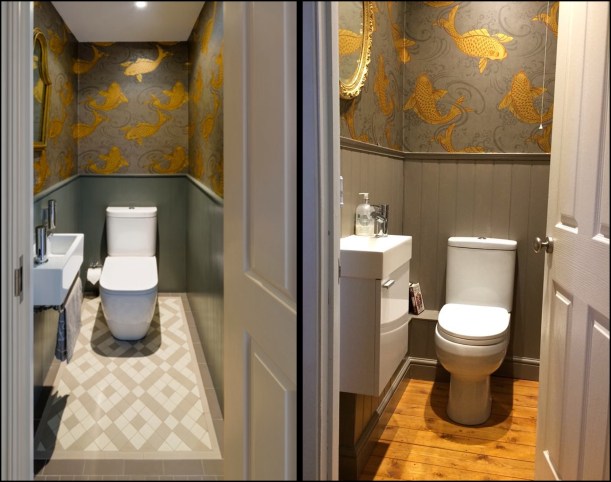
Inspiration VS Reality

Yes, we could have played safe and done the usual beige thing of white ‘contrasting’ against magnolia……

loo

…..but why would you when you can have gold Koi Carp on the walls?!

37047455_10214494317305714_3507848628439875584_n

Who else has been bold with a downstairs loo?

I wanna see some of your photos, so put your link in the comments!


39 Comments

Sunday Sevens #120

Time for another Sunday Sevens – a weekly blog series showing your week in photos. Linking up with Nat at Threads & Bobbins.


We had my four children, two step-daughters, all of their partners, and our gorgeous granddaughter to stay at the weekend, and took the obligatory annual photo as proof!

1. While most went to watch The Boys play football, I took two of them and The Baby to Sherborne for the morning – here they are outside The Abbey.


2. Of course, we had a coffee-and-cake stop in a café. Do you think she’s enjoying her first taste of a jam tart?


3. No.1 Son bought these chocolates for me. I don’t like anything sweet as a rule, but these were amazing!


4. As many of you already know, I share a birthday with my daughter. We spent the day together at our favourite place, Summer Lodge.


5. A full body and head massage was the BEST way to while away an hour and a half, followed by leisurely morning using the spa facilities.


6. Hubby also treated us to the most incredible three-course lunch. Smoked duck breast with various different forms of apple, all steeped in alcohol anyone?


7. Mr H-L and I also managed to sneak a little lunch out on our own later in the week.


8. But……most of the week was dedicated to building work and, at last – decorating. The Koi Carp wallpaper went up in the downstairs loo!


9. I also finished gilding the mirror that will add the perfect touch of bling to the already-quite-bling wallpaper.


10. Did I mention that we are having our en suite done at the same time? Oh, the dust…….


11. It’s also well under way.


12. Do you remember that I mentioned I was searching for some mirrors, specifically the frameless type from the Forties? Well, this is what I had in mind – a wall of mirrors above the sink unit. Although the en suite isn’t quite finished, I was desperate for hubby to put the mirrors up and he kindly obliged. It was no mean feat, taking over two hours to get just right, but I already love the overall effect. En suites are modern by the very concept, and the old mirrors tone the modern-ness down a bit, especially as most of them are chipped or rusty in part.


13. I’ve still managed to squeeze in a bit of sewing which is a miracle. It’s actually for a Minerva blog post and is overdue, so I must try to finish it today.


14. I’ve completed the ribbing on the socks, too, but still need to sit down and google “see-through wellies”!!


66 Comments

Chalk Painted Dresser Makeover

A couple of months ago, I was lucky enough to buy this solid oak dresser on eBay for just £96.00.

image

Now, I know there’s nothing wrong with it and it is, indeed, a beautiful piece of furniture just as it is, but I had plans to paint it.

We have a large kitchen diner with a LOT of wood in it, so yet another ‘heavy’ piece was never going to look right. I spent months searching for the right dresser at the right price and the right size and eventually found this modern one, which was beautifully made and really solid.

Mr H-L drove for over an hour to go and collect it and wasn’t particularly happy about it being painted, but resigned himself to the fact that I was going to, anyway. What he DID object to, though, was that I wanted him to chop a section of the dresser out, in order to fit our coffee machine in.

image

I won that debate, too:)

imageimage

Having used Annie Sloan and Rustoleum chalk paint successfully in the past (guest room makeover), I opted for ‘Bleu Clair’ by Autentico, purely because they had the exact shade of blue that I was looking for.

image

The main reason that I chose chalk paint in the first place is that there is no need for preparation on most surfaces – you just slap it on.

image

Two coats are usually needed for good coverage, especially when covering dark with light.

image

image

When the paint was totally dry, a coat of finishing wax was rubbed in and buffed to a sheen to protect the surfaces.

I’m told it takes a month to cure completely, so be careful until then. It’s been over a month now, and the finish is still blemish free.

imageimage

With a bit of determination (for which, read ‘impatience’), I managed to get two coats of paint and a coat of wax on in just one day.

image

Then I left it for a month.

Or two.

And decided that the knobs had to go.

image

I dug out four wooden knobs leftover from the kitchen cabinet doors and painted them with two coats of ‘Walnut’ wood stain and a coat of Matt varnish.

image

Now they match the kitchen units.

image

So this is the finished article, brightening up the other end of the kitchen part of the room, and I have to say that I’m very pleased with it.

image

The coffee station works brilliantly with everything in one place – all I need now are some beautiful mugs to hang on the new hooks we installed.

image

Turn around 180 degrees and this is what greets you, so you can see that both the style and the colour work really well as a whole.

image

Before and after: –

I love it both ways, but it just sits in our kitchen better now it’s painted and if I ever change my mind, it should be easy to get dipped back to the plain oak.

What do YOU think – love, or loathe?


24 Comments

Guest Bedroom Makeover

After several sneak peeks on the blog and on Instagram, I have finally got around to blogging about the guest bedroom makeover which we finished a few weeks ago.

This post is picture-heavy, so you might want to get yourself a cup of tea before you start:)

guest bedroom makeover15

Of course, there’s no point in having the ‘after’ photos if you don’t show the ‘before’ photos, grim though they may be.

guest bedroom before1

Believe it or not, this room was actually quite nice when it was first decorated but, ten years on, it was looking really tired and in desperate need of a facelift.guest bedroom before2

No.1 Son returned home after four years at Uni and decided that he would like to move from his old bedroom into the guest bedroom as it has a double bed. Although he’s generally quite good at keeping his room presentable, boy ‘stuff’ has a habit of piling up, corners get bashed and, before long, redecoration became a must.guest bedroom before3

We have plenty of nice, plain white, inoffensive bedlinen but, being male, he just puts on any old set, in this instance his sister’s faded old duvet cover from when she was at Uni.

Hmm, not a good look.guest bedroom before

The window treatment may look OK at first glance, but when you look closer…..guest bedroom before6

….the silk edging of the roman blind has disintegrated after ten years of sunlight.guest bedroom before4

Embarrassed though I am to publicly display these pictures, it does mean that you can’t fail to be impressed at the change!

Having looked carefully at the room, I came to the conclusion that we didn’t have to do an awful lot to make a huge difference – some wallpaper, new curtains and a new bed were all that were really needed. Other elements like the bedside tables and lamps were still in good condition so there was no reason to change them.

I fell in love with this ‘Yellow Chinoise’ wallpaper ages ago at Homebase and managed to buy it when there was 20% discount.

guest bedroom makeover20

The men set to, stripping off the old wallpaper.

guest bedroom makeover3guest bedroom makeover2

It’s always exciting to see the first drop in place, isn’t it?guest bedroom makeover1

The existing pine bed was solid enough so I made the decision not to go to the unnecessary expense of buying a new one, but to update it with chalk paint instead.

chalk paint

No.1 Son helped out with that task, too, and it only took a couple of evenings to apply two coats and a finishing wax.guest bedroom makeover

I remade some silk curtains to fit – the leading edges of the originals had also disintegrated in the sunlight, and I had long since replaced them with new ones in the dining room.

I even removed the beading from the pelmet, washed it and restitched it to the leading edge of the new curtains. Hopefully, this will give them a longer life as the sunlight now only falls on the lining and not the silk.

guest bedroom makeover18

The curtain pole was kept as it ties in perfectly with the new scheme.guest bedroom makeover22

I swapped the huge tasselled tie backs with the ones in the dining room.guest bedroom makeover21

Since this photo was taken, we’ve put up tie back hooks on the wall:)

guest bedroom makeover11

The nasty orange pine has been banished and newly painted bedframe sits much more subtly in its surroundings.

guest bedroom makeover25

The bedside tables work well in the yellow and cream colour scheme. A bit shabby in places, but that’s fashionable right now, isn’t it?guest bedroom makeover26

Duck egg blue silk lampshades are still fine after surviving three house moves – a quick hoover was all that was required to make them look like new again.guest bedroom makeover29

I remember adding the beaded trim to the shades when we moved to this house, nearly ten years ago. A quick way to transform them.guest bedroom makeover27

The mirror seems to stand out more against the yellow wallpaper whereas, previously, it just blended in to the cream painted walls.

guest bedroom makeover24

The shelf beneath the mirror was painted to match all the woodwork and some essentials for guests put in place. guest bedroom makeover14guest bedroom makeover17

The magazine rack is filled with reading material and recent magazines that might be of interest.guest bedroom makeover19

I could reupholster the chair, but the duck egg blue ties in with the lampshades so I think I’ll leave it.guest bedroom makeover23
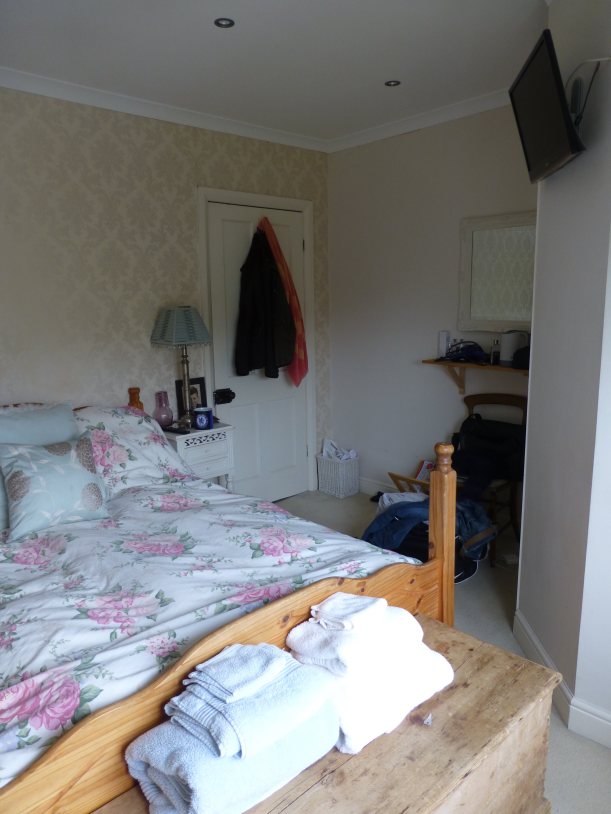
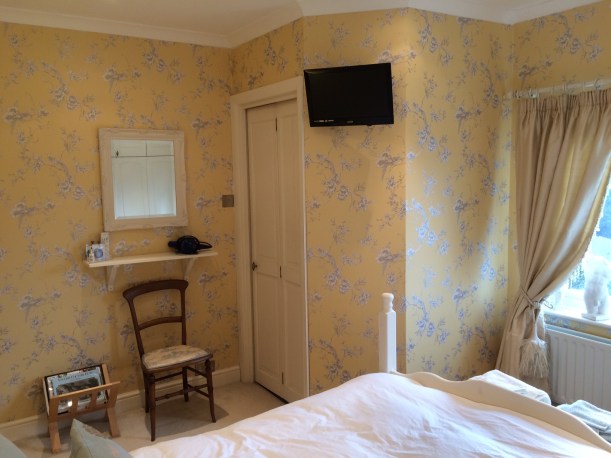
His ‘n’ hers towels are stacked on a blanket box at the end of the bed.

guest bedroom makeover28

Fluffy robes on the back of the door and disposable slippers in the wardrobe along with plenty of wooden hangers (I can’t stand the plastic ones!) are items that are well received by people that stay.

guest bedroom makeover13

It’s just across the hallway to the bathroom for now, but……guest bedroom makeover12
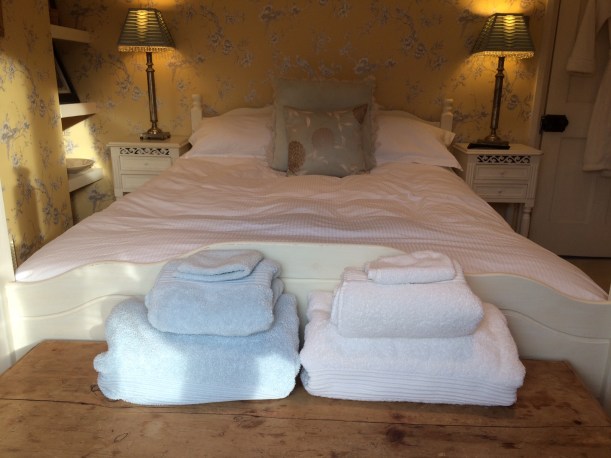
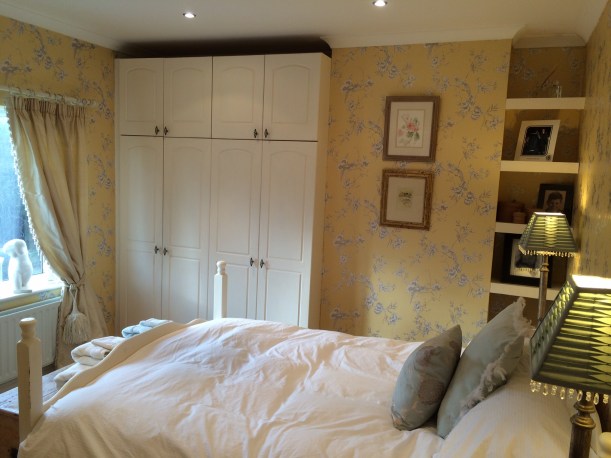
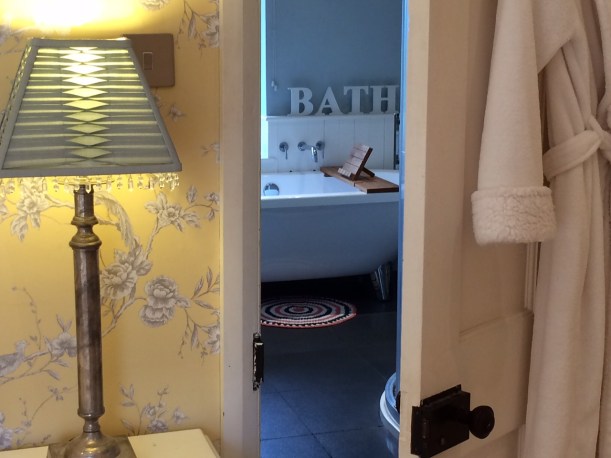
…..the ensuite is in place behind these doors ready to be kitted out.

guest bedroom makeover16So that’s it, really. Do you want to see some photos of the overall effect?
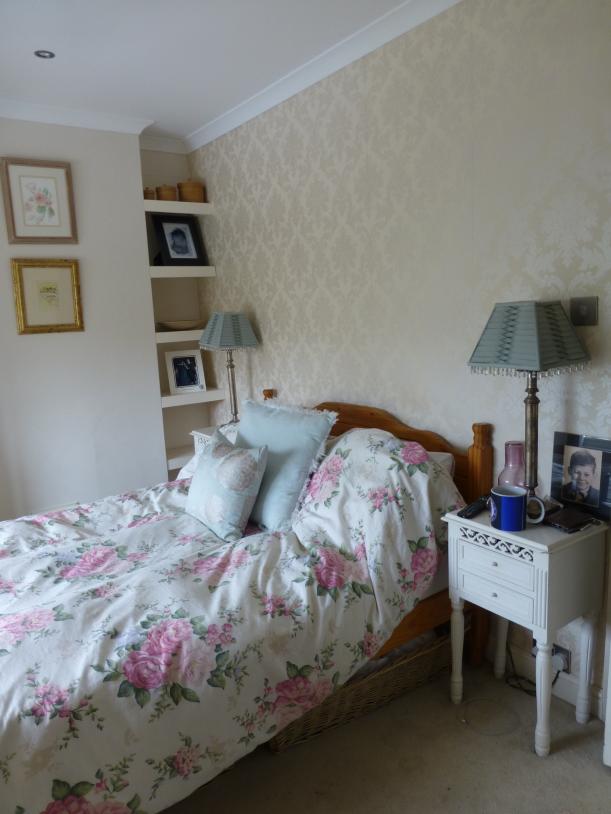
guest bedroom makeover6guest bedroom makeover8guest bedroom makeover9guest bedroom makeover4guest bedroom makeover10

Here are some direct comparisons of the before and after shots – much more warmer and welcoming, don’t you think?

Best of all, by keeping changes to a minimum and concentrating on things that would have the biggest impact, it only cost just over £80 in total!!

That’s five rolls of wallpaper and some chalk paint and wax! The rest was just hard work and a little vision to see the potential of what was already there.

It may not be to everyone’s taste, but there’s no denying that it’s a vast improvement on the tired old room that it used to be and it’s going down well with our guests so far, so that’s all that really matters:)