
Having received many compliments and enquiries about the clay gift tags I made for Christmas this year, I thought I’d show you how easy it is to make your own.
Aren’t they lovely?

After having spent many a long hour hand making presents for the majority of family and friends this Christmas, what better way to set them off by making gift tags too?
In common with so many other like-minded folk, I have always kept last year’s Christmas cards with the explicit purpose of re-inventing them as gift tags on next year’s presents and this year was no different.

Although we only give to close family and friends, with six children of our own the gift list soon grows to a sizeable read and I find myself needing more tags than I can produce through recycling alone.
Enter from stage left: A solitary bag of Das Air Drying Clay, bought with this very project in mind a couple of years ago, but only recently rediscovered after a drawer clearing-out session.

Ah ha! (I thought, in one of those ‘lightbulb’ moments). I could use those cookie cutters in my cookie cutter drawer (what – doesn’t everyone have one?) to make just one personalized gift tag for everybody which could also double up as a tree decoration!
So, equipment gathered, let the crafting commence!

The clay should be worked in your hands for a minute or so – this softens it and makes it easier to roll.
Using a cookie cutter, press into the clay and wiggle slightly to separate the shape from the main body of clay.
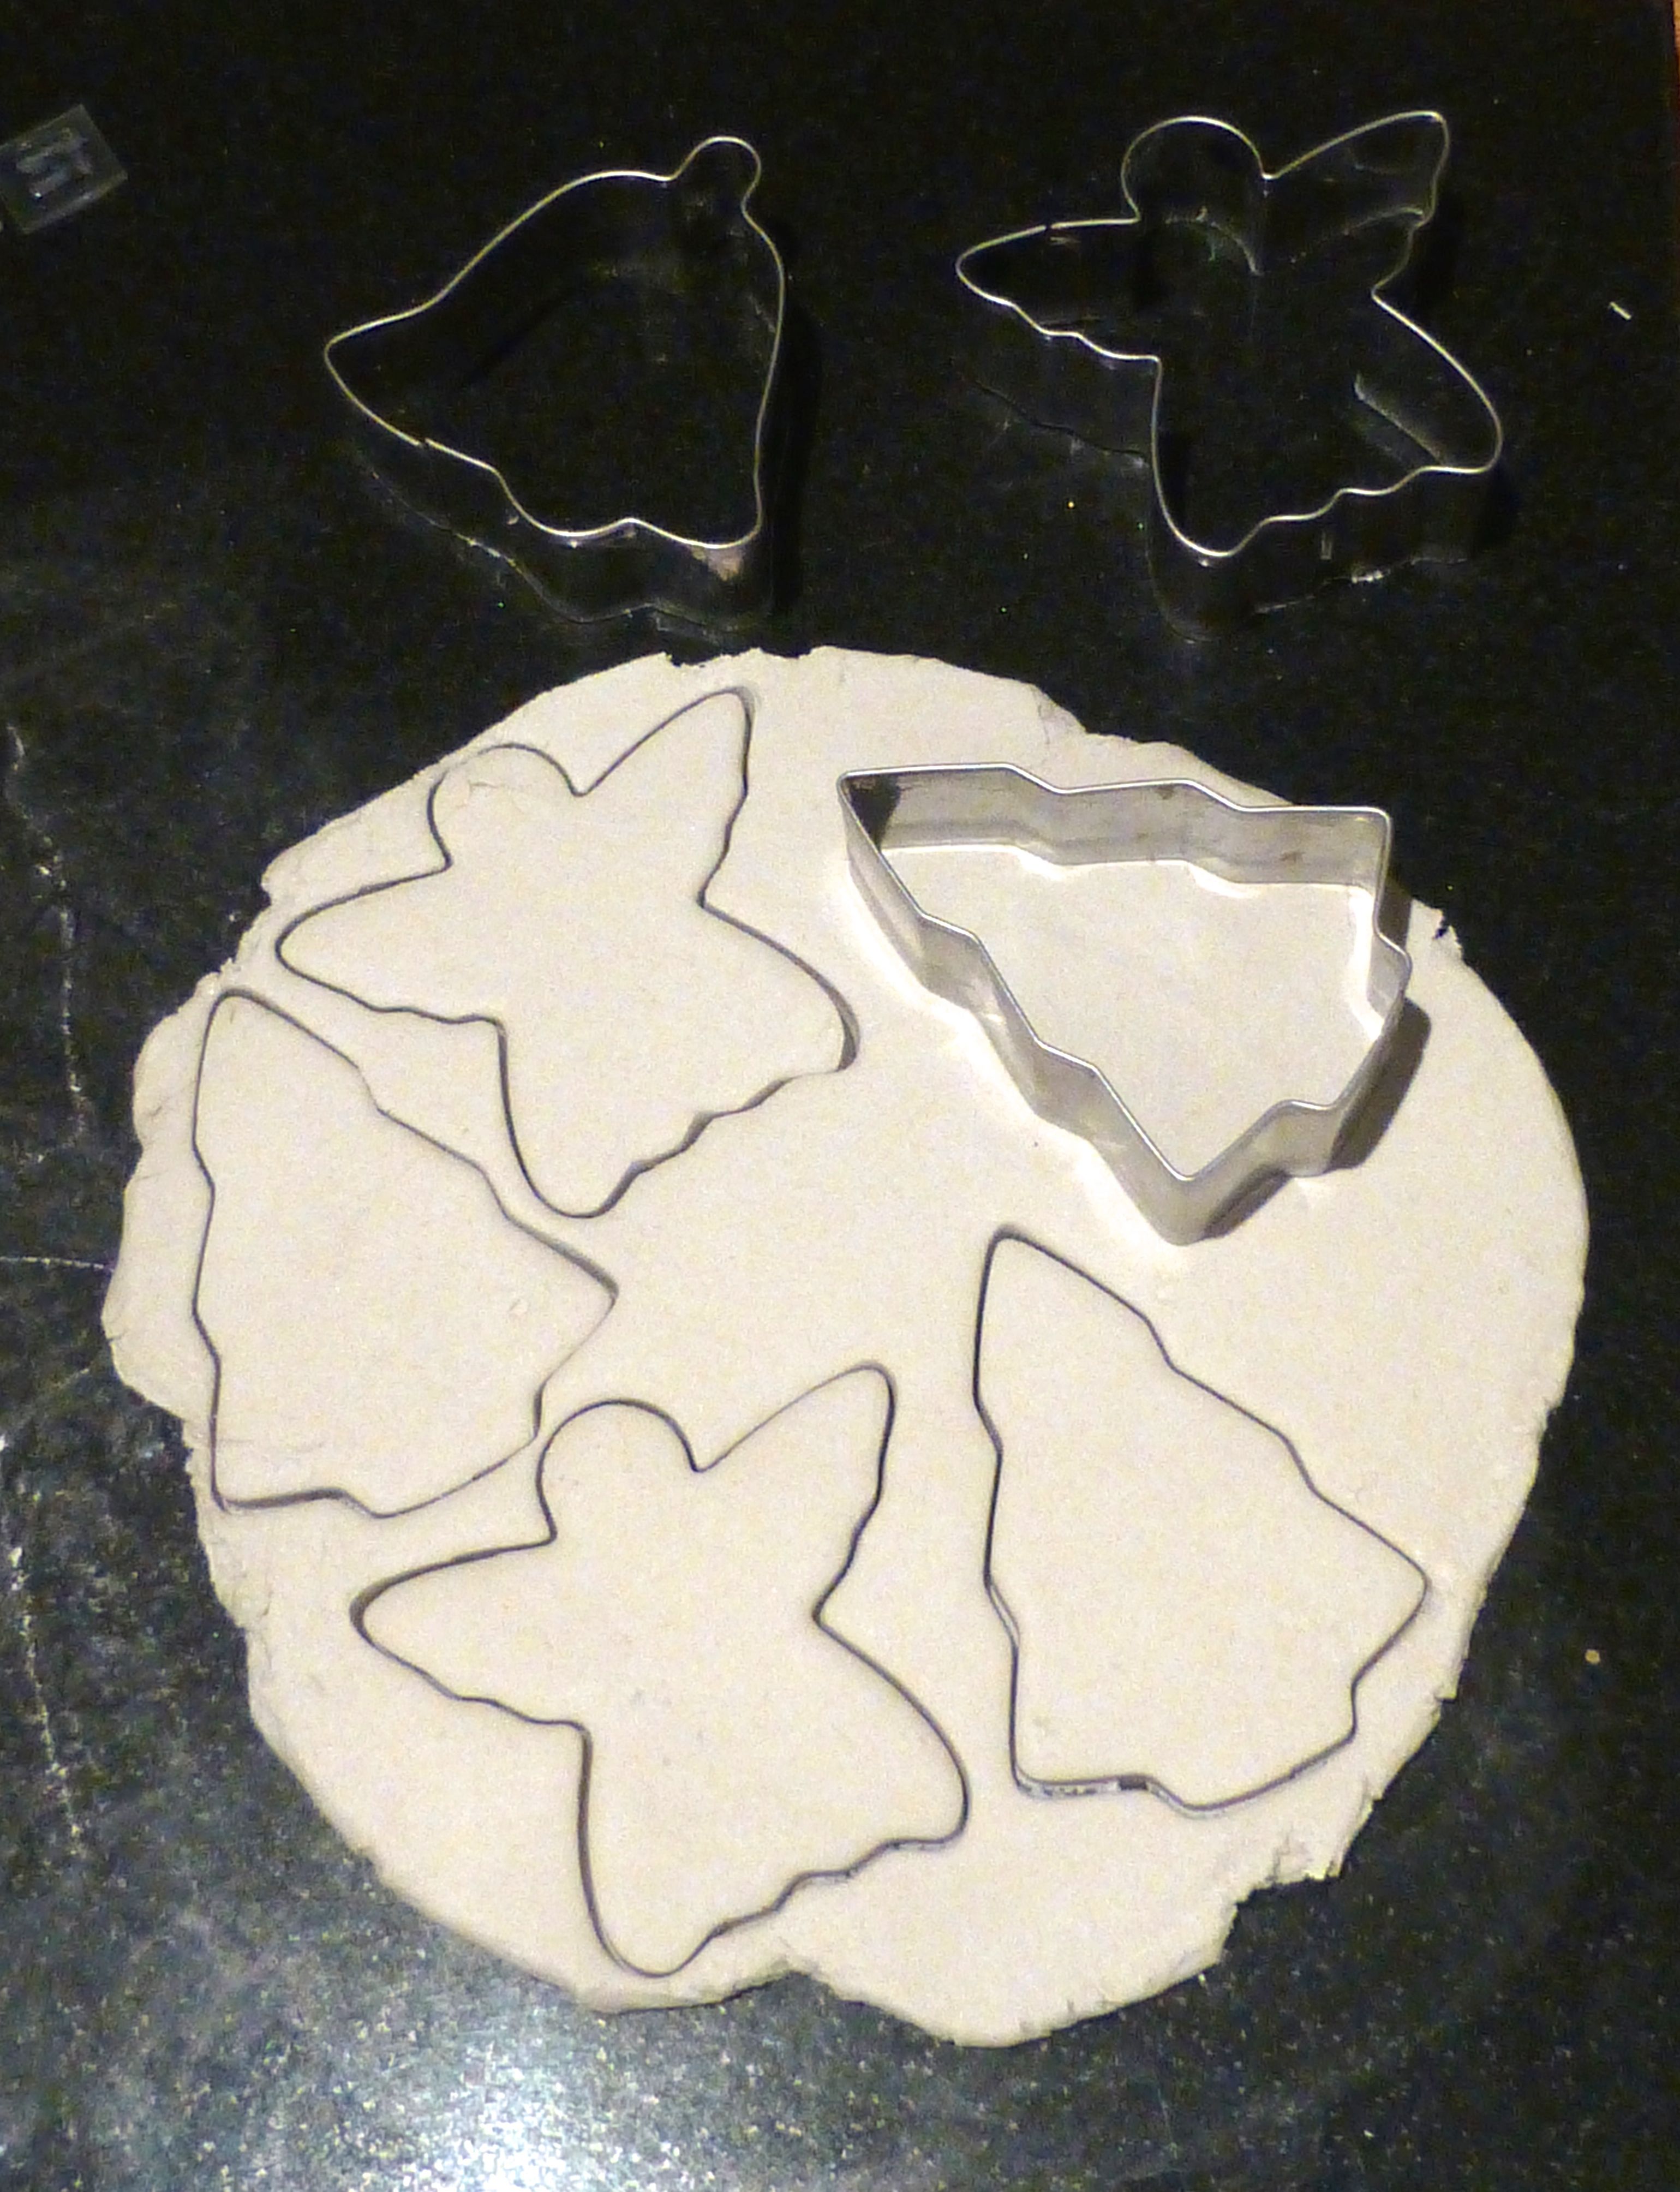
Lift carefully and smooth any rough edges using your finger.
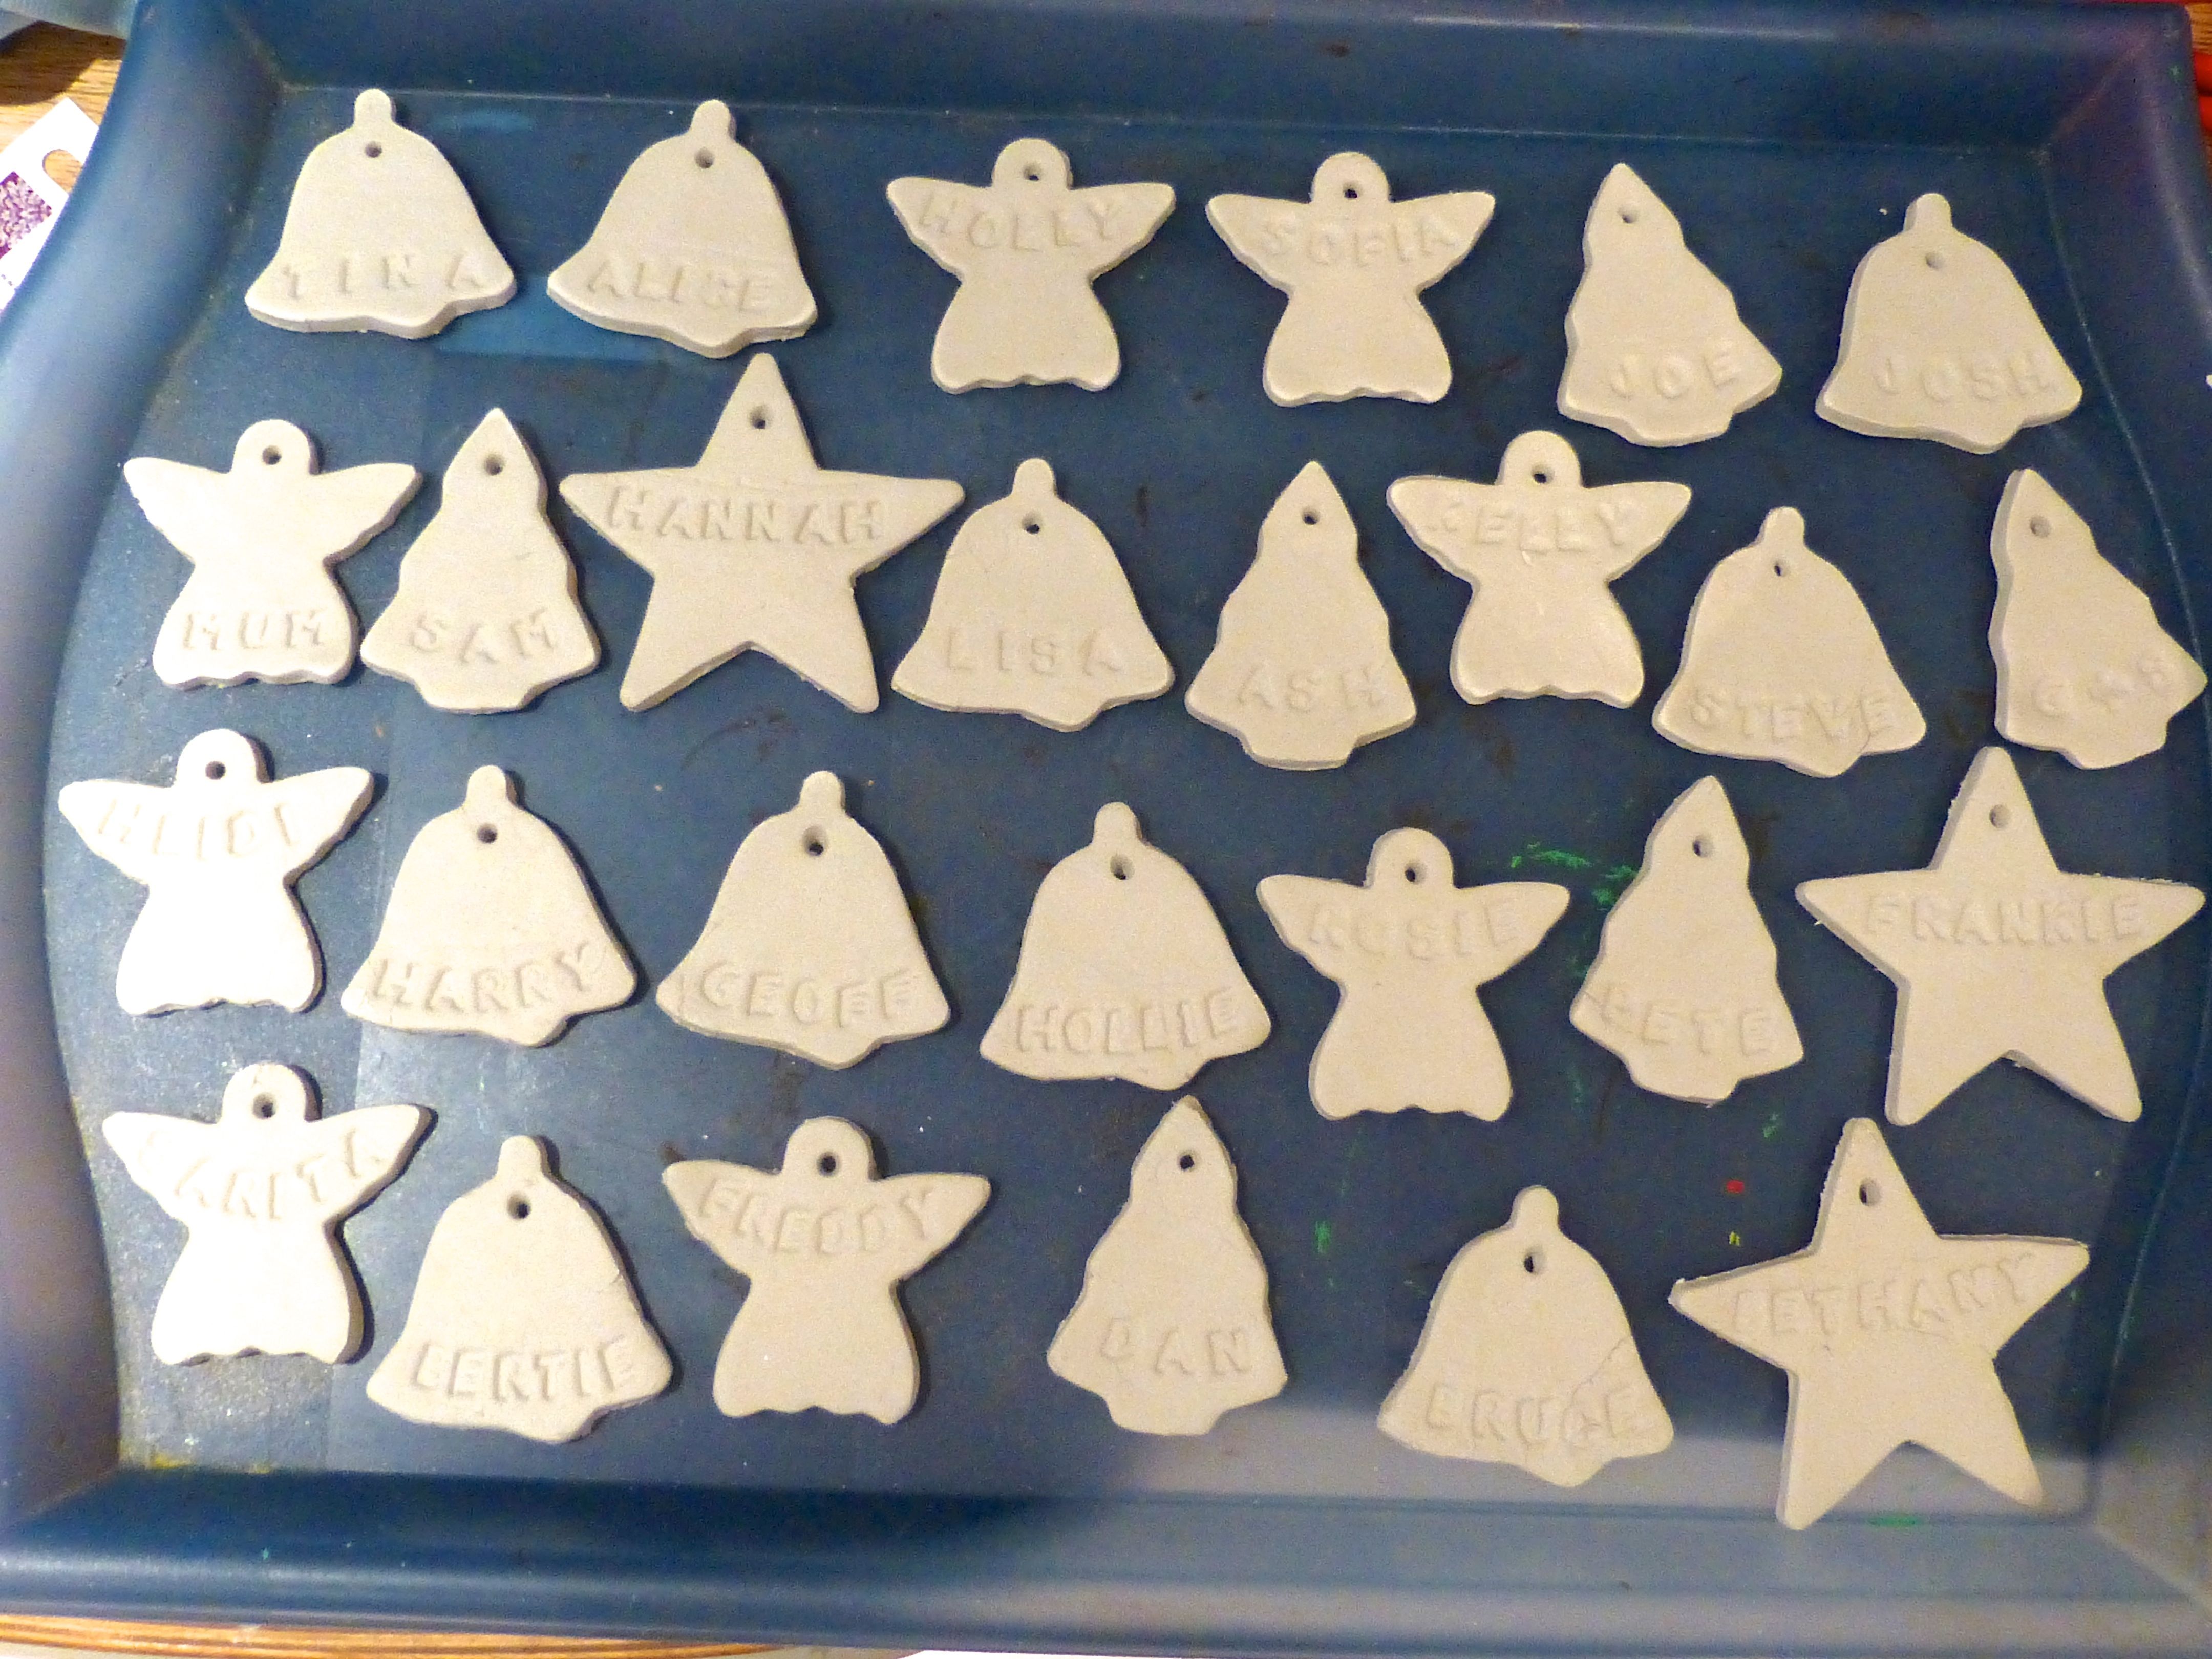
I used alphabet stamps to impress names into the wet clay.

Take a skewer or knitting needle and push through the top of the shape to create a hole from which to hang your tag.

Place on a tray and leave at room temperature until completely dry – mine took three days! You will know when they are dry as the wet clay is grey initially and gradually turns white from the outside edges in towards the centre.
You can leave them like this or paint them – it’s up to you.

Watercolour paint gives a translucent effect, or you could rub off the paint while still wet to give a subtle wash effect to the lettering. A coat of varnish will protect the paint an make it more durable.
You can also use acrylic paint or even PVA glue sprinkled with glitter!
I chose to leave mine plain largely because I ran out of time, but they still add a special touch to gift-wrapping – especially if there is a beautiful hand made gift inside.
What’s really nice though, is the thought that this is a gift that will come out year after year as an ornament on a tree and, hopefully, they will remember me as it is hung in place.
I may try making more clay gift tags next year, starting early enough next time to give myself time to paint them!

January 13, 2015 at 4:42 pm
I love the thought of them being keepsakes as well as gift tags what a wonderful idea 🙂
LikeLiked by 1 person
January 13, 2015 at 5:39 pm
Thanks Roma, it made sense to make them useful after going to the trouble of making them:)
LikeLiked by 1 person
January 13, 2015 at 5:06 pm
I wish I were able to work clay….
LikeLiked by 1 person
January 13, 2015 at 5:37 pm
I’m no ceramic artist but this was just too easy to resist:)
LikeLiked by 1 person
January 13, 2015 at 6:32 pm
Thanks, looks really effective 🙂
LikeLike
January 13, 2015 at 7:33 pm
So simple, yet a lovely finishing touch too 🙂
LikeLike
January 14, 2015 at 2:35 pm
I simply love how you’ve made these! Such wonderful treasures – thanks so much for sharing this great tutorial; they’re already on my 2015 Xmas-to-do list! Marianne xx
LikeLiked by 1 person
January 14, 2015 at 4:17 pm
So pleased you want to make these too! I have to say the recipients were ‘wowed’ by them, so they’re certainly well worth the effort:)
LikeLiked by 1 person
January 16, 2015 at 1:32 am
Such a good and thoughtful idea! I also love how they can be used as a keepsake. Very nice.
LikeLike
January 16, 2015 at 8:49 am
Thanks Liz!
LikeLike
January 18, 2015 at 4:49 pm
So glad you wrote an extended post on these as they are something I would definitely like to do in future. Not sure whether I would paint them either, as I think they look so effective as they are 🙂
LikeLike
January 19, 2015 at 5:14 pm
These look wonderful! I love how it’s also used as a tree ornament. Best gift tag!
LikeLike