
Ah, the English Summer! What does it mean to you?
For me, it’s day trips to the coast, balmy evenings sat outdoors until after sundown, weekend breakfasts in the garden, outdoor concerts in the grounds of old ruins……in short – being outside.
And being outside is made all the more perfect if you take that most quintessentially English thing with you – a picnic. Dressed down with sandwiches and a flask of tea at the seaside, or glammed up with champagne and a candelabra for a classical concert, everyone loves a picnic, with a soft, warm, waterproof picnic blanket to relax on in comfort…….
……except we haven’t got one.
Well, we didn’t have until recently when I decided to take advantage of being part of the Minerva Crafts Blogger Network and make one.
I didn’t want to make just any old picnic blanket, oh no, I wanted the ‘deluxe’ version, something a bit special, so decided to make a patchwork blanket with a waterproof backing and a carry handle. As there are four boys in the house (if you include Mr H-L), anything too pink and girly was out of the question, but I thought I could get away with a small floral print if the main colour was blue.
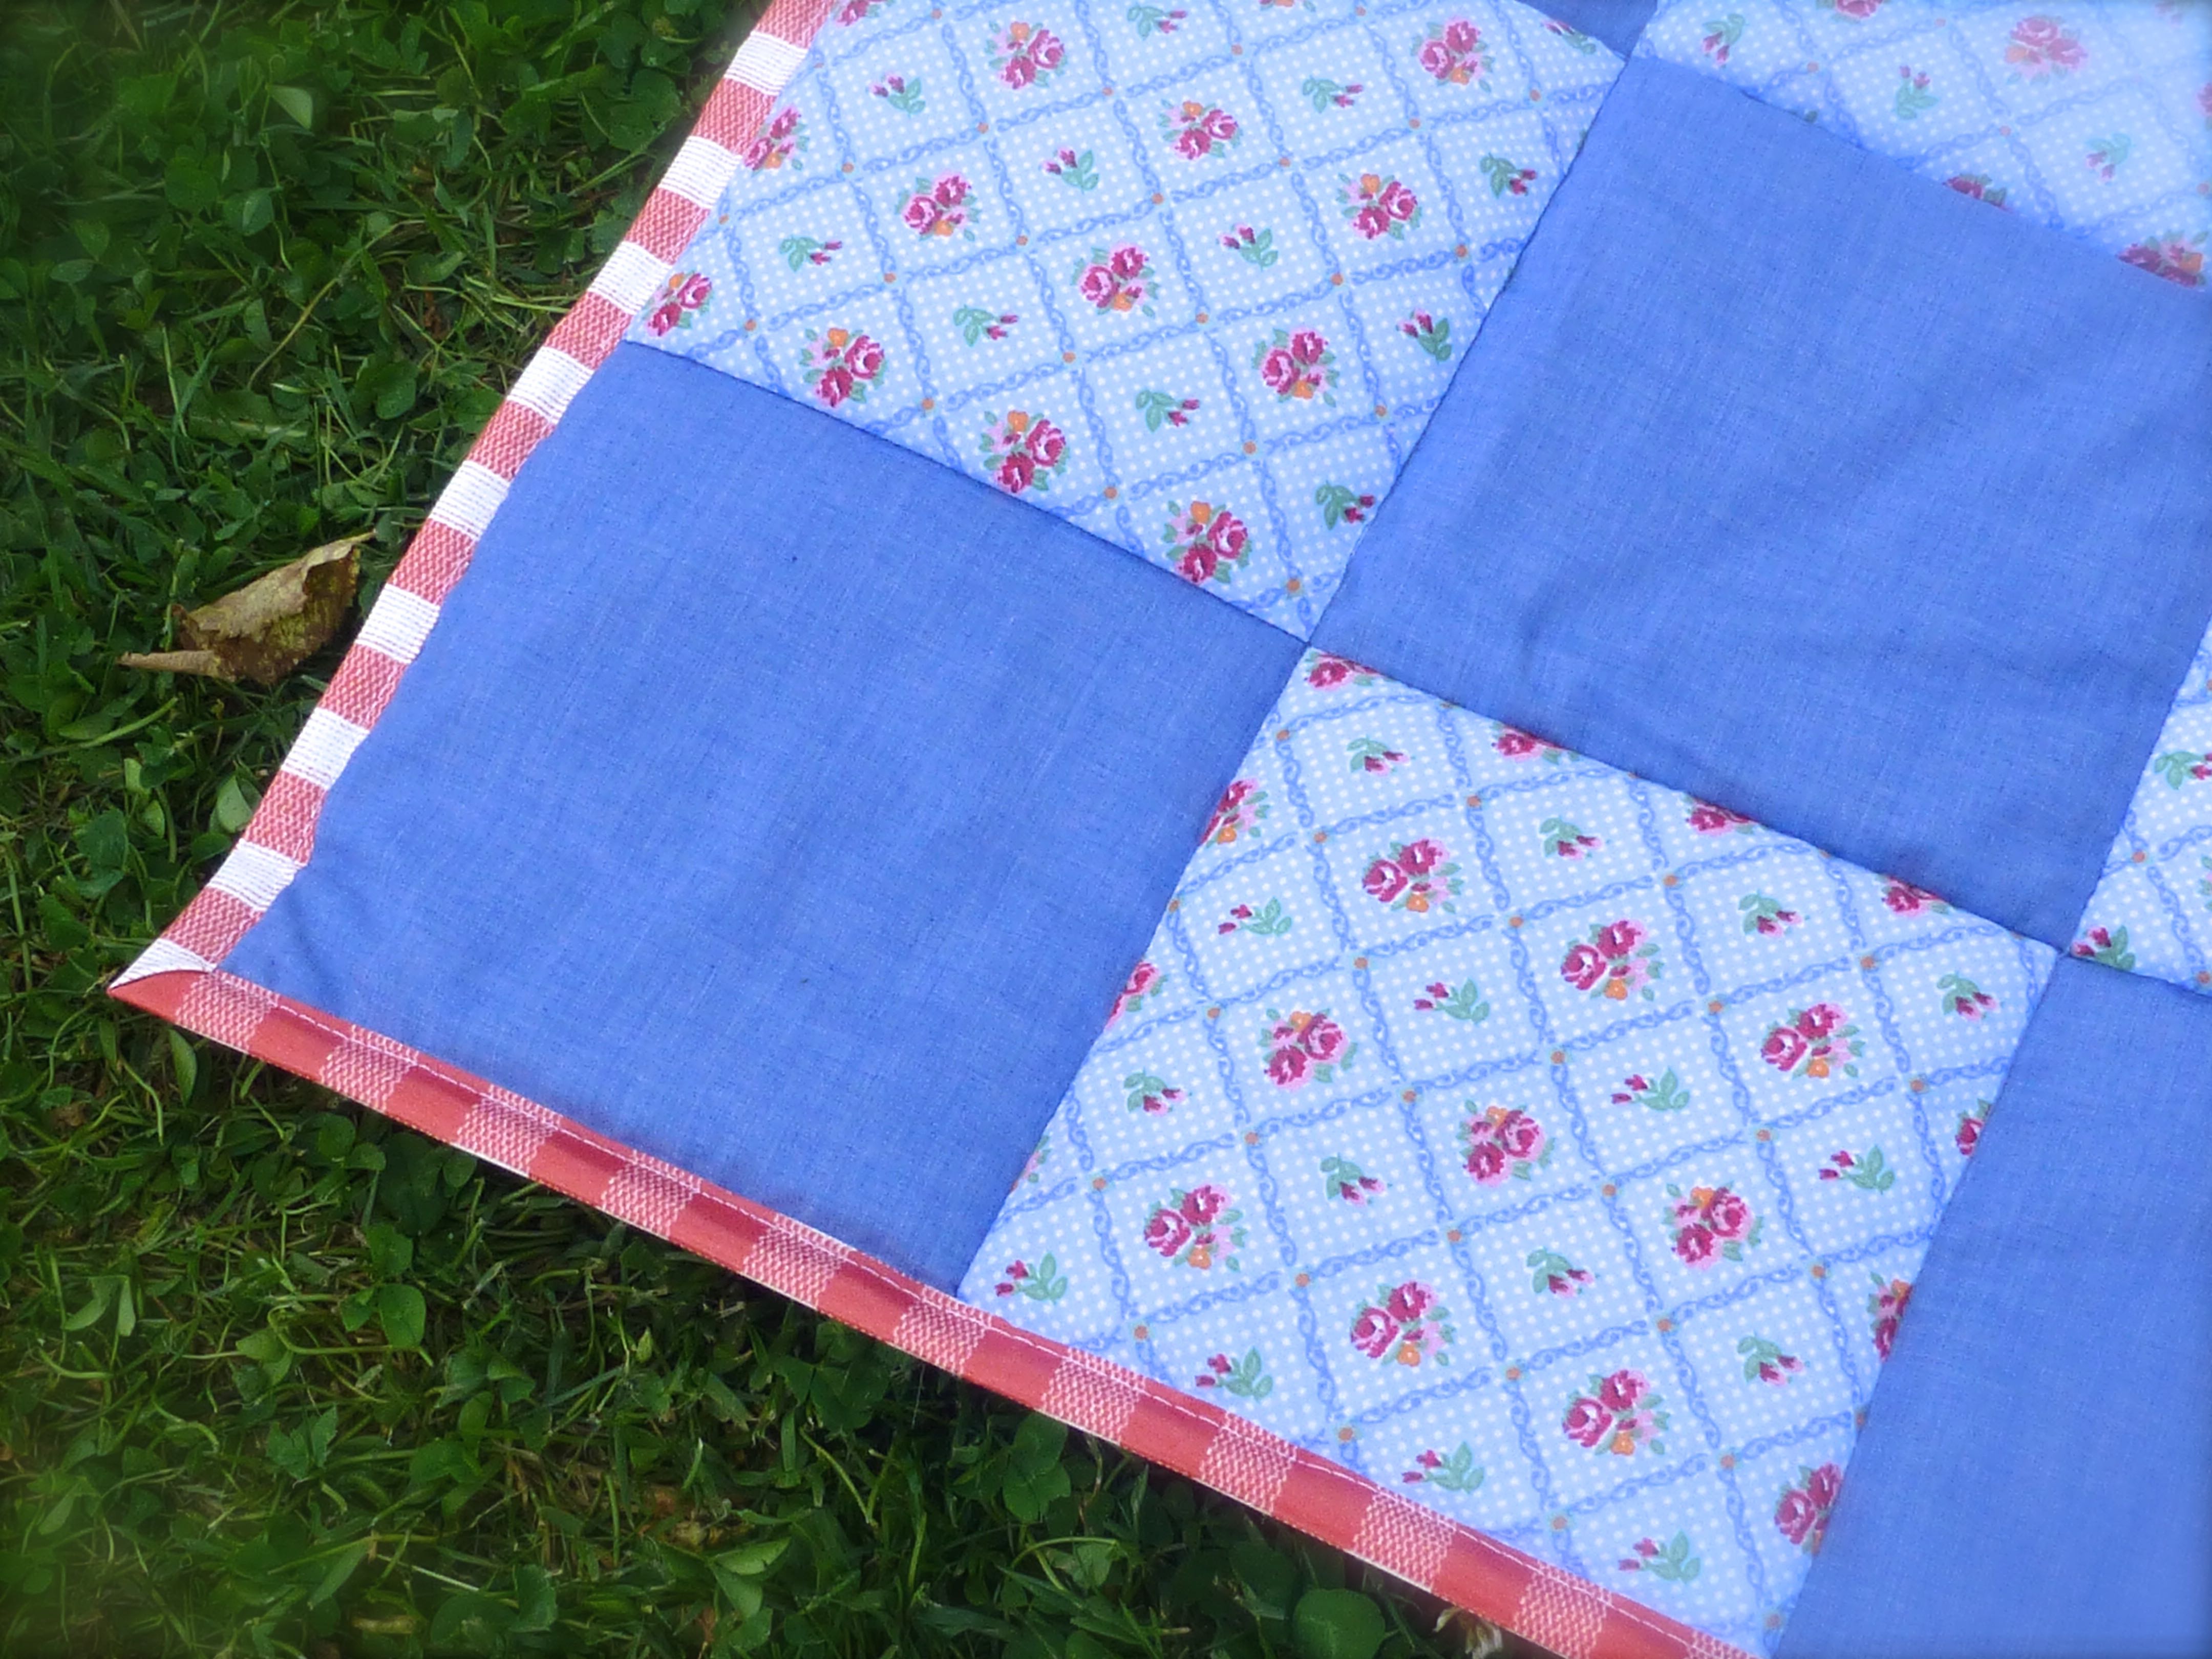
After much deliberation, this is what I finally ordered: – 1.5m each of plastic coated red gingham, floral patchwork print polycotton, and denim blue polycotton. This makes a blanket approximately 1.25m x 1.25m.

My Olfa Quiltmaking Kit came with this mat, rotary cutter and 6.5″ square ruler, so I kept things simple by cutting the patchwork squares the same size as the ruler.

Cutting through folded fabric made short work of all those squares as I could cut through four layers at a time – using a rotary cutter and the quilting ruler ensured that they were accurately cut, which is essential in patchwork.

In no time at all I had two piles of neatly stacked patchwork squares, 36 of the floral and 45 of the plain making 81 in total.

The easiest way to keep accurate seam allowances is to line up the edge of the fabric with the edge of the machine foot, the needle in the central position. On my machine, that means a seam allowance of 1cm throughout.

Whilst it may sound obvious, there is a quick way to whizz through all those squares.
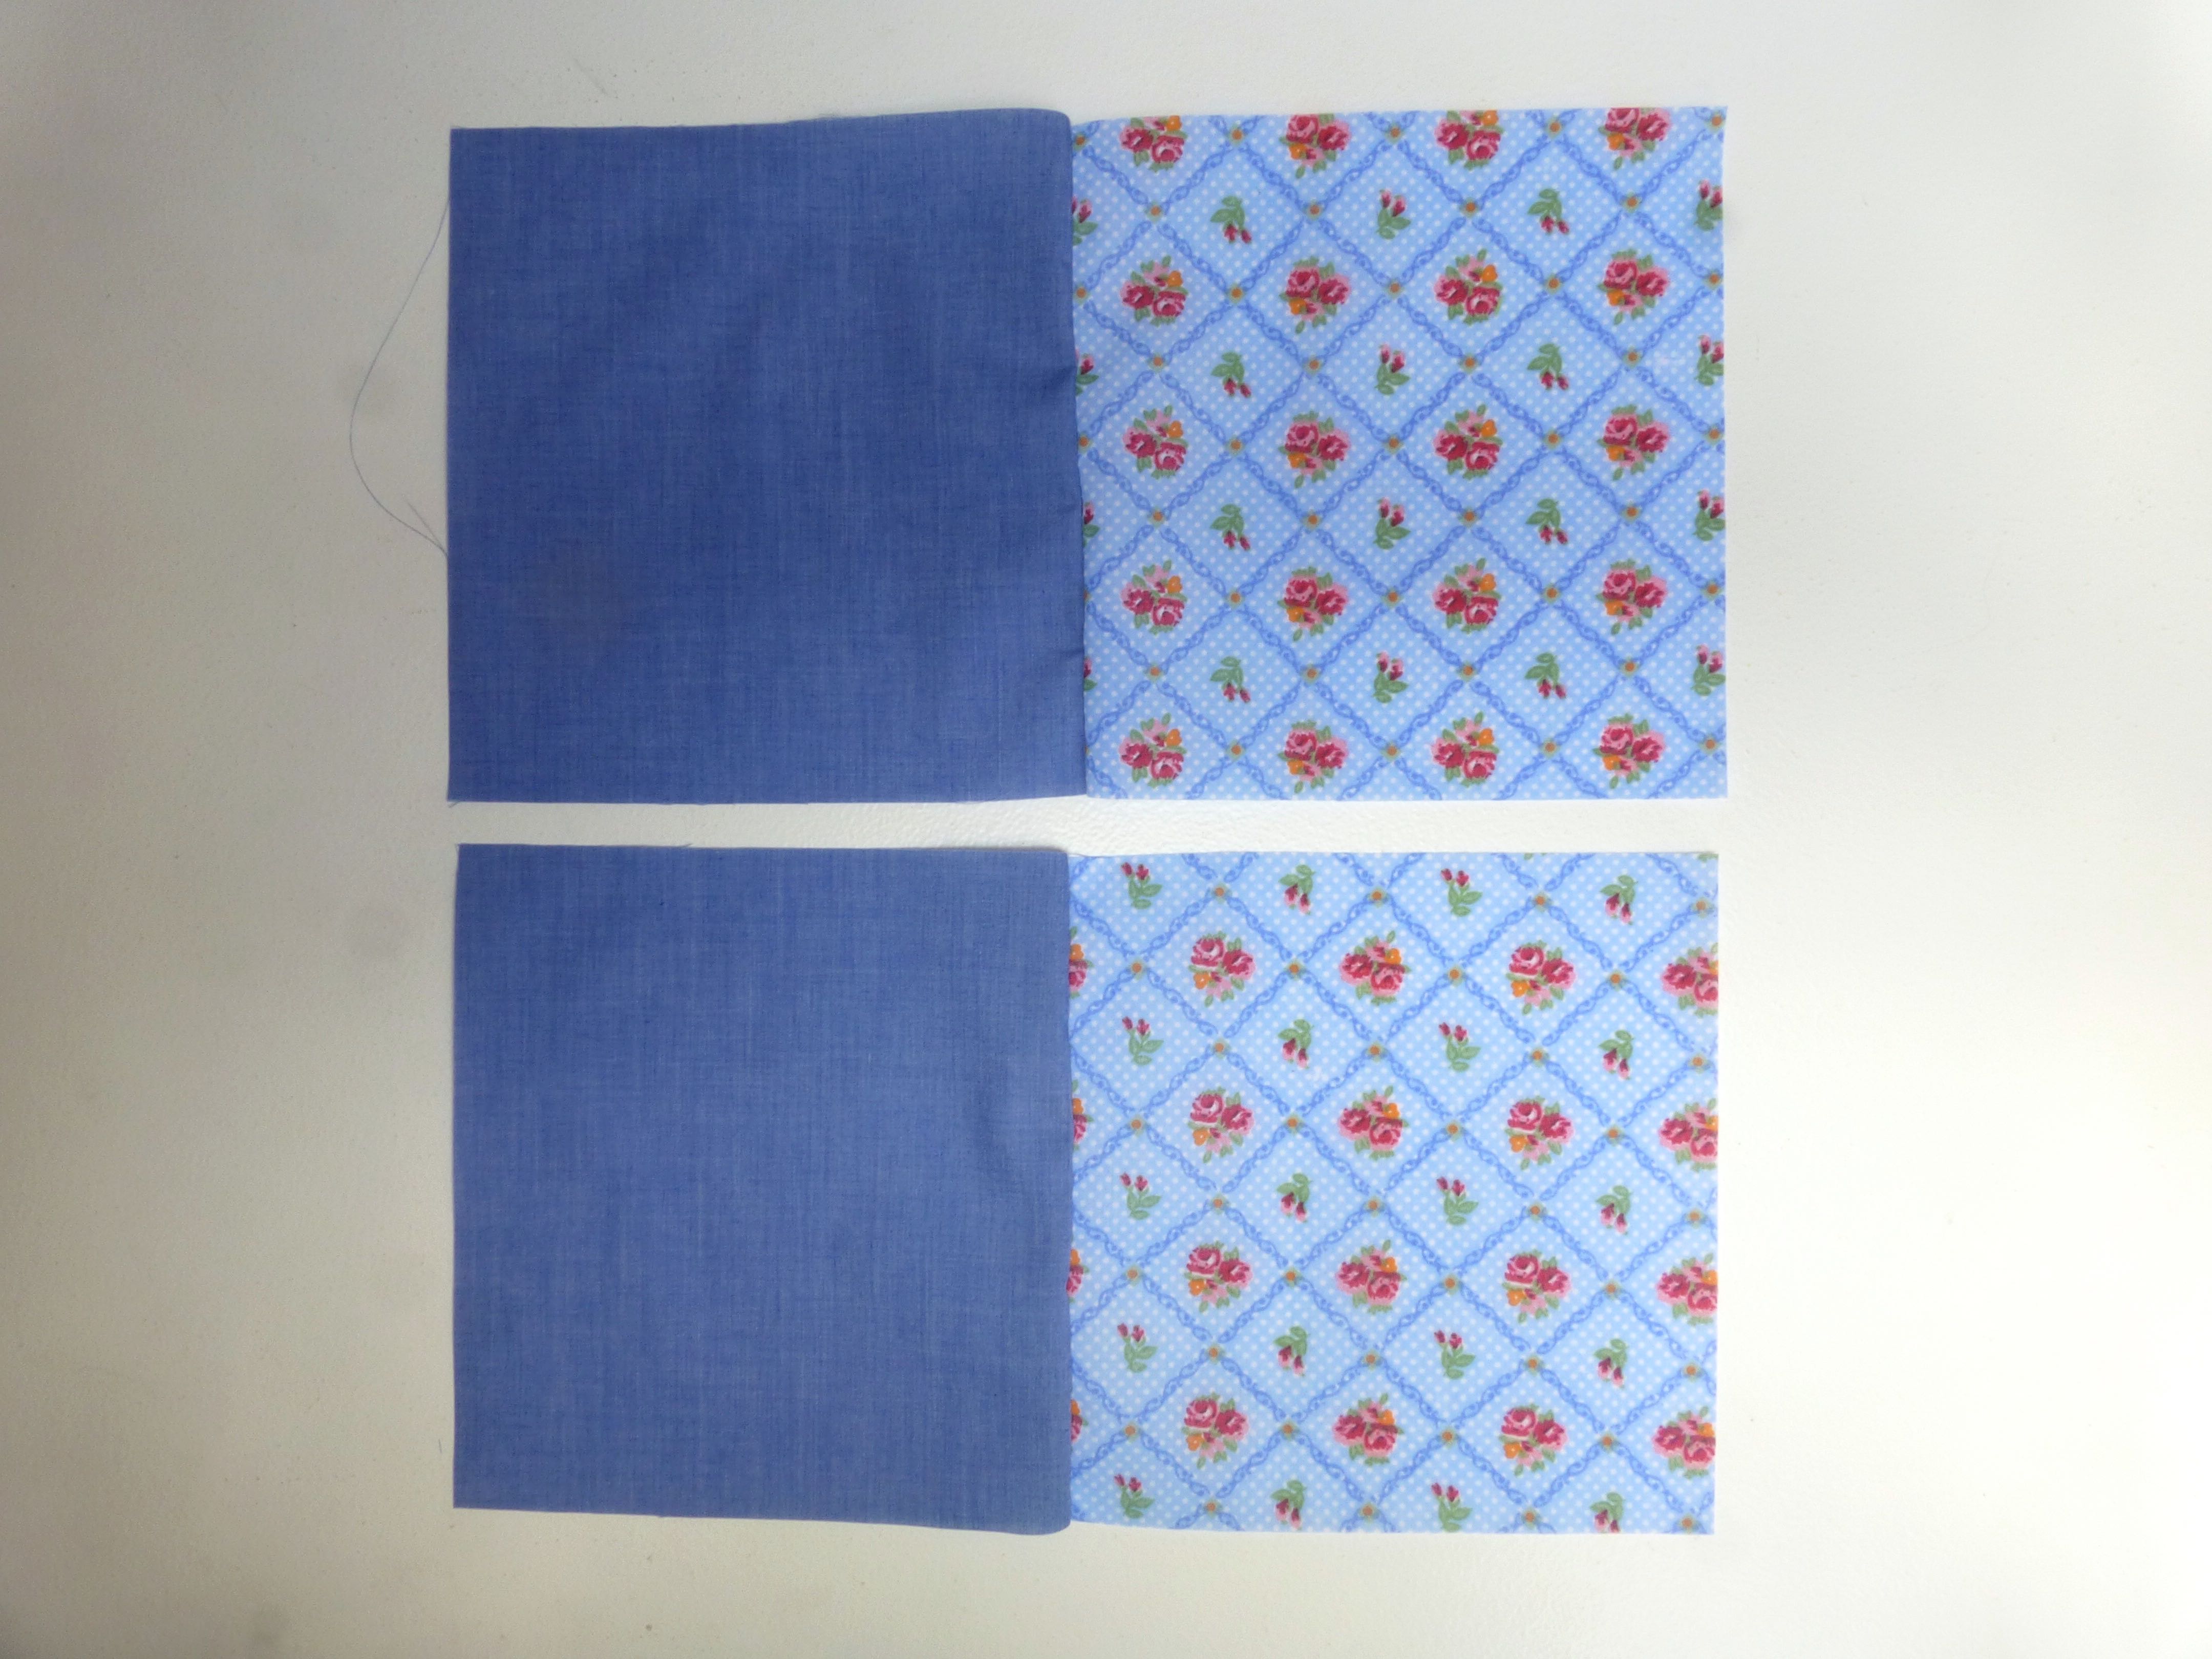
Start by sewing them in pairs, each floral with a plain, right sides together. You will need to make 36 pairs which should leave you with 9 spare squares – 5 plain and 4 floral.
Don’t bother reversing your stitching at the beginning and end of each set, cutting the thread and repeating with the next pair – just keep feeding the pairs through the machine one after the other as shown below.

When all the pairs of squares are sewn, snip the joining stitches to separate them.

Repeat this process with the pairs of squares…

….until you have rows of 4….
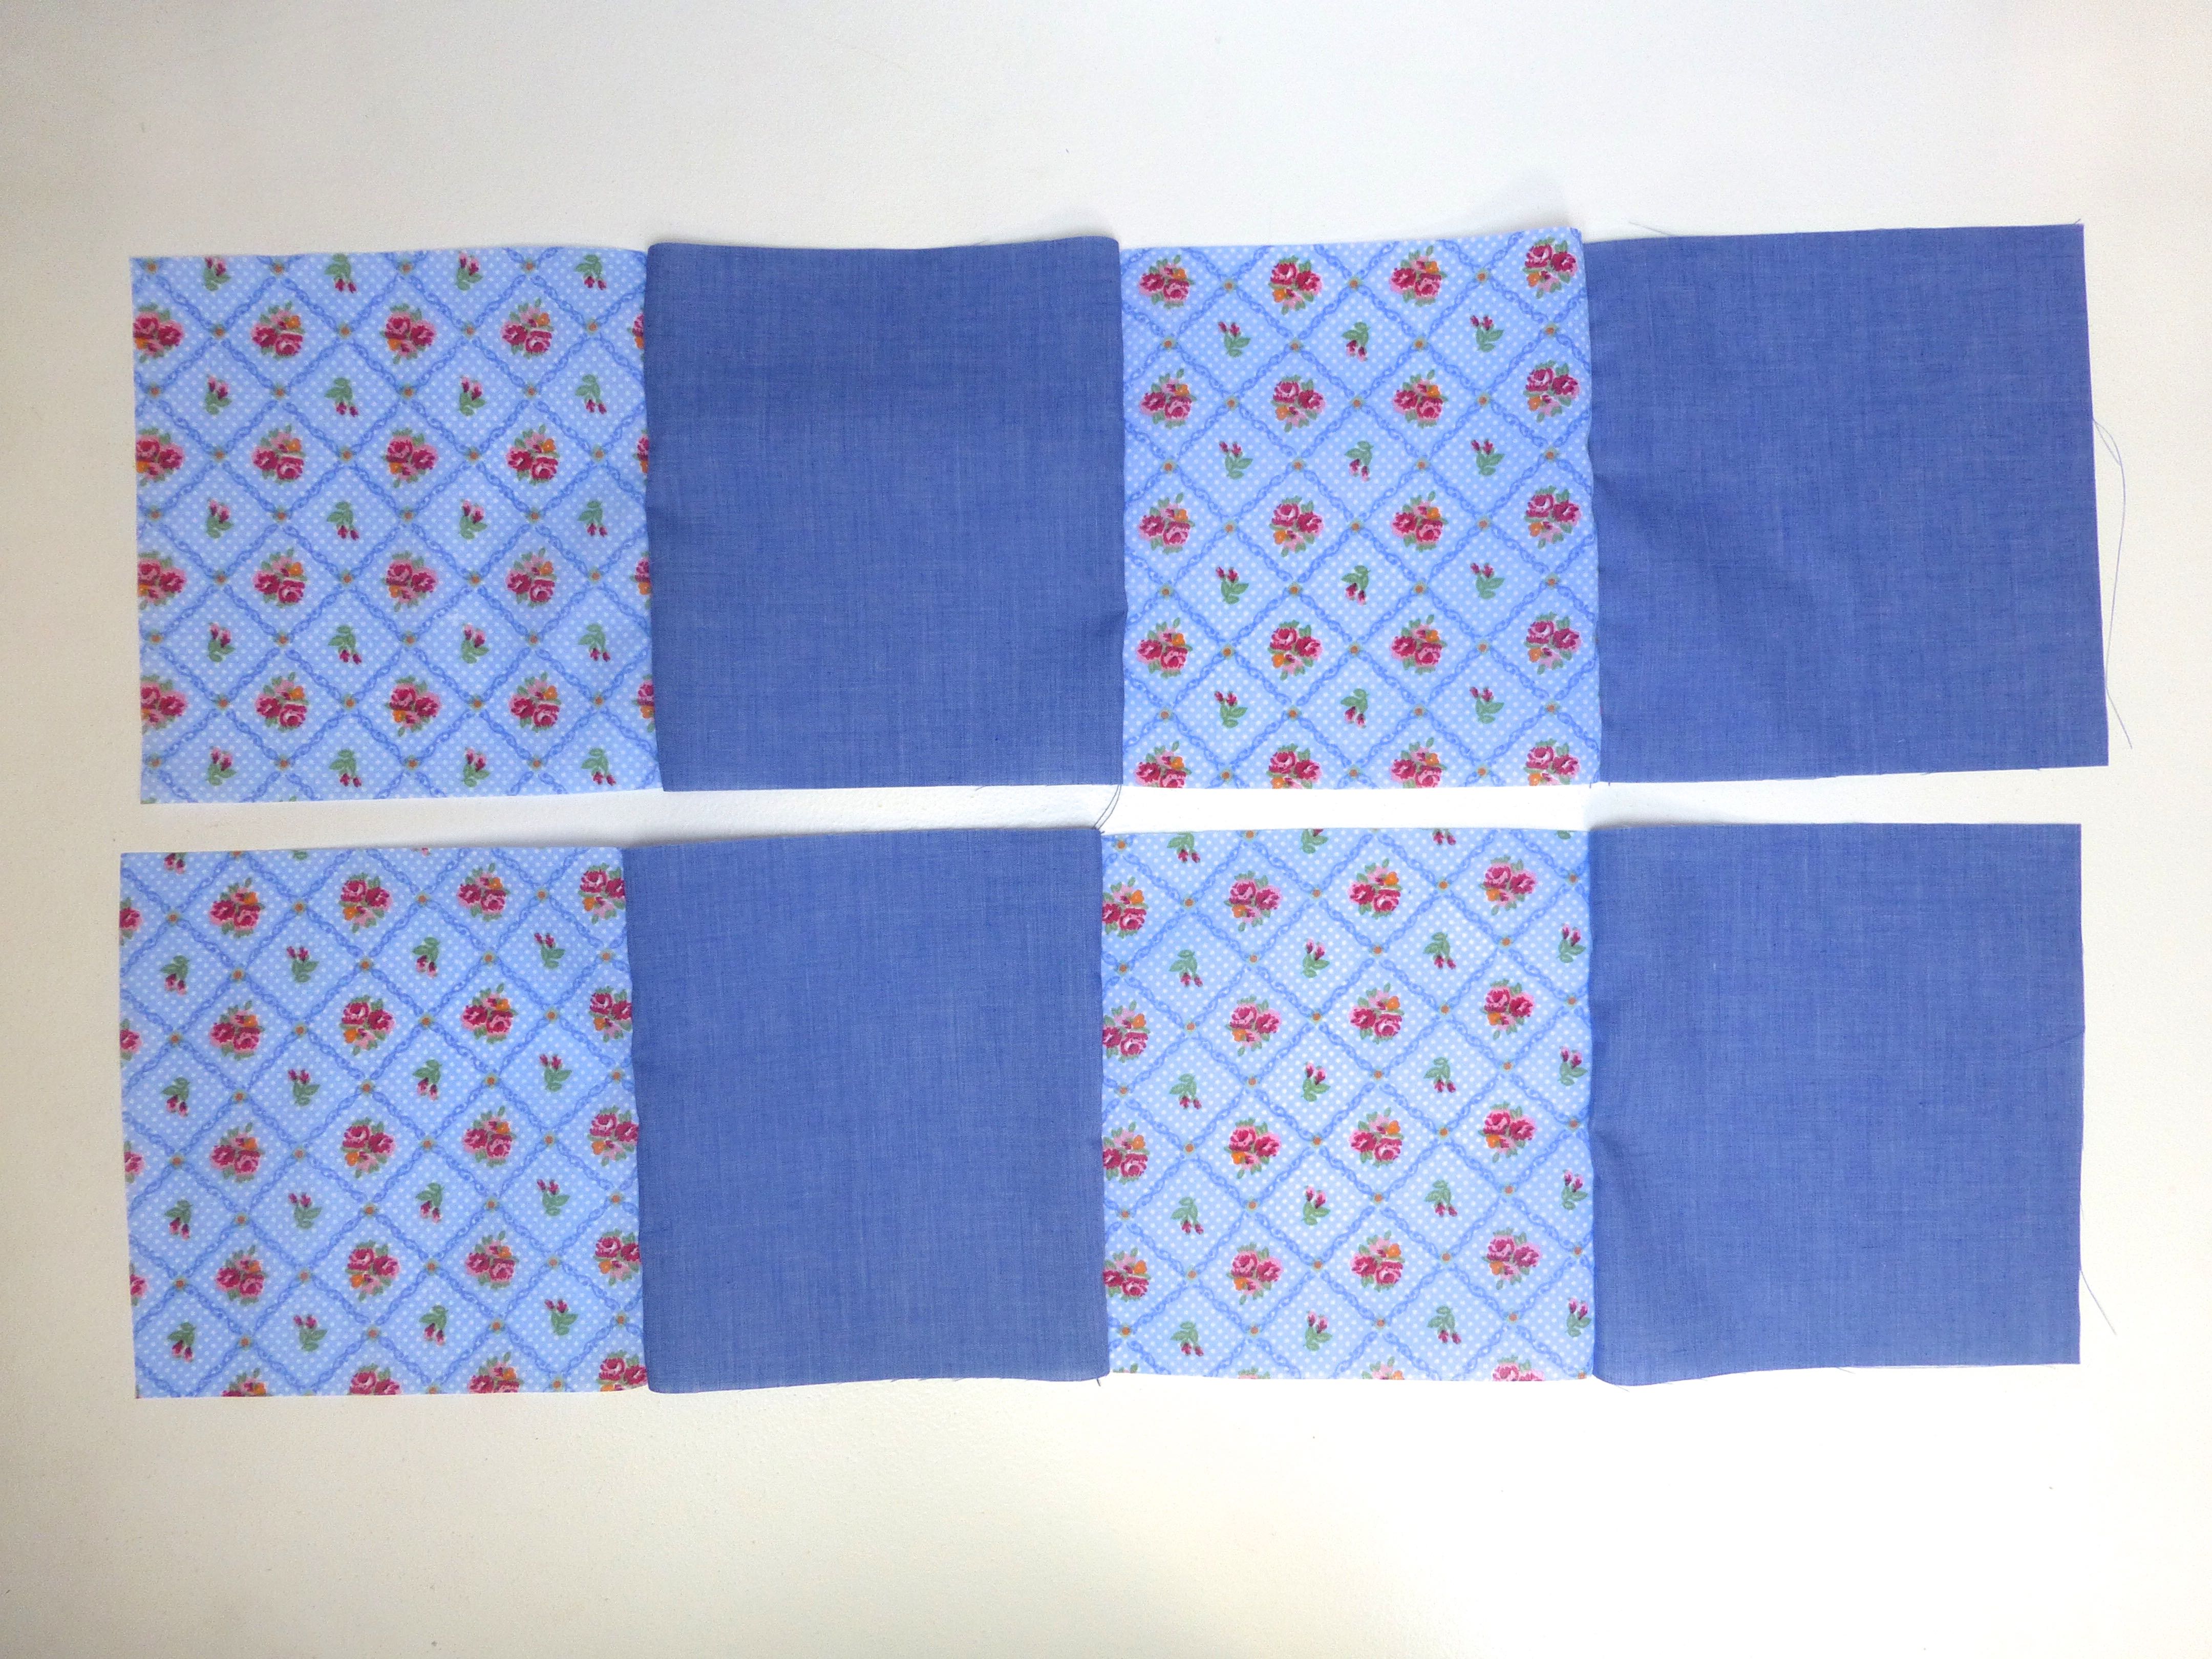
….then sew the rows of 4 together to make rows of 8. Now add one of your left over squares to the end of each row.
You should now have 9 rows of 9 squares.
Press all the seam allowances to one side.

To minimise any bulk at the seams, you may wish to alternate the direction in which you press them flat.

Join these rows along the long edges, matching and pinning the seams as you go.


Continue until all your strips of patchwork are sewn together into one large square.


As I reached this stage, I made the spontaneous decision to add a layer of wadding between this top layer and the bottom layer. (I had plenty in my stash, but you can buy it here.)
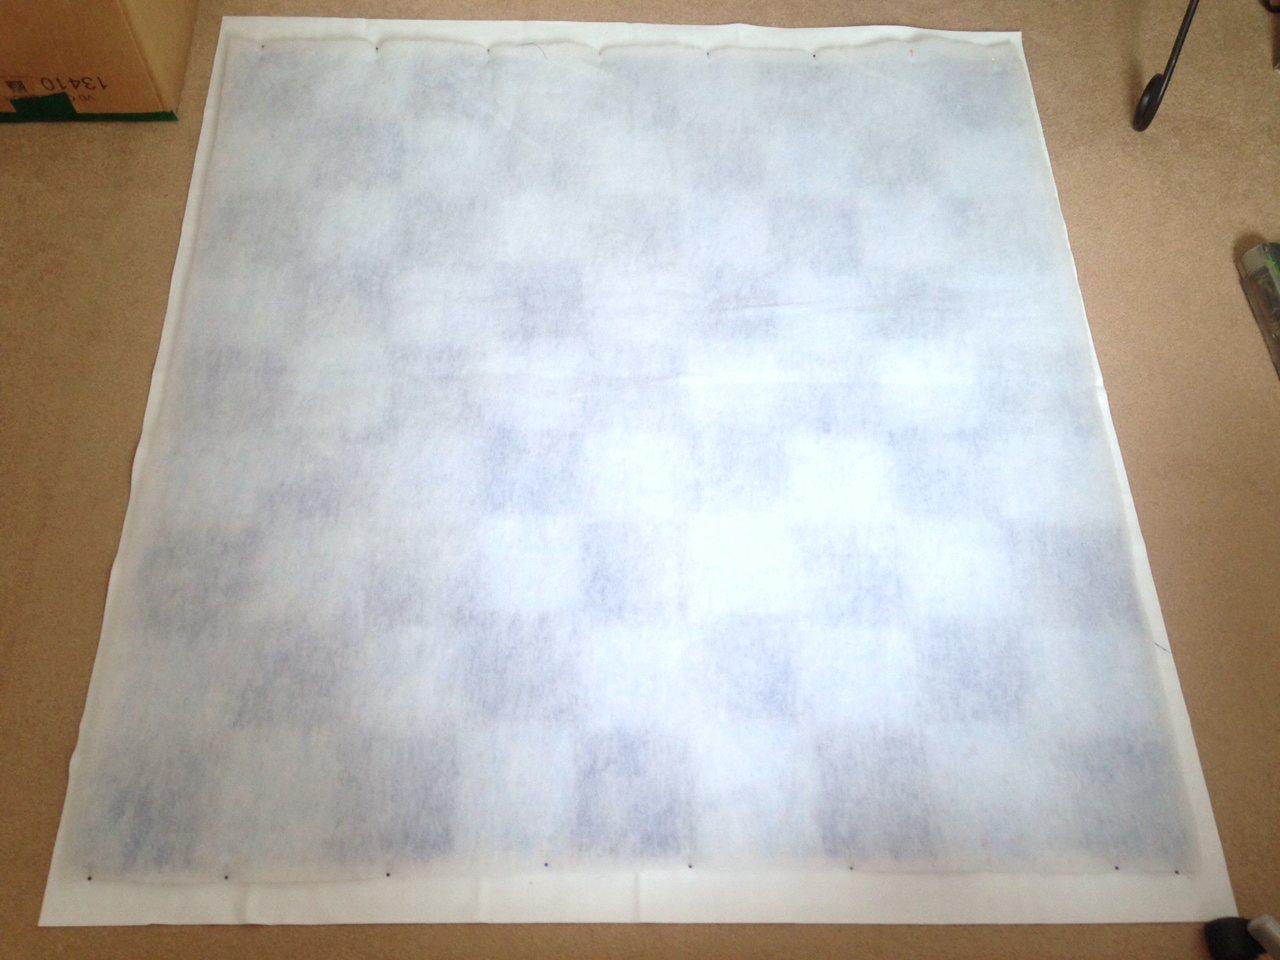
I cut a square of wadding slightly larger all the way around than the patchwork piece, laid it on top of the wrong side of the patchwork and pinned it around the entire edge.
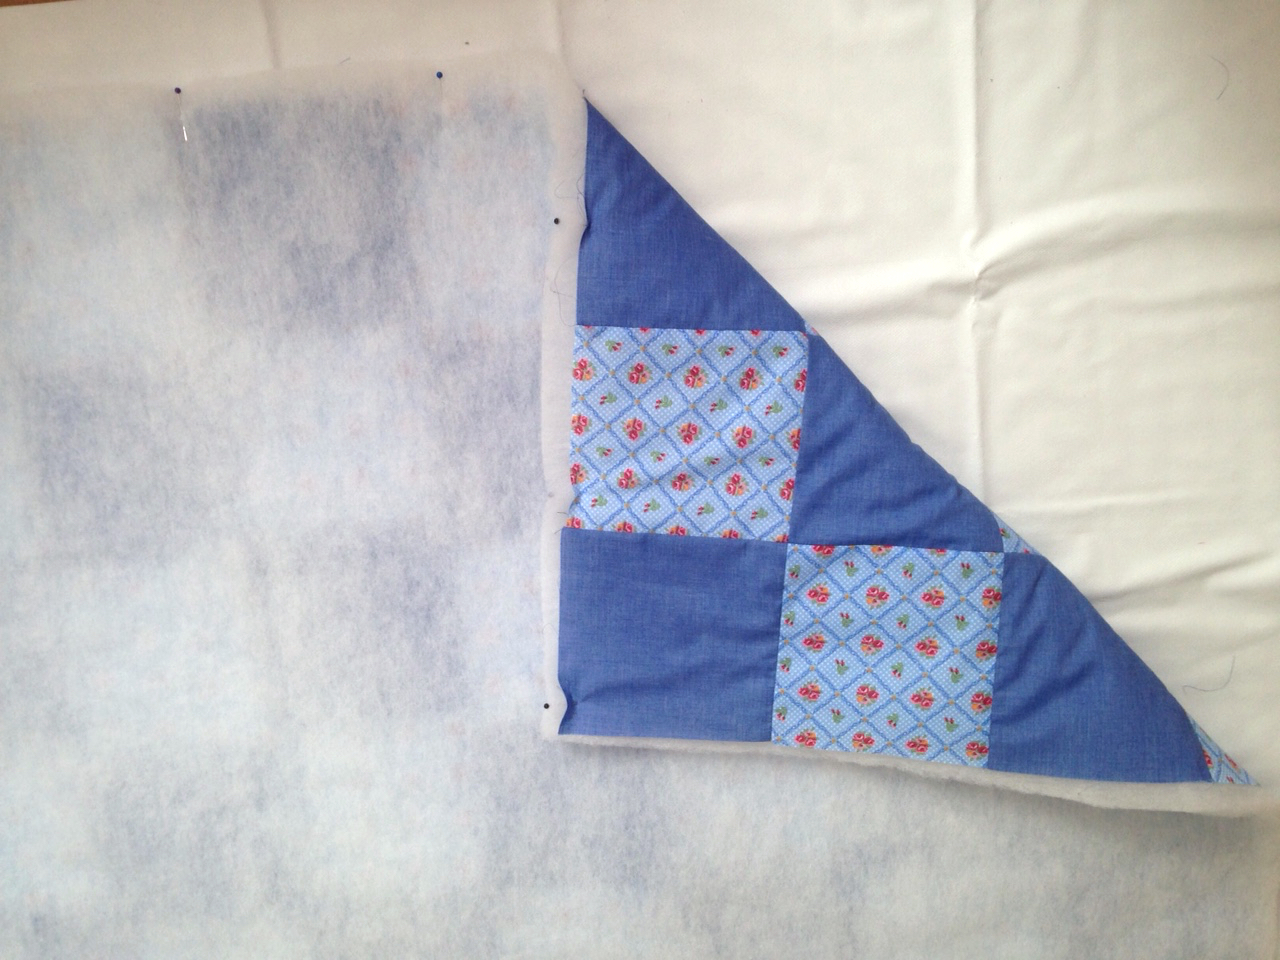
Stitch close to the raw edges all around the outside and trim the excess wadding as shown.

Now the wadding is secured, you can use large tacking stitches through both layers to stop them shifting whilst quilting.
Stitch in the ‘ditch’ using a long stitch length until the whole blanket has been quilted along the seam lines.

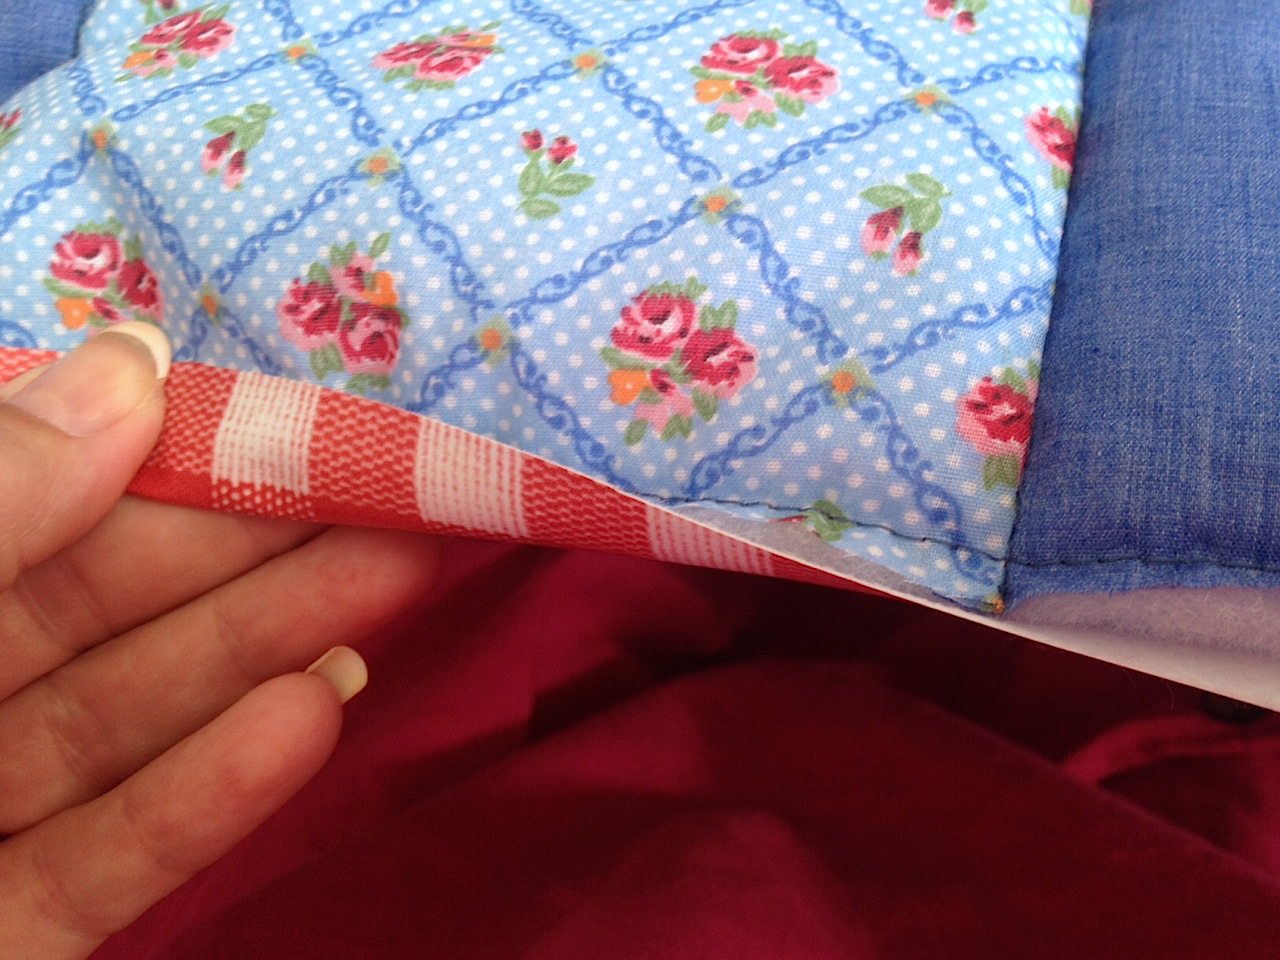
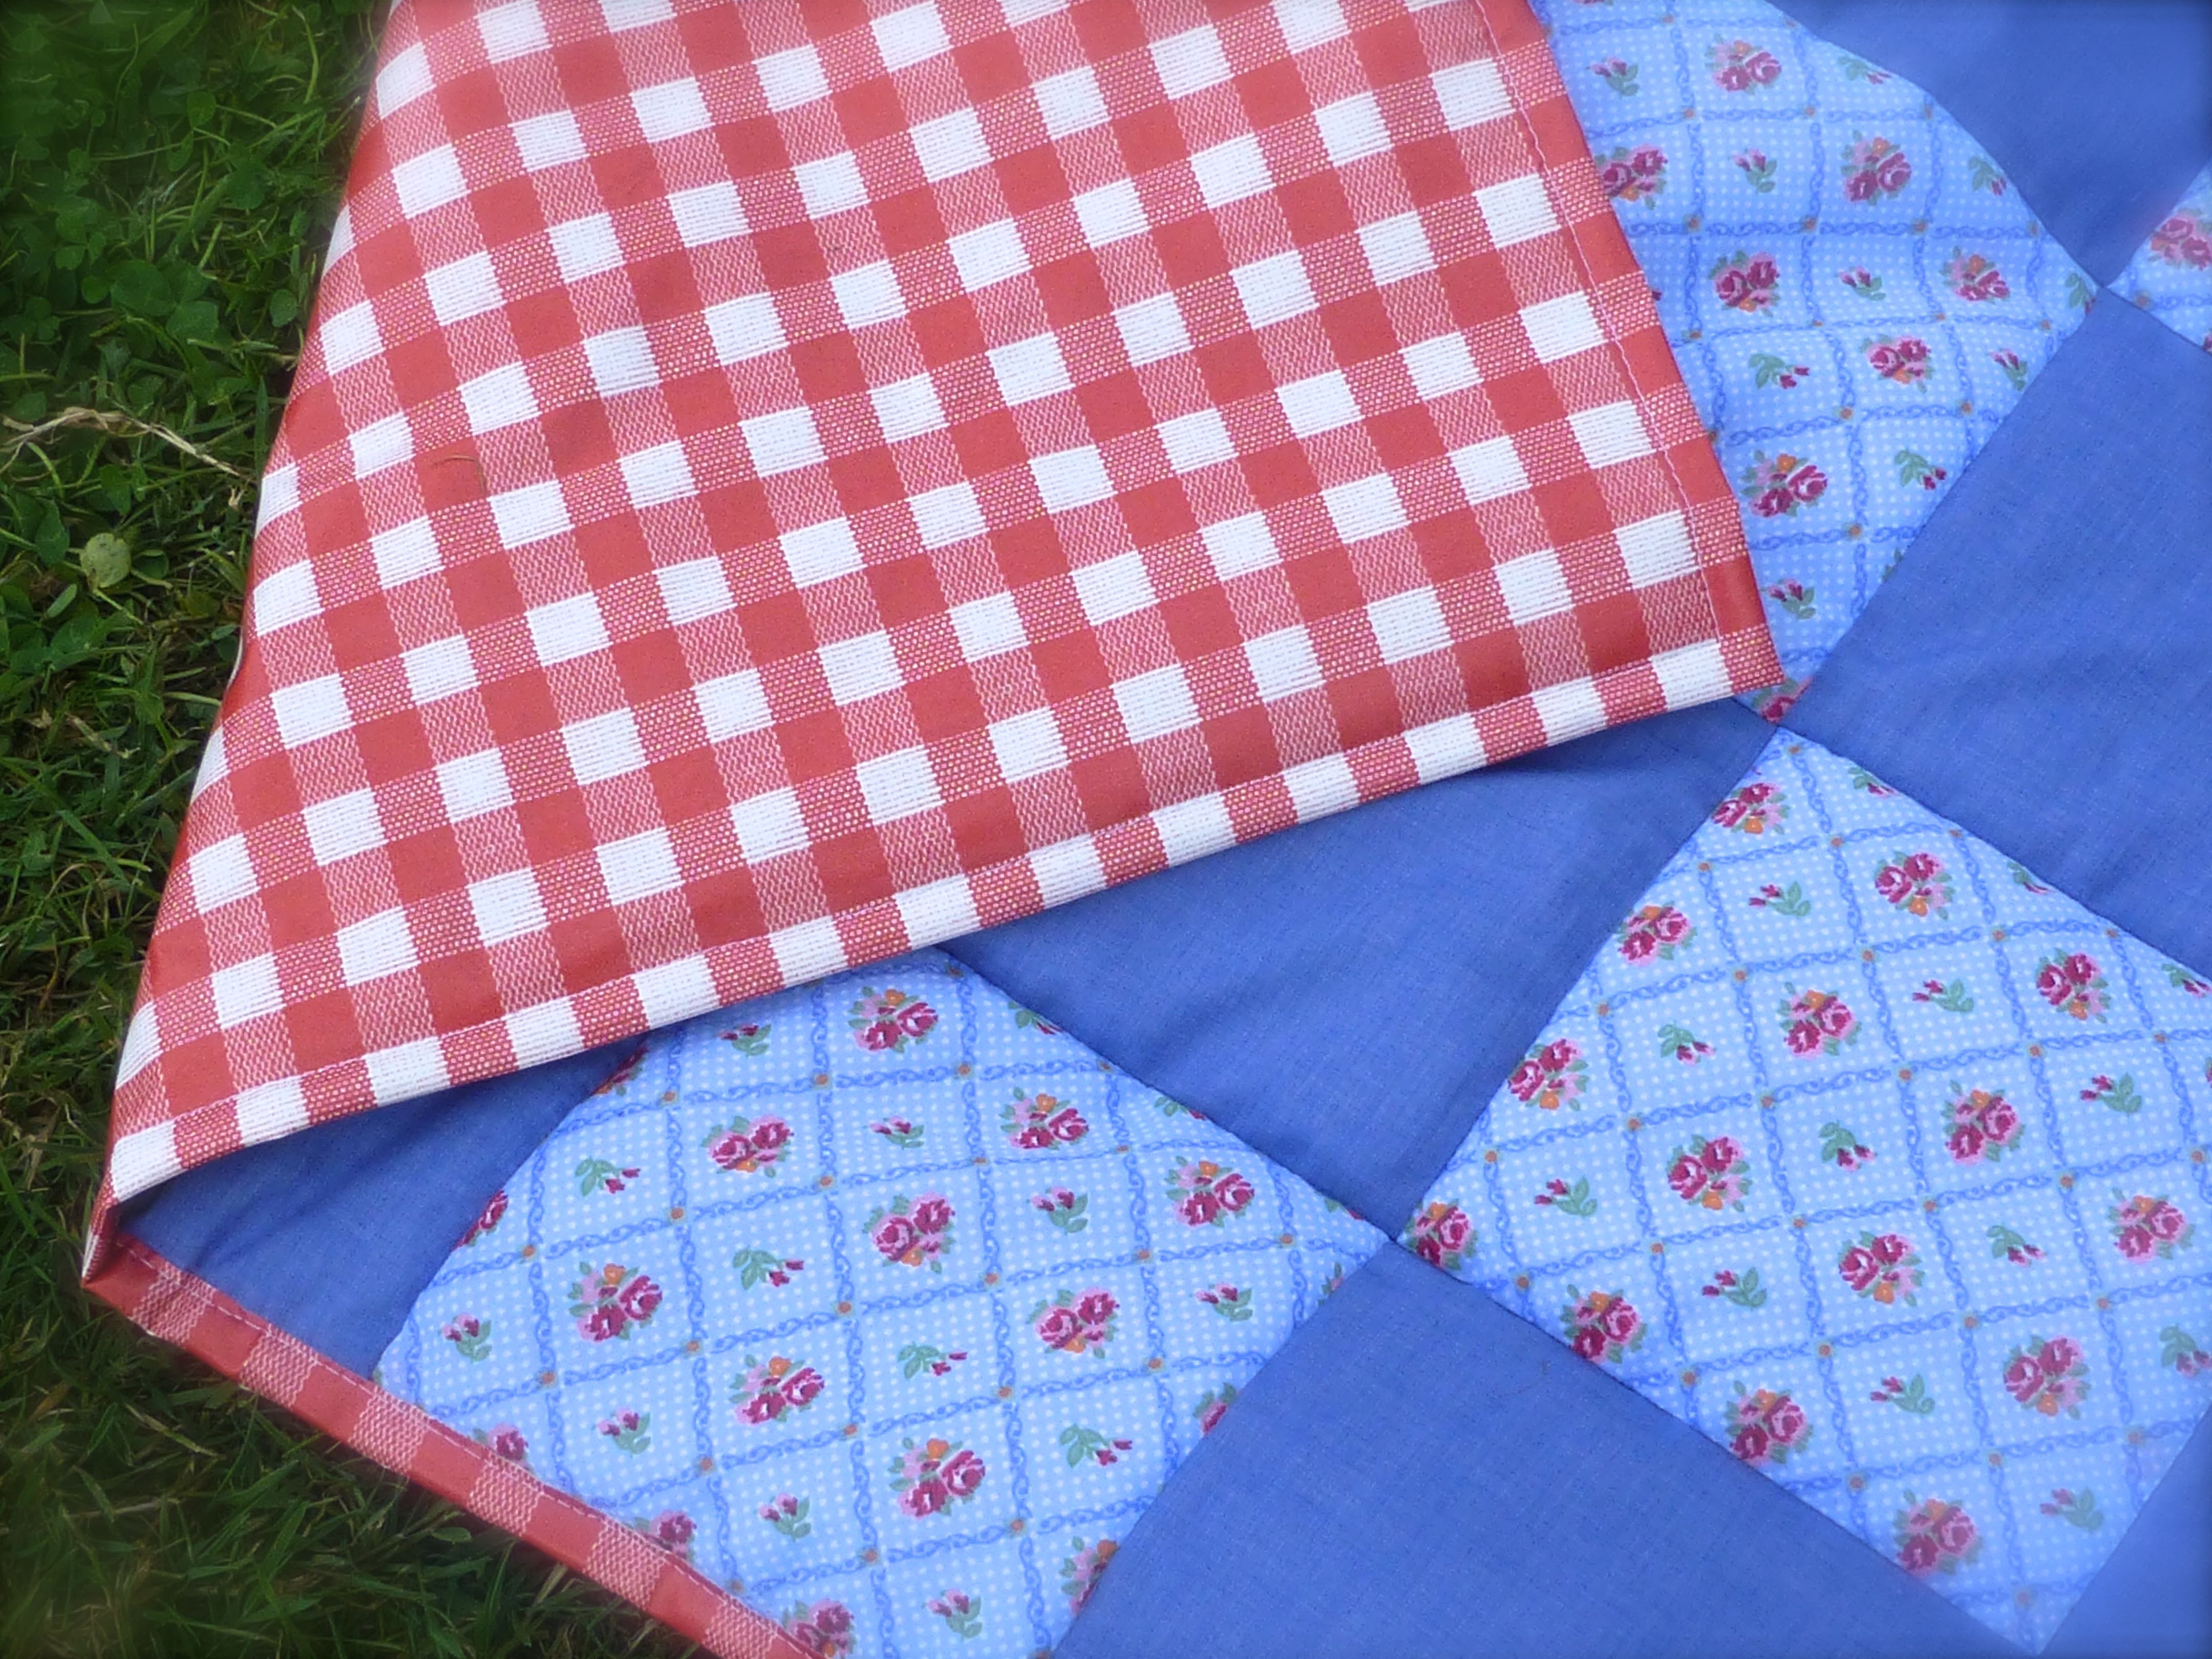
Place the quilted layer onto the vinyl backing, wrong sides together, and trim the backing so that it is 1.5cm bigger than the top all the way around.

Using clips, fold the excess vinyl over to the right side of the blanket and secure in place.
A teflon foot makes the vinyl move smoothly through the machine, and a leather needle with its wedged shape will stop any skipped stitches (discovered through trial and error!)

A simple long straight stitch close to the raw edge of the vinyl is all that is needed.
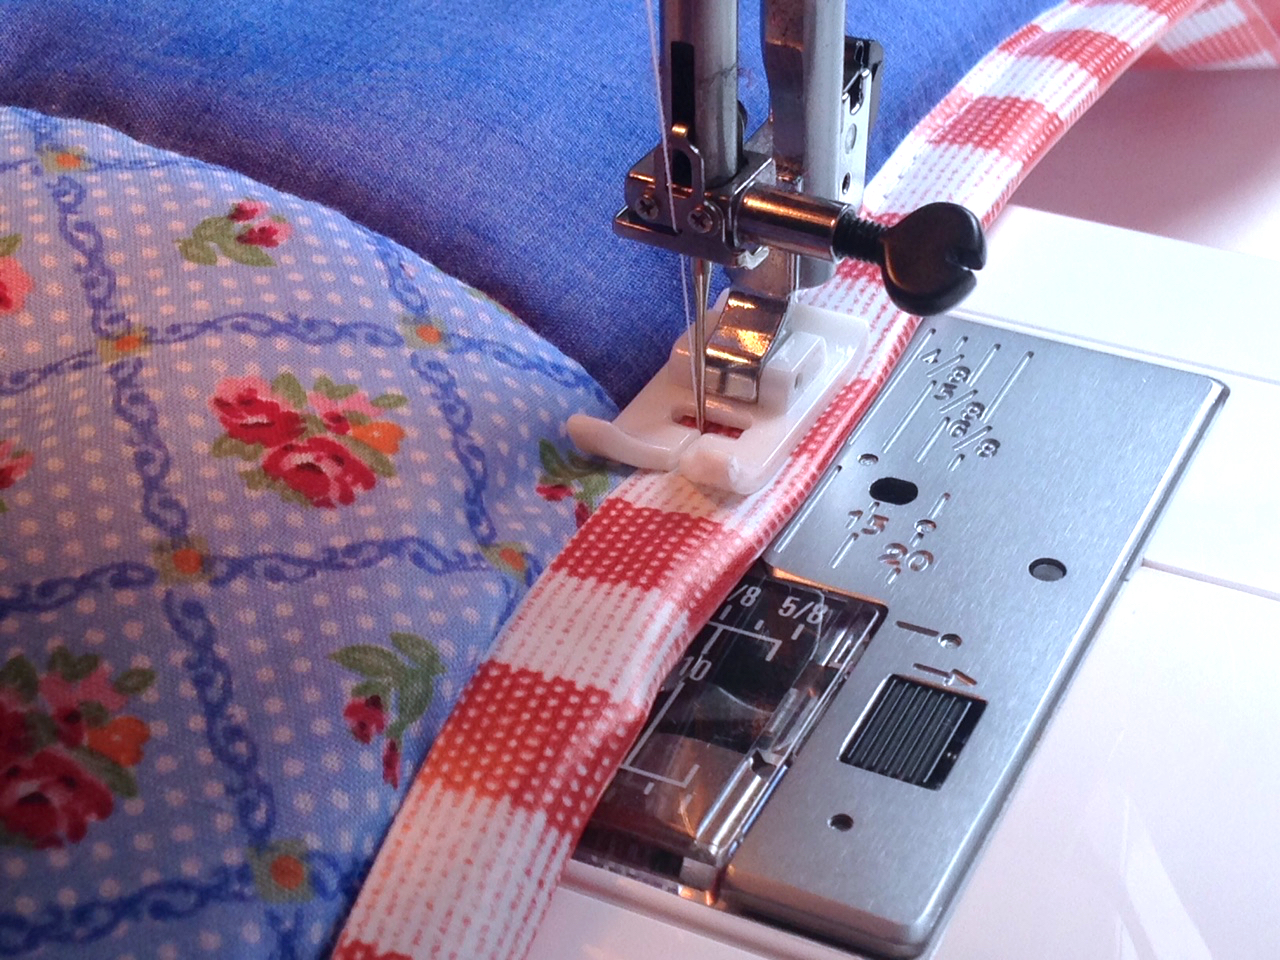
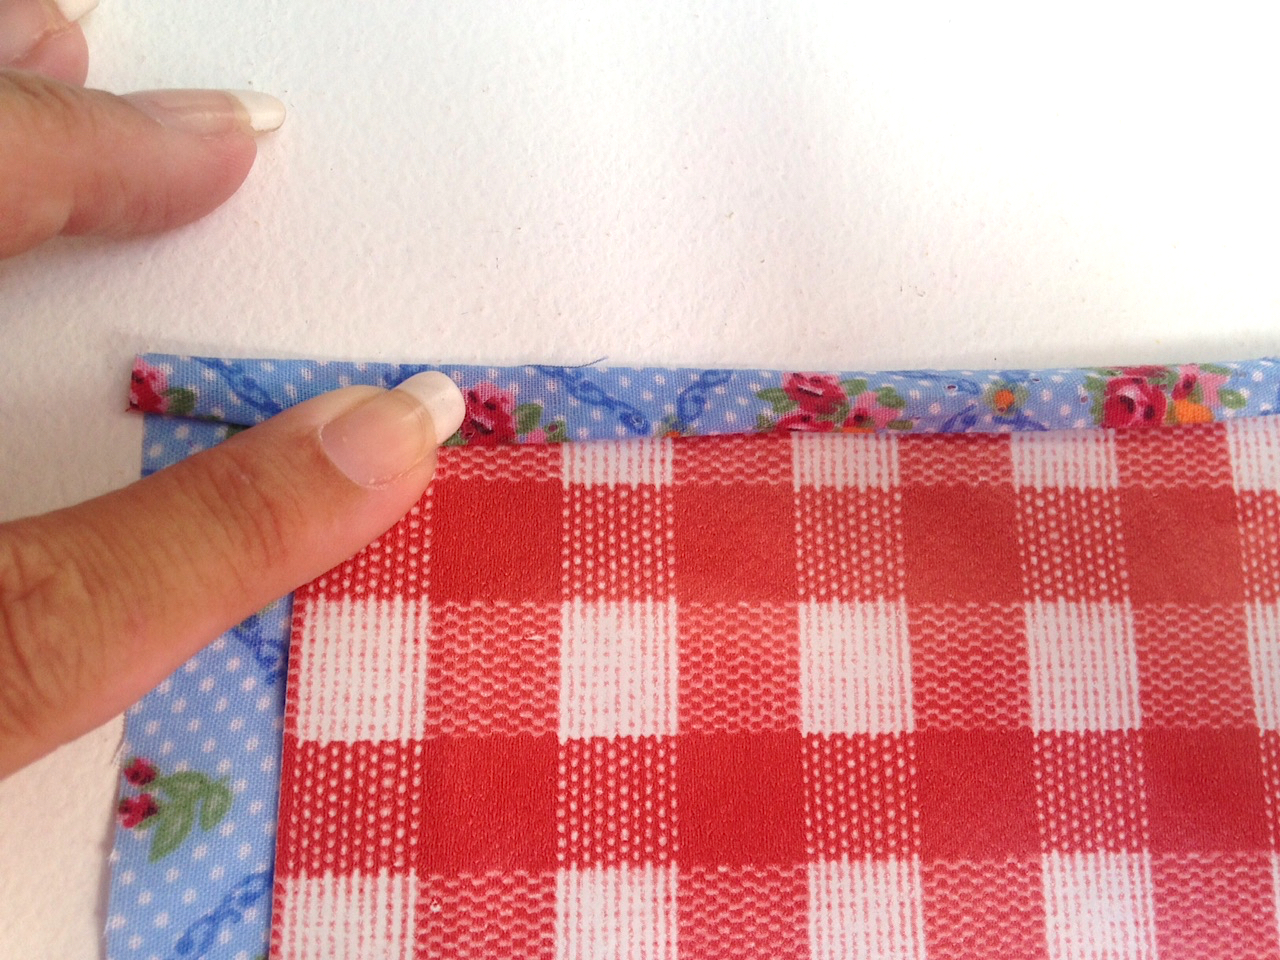
Mitre the corners as you go for a neat finish.

I was left with a few scraps of fabric and vinyl, so I also designed a fabric roll to act as a carry pack for the blanket.
For the carry pack, cut 3 floral and 2 plain squares the same size as before and sew them all together in a single row. Press.
Cut a piece of spare vinyl 1.5cm smaller than the patchwork strip and place in the centre of the strip, wrong sides together.

Turn a narrow hem…..

….and stitch in place close to the inner folded edge around all 4 sides, mitring the corners as you go.
Cut two pieces of vinyl for the handles, each measuring 20cm x 5cm.
Fold the long upper edge in to the wrong side by 1cm, and bring the lower edge up to meet it, overlapping a little to encase the raw edge as shown below.
Stitch close to the raw edge.
Repeat with the second handle.

Position the two ends of the handle in the corner of the carry pack using the photograph as a guide.
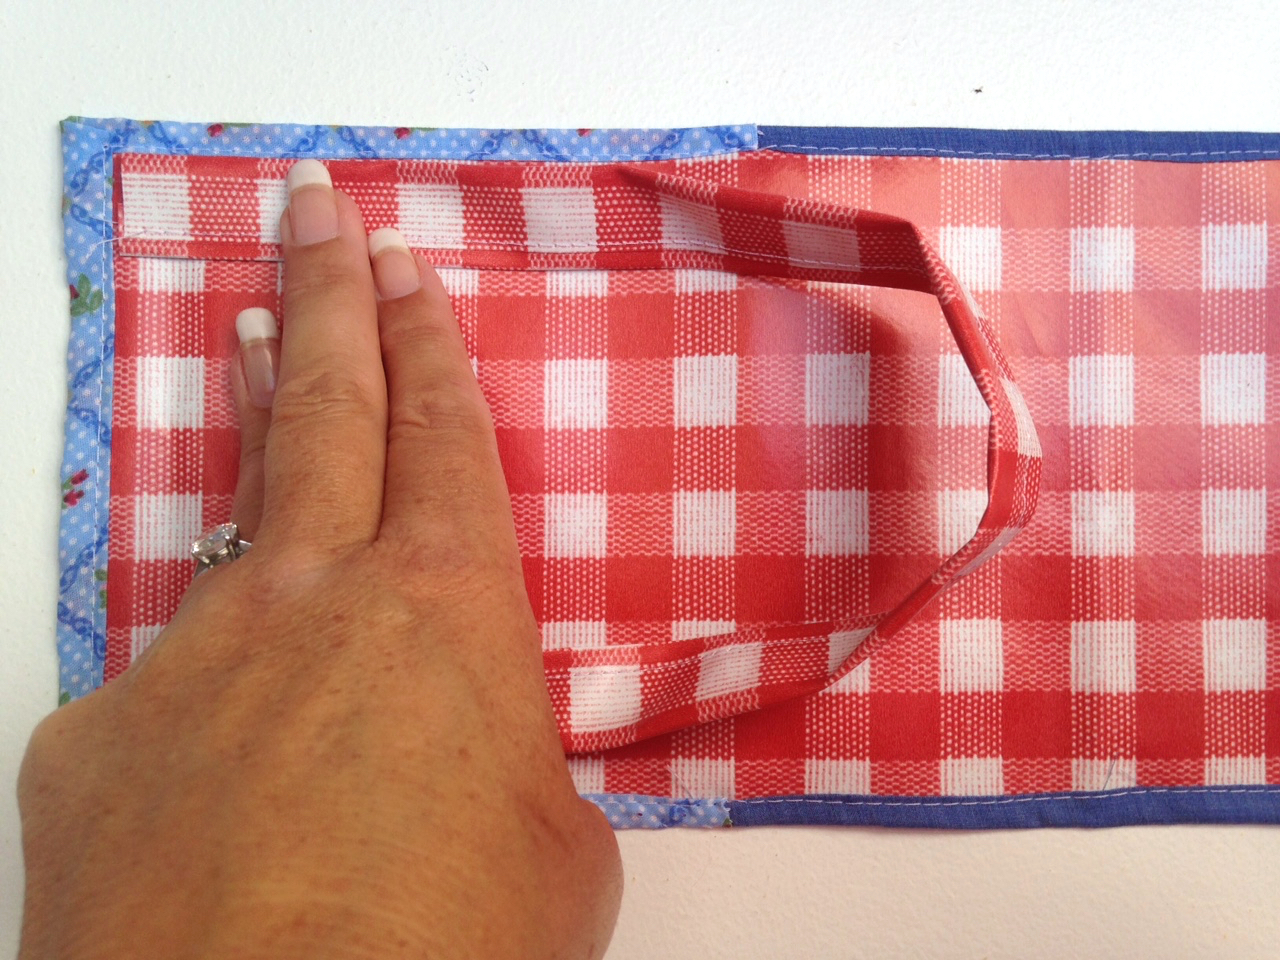
Stitch in place with a 1cm seam.

Fold the handle to the outside and turn over, vinyl side down.
Cut a 12cm strip of velcro hook and loop fastener and sew the hook side to the fabric side of the carry pack, being sure to catch the handle in the ‘up’ position, securing it in place at the same time.
Repeat with the loop side at the other end of the carrier.

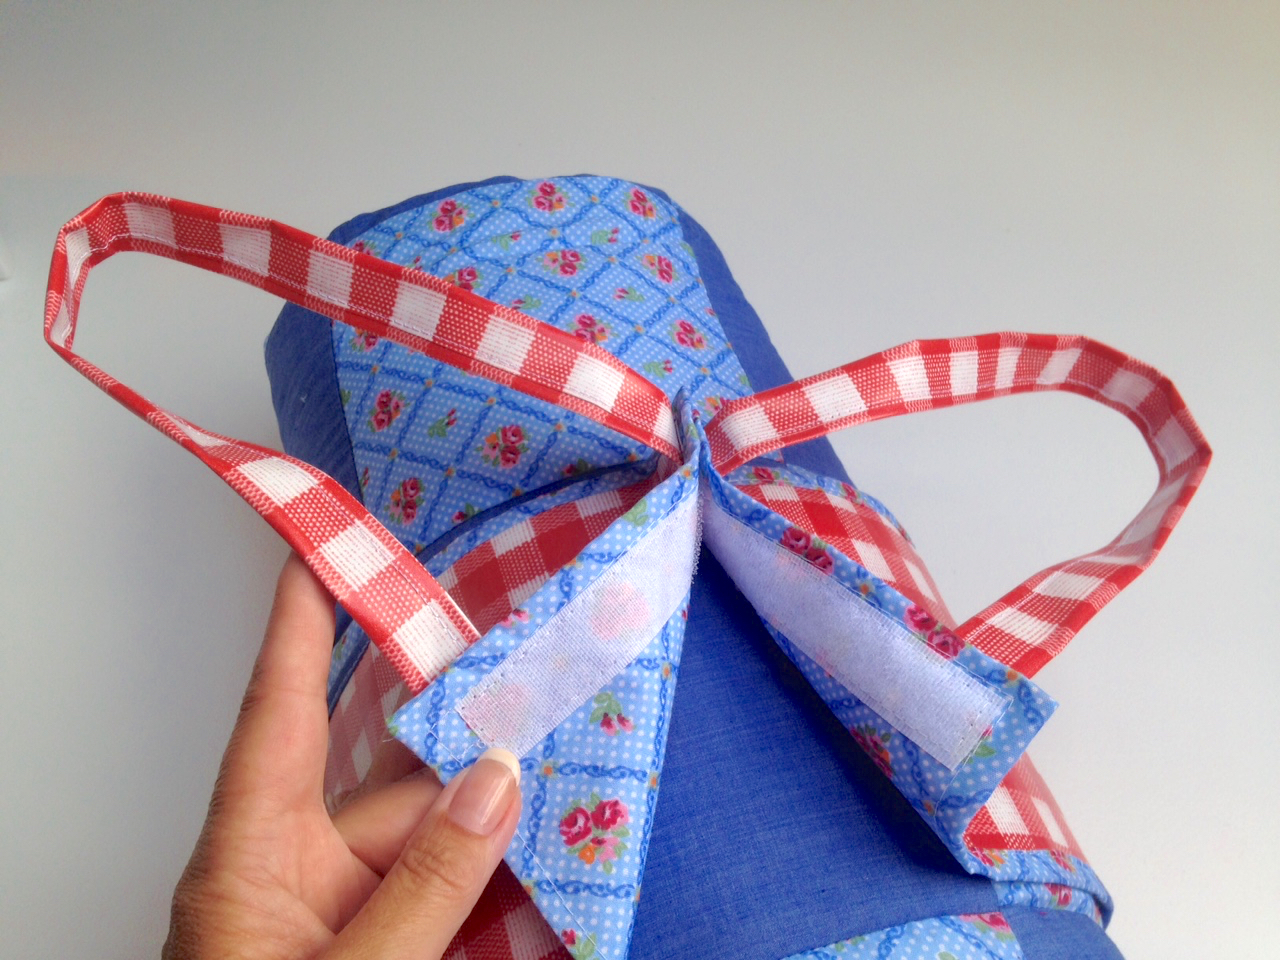
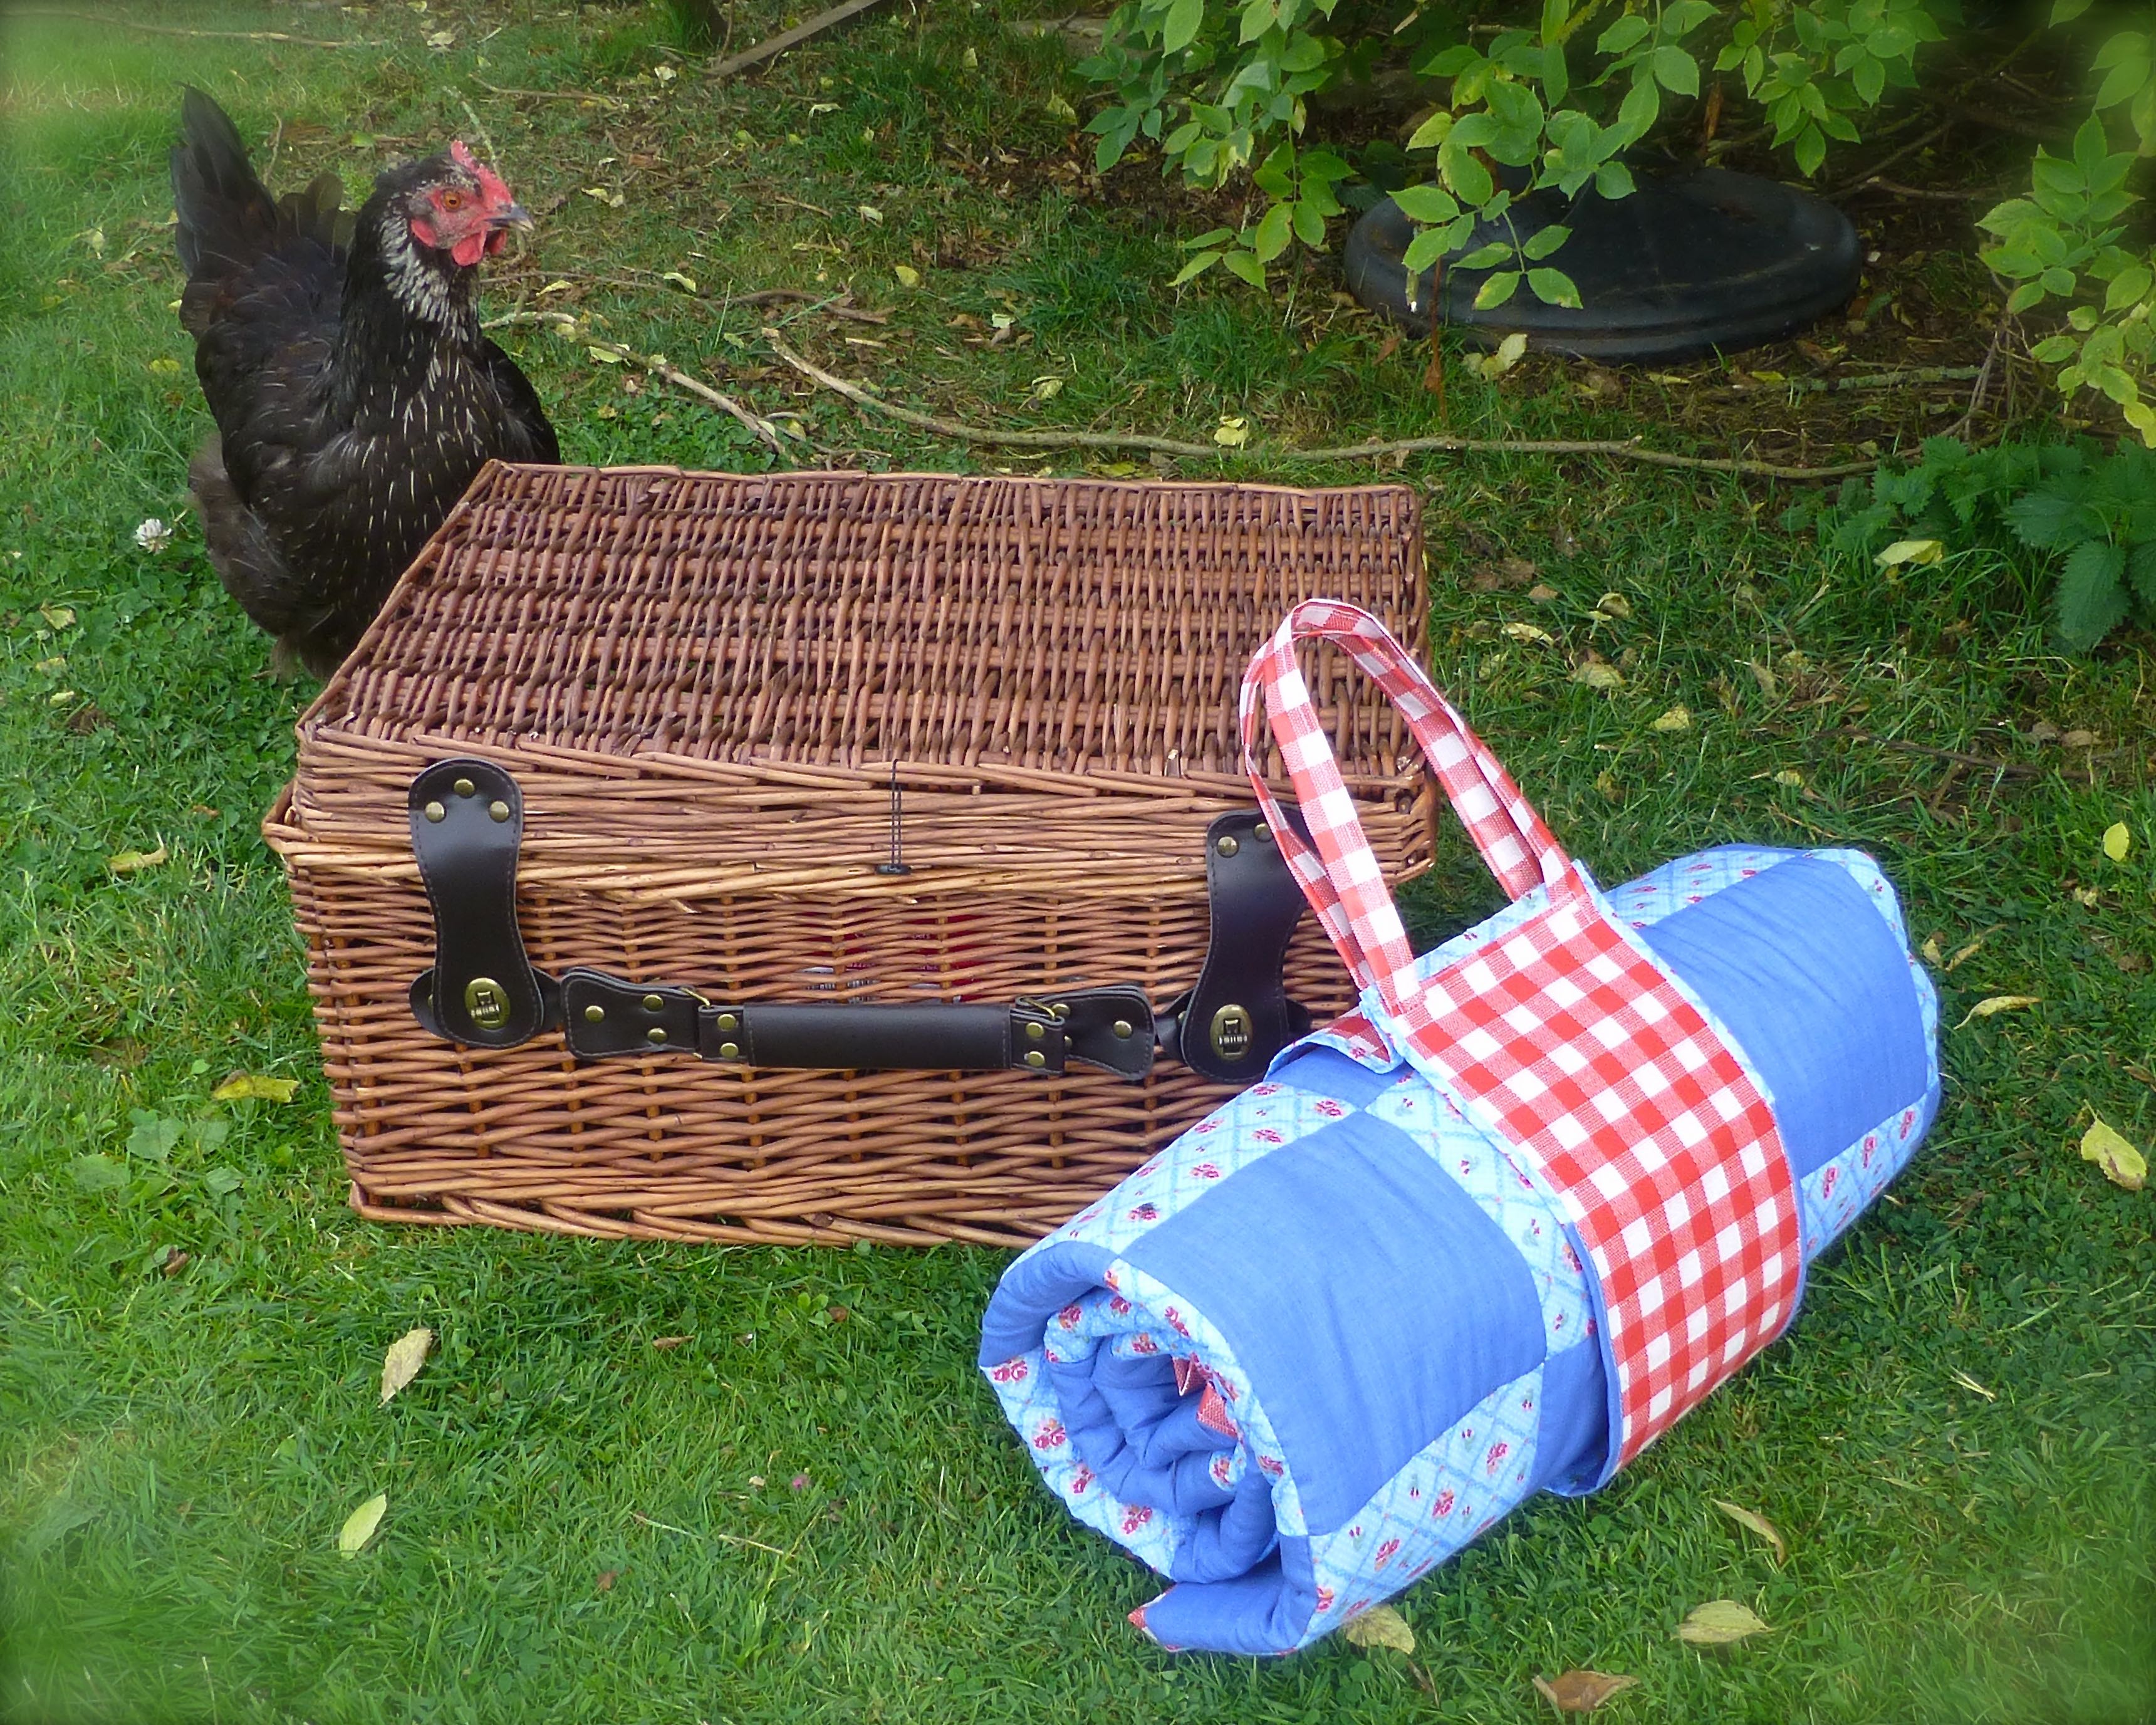
When the blanket is rolled up, wrap the carry pack around it and press the velcro strips together.

For a picnic in the garden (or anywhere), just add bunting, a squishy cushion and a hamper full of goodies.

Sun is a bonus for a picnic, but not when taking photographs (too much contrast)…

The perfect fusion of girl/boy styling that anyone would be happy to sit on.
No more damp bums!
A lovely layer of wadding for added comfort.

The carry pack with handles means that it’s compact and easy to transport.

Marley was interested to see what was going on – sometimes our hens are just a little bit too friendly!

Now all we need is for Summer to return so we can actually use our lovely new picnic blanket!!
