
Last week it was our school’s Summer Fête and, as well as many edible goodies, I made a play tent for the PTFA to raffle off for their funds.
All week I had been making jam, marmalade, fudge….

….Elderflower Cordial….

…….and scones.

The day before the fair, Mr H-L had a delivery of some new shirts for work and decided to have a wardrobe clear out resulting in the eviction of nine of his ‘old’ ones.

Some of the shirts had never actually been worn and even those that had were still in great condition so, when he asked me to take them to the charity shop, and idea sprung to mind.
Why not upcycle them and make a patchwork play tent to raffle off for the school funds?
This ended up making far more money than they would have achieved in a charity shop, and the money was still going to a good cause, so off to my studio I went to formulate a plan.
I made a similar tent for The Boys last year which I never got around to blogging about, so I based it on that.

YOU WILL NEED: –
Nine men’s cotton shirts
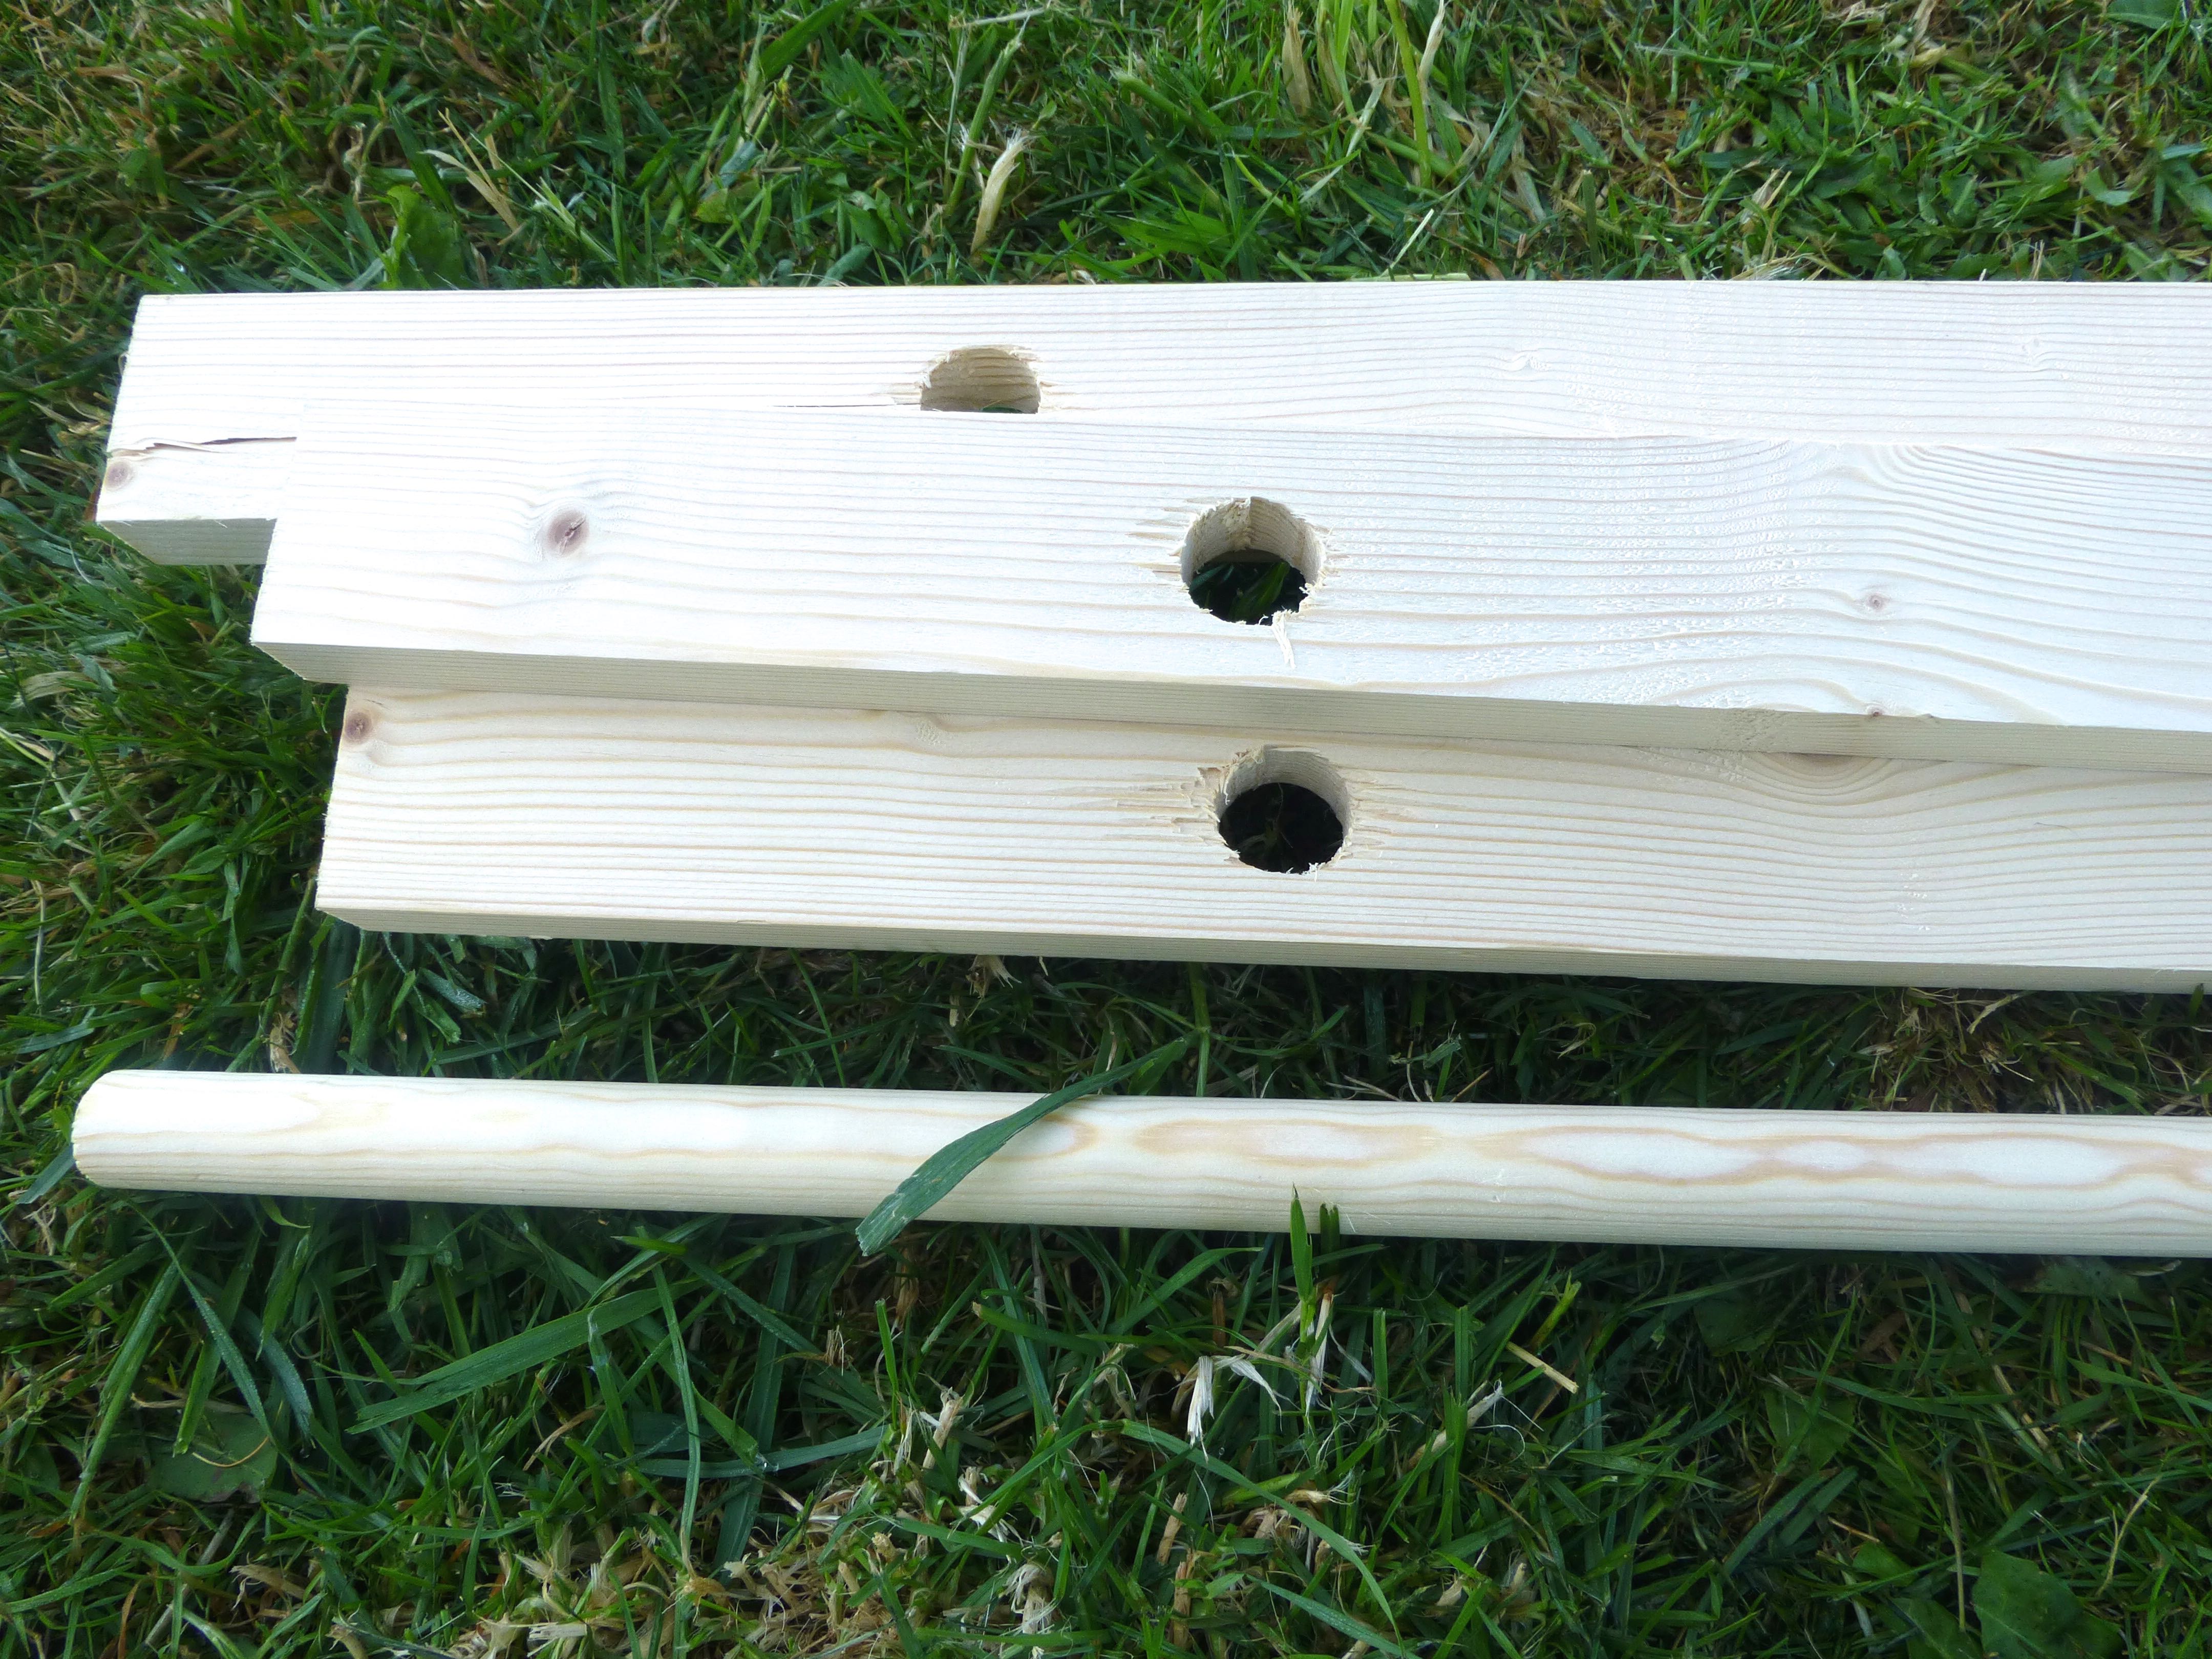
1 x dowelling (2000mm x 25mm)
4 x planed timber (1800mm x 44mm x 18mm)
4 x eyelets
2m elastic cord
Drill a hole 15cm in from one end of each of the bits of planed timber using a spade bit the same size as your dowelling.
You now need to create one single piece of fabric that measures 1.60m x 3.20m.
The first job was to cut up the shirts into as many usable sections as possible using my rotary cutter for speed.
I started by removing the button flaps, cuffs and collars.

Look at all the buttons I rescued!

I wasn’t at all precise in my cutting as I intended to fit each piece as I went – very liberating and totally the opposite of normal patchwork!
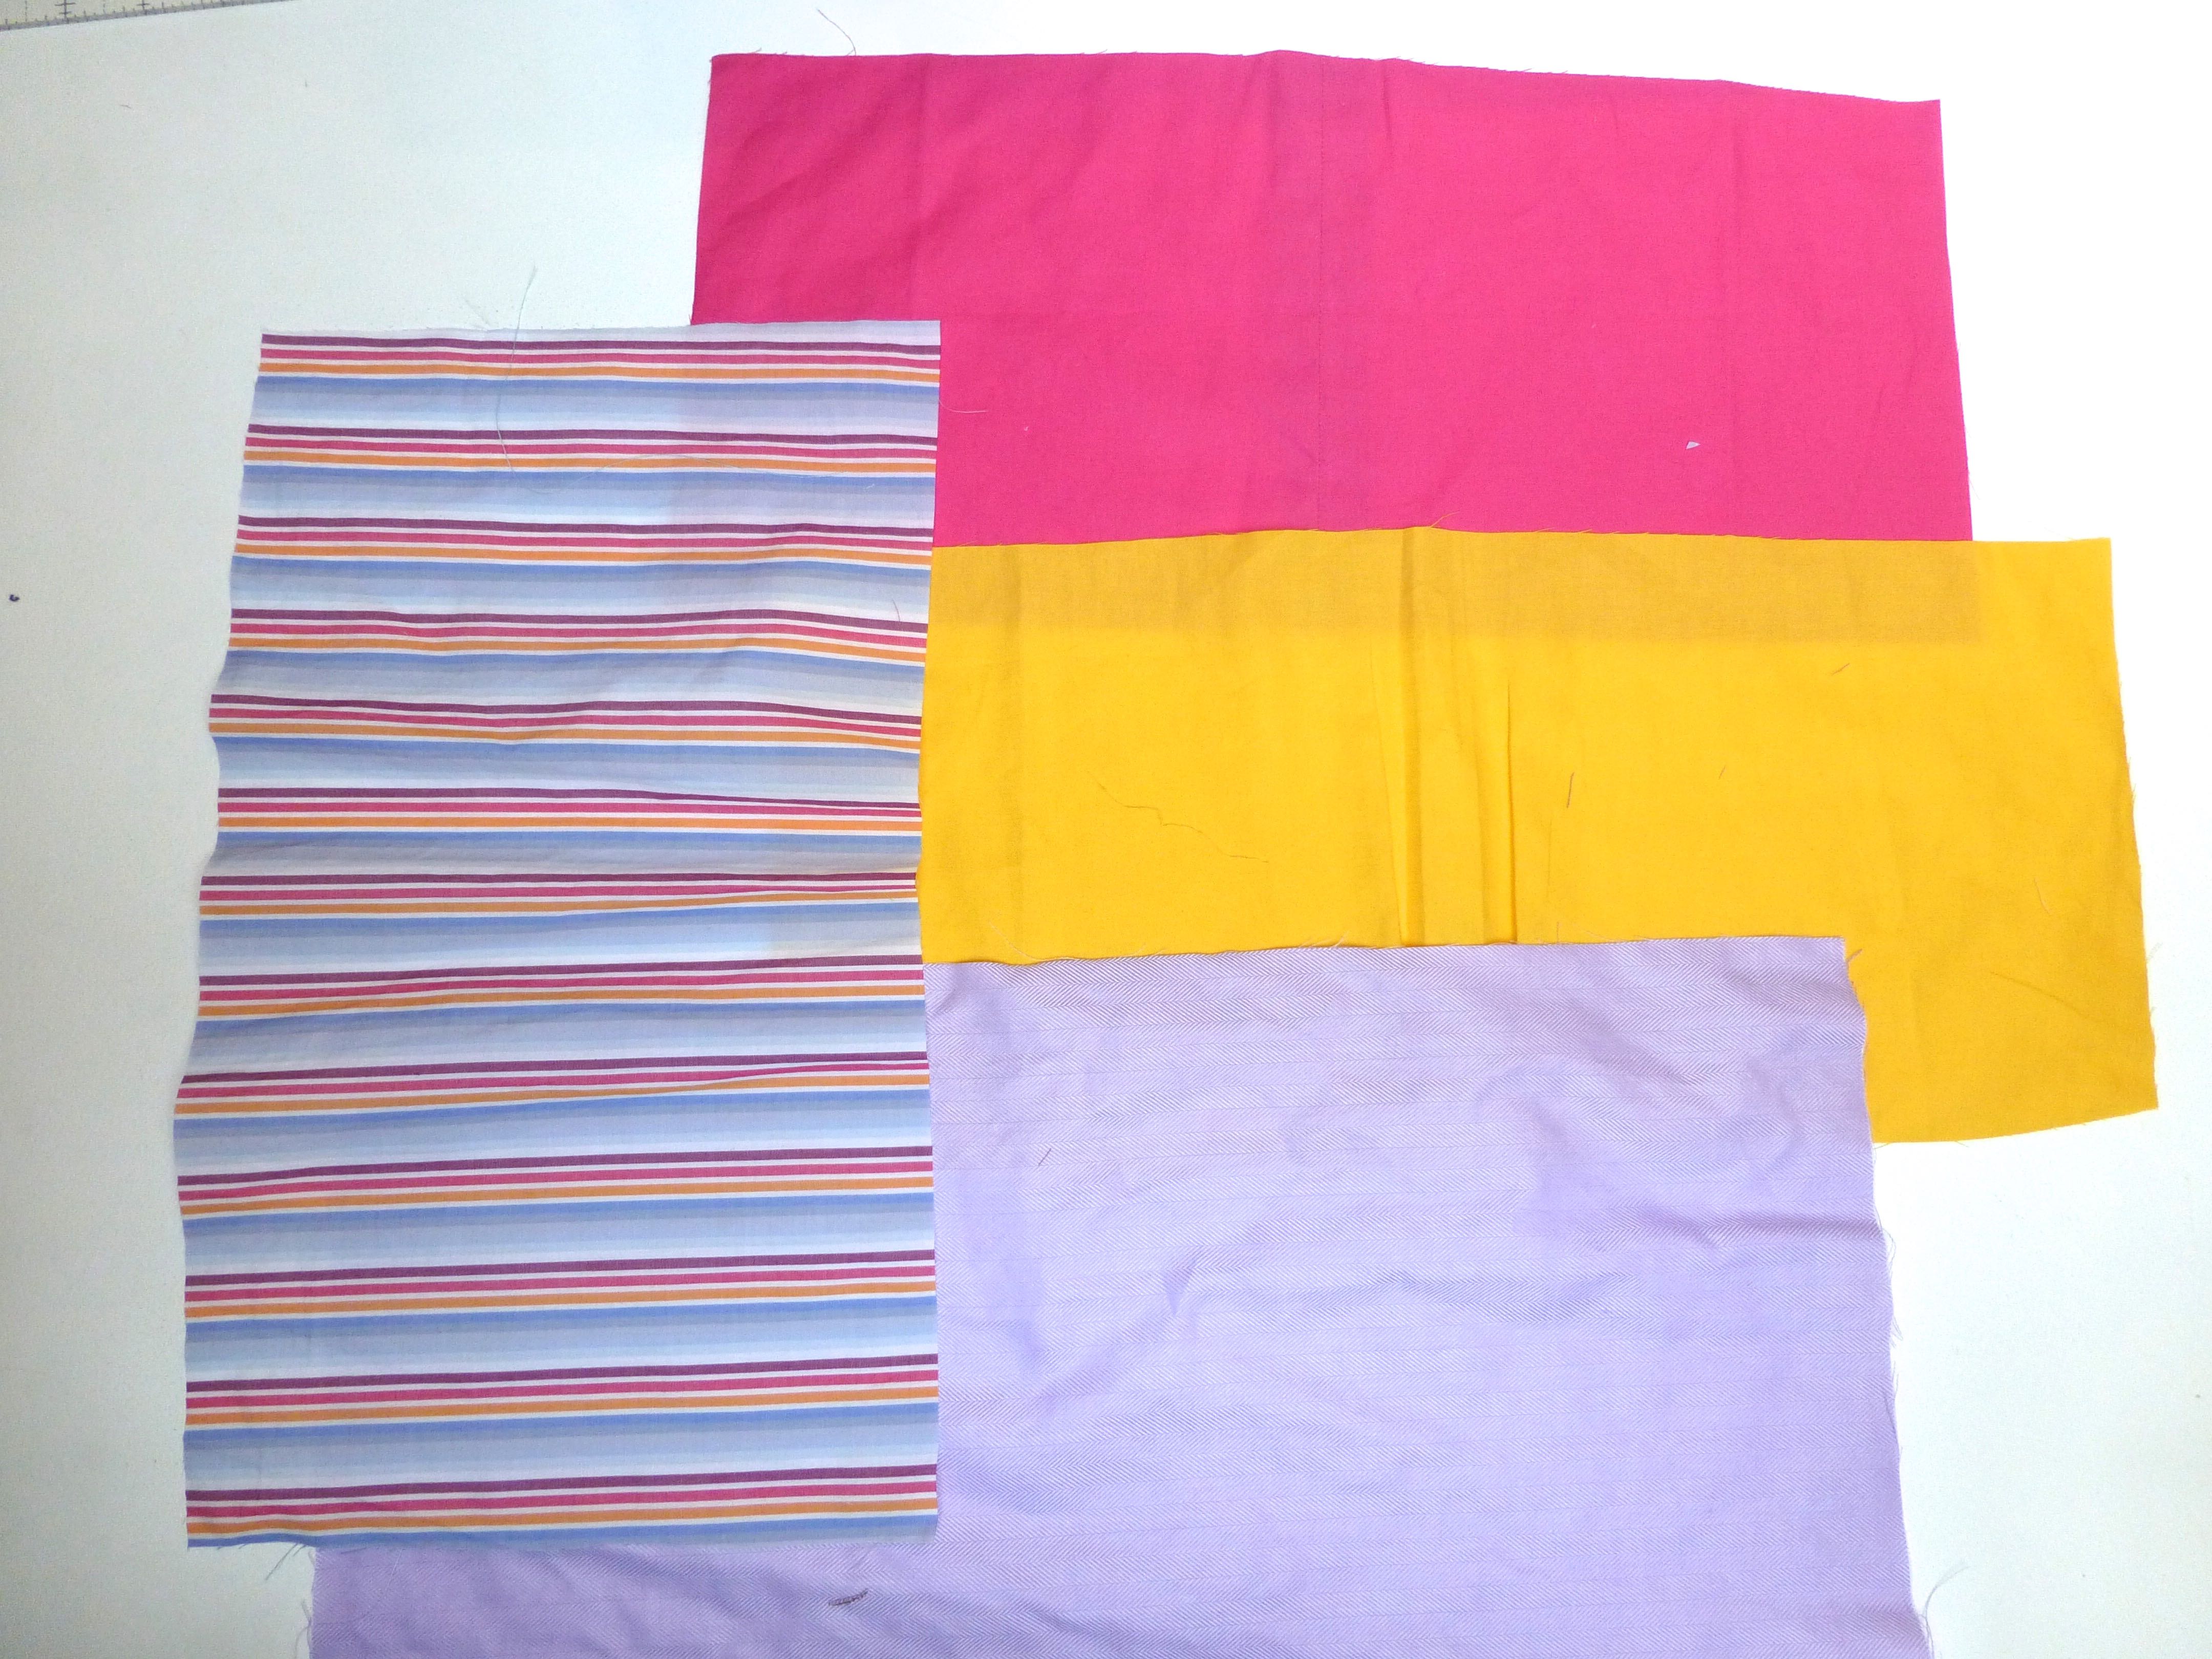
I laid all the bits out on the floor and arranged them in a pleasing order, being sure to space out evenly the more brightly coloured yellow and pink.
This would not have quite the same impact with the more conservative blue or white work shirts, but you could always appliqué onto the patches for added interest.
I didn’t need to – Mr H-L likes a shirt that stands out:)
As you can see from the picture below, I sewed the pieces of fabric VERY roughly together into strips. The edges were then trimmed into a neat line before stitching the strips of patchwork together along their long sides.

As both sides of the tent were going to be visible, I used Flat Fell seams throughout.
This type of seam leaves a smart finish and adds strength to the seam.
Here’s a line drawing to show the construction: –
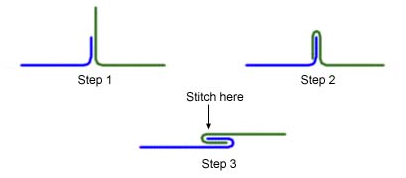
Image courtesy of Google images
In photographs, here’s what I did: –
Stitch a staggered seam where the lower fabric (pink) sticks out 1cm more than the top fabric.

Open the two fabrics flat with the raw edges of the seam uppermost.
Fold the seam to the left and tuck the (pink) overhang over the raw edge of the other (striped) fabric, enclosing all raw edges in the process.
Stitch close to the folded edge.

As I said, a very neat finish which I used as the outside of the tent.

Keep going until you have one piece of fabric measuring 1.60m x 3.20m.
Hem all around the outer edges.

In each of the four corners of the tent, fix an eyelet through which you need to attach a 50cm length of elastic cording as shown below.

Tie the ends of the cord in a knot to form a loop through which the tent poles will pass.
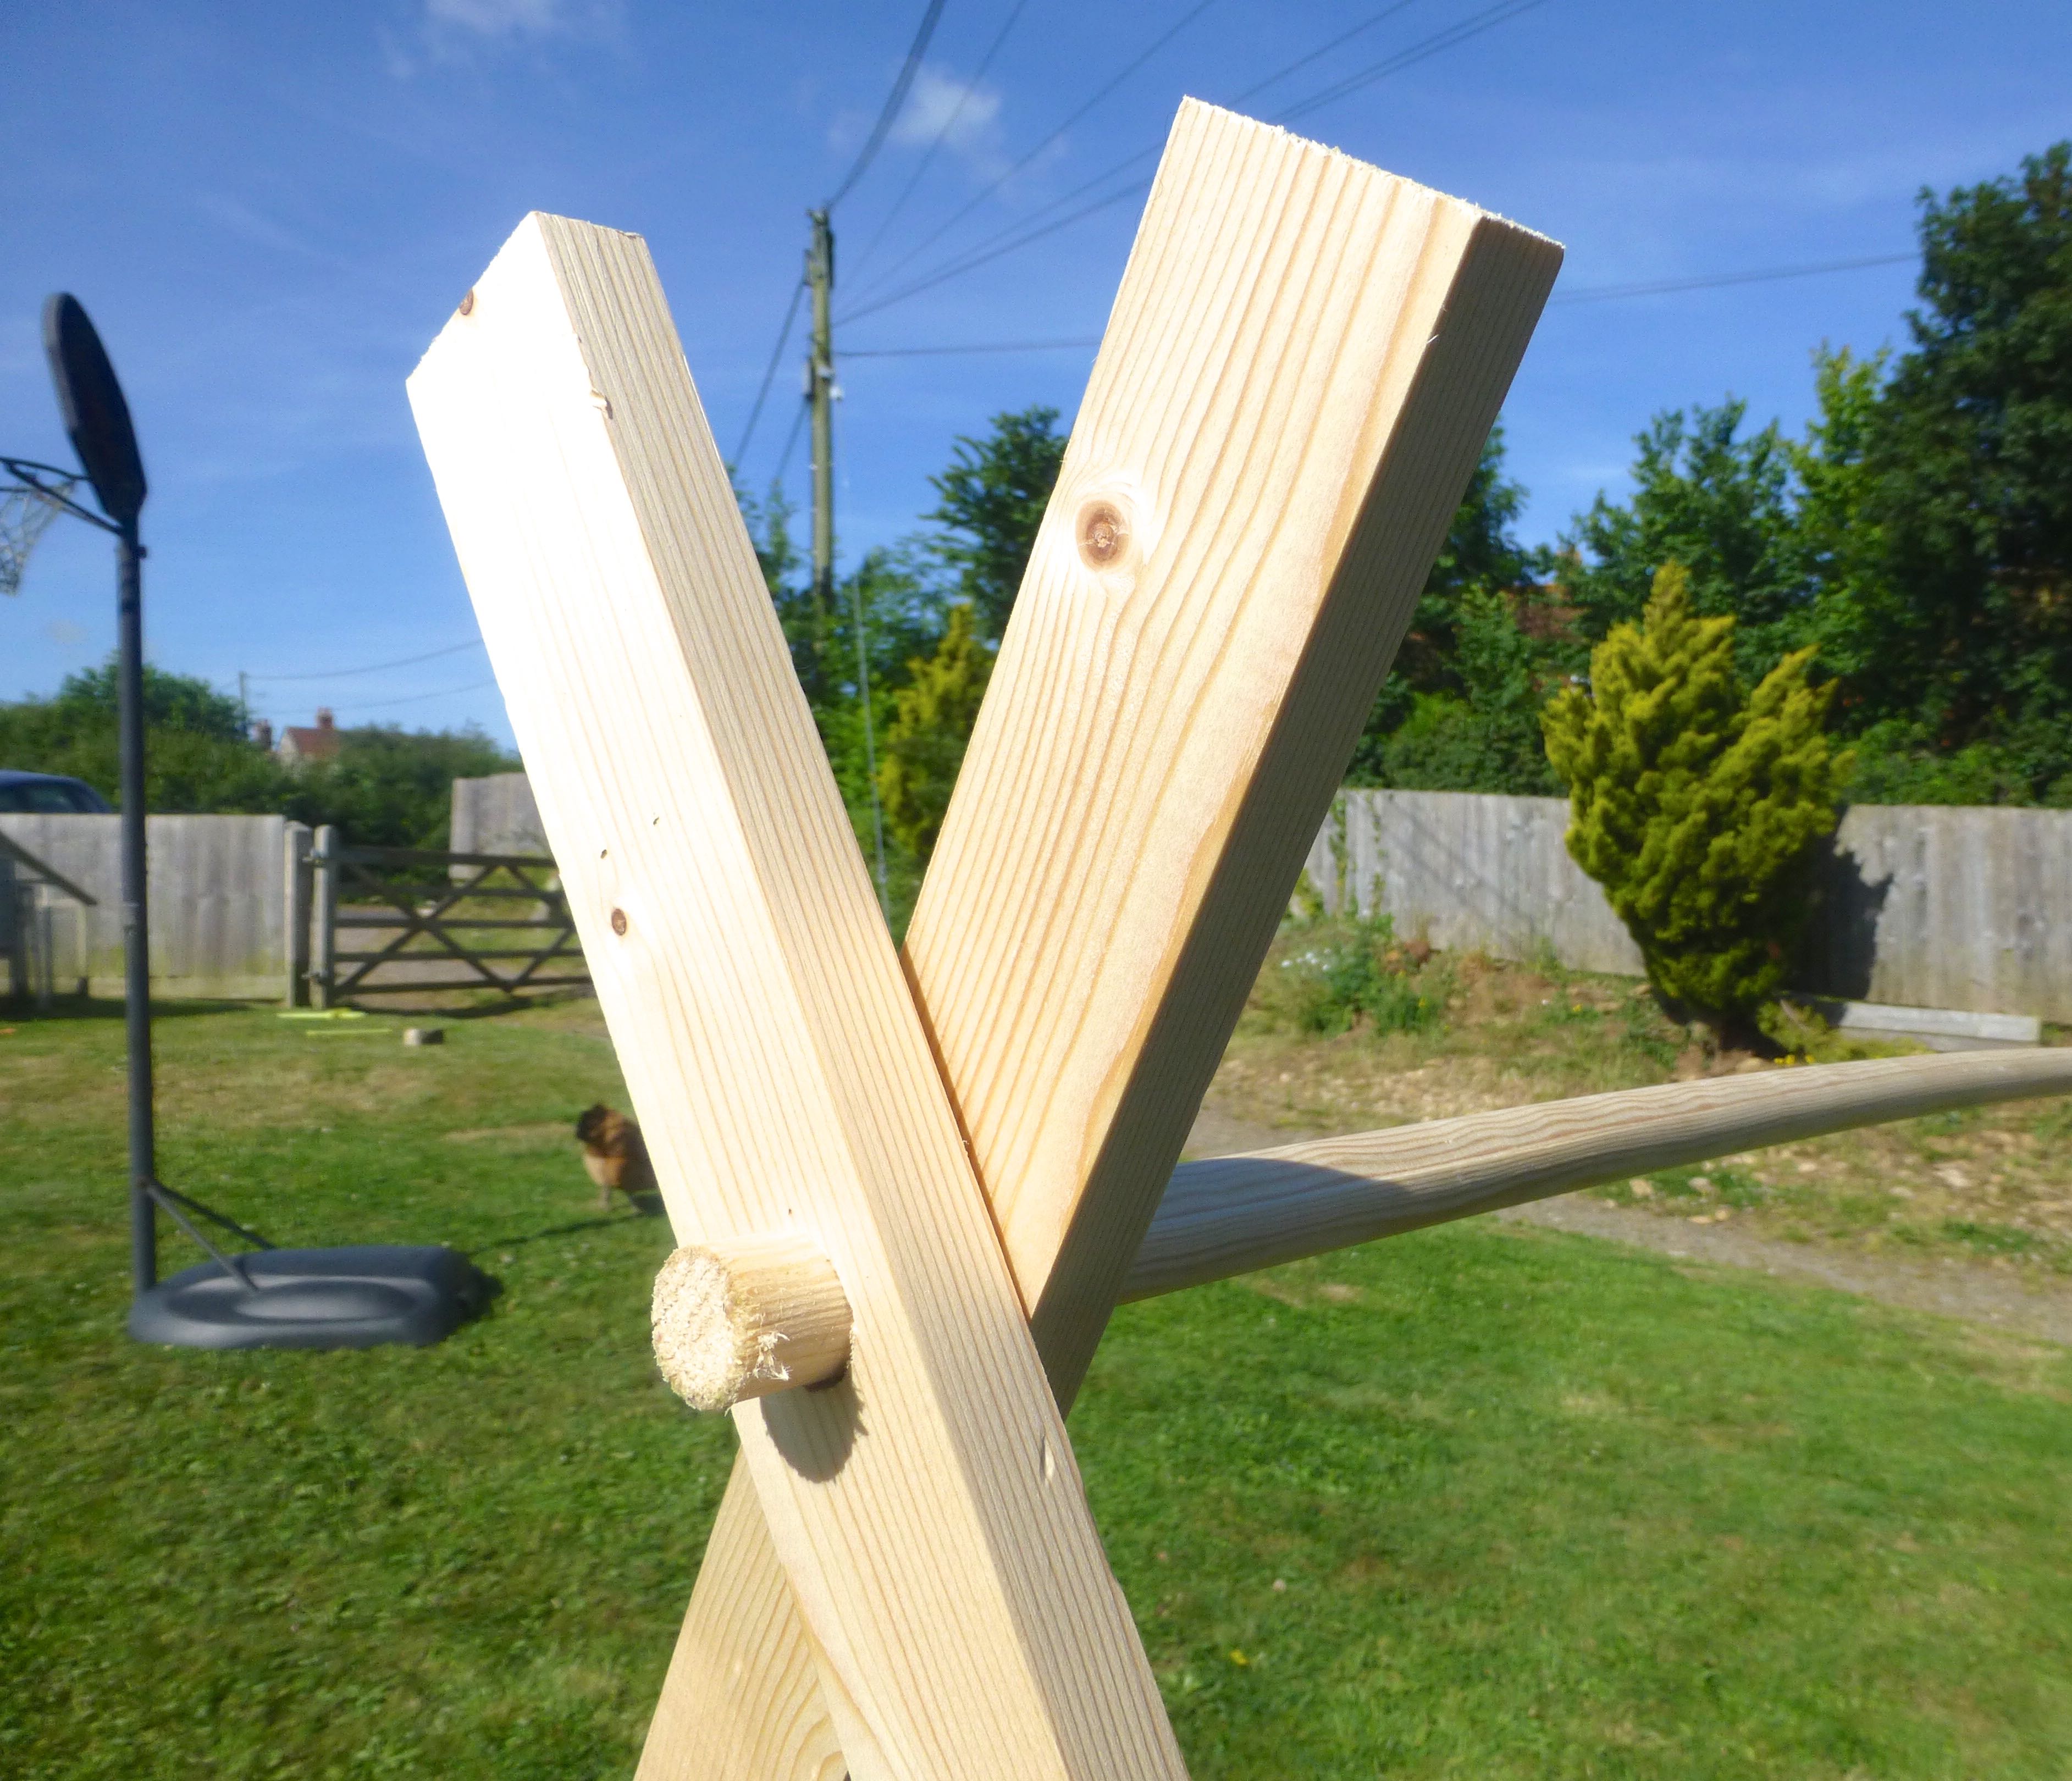
Align the holes in the tent poles….
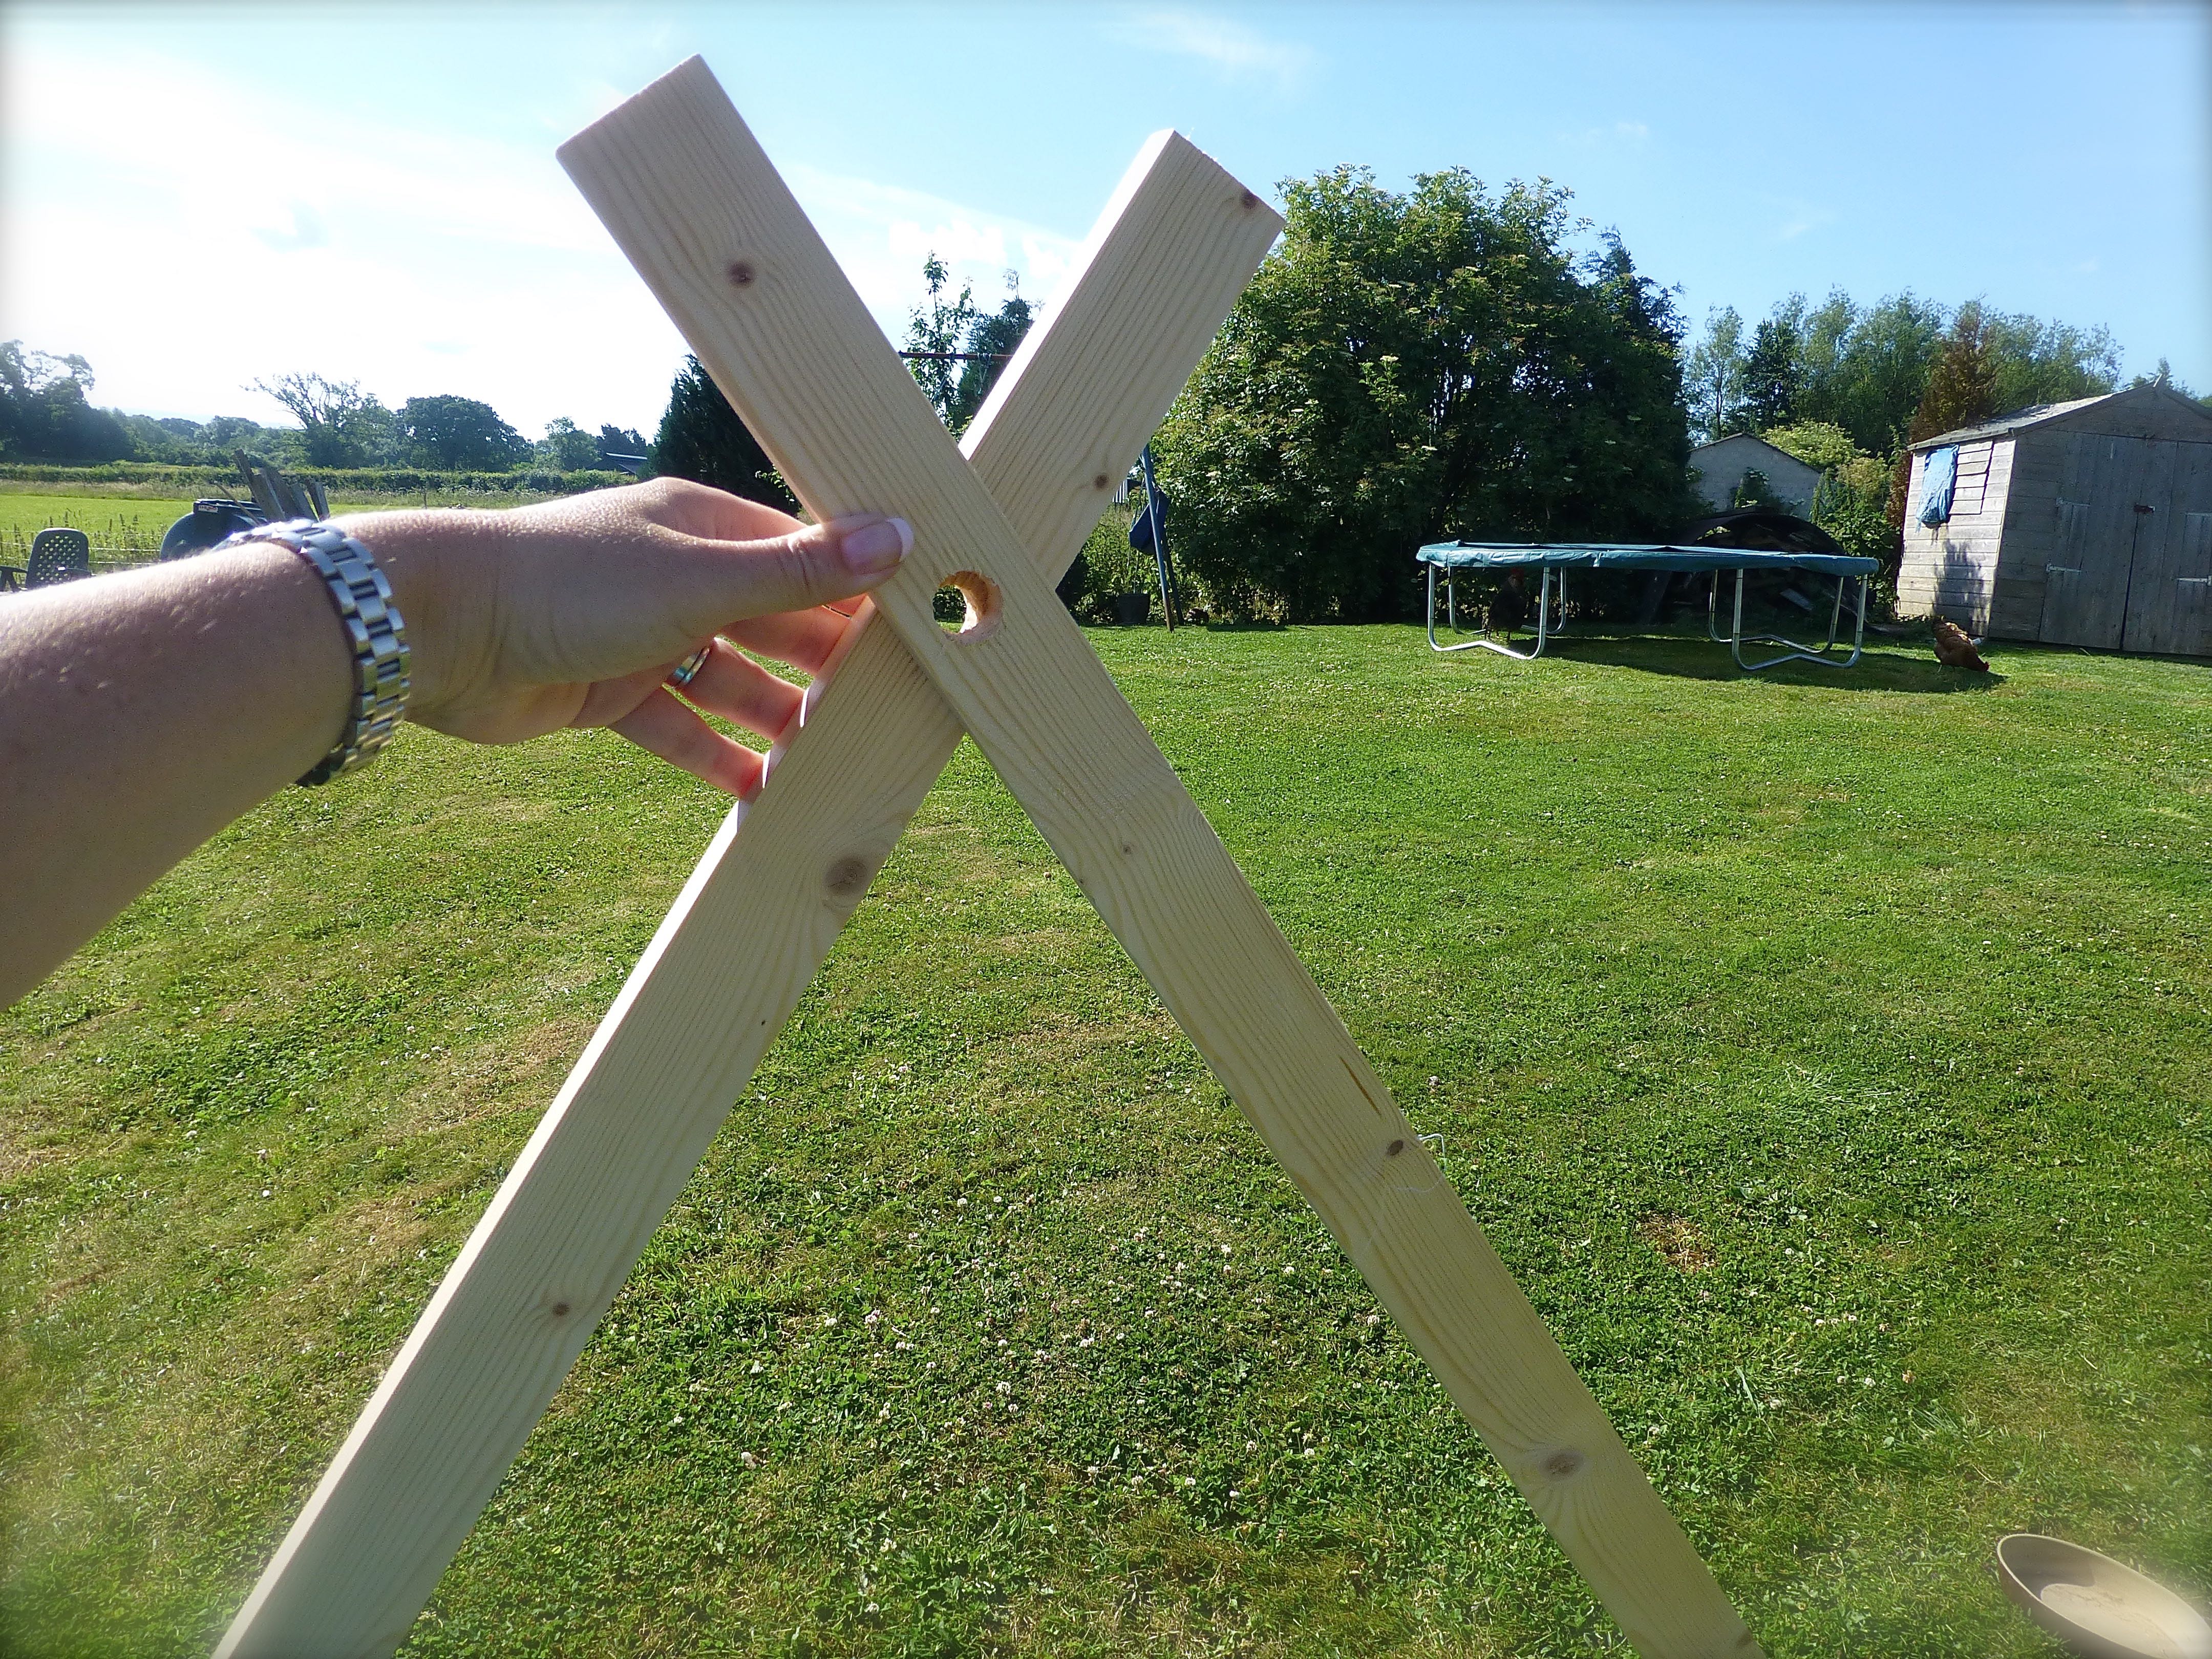
….and insert the length of dowelling.
Lay the tent over the central dowel and pass the poles through the elastic cords at the bottom edge.
I also added a tie half way up each side of the tent – but, in my haste, forgot to document it. Basically, four 50cm long ties were made using scarps of leftover shirt fabric and sewn to the seam. These hold the tent more tautly to the frame.
We also decided to saw a shallow groove on the outer edge of the pole where the elastic cord sits – this helps stop the cord from riding up the pole.

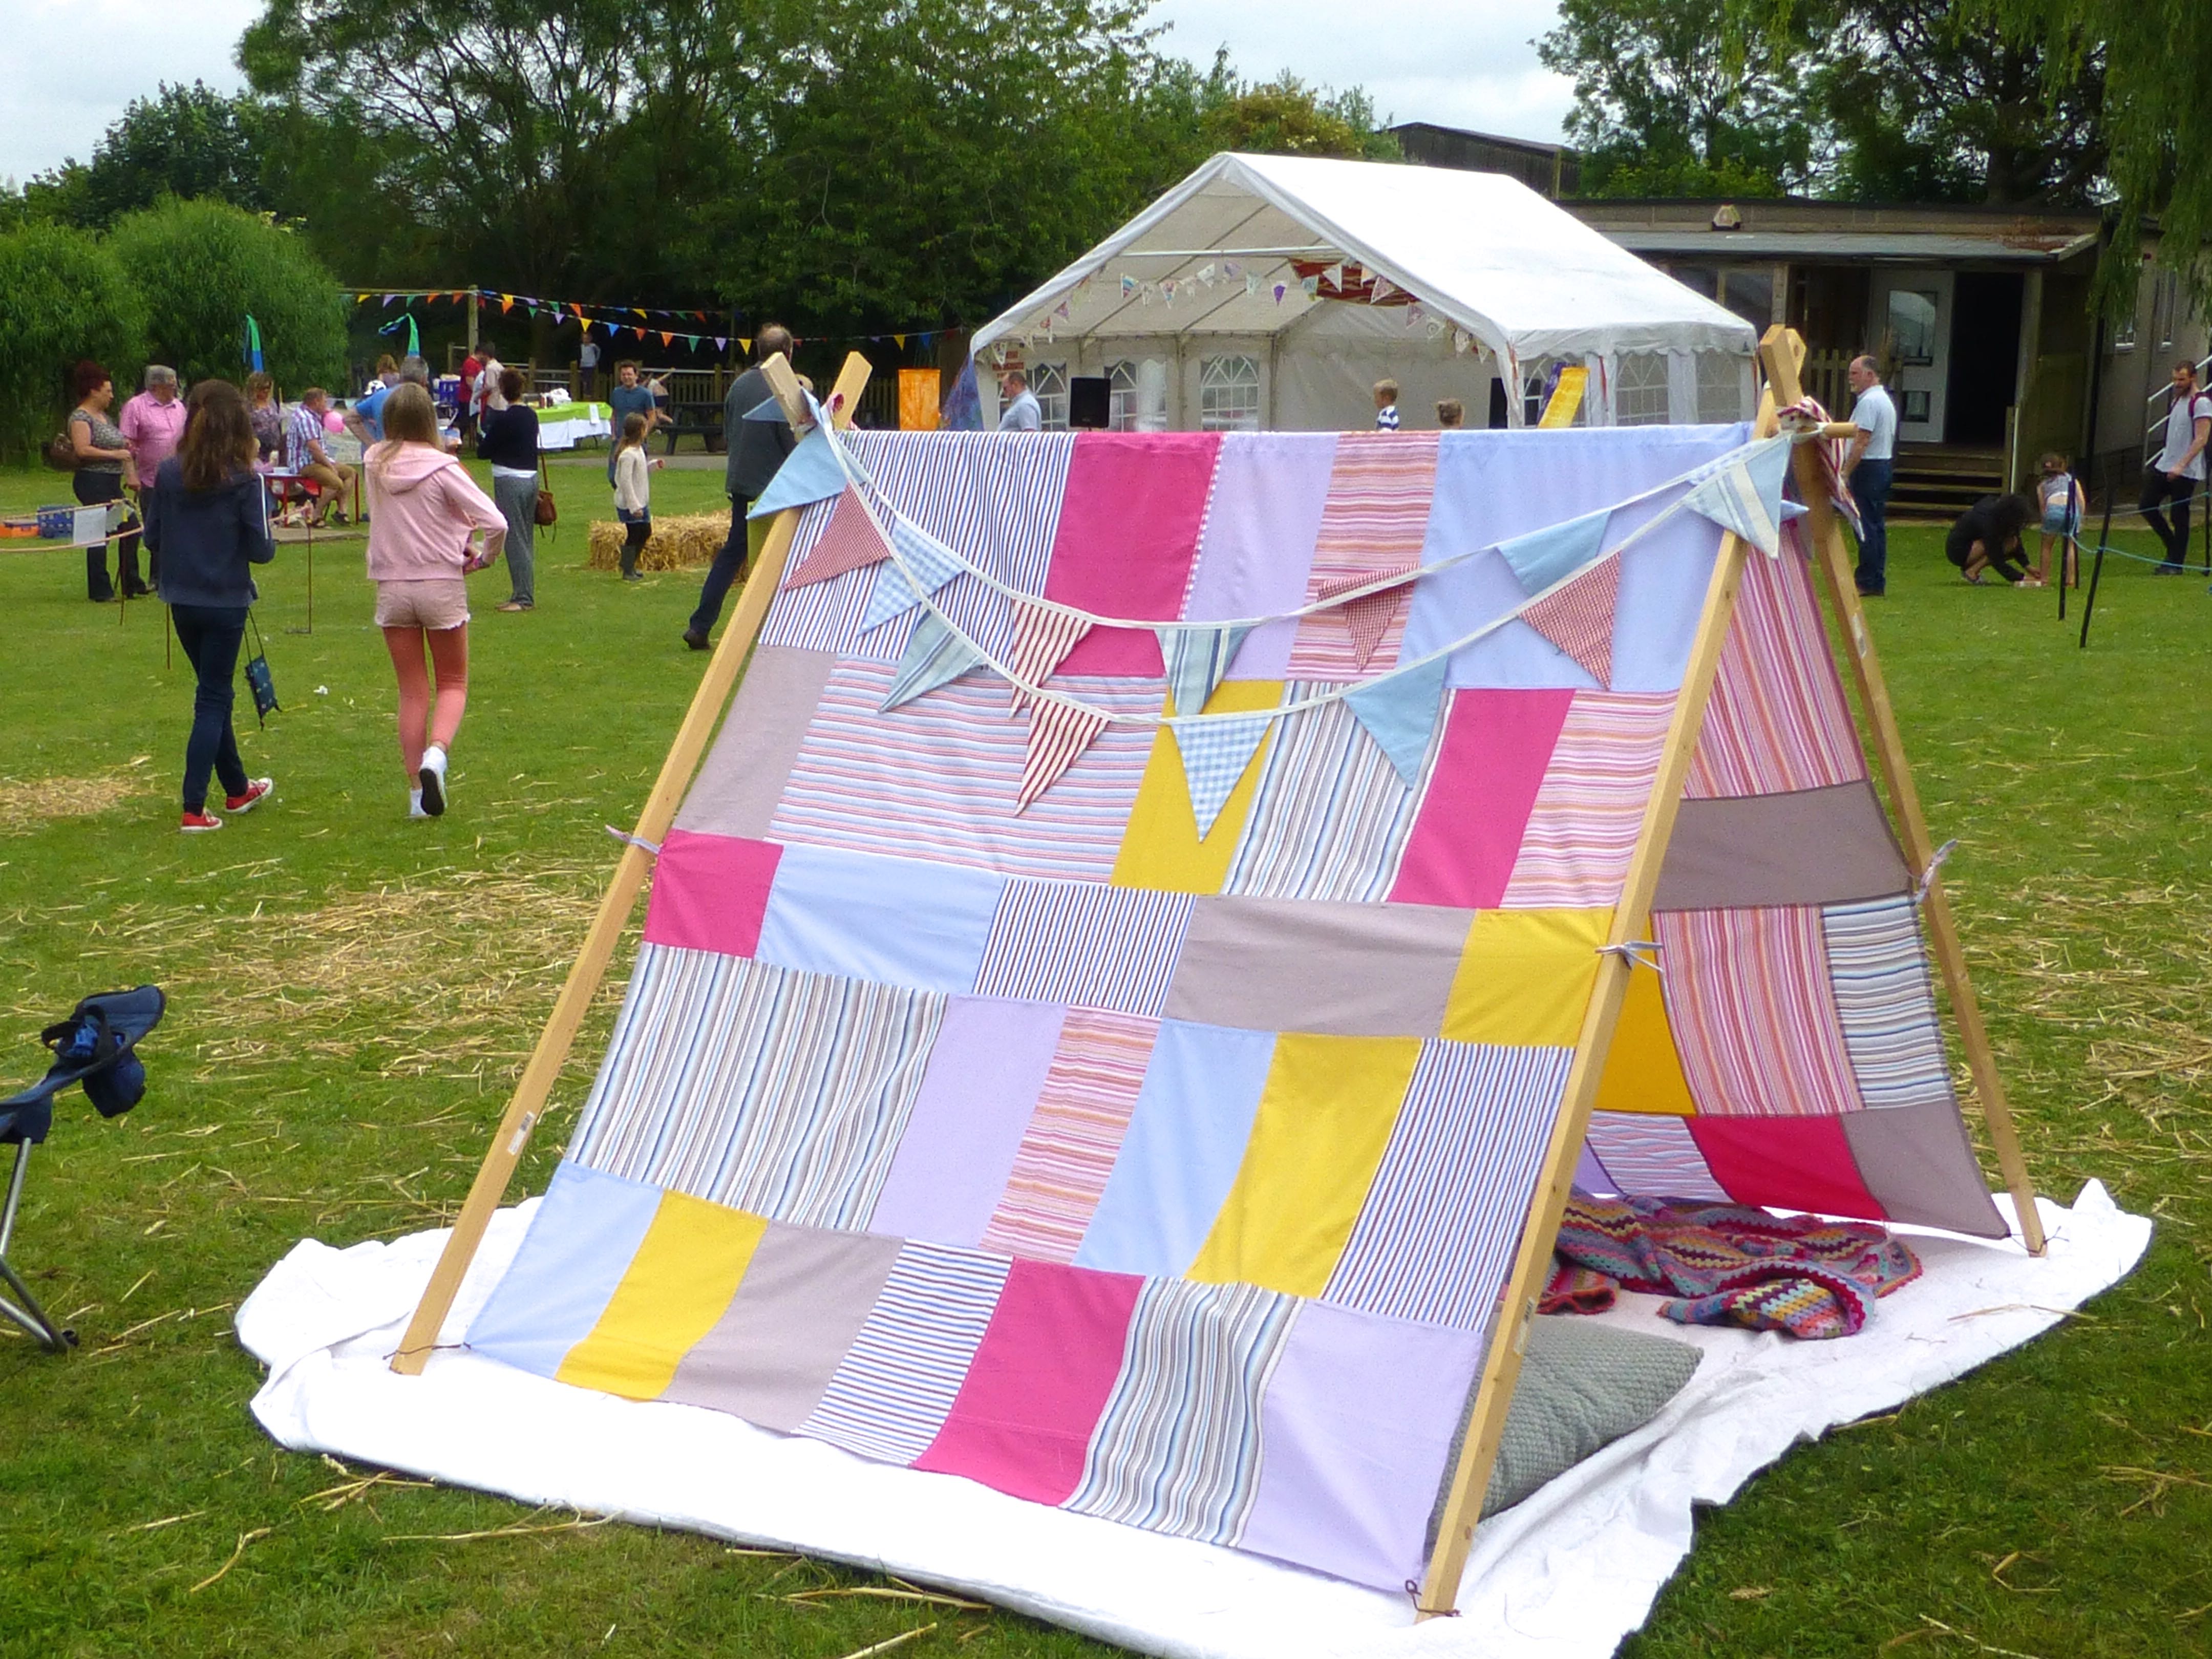
With the addition of some bunting, a blanket and some cushions, it makes a lovely spot for young children to play.
Or the perfect place for No.1 Son to shade his cider from the afternoon sun!

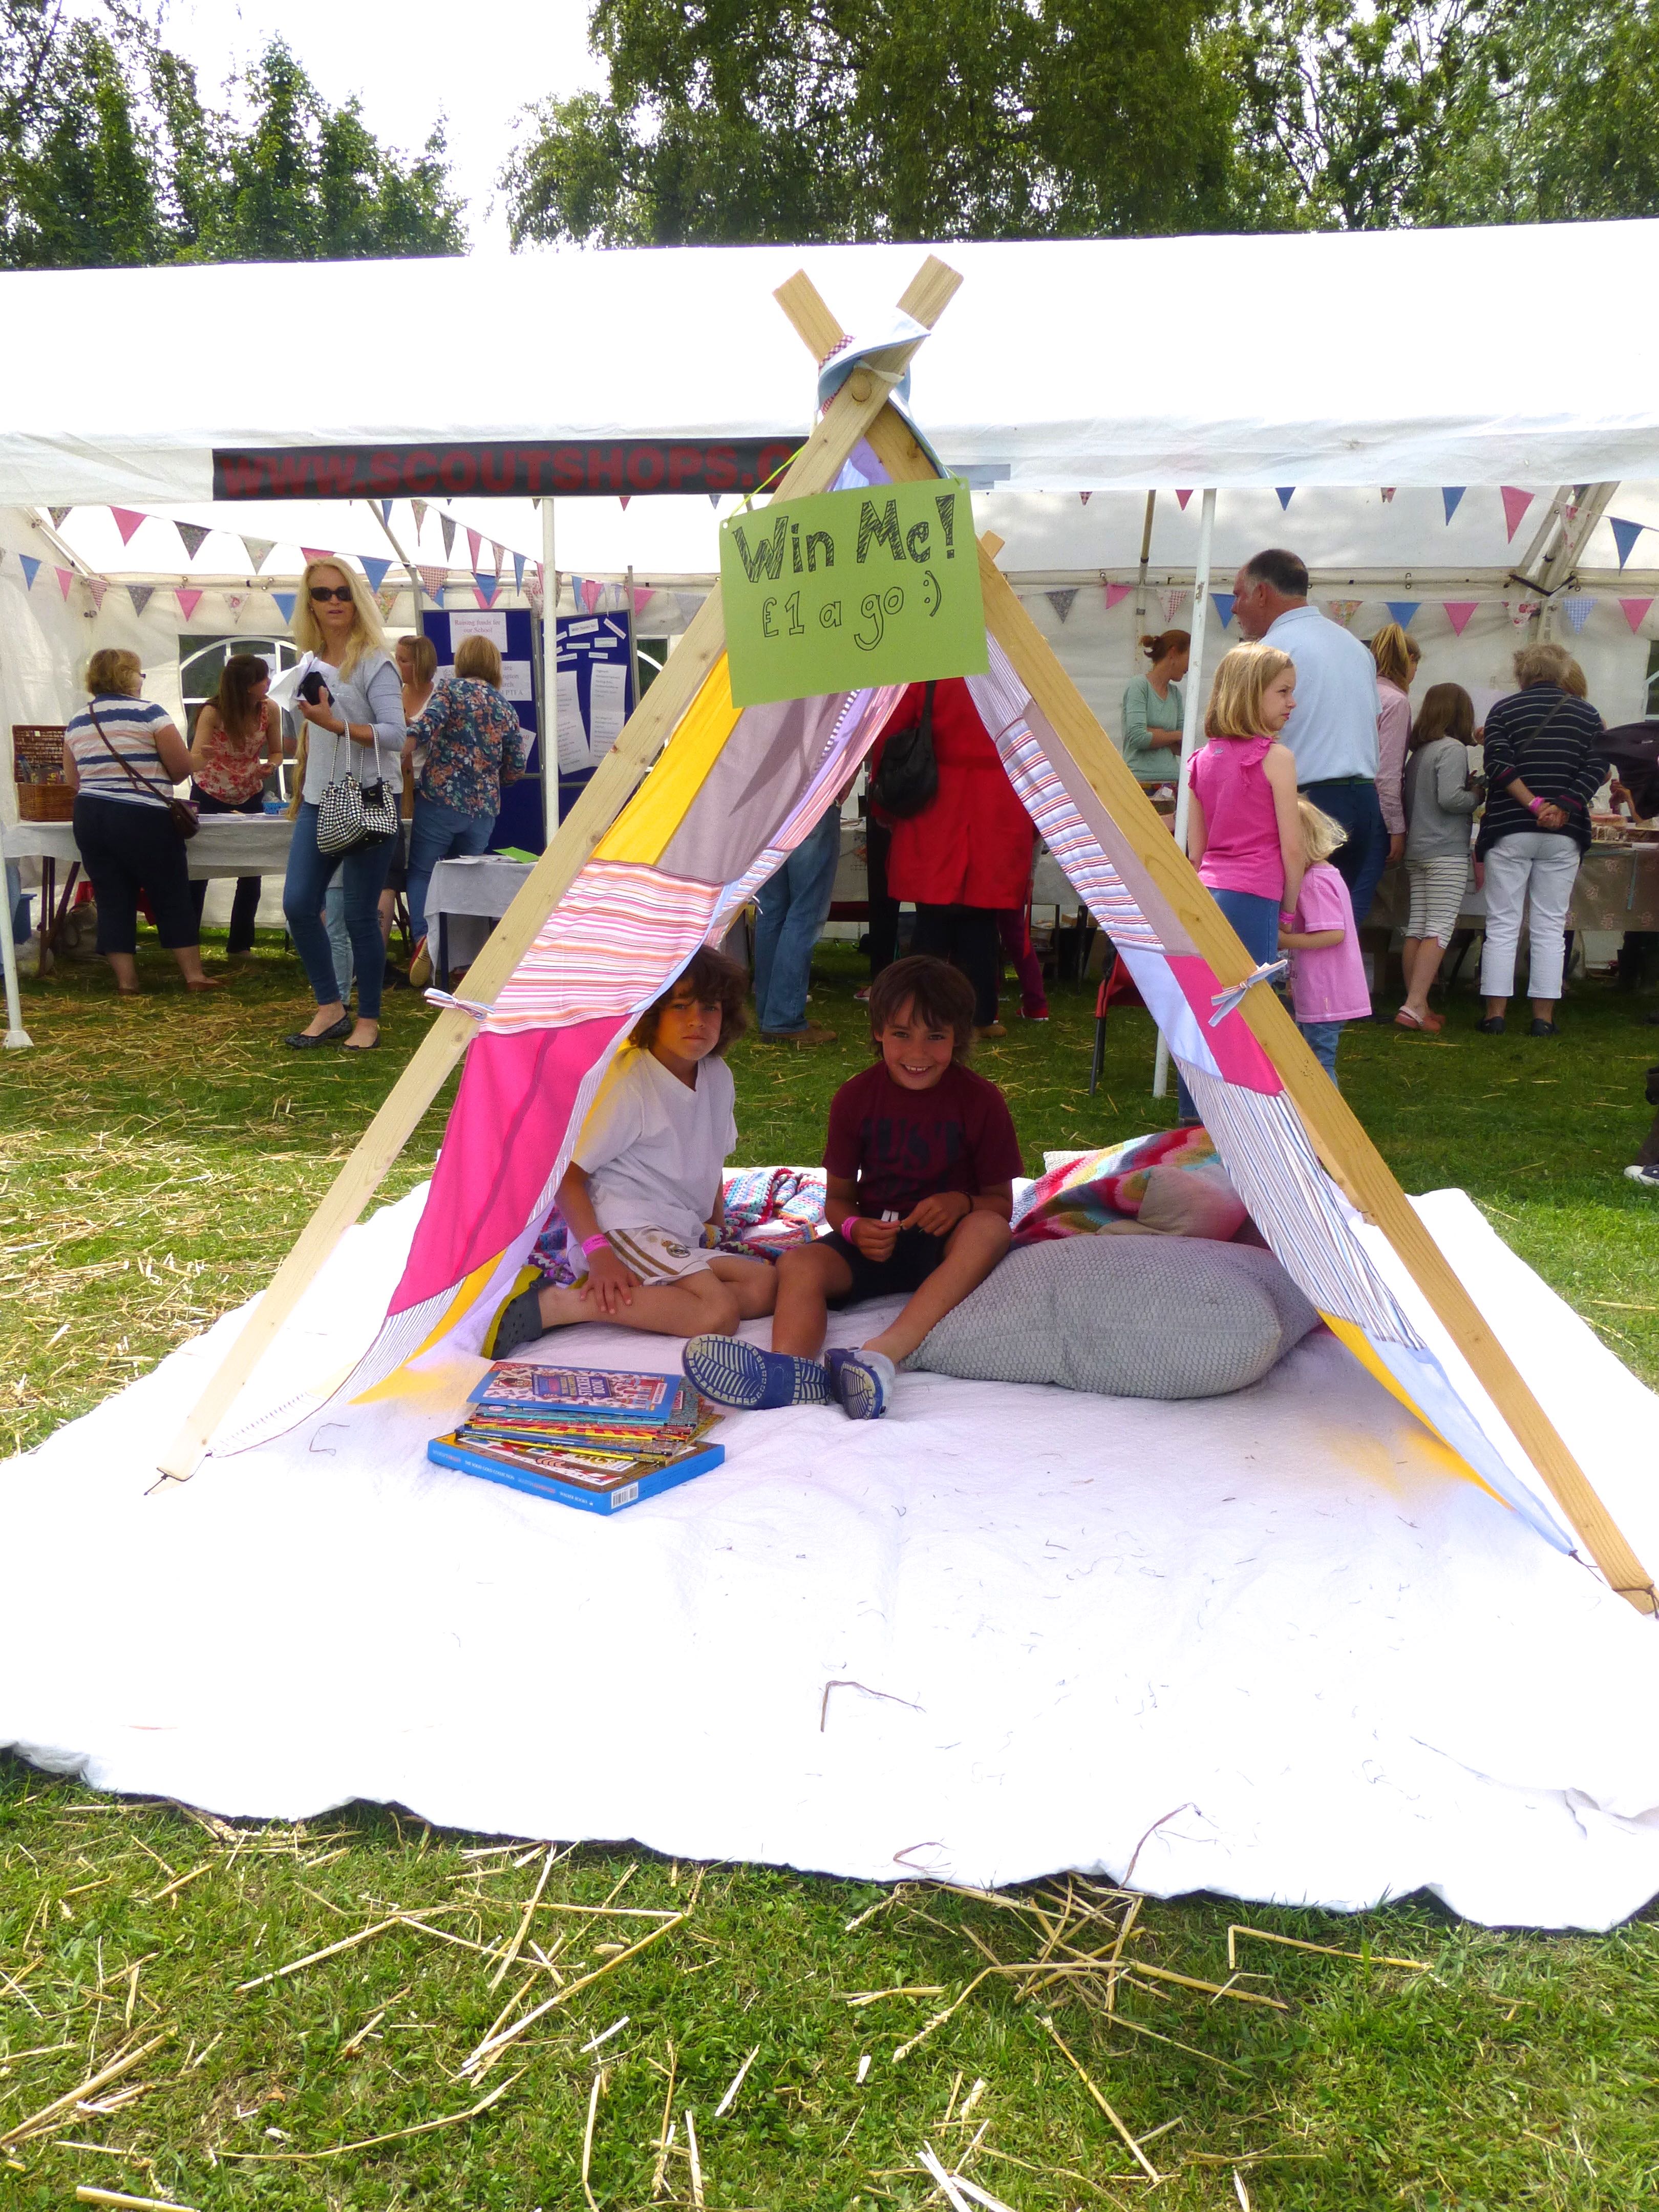
We sold raffle tickets for the tent and raised almost seventy pounds for the school funds!
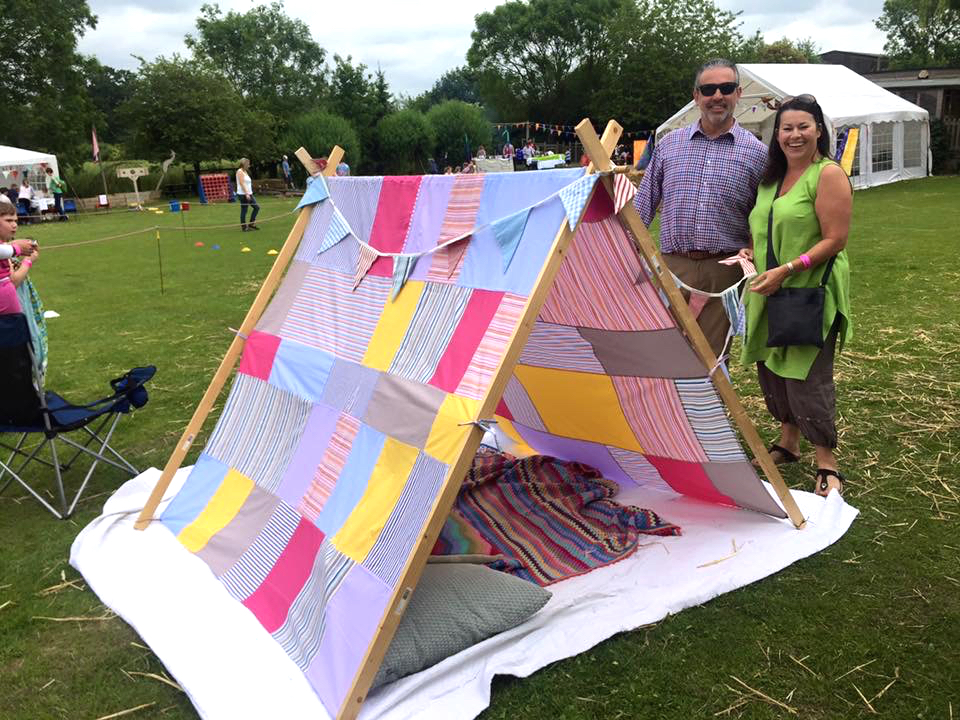
The lucky winner was thrilled to bits to win it for her little girls and, as it was such a success, I think I’m going to be asked to make one for next year’s fête.
Watch out Mr. H-L, I’ve got my eye on your shirts…..
