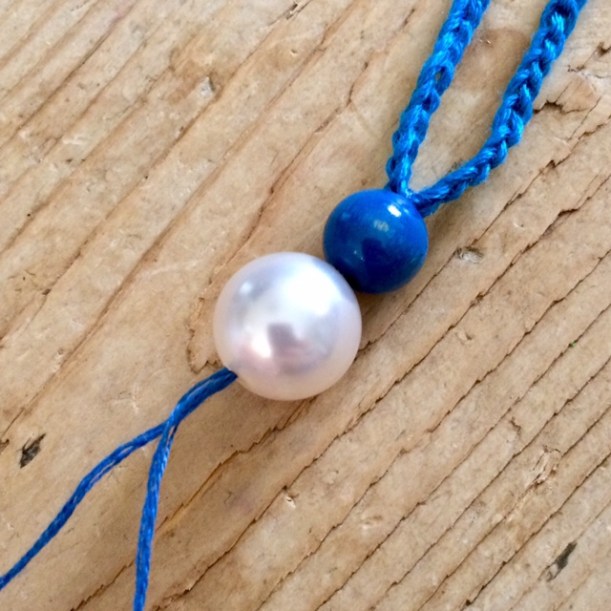
In my last post I showed you the necklace that I made to go with the top I had just finished, to add a bit of colour to the neckline.
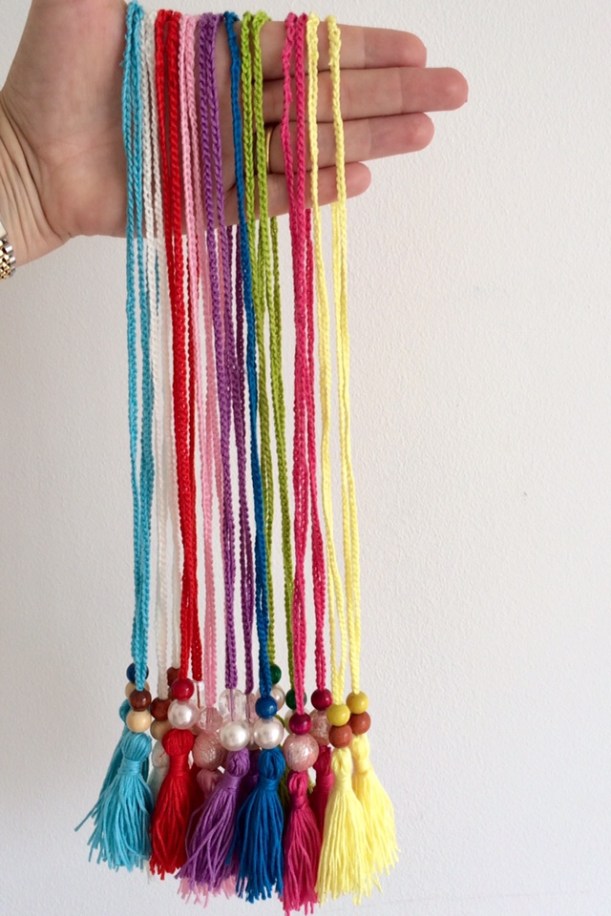
It was quick and easy to do, so I decided to make a whole bunch more for the school to sell at their Summer fair – and here they are!
The lovely folk on Instagram said that a tutorial would be nice, so here goes….
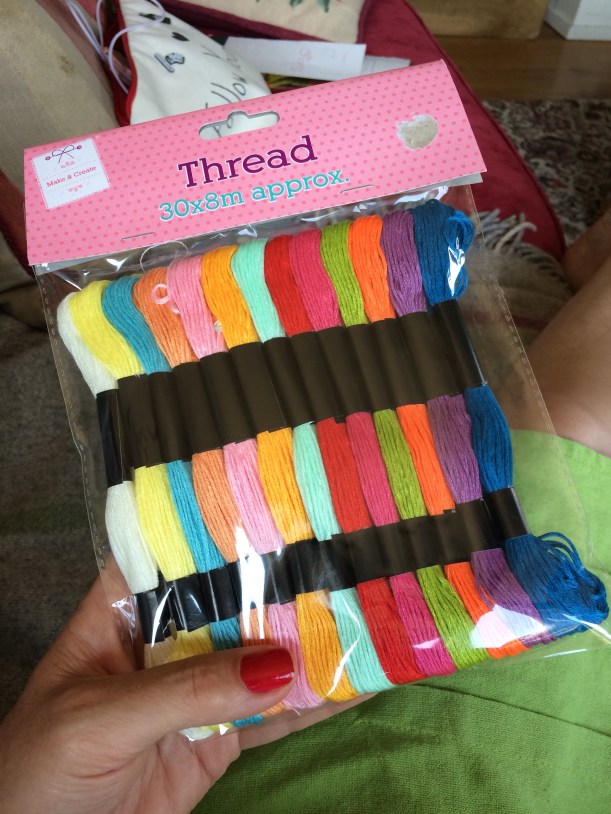
For each necklace you will need one skein of embroidery floss. I bought this packet of 30 for just £3.00 from The Works which, as most of the beads were rescued from broken jewellery, works out at only 10p each – perfect for the school fair, or any fundraising event.
I chose beads ranging from natural wooden ones to lace covered pearlescent ones.
For the necklace itself you will need a 2.5mm crochet hook.
Simply crochet a chain to your desired length then fasten off.
Tie the threads together in a double knot to complete the circle.
Weave in the ends through a few chains and trim neatly.
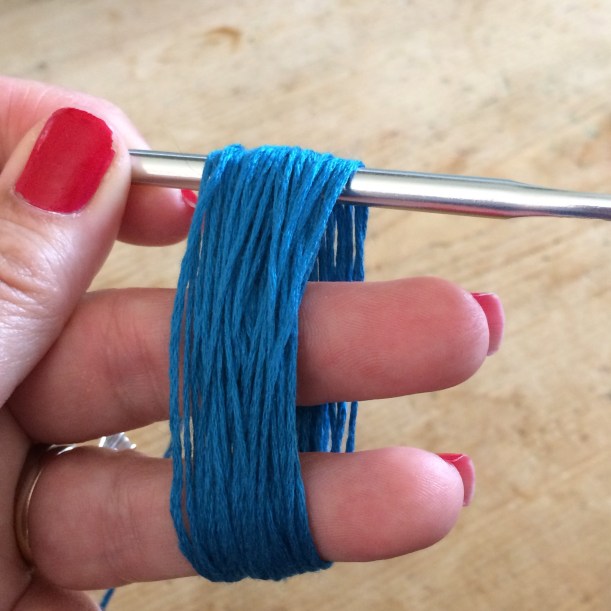
Using all the remaining floss, wrap it continuously around three fingers, leaving a tail of about 12″.
Take a 5.50mm crochet hook….
….and pass the handle through the loops as shown.
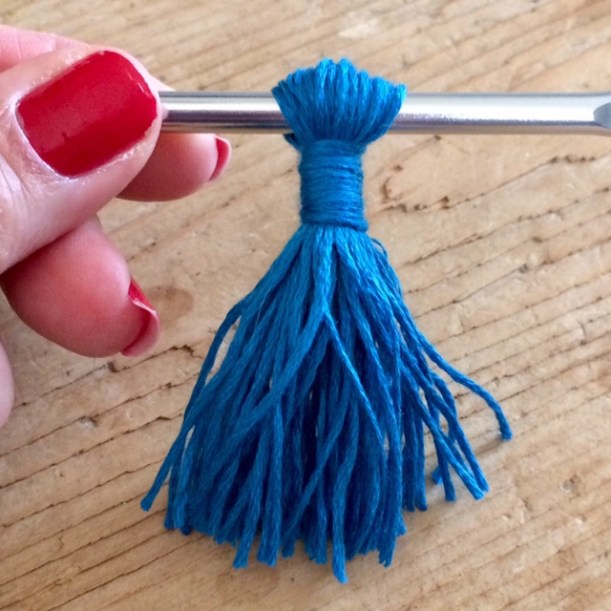
Using the 12″ tail, wind the floss tightly, close to the crochet hook.
Secure the floss with a knot.
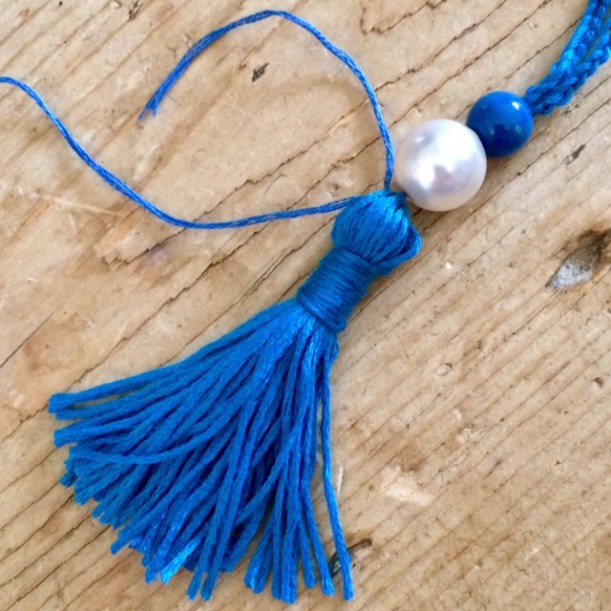
Cut through the bottom loops to form your tassel.
Leave the crochet hook in place for now.
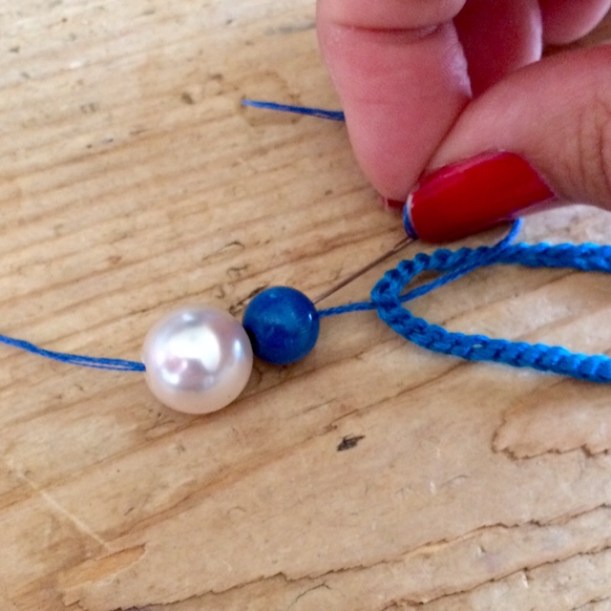
Thread a needle with about 10″ of matching thread.
Take your beads and, starting at the bottom, pass the needle up through all the beads, around the crocheted chain and back down through all the beads.
Push the beads up tight to the crocheted chain. Both ends of the floss should be hanging down from the bottom bead at this point.
Pass your needle through the top loops that are still on your crochet hook.
Tie the ends together securely.
Hide the ends by passing the needle through the wrapped section and trim to the length of the tassel.
And that’s it!
These are some of the other ones I made.
I think the girls at the school fair will have no problem parting with their pocket money for one of these.
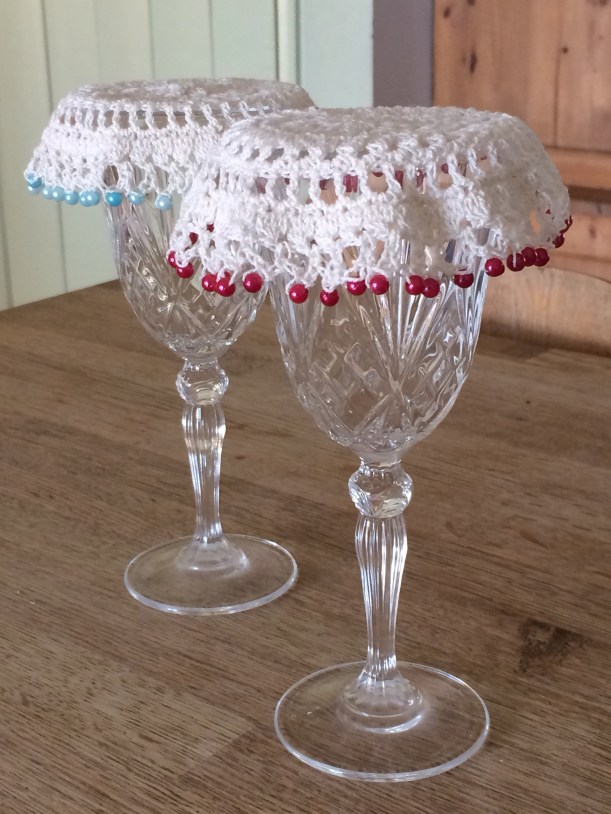
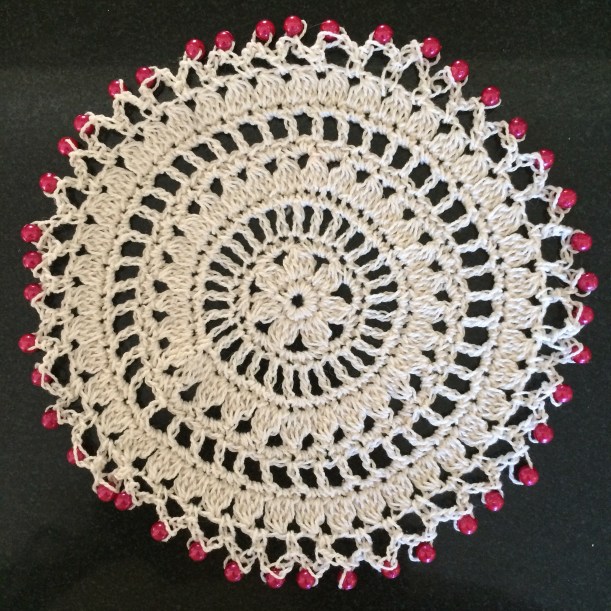
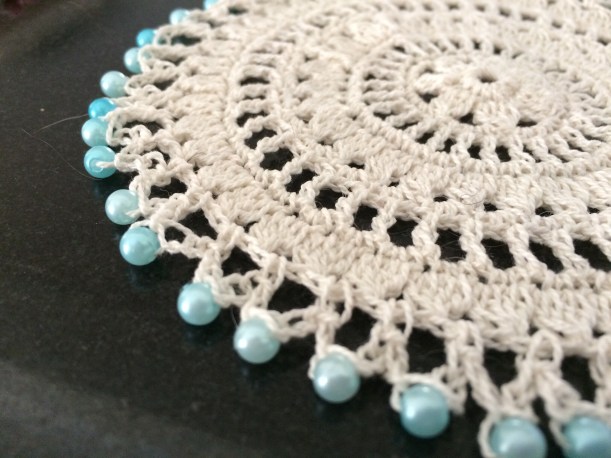
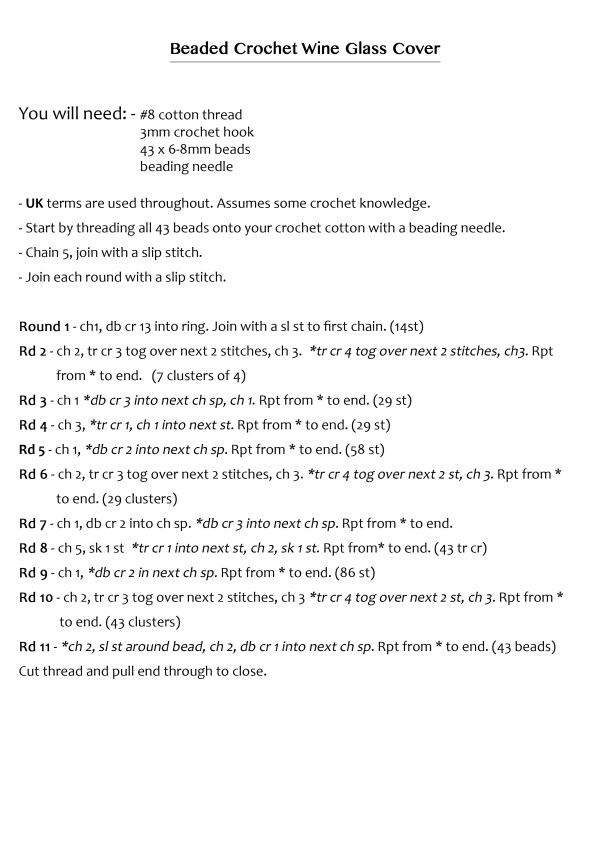
Following requests for a pattern after this blog post here, I finally have one for you! Click to open the printable PDF pattern, or it is written out at the bottom of the page.
I’d love to see any that you make, so please share pictures:)
Early on in the Stitching Santa, I had already decided that I was going to make a project bag for my ‘Yarny’ recipient as I knew I had lots of odd balls of yarn lying about. In effect, this was to be a ‘free’ handmade extra to add to the parcel as my £10 budget had been spent entirely on yarn.
Rooting through my leftovers to see what colours went well together, this is what I ended up with.
Quite nice and pastel-y, I thought, and the limited palette should be enough to make granny squares in a variety of colour combinations.
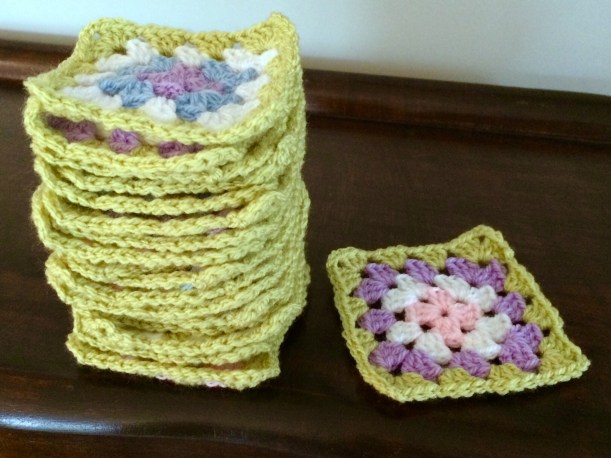
So, colours decided, I started on the squares and soon had a growing pile.
I used single crochet on the front to join the squares together, adding a bit of texture for interest.
I ended up with a rectangle of squares 10 wide by 3 high, and a base panel of 4 squares.
If you fancy making your own, you can use the photo below as a colour guide.
Obviously, the bag needed to be lined to prevent any knitting needles or crochet hooks slipping through. This was simply a process of cutting around the crocheted sections and adding a seam allowance.
Next, I crocheted the short edges of the bag together to form a tube.
Then the bottom panel was single-crocheted in place.
The lining was sewn by machine in the same way.
Two handles were crocheted as below with a starting chain of 75.
The handles were sewn in place by hand, before sewing in the lining.
The lining was just oversewn around the top edge only.
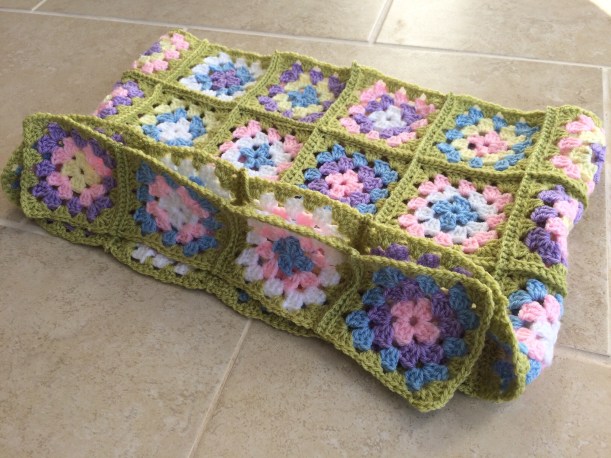
Here’s the finished bag: –
I added one of my labels, of course:)
It’s a good size for a jumper or something similar, so should prove quite useful to my secret recipient – let’s hope she agrees!
This has been gifted now, so I can share with you what I made for our granddaughter’s second birthday.
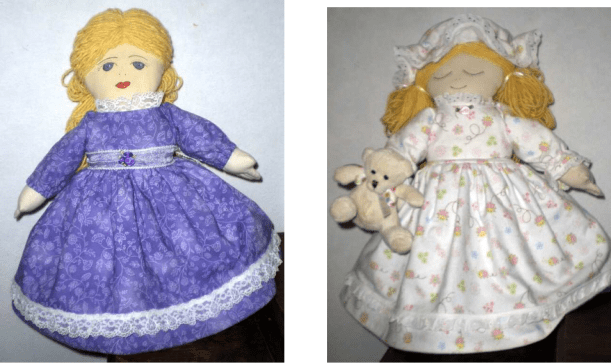
Do you remember having a Topsy-Turvy doll as a little girl? I do, and I also remember absolutely loving her, so I knew I was going to have to make one for our granddaughter.
I found a free tutorial at Keepsake Crafts and pretty much followed it to the letter. This is her version, a daytime/bedtime doll: –
Although you can be more creative and do many other things like a Red Riding Hood/Wolf doll, or a Beauty/Beast doll, I decided to stick to the traditional daytime/bedtime doll.
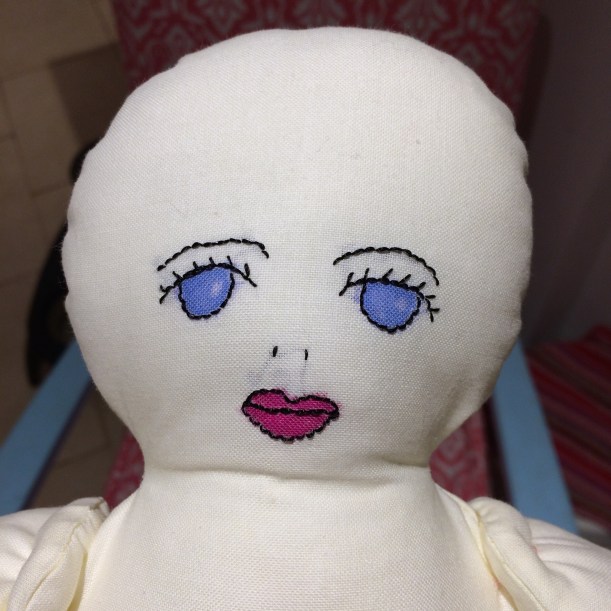
You start off by embroidering the faces and I simply coloured in the eyes and mouth with permanent marker pen.
I wish I’d backed the faces with interfacing now, as the black embroidery thread shows through in places, but hey-ho.
When the body is assembled and stuffed, at this stage it looks a bit like Frankenstein’s experiment!
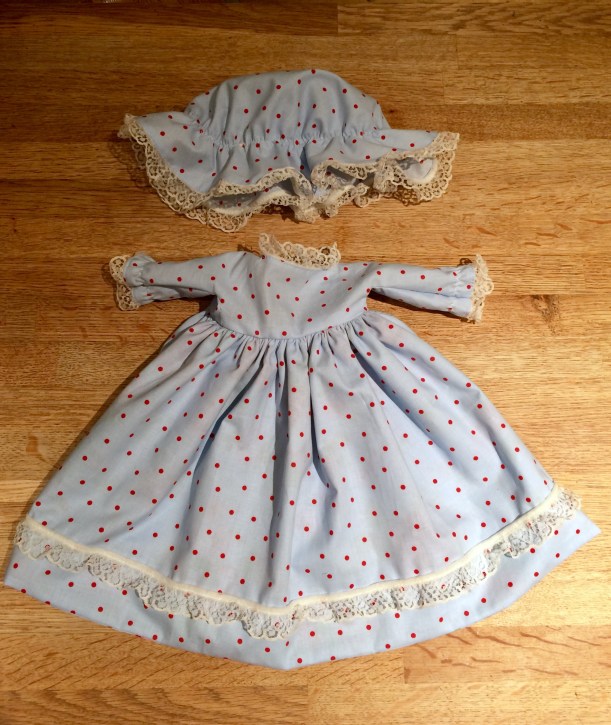
I used coordinating fabrics for each dress, originally from Ikea, I think; floral for the day dress and spotted for the nightgown and cap.
I had plenty of lace in my stash to trim both dresses.
The hair was easy enough – just a ball of yarn wrapped around a book and sewn through all layers in the centre to keep it together.
The wig is then stitched on to the head, sewing over the previous line of stitching. Easy.
The daytime doll had her hair drawn back into a neat ponytail and tied with a bright red ribbon to go with her dress.
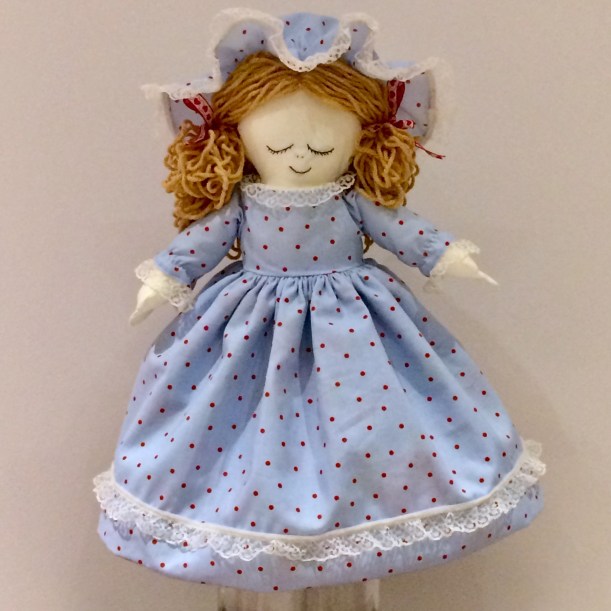
The bedtime doll had her hair in bunches held with some red heart ribbon.
A nice touch is to create fingers with three lines of stitching.
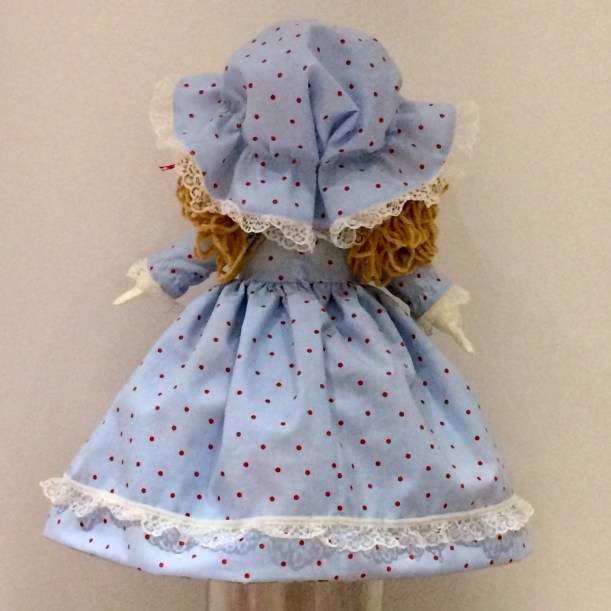
Here she is, all finished, in her daytime mode.
Doesn’t the hair look pretty from the back?
The sleepy side has a matching bonnet to go with her nightgown.
It’s a great tutorial which includes an easy to follow pattern, so why not give it a go for a little girl you know?
No, your eyes don’t deceive you, this IS yet another post featuring the lilac faux sheepskin fabric I bought last month. It really has been the fabric that keeps on giving as I have made not only a full length coat and two pairs of mittens, but also TWO tote bags!
If you would like to make your own, either from similar fabric or from a thick fleecy fabric, here’s a quick tutorial on how I did it.
Materials: Approx. 3/4yd of 45″ wide Faux Sheepskin or fleece
2 Magnetic Snaps
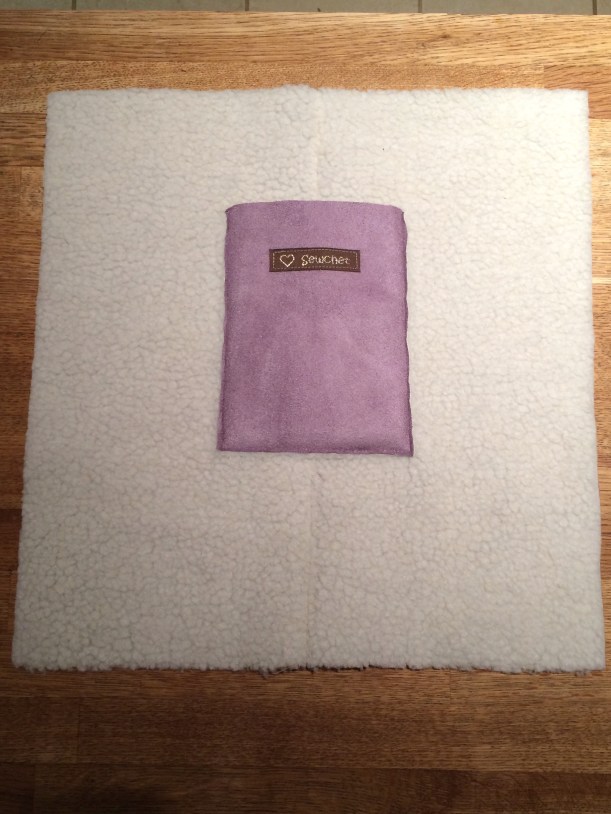
Cut pieces from your fabric following the diagram below (which is NOT to scale). If your fabric has a nap or a directional pattern, be sure to take this into account when cutting out.
You may have to adjust the size of the pocket to suit your particular ‘phone – this pocket is the perfect size for a normal (not ‘plus’) iPhone and you may well have to make it larger for a Samsung Galaxy or similar.
This photo shows the main pieces; front and back, gusset and interior mobile ‘phone pocket.
Seam allowances are 1/4″ throughout.
All raw edges are left unfinished and the seams are constructed with WRONG sides together, making a feature of them.
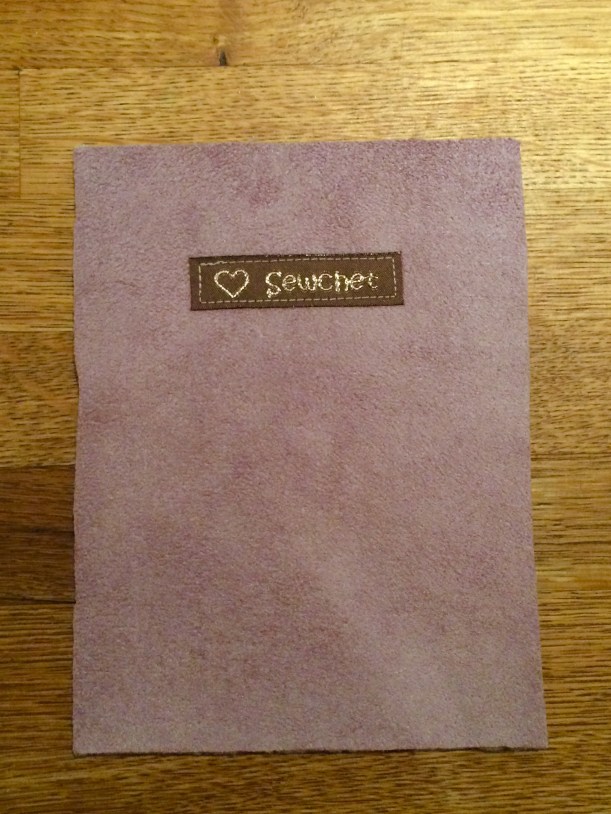
If you have your own labels, sew them to all pieces before any construction takes place. This avoids any fiddly sewing later on.
Sew your pocket to the inside of the BACK section of the bag around three sides only, leaving the top open.
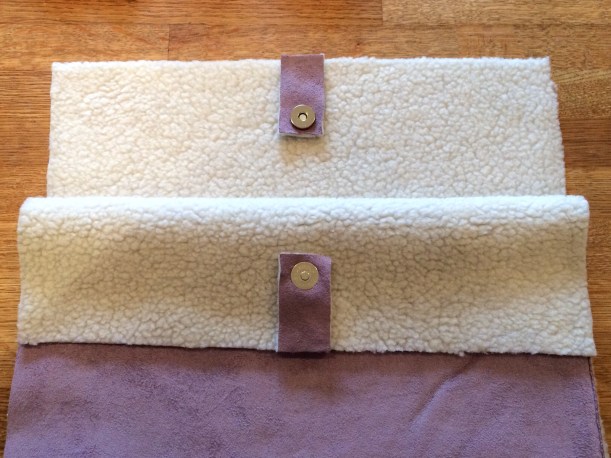
Apply the magnetic tabs according to the manufacturer’s instructions, using the photos as a guideline for placement.
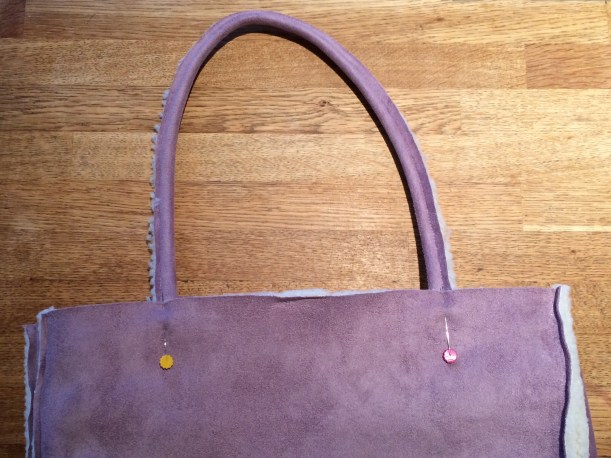
Pin a tab to the top centre of the front and back sections.
Sew in place.
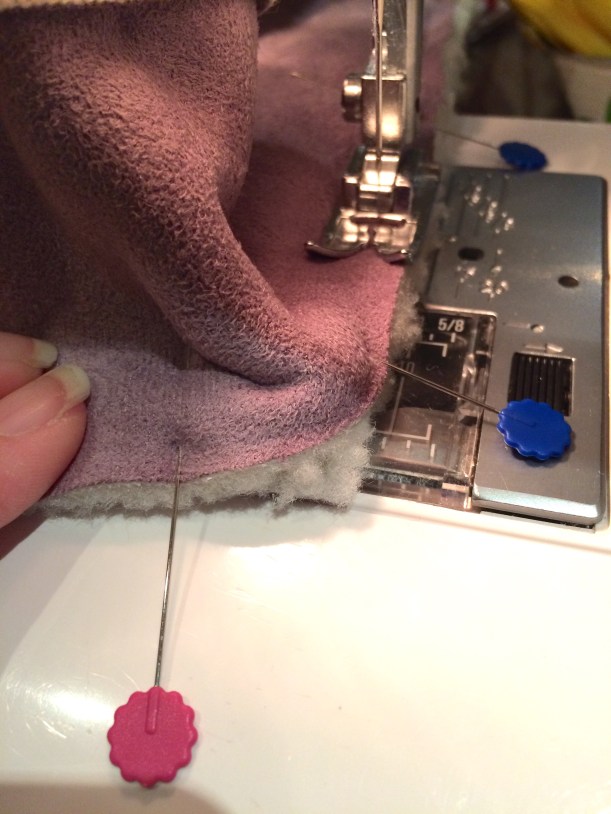
Pin the gusset to the back section with WRONG sides together. There will be surplus fabric to cut off later.
Stitch with 1/4″ seam allowance, being careful not to get any puckers as you sew around the corners.
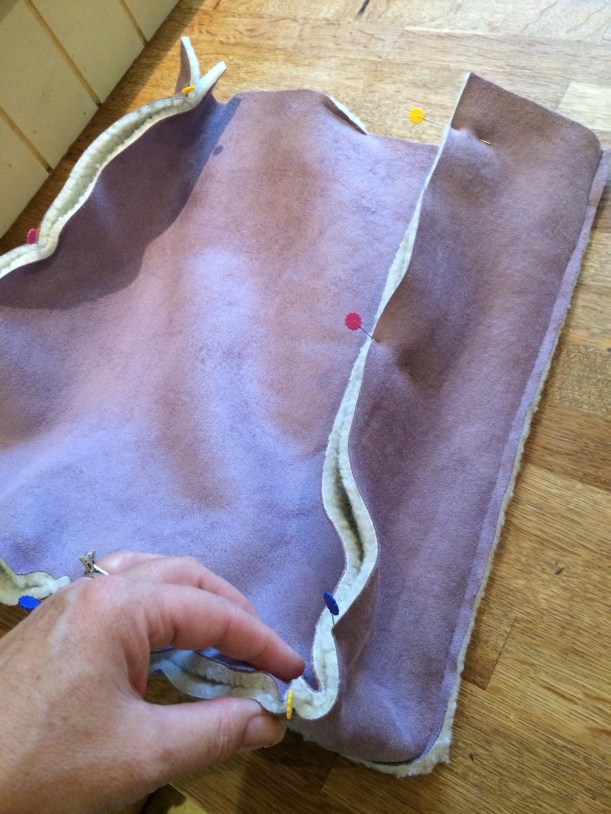
Pin the front to the remaining long edge of the gusset and stitch as before.
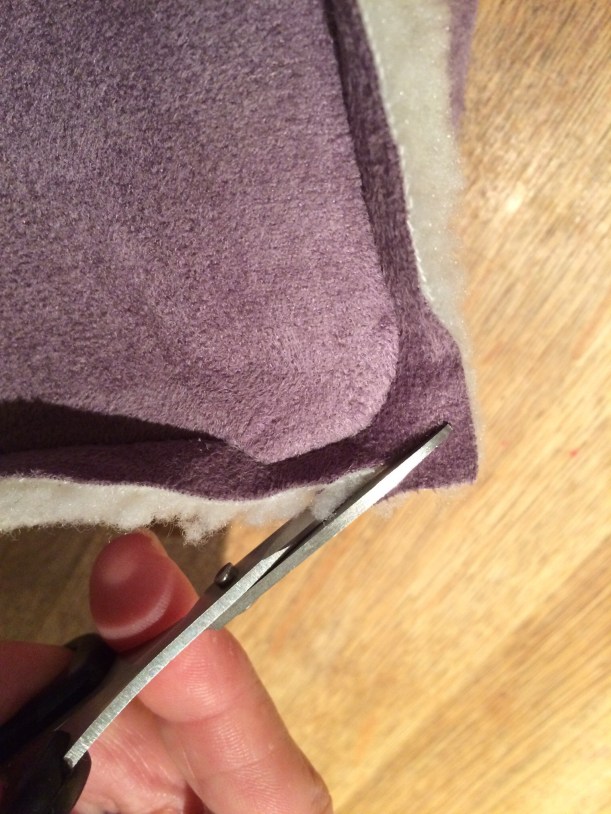
Trim the corners off the front and back sections to give a rounded finish.
Onto the handles.
Fold in half lengthways with WRONG sides facing in.
Stitch close to the raw edges.
Pin handles about 3″ in from the sides of the bag, on the INSIDE.
BASTE loosely in place if necessary, although I just pinned them.
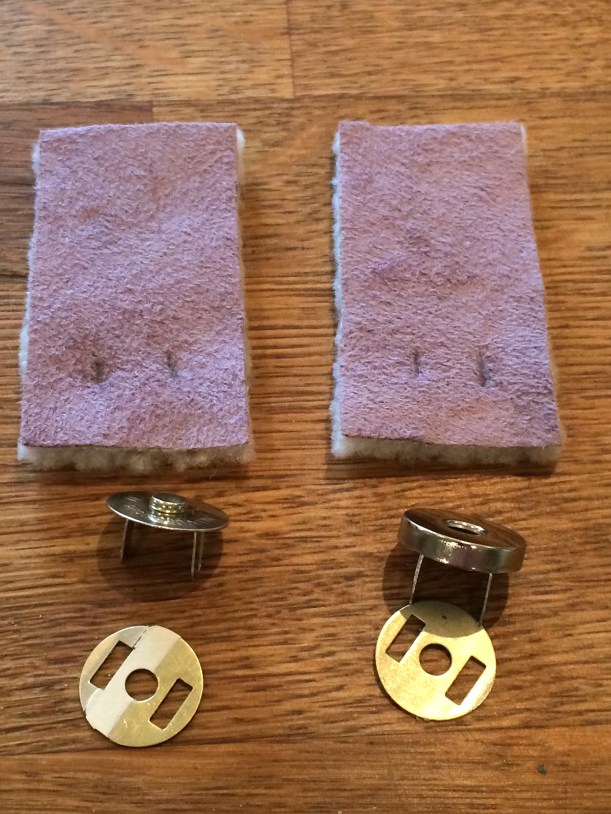
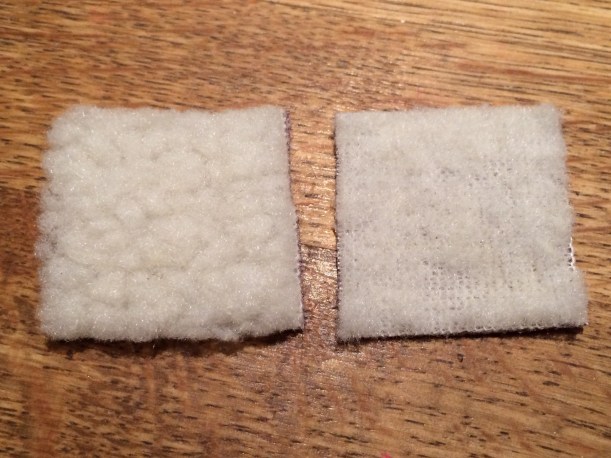
Take your 4 little squares – these will cover the ends of the handles to lend a neat finish on the inside of the bag.
You will need to remove as much of the pile on the reverse side of the fabric as possible. This will reduce the bulk and leave a flatter surface.
Pin each square over the raw edge of a handle and stitch in place, crossing your stitching to strengthen the base of the handles as shown below.
And that’s all there is to it!
This is the first one I made.
I even managed to make a second one using the rest of the scraps. There wasn’t enough to cut the main sections out in one piece, so I had to make a seam for the centre front and back, and I actually prefer this version.
I added my label in a slightly different position and it looks just as good.
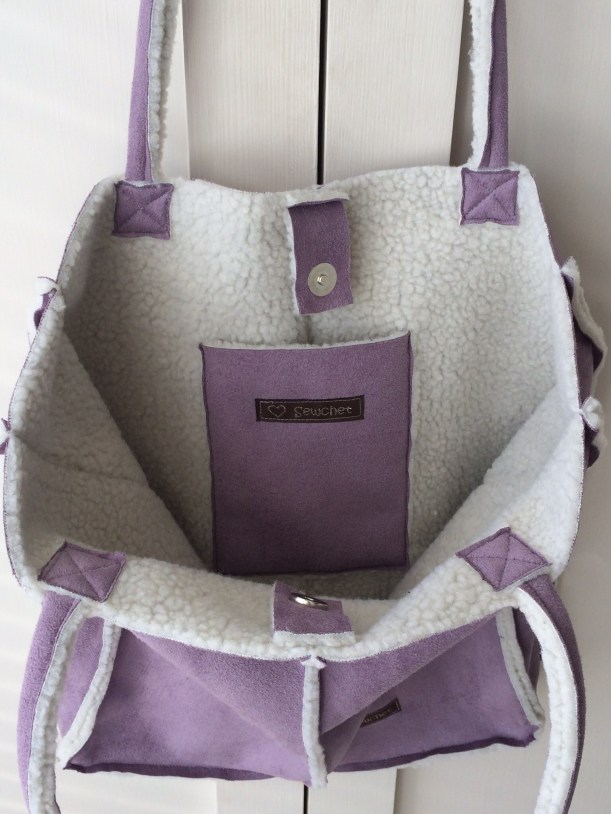
The inside is nice and roomy with the all-important interior pocket to keep your ‘phone easily accessible.
The magnetic tabs give an element of security and stop the bag falling open.
As always, your own label adds a professional touch both inside and out.
The handles are short enough not to have the bag dragging on the floor (if you’re around the 5″ mark like me!), but also long enough for you to carry over your shoulder if that is your preference.
One of these is to be a Christmas gift for family and the other one may well end up in my Stitching Santa parcel, depending on who I get in the draw.
Well, despite messing up the sleeves and having to re-cut them, I still had some largish scraps of fabric left and started looking for ways to use them up, preferably for Christmas presents or for something to add to my Stitching Santa parcel. The first and most obvious thing that came to mind was to make a pair of mittens.
Having trawled the internet for a pattern, I discovered that it would probably be just as easy to design my own based on a few that I’d seen, so I gave it a go and this is the result.
They turned out better than I imagined and only took a couple of hours, most of which was taken up hand-sewing the thumb in place.
Boosted by my success, I thought I’d do a quick tutorial as these would make a great handmade Christmas gift. They would be great in a fleecy fabric, too, as the raw edges can just be left as they are without fraying.
There are just two simple pattern pieces to this pair of mittens; click on the links below to download and print.
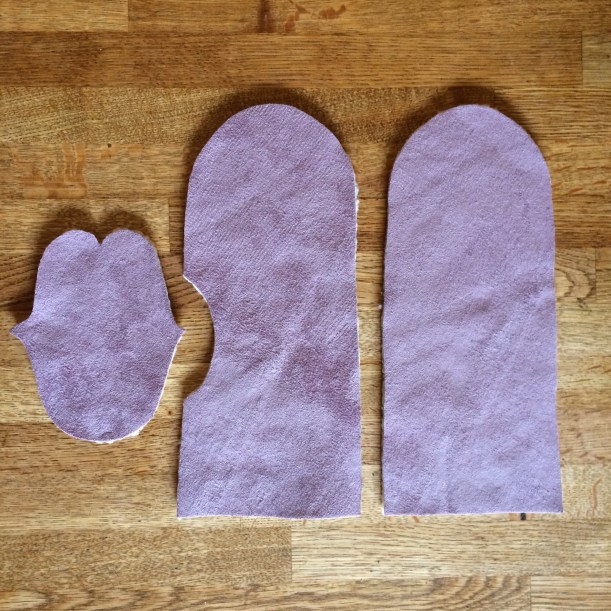
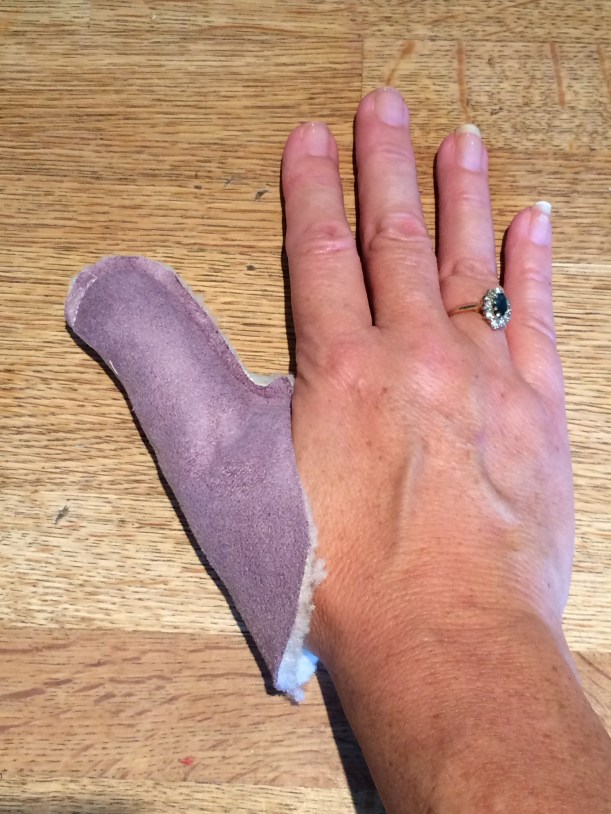
Cut out the pieces as below for each mitten, reversing the template for the second mitten.
You will notice that the TOP of the mitten has been cut out WITHOUT the curve. To do this, simply draw a straight line connecting points D+E on the MITTENS template.
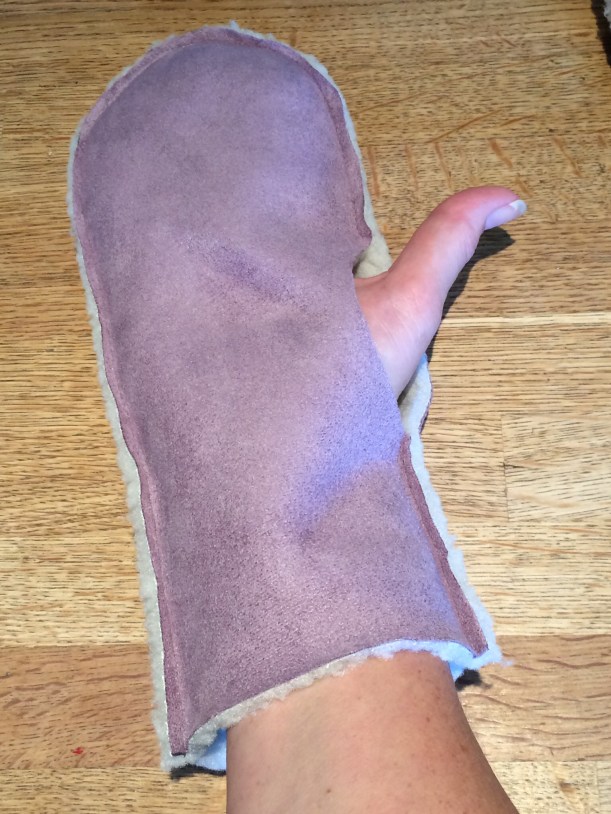
Make sure that any stretch in the fabric goes ACROSS the hand width – you can see where I am pulling the fabric to find the stretch in the photo below.
You may also spot in the photo above that the first draft was one piece folded in half. I later adapted this to make two separate pieces so that there would be a seam all the way around.
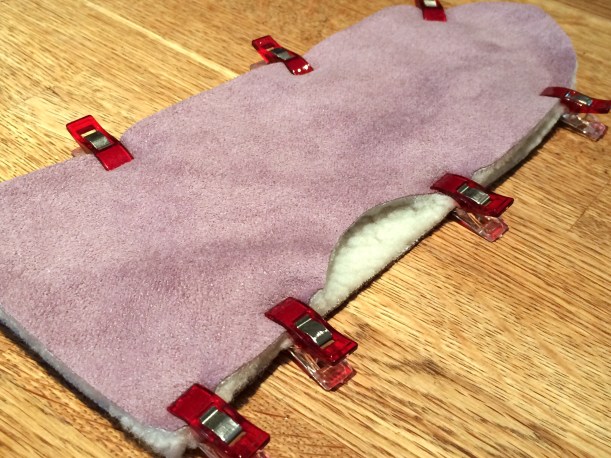
Pin the top of the mitten (no curve) to the bottom (with curve) with WRONG sides together. You may find this easier with quilting clips if the fabric is thick like mine.
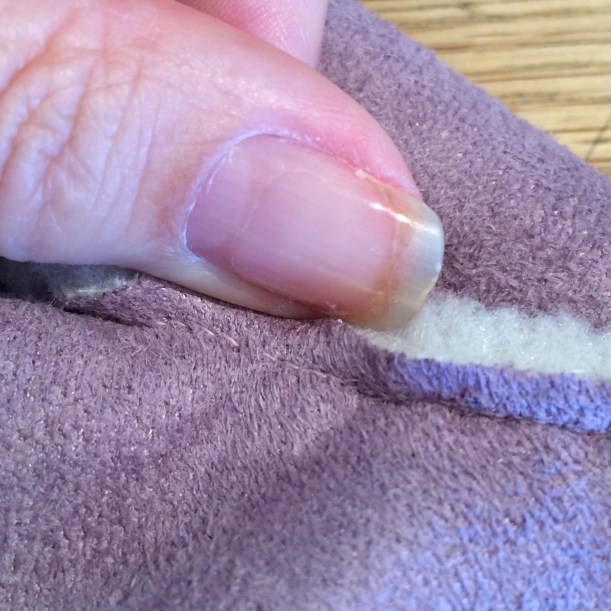
With 1/4″ seam allowance, sew from A to D and from B to E, leaving an opening for the thumb.
With WRONG sides together and 1/4″ seam allowance, fold the thumb in half and sew from C to D.
Pin the thumb in place.
Hand-sew the thumb to the body of the mitten with a BACKSTITCH, 1/4″ from the raw edges.
You can trim any excess fur from the seams if you like, to tidy them up, but that’s it – finished.
How simple?
They really are lovely and cosy and much more pliable than real sheepskin, so are much more comfortable to wear.
I managed to get a second pair of mittens out of the scraps, so I am going to put one pair in my Stitching Santa parcel and the other will be a Christmas gift for someone in the family.
Talking of Stitching Santa the deadline is 31st October – have YOU signed up yet?
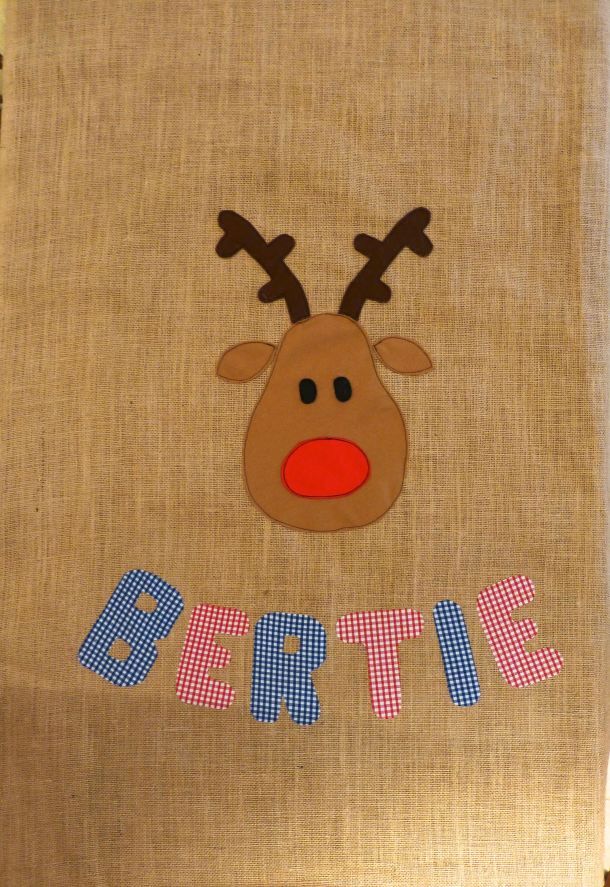
In case you hadn’t noticed, Christmas is just around the corner – nine days, to be precise and I’ve got a great last-minute make for you; a personalised Christmas sack for that special little person in your life.
I’m not joking when I say last-minute as I made TWO personalised sacks yesterday afternoon, each one taking about two and a half hours from start to finish. They’d make great gifts, too, with a little something popped inside and they only cost £12.94 each to make so won’t break the bank.
Trim your gingham fabric to the same size as the hessian – 39″ x 56″.
Put the offcuts to one side as you will use these for the tie and the fabric letters.
Draw a reindeer on a sheet of paper and cut out the individual elements separately.
Cut these out of the felt squares using the picture below as a guide.
Stitch the nose and eyes onto the felt face – I used free machine embroidery throughout to achieve a ‘scribble’ effect which works well on children’s gifts.
Fold your hessian in half and arrange the felt pieces in the centre as shown.
Hessian has an open weave which tends to move quite a lot, so either tack your appliqués on first or use LOTS of pins to keep them in place while you sew them on.
I loathe tacking so I opted for pin overkill instead.
With the reindeer face stitched securely in place, it’s time to move on to personalising your sack.
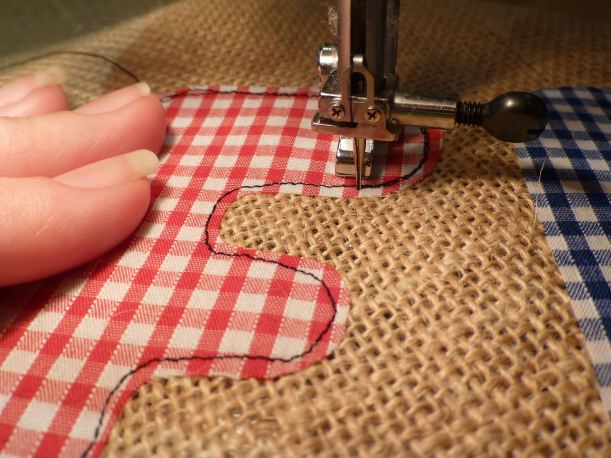
You can download a suitable font or just freehand it like I did onto thin card. As I was making two sacks I had both blue and red gingham offcuts to cut the letters from. I also decided to use some paper backed fusible web to secure the letters to the hessian before stitching them.
Arrange the letters evenly in a curve around the bottom of the reindeer, remove the paper backing and iron in place.
Two rounds of stitching on each letter gives a good effect.
When all your stitching is done, sew the top edge of the sack to the top edge of the lining with right sides together (sorry, no photo). Press the seam flat to create a crisp edge.
Then, lay your fabric out on a large table or on the floor and fold in half lengthwise, right sides together to create a ‘tube’.
Pin all the way around, leaving a gap in the lining where shown through which to turn. (I forgot to photograph this step on the first sack so the lining is shown in red).
Put pins at 8″ from the top edge and 9″ from the top edge – this will be a break in the stitching to provide a channel for the tie.
Sew all the way around the three sides with breaks in the stitching as described above.
Trim the corners and turn the sack through to the right side. Sew the lining closed at the gap through which it was turned. Press.
With a soft pencil or tailor’s chalk, mark two parallel lines all the way around at 8″ and 9″ from the top edge of the sack. Pin through both layers of fabric. Stitch along the lines.
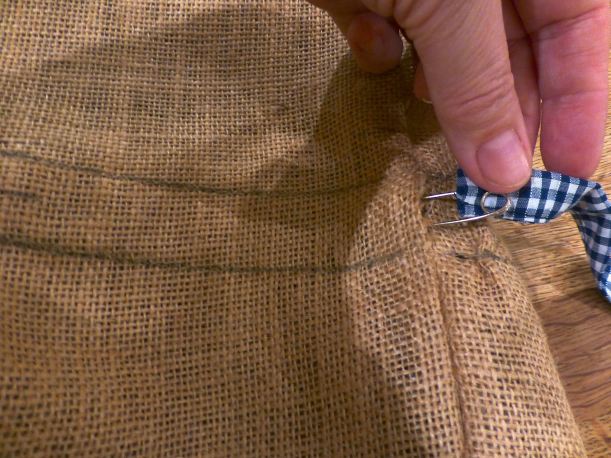
For the tie, use your remaining offcuts of gingham to assemble a length that measures about 70″ x 2″.
Fold in and press 1/4″ at each short end.
Fold in and press 1/4″ along each long edge.
Bring the folded long edges together enclosing the raw edges.
Stitch close to the edge to finish your tie.
Use a safety pin to thread the tie through the channel in the gap left for this purpose.
And that’s it – finished!
A beautiful sack which any child would be delighted to have on Christmas Day to pop all their opened presents into.
They’re huge, too, I would have added The Boys to the photo for scale except that the sacks are a surprise for them.
You’ve still got time, so who fancies whipping up a Christmas Sack for their little boy or girl?
I was contacted recently by Craftseller magazine in relation to their “Blogger of the Month” feature and was asked if I would like a free double page spread in their magazine.
Um, let me think a minute…..yeeees!
As part of the feature I designed a free pattern for the readers, which was to be copyright-free allowing full reproduction rights. This was harder than it initially seems, I mean, what could I design that hadn’t been done before????
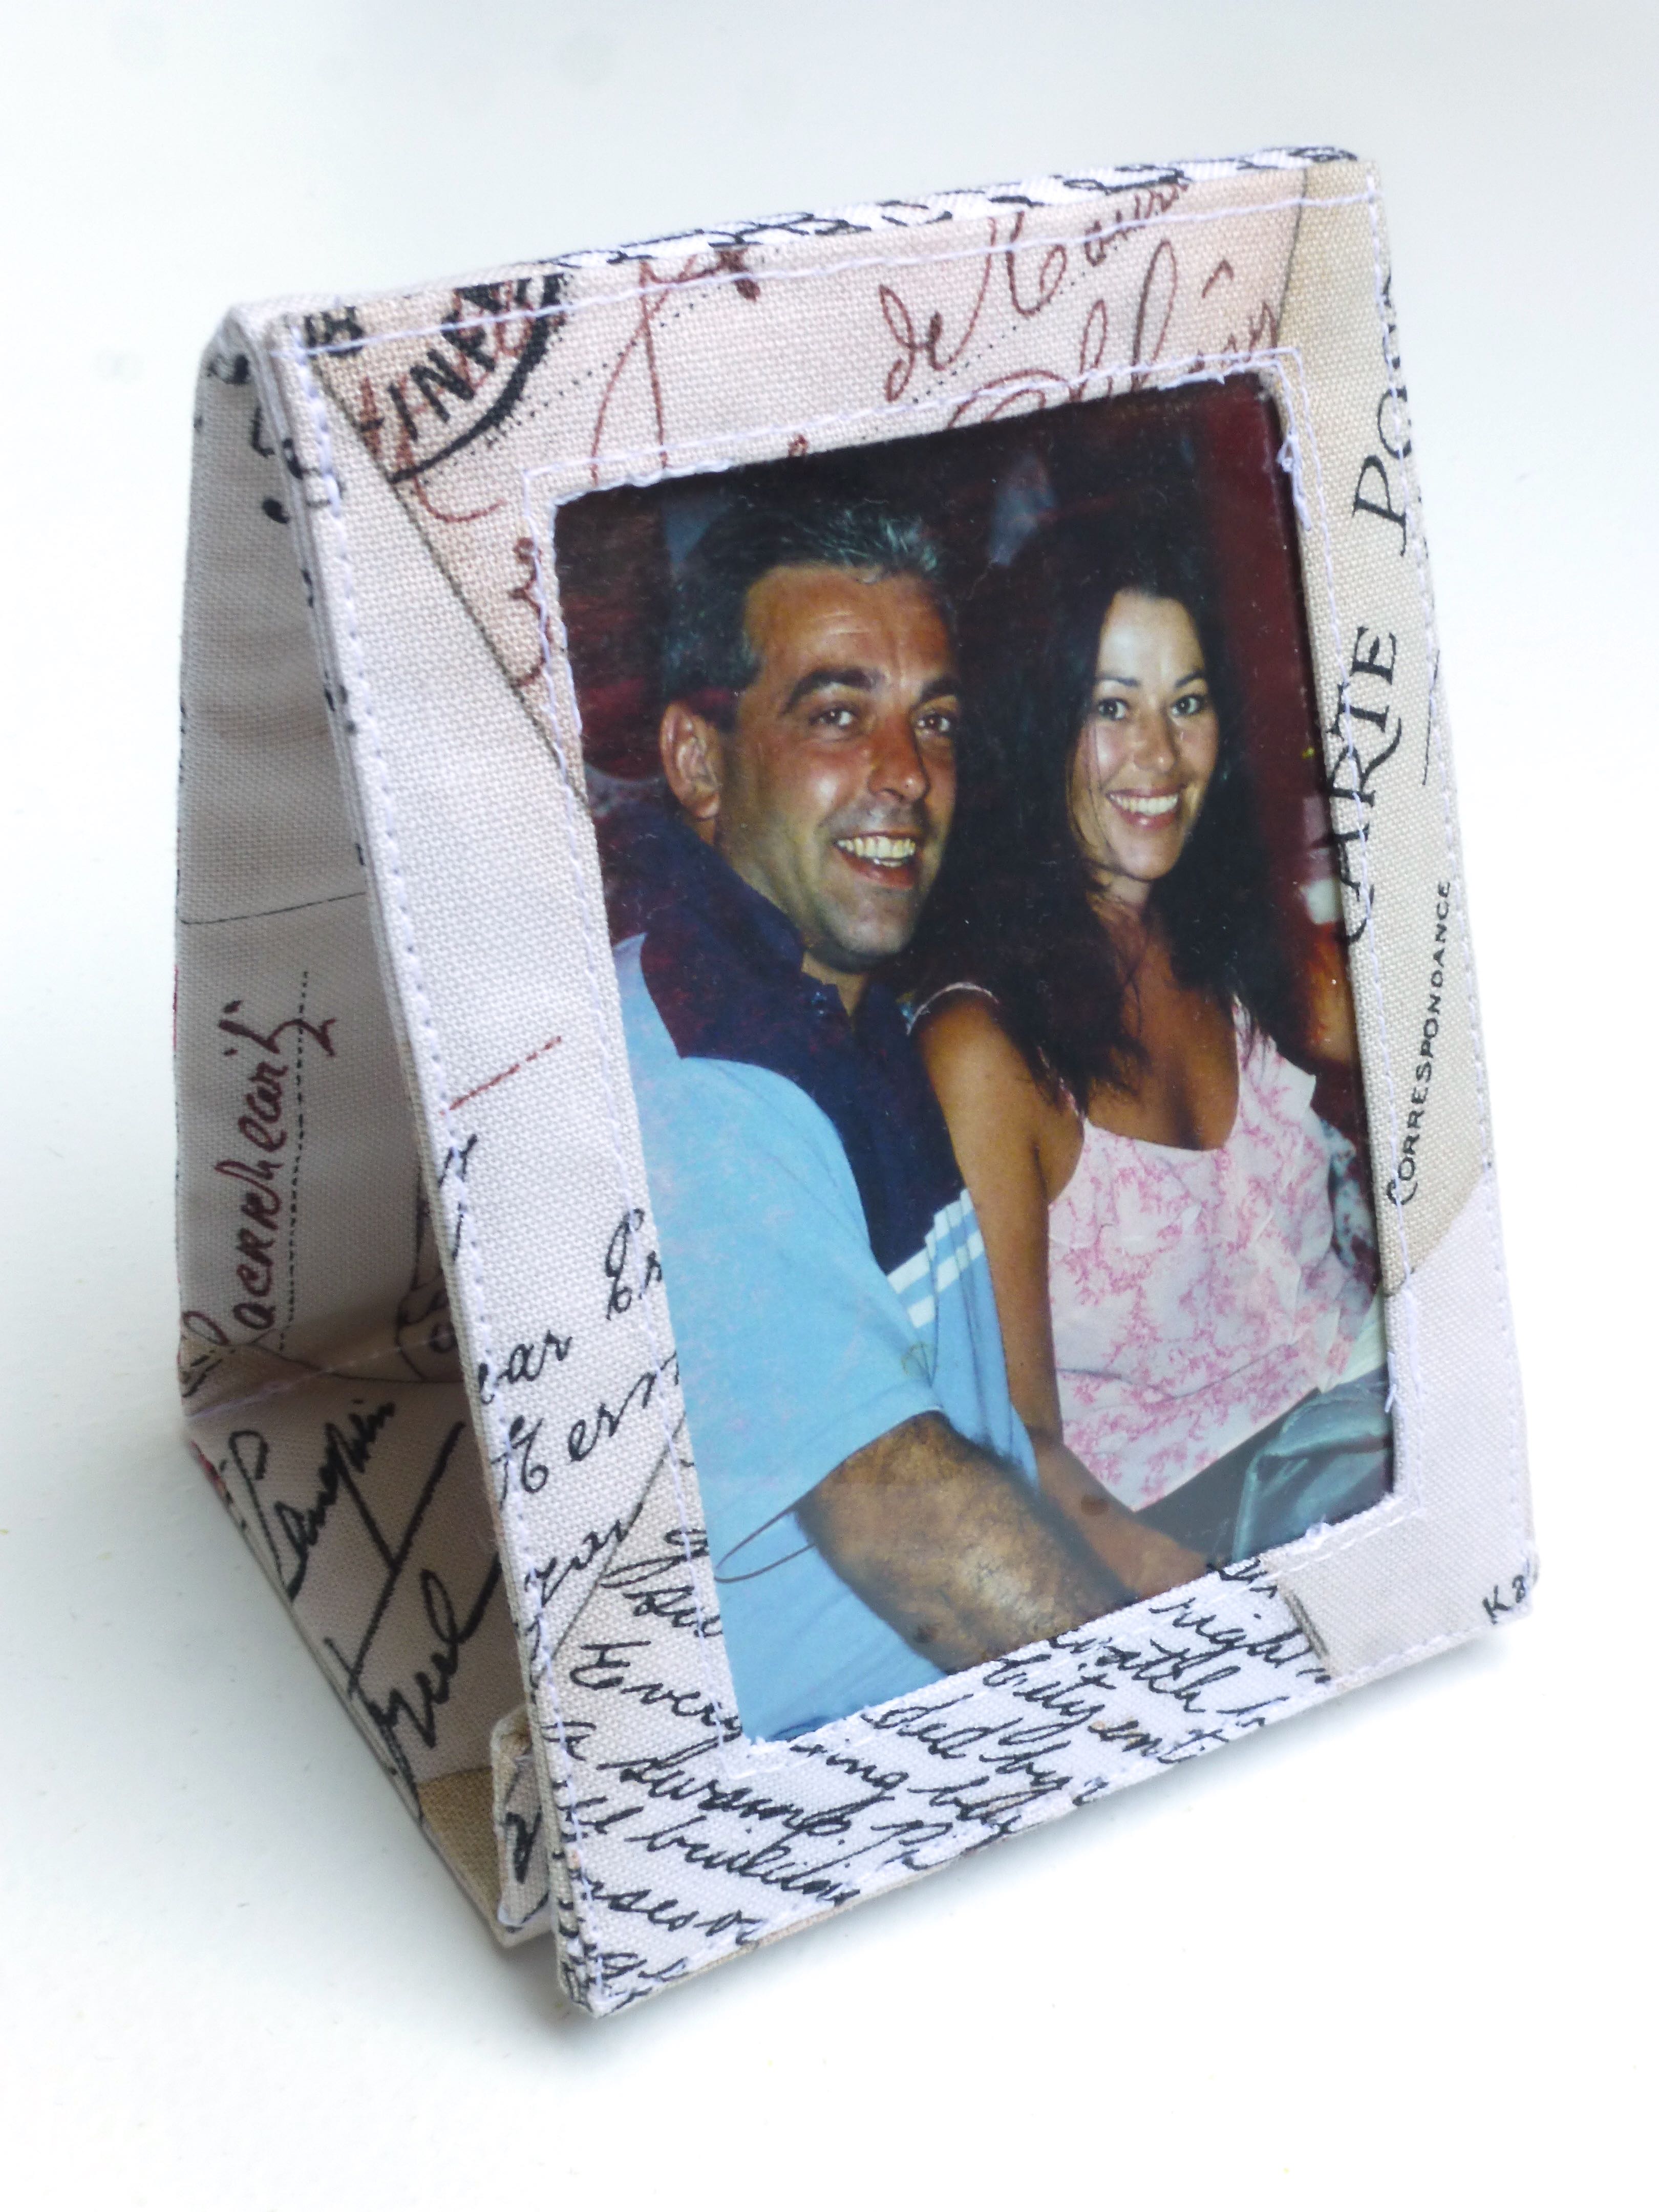
I came up with the idea of a folding travel photo frame and Googled/Pinterest-ed it…….not a single result.
Not one.
No one seems to have come up with a tutorial for such a thing, unless I just didn’t type in the correct keywords. So that was it, decision made, a “Folding Travel Photo Frame And Case” was going to be the free pattern for Craftseller’s readers.
After finalising materials and method on a prototype, this is the final product: –
Do you like it?
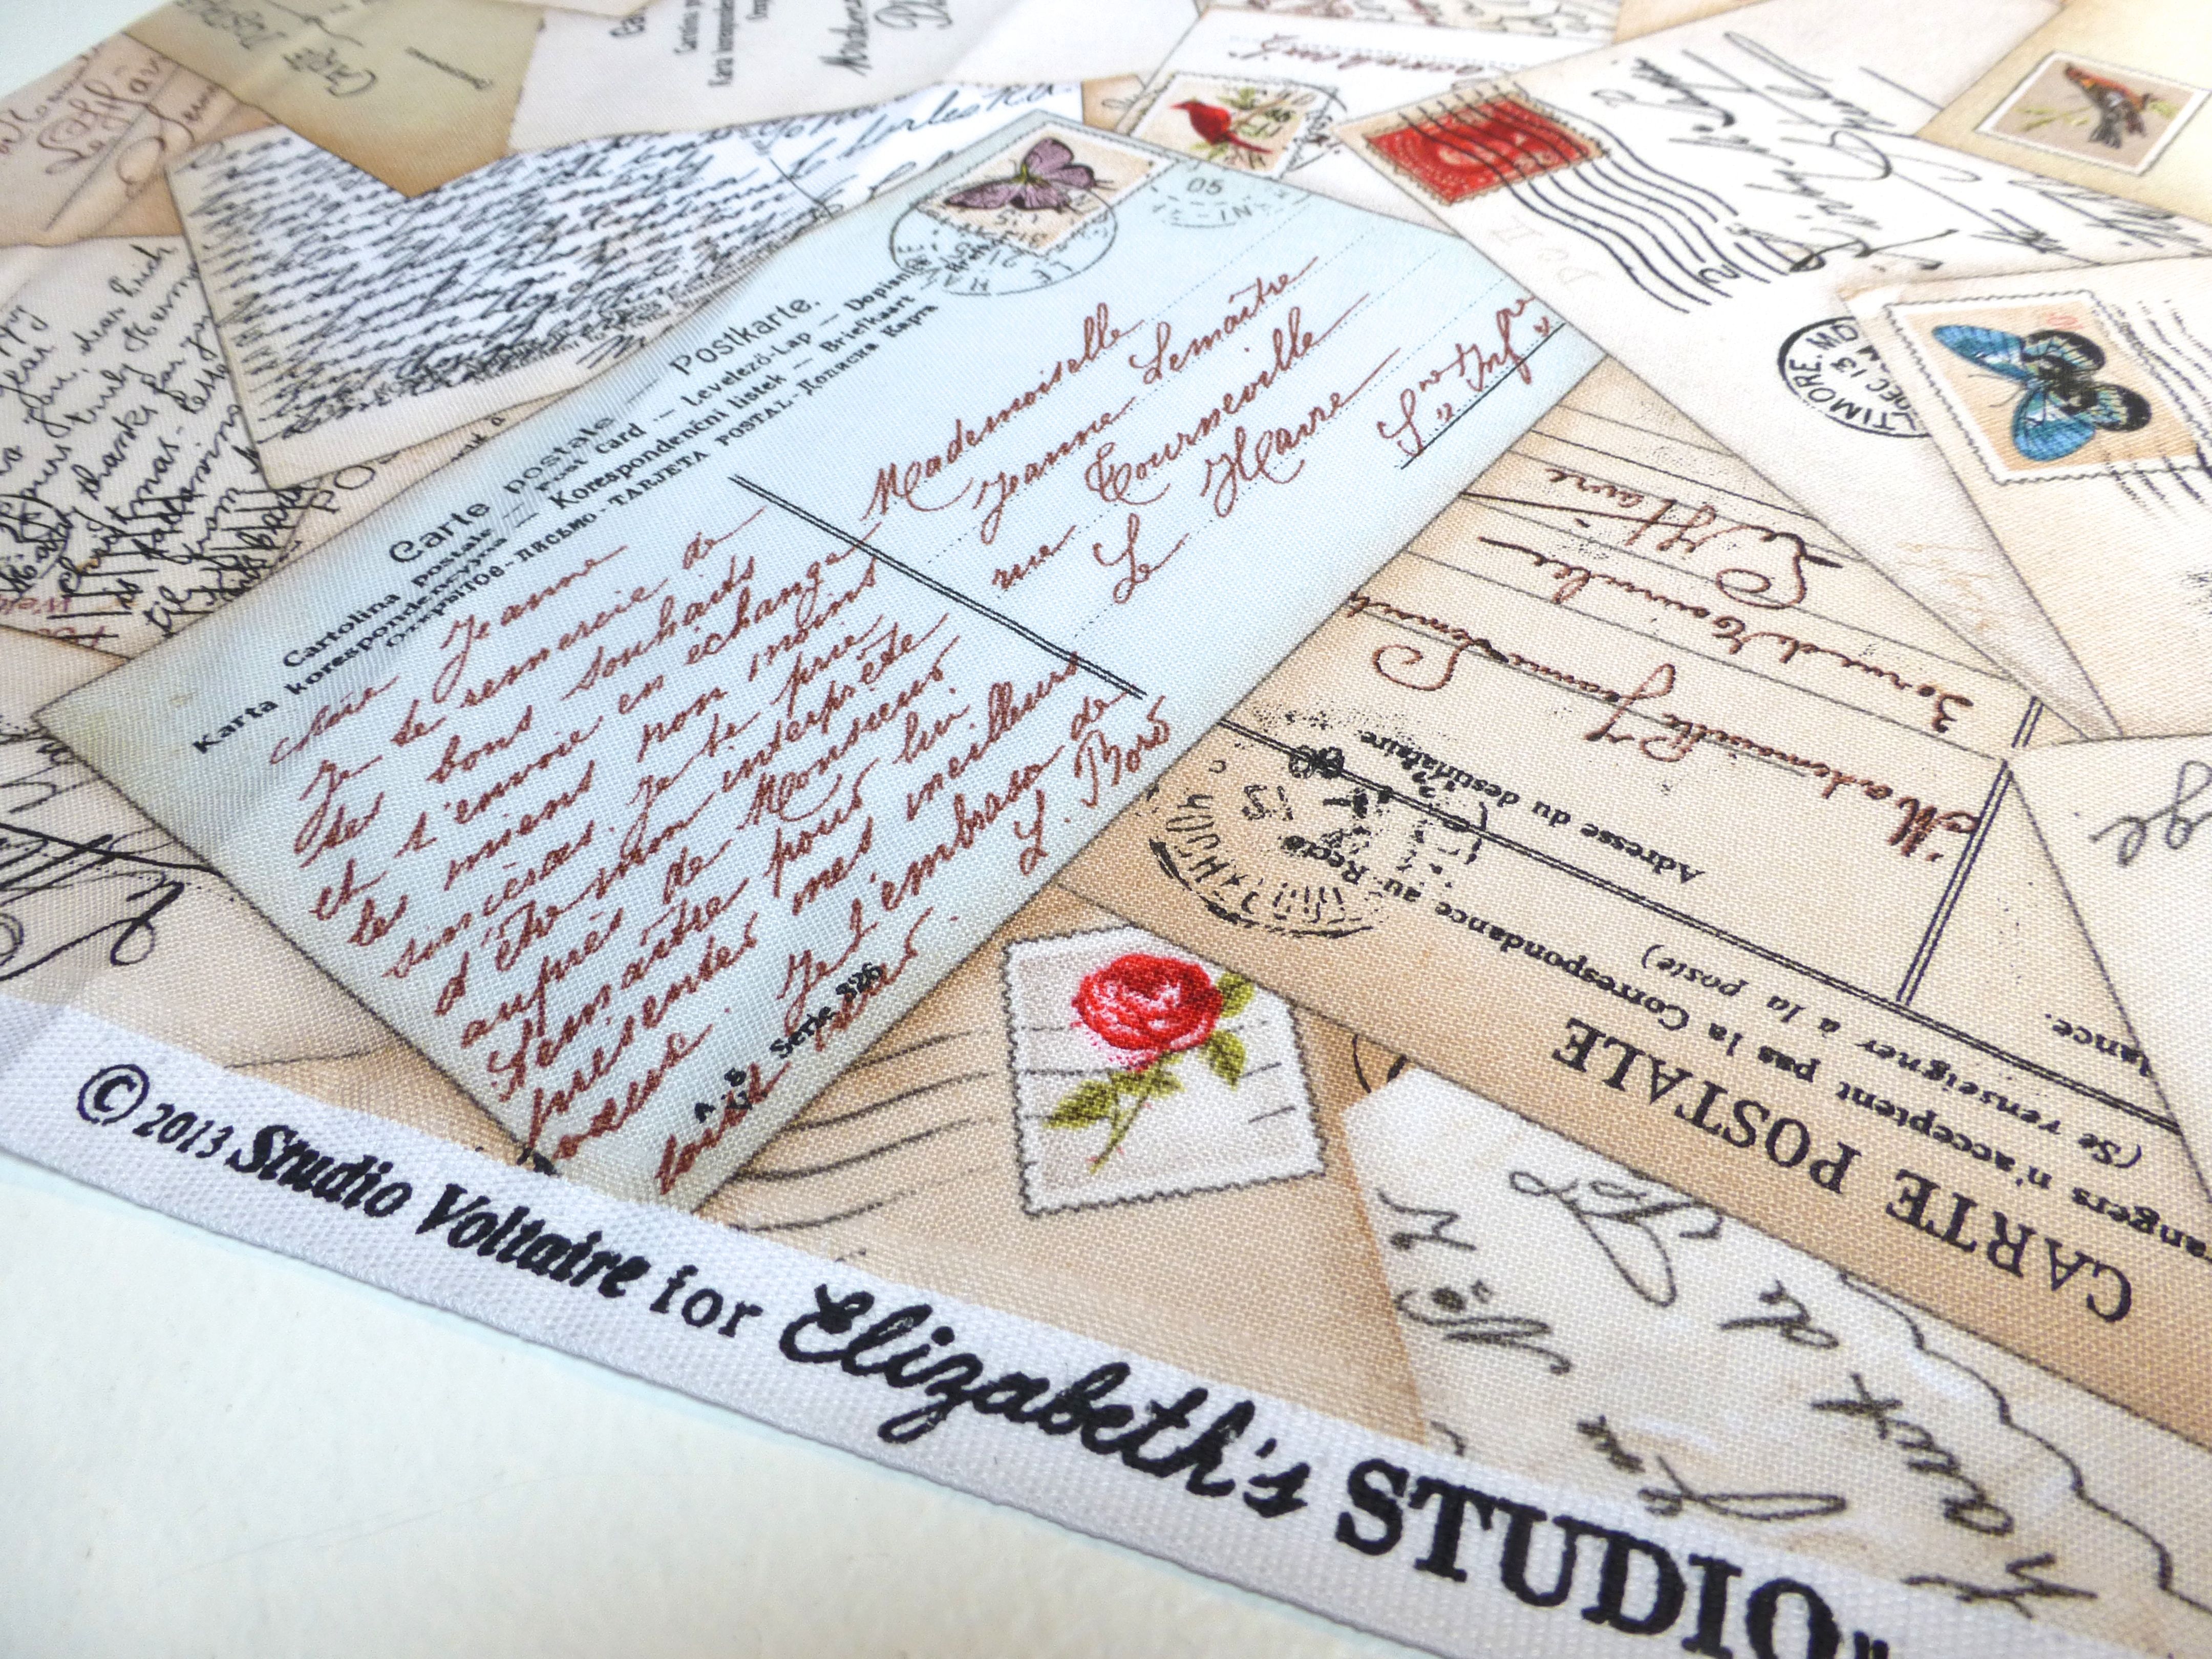
You may remember the “Postcards” fabric from the “Spring In Paris” collection by Studio Voltaire that I bought earlier in the year (see this post), well I thought it would be the perfect match for a travel themed project.
So, here goes with the tutorial!
You will need: –
A single fat quarter of fabric
Medium weight iron on interfacing
1 sheet acetate
1 sheet cardstock
2″ length of hook and loop fastener
Cut the following: –
fabric: – 2 x pieces 12″ x 3.5″
1 x piece 4.5″ x 3.5″
iron-on interfacing: – 2 x pieces 12″ x 3.5″
1 x piece 4.5″ x 3.5″
acetate: – 1 x piece 3.5″ x 2.5″
cardstock: – 2 x pieces 3.5″ x 2.5″
1 x piece 2.5″ x 2″
Fuse the interfacing to the reverse of the matching fabric pieces following the manufacturers instructions.
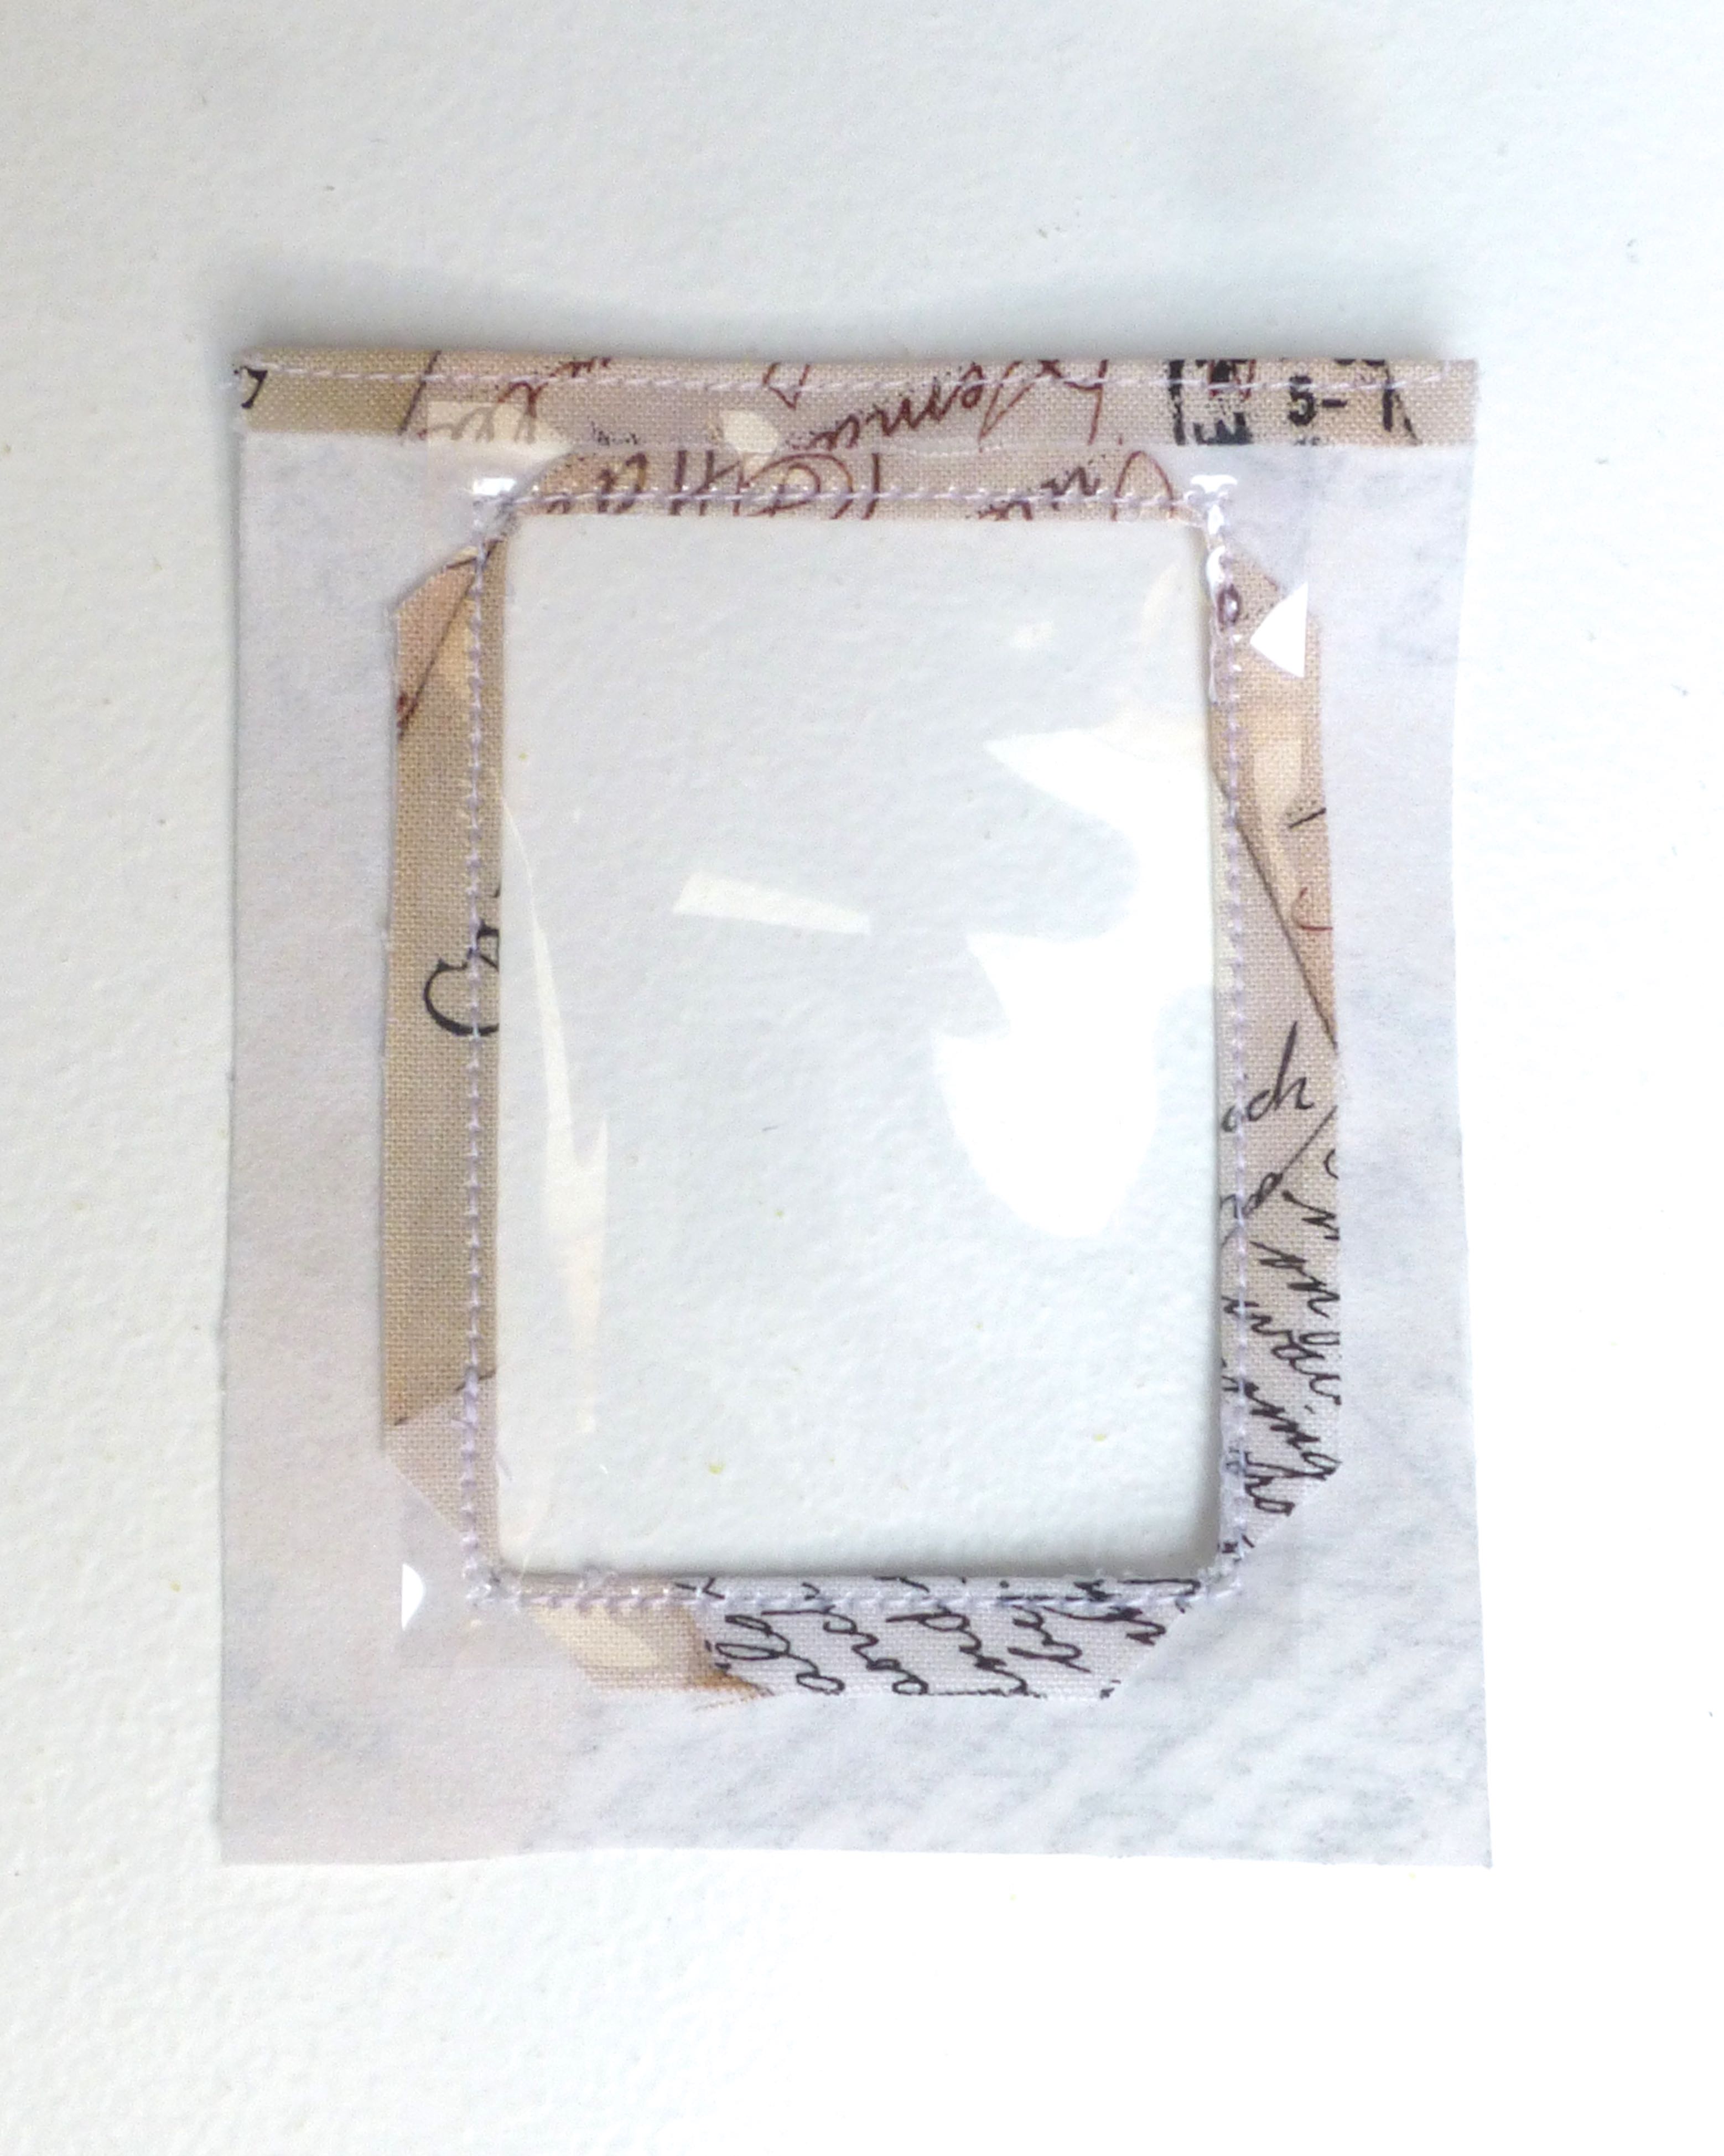
Place the acetate in the centre of the reverse of your 4.5″ x 3.5″ piece of fabric and draw around it, marking a rectangle. Remove the acetate and stay stitch the corners of the marked rectangle..
Draw a second rectangle 1/4″ inside the first one and cut this section out to create a window for your photograph.
4. Clip corners diagonally to the stay stitching.
5. Fold to inside along the solid lines. Press.
6. Turn down a 1/4″ hem on the top edge and top stitch close to the fold.
7. Place acetate on the reverse of the window and top stitch close to the inner edge on all four sides.
8. Turn and press a 1/4″ hem on remaining three sides of the fabric, being careful not to touch the acetate with the iron.
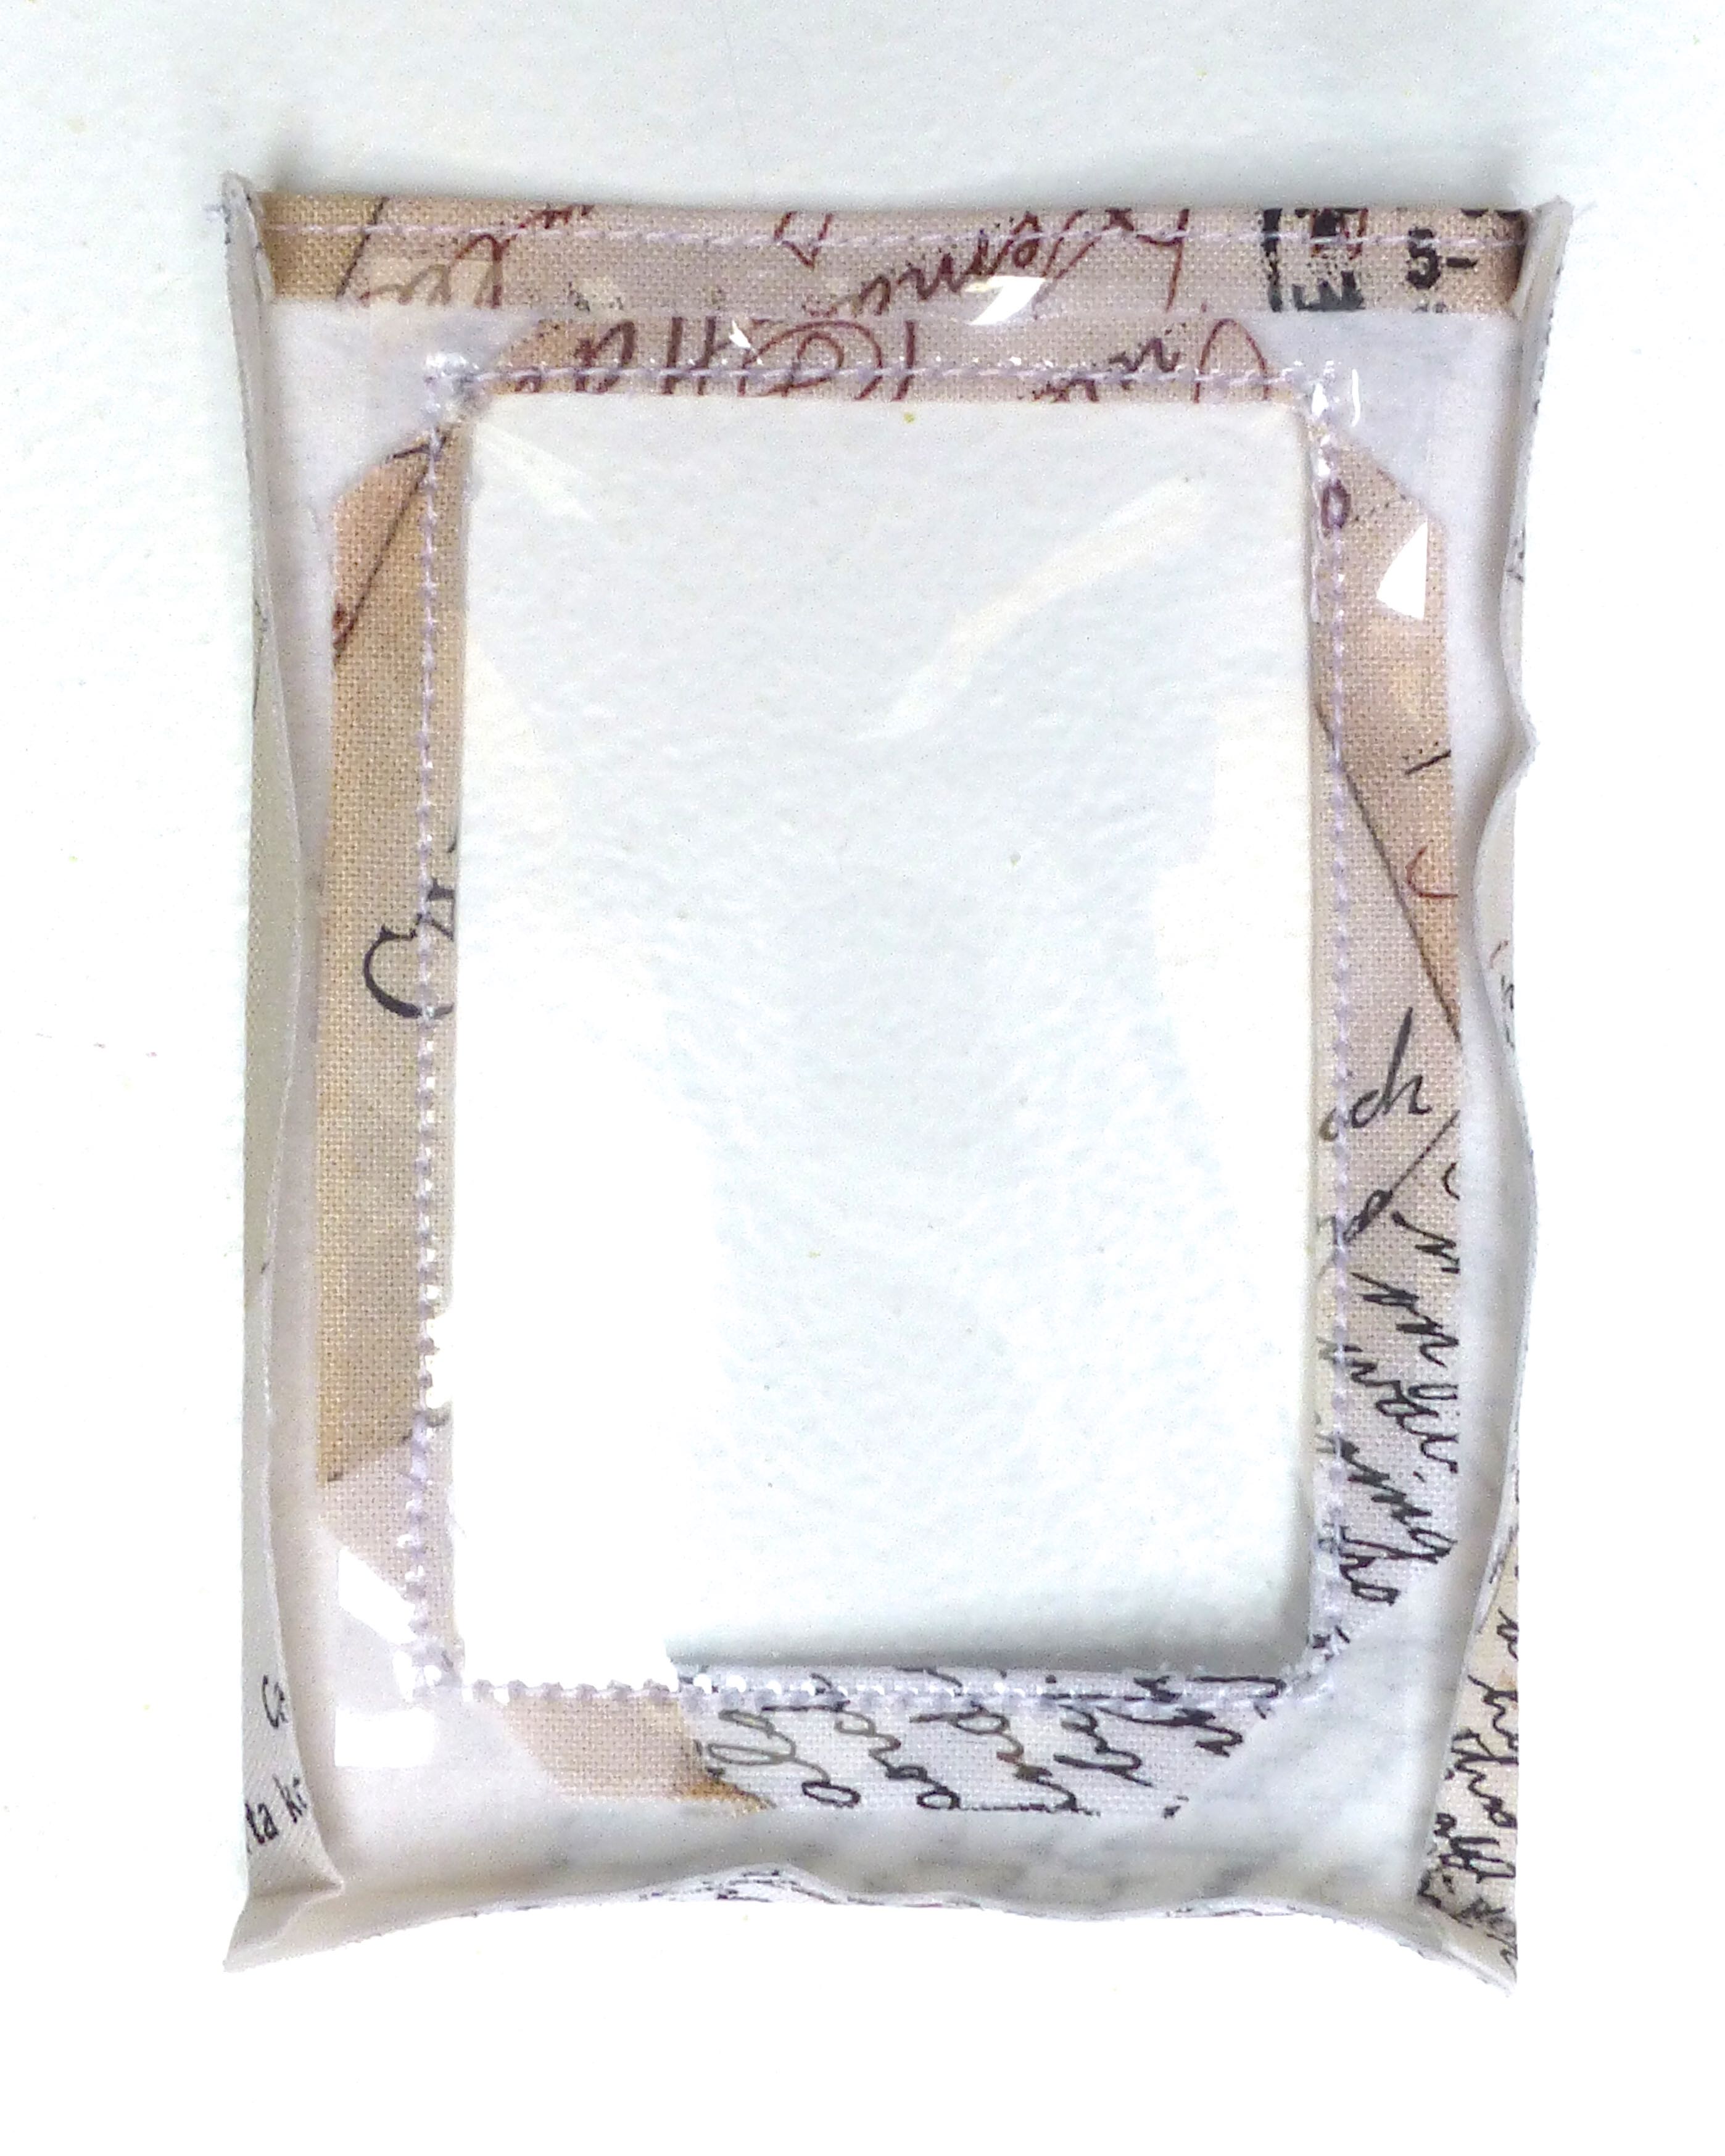
It should now look like this from the right side.
9. To make your frame, take both 12″ x 3.5″ pieces and, with right sides together, sew around three sides with a 1/4″ seam allowance. Trim corners, turn and press.
10. With the right side up, place your window on top of the frame aligning the bottom folded edge with the bottom seam of your frame. Top stitch the window close to folded edges on three sides, leaving the top edge open to slip your photo into.
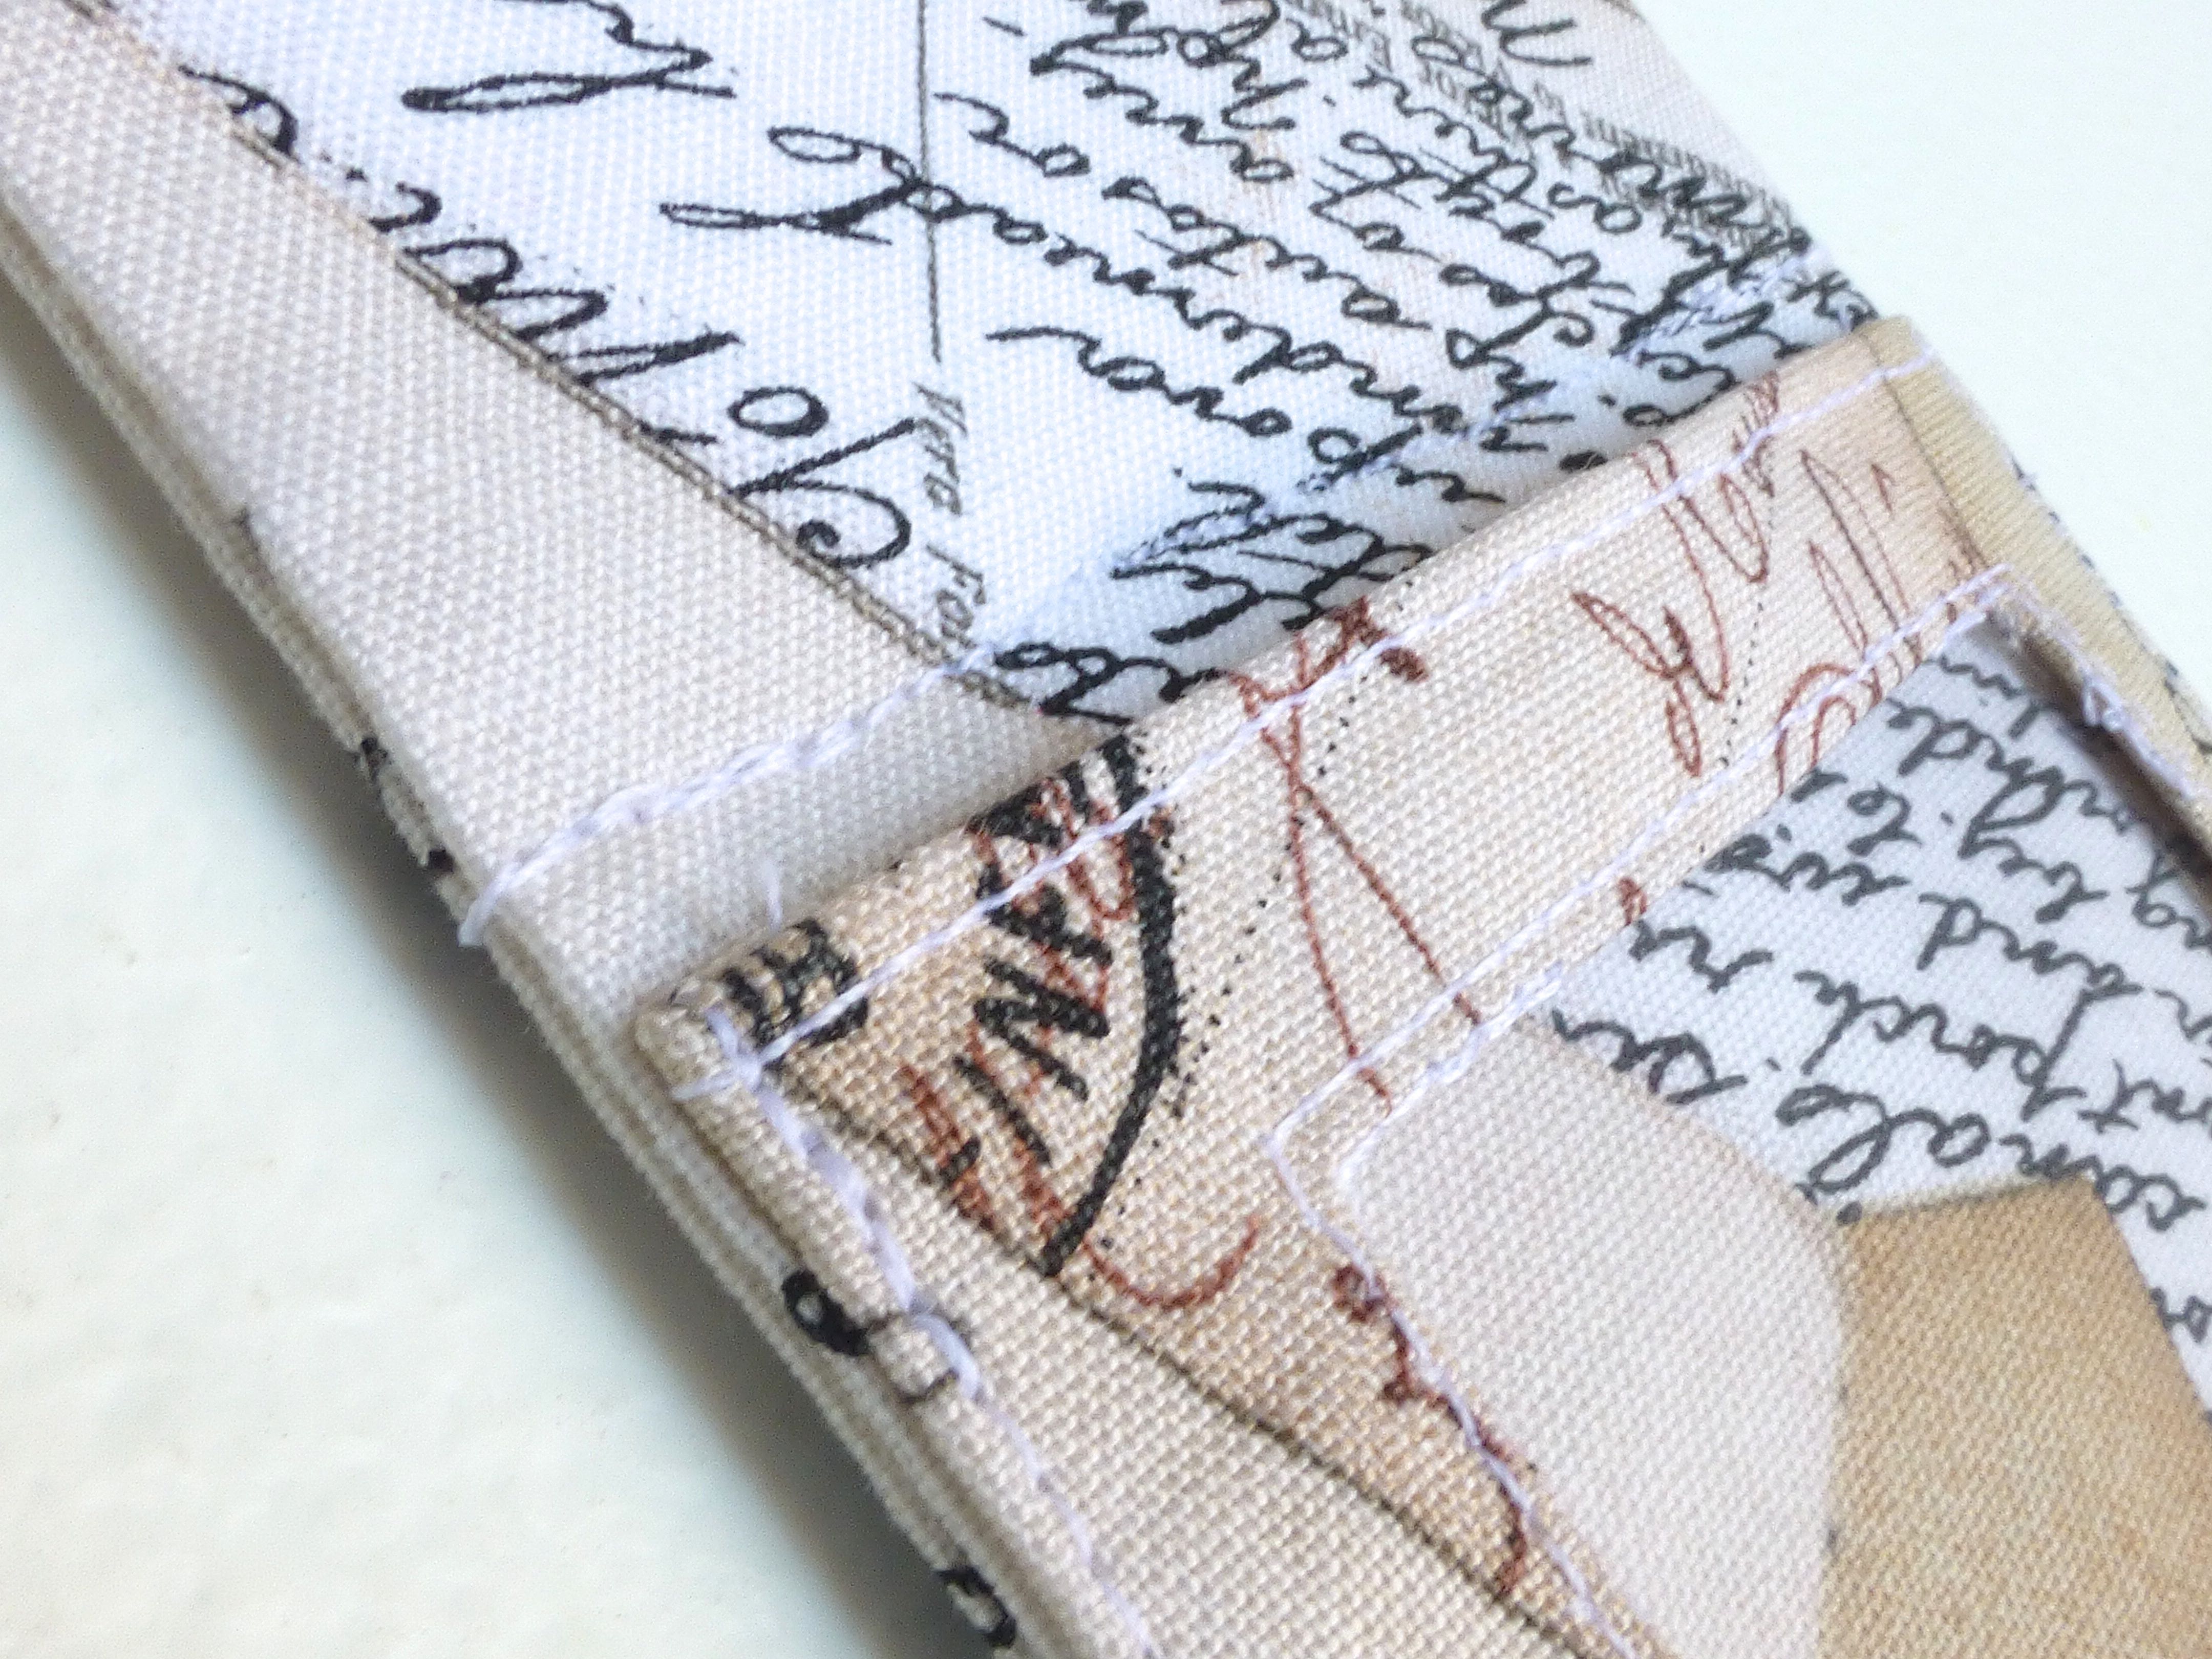
11. Insert a 3.5″ x 2.5″ piece of card into the open, unfinished end of the frame and push right down to the bottom.
12. Sew just above the window through all layers of the frame to encase the card.
13. Insert the second 3.5″ x 2.5″ piece of card and push down to meet the previous line of stitching.
14. Sew across the width of the frame as before, encasing the second piece of card.
15. Repeat steps 13 & 14 with the smallest 2.5″ x 2″ piece of card.
16.Turn in the raw edges of the frame opening, press and top stitch to close.
17. Window side uppermost, stitch the loop side of the hook and loop fastener to the opposite end of the frame as shown below.
18. Hand stitch the hook side of the fastener to the reverse of the window along the bottom edge.
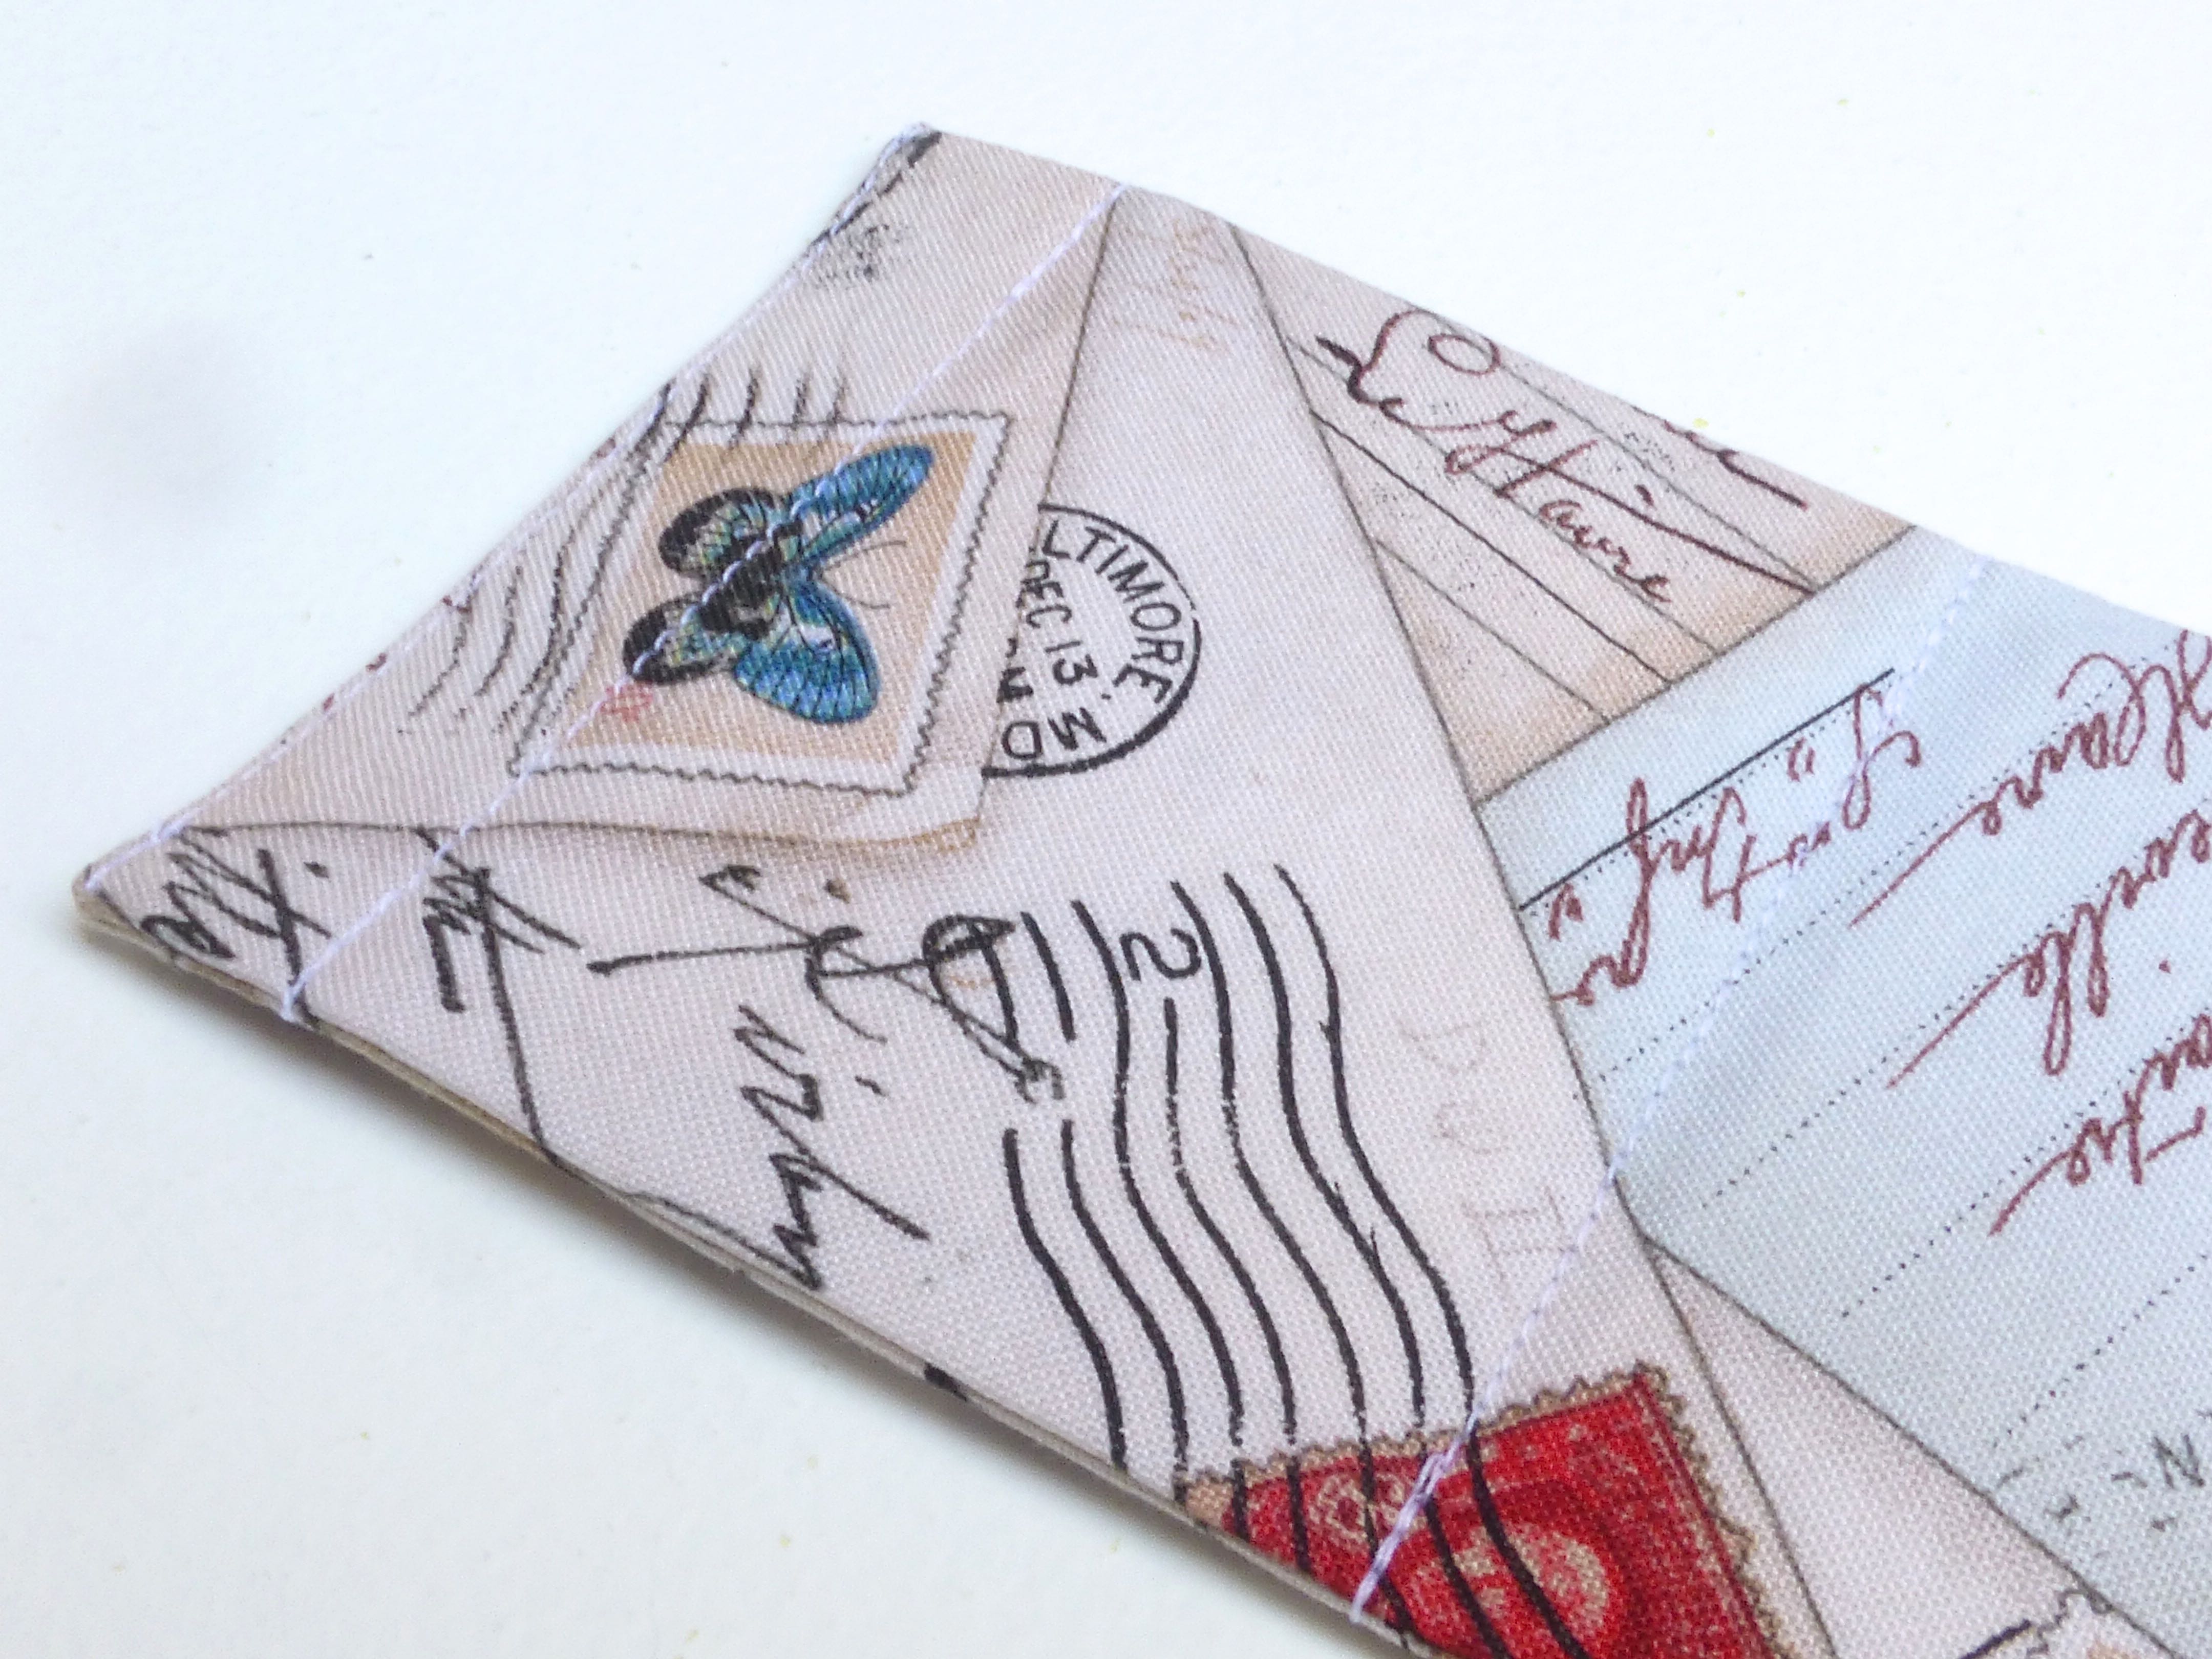
19. To assemble your travel photo frame, simply fold into a triangle shape and press together the hook and loop fastener.
20. Slide your 3″ x 2″ photo in behind the acetate.
For the case: –
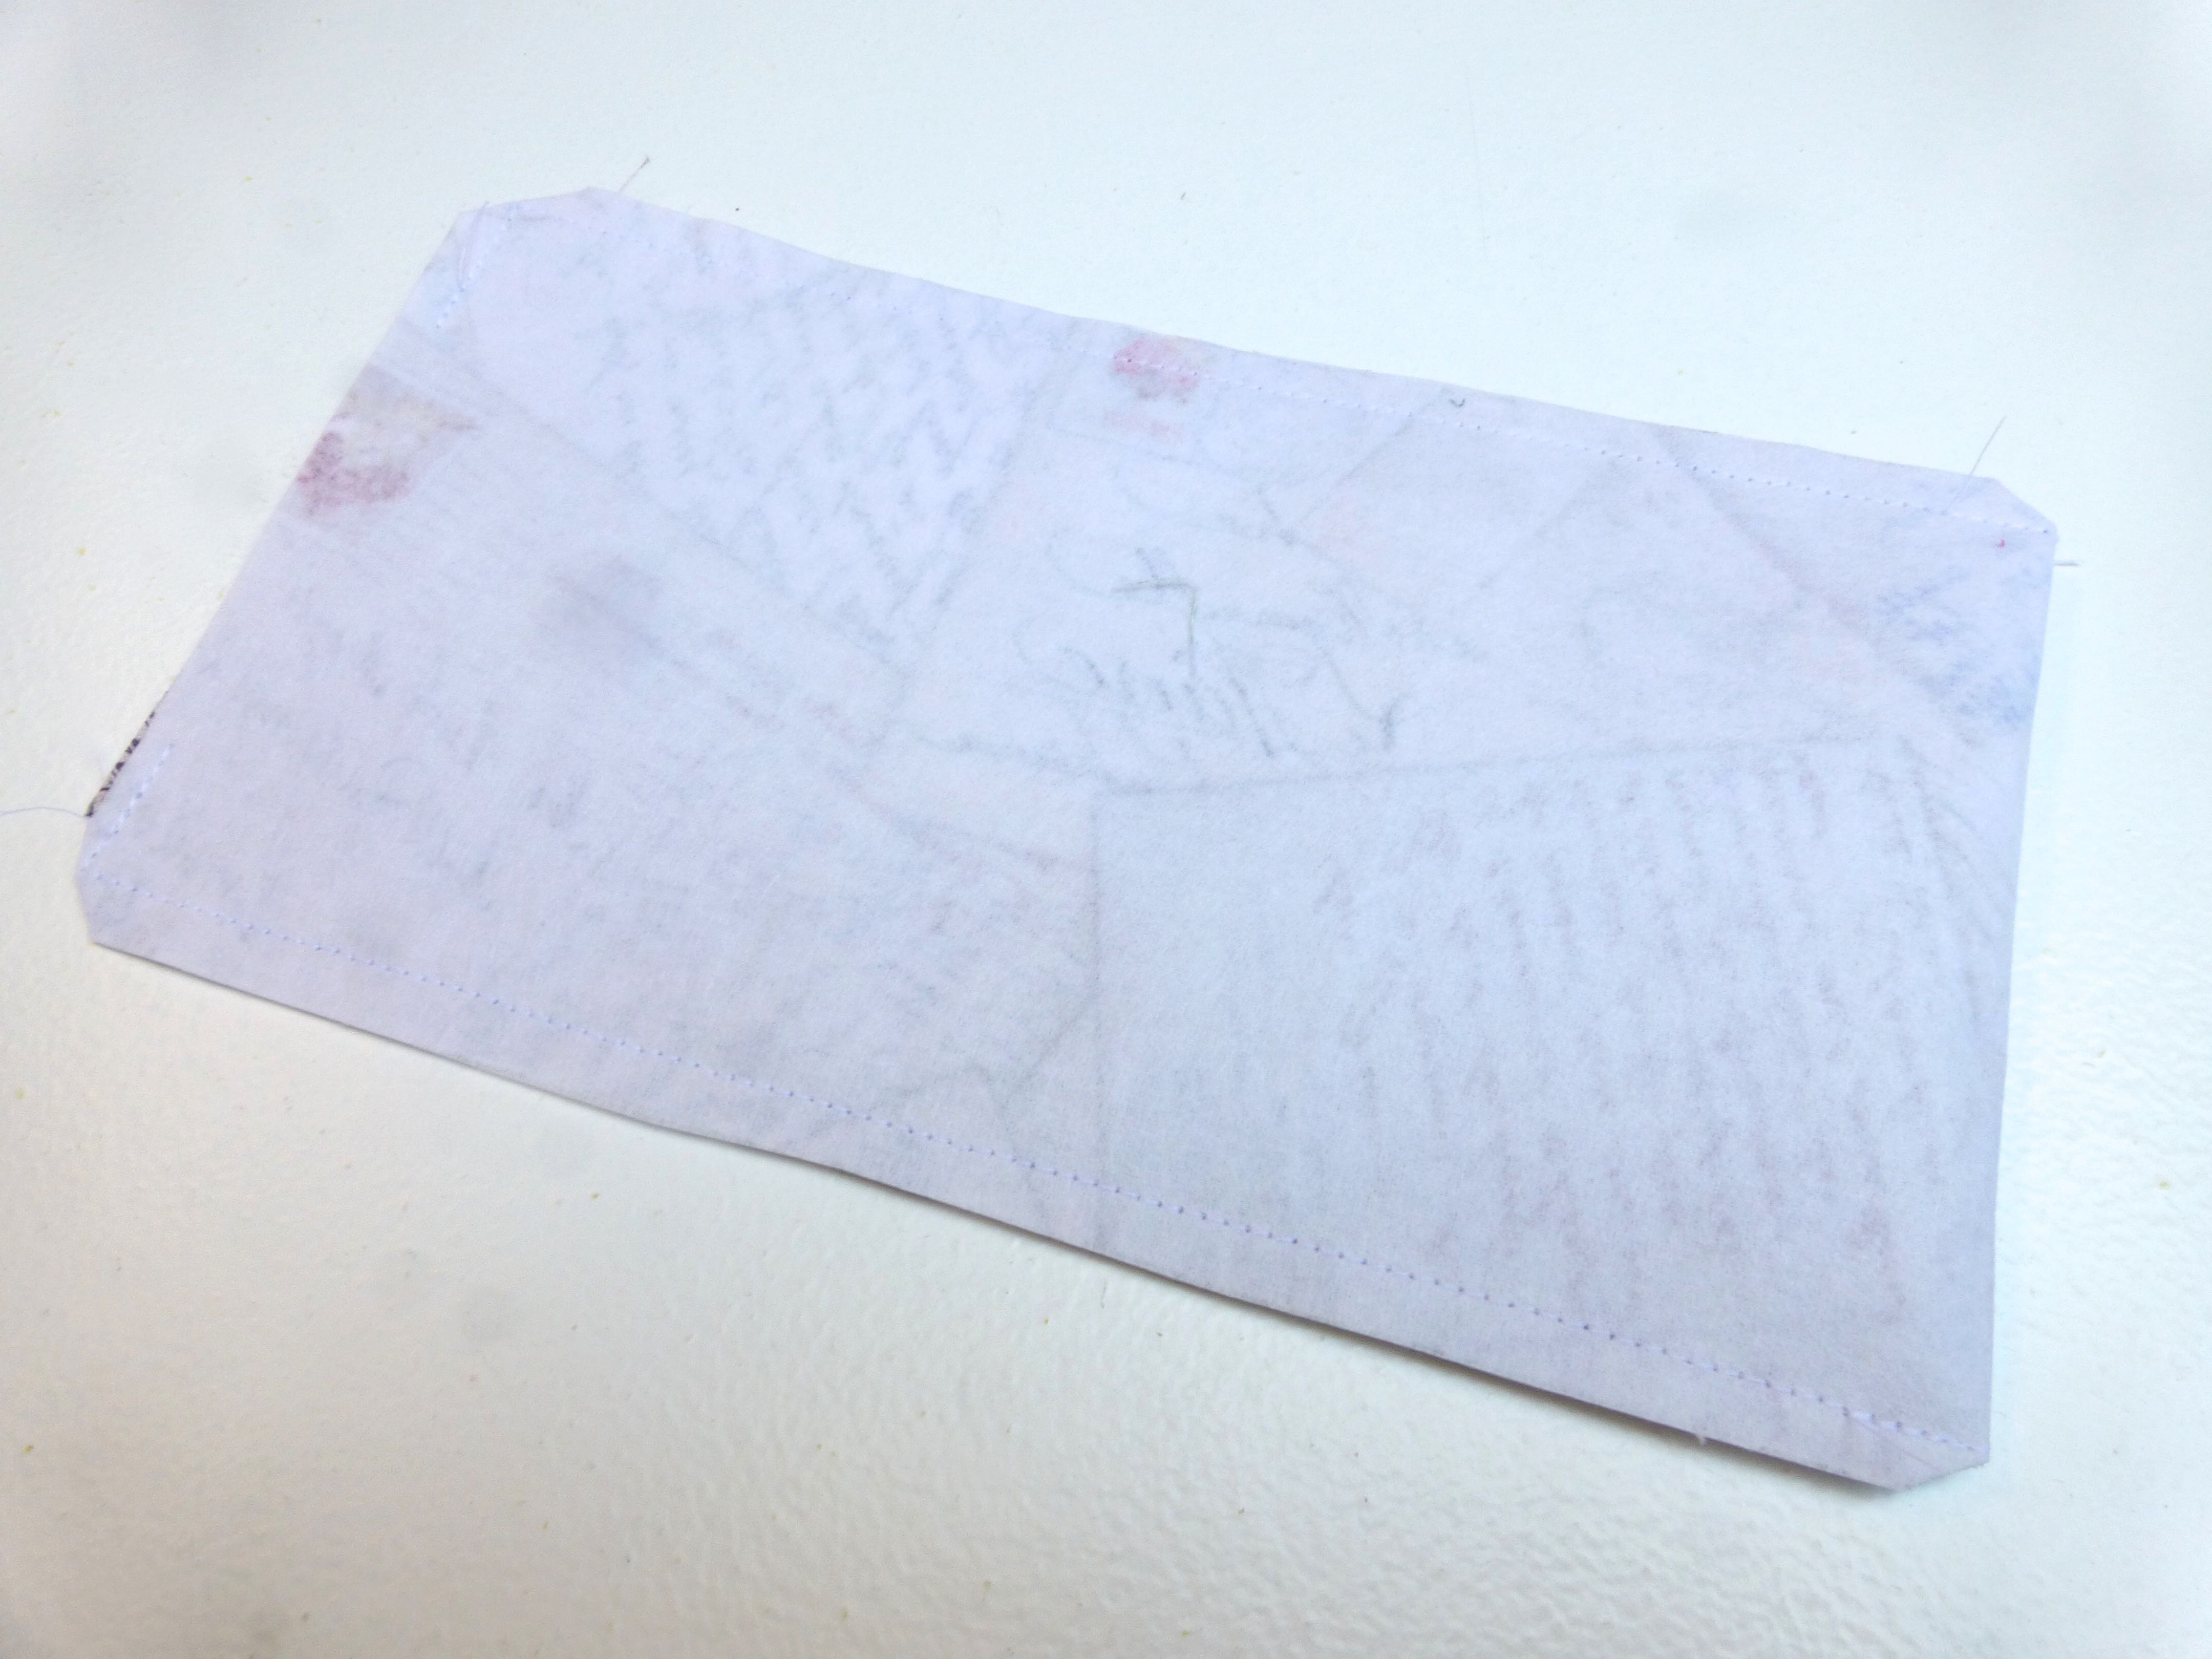
Fuse interfacing to a piece of fabric measuring 16″ x 4.5″. Fold in half width-wise and sew a 1/4″ seam on the three raw edges, leaving a gap to turn.
2. Turn and press.
3. Top stitch close to the edge of the bottom edge.
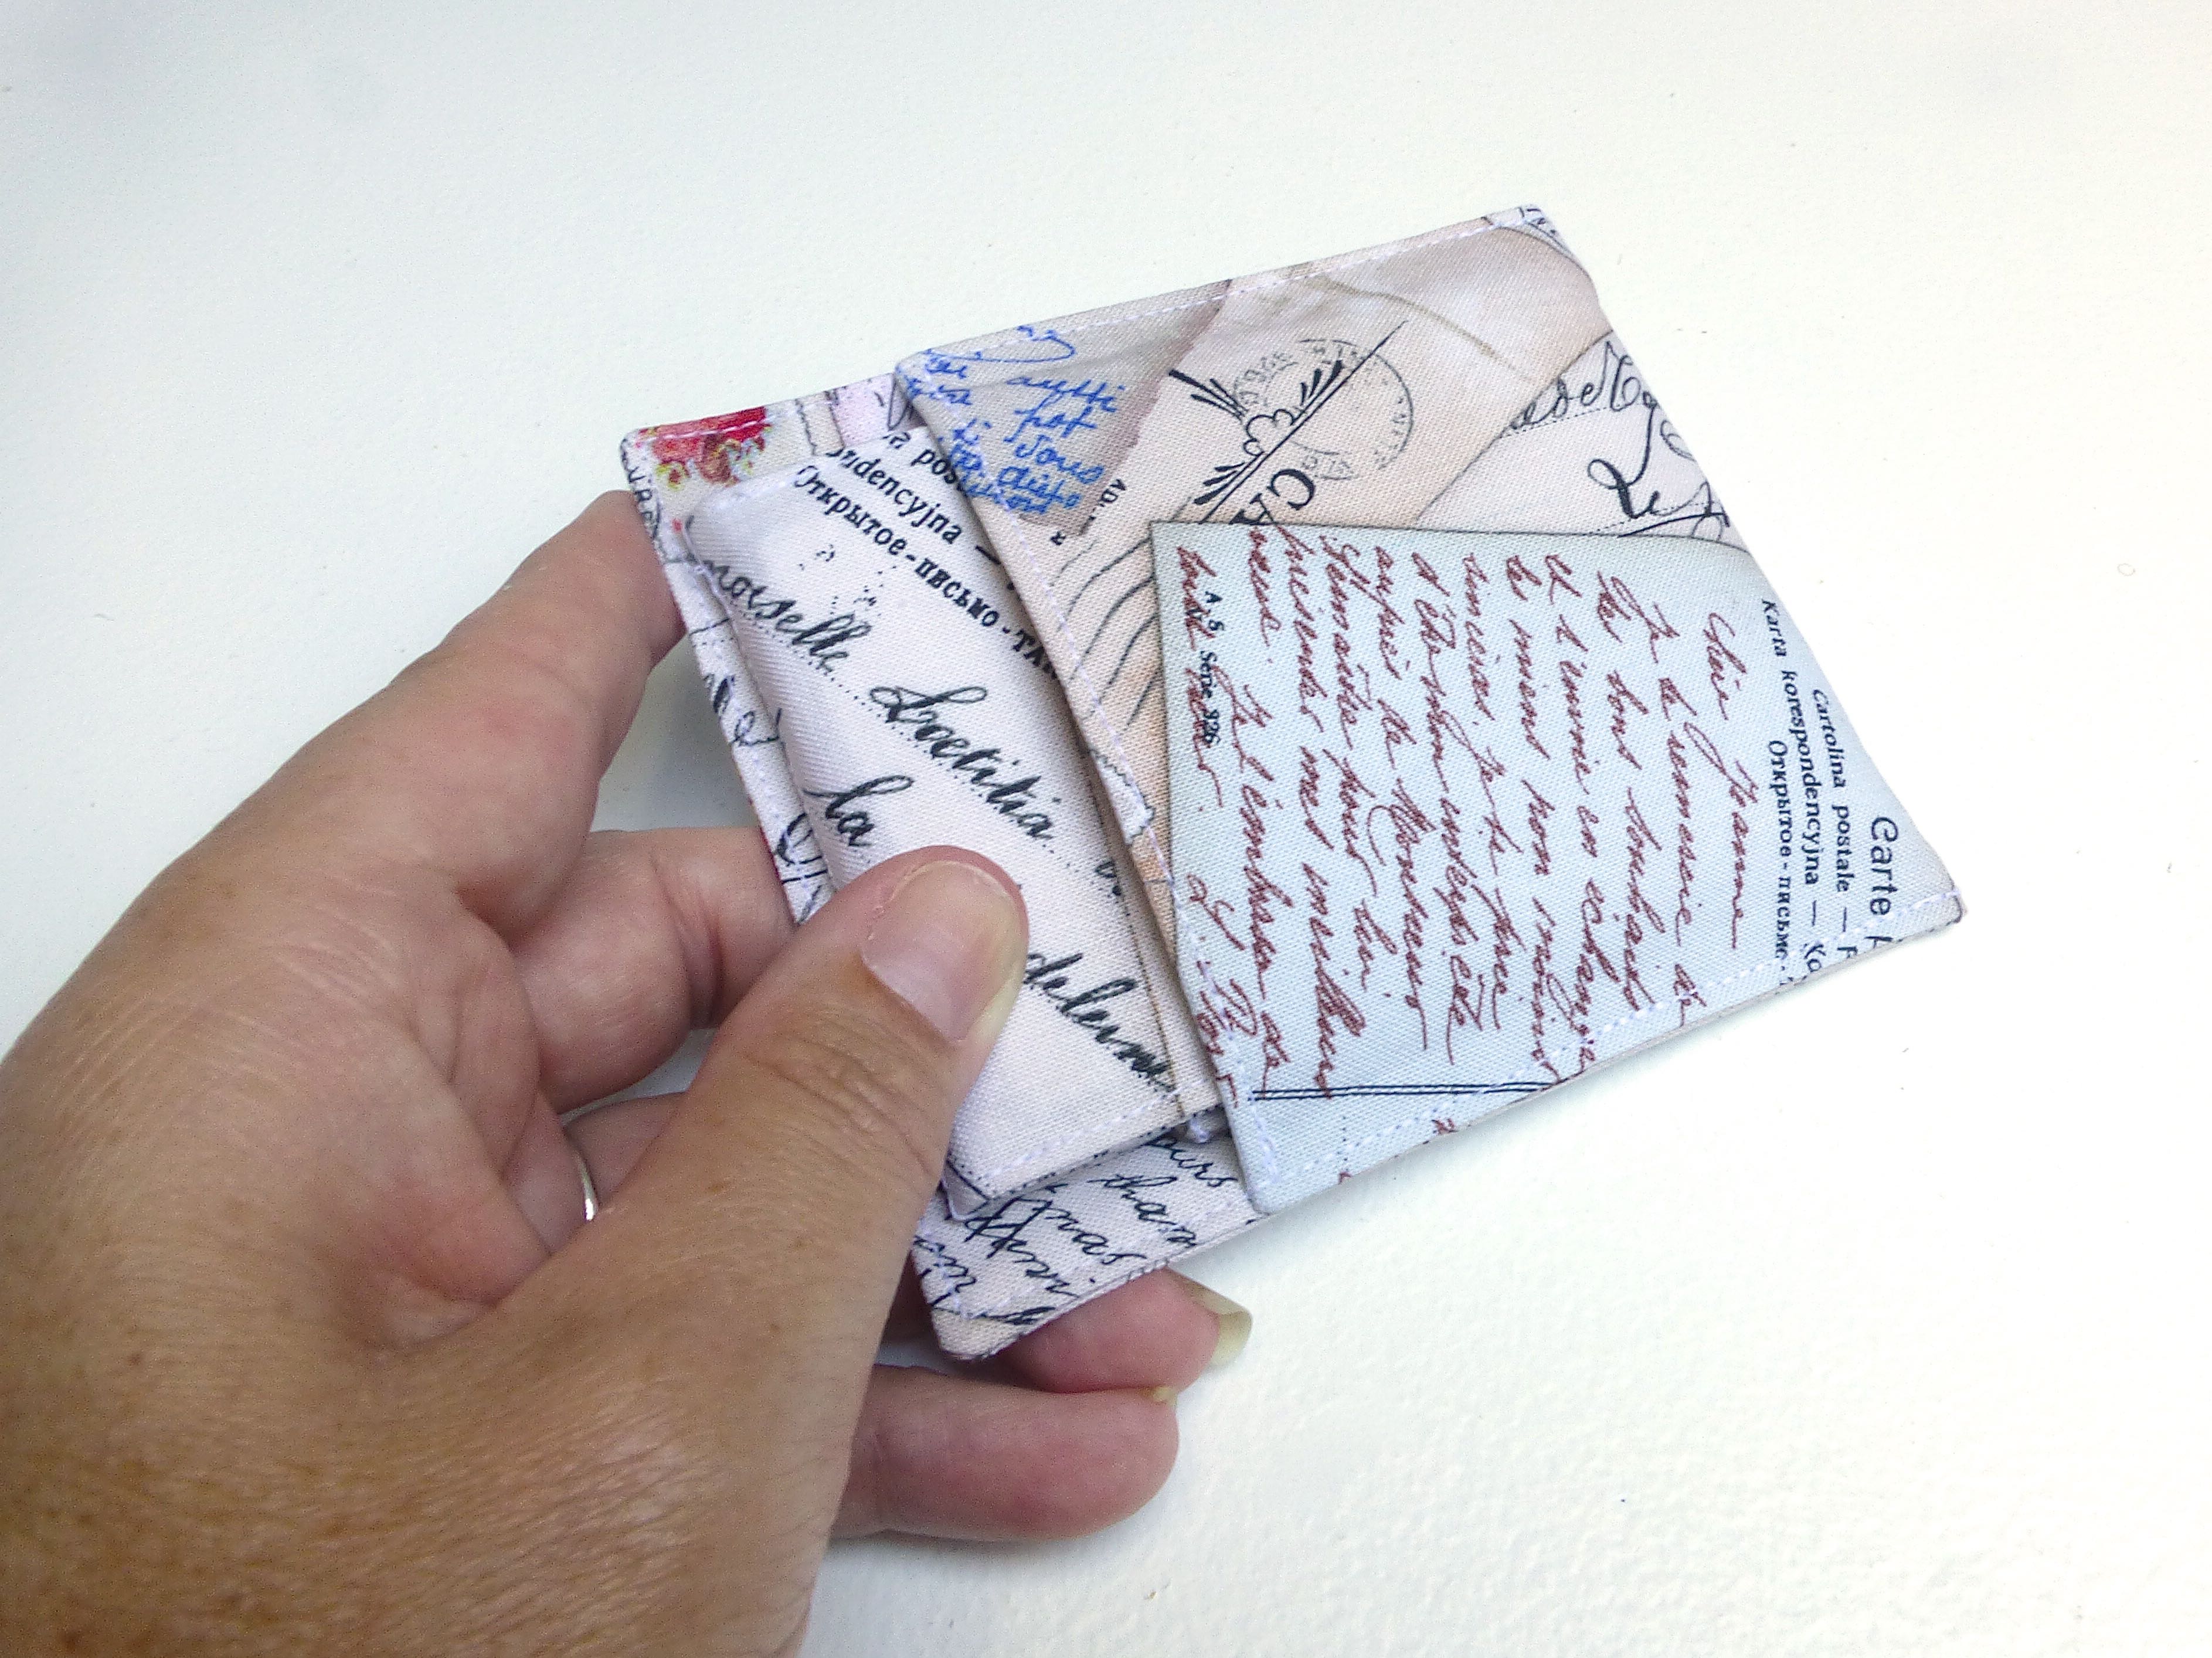
4. Fold up from the bottom about 3.25″, so the top stitched edge stops 1.25″ from the top edge.
5. Top stitch around the side and top edges to finish.
6. Fold your travel photo frame flat and pop inside the case.
There you have it, a compact and portable, travel-themed folding photo frame – perfect for the traveller or person who works away from home.
Look out for my Blogger Of The Month feature in Craftseller magazine soon!
Previously Boys and Chickens, I have created a new blog to share my sewing adventure as 2018 is they year I plan to teach myself to sew! There will also be bits of crochet and cooking too.
My challenge: One year - I will not buy clothes - I will upcycle to make what I need - everything from underwear to evening wear! Join me for tips, exclusive BrawHem makes, and inevitably some hilarious disasters...


 For each sack you will need: