Sewchet

Sewing, crochet, crafts, accessories, baking, tutorials,


29 Comments

Tutorial: How To Make A Faux Sheepskin Bag / Tote

img_3365

No, your eyes don’t deceive you, this IS yet another post featuring the lilac faux sheepskin fabric I bought last month. It really has been the fabric that keeps on giving as I have made not only a full length coat and two pairs of mittens, but also TWO tote bags!

If you would like to make your own, either from similar fabric or from a thick fleecy fabric, here’s a quick tutorial on how I did it.

Materials: Approx. 3/4yd of 45″ wide Faux Sheepskin or fleece

2 Magnetic Snaps

Cut pieces from your fabric following the diagram below (which is NOT to scale). If your fabric has a nap or a directional pattern, be sure to take this into account when cutting out.

You may have to adjust the size of the pocket to suit your particular ‘phone – this pocket is the perfect size for a normal (not ‘plus’) iPhone and you may well have to make it larger for a Samsung Galaxy or similar.

Sheepskin Tote Pattern

This photo shows the main pieces; front and back, gusset and interior mobile ‘phone pocket.

img_1304-1

Seam allowances are 1/4″ throughout.

All raw edges are left unfinished and the seams are constructed with WRONG sides together, making a feature of them.

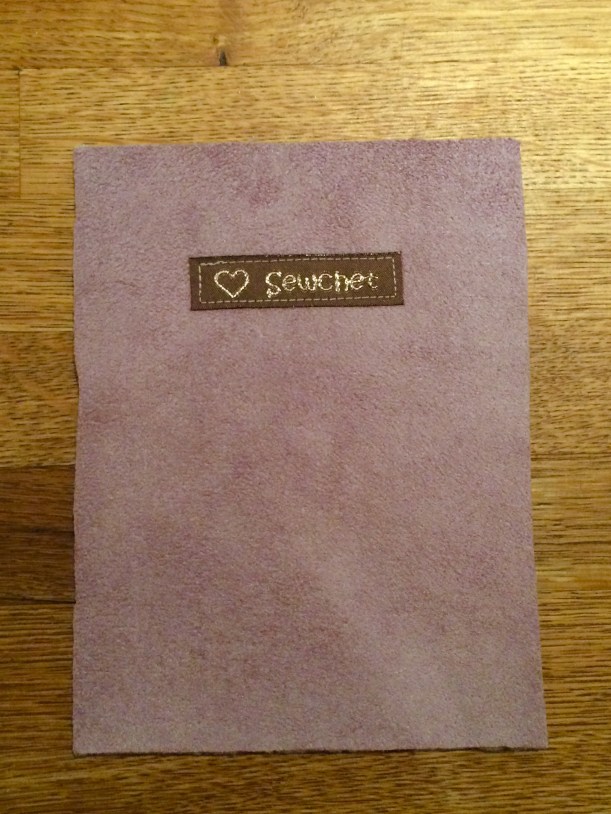
If you have your own labels, sew them to all pieces before any construction takes place. This avoids any fiddly sewing later on.
img_3344

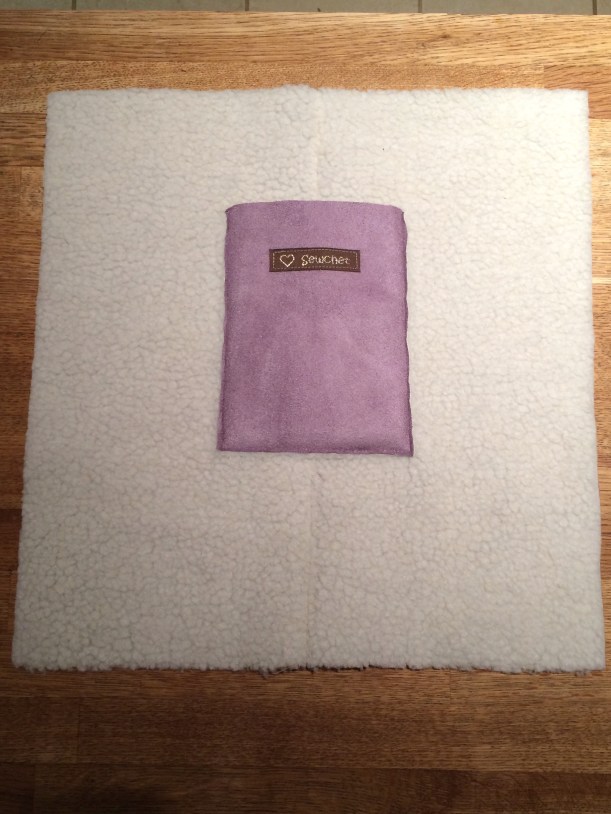
Sew your pocket to the inside of the BACK section of the bag around three sides only, leaving the top open.
img_3345

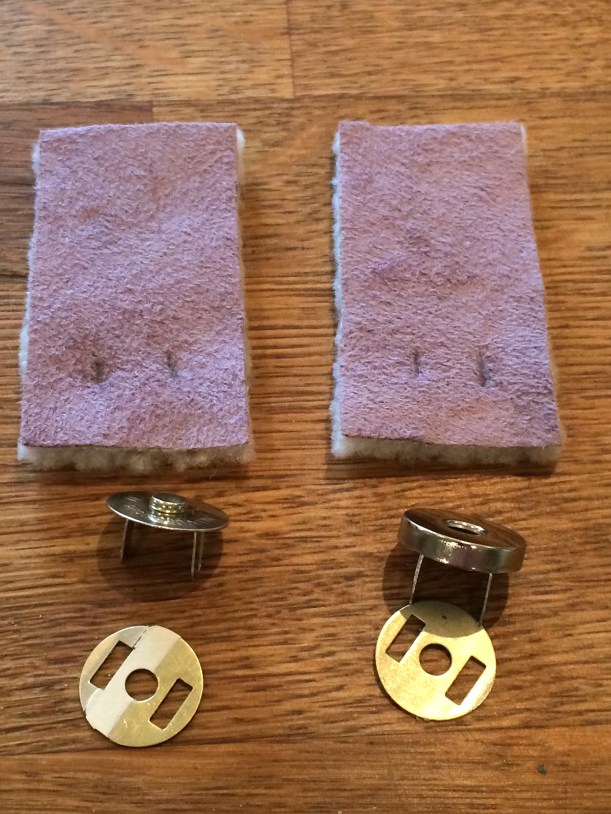
Apply the magnetic tabs according to the manufacturer’s instructions, using the photos as a guideline for placement.
img_3321

img_3322

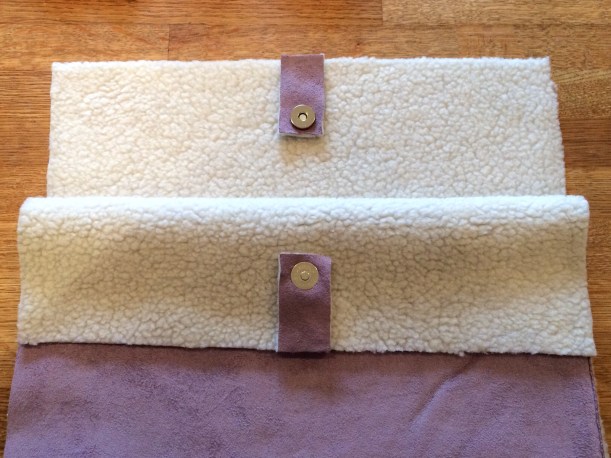
Pin a tab to the top centre of the front and back sections.

img_3346.jpg

Sew in place.

img_3323

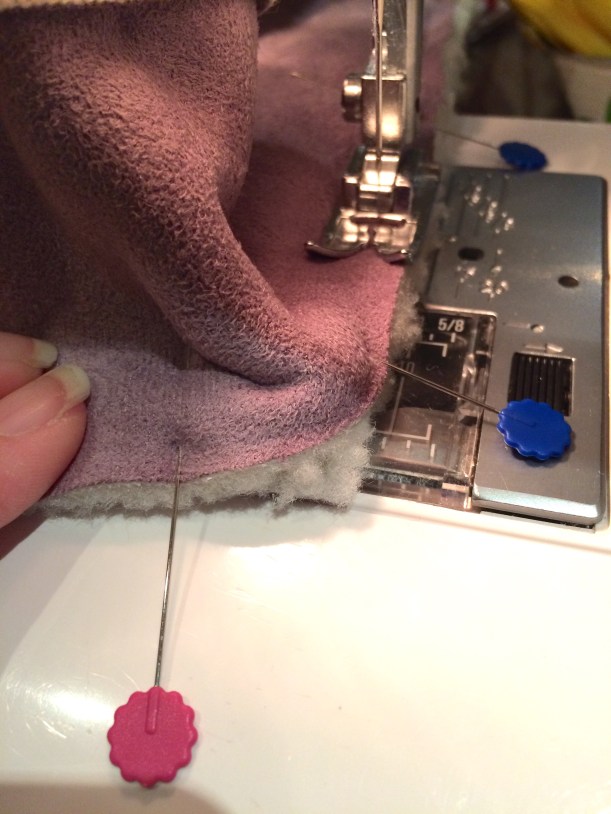
Pin the gusset to the back section with WRONG sides together. There will be surplus fabric to cut off later.

img_3348

Stitch with 1/4″ seam allowance, being careful not to get any puckers as you sew around the corners.
img_3350

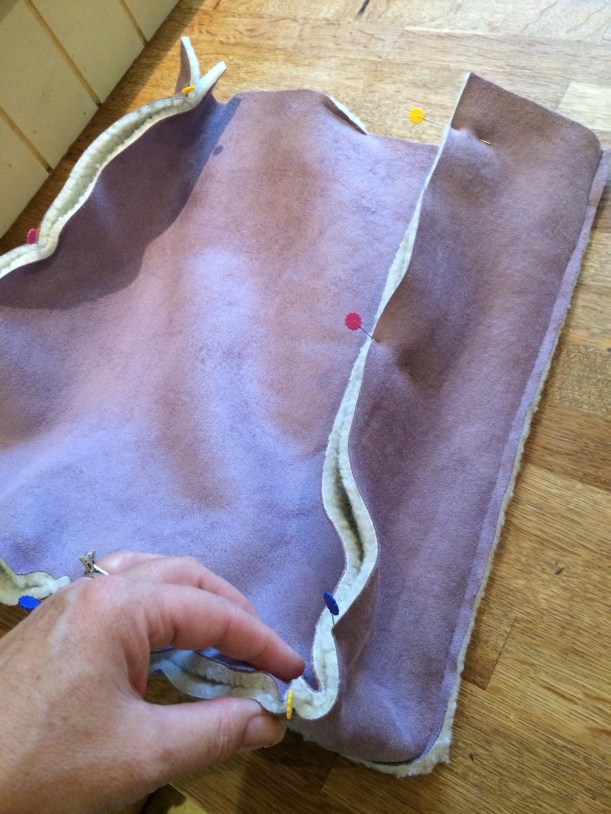
Pin the front to the remaining long edge of the gusset and stitch as before.
img_3324

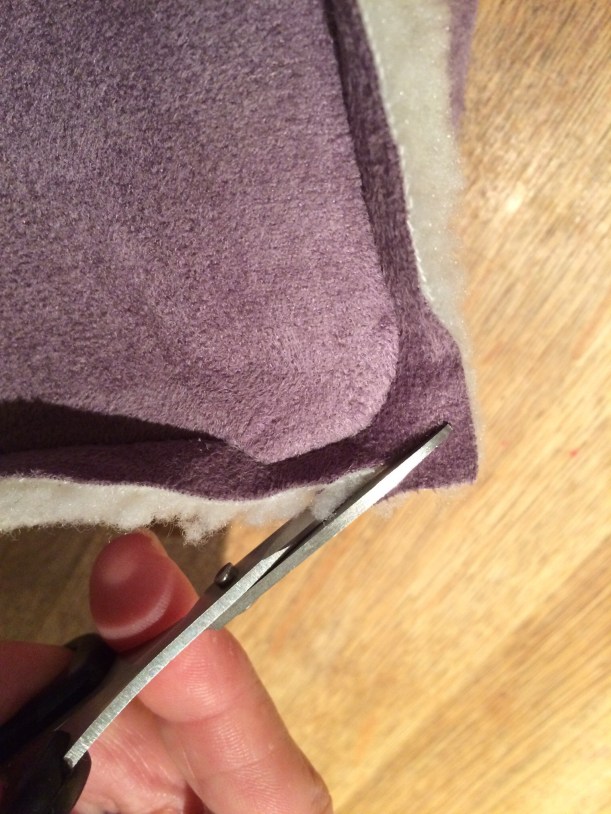
Trim the corners off the front and back sections to give a rounded finish.
img_3349.jpg

Onto the handles.

Fold in half lengthways with WRONG sides facing in.

img_3352

Stitch close to the raw edges.

img_3327.jpg

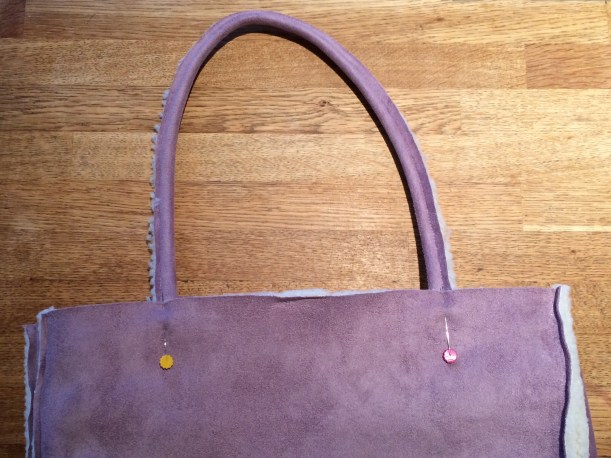
Pin handles about 3″ in from the sides of the bag, on the INSIDE.

img_3328

BASTE loosely in place if necessary, although I just pinned them.
img_3329

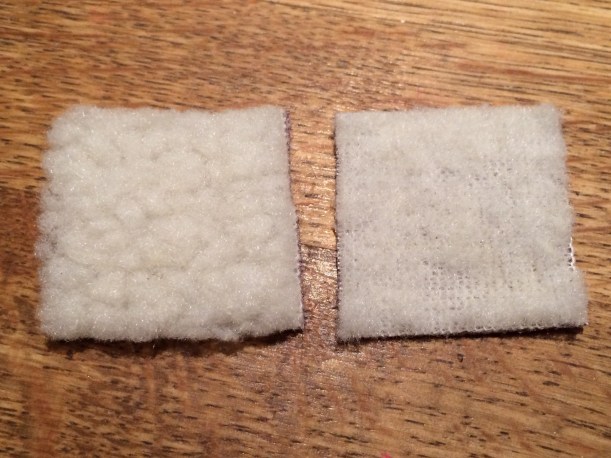
Take your 4 little squares – these will cover the ends of the handles to lend a neat finish on the inside of the bag.

img_3330

You will need to remove as much of the pile on the reverse side of the fabric as possible. This will reduce the bulk and leave a flatter surface.
img_3358.jpg

Pin each square over the raw edge of a handle and stitch in place, crossing your stitching to strengthen the base of the handles as shown below.

img_3331

img_3335

And that’s all there is to it!

This is the first one I made.

img_3359

img_3368

I even managed to make a second one using the rest of the scraps. There wasn’t enough to cut the main sections out in one piece, so I had to make a seam for the centre front and back, and I actually prefer this version.

img_3365

I added my label in a slightly different position and it looks just as good.

img_3361

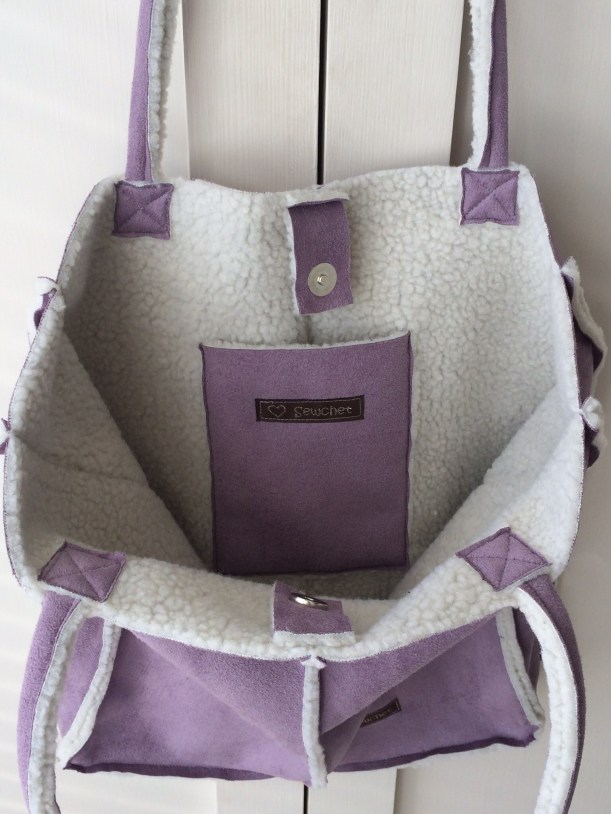
The inside is nice and roomy with the all-important interior pocket to keep your ‘phone easily accessible.
img_3367

The magnetic tabs give an element of security and stop the bag falling open.

img_3334

As always, your own label adds a professional touch both inside and out.

img_3366

The handles are short enough not to have the bag dragging on the floor (if you’re around the 5″ mark like me!), but also long enough for you to carry over your shoulder if that is your preference.

img_3339

One of these is to be a Christmas gift for family and the other one may well end up in my Stitching Santa parcel, depending on who I get in the draw.

Which is your favourite?


50 Comments

Birthday Gifts – A Purse (Wallet) And Matching Tote

We were invited to No.1 Son’s girlfriend’s parent’s house (are you with me?) at the weekend, for a barbeque.

It was his girlfriend’s mother’s birthday (keep up!) so we wanted to take a suitable present, but there was a tiny problem – we’d never met, so I had no idea what she would like.

Obviously I was going to make a gift and, after a little indecision, settled on a purse (wallet, for our U.S. friends) and a matching tote.

I found this great tutorial at Confessions Of A Fabricaholic and got cracking straightaway.

I had some leftover vinyl from the One Hour Ikea Bag and searched through my (massive) stash before whittling it down to these grey and pink coordinating cottons, using just the dotty ones in the end.

P1050993

The tutorial is pretty comprehensive and soon I had put the main pieces together.

P1050995

After sewing the outside to the inside, it was simply a matter of turning through to the right side and top stitching.

P1050996

Et voilá – one (very pretty) vinyl purse!

P1050998

I chose to fit a magnetic snap closure simply because I’ve got loads of them and they really do give the best finish.

P1060001

The inside is a purse of two halves – one side is pink, the other is grey.

P1060003

The grey side holds all the real money.

Coins are kept safe in the zipped pocket….

P1060011

….which is lined with the contrasting pink.

P1060016

Notes are stashed in the open pocket below.

P1060015

The pink side houses the ‘pretend’ money and can accommodate up to eight credit cards or similar.

P1060006

P1060013

Just in case there was any doubt I included a label from Hobbycraft.

P1060012

I whipped up a simple tote using the same principle as the One Hour Ikea Bag but with dimensions and handles more suited to a shopper.

P1060018

Box corners makes for a more spacious interior.

P1060025

Matching grey webbing is perfect for two short handles.

P1060021

I think they make quite a smart set for nipping down to the corner shop for a loaf of bread and a pint of milk. (In my dreams. We don’t have a shop in our village.)

P1060019

All wrapped up and ready to go – complete with handmade birthday card!

P1060027

Update: The handmade purse (wallet) and matching shopper was a huge success fortunately – she loved it!


71 Comments

One-Hour ‘Ikea’ Bag

Continuing the theme of ‘One-Hour’ makes (well, it wasn’t really a theme until just now when I realised that this project also took less than an hour to make), I’ve designed a simple pattern along the lines of one of those big blue Ikea bags.

You know the ones; they make great laundry bags, shopping bags, picnic hampers etc., but there’s one major design fault – they’re just so damned ugly!

P1040710

There’s a huge choice of suitable vinyl fabric out there, but I fell in love with this “Butterflies” print and ordered a couple of metres online which turned out to be more than enough.

P1040667

I did come across a tutorial but it involved printing off a pattern on about twenty sheets of A4 paper, piecing it all together, sellotaping and then cutting out, all of which would take longer than actually making the entire bag!

There had to be a better way so, after hours and hours of head-scratching, making sample after sample and at least a dozen pattern refinements (not really!), here is my somewhat simpler pattern: –

Cut one piece of vinyl fabric 90cm x 120cm.

That’s it.

P1040674

Now, vinyl is notoriously difficult to iron because, basically, it just melts and welds itself to your iron. So you can either buy it from a shop and ask them to roll it for you or put up with the creases which will eventually disappear. A hairdryer is said to speed up this process.

I didn’t bother:)

The only other supplies you’ll need are 2 1/2m of 2.5cm polyester webbing and some matching thread.

P1040679

P1040677

Stitching vinyl needs a little bit of forethought as it can be tricky. Sewing right sides together is no problem but when top stitching you may need to change to a Teflon coated foot or improvise with masking tape on the bottom of your normal foot. Putting a layer of tissue paper between the machine bed and the vinyl works for the bottom layer, with the added bonus of ripping away easily afterwards.

Use clips instead of pins to avoid any tell-tale holes in the vinyl.

A longer stitch length is used too, as a short stitch can weaken the vinyl and it could rip between the stitches.

P1040682

Start by folding your fabric with right sides together aligning the two short edges and sew a 1cm seam along each side, leaving open along the edge opposite the fold.

P1040683

Bring the seam to the centre and lay flat to form a corner as below. Mark 18cm from the corner along the seam and draw a line all the way across at right angles to the seam as shown.

P1040685

Sew along this line.

P1040686

Trim the excess fabric leaving a 1cm allowance.

P1040688

Repeat with the opposite corner, then turn the bag right sides out.

P1040689

Turn down a 2.5cm hem and stitch close to the raw edge.

Cut some webbing: –

2 x 35cm

2 x 74cm

Lay a short length of webbing on top of a longer length about 1cm from the end as shown.

P1040690

Fold the overhang back over as shown below and tack together through all layers.

P1040691

Repeat with the other ends of the webbing, being careful not to twist it in the process.

Make the other set of handles in the same way.

P1040692

With the raw edges of the handles facing the wrong side of the bag, stitch in place 32cm in from each side seam.

P1040695

P1040697

To ensure that there is plenty of strength at the point where the handles join the bag, I stitched a cross within a square as shown in the photo below.

P1040698

Attach the other pair of handles in the same manner.

P1040699

Finish with a second row of top stitching around the entire top edge about 4mm in from the first row.

P1040700

Fill with laundry and go peg your clothes on the line!

P1040708

P1040709

P1040712

P1040722

P1040719

P1040715

P1040713

P1040724

Well, the girls seem to approve of the stranger in the garden!

Anyone tempted to have a go at making an Ikea style laundry bag?