
Continuing the theme of ‘One-Hour’ makes (well, it wasn’t really a theme until just now when I realised that this project also took less than an hour to make), I’ve designed a simple pattern along the lines of one of those big blue Ikea bags.
You know the ones; they make great laundry bags, shopping bags, picnic hampers etc., but there’s one major design fault – they’re just so damned ugly!

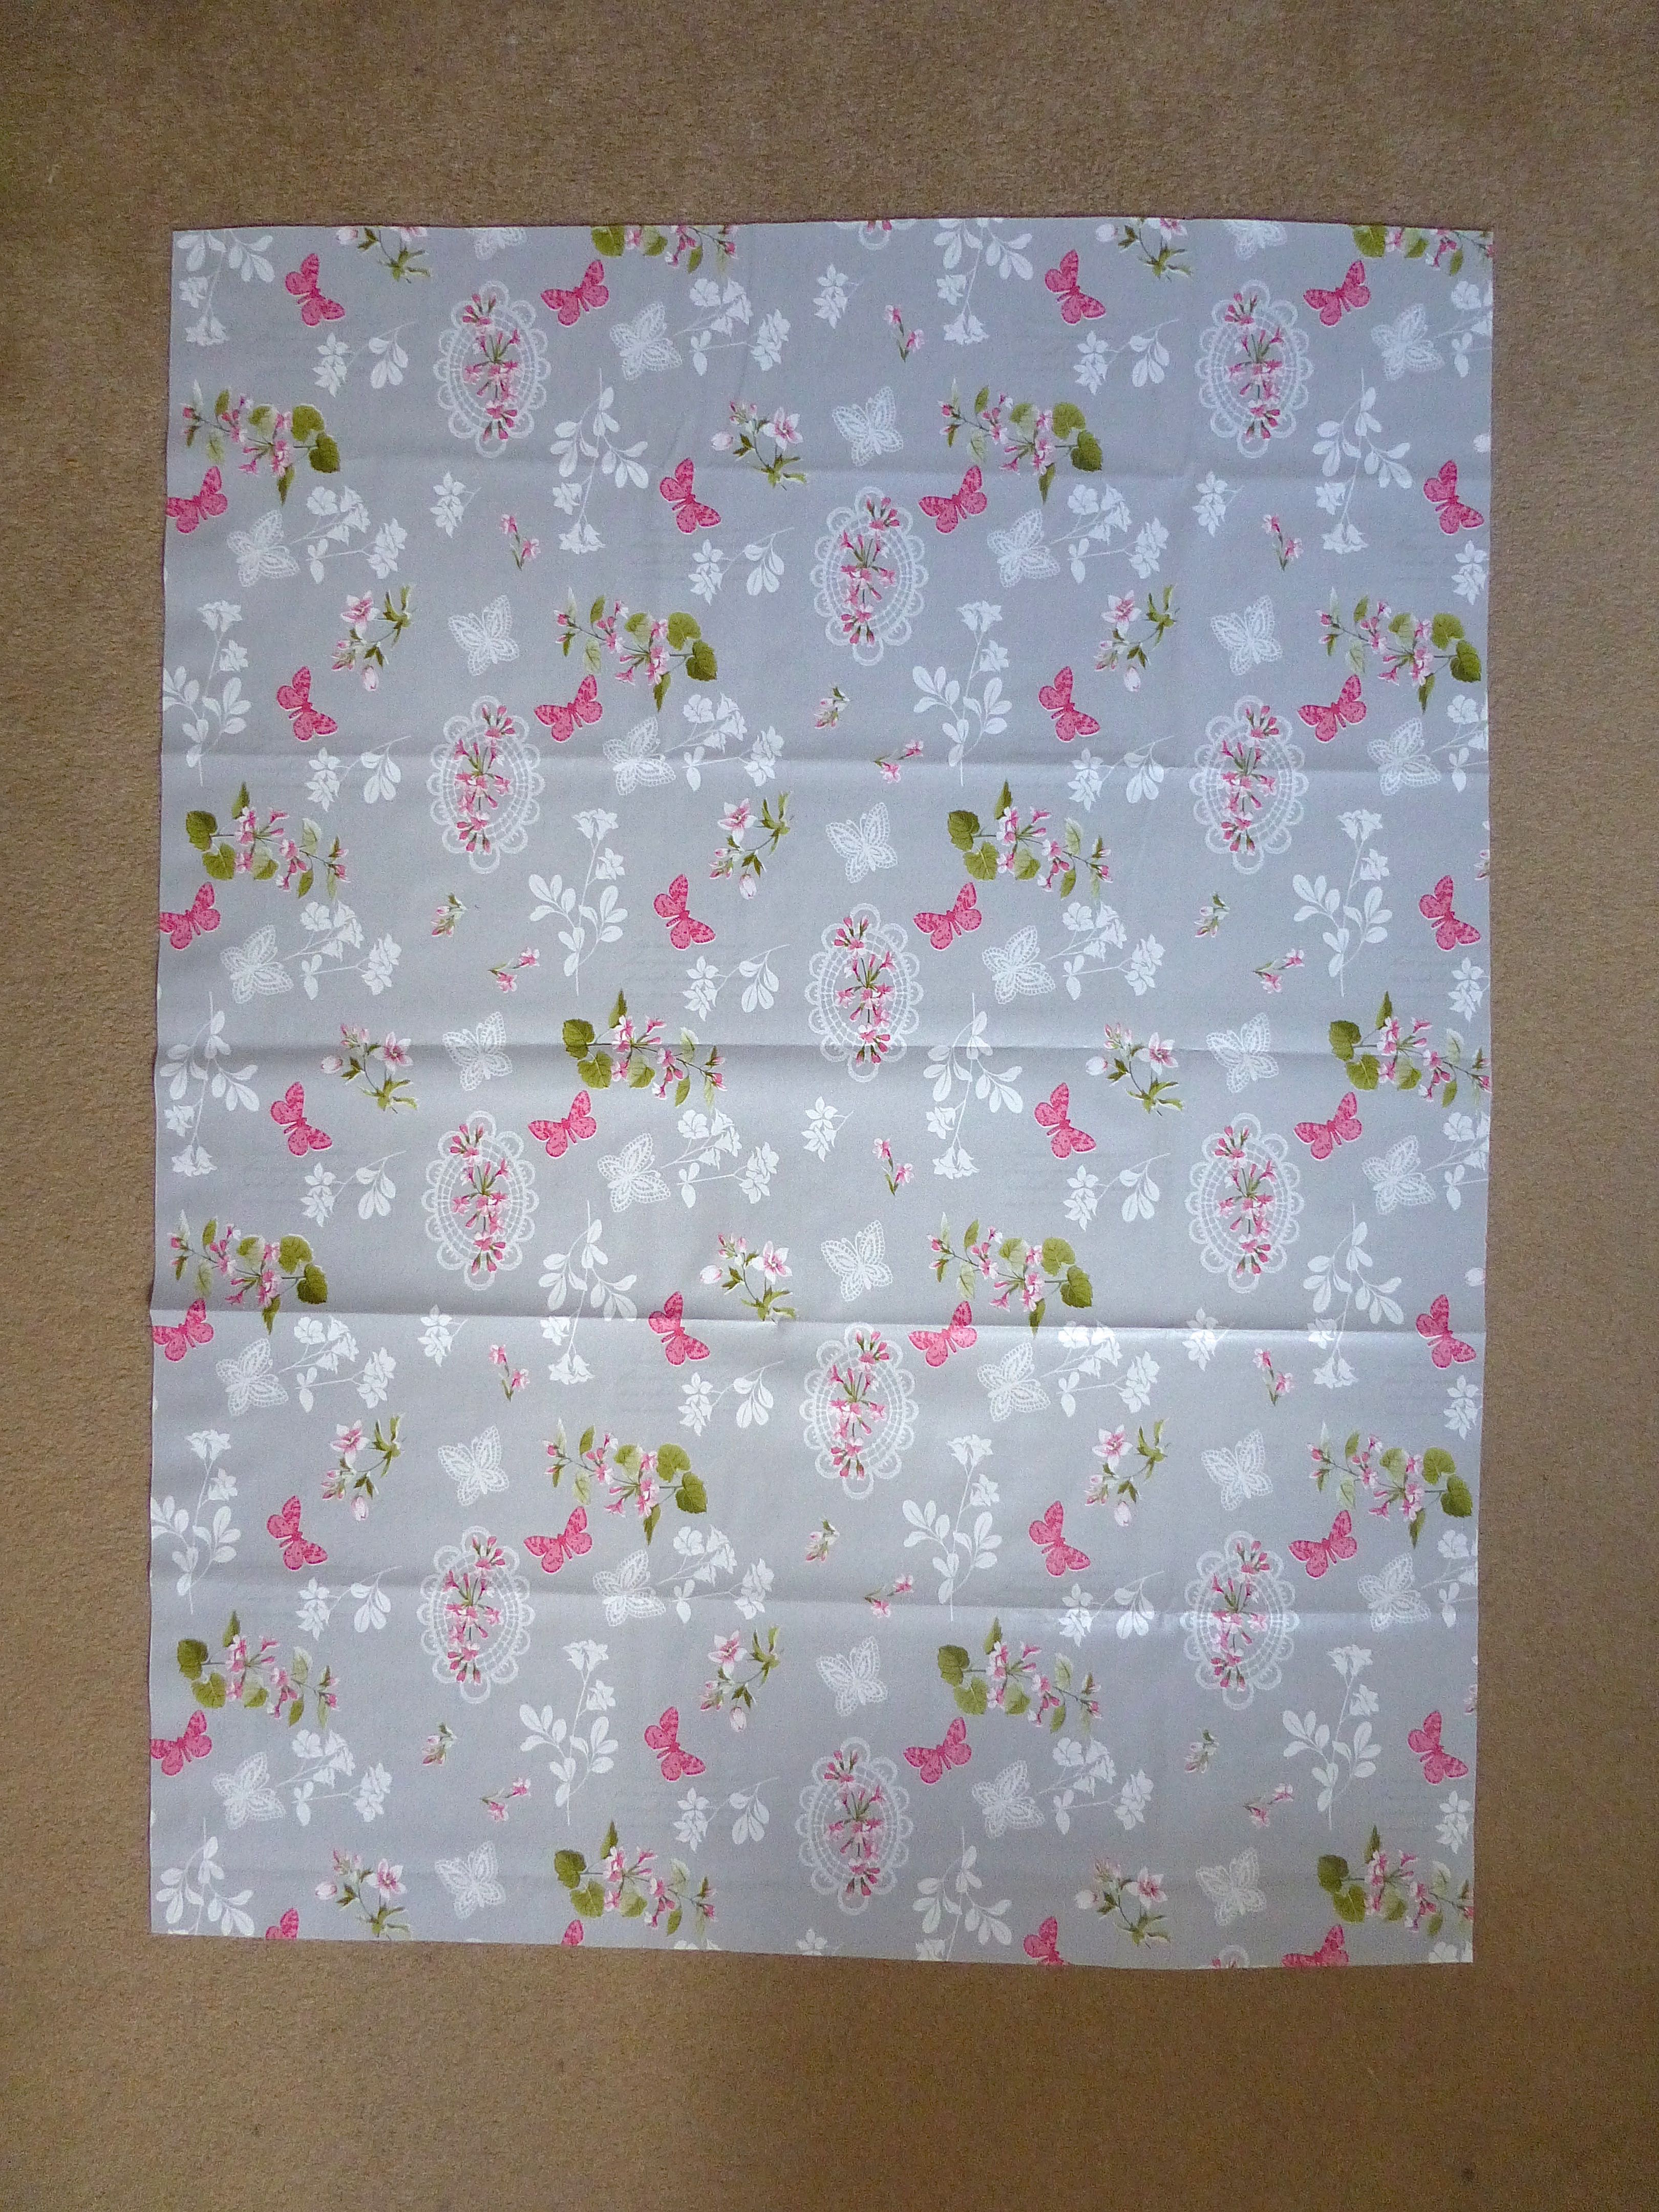
There’s a huge choice of suitable vinyl fabric out there, but I fell in love with this “Butterflies” print and ordered a couple of metres online which turned out to be more than enough.

I did come across a tutorial but it involved printing off a pattern on about twenty sheets of A4 paper, piecing it all together, sellotaping and then cutting out, all of which would take longer than actually making the entire bag!
There had to be a better way so, after hours and hours of head-scratching, making sample after sample and at least a dozen pattern refinements (not really!), here is my somewhat simpler pattern: –
Cut one piece of vinyl fabric 90cm x 120cm.
That’s it.
Now, vinyl is notoriously difficult to iron because, basically, it just melts and welds itself to your iron. So you can either buy it from a shop and ask them to roll it for you or put up with the creases which will eventually disappear. A hairdryer is said to speed up this process.
I didn’t bother:)
The only other supplies you’ll need are 2 1/2m of 2.5cm polyester webbing and some matching thread.


Stitching vinyl needs a little bit of forethought as it can be tricky. Sewing right sides together is no problem but when top stitching you may need to change to a Teflon coated foot or improvise with masking tape on the bottom of your normal foot. Putting a layer of tissue paper between the machine bed and the vinyl works for the bottom layer, with the added bonus of ripping away easily afterwards.
Use clips instead of pins to avoid any tell-tale holes in the vinyl.
A longer stitch length is used too, as a short stitch can weaken the vinyl and it could rip between the stitches.

Start by folding your fabric with right sides together aligning the two short edges and sew a 1cm seam along each side, leaving open along the edge opposite the fold.

Bring the seam to the centre and lay flat to form a corner as below. Mark 18cm from the corner along the seam and draw a line all the way across at right angles to the seam as shown.

Sew along this line.

Trim the excess fabric leaving a 1cm allowance.

Repeat with the opposite corner, then turn the bag right sides out.

Turn down a 2.5cm hem and stitch close to the raw edge.
Cut some webbing: –
2 x 35cm
2 x 74cm
Lay a short length of webbing on top of a longer length about 1cm from the end as shown.

Fold the overhang back over as shown below and tack together through all layers.
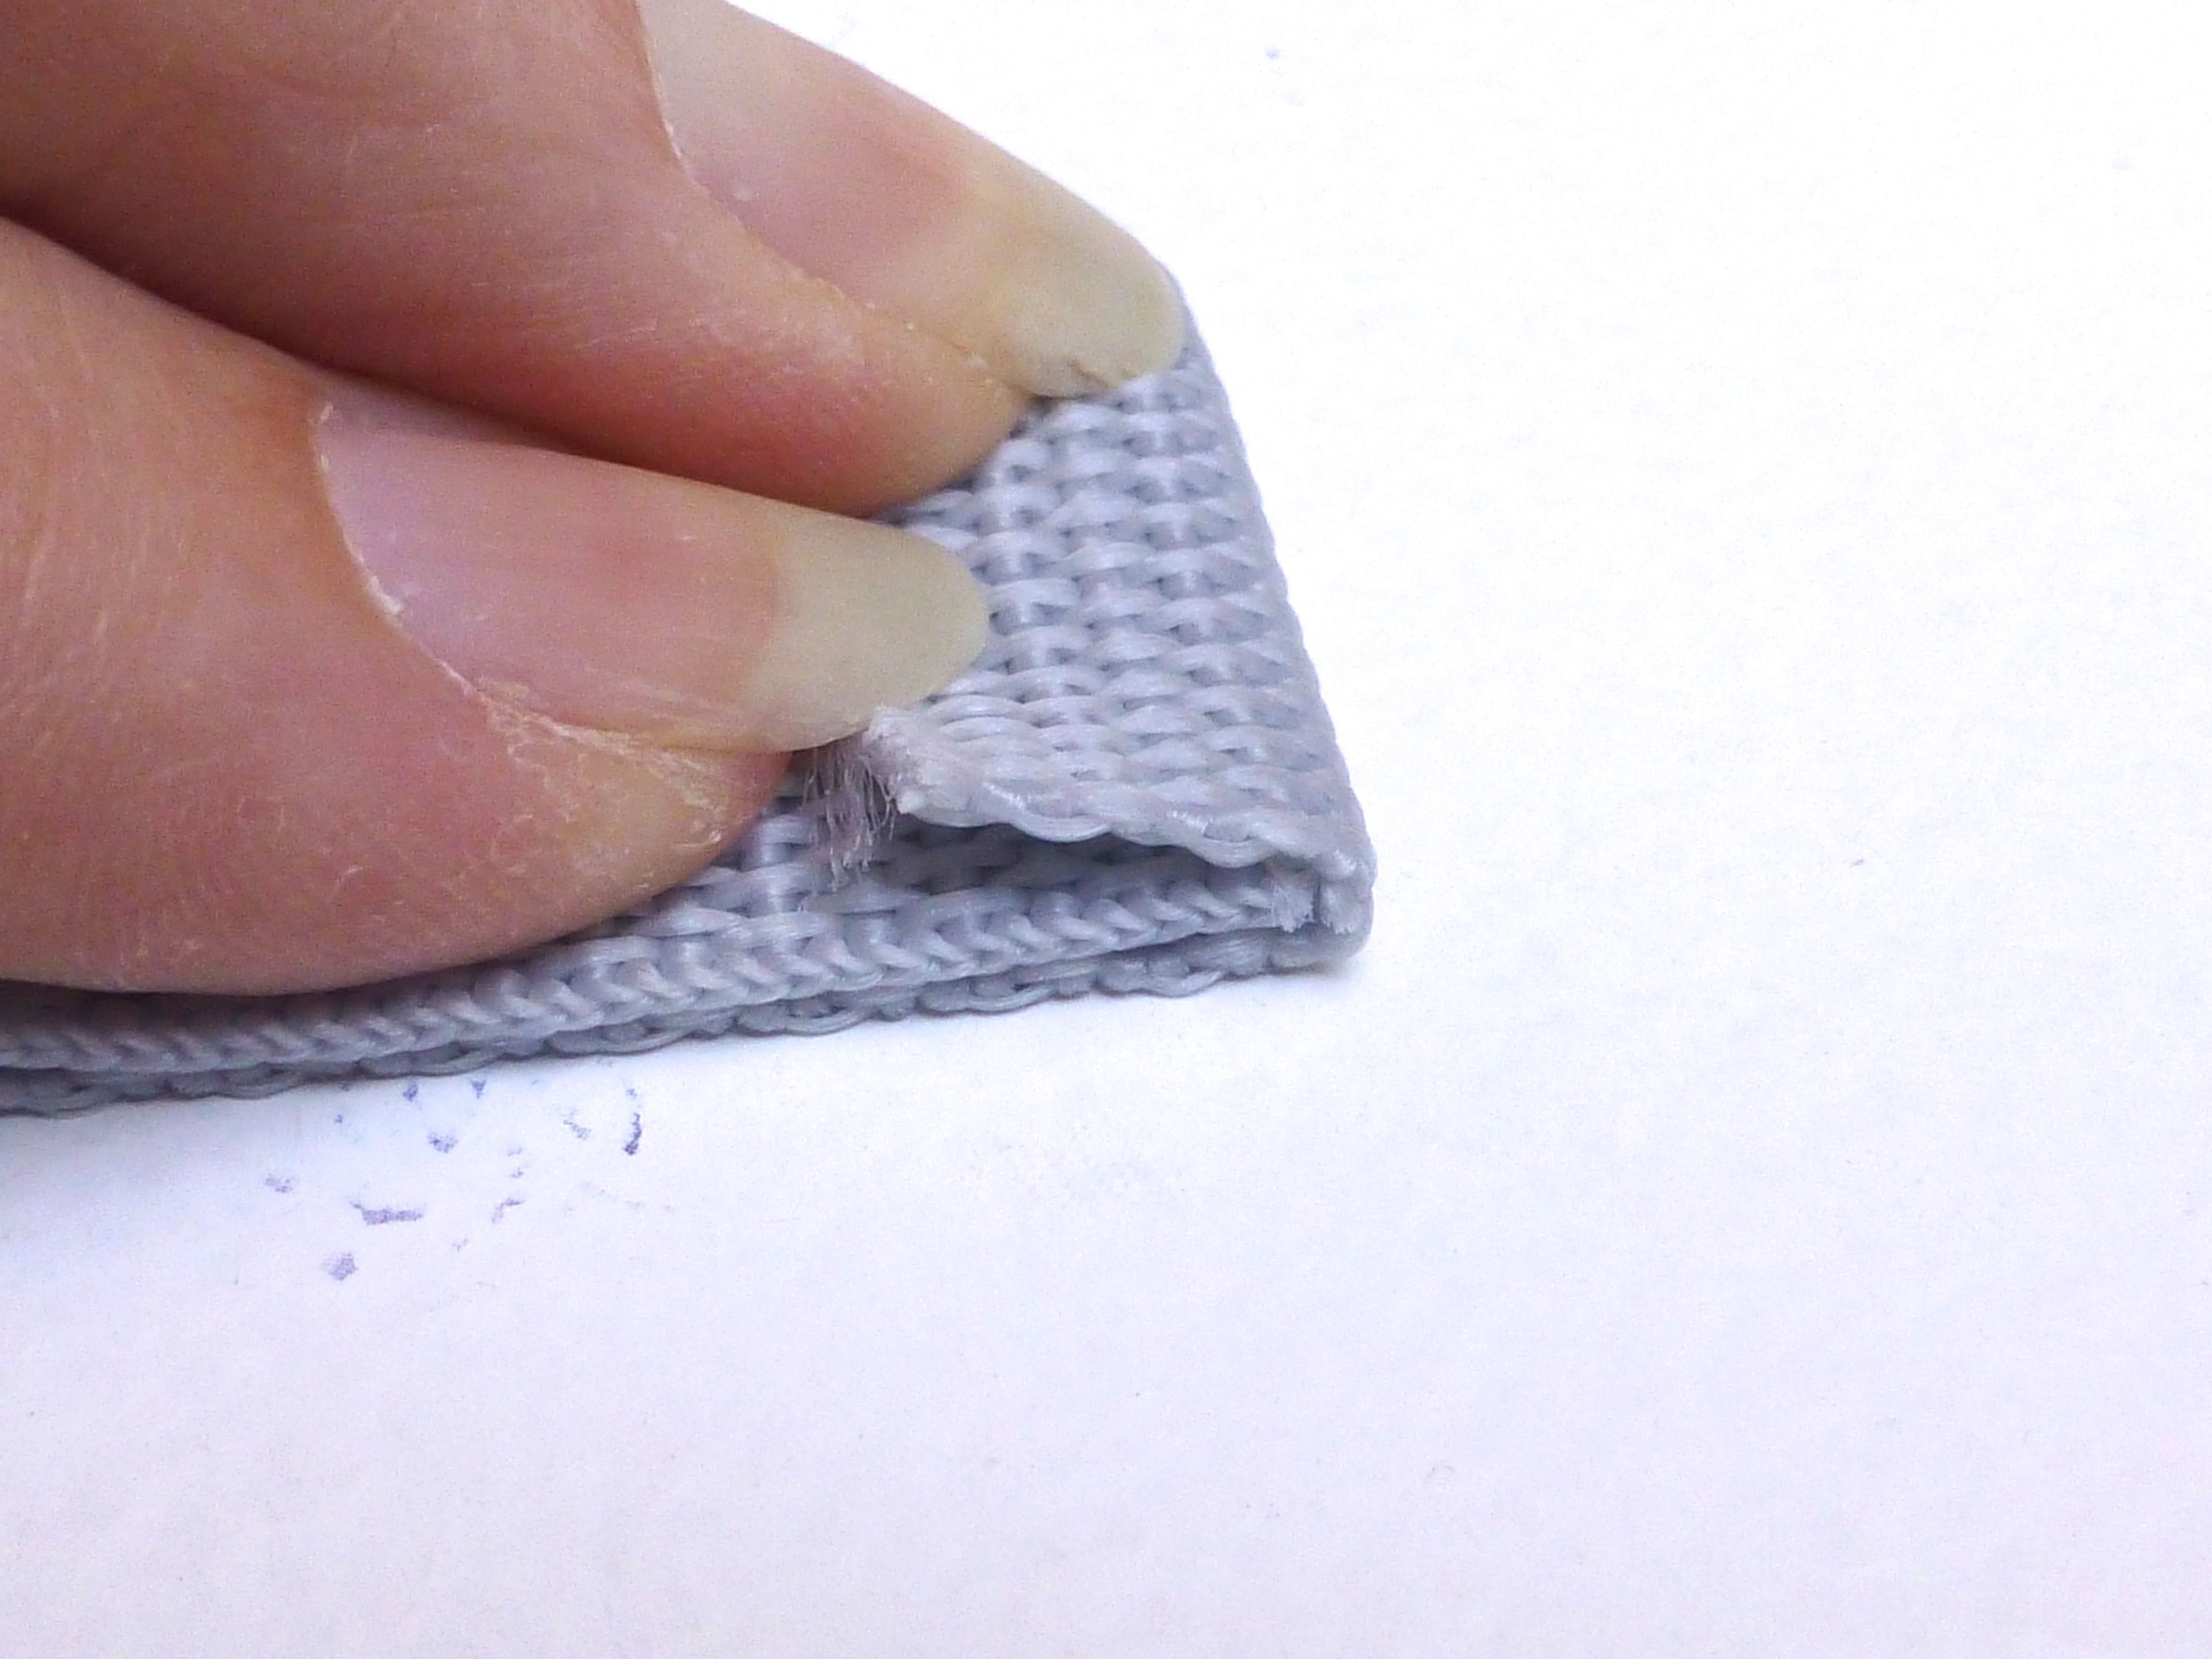
Repeat with the other ends of the webbing, being careful not to twist it in the process.
Make the other set of handles in the same way.

With the raw edges of the handles facing the wrong side of the bag, stitch in place 32cm in from each side seam.

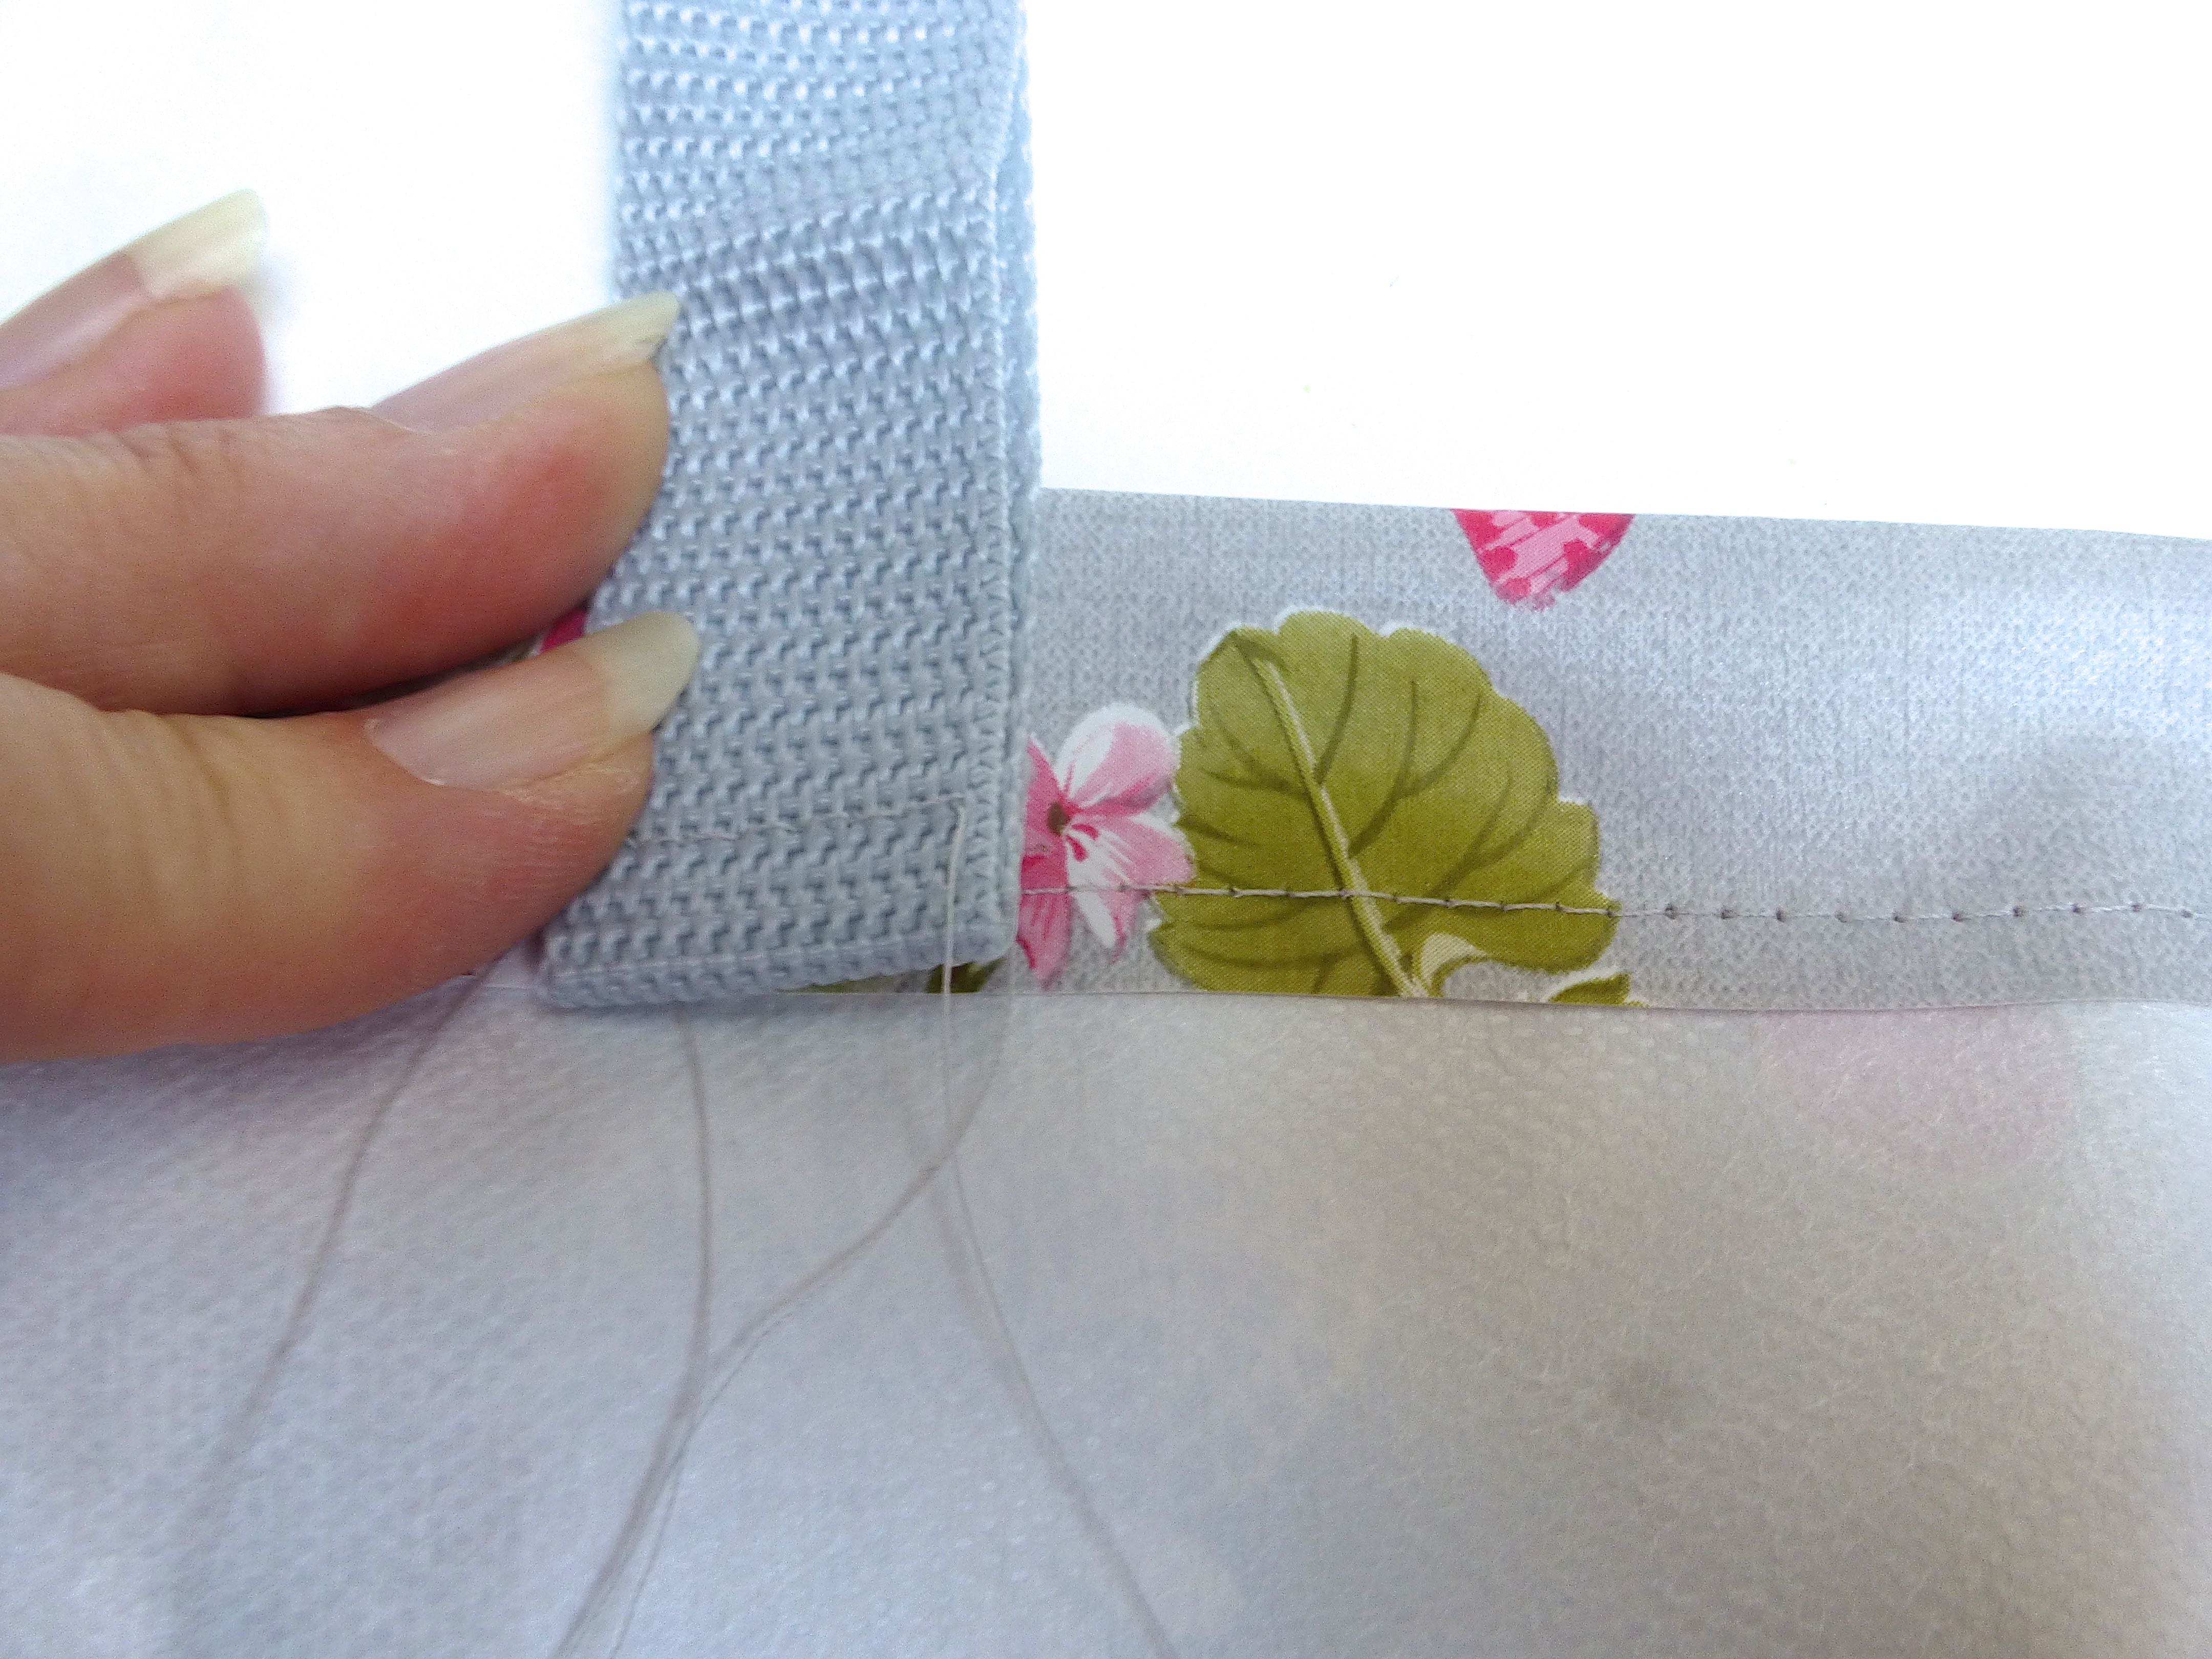
To ensure that there is plenty of strength at the point where the handles join the bag, I stitched a cross within a square as shown in the photo below.

Attach the other pair of handles in the same manner.

Finish with a second row of top stitching around the entire top edge about 4mm in from the first row.

Fill with laundry and go peg your clothes on the line!
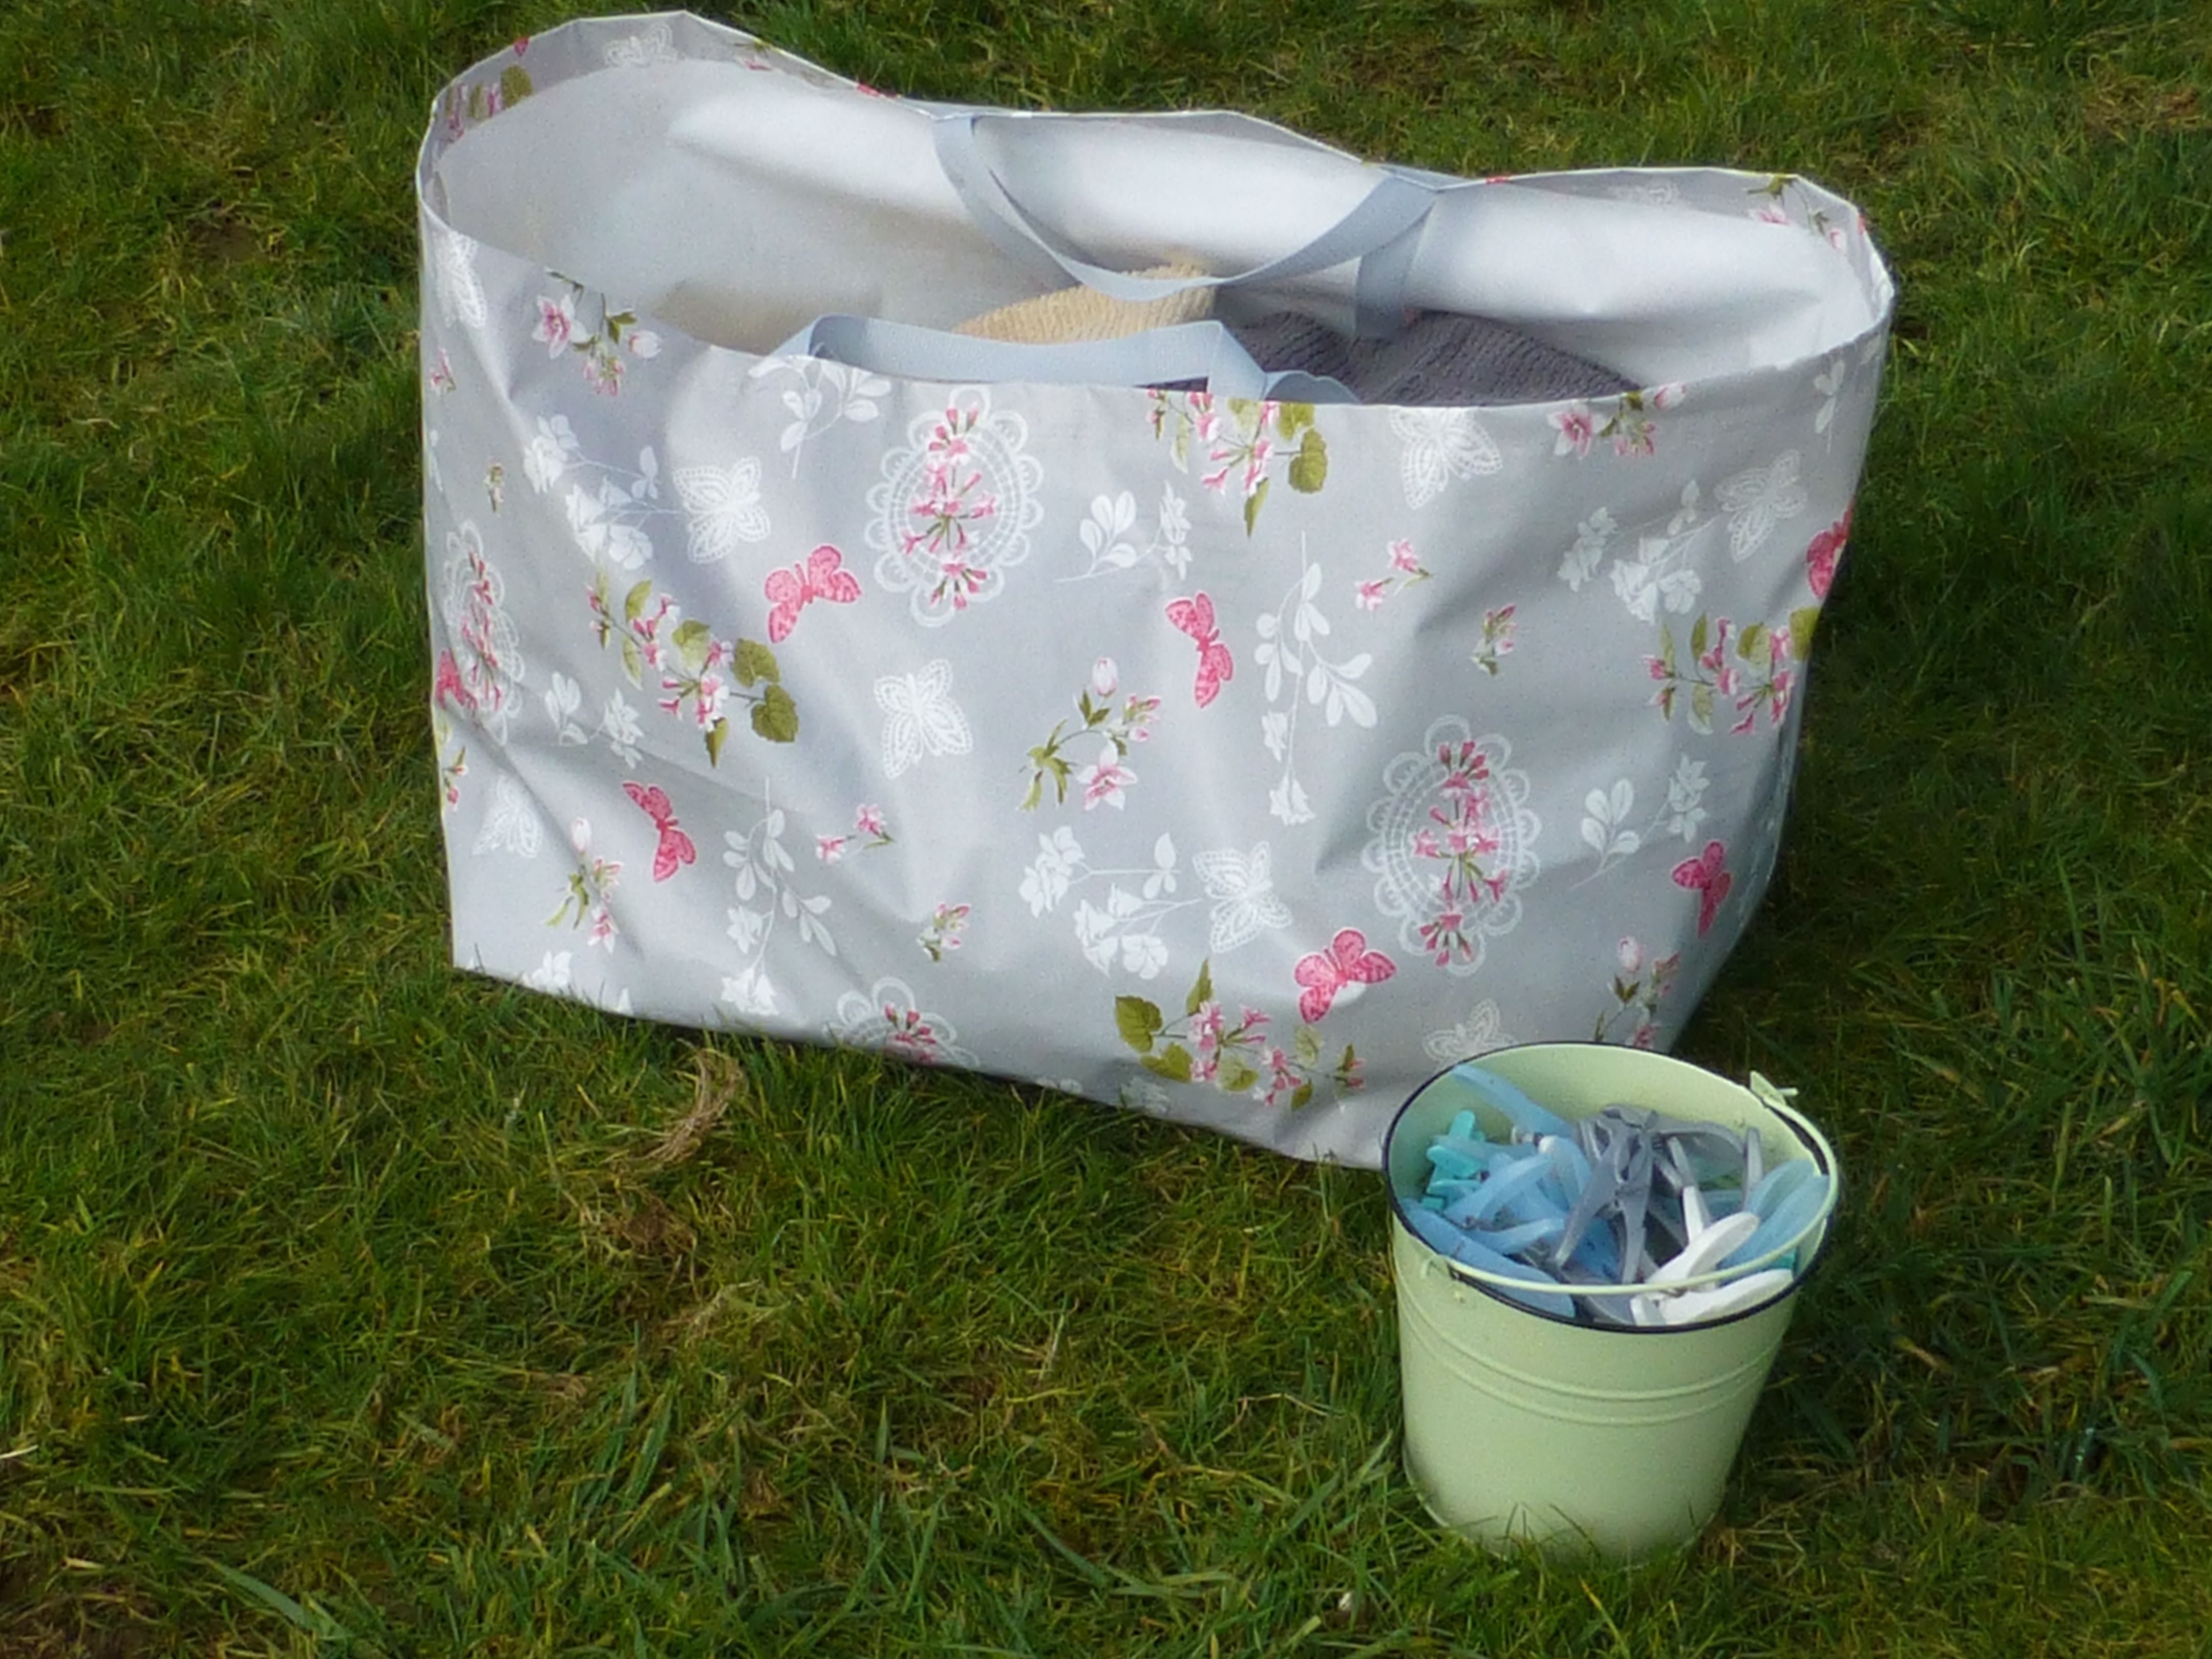


Well, the girls seem to approve of the stranger in the garden!
Anyone tempted to have a go at making an Ikea style laundry bag?
