Browsing Pinterest with no particular goal in mind is usually dangerous in that it will take away hours of your life that you will never get back again.
On this occasion, however, this image caught my eye almost immediately.
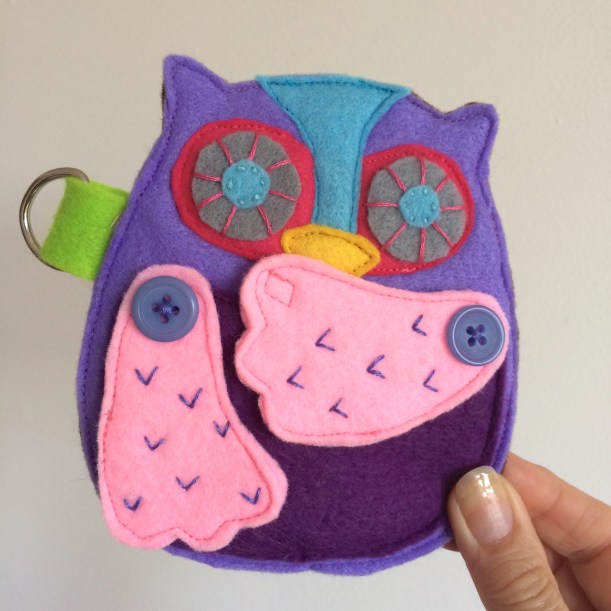
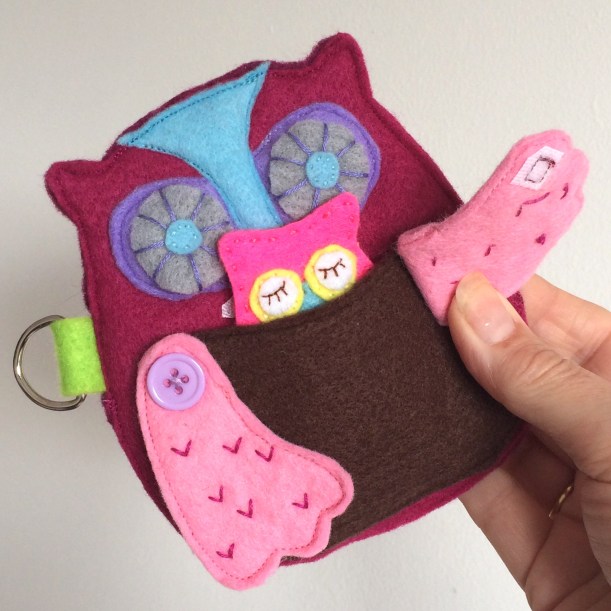
Now, owls are perennially popular and, when given a useful (not to mention cute) function, proved too irresistible a present-making opportunity for me.
I remember when my daughter was about ten she loved Polly Pocket and a large part of that enjoyment stemmed from its minuscule nature and the fact that, as it hung from a locket around her neck, it was a portable toy that could go anywhere with her, ready to play with as the urge arose. This purse had similar amusement potential.
Clicking on the image through to the original post revealed that the owl was a coin purse with – and this bit is crucial – a secret pocket!
Instantly I knew two little girls that would potentially love this, and I also had an idea for the contents of the secret pocket.
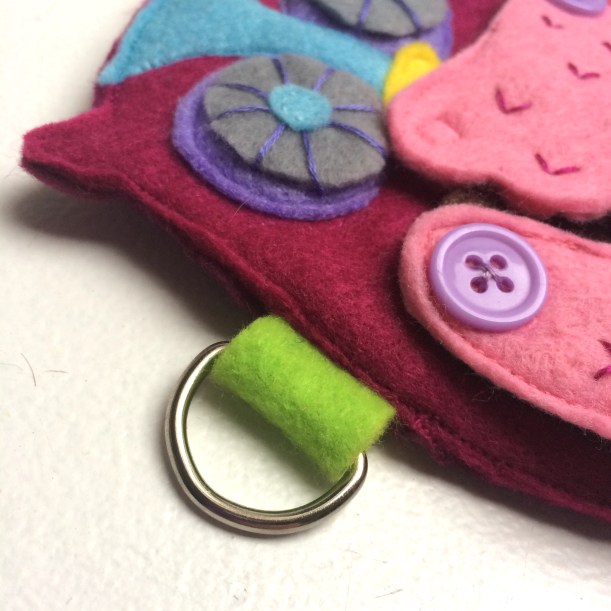
Made from scraps of felt, the only extras needed are a zip, D-ring and two buttons, all of which I already had so these were effectively ‘free’ projects.
Although if you were to count the hours spent (approx six for both) they’re probably the most expensive felt purses ever:)
The raw materials…..
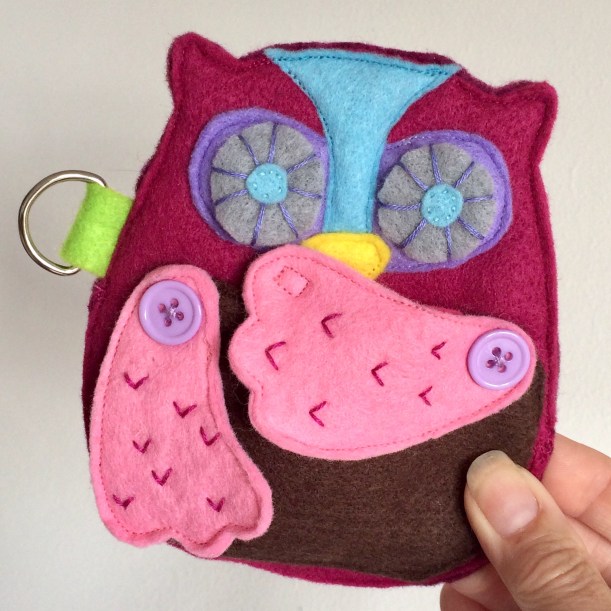
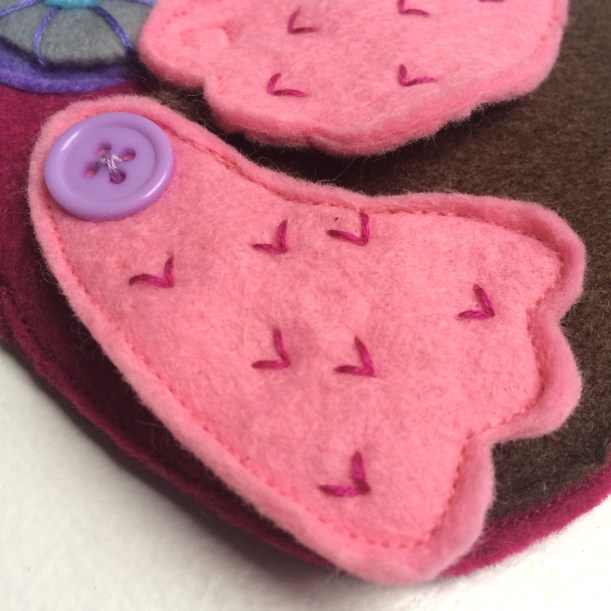
….the completed front and back before final construction.
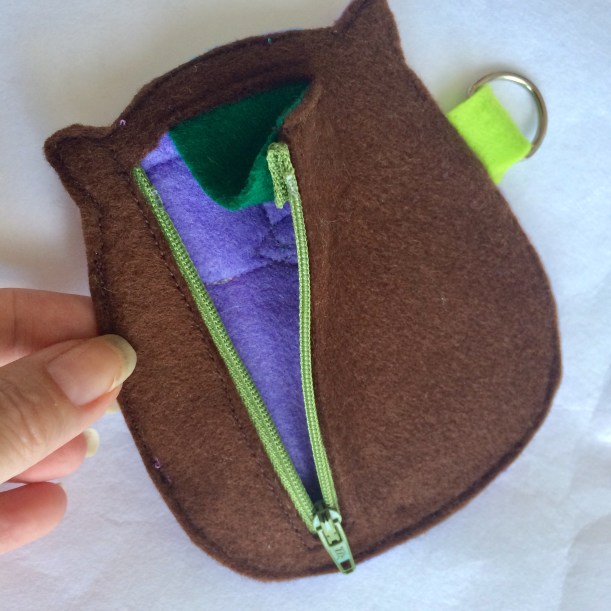
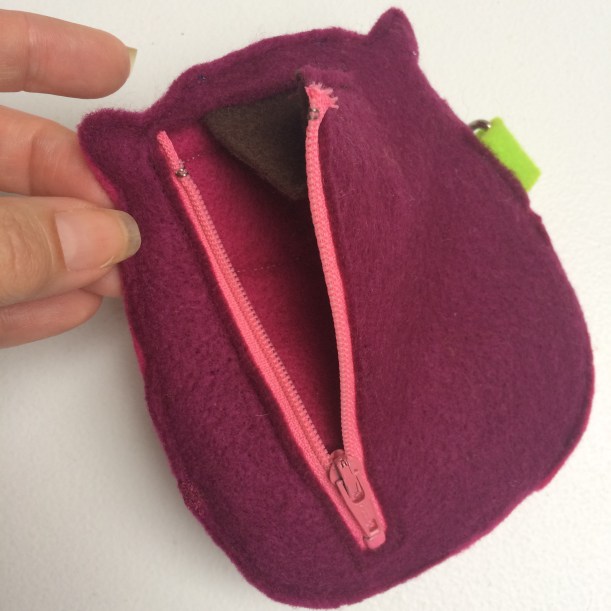
Here’s a peek at the insides.
A combination of hand and machine sewing make for an interesting mix.
I chose to include zips of contrasting colours, but you could match them to the felt for a more blended-in finish.
I’m going to buy some sprung keyring clips to attach to the D-rings.
A bit of hand embroidery makes a welcome change for someone who rarely gets the chance to indulge in such things!
The tutorial calls for a magnetic clip to close the secret front pocket, but I literally just used my last one so improvised with a tiny piece of Velcro.
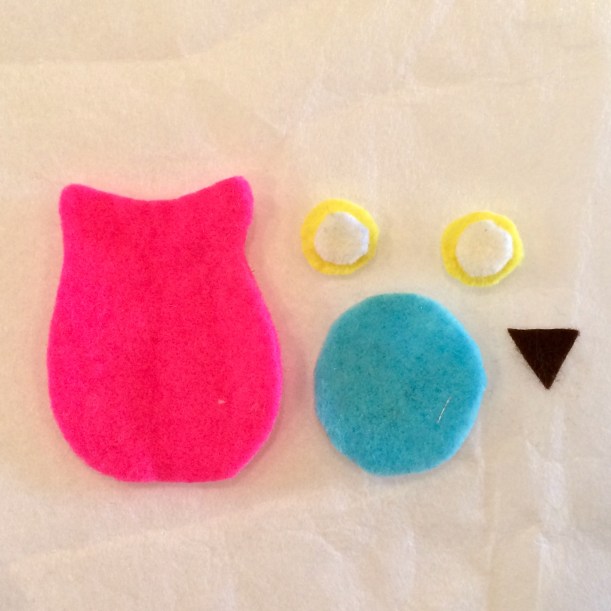
As for the secret contents, the obvious choice was a sleeping baby owlet.
I sketched out a quick pattern and cut out the pieces from neon-coloured felt.
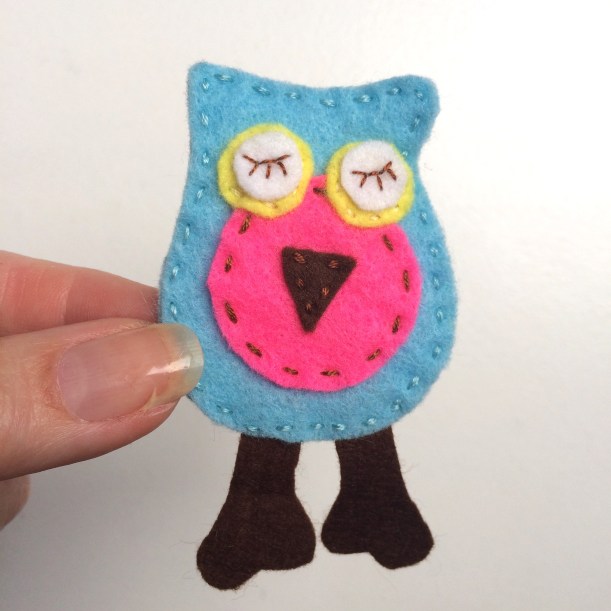
At the last minute I decided to add a pair of legs, sandwiched between the front and back layers of the body.
Another one made in opposite colours for the second purse.
Lift the flap and……a little surprise is revealed under the wing!
So there we are, one each for two girls that will, hopefully, derive as much fun from a tiny toy as my daughter did all those years ago.
Only a day late, but trying to get back into the swing of things with another Sunday Sevens.
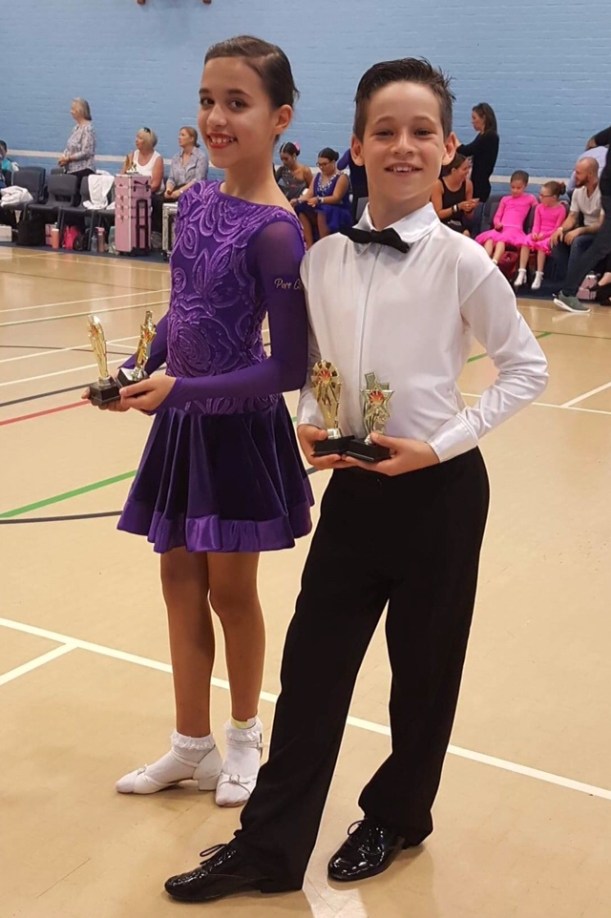
1. No.3 Son and his dance partner gained medals in their latest Latin and Ballroom competition – 2nd and 4th places in Waltz and Jive respectively.
2. It’s Somerset Art Weeks at the moment and I spent a day visiting some of the exhibitions with my sister and mother. This particular exhibition was in a converted barn on a farm where there were hungry piglets feeding.
3. My sister and I asked the artist to pose for a picture in front of some of her sketches.
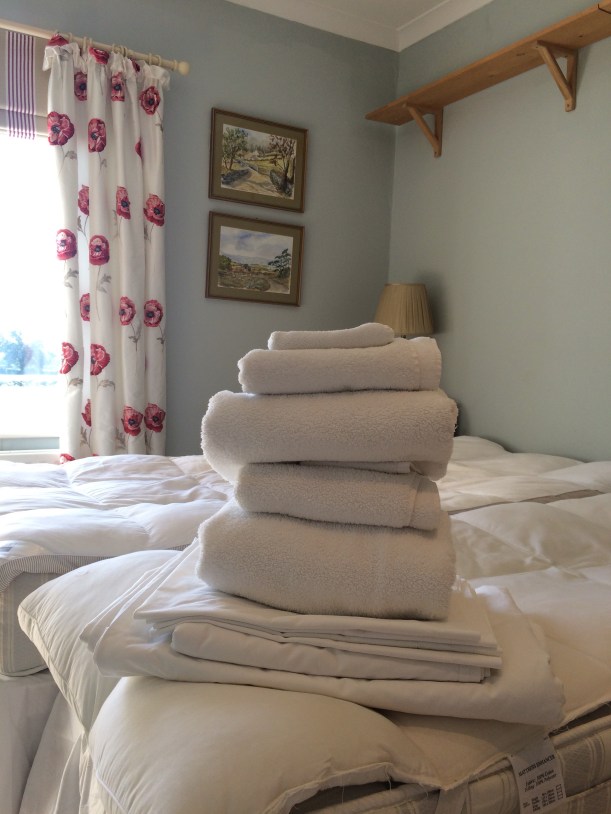
4. Back home we’re still getting bookings for b+b guests well into October, so I’m kept very busy with laundry/cleaning/cooking.
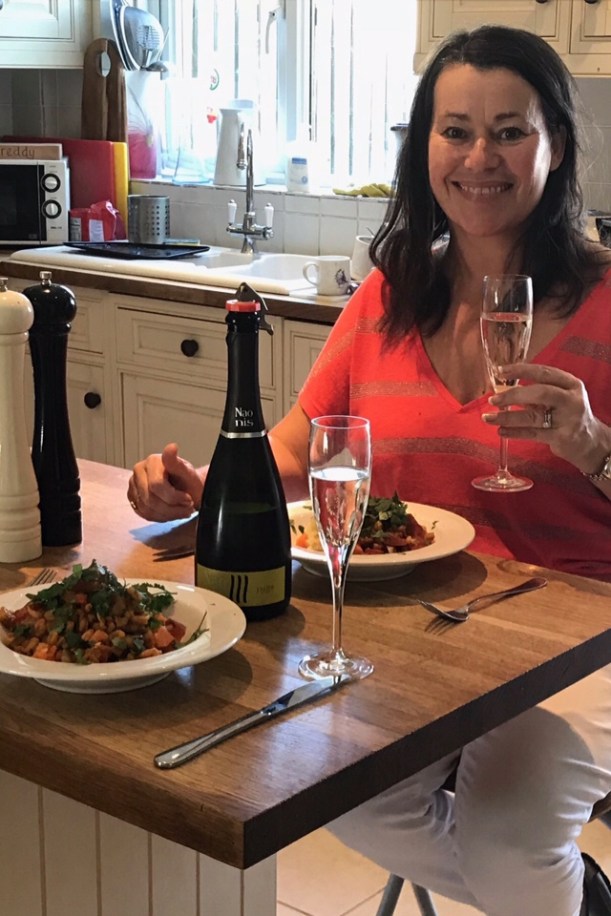
5. I keep expecting business to die out for the season, but if more guests give us a bottle of bubbly from their own village in Italy as a ‘Thank you”, then I don’t mind!
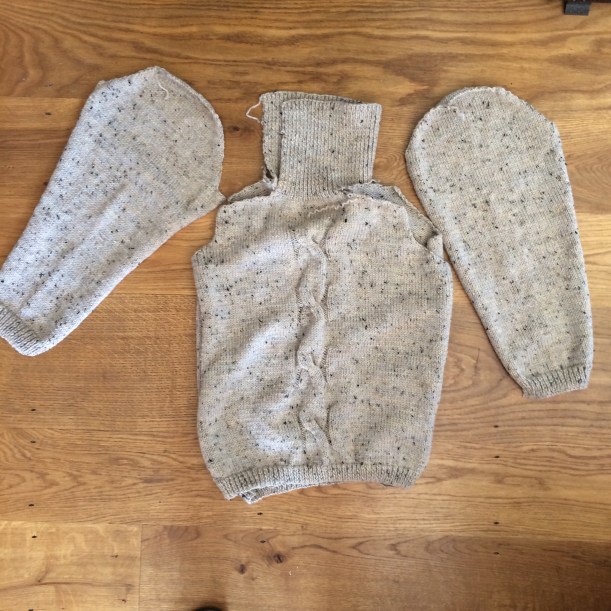
6. Jumper weather isn’t here just yet, but I resurrected this make from a couple of years ago which has never been worn because I wasn’t happy with the way the seams were finished – so I unpicked them all.
7. Ready to be put back together with a better method of joining this time.
8. Following on from last week’s Christmas present make of a jumper, I cast on again.
9. This will be a really striking and unusual asymmetric poncho, also destined to be a Christmas present. And if they don’t like it – I do! This one will be hard to give away.
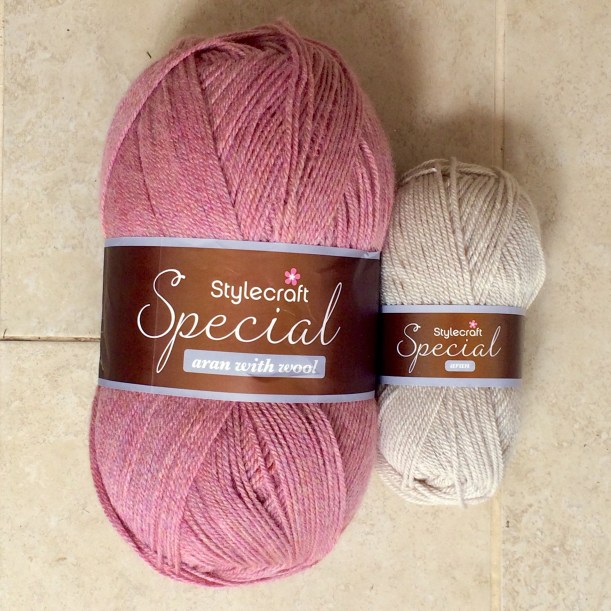
10. I cast on another present as well, in these two colours.
12. Progress as of Sunday night is looking good.
13. I finally wrapped up and sent off The Wedding Blanket to its new owners, who have since received it and sent their thanks.
I’m really focused on Christmas presents now and feel like I’ve made some good progress this last couple of weeks – how are you getting on with yours?
In my last post I showed you the necklace that I made to go with the top I had just finished, to add a bit of colour to the neckline.
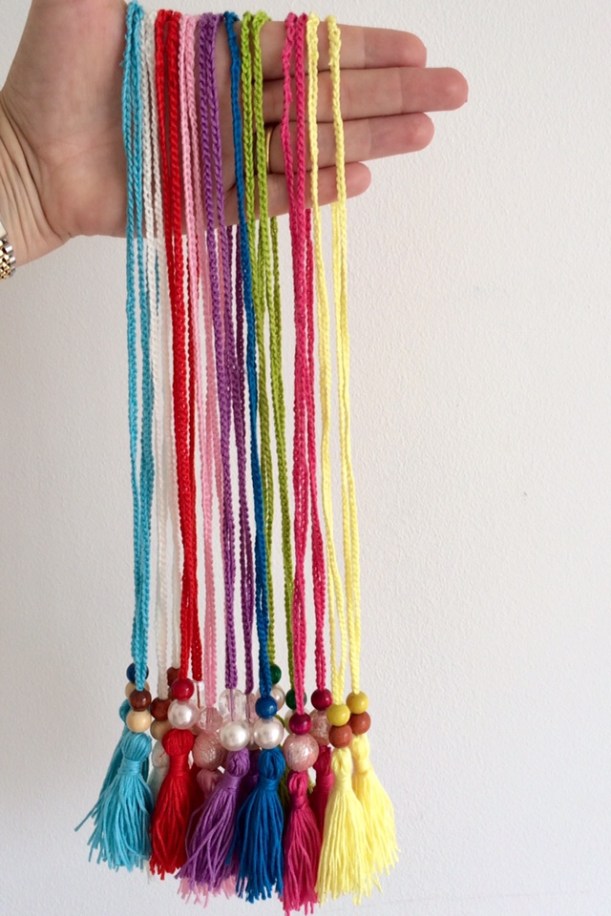
It was quick and easy to do, so I decided to make a whole bunch more for the school to sell at their Summer fair – and here they are!
The lovely folk on Instagram said that a tutorial would be nice, so here goes….
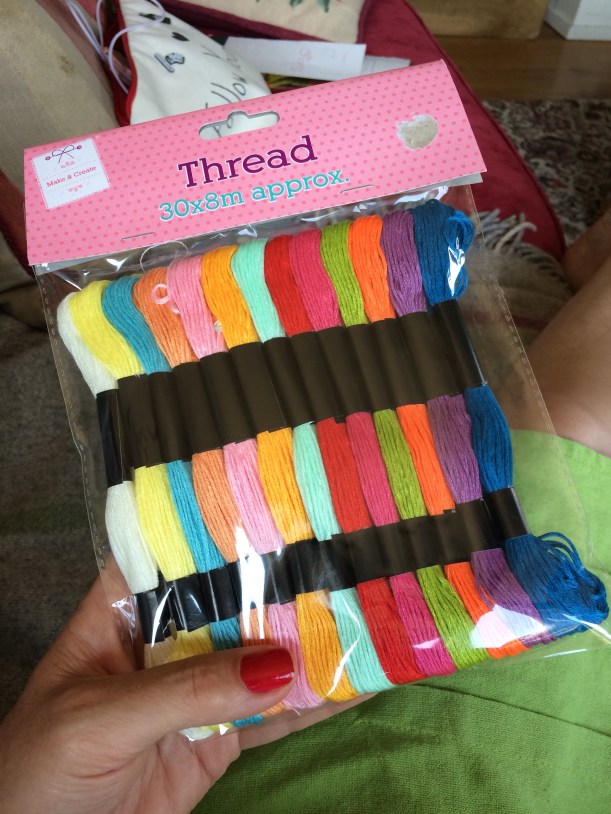
For each necklace you will need one skein of embroidery floss. I bought this packet of 30 for just £3.00 from The Works which, as most of the beads were rescued from broken jewellery, works out at only 10p each – perfect for the school fair, or any fundraising event.
I chose beads ranging from natural wooden ones to lace covered pearlescent ones.
For the necklace itself you will need a 2.5mm crochet hook.
Simply crochet a chain to your desired length then fasten off.
Tie the threads together in a double knot to complete the circle.
Weave in the ends through a few chains and trim neatly.
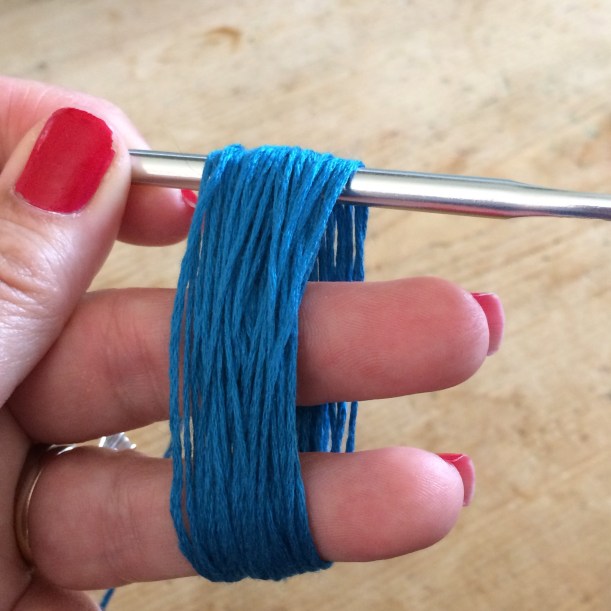
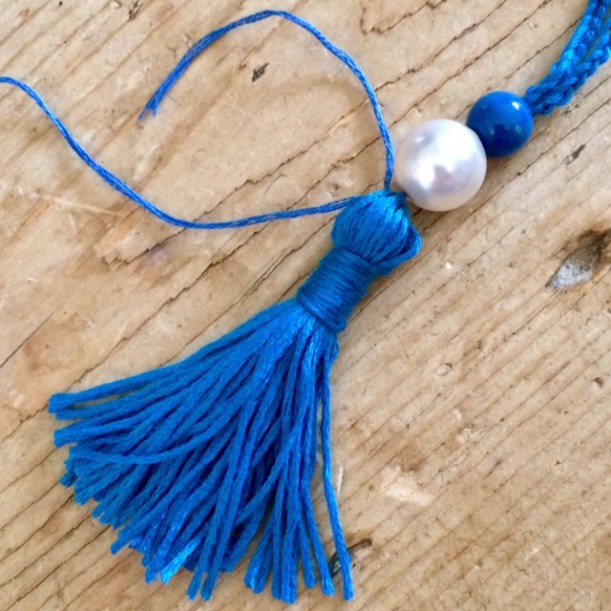
Using all the remaining floss, wrap it continuously around three fingers, leaving a tail of about 12″.
Take a 5.50mm crochet hook….
….and pass the handle through the loops as shown.
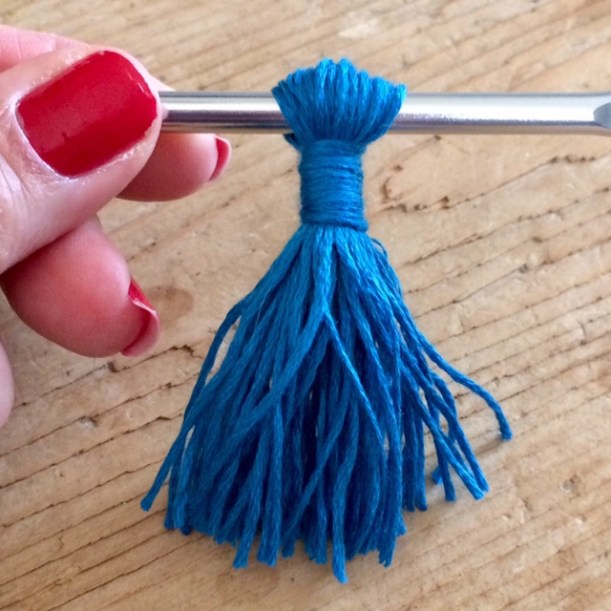
Using the 12″ tail, wind the floss tightly, close to the crochet hook.
Secure the floss with a knot.
Cut through the bottom loops to form your tassel.
Leave the crochet hook in place for now.
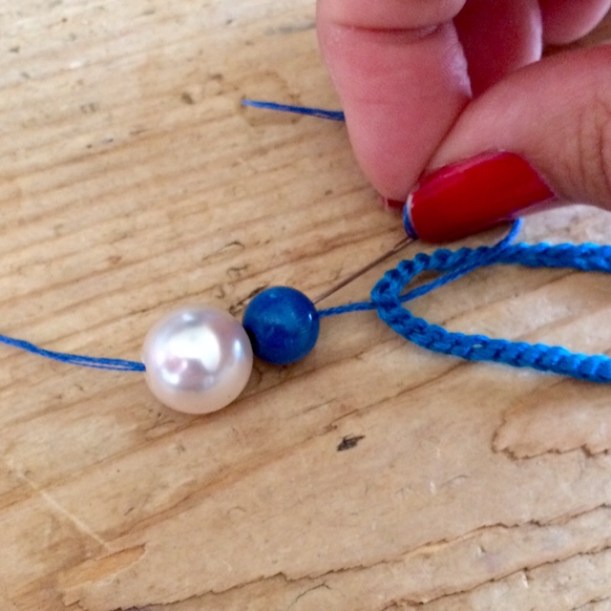
Thread a needle with about 10″ of matching thread.
Take your beads and, starting at the bottom, pass the needle up through all the beads, around the crocheted chain and back down through all the beads.
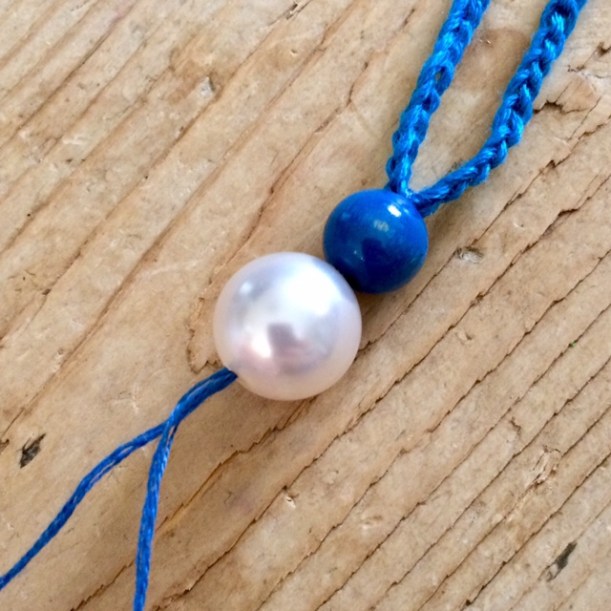
Push the beads up tight to the crocheted chain. Both ends of the floss should be hanging down from the bottom bead at this point.
Pass your needle through the top loops that are still on your crochet hook.
Tie the ends together securely.
Hide the ends by passing the needle through the wrapped section and trim to the length of the tassel.
And that’s it!
These are some of the other ones I made.
I think the girls at the school fair will have no problem parting with their pocket money for one of these.
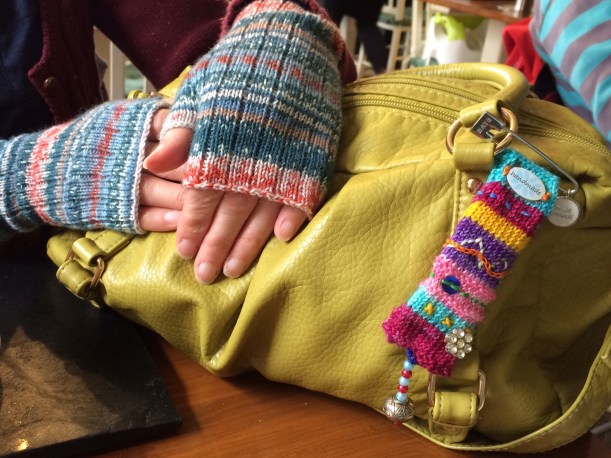
It was my sister’s birthday on Monday and she had previously dropped a heavy hint for some more fingerless gloves, as hers (also made by me) had seen better days.
You may remember the knee length socks I made her for Christmas…..
….well, I had enough left over wool to make a matching pair of fingerless gloves – so I did!
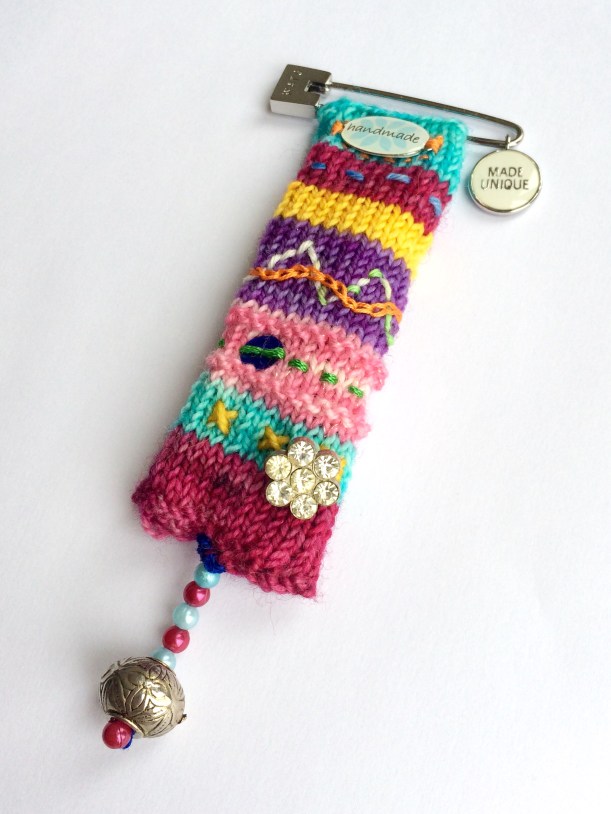
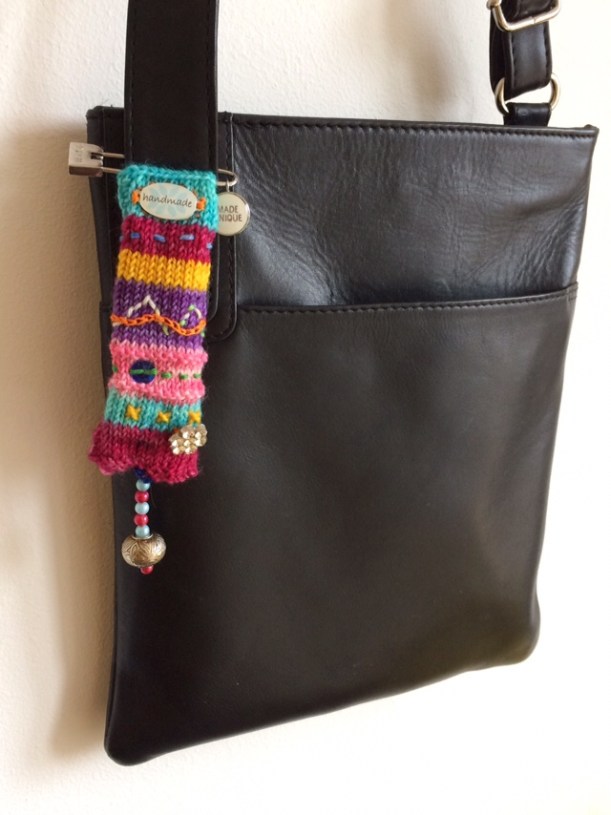
I had also been inspired by some handbag charms by Tamsyn G on Instagram.
I absolutely love these and decided to use up some bits and bobs to make one for my sister. It was a totally organic process with no plan whatsoever, and this is what I ended up with.
Where Tamsyn G makes her own buttons, I used one from my button box.
The large end bead is from a broken necklace.
This fabulous ‘safety’ pin was in my Stitching Santa parcel, as was the ‘handmade’ tab.
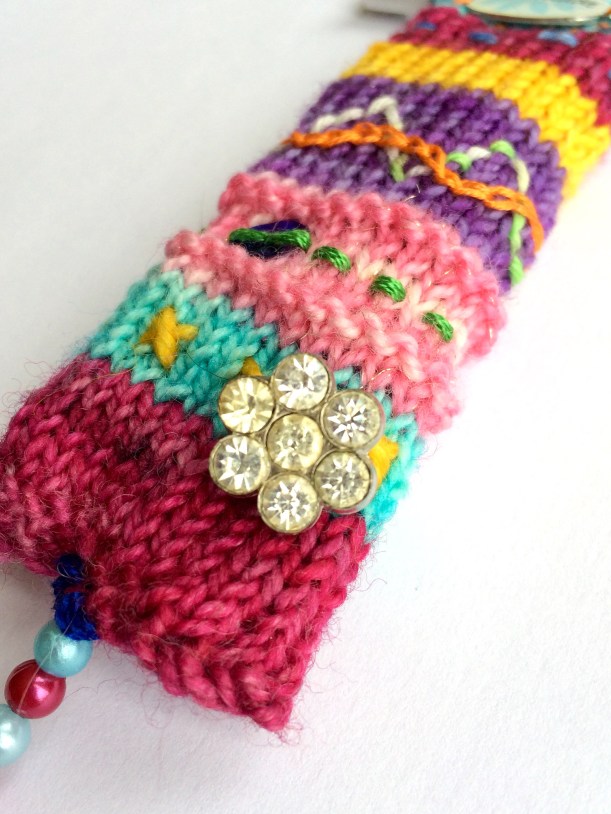
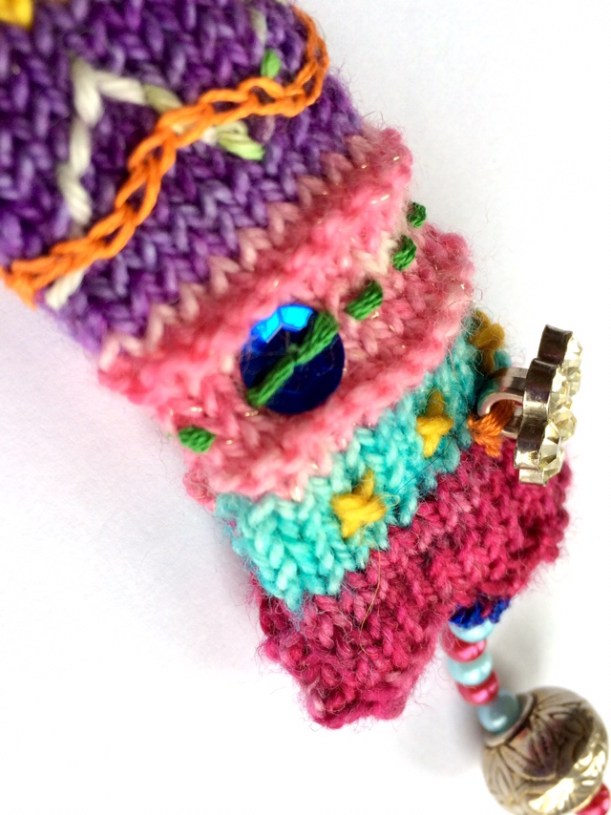
Some hand embroidery on the surface adds extra texture.
Here it is on my bag, to give a sense of scale.
And here they both are on my sister/bag:)
I know, it’s utterly pointless but, as pointless things go, it’s bright and cheerful and I wouldn’t mind one on my bag, so I may cave in to the urge to make another.
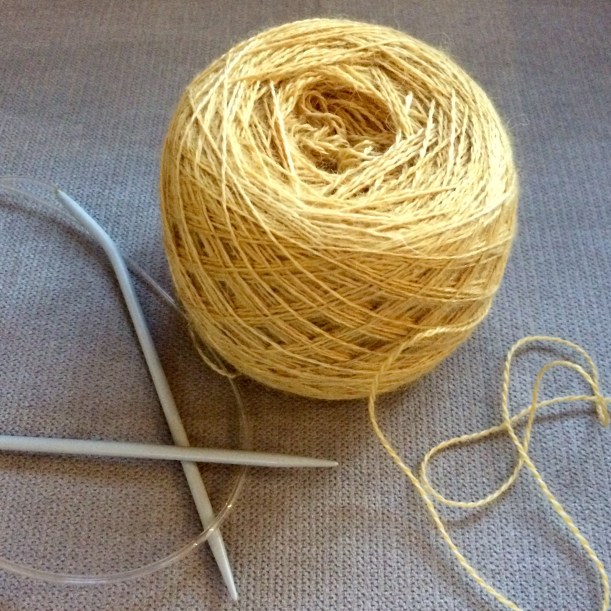
You may recall that I went to the Unravel festival in Farnham a few weeks ago, and these are the skeins of yarn I came home with. Very restrained, I think, considering I could literally have bought something from every single stand had money been no object!
I bought the Bellagio shawl pattern from Debonnaire Yarns and planned to use the yellow yarn for it, which is a laceweight Ainsworth Prin bought from The Knitting Shed, 80/20 Baby Alpaca & Silk.
There’s something special about skeins of yarn as opposed to the balls that are more readily sold. I love the process of transforming it into a yarn cake, too. All part of the pleasure of hand knitting, I suppose.
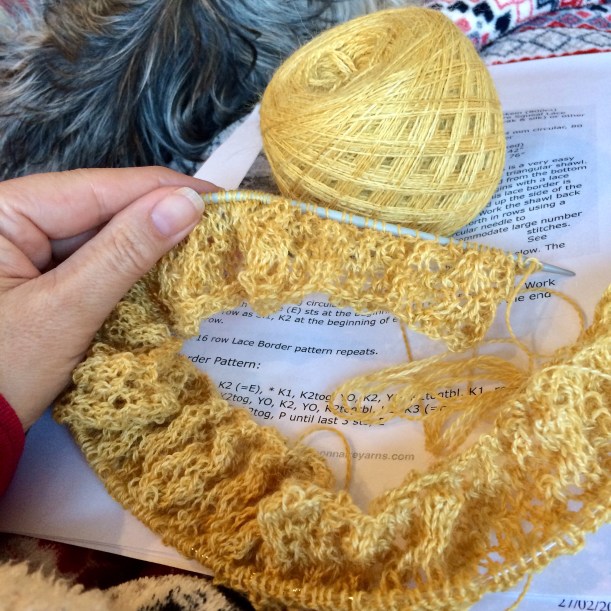
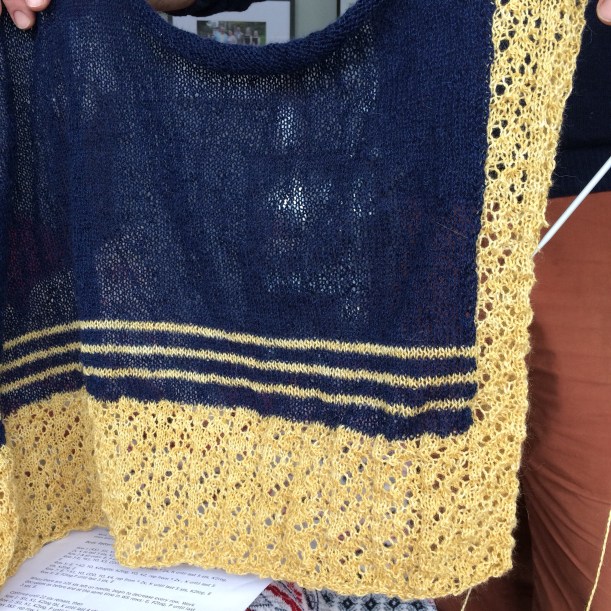
I used a 3.75mm circular because I didn’t have the 4mm one that it required, so the final measurements were slightly smaller than those listed.
The border was an easy-to-memorise 16 row lace pattern and, unusually, it was an asymmetric design.
After completing the main border, I made a spontaneous decision to change the colourway and add in the navy yarn bought at Unravel. Making it up as I went, I included three golden stripes to break up the navy and add interest.
The ‘feel’ of the original pattern has totally changed but, as I wear mustard and navy together, this combination in a shawl made perfect sense.
The construction is slightly unusual, but I like the asymmetry of it which is enhanced by the three stripes.
A little under two weeks, and it was nearly finished.
I really must get some blocking pins, but until then, I’ll continue to use dressmaking pins and a towel on the dining table.
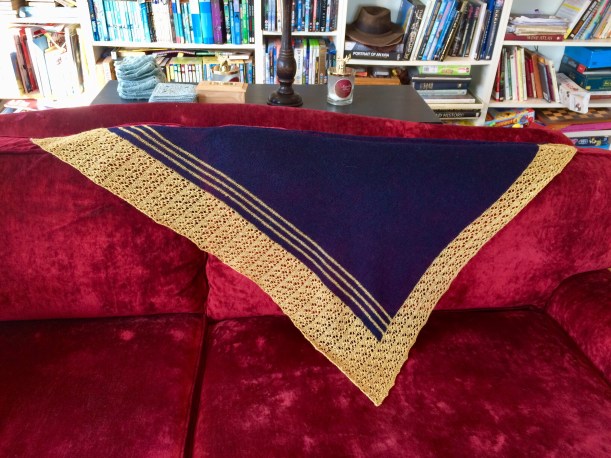
Here’s the finished shawl, laid out over the back of the sofa.
I did make several mistakes in the lace – not that you’d notice as the pattern is very forgiving.
Being laceweight, the shawl has a light texture and drapes beautifully.
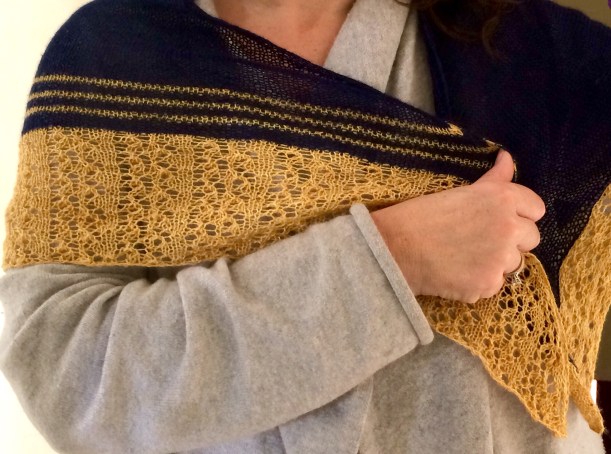
It’s nice and warm around the neck, without being constrictive as it’s so light that you don’t really notice you’re wearing anything!
It’s already drawn lots of compliments (shawls do, don’t they?) and goes well with my Stag’s head dress – a favourite which is bearing up well considering how often I wear it.
The thing about hand knitted shawls is that you simply can’t buy them, which is why they get noticed, I suppose. I love having something unique….which is why I can’t wait to cast on another one with some more of that lovely yarn from Unravel:)
My second Stitching Santa parcel was a sewing one from Ali who blogs at Thimberlina and it came in the guise of a stuffed-to-the-brim red Christmas bag.
On to my second glass of Bailey’s by now, as it had taken me almost an hour to open and photograph the many contents of my first parcel from Bekki at DYC, I started by emptying the bag out onto the coffee table. Just look at that little lot, every single one individually wrapped again!
This metallic top-stitching thread is for my overlocker, but could probably be used on the sewing machine, too. I’ve never used this, so am keen to have a go.
Some embroidery thread with a lovely sheen. This won’t hang around for long as I do a surprising amount of decorative hand stitching.
I just love this little tin, although I think it will become a travel sewing kit as it’s the perfect size to throw in my bag.
I love these! They’re going to be saved for those really special projects that deserve something more than my humble labels.
Next was this bag of treasure……
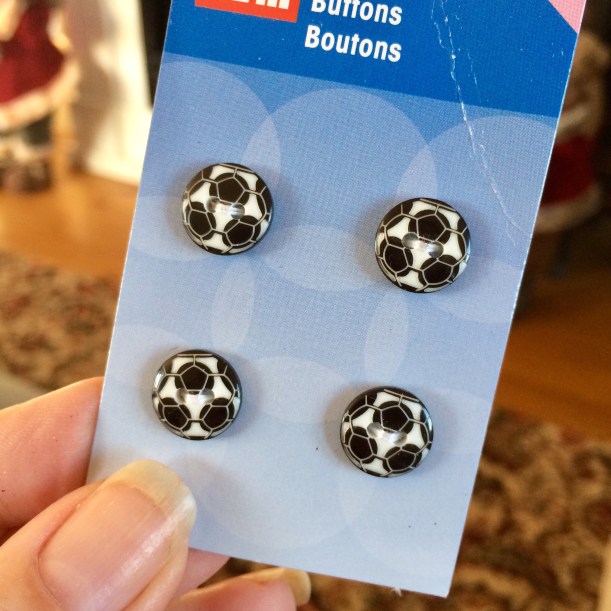
See what I mean? Those turquoise buttons in the middle caught my eye straight away, as did the sparkly one on the pin. Then I spotted a familiar item from the past in the form of a matchbox.
Isn’t that a blast from the past?
Inside were the tiniest cranberry-coloured beads that will be perfect for lots of different things, the first idea that springs to mind is edging for a crocheted wine glass cover to keep the flies out.
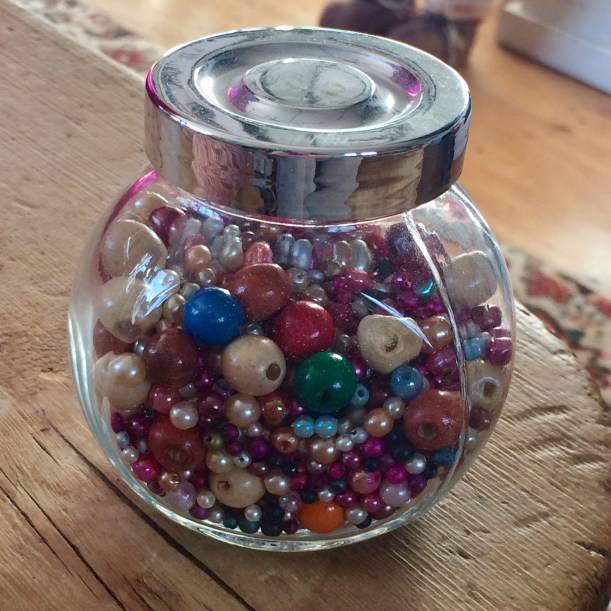
The very next present I opened was this jar filled to the brim with numerous beads in all shapes and sizes. I have a shelf in my sewing room with all my beads and buttons stored in these Ikea jars, so this will sit right next to them.
The Boys have already claimed these, so I’ll have to think of a project to which they can be added.
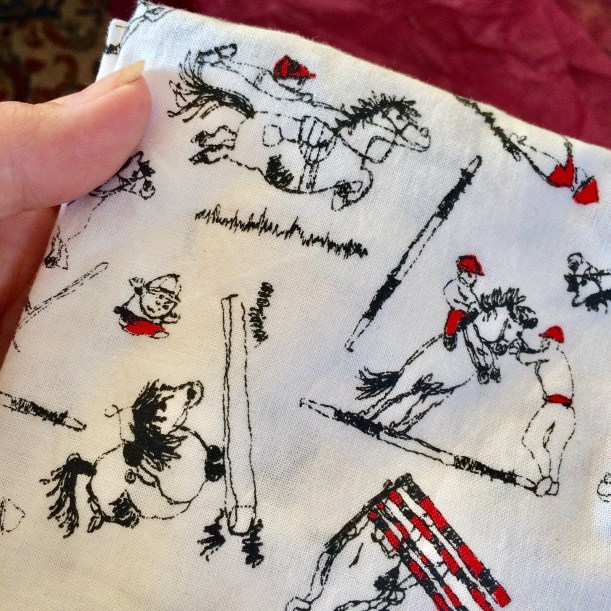
This horsey print fabric was earmarked for The Boys too…..but I’m going to keep it for myself ‘cos it’s cute and will be wasted on them:)
I’m hoping there will be enough of this lovely knit fabric for a Coco, as it’s thick and perfect for Winter. There’s a good couple of metres, so I’m hopeful there will be enough – watch this space.
Time for a little hydration in between the Baileys – Ali sent me some sparkling spring water from her home county!
I’ll be on Ravelry looking for inspiration for these three little Merino beauties!
Ali made me some beautiful coasters from this very same speech-bubble fabric a couple of years ago, so I was thrilled to unwrap a hexi caddy in matching fabric. Handmade by Ali, of course, and much admired by me when I’d seen several other versions on her blog earlier in the year. This will live on the table in my sewing room, keeping all my essentials close to hand. And if I feel stressed I’ll just read out loud some of those quotes – that’s sure to cheer me up!
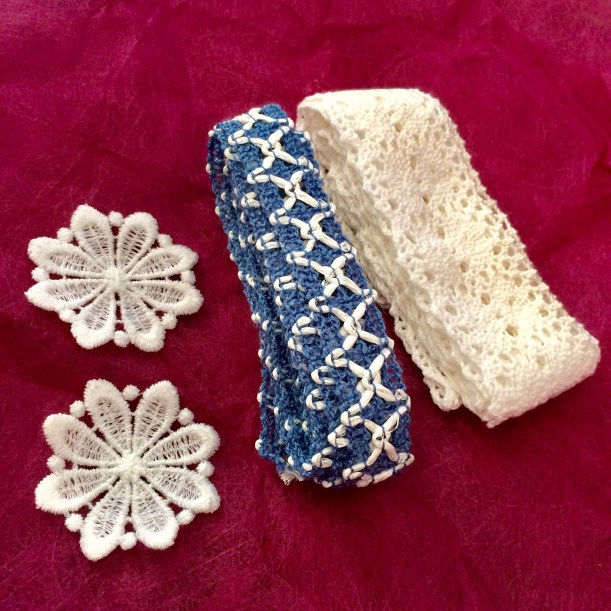
Several bundles of homemade bias tape is such a timesaver and will be put to good use. I remember loving the blue and white fabric when I saw it made into PJs on Ali’s blog.
Lacy trims because one can never have too many.
Two chunky zips will come in handy as I’ve never got one when I need it:/
Such a pretty doily and so intricate that I don’t think Ali made this one (please correct me if I’ve just insulted you, Ali!). I made my mother two little beaded covers that keep insects out of wine glasses for Christmas, so I totally appreciate the work that goes into these tiny stitches.
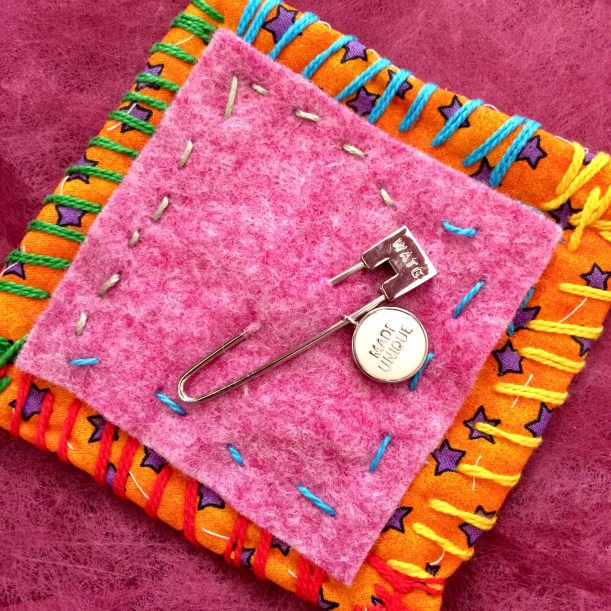
The next gift I opened made my heart skip a beat. I recall being totally inspired by the Raggedy Annie workshop that Ali attended, and here is one of the actual squares she made at said workshop! I recognise the sheep on the other side, but this side has a gorgeous pin from Wool And The Gang on it. I’d forgotten all about the workshop but, now I’ve had another read of the blog post, it will be a technique I’m trying in the New Year. You MUST head over to read Ali’s post to see what it’s all about!
Yay, my very own set of pattern weights and a bag to keep them in, too! I’ve made plenty for other people but somehow have never got around to making any for myself and end up using the weights from the kitchen scales most of the time.
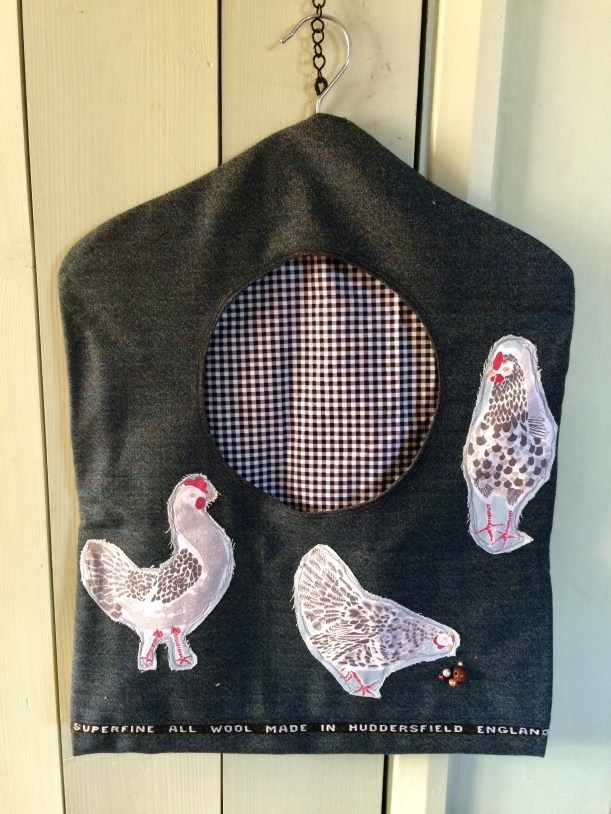
As I unwrapped my final gift I had my fingers and toes crossed that it might be one of Ali’s famous peg bags – and I wasn’t disapponted! She put a sneak peek on her blog or IG and you could just make out the front opening so I was a bit excited, especially as she personalised it with hens for me. I can tell you now that it won’t be a peg bag though, it’s far too good to be shut in the broom cupboard all the time. It’s going to be used in my sewing room to keep those tiny (1″) scraps of fabric that I can’t bear to throw out. The plan is to make ‘new’ fabric from the scraps and re-purpose them into a scrappy quilt eventually.
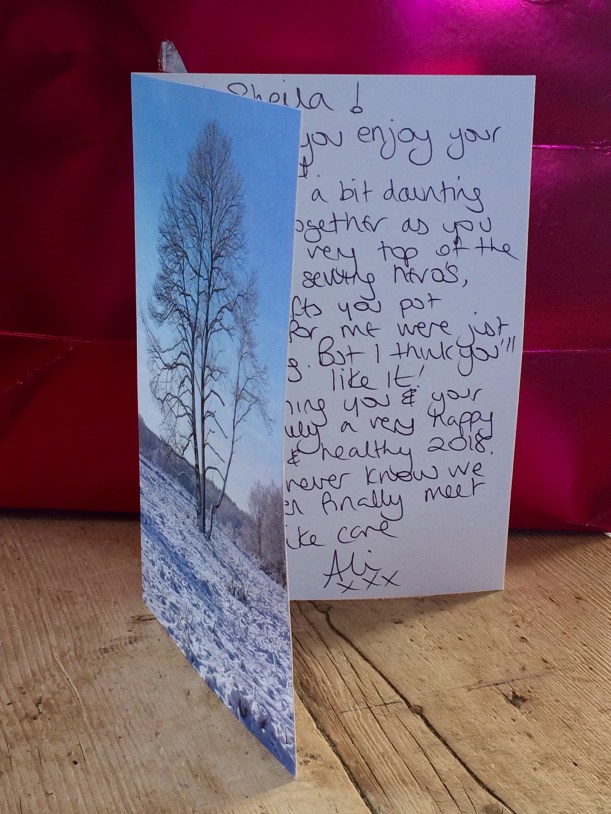
Last but not least was the card that Ali had included which threw in the casual remark that I was right at the top of her list of sewing heroes – not too much pressure for the coming year then!
Seriously though, that is the nicest blog related compliment I’ve ever had, so ‘Thank you” Ali, and that goes for all of you wonderful, supportive Bloggers and IGers out there – what a fabulous community we are privileged to be a part of. Happy New Year to you all!!
I didn’t get chance to sit down with my iPad in the two weeks running up to Christmas as things were so hectic here, what with hosting for two separate lots of people and with present-making continuing right up to the wire. I also made the decision to wait until the last guests had gone home before opening my two Stitching Santa parcels, which meant resisting the temptation to have ‘just a little peek’ until the 28th December.
The 28th – can you imagine the willpower needed!
Anyway, when the time came, I put on a Christmas film for The Boys to ensure no interruptions, poured myself a large glass of Bailey’s and recovered the last two presents from underneath the Christmas tree.
(Well, last-but-one, as the niece’s boyfriend appeared to have gone home without my noticing that he hadn’t opened our gift.)
At this point in the proceedings, the obligatory festive red dress and sparkly cardigan had been discarded in favour of ‘lounge wear’. But not just any lounge wear, oh no – hubby bought me some Cashmere trousers to go with the waterfall jacket bought previously. So I’m sitting smug, head-to-toe in ridiculously soft Cashmere. And drinking Bailey’s.
I had already put one of my presents in the fridge as per Bekki’s instructions, so I opened her parcel first – a Yarny one from The Dartmoor Yarn Company.
Beautifully wrapped in snowflake paper and stripy cord, I had already had a quick look when I put the first gift in the fridge a week earlier.
This was the first to be opened and turned out to be fudge made by Bekki herself, which was a godsend as the fudge I had made turned out more like toffee. (I re-named it ‘Fudge Brittle’ and I think I got away with it!).
In true DYC style, Bekki had chosen a fab card and letter in with the parcel.
The very next present I unwrapped was my favourite of all – a hand dyed skein of yarn from a company local to me with which I am already familiar; Rosie’s Moments. A self-striping yarn in my favourite shade of fuchsia in what I think is a DK weight.
I have already cast on a pair of socks and it is knitting up beautifully!
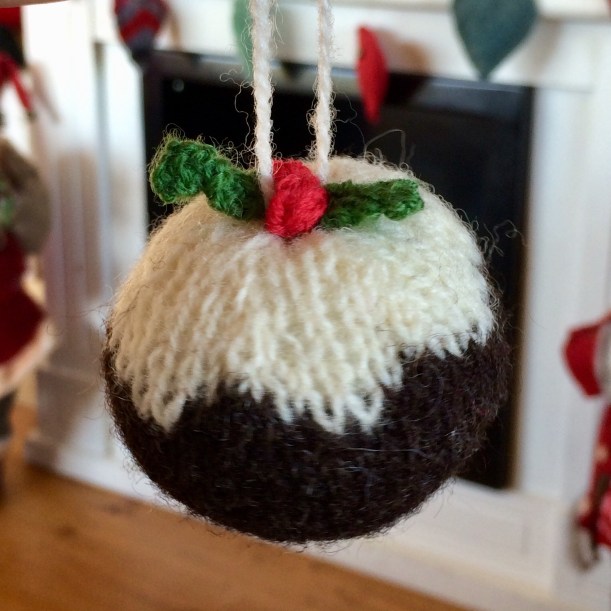
One of Bekki’s famous Christmas puddings was next out of the box – isn’t it sweet?
Some wool tops in Christmassy red, green and white will turn into a felted creation or two, when I’ve got my creative head back on.
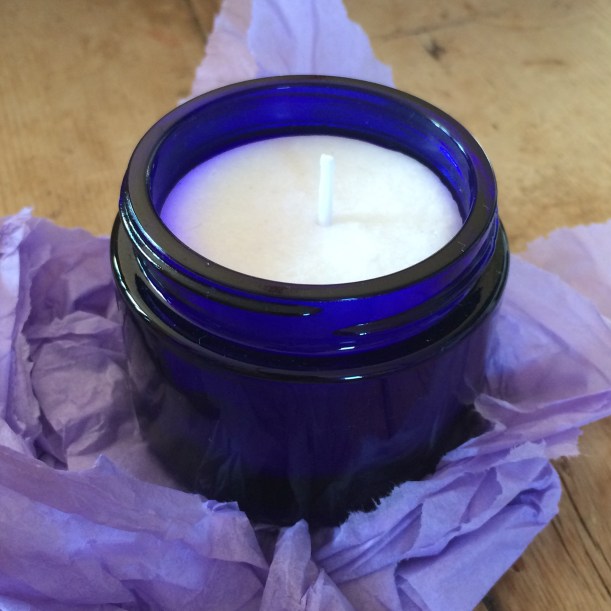
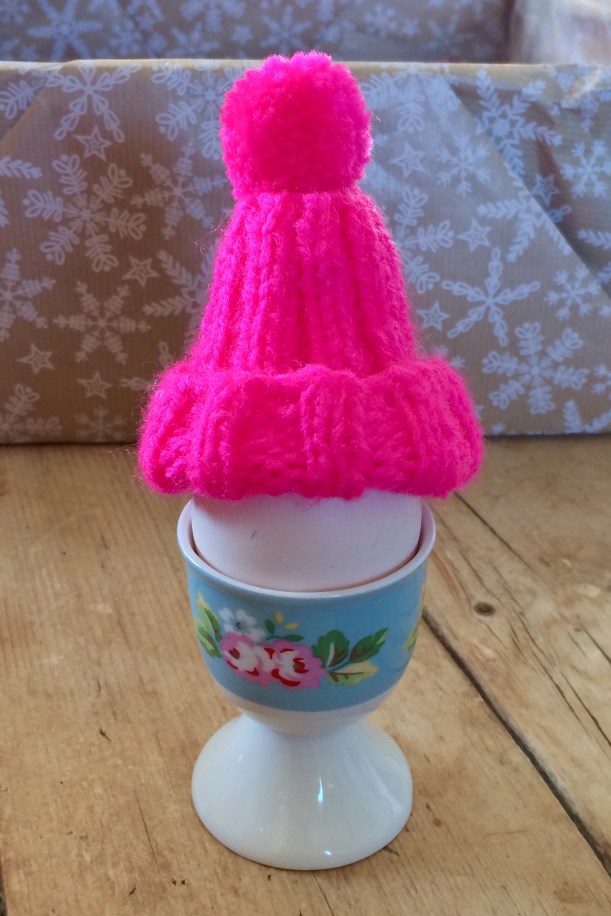
Bekki even included one of her handmade lavender scented candles – one of my favourite scents! That is going straight on my bedside table as it helps induce sleep. Not that I ever have a problem sleeping (I do love my bed; it’s currently 12.35pm!), but it will smell lovely just before lights out.
Yes Bekki, I did guess it was an egg cosy!
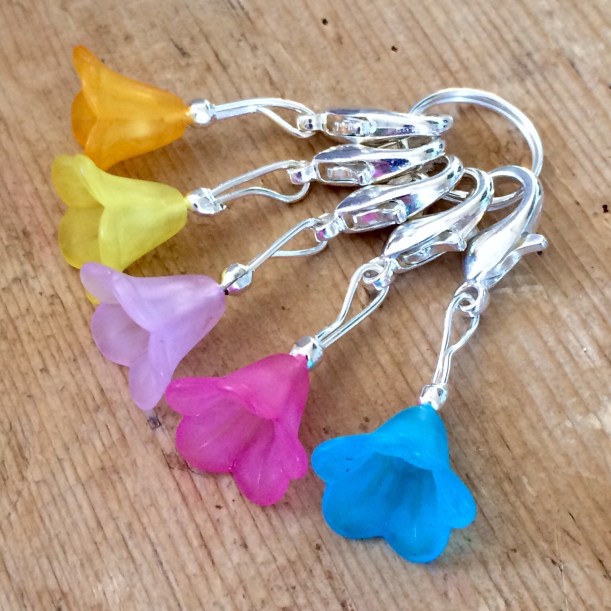
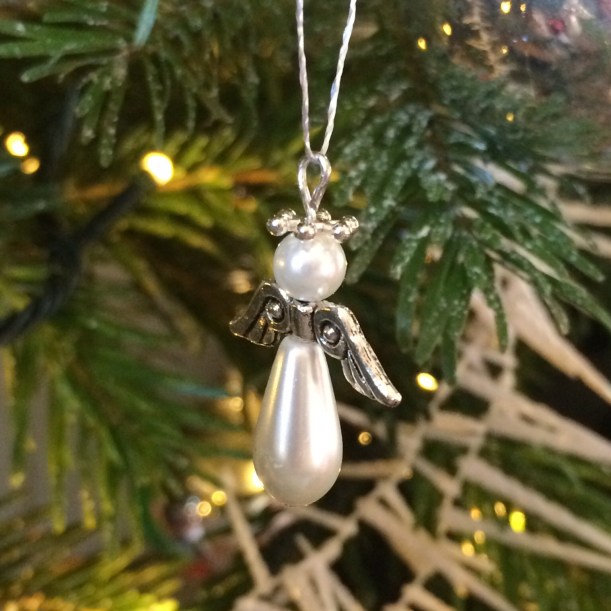
Three gorgeous handknit sacks each contained a tiny handmade gift.
Bell-shaped flowers crochet stitch markers…..
….knitting stitch markers, already in use on the socks……
…..and the dearest little pearl-drop angel.
Now I’d unwittingly given my input on the design of this hat, as Bekki had craftily canvassed for opinion on pom poms on her blog, which she dislikes and I love – so the pom poms won out!
Despite concerns about exploding pom poms, mine are perfectly intact, as you can see.
Even The Dogs had a gift each of identical bandanas. Fifi wears hers holly side out…..
…and Tess wears hers tree side out. They both posed obligingly for the photos:)
And here it is all together!
Thanks SO much Bekki – I love everything and you got me spot-on. The thought that has obviously gone into my parcel is immense and all those handmade extras are a joy which I will treasure.
Having been invited to a friend’s birthday party at the beginning of December, I found myself in the unusual position of knowing exactly what to make her as a gift.
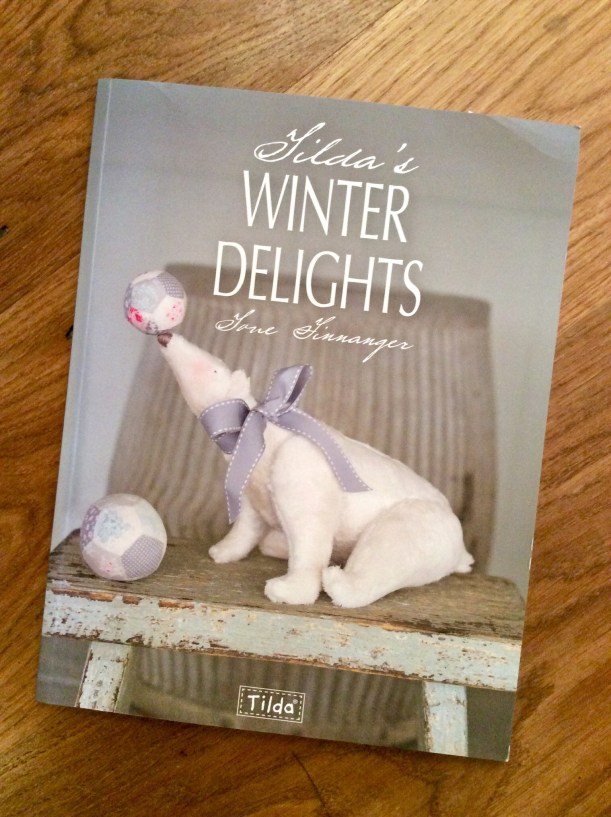
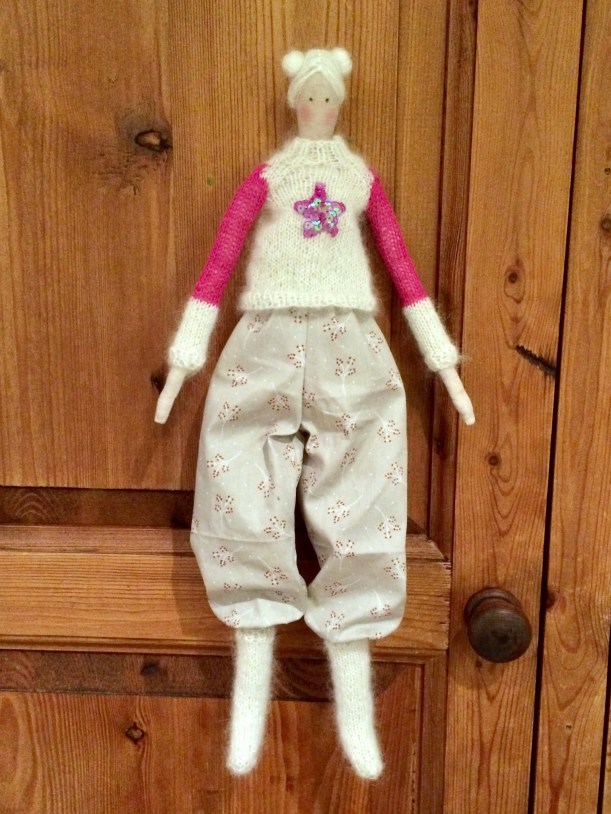
She had previously shown me a book purchase in which there was a typical Tilda doll, and mentioned that she loved them in all their whimsical weirdness. As I happen to own several of Tone Finnanger’s publications, it was an easy decision to actually go ahead and make one for the first time.
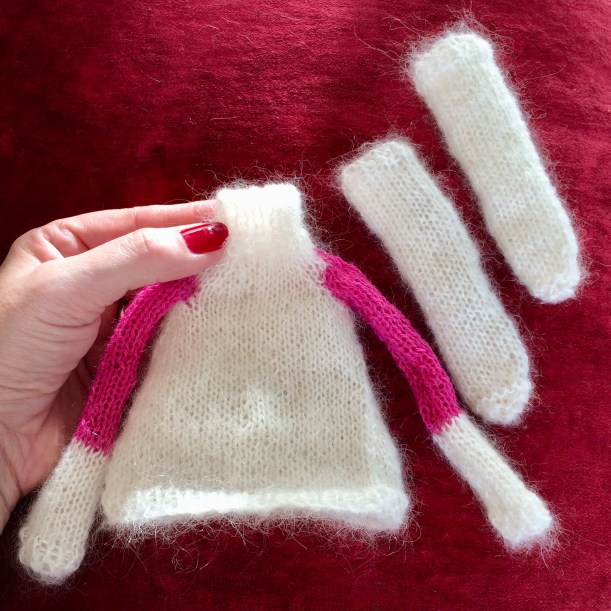
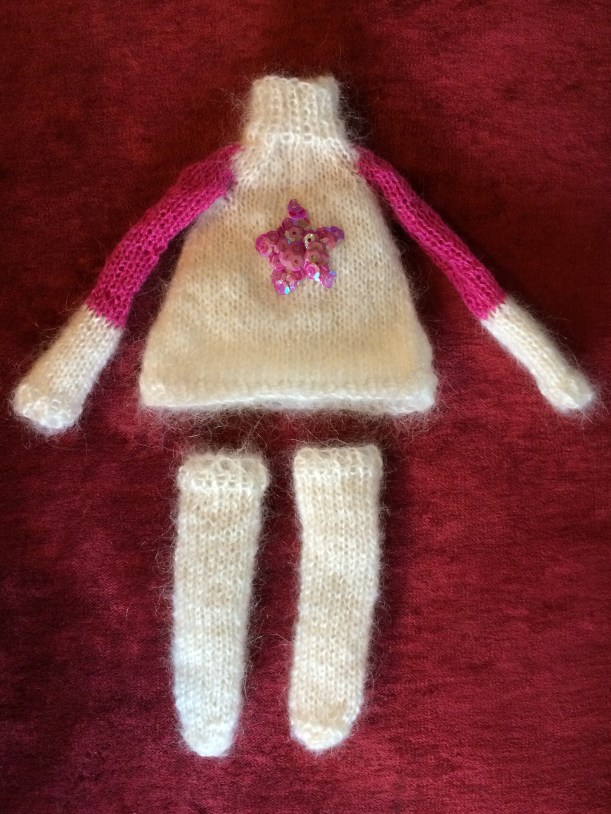
I had some wool left over from knitting the Westie, but had to add in some pink to make two-tone sleeves as there wasn’t quite enough of the cream. Although just a small project, the jumper and stockings took the best part of a day to knit – but aren’t they cute?
Cutting a star shape out of some firm interfacing, sequins were individually sewn on until a sequin star was achieved.
The use of pink sequins ties in with the pink sleeves.
Now, on to the doll itself.
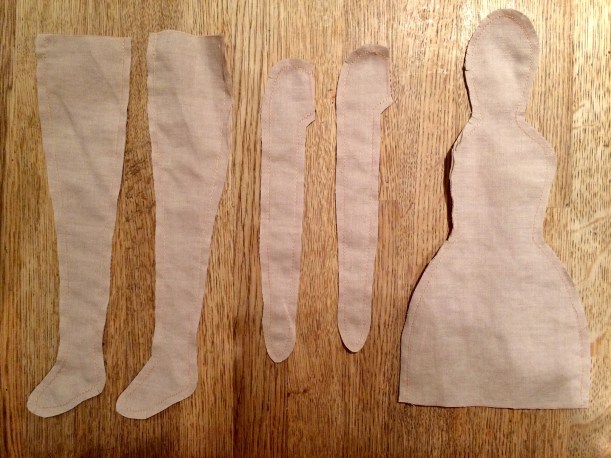
The instructions direct you to draw around the pattern pieces and sew BEFORE cutting them out. This is the best method when dealing with narrow pieces of fabric.
This is what you end up with and then comes the fiddly bit – turning them the right way out!!
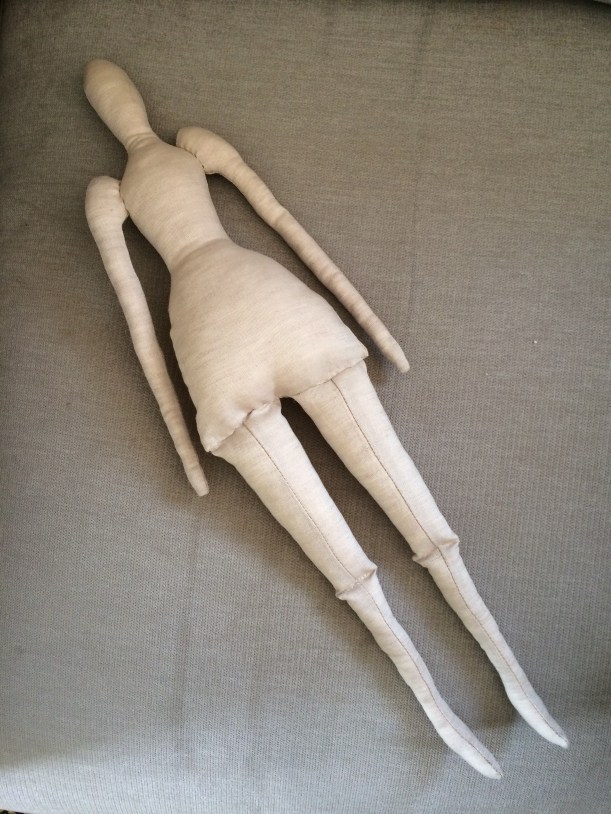
It took at least an entire hour to turn, stuff and assemble the doll, probably nearer two – then you end up with the weirdest proportioned doll you have ever seen!
Following the instructions to the letter, the hair was added.
I ran out of cream yarn so, instead of winding tiny balls for the side buns, I wound what was remaining around two miniature pom poms for the same effect.
Two dots for eyes were added along with a smudge of blusher, and she’s finished.
The trousers were a simple and quick finishing touch.
I added a thread chain at the base of her neck so she could be hung from a hook as well.
Here she is sat on my table just before being wrapped and gifted an hour later. I know, I know, yet another by-the-skin-of-my-teeth project!
My husband thinks it’s ugly and odd, and I kind of see where he’s coming from but, luckily, my friend loves it and that’s all that matters.
Will I make another one? Well, it’s time-consuming and extremely fiddly in parts, but Tilda’s creations are strangely attractive partly because they’re so unusual and Scandinavian in character, so I think I probably will. The fact that I have four of her books on my shelf is rather telling……
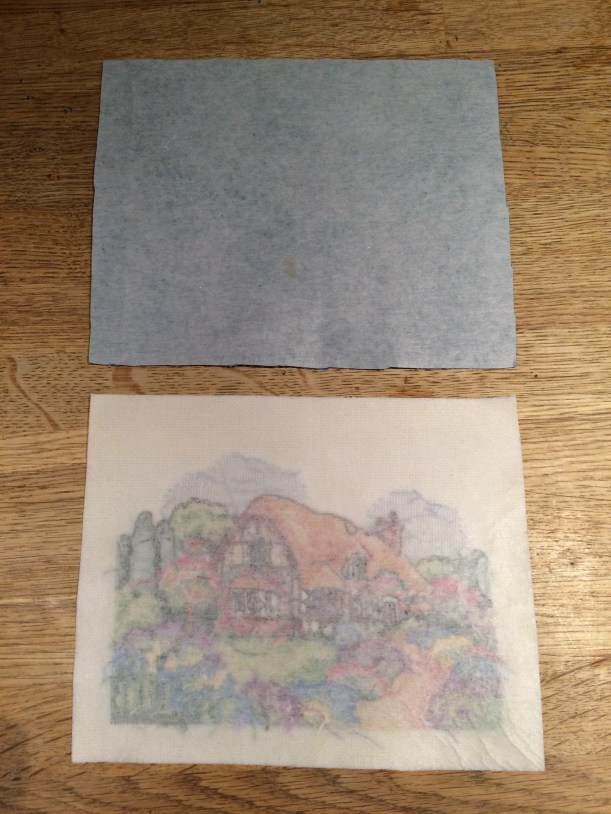
A couple of weeks ago I rescued this beautiful cross stitch from our local charity shop. It was mounted and framed but needed reinventing into something more usable in today’s modern life and was far too wonderful to leave there.
Only measuring a modest 5″ x 7″, I ummed and aahed about what to do with it for a while, having some brilliant suggestions on Instagram.
Ultimately, this is for one of my Stitching Santa recipients (I’m doing both sewing and yarny versions) so I wanted to make it a useful object. This lady is multi-talented across many craft disciplines, as are so many of my blogging pals, and she dabbles in cross stitch herself so I thought this would be perfect for her.
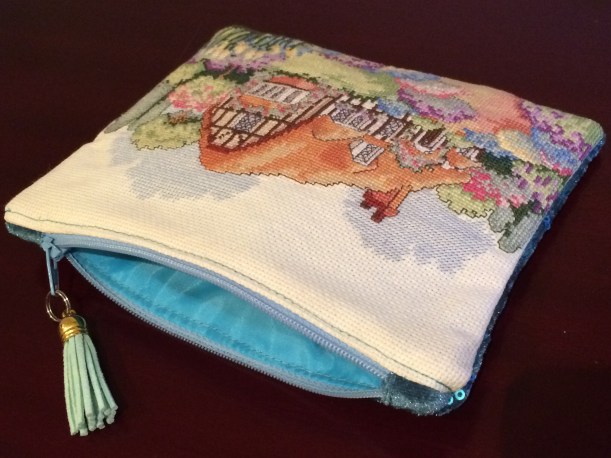
I decided to make a zipped pouch, about the size of a cosmetic bag, which could have a variety of different uses. Maybe for a portable cross stitch project, a small crochet or knitting project, or maybe as an actual cosmetic bag – it is rather swanky, after all!
So here’s a quick run-through of what I did, which might be informative if you have a similar piece of needlework that needs reinventing.
It had been spray-mounted to card and well laced across the back, so all that had to be undone. I then gave it a little steam press.
After trimming the needlework to a useable size, I used it as a template to cut two lining pieces and a back.
Iron-on interfacing was attached to the reverse of the front and back sections to stabilise the bag.
I used the covered tab method for the zip to give as neat a finish as possible (there are plenty of tutorials online on how to do this).
The zipper tabs should be about 1/4″ shorter than the width of the bag to ensure that they don’t get caught in the seam allowance when the bag is stitched together.
After inserting the zip, I topstitched close to the seam through the lining as well. This means that the fabric won’t get stuck in the zip when opening and closing.
OPEN the zip.
With lining-to-lining and front-to-back (right sides together) stitch all the way around, leaving a gap in the lining through which to turn.
Be sure not to catch the tabs in the seam as you sew.
Trim the tabs to reduce bulk.
Cut across all the corners before turning the right way out.
Close the gap in the lining either by hand or machine.
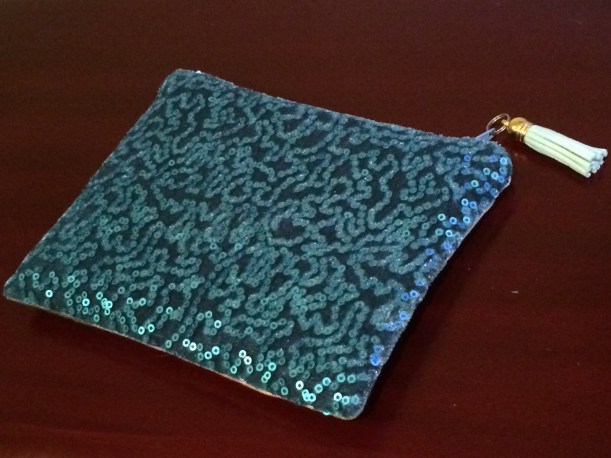
I added a coordinating leather tassel from my supplies.
The sequinned fabric is a small piece cut from a length of fabric that will become a dress later in the week. It adds a touch of glamour.
Some matching blue lining is a nice vibrant surprise when you look inside.
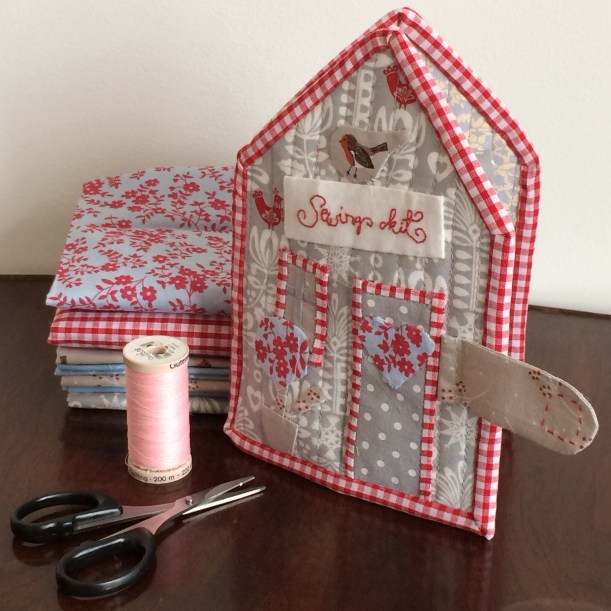
So, before I even knew who I would be sending a parcel to for this year’s Stitching Santa, I made this not-so-little sewing kit. Well, what needlewoman couldn’t do with a new sewing kit?
Made entirely with fabric offcuts from my collection, the pattern comes from Tilda’s Toy Box, although you could easily copy mine just from the photos as it is pretty straightforward.
Hopefully, you can recognise the shape of a house with its front door and a pot plant under the window.
A little robin perches on the sign above the door which, instead of the house name, says “Sewing Kit”.
The whole thing is quilted with a layer of wadding to add support.
Inside, there is a heart shaped pin cushion and two little pockets…..
…..a place to store hand sewing needles and embroidery scissors.
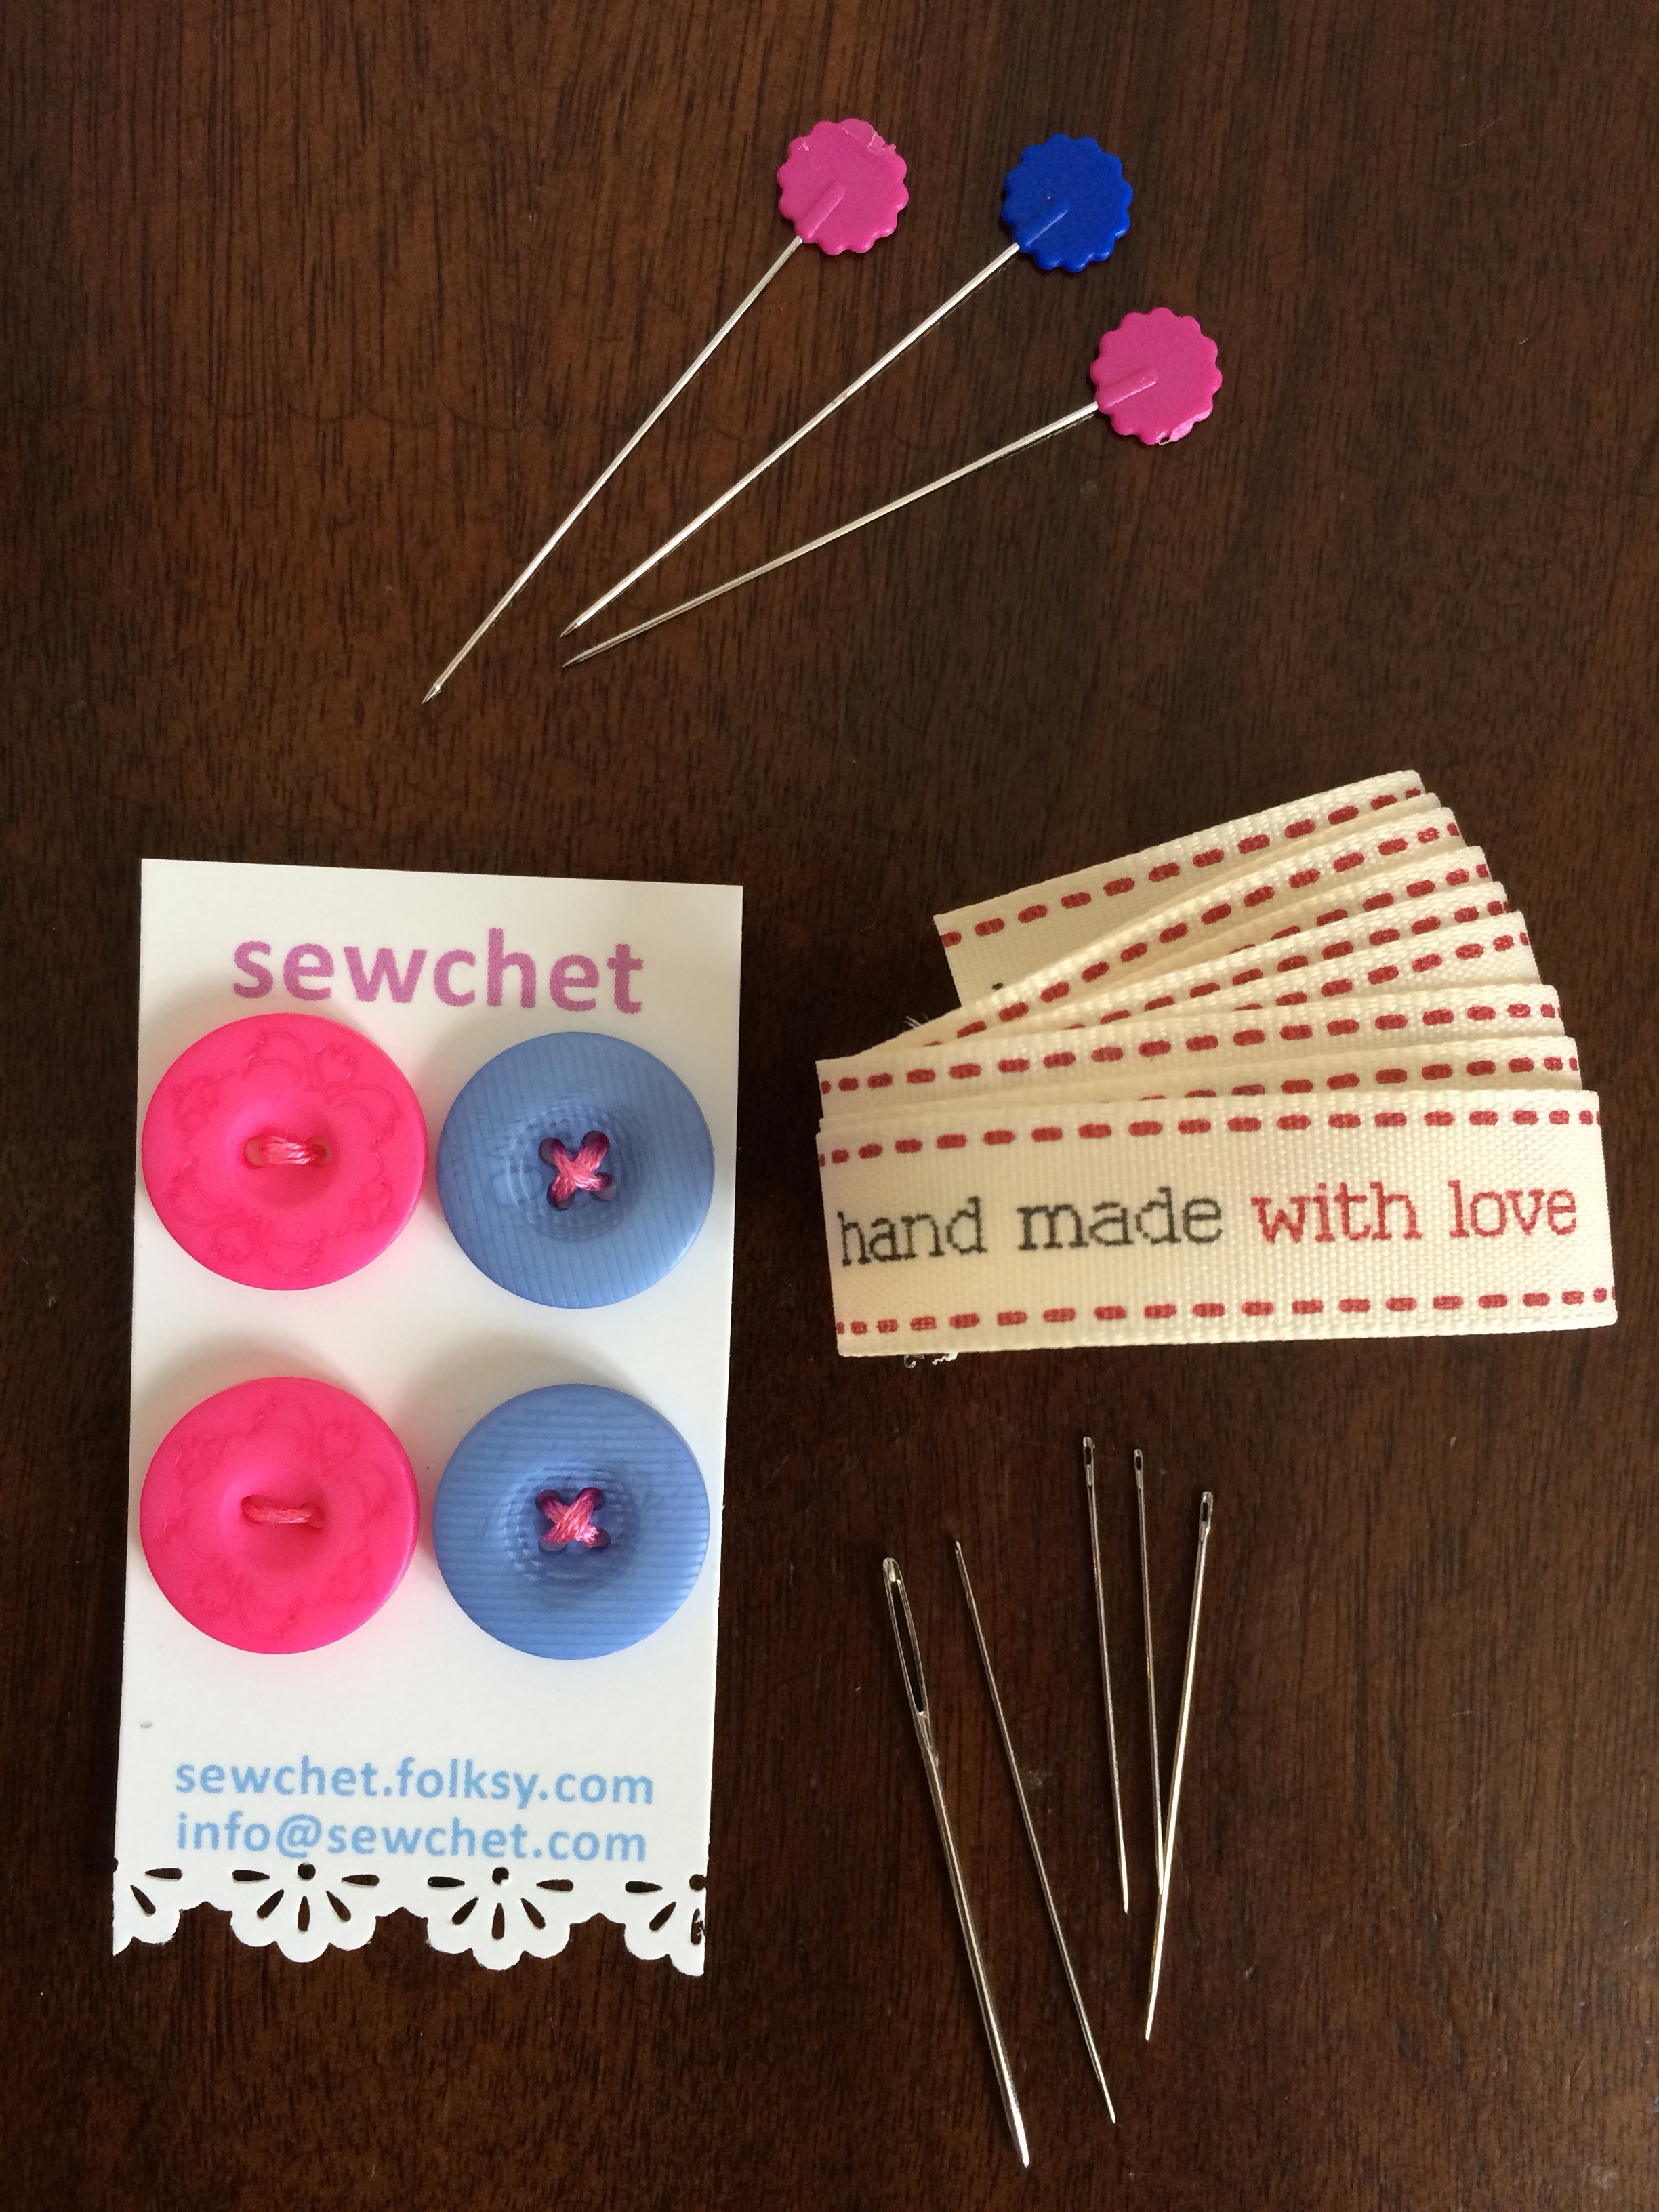
I’m adding my new labels to my handmade things now.
Including some “Handmade With Love” labels, buttons, pins and needles (all from my own supplies) will make the sewing kit more complete.
I haven’t included any scissors though, as I think I’m going to spend the whole budget on some fabric – a good pair of embroidery scissors could use it all up!
How are you getting on with your handmade gifts this year?
Previously Boys and Chickens, I have created a new blog to share my sewing adventure as 2018 is they year I plan to teach myself to sew! There will also be bits of crochet and cooking too.
My challenge: One year - I will not buy clothes - I will upcycle to make what I need - everything from underwear to evening wear! Join me for tips, exclusive BrawHem makes, and inevitably some hilarious disasters...