Sewchet

Sewing, crochet, crafts, accessories, baking, tutorials,


17 Comments

Felt Owl Purse (With Secret Pocket!)

Browsing Pinterest with no particular goal in mind is usually dangerous in that it will take away hours of your life that you will never get back again.

On this occasion, however, this image caught my eye almost immediately.

owl

Now, owls are perennially popular and, when given a useful (not to mention cute) function, proved too irresistible a present-making opportunity for me.

I remember when my daughter was about ten she loved Polly Pocket and a large part of that enjoyment stemmed from its minuscule nature and the fact that, as it hung from a locket around her neck, it was a portable toy that could go anywhere with her, ready to play with as the urge arose. This purse had similar amusement potential.

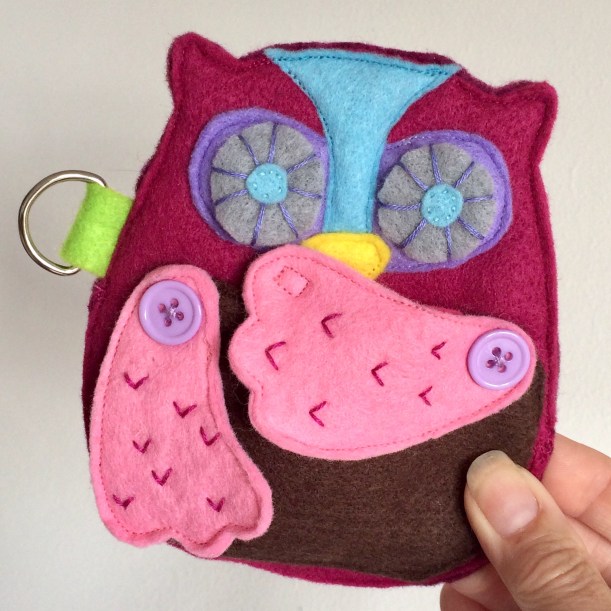
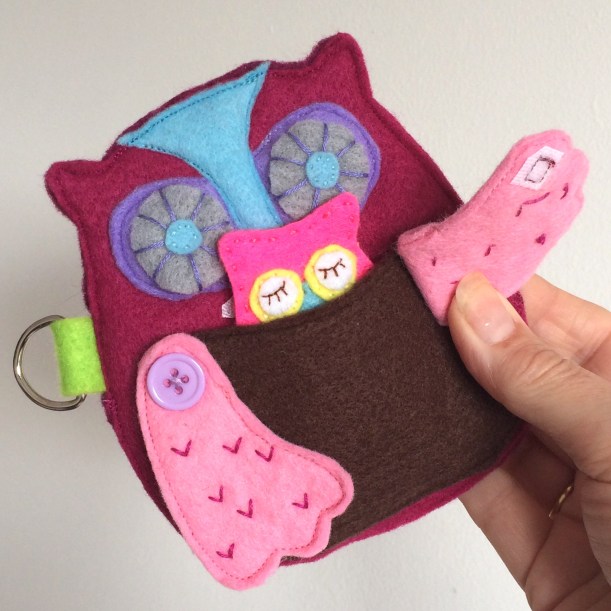
Clicking on the image through to the original post revealed that the owl was a coin purse with – and this bit is crucial – a secret pocket!

Instantly I knew two little girls that would potentially love this, and I also had an idea for the contents of the secret pocket.

You can find the full tutorial here.

Made from scraps of felt, the only extras needed are a zip, D-ring and two buttons, all of which I already had so these were effectively ‘free’ projects.

Although if you were to count the hours spent (approx six for both) they’re probably the most expensive felt purses ever:)

The raw materials…..


img_6491

….the completed front and back before final construction.

img_6494

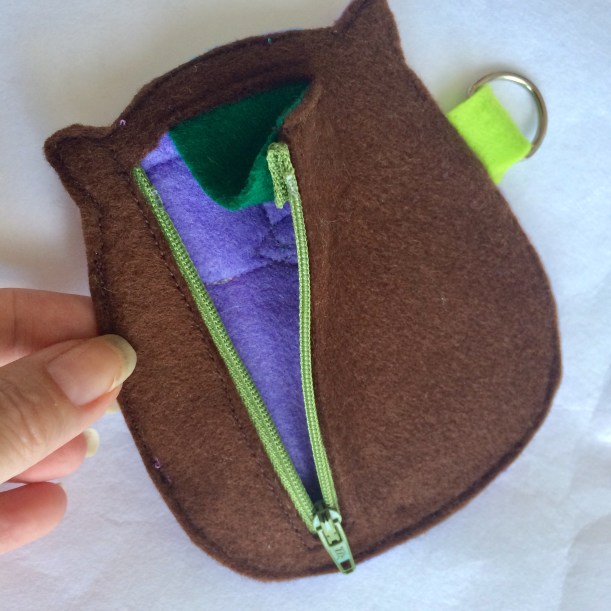
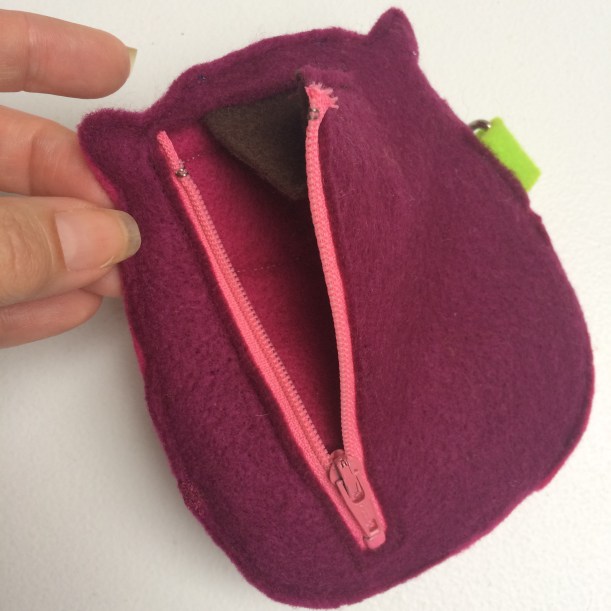
Here’s a peek at the insides.

img_6495

A combination of hand and machine sewing make for an interesting mix.

img_6497

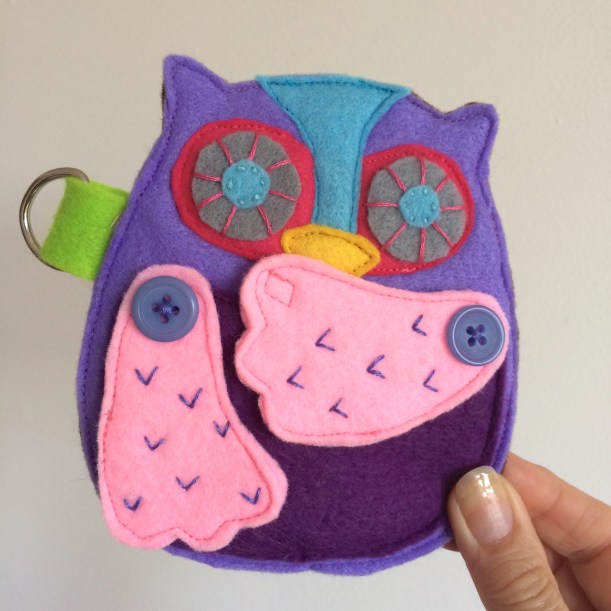
I chose to include zips of contrasting colours, but you could match them to the felt for a more blended-in finish.

img_6496

img_6489-1

img_6465

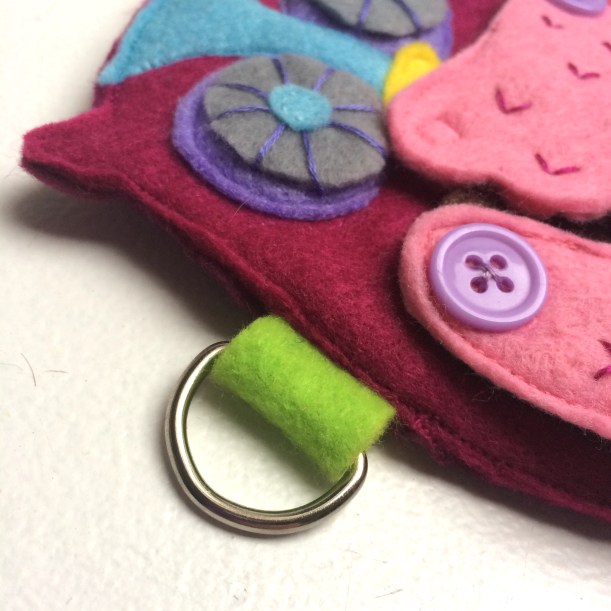
I’m going to buy some sprung keyring clips to attach to the D-rings.

img_6469

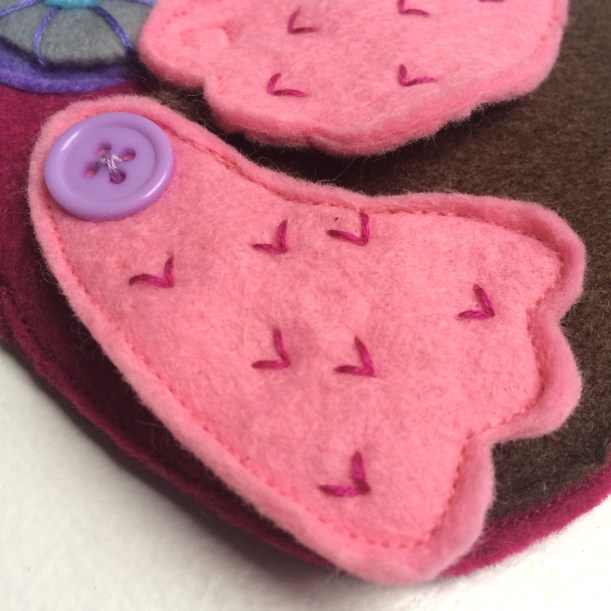
A bit of hand embroidery makes a welcome change for someone who rarely gets the chance to indulge in such things!

img_6468

img_6470

img_6460

The tutorial calls for a magnetic clip to close the secret front pocket, but I literally just used my last one so improvised with a tiny piece of Velcro.

img_6467

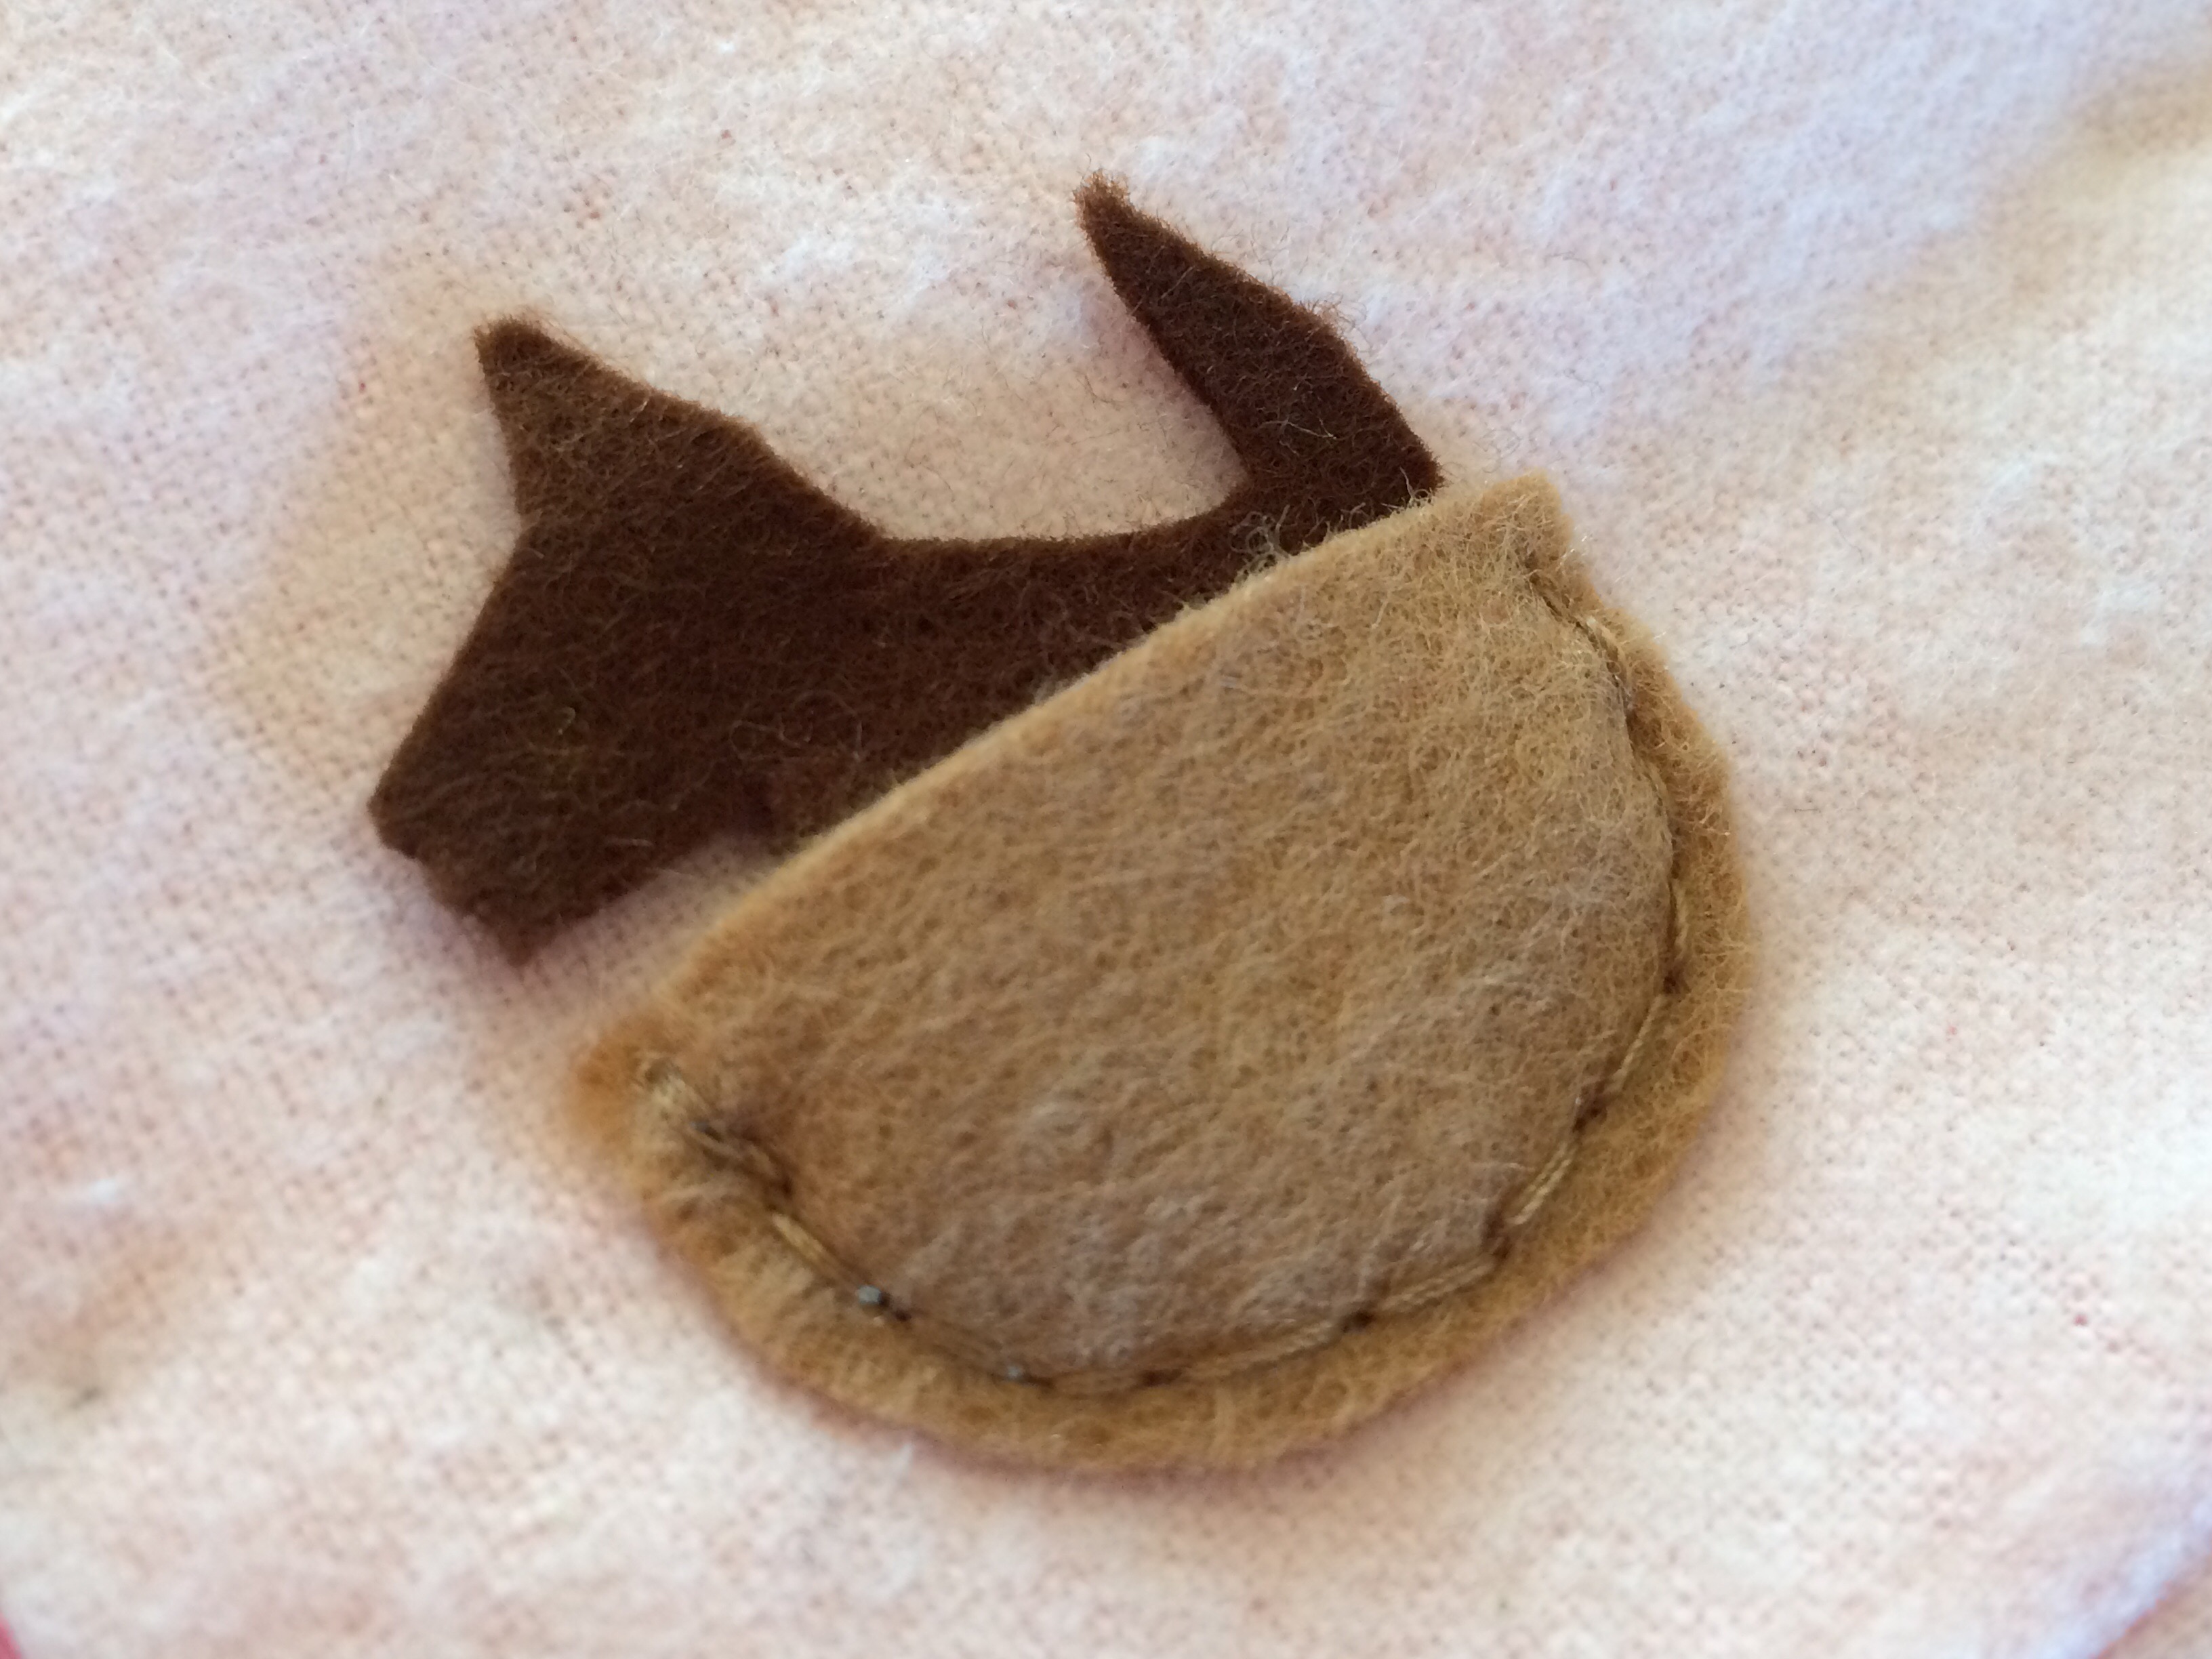
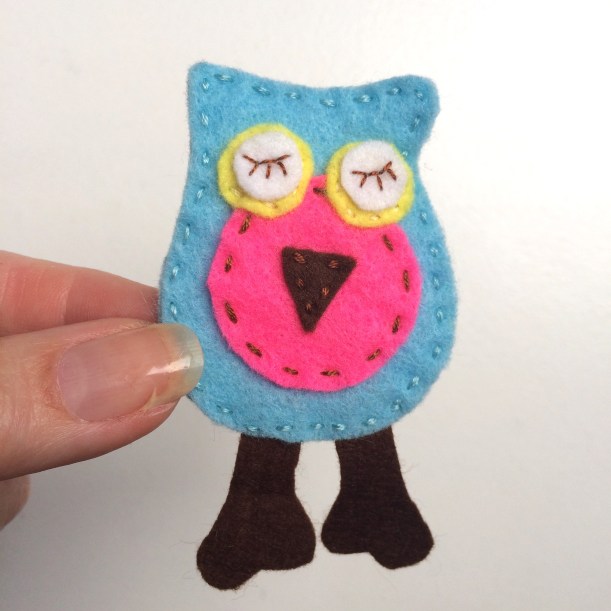
As for the secret contents, the obvious choice was a sleeping baby owlet.

I sketched out a quick pattern and cut out the pieces from neon-coloured felt.

img_6481

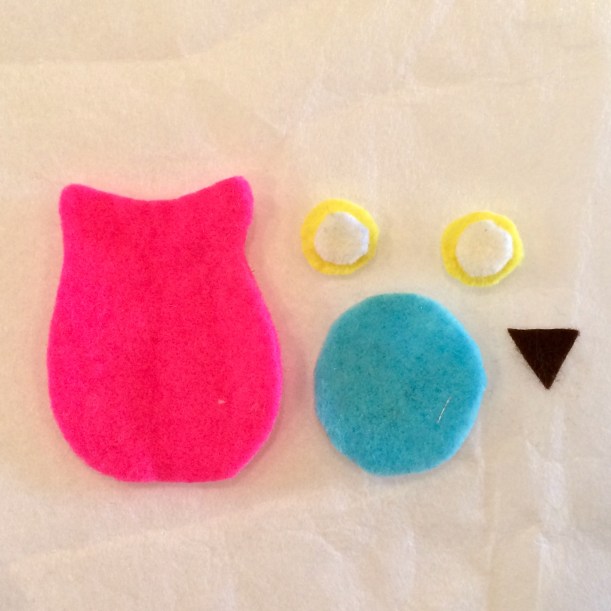
At the last minute I decided to add a pair of legs, sandwiched between the front and back layers of the body.

img_6485-1

img_6486-1

Another one made in opposite colours for the second purse.

img_6509

img_6508

Lift the flap and……a little surprise is revealed under the wing!

img_6488-1

So there we are, one each for two girls that will, hopefully, derive as much fun from a tiny toy as my daughter did all those years ago.

img_6506


33 Comments

Topsy-Turvy Doll

This has been gifted now, so I can share with you what I made for our granddaughter’s second birthday.

Do you remember having a Topsy-Turvy doll as a little girl? I do, and I also remember absolutely loving her, so I knew I was going to have to make one for our granddaughter.

I found a free tutorial at Keepsake Crafts and pretty much followed it to the letter. This is her version, a daytime/bedtime doll: –

Although you can be more creative and do many other things like a Red Riding Hood/Wolf doll, or a Beauty/Beast doll, I decided to stick to the traditional daytime/bedtime doll.

You start off by embroidering the faces and I simply coloured in the eyes and mouth with permanent marker pen.

I wish I’d backed the faces with interfacing now, as the black embroidery thread shows through in places, but hey-ho.

When the body is assembled and stuffed, at this stage it looks a bit like Frankenstein’s experiment!

I used coordinating fabrics for each dress, originally from Ikea, I think; floral for the day dress and spotted for the nightgown and cap.

I had plenty of lace in my stash to trim both dresses.

The hair was easy enough – just a ball of yarn wrapped around a book and sewn through all layers in the centre to keep it together.

The wig is then stitched on to the head, sewing over the previous line of stitching. Easy.

The daytime doll had her hair drawn back into a neat ponytail and tied with a bright red ribbon to go with her dress.

The bedtime doll had her hair in bunches held with some red heart ribbon.

A nice touch is to create fingers with three lines of stitching.

img_3694

Here she is, all finished, in her daytime mode.

Doesn’t the hair look pretty from the back?

The sleepy side has a matching bonnet to go with her nightgown.

It’s a great tutorial which includes an easy to follow pattern, so why not give it a go for a little girl you know?


22 Comments

Simplicity 1238

Simplicity 1238
Meet Ellie, the star of this month’s blog post for the Minerva Crafts Blogger Network.

She has this rather splendid suitcase home complete with a whole wardrobe full of clothes.

Simplicity 1238
To see lots more photos of how it all came together, click on the link: – Ellie The Elephant And Her Suitcase Home


25 Comments

Portable Doll’s House

When Issue 62 of Mollie Makes dropped through the letterbox, it was a good one. See the text on the front saying “Kid’s Doll House”? 

Easily missed, I know, but when I opened it onto the relevant page I did a little virtual skip – this would be the perfect present for a little three year old girl in the family.

A fold-out doll’s house, ideal for taking out and about to keep any little girl entertained (and better than handing over your smart phone, any day).

The details were a joy to put together and customise with whatever scraps of fabric I had to hand.

See, I told you that bag full of two-inch scraps would come in handy one day. I can’t throw any fabric out, no matter how minuscule the leftovers.

The teeny tiny tea set could have Velcro on the back for an older child, to make it removeable. As this was for a toddler, I sewed them to the table permanently.

Some of the bits were embroidered by hand….

….and others were stitched on by machine.

Dolly herself also has a dress and some hair bows, but those will have to follow in the post as I didn’t have time to make them before we visited.

Here’s the bed which is open for the doll to get in. She even has a little removeable pillow.

Of course, she needs a bedside rug to step out onto.

A bedside table has open-topped drawers to store those hair bows, and a little lamp.

I added a last minute dog in its basket, for added fun. Kids love things that ‘do’ something, don’t they?

The bathroom had some lovely details, like the bubbles and towel rail. I embroidered the tap using metallic gold thread to make it more realistic.

Once everything had been sewn on, it was just a case of attaching the front to the back and then turning it right side out.

Roof on, handles added.


Isn’t that just the cutest front door?

So, the house opens up and lays flat for play, like this: –

To close it, you simply fold the side in…..

….fold the bottom up to meet the top and then fasten the popper.

It transforms quickly and easily into a ‘bag’ with carry handles – simple enough for any toddler to use without help.

The iron test is, of course, if the girl in question actually likes it.

What do you think?!


47 Comments

American Girl Doll’s Clothes

Last month, No.2 Son was invited to his girlfriend’s birthday party (they’re both ten) so I had to come up with an appropriate gift idea – no mean feat when you’re used to buying for boys.

I don’t know about you, but the amount of parties The Boys get invited to means that you can end up spending a small fortune throughout the year in presents, even though I try to spend no more than £10 maximum per child.

£10 doesn’t buy much nowadays, unless you opt for the useful book token which, despite being a great gift which kids love to spend, is hard to get excited about when you open it. You never hear “WOW! It’s just what I’ve always wanted – thank you!”

So I had a little think and remembered that this little girl had recently been to America on holiday and had come back with a “Truly Me” American Girl doll.

doll

Apparently, these dolls are a bit of a cult item in the USA with girls and women alike, and you can choose the skin, hair and eye colour to match your own.

With the doll itself costing $115 and each item of clothing costing upwards of $10, she, understandably, had a very limited wardrobe thus far.

So I decided to put aside a whole day and make some clothes for her.

With a bit of searching on the internet, I found several patterns suitable for an 18″ doll, and these are what I came up with.

Remember THAT hoodie I made earlier in the Summer? Well, I used some of the leftover fabric to make a sweatshirt for the doll with popper closures at the back.

fullsizerender73

I matched the sweatshirt with some purple elasticated jogging bottoms and that was one outfit completed.

american-girl-doll-pants-trousers

Using the same T-shirt pattern as for the sweatshirt, I made a plain white Tee to which I added a ruffle to jazz it up a bit.american-girl-doll-skirt

A velcro back was used this time.

The little lace-trimmed  A-line skirt took hardly any fabric at all and was whipped up in minutes, again with a velcro back fastening.

american-girl-doll-skirt-back

Next up was a simple dress which could be worn on its own or with the white ruffle tee as before.

american-girl-doll-dress-strappy

I knew a ‘proper’ dress would be appreciated, so this next one took a little more effort, adding full lining and ric rac trim at the waist and hem.

american-girl-doll-dress

I even inserted a back zip to make it more special.

american-girl-doll-dress-back

Finally, one more top, this time in blue, and a coordinating elasticated straight skirt with side splits.

american-girl-doll-sirt-and-topamerican-girl-doll-skirt-top

I can’t tell you quite how much fun I had making them all and, not only that, I worked out that, had similar outfits been purchased, the cost would have been upwards of £/$100!

And guess what? She said: –

“WOW! It’s just what I always wanted – thank you!”