Click on the link to see this month’s project for Minerva Crafts in action! : – Burda 6610 Tunic


Click on the link to see this month’s project for Minerva Crafts in action! : – Burda 6610 Tunic
Every year the school holds a Summer fair to raise funds for the PTFA and I make various things for them to sell or raffle, often at the last minute, so I’m feeling a little bit smug that I’ve already started this year – and it’s not until June!
In three mammoth jam-making sessions I managed to make 42 jars of Blackberry and Apple jam, 25 of which are being donated for the school fair.
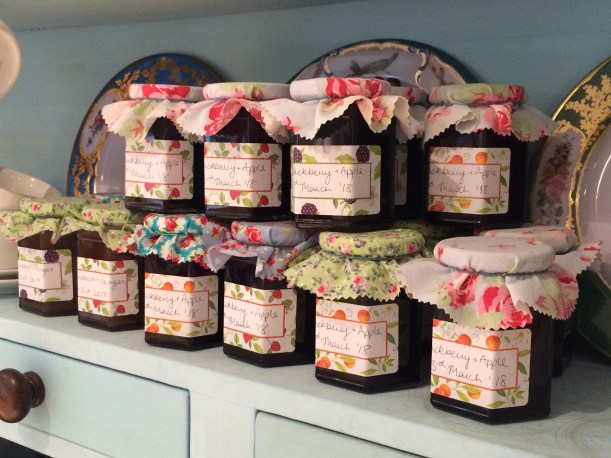
Last year there was a ‘Horsington’s Got Talent’ stall, whereby parents and pupils make all manner of crafty things to sell, and for which I made lots of things. It was a huge success, selling out completely apparently, so the Committee have put out another request for handmade items.
As I inevitably end up spending quite a bit of money on things I make like sugar and lemons for the jam, all the ingredients for 50 scones and cakes for the cake stall, I try to make the crafty items out of things I can source for free or that I already have in my supplies.
Like this pile of (freshly laundered) pillowcases and tea towels, all surplus to requirements and acquired from several different people who know I can’t say no to gifts of leftover/unwanted fabrics.
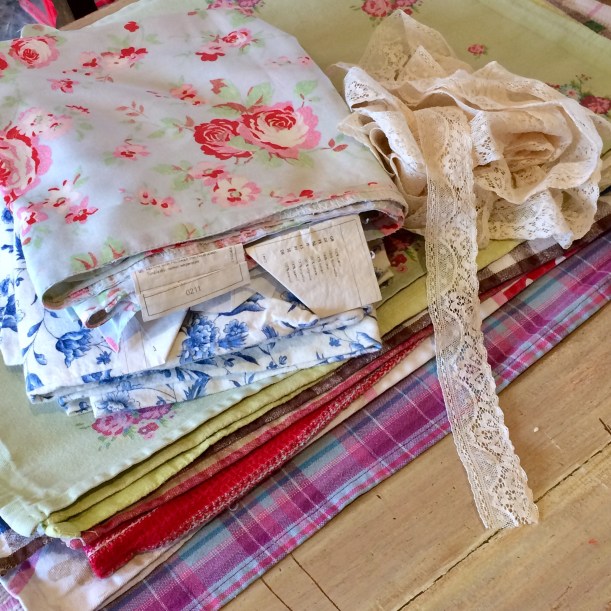
I don’t know what you see when you look at this mix but, add in a bit of vintage lace trim and it screams “Patchwork quilt” to me. No? Well, that’s how my mind works, anyway:)
The very word ‘vintage’ conjures up images of faded florals and linens, so I picked out the remaining old Ikea pillowcases (some of which had been cut up to make hats for the jars of jam) and 3 or 4 neutral tea towels which would work nicely.
My Olfa quilting set made short work of cutting out the 48 6″ squares needed to make a quilt just large enough for a single bed.

I laid them all out on the floor and fiddled around until I was happy with the arrangement.

All seams were stitched with 1/4″ seam allowance and pressed as each strip was completed.

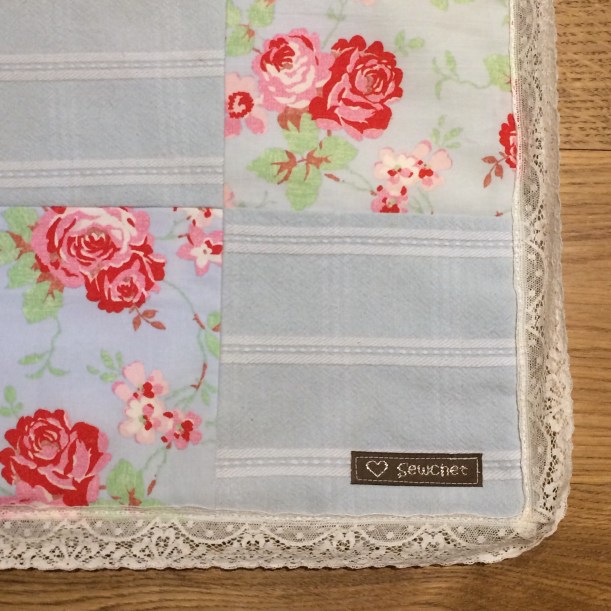
This is the finished quilt top.

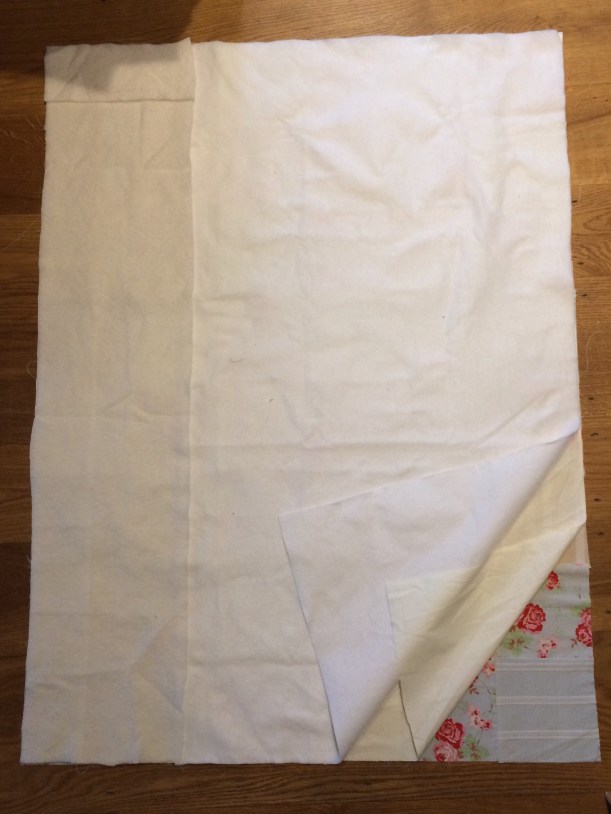
For the backing, I had to piece together bits of wadding and leftover curtain lining to make up the size I needed.
With right sides facing, lay the lining on the quilt top, then the wadding on top again.

I stitched around all four sides, leaving a gap through which to turn the quilt. Then the lace trim was sewn to the edge.
Finally I added a little “Sewchet” label.

I may go back and add a bit of hand quilting if I get time, but it actually doesn’t need it.
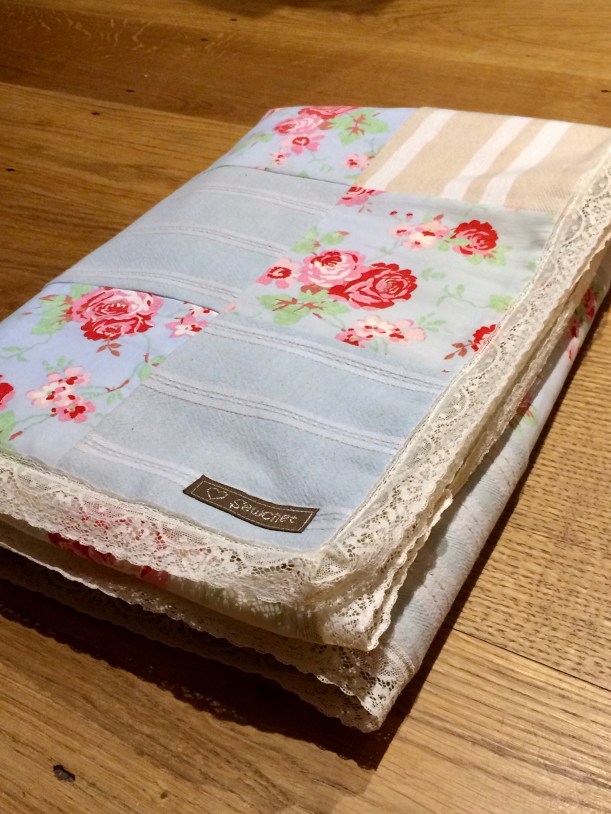
It’s just the right size to be a comforter on a single bed, or would make a cosy lap blanket for the sofa.


It took me six hours yesterday to make, so the fact that it will probably be sold for about a fiver has to be put to the back of my mind – but at least the fabric was free!
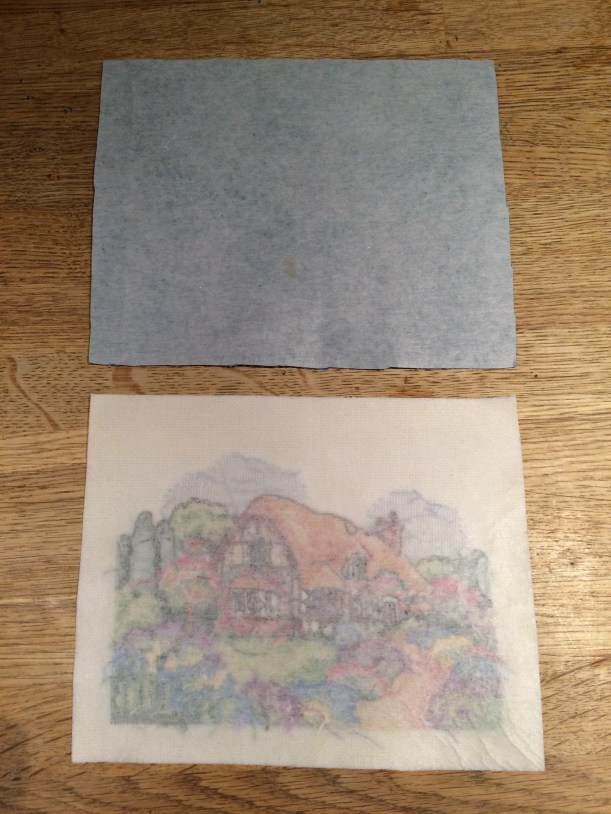
A couple of weeks ago I rescued this beautiful cross stitch from our local charity shop. It was mounted and framed but needed reinventing into something more usable in today’s modern life and was far too wonderful to leave there.

Only measuring a modest 5″ x 7″, I ummed and aahed about what to do with it for a while, having some brilliant suggestions on Instagram.
Ultimately, this is for one of my Stitching Santa recipients (I’m doing both sewing and yarny versions) so I wanted to make it a useful object. This lady is multi-talented across many craft disciplines, as are so many of my blogging pals, and she dabbles in cross stitch herself so I thought this would be perfect for her.
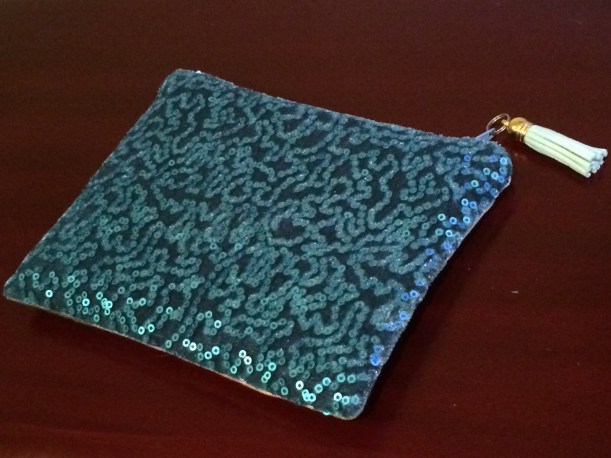
I decided to make a zipped pouch, about the size of a cosmetic bag, which could have a variety of different uses. Maybe for a portable cross stitch project, a small crochet or knitting project, or maybe as an actual cosmetic bag – it is rather swanky, after all!
So here’s a quick run-through of what I did, which might be informative if you have a similar piece of needlework that needs reinventing.
It had been spray-mounted to card and well laced across the back, so all that had to be undone. I then gave it a little steam press.

After trimming the needlework to a useable size, I used it as a template to cut two lining pieces and a back.

Iron-on interfacing was attached to the reverse of the front and back sections to stabilise the bag.
I used the covered tab method for the zip to give as neat a finish as possible (there are plenty of tutorials online on how to do this).

The zipper tabs should be about 1/4″ shorter than the width of the bag to ensure that they don’t get caught in the seam allowance when the bag is stitched together.

After inserting the zip, I topstitched close to the seam through the lining as well. This means that the fabric won’t get stuck in the zip when opening and closing.

OPEN the zip.
With lining-to-lining and front-to-back (right sides together) stitch all the way around, leaving a gap in the lining through which to turn.
Be sure not to catch the tabs in the seam as you sew.

Trim the tabs to reduce bulk.

Cut across all the corners before turning the right way out.
Close the gap in the lining either by hand or machine.

I added a coordinating leather tassel from my supplies.

The sequinned fabric is a small piece cut from a length of fabric that will become a dress later in the week. It adds a touch of glamour.
Some matching blue lining is a nice vibrant surprise when you look inside.
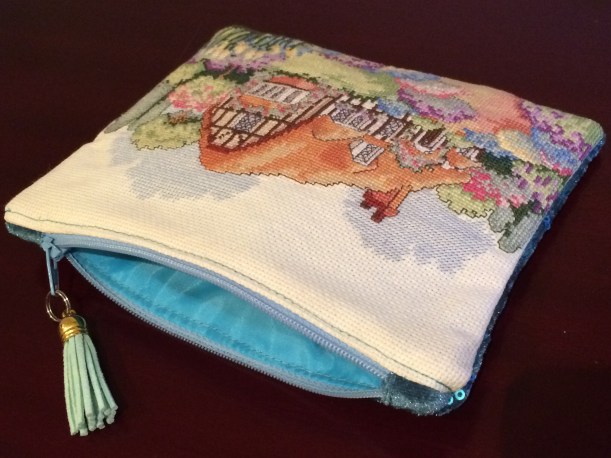
I hope she likes it!
When I posted this photo on Instagram, of the “Best In Show” book of knitted dogs that I bought nearly-new for a bargain on Amazon, it had a mixed reception.

Some people thought I’d lost my marbles while others clearly saw the attraction of knitting such pointless-but-cute objects.
So, when the other one in the series one popped up at a knock-down price, obviously I snapped it up!

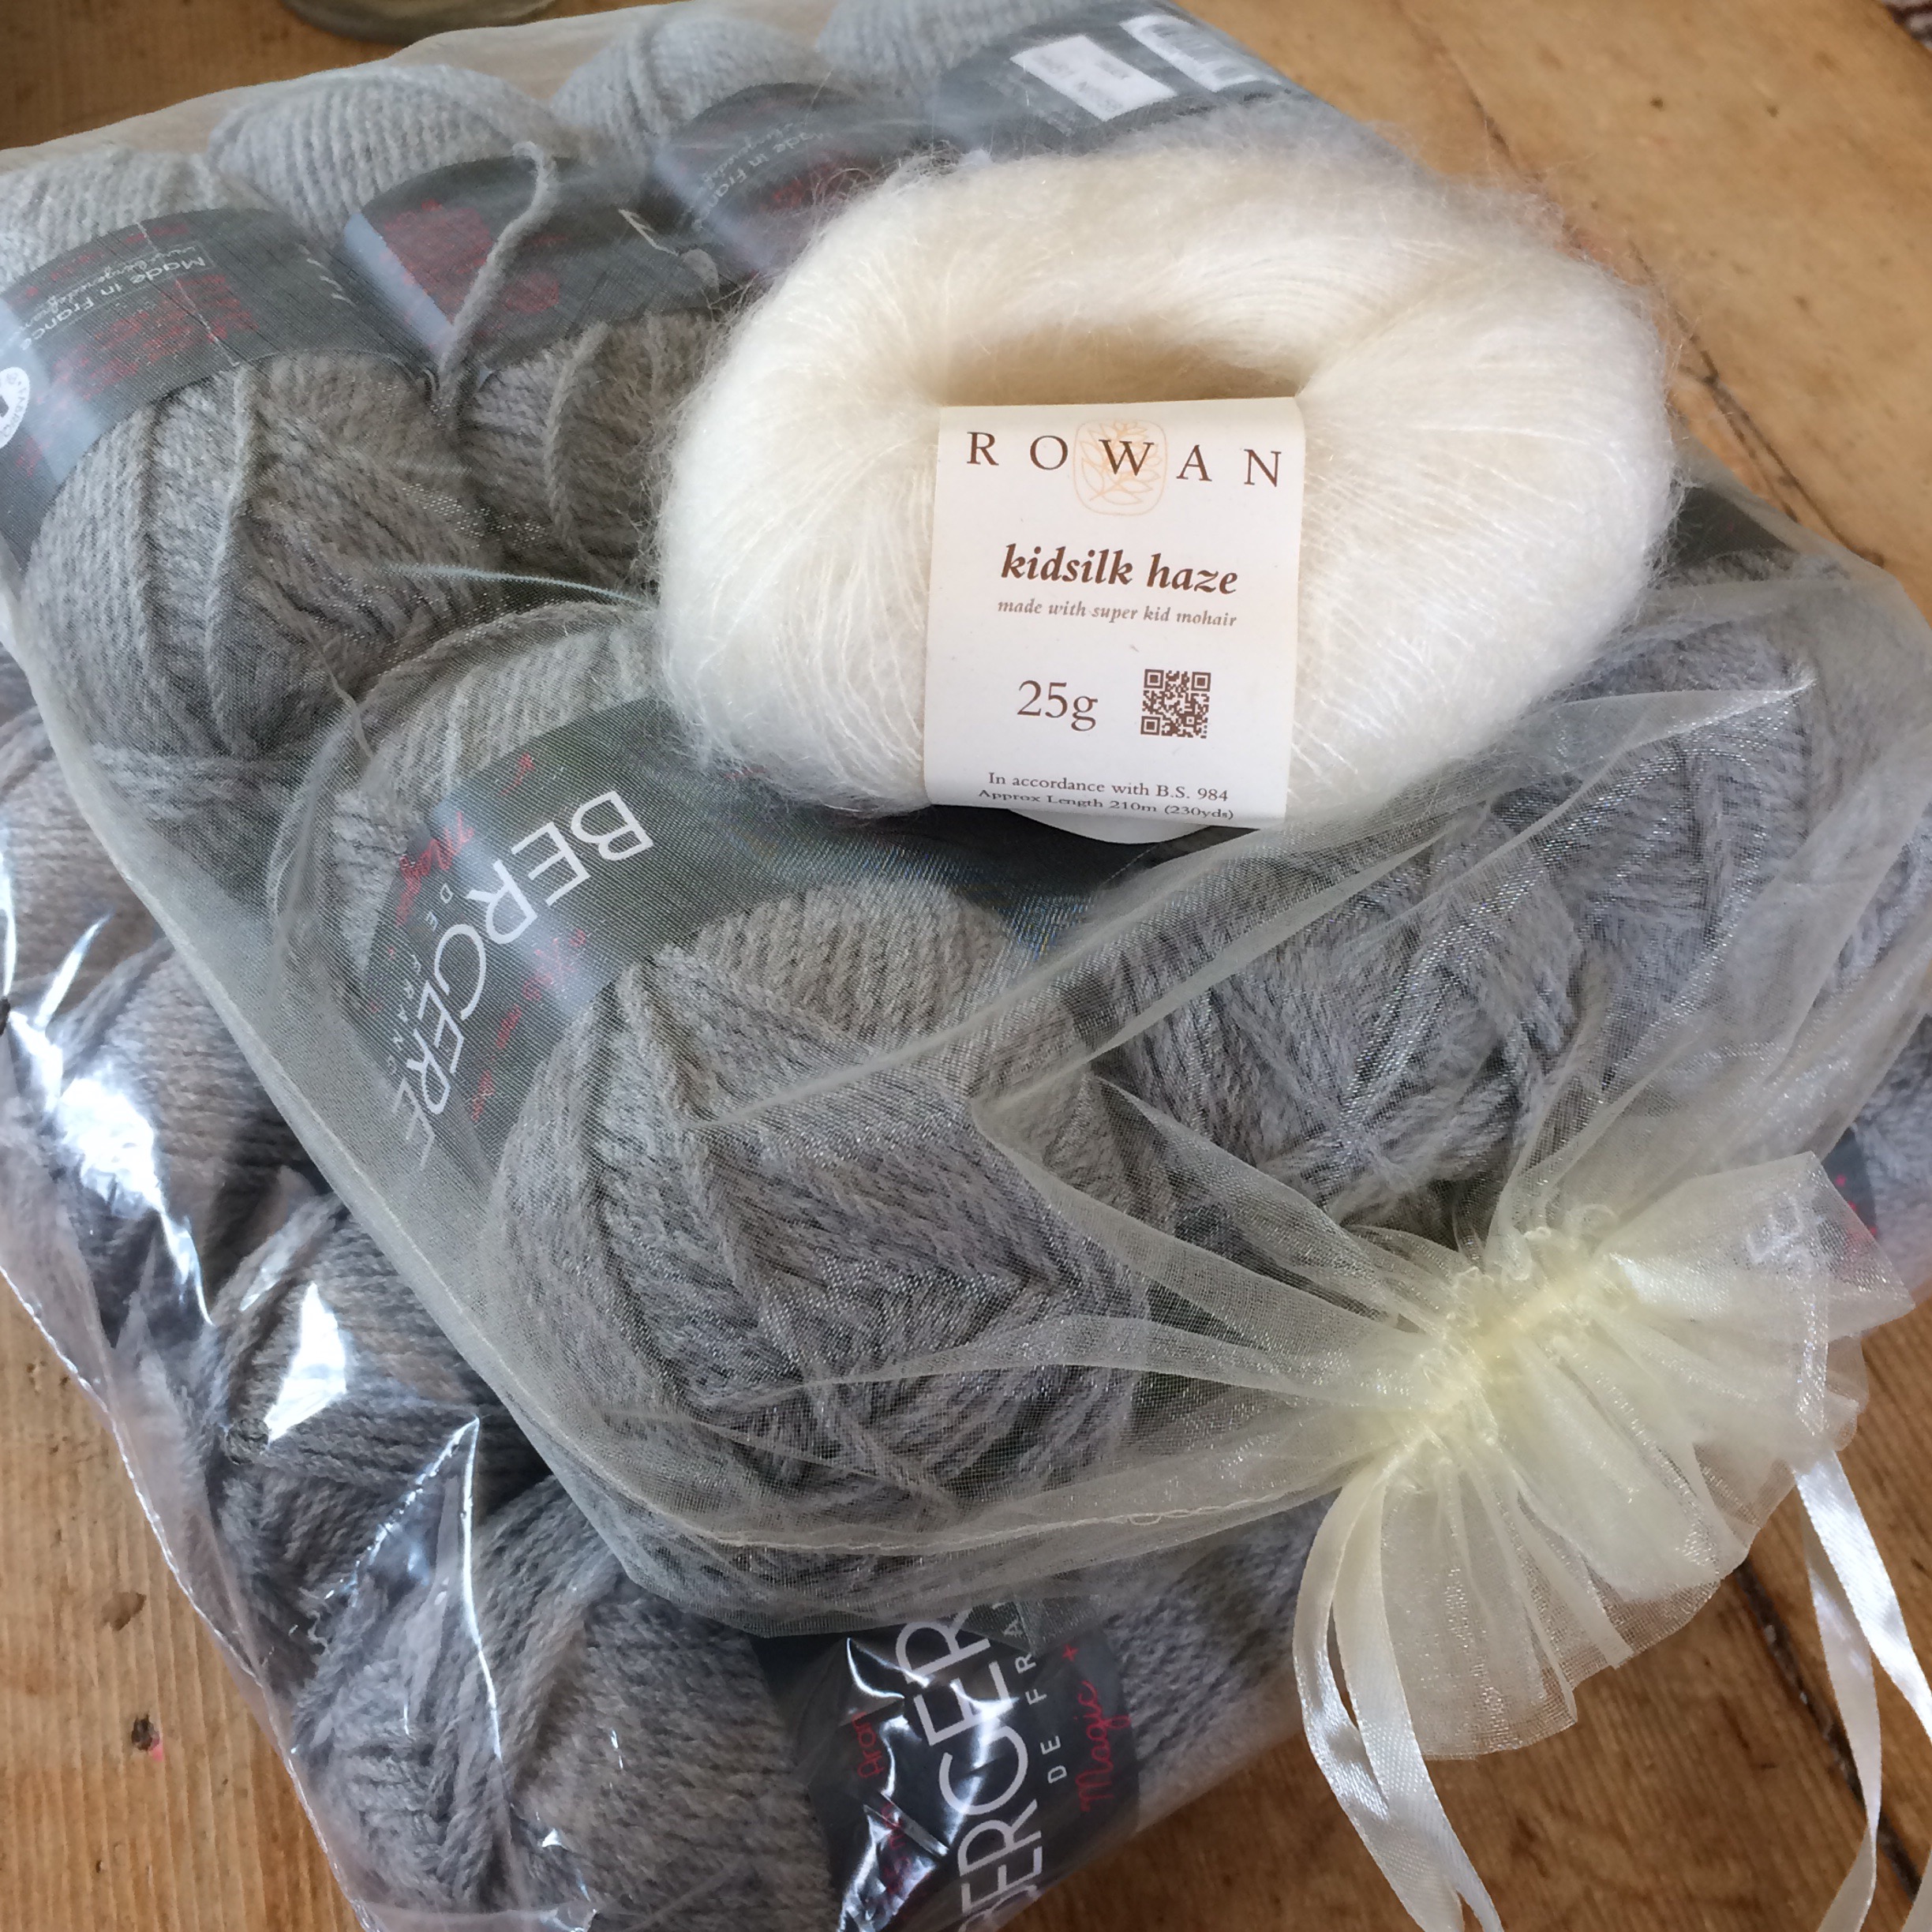
Almost instantly, a lovely Instagrammer from Australia contacted me and asked if I’d consider a commission for her of a West Highland Terrier, a “Westie”.
Of course, I jumped at the chance to have a bonafide excuse to actually go ahead and make one, so agreed straight away.
Unfortunately, there is no local stockist of Rowland Kidsilk Haze, so I had the ideal opportunity to put together a larger order with an online stockist to include yarn for a poncho that I’d admired for a long time.
Armed with everything I needed, I couldn’t wait to cast on.

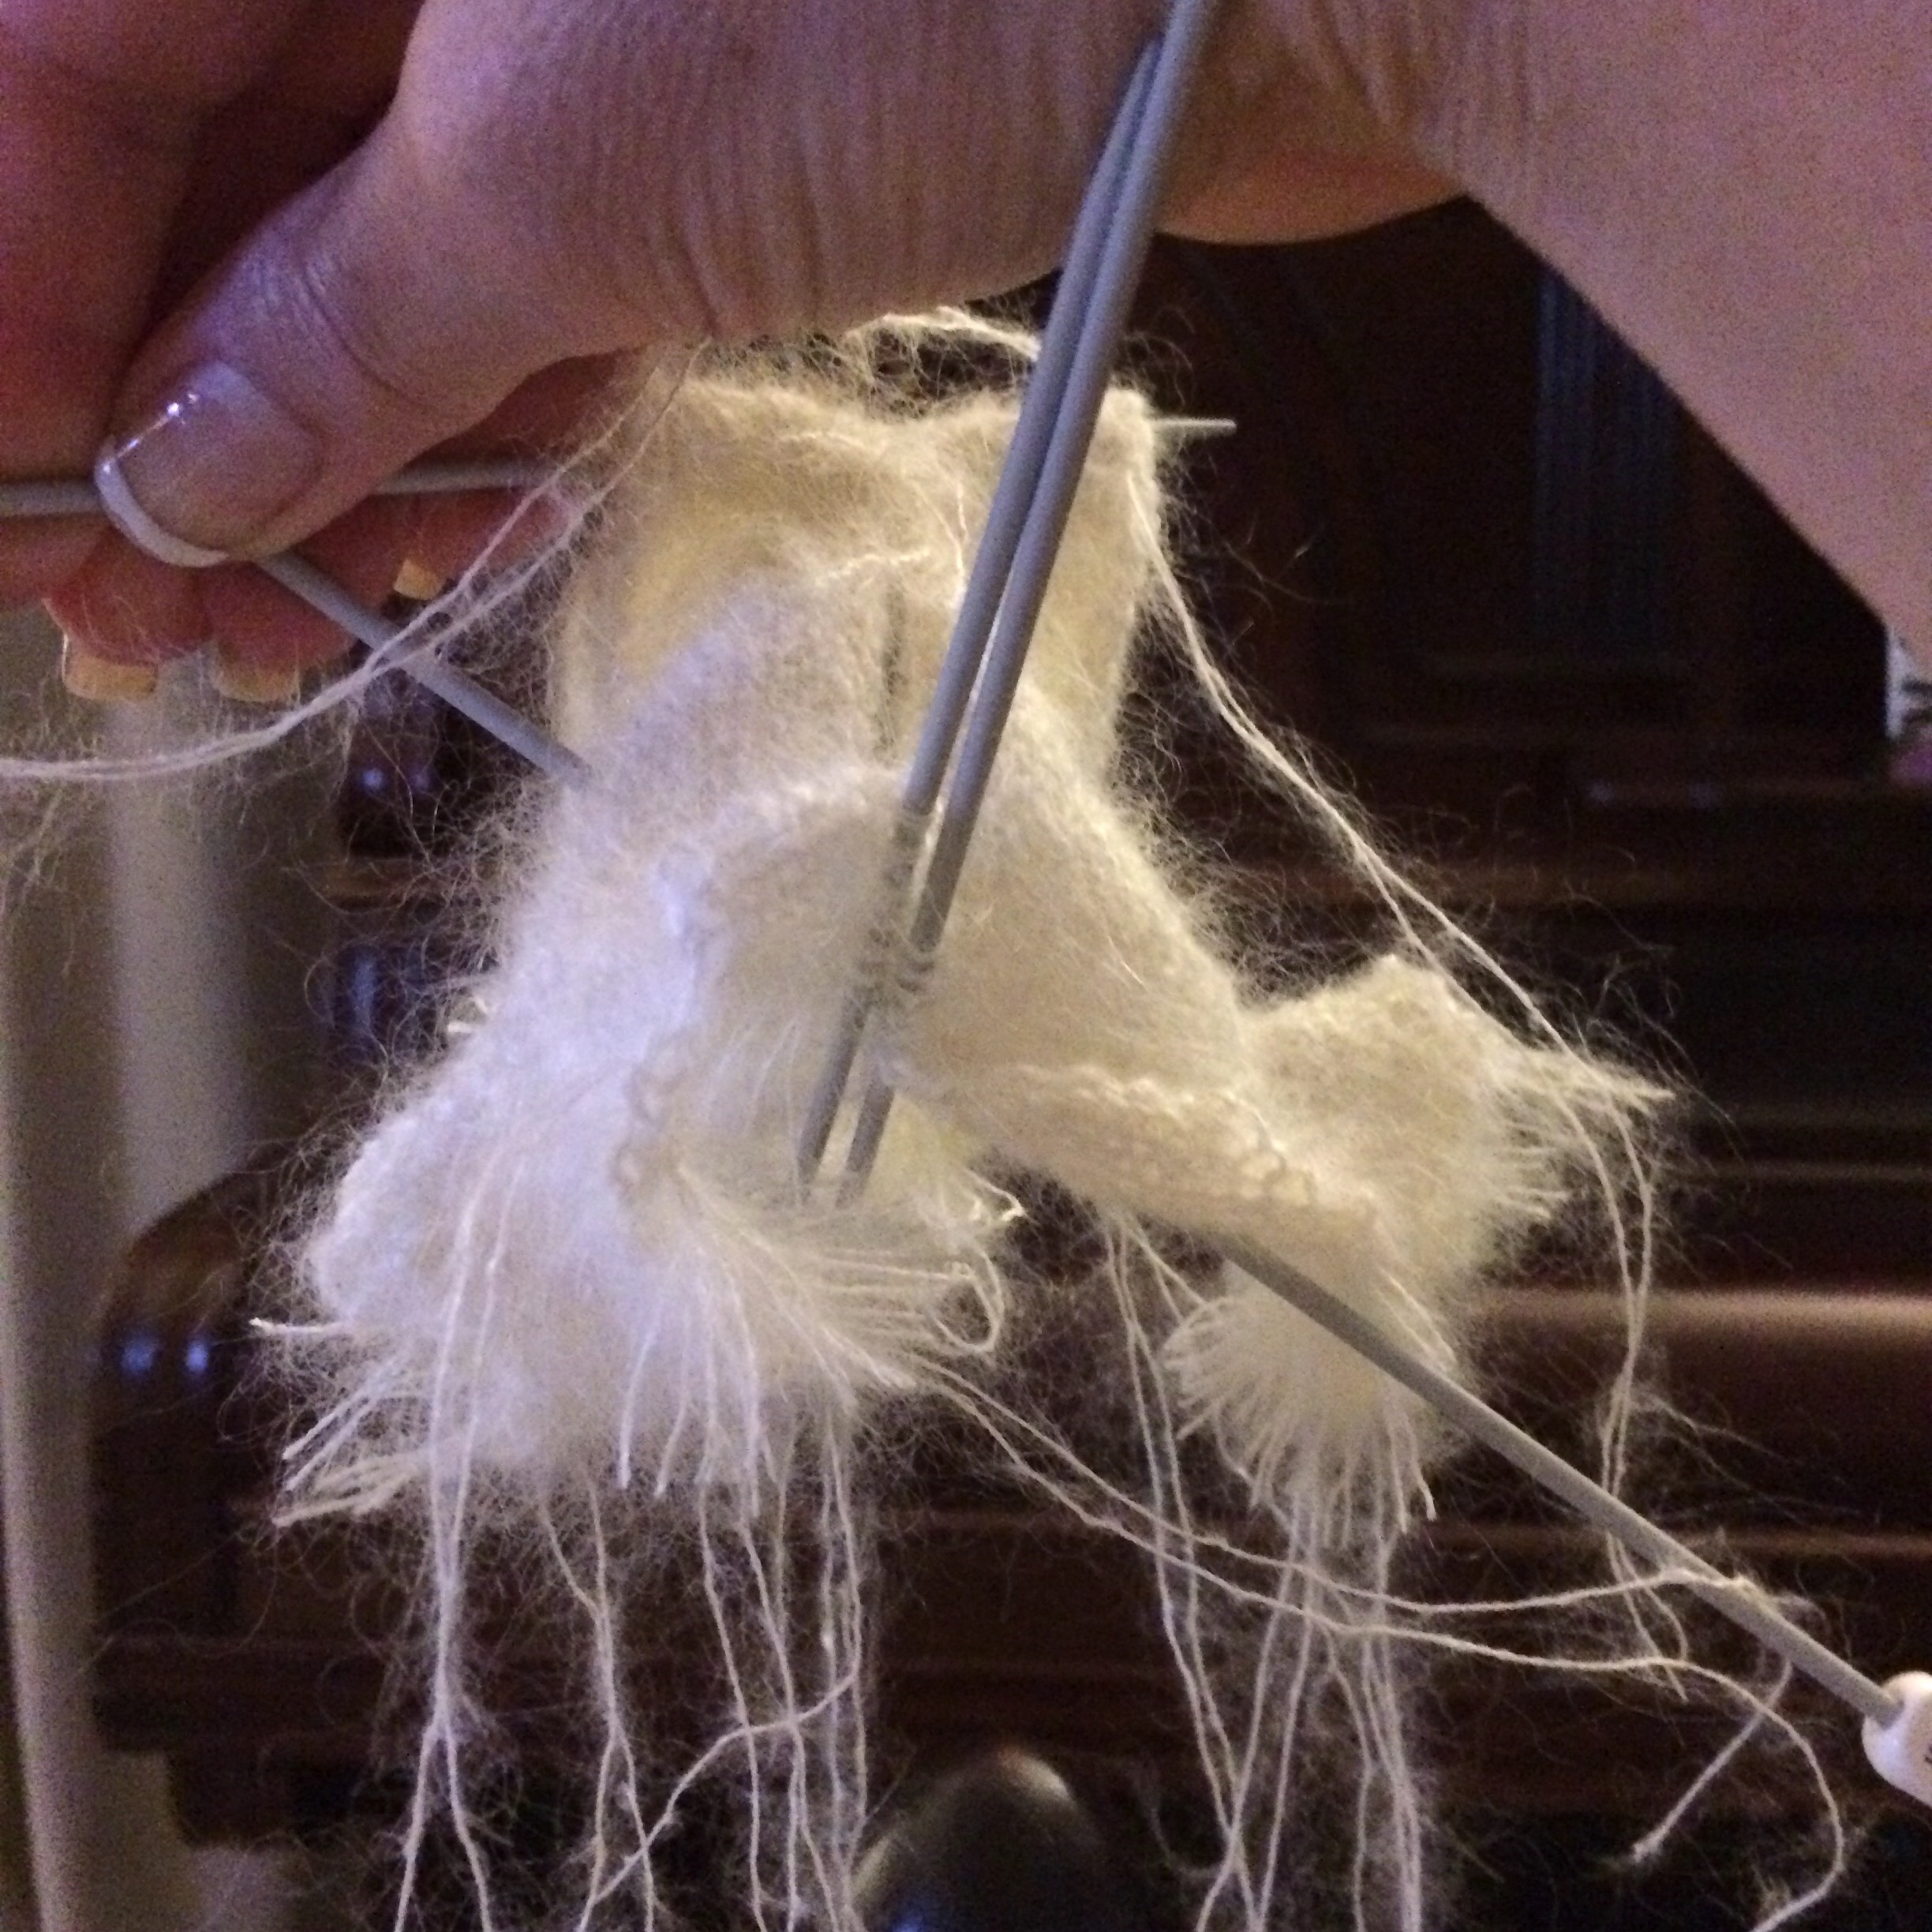
The fuzzy nature of the mohair would be perfect to imitate the fur of a Westie. Two strands of yarn are held together throughout.

Believe it or not, this is a finished leg!!

Whilst not complicated, you need to concentrate on the instructions especially as this one asks you to “follow instructions as for Scottish Terrier” for certain elements of the knit.
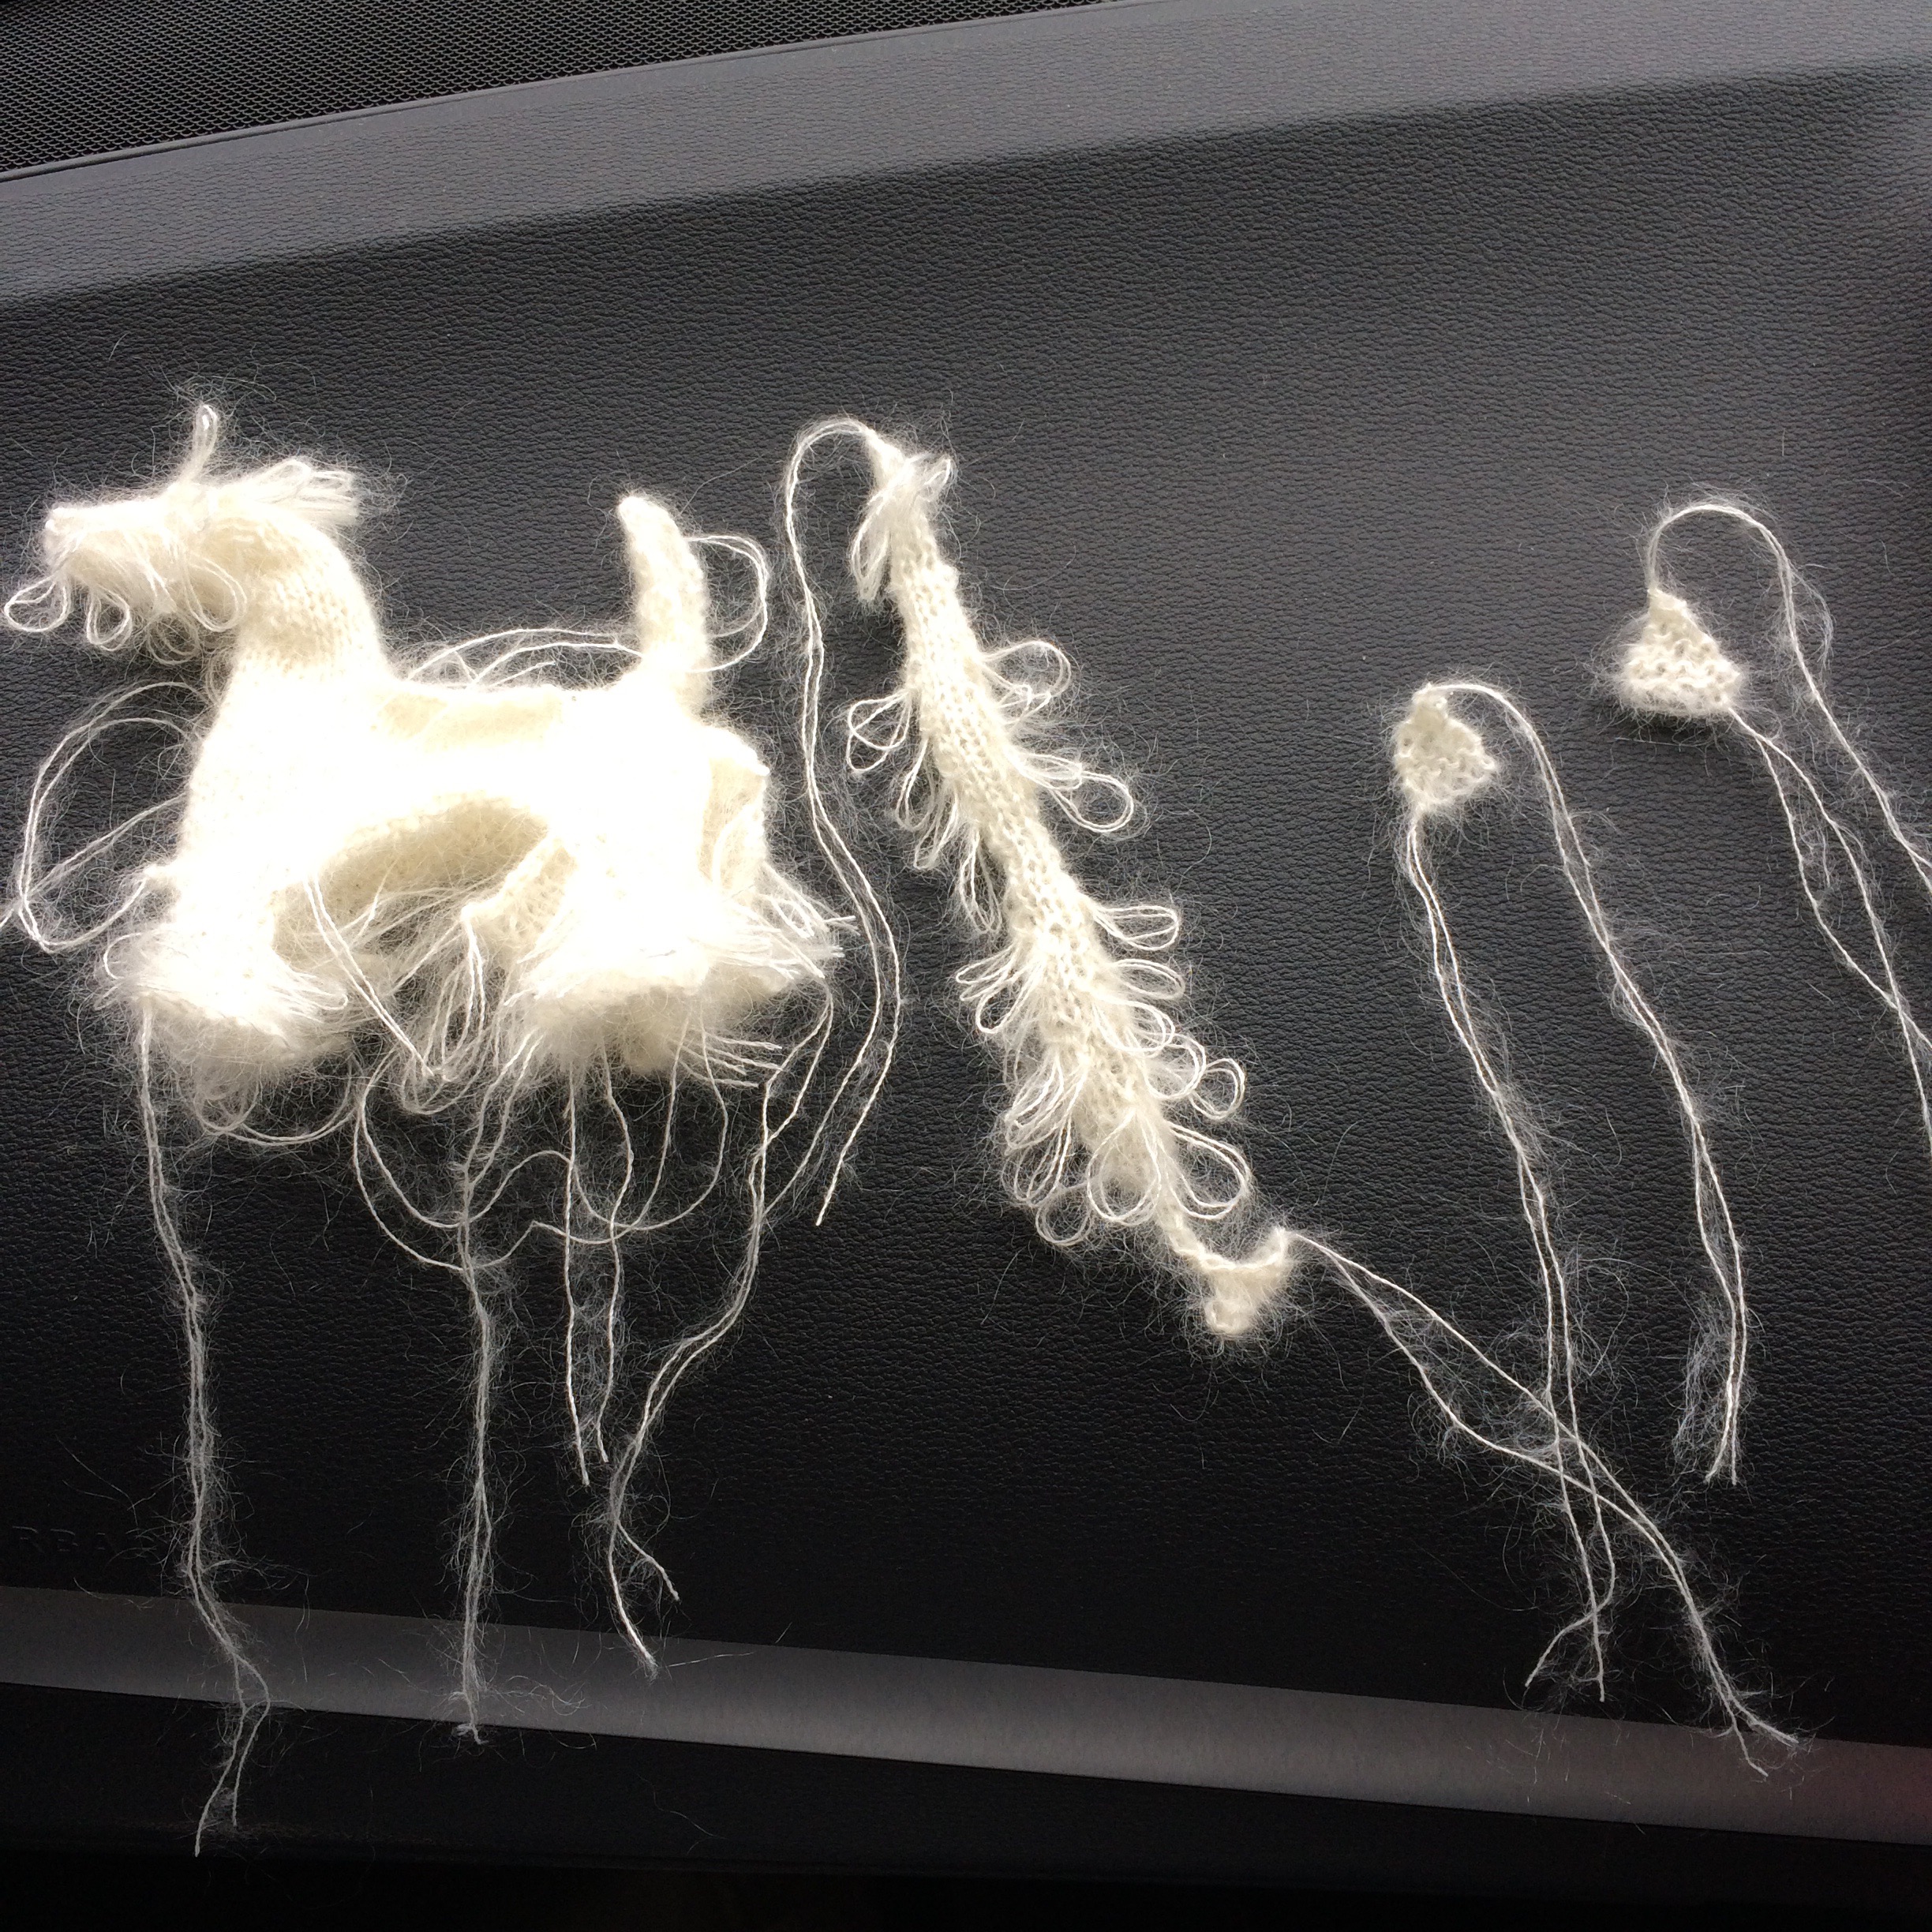
At this point, the knitting was almost completely finished but still looked absolutely nothing like a dog, let alone a Westie!
The extra bits were finished in the car whilst at a football match – they’re laid out on the dashboard.
Now to sew it all together.


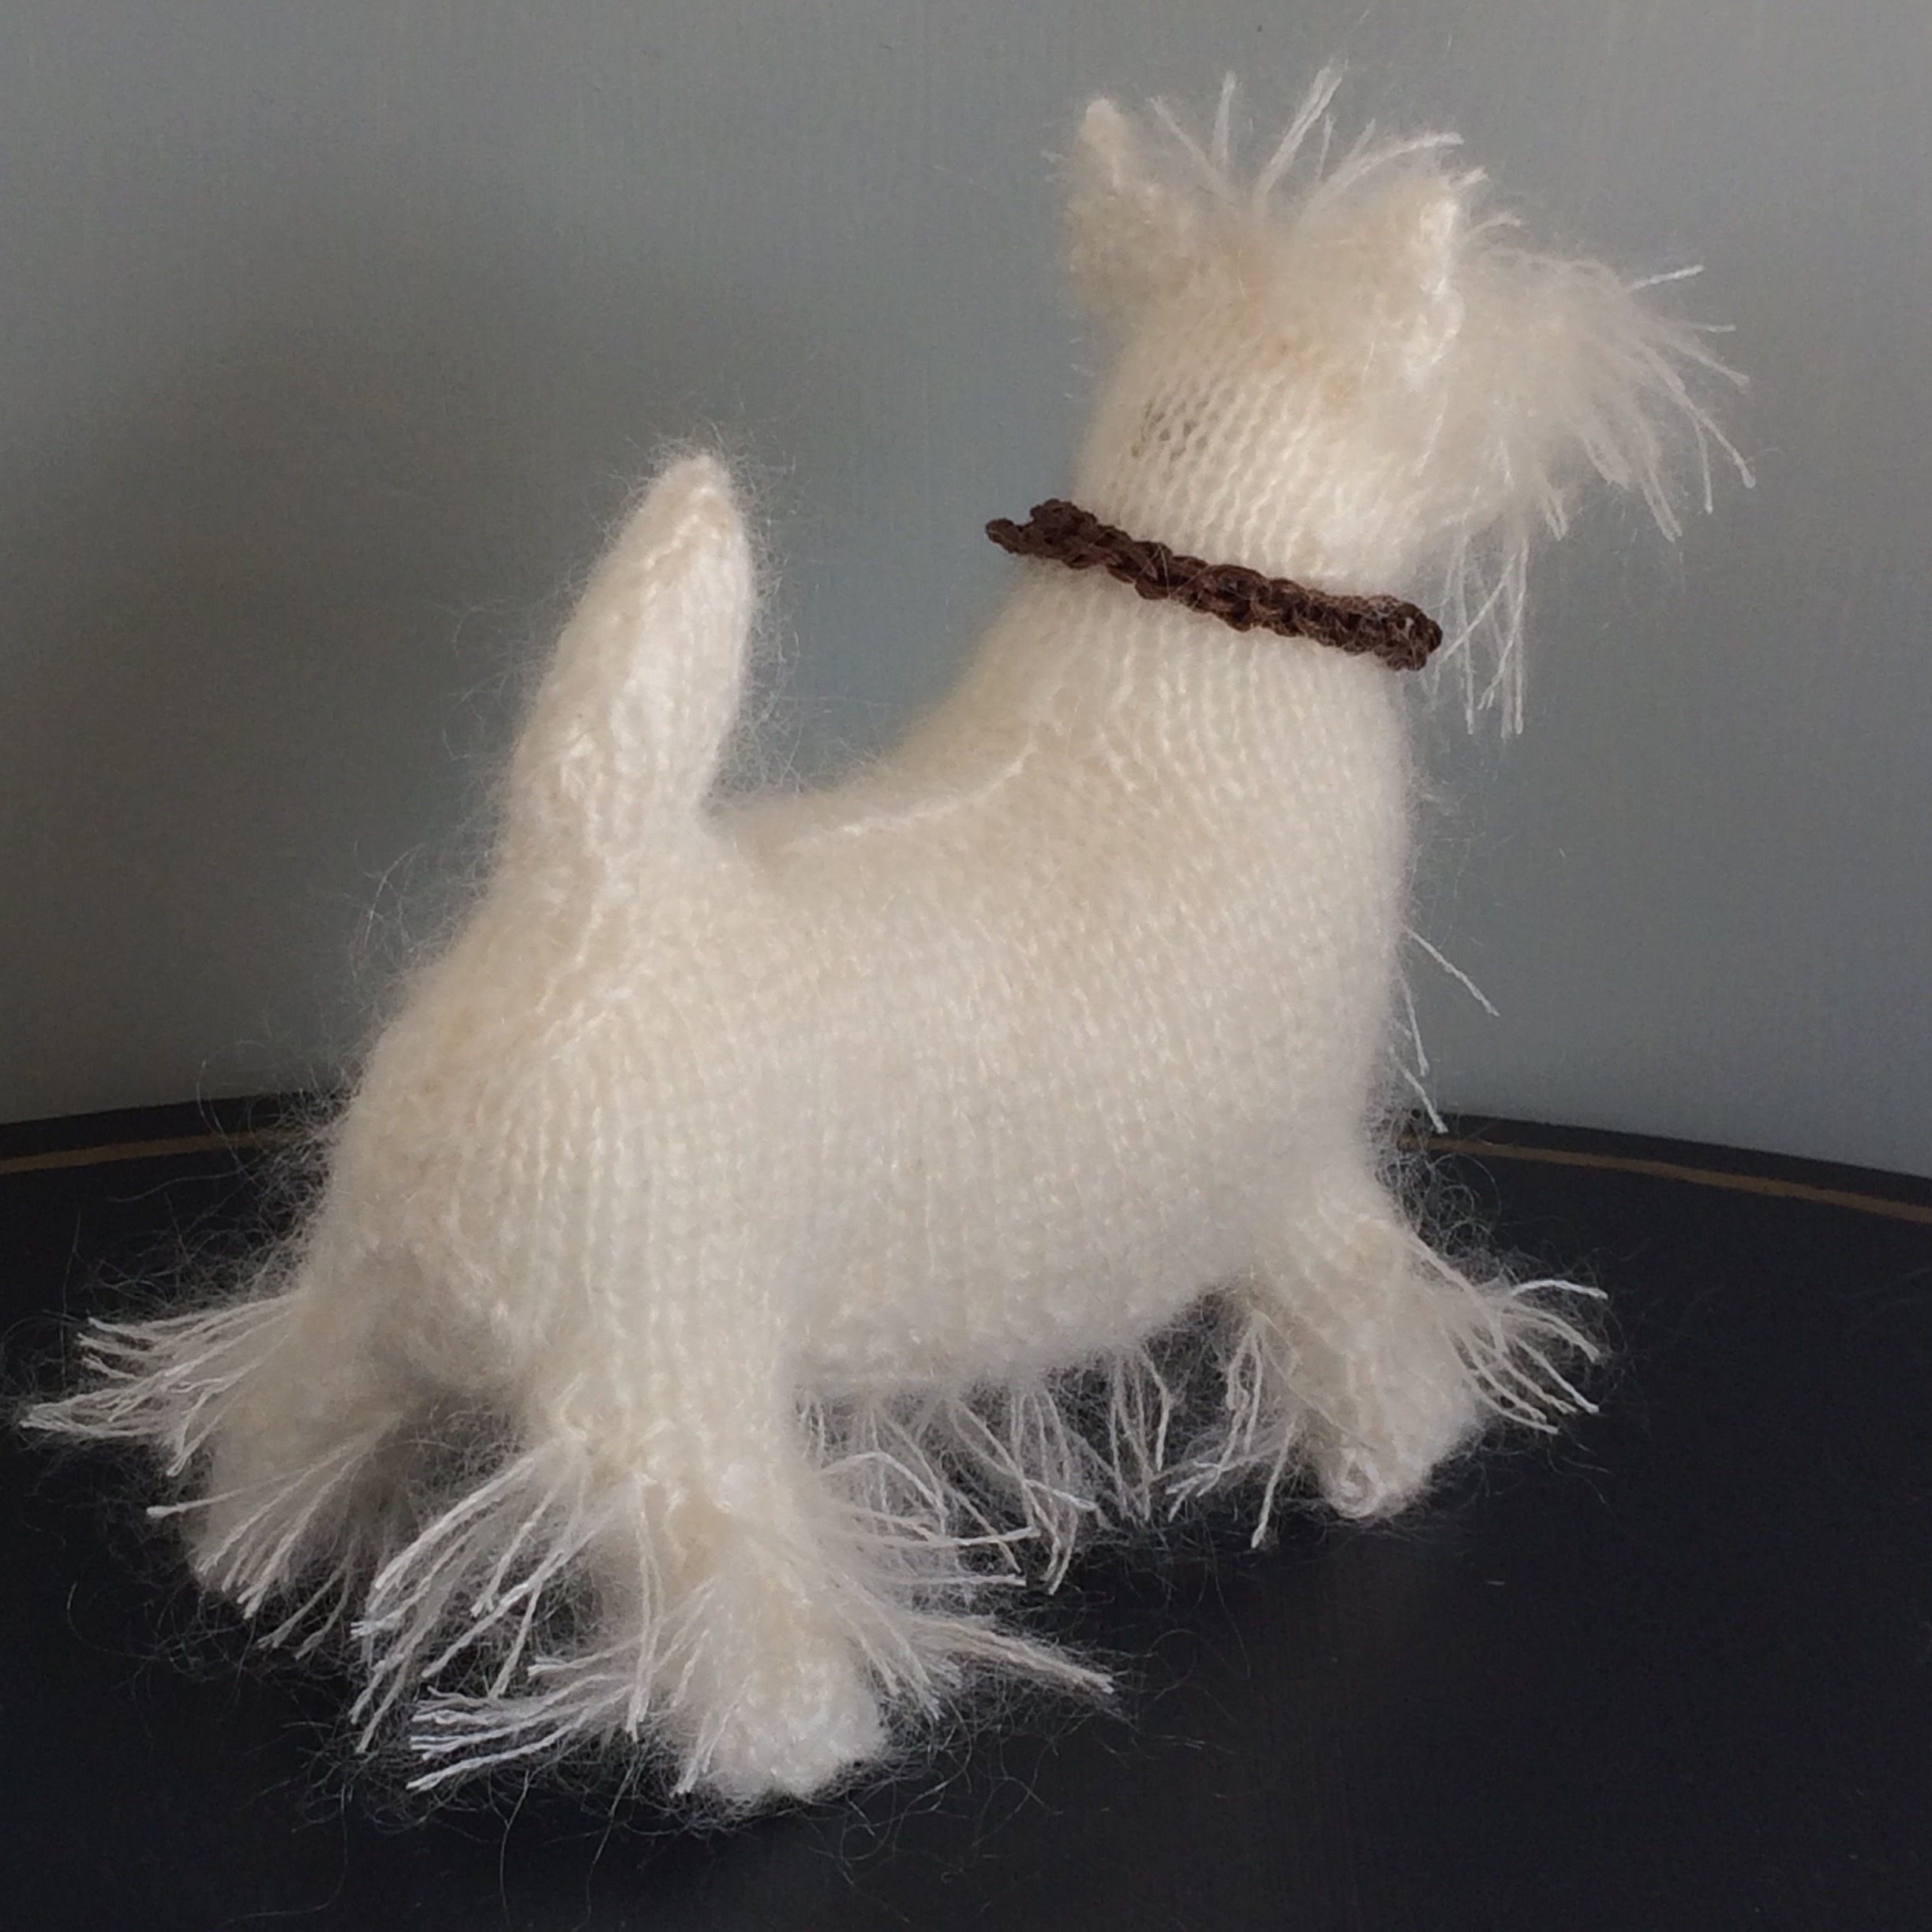
A satin stitched nose, French knot eyes and collar, all made using embroidery silks, are the final touches.
And here he is!


For scale, here he is sat in the palm of my hand.
He is about 6 inches long and 4 inches high.

Not only that, but I have enough yarn left to make another one……anyone else want to commission a Westie?!!

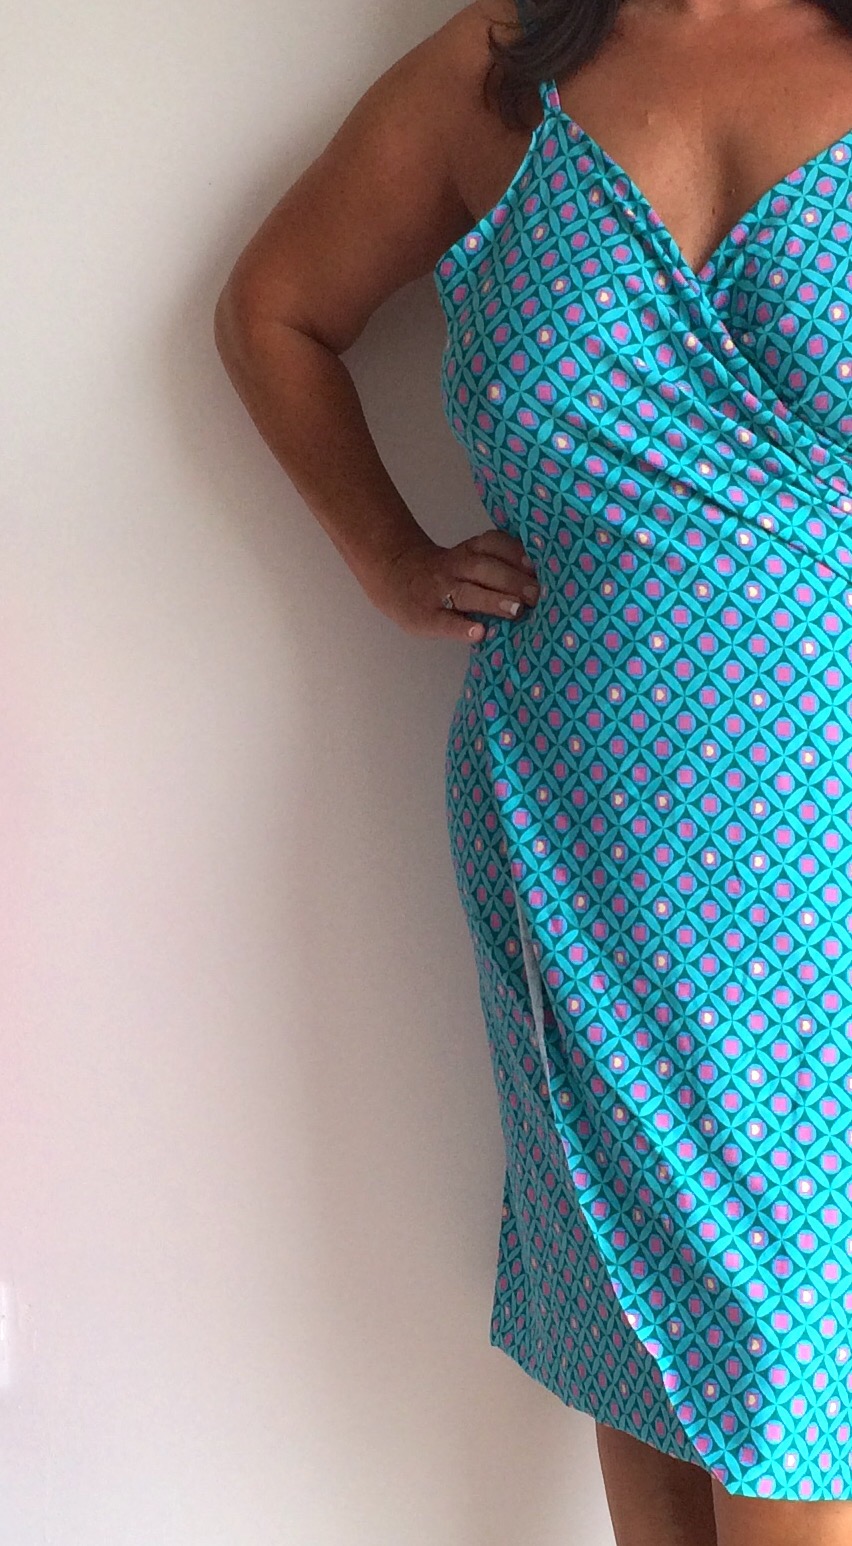
Looking ahead to the Summer holidays, I wanted to make a simple cover-up that would be quick to throw on over a swimsuit. You know those times; when you want a drink at the pool bar and don’t want to get dressed, but don’t want to sit there in a pair of bikini bottoms!
You can read all about it in my blog post over at Minerva Crafts :- Beach Wrap/Bikini Cover-Up
 This month’s project for the Minerva Crafts Blogger Network is now live – follow the link to read all about this challenging make!


I’ve come over all Teal for this month’s Minerva Crafts Blog post!
To see the full post, just click on the link here: – Teal Waterfall Jacket And Leggings
(Boots can be found here)

My blog post for Minerva Crafts this month is this adorable little girl’s cardigan/bolero, which is now available for grown ups, too!
This one is for a Christmas present but, as it was whipped up in just a few hours, I couldn’t resist casting on another as a birthday present immediately after the first one was off the needles.
Follow this link for the pattern and to see how sweet it looks on our baby granddaughter.
To see what I did with this old chair, a pot of paint and these colourful fabrics, click on the link below: –
Minerva Crafts Blogger’s Network: Upcycled Chair

They’re finished!
Bright red, tailored shorts with so many exquisite little details that make them a joy to look at!
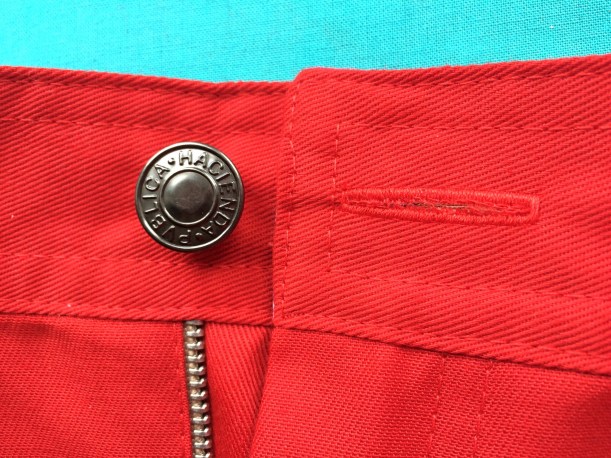
Just one look at the smile on his face tells you how much Mr H-L likes them.

To see the full blog post over on the Minerva Crafts Blogger Network, just click on the following link: Red Shorts With Camper Van Lining
In other news, I am delighted to say that the winner of the fabric giveaway is……

Congratulations Lulu! Please email your full name and address to info@sewchet.com so that I can get your prize in the post to you as soon as possible.
Artist and tutor
a creative life on the spectrum
Everyday craft inspirations
Movin' On Up
Because We're All a Work in Progress
Previously Boys and Chickens, I have created a new blog to share my sewing adventure as 2018 is they year I plan to teach myself to sew! There will also be bits of crochet and cooking too.
Sewing, crochet, crafts, accessories, baking, tutorials,
small steps to a kinder world
Sew What... Sewing, Embroidery and handmade
"She is too fond of books and it has addled her brain." (Louisa May Alcott)
A life of books . . .
Official crafty blog for my Quiet Water Craft Etsy shop
Sewing, crochet, crafts, accessories, baking, tutorials,
my year of trying to be more creative in different ways
Sewing, crochet, crafts, accessories, baking, tutorials,
The latest news on WordPress.com and the WordPress community.
Adventures in dressmaking from an improving sewist!
Knitting, Sewing, Crafting
Sewing, crochet, crafts, accessories, baking, tutorials,
Sewing, crochet, crafts, accessories, baking, tutorials,
Sewing, crochet, crafts, accessories, baking, tutorials,
Sewing up a self-made wardrobe
Sewing, crochet, crafts, accessories, baking, tutorials,
Sewing, crochet, crafts, accessories, baking, tutorials,
My art work and other musings
Fabric, life, and all that
Sewing, crochet, crafts, accessories, baking, tutorials,
Sewing, crochet, crafts, accessories, baking, tutorials,
Making and creating
From Scraps to Quilts
Lesley blogging about her sewing projects
lathaminteriors.co.uk
Sewing, crochet, crafts, accessories, baking, tutorials,
What's happening in North Cheriton
Returning sewist, crafter and runner
My quest to sew a wardrobe of clothes which actually fit me
a blog about making things
the joy of creativity
My challenge: One year - I will not buy clothes - I will upcycle to make what I need - everything from underwear to evening wear! Join me for tips, exclusive BrawHem makes, and inevitably some hilarious disasters...
Go Sew Something
Sewing, crochet, crafts, accessories, baking, tutorials,
