Click on the link to see this month’s project for Minerva Crafts in action! : – Burda 6610 Tunic


Click on the link to see this month’s project for Minerva Crafts in action! : – Burda 6610 Tunic
This month’s Minerva Crafts blog post is finished!
Just click on the link to see all about the Linen Look Cotton Tunic.
The other day I was browsing through the latest Love Sewing magazine after it obligingly popped through the letter box whilst The Boys were at football, meaning I could actually sit down for five minutes and read it without interruption.
The cover featured an inset photo with the model wearing a keyhole neck tunic which I rather liked the look of – not in mustard though, I can’t wear mustard.

After a quick glance at the line drawings, I thought I’d give it a go. Not being blessed with model-esque proportions myself, I don’t trust the photographs as I know it’ll never look like that on me!
I remembered some fabric that I had recently been given from a friend who was clearing out her studio which would be perfect for this top.

There were about four metres of thin, loosely woven cotton fabric which, according to the selvedge, was vintage Rose & Hubble.

The top came together pretty quickly and very easily. The neck keyhole opening was simply turned back twice to provide a narrow hem.

I narrow hemmed the bottom of the top, too, as it was such fine cotton.

I made some bias binding for the neck edge.
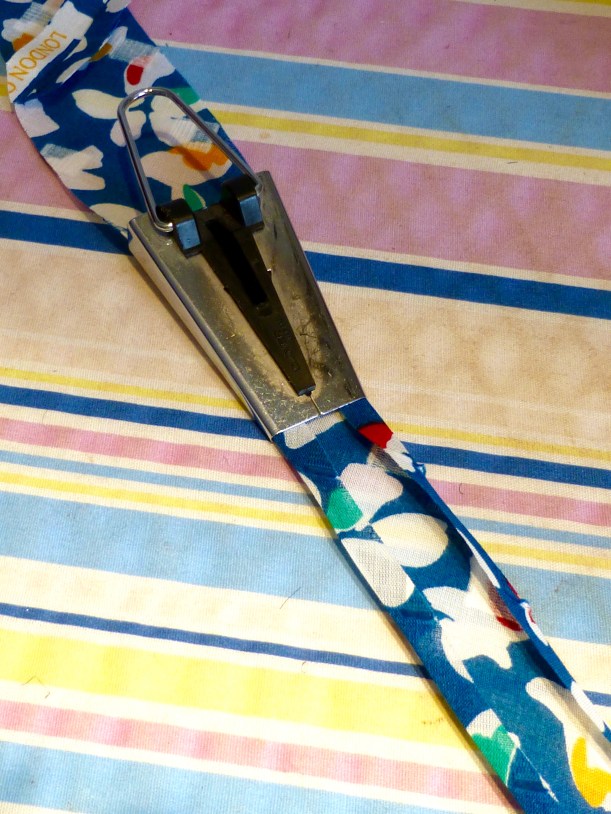
The pattern called for a continuous strip of binding around the front and back leaving a ‘keyhole’ neckline, but I fancied having ties at the front instead so extended the binding length accordingly.

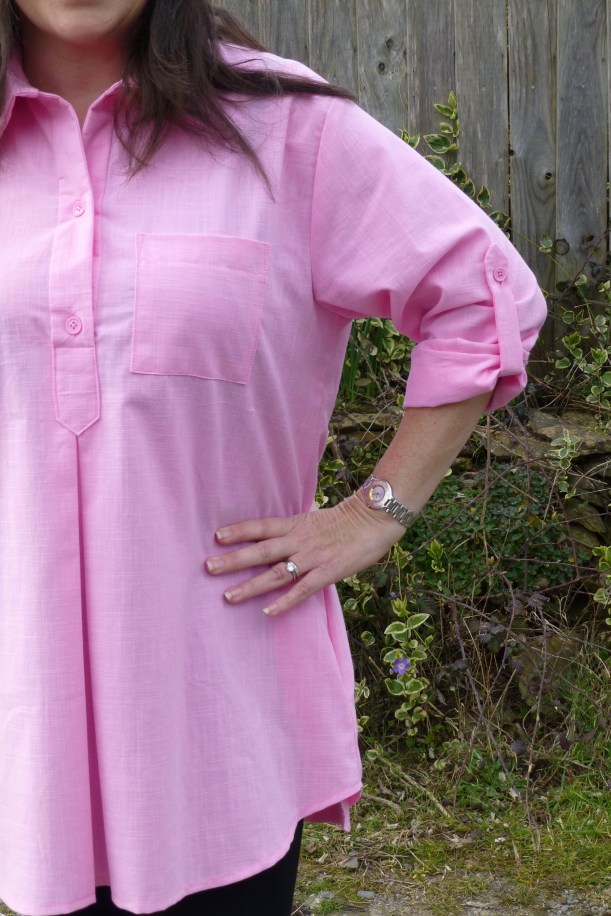
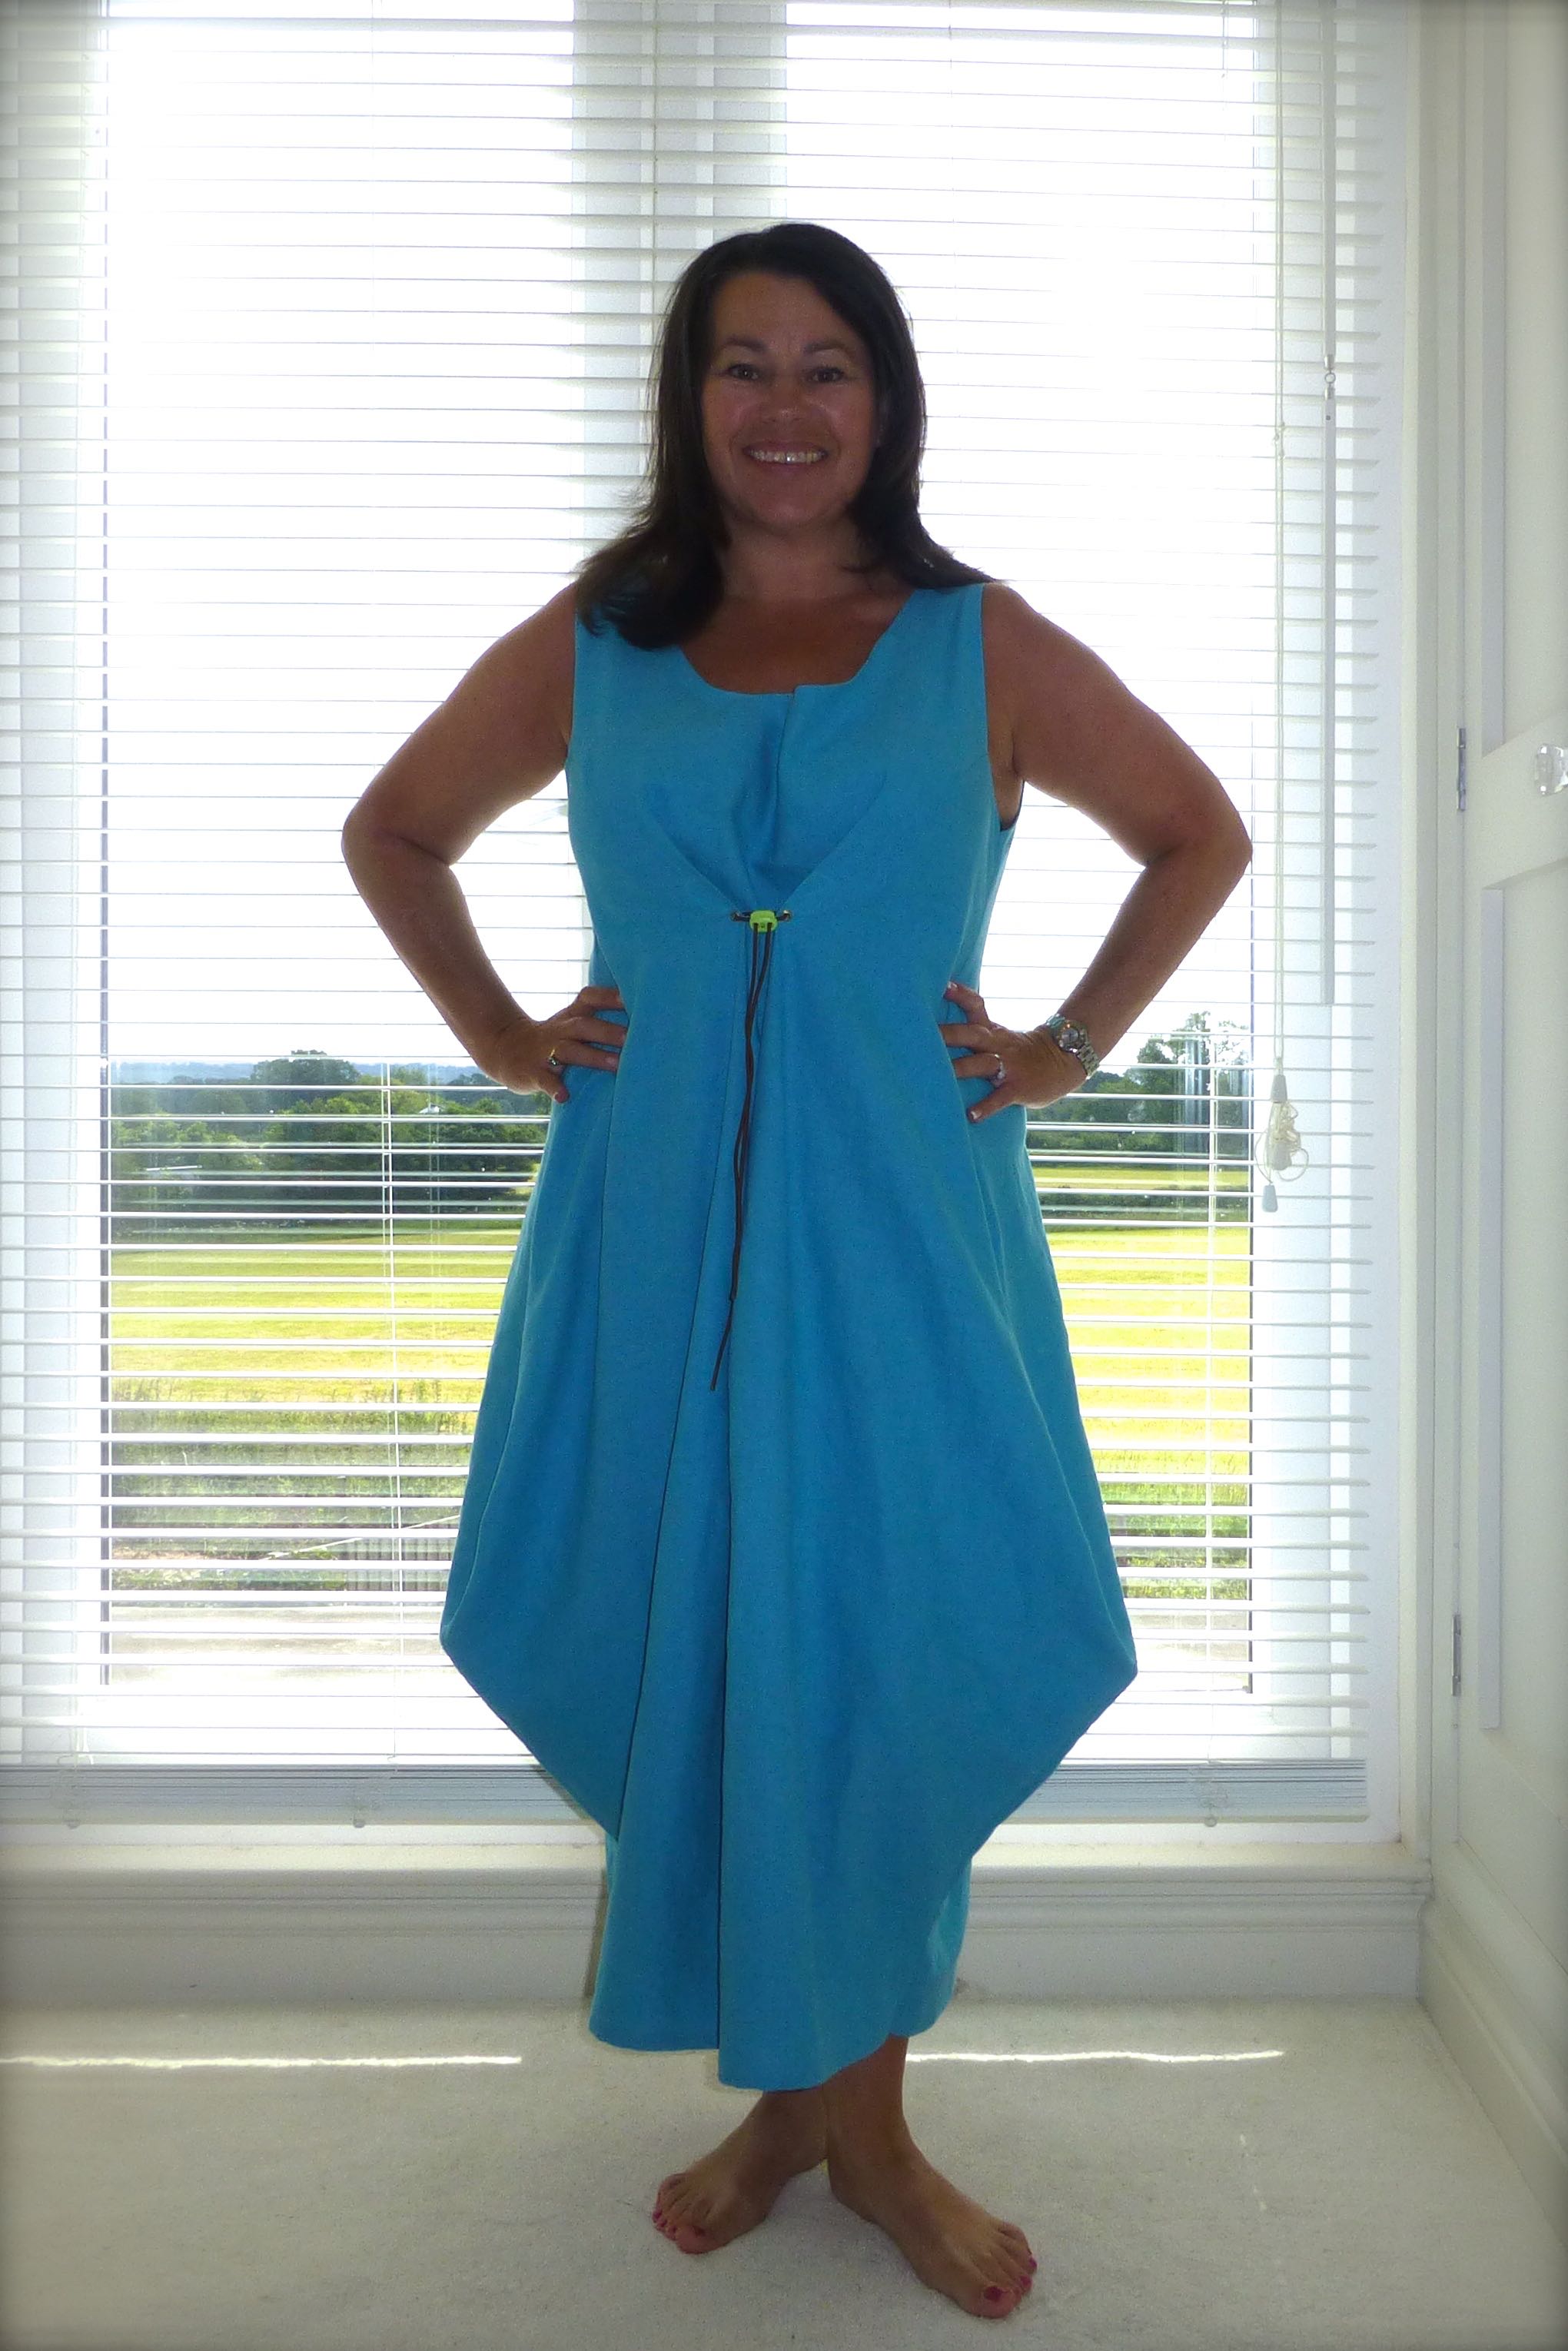
The finished tunic fits my dressform pretty well. You can’t see the pleats because of the patterned fabric but you CAN see how low the front opening is!!

Sure enough, when I put it on, far too much cleavage was displayed. I do like how the front pleats are stitched down and draw the fabric in underneath the bust though, to stop the top hanging like a shapeless sack.

A vest top will definitely have to be worn underneath, which is a bit of a shame.
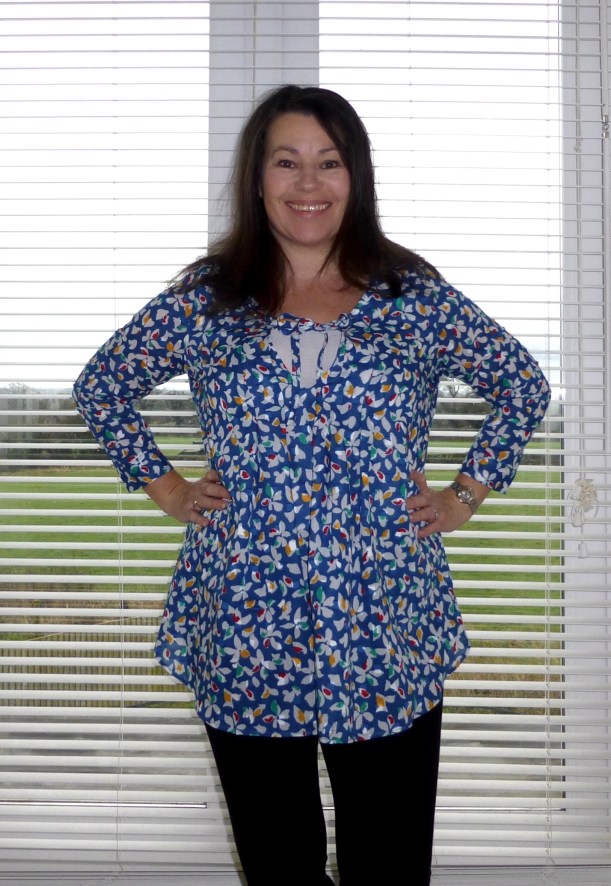
The shawl that Tajana made for me on a gift exchange (blogged about here) matches the blue in the tunic perfectly so, with a cardigan, it can be worn in the Winter too.
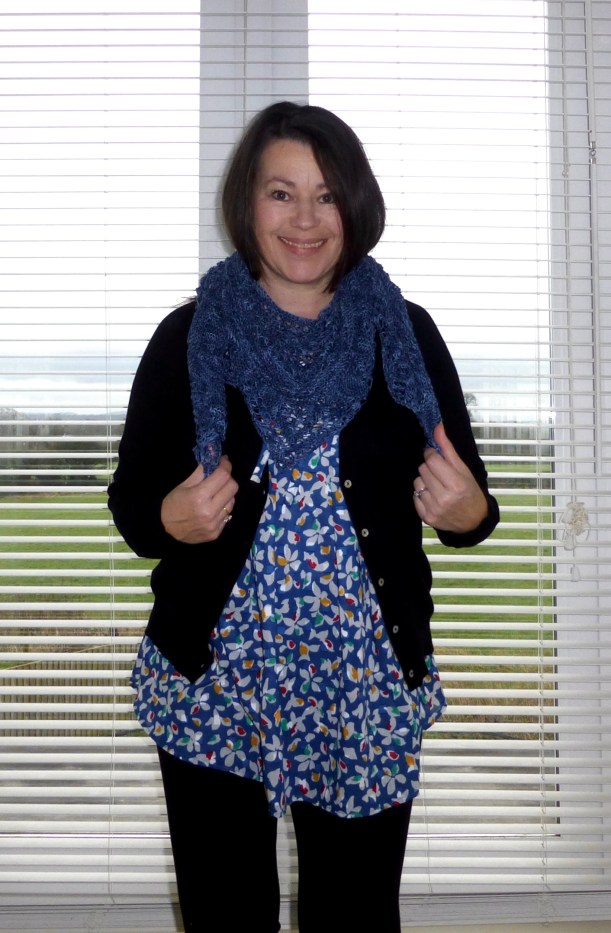
I’m not really a dark blue kind of person, but the shade is more Cobalt and is lifted by spots of red, white, yellow and green, so it feels quite cheerful and bright. The blue scarf stops the black cardigan from looking too gloomy, too, as I don’t like black next to my (almost) black hair.

Has anyone else made this top? What did you think of it?
Well that’s it, all my lovely linen used up and made into loose Summer garments which have been perfect in this recent spell of hot weather.
Remember these citrus shades I bought from Calico Laine?

I made a sleeveless dress from the “Pool Blue” and self drafted a tunic from the “Leaf Green” (Don’t you just love the descriptive colours?)

I wanted something along the same lines for the fuschia linen, another loose fitting, easy-to-wear item that would be a delight to wander around in on even the hottest day.
In the end I decided to make a dress based mainly on the tunic but, this time, with sleeves, albeit short ones.

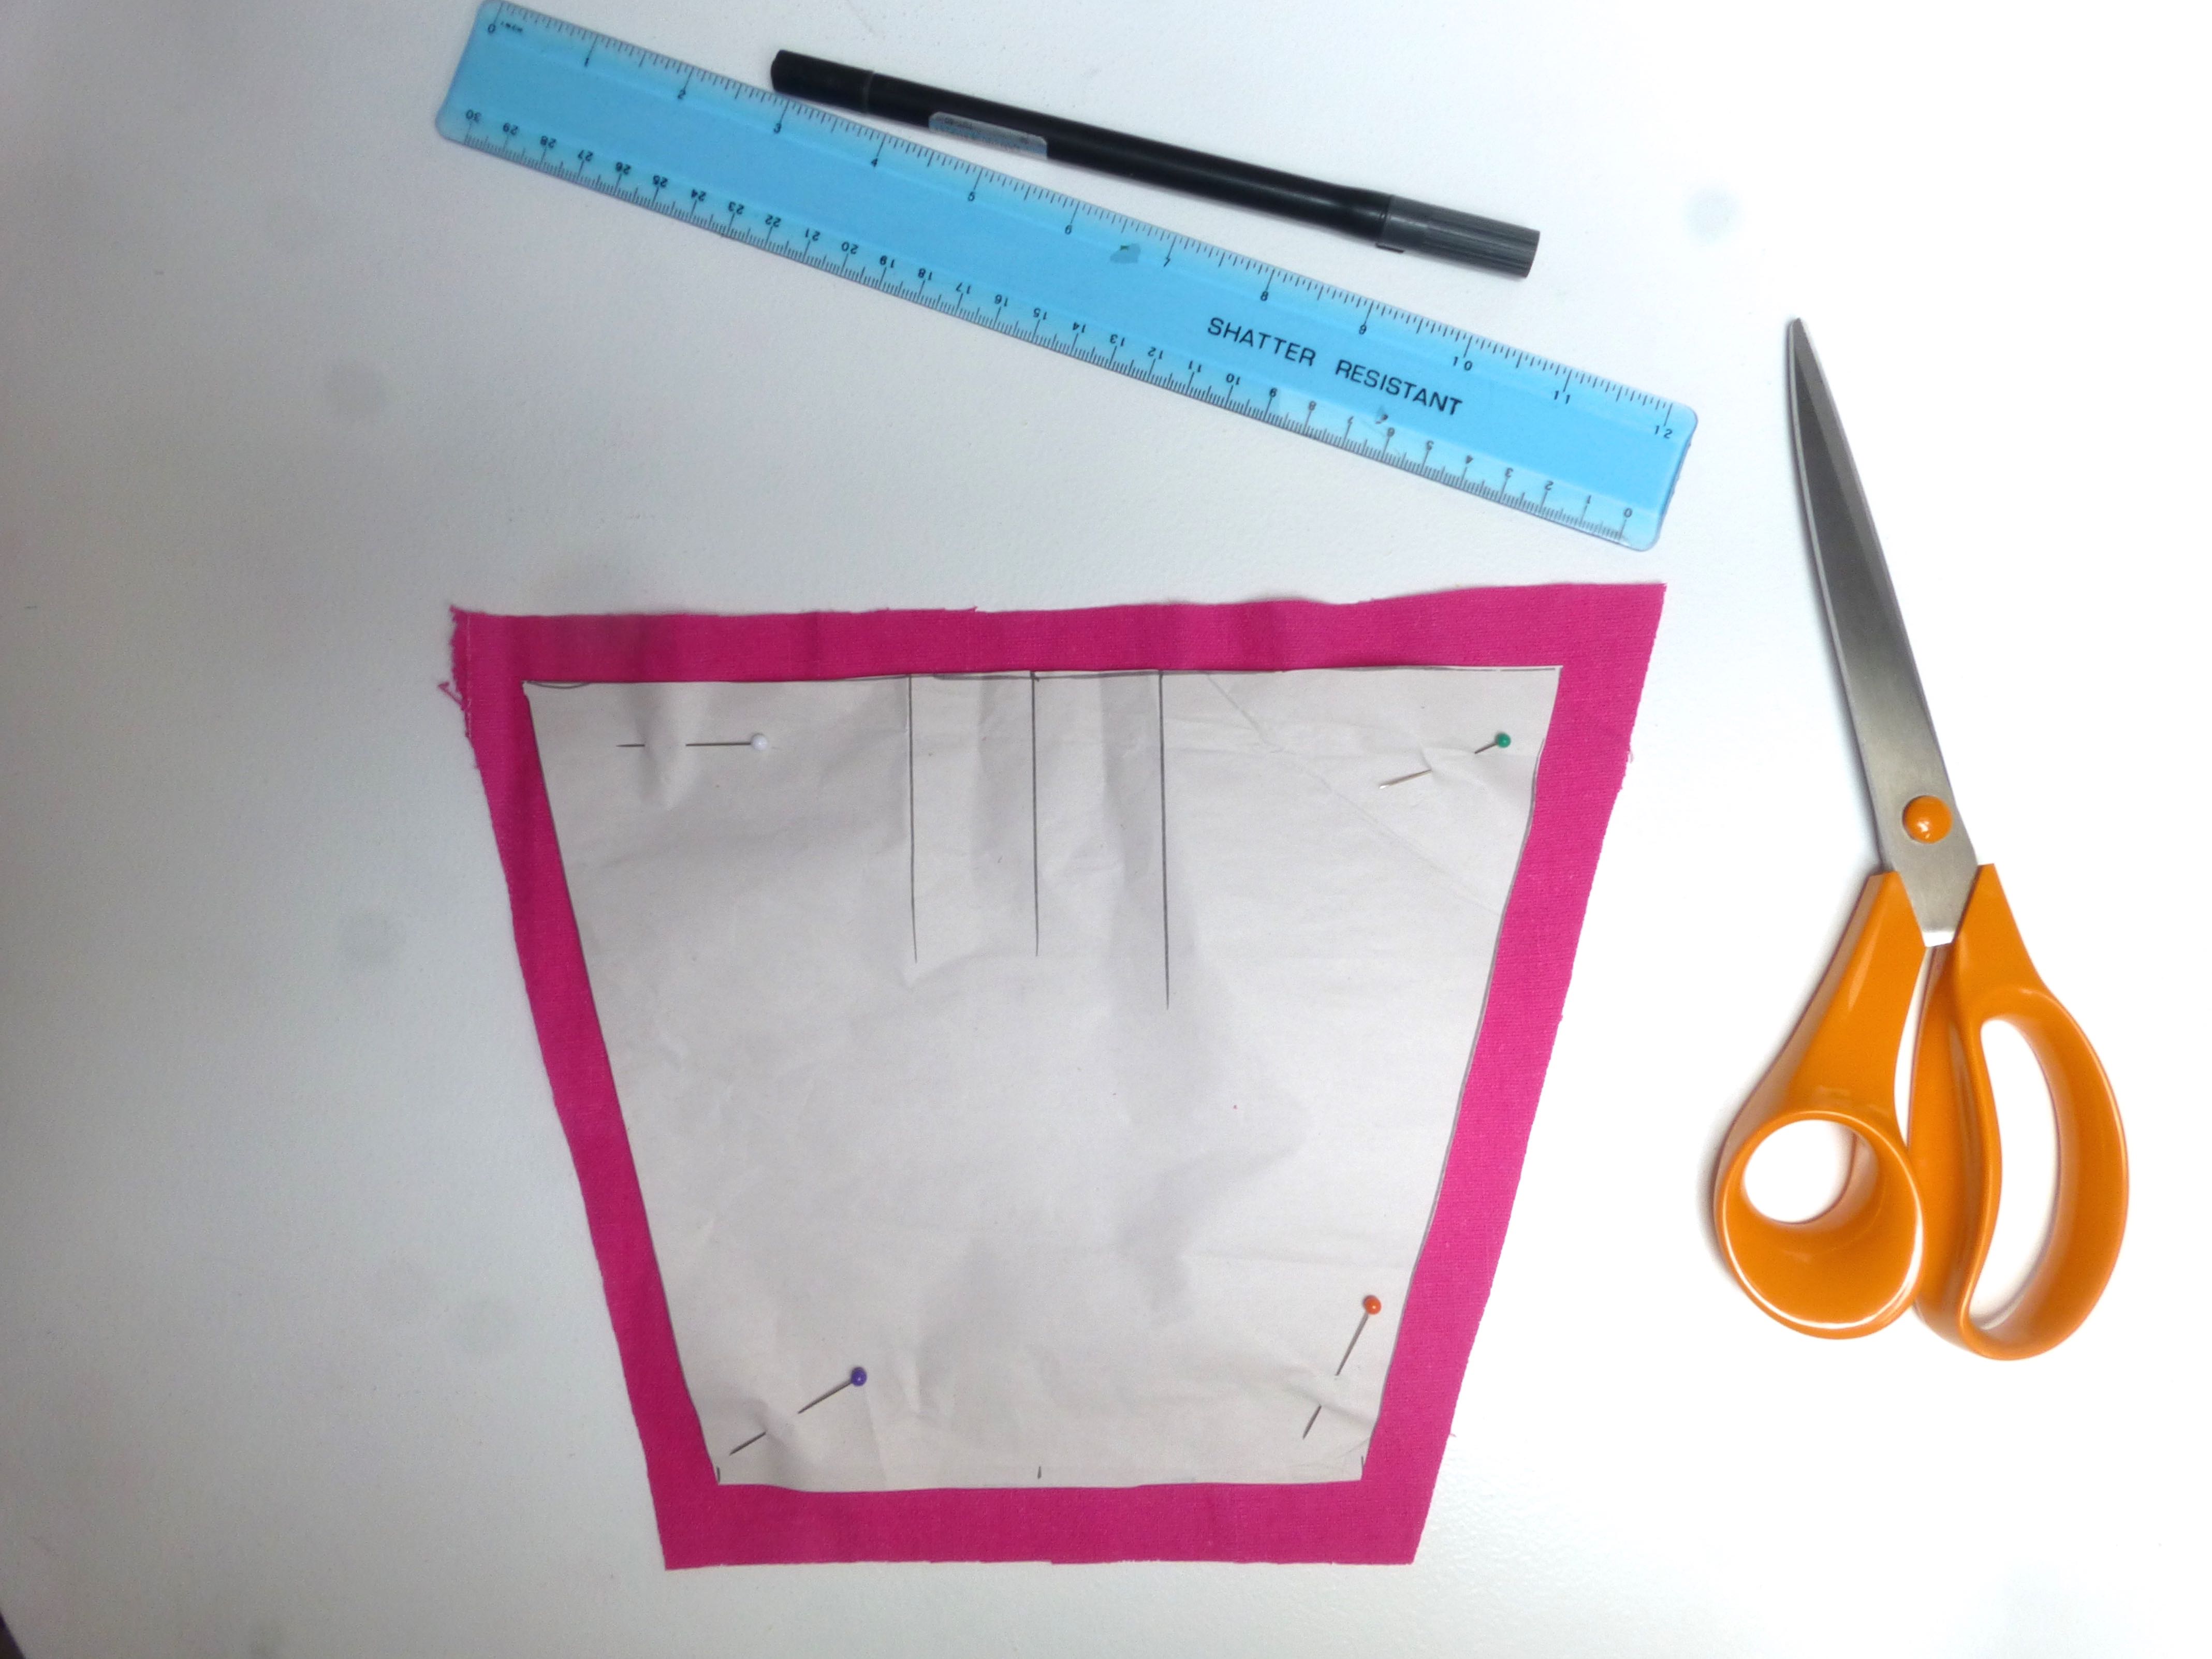
This is what I came up with for the pockets, the lines marking the placement for an inverted pleat.
I used a combination of flat fell seams and French seams for the construction.


Narrow hems were made throughout, so no need for facings.
I really liked the details in the tunic so I applied them to this dress as well.
The parallel pleats on the front and back which draw the centre upwards and allow the edges to hang lower in an interesting shape….

…the exterior pleats on the back which add shape as an alternative to darts…

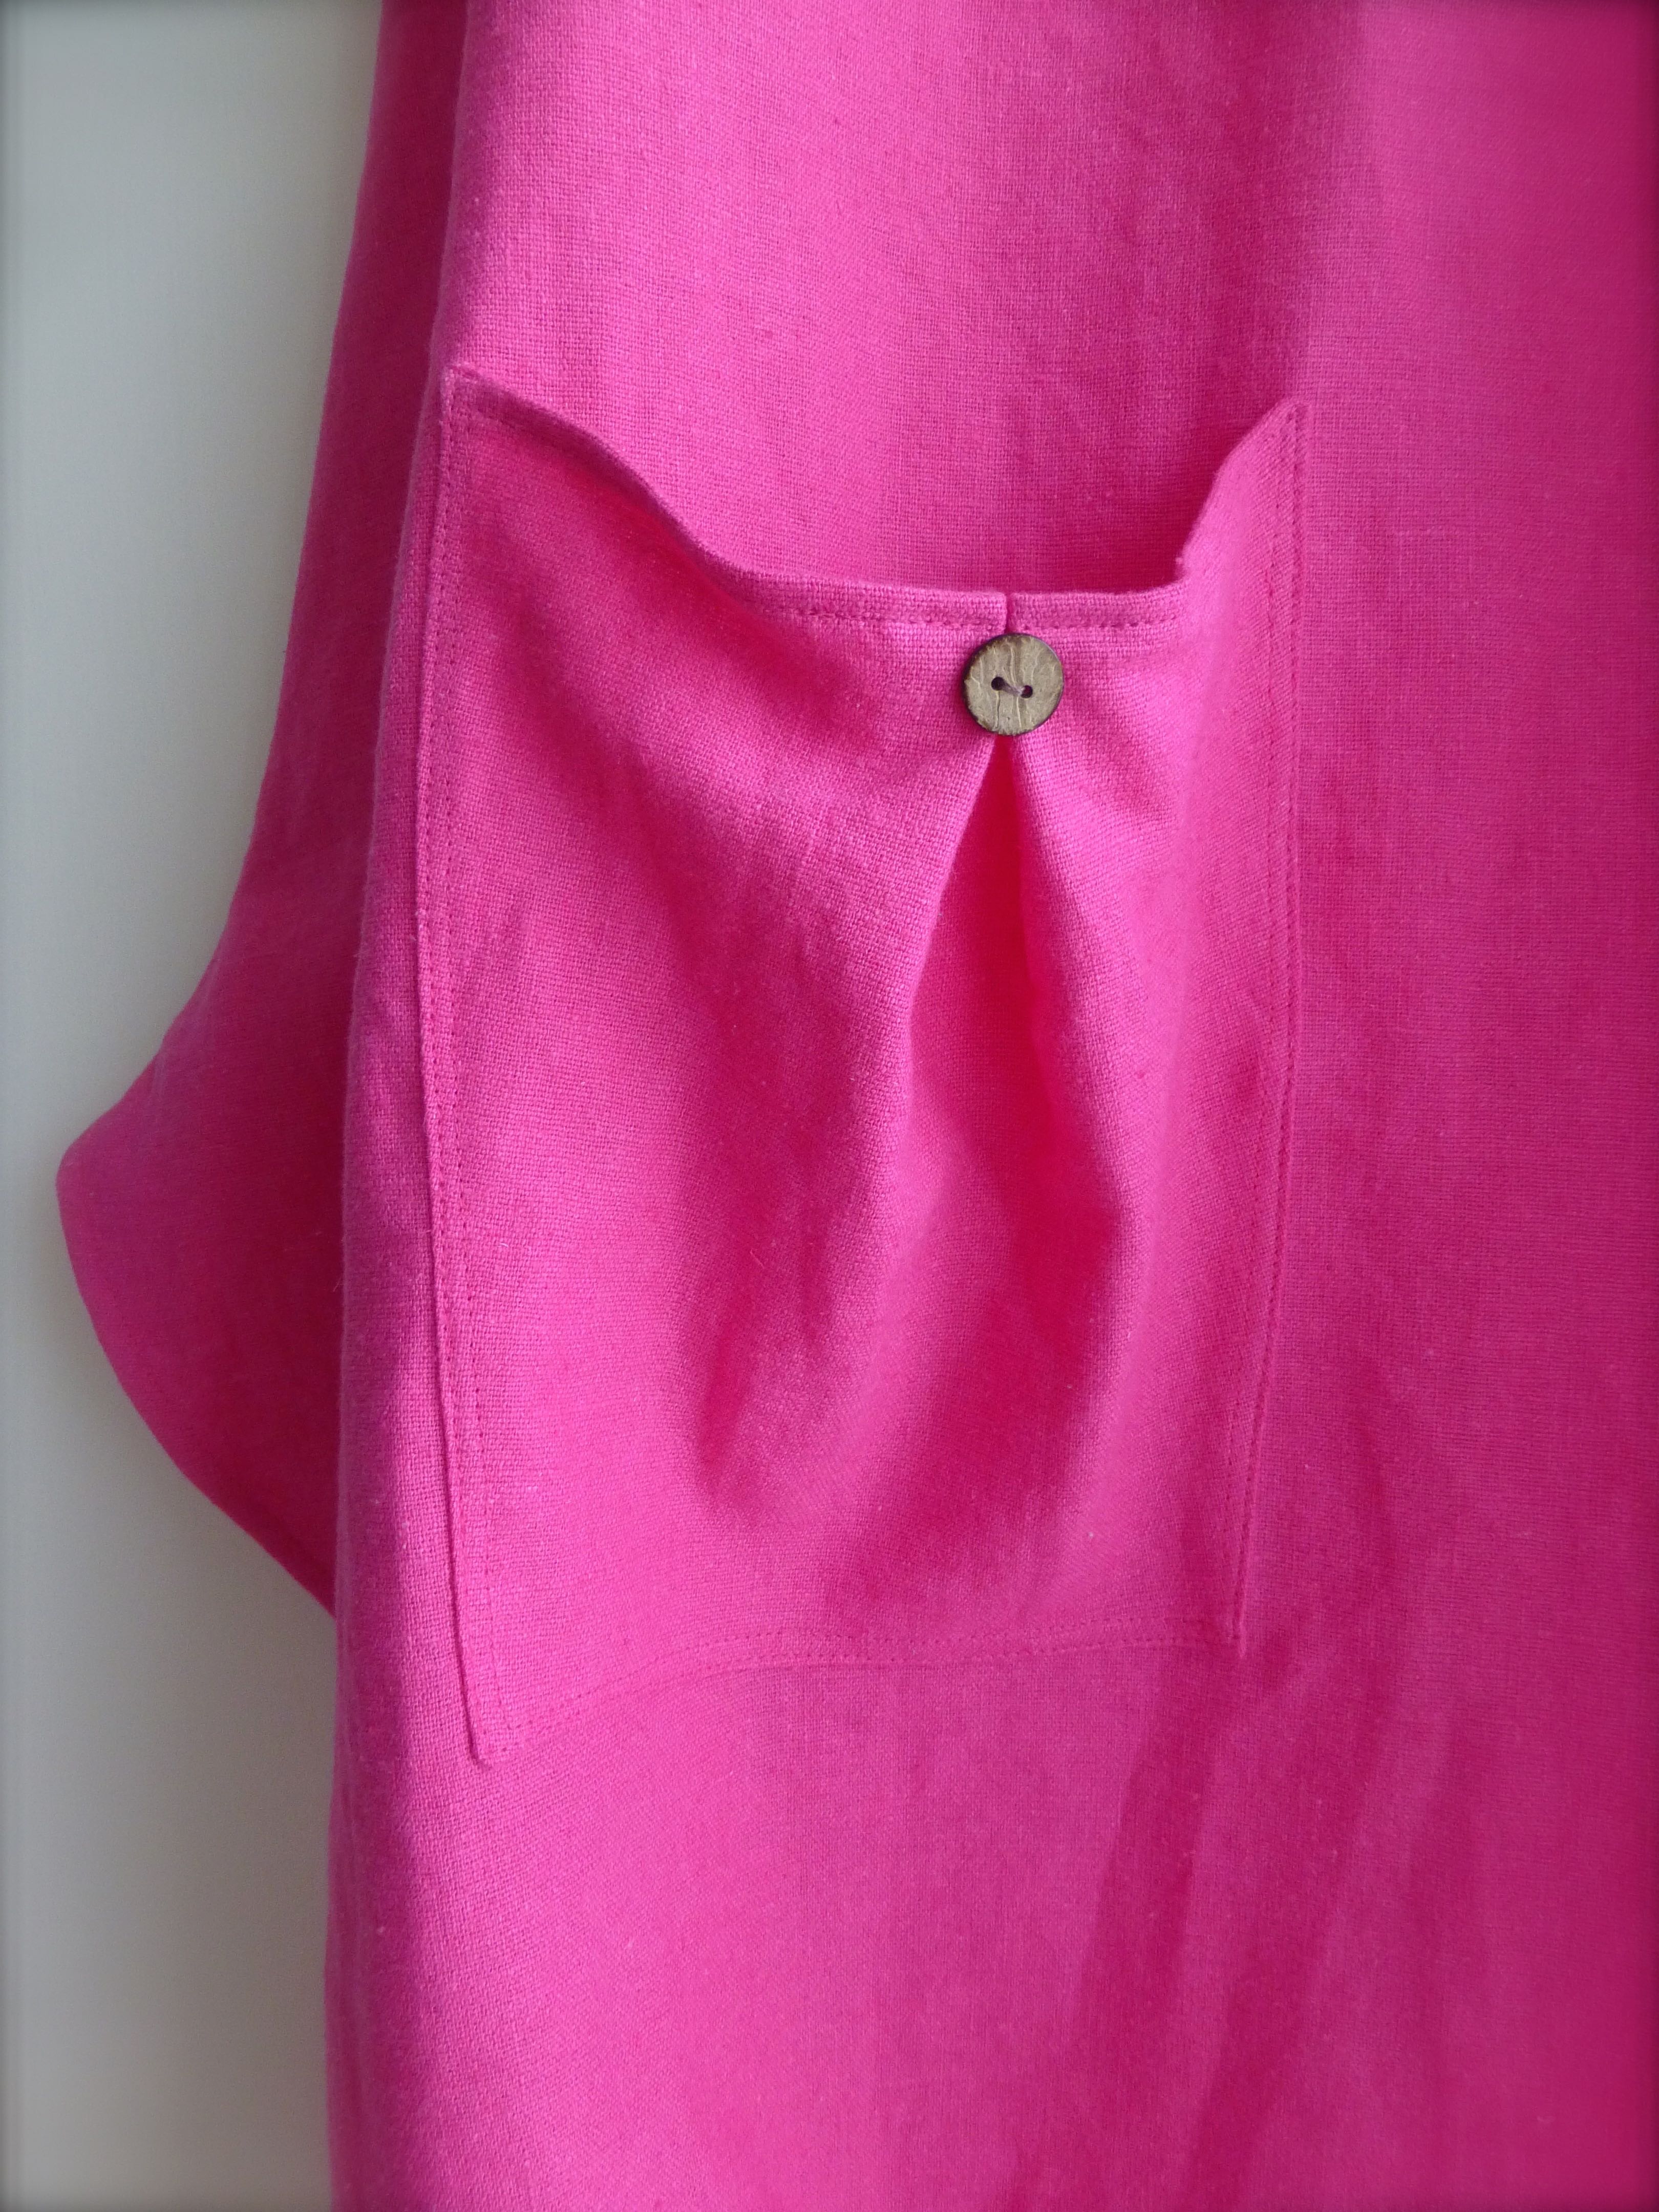
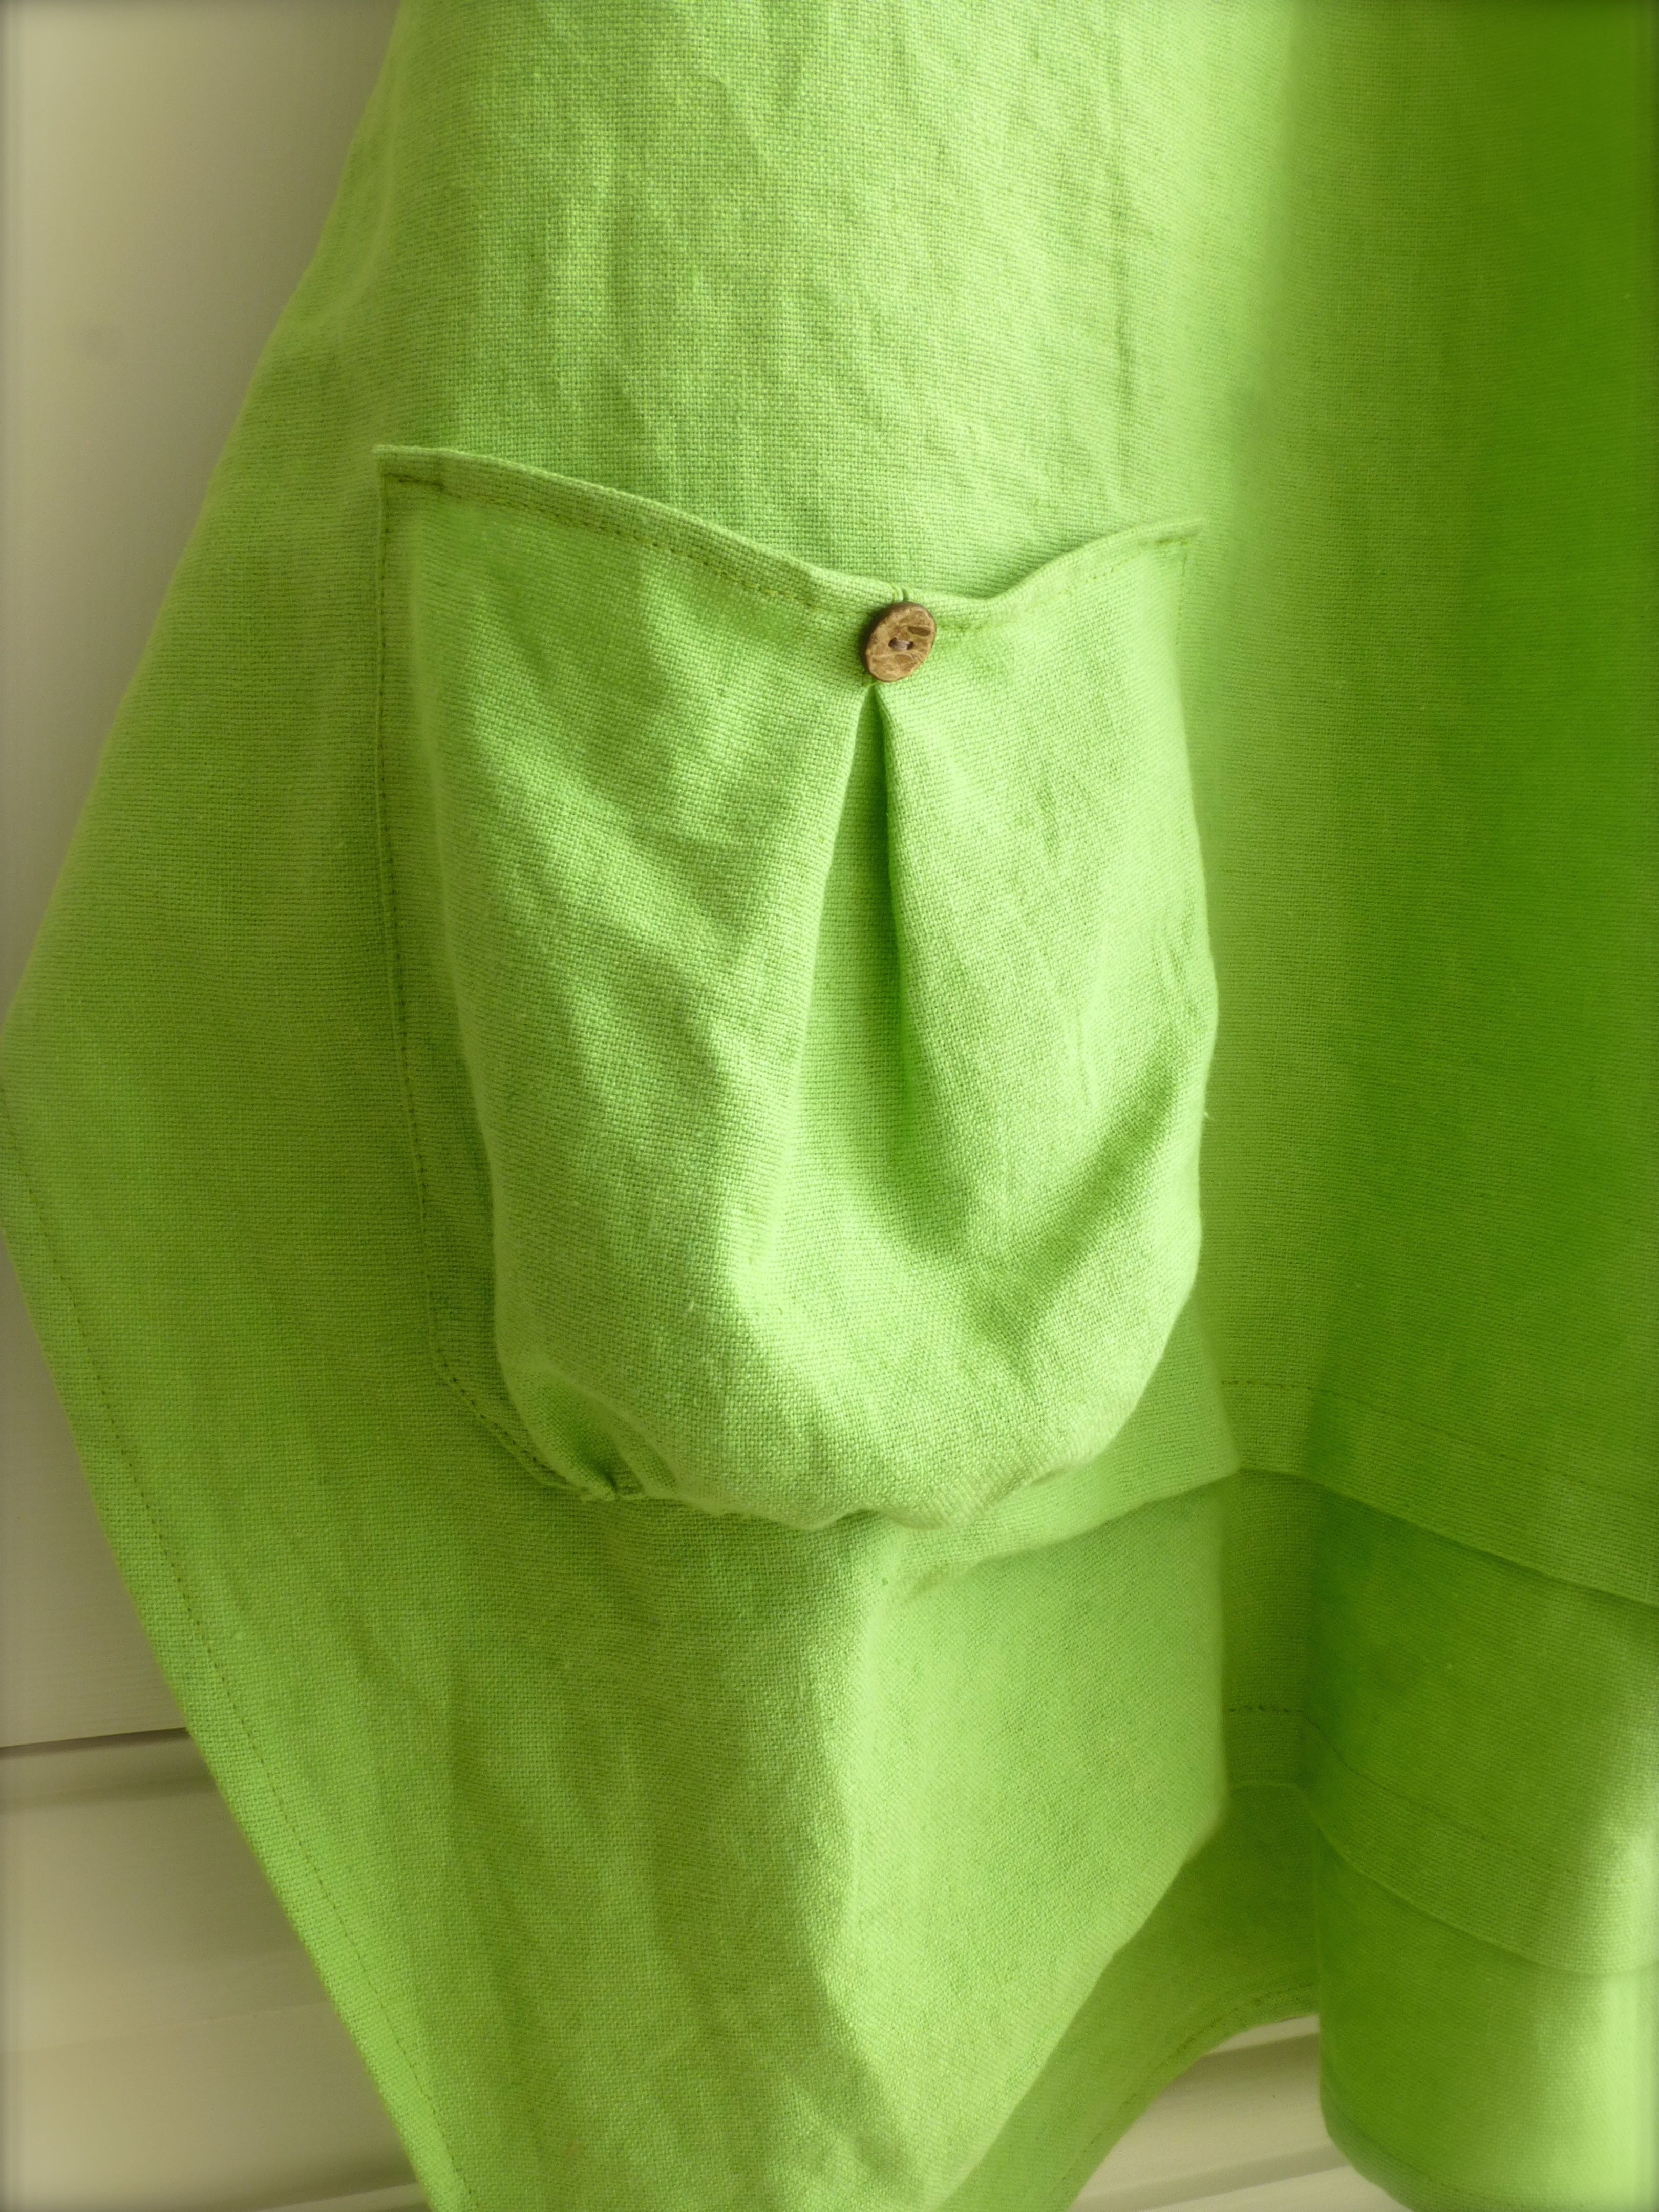
….and the inverted centre front pleat adorned with two coconut shell buttons.

I added two pockets this time, in a slightly different style….
…and this is the finished article!

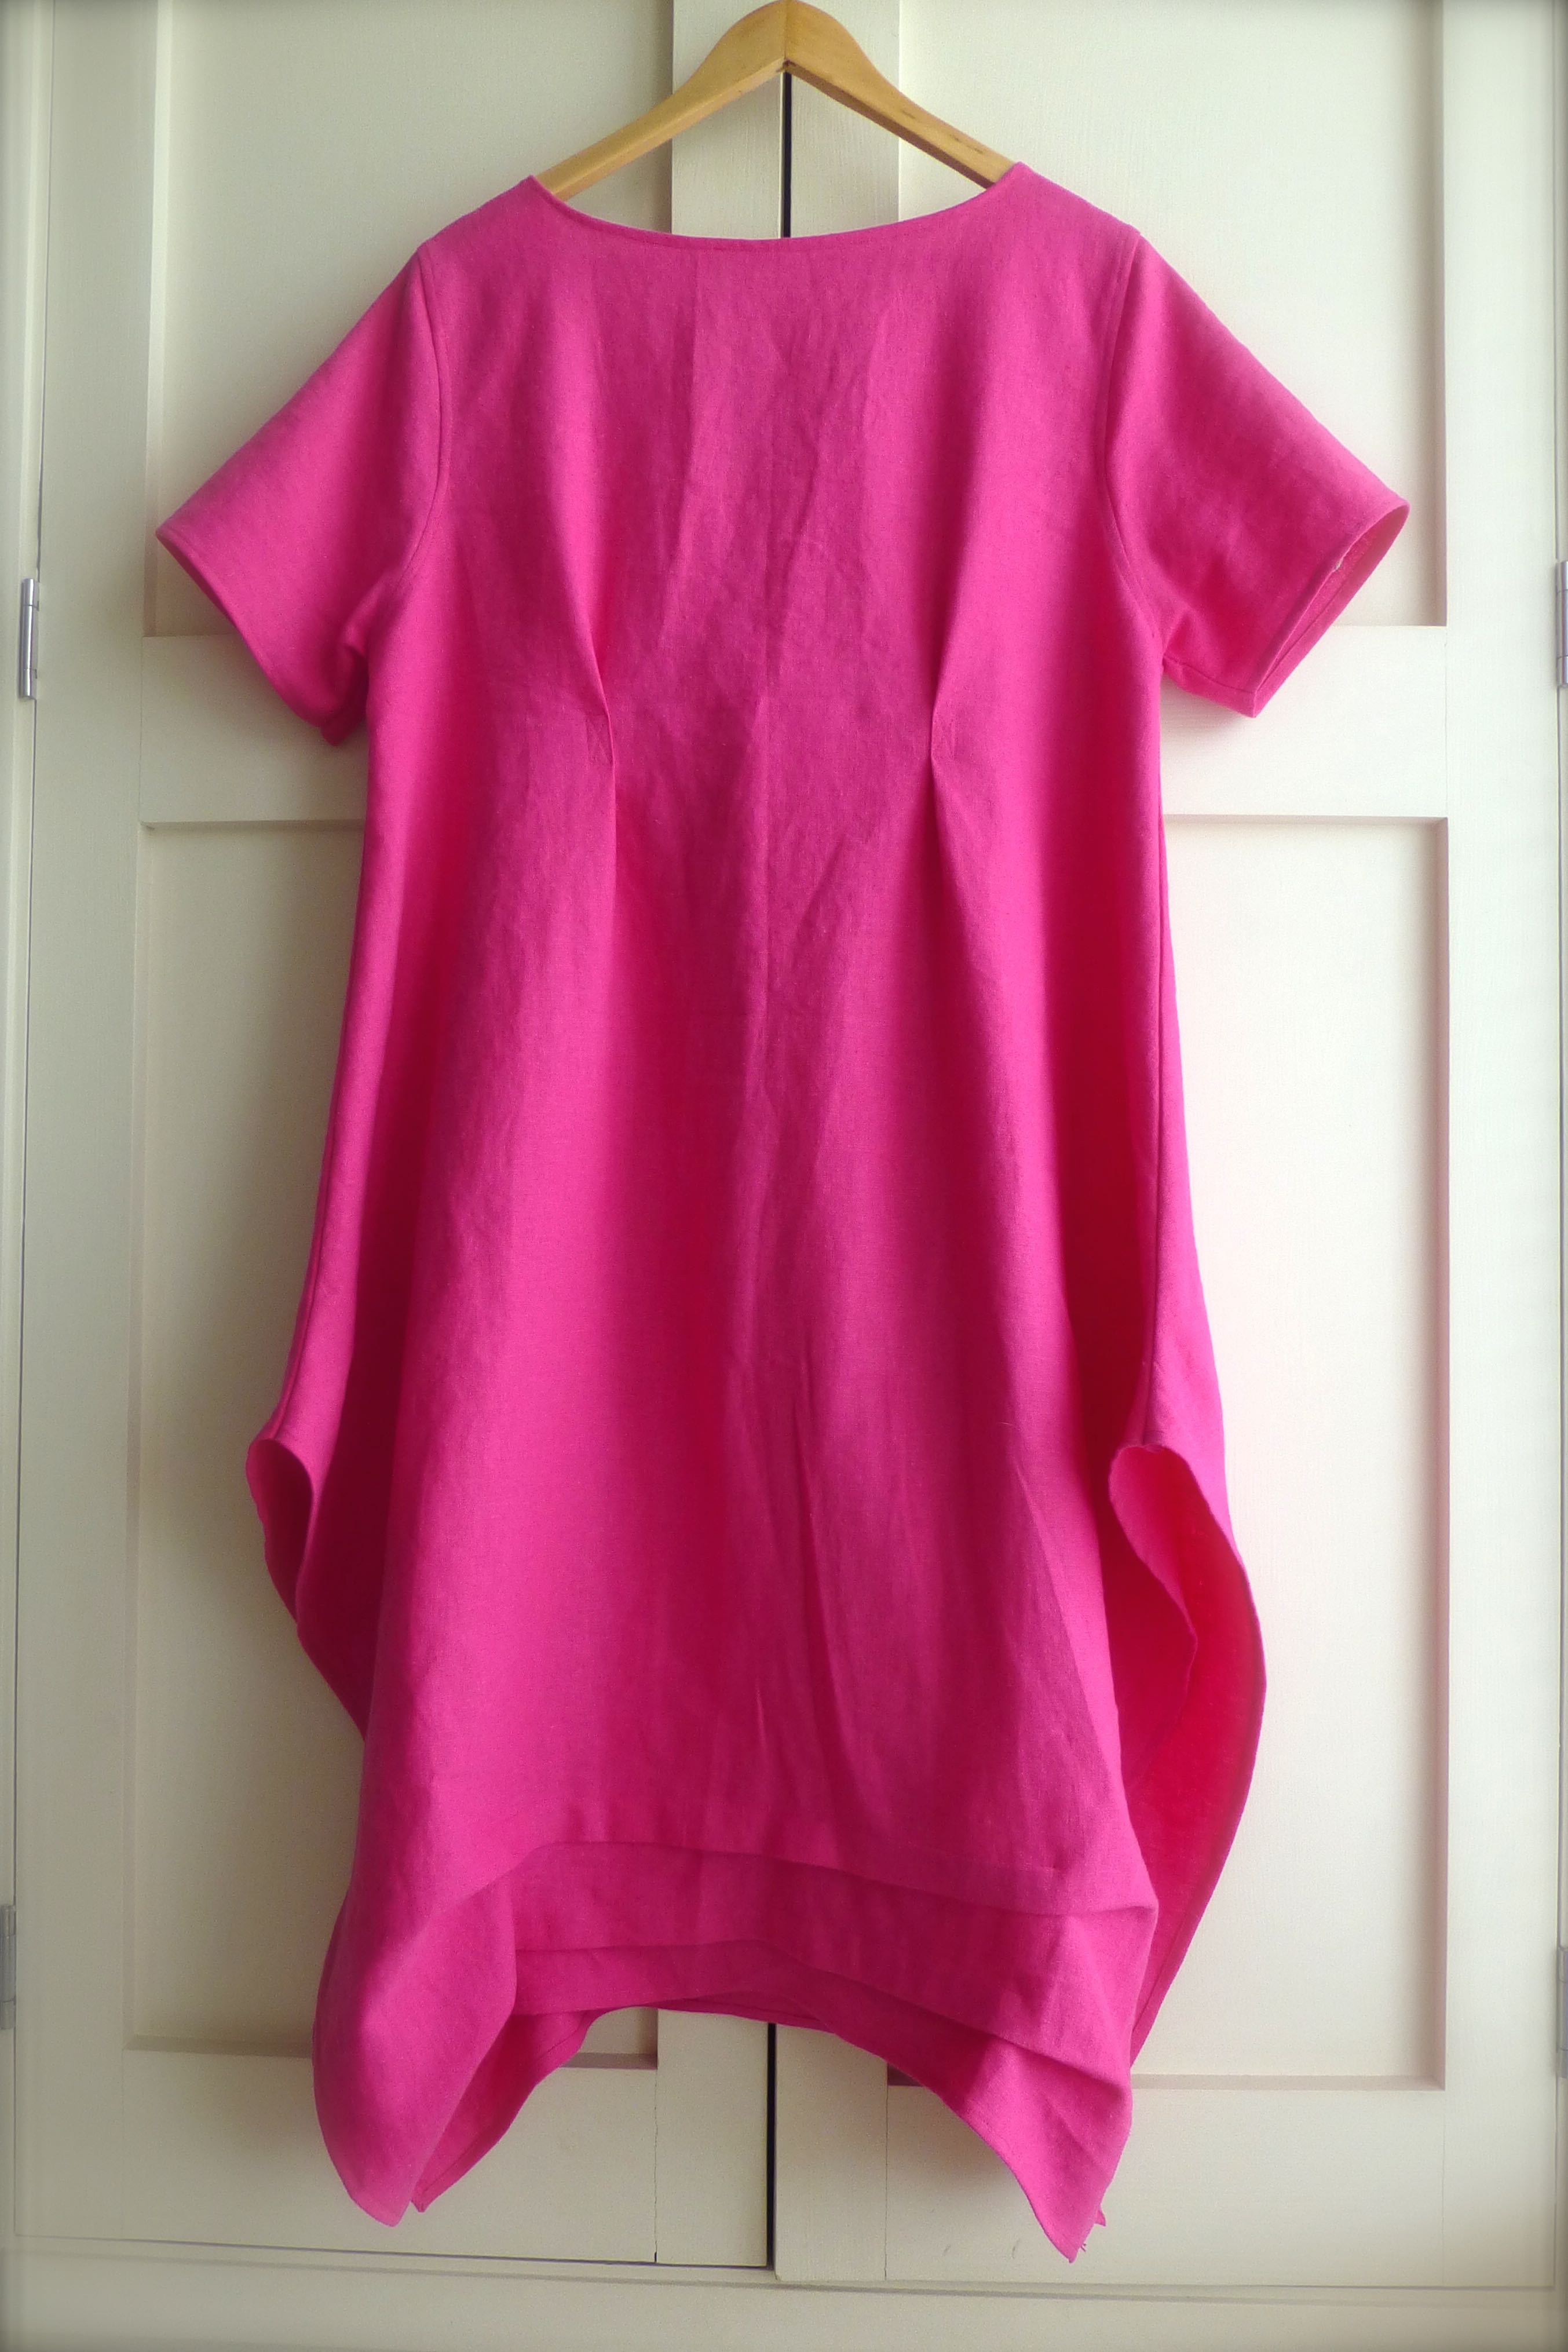

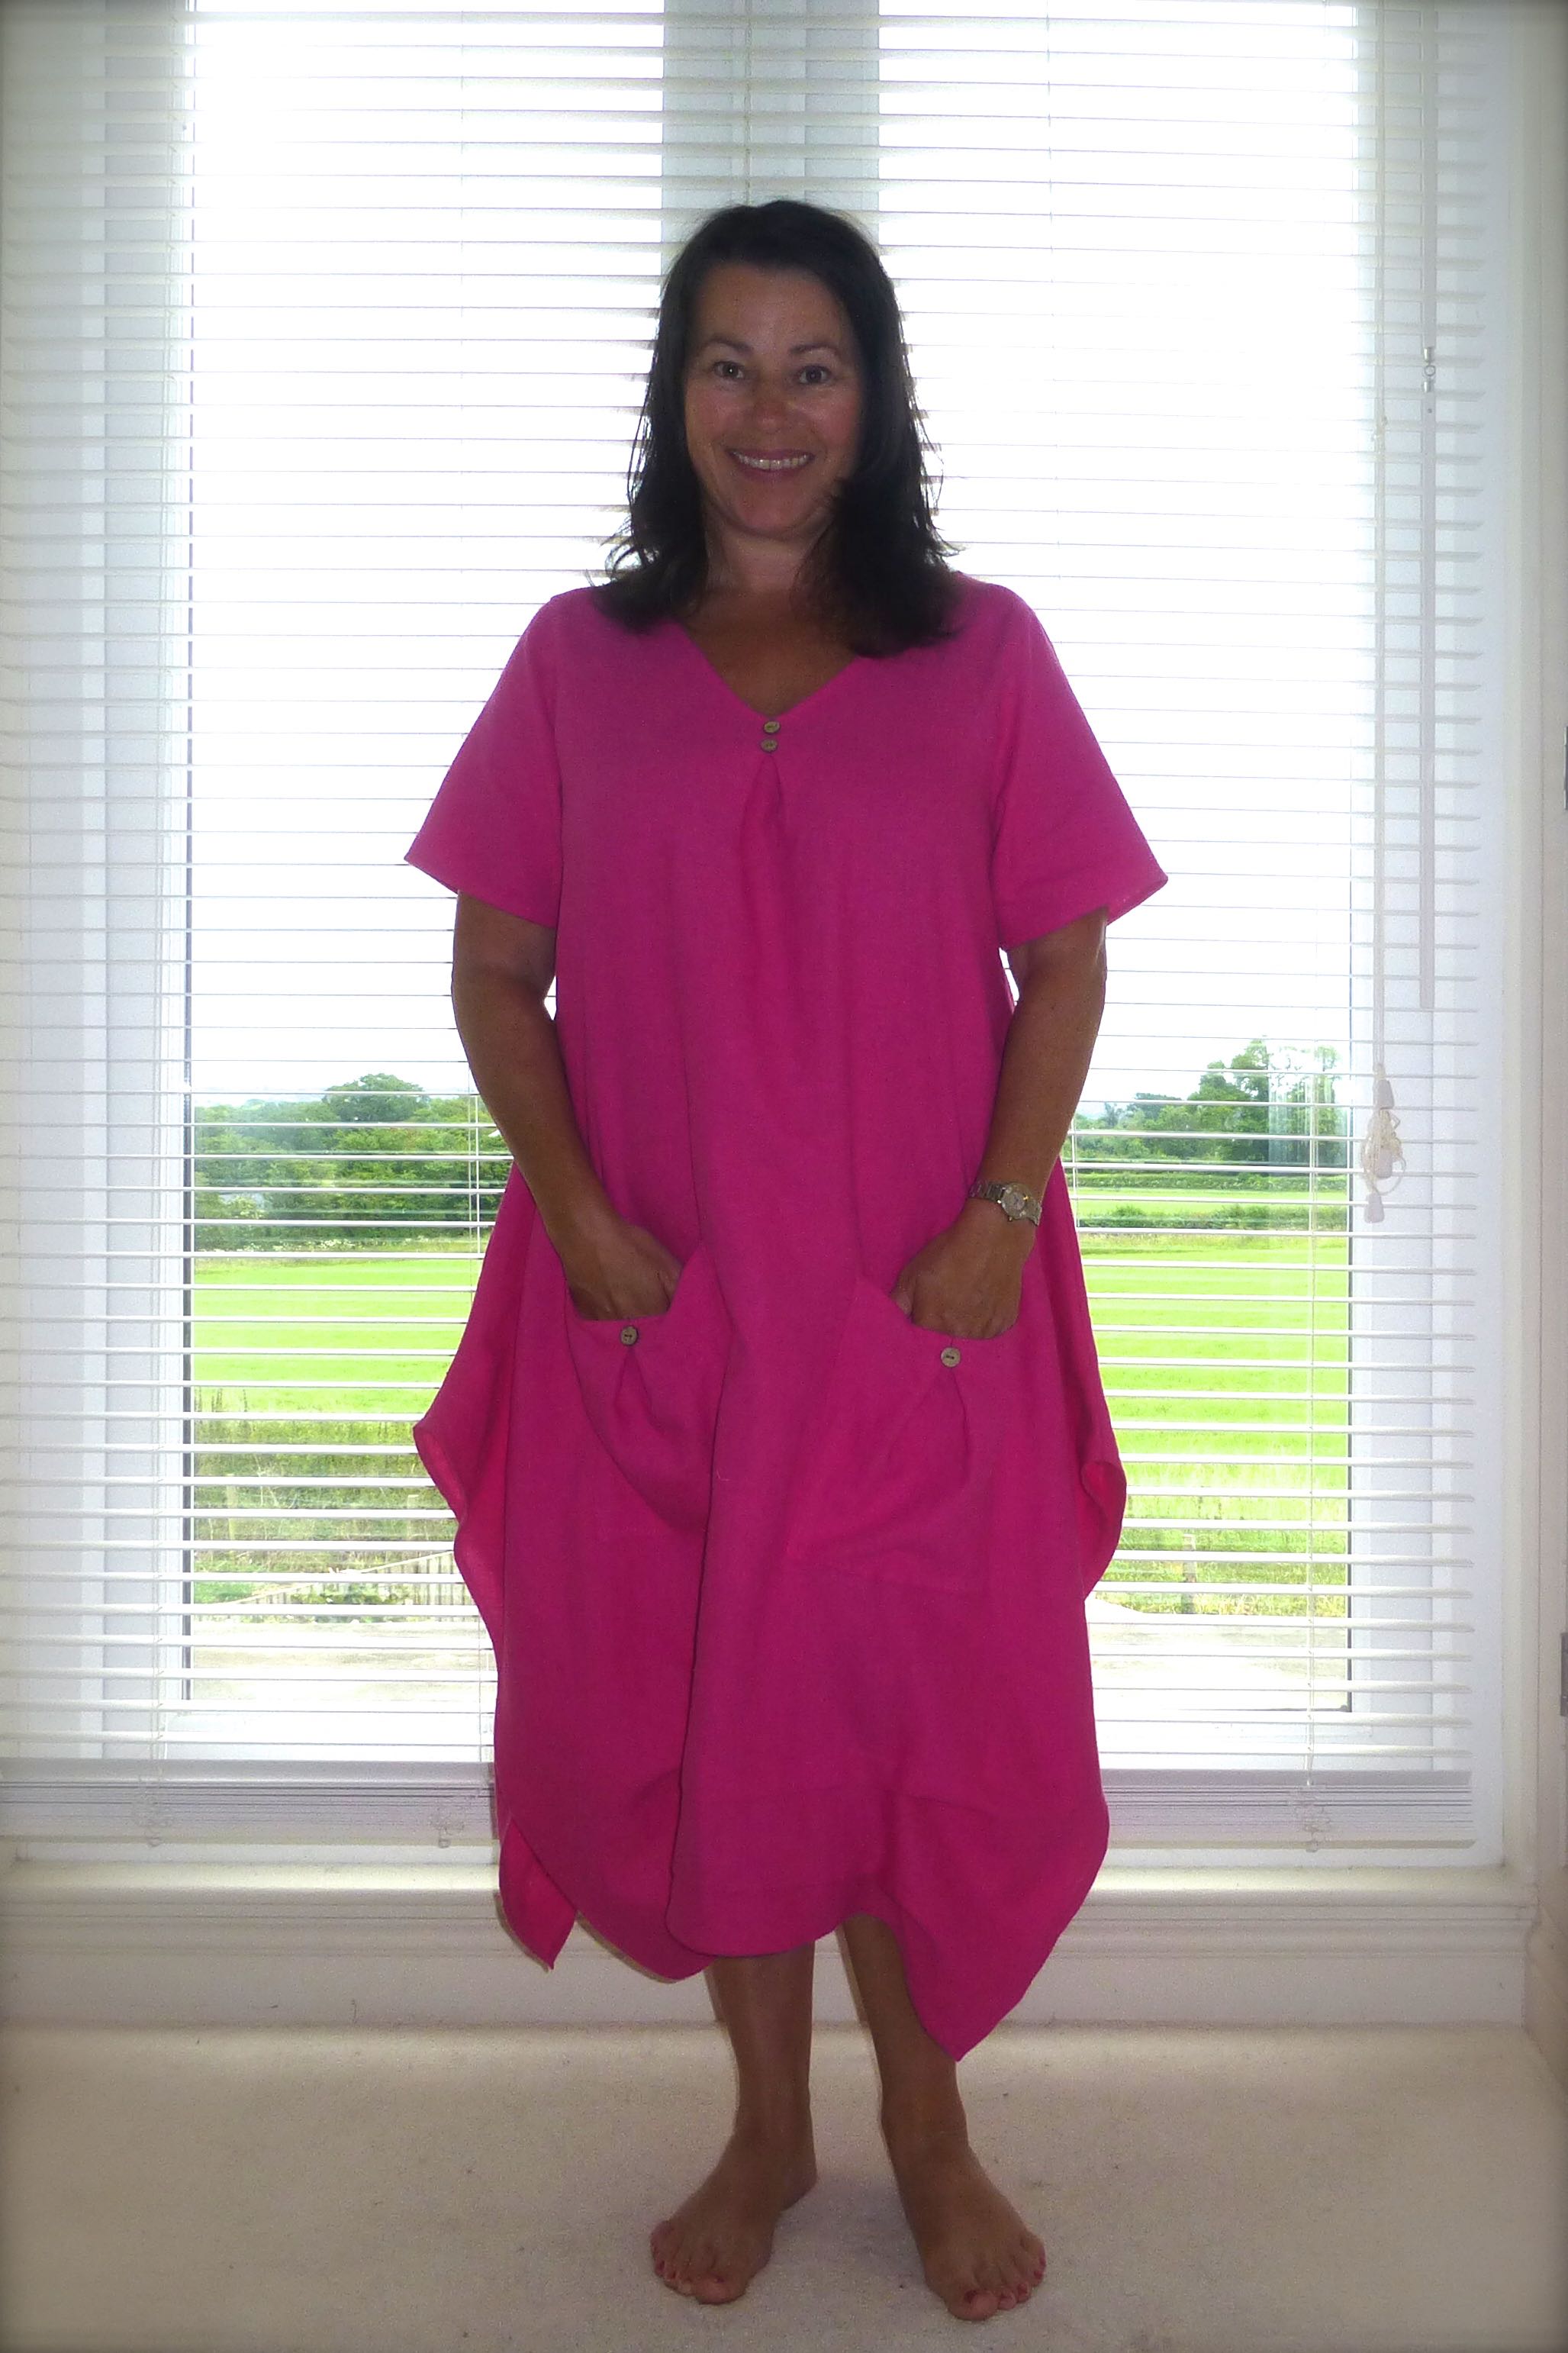
The sides are split to mid thigh level which lets the breeze in to keep me nice and cool!

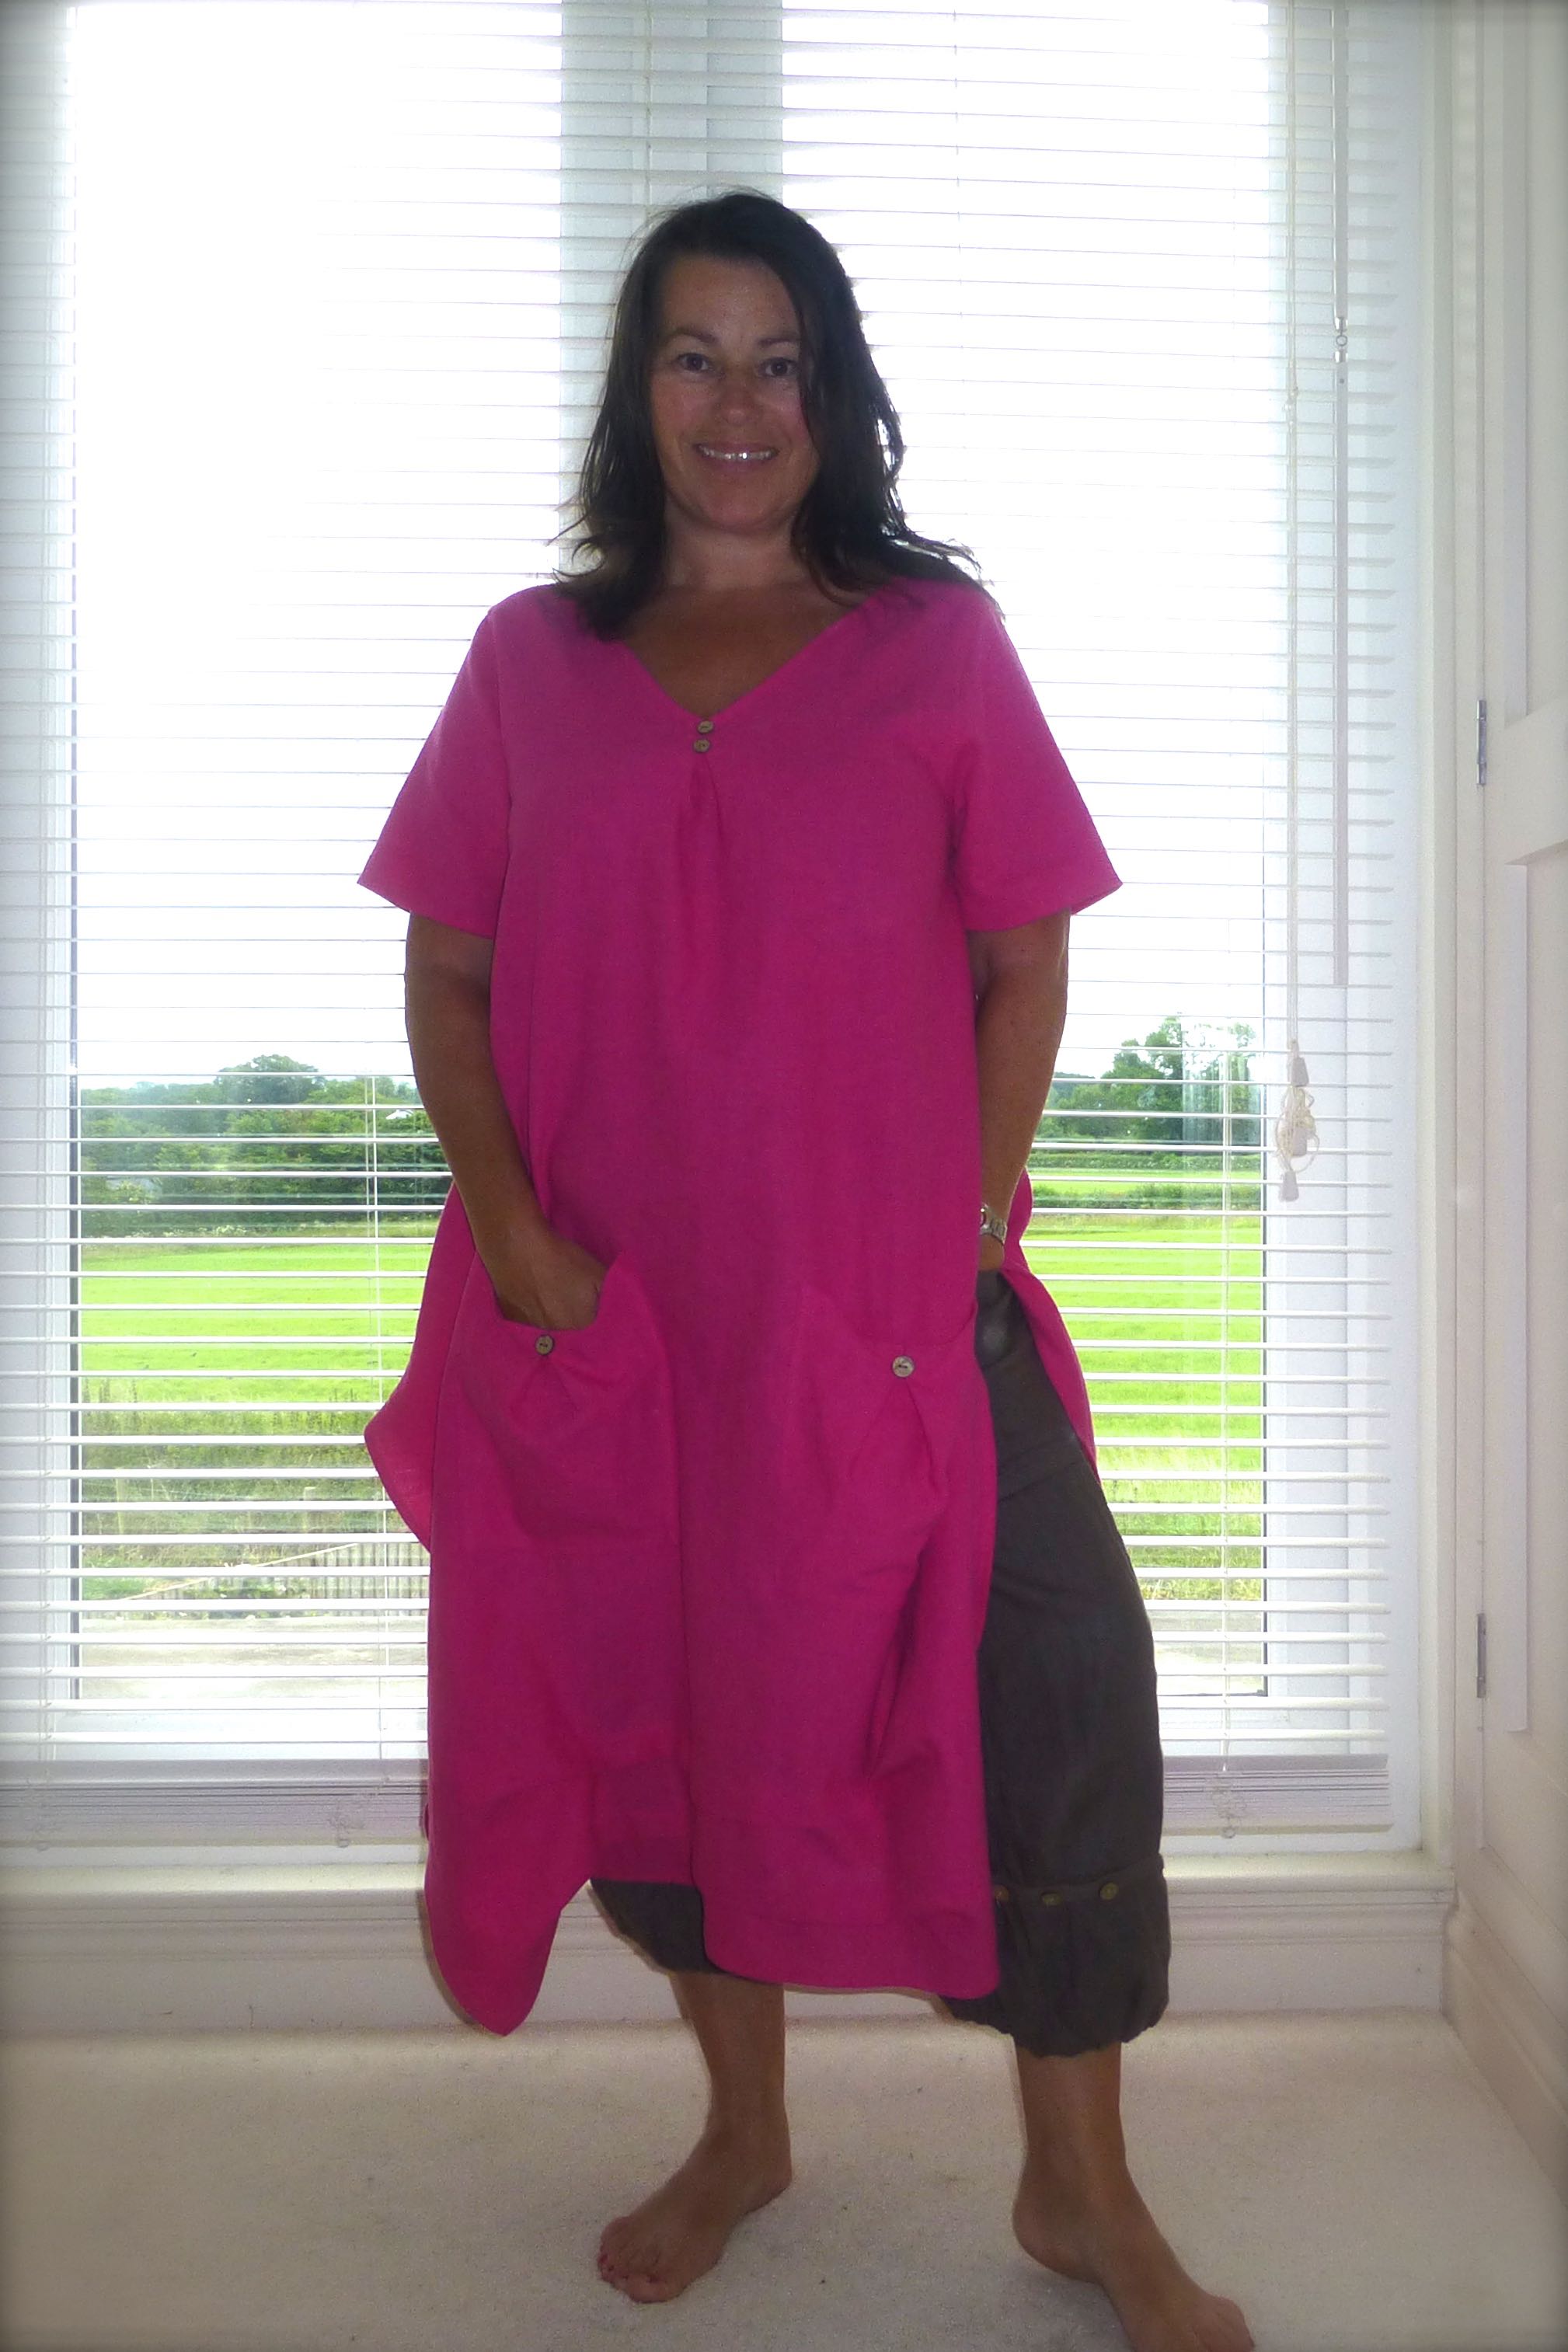
I can also wear linen trousers underneath for a different look (or if it gets cooler).

Very casual, comfortable and cool – three reasons why I LOVE linen!

You may remember that a few weeks ago I showed you some brightly coloured linen that I bought from Calico Laine.
I made this Vogue designer Summer dress from the ‘Pool Blue’ and blogged about it here.
The gorgeous ‘Leaf Green’ was destined to become a tunic top of sorts, but I couldn’t find an off the shelf pattern that I liked enough so I decided to draft my own.
I had several features in mind from other tops I own that I wanted to incorporate, so I played around awhile until I came up with this: –
A one-piece front with a centre front pleat and two horizontal partial pleats running parallel to the hem.

The back was also to be one-piece and would have some added shape in the form of external darts.
It was also to be shorter than the front and there would be slits on both sides.

This is the finished tunic which, from the creases, you can see has been worn quite a bit already.

The inverted centre front pleat was reinforced with a line of top stitching….

…and a couple of coconut shell buttons.

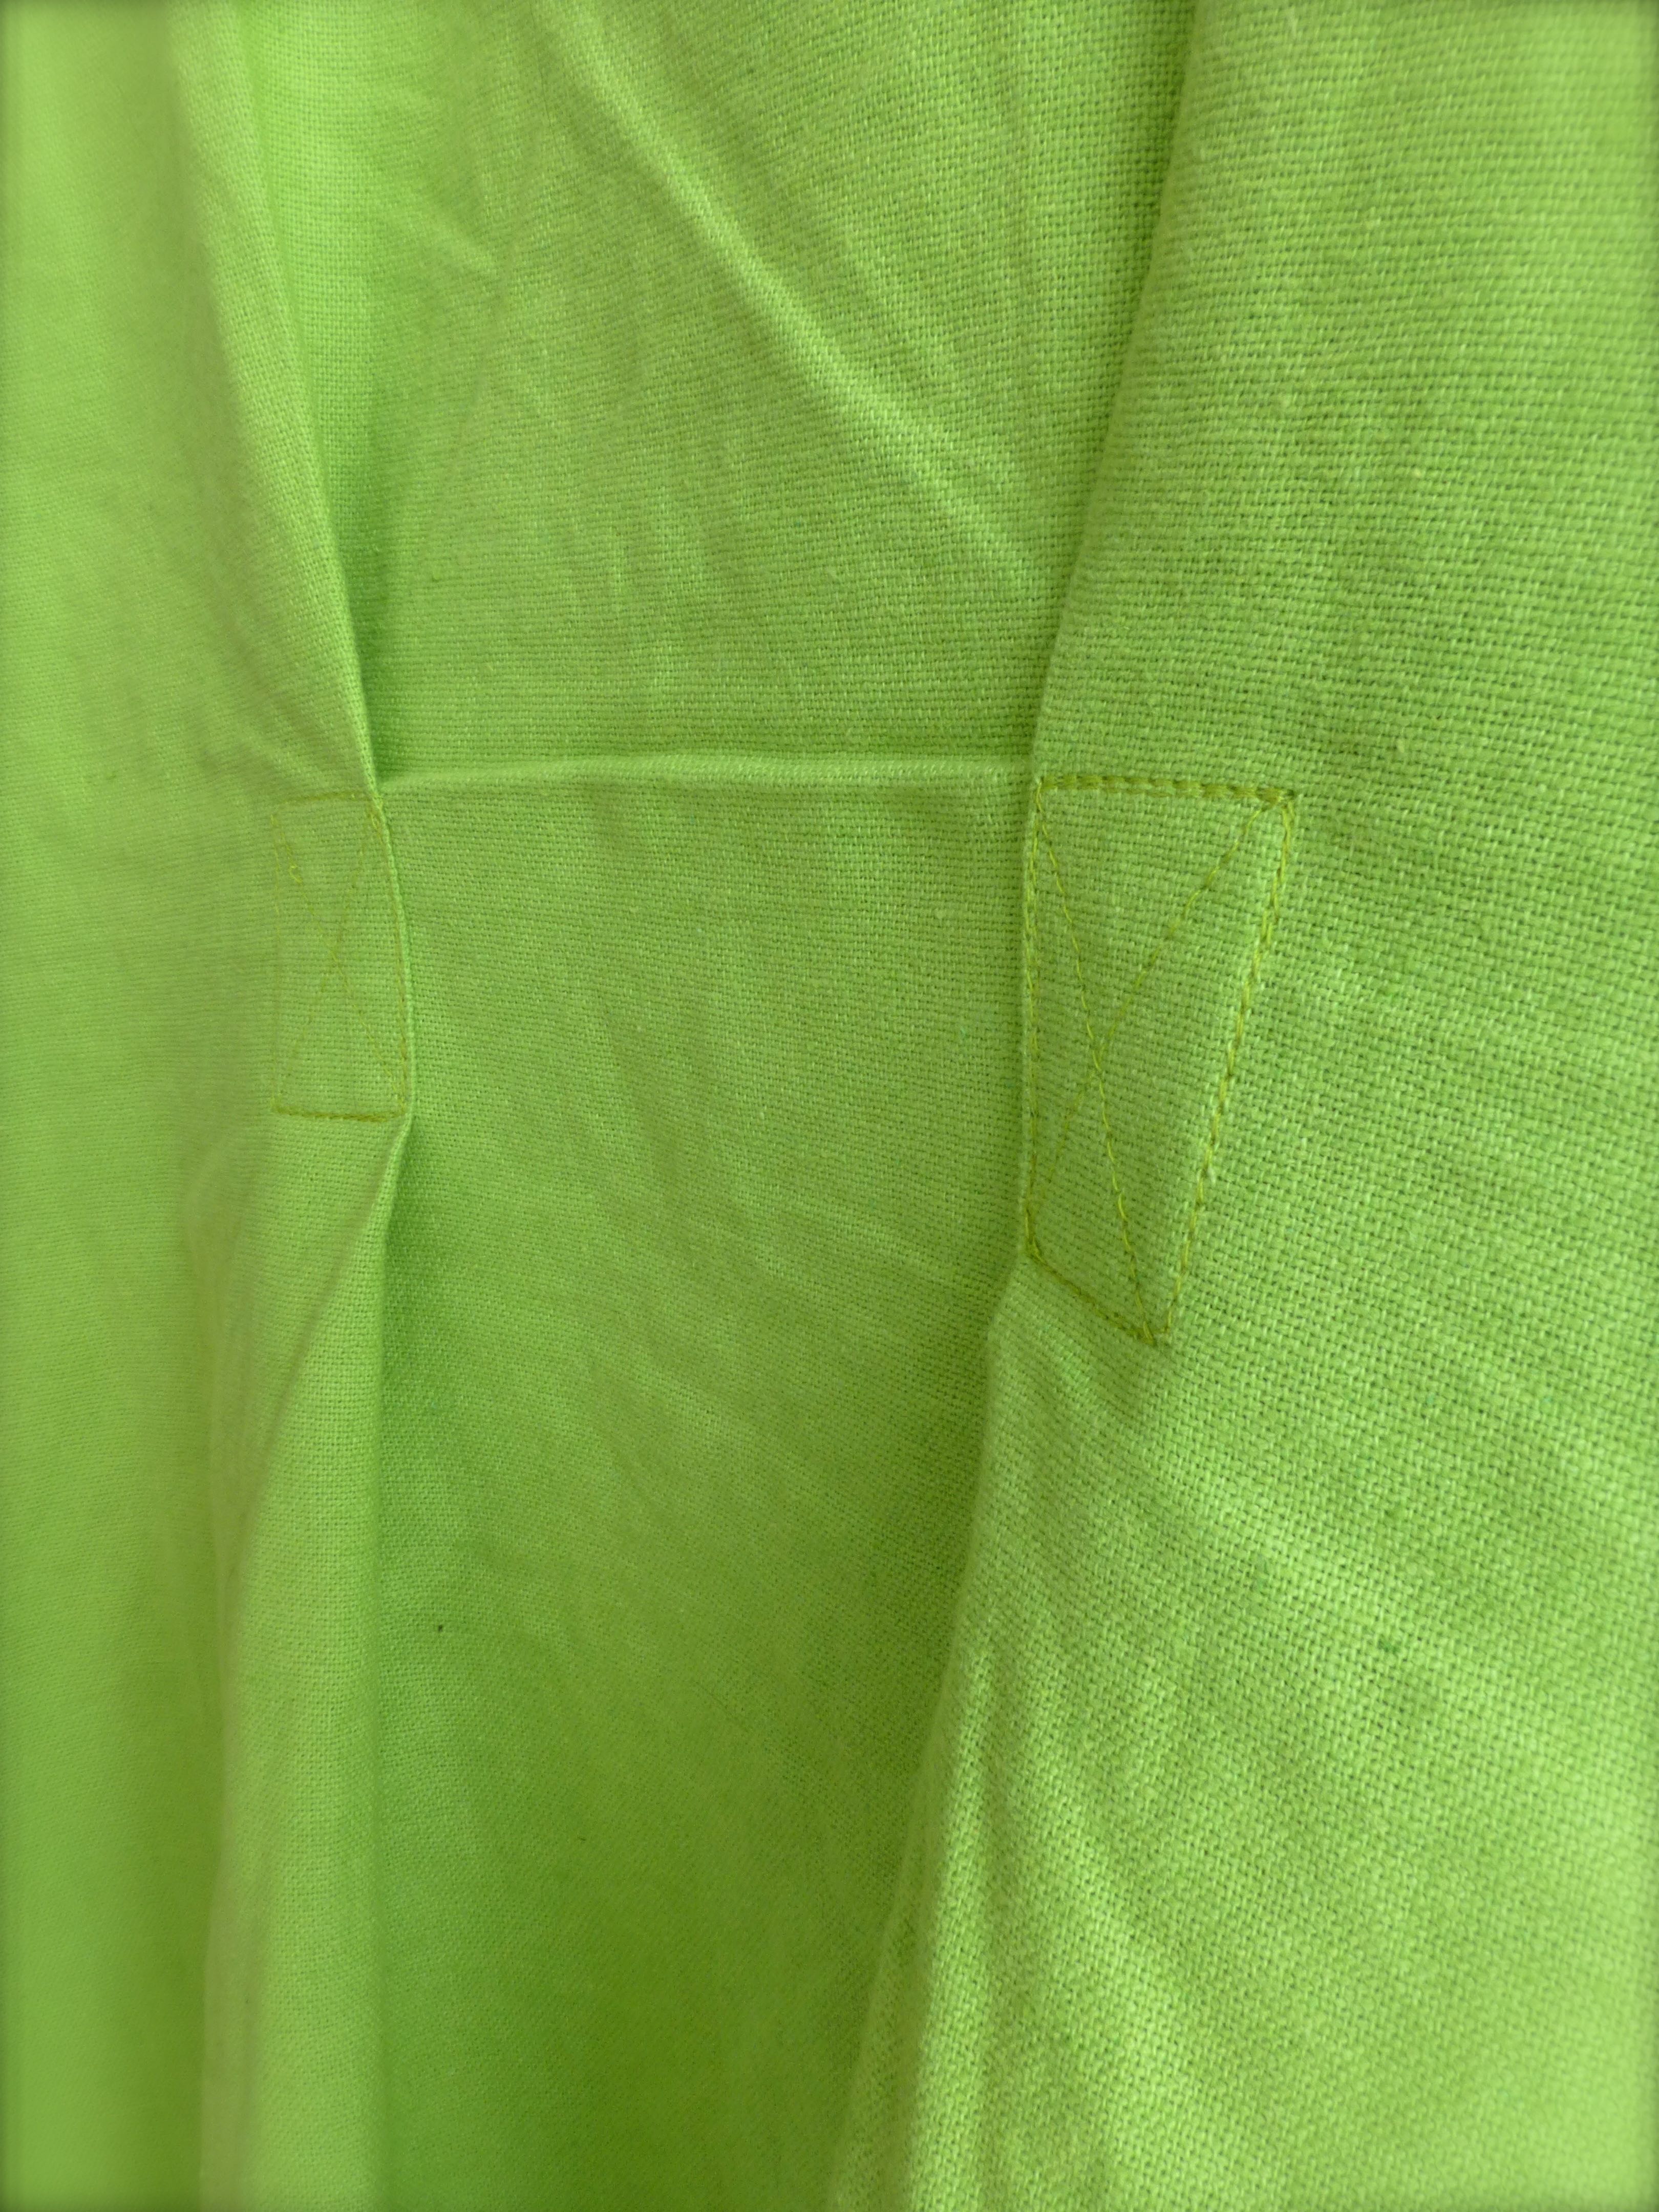
The parallel pleats at the bottom were designed to lift the tunic in the middle leaving the sides to drape lower.
To acheive the desired effect, the pleats were only partial and I only sewed between the pins as shown below.


I like the darts from the dress I made but was happier after securing them flat against the back, so I did the same with this tunic.

Much better!
French seams and narrow hems were used throughout.

The front pleats hang exactly as envisioned….

…and I added a gathered pocket at the last minute, matching the style with a pleat and another coconut shell button.
It’s a little bit stiff at the moment but will soften after the first wash.
I love it – the perfect loose, linen tunic to throw on over a pair of comfy linen trousers and mess around in the garden.
So cool and easy to wear and a lovely cheerful shade of lime green!

I could have brushed my hair for the photo though – I look like a tree with a bird’s nest on the top:)
Ah, the wonders of technology – I’m probably sat around the pool in Andalucia, sunning myself with a cheeky G&T for company as you read this, as I planned ahead and scheduled this post in advance!
If you saw my post ‘Holiday Sewing’, you’ll know that I wanted to make a few new things to wear, so this is the second in the series, so to speak.
You may have noticed over the past year of my blogging journey, that colour is a recurring theme – and lots of it, preferably clashing.
The wackier the print, the more likely I am to want it and, as The High Street doesn’t often float my boat, I source fabrics online to conjure up my own creations.
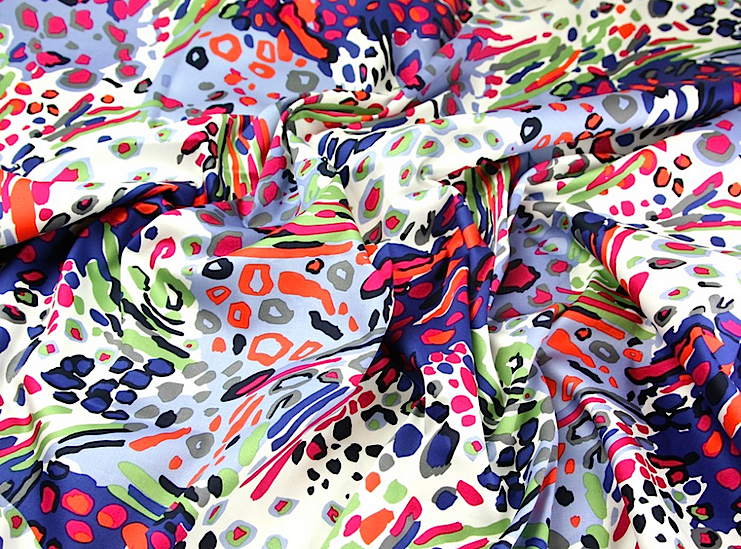
As a member of the Minerva Crafts Blogging Network, I received this cheery package for this month’s make: –

“Where have I seen that wacky animal print before?” I hear you all cry.
Well, unbeknown to me at the time, Lucie of Love,Lucie had also fallen for its charms and has since used it to make a stunning Summer dress (click here to see the Wow! dress).
It’s a supremely soft textured Stretch Cotton Sateen which has proved so popular that Minerva are having to restock!
The pattern is New Look 6983 and includes cropped trousers as well as variations on a tunic.
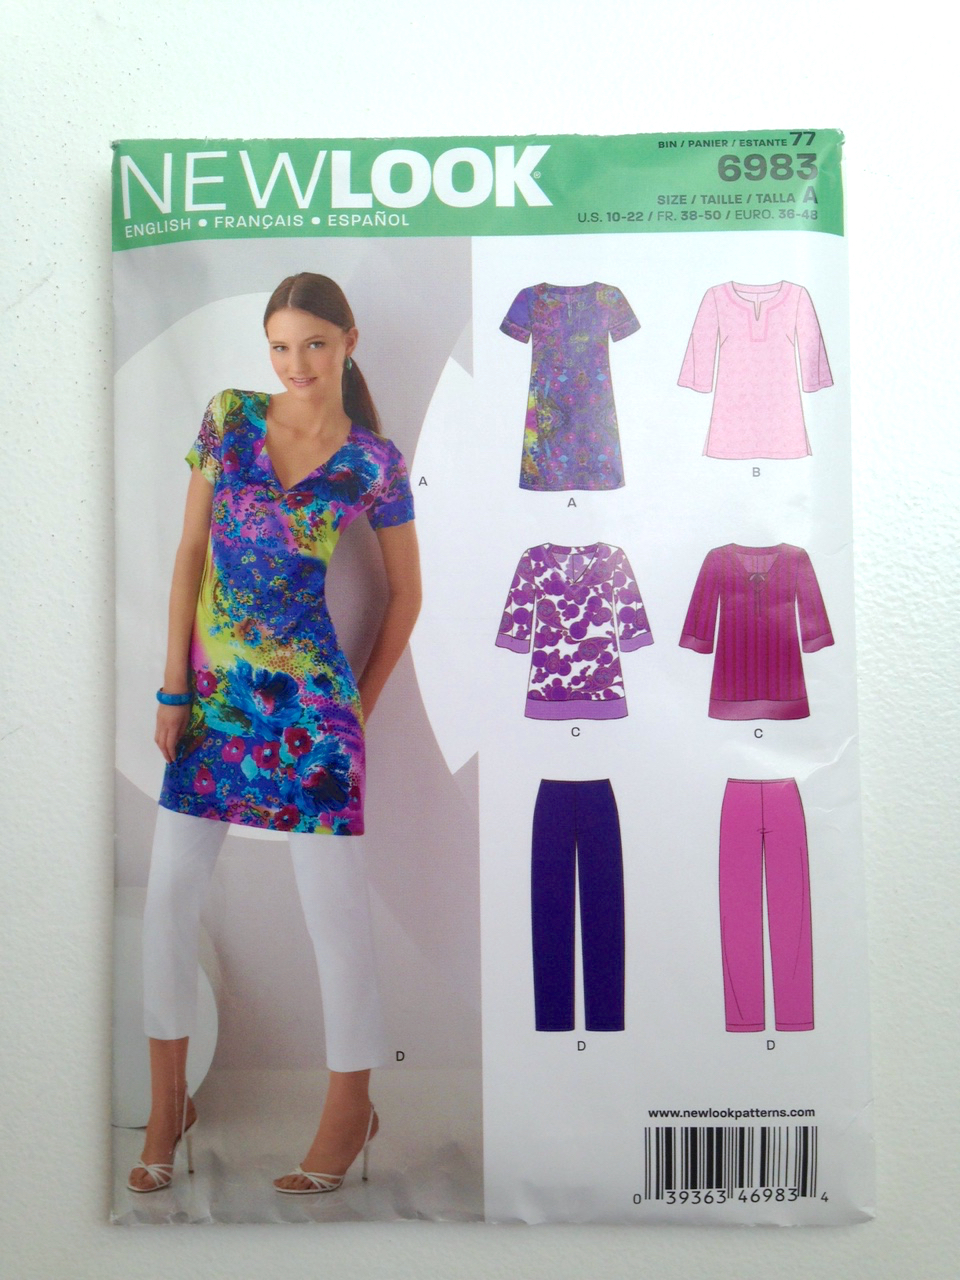
Liking the look of a bold print tunic worn with a pair of Daz-white three-quarter lengths, I also ordered some of the same fabric in plain white.

So, onto the construction of the top which consisted of three basic pieces – a front, back (with facings) and sleeves. Shaping was in the form of two bust darts so, really, it couldn’t be simpler for even a beginner to do.
After putting together the basic shape, including the darts, I always try garments on inside out. This way you get a better idea of how well/badly it actually fits without being distracted by the pattern, and you can also pin any adjustments that need to be made.
Obviously a dressform would be ideal, but I outgrew my old one while I was pregnant ten years ago and have decided the two stone of baby weight is here to stay:)

Again, being a UK size 14, I cut out the US equivalent of size 18.
This time, it really was too big by quite a long way and I ended up taking it in all the way by a whole dress size.

The pattern is very straightforward but included nice details like understitching of the neck facing to create a neater, flatter finish.

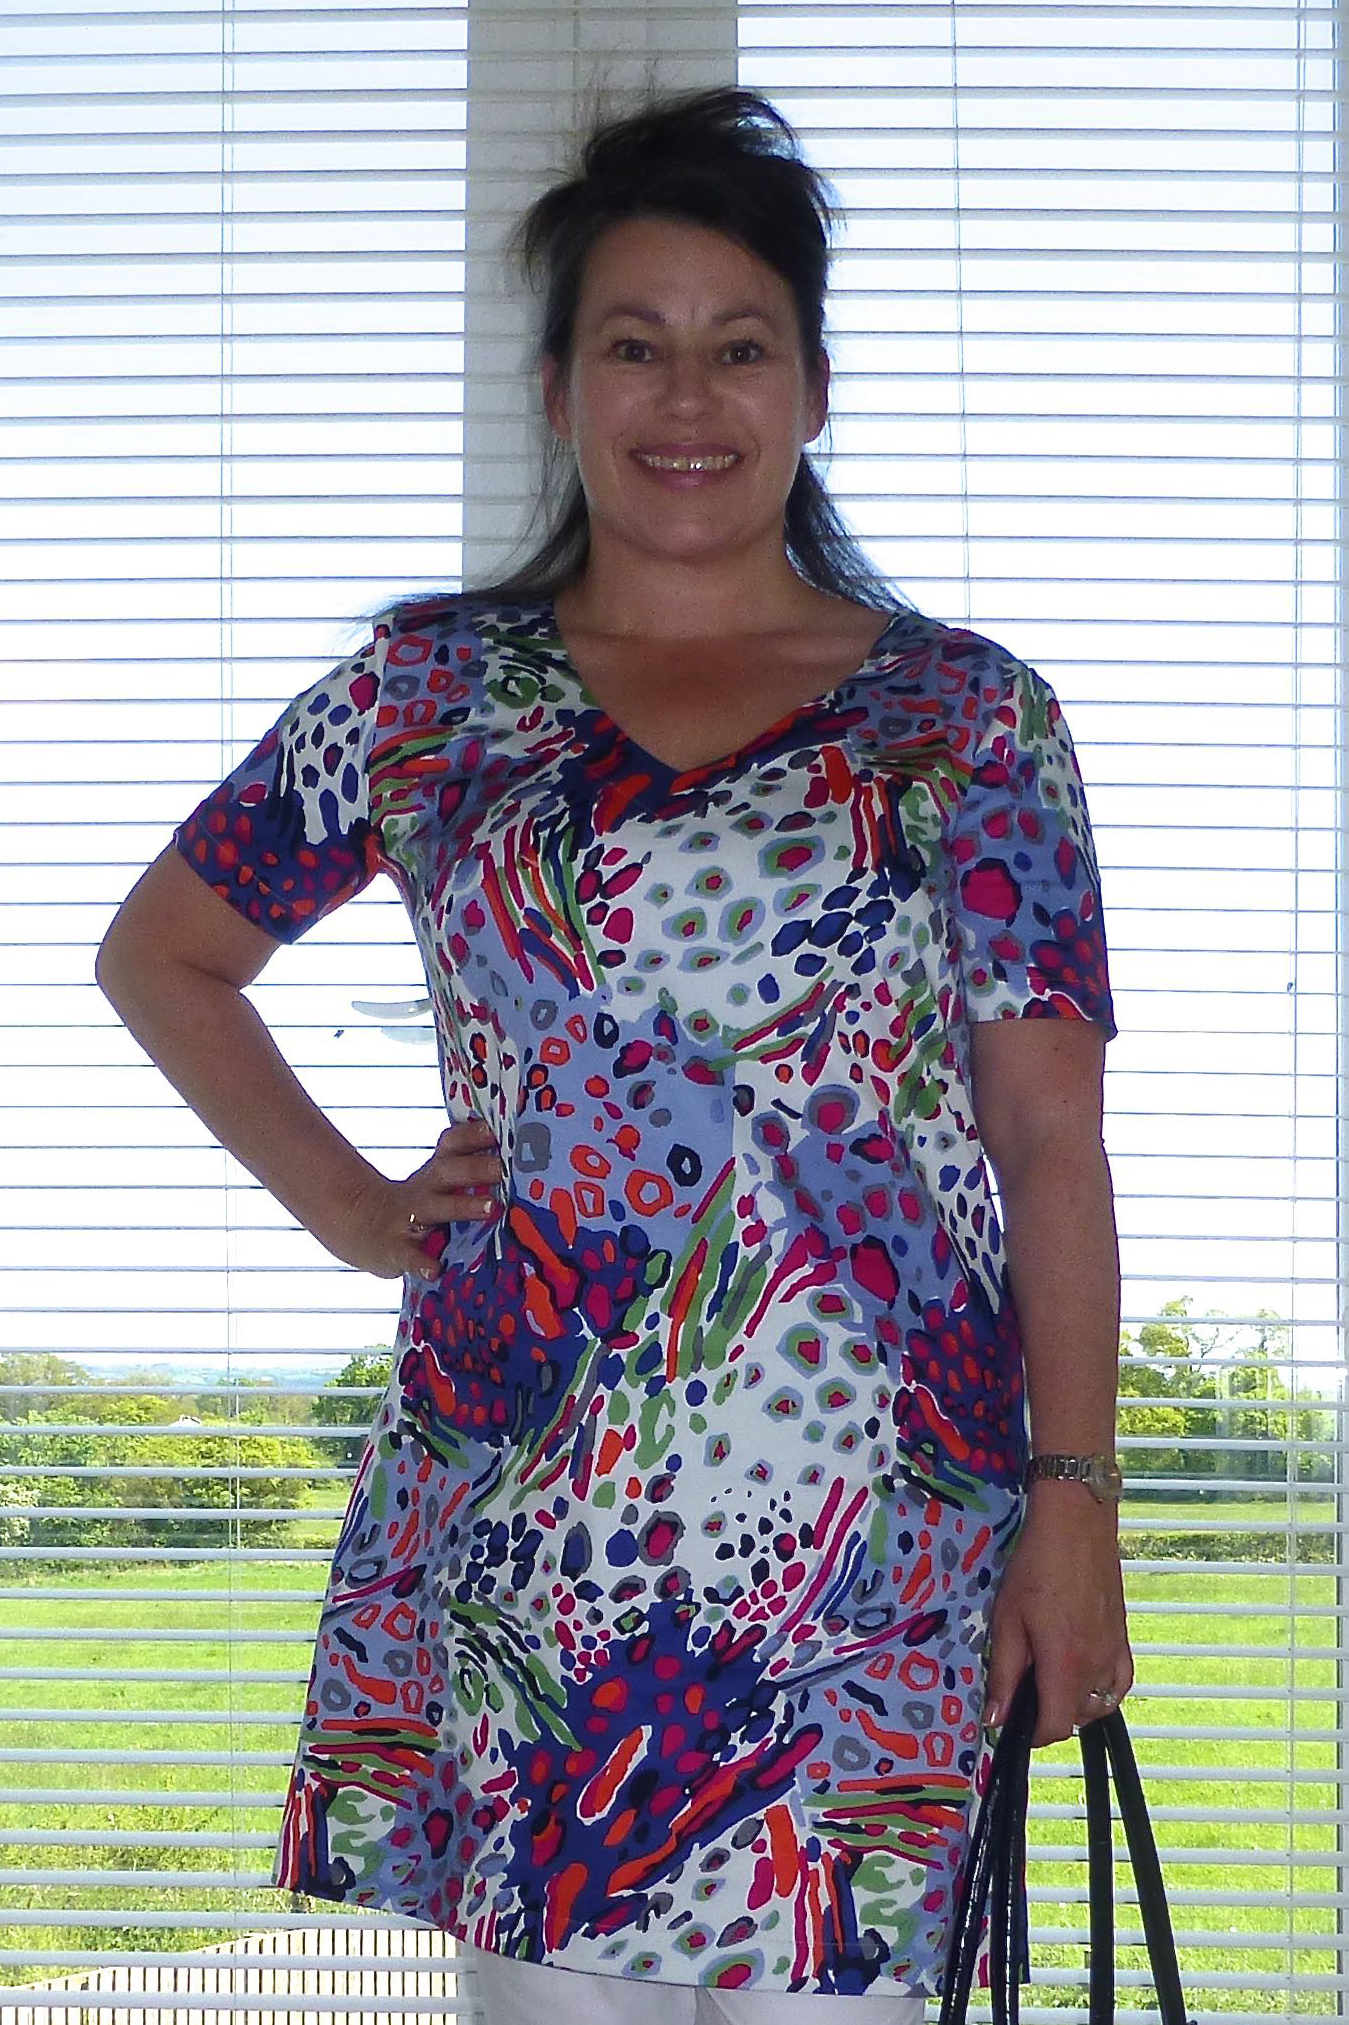
I’m really pleased with the way it turned out – it has already attracted many comments:)
The cropped trousers (well, they weren’t until I shortened them by three inches at the “lengthen/shorthen here” mark!) were also too big initially, so I took them in by a whole dress size too.
There was no waistband for a change, just a facing of petersham ribbon-type tape which lends a clean, minimal look to the trousers and also makes them super comfortable to wear.

The lapped zip is always a neat addition when inserting into a side seam.

A tip is to reinforce at the bottom with several lines of stitching though, as I’ve done here.

They fit well and the stretch in the cotton means that they will be a pleasure to wear – and somewhat smarter than the white leggings that I usually favour!

So, how does the outfit look as a whole?
Just as I had hoped, actually and feels even better due to the stretch in both fabrics.

The New Look pattern was easy to understand and the instructions simple to follow.
The cotton sateen is heavy enough to add structure and the stretch makes for incredible comfort.

Sunnies on and I’m ready to go!

Why not pop over to Minerva Crafts to find your own piece of fabric heaven?
Artist and tutor
a creative life on the spectrum
Everyday craft inspirations
Movin' On Up
Because We're All a Work in Progress
Previously Boys and Chickens, I have created a new blog to share my sewing adventure as 2018 is they year I plan to teach myself to sew! There will also be bits of crochet and cooking too.
Sewing, crochet, crafts, accessories, baking, tutorials,
small steps to a kinder world
Sew What... Sewing, Embroidery and handmade
"She is too fond of books and it has addled her brain." (Louisa May Alcott)
A life of books . . .
Official crafty blog for my Quiet Water Craft Etsy shop
Sewing, crochet, crafts, accessories, baking, tutorials,
my year of trying to be more creative in different ways
Sewing, crochet, crafts, accessories, baking, tutorials,
The latest news on WordPress.com and the WordPress community.
Adventures in dressmaking from an improving sewist!
Knitting, Sewing, Crafting
Sewing, crochet, crafts, accessories, baking, tutorials,
Sewing, crochet, crafts, accessories, baking, tutorials,
Sewing, crochet, crafts, accessories, baking, tutorials,
Sewing up a self-made wardrobe
Sewing, crochet, crafts, accessories, baking, tutorials,
Sewing, crochet, crafts, accessories, baking, tutorials,
My art work and other musings
Fabric, life, and all that
Sewing, crochet, crafts, accessories, baking, tutorials,
Sewing, crochet, crafts, accessories, baking, tutorials,
Making and creating
From Scraps to Quilts
here’s what I’m sewing...
Lesley blogging about her sewing projects
lathaminteriors.co.uk
Sewing, crochet, crafts, accessories, baking, tutorials,
What's happening in North Cheriton
Returning sewist, crafter and runner
My quest to sew a wardrobe of clothes which actually fit me
a blog about making things
the joy of creativity
My challenge: One year - I will not buy clothes - I will upcycle to make what I need - everything from underwear to evening wear! Join me for tips, exclusive BrawHem makes, and inevitably some hilarious disasters...
Go Sew Something
