Sewchet

Sewing, crochet, crafts, accessories, baking, tutorials,


22 Comments

Beaded Crochet Wine Glass Cover – A Tutorial

img_4386

Following requests for a pattern after this blog post here, I finally have one for you! Click to open the printable PDF pattern, or it is written out at the bottom of the page.

I’d love to see any that you make, so please share pictures:)

Beaded Wine Glass Cover PDF Pattern

img_4381

img_4382

Beaded Wine Glass Cover


4 Comments

Beach Wrap/Bikini Cover-Up

Looking ahead to the Summer holidays, I wanted to make a simple cover-up that would be quick to throw on over a swimsuit. You know those times; when you want a drink at the pool bar and don’t want to get dressed, but don’t want to sit there in a pair of bikini bottoms!

You can read all about it in my blog post over at Minerva Crafts :- Beach Wrap/Bikini Cover-Up


54 Comments

What to do with a bag of scraps?

We live in a lovely little village, not quite a hamlet because, by definition, a hamlet doesn’t have a church.

We have a church. And a village hall. Nothing else.

The pub is a twenty minute walk away in the next village which is great in the Summer. Not so on a cold, wet Winter’s evening when you fancy a pint.

I digress. The point is, being a small community of just 91 dwellings, people are friendly and generous and generally get on rather well. (Remember those flowers?)

A few weeks back, I had an email from an artist living in The Old Stables asking me if I would like first dibs on some textile-y things as she was having a clear out of her studio. Of course, I jumped at the chance and popped round that afternoon to have a look. I ended up coming home with a car load of stuff from fabric remnants a few yards long to tiny 4″ squares of silk oddments.

After being quite strict with myself, I kept only what I knew I would definitely use and, with her permission, bagged up the remainder for the charity shop.

There was also a bin liner stuffed to the brim with feather cushion pads which is where I made a start.

P1070143

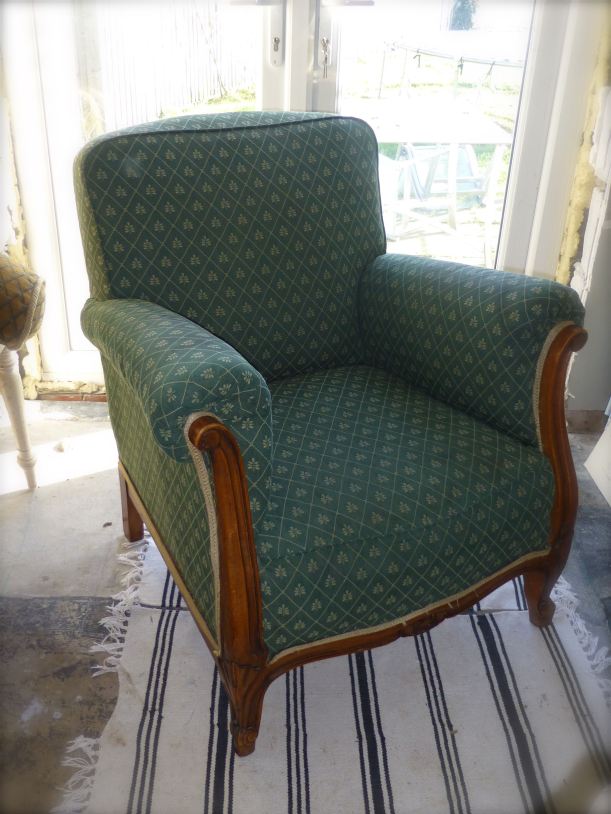
No.1 Son is now twenty-three, has his first post-graduate job and is saving hard for a deposit for his own house. He is also amassing quite a ‘bottom drawer’ in readiness for his new home, the most recent being this cute little Edwardian armchair from eBay.

Chair

Anyway, amongst the things I found when rooting through the stash of goodies I had been given, was a square of fabric from Anthropologie. Possibly a (very large) napkin in its original incarnation, it was unused with the store tag still attached.

P1070145

A little bit too ethnic for my taste, I asked said son if he liked it and would he like me to make him a cushion cover from it. Having received a ‘yes’ on both counts, I set to.

There was a small carrier bag full of bits of top quality wool tweed in several shades of grey which were pretty useless on their own, but which I could see (!) would piece together to make a nice back to the cushion.

P1070146

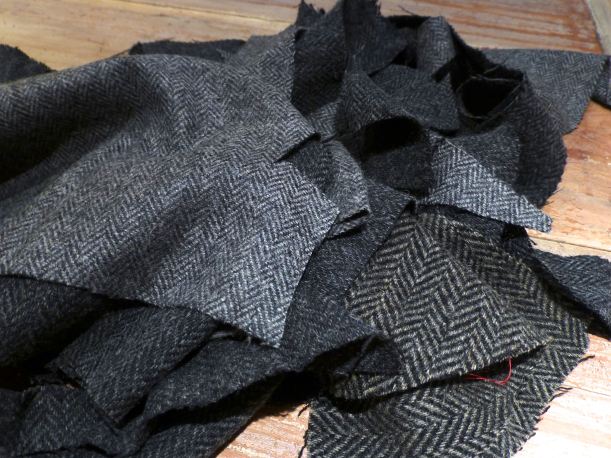
See? They go together quite well.

P1070147

I patchworked some strips together until I had a square measuring 20″, the same as the front.

P1070148

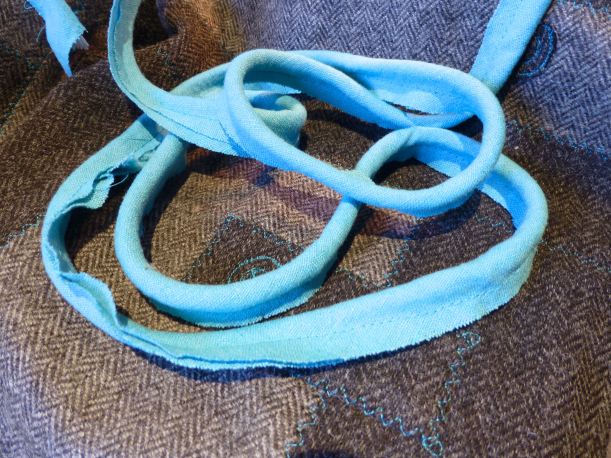
Then, because it still looked exactly like what it was – scraps of fabric sewn together – I added some detail in the form of turquoise top stitching along all the seams.

P1070151

P1070150

It was still a bit ‘functional’ so I thought a few appliquéd swirls wouldn’t go amiss.

P1070154

P1070155

P1070156

And a few more….

P1070158

There, that’s enough. Now it looks more like a piece of textile art than leftovers!

P1070157

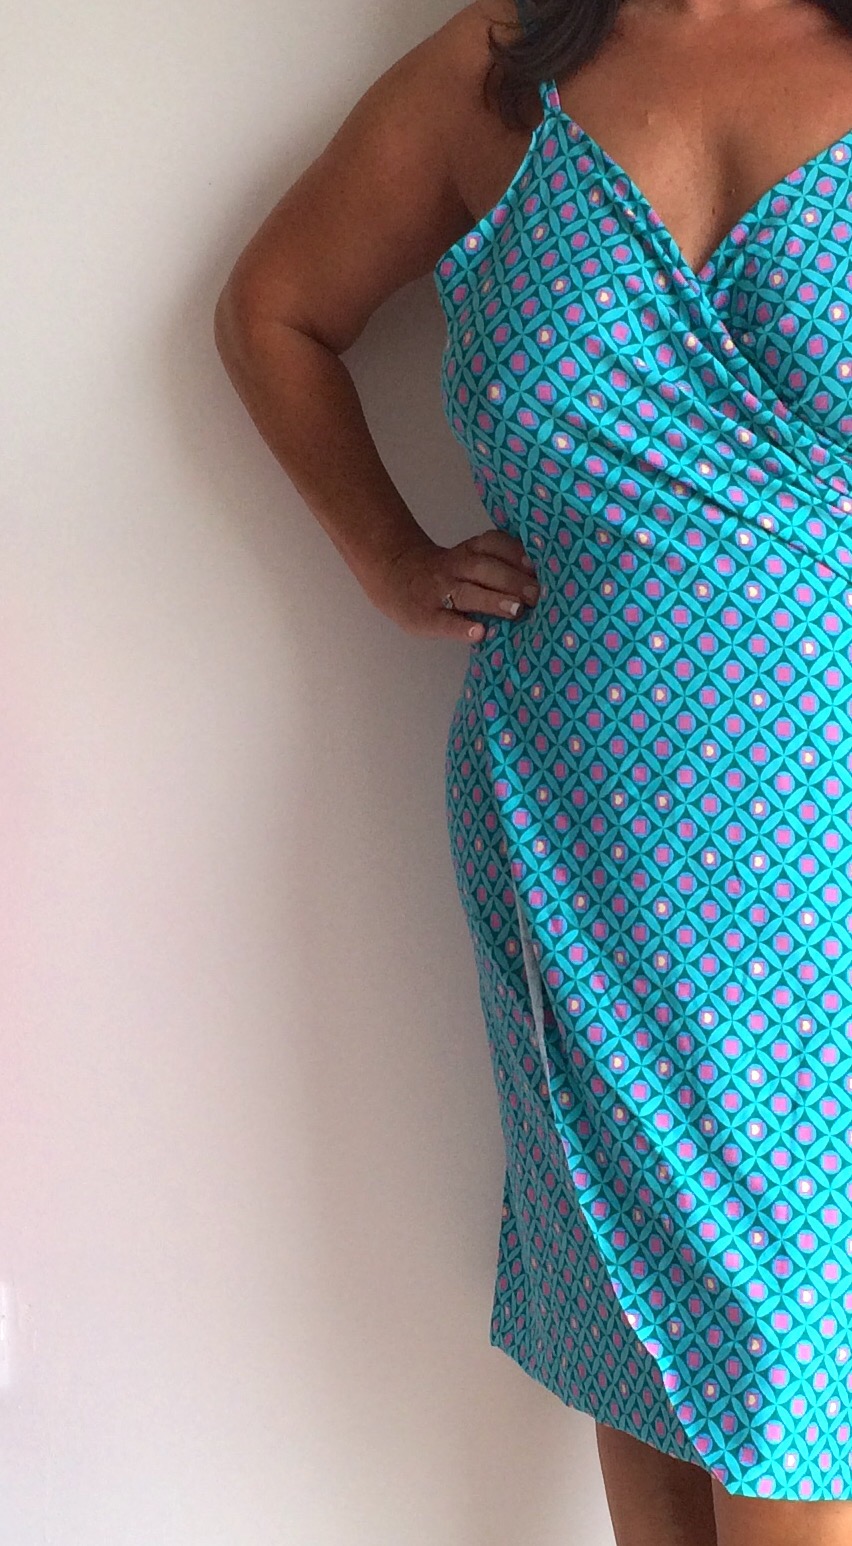
Using some turquoise linen (left over from this dress), I covered some piping cord in a shade that would pick out the blue in the Anthropologie napkin. See, there was a reason for choosing turquoise?!

P1070160

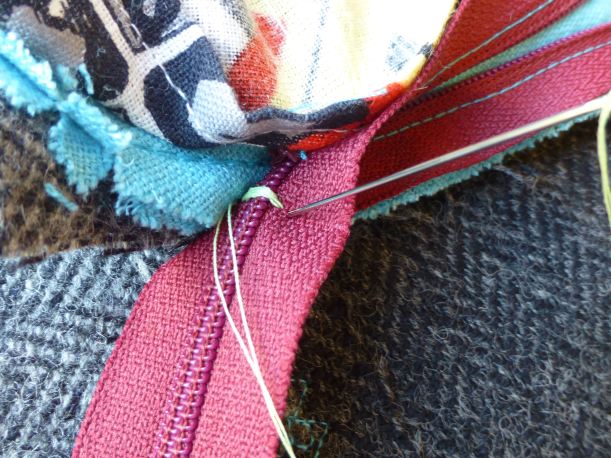
Piping was basted on first…

P1070159

…then a random zip from my collection was inserted.

P1070162

The zip was too long so I shortened it by sewing a new ‘stop’.

P1070163

P1070161

Sew round the remaining three sides, turn inside out and – TADAH!

P1070164

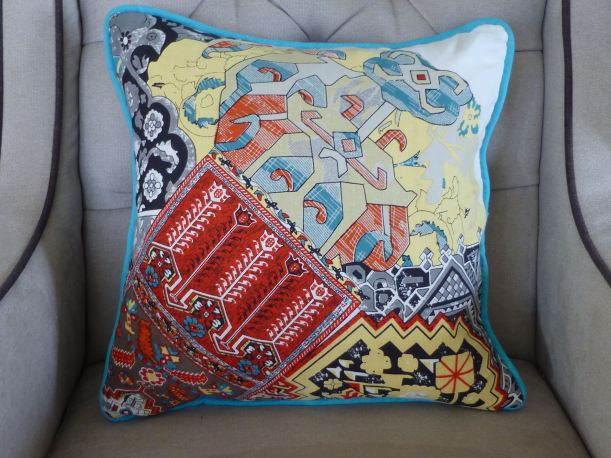
A tip is to make the cushion cover slightly smaller than the size of the feather insert, then it stays nice and plump like this.

P1070165

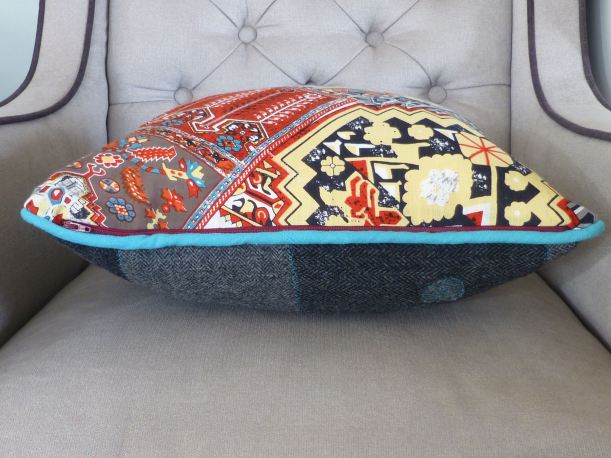
The turquoise piping ties the front in with the back.

P1070169

Actually, there’s not really a front or back as both sides are deserving of top spot!

P1070166

P1070168

I thought it looked quite at home in our lounge and said as much – at which point it was “Thanks, Mum” and whisked off to No.1 Son’s bedroom before I got too attached to it!


18 Comments

Tutorial: How To Cover A Lampshade and use Chalk Paint to upcycle table lamps

You may remember a post from earlier this week when I mentioned that I had been bargain hunting in charity shops for Number One Son’s return to Uni. Part of our haul included two utterly minging shiny brass-effect table lamps complete with two equally vile lilac lampshades.

I snapped them up solely because they were in perfect working order and only cost a meagre £3.00 in total. No.1 would never have bought them but, as I was paying, he was grateful for anything and I convinced him that we could do something, anything, with them to increase their aesthetic appeal.

Quite frankly setting a match to them would make them more attractive so my plan to paint the bases and cover the shades was over and above, I think!

My lovely friend Roz over at The Velvet Cow has been extolling the virtues of Annie Sloan’s Chalk Paint for a while now and very kindly lent me a pot of Old White and a paintbrush for the afternoon. (Be sure to check her blog out to see the wonderful things she has done with it!)

We started painting before I remembered to take photos, but you get an idea of what we were up against: –

P1030526

P1030529

The great thing about Chalk Paints (we used Annie Sloan but Autentico also has an extensive range of colours) is that they eliminate the need for laborious preparation. No sanding necessary, just wipe clean and paint – it truly is that simple!

So we did…

P1030527

One coat was all they needed before being left to dry. A coat of wax should then really be applied as a protective layer but, as these were table lamps, not table legs, we figured they weren’t going to get bashed about that much to warrant it. And we didn’t have any anyway:)

P1030542

Much better.

Now to start on the lampshades.

Having mixed some PVA glue with an equal amount of water, it was slopped on the the shades very quickly.

P1030531

Another charity shop find that I couldn’t resist ages ago was this book of musical scores, each one the National Anthem of a different country. It’s so old that the pages are the authentic tobacco-stained brown that is so often faked with cold tea; a lovely contrast to the white base.

P1030528

We literally tore pages from the book and pasted them with more PVA onto the shades, smoothing it as we went.

P1030532

Extra pages are slapped on, overlapping where necessary, until the whole shade is covered.

P1030533

When dry, use a Stanley knife or (similar craft knife) to cut away the overhanging edges. (Tip: make sure you use a fresh blade or you risk ripping the paper).

P1030537

P1030540

I can’t wait to show you the result so, without further ado…..

….TADAH!

P1030539

No.1 is understandably chuffed with our efforts and I think they will add a cosy touch to his Uni digs. They look especially lovely at night time.

P1030541

It’s amazing what you can do with very little cash and lots of imagination, isn’t it?