The first of December is eagerly awaited in our house by young and old(ish) alike. Yes indeedy, we all love the opening of the first window on the advent calendar.
Now, I’m one of those traditionalists who absolutely has to have one of the old fashioned, Dickensian-type calendars with lots of glitter and a romanticized scene from Victorian times hiding behind each tiny window. In fact I browse for hours in various different shops before making the most difficult decision of Christmas and coughing up the cash for four of the best. One each for Daughter (who lives with her boyfriend), No.1 Son (at Uni in Plymouth – boy, does he love it when the post arrives on the communal doormat) and No.2 and No.3 Sons.
There will be no chocolate-filled advent calendars in this house, thank you very much and, no, they are never disappointed because that’s all they’ve ever known. Anyway, I still remember the sense of anticipation and subsequent joy felt as a child when it was my turn to open a window – there were four of us and only one calendar so we got to open a door every four days. My lot are relatively spoilt as they get one each!!!!


Back to the item in question.
Yesterday’s post showed another advent calendar, one that I made both as a decoration and as a way to bring together the family throughout December.

First the tutorial, then onto what went into the pockets.
Now stop it, don’t be impatient and scroll down to the bottom like a petulant child – enjoy the journey and try to imagine and appreciate the hours of toil that went into constructing this masterpiece!
Right, off we go.
This project was free to make as I used what I had in my stash – you may have to substitute bits according to whether you also want to use up leftovers or are happy to go and buy the bits specially.
You will need two pieces of fabric each measuring 55cm wide x 67cm high. I used navy linen for the front and white cotton for the back.
For everything else I used felt as it doesn’t fray so there is no need to hem the edges. You could use cotton from your stash and hem all four sides before sewing onto the calendar, but make sure you choose a thin fabric to keep the bulk down to a minimum.
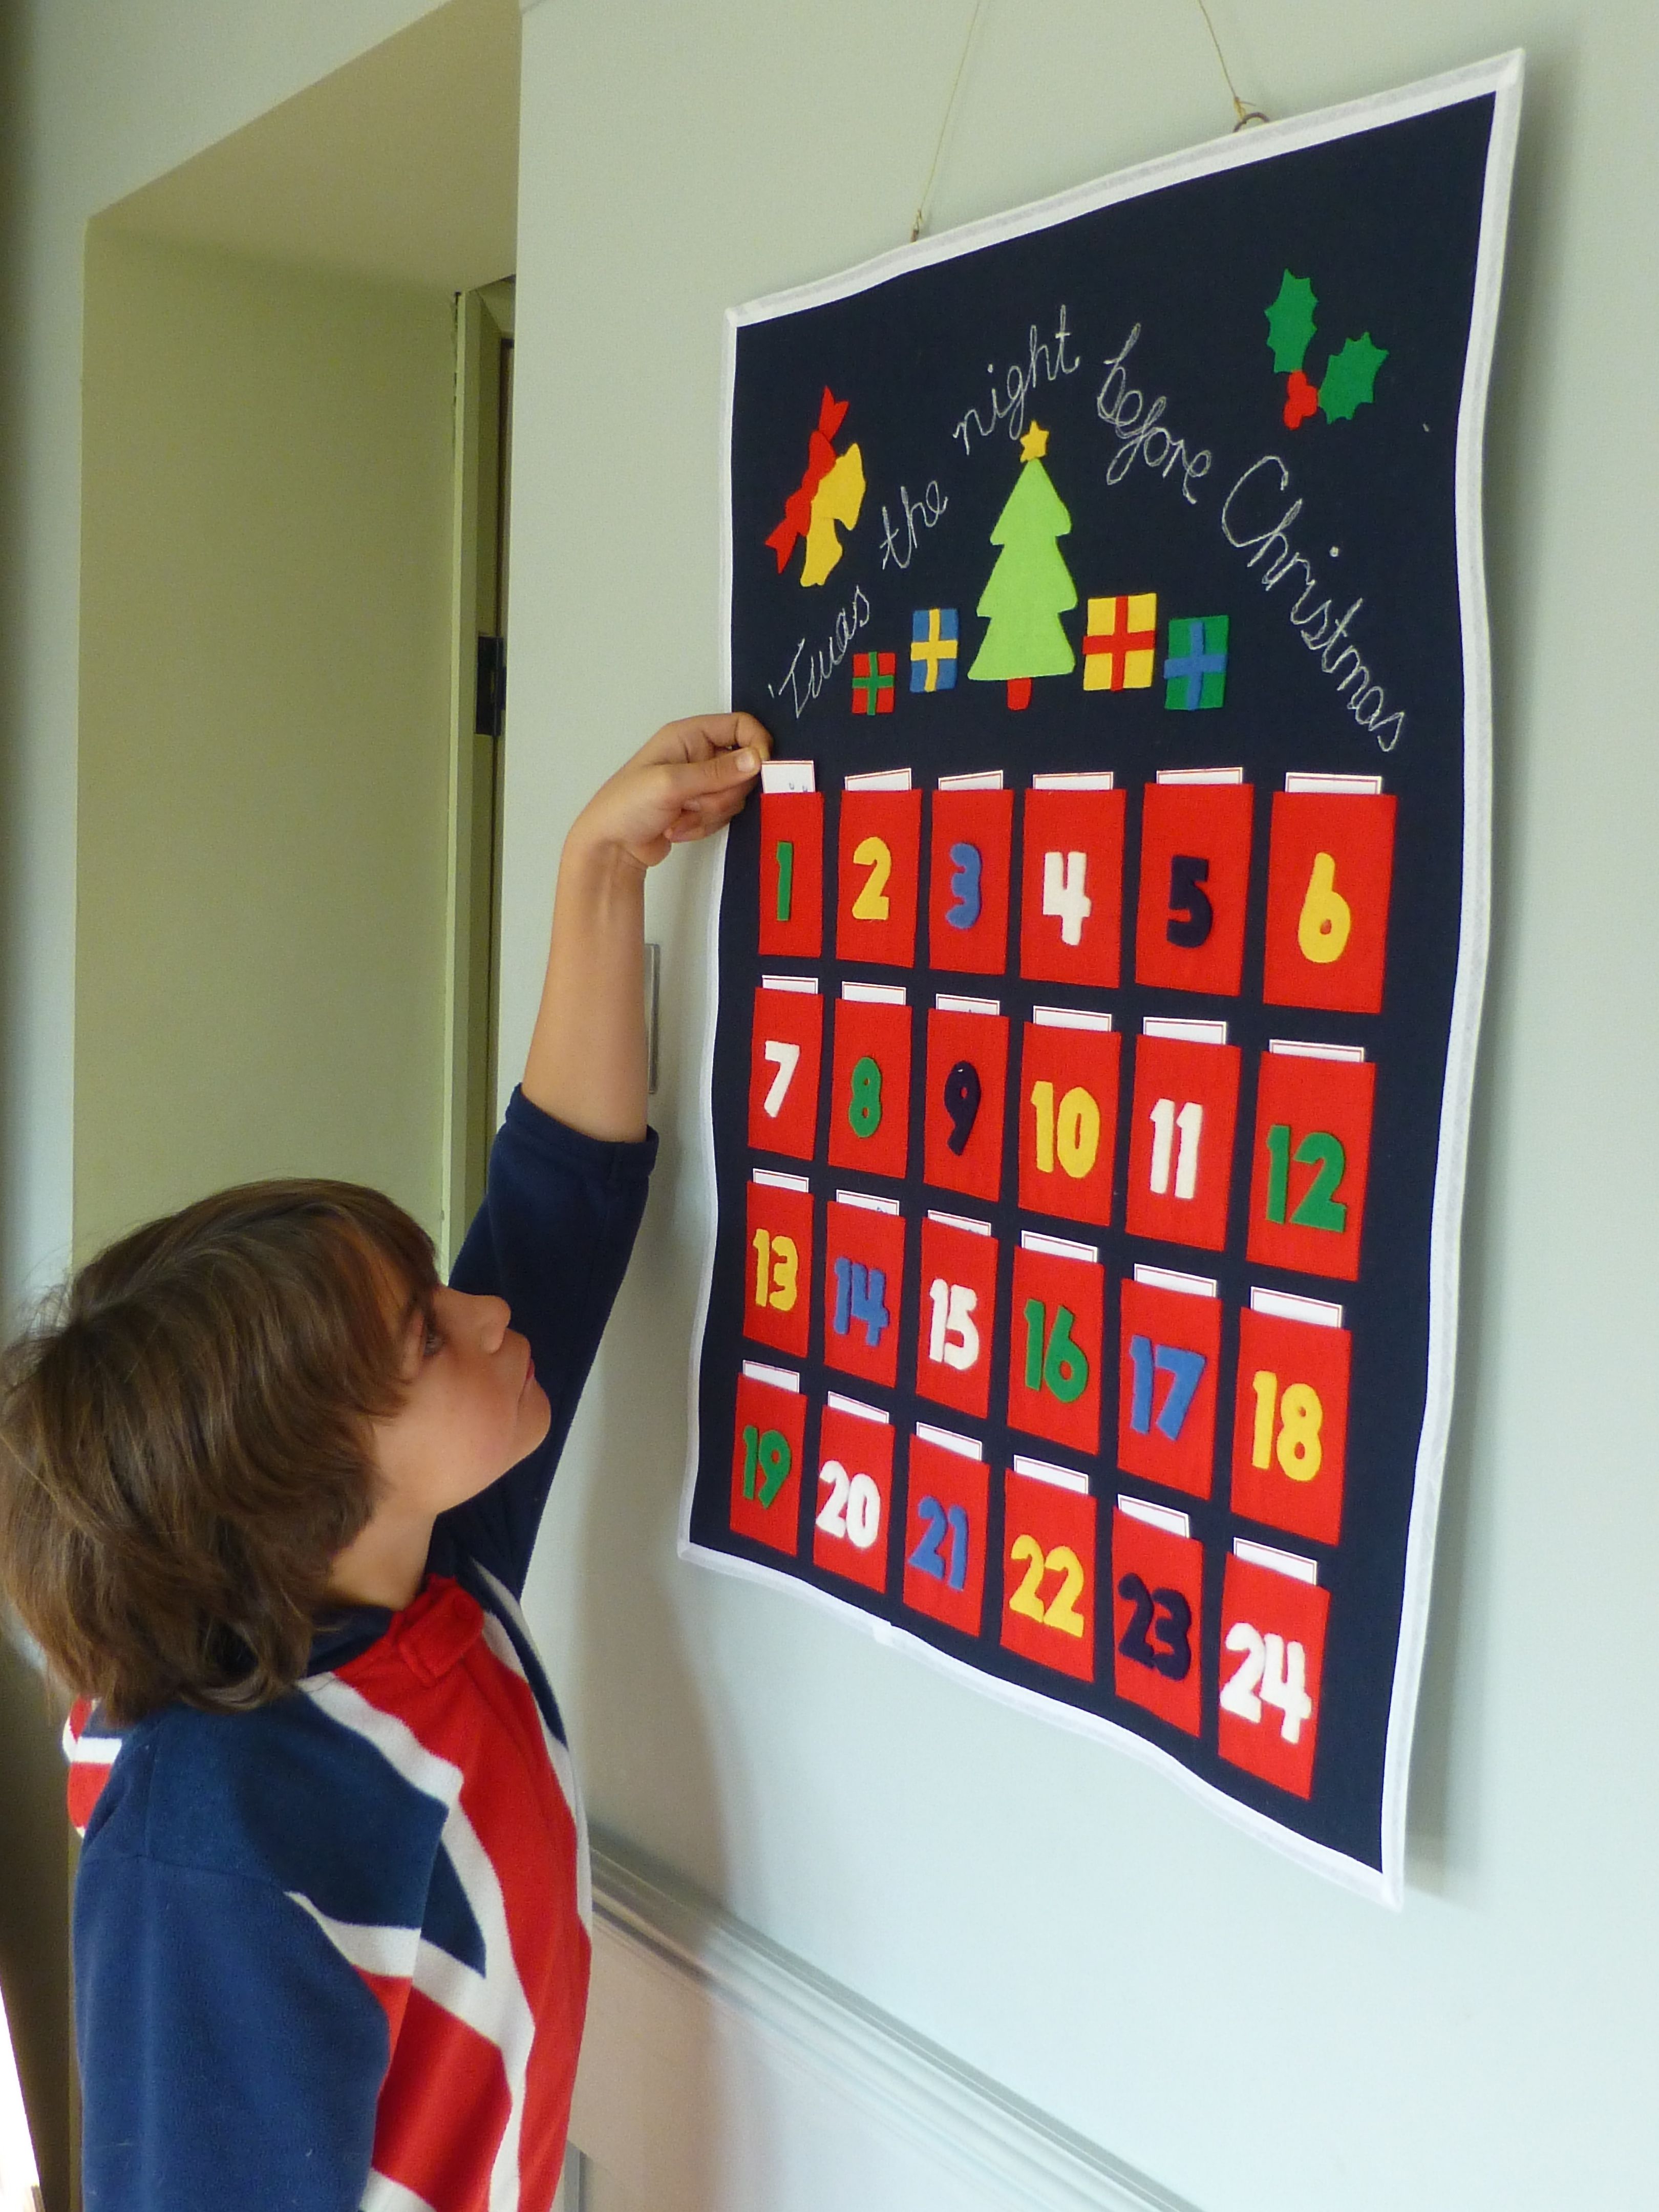
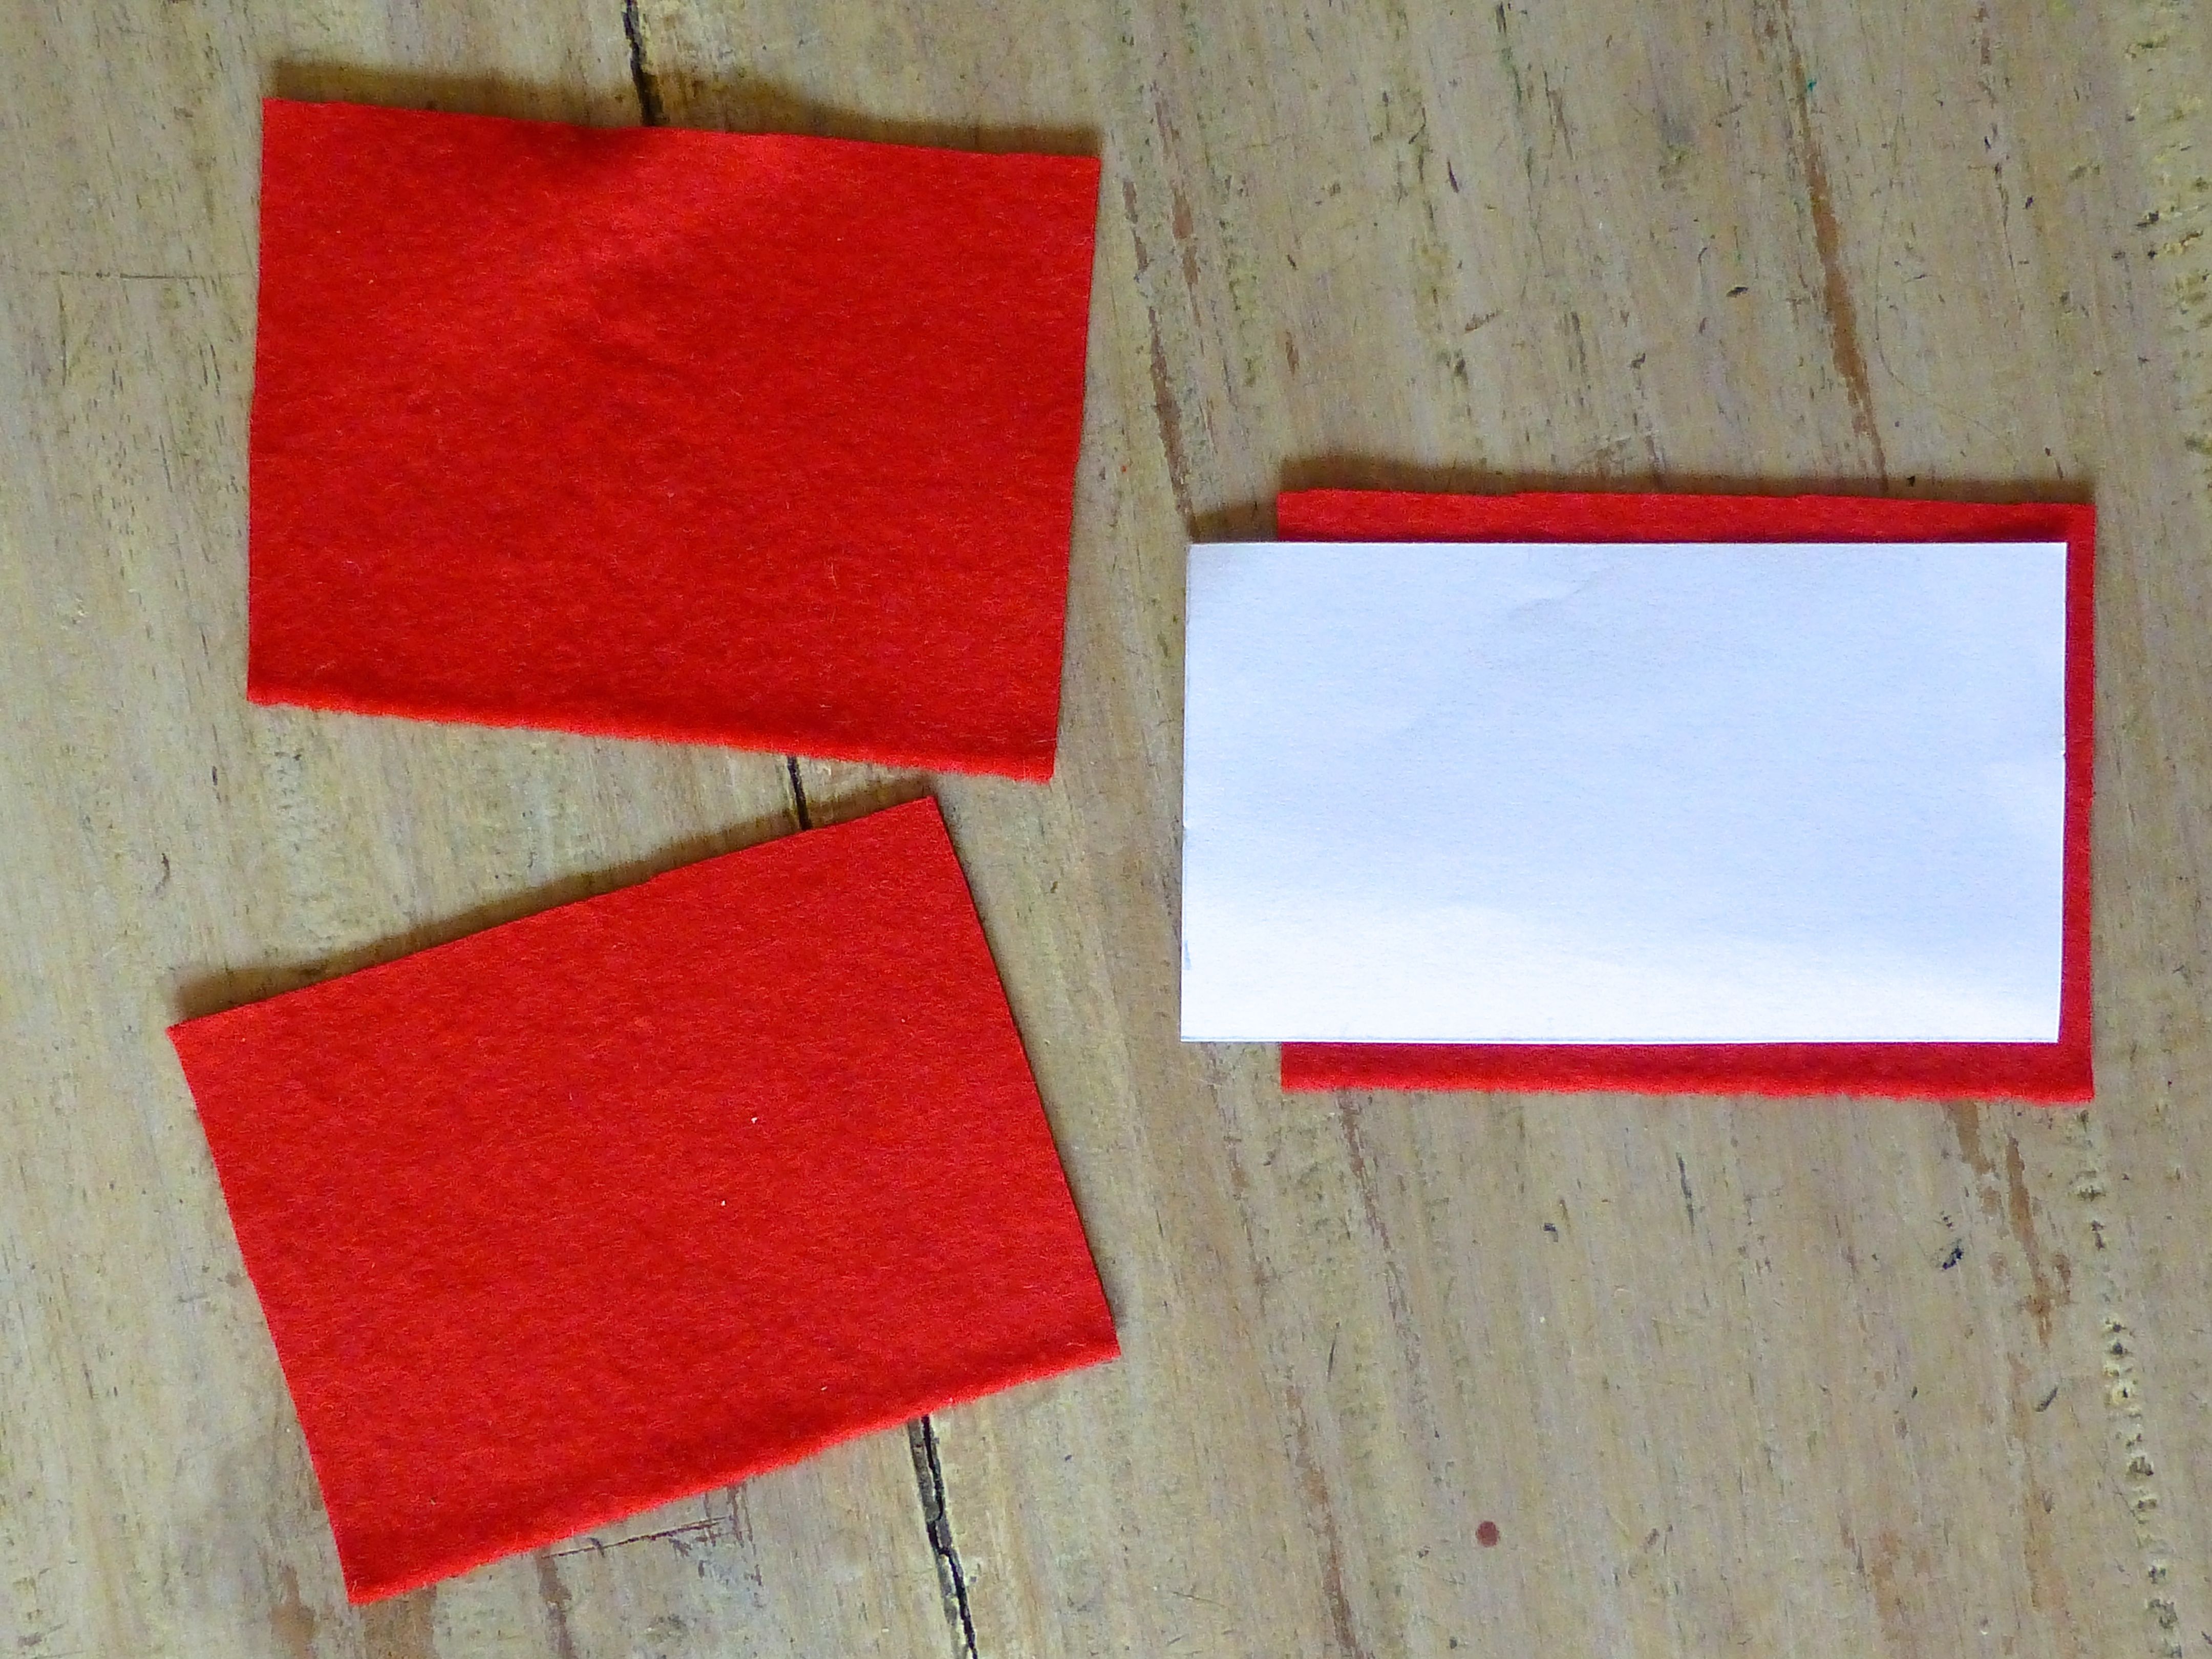
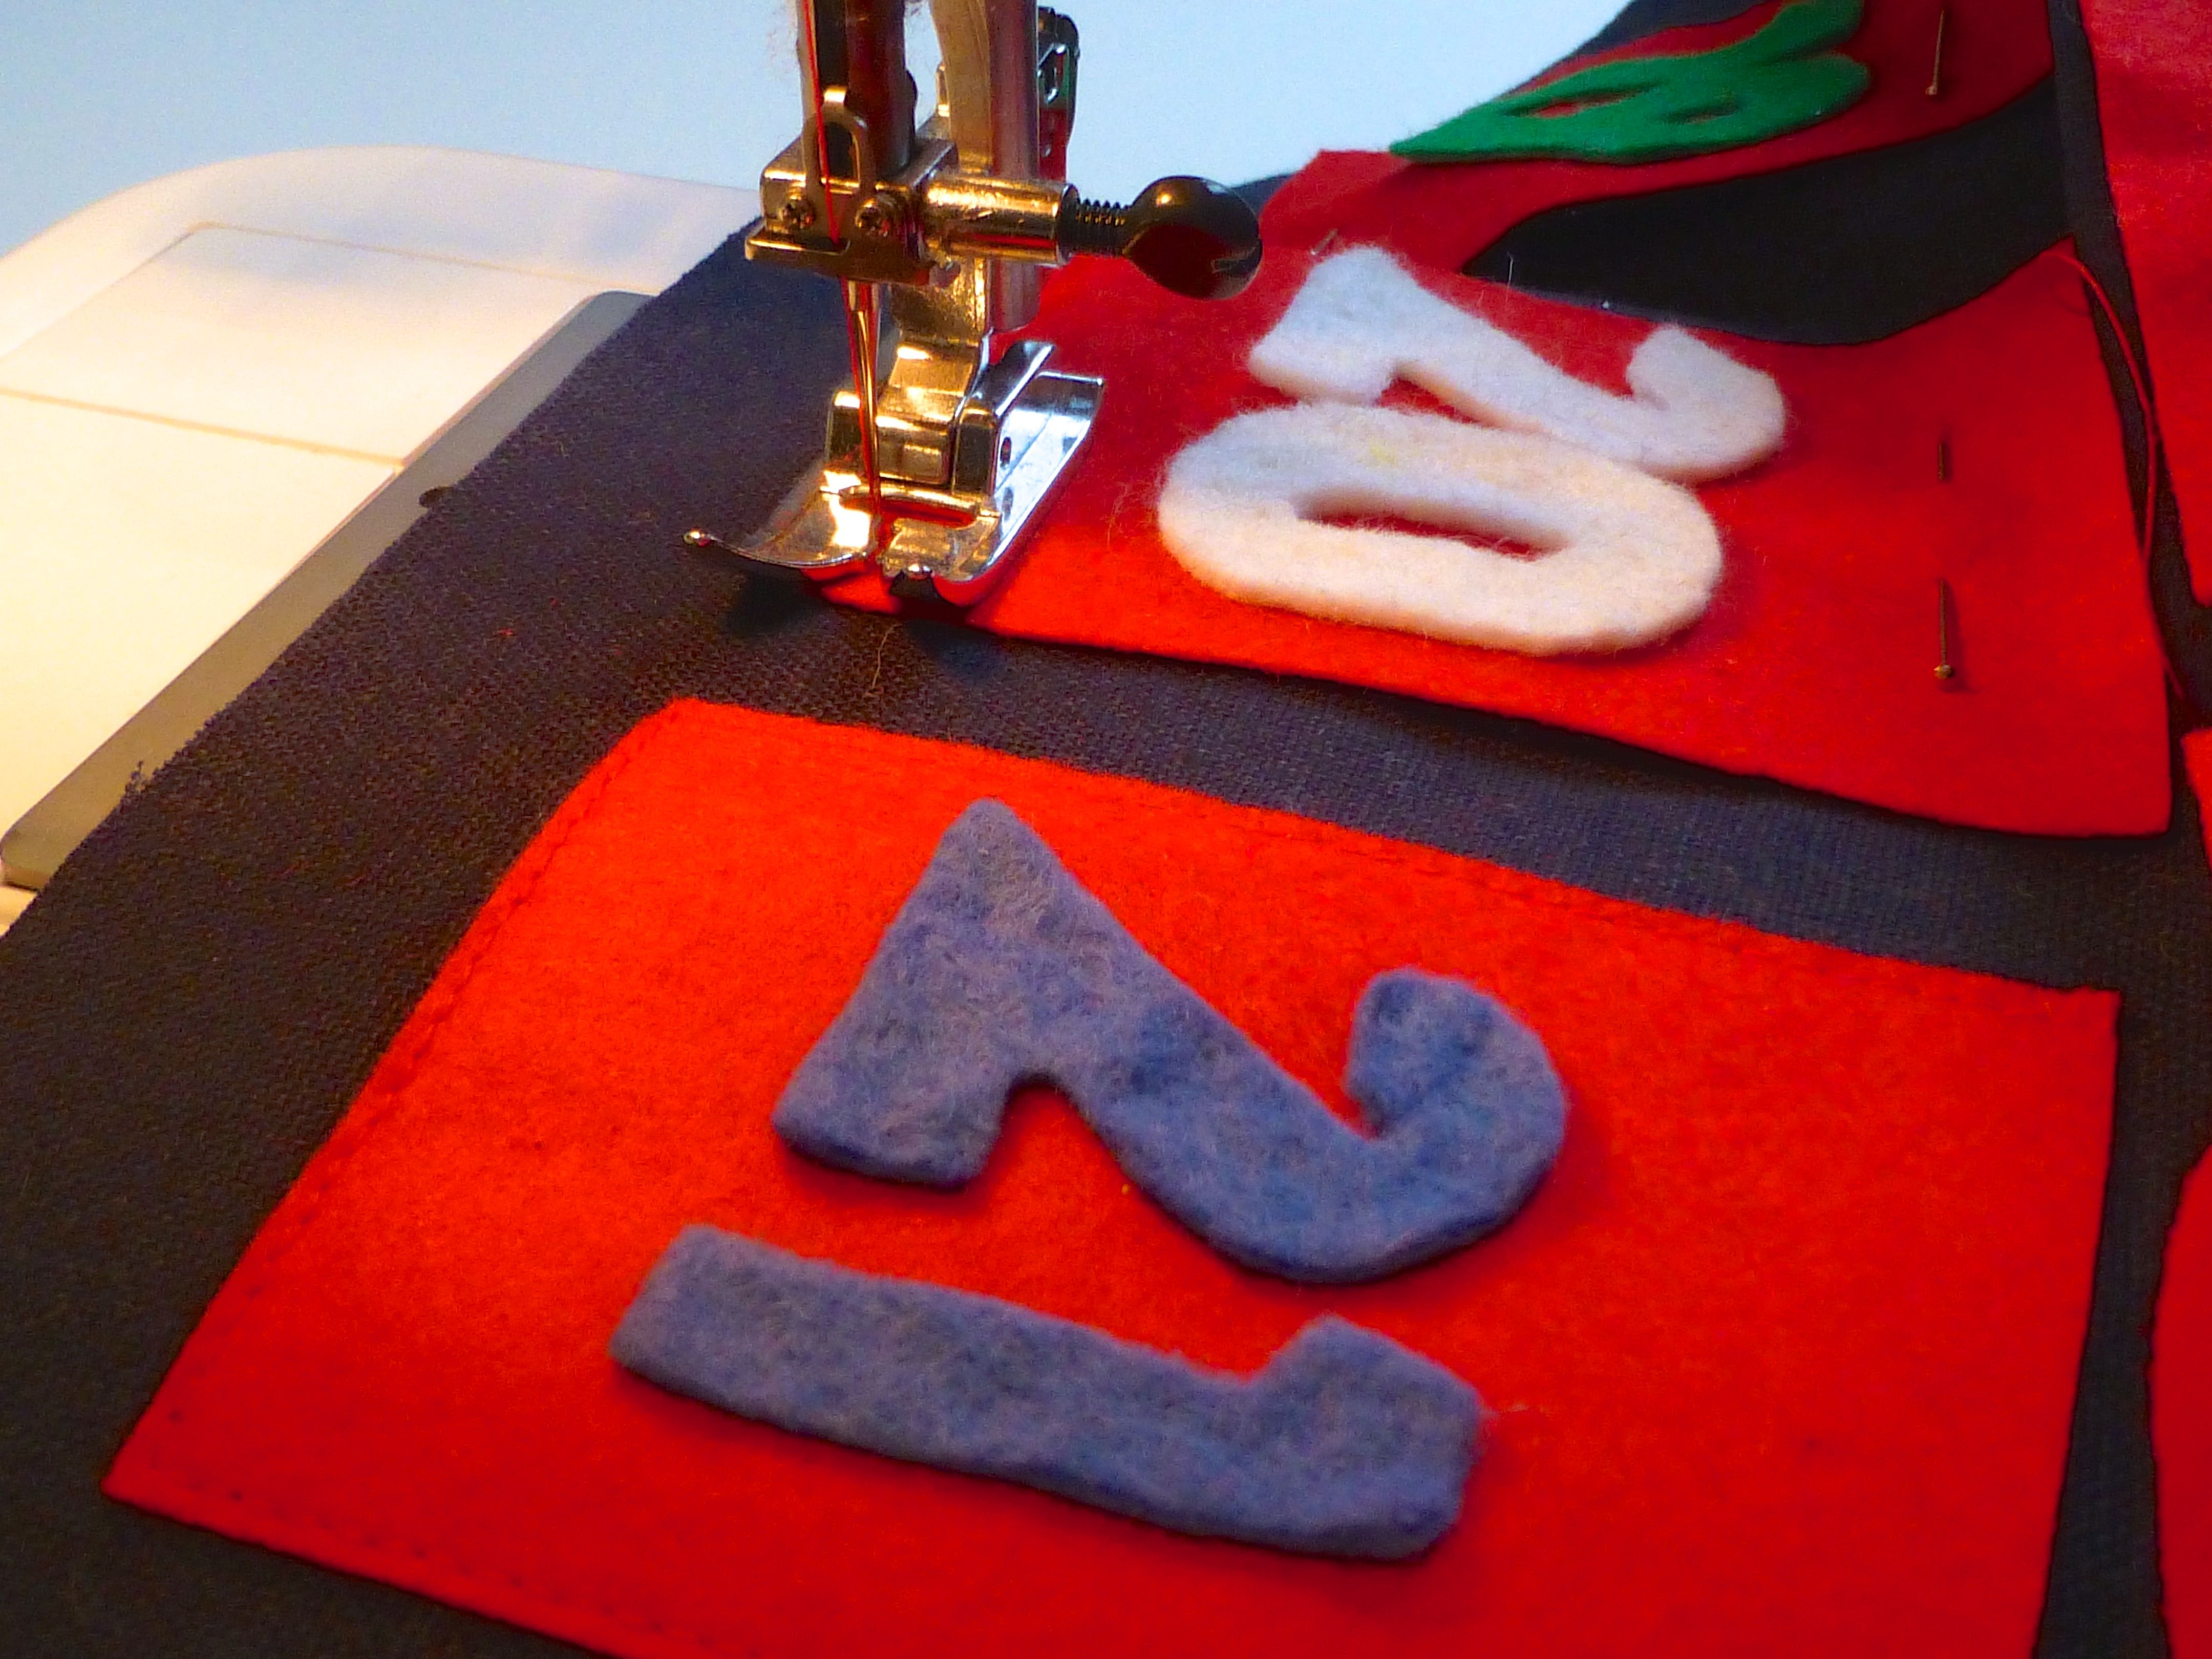
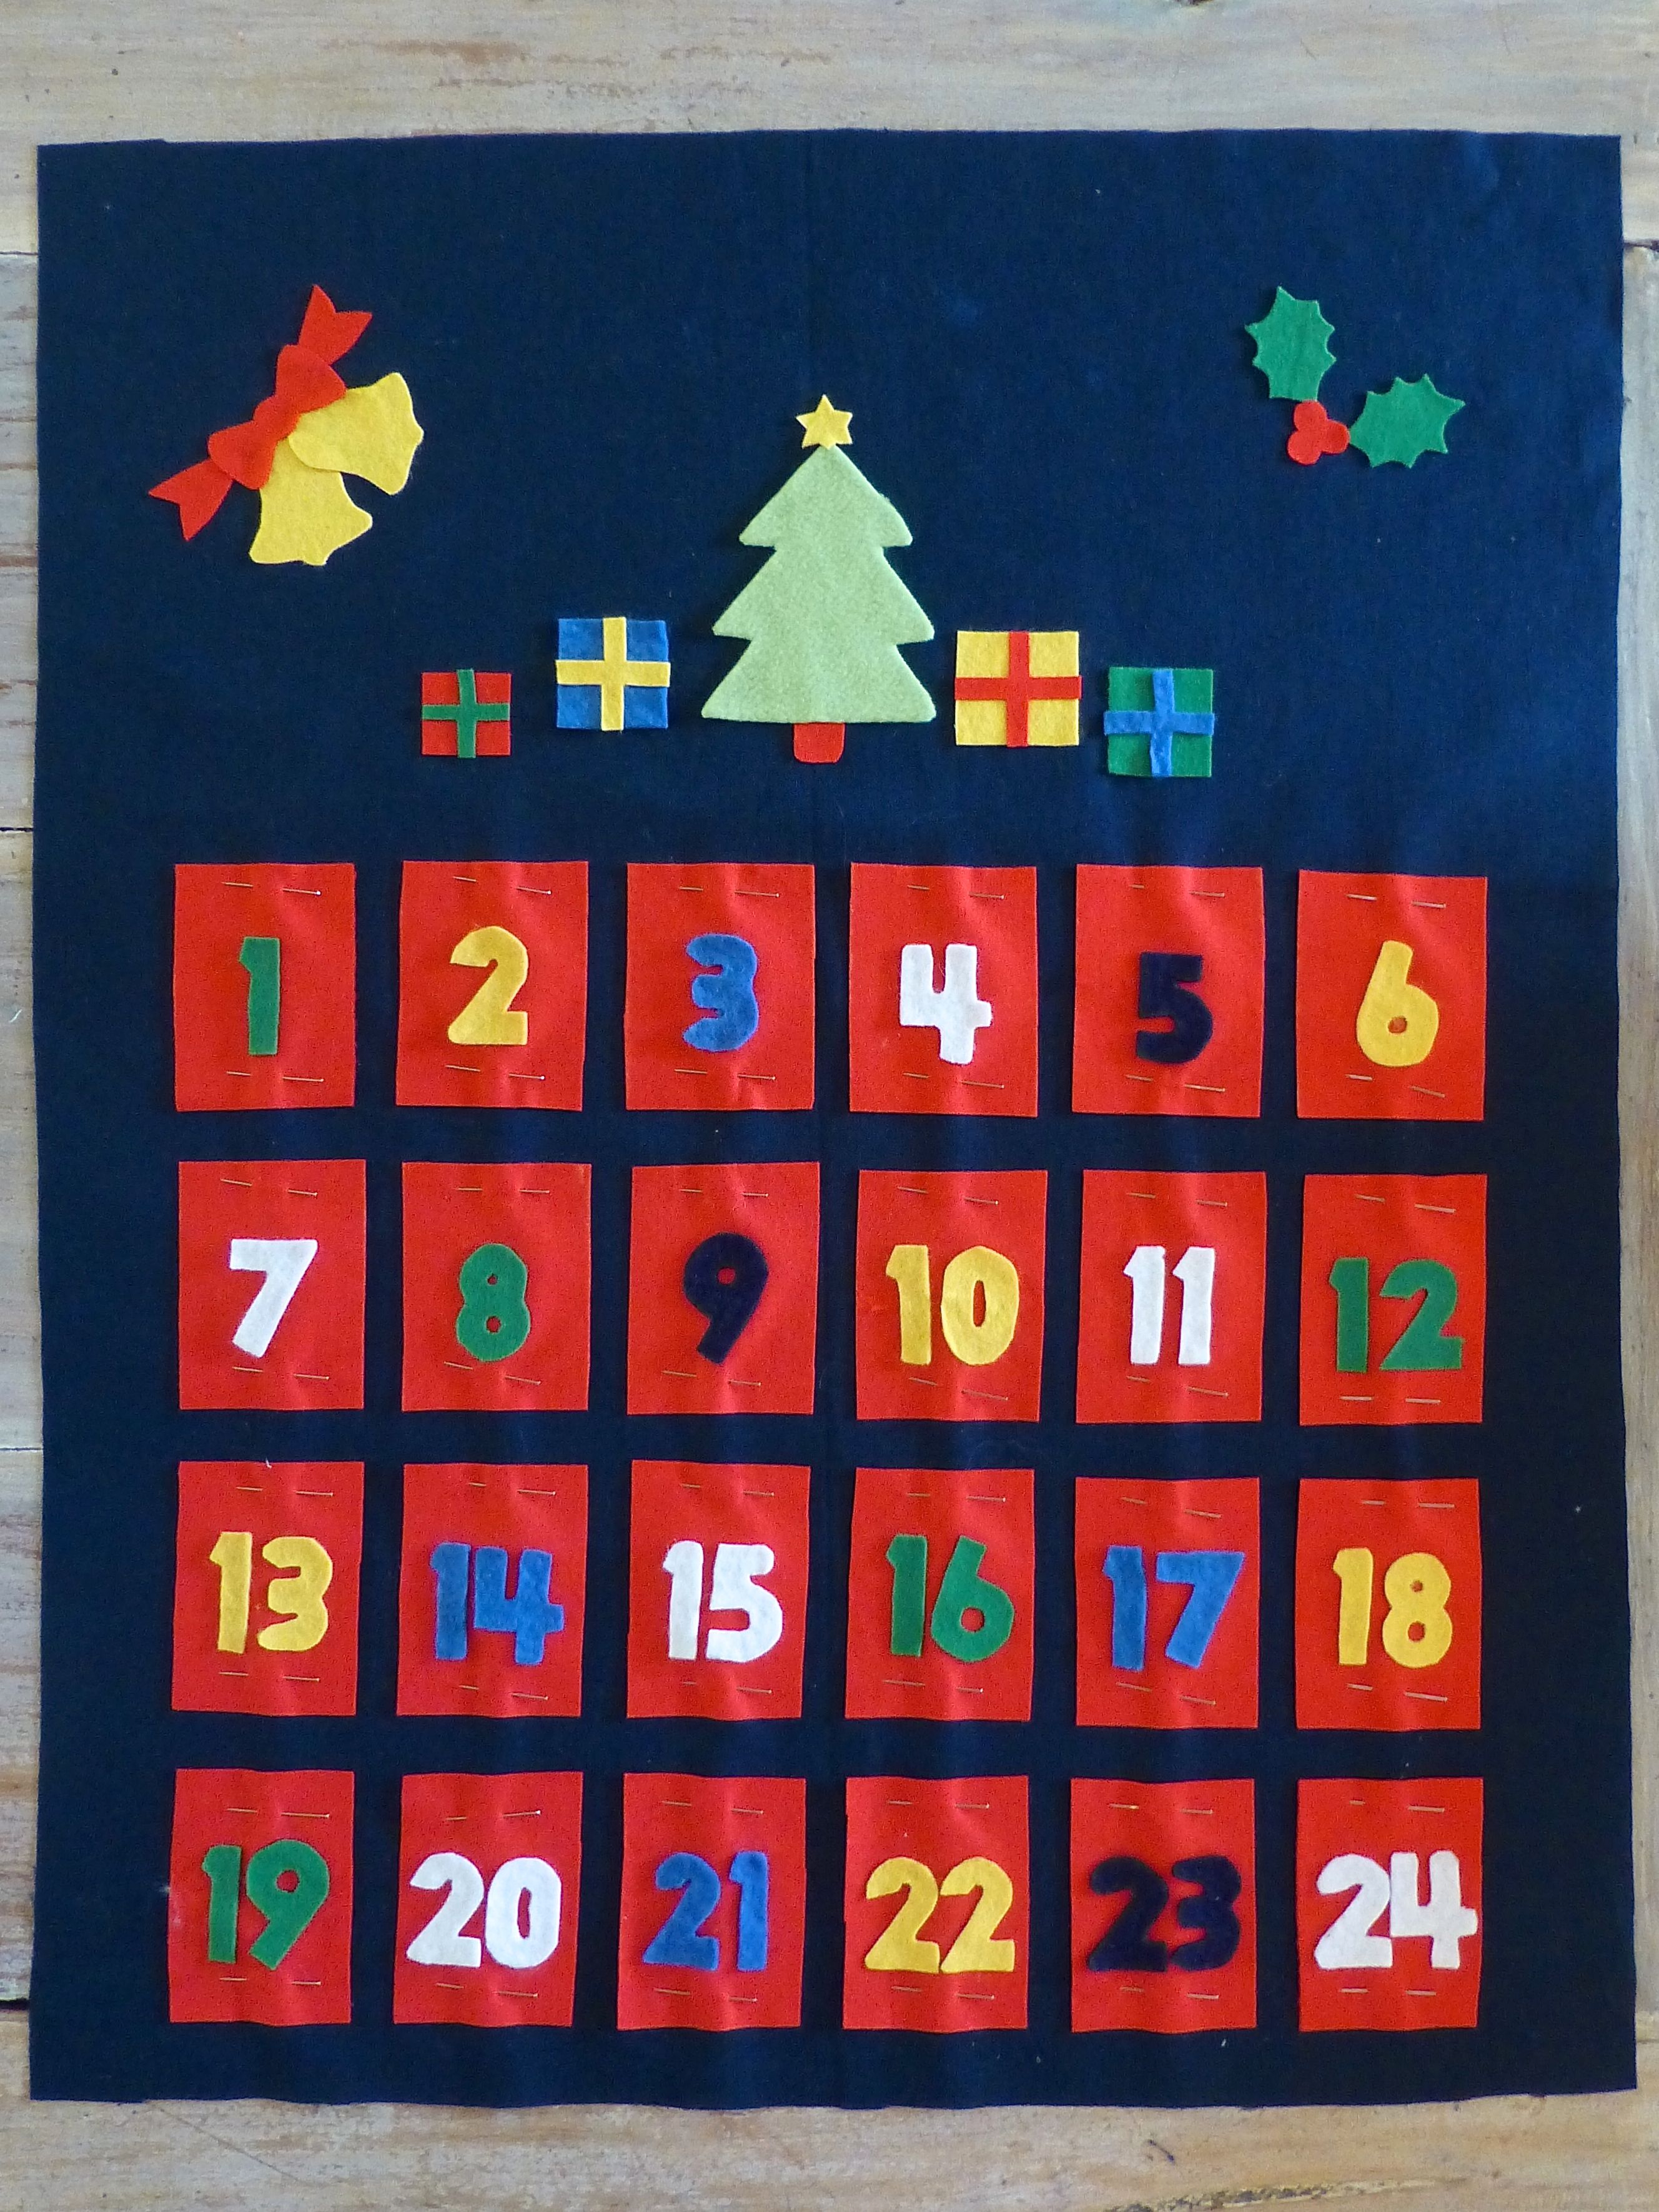
From red felt, cut twenty-four rectangles to form the pockets, each one 6cm x 8cm.

I used fridge magnets in the shape of numbers to trace around and cut numbers 1-24 out of different coloured felt. You could use stencils, download a suitable font off the internet or, if you’re particularly good at that sort of thing, draw them freehand.

Fabric glue or PVA is perfect for sticking the numerals onto each of the felt pockets.


Bright colours in a random order make this visually more appealing for children but you could use a more sophisticated colour scheme for adults.

Time to decide what to put at the top of the calendar!
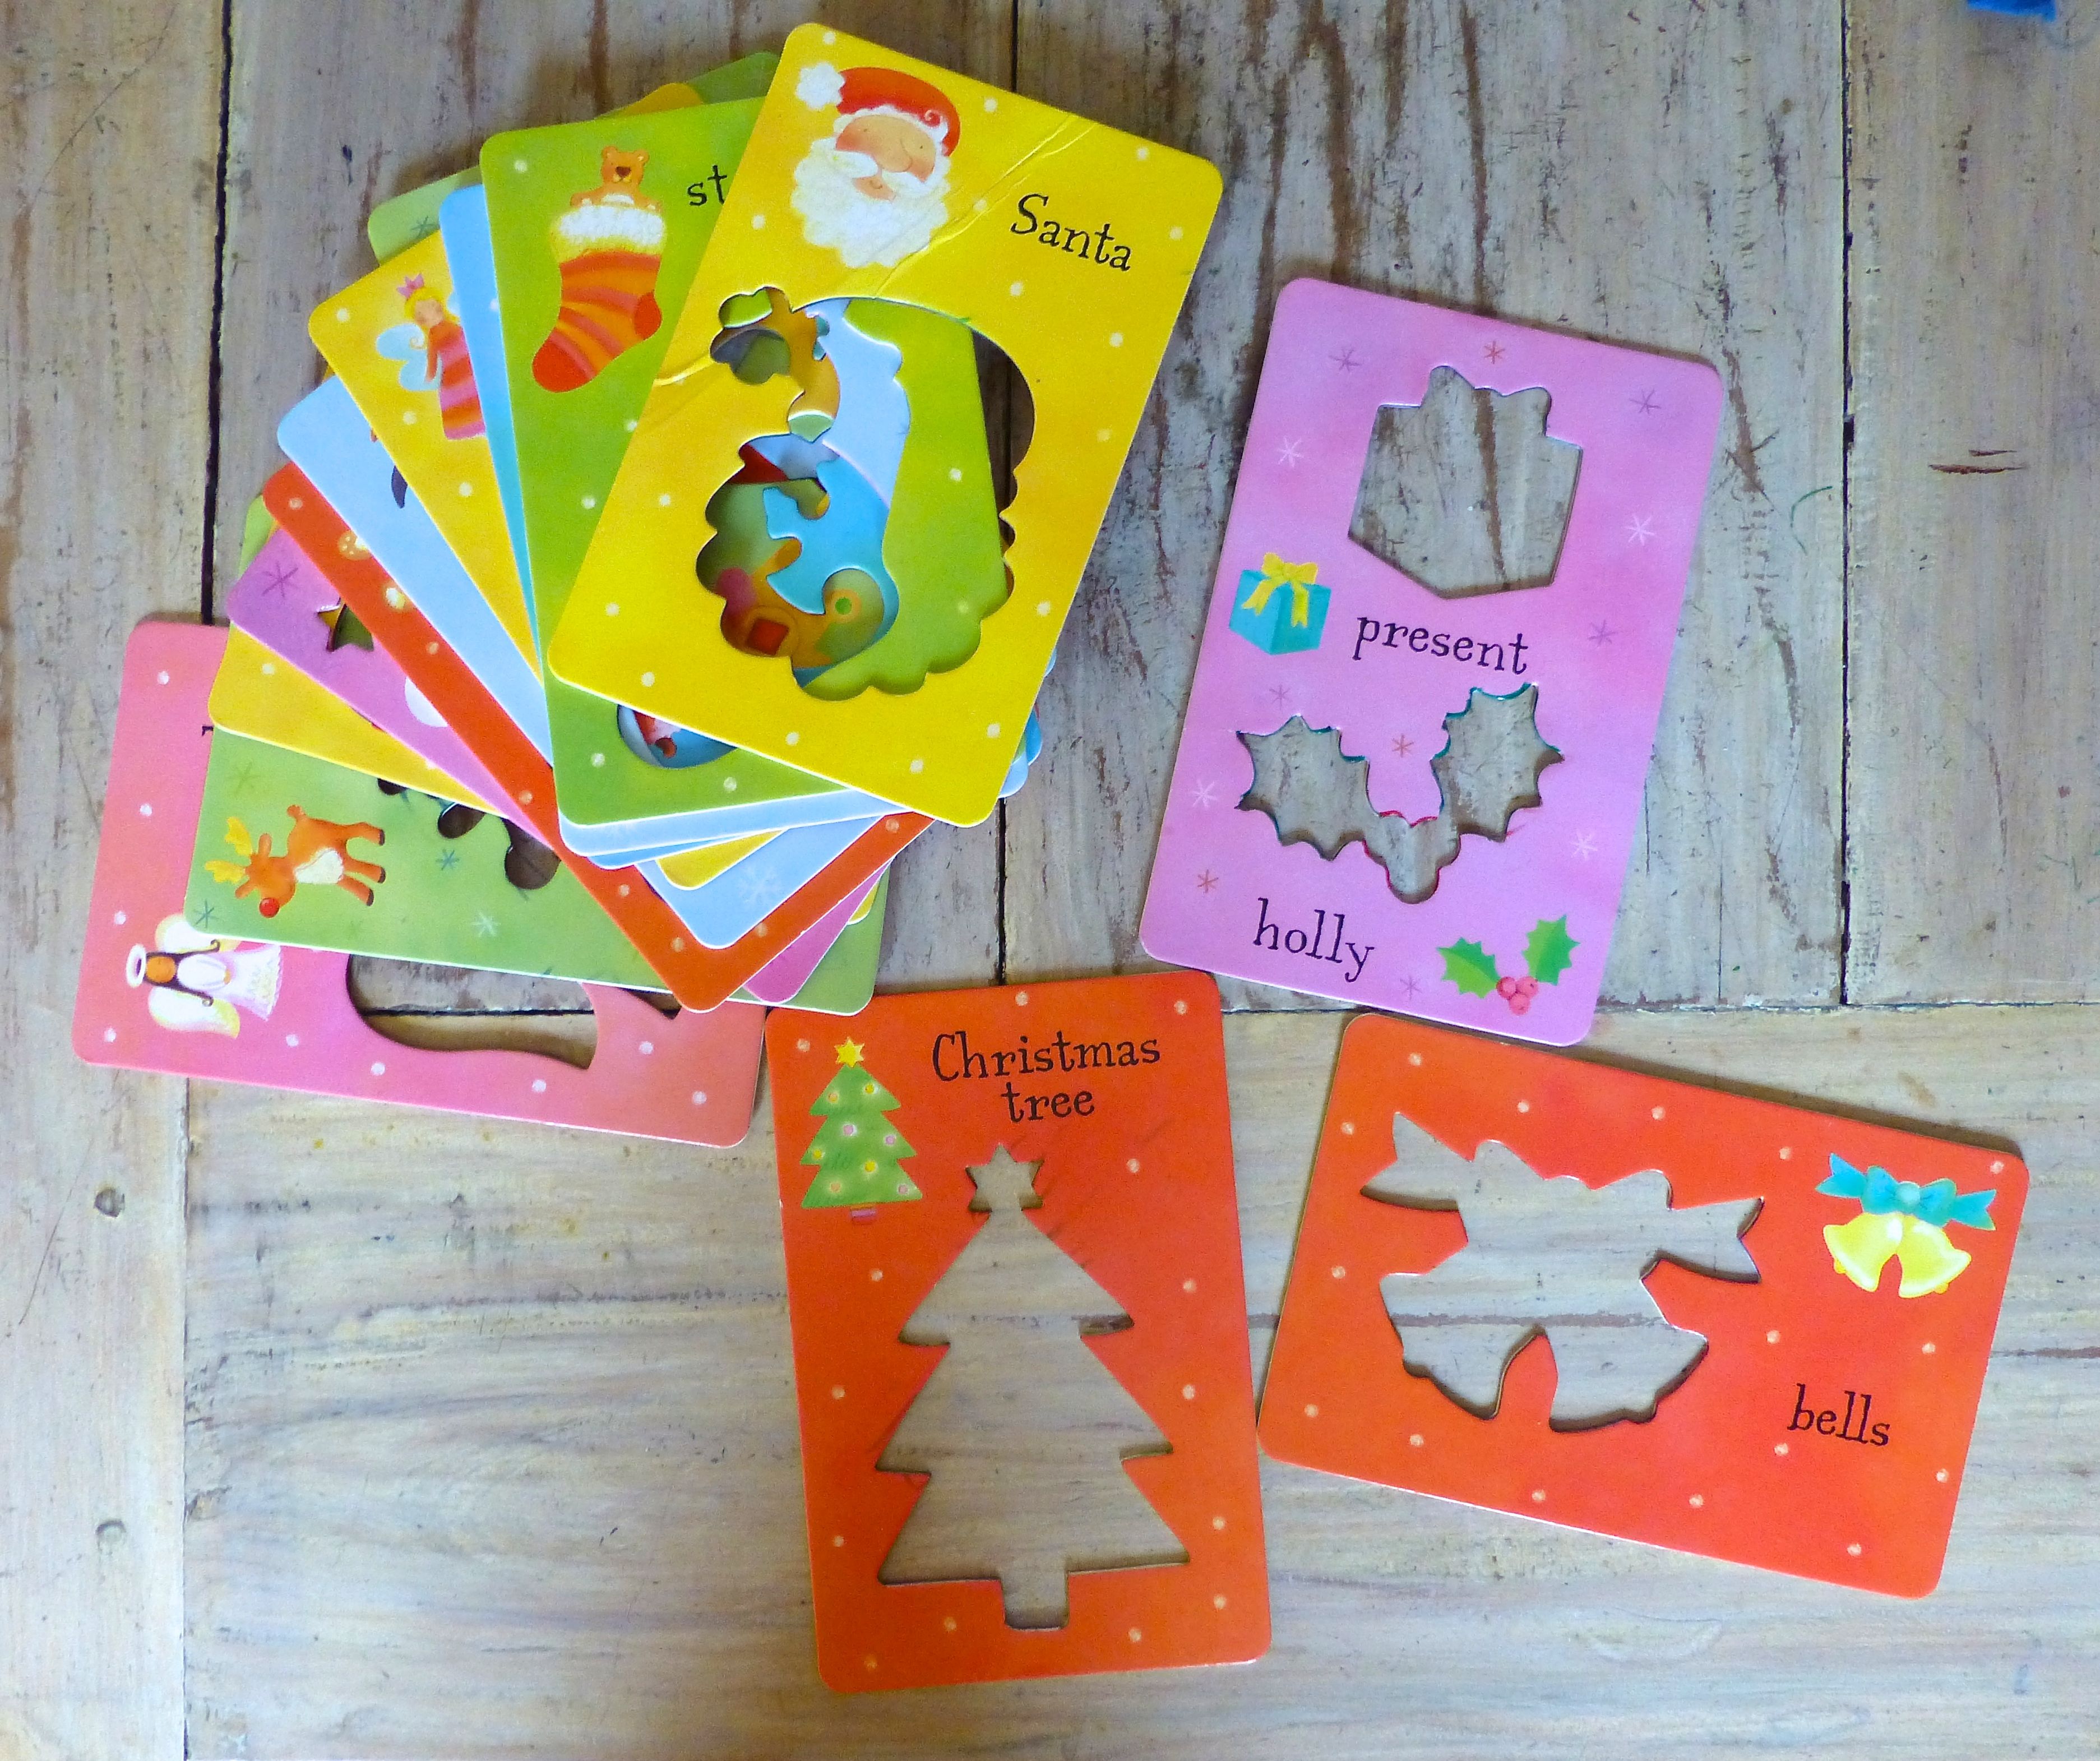
We have a box of Christmas stencils by Usborne available at Amazon for £5.99 or The Works for just £2.99!

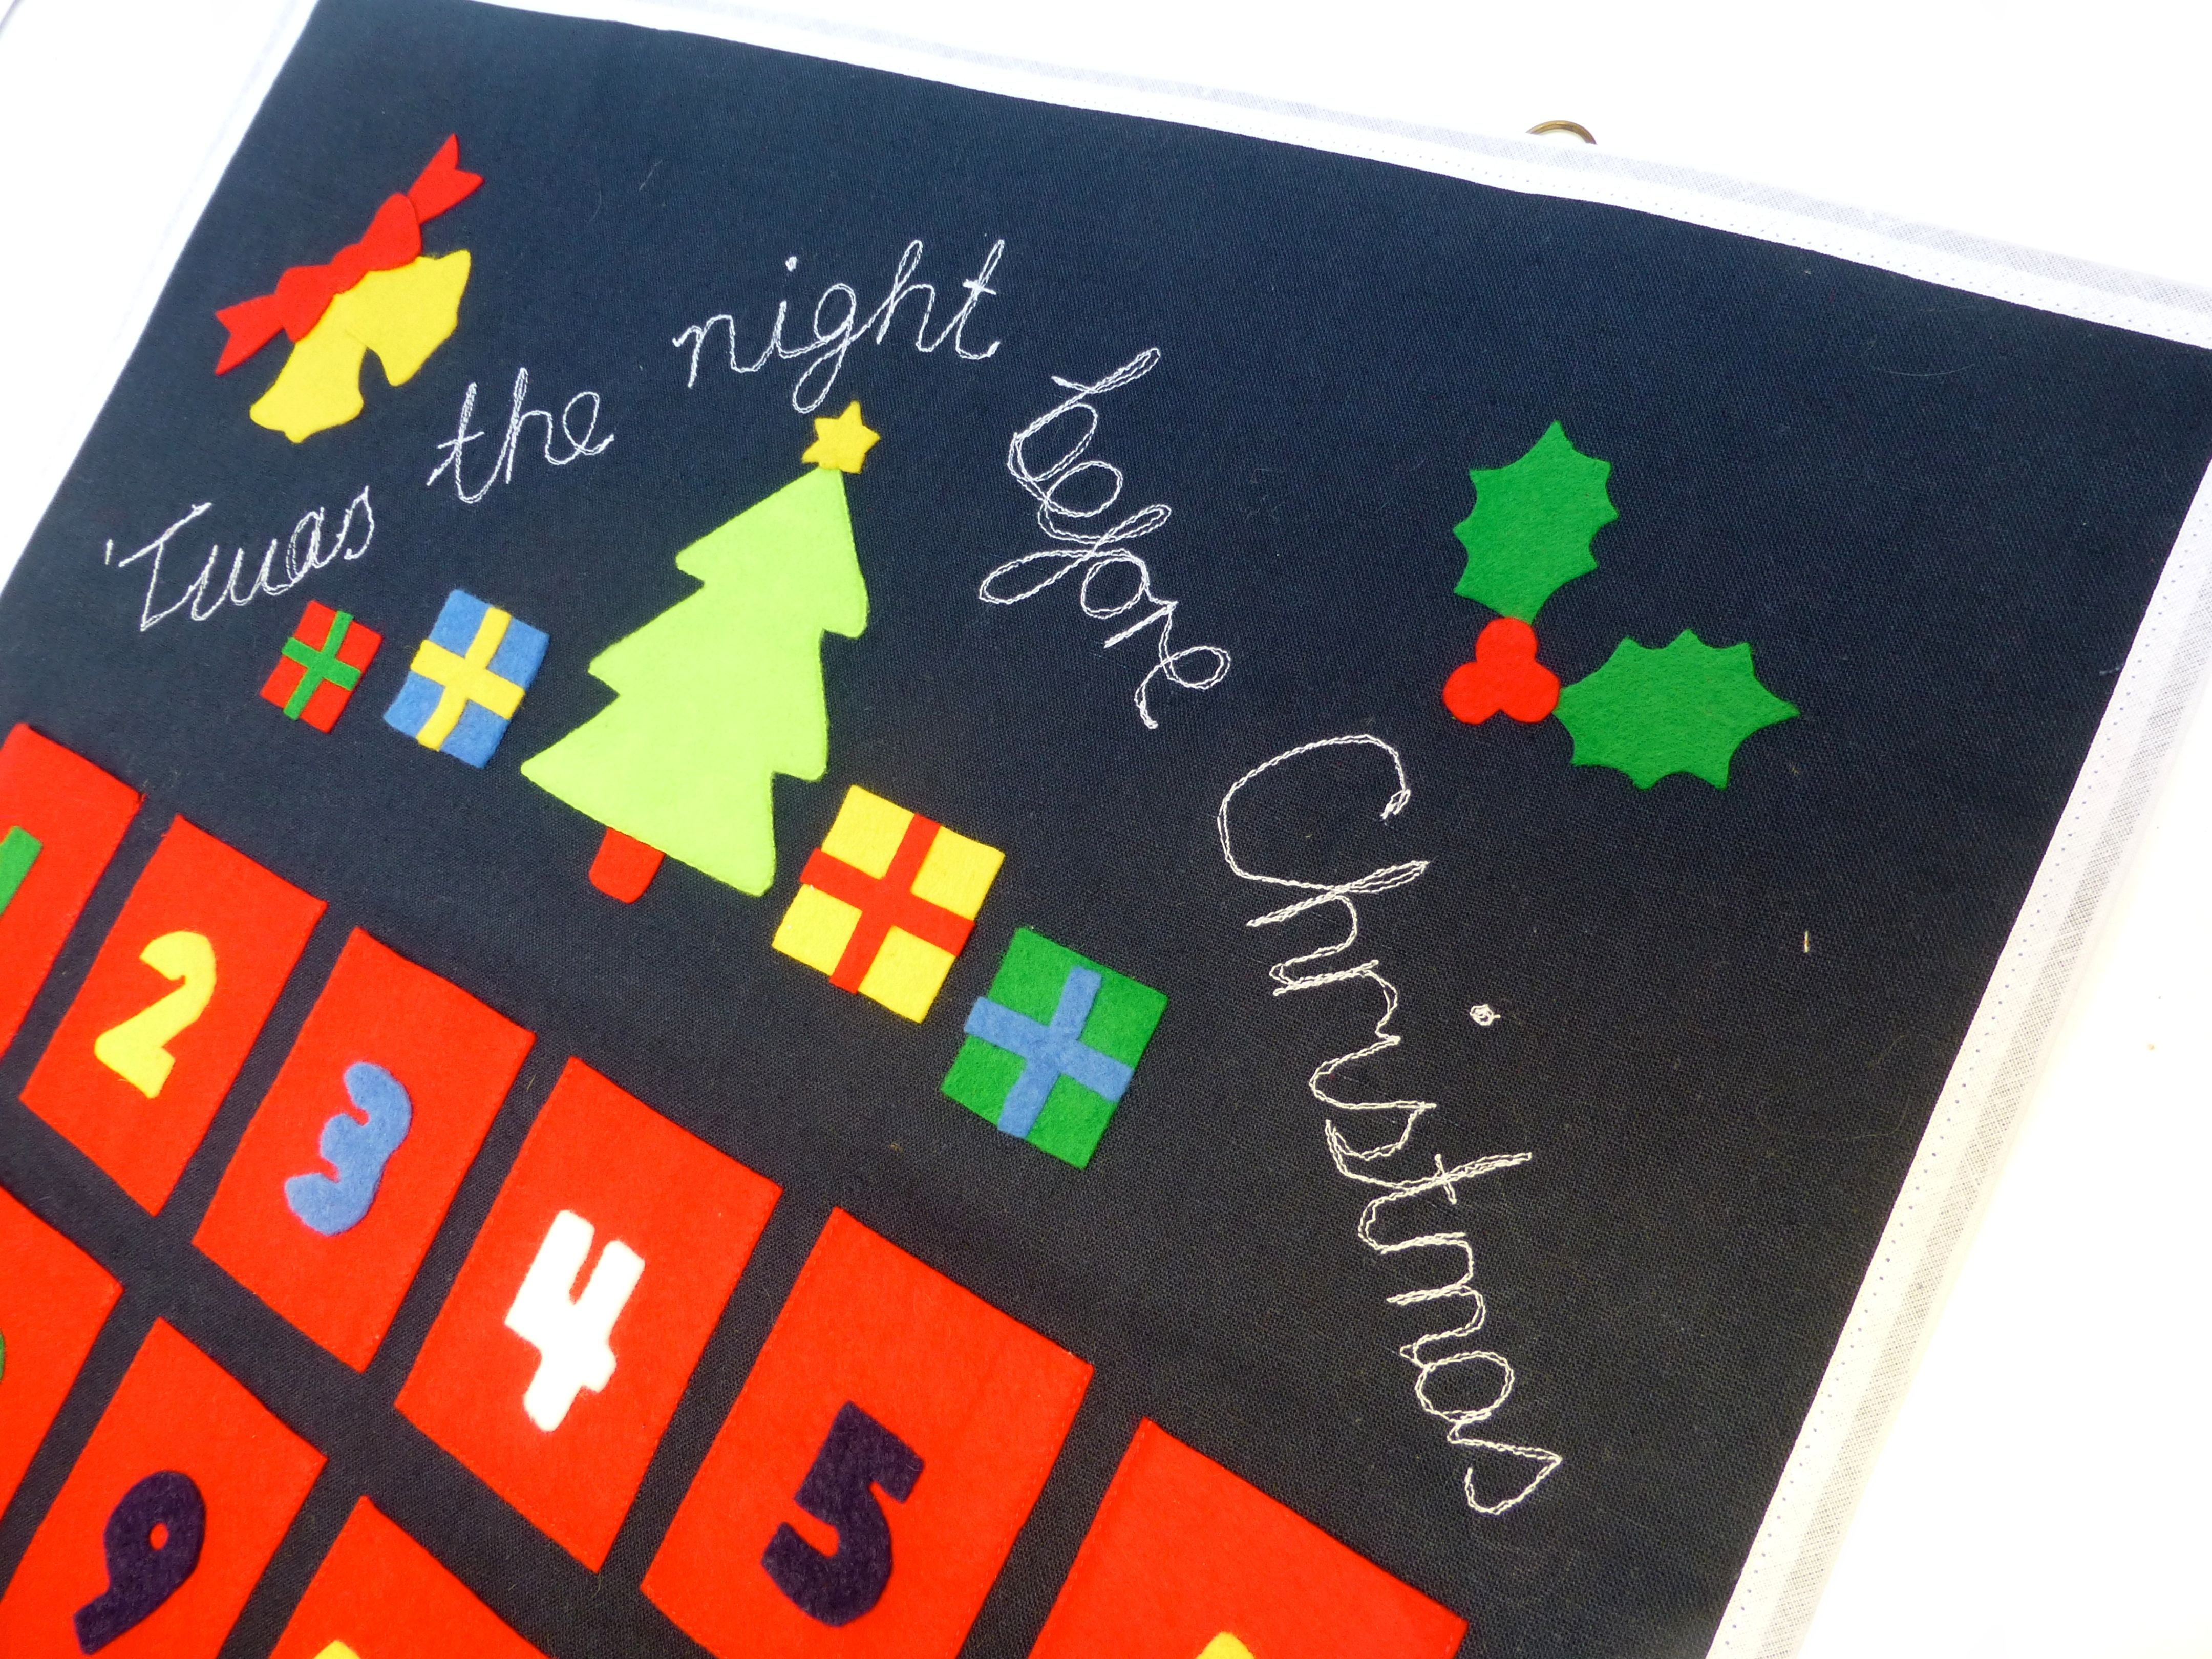
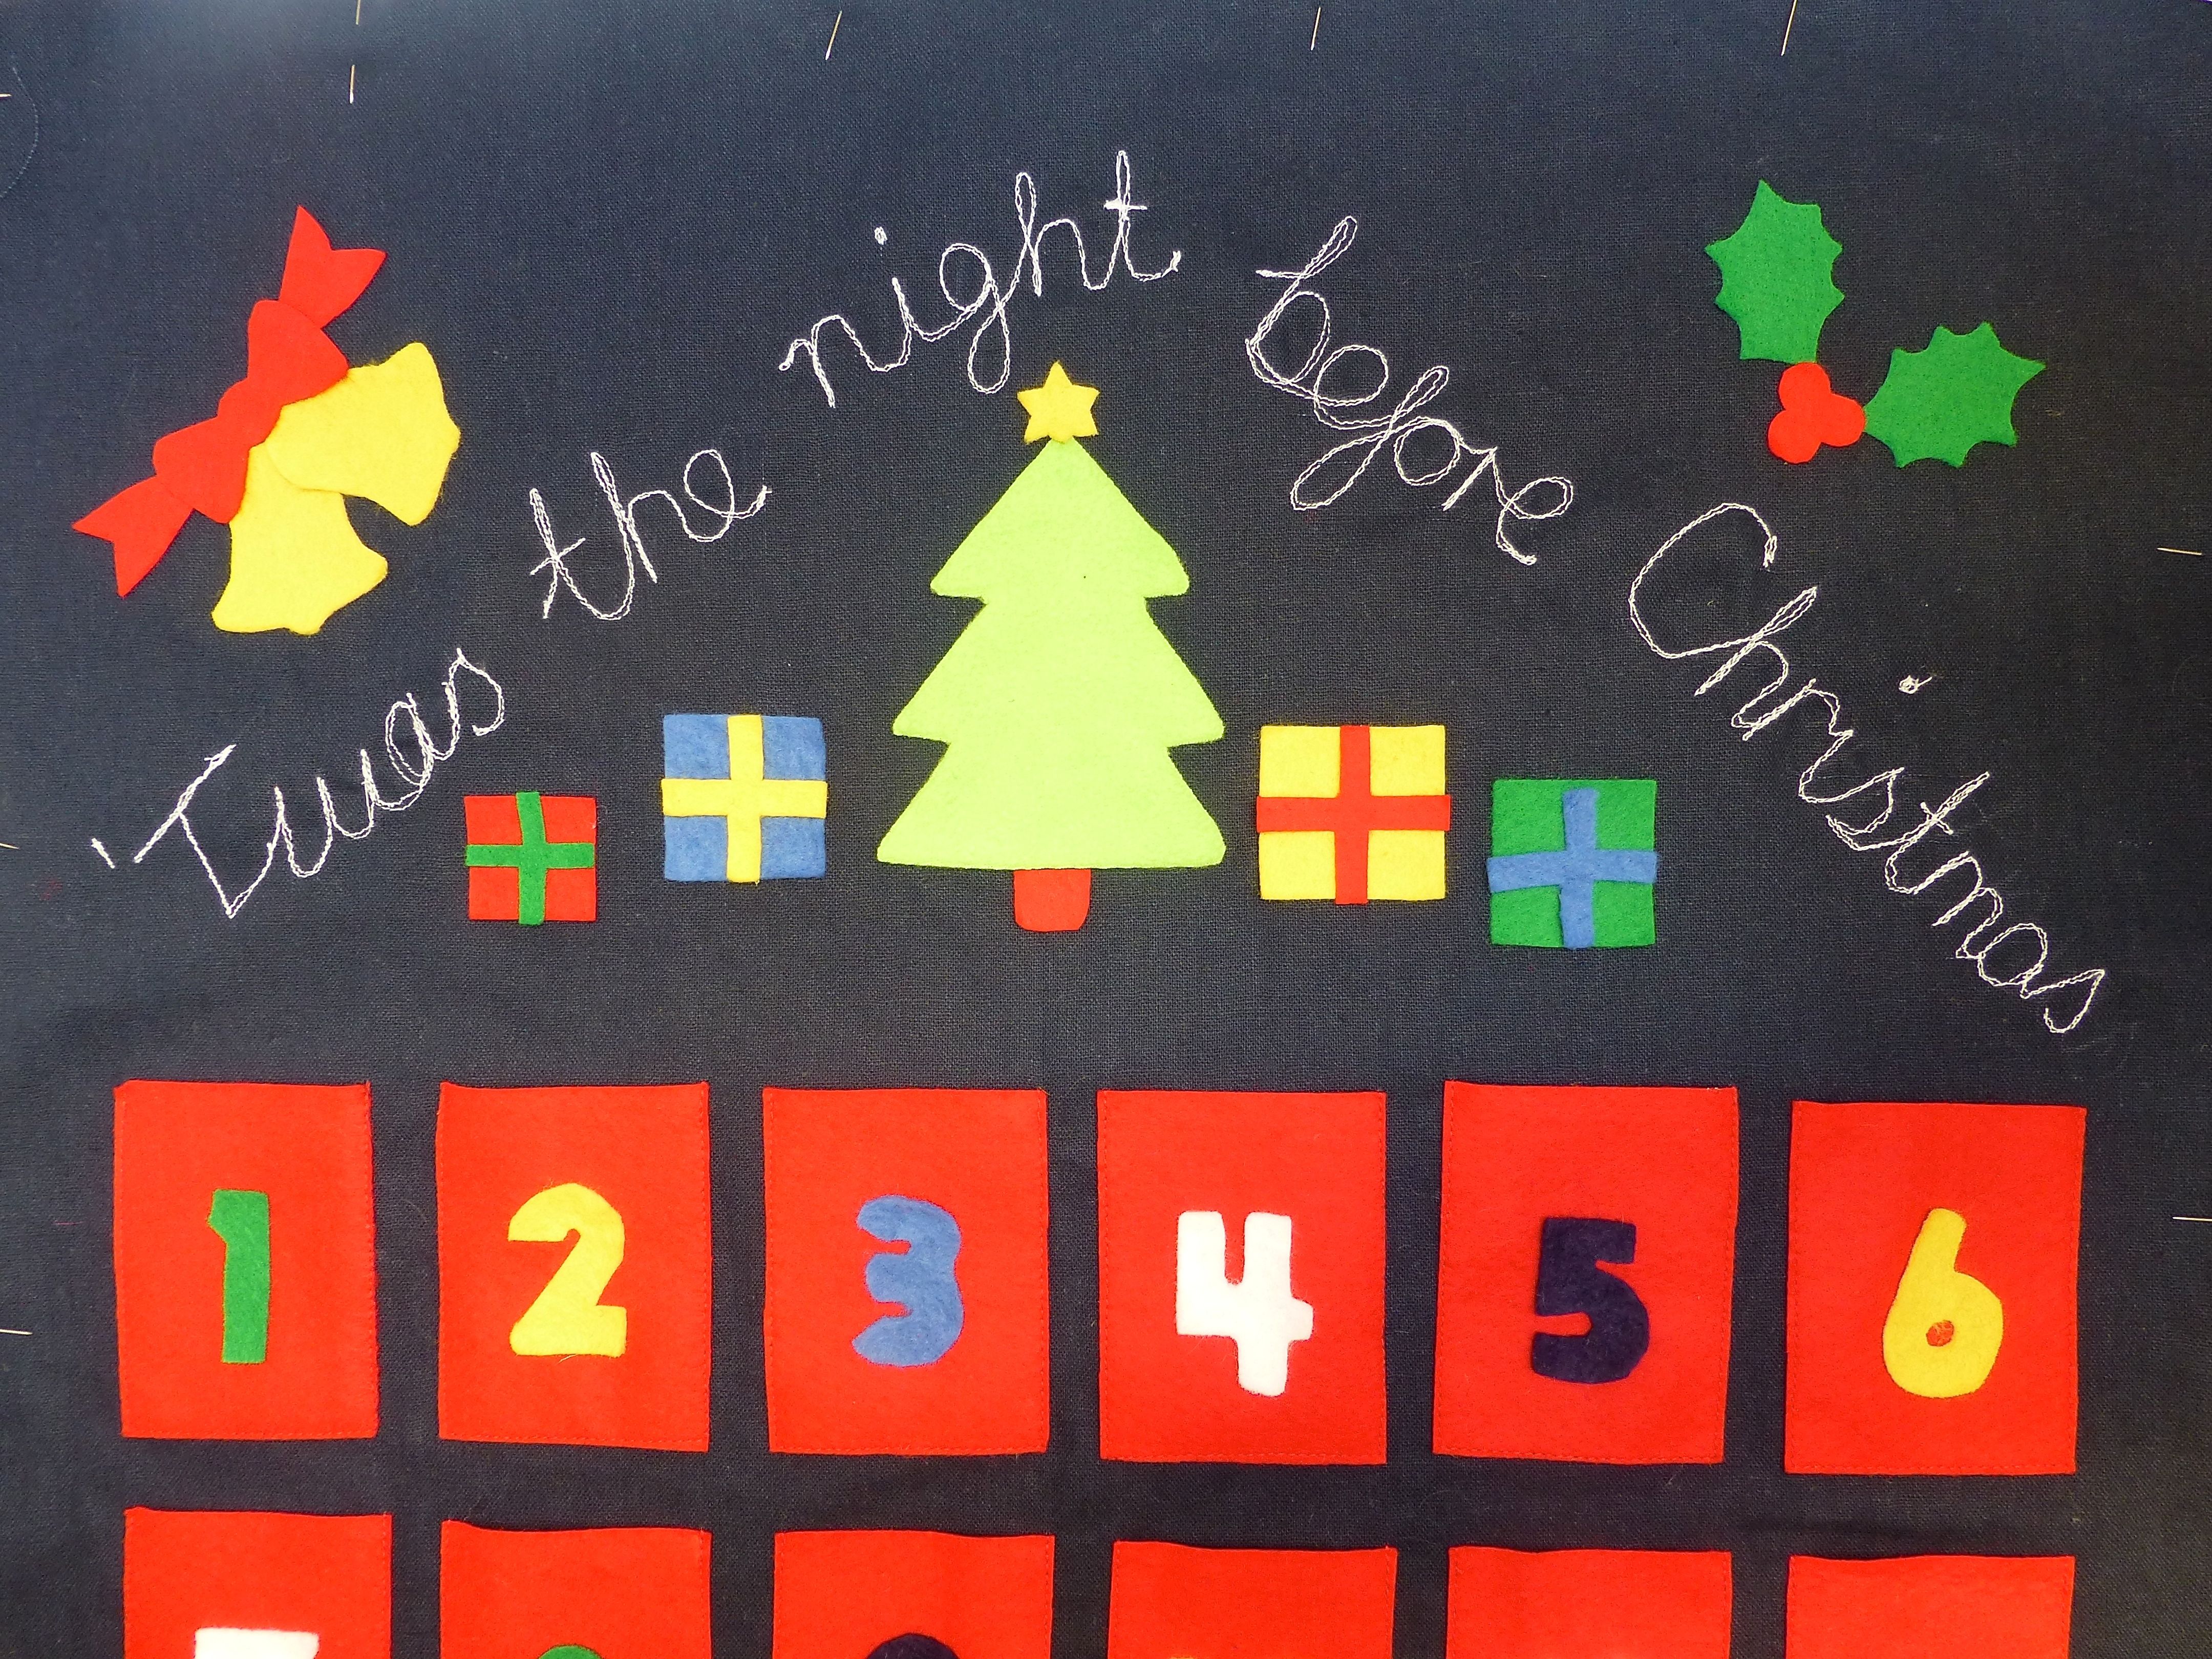
They’ve been invaluable over the years for sooooo many different projects and this time I picked out the Holly, Bells and Christmas Tree to use at the top.

To make the presents I simply cut some squares out of felt and added a square shaped cross to represent the ribbon.

All were then glued in a pleasing arrangement leaving a gap about 5cm from all edges.

The next part was quite fiddly in that you have to place the felt pockets onto the front of the calendar making sure they are evenly spaced. When you’re happy that it looks right, pin each pocket in place and sew around three edges leaving the top edge open.


I thought it needed a little something extra so decided to add some free machine embroidery using that classic first line “‘Twas the night before Christmas….”
Because it was quite a long phrase to squeeze in, I used dressmakers chalk to pencil the words in as a guideline. I did NOT fancy unpicking all those stitches if I ran out of space before getting to the end of the fabric! The chalk is so soft it just rubs away with your fingers afterwards leaving no trace.


Pin the back to the front, wrong sides together and stitch all the way around.
If your fabric is on the flimsy side just use some wadding or interfacing in between to make it less floppy.
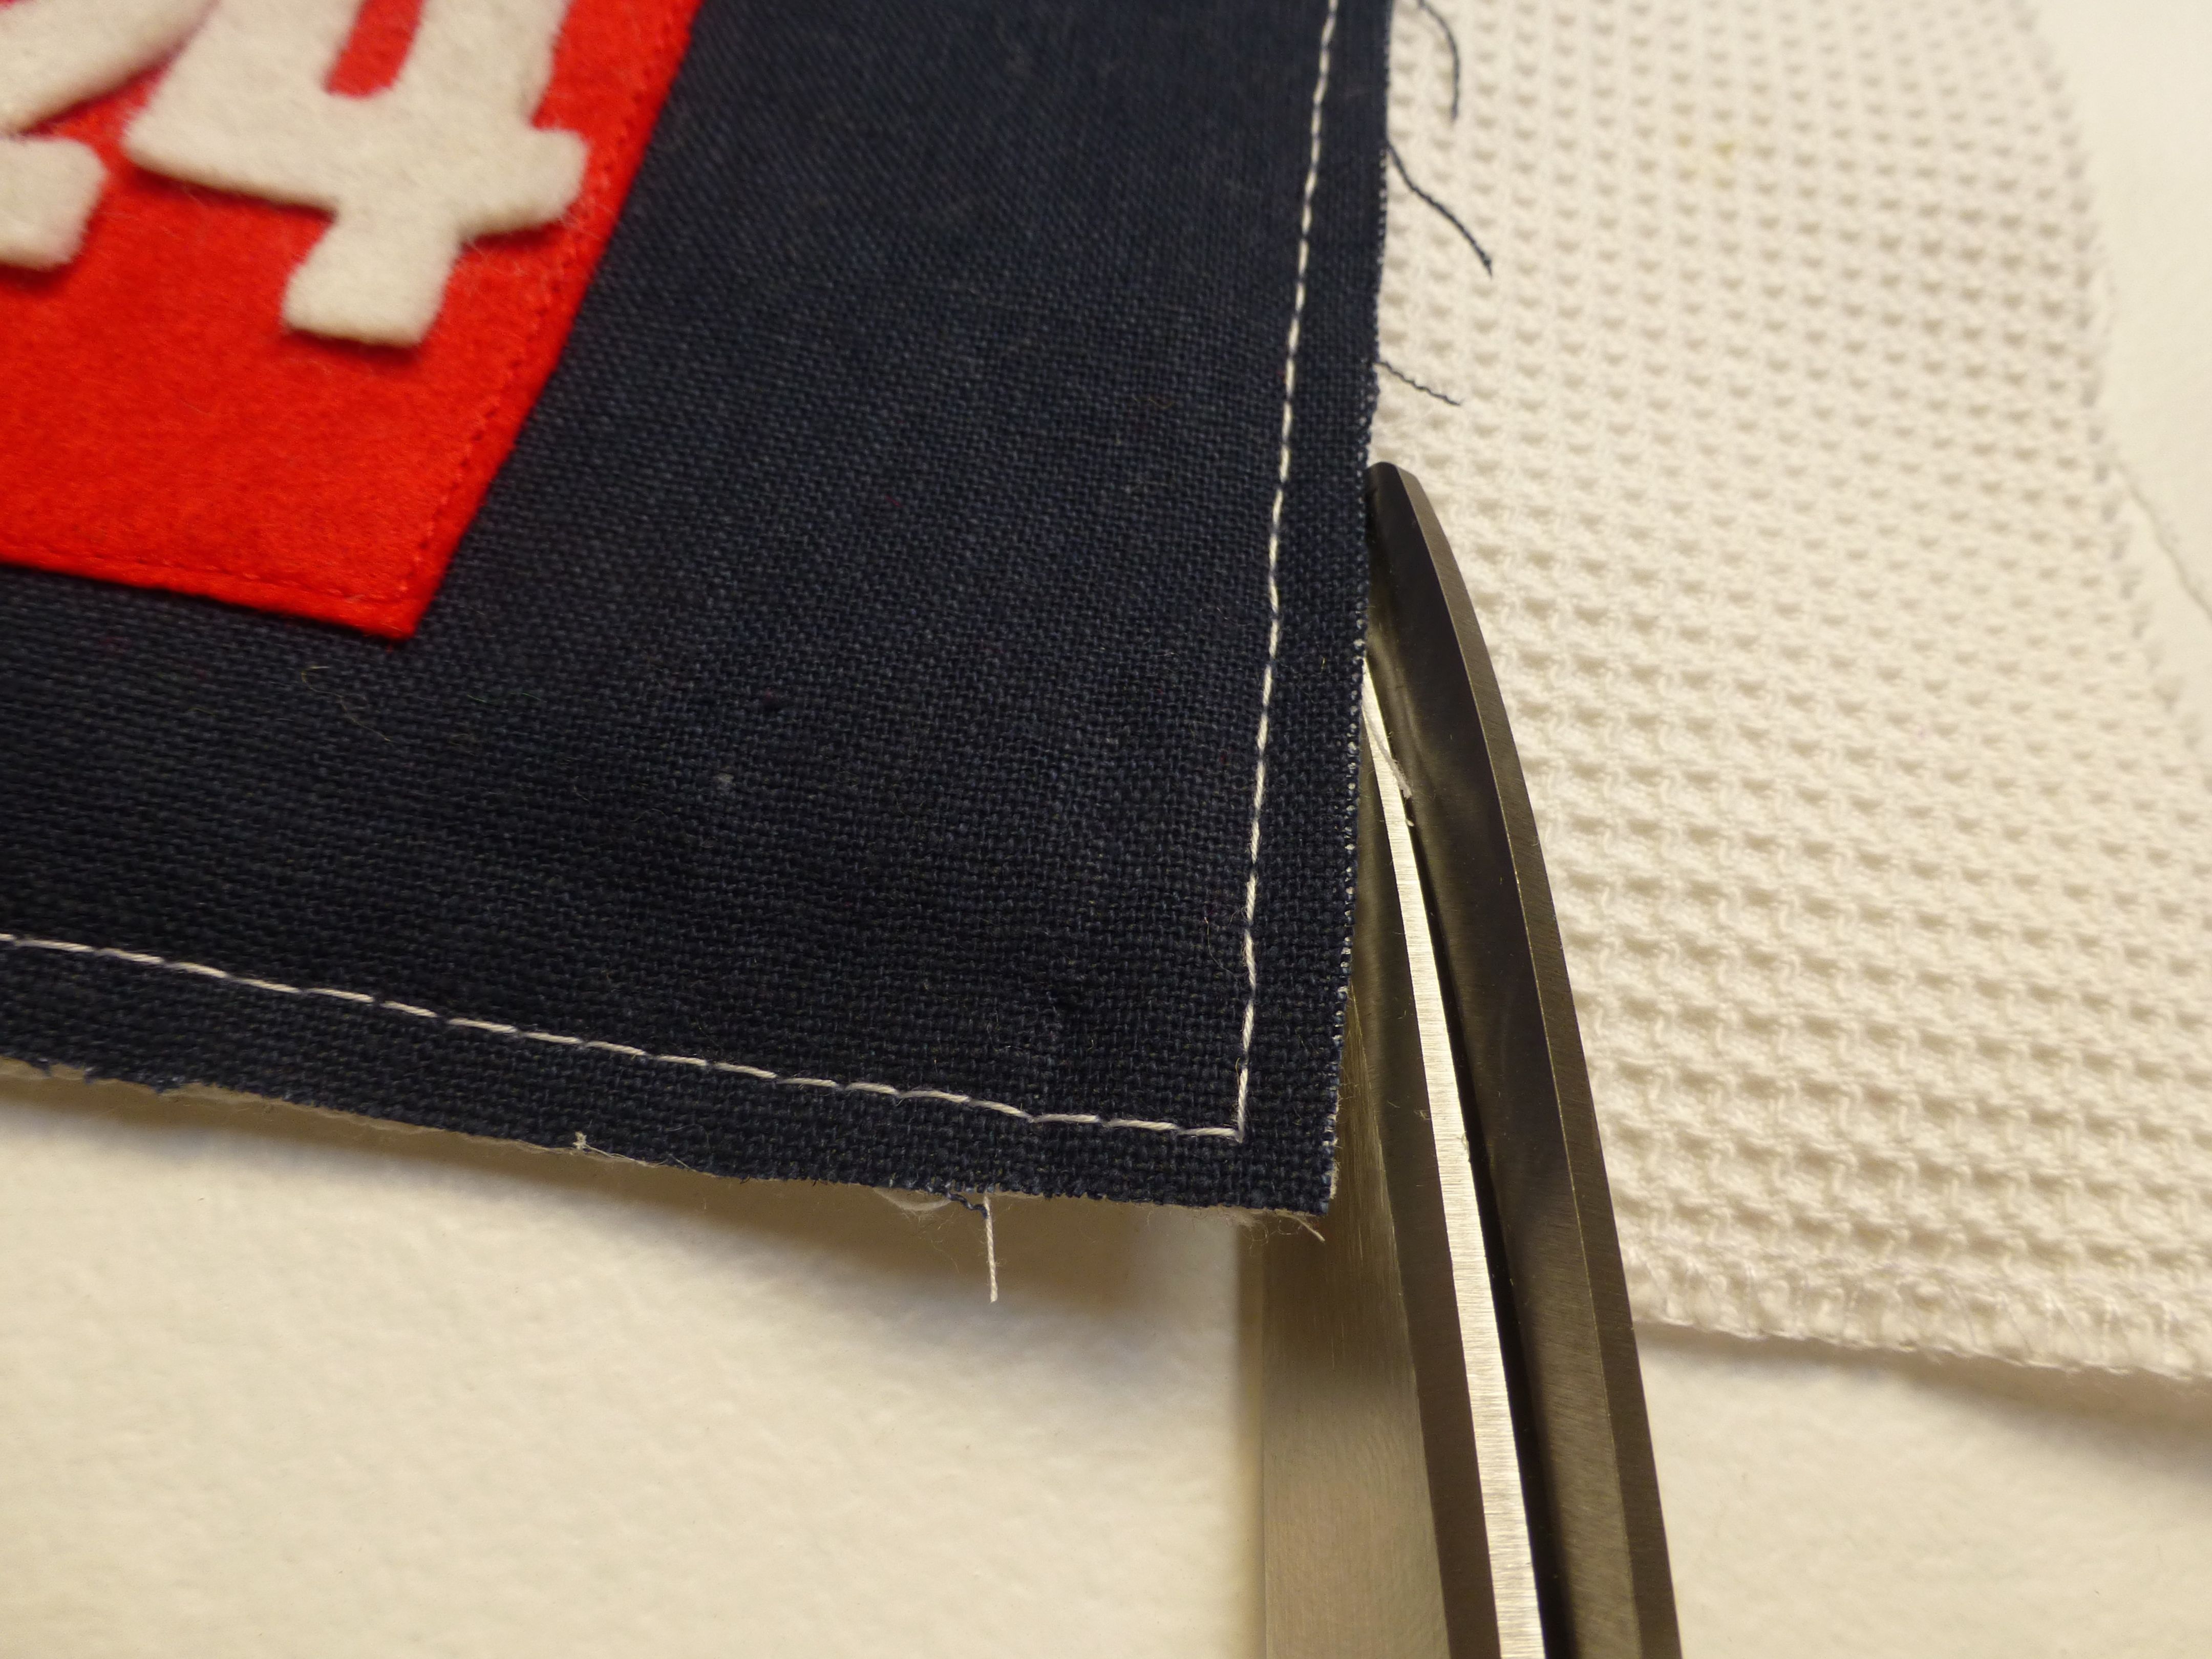
Trim the edges to an even width.

Fold about 3m of bias binding in half and iron the crease well. Encase the raw edges within and stitch close to the edge as shown below.

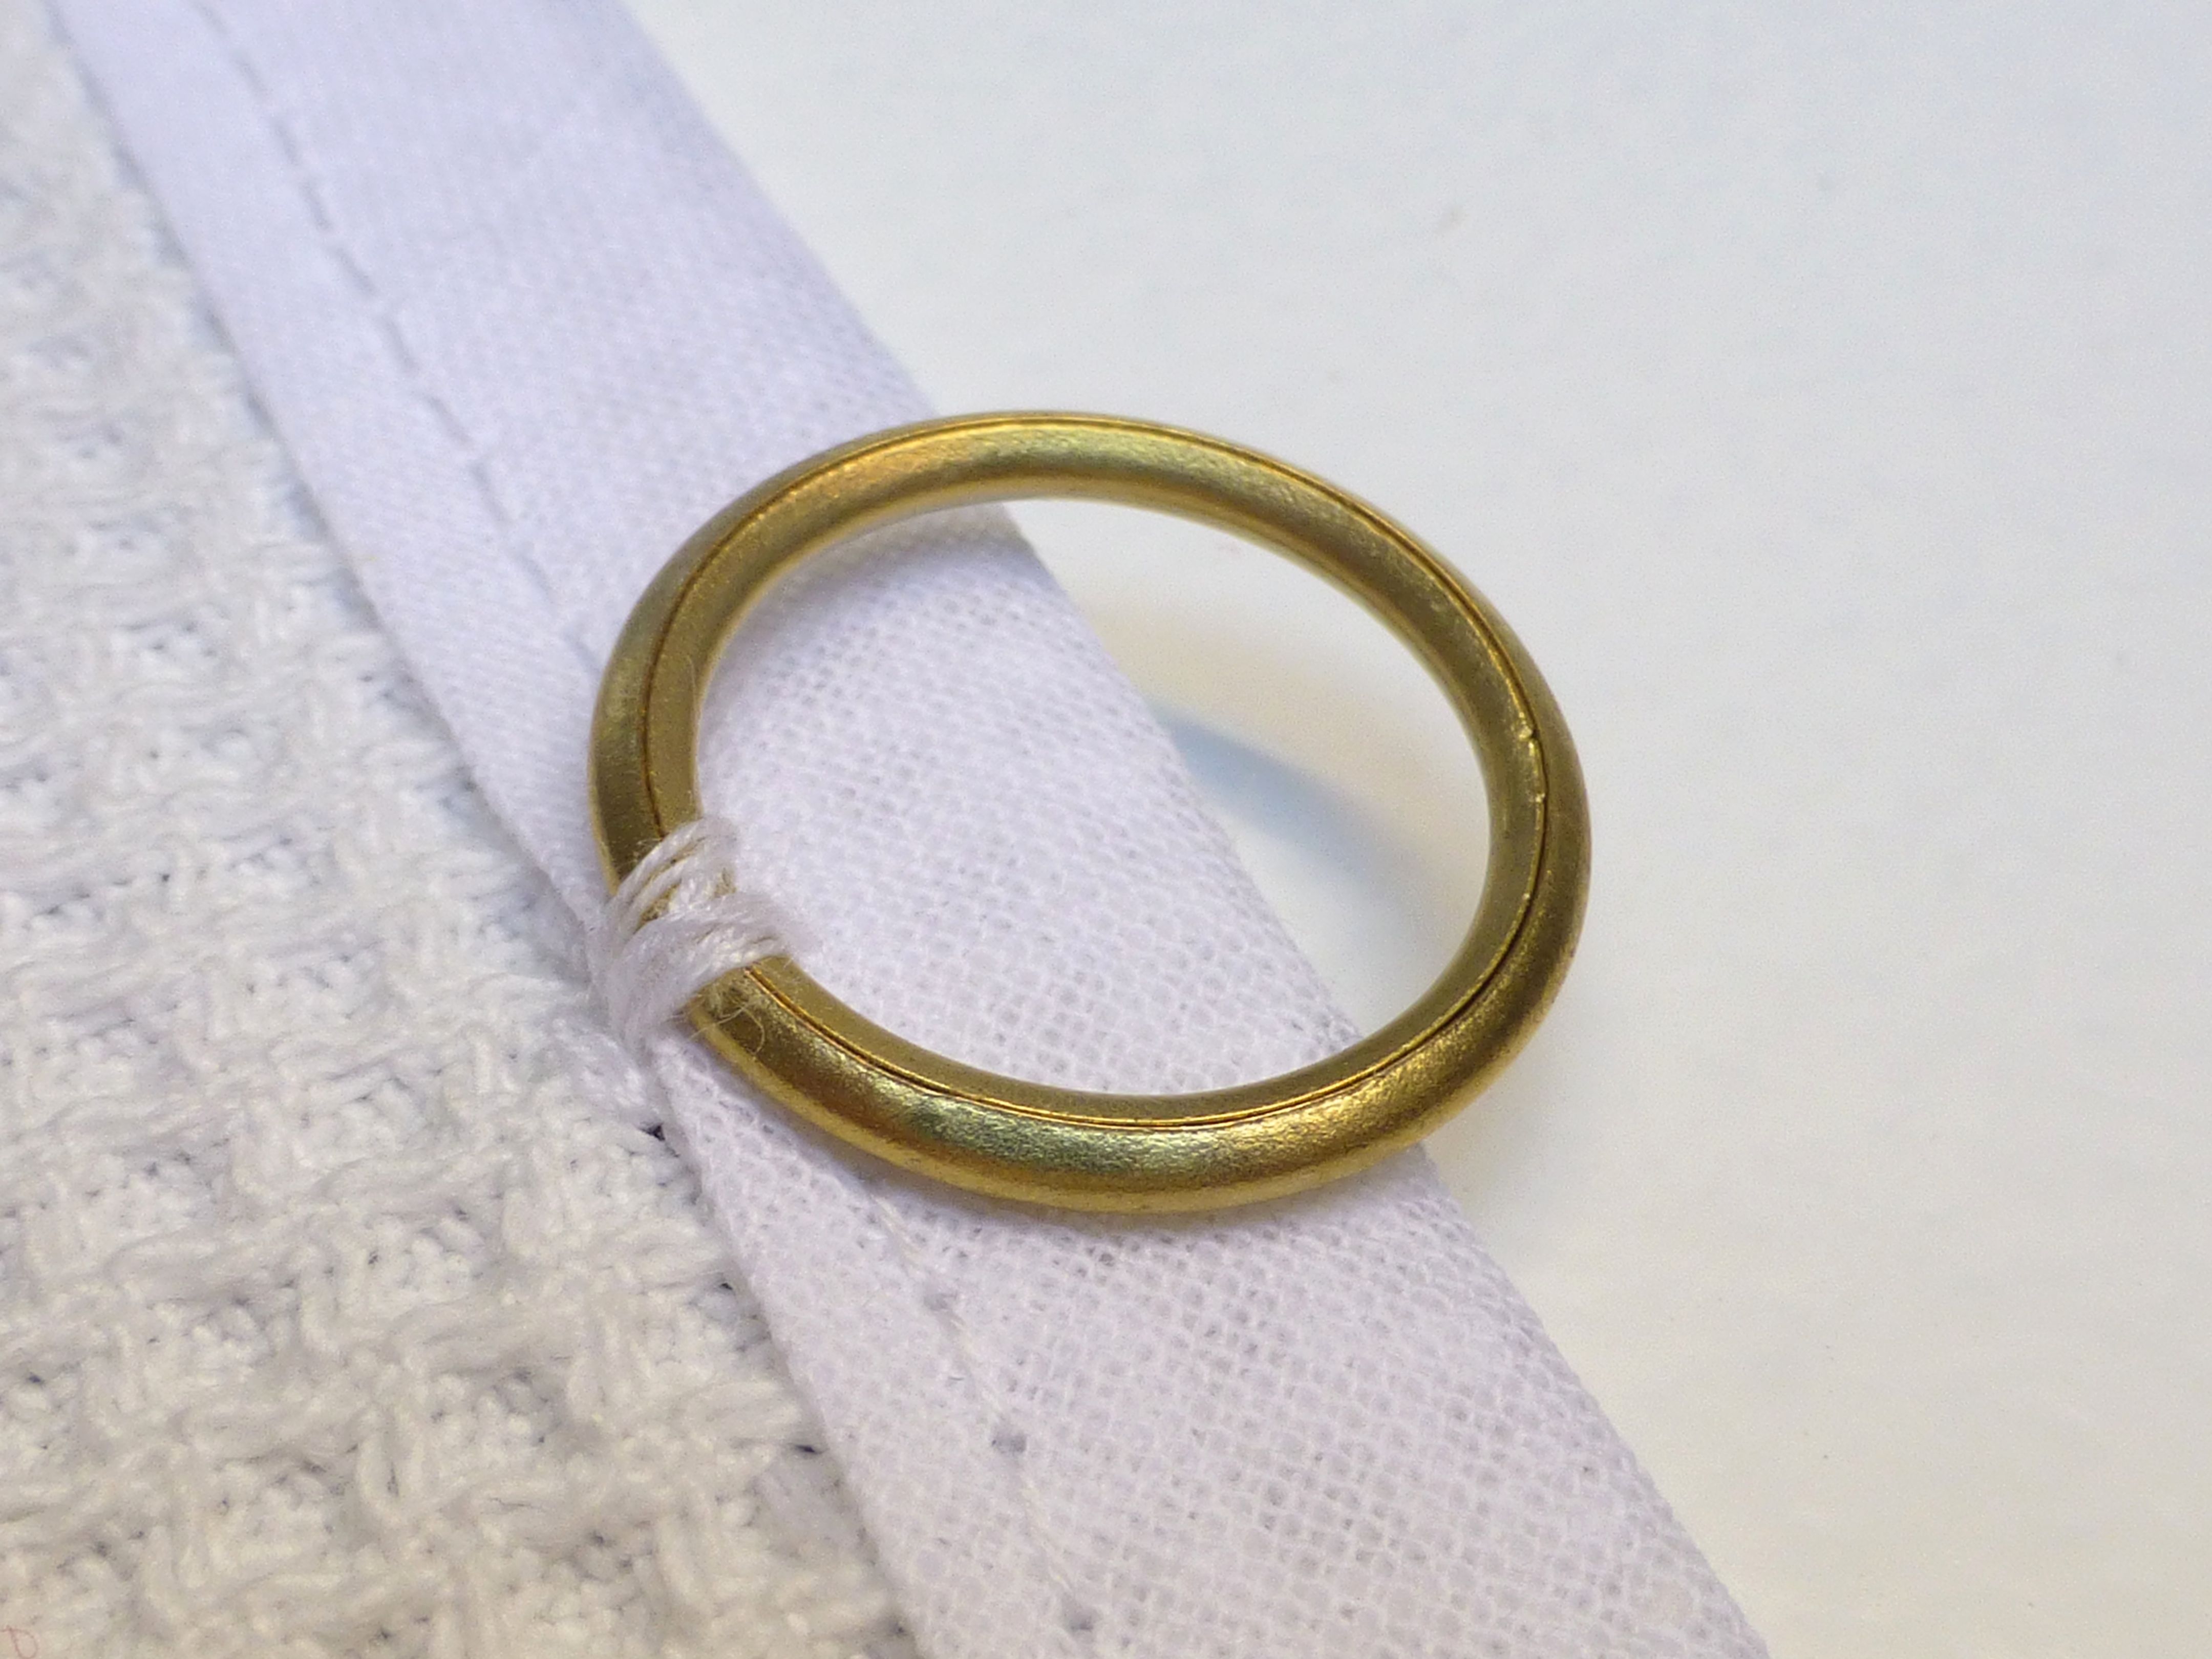
Attach two brass curtain rings to the back of the calendar, about 15cm in from each side.

I used picture hanging wire to hang from our picture rail.

If you find that it flops a bit, you could add a casing to the top on the reverse with a length of dowelling inserted.
Or you could cheat like I did and use double sided sticky tape to fix a plastic 12″ ruler to the back. Well, no one can see it, can they?
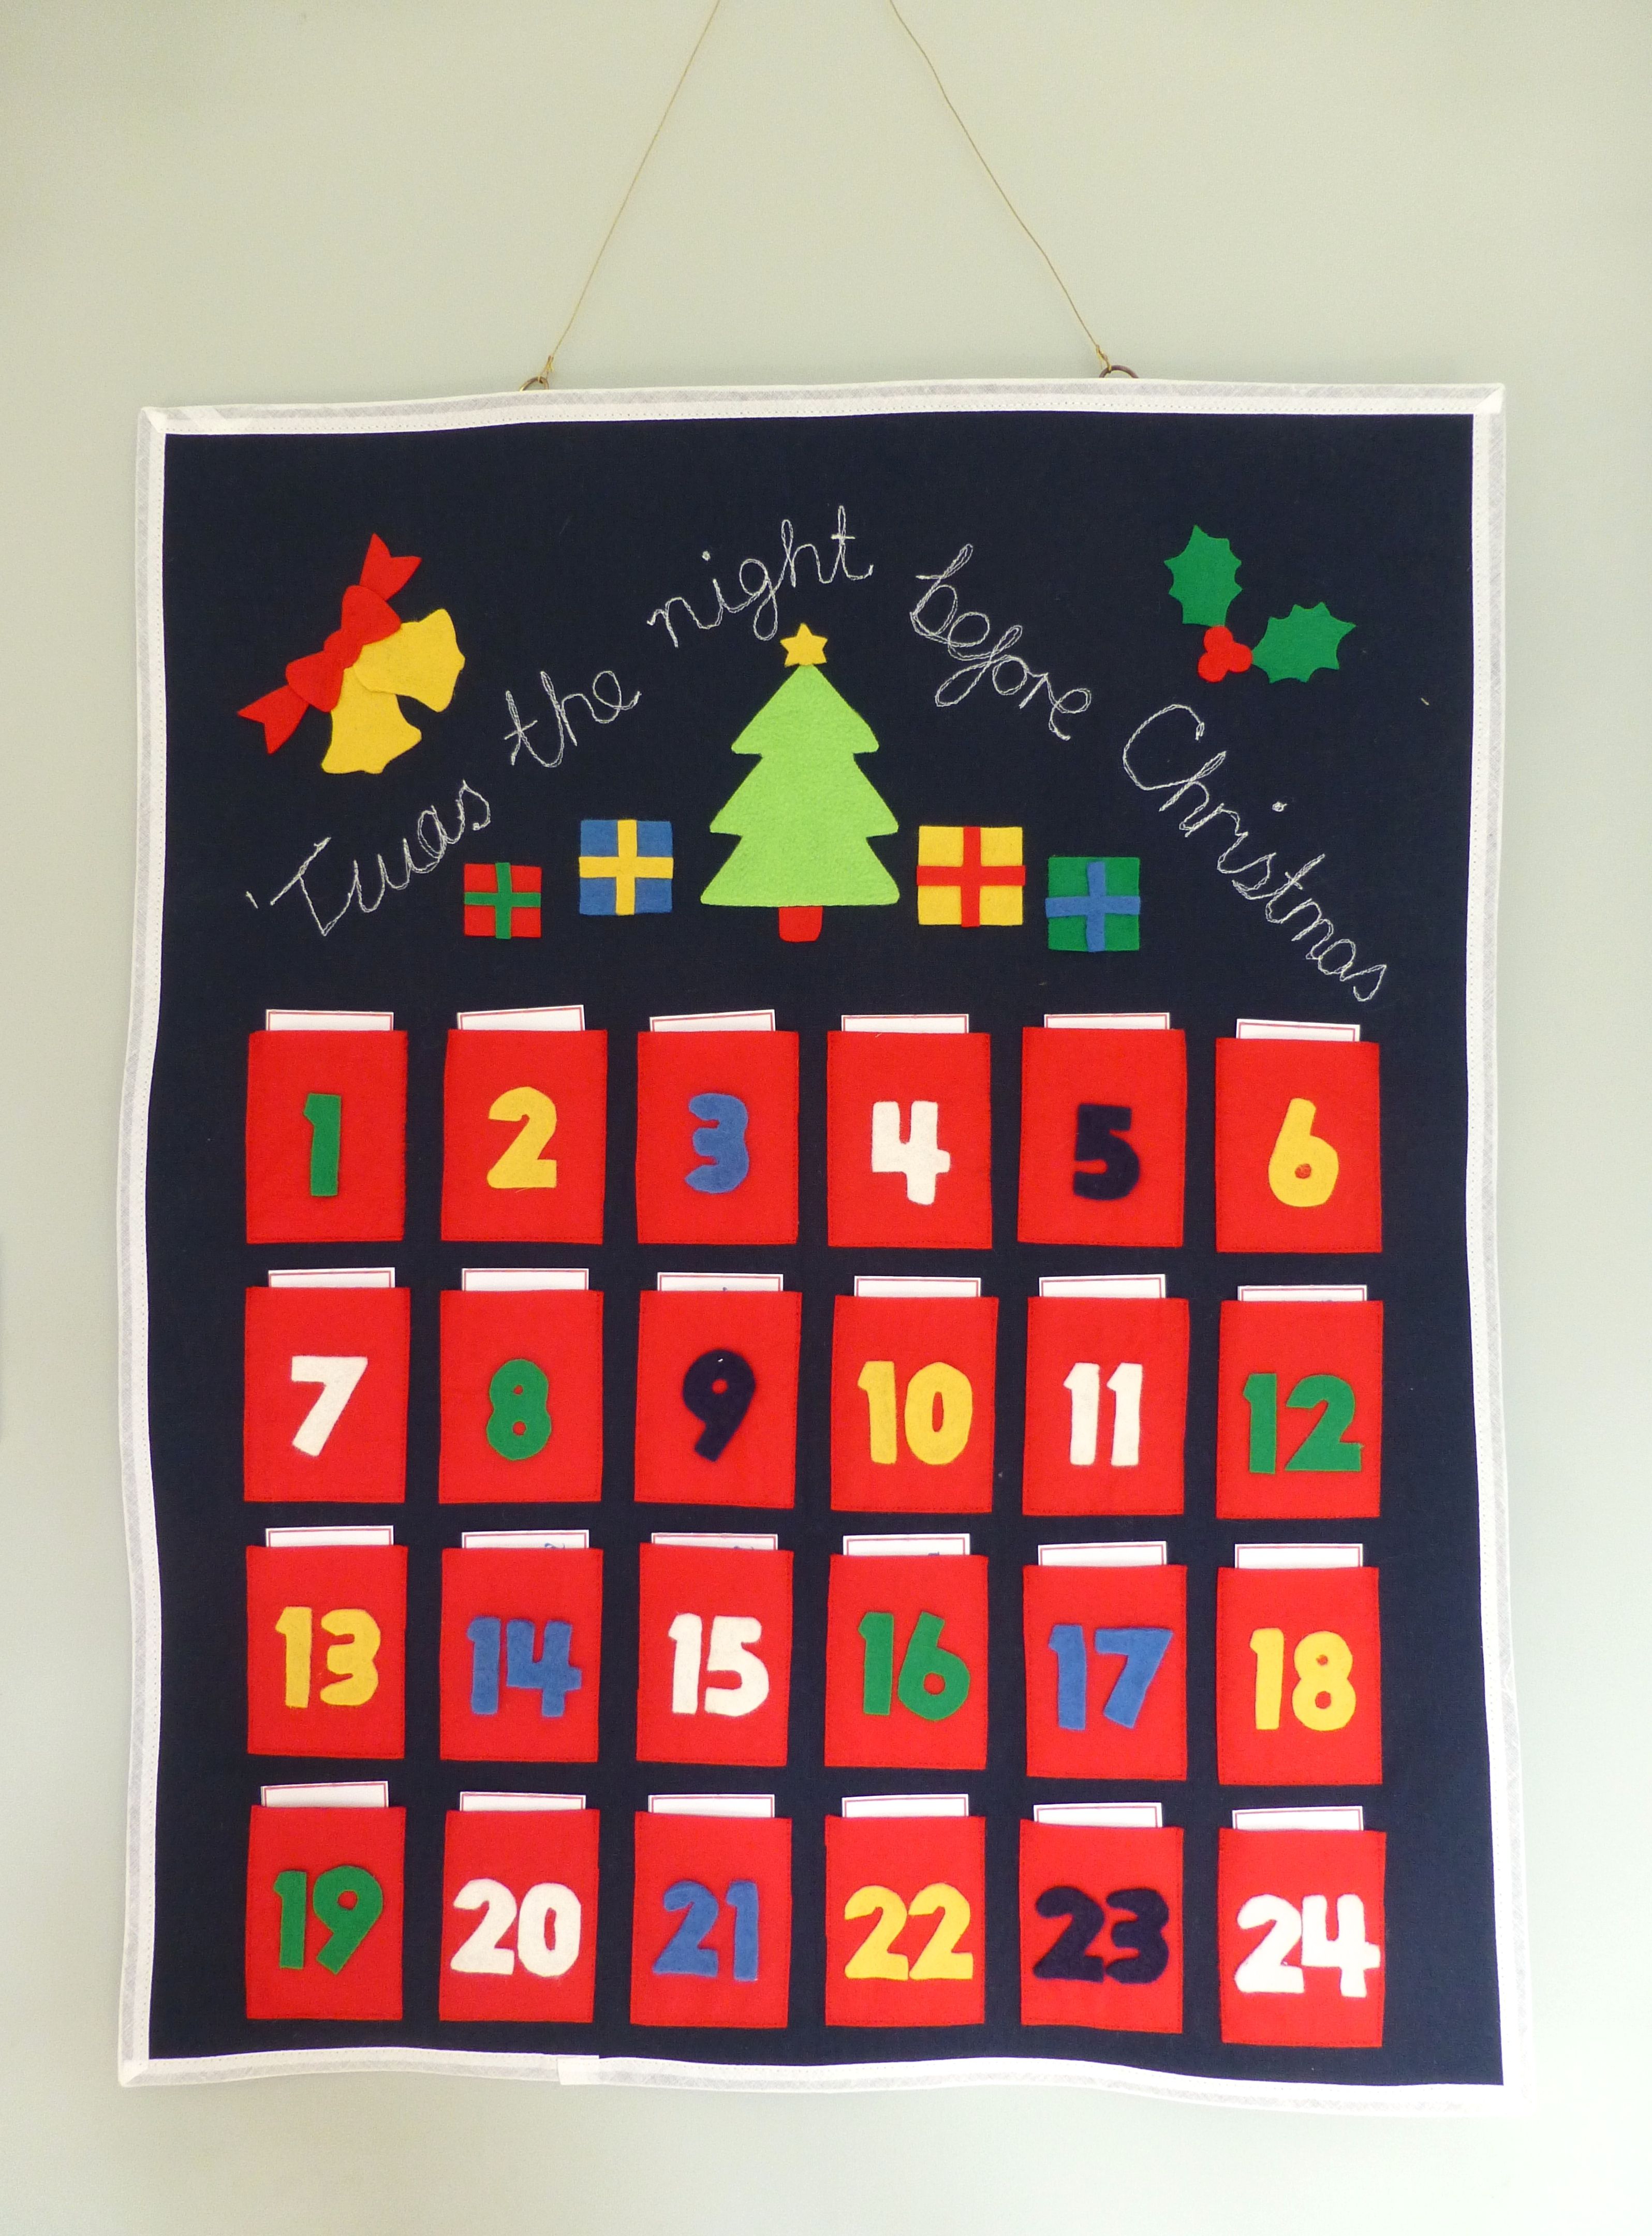
And here it is – TADAH!

OK, so what did I put inside each pocket as a treat if not chocolate?
I had a long, hard think about the whole concept of Christmas and what it means to us, religion aside and concluded that it’s about doing things together as a family. Our children would rather have the gift of our time than all the presents in the world, so this is what I did.
On each of thirty little white cards measuring 8.5cm x 5cm, I wrote a different ‘gift’. These ranged from “Look At Christmas Lights” on the front with more detail on the reverse – this particular one being “Put your pyjamas on, get in the car with a blanket and mug of hot chocolate, and drive round in the dark to look at all the Christmas lights”.
Another card reads “Camp Out Under The Christmas Tree” which needs no further explanation!
One of my favourites is “Tape Candy Canes To Cars” , the reverse explaining “Give the anonymous gift of a candy cane to complete strangers by taping one to the windscreen of their cars after dark for them to find in the morning”.

Simple pleasures are often the best, so “Toast Marshmallows Over The Fire”, “Sing Christmas Carols” and “Make Paper Snowflakes” are minimum effort solutions for those busy days.

The Boys open a window on their traditional calendar on waking each morning, but we save the reveal of the evening’s treat until after supper so they have something to look forward to all day, every day of Advent.

Although all the cards are inserted for the photos, I will actually engineer the day’s treat depending on our schedule – they can’t “Stay Up Late” on a school night, for example!
If you would like a copy of all thirty treats (I made extra in case some ideas couldn’t be followed through), just email me and I can send you the jpegs for you to print out yourself.
Wow, that was a long post – I hope you managed to stay awake until the end….or did you just skip straight to the important last bit about the cards?!!!

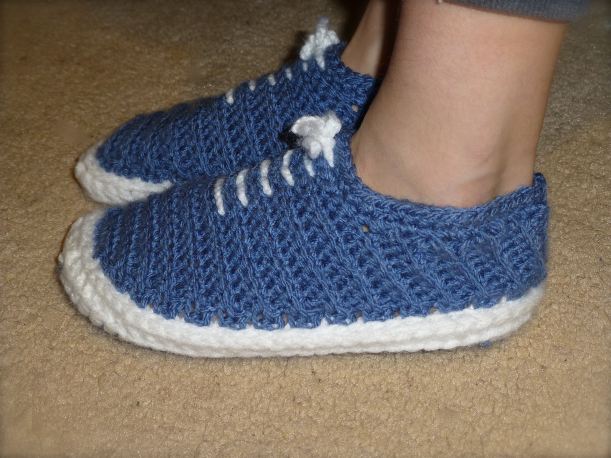
 I reckon these are as cool as it gets for the inherently un-cool footwear that is a slipper, so I thought I’d make a couple of pairs for The Boys for Christmas.
 So, how did they work up?
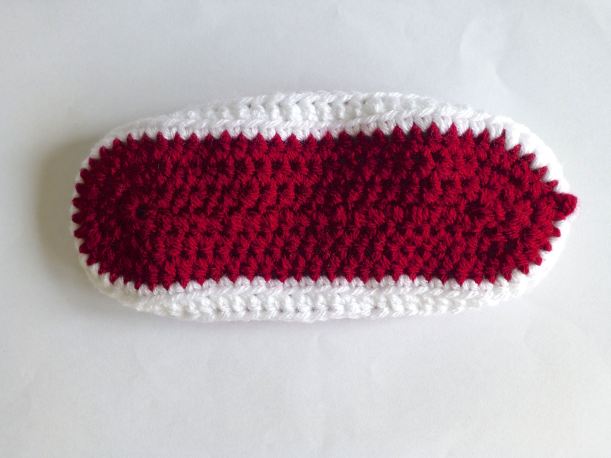 The body of the slipper is crocheted with just one strand of yarn into the back of each stitch which results in a rather lovely ribbed pattern.
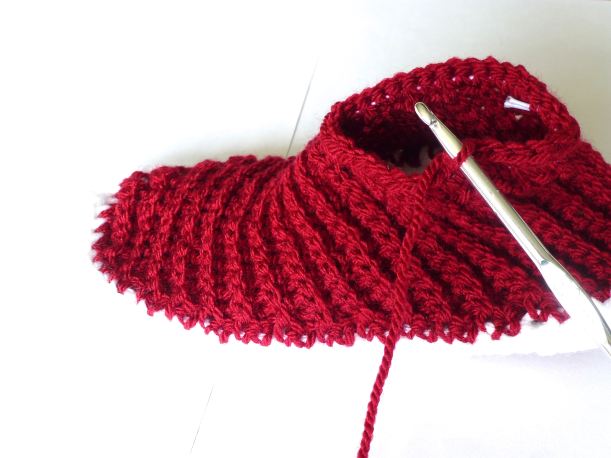 You crochet over a circle of hat elastic at the ankle edge to give a more snug and secure fit.
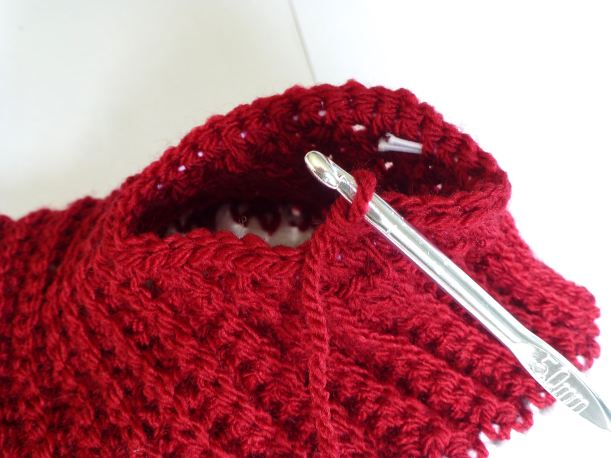 You can just see the elastic if I stretch the top edge open wide.
 Bottom edge before: –
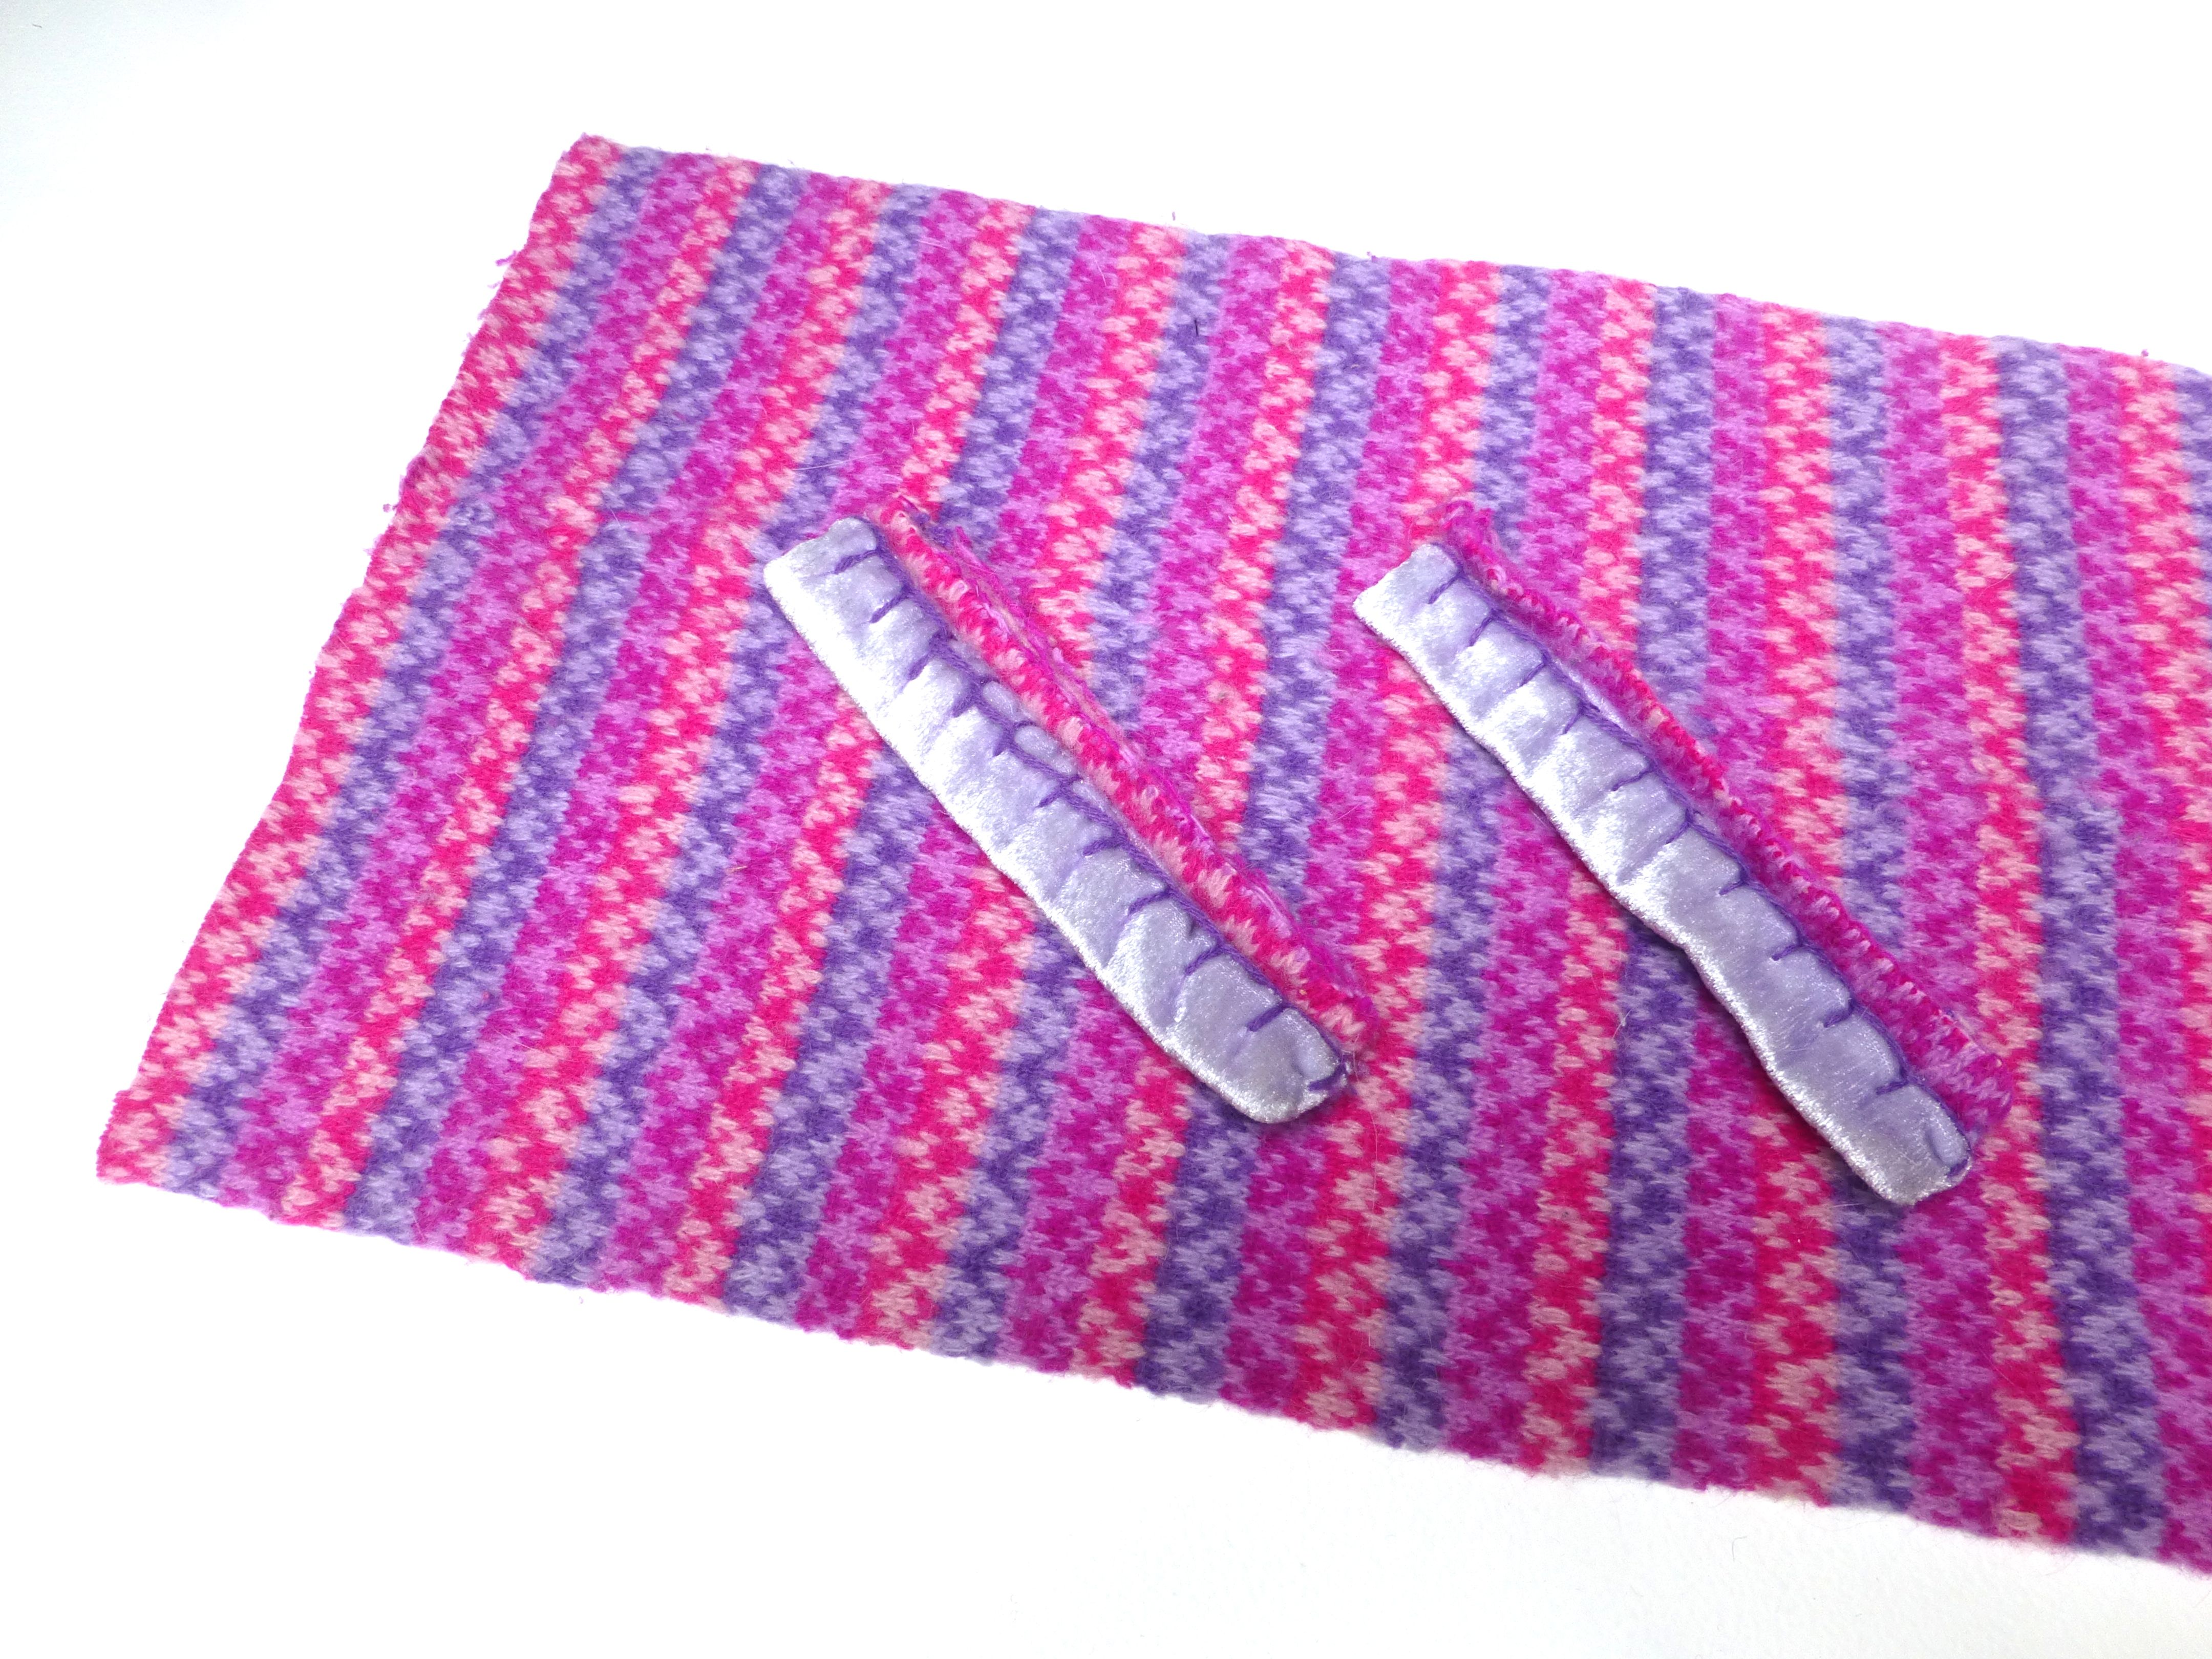
 Bottom edge after: –
 A row of slip stitches cleverly cover up the change of yarn colour as demonstrated in this photo: –
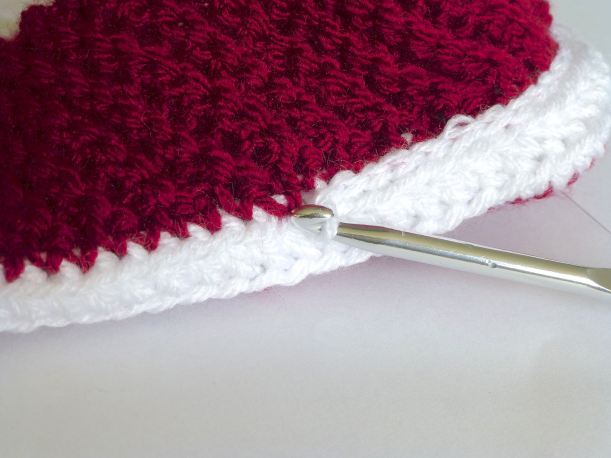 Next are the laces which are just for show – two very long rows of simple chain stitches.
 I made 150 chains instead of the stated 110 as I didn’t feel they were long enough.
 The ‘laces’ are just threaded through with a darning needle and tied in a bow to give the trainer look.
 And there you are – a pair of Van’s style slippers whipped up in an evening!
 The following evening I made a second pair in blue.
 Size wise, I found that they crocheted up small so would suggest going up a size, but they are stretchy so will still be fine for The Boys.

 I ended up giving these to The Boys after they were finished because the photos look better while they are being worn and a little bit odd without a foot inside.
 No.3 Son in particular is chuffed with them, but No.2 Son says they’re a bit tight…..guess what I’ll be making out of the leftover yarn tonight?