🎶 “Oh, this year I’m off to sunny Spain, Y Viva España” 🎶
We’re talking HOLIDAYS – a whole two weeks!!!
My Auntie lives in Spain and we hop on a plane as often as possible to visit her in the beautiful mountainous region of Andalucia.
That time has come around again and not a moment too soon considering the pretty grim weather we’ve endured recently. I mean, The Boots have made a reappearance after having been enthusiastically relegated to the back of the wardrobe for the “Summer” after the glorious Easter we enjoyed.
I know, a tad optimistic, I’ll grant you, but flip-flops make you feel summery, don’t they, and I kind of assume the sun would be duty bound to follow.
Not so. So, Spain, here we come.
(Burglars please take note: we have House Sitters for the duration. And dogs. And a feisty Cockerel. You have been warned.)
Anyhoo….
I took a quick look through my wardrobe and decided that, although I have plenty of summery clothes, I fancied making a few things.
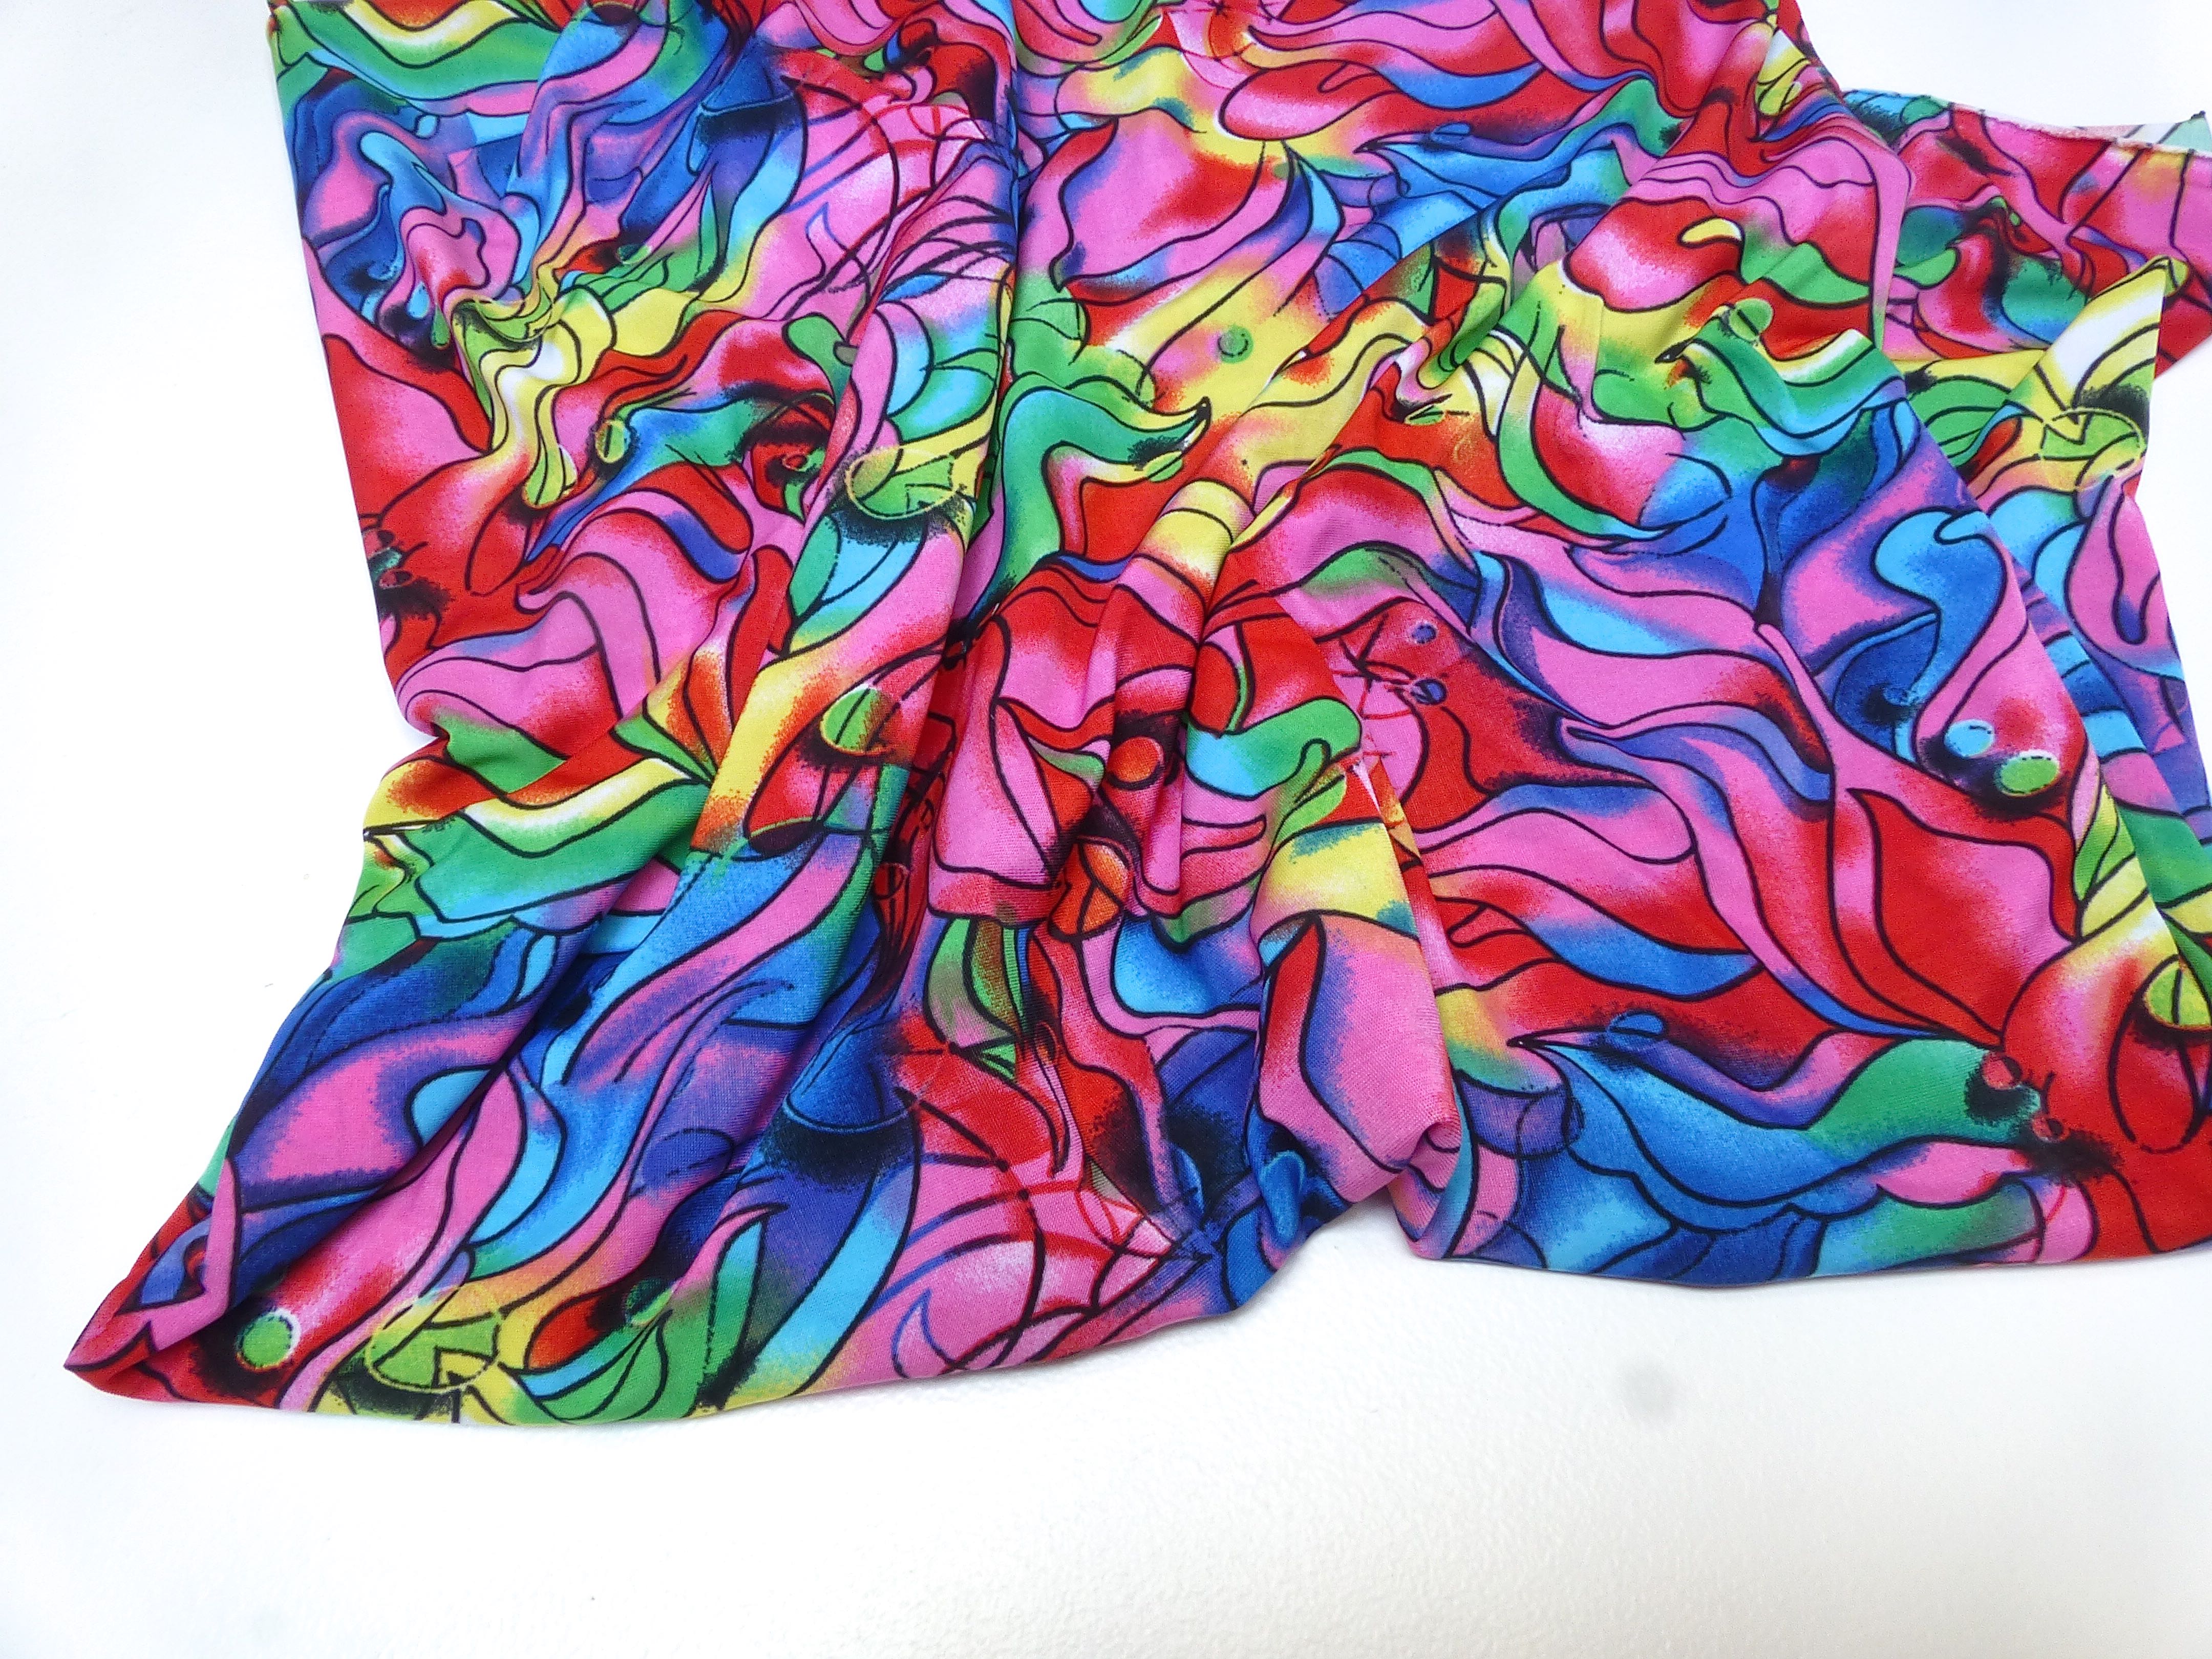
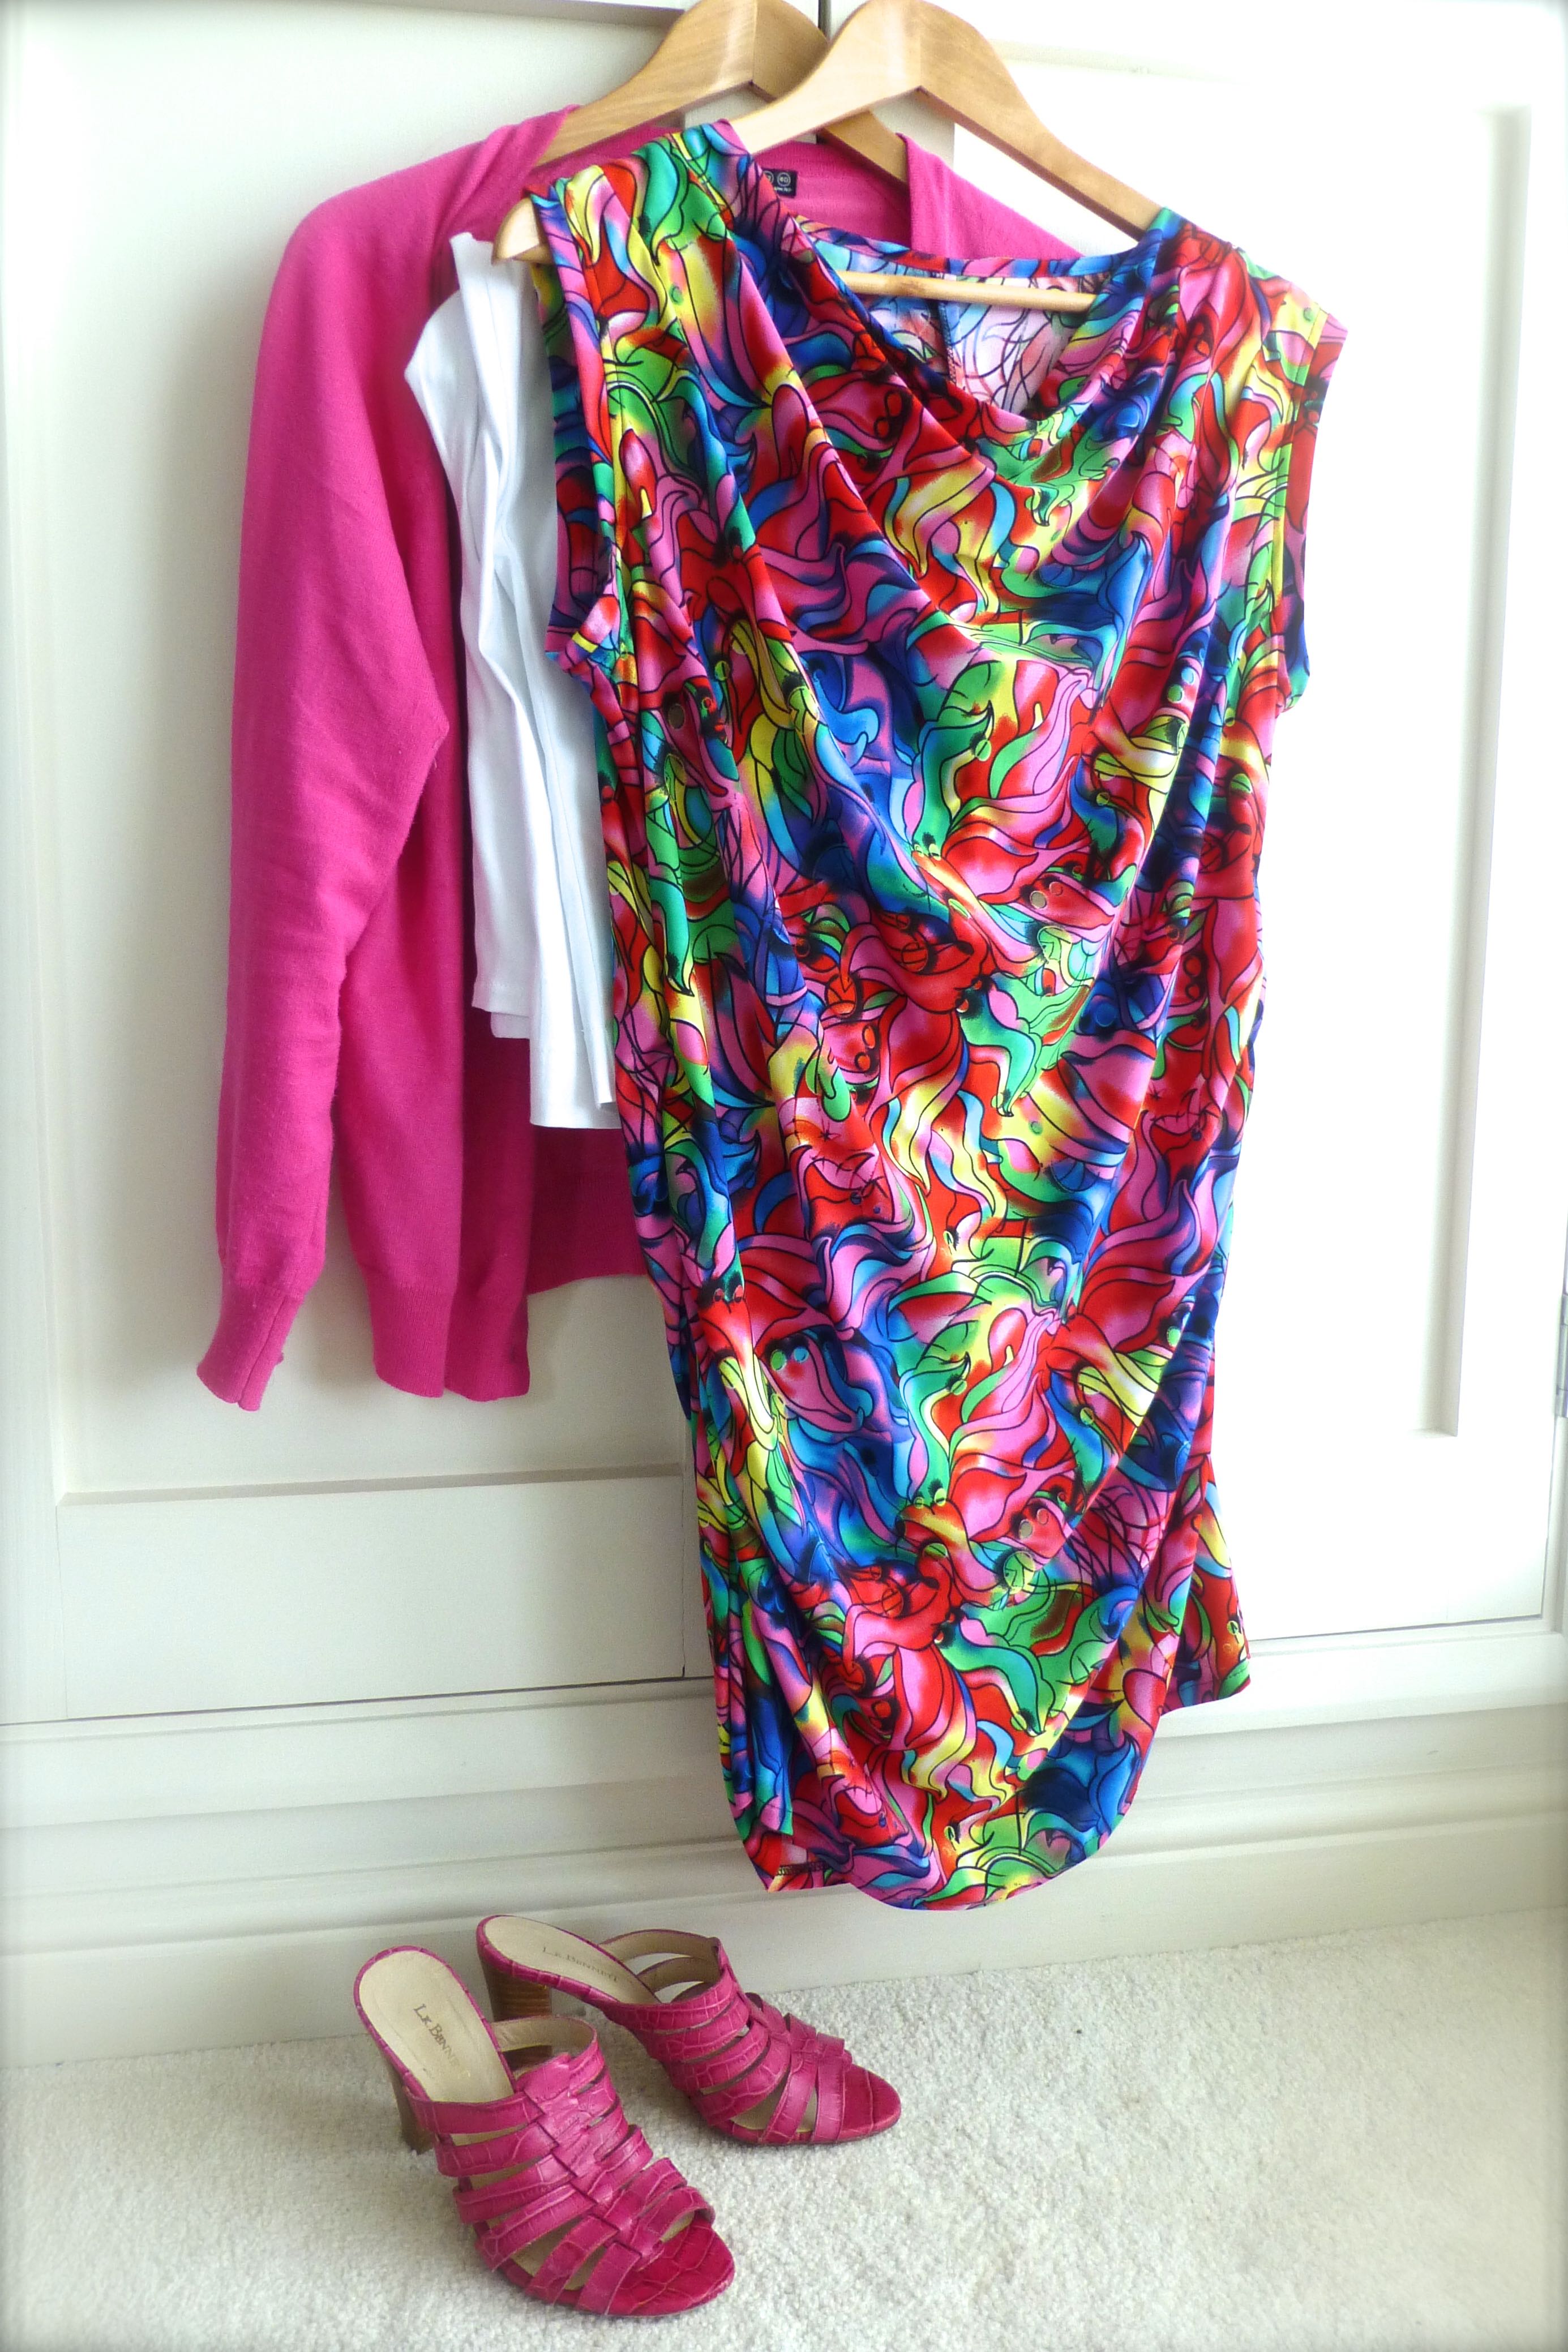
I have acquired several pieces of fabric lately (as you do) and this one in particular caught my eye, glaring garishly back at me from the ever-growing stash.
Not for the faint hearted, I’ll admit, but it’s so “me”.
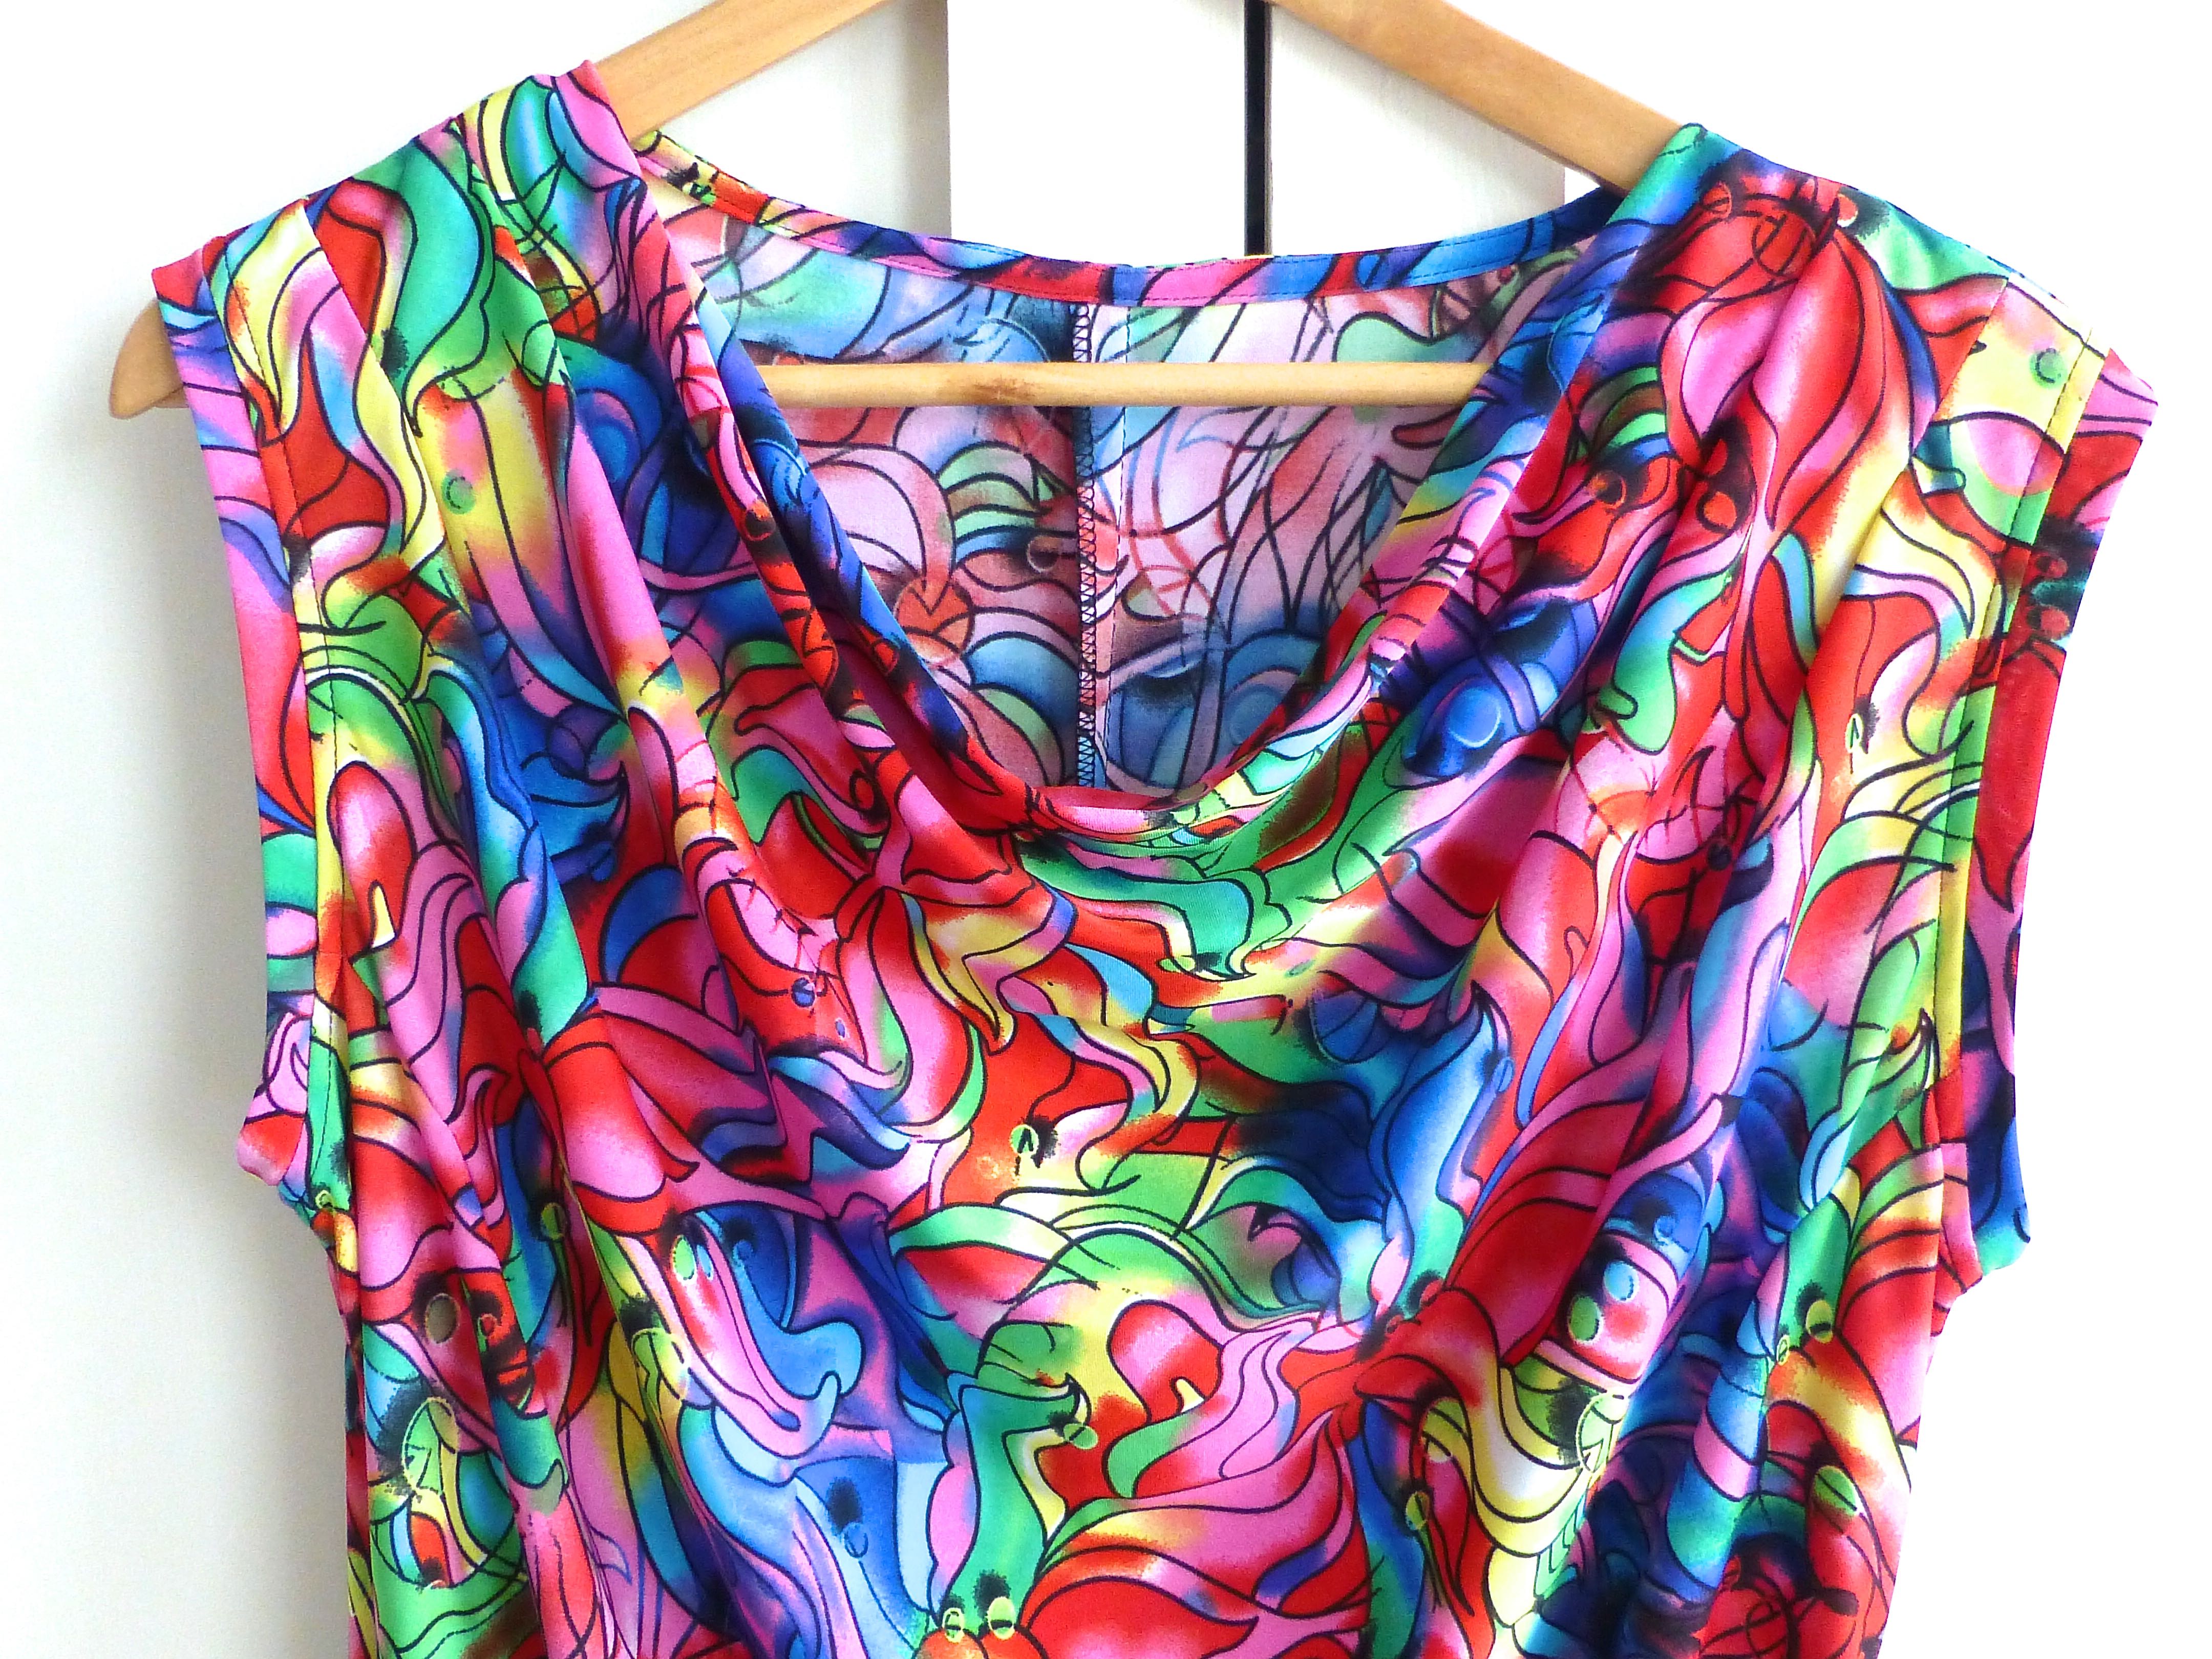
A medium weight polyester jersey which is incredibly soft to the touch, I imagined it would drape perfectly on a cowl neck.
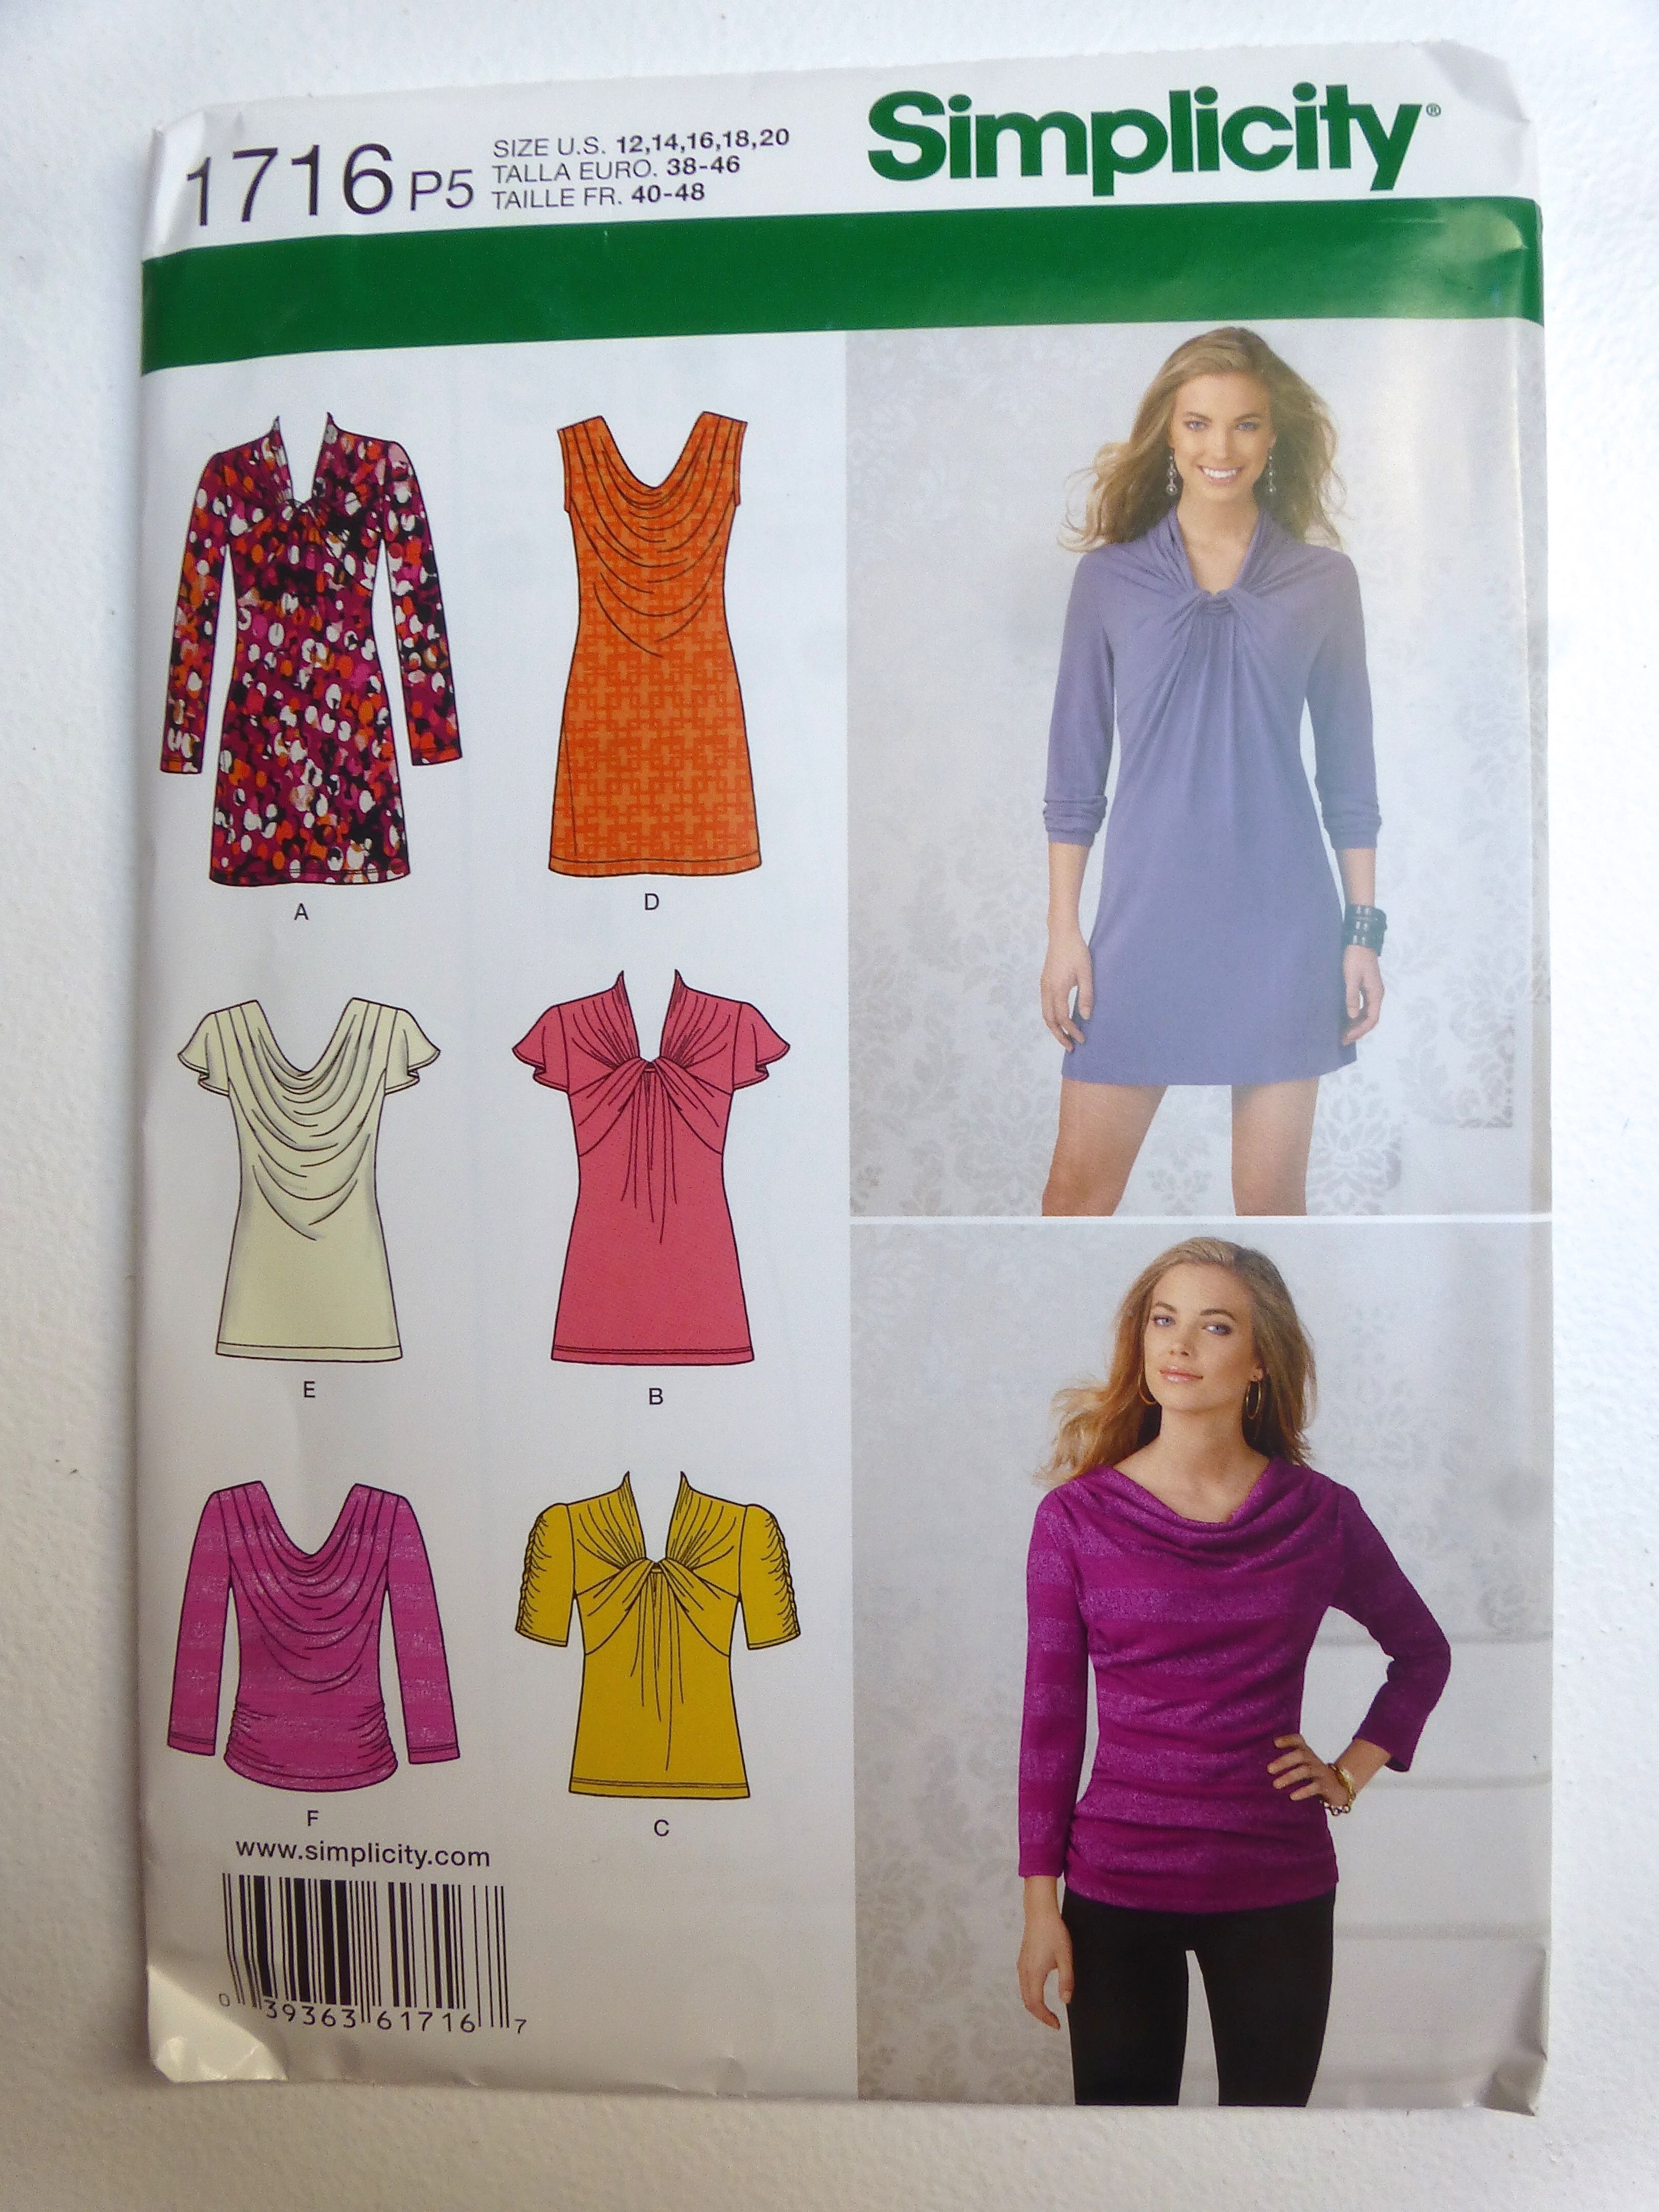
I chose Simplicity 1716 with view ‘D’ in mind, but with the pleating continuing to the hips as in view ‘F’.
I’m a size 14 in UK stores which equates to a US size 18, so I cut the pattern pieces out accordingly and the fit was spot on without any adjustments.
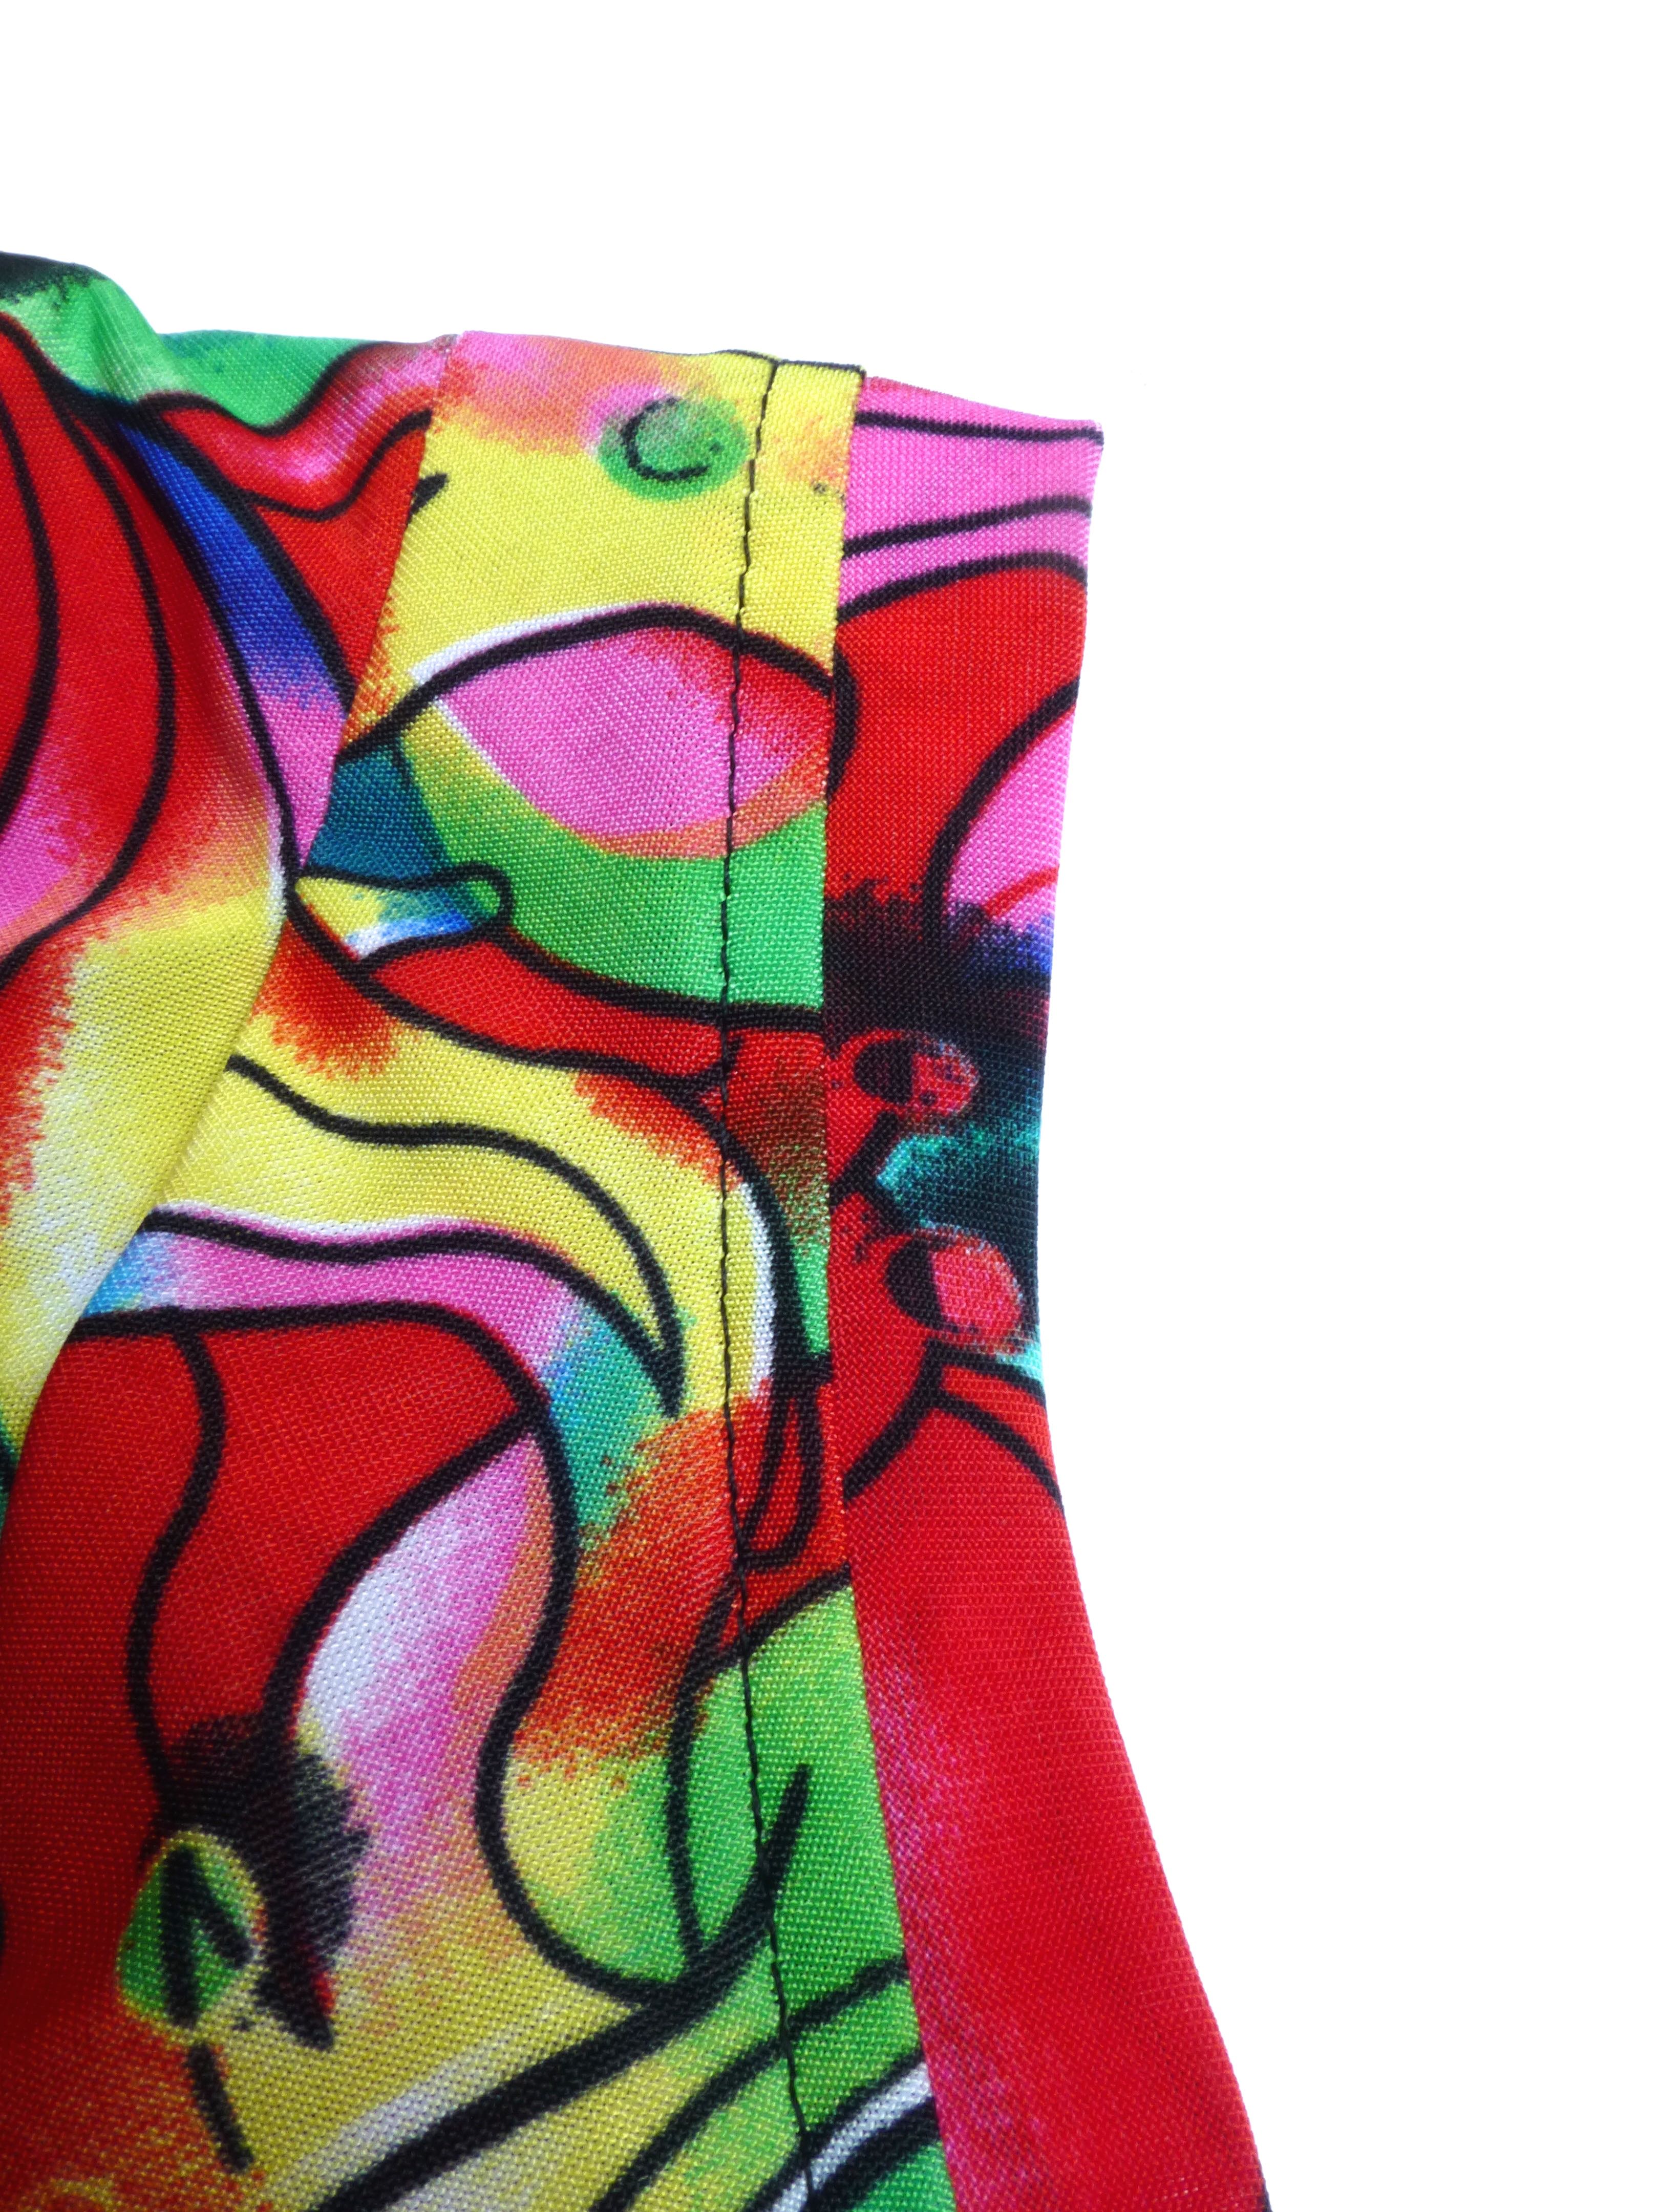
I didn’t have any black cotton tape for stabilising the shoulder seams so used white but, as the fabric is opaque, it doesn’t show through so all is well.
I like the neat method of attaching the facing to the back neck…..
…and the armholes.
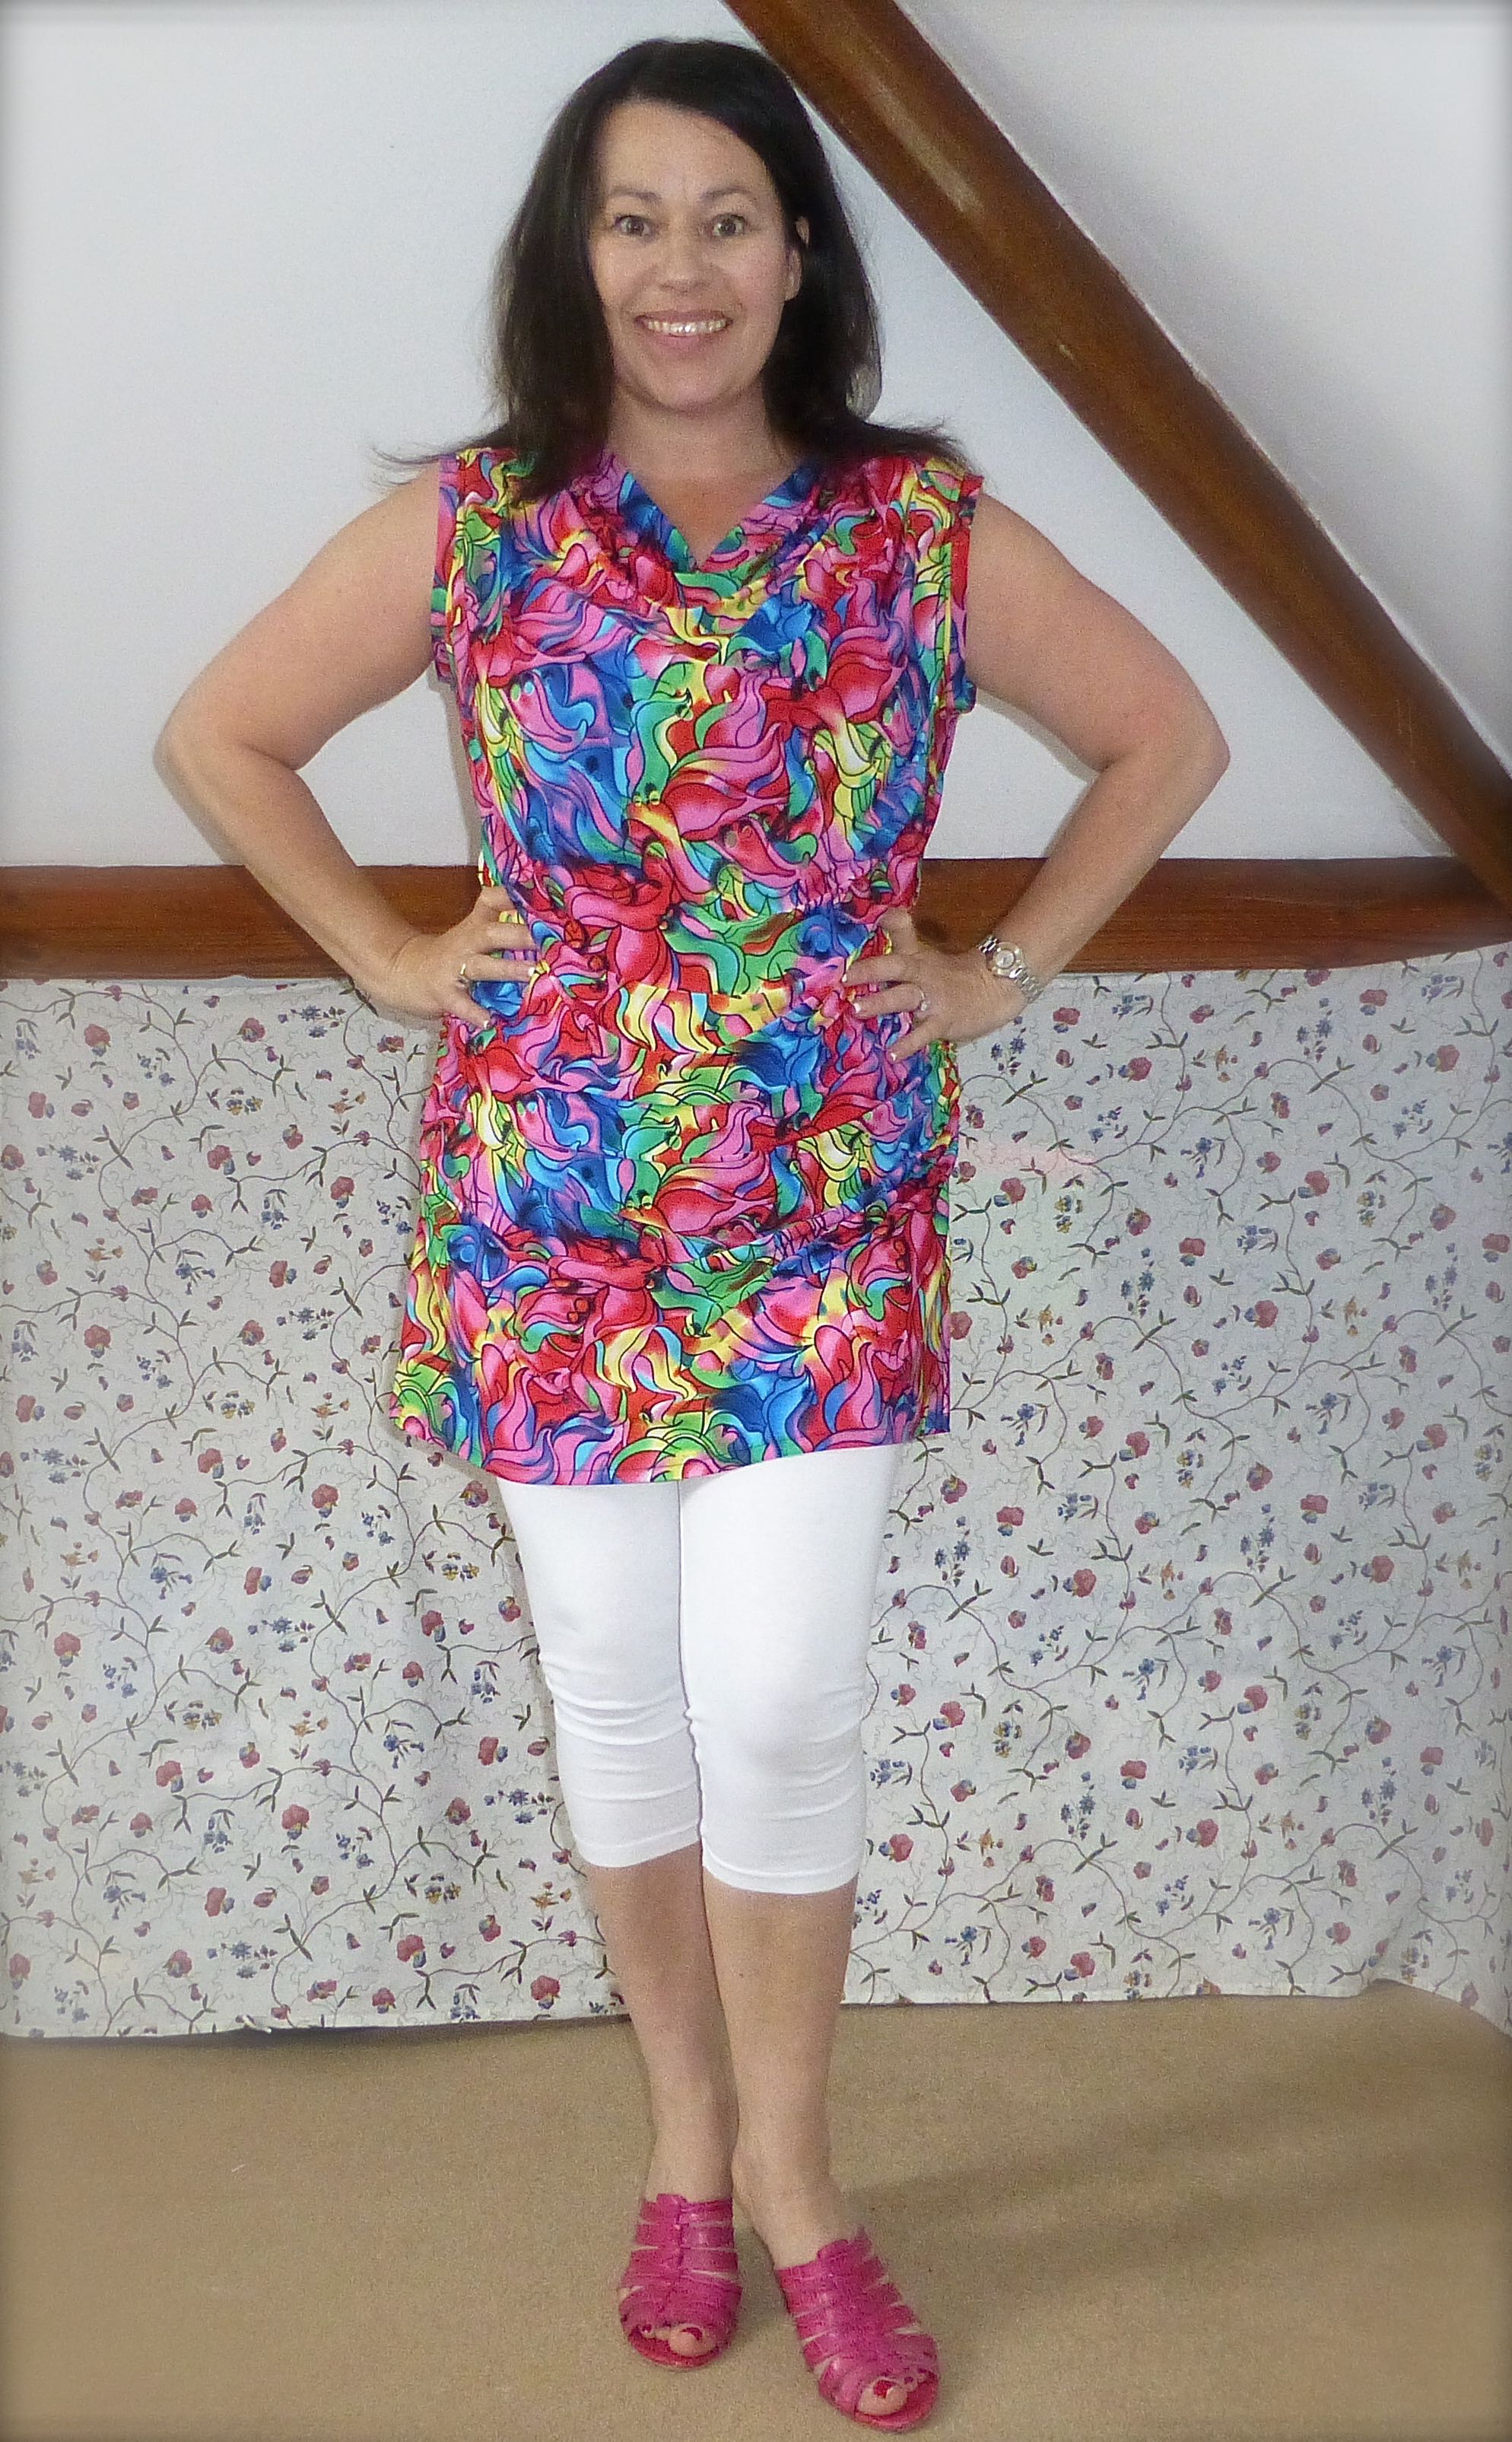
The cowl neckline does indeed drape beautifully, falling into soft folds right down to the hips.
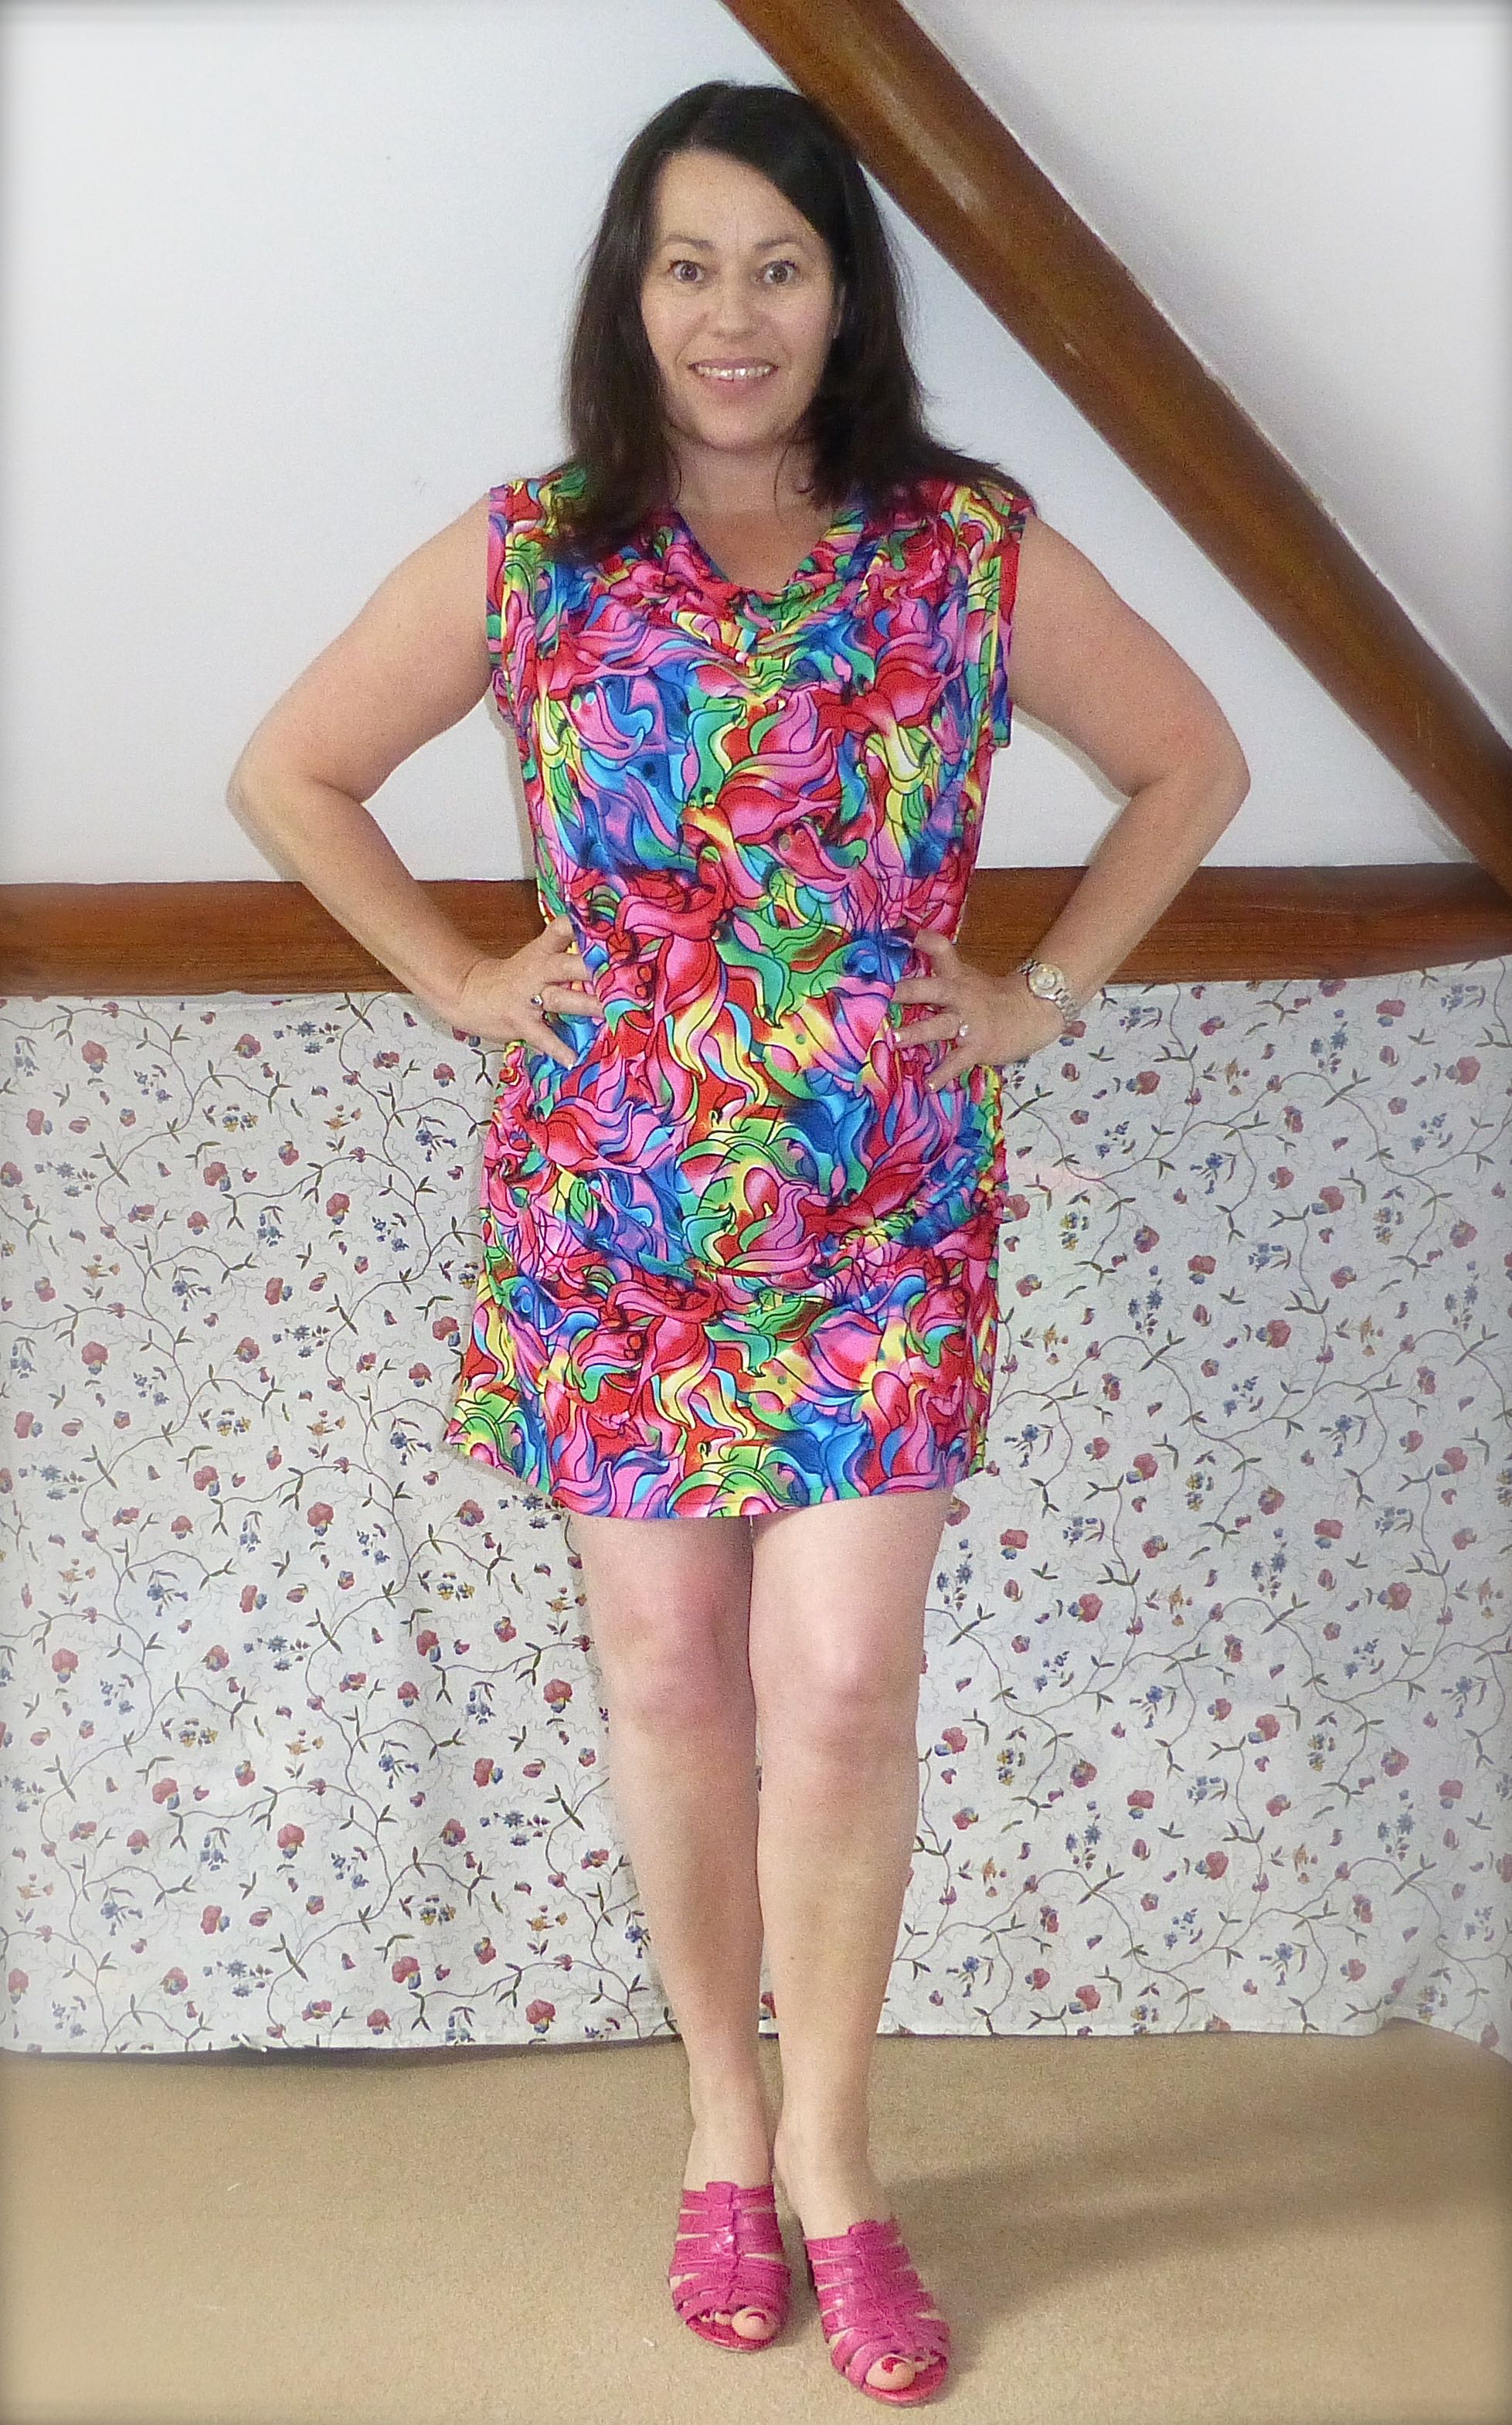
Excuse the scary expressions in the photos that follow – it’s a case of set up the self timer and run!
Hmmm, far too short to wear as a dress – note to self, allow another four inches for the hem if combining two pattern designs.
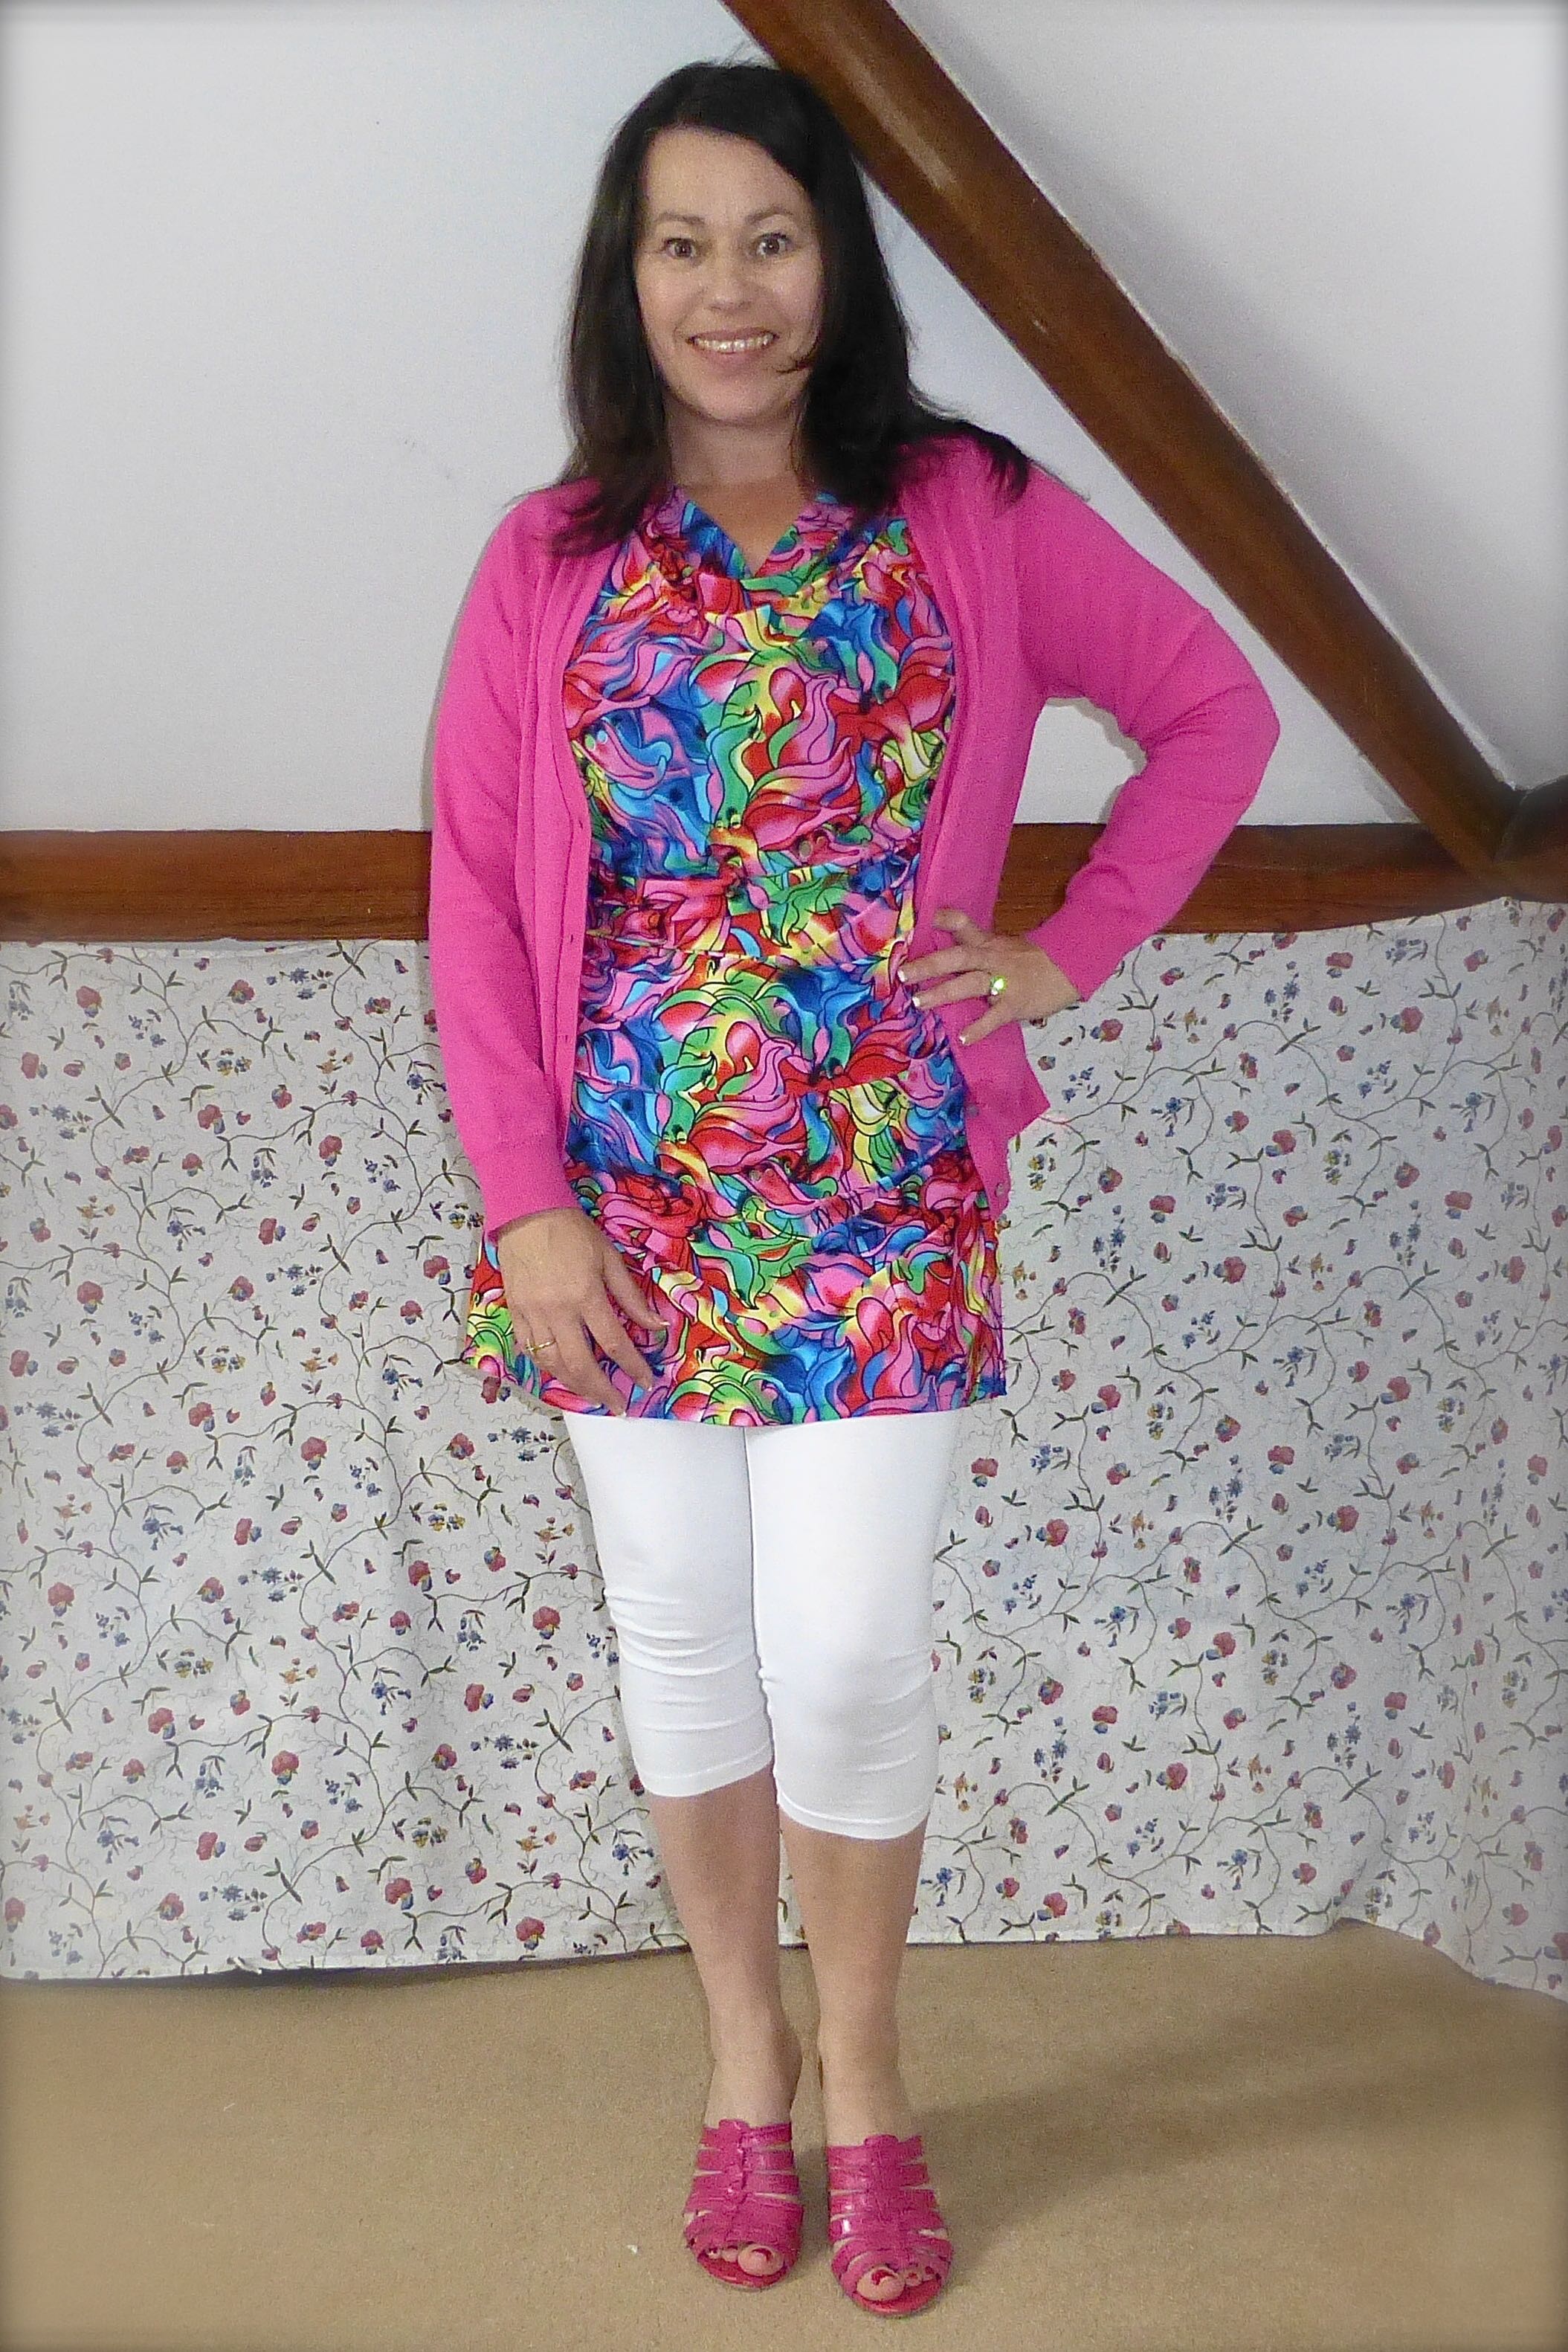
A quick root through my wardrobe resulted in some coordinating items.
That’s better, but what about the slightly saggy upper arms, after all, I can’t walk around with my hands on my hips all the time, can I?
Sorted!
Although, in Spain it’s currently 40°C so a pair of bikini bottoms is probably going to be the most I’ll wear. (It’s a private villa, otherwise it would be a maxi dress).
Right, onto some tops using that gorgeous Liberty fabric I bought in April:)
Father-in-law needed some larger T-shirts, which meant a pile of too-small ones were destined for the charity shop – until I saw several holes in them.
I don’t know about you, but anything which is slightly damaged goes in the clothes recycle bin rather than the charity shop as I know lots of people are unable to make small repairs.
As the holes could either be cut around or patched, I decided to have a go at refashioning them into T-shirts for The Boys.
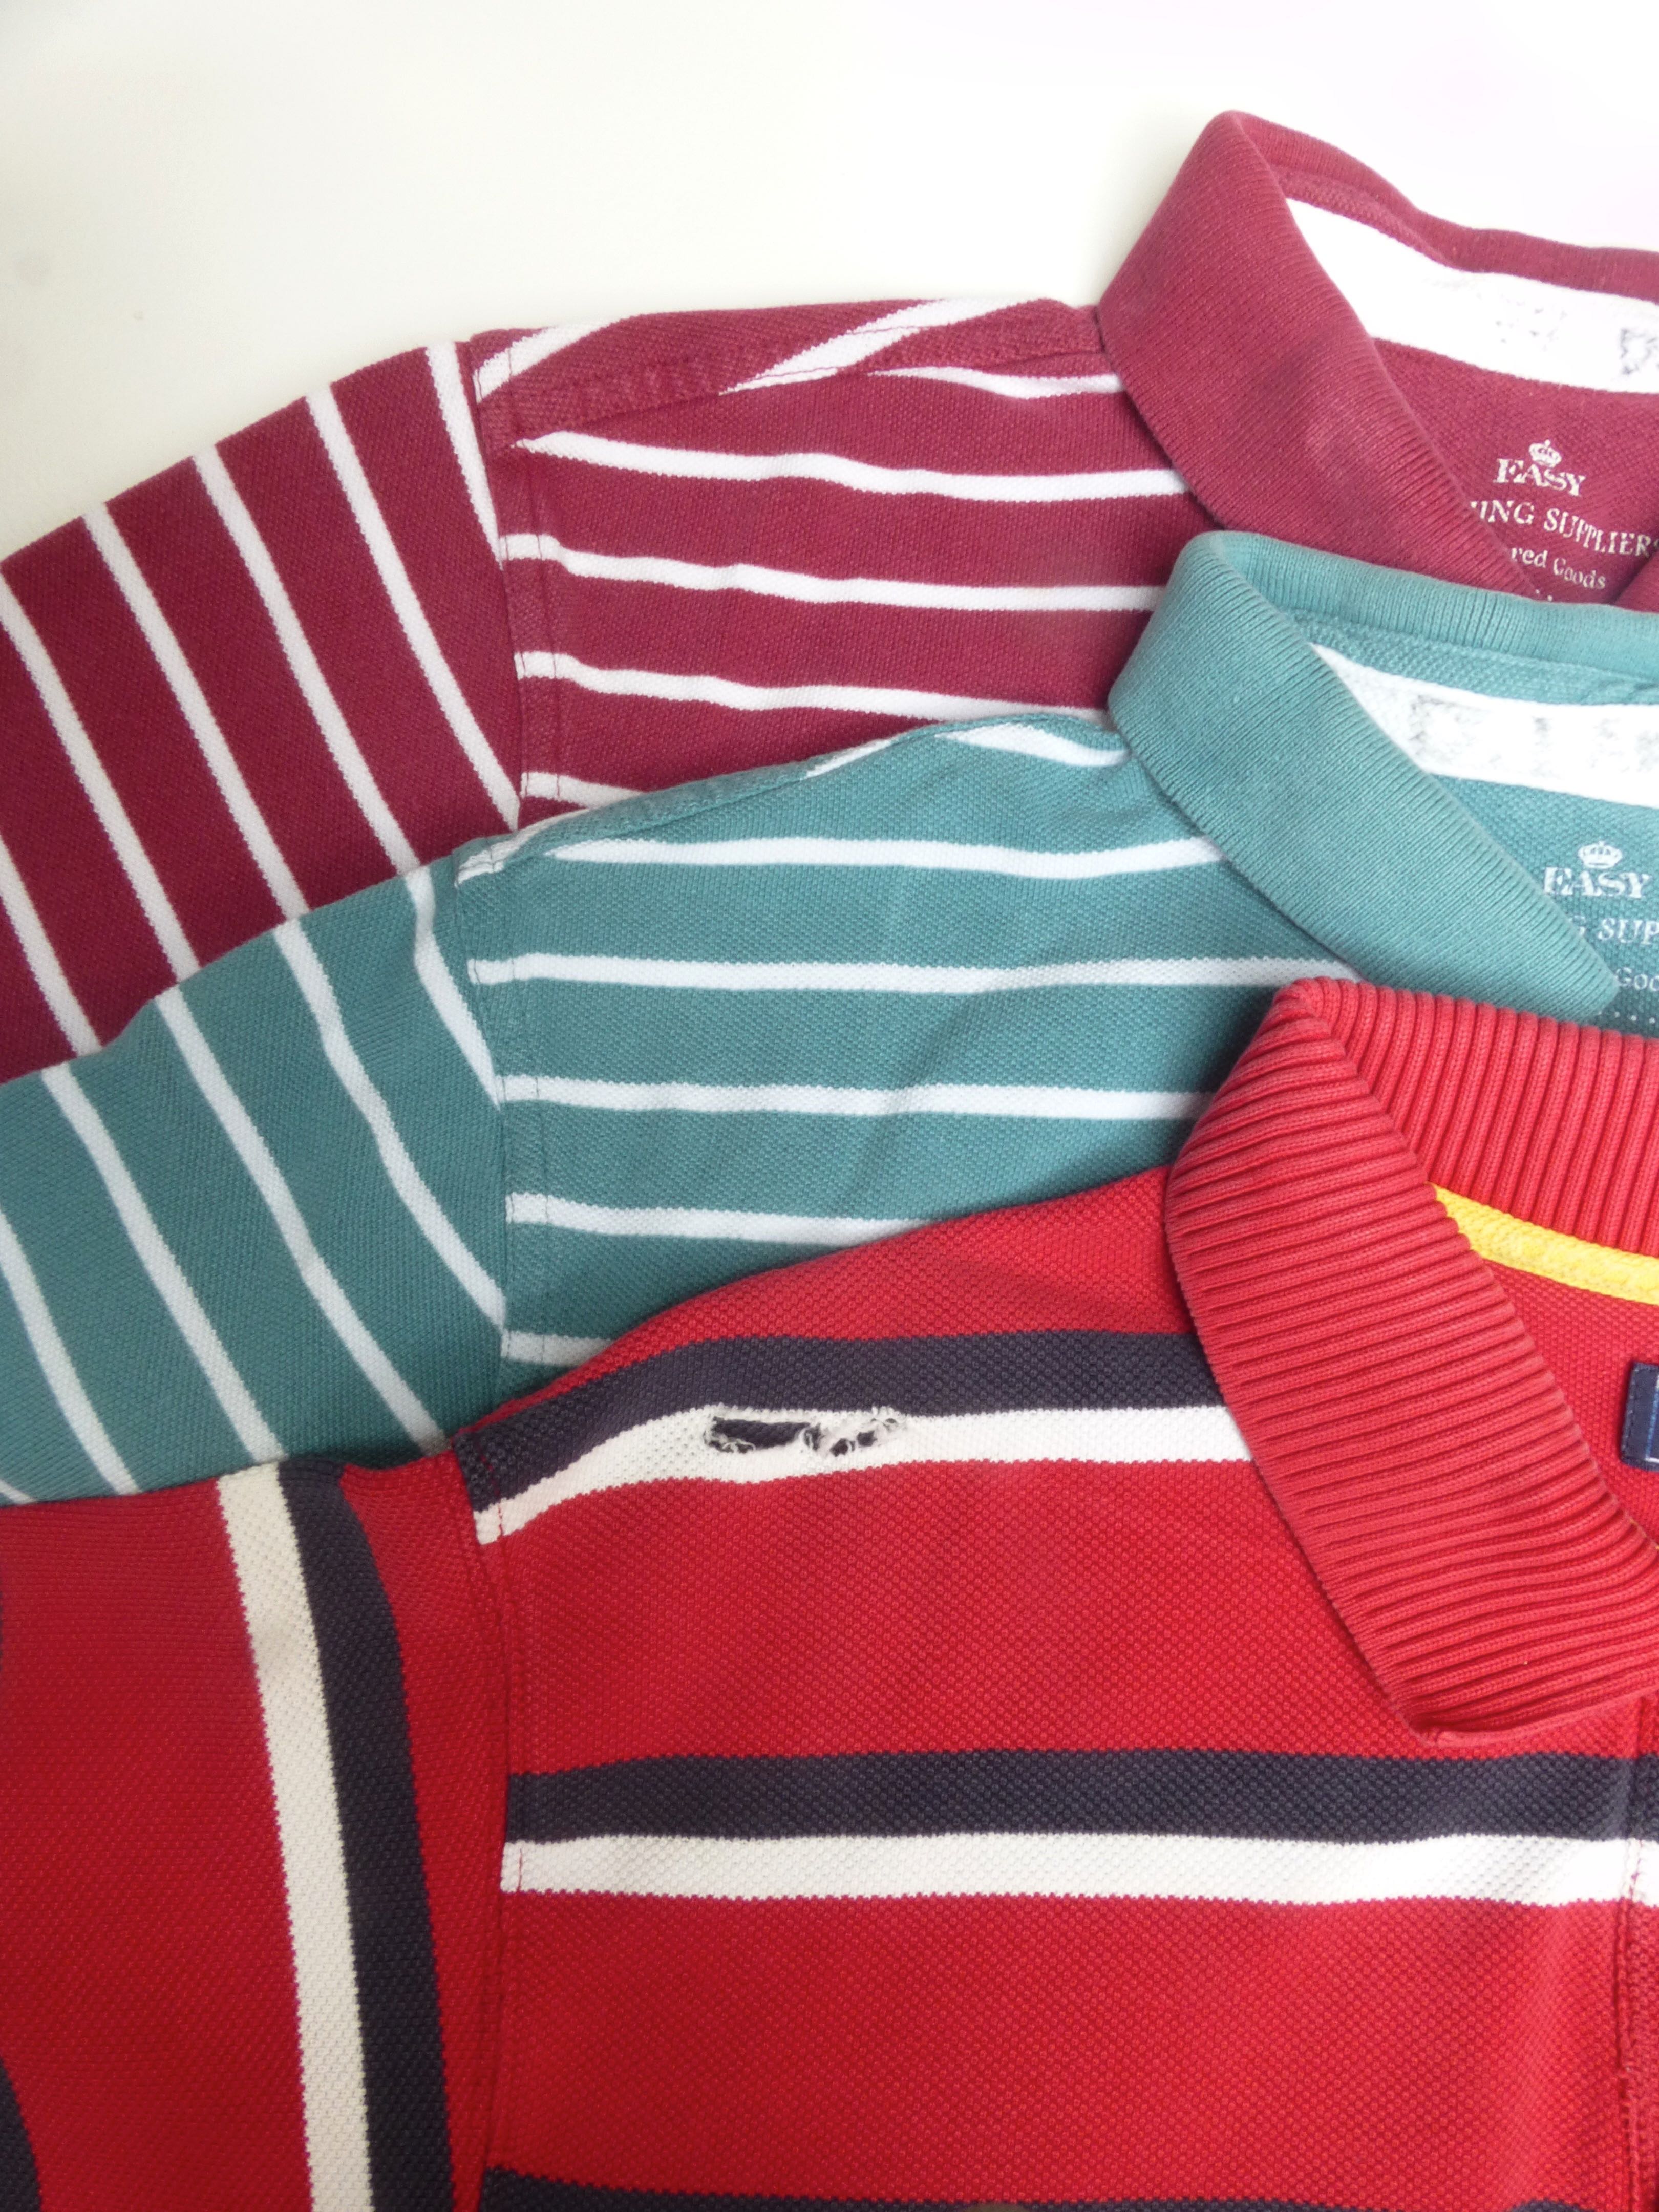
They were all polo-style shirts and the piqué fabric was good quality with plenty of wear in it yet.
Using a well-fitting T-shirt from No.3 Son’s drawer, I cut around the basic outline from the body of the shirt, cutting the sleeves from the original sleeves.
After sewing the shoulder seams, the sleeves were set in and the raw edges overlocked, then I sewed the side seams (right sides together) in one continuous seam from the sleeve hem to the bottom edge.
The raw edges of the seams and the hems were overlocked, then the hems were top stitched in place.
The side seams were reinforced at the bottom with some decorative stitching.
For the collar, I cut off a strip from the original polo collar, sewed the short edges to make a circle…..
….and stitched it to the neckline right sides together, finishing with some more top stitching.
Then to deal with the hole in the middle of the back….
I cut a square of left over fabric (about an inch larger than the hole all around) and pinned it to the inside over the hole.
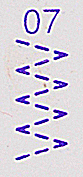
Working from the right side, I used this stitch on my sewing machine (combined with a stitch length of less than one) to completely fill in the hole.
The repair is virtually invisible on the outside.
The inside looks like this: –
Trim close to the stitching for a neat finish.
No.3 Son was excited with his ‘new’ T-shirt!
I was just pleased to be able to make another wearable item from something which would otherwise have been discarded.
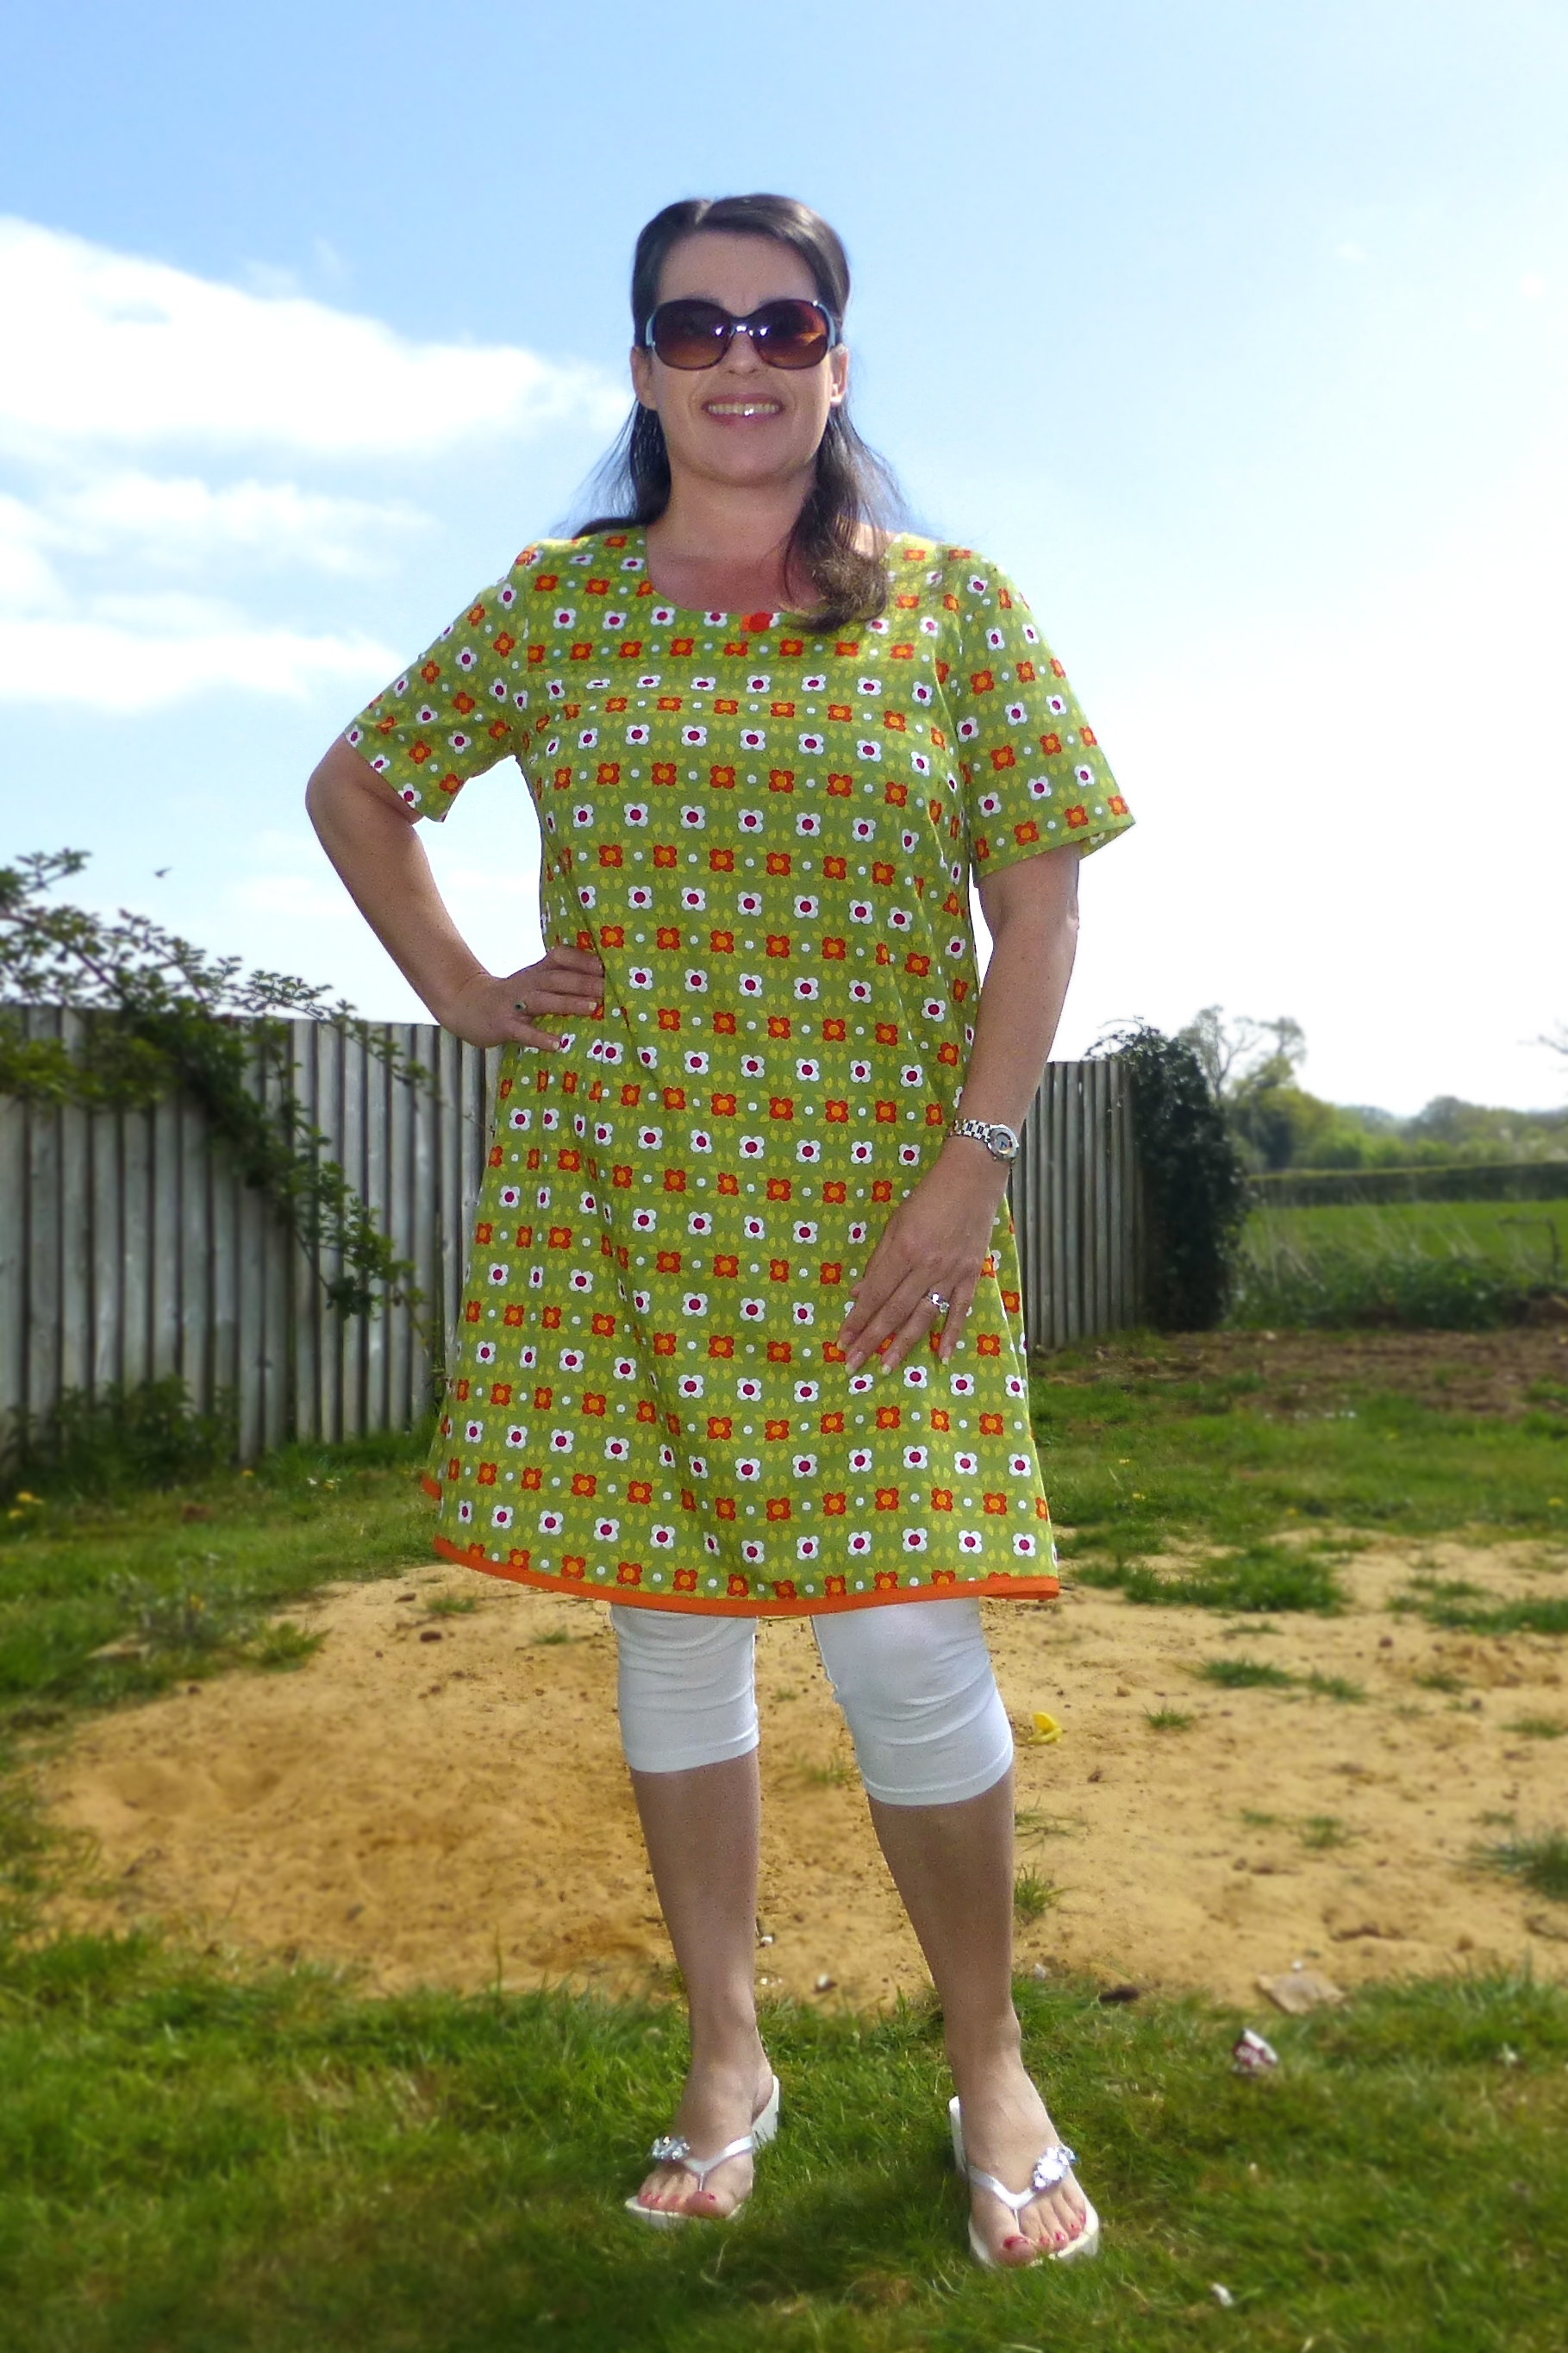
Almost as soon as the latest issue of ‘Love Sewing’ magazine landed on my doorstep, I knew I was going to make the ‘Matilda’ Everyday Tunic with the free pattern (included).
It looks like just the thing to pull on in the morning without having to worry about whether I’m having a fat(ter) day:)
Of course, I chose something a bit more eye-catching than the boring neutral denim – well, I do like a bit of Lime Green and Orange!
Due to the busy fabric and the fact that many of the design features wouldn’t work, I actually made huge alterations to the pattern but kept the basic shape: –
Re-cut the pattern into one piece for both the front and back
Cut the front neck a little lower
Lost the pockets altogether
Shortened the sleeves
Moved the rouleau closure to the front neck
Bound the hem with matching orange bias binding
After this photo was taken I took the side seams in by another four inches as I realise my body looks quite ‘square’ – it was just too big at the waist.
Although it is a very simple shape, there is some shaping in the form of side bust darts.
Darts can be tricky so do them carefully to make sure they lie flat and don’t pucker at the point.
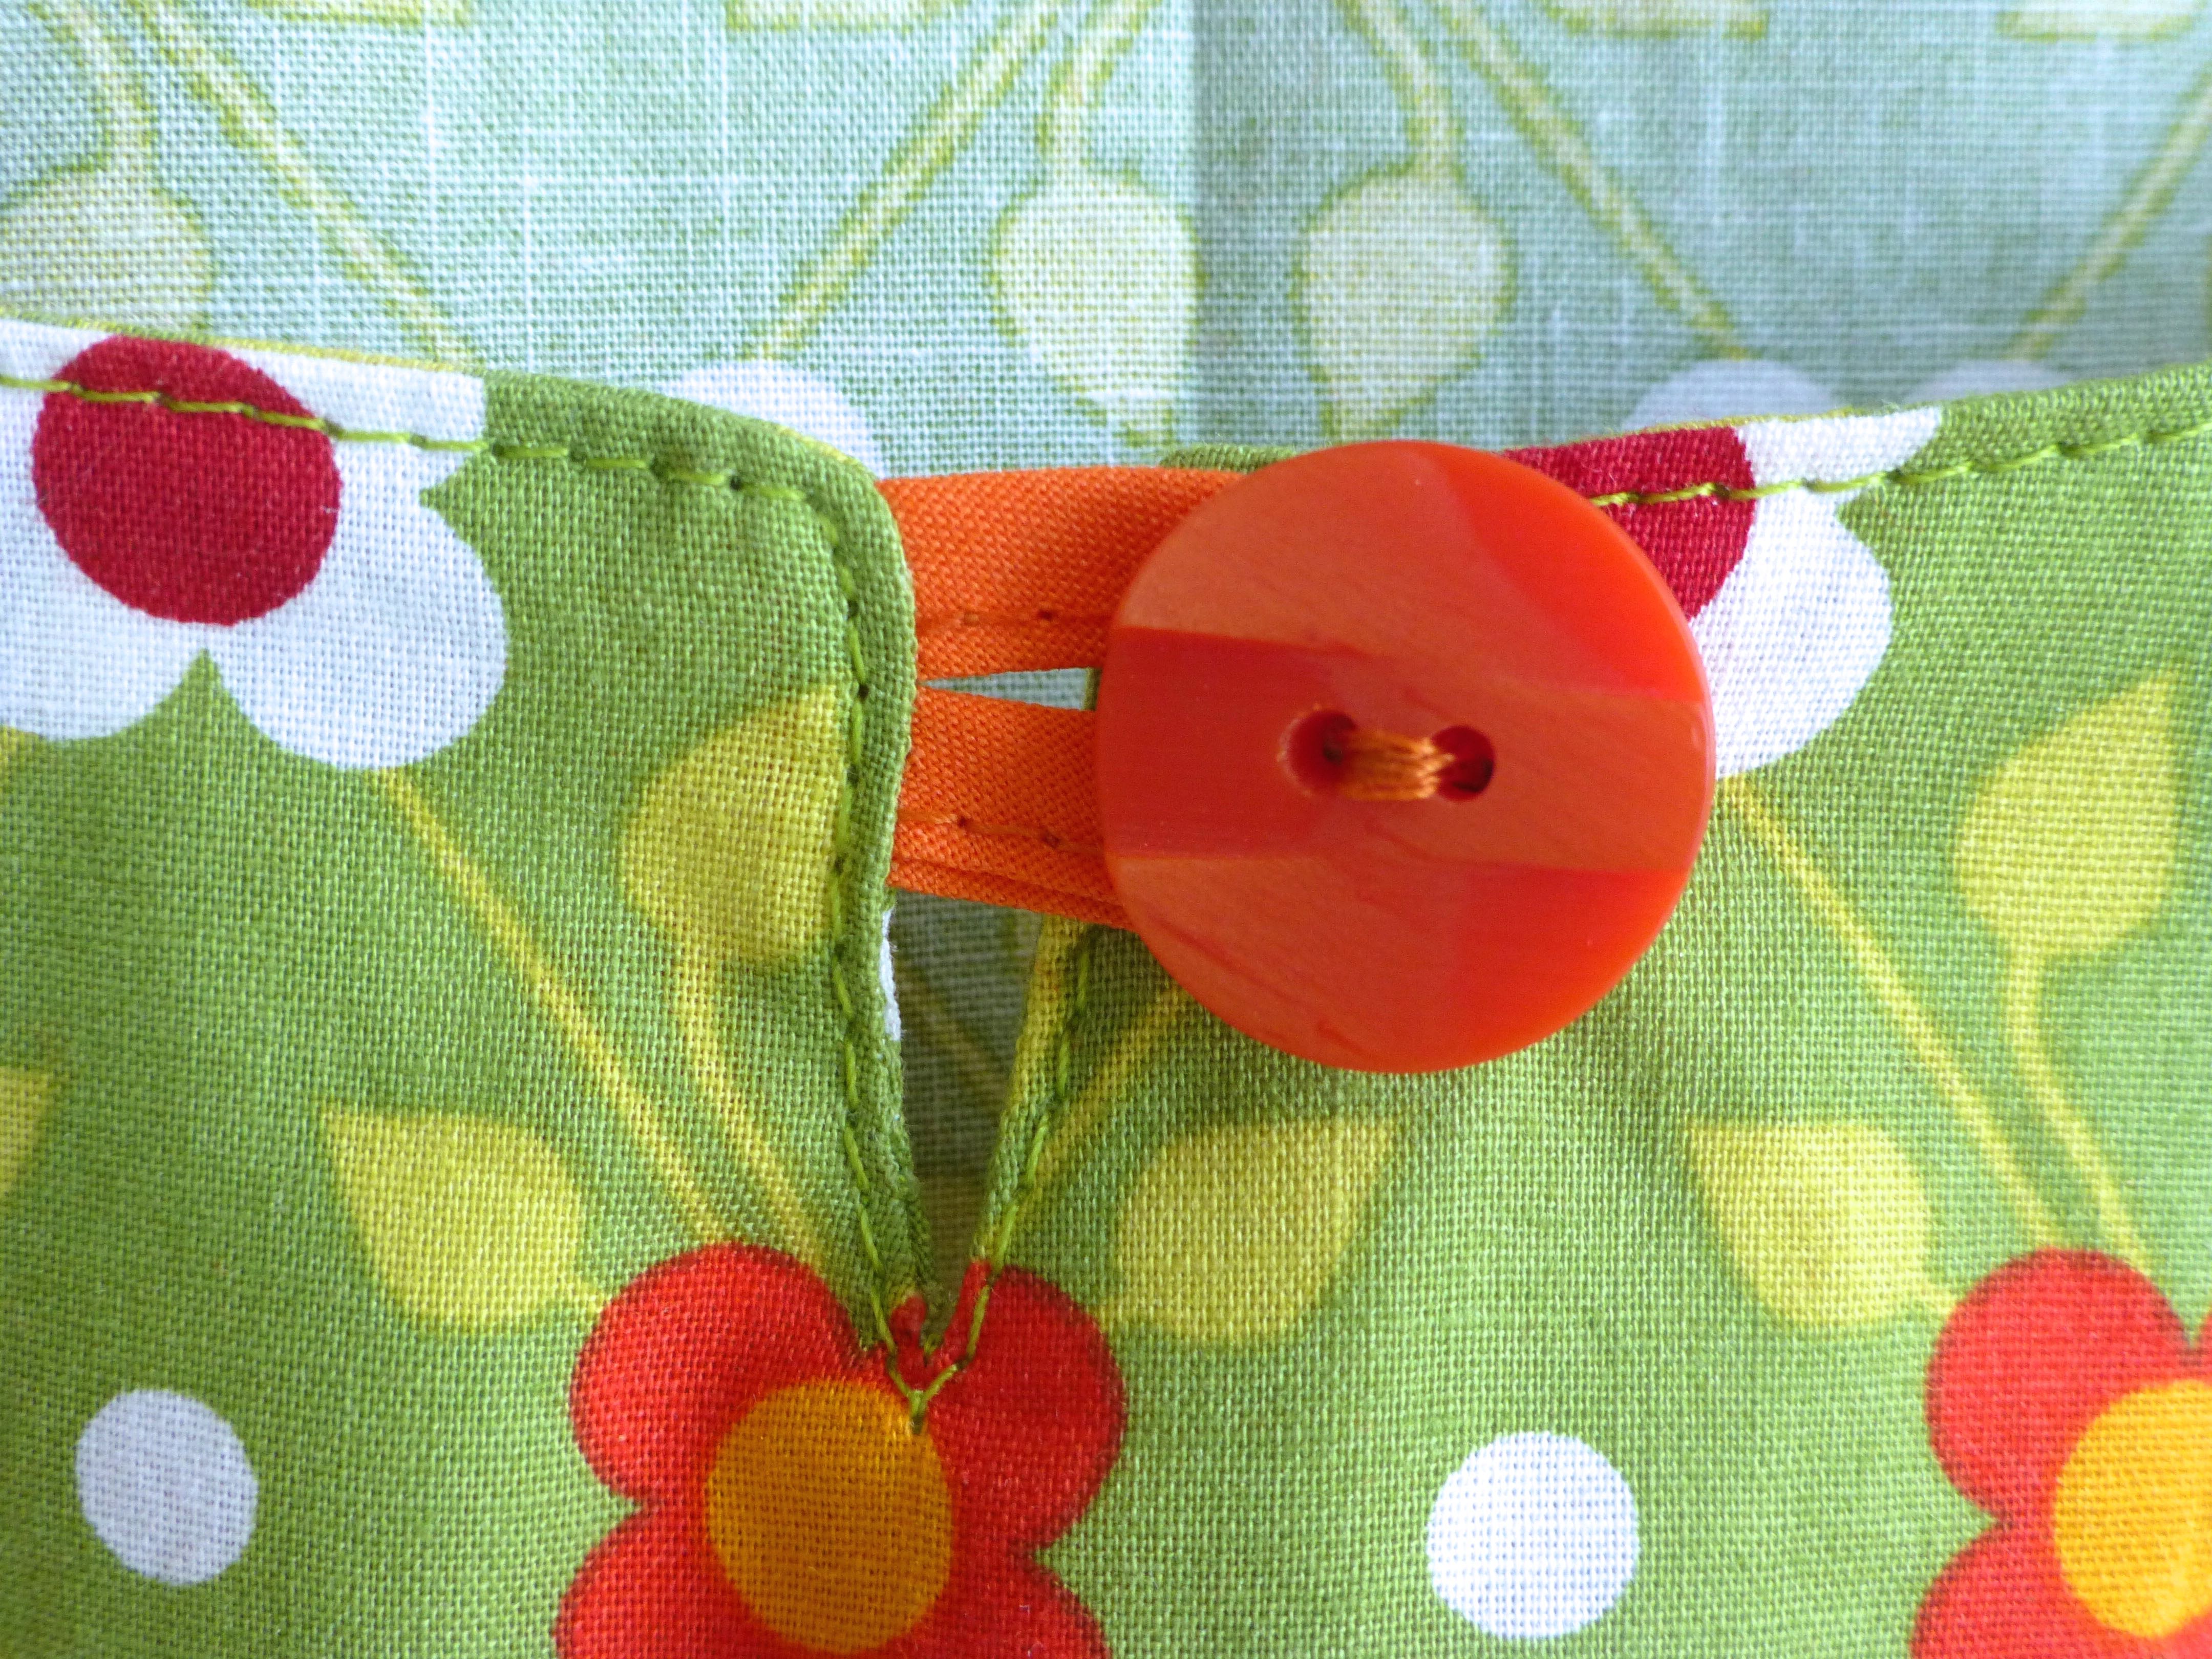
The design called for a single rouleau button loop at the back neck.
I rarely wear my hair up so this little detail would have been hidden under my hair, so I recreated it at the front neck instead.
I used my trusty overlocker to finish all the raw edges and side seams…
….and a flat fell seam for the shoulder seams.
I just love how neat this type of seam looks and feels!
I was about to turn up a plain hem when I remembered some bright orange bias binding left over from a previous project. It lends the perfect designer touch to lift the tunic out of the ordinary.
What do you think? It certainly shouts “Summer is coming” to me!
We Brits are a nation of animal lovers, particularly cats and dogs and, generally, we look after them well and love to pamper them just a little.
There inevitably comes a time when we have to say farewell to our loyal companions and, whilst I have lost many a pet over the years, it doesn’t get any easier.
They say the best way to mend a broken heart is to find a new love and certainly the arrival of a new puppy in the family does wonders to heal the gaping hole left by the loss of an old dog.
They also say that a puppy breathes new life into an elderly dog so, when our Yorkshire Terrier reached eleven years, we thought it would be a good time to introduce a puppy.
Yorkies have a life expectancy of 12-15 years so Fifi, who is now 12 1/2, is enjoying her old age with a new spring in her step with the companionship of a younger dog. Tess, who is now an 18 month Yorkie x Chihuahua, has benefited enormously from her older, wiser, calmer and well behaved mentor. When Fifi goes, we will have the comfort of having a dog in the family still. It’s a win-win-win.
Tess has the boundless energy found in one so young and they both enjoy long walks in the country, but recently Fifi has started showing her age. She often turns around and walks back home if we are in the fields behind the house and, if we are doing a lane walk, she plods along slowly unable to keep pace after a couple of miles.
I now get to the point of this story; I wanted to make a dog carrier to take with me on our walks so that Fifi could climb in and rest her weary bones as and when she feels like it and, yes, she does tell us when she wants a carry!
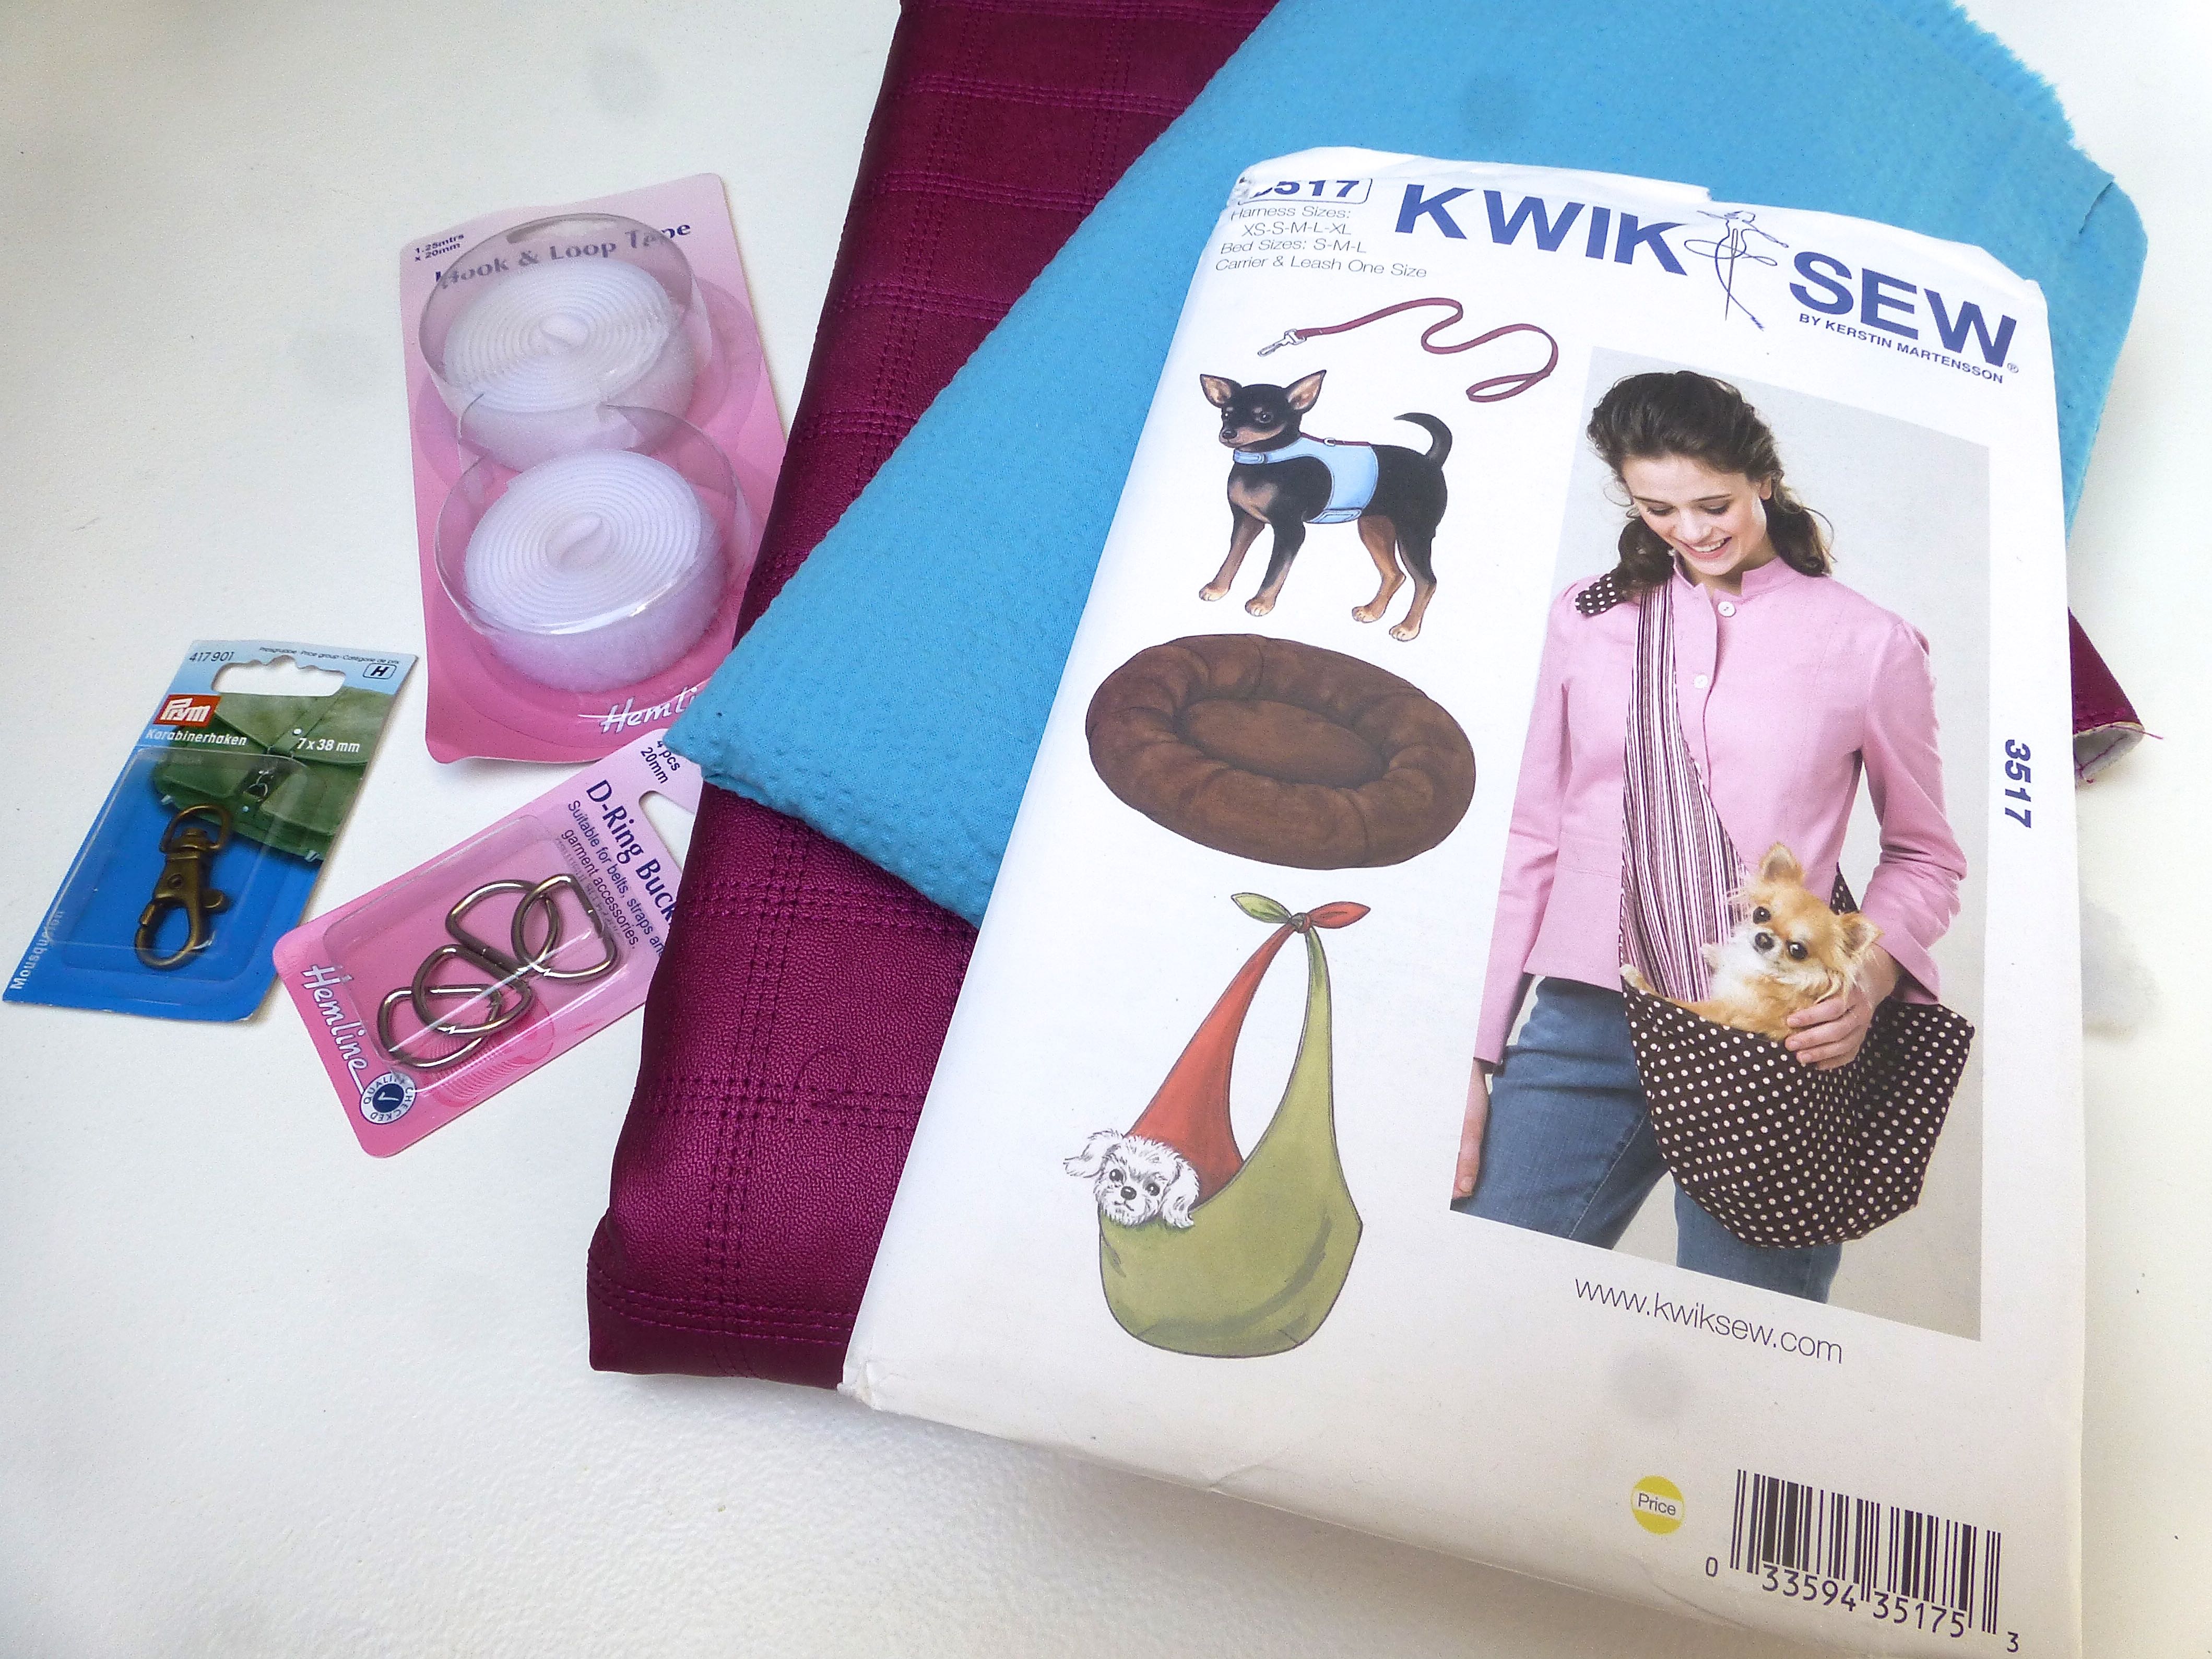
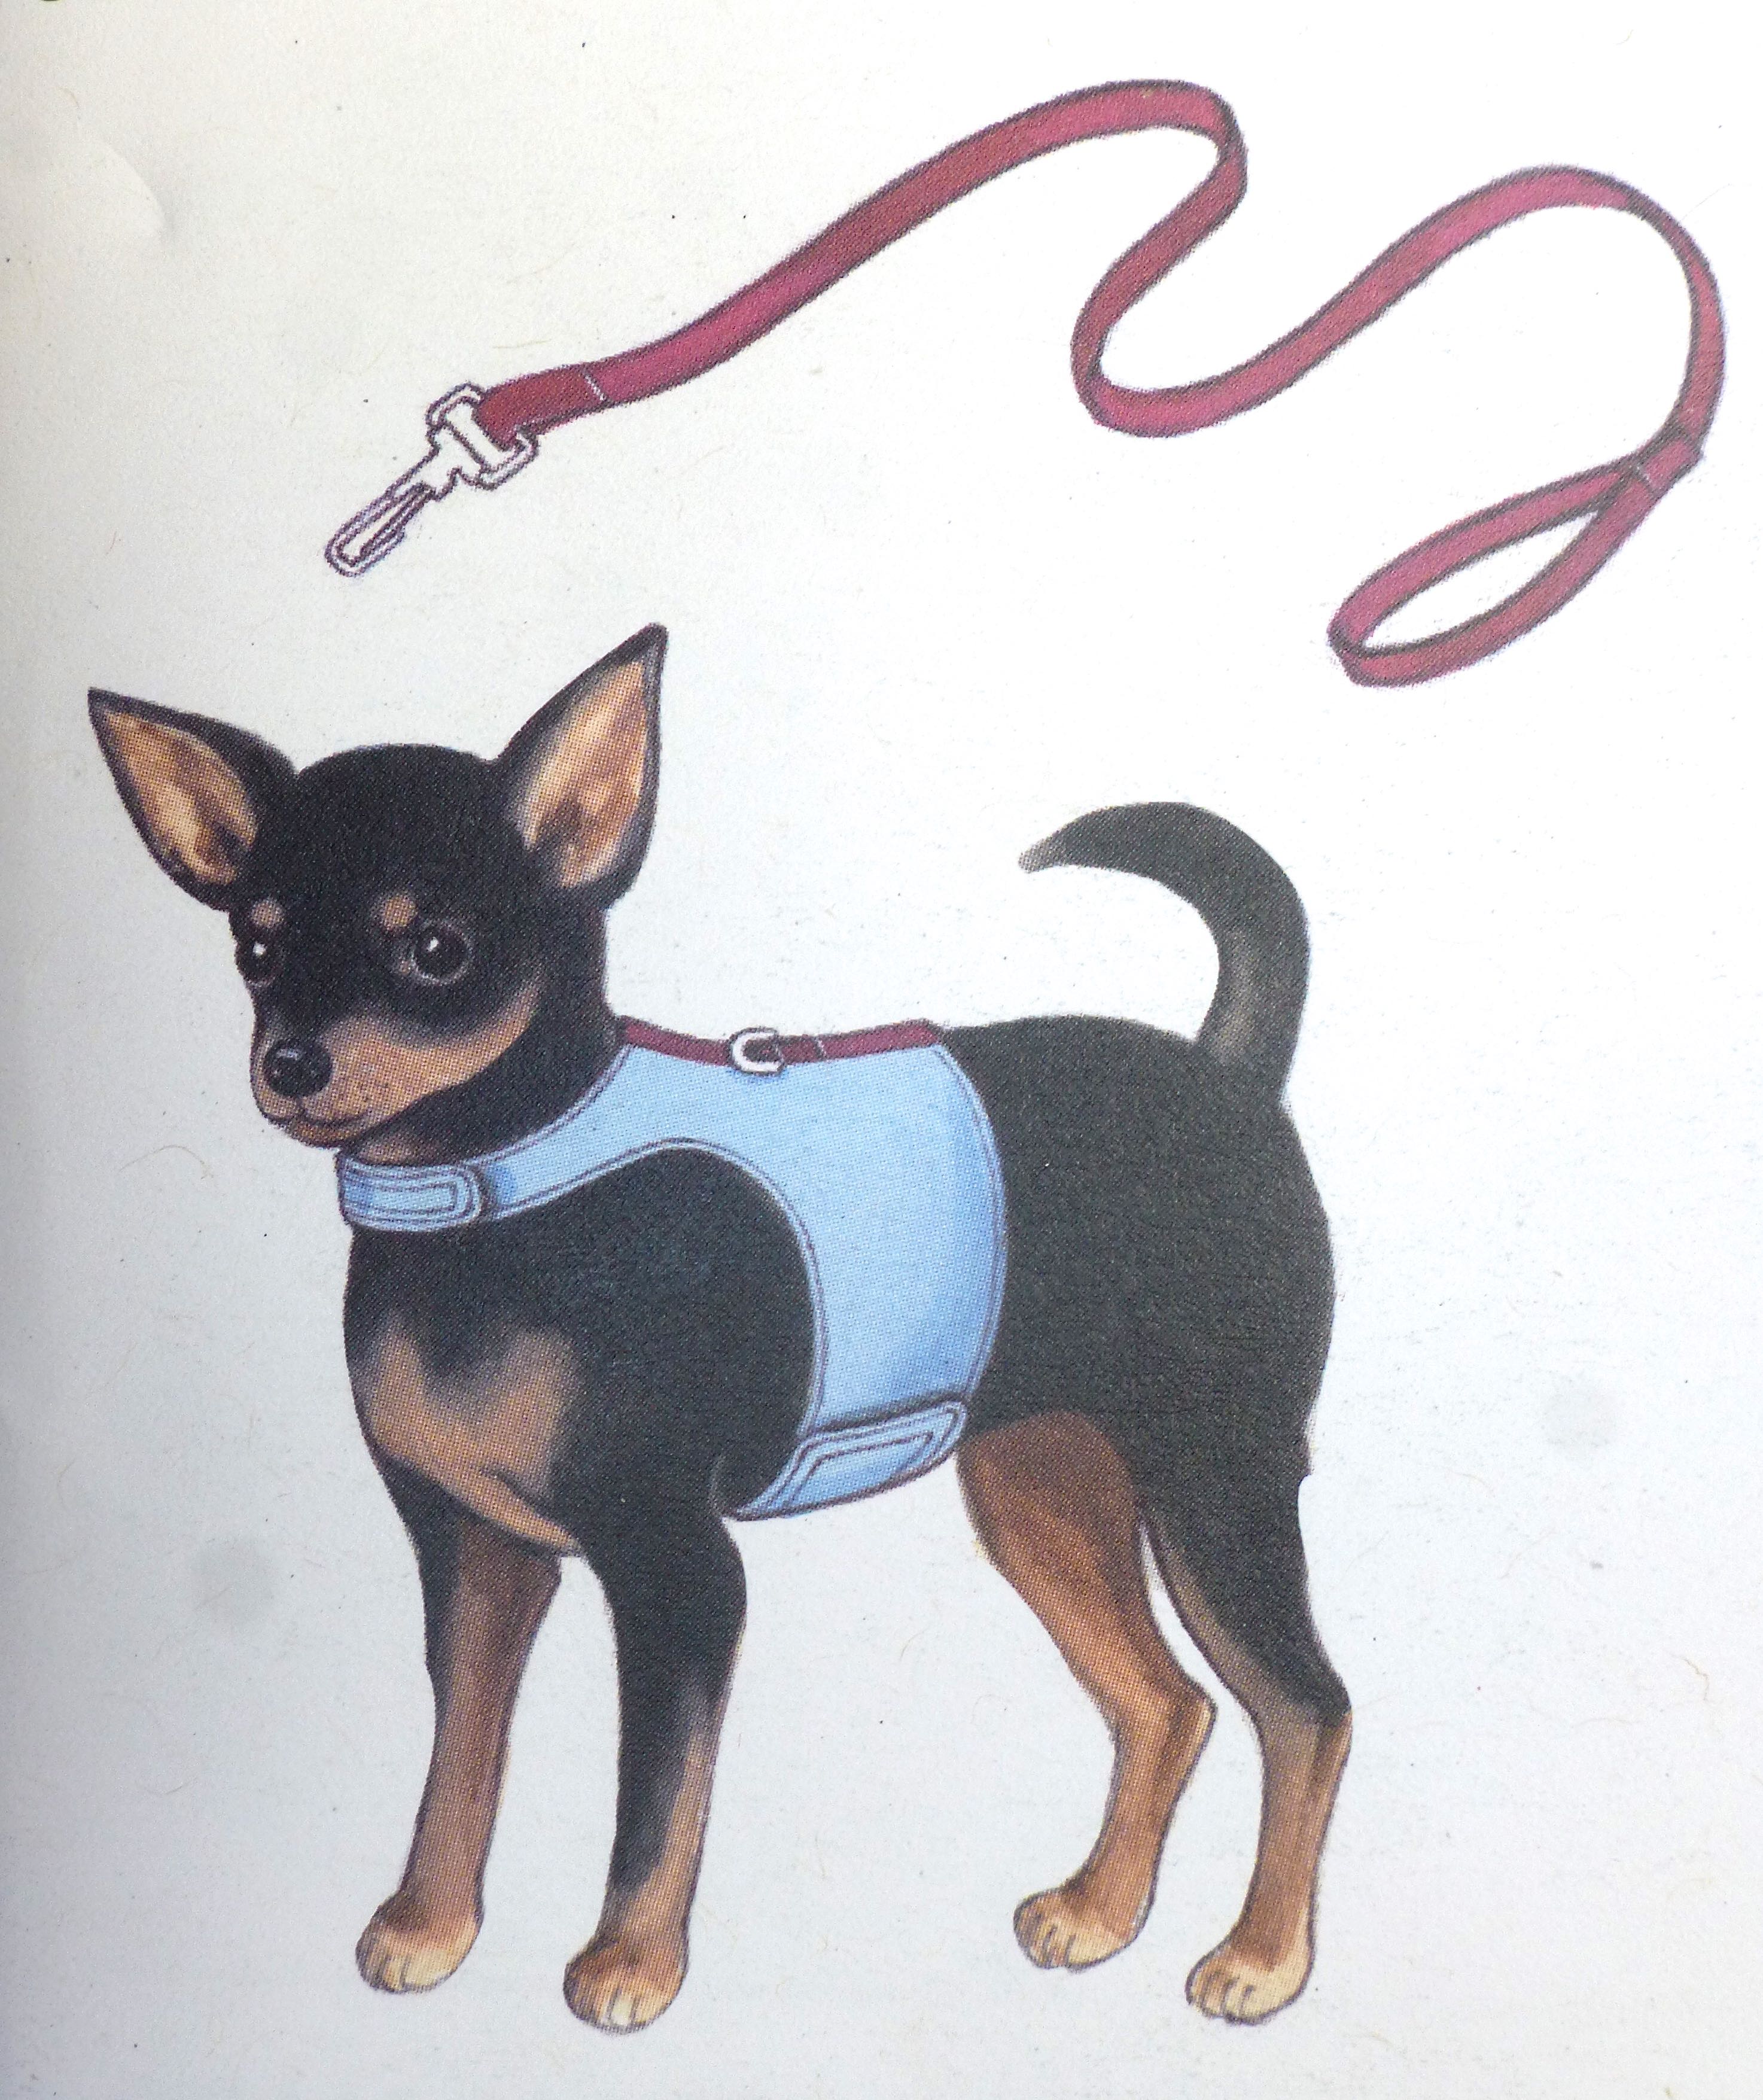
Minerva Crafts had the perfect pattern (Kwik Sew 3517) and fabrics for both a dog carrier and a harness and lead, so I got cracking and decided to make a matching set!
This is the parcel that arrived: –
The carrier is lined and padded so is both comfortable for the dog and for you to wear across the body.
It incorporates a swivel clip to secure the dog to the inside of the carrier, but I chose not to include this as Fifi is an old dog and wouldn’t even consider jumping out – being restrained would make her nervous.
I saw the matching accessories and just had to make those too! The swivel clip could be used on the lead instead.
I chose a ready-quilted fabric in a raspberry coloured faux leather which incorporated a layer of wadding so would be the perfect choice, adding structure and warmth to the carrier and harness, yet is also wipeable for practicality.
It also meant that I didn’t need to add the layer of fleece that the pattern called for as the wadding was padding enough.
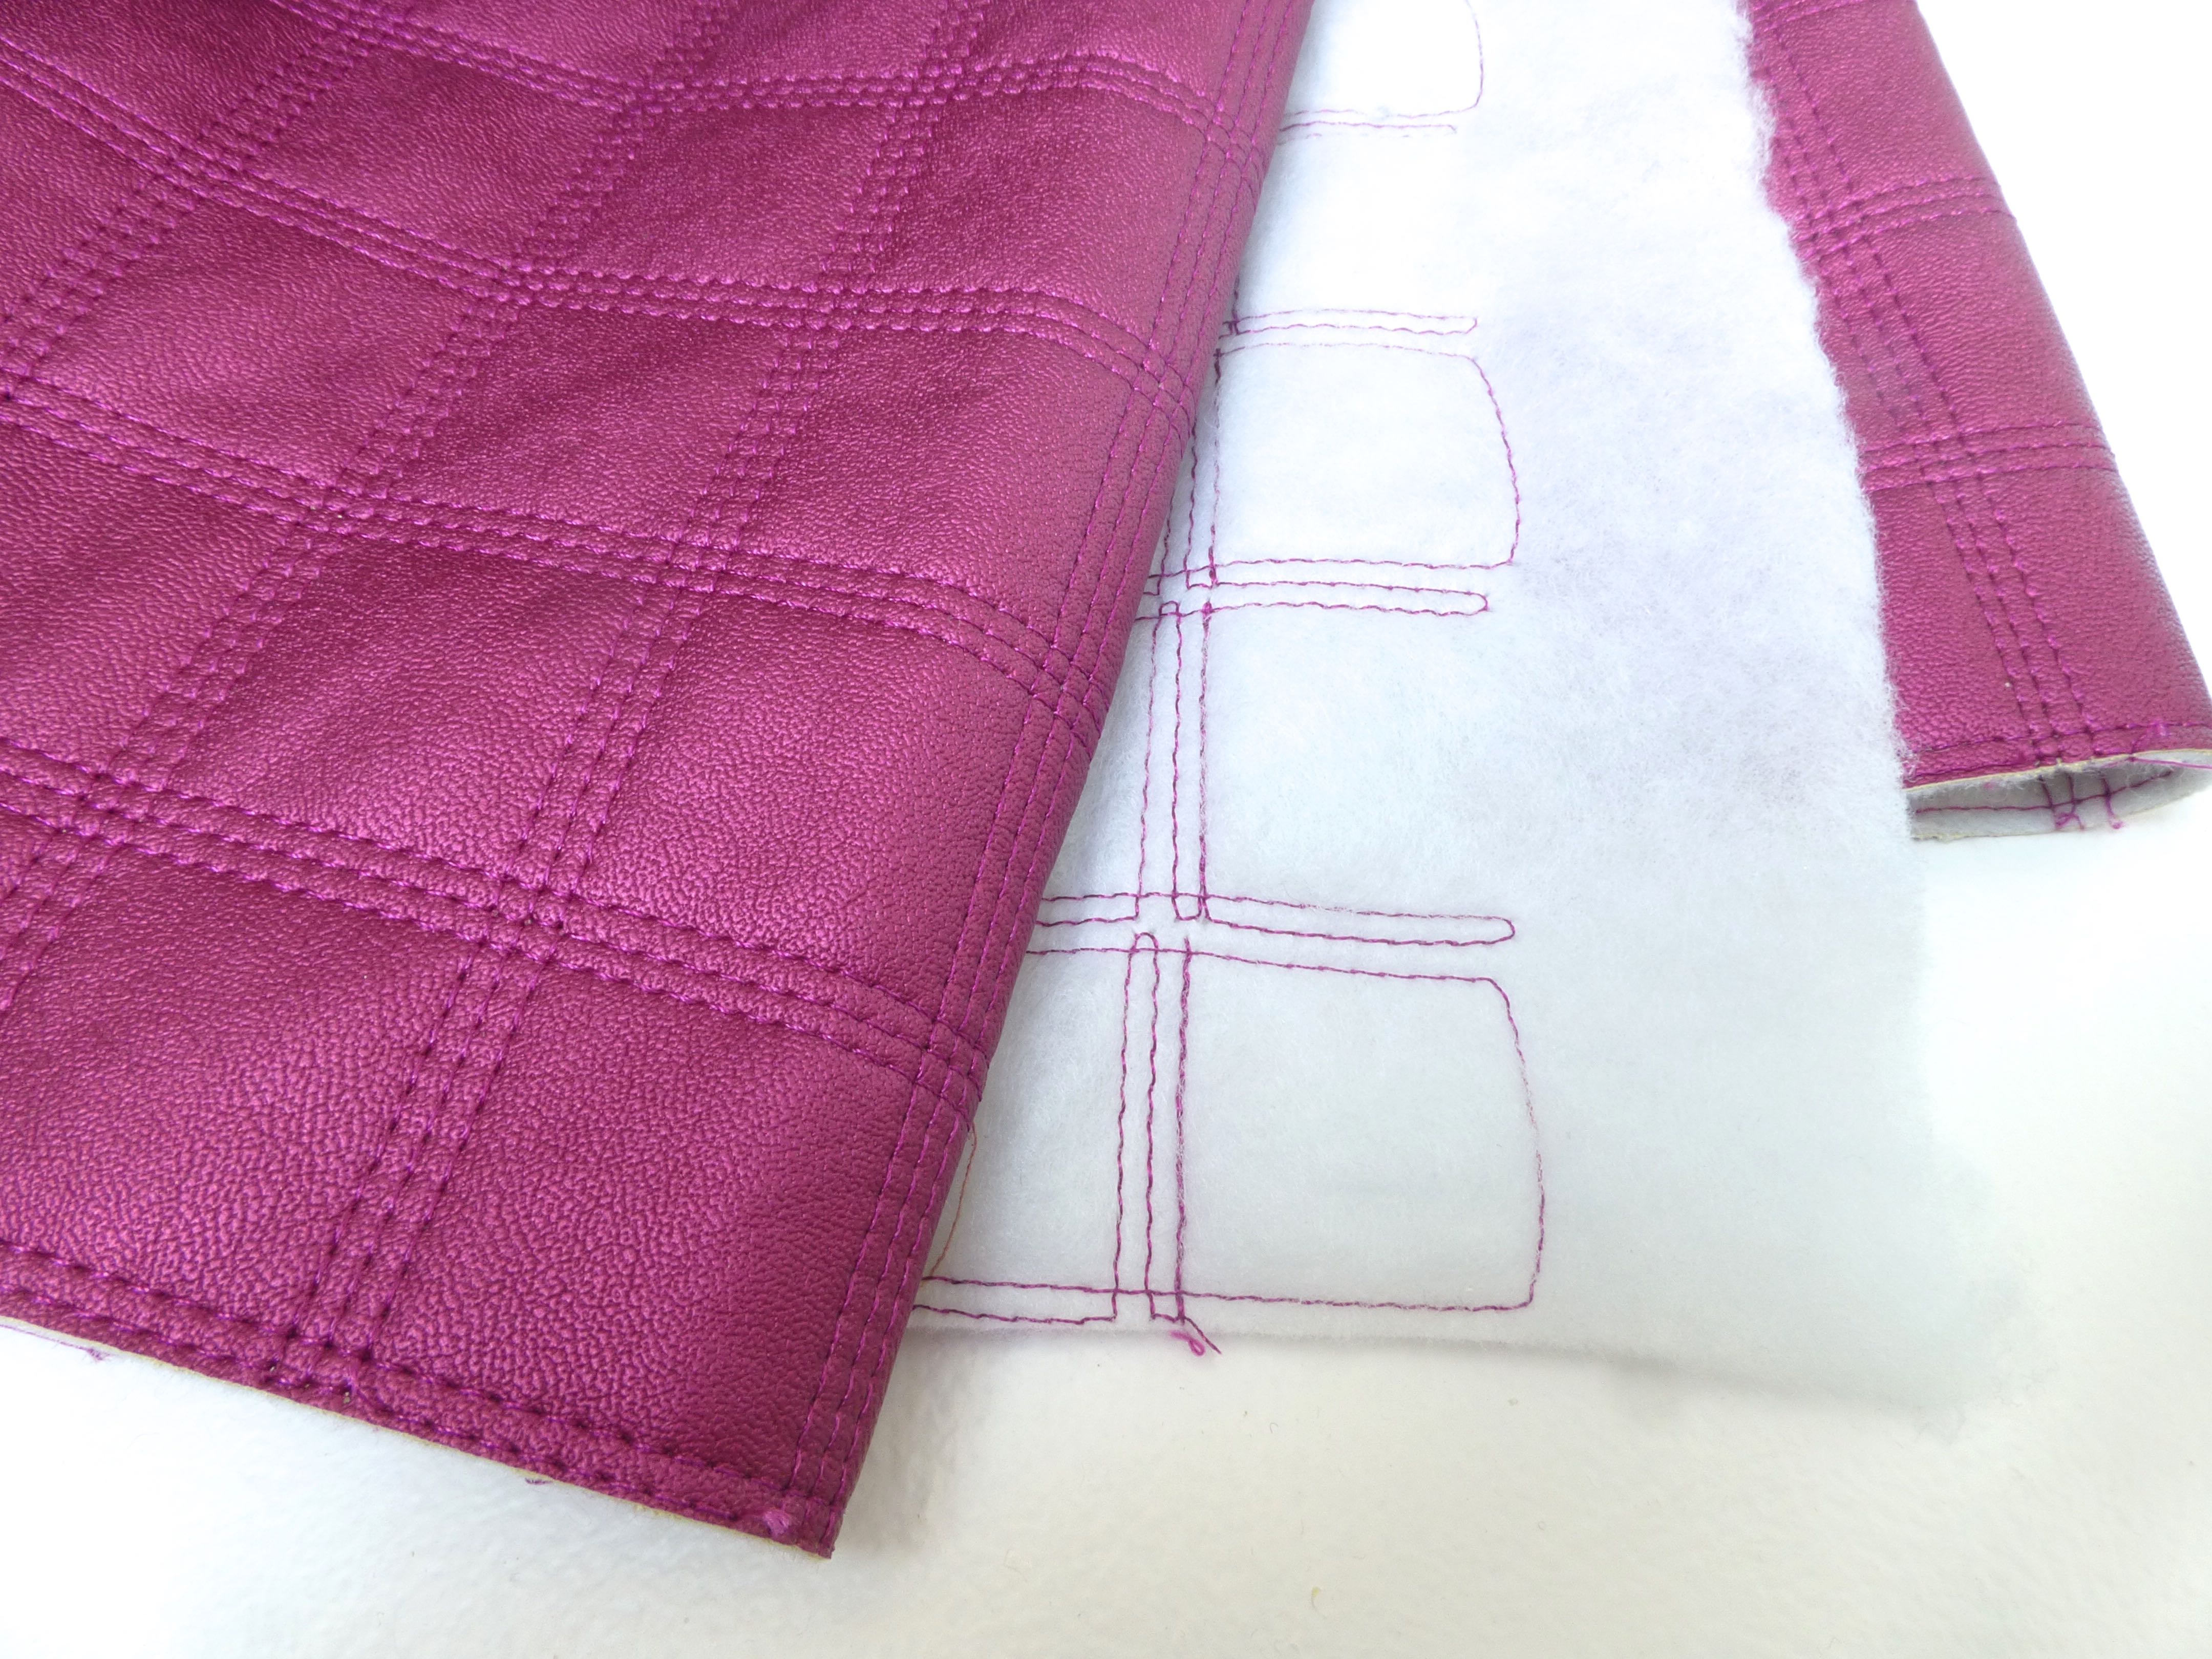
There was just one single pattern piece for the carrier which made it very simple to cut out.
I have to mention that I was extremely impressed with the quality of the paper used for the pattern – can you get an idea of how sturdy it is from this photo before I ironed it? It’s not transparent or flimsy and therefore doesn’t tear accidentally, unlike the usual brown tissue paper type.
Always iron your pattern pieces!
The carrier made up like a dream – the instructions were simple and easy to follow. You’re required to press at every stage which I couldn’t do with the faux leather in case it melted. When top stitching, it wasn’t a problem just rolling the faux leather out slightly over the cotton to get a crisp edge so being unable to iron it didn’t matter.
Here is the finished carrier….
….and here’s Fifi trying it for size!
She may look a little reticent in this photo, but she actually curled up happily and let me snap away until I got the pics I needed.
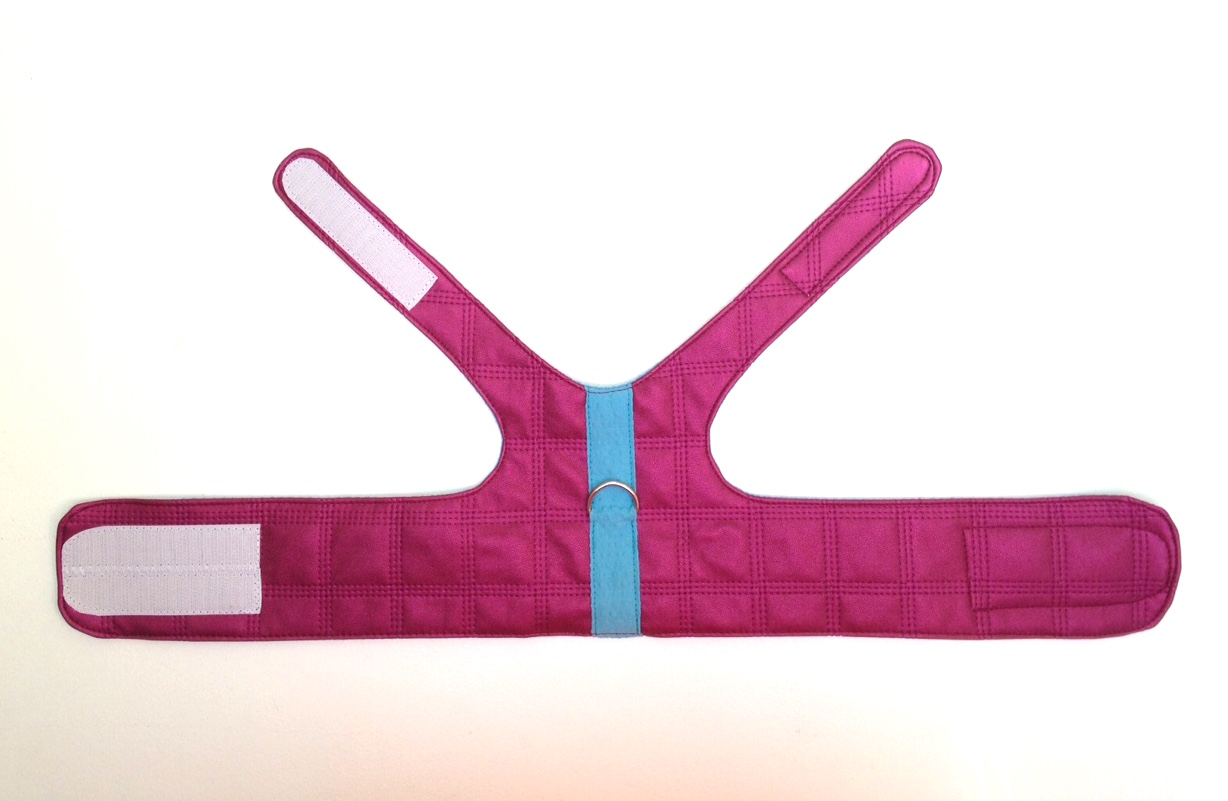
Then onto the harness.
Again, just one main pattern piece (plus a piece for a strap for the D-ring) so the lining and main fabric were simply sewn right sides together before being turned through a gap in the stitching.
Simples:)
Sew the scratchy side of the velcro to the outside….
…and the soft side to the inside lining. We don’t want friction causing any nasty sores, do we?
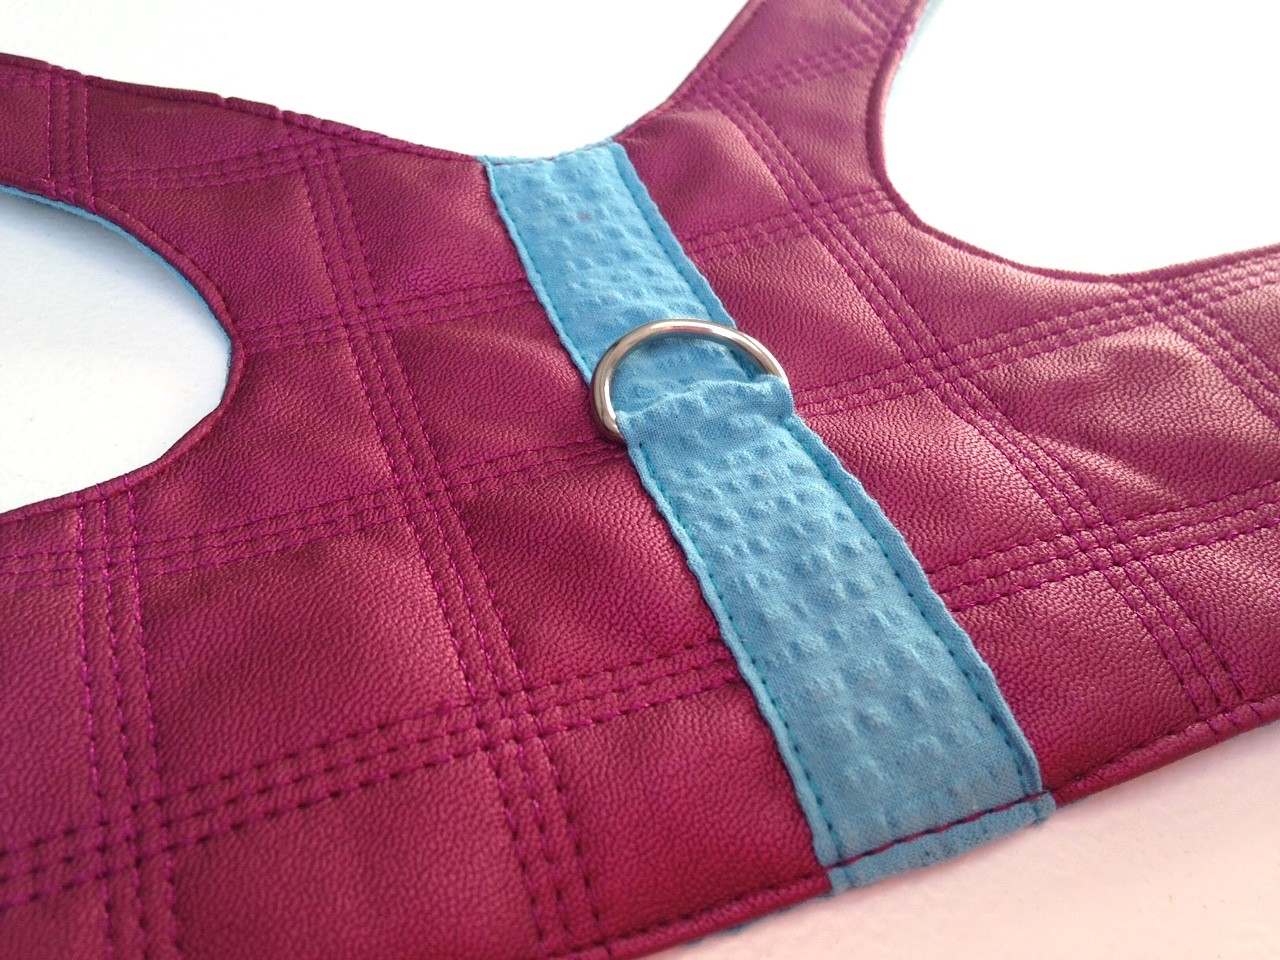
I used the lining fabric as a contrast for the D-ring strap which was top stitched on securely.
Different coloured thread was used for the bobbin for a ‘blend in’ effect but opposite colours would work equally well if you prefer a contrast – turquoise on the magenta and vice versa.
How ‘Designer’ does that look, eh?
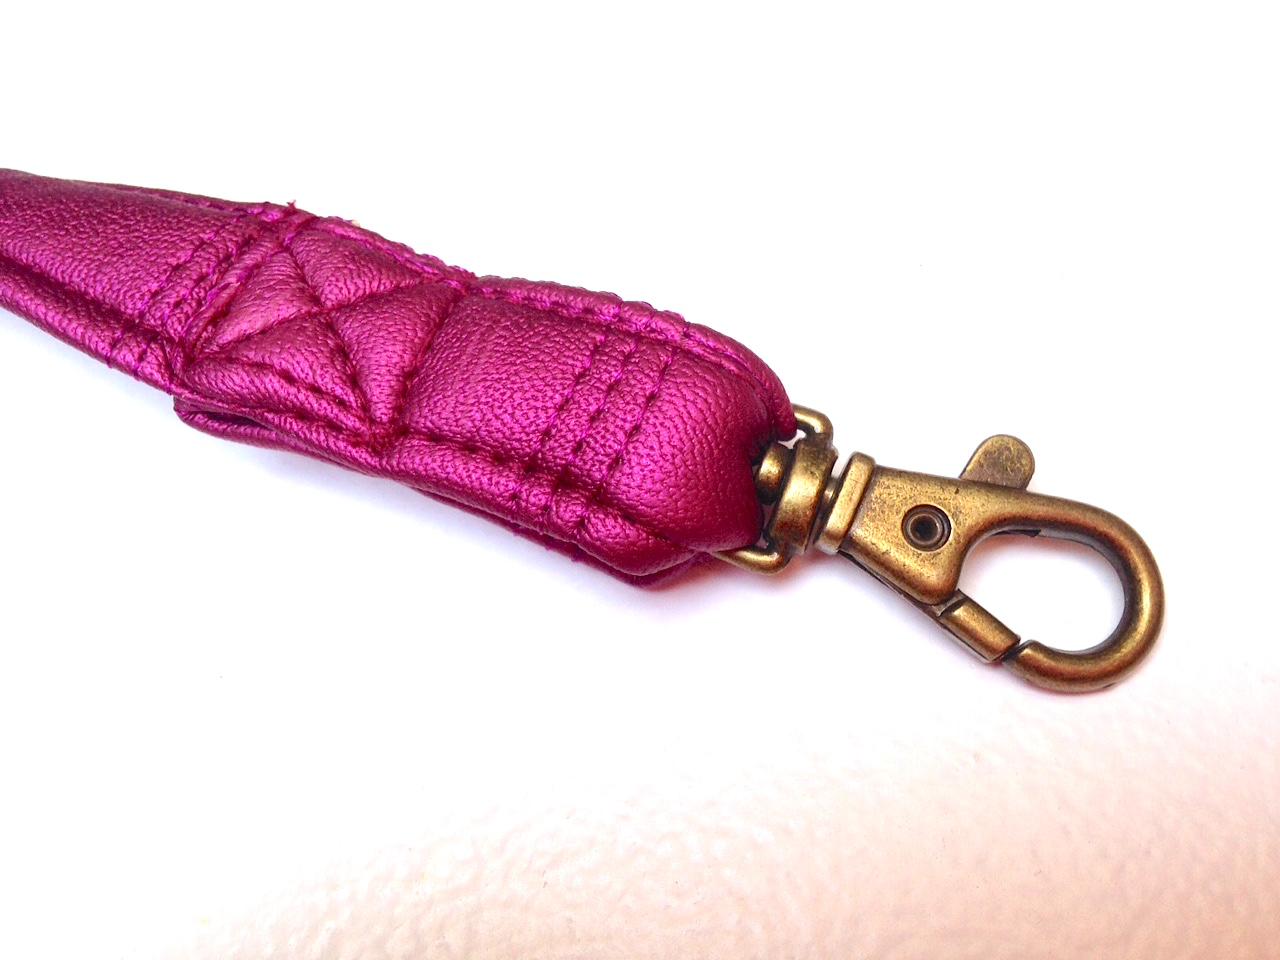
I almost plumped for the turquoise cotton to make the lead, but in the end thought the quilted fabric looked more luxurious.
It was a bit of a pig to fold and top stitch such a narrow, thick strip of fabric though, the cotton would have been a piece of cake to press and stitch but you can’t iron faux leather….
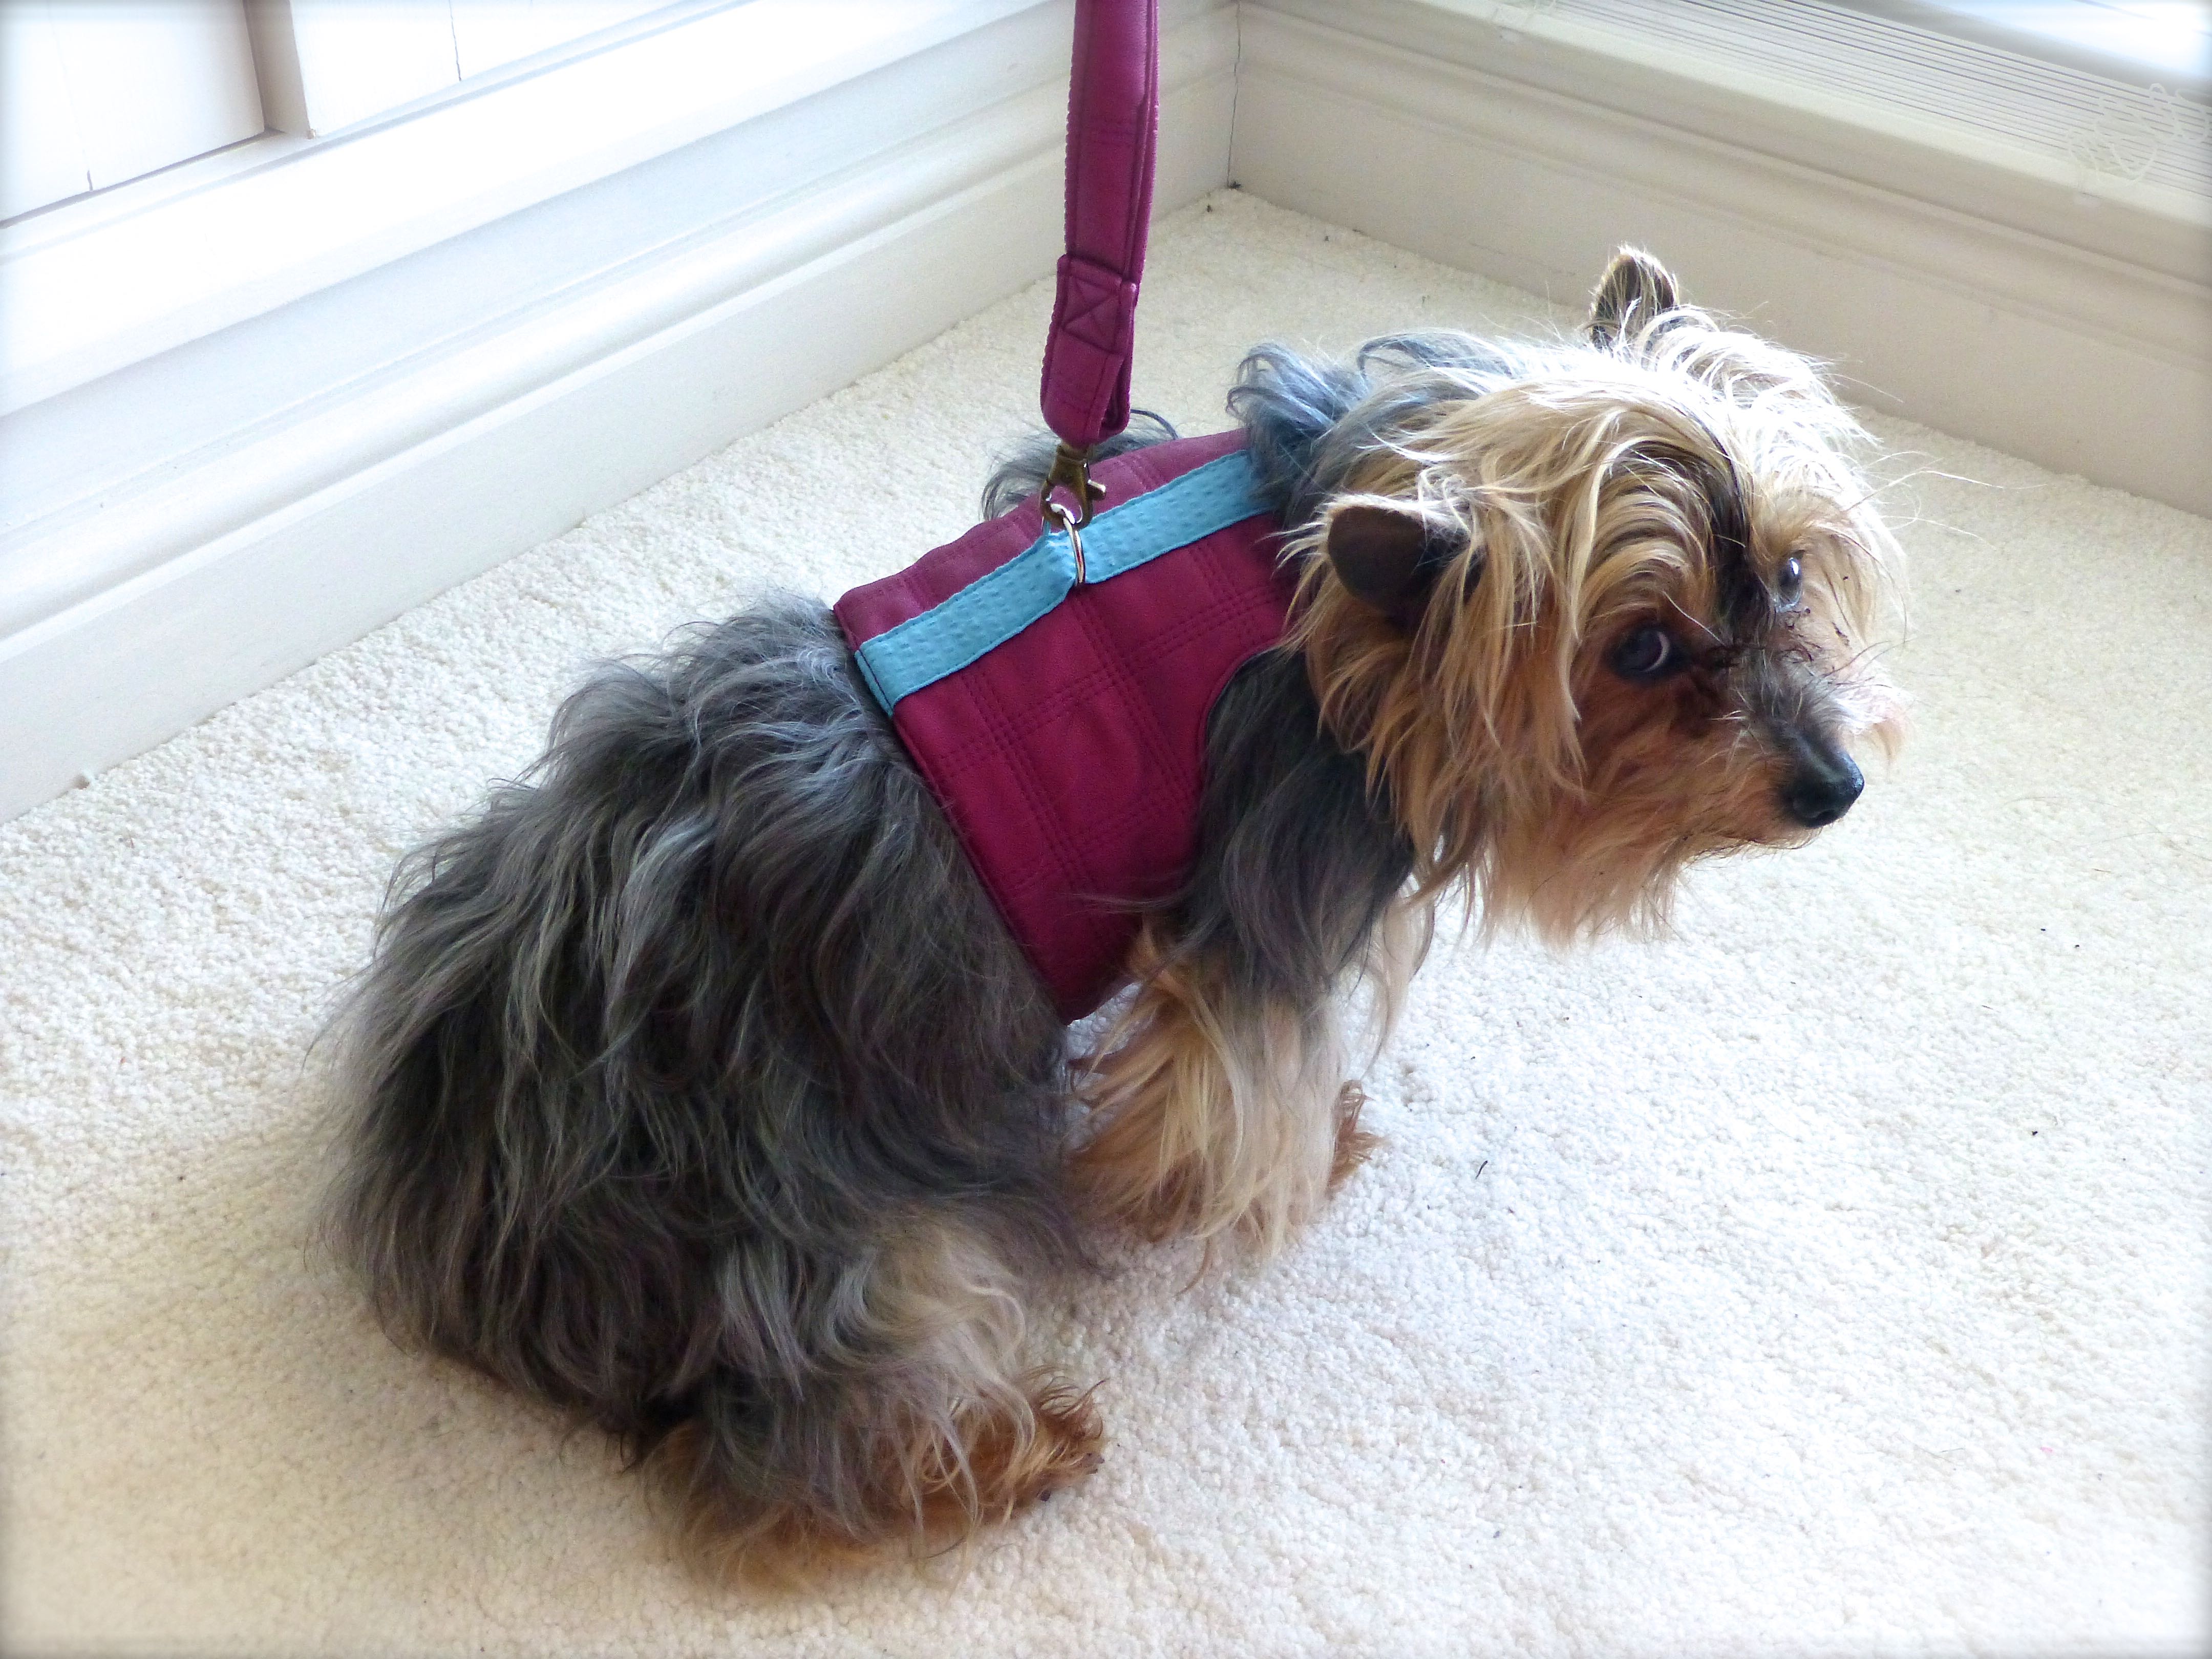
Just look at Fifi’s hang-dog expression! She was itching to come to me but I wanted a photo from the back to show off the harness to best effect, so this is her being patient with me.
I sewed the ‘Large’ size harness believe it or not (Fifi only weighs six pounds!), but there was one larger and three smaller sizes on this multi-sized pattern. I’m guessing the variation in sizes would probably fit from a Chihuahua to a Westie.
Here we all are, ready to go for a ‘walk’.
I think I’ll tie it up a bit higher as I usually carry her under my arm and this feels a little low.
Fifi loved it though – she was almost asleep by the time No.3 Son had finished taking photos!
Thanks go to Minerva Crafts for providing all the materials for these items – why not pop over to visit the others on the Blogger Network and see what they’ve been up to lately?
I turned on my computer this morning and this popped up in my notifications: –
I thought it was next week but I’ll go with WordPress and celebrate today as my One Year Anniversary, rather comically referred to as a Bloggiversary (my interpretation of spelling, seeing as it is a made up word!).
I’d planned to do a giveaway as a small gesture of thanks to everyone who has followed, visited or commented over the past twelve months as, without such unfailing support, this blog would not be here now. You can’t continue without constant encouragement, can you?
I can’t put into words quite how much I have enjoyed blogging – both the creative process and (even more) discovering the multitude of fantastic blogs out there. That so many lovely (mostly) ladies are happy to share so unselfishly their ideas and creations, quite overwhelmed me in the beginning and gave me the confidence to join in and nervously share some of my own makes.
I fully expected criticism as part of the deal, but can honestly say that I haven’t had a single negative comment – all words have been constructive and, most importantly, kind. I feel as if I ‘know’ a lot of you and hopefully will somehow meet some of you wonderful, like-minded people in the future. (A get-together anyone?!)
Anyway – back to the giveaway.
Remember the hugely successful Crafternoon that I held for Comic Relief, raising £340 in total? I did a couple of posts (here and here) in the run up showing you the things I’d made prior to the day itself.
Would anyone like to win ALL of them?
To enter, just make sure you ‘Follow’ the blog then leave a comment below.
No. 3 Son will pull a name out of the hat after the closing date of midnight on Saturday 18th April – so be quick!
As a reminder, here’s what’s up for grabs: –
Pear Pin Cushion
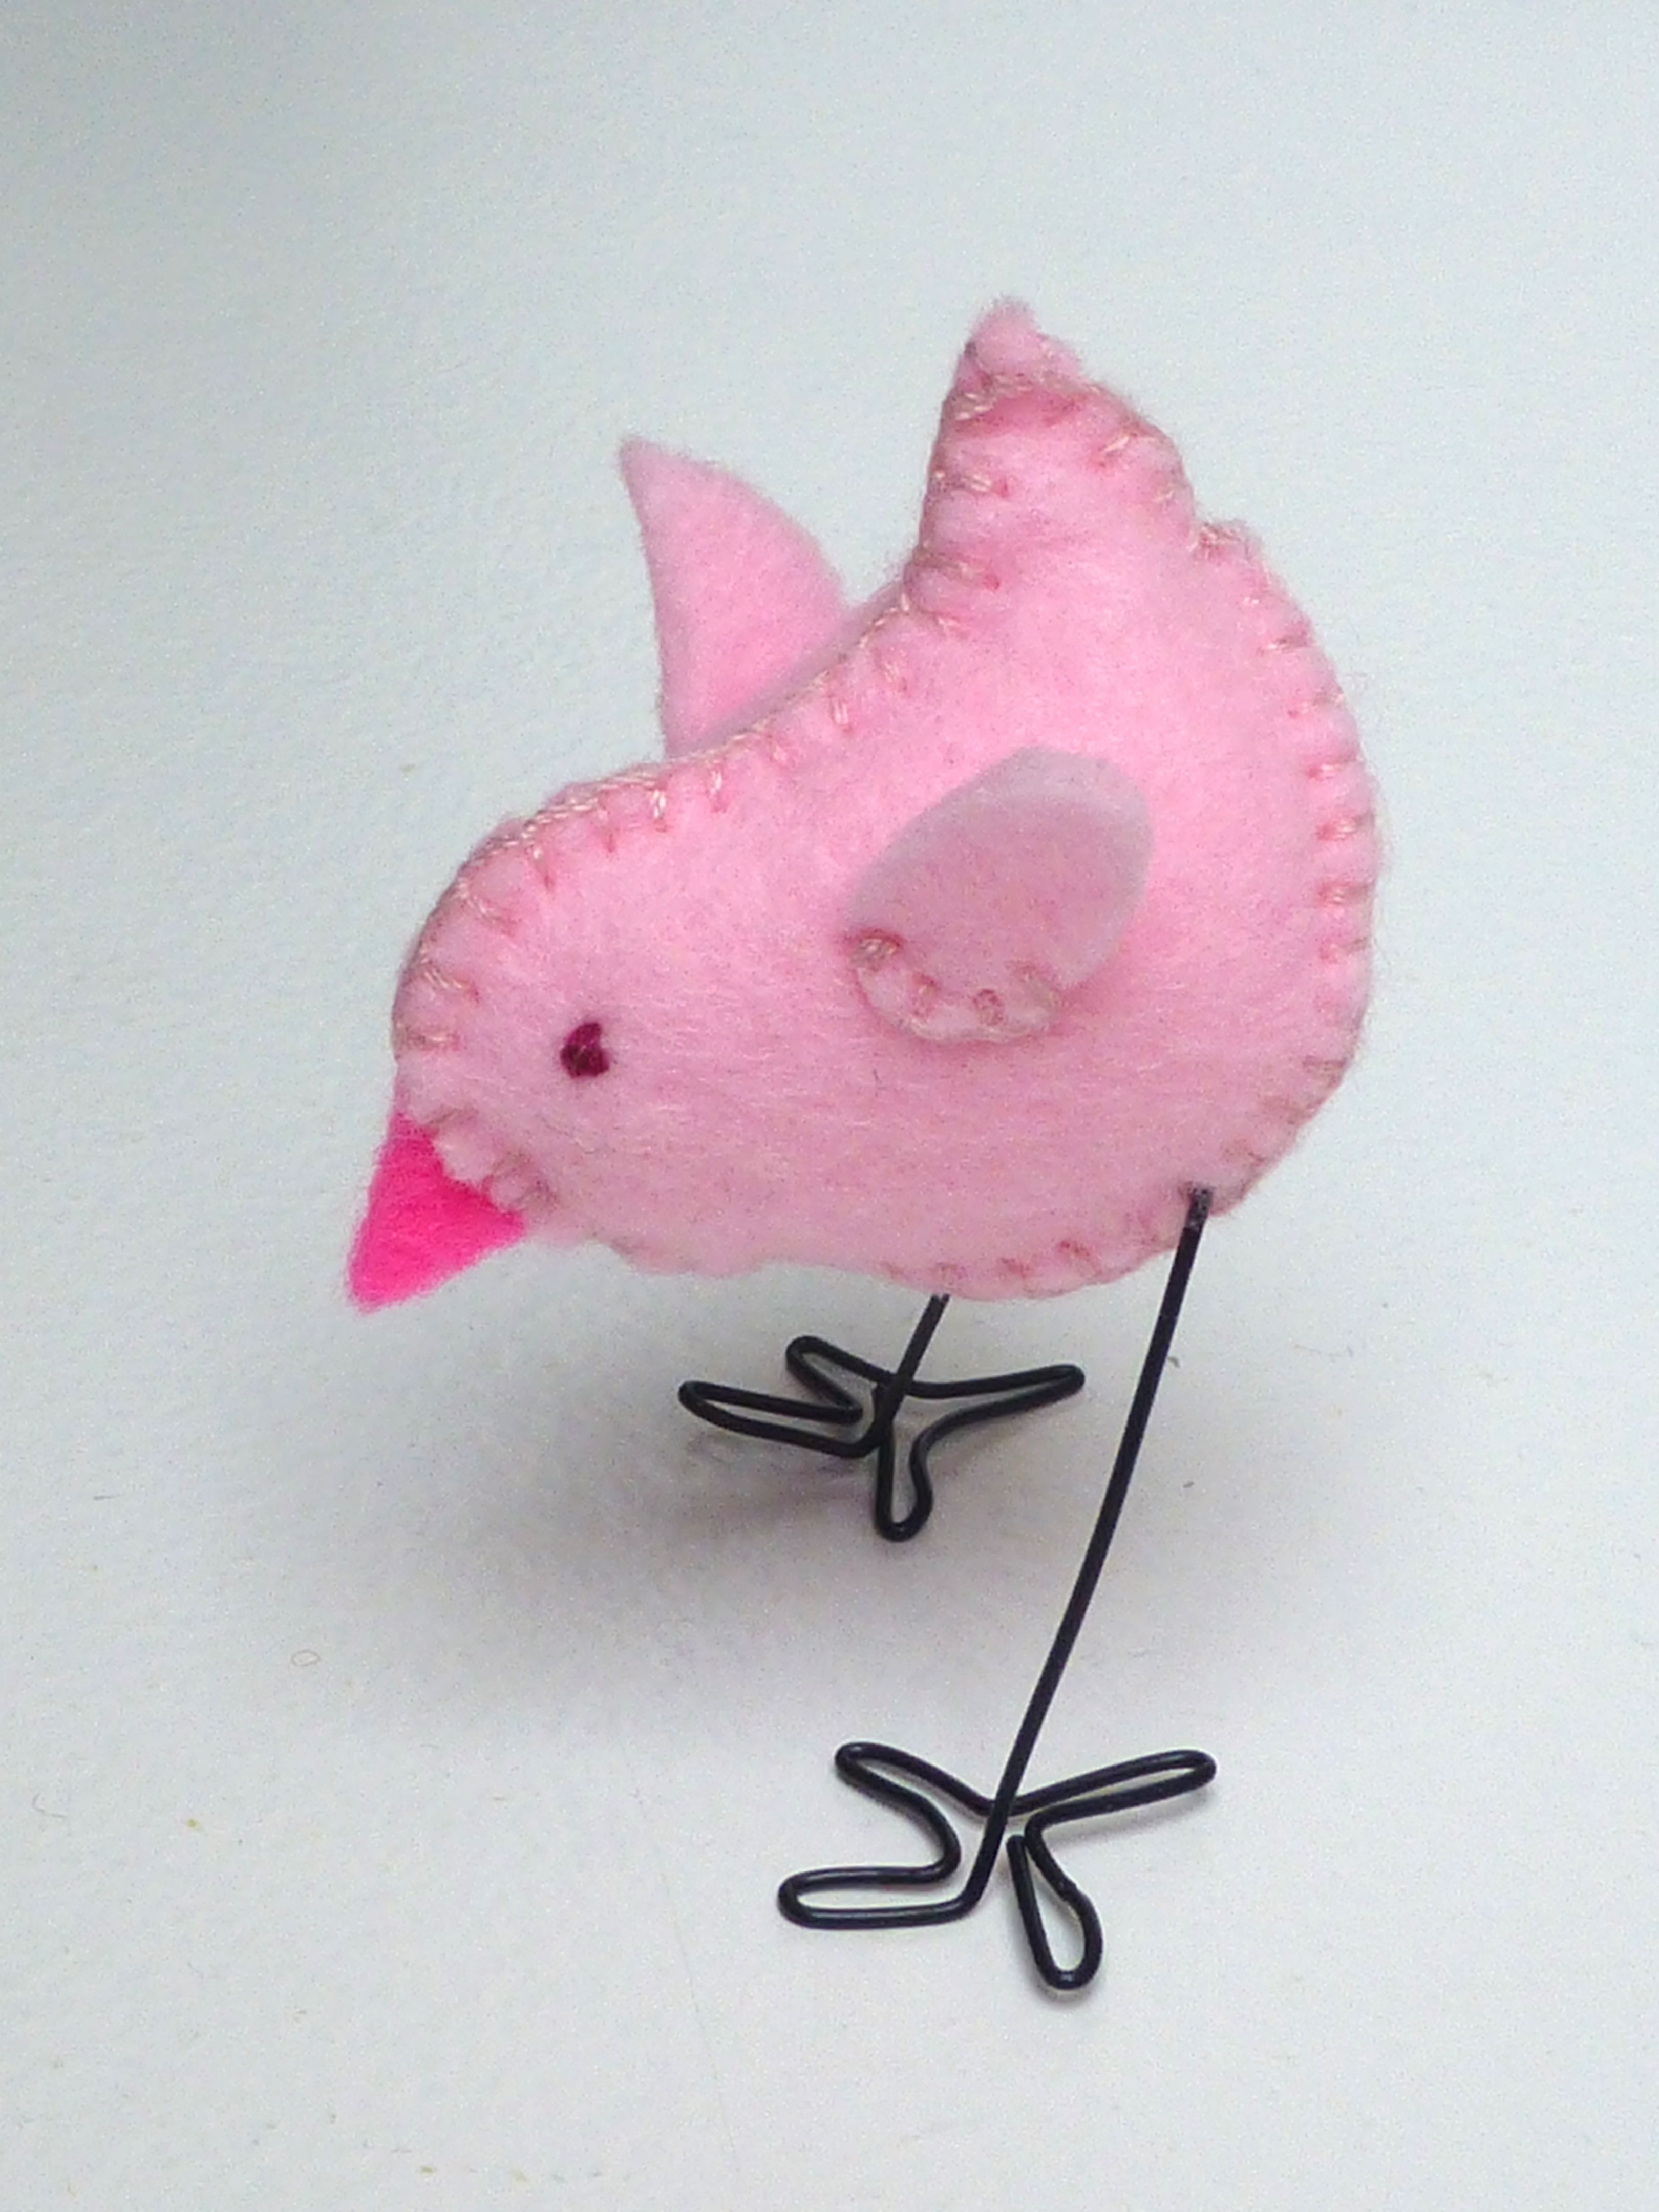
Felt Chick
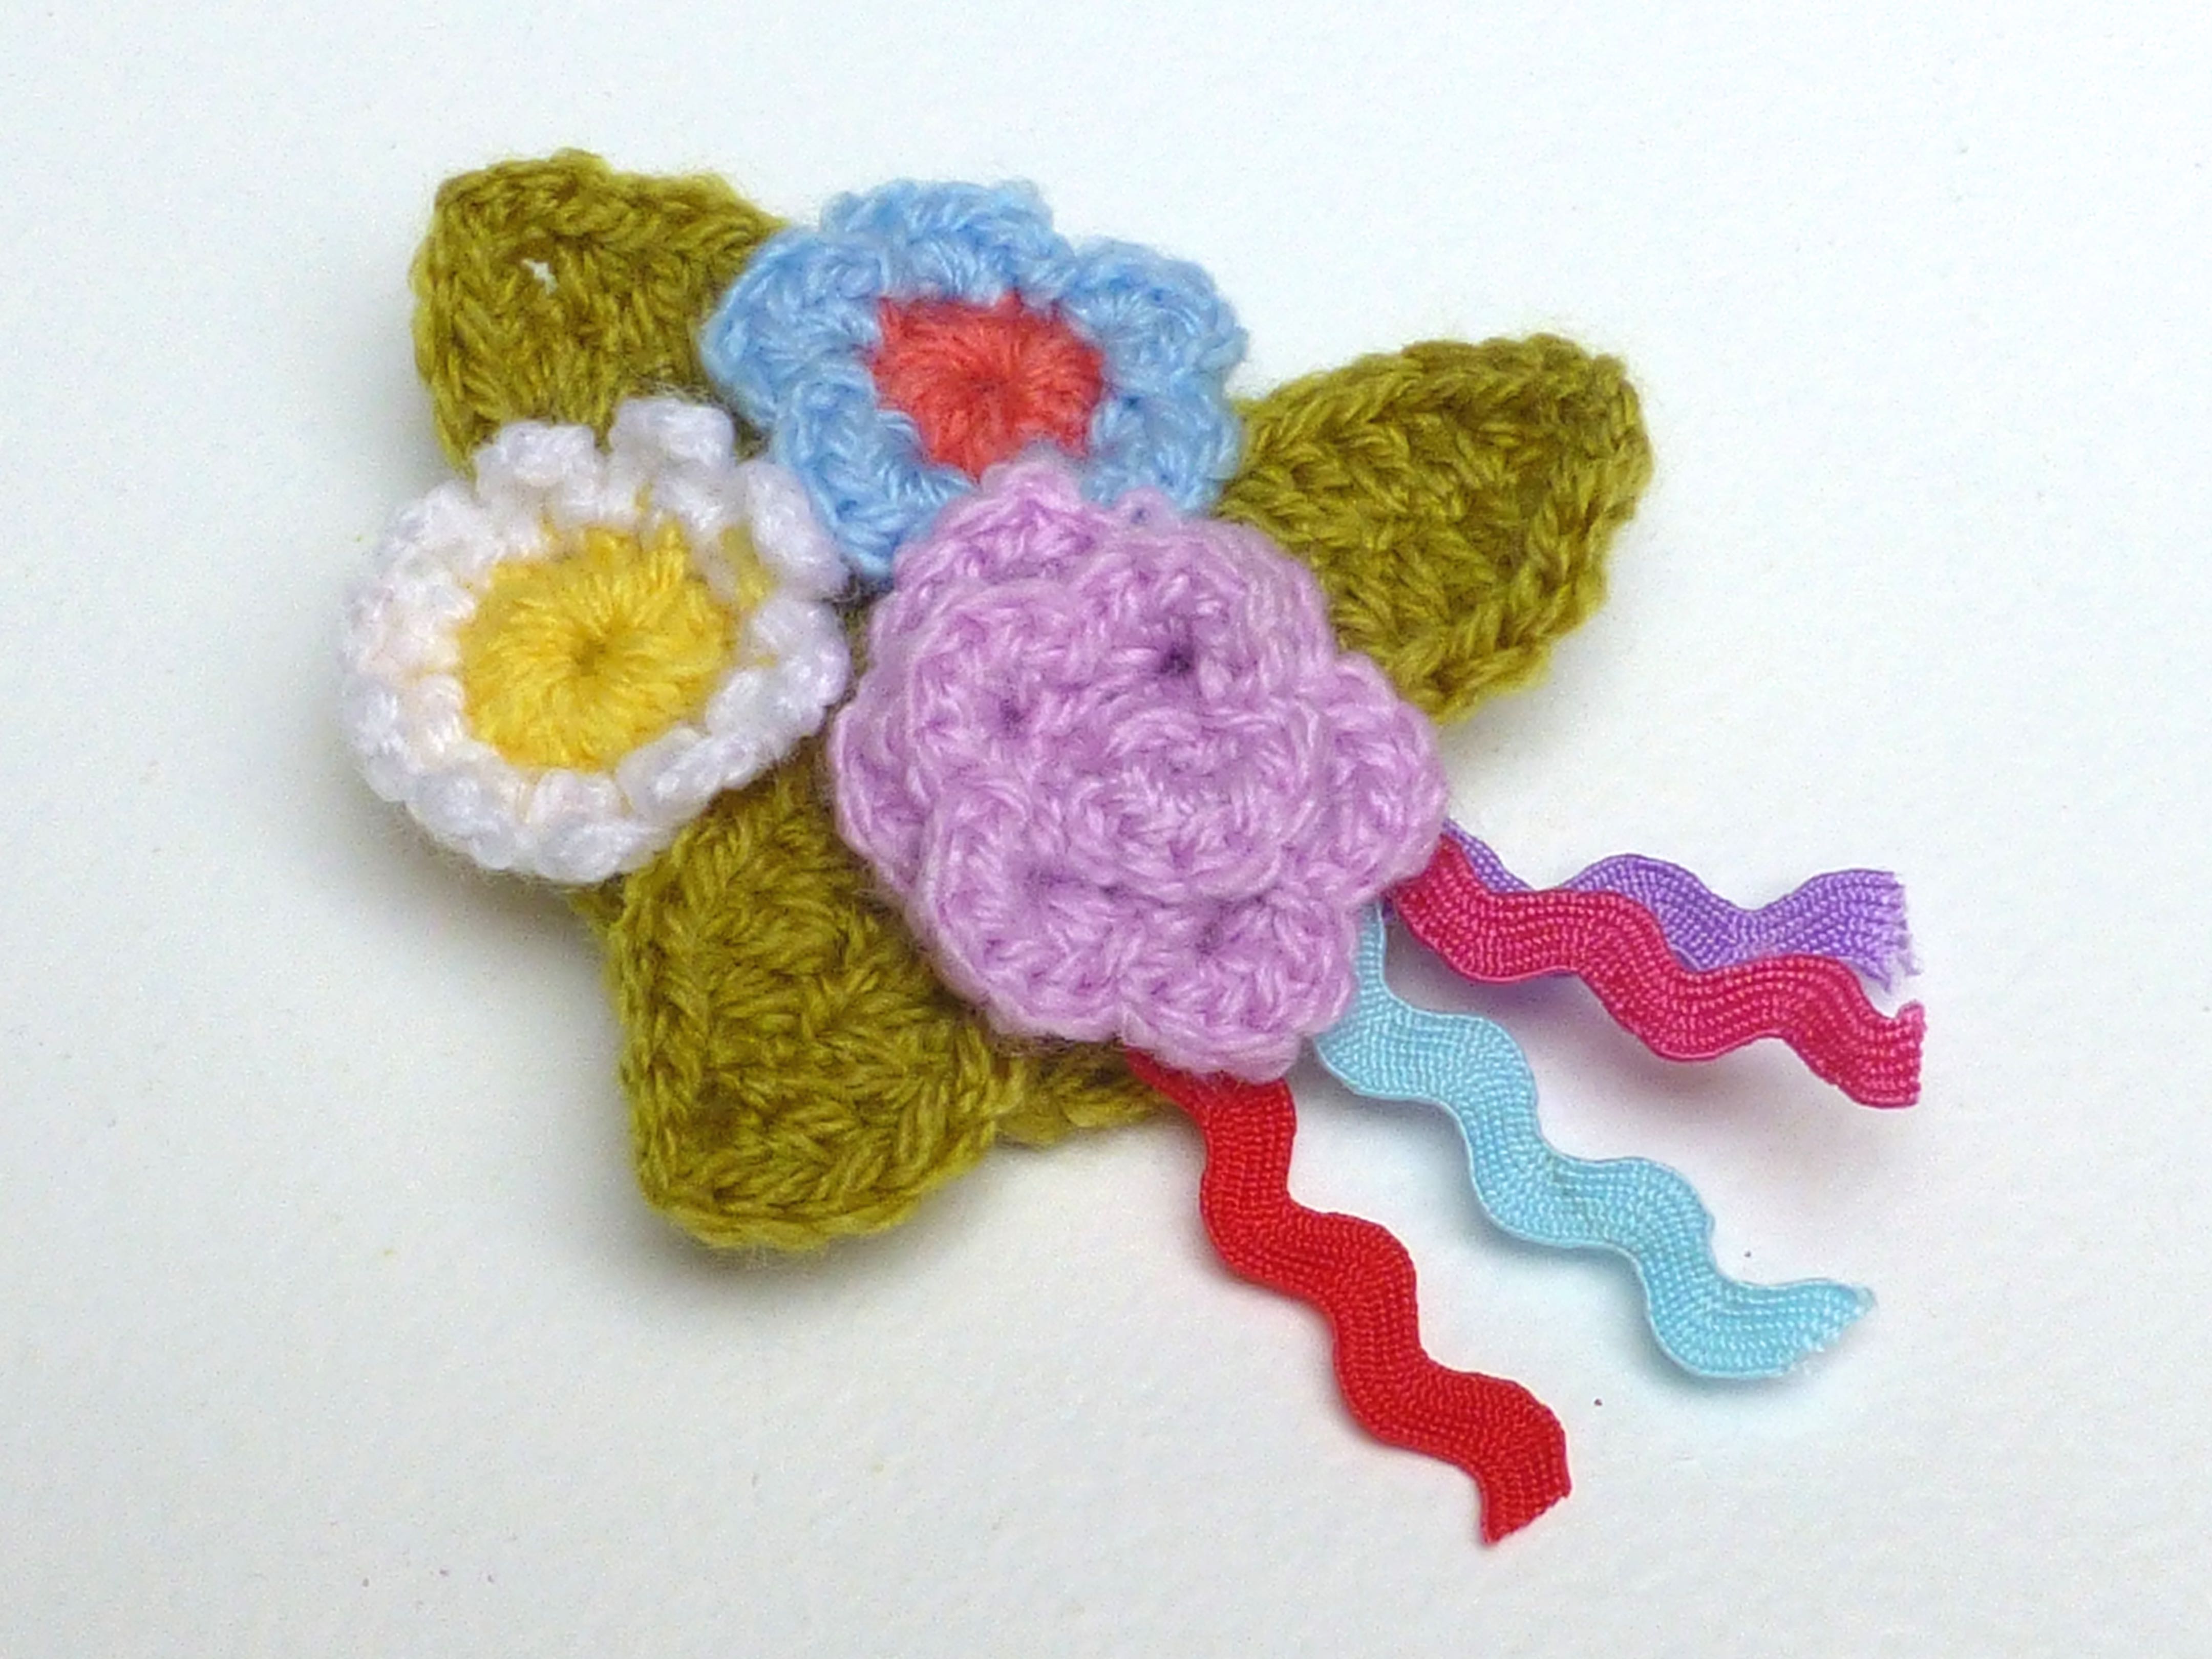
Attic 24’s Spring Posy Brooch
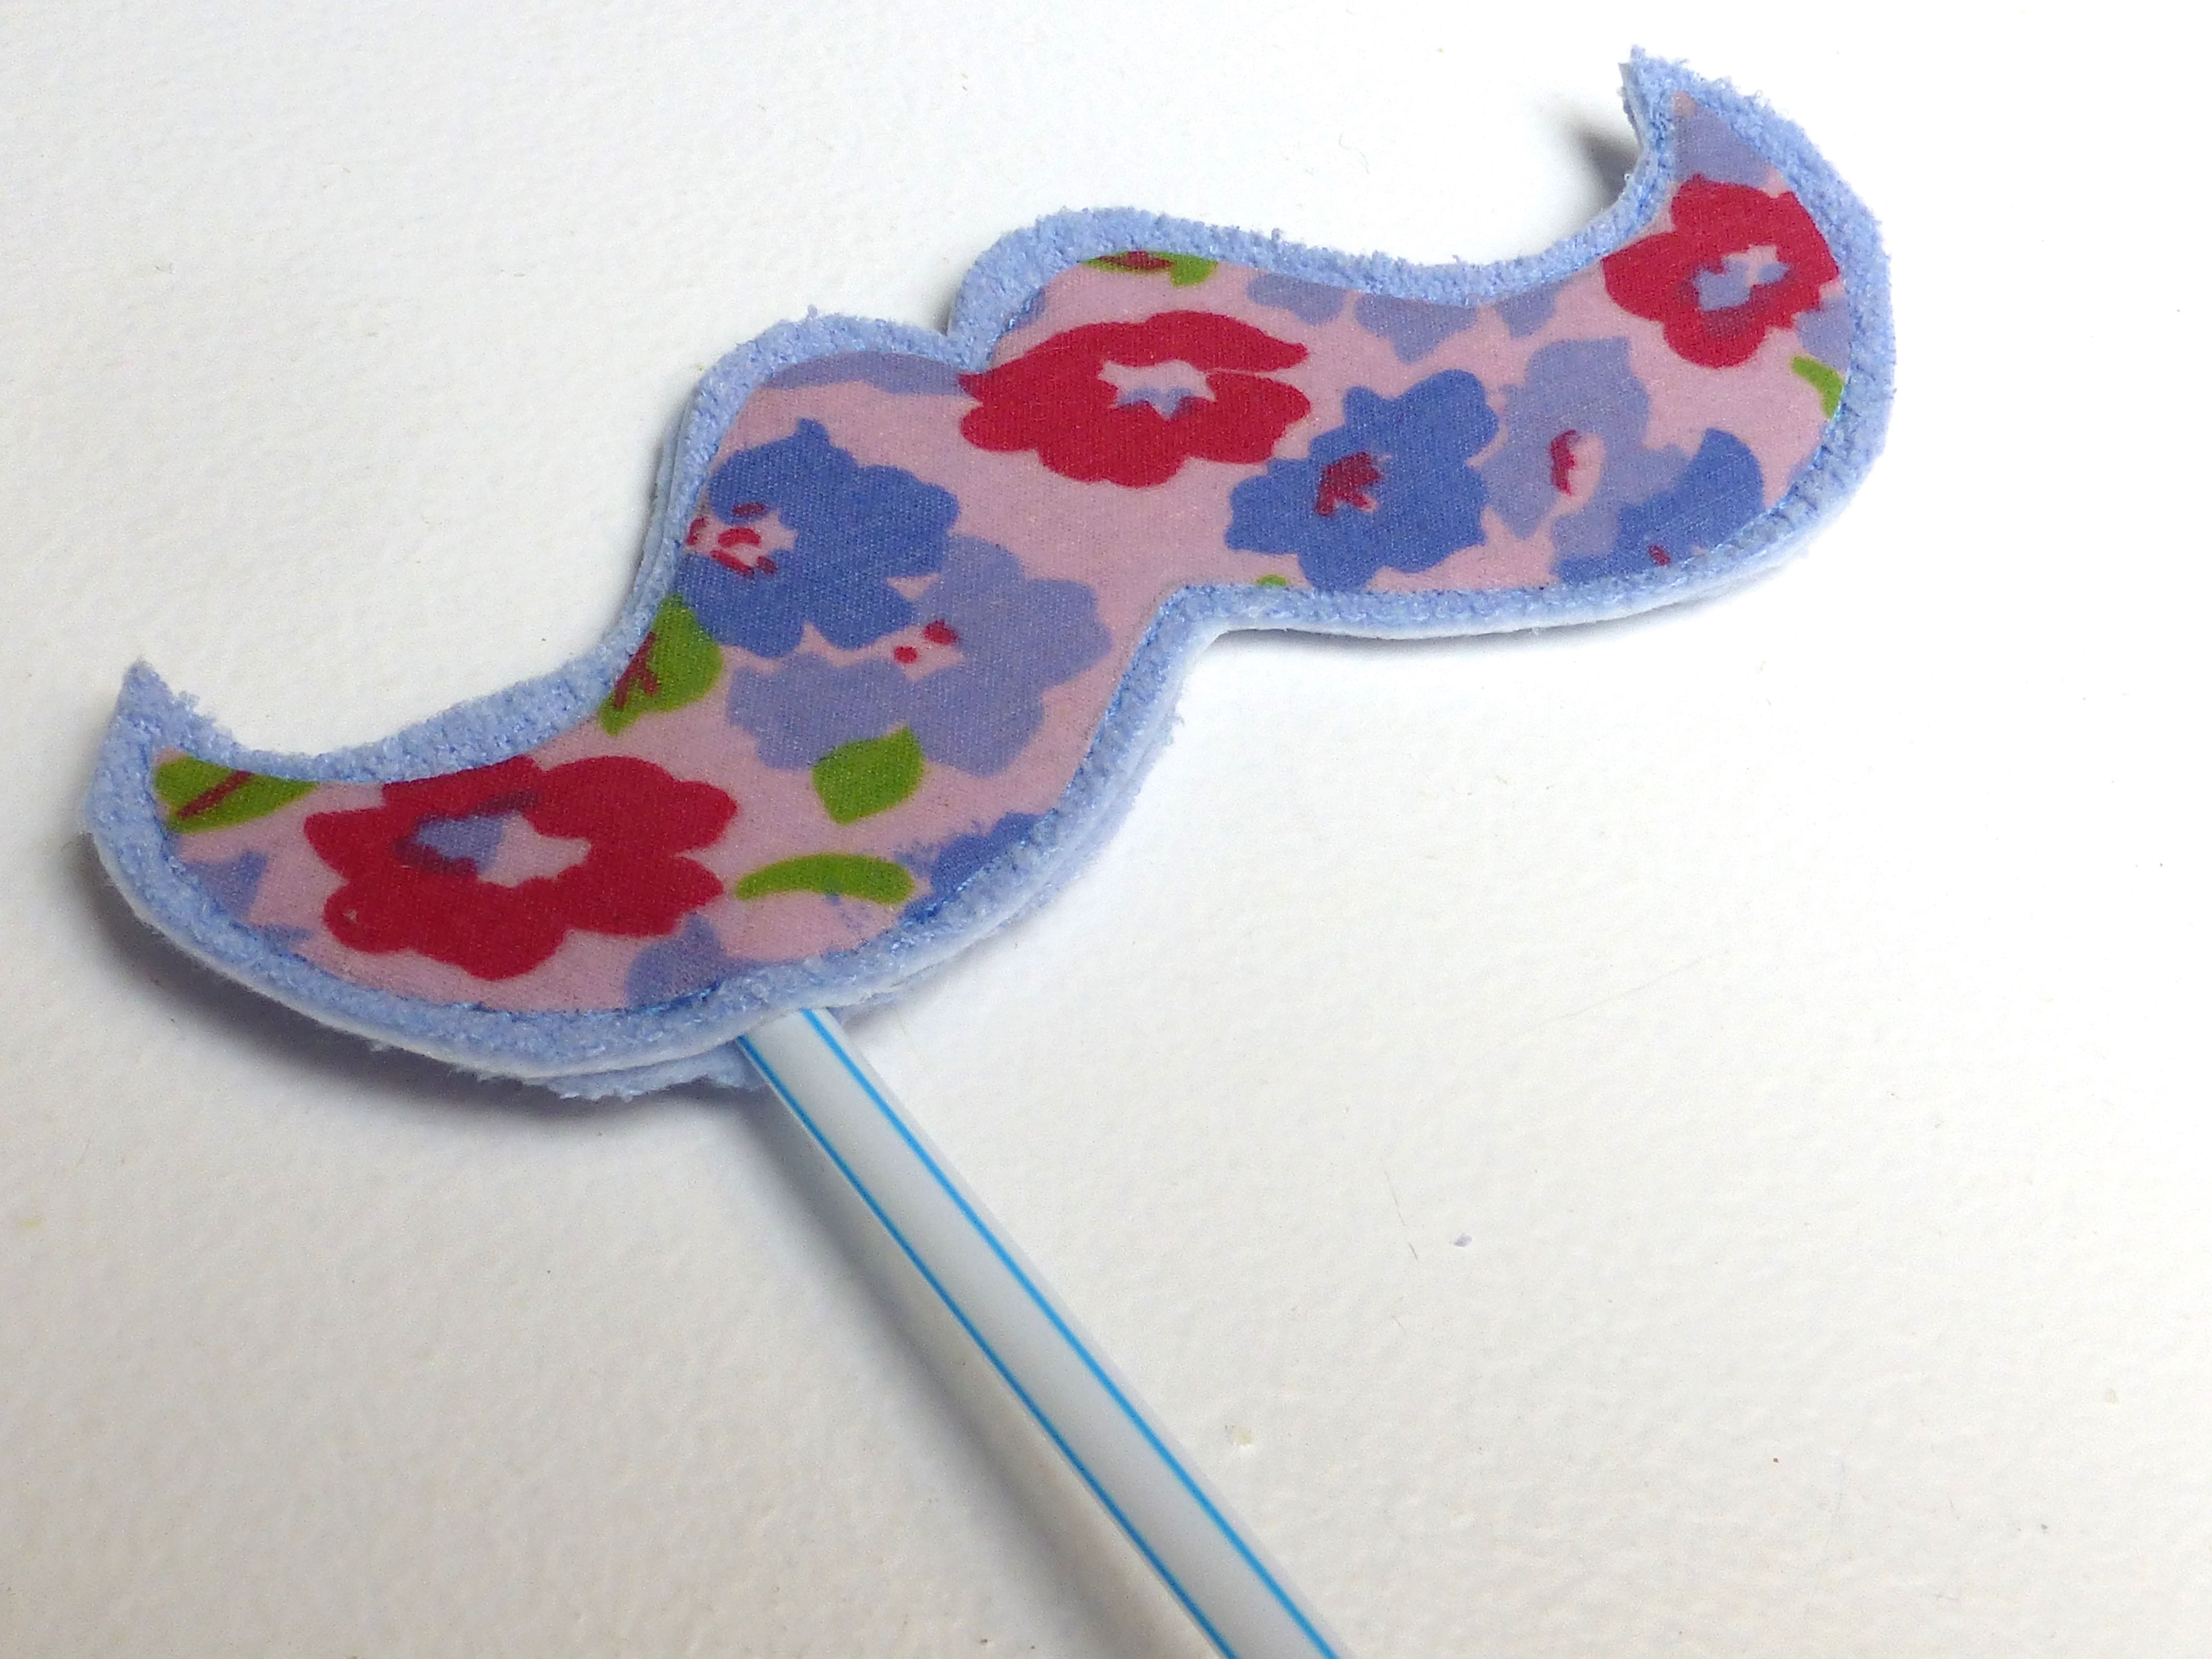
‘Make your face funny for money’ Moustache
Felt Cloud Mobile
Crocheted Red Nose
Thanks again to EVERYONE for your brilliantness (definitely a word)!
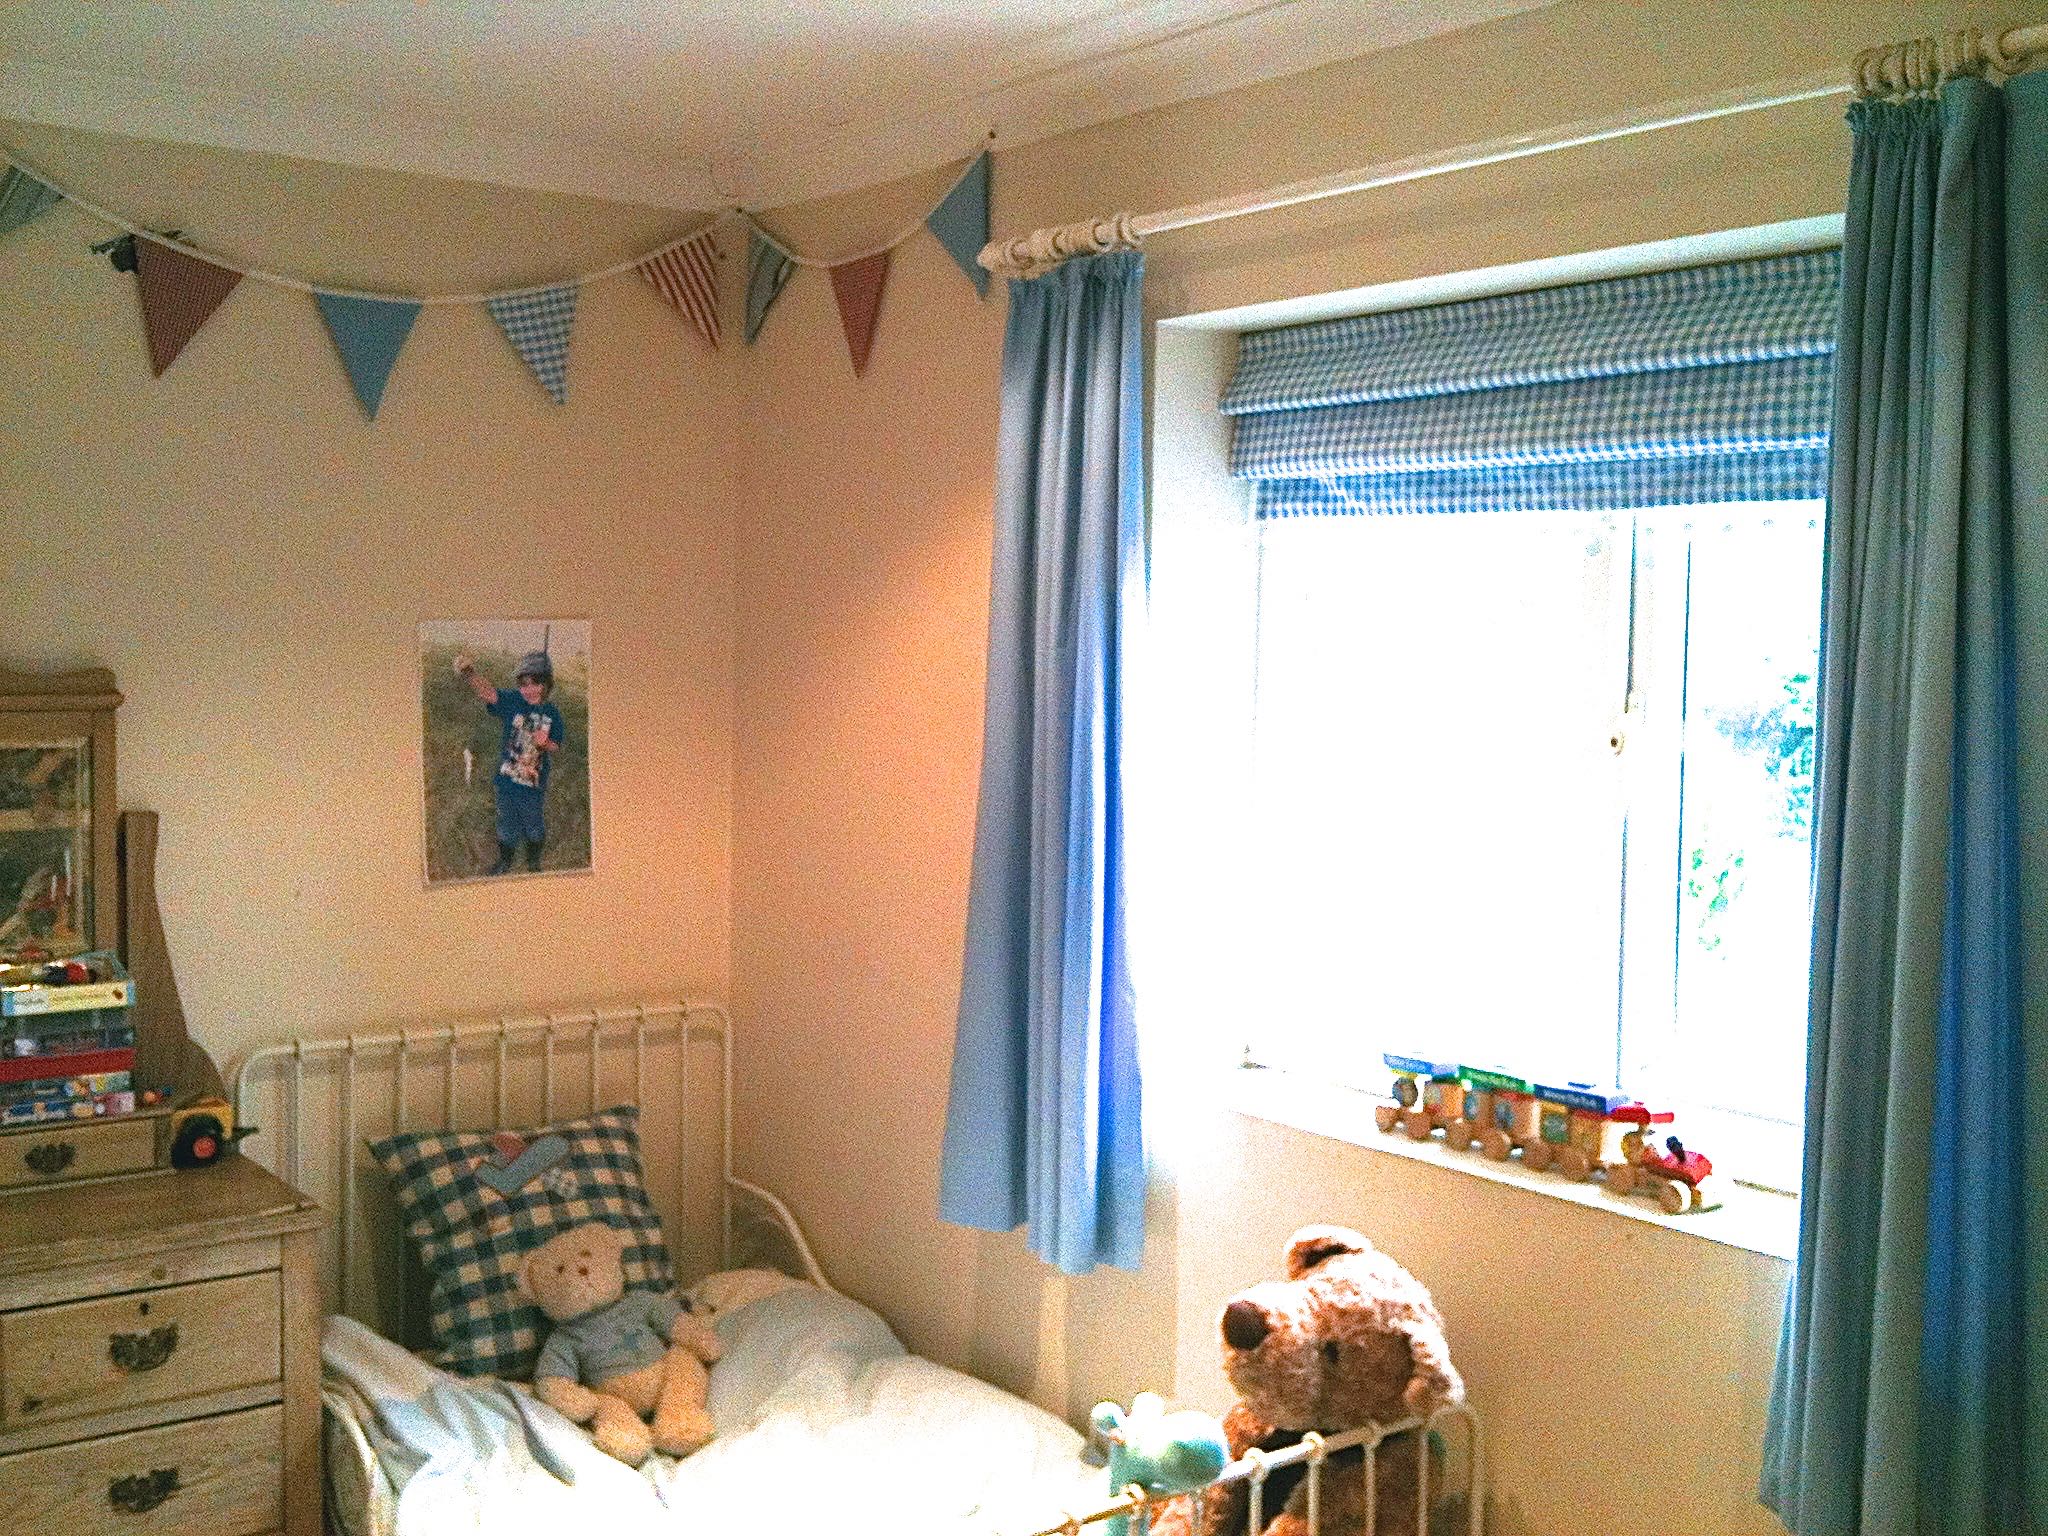
A few weeks ago I mentioned that we were going to redecorate The Boys’ bedroom and I was so desperate to get started that I forgot to take any ‘before’ shots. After rooting through my old phone pics I came across this one, which is pretty poor quality but gives you an idea of how bland and boring it was for two young boys.
Resourceful as ever, I did actually originally make the curtains myself from a really heavy vintage sheet. I also made the roman blackout blind, the bunting and appliquéd cushion cover.
However, that was six years ago and we really wanted to bring the room up to date and add some bright, stimulating colours with a funky pattern. In short, something infinitely more appropriate for seven and nine year old boys sharing a room.
The starting point for the new design was this incredible wallpaper by Quentin Blake for Osborne & Little (£42-00 per roll) based on his “Cockatoo” illustrations for his children’s book of the same name.
A single roll was just enough if we papered one wall and was economical enough to enable us to choose designer wallpaper.
The room was also crying out for more storage and where better to go for storage solutions than Ikea?
Whilst I’m not a fan of flat pack furniture, in this case it made perfect sense – we measured up units to fit around two walls and it all came in at under £300 including delivery, which is less than half the price of a good quality single wardrobe!
You might remember that I showed you the mood board I put together – here it is again in case you missed it: –
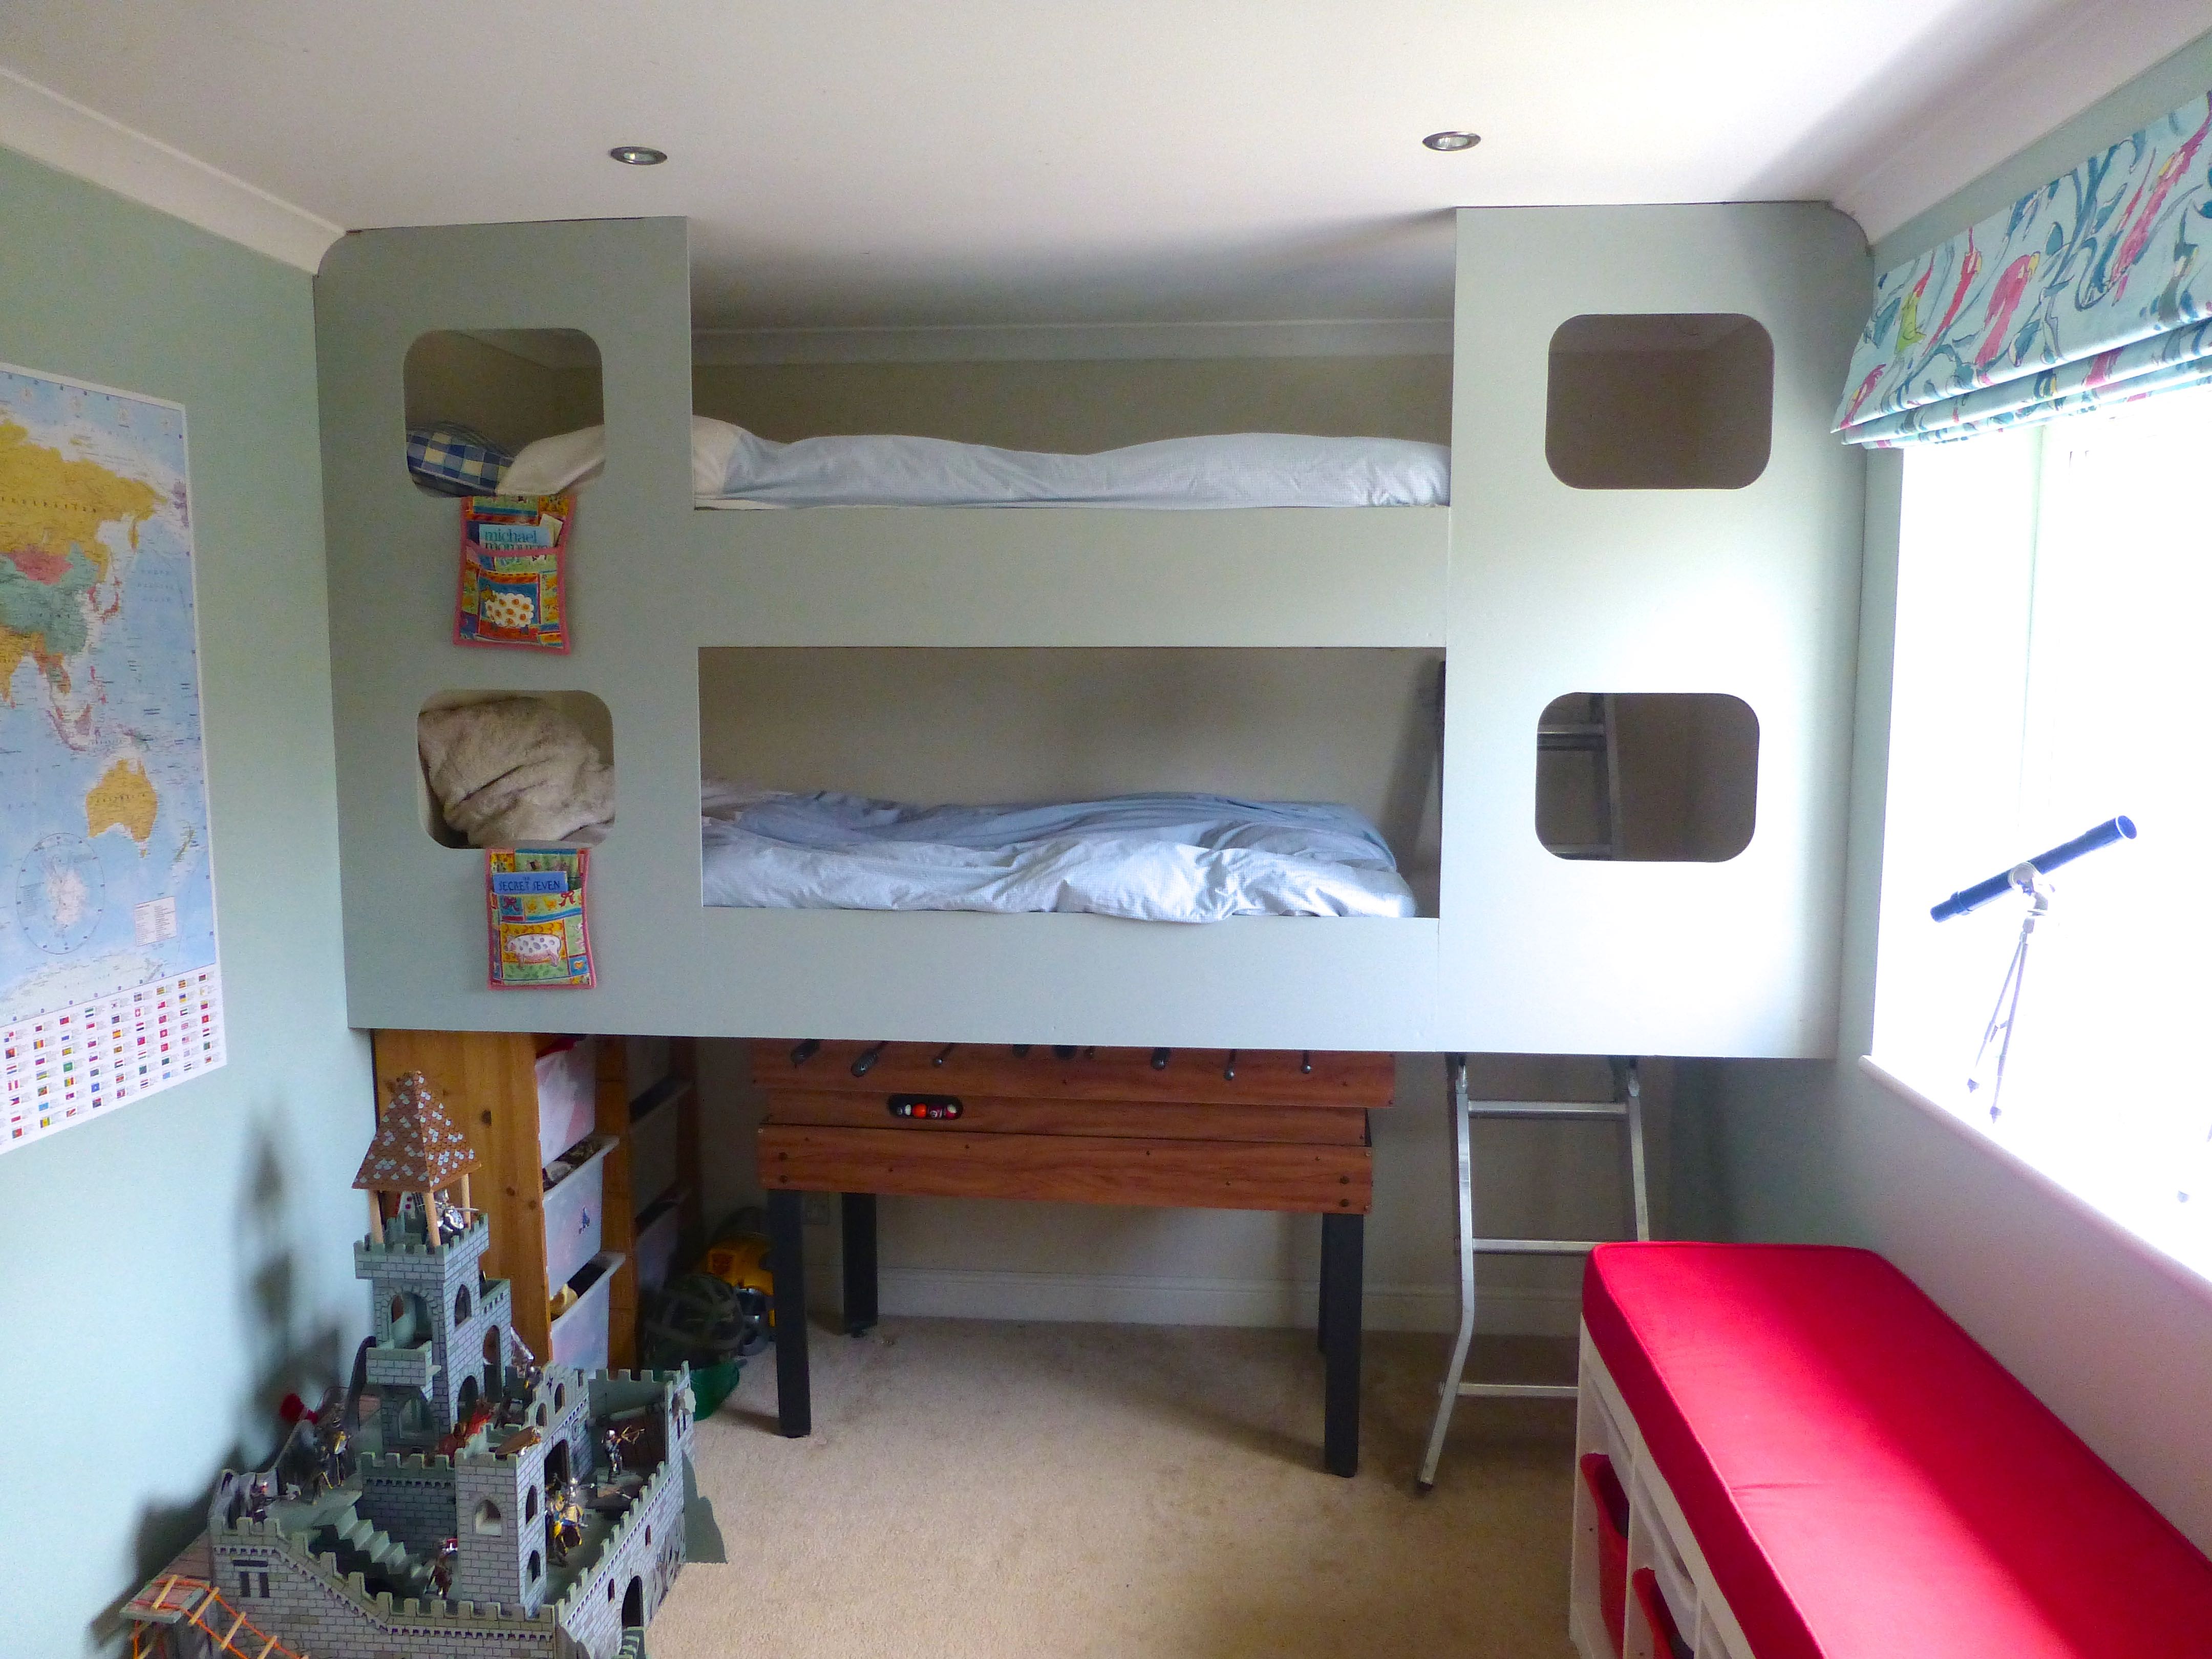
And here is our interpretation of that design – very close to the vision and pretty successful, though I say so myself!
We didn’t have enough to paper the bit behind the units but they’re fixed to the wall so you can’t see!!
I made a roman blind out of 1.2m of matching fabric (also £42-00 per metre) and this is enough to tie the whole design together without being too matchy-matchy.
“Teresa’s Green” paint by Farrow & Ball in a washable finish was a good match to the wallpaper and was used on the remaining walls.
I already had this limited edition print by Quentin Blake (featuring the scene from Charlie and the Chocolate Factory where he finds a Golden Ticket), so I put it in a large square Ikea frame and it has the starring role on its own wall.
The lower height storage units had the potential to double up as a comfortable seating area, so a 2m length of 10cm thick upholstery foam makes the perfect bench seat cushion. I made a piped box cushion cover from cotton twill in a vibrant Pillar-Box Red, being sure to include a zip at one end to make it removable for washing.
With the addition of a plump feather, faux fur cushion, this is now a favourite place for The Boys to sit and read.
The Works were selling this huge poster of a map of the world at the bargain price of £4-99 back last year and The Boys begged me to buy it for their room.
I can’t tell you how brilliant it has been for teaching them Geography without them even knowing it – they have hours of fun matching up the countries with their respective flags at the bottom!
A couple of hooks on the back of the yet-to-be-painted door give them space to hang their dressing gowns.
Their Very Talented Father made the bunks from scratch to my design. I wanted them to stretch the entire width of the room and be high enough up off the floor to store a games table which they can pull out when they want to use it. It was the only way I could incorporate their request for a table tennis/table football/snooker/air hockey table into such a modestly sized room!
The space underneath holds more units for the hoards of dressing up clothes that are in daily use and also becomes a den when the games table is removed.
The best bit is yet to come though.
See the ladder in the corner? It’s going to be replaced with a climbing wall as the means of getting into bed, and a fireman’s pole to get out!
Needless to say they can’t wait for those, but that’s going to have to be another payday:)
Remember the bedside book pockets I made last year? They’ve been a huge success so they went straight back onto the newly painted bed panels.
The battery operated lights were a fiver each from Homebase, I think, and are ideal for The Boys to enable one to carry on reading without keeping the other awake.
All in all we’re thrilled with the makeover and The Boys absolutely LOVE their new room – they even keep it tidy because it’s so easy now everything has its own place!
Have you come down with Spring Fever and feel the need to spruce up your home too? Come on, show us your decorating projects – everyone loves a “before” and “after”:)
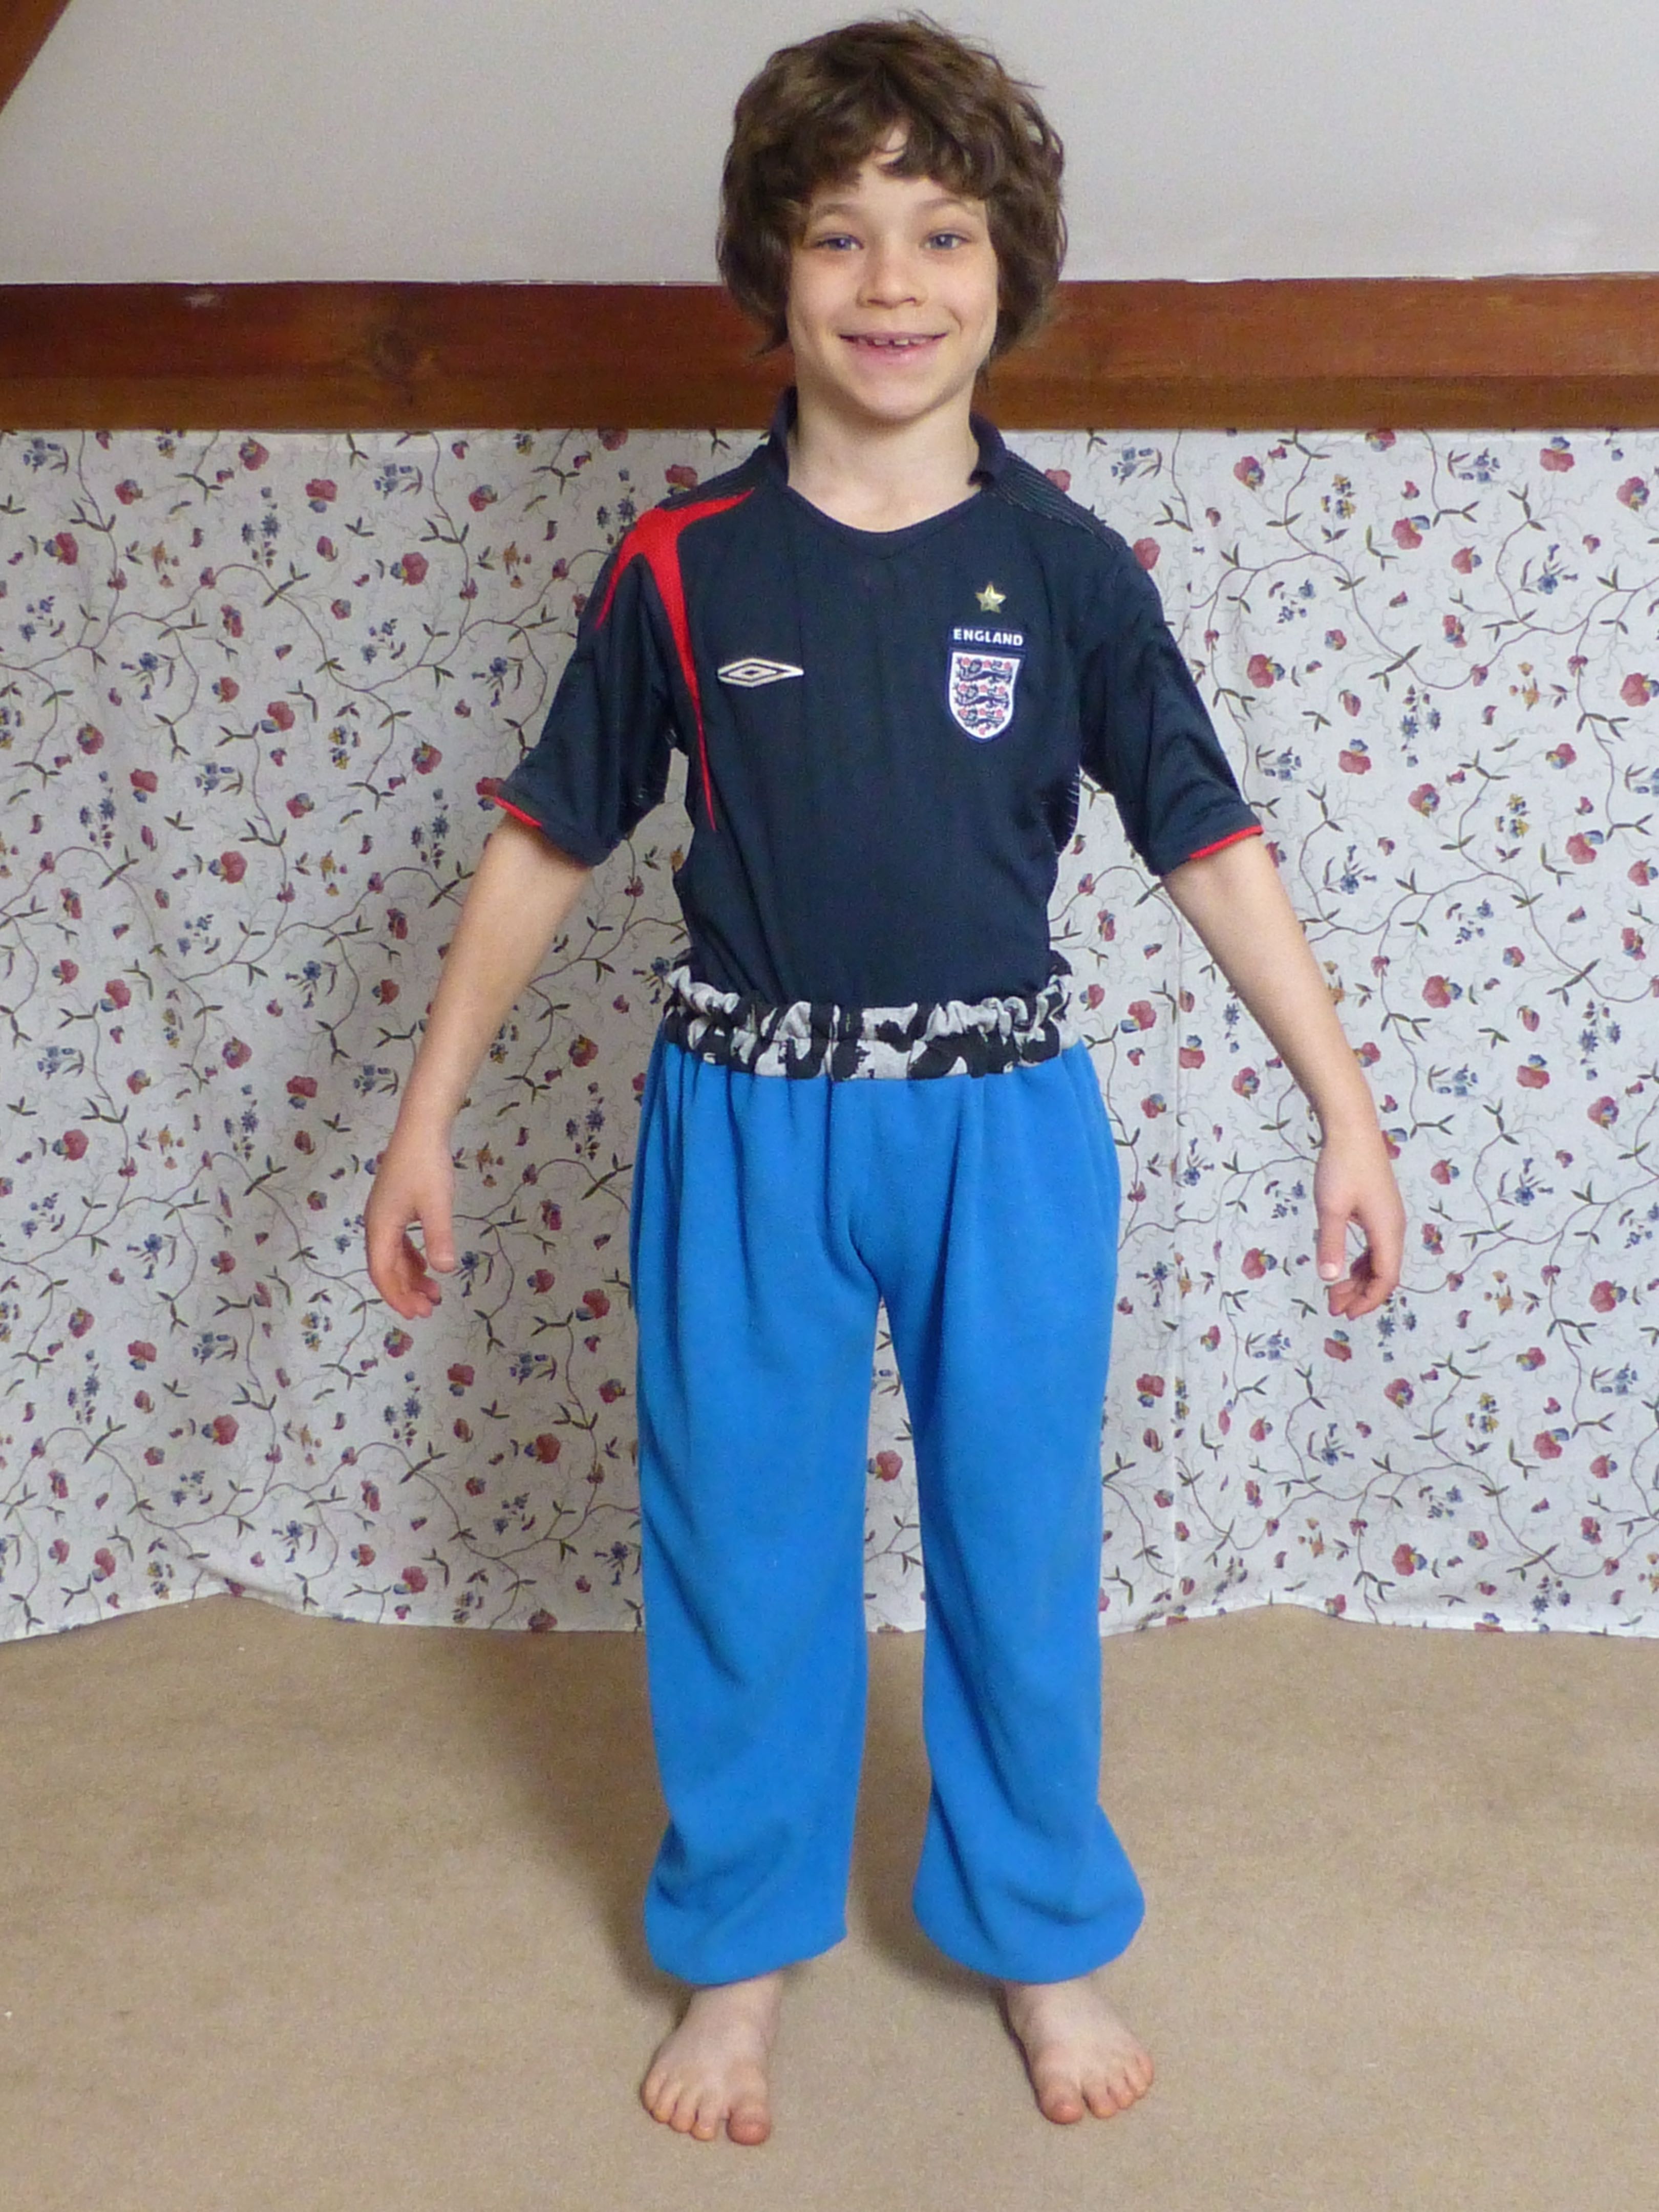
This third and final part shows how to make a pair of slipper boots!
These are the feet of the onesie that were remaining after the rest had been remade into other garments.
Some more leftover knit fabric was cut into a 5″ strip twice the width of the flat boot top, plus a seam allowance.
After sewing the short edges together to form a circle, pin to the boot top, right sides together and matching seams. Stitch in place.
Press seam up towards the cuff and overlock the raw edge.
Top stitch about 1cm up the cuff, catching the seam allowance as you go.
Turn cuff to the inside having the overlocked edge protrude over the seam by about 1cm. Pin in place.
Working from the right side, stitch in the ‘ditch’ of the seam, leaving a gap for threading the elastic.
Stitch again in the middle of the cuff, leaving a gap for the elastic as before.
Top stitch close to the top edge all the way around the cuff.
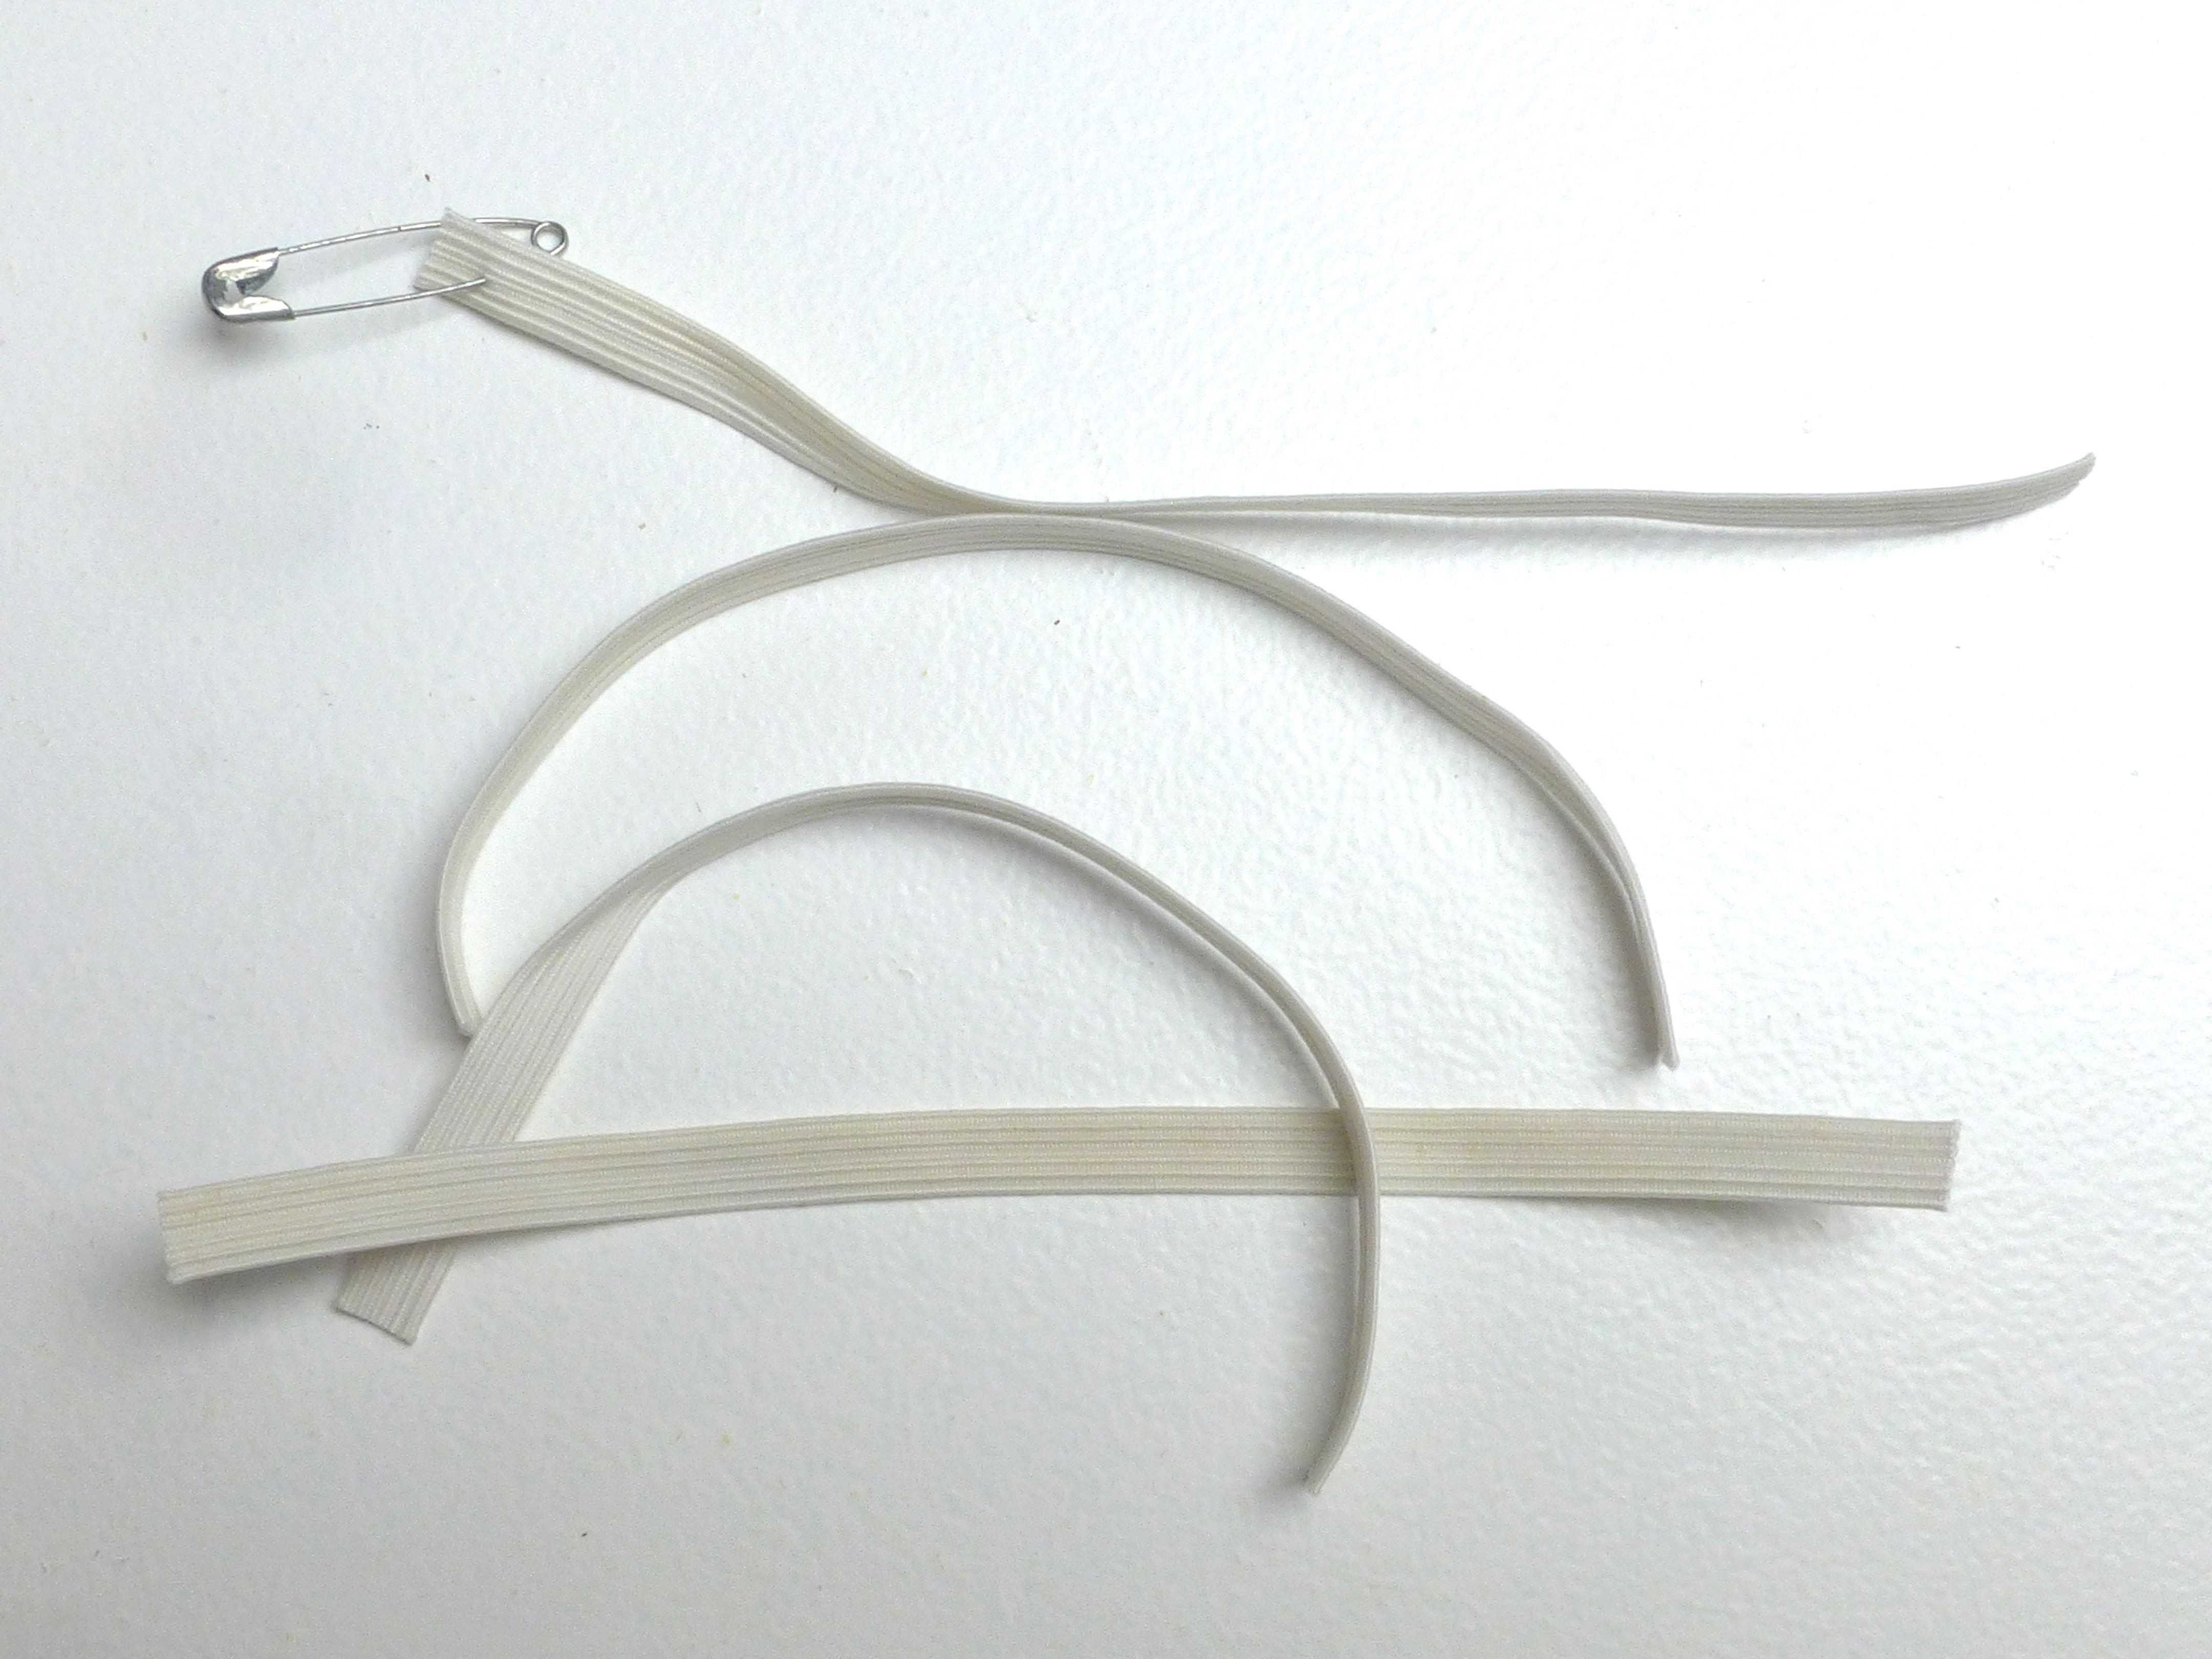
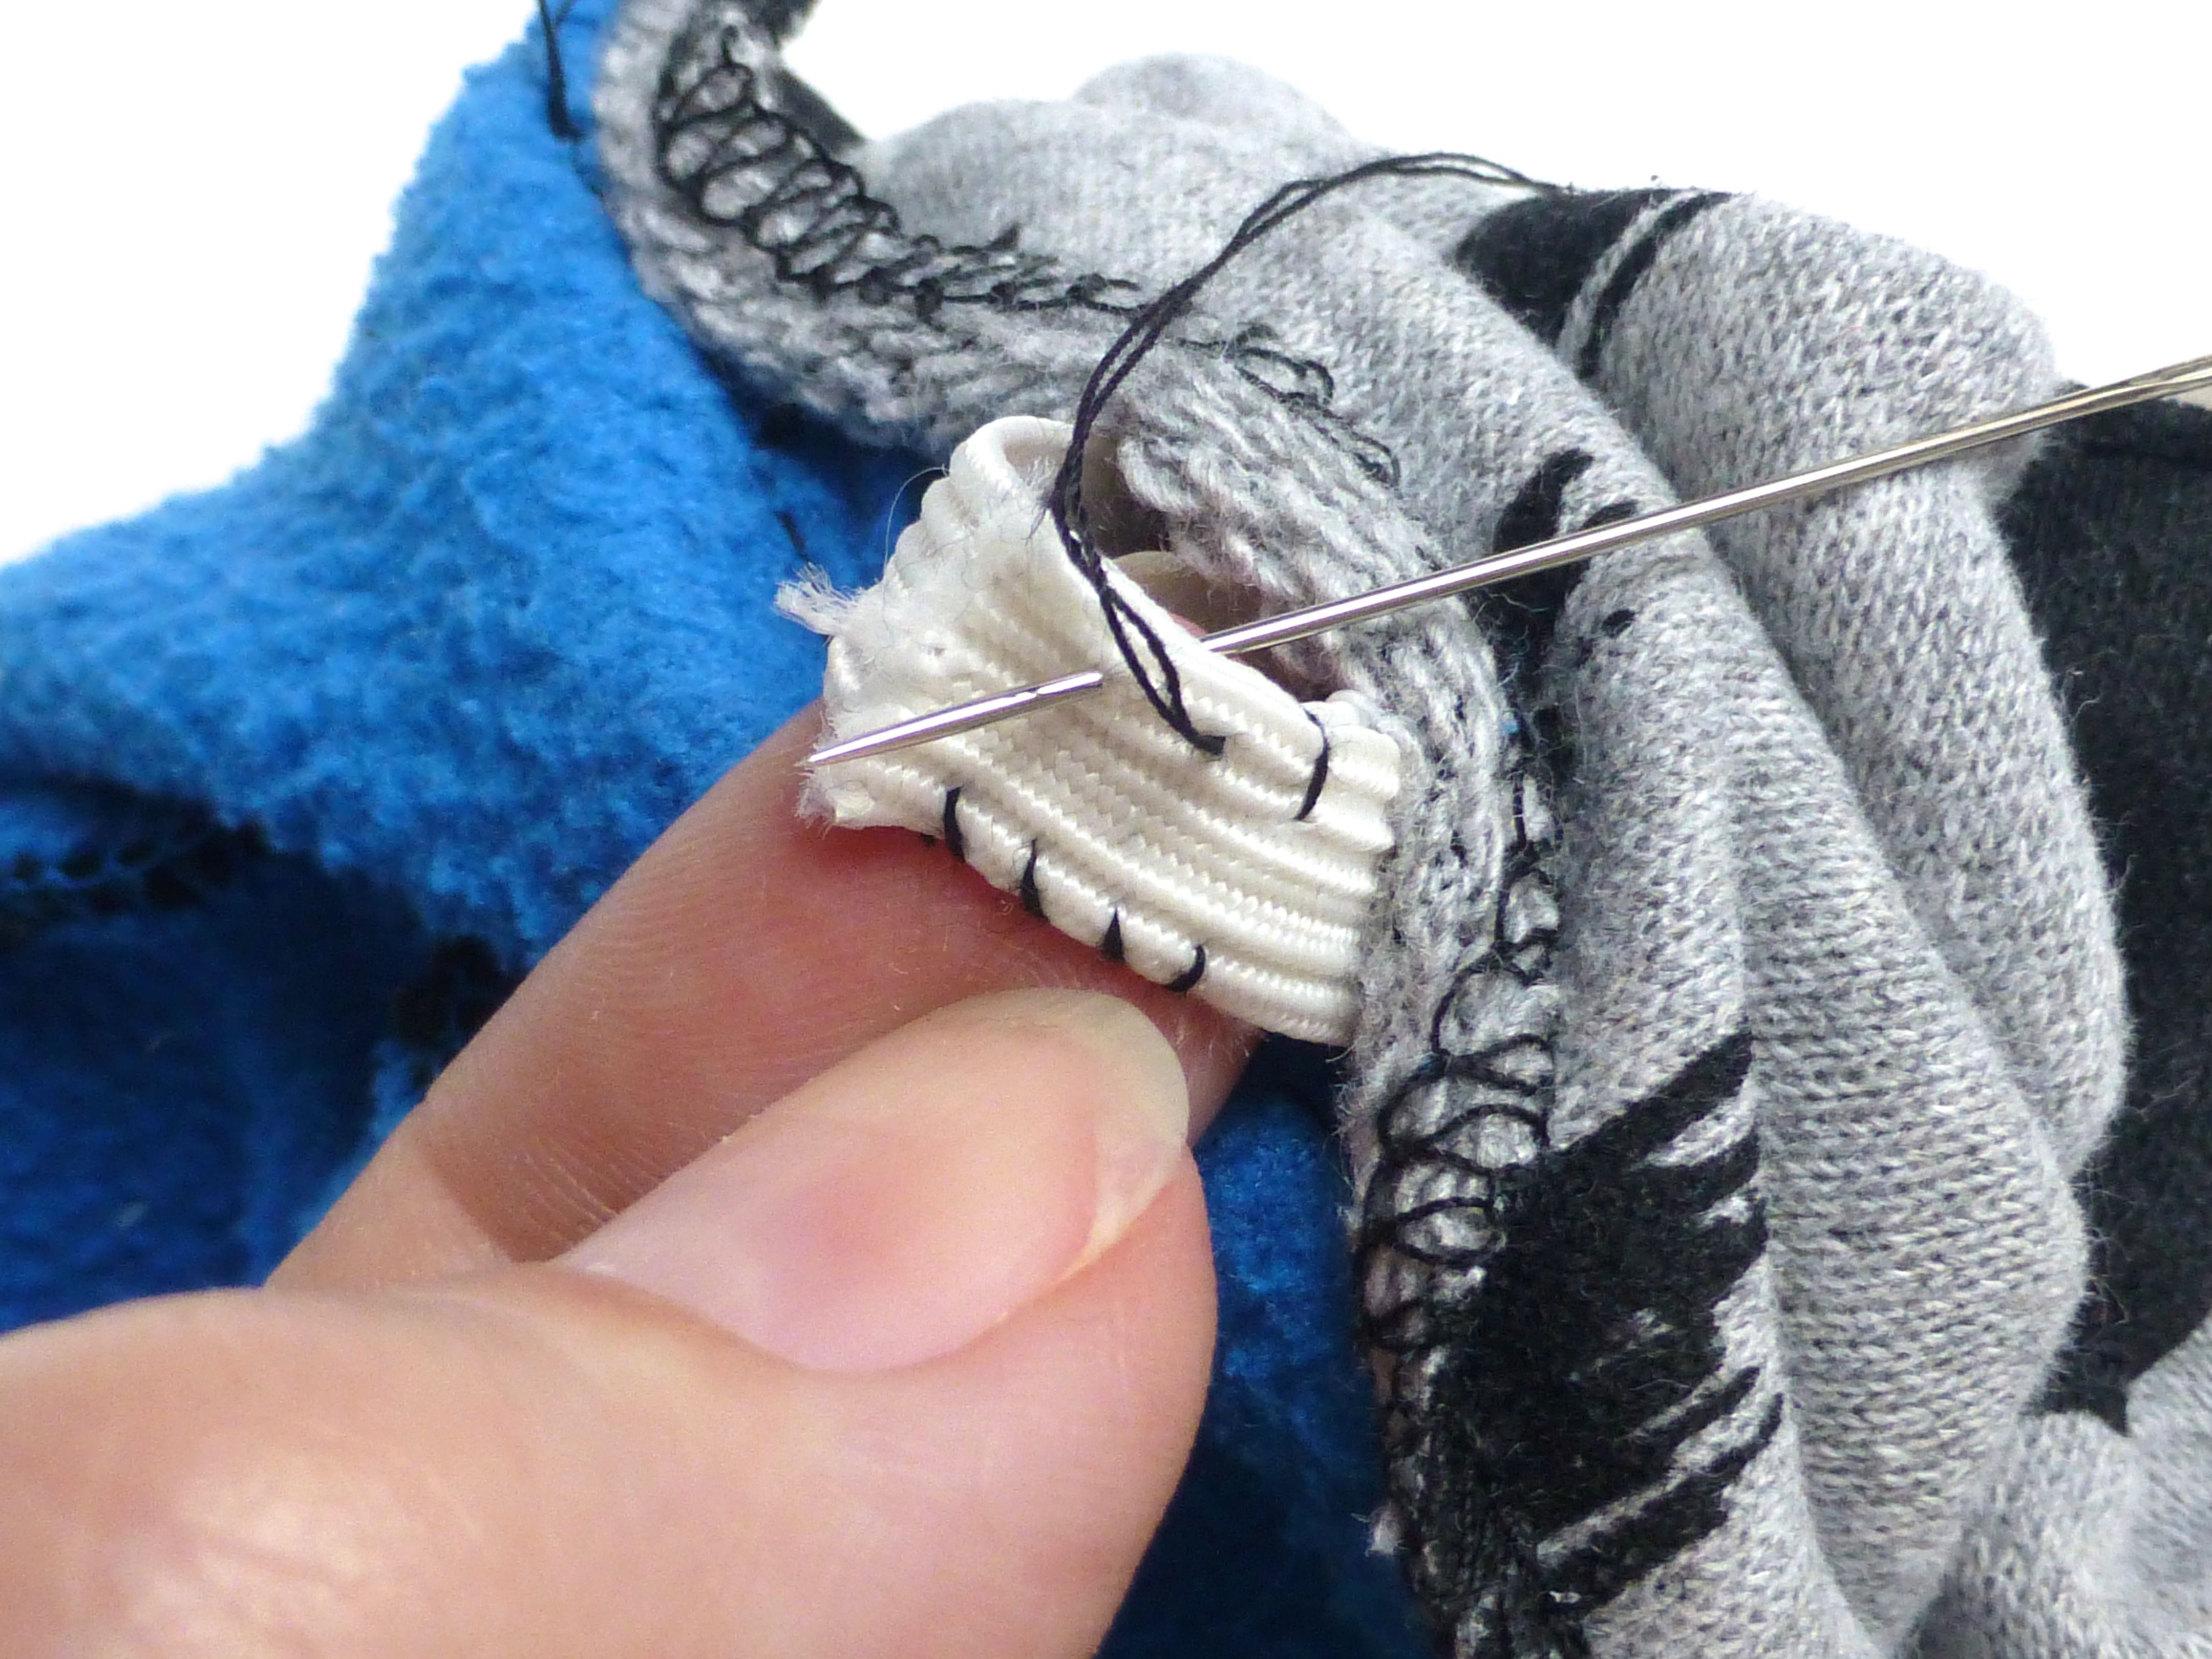
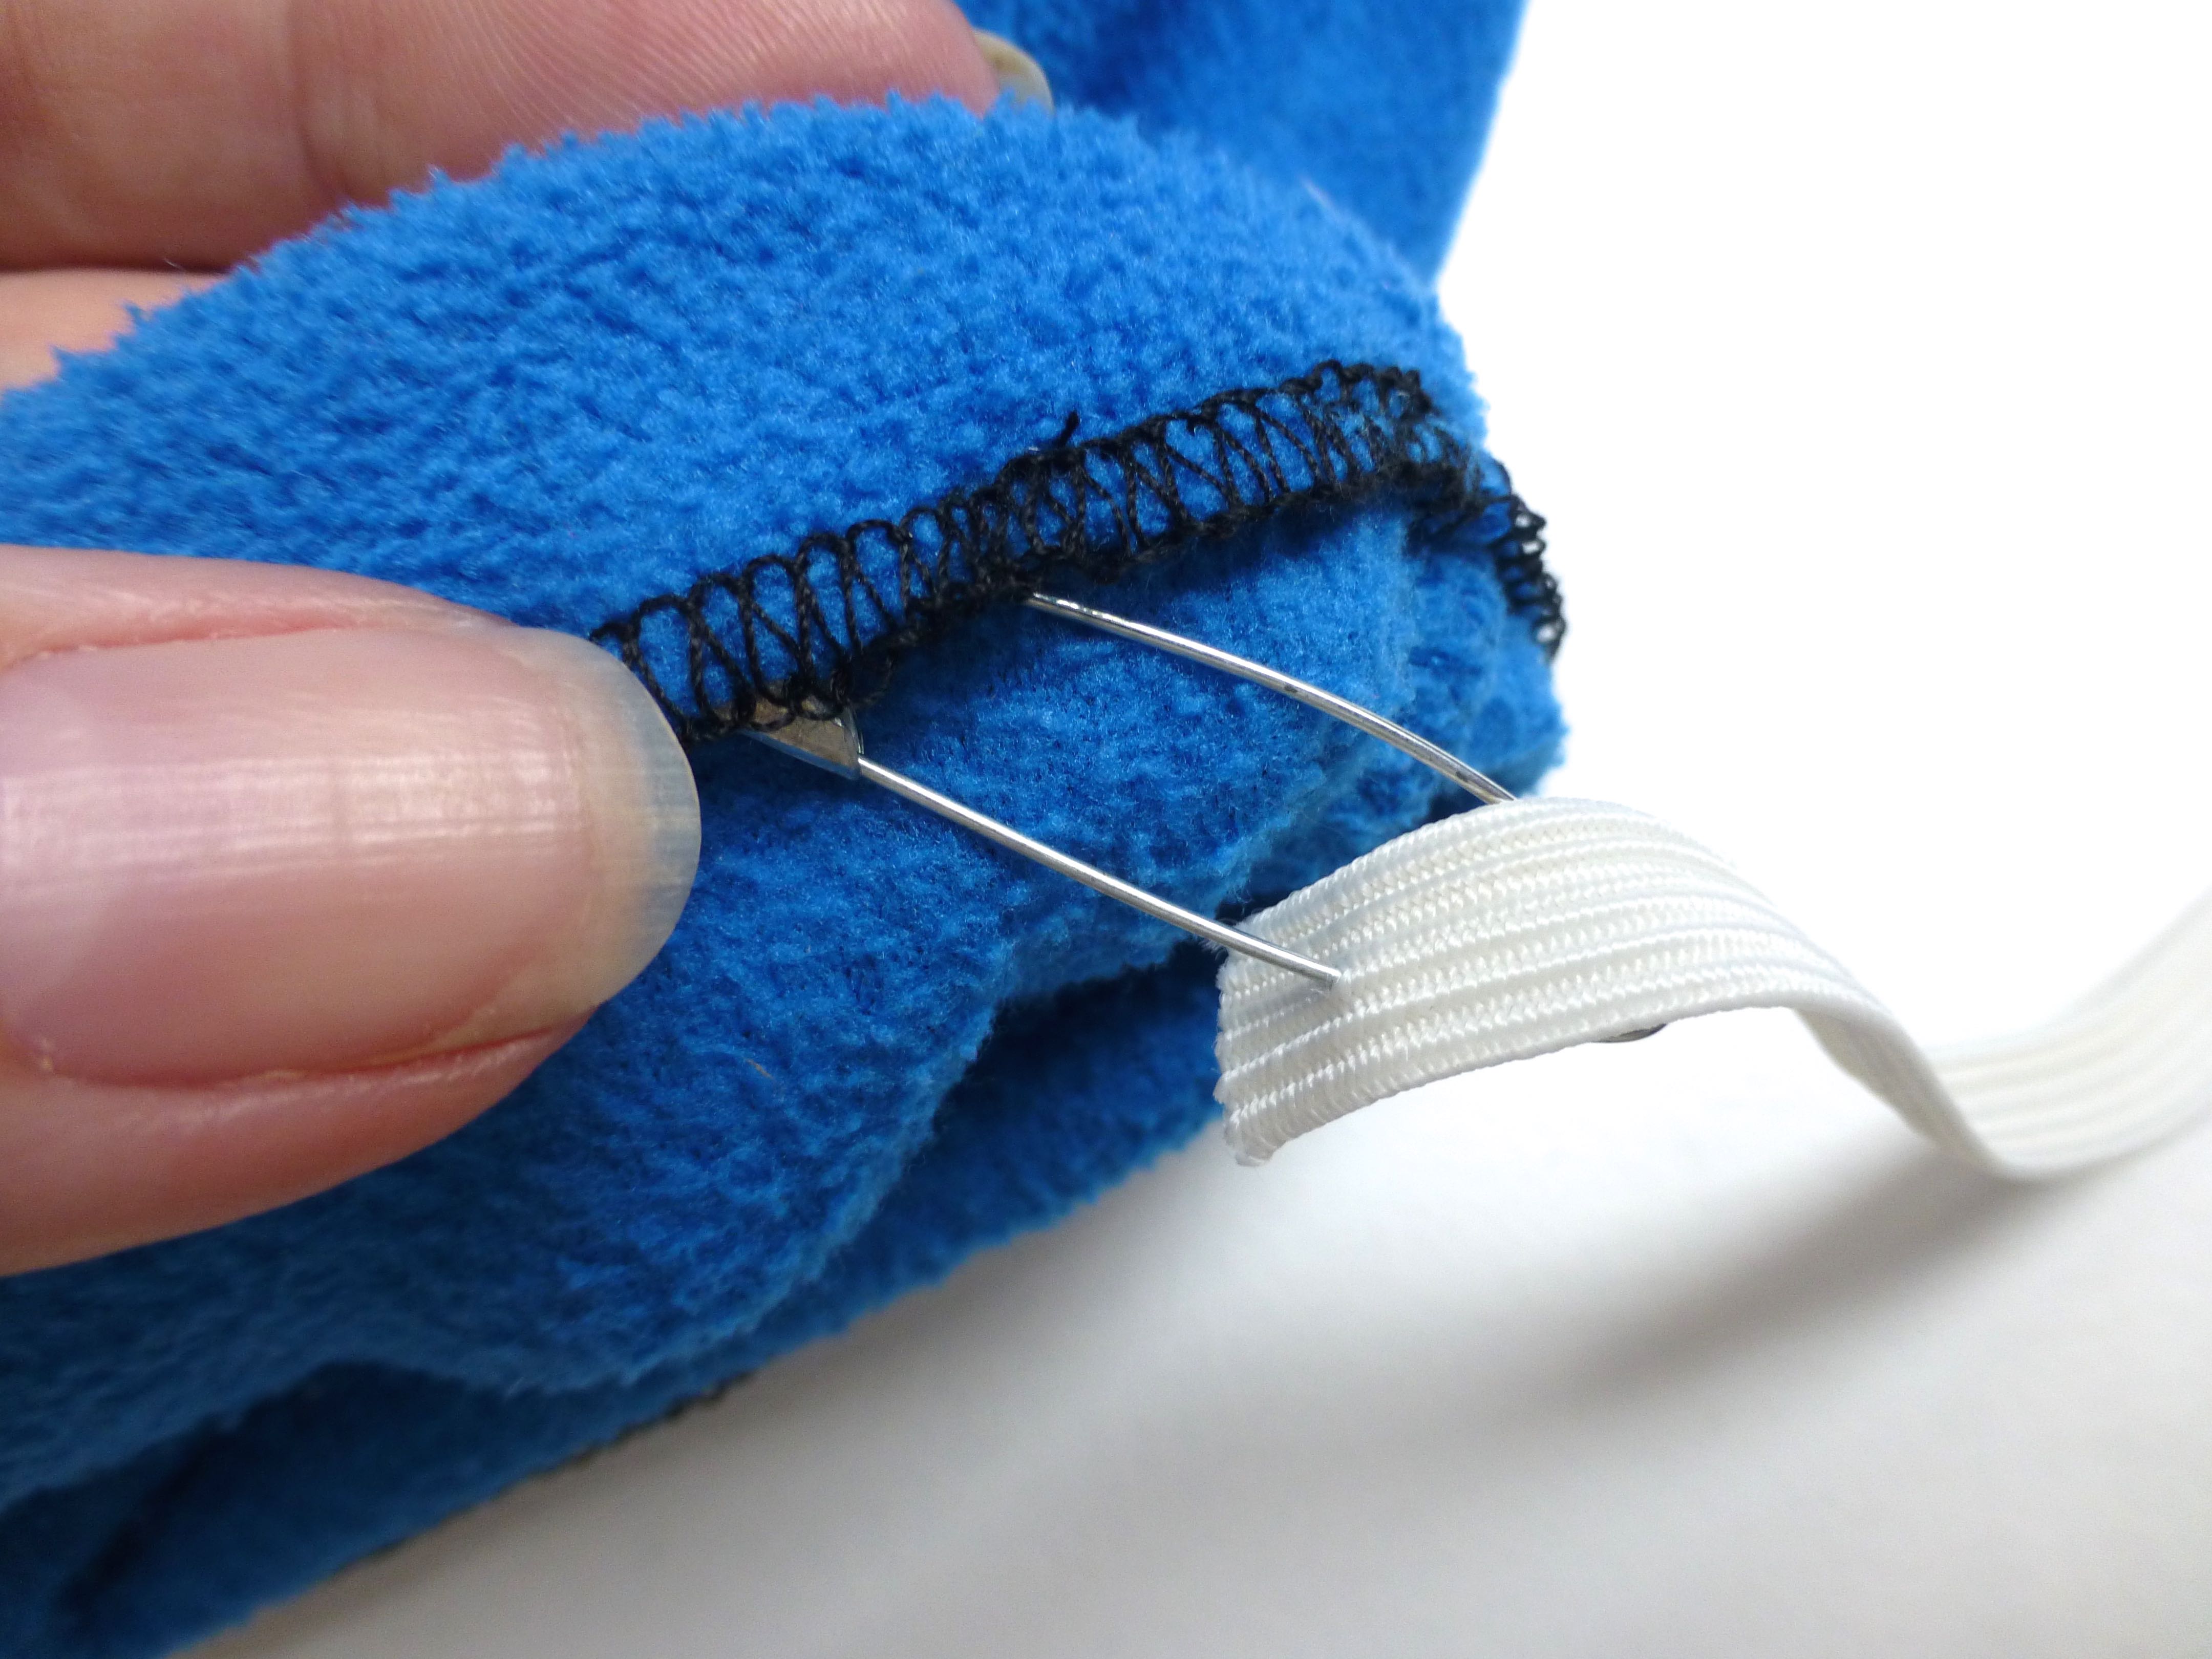
Cut four pieces of 1/2″ elastic to loosely fit the ankle…
…and thread them through each channel on both boots with a safety pin.
The ends of the elastic are hand sewn together.
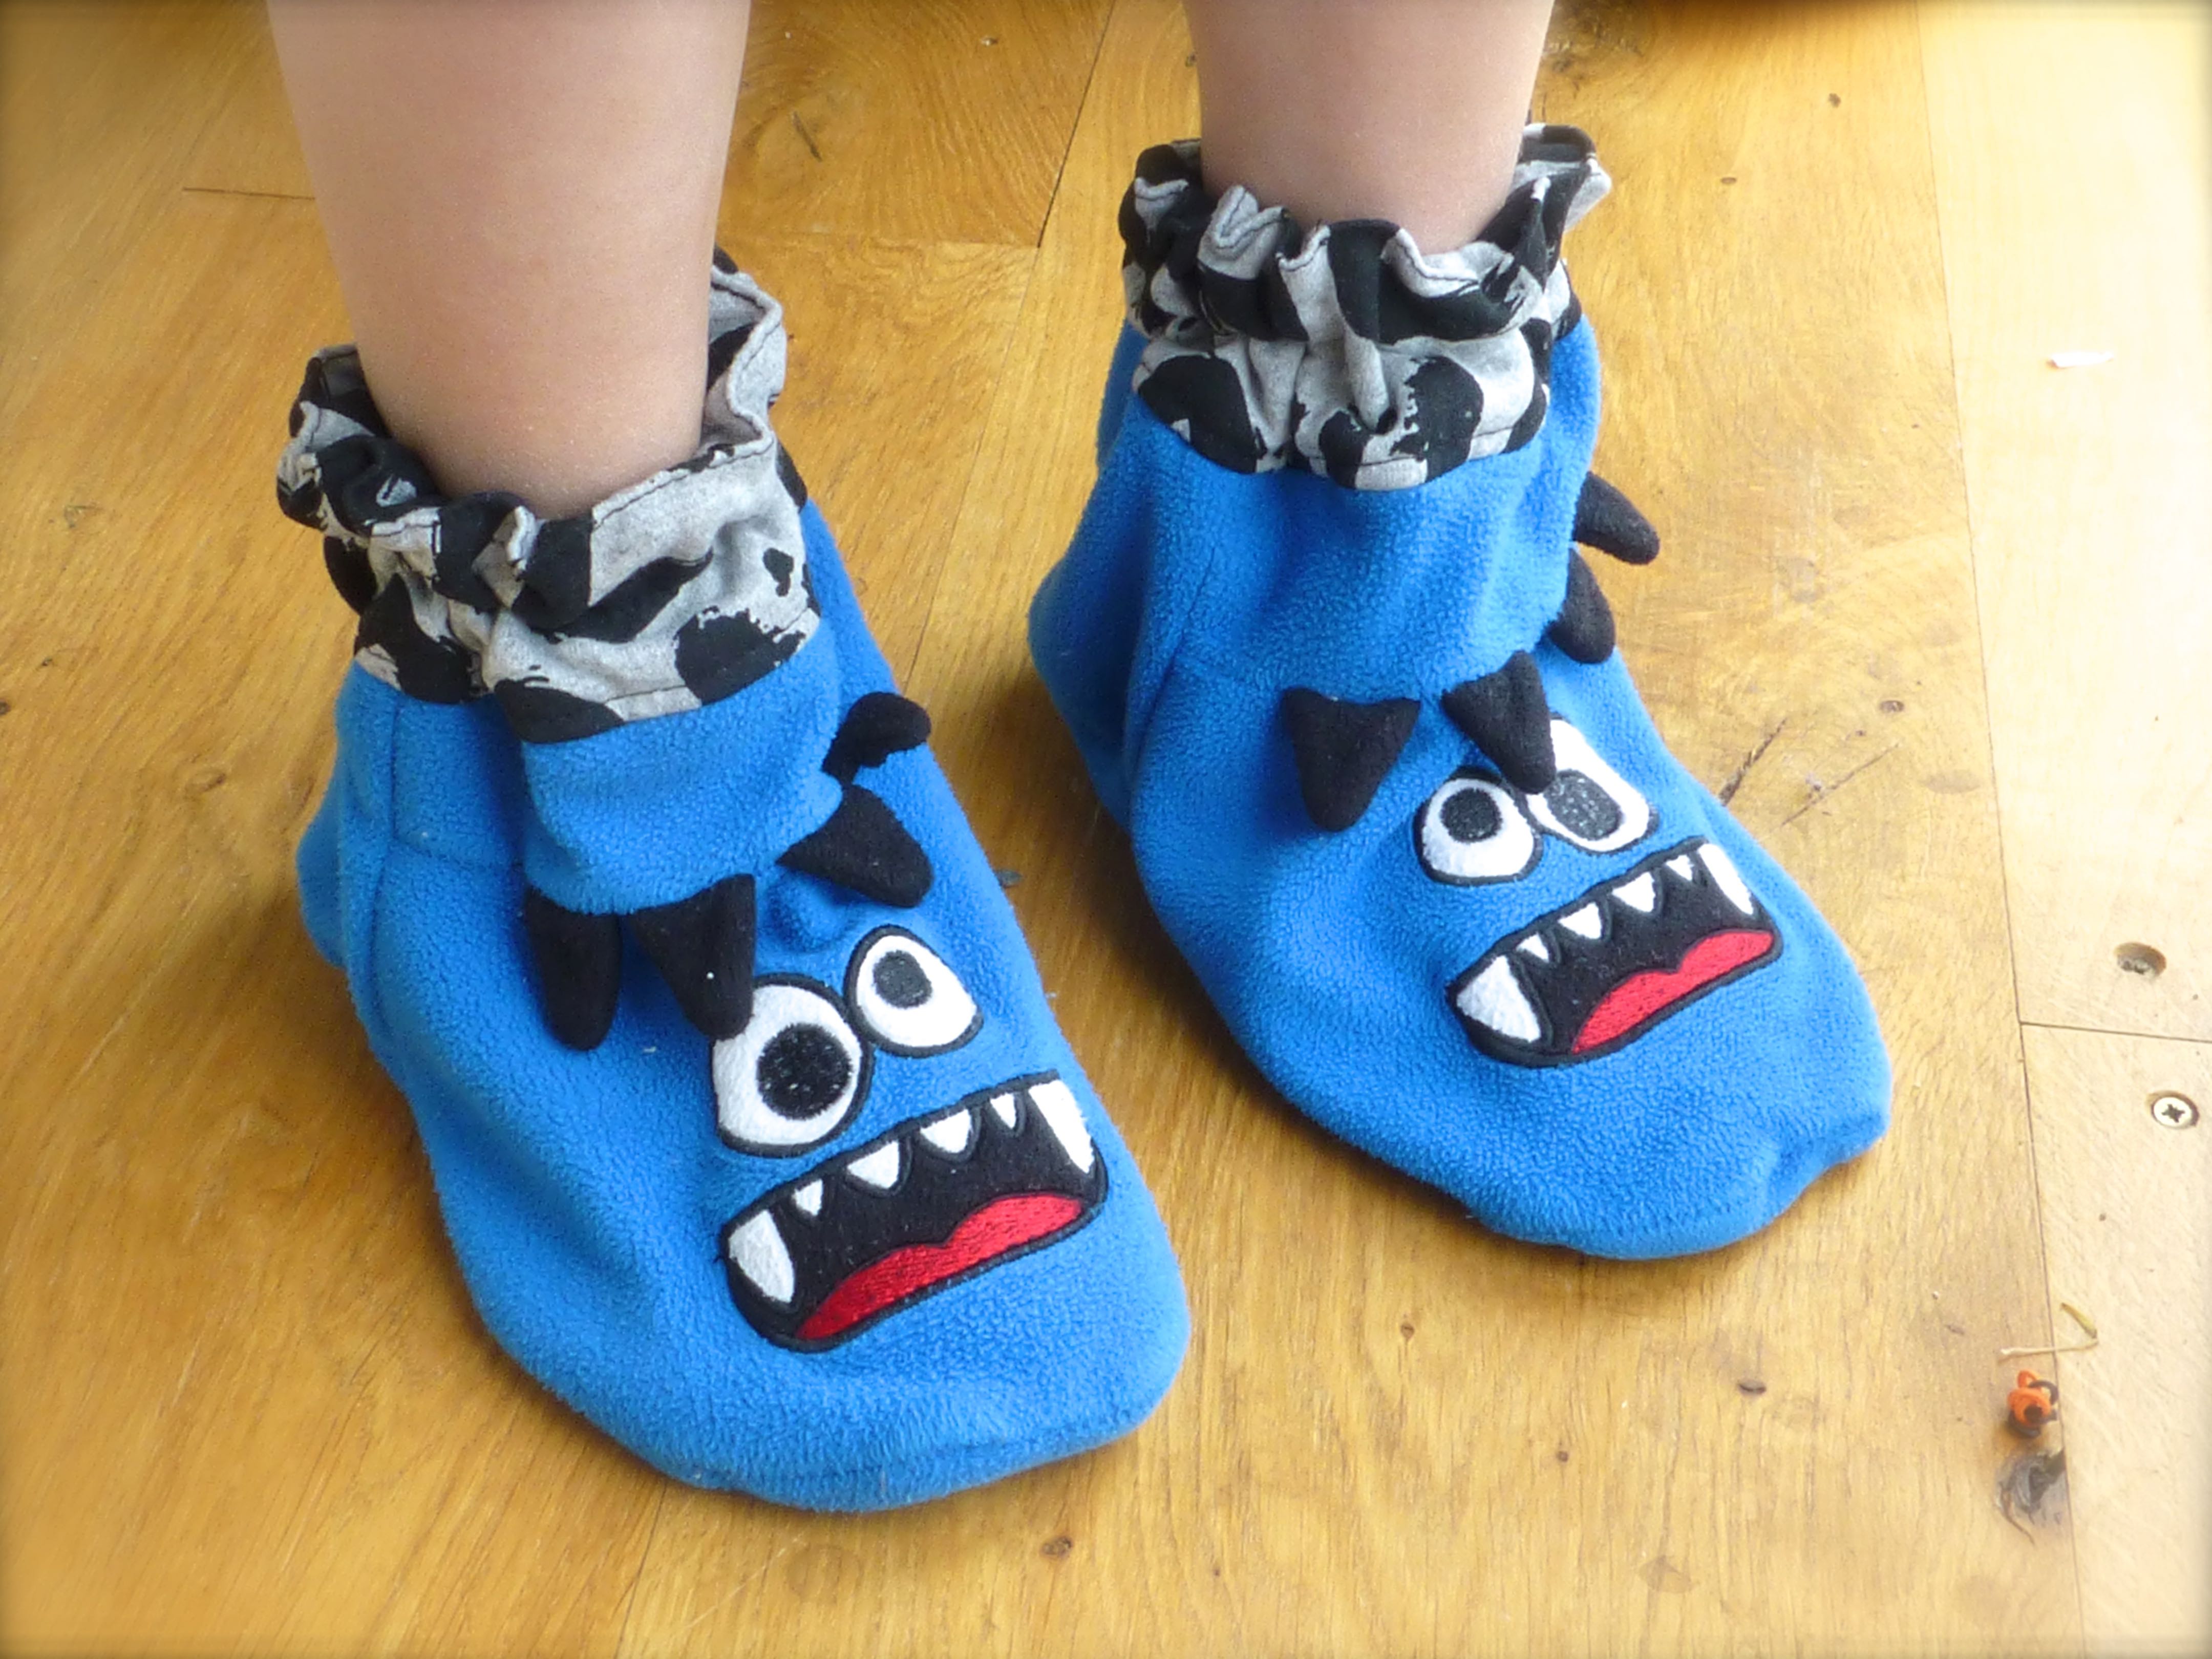
Tadah!
A sweet pair of slipper boots.
These turned out to be the favourite part of the recycled outfit and are great for sliding across oak floors.
Hmmm, that reminds me of a ‘game’ we used to play when we were kids. Mum used to put wax polish on rags, tie them to our feet and ‘let’ us slide on the linoleum floor in the dining room.
Wonder if I could use that ruse on my boys?
Hope you enjoyed this post, how to make slipper boots from an old onesie – if you’d like to see more;
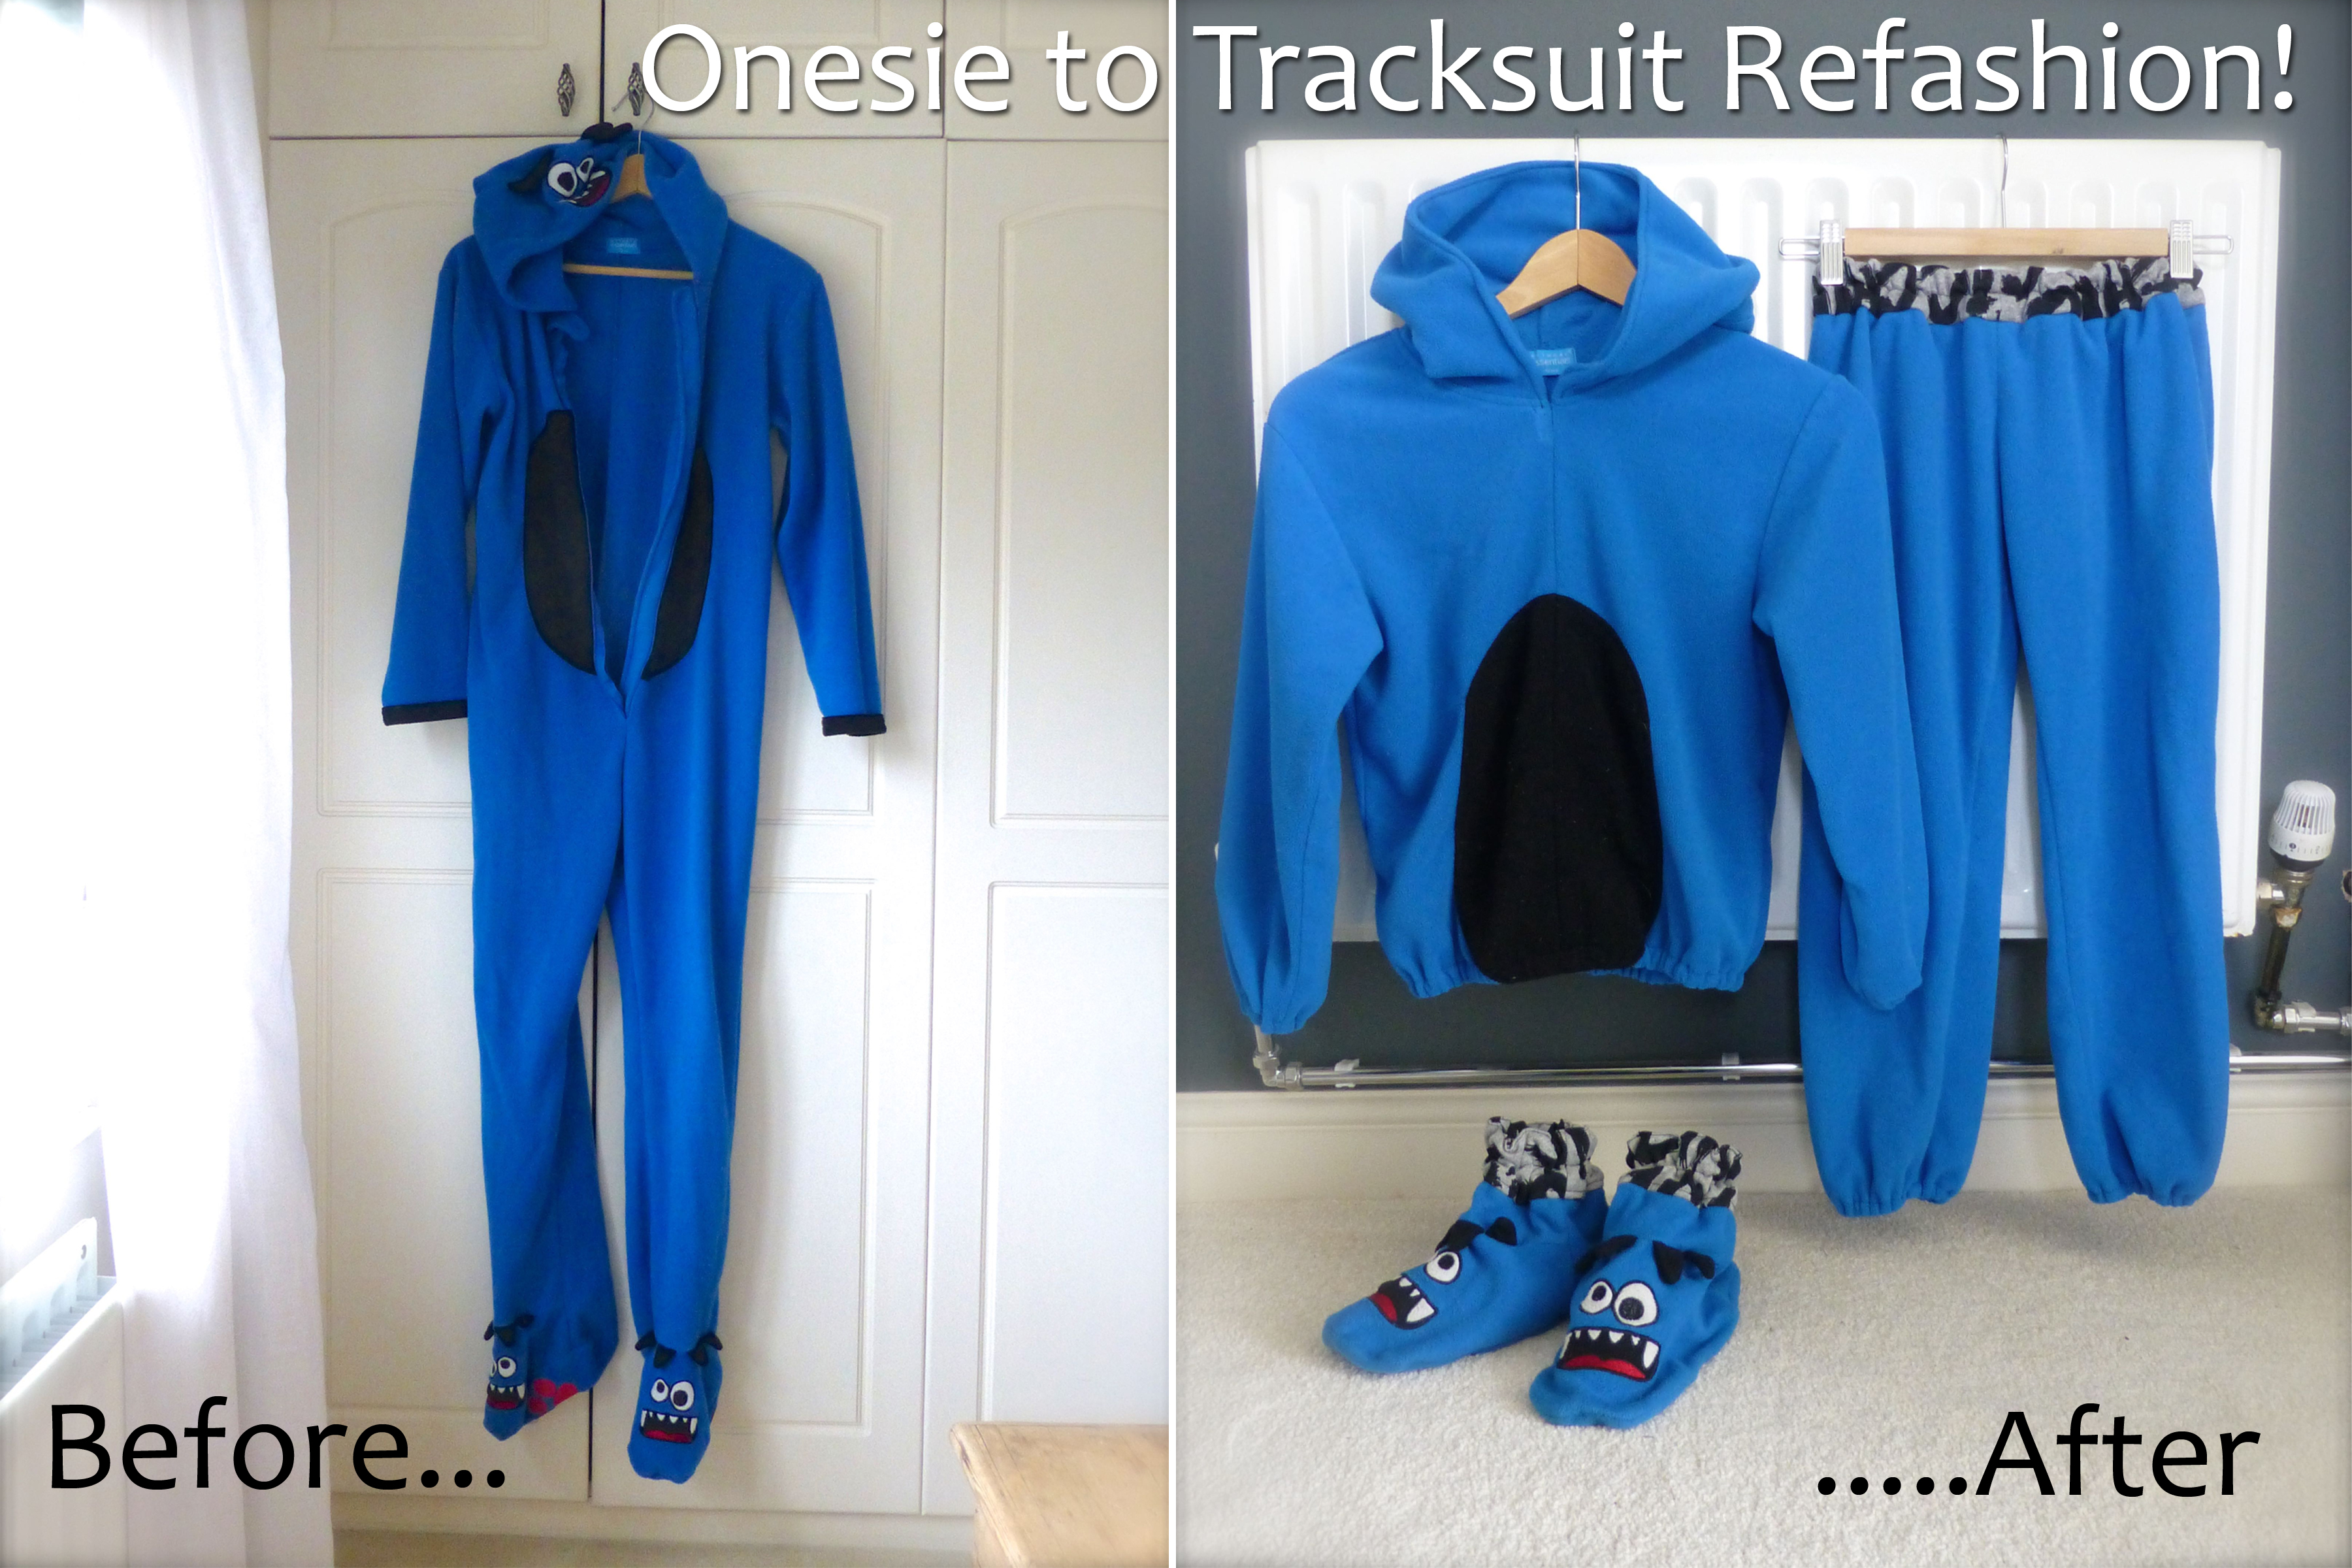
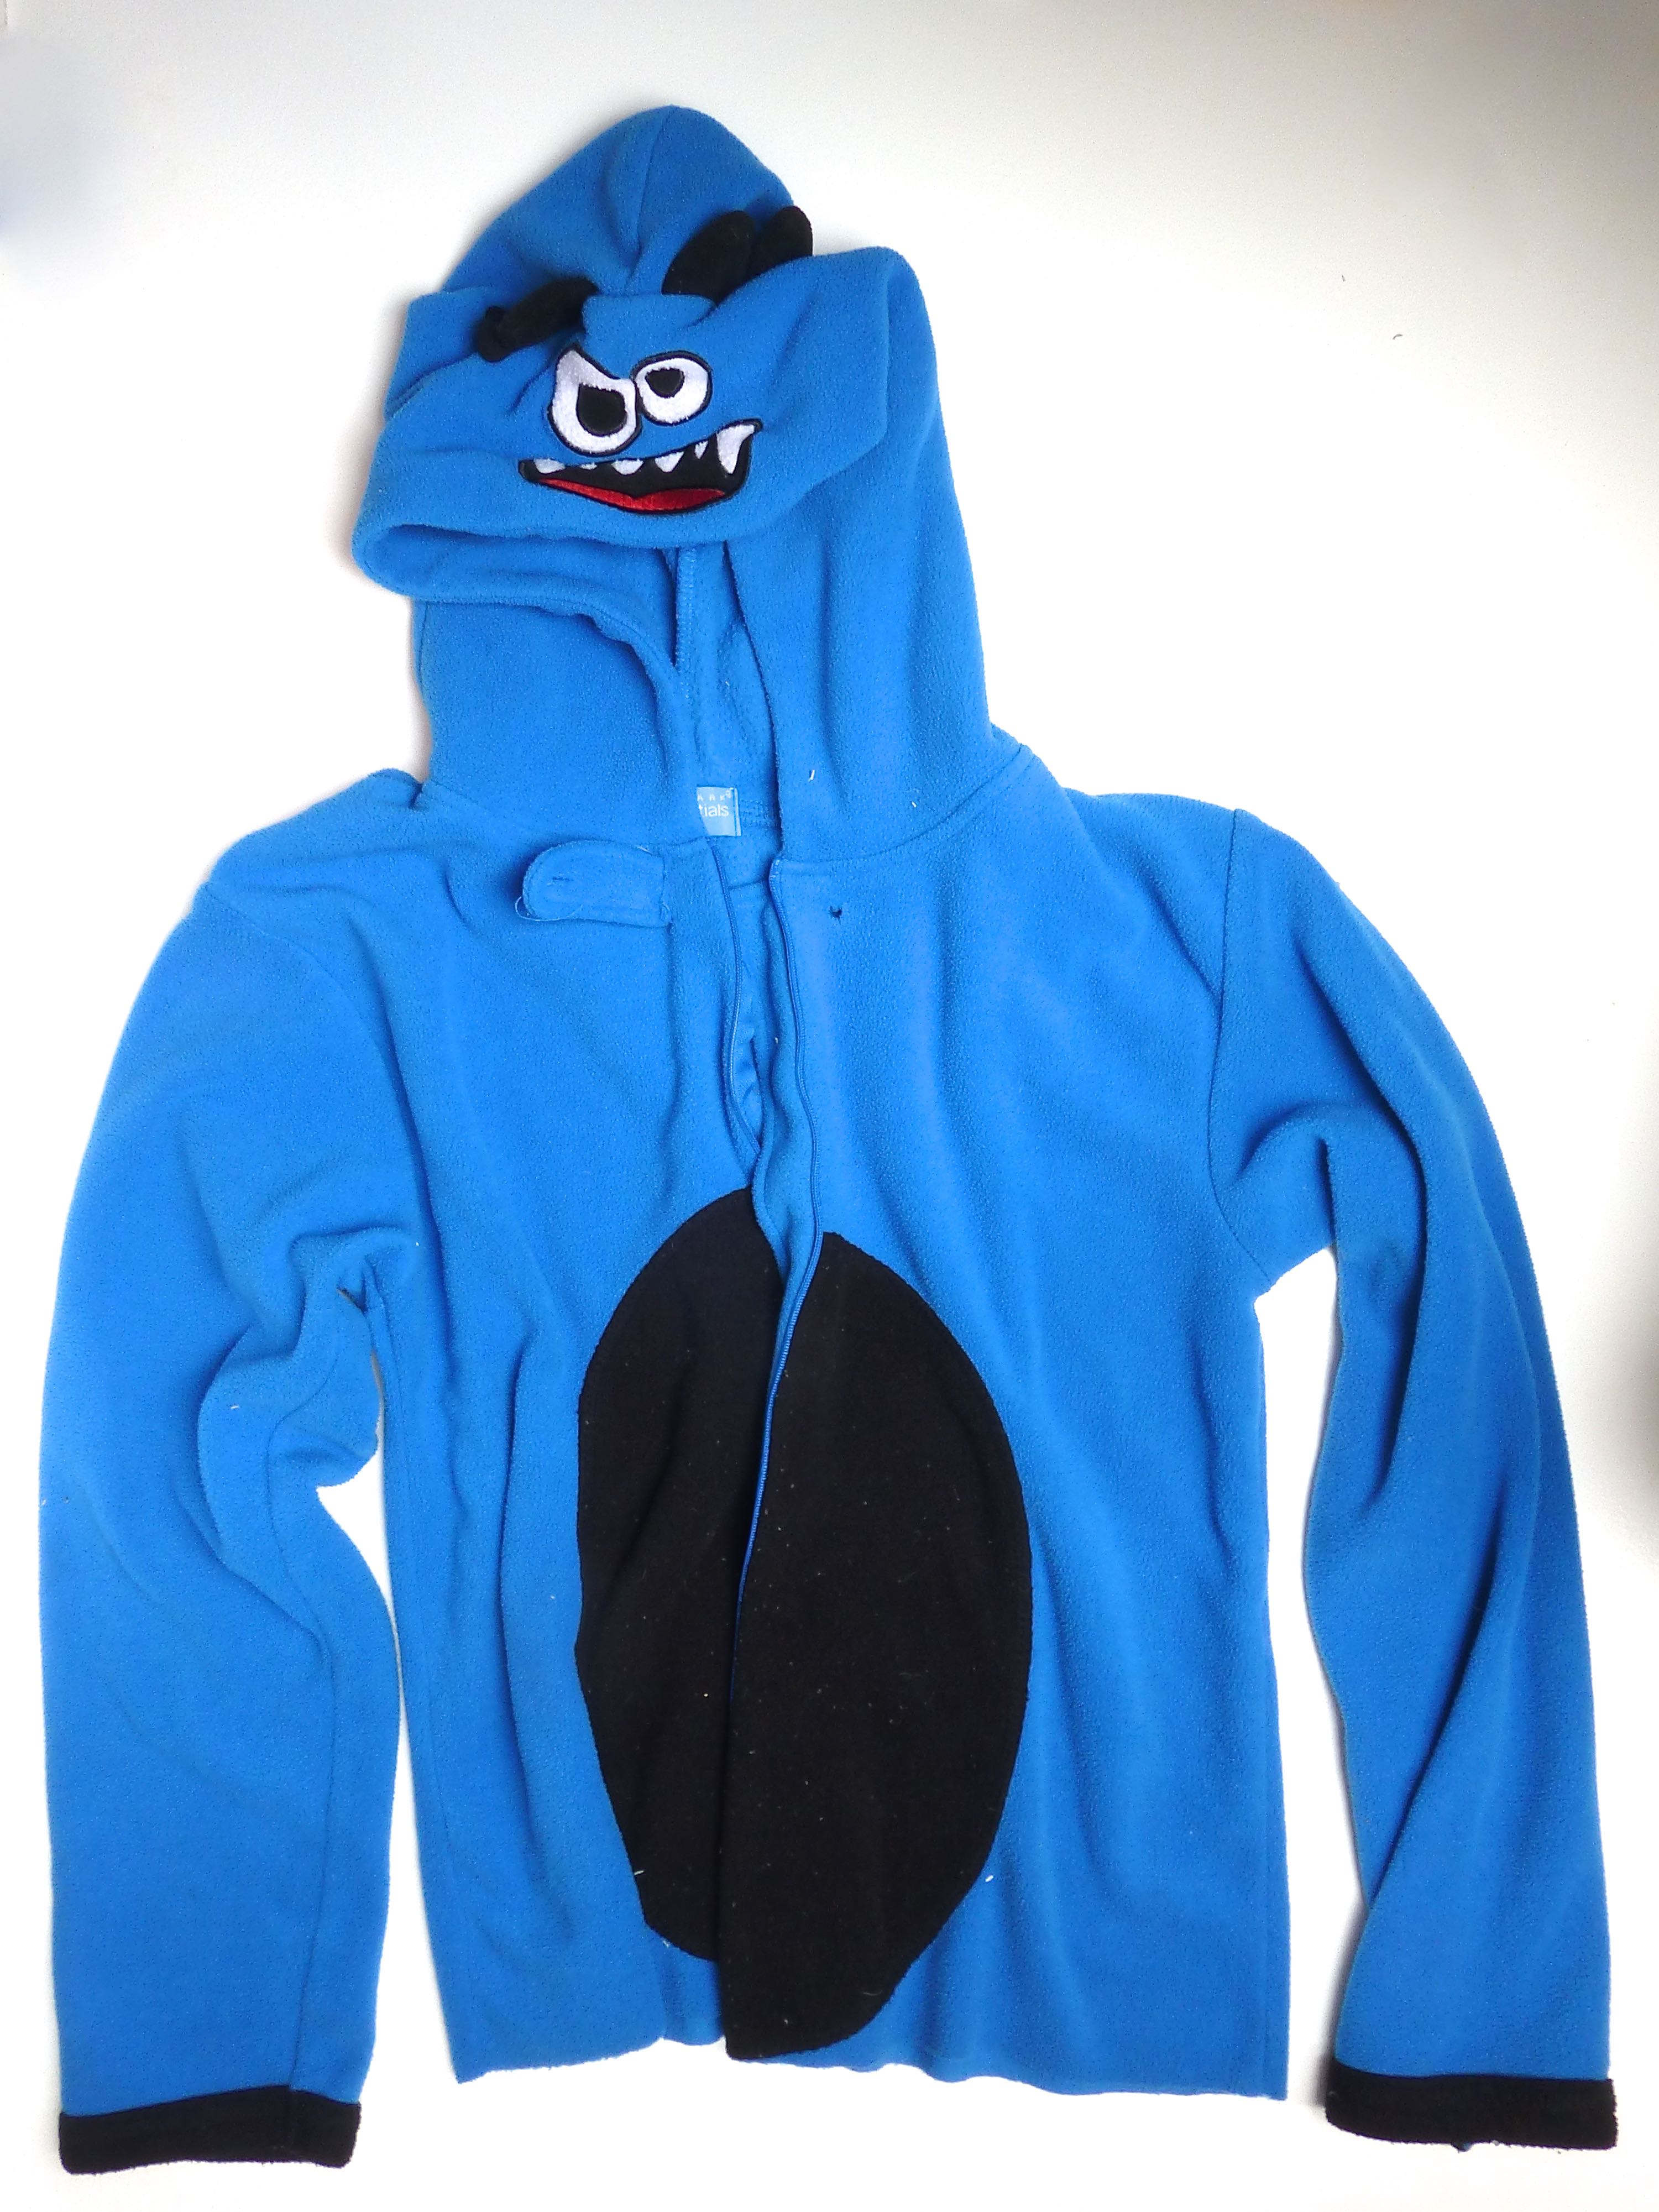
Have your kids (or you!) got one too many of those novelty Onesies that continue to be so popular?
We were given a couple of hand-me-downs from my nephew which would take my boys four or five years to grow into, so I had the idea to re-make one of them into something more wearable – Tracksuit Bottoms, Hoodie and the added bonus of a pair of Slipper Boots!
It’s not a complicated refashion, but I seemed to take quite a lot of photos so I’ll split this upcycle into three posts, this being the first.
TRACKSUIT BOTTOMS
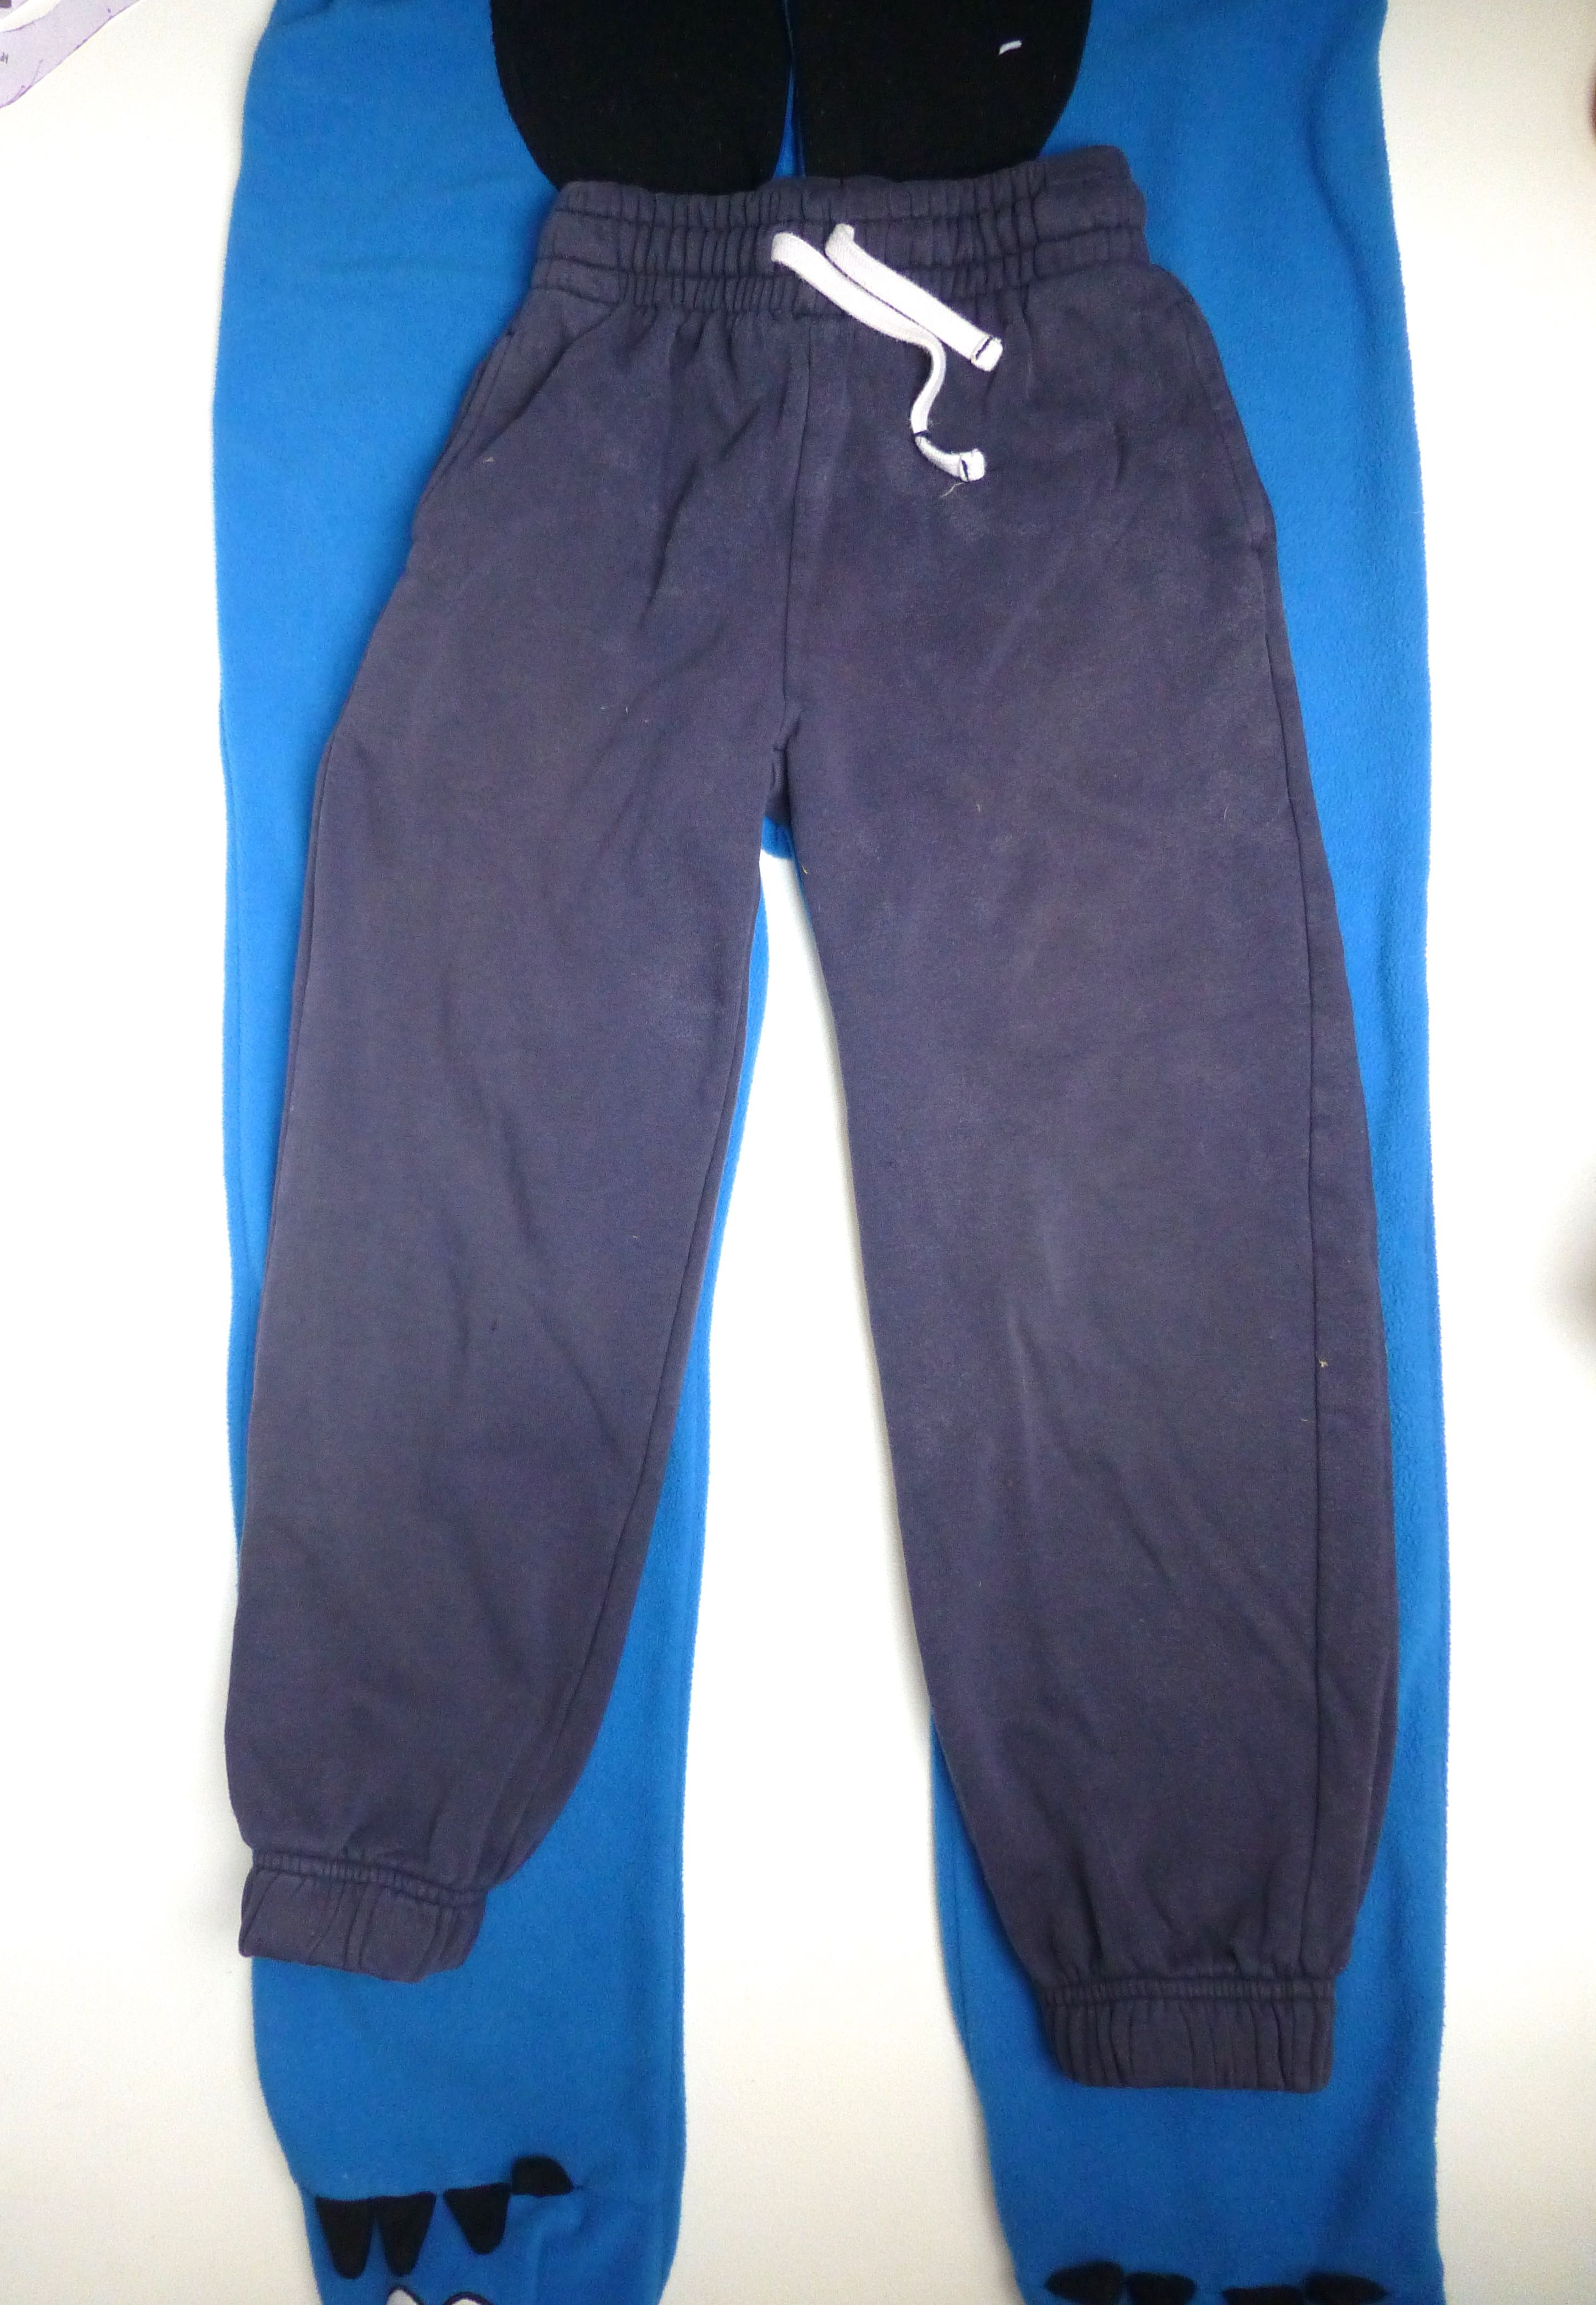
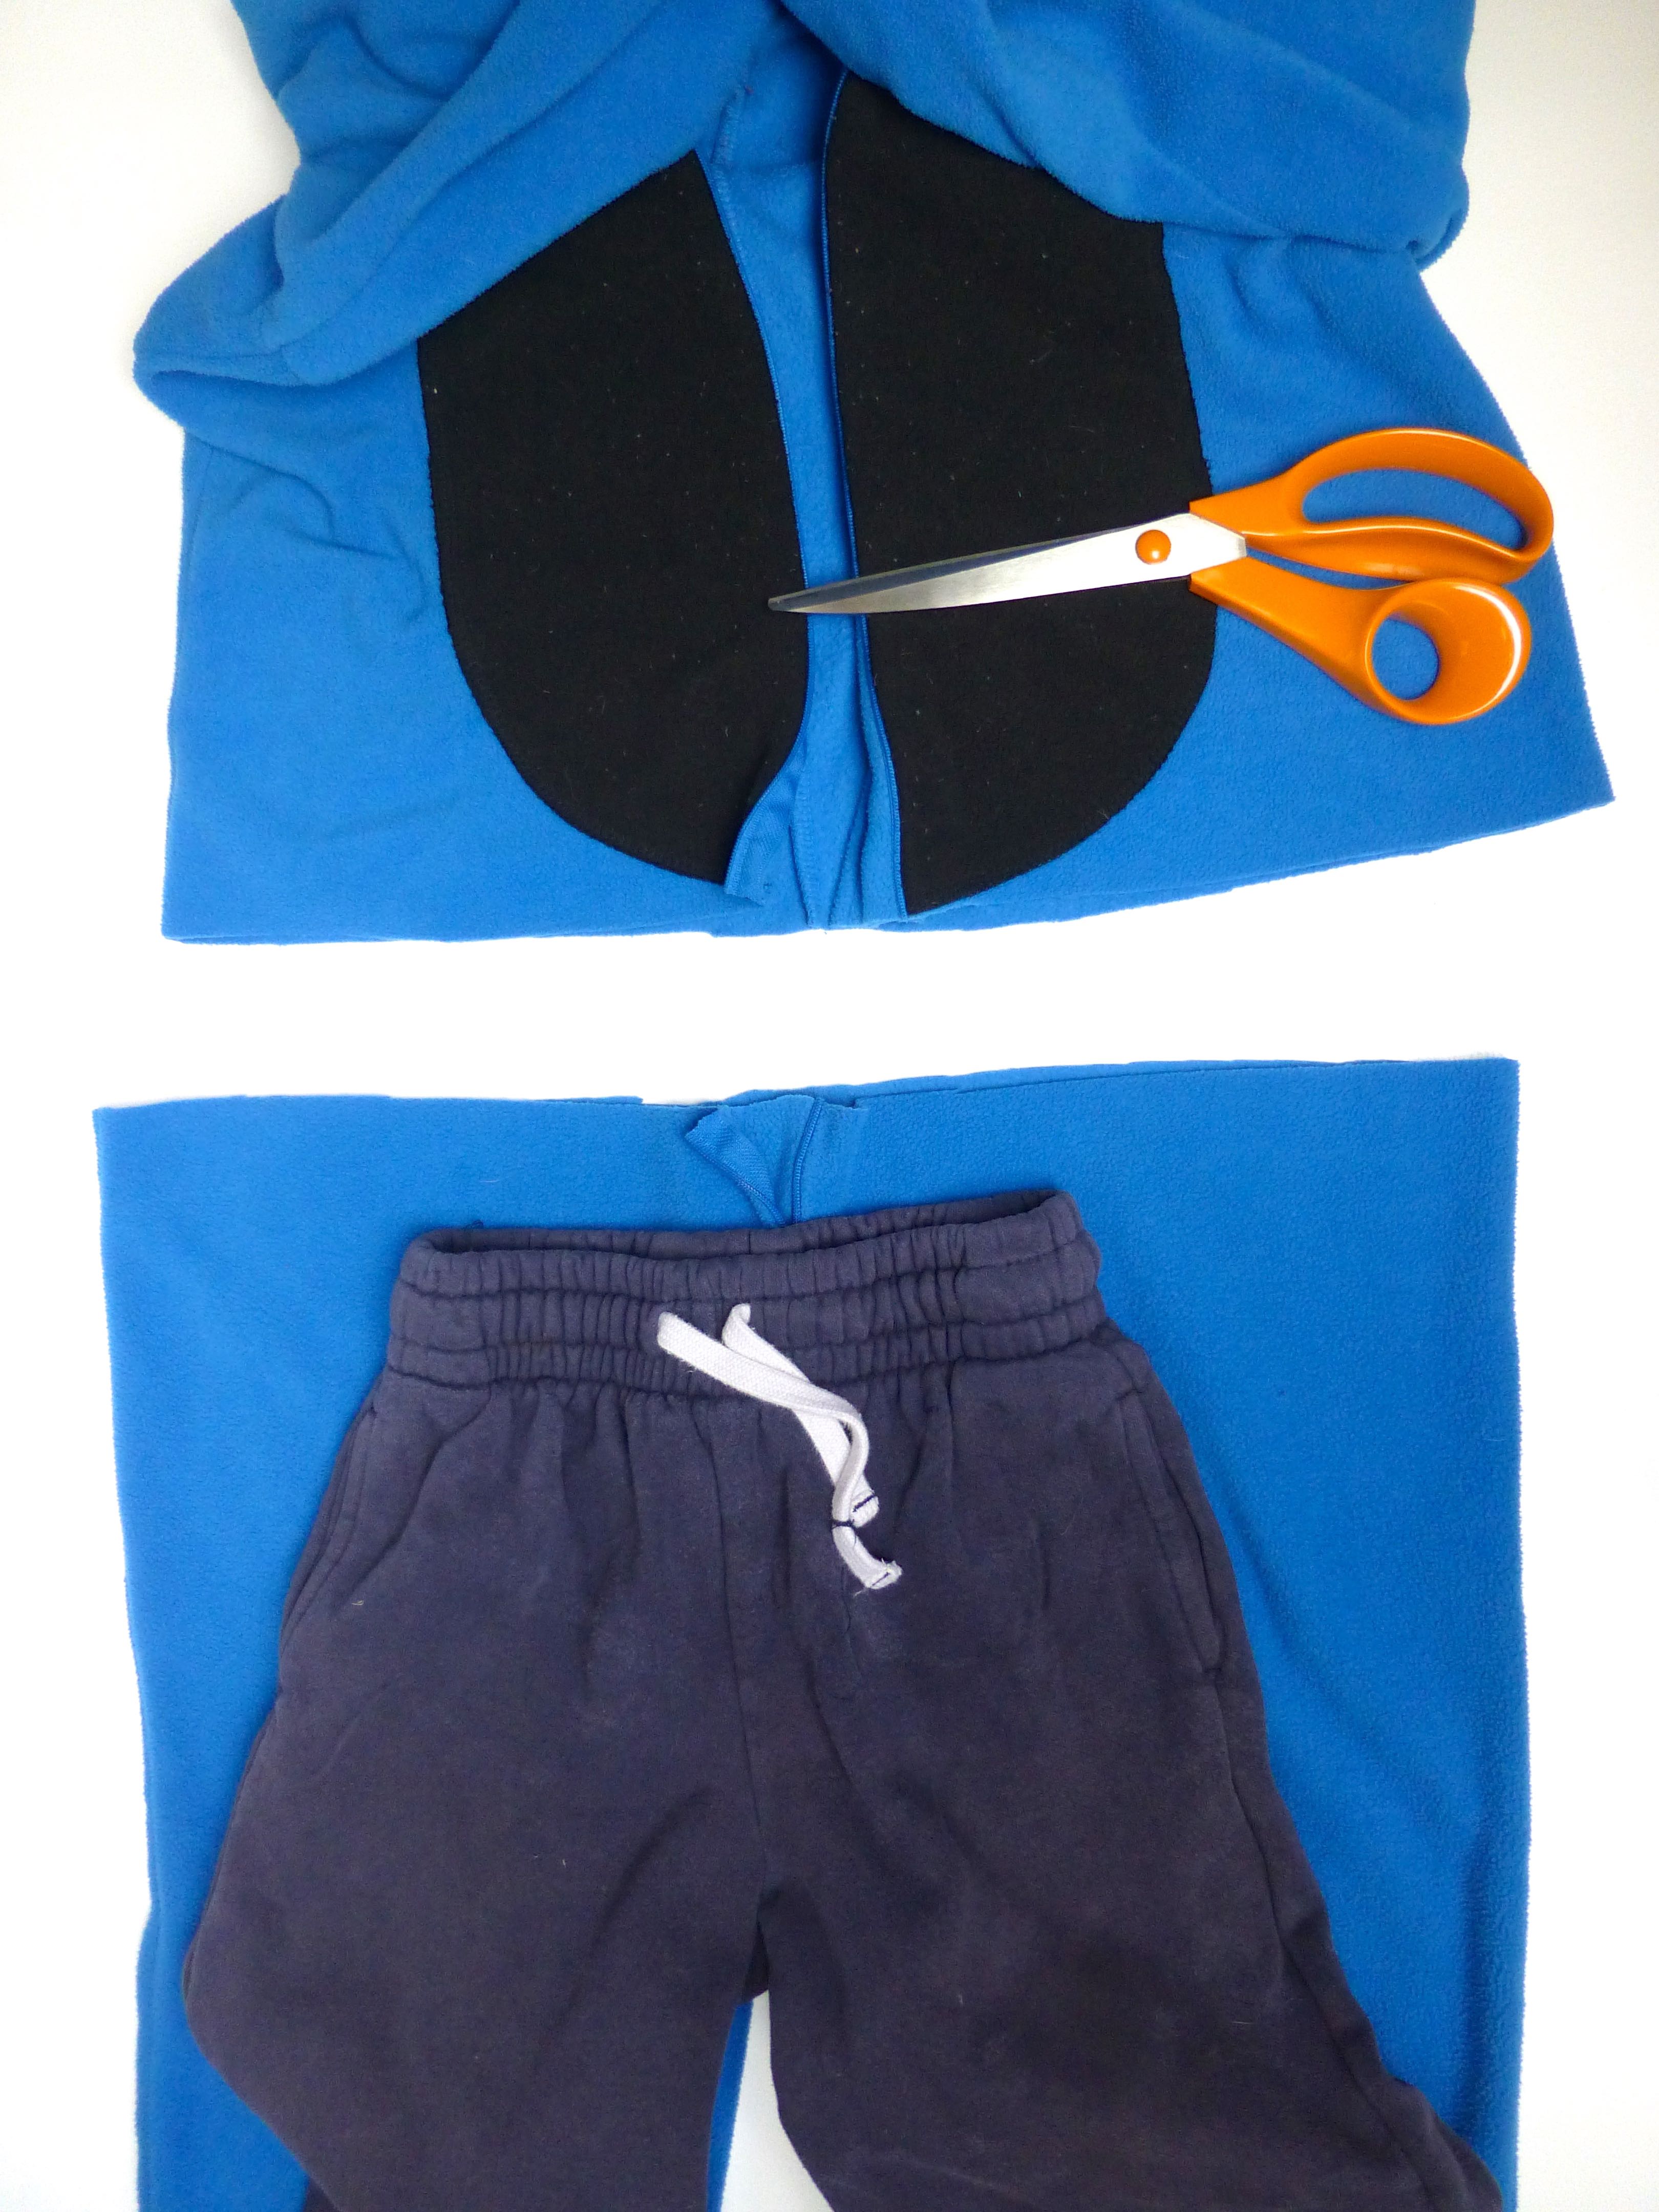
First up, I took an existing pair of well-fitting tracksuit bottoms and roughly cut the bottom half of the onesie to size.
I left plenty of space to turn up a hem and put the feet to one side for later.
A couple of inches was left at the top to add a little growing room and the top was also put to one side for later.
I started by unpicking and removing the remainder of the zip, then sewed the centre front seam closed.
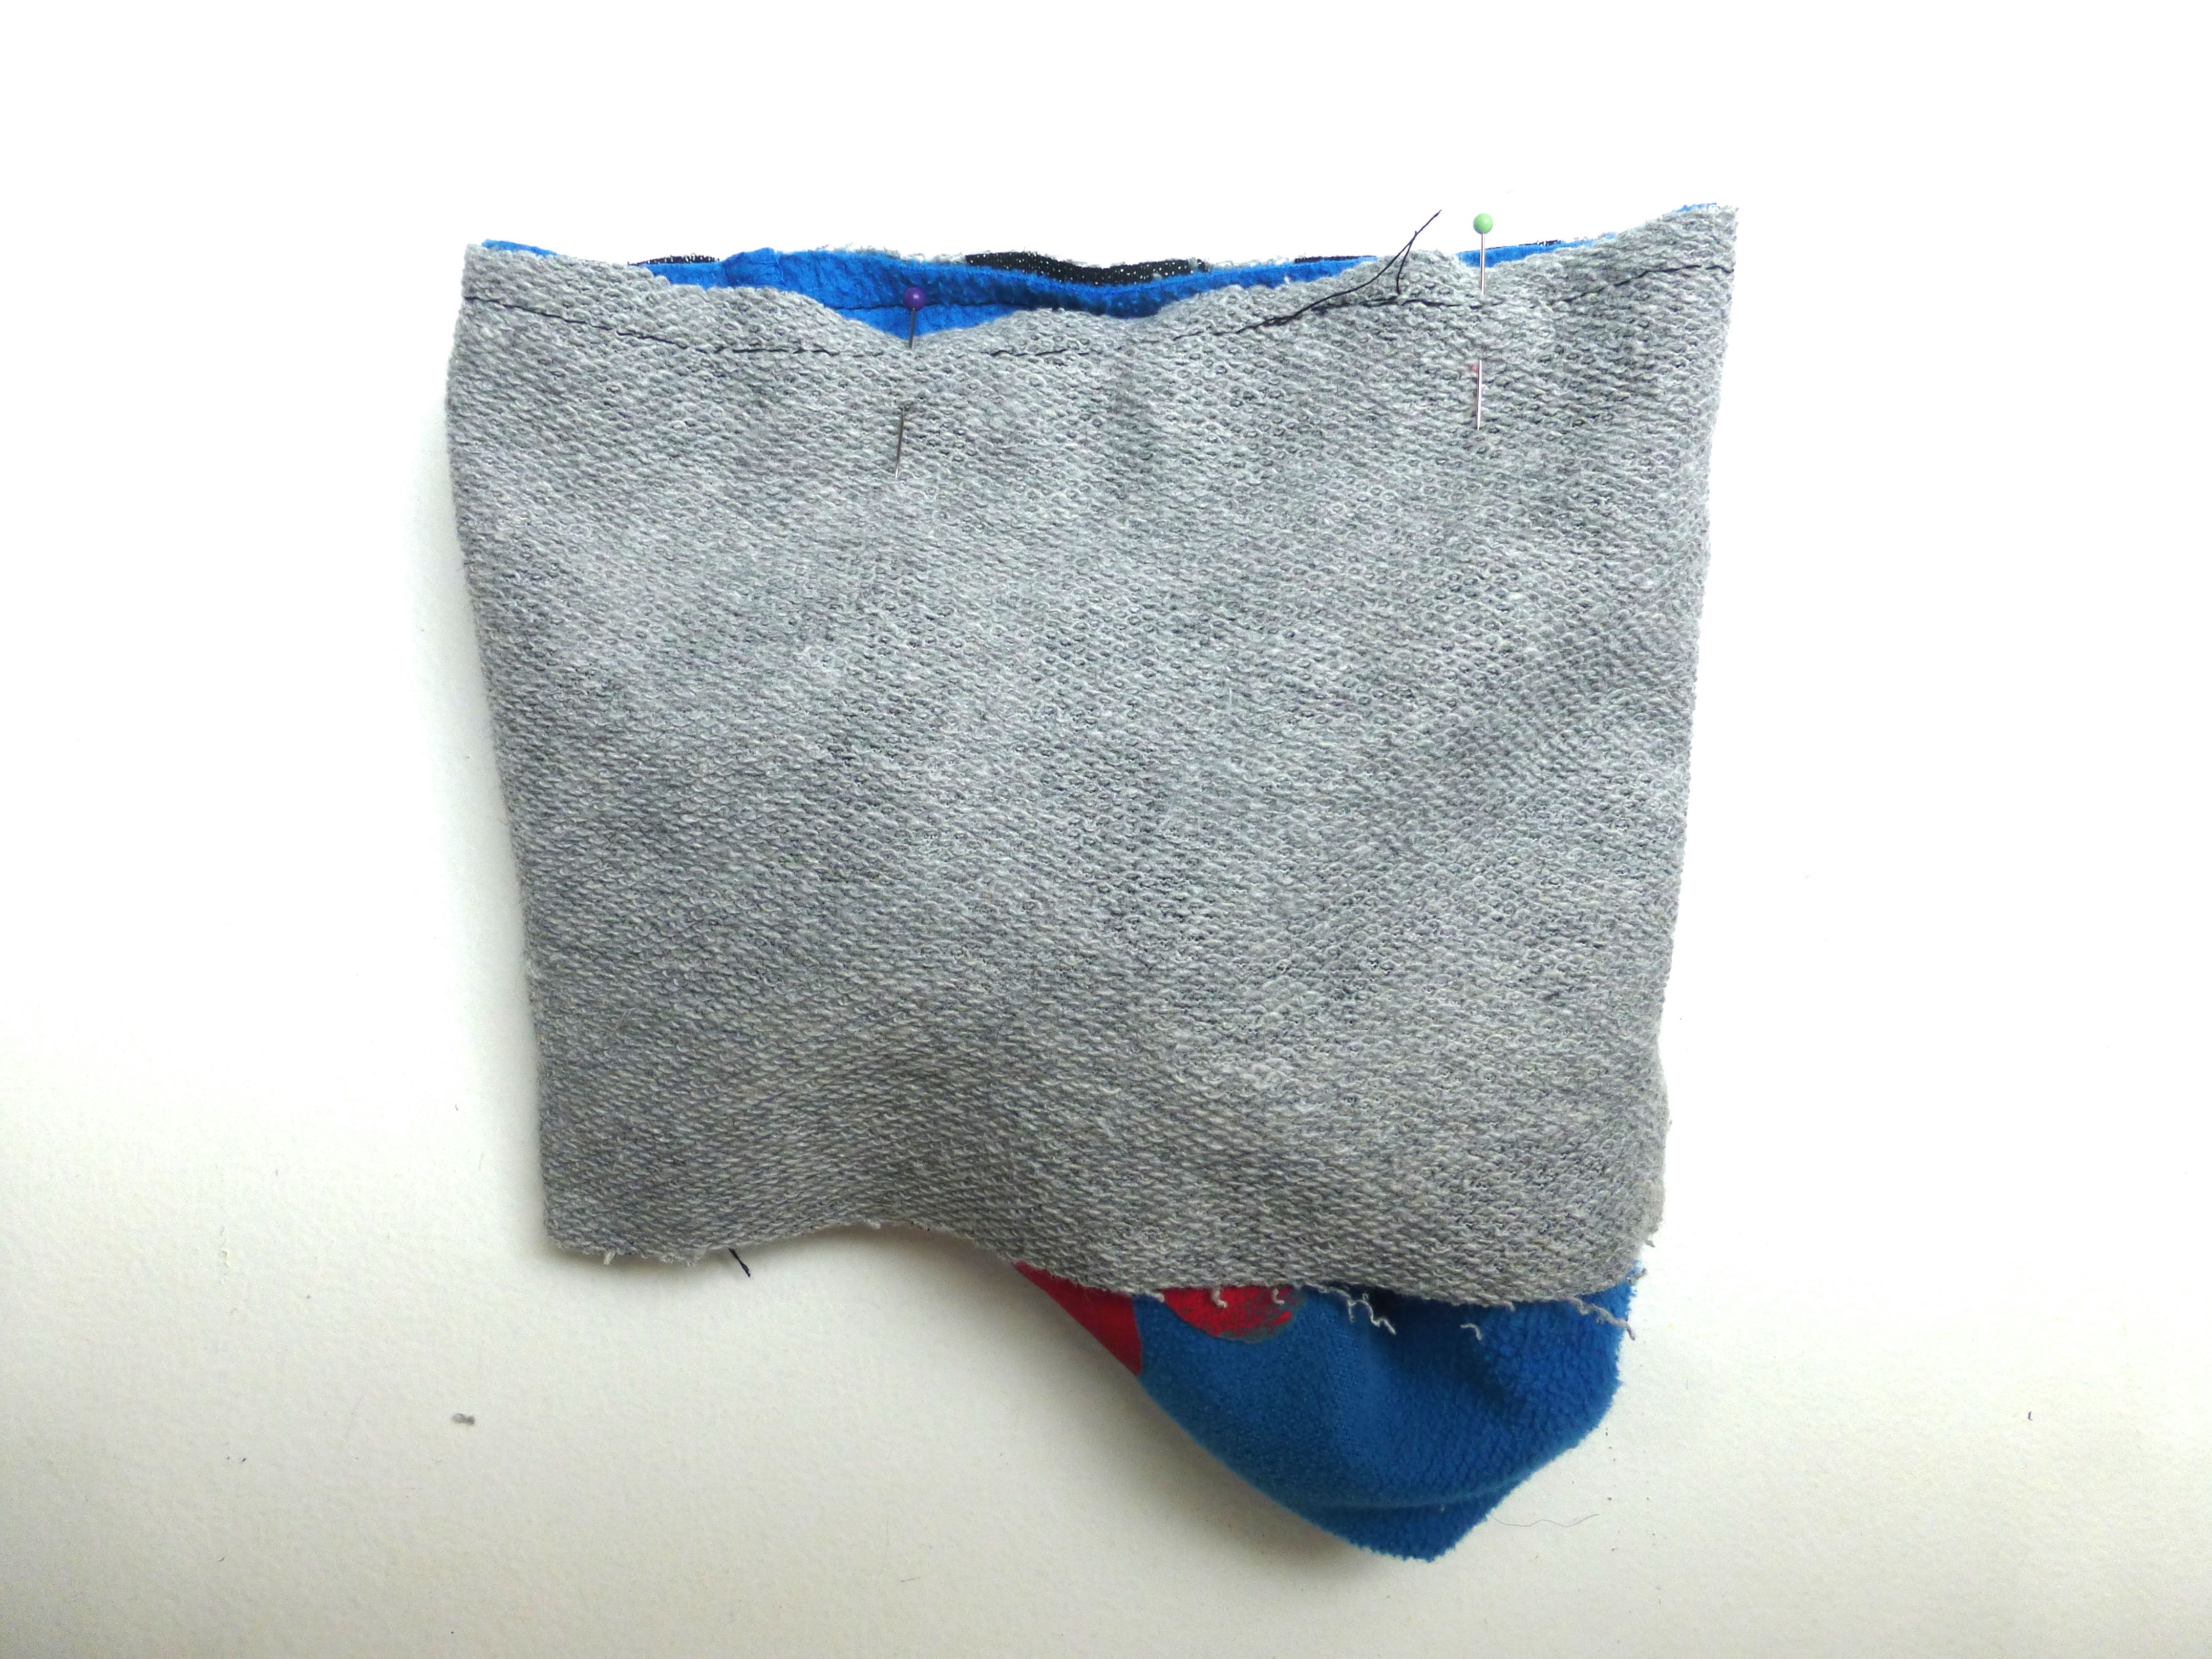
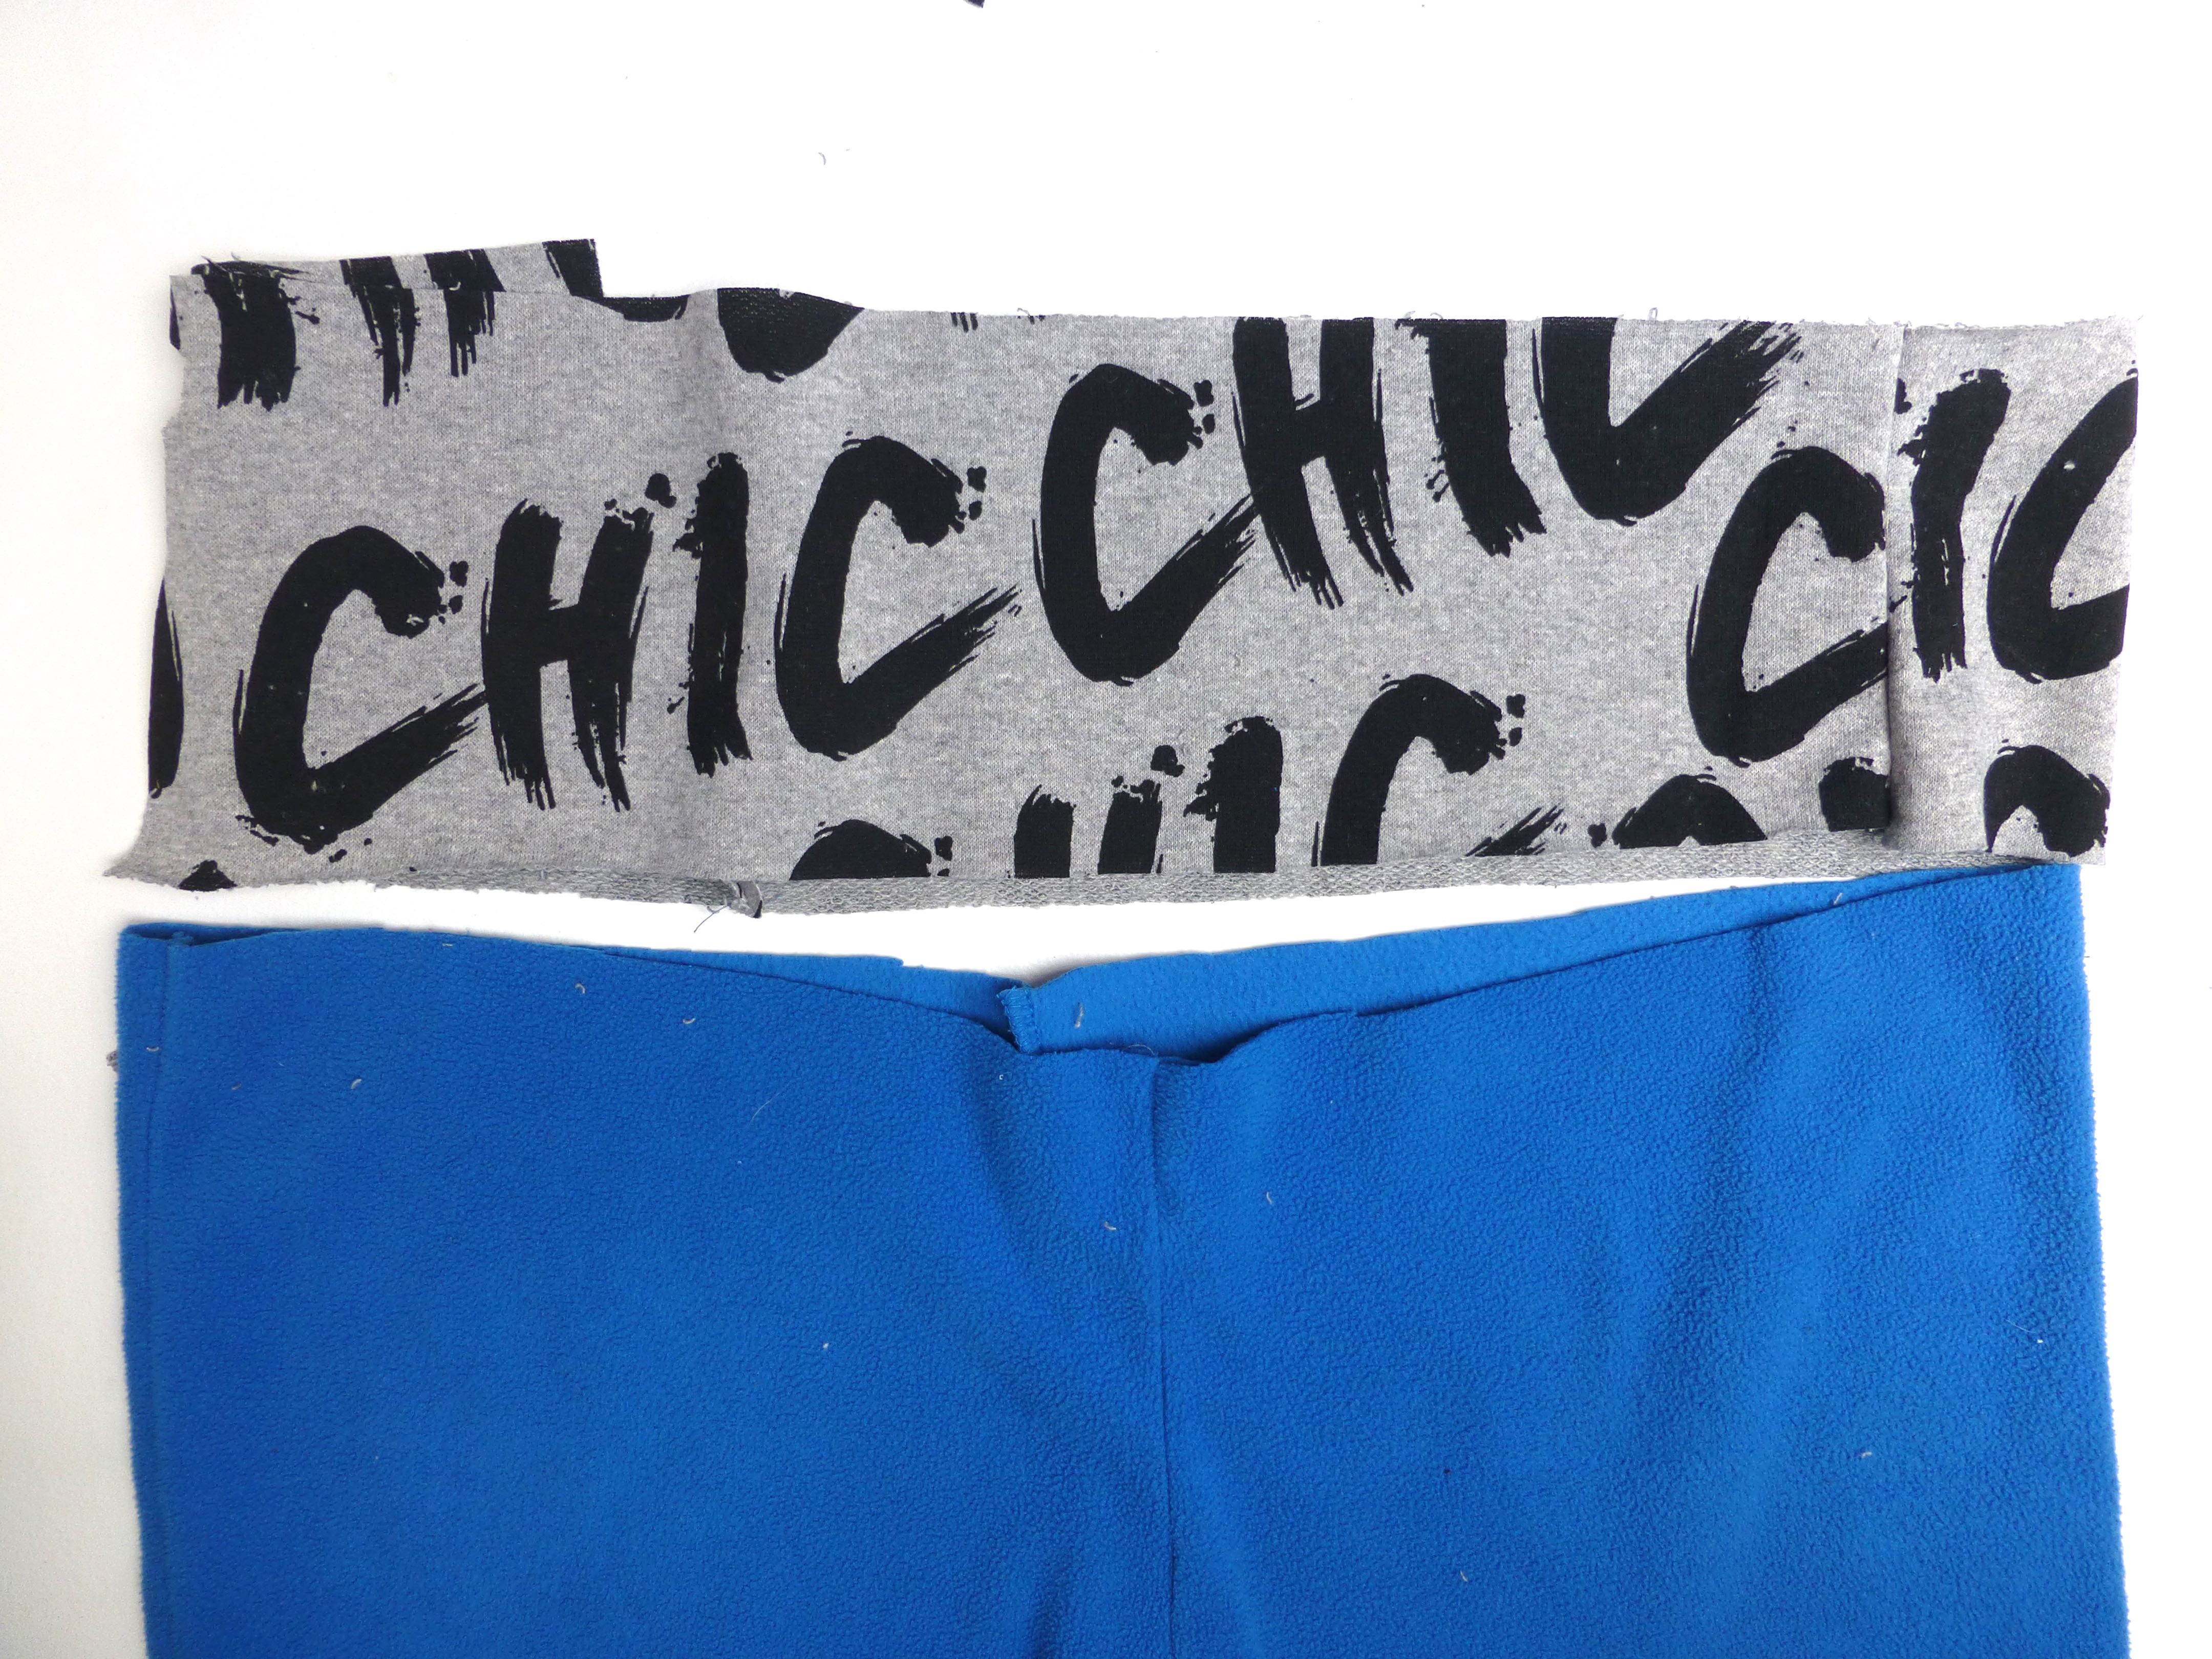
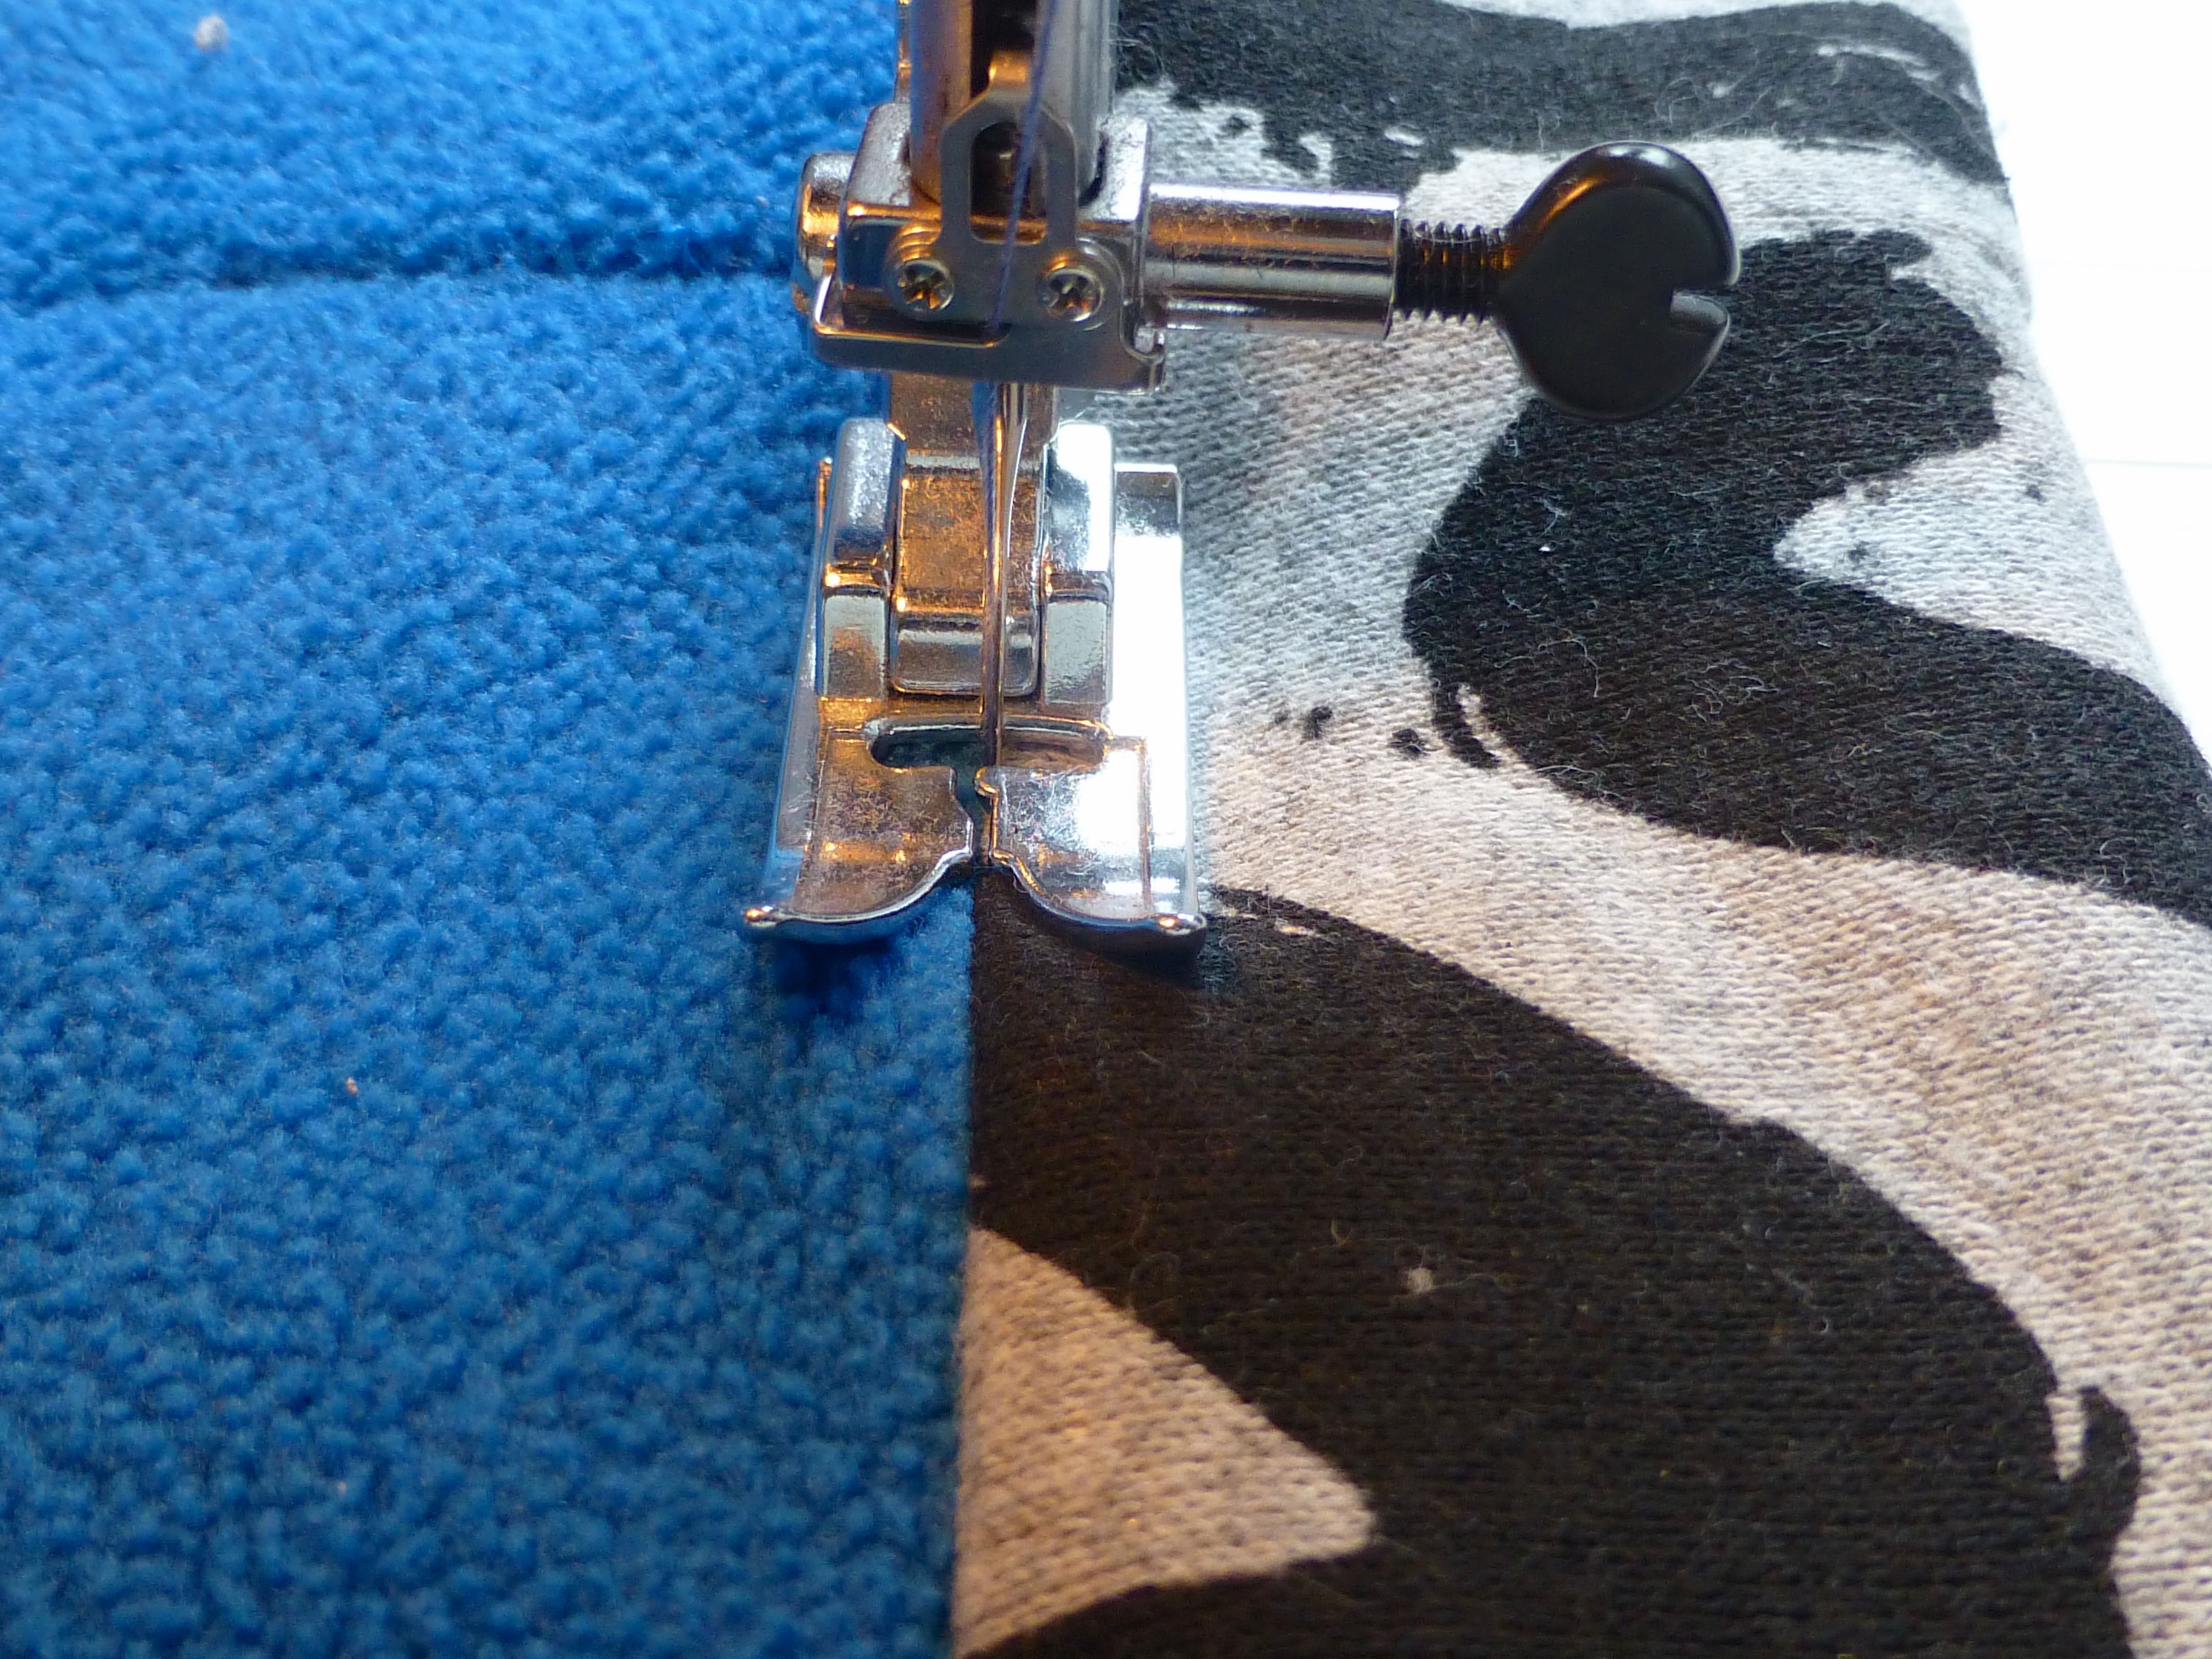
There was just enough knit fabric leftover from a previous project to make a new waistband. I cut 4″ wide strips and pieced them together to measure the same as the onesie and added a seam allowance. The short ends were sewn right sides together to make a circle.
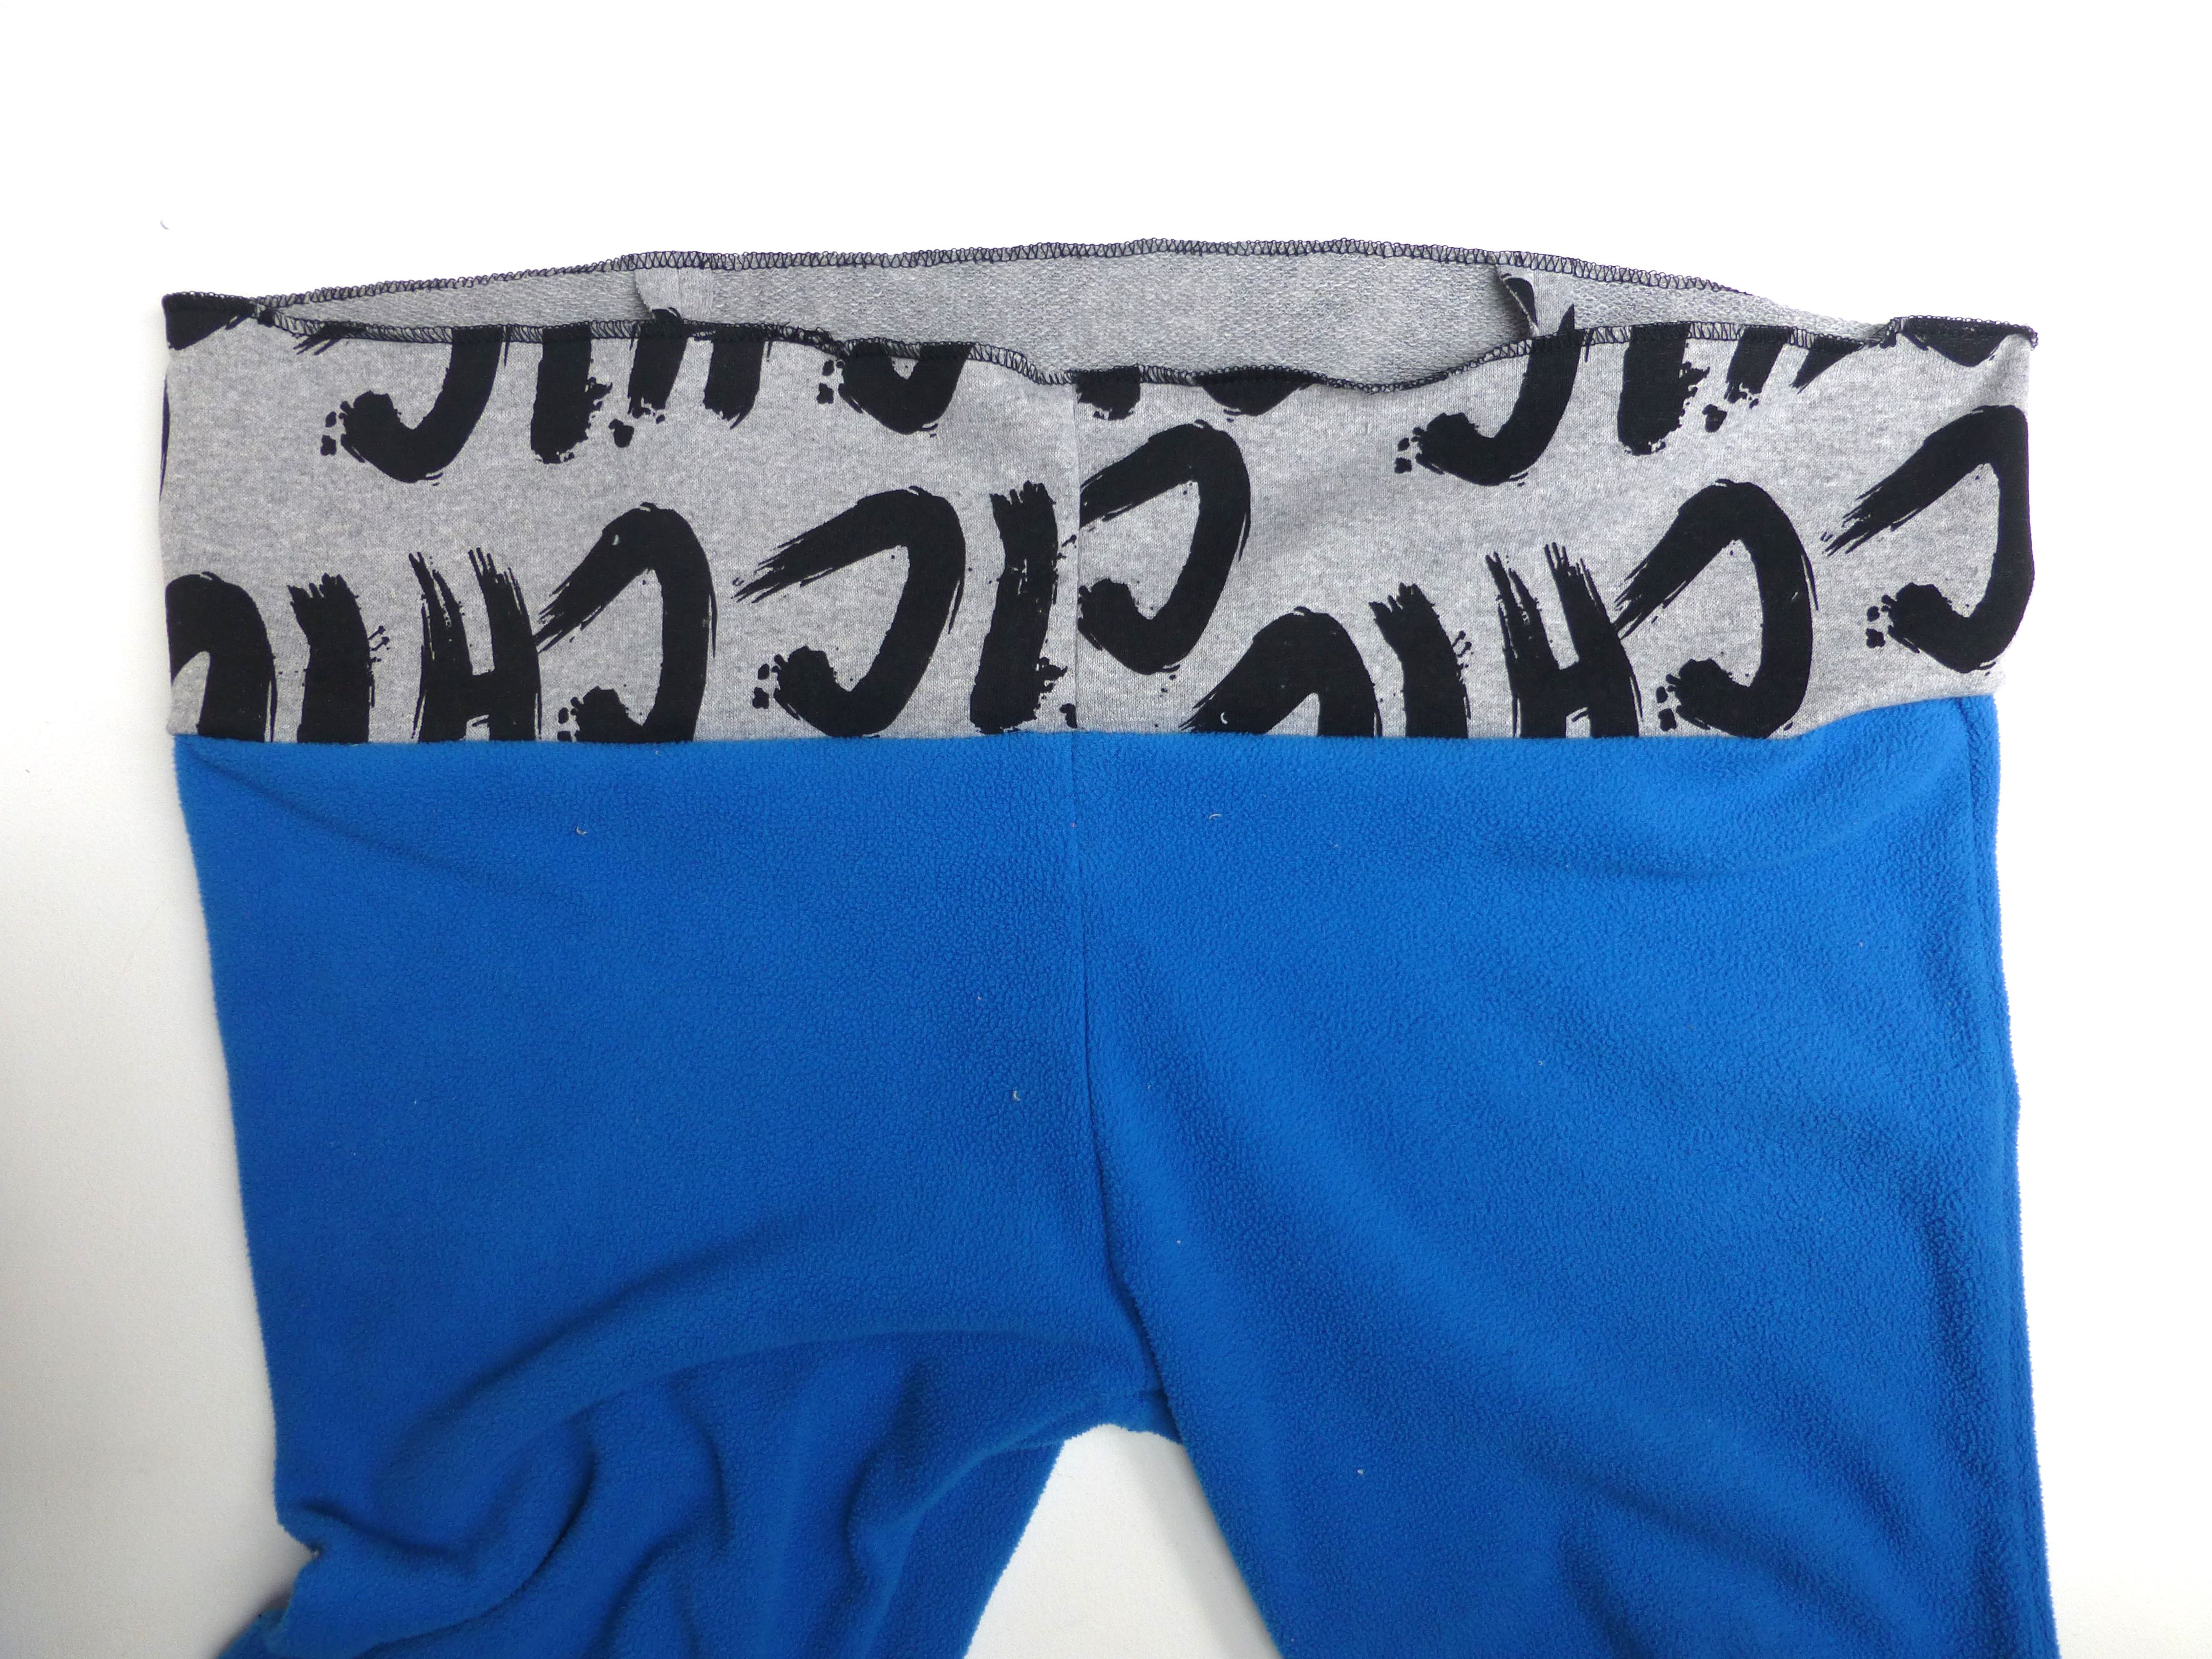
The new waistband was sewn right sides together with the onesie and the raw edge was overlocked.
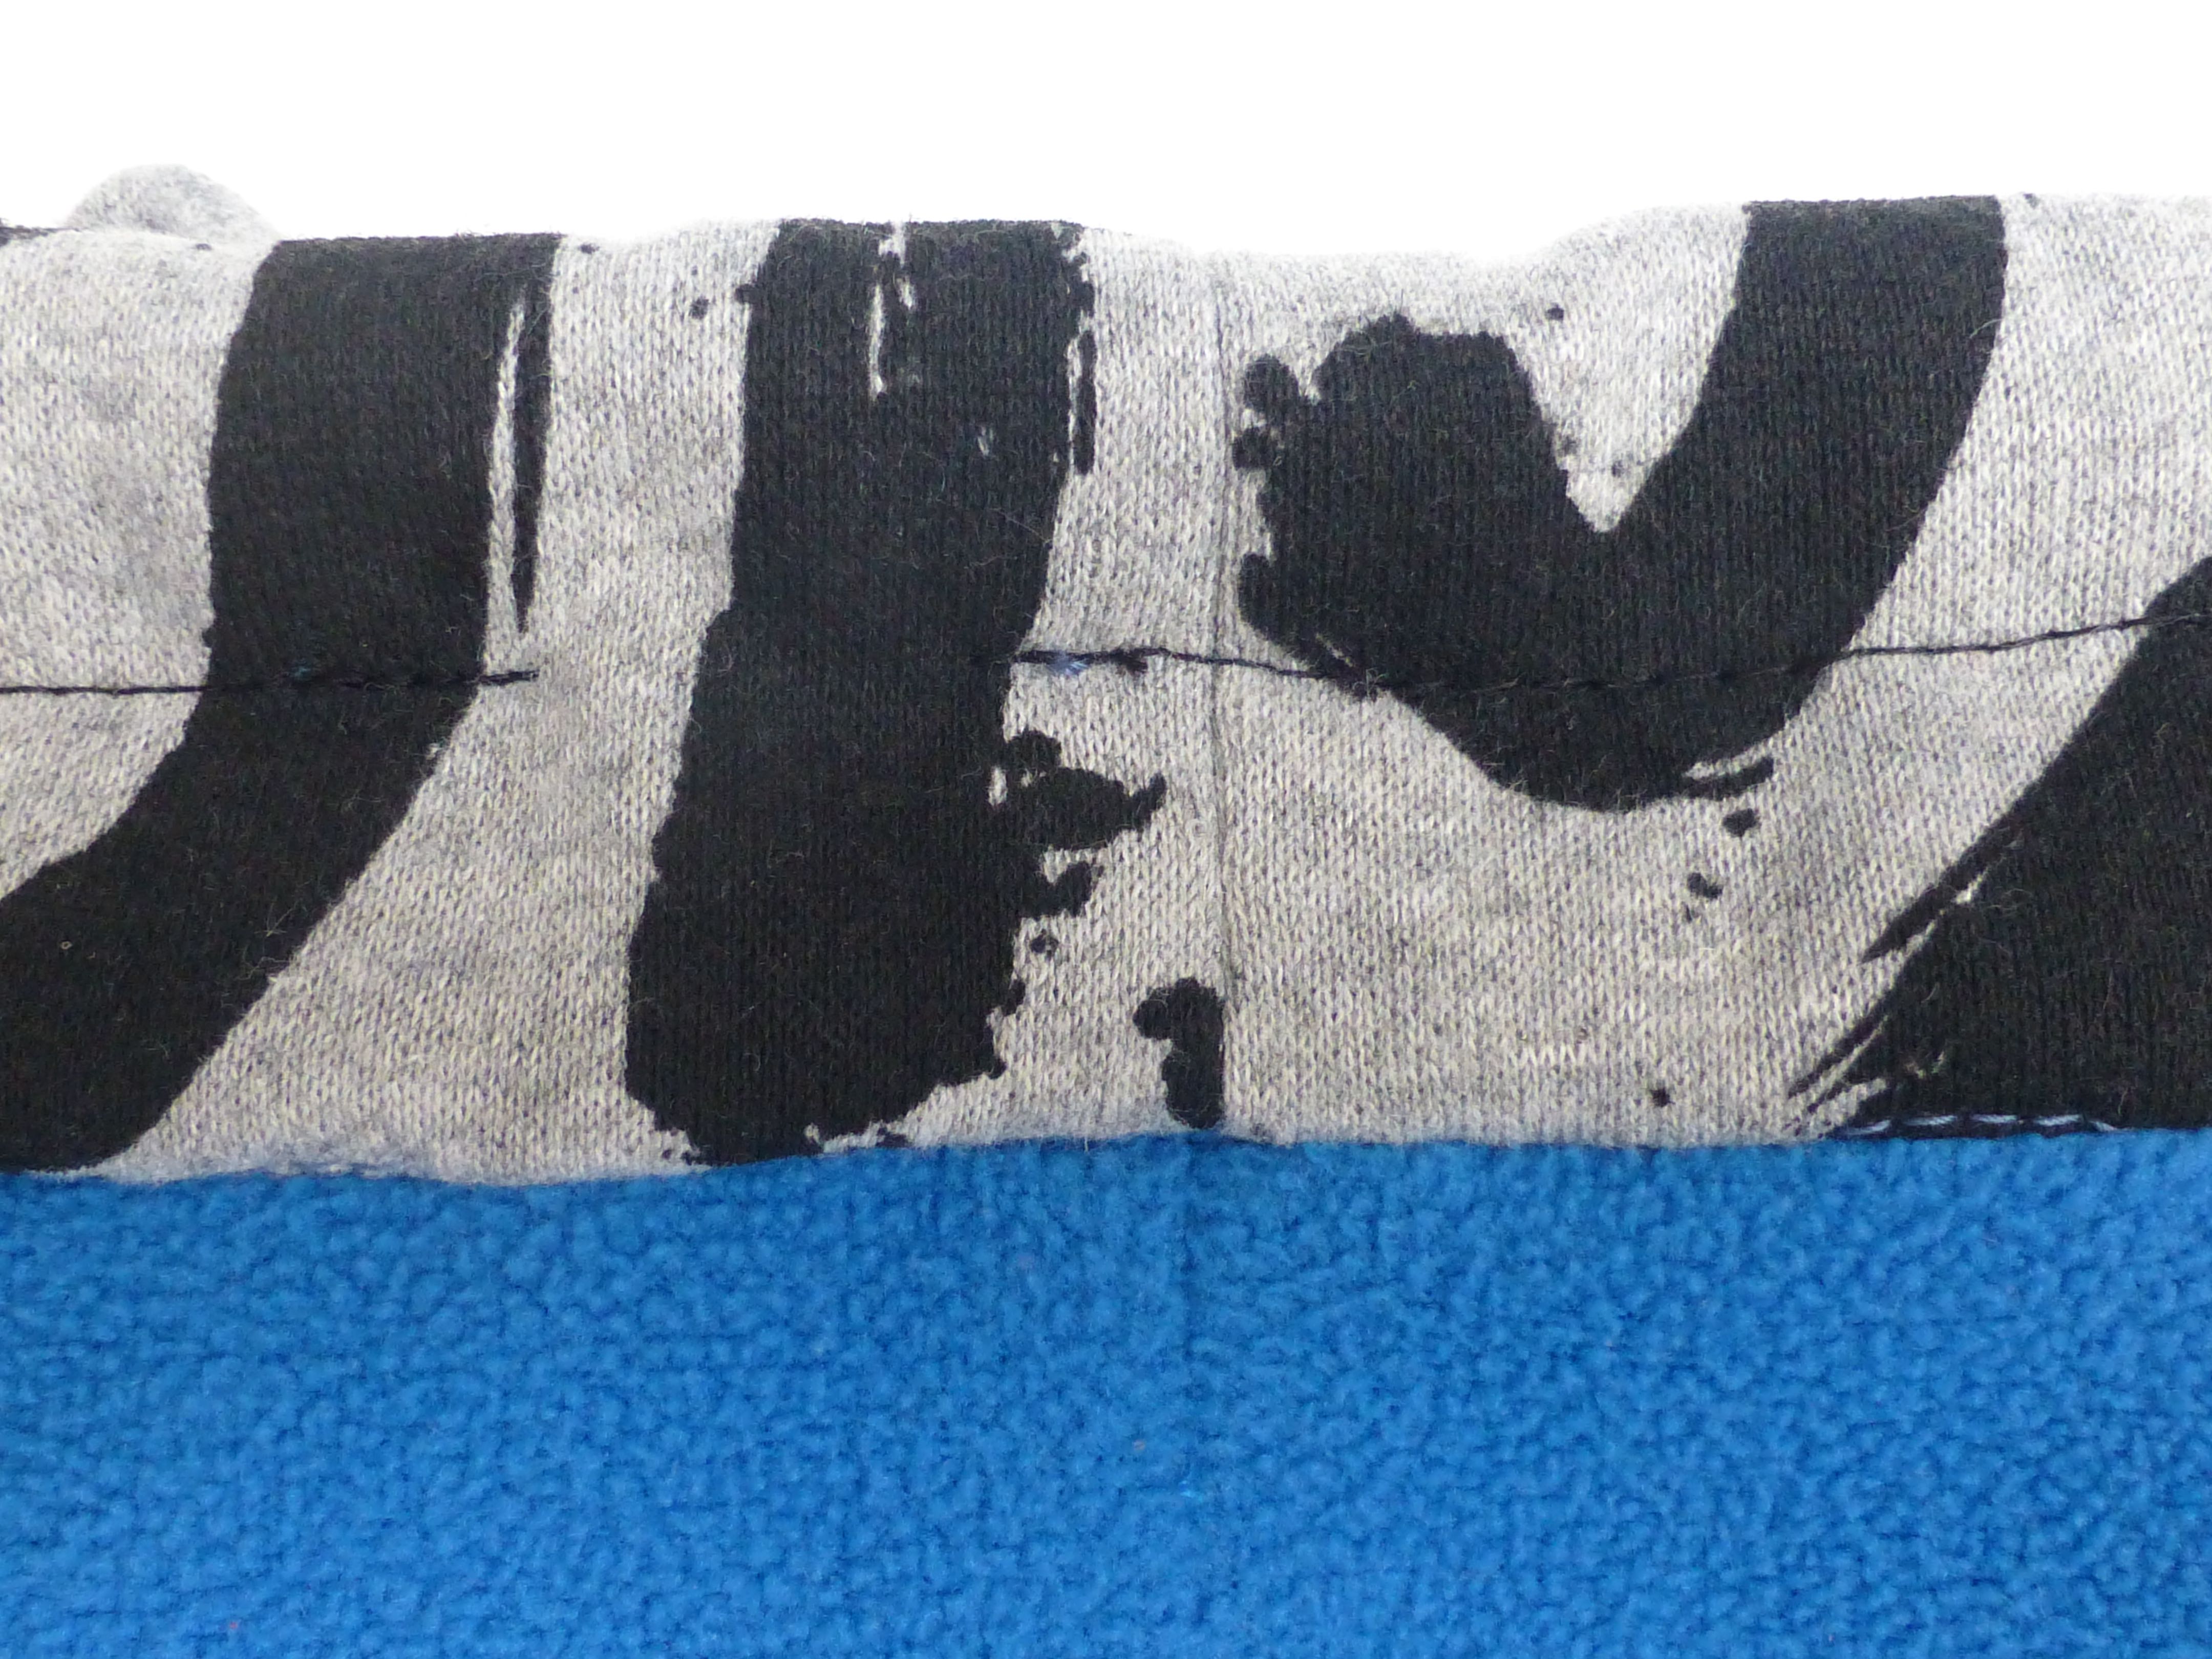
The seam was pressed up towards the waistband.
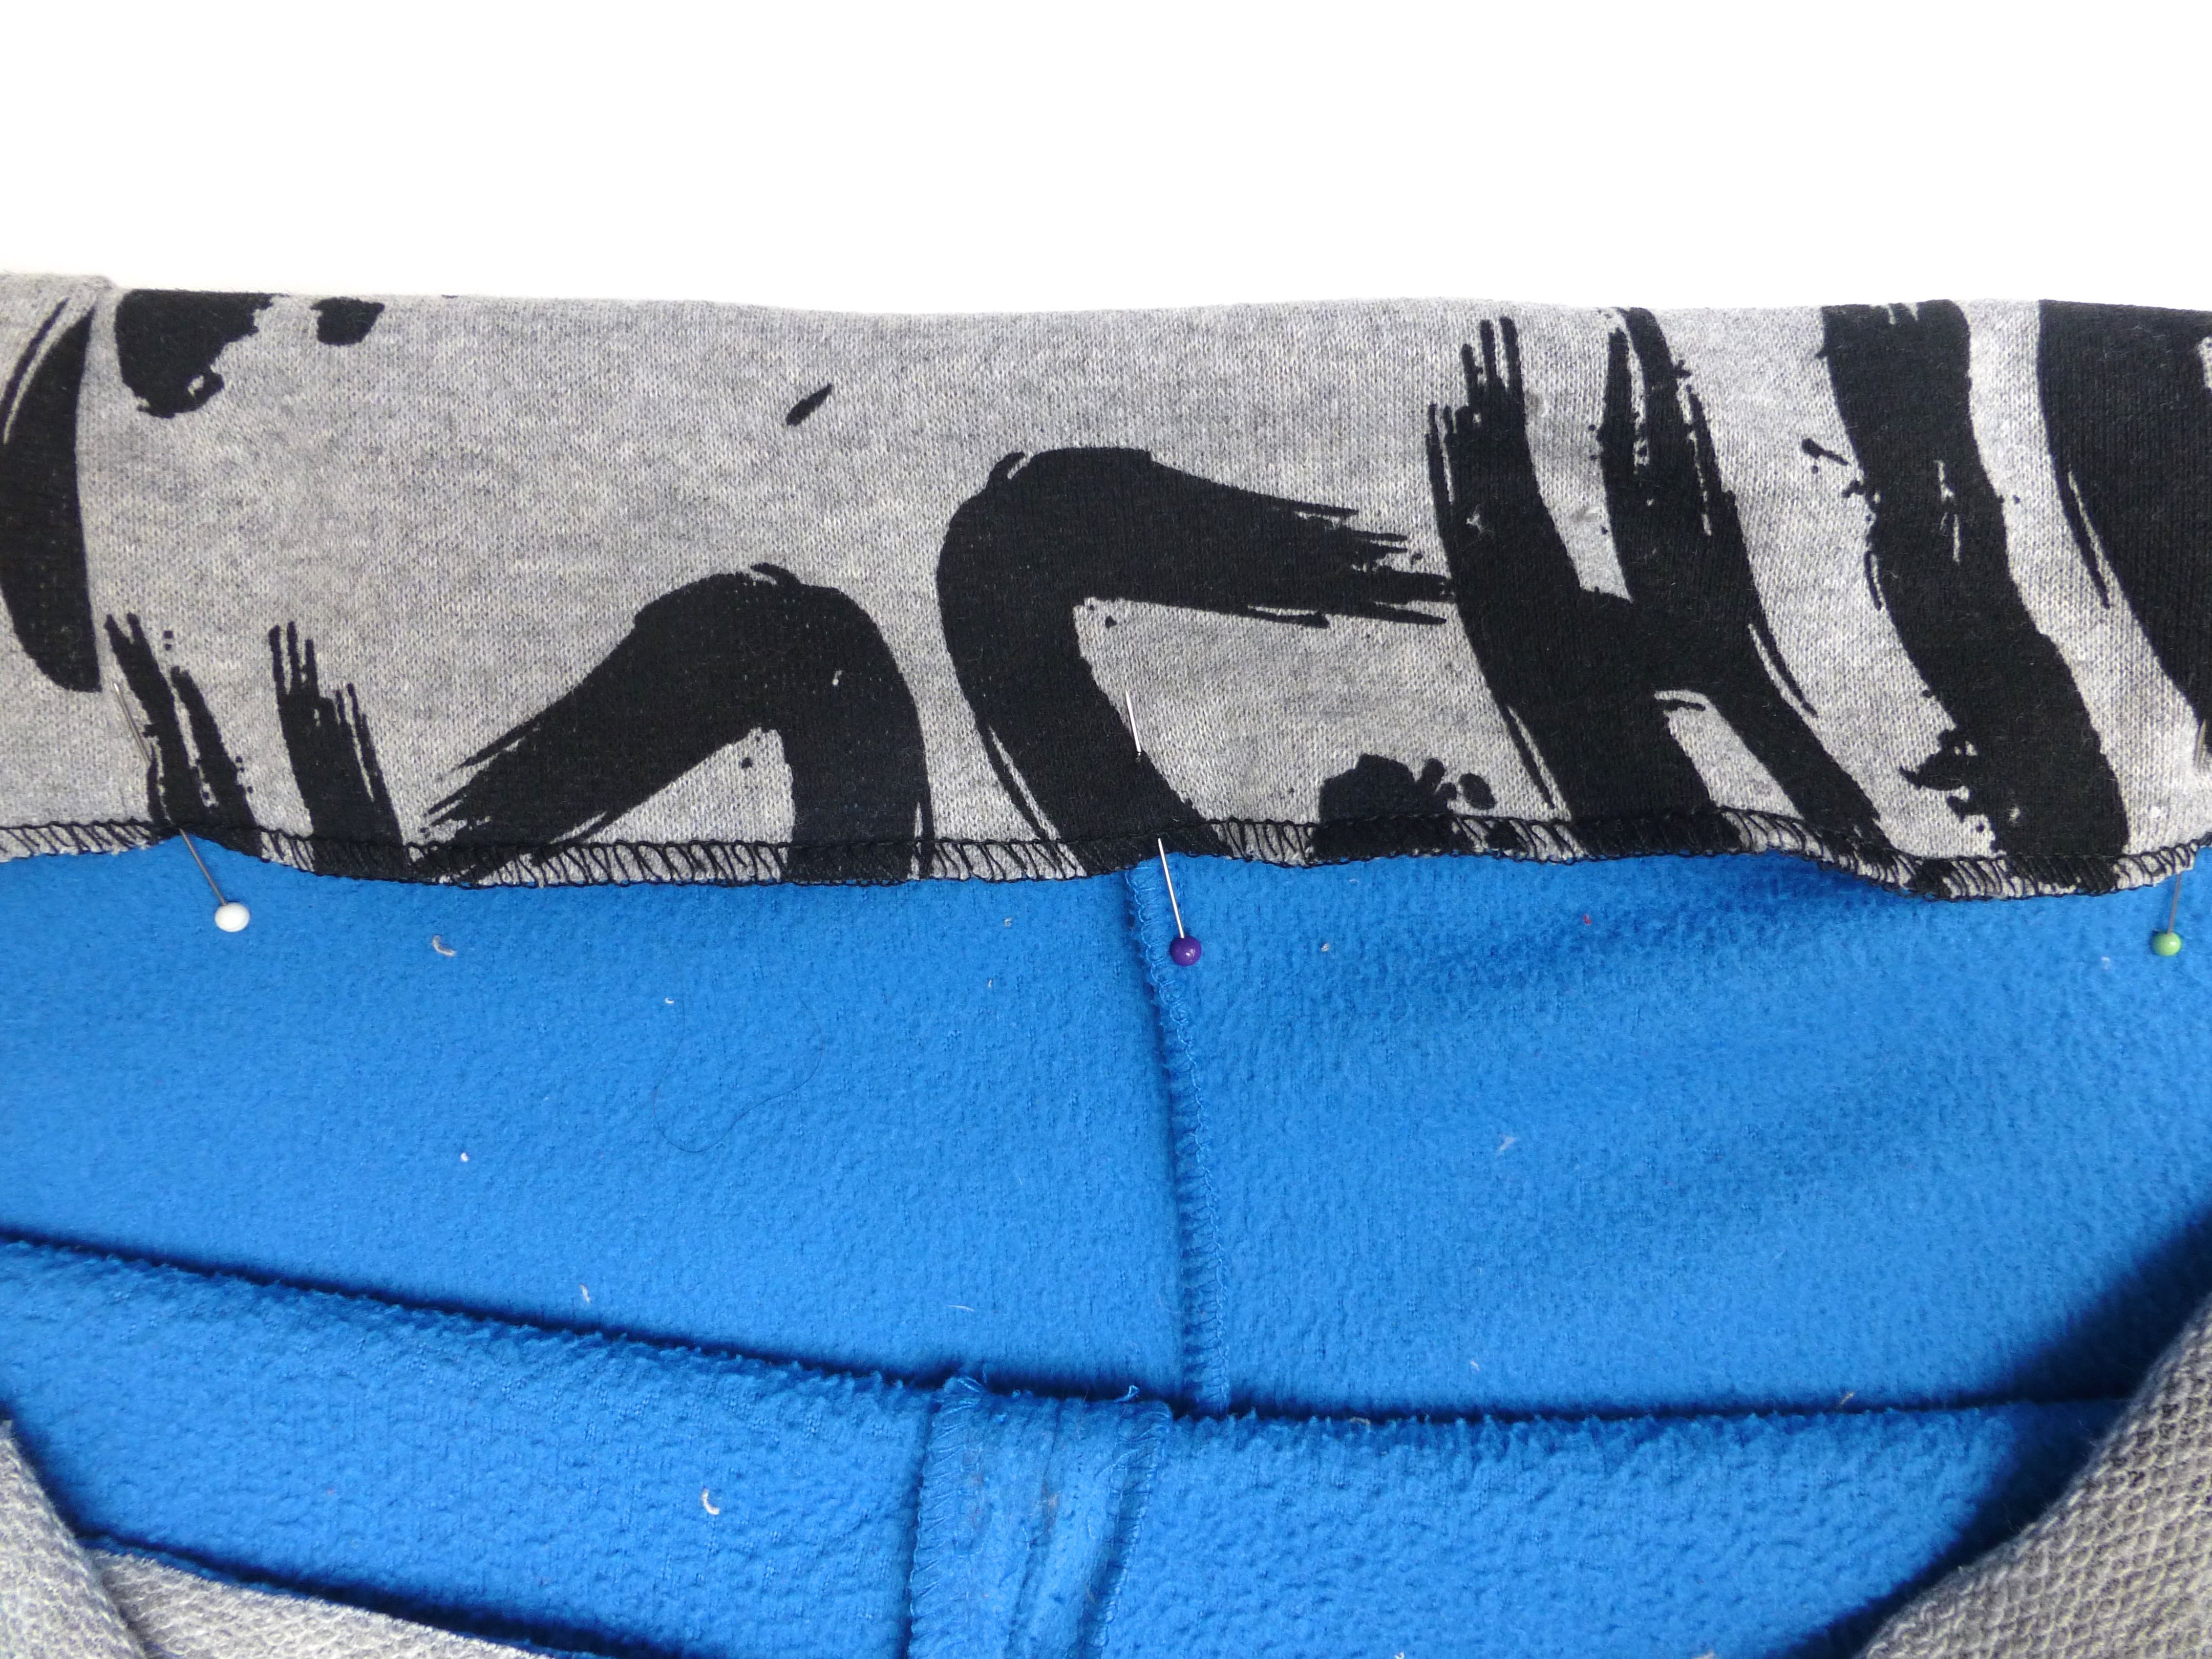
The waistband was folded to the inside where the raw edge was pinned over the seam, enclosing the raw edges and extending over by about 1cm.
I stitched in the ‘ditch’ from the right side, leaving a gap at the centre back to thread the elastic.
I stitched again in the middle, leaving another gap for the elastic.
A final row of top stitching finishes off the top edge neatly.
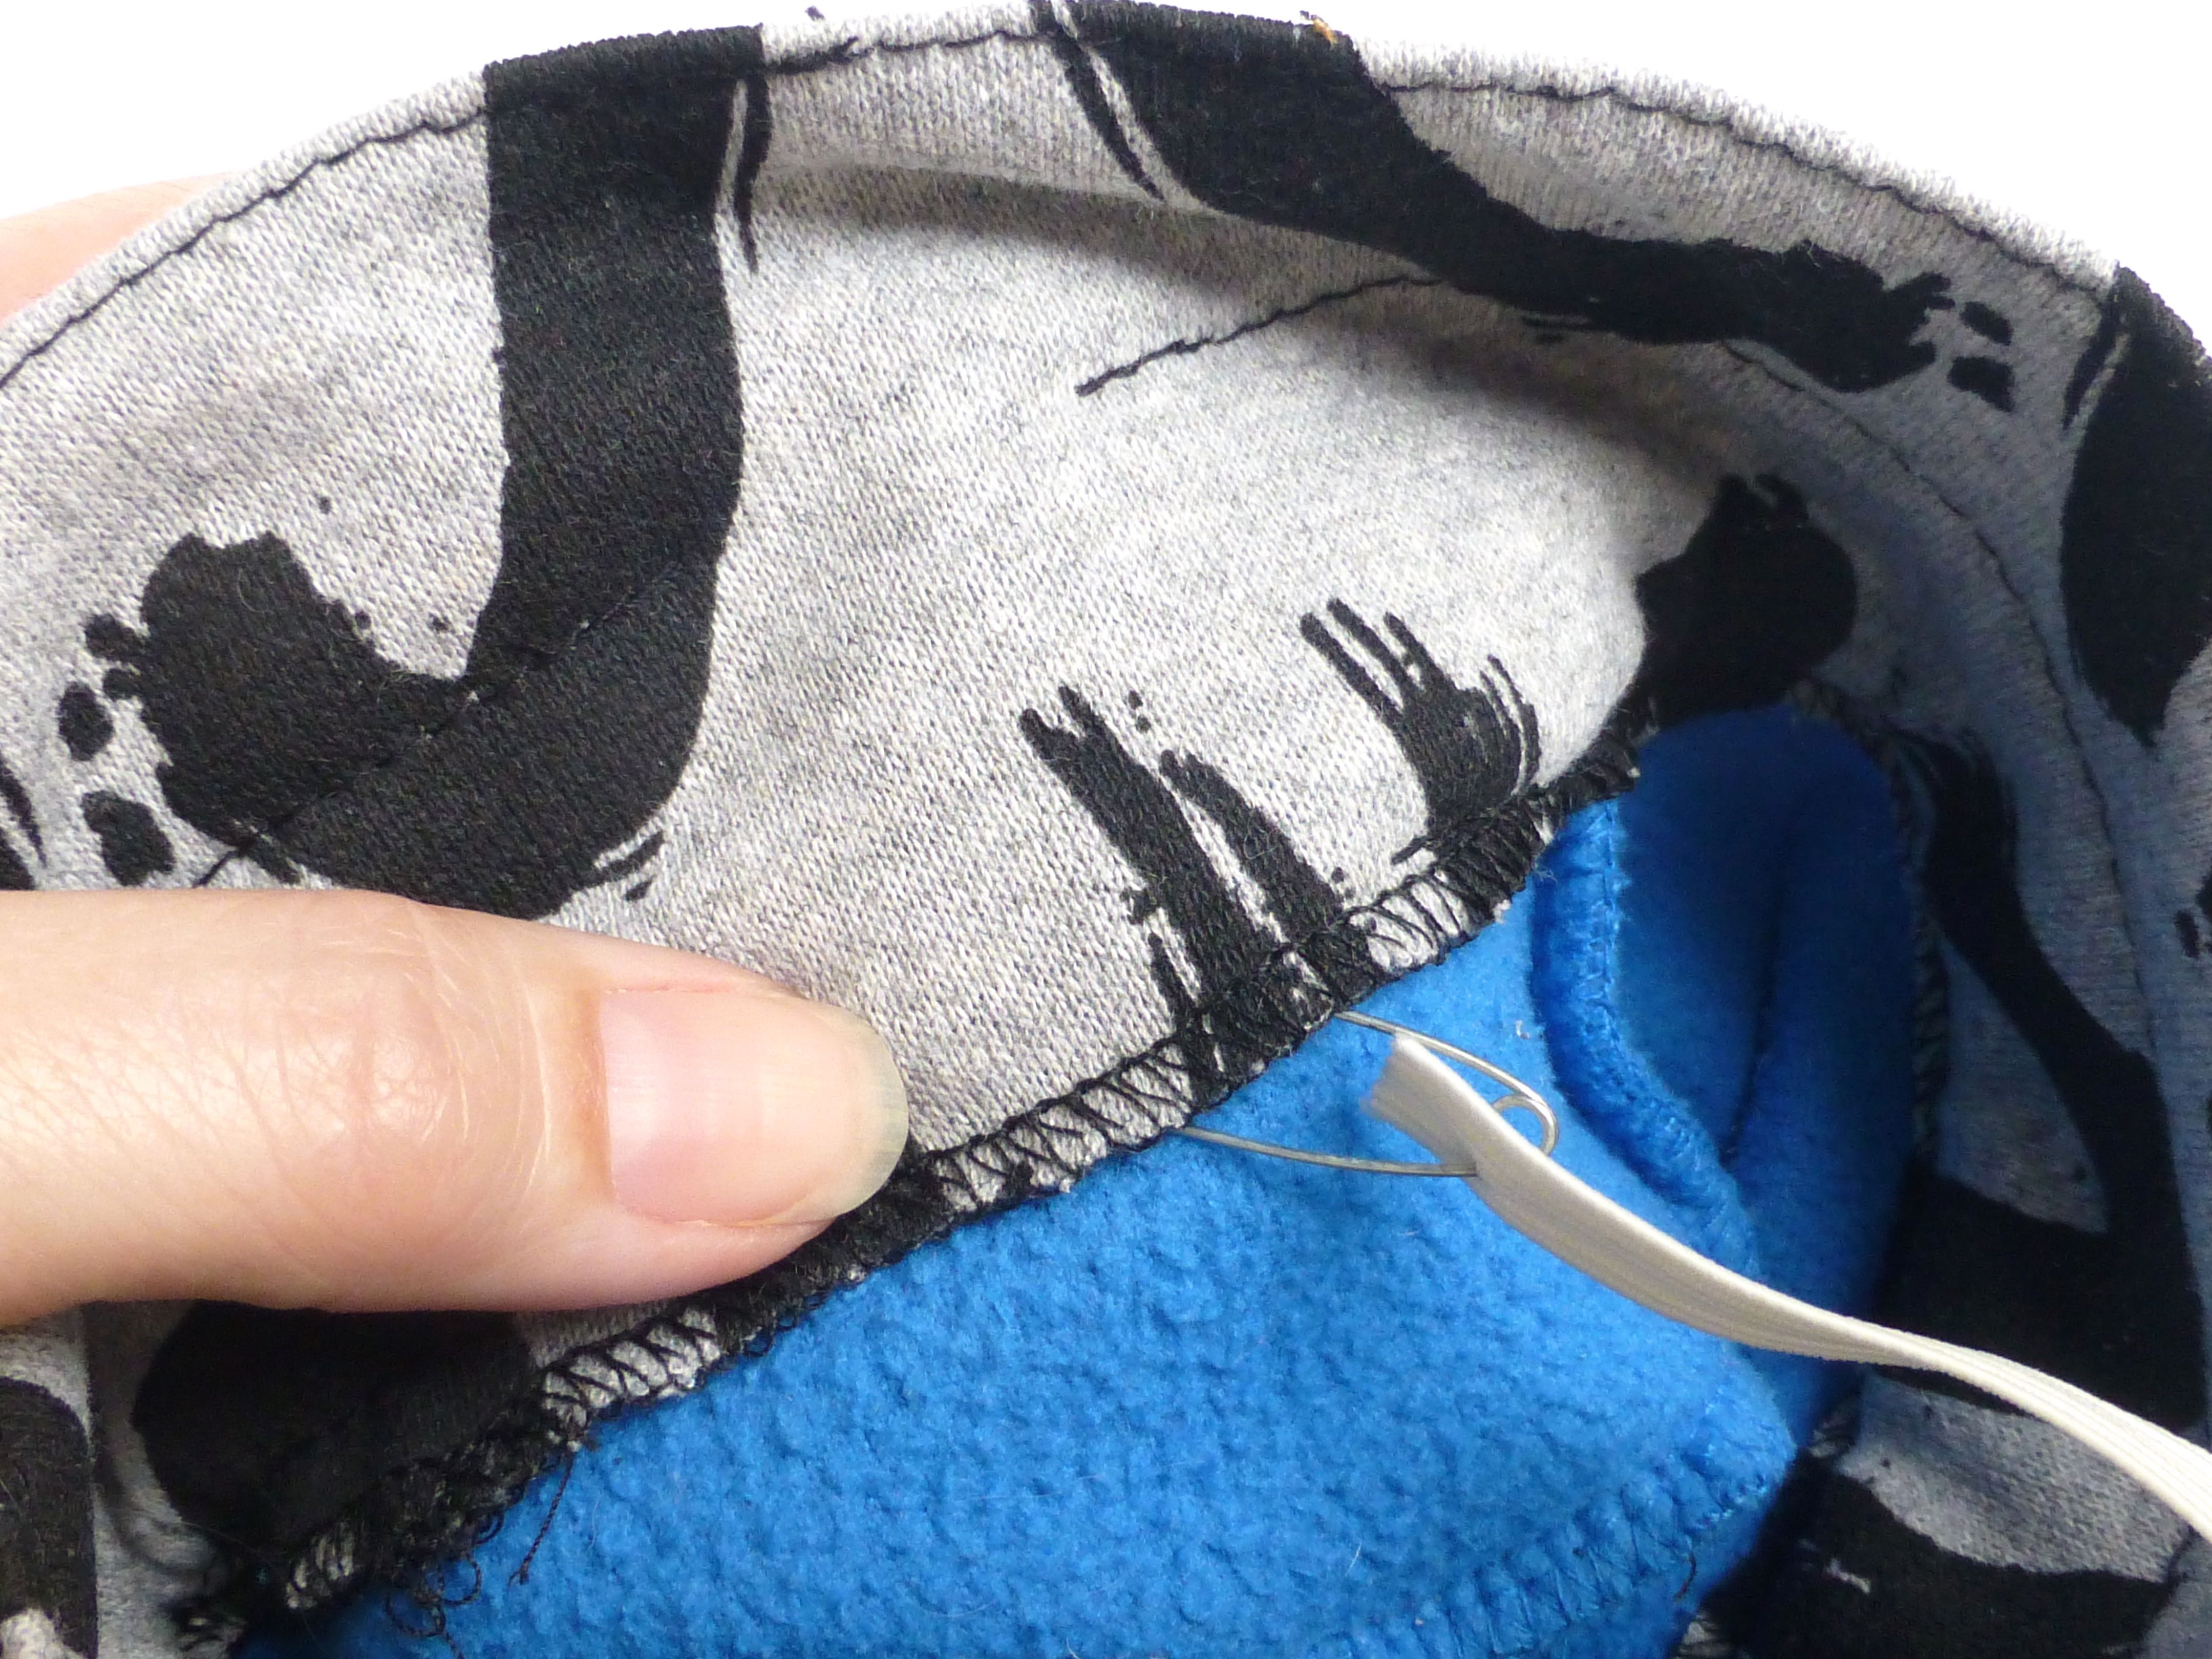
Two pieces of 1/2″ wide elastic were cut to my son’s waist measurement and threaded through the channels using a safety pin.
The ends of the elastic were sewn together by hand and the gaps in the top stitching were sewn closed by machine.
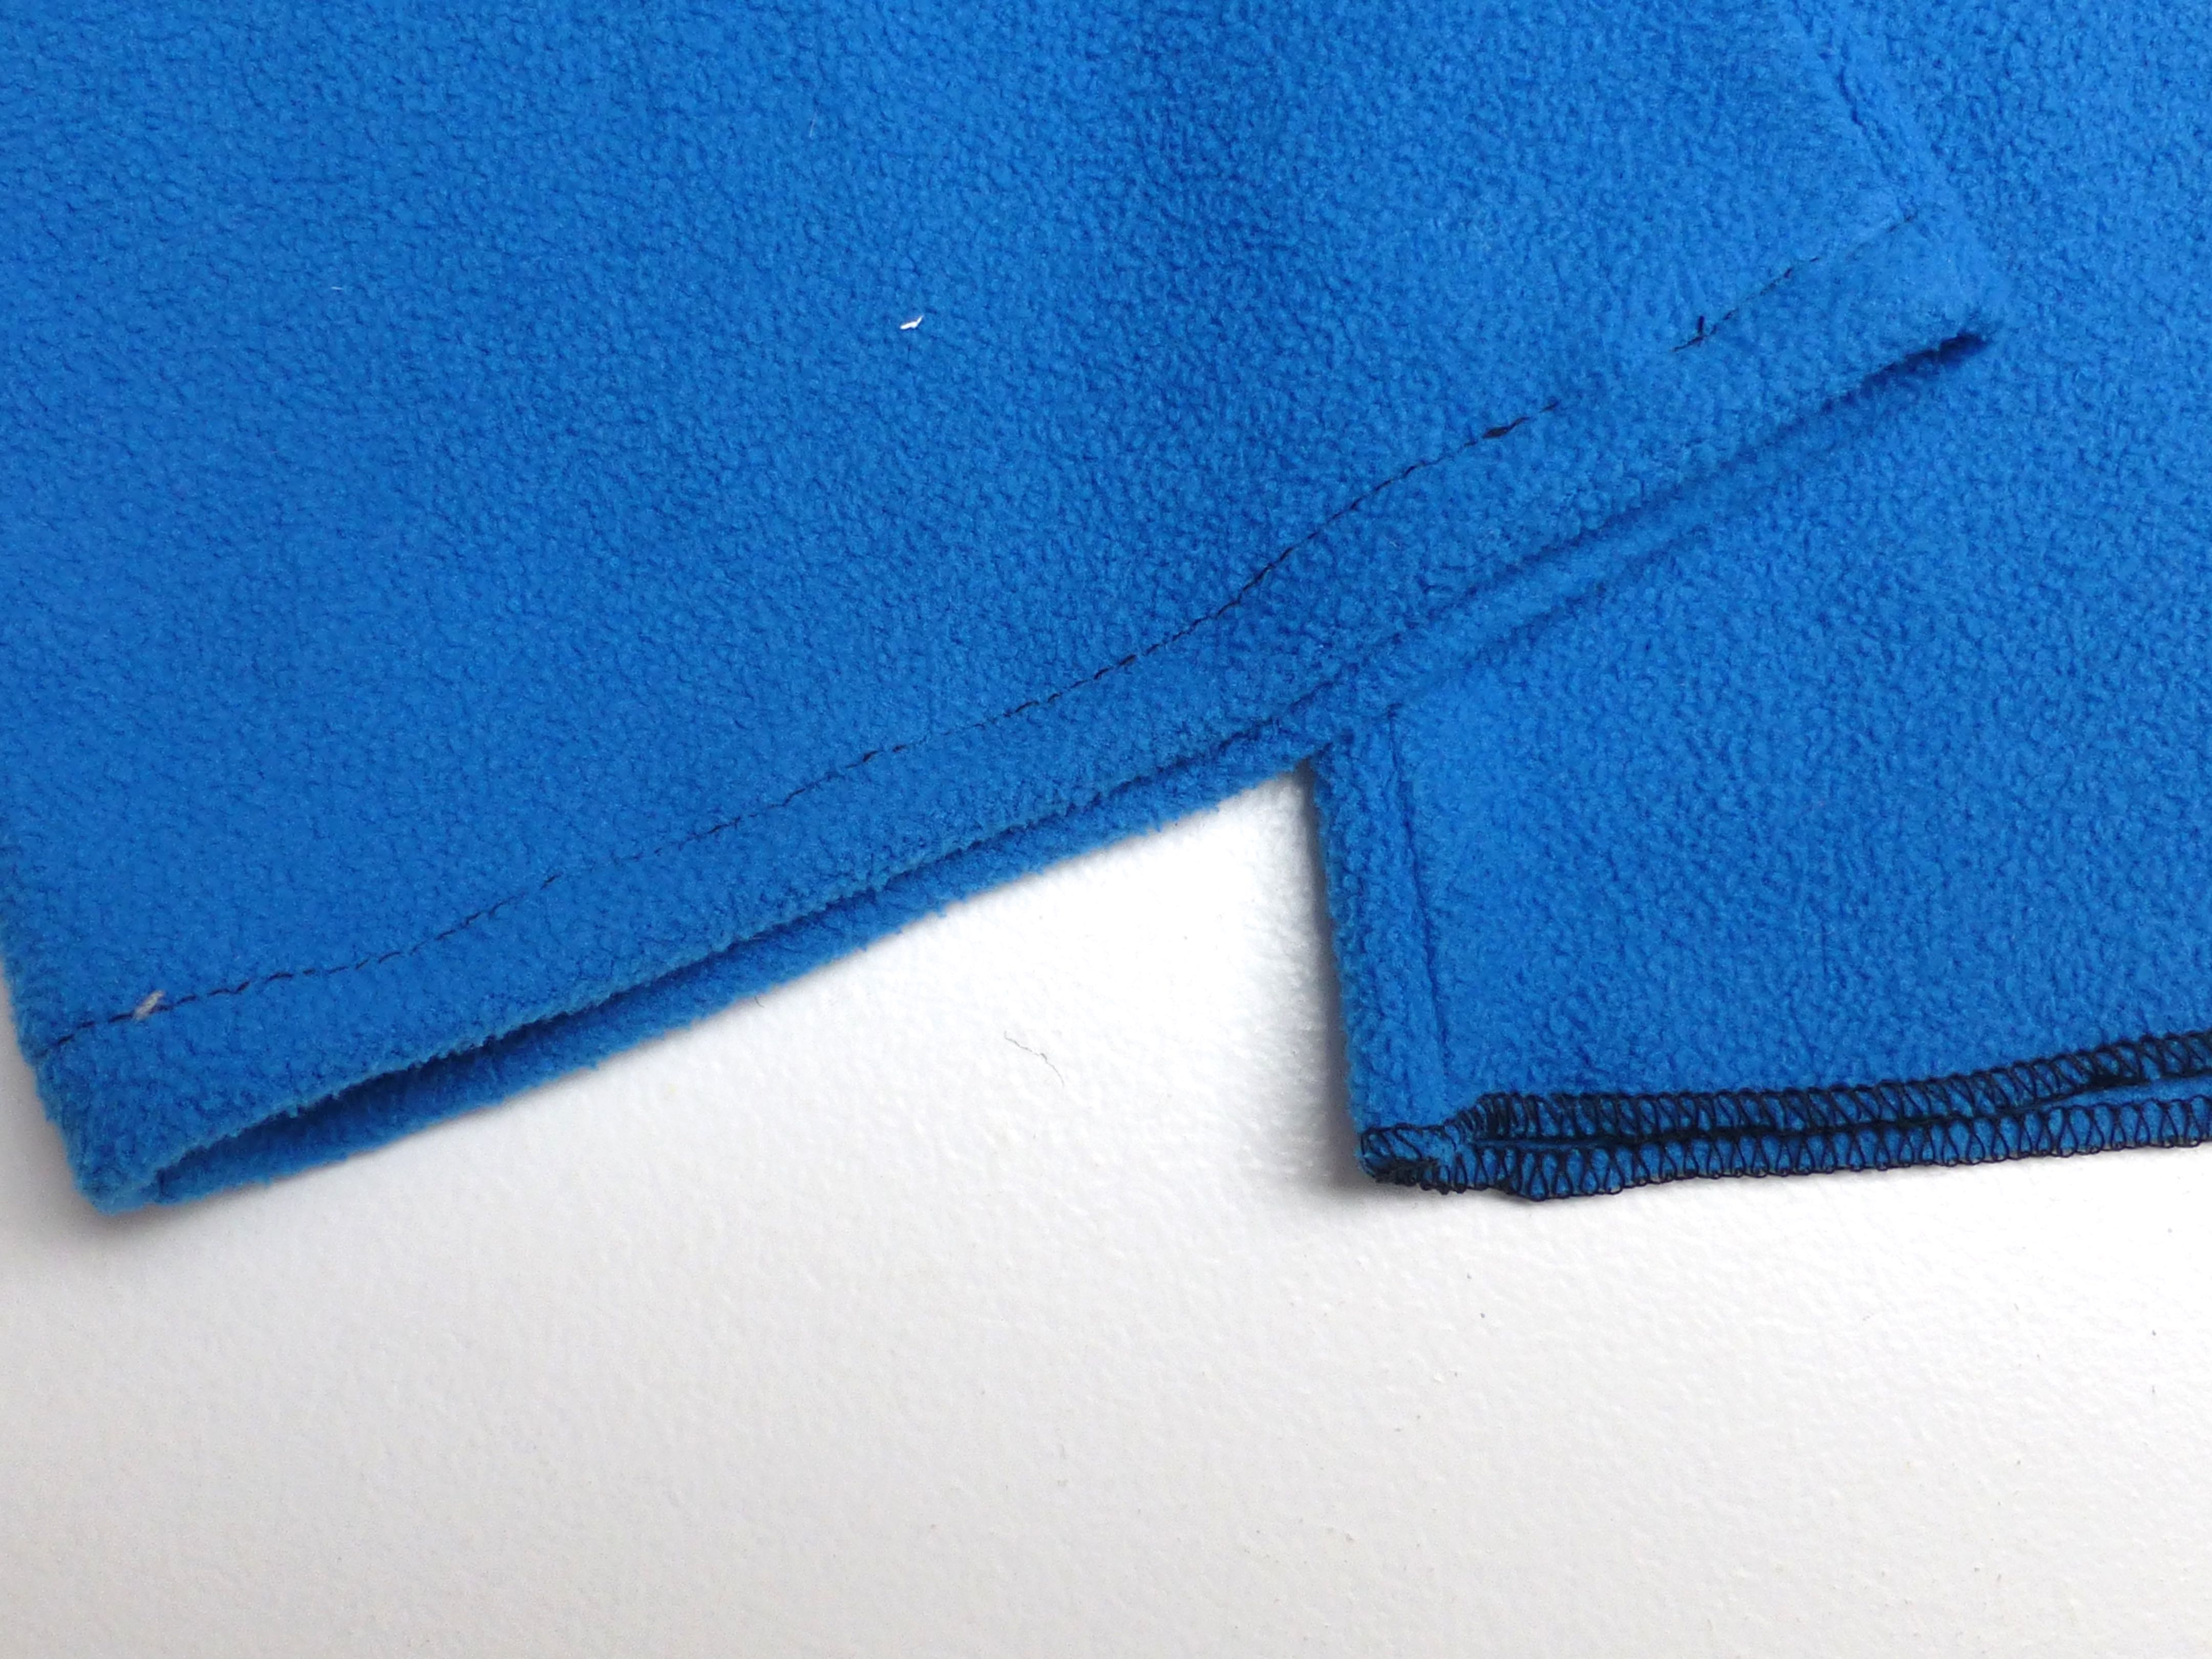
For the bottom hems, I just overlocked the raw edges and sewed a small hem leaving a gap to thread through some 1/4″ wide elastic.
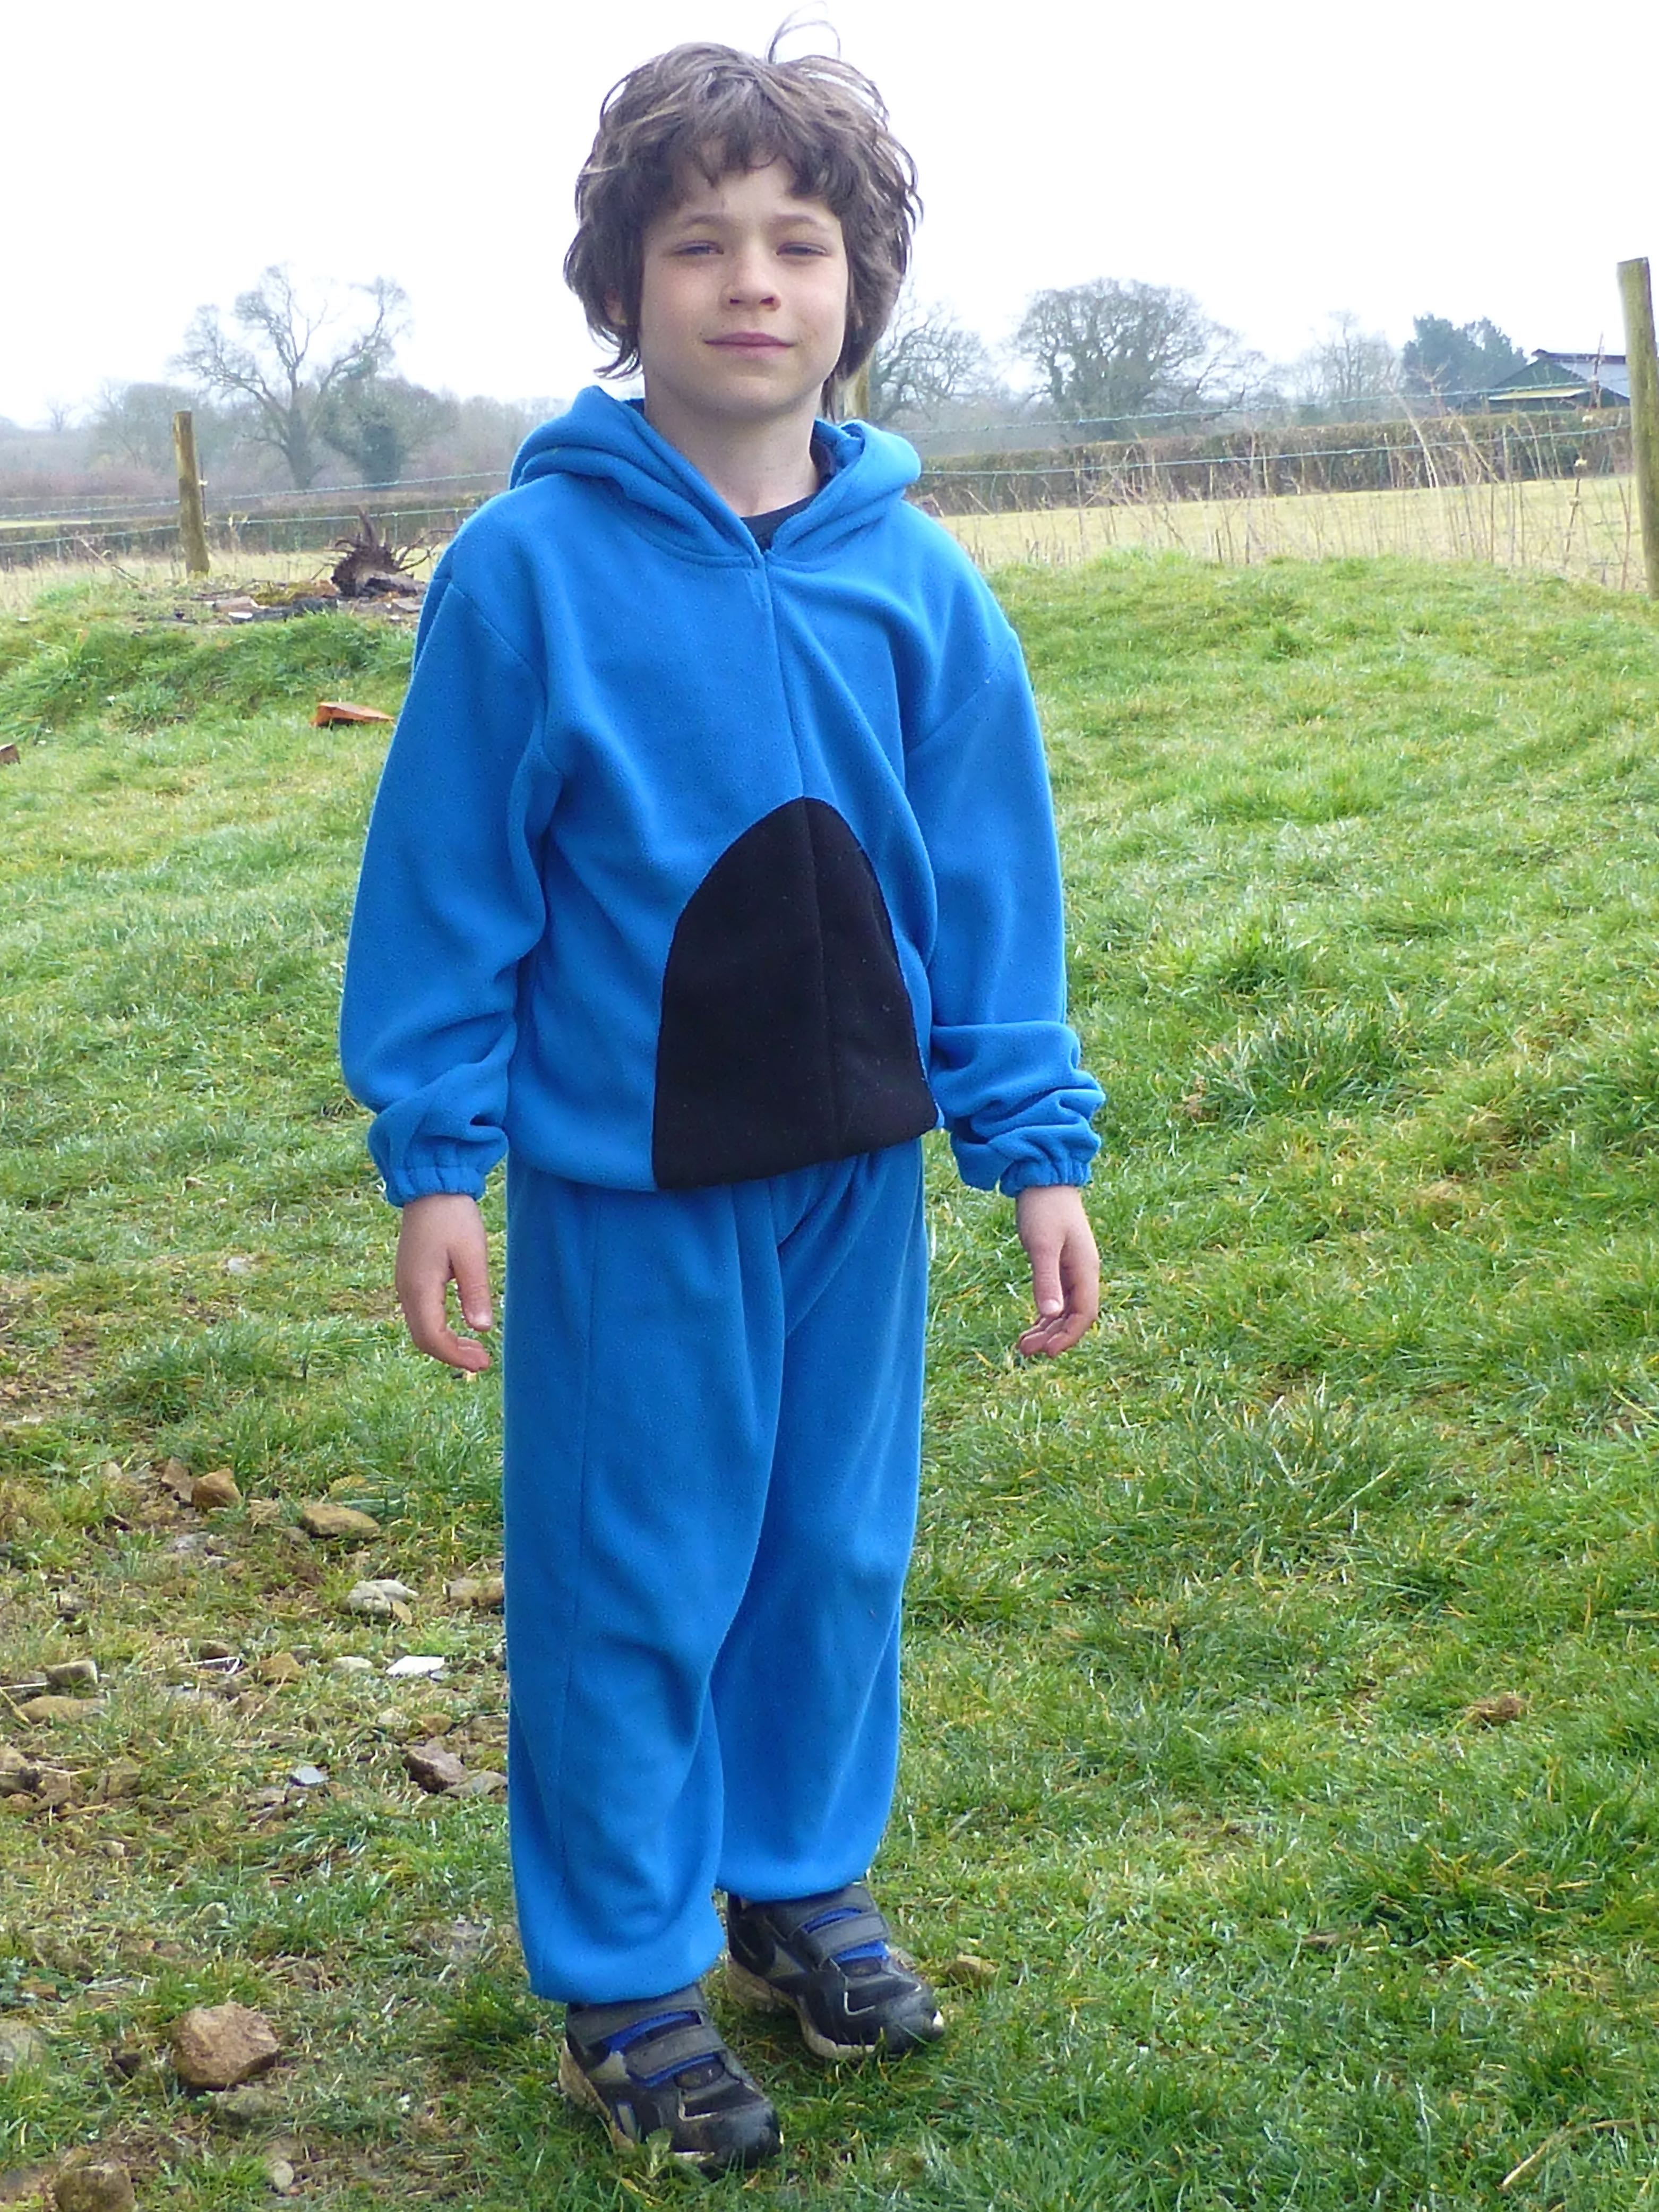
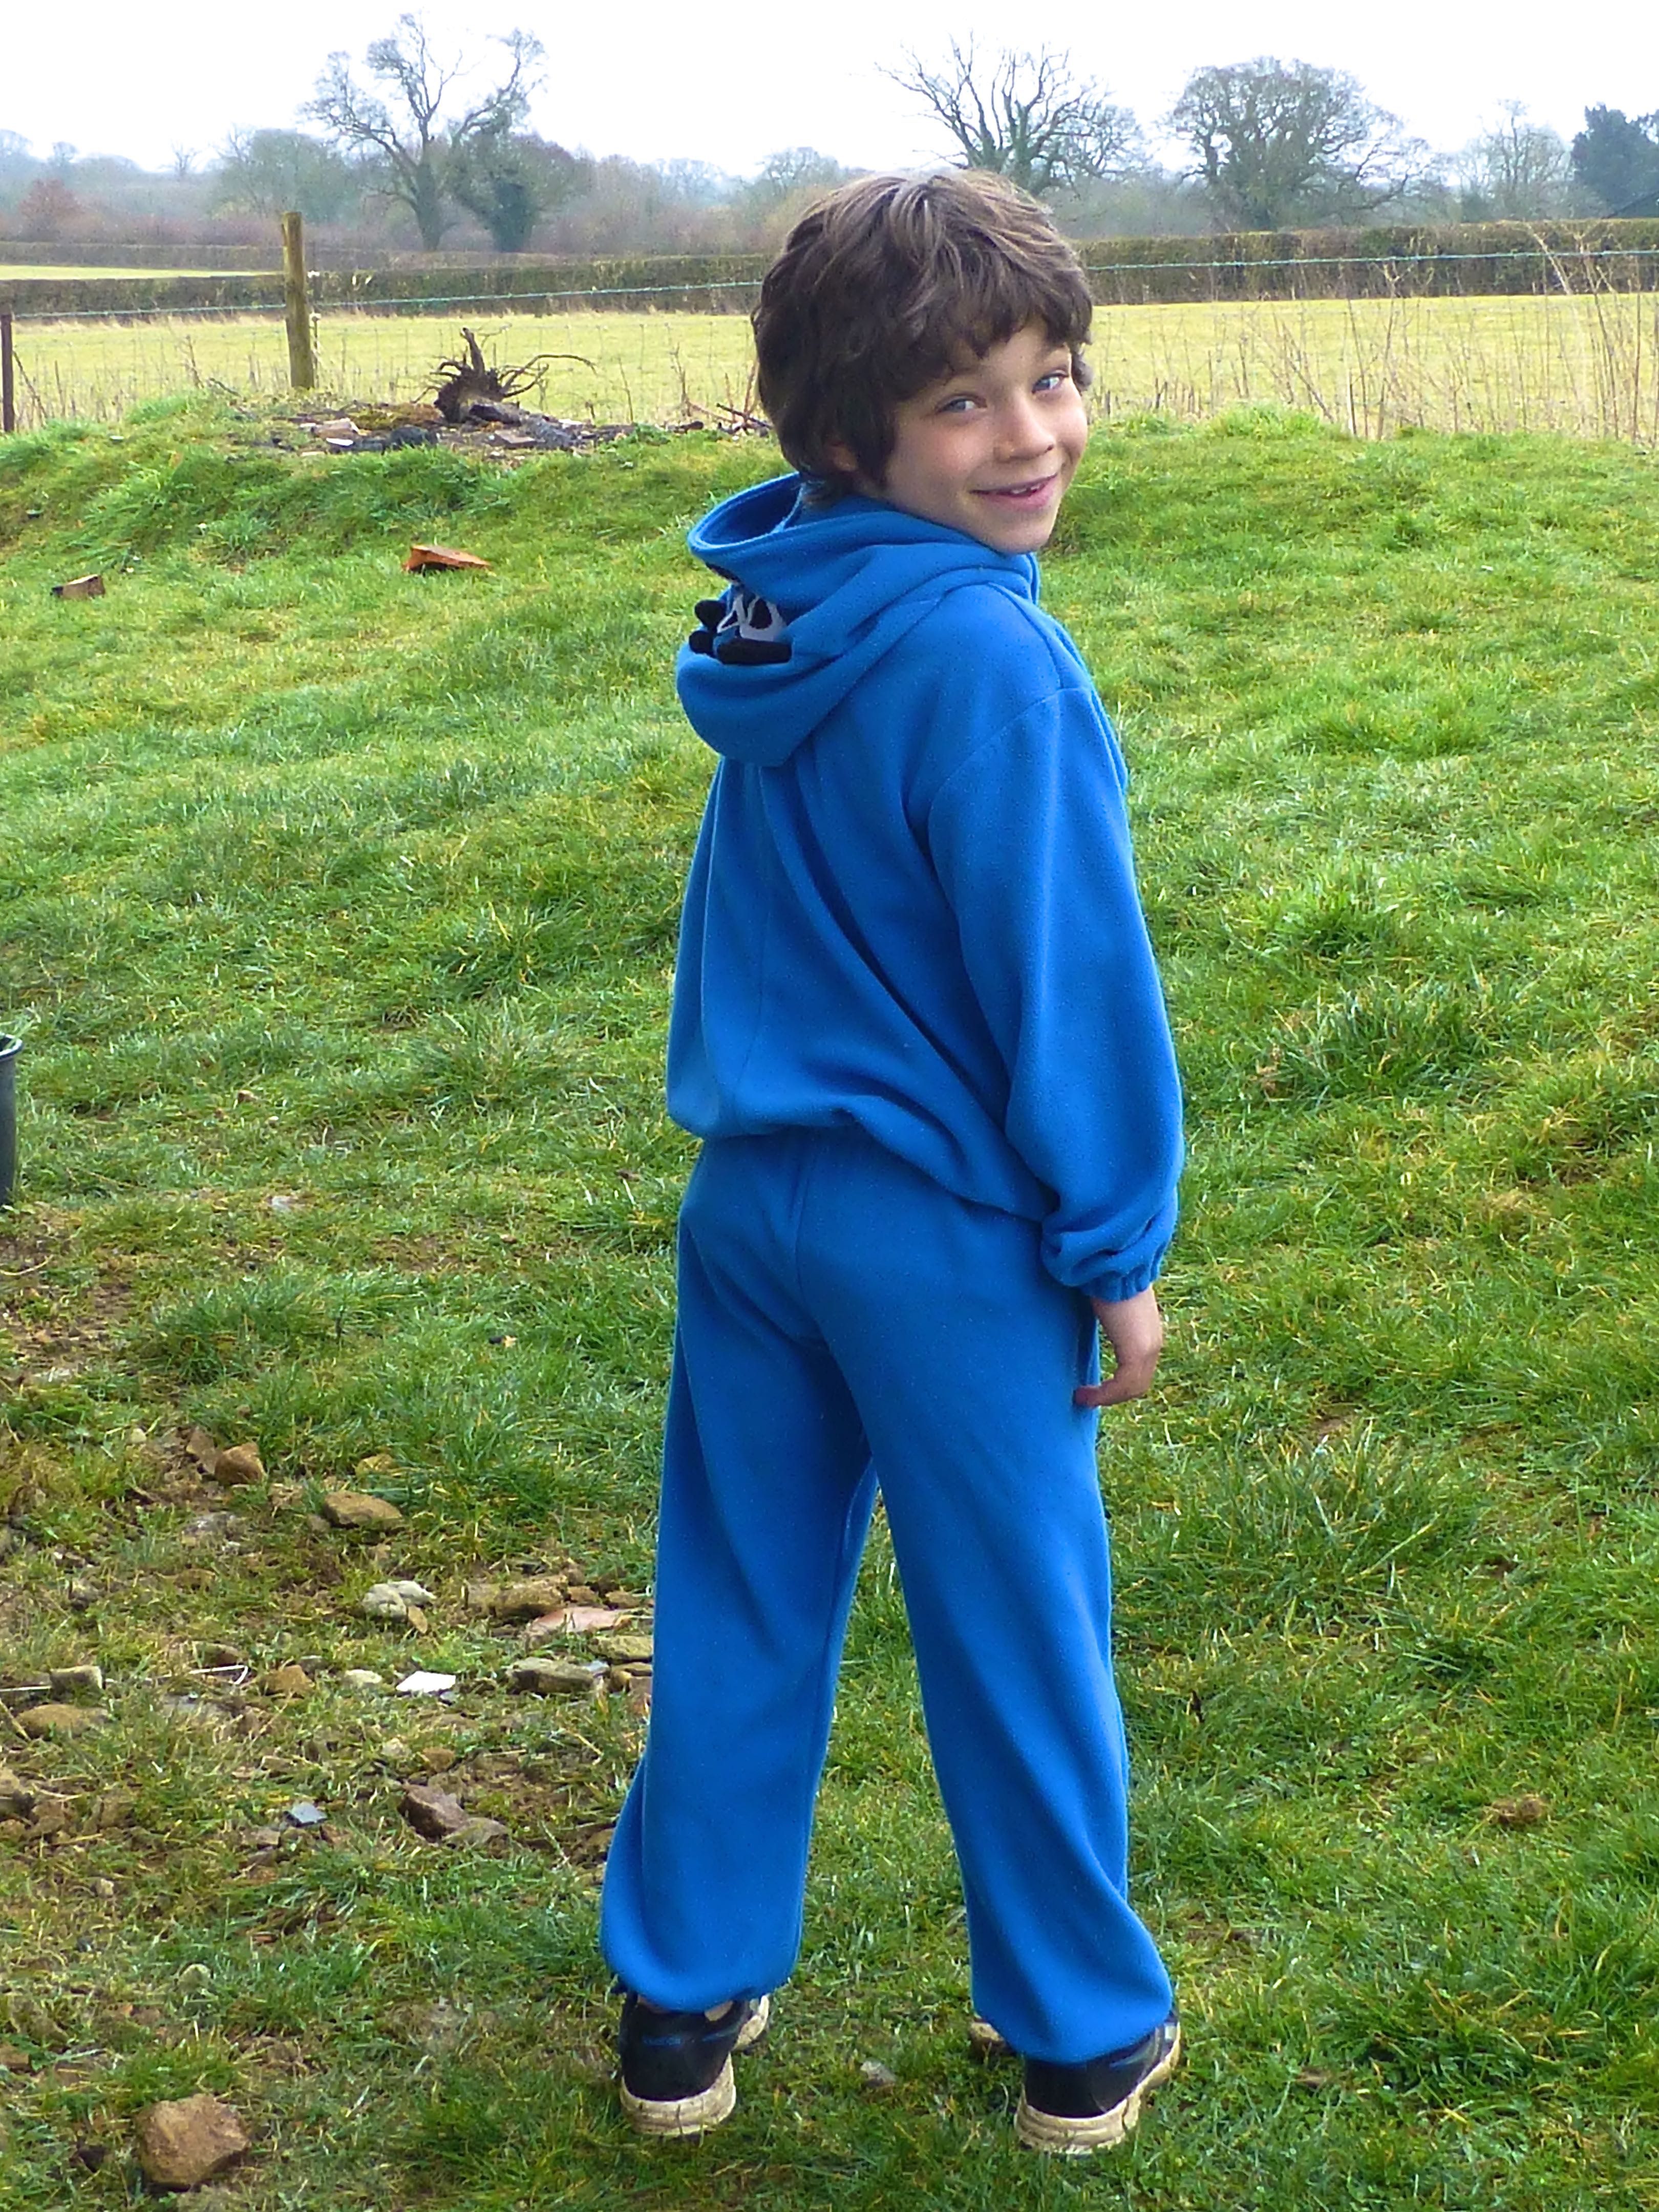
Et Voilá!
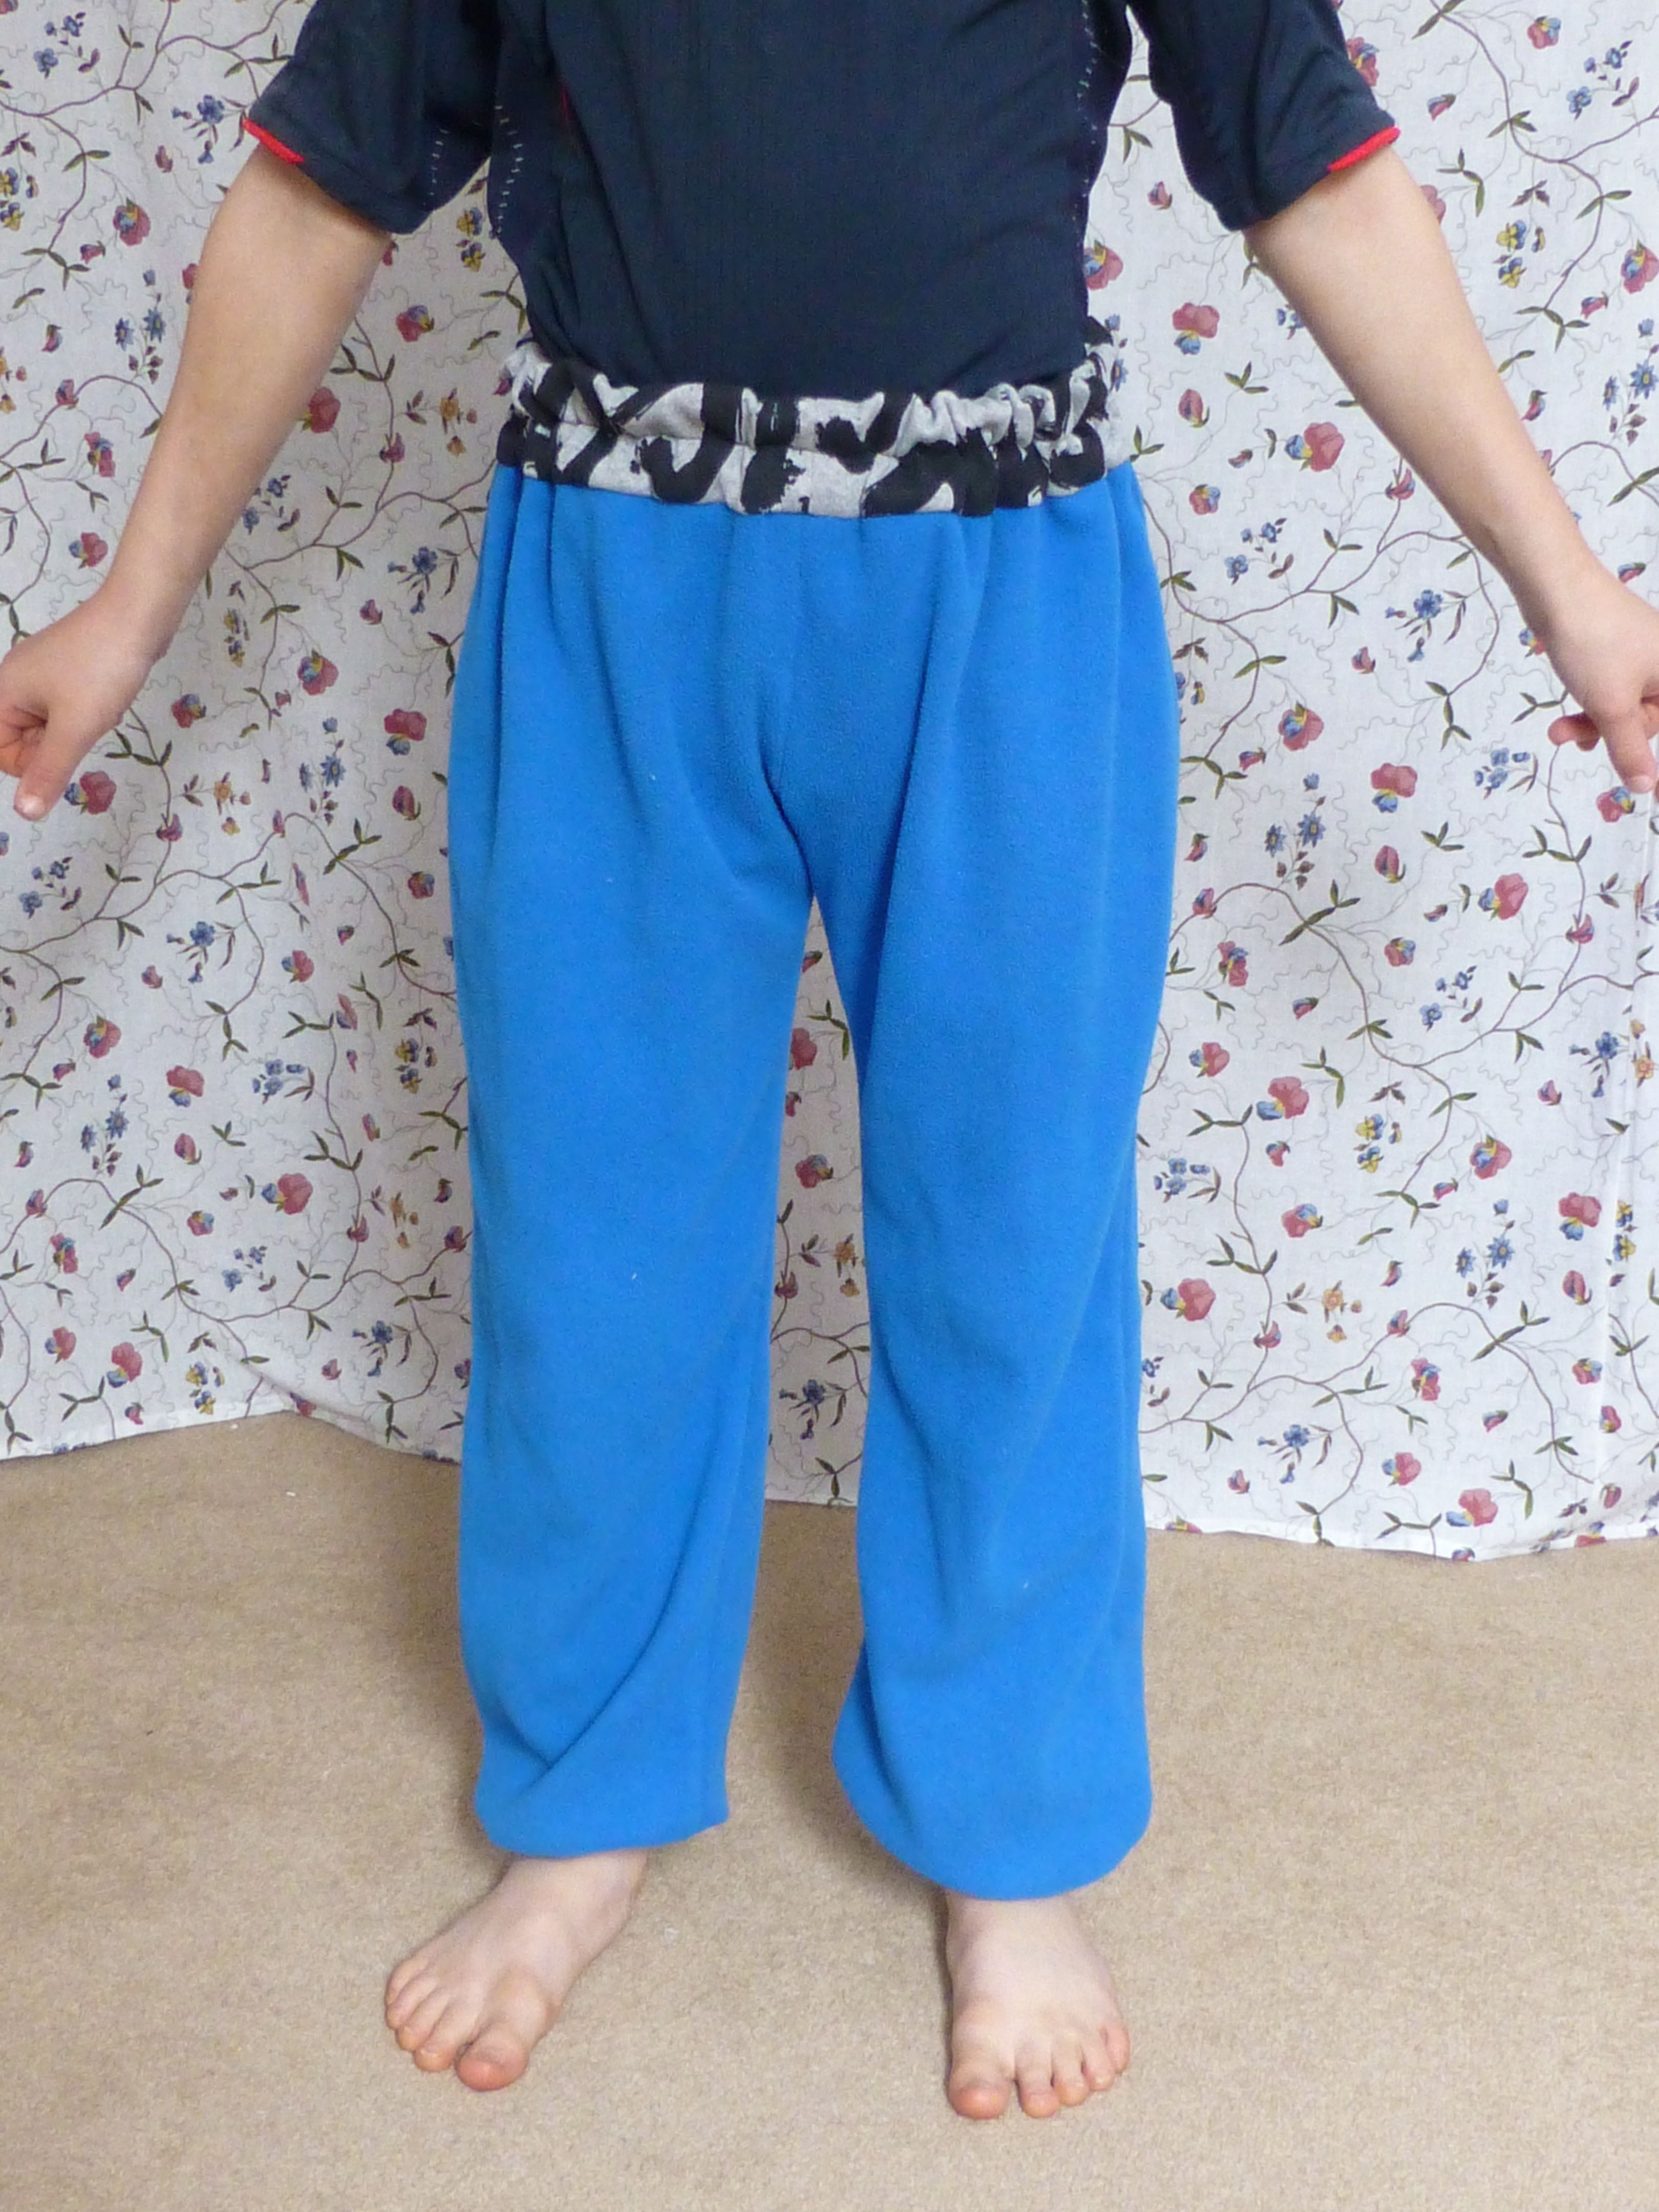
A perfectly good pair of tracksuit bottoms.
Ok, so the T-shirt doesn’t go with them very well, but No.3 son doesn’t care!
So there you go – how to refashion/upcycle an old onesie into a pair of tracksuit (jogging) bottoms:)
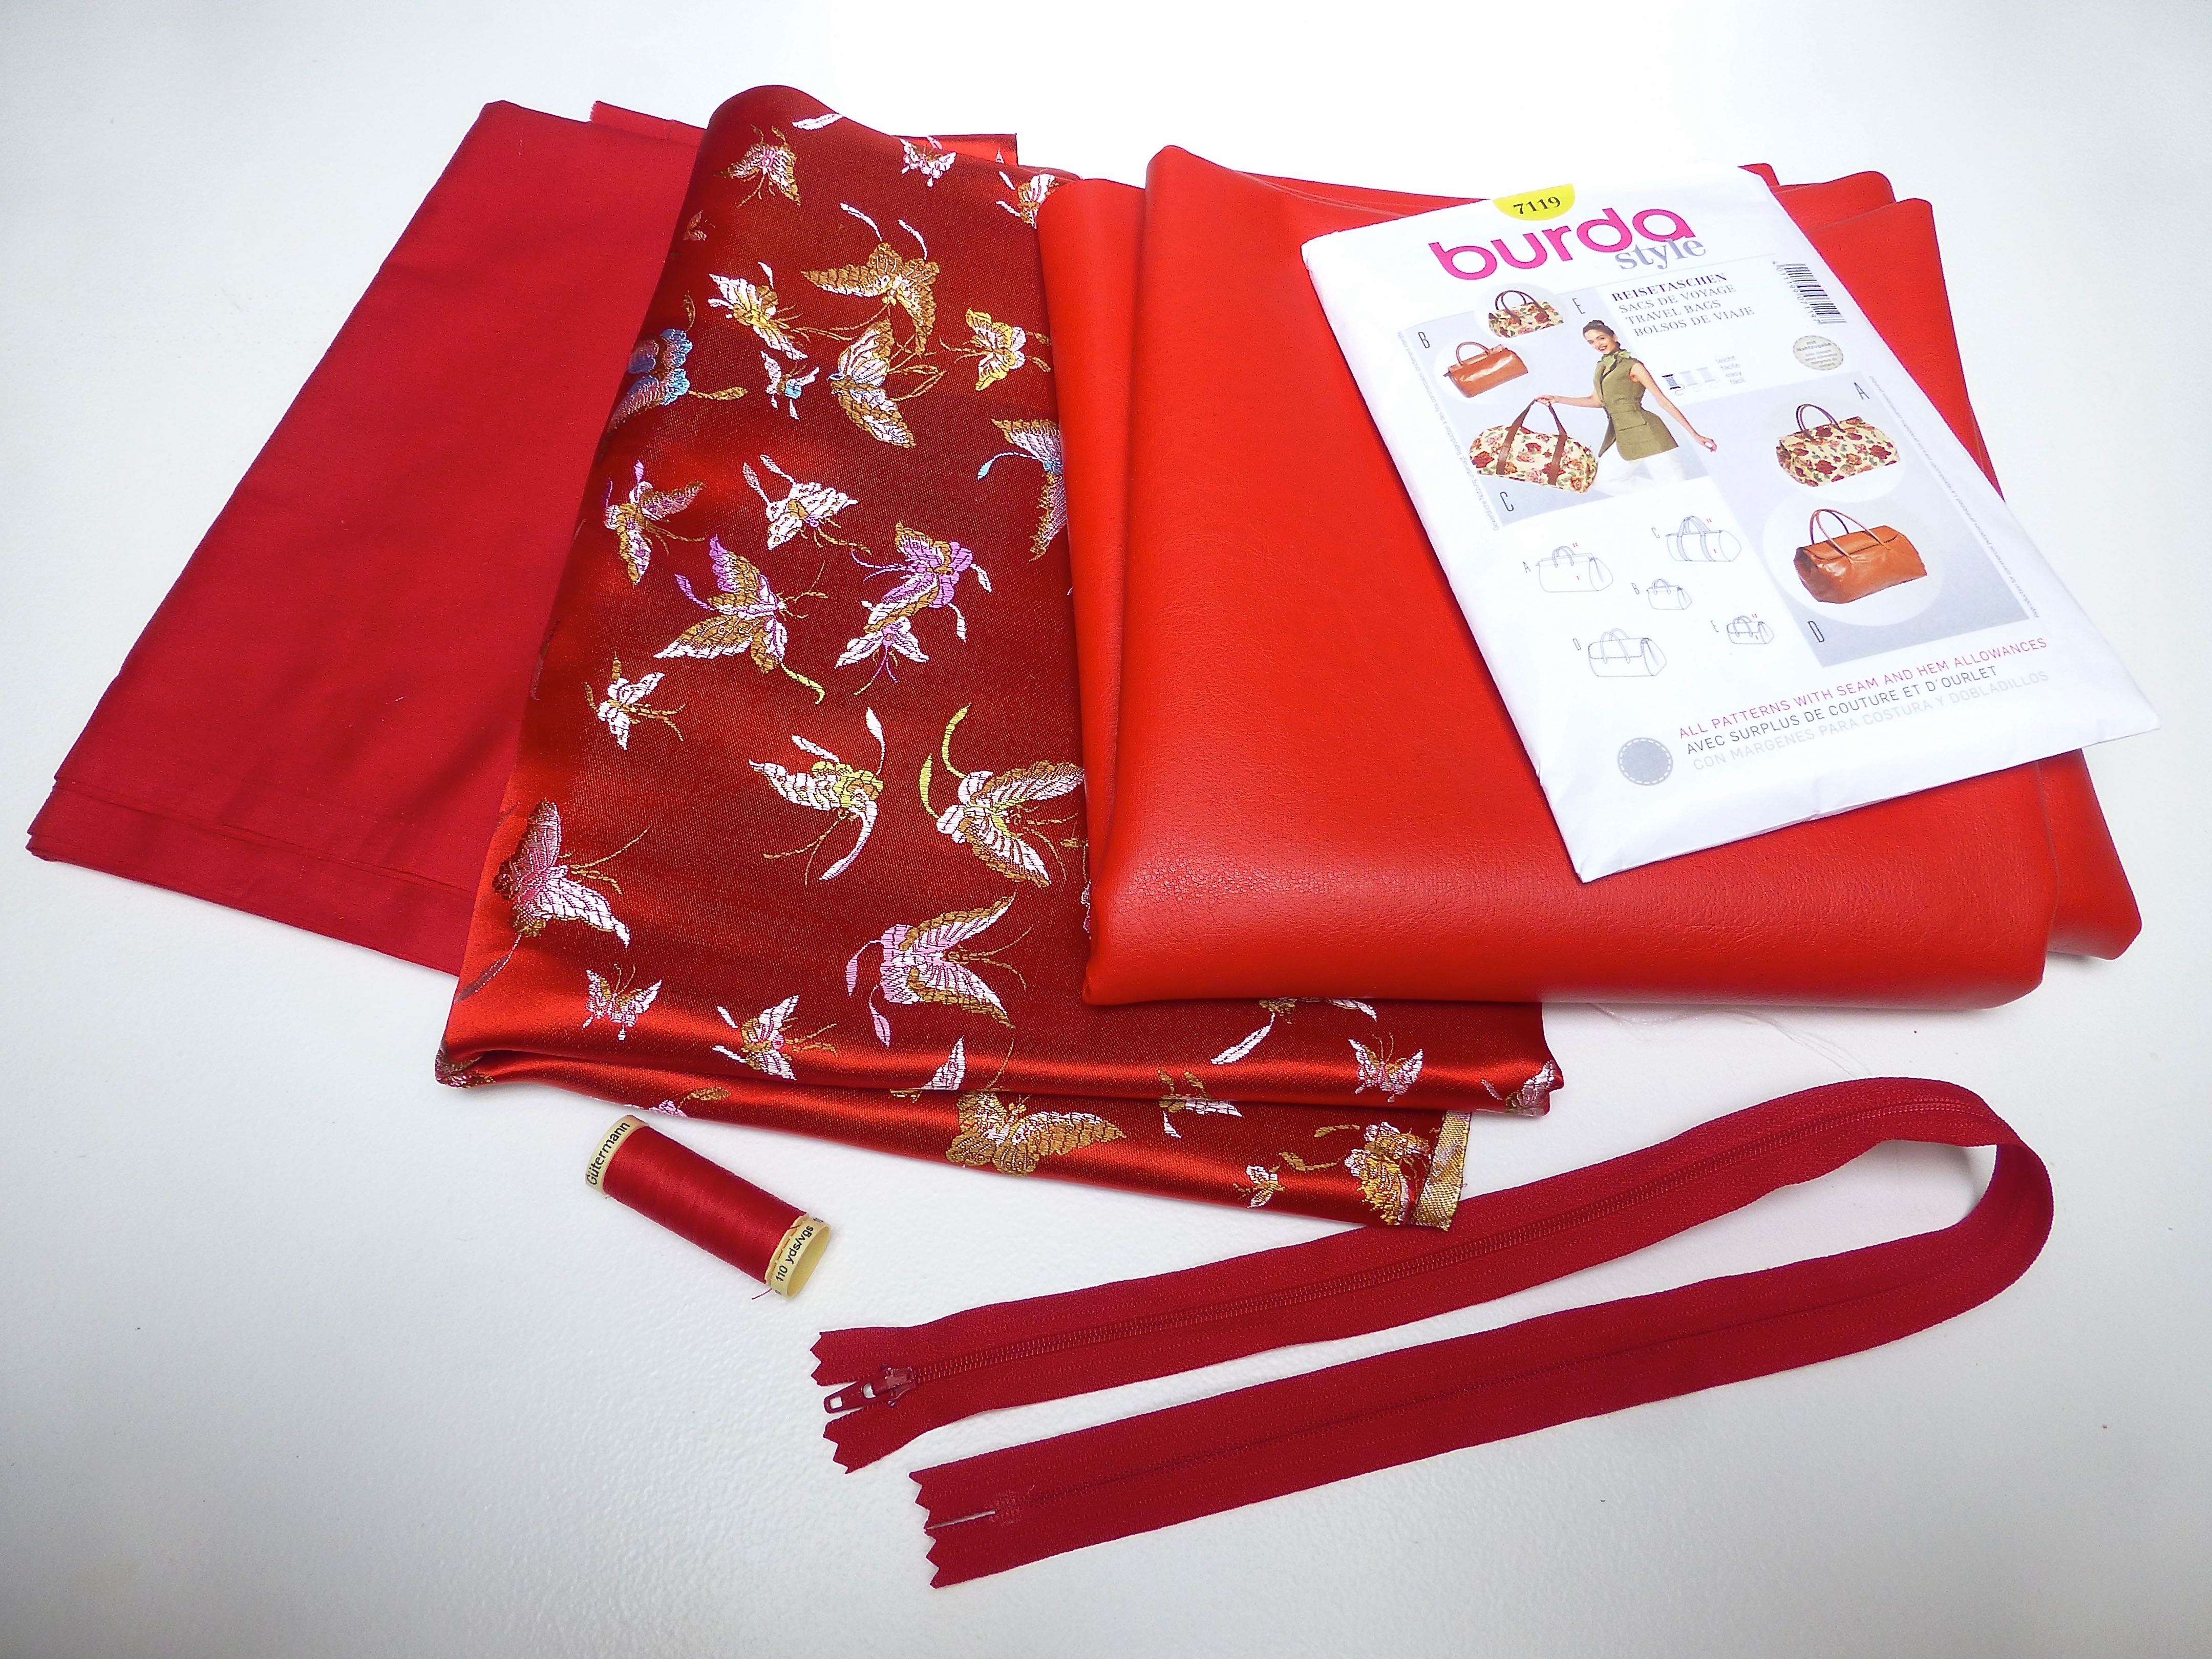
I’m really excited about my Minerva Bloggers project this month especially so because of the totally fabulous Chinese Brocade that I have used. The colour is a vibrant Pillar Box Red and the motif is a repeating butterfly pattern which shimmers in the light due to the metallic thread running through the medium-heavy weight satin.
It can never be said that I’m afraid of colour!
As soon as I saw this fabric I was desperate to use it – I had considered a kimono style dressing gown as kimonos are very ‘in’ at the moment and it would make a very decadent one, but I don’t need another.
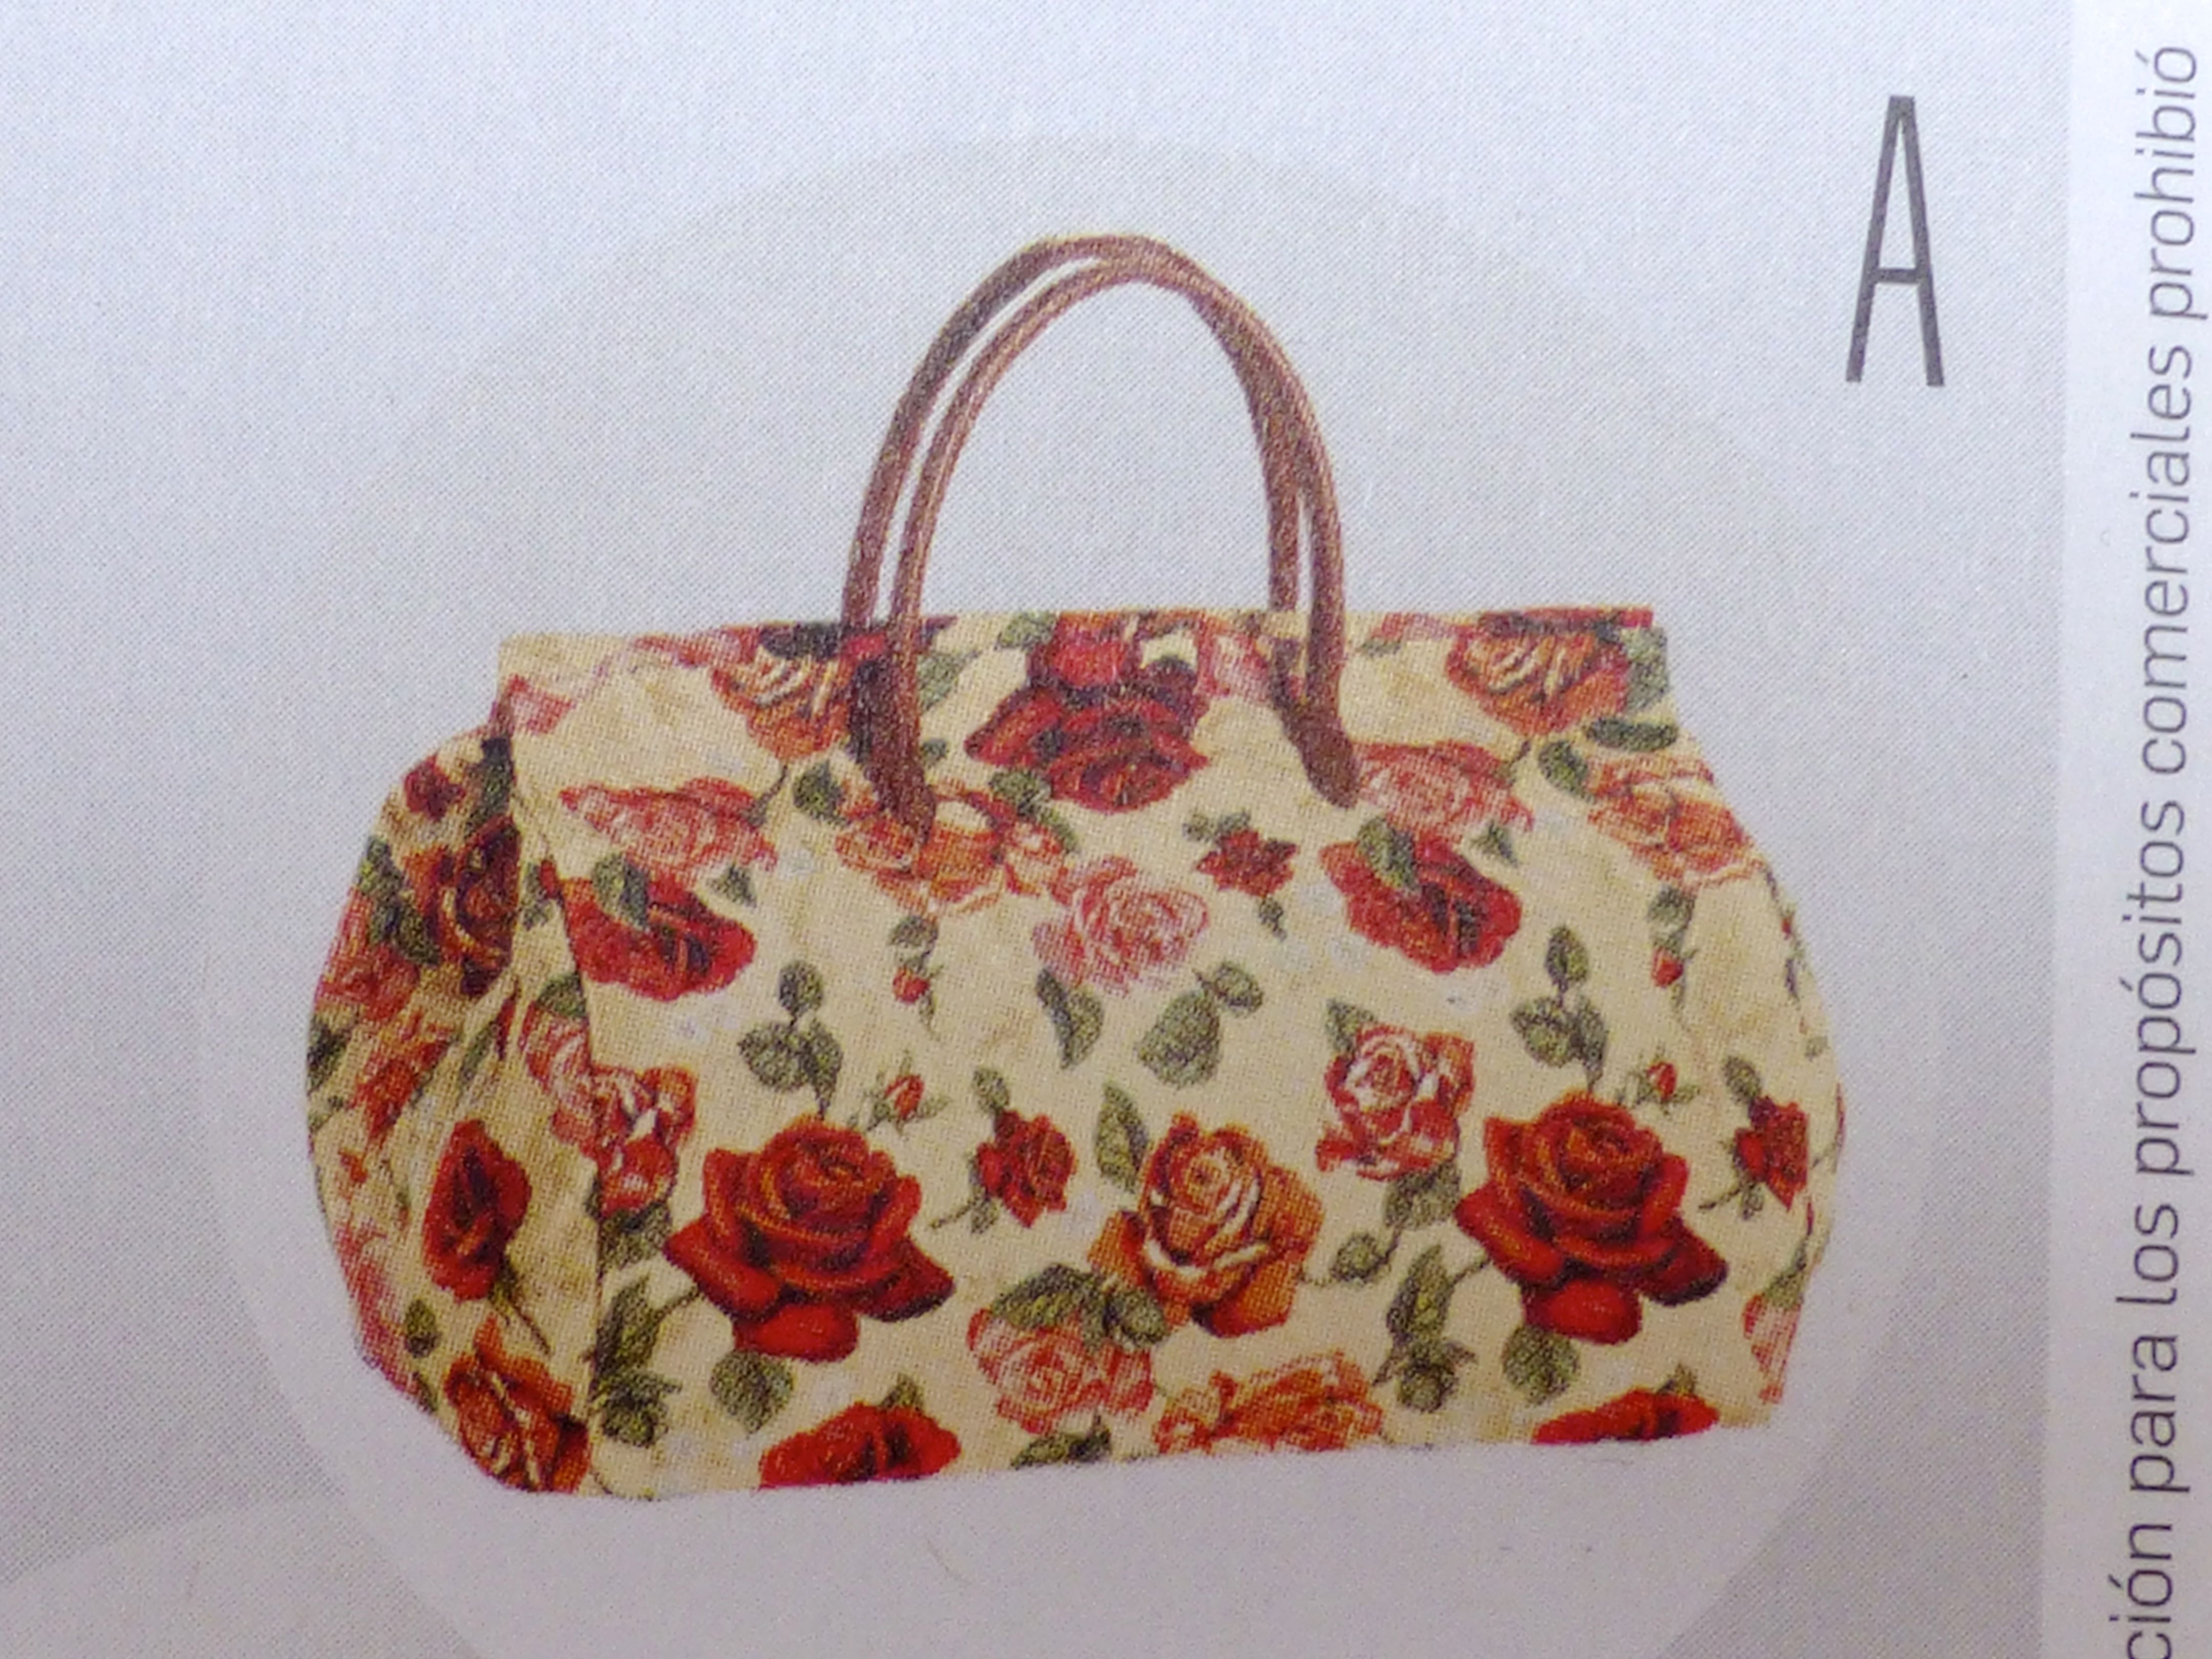
I do, however, need a new weekend bag as my old faithful is falling apart at the seams and looking extremely tatty. I wanted a pattern that wasn’t too fussy or detracted from the beautiful fabric which needs a starring rôle, so I was delighted when I stumbled upon Burda Style 7119.
I chose view ‘A’ which reminds me of the old Doctors’ bags or carpet bags.
The pattern has been classed as “Easy” by Burda and I have to agree, although the handles may prove fiddly for the absolute beginner.
It has been commented that I like a more roomy bag (see my “Sew Retro” bag) and this one is no exception. My fabric choice makes it a softly structured option but I can see it working even better in a leatherette or vinyl.
In fact, although I ordered a metre of bright red leatherette, I only used a tiny amount to make the handles so there is plenty left to make up a smaller version. Maybe a wash bag with waterproof lining?
These are the supplies, including matching red cotton lining, zip and thread. What a happy photo – red makes me want to shout out loud!
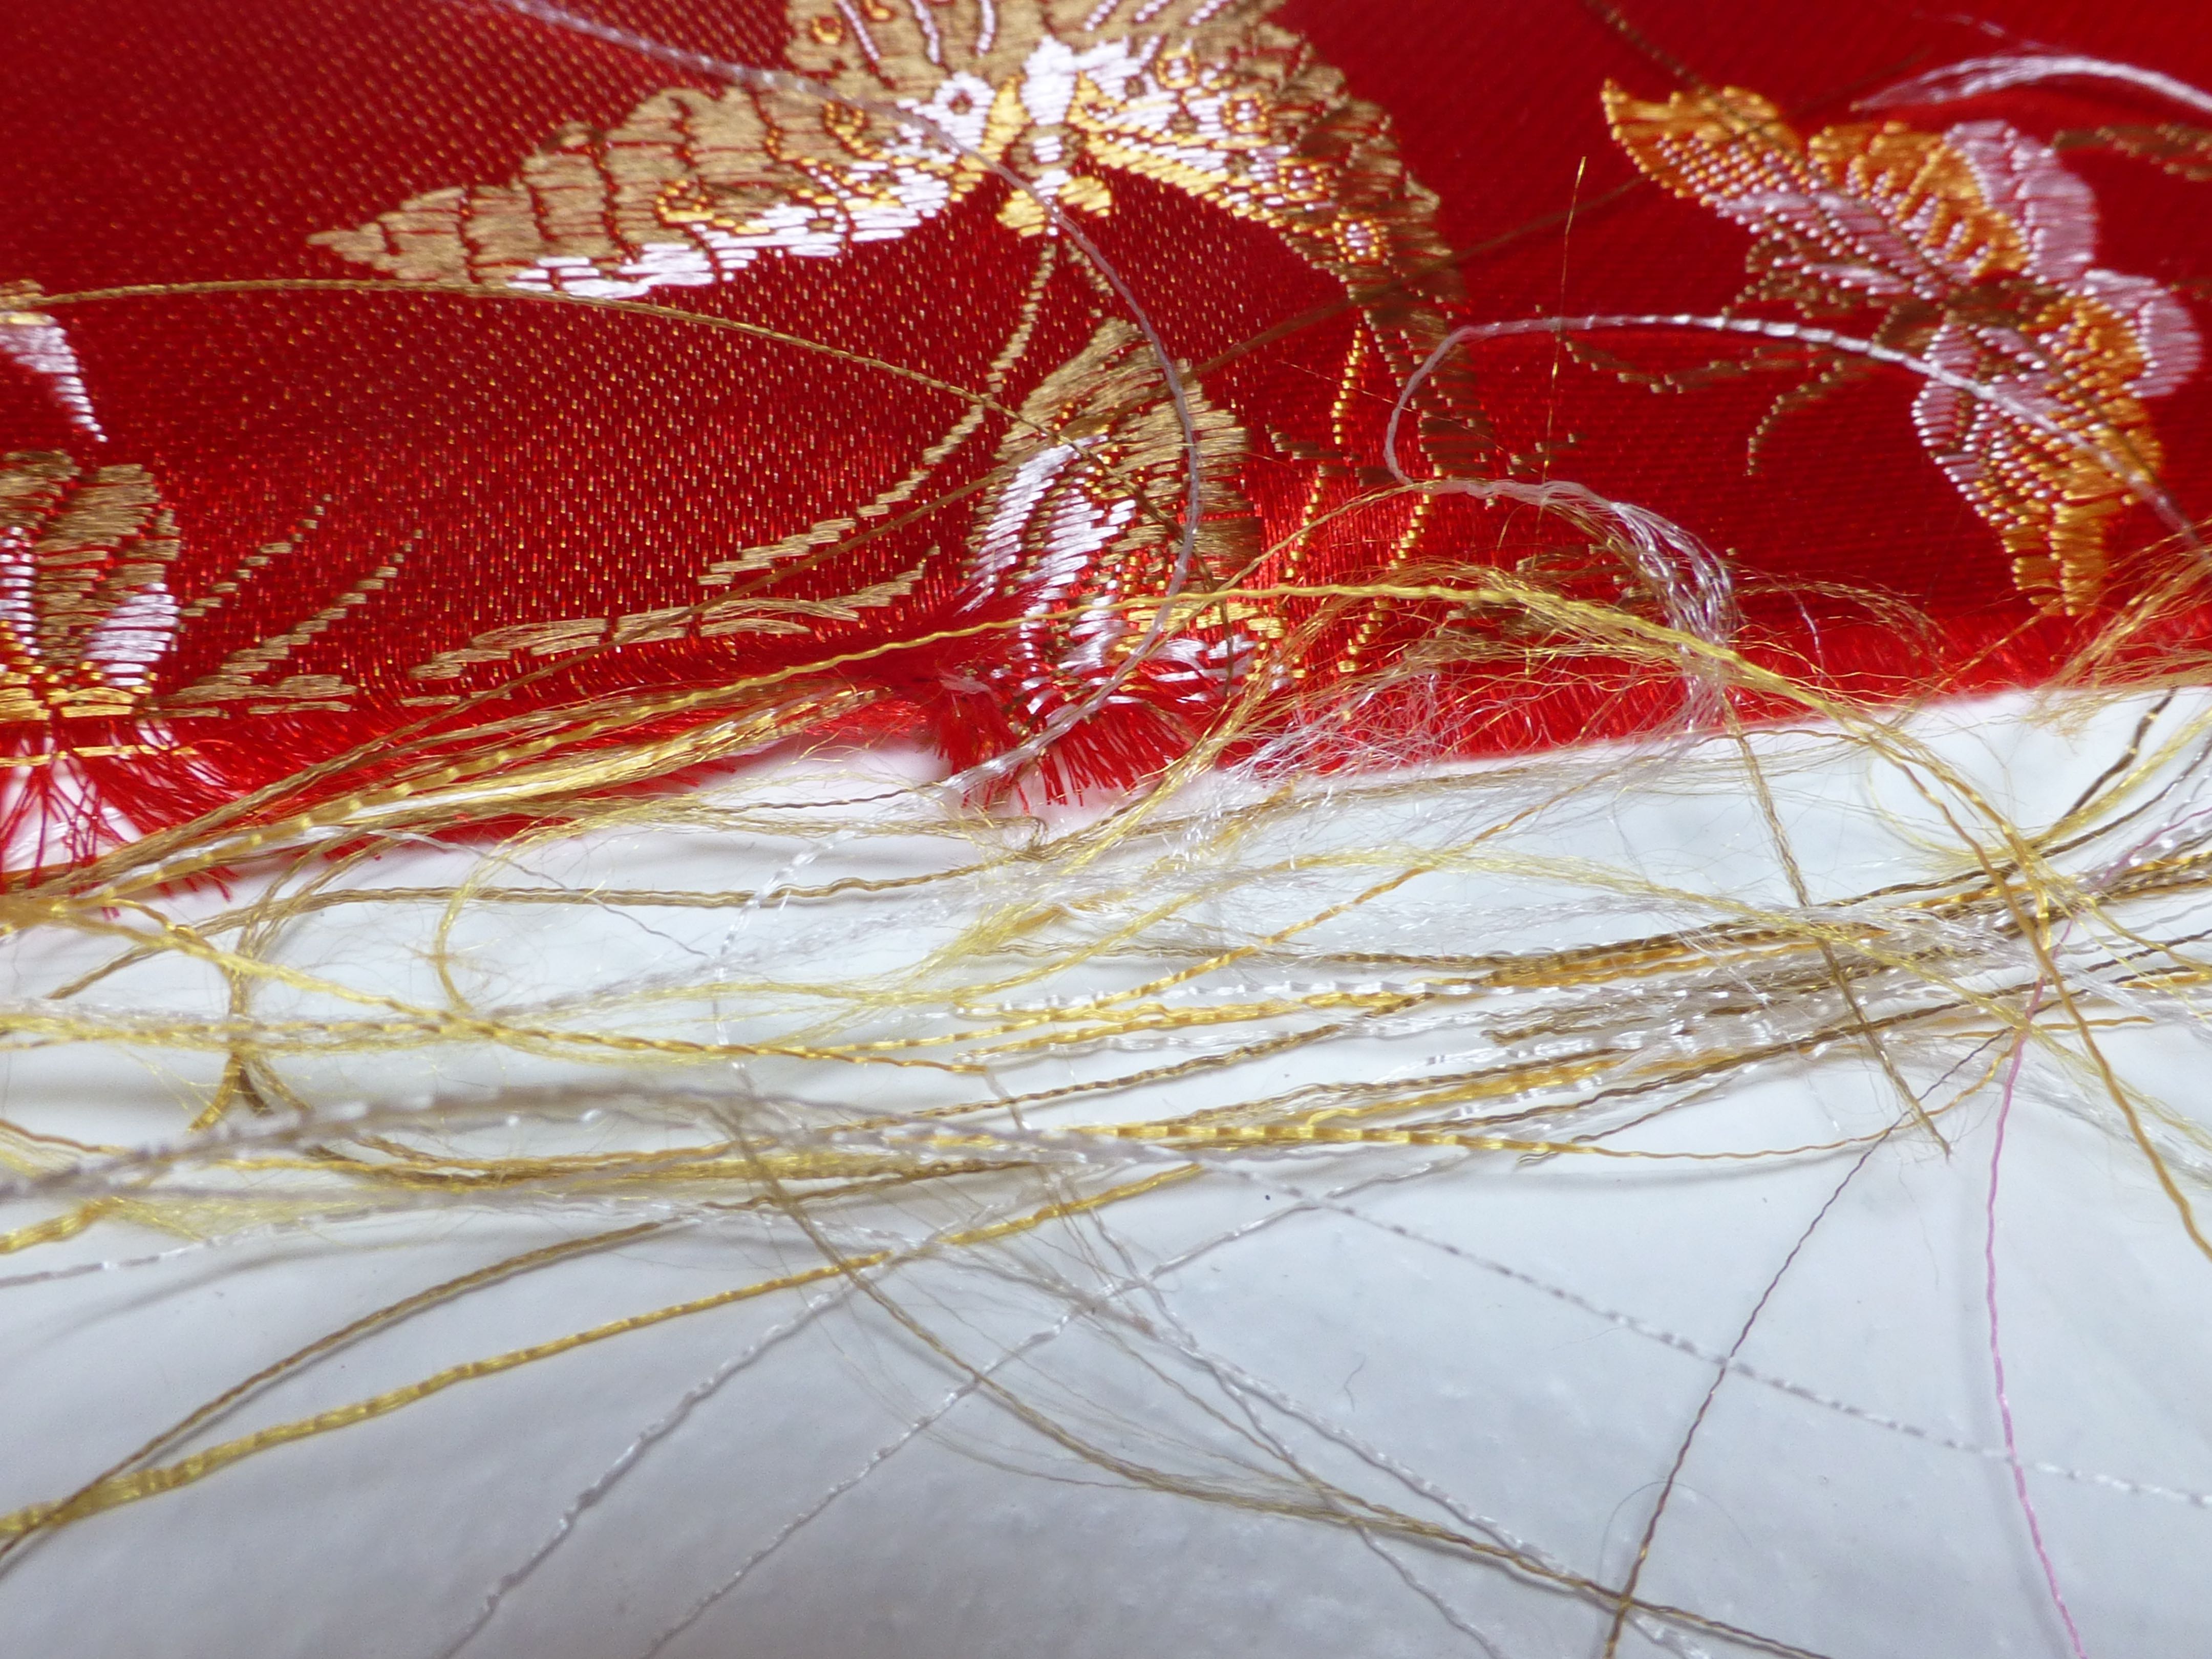
The downside to using brocade is that it frays extremely easily. The pattern is not printed onto the fabric, it is woven with shimmery, metallic threads which are so beautiful (the photographs do not do it justice!) but which slide out at the slightest touch.
To prevent the fraying and to make sewing a much easier experience, I overlocked every single raw edge which I wouldn’t normally do when the edges are encased within a lining.
That’s better!
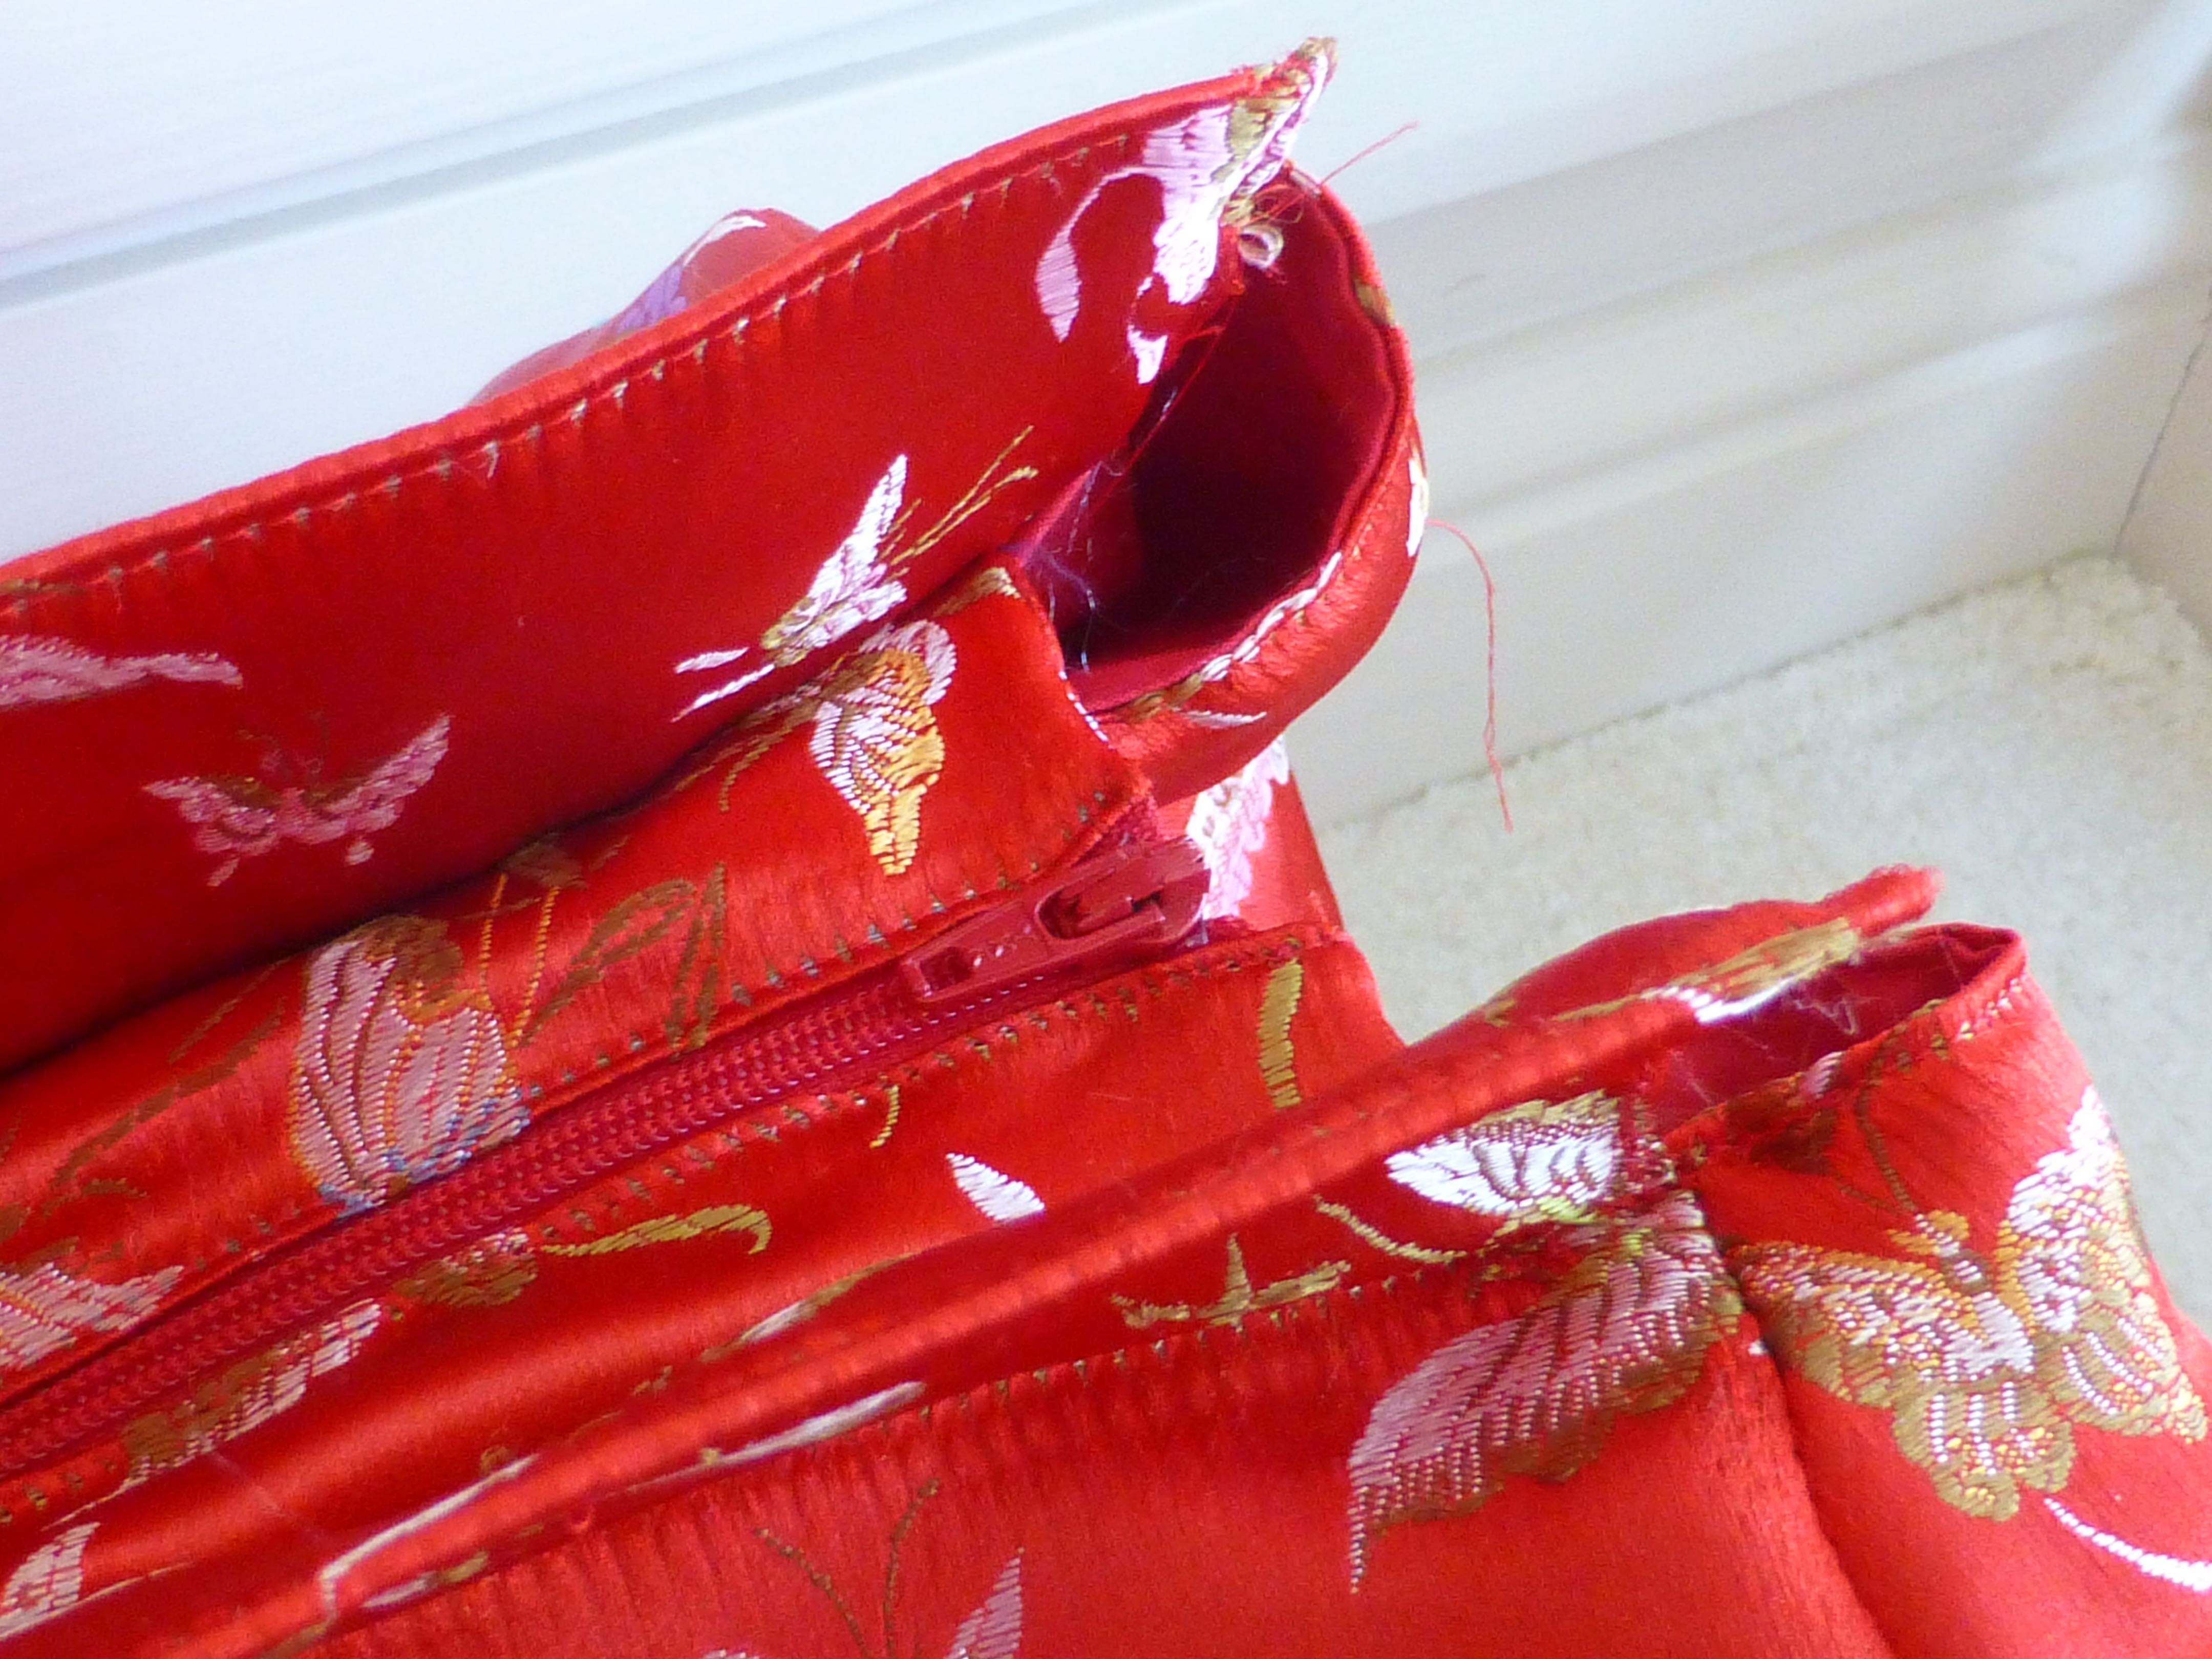
The zip went in easily enough and the placement makes a pleasant change from the norm.
The zip extends past the end of the bag by a few inches and I liked the leatherette detail as a stop tab.
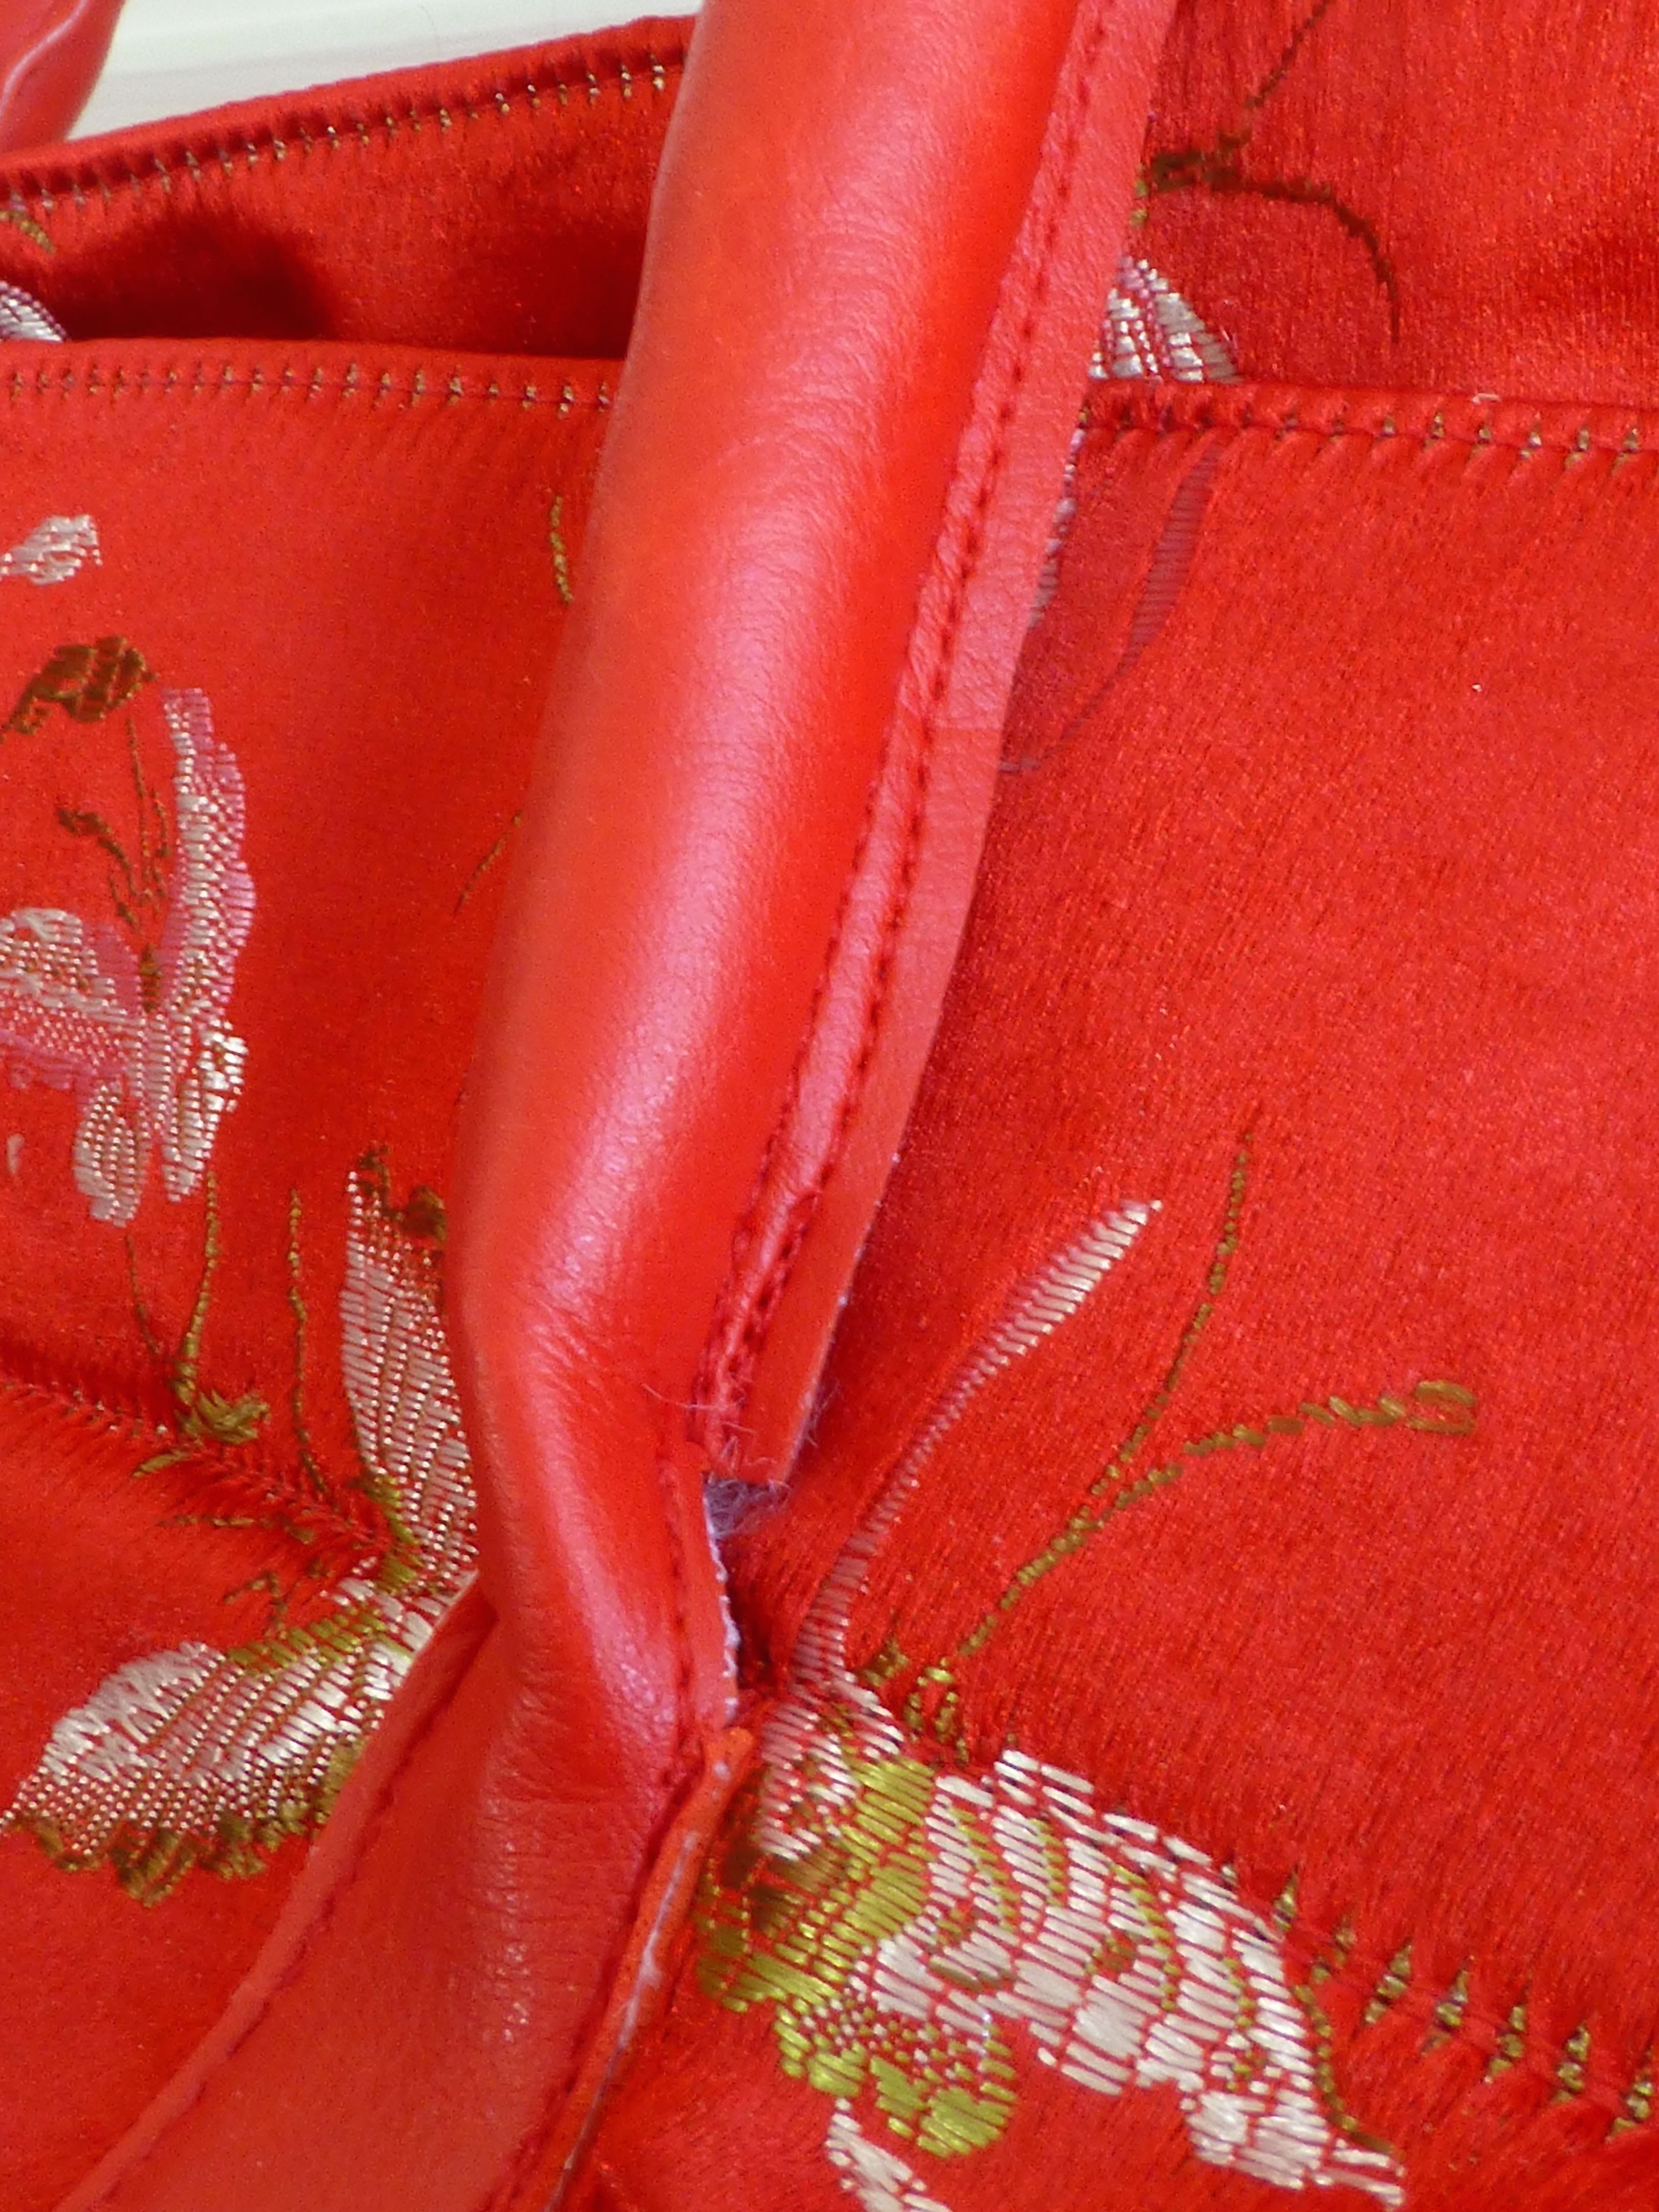
When it came to making the handles, I altered the pattern slightly.
The design called for a tube to be sewn right sides together, turned inside out and tubes of handle wadding to be threaded through. I couldn’t source this anywhere so I improvised. I sewed the handles wrong sides together with two rows of stitching for strength and decoration, then poked some polyester toy wadding all the way through with a knitting needle.
Three rows of stitching adds strength to where the handles join the bag.
The padded handles are really soft and comfortable too, an important consideration which is often overlooked.
The amount of interior space is quite impressive and I love that the lining is just as cheery a colour as the outside!
As I said, it’s a little floppy unless it’s stuffed full of clothes but the benefit is that it folds away neatly when stored. I’m not averse to the less structured look anyway.
Tadah!
I love it!
All in all it was a great pattern with easy to understand instructions and the fabric was a dream to work with after the fraying issue had been dealt with.
I can’t wait to use it – luckily we’ve got several overnight trips planned over the Easter break so it will get plenty of use. My husband has also planned our second wedding anniversary trip somewhere secret so it’s sure to get lots of second glances at the airport – it’s definitely a bag that stands out from the crowd.
It makes a lovely change from the generic overnight bags that you get in the shops and just proves the theory that hand made is best!
If you haven’t checked out Minerva Crafts yet, do hop over and have a look – the fabric selection alone is enormous and worth browsing over a cup of tea:)
Previously Boys and Chickens, I have created a new blog to share my sewing adventure as 2018 is they year I plan to teach myself to sew! There will also be bits of crochet and cooking too.
My challenge: One year - I will not buy clothes - I will upcycle to make what I need - everything from underwear to evening wear! Join me for tips, exclusive BrawHem makes, and inevitably some hilarious disasters...


 Right, onto some tops using that gorgeous Liberty fabric I bought in April:)