As usual, I made myself a new dress for Ascot this year – to read all about the slightly rushed experience (I made it the day before!) just click on the link below which will take you to the full blog post over at Minerva Crafts.
Tag Archives: Minerva Crafts
Stag’s Head “Coco” Dress
So this is my new favourite dress!
I decided to make a “Coco” dress by Tilly and the Buttons and I’m so glad I did – it’s the perfect ‘everyday’ dress for Autumn.
To see more photos, just click on the link to the full post on the Minerva Crafts Blogger Network: – Stag’s Head “Coco” Dress
The Hoodie That (Almost) Changed My Mind
It’s finished!
For those of you that would like to see how the dreaded Hoodie turned out, here’s a link to the full blog post: – The Hoodie That (Almost) Changed My Mind
Triple-Layered Linen Dress
This month’s make for the Minerva Crafts Blogger’s Network is an interesting one. I started off with a commercial pattern but had to drastically alter it after I realised that the white fabric revealed my underwear!
Click on the link below to read all about it: –
Faux Fur Gilet
My Minerva Crafts sponsored make for February is this luxurious faux fur gilet. If you want to read the full article, things have changed slightly and you need to click on the link below which will take you directly to it on the Bloggers Network: –
https://www.minervacrafts.com/blogger-network/post/faux-fur-gilet
Let me know if it works and don’t forget to come back here and tell me what you think of it:)
(By the way – WordPress has just informed me that this is my 200th post!)
Crochet Dolls – TADAH!
This reveal has to be one of the most fun projects I have EVER undertaken, certainly the most enjoyable crochet project I have ever had the pleasure to immerse myself in – even more than a blanket!
Anyone who crochets will know how deeply satisfying the process of blanket-making is, especially during the Winter months. Long, dark nights curled up on the sofa watching TV, all the while plodding steadfastly through the labour of love that is a crocheted blanket. Whilst always ecstatic to finally finish such an epic task, there’s invariably a sense of “What do I do now?”.
Summer is different. Less time spent indoors, more holidays, car journeys, time in the garden, means a large, cumbersome WIP is out of the question. A small, portable piece is what’s needed, something you can pop in your handbag and get on with anytime, anywhere.
When I came across the book “Crochet Your Own Dolls And Accessories” published by Annie’s Attic, I let out a silent squeal of delight. Here was such a project and, not only that, it could double up as being both my Minerva Crafts Blogger Network post for October and the perfect Christmas present for a little girl!
I don’t know about you, but my idea of crochet dolls has always been, well….
Link omitted so as not to hurt anyone’s feelings:)
With images like this deeply ingrained in my subconscious, I was surprised and thrilled to find a thoroughly modern version which any twenty-first century youngster would find hard to resist falling in love with.
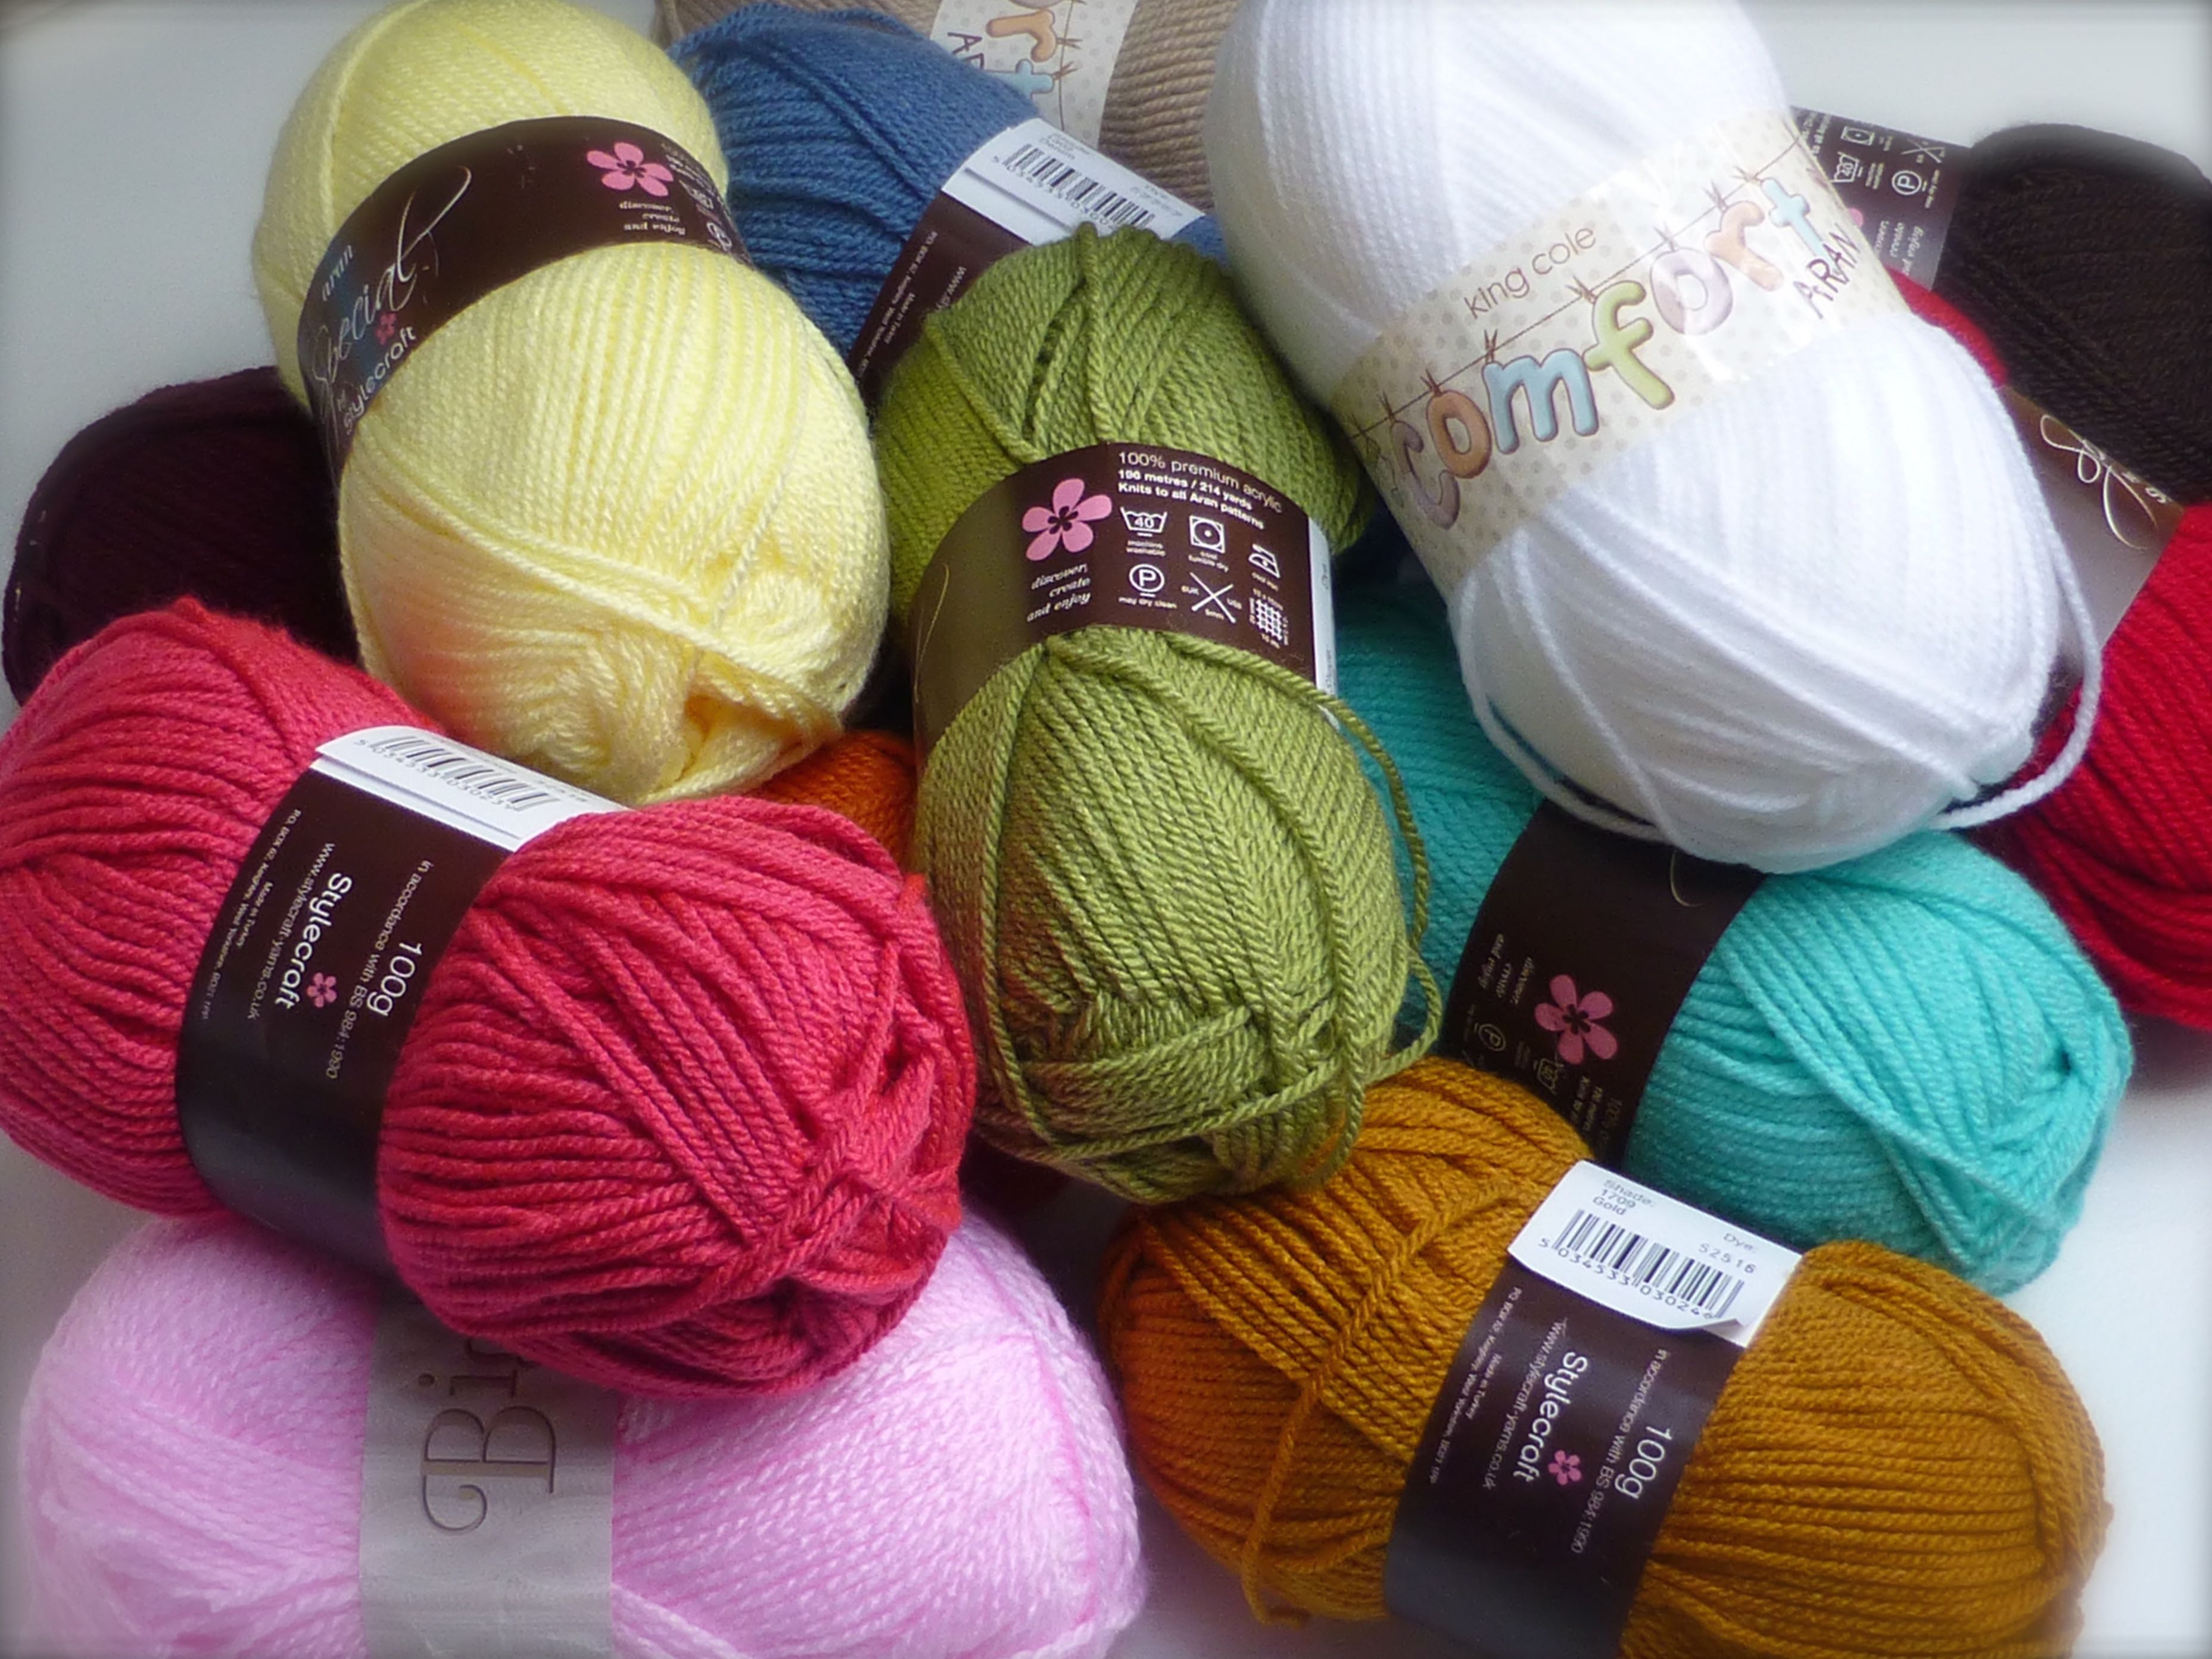
This huge sack of double knitting yarn arrived from Minerva Crafts way back in July with a tight, three-month deadline of October in mind.
Oh, I forget to tell you – my plan was to make every single thing in the entire book!
With such a lot to do, I got cracking immediately, starting on page one with “Bella Ann”.
The bodies of all four dolls are constructed the same way – in one piece from the feet up to the head, then attaching the separately crocheted arms at the end.
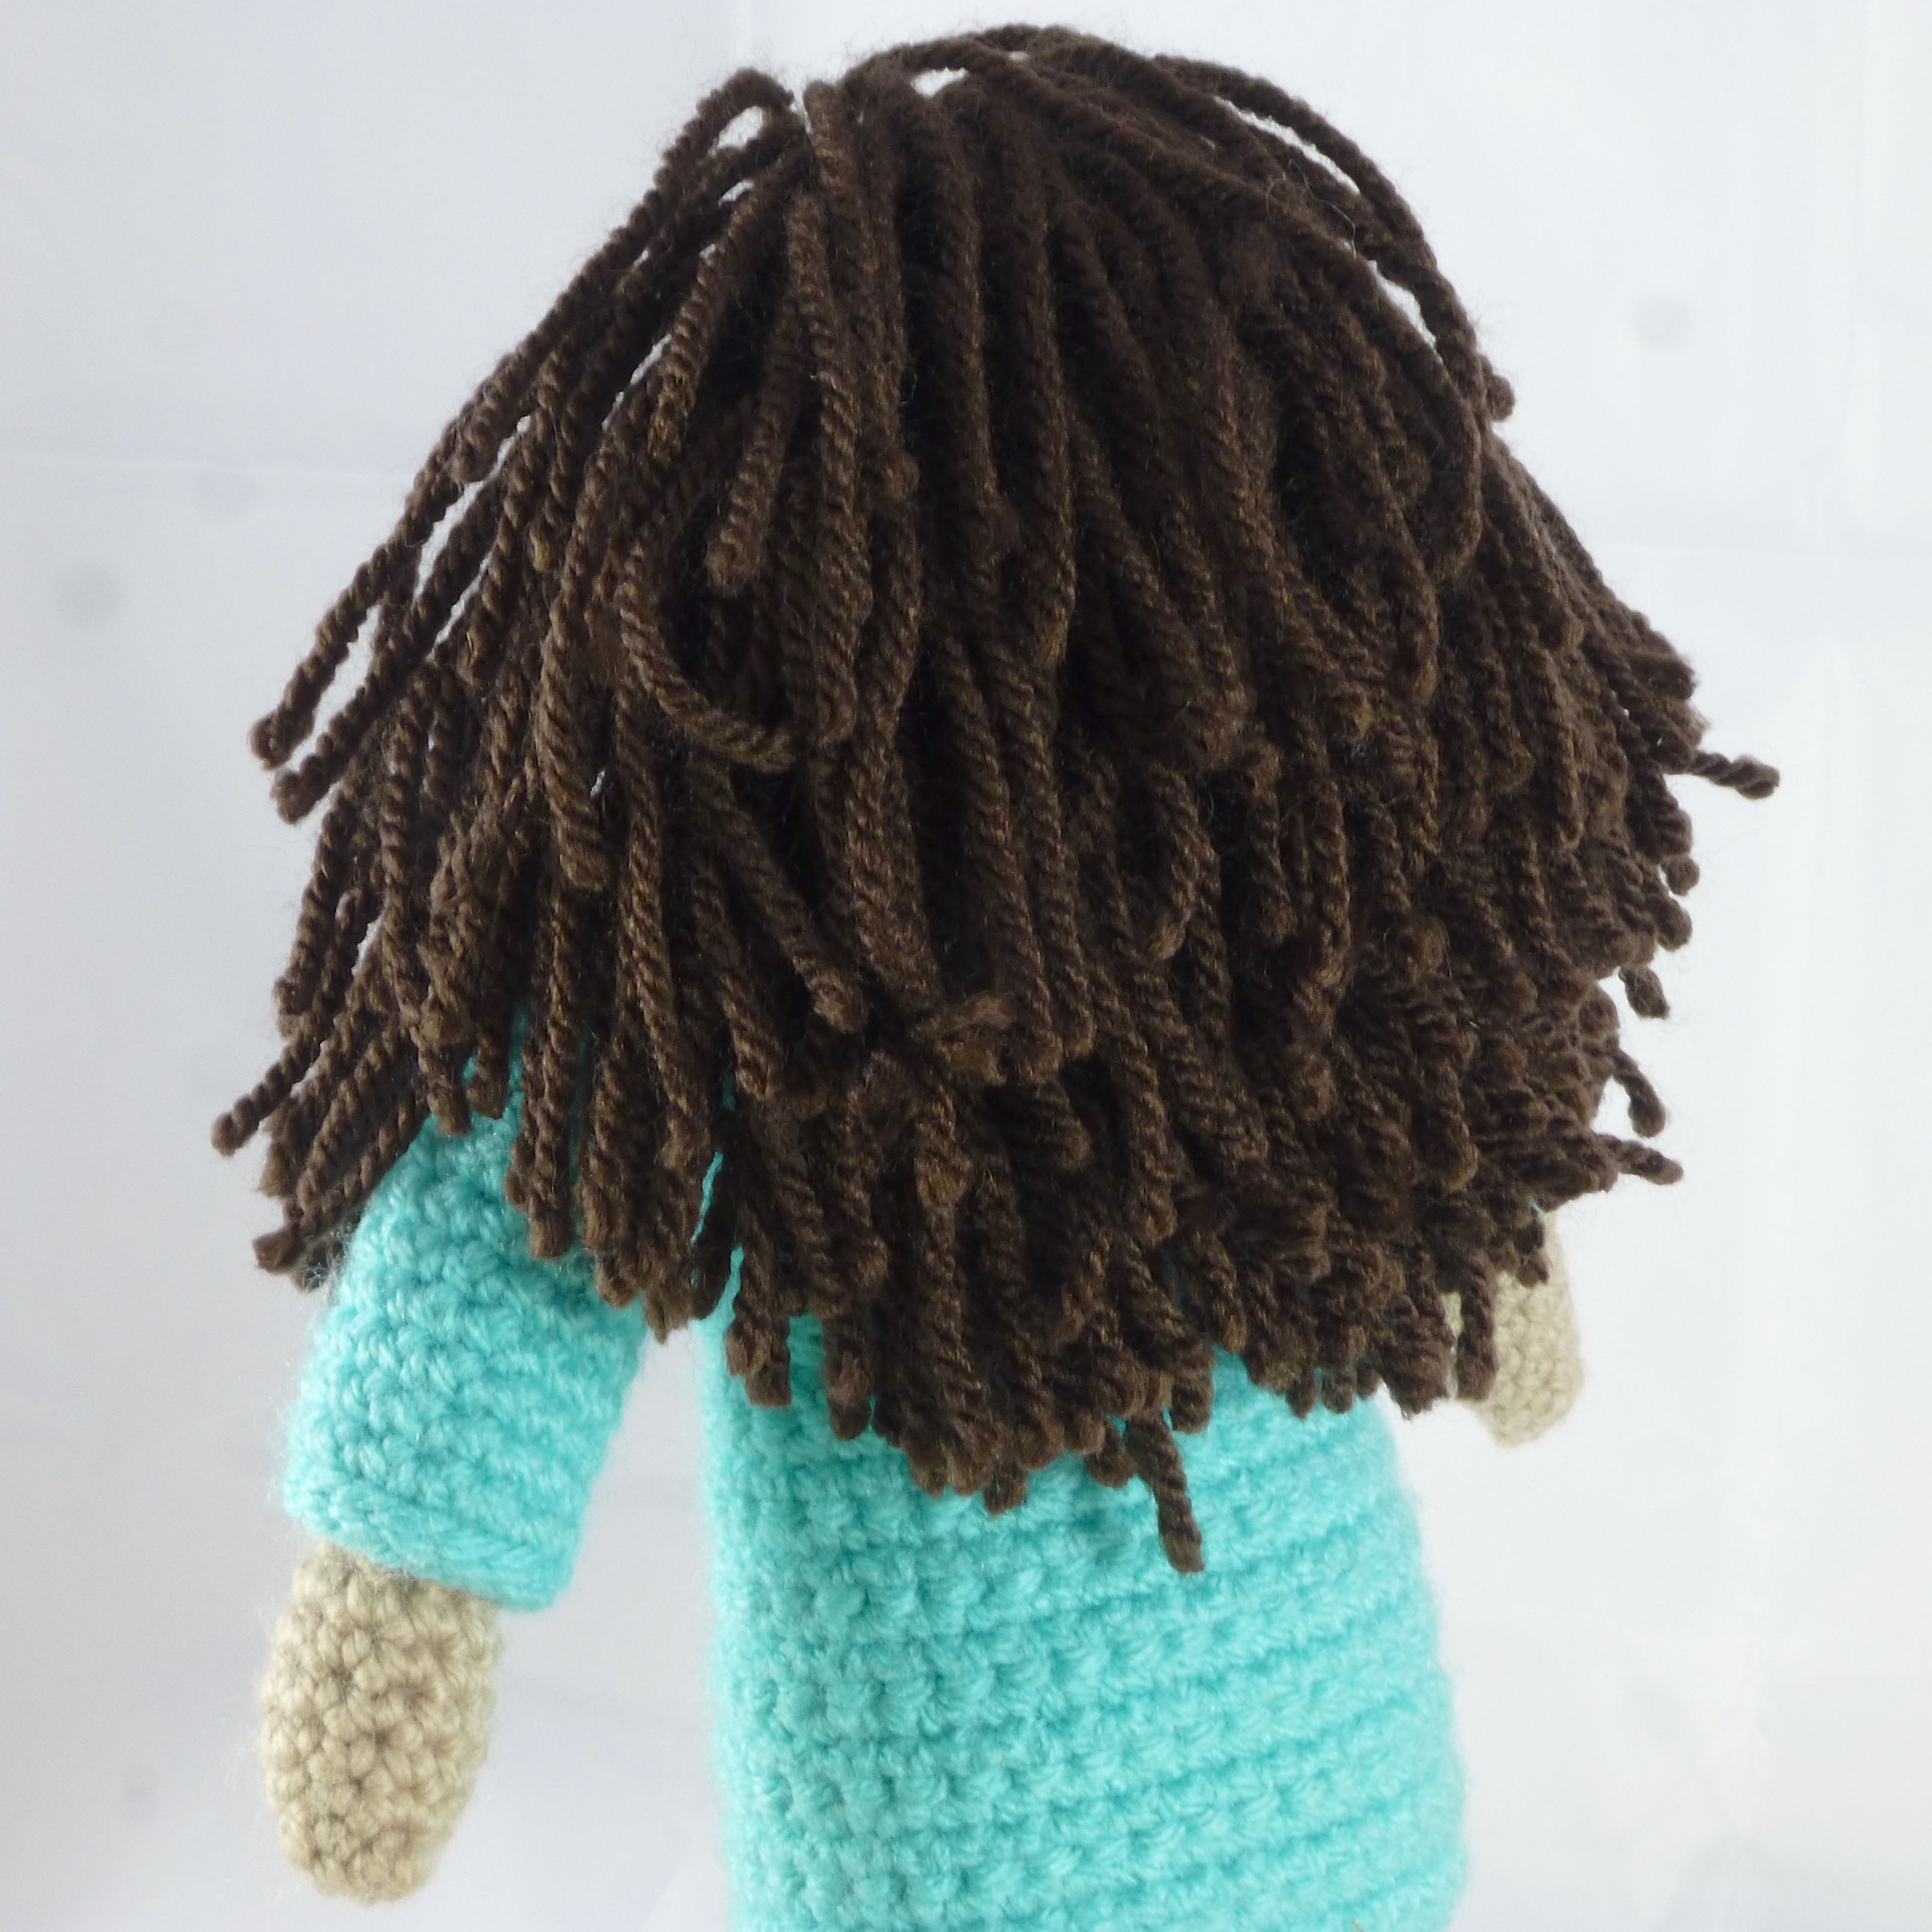
The hair is created using a darning needle and 135 strands of yarn, each one individually knotted onto a single stitch on the head!
The facial features are basic – two French knots for the eyes and a dab of blusher for the cheeks.
Simple, but effective, just enough to resemble a face.
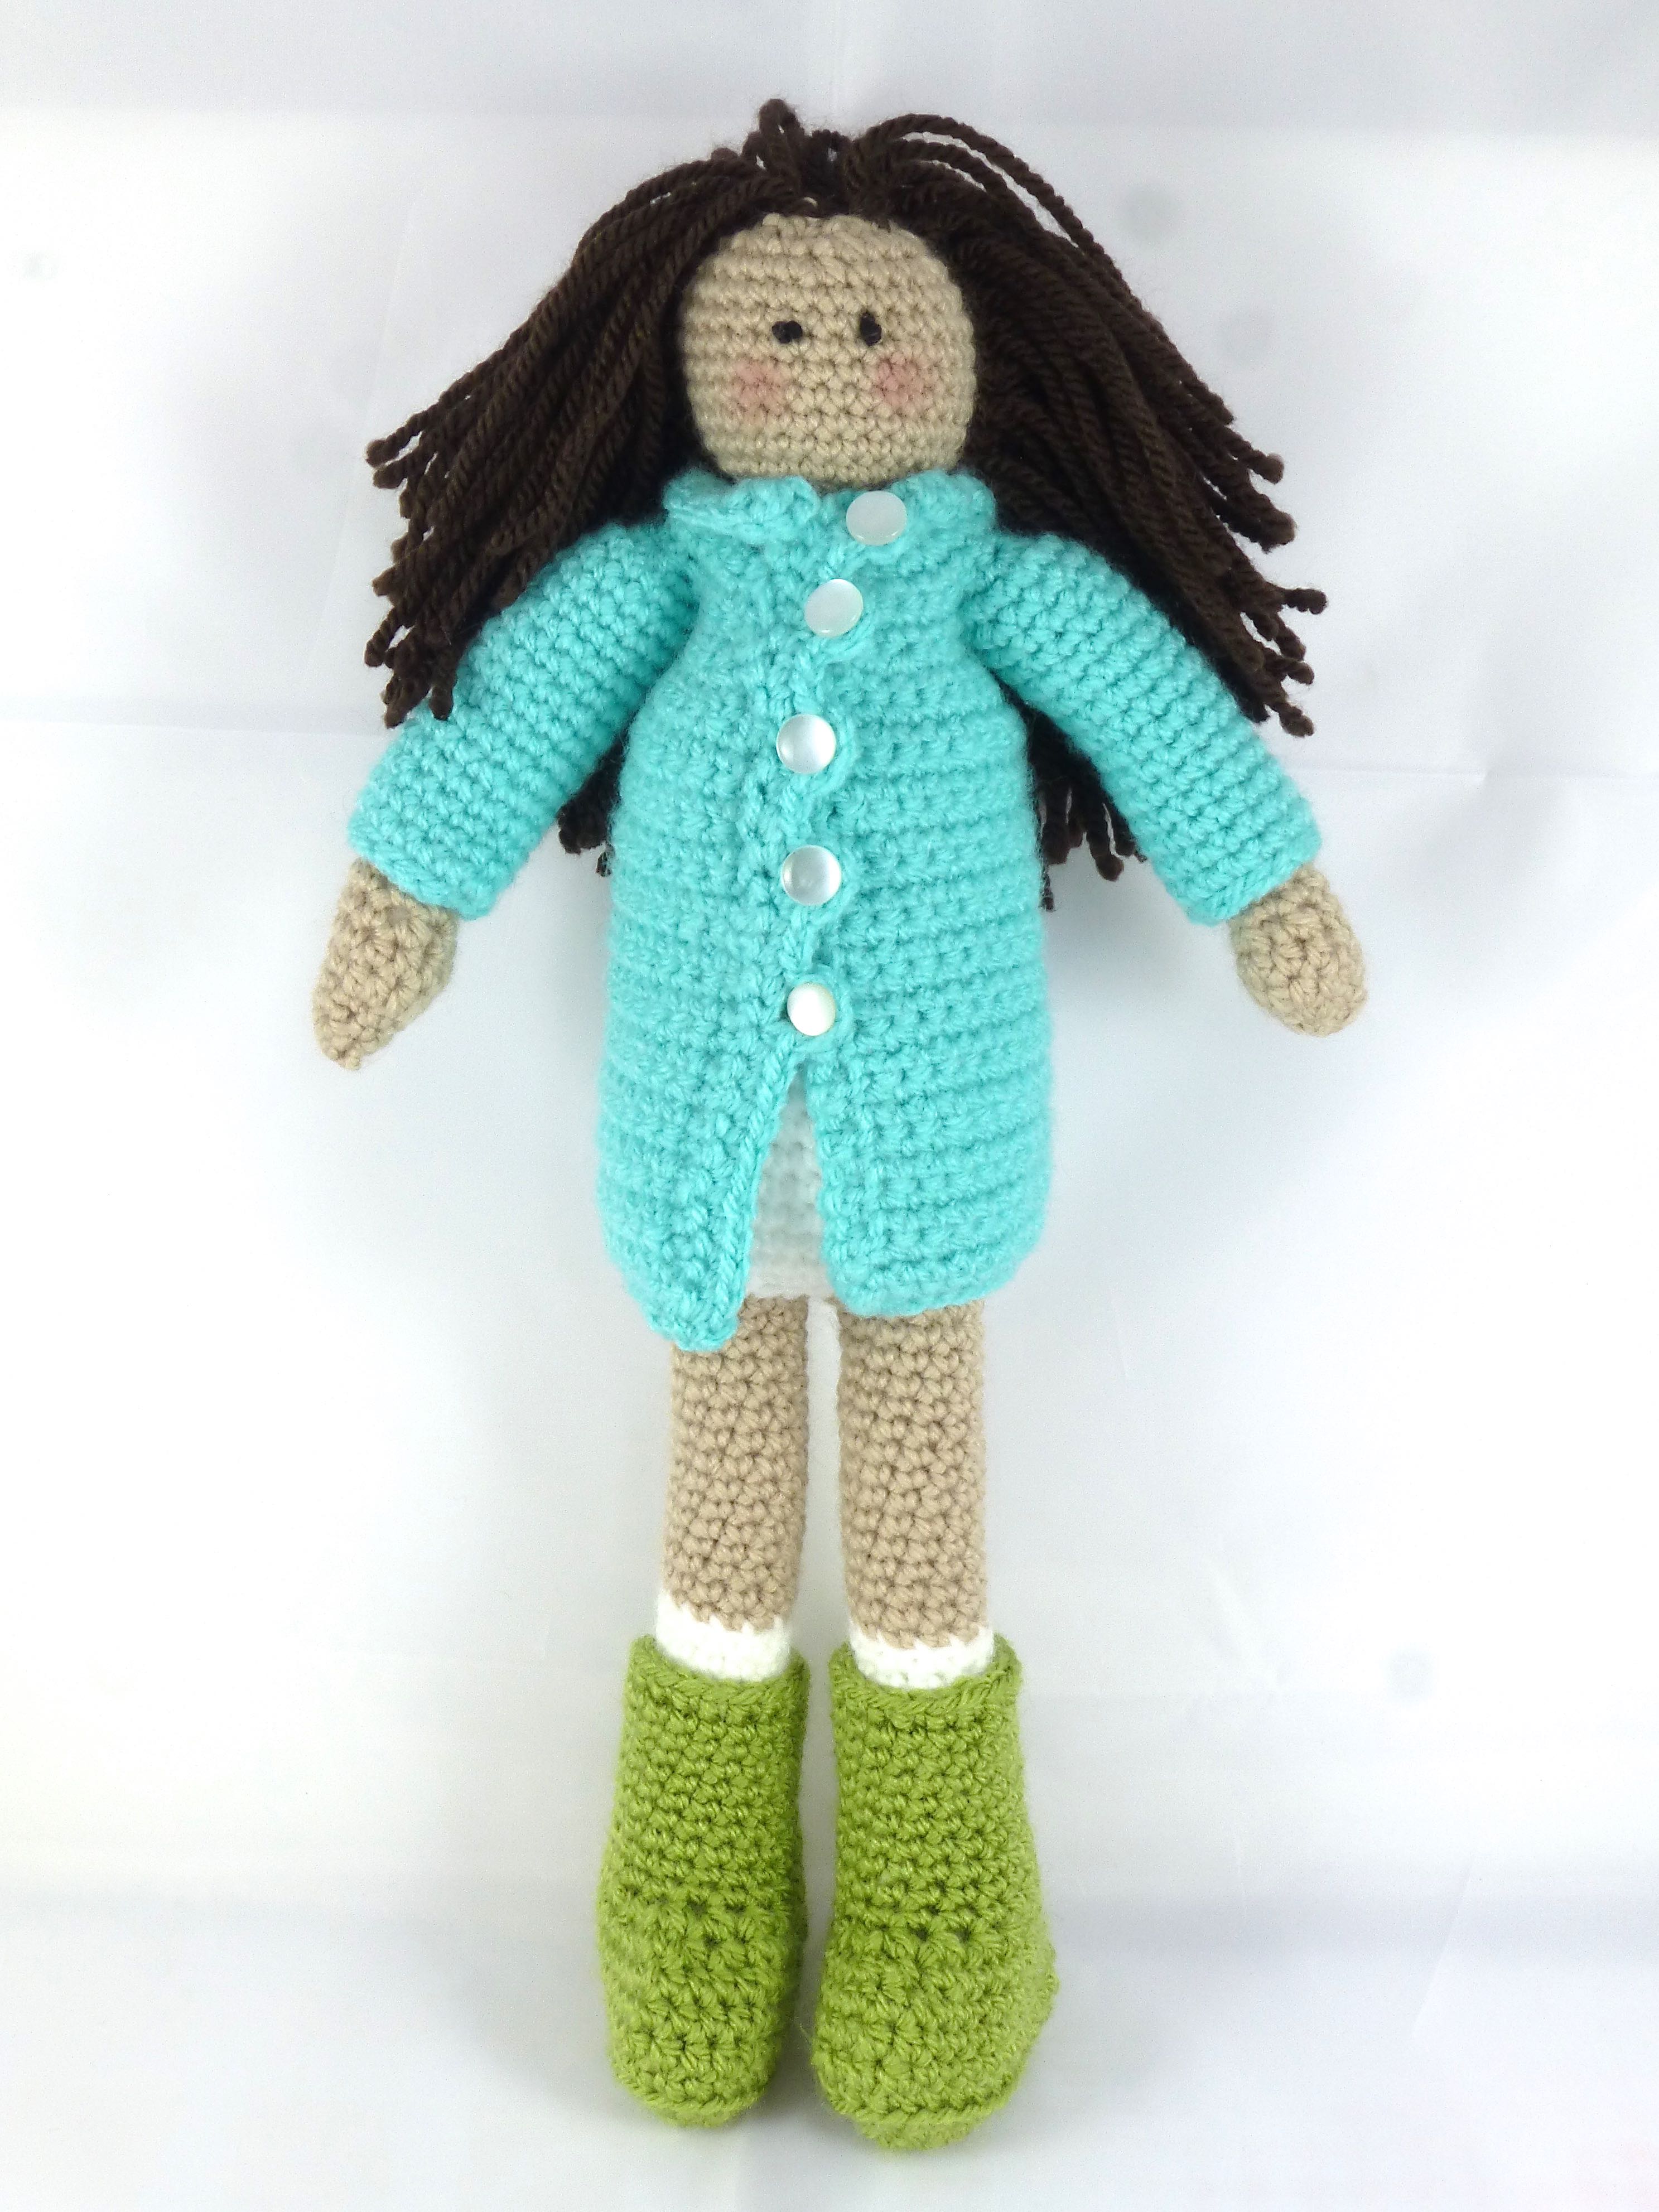
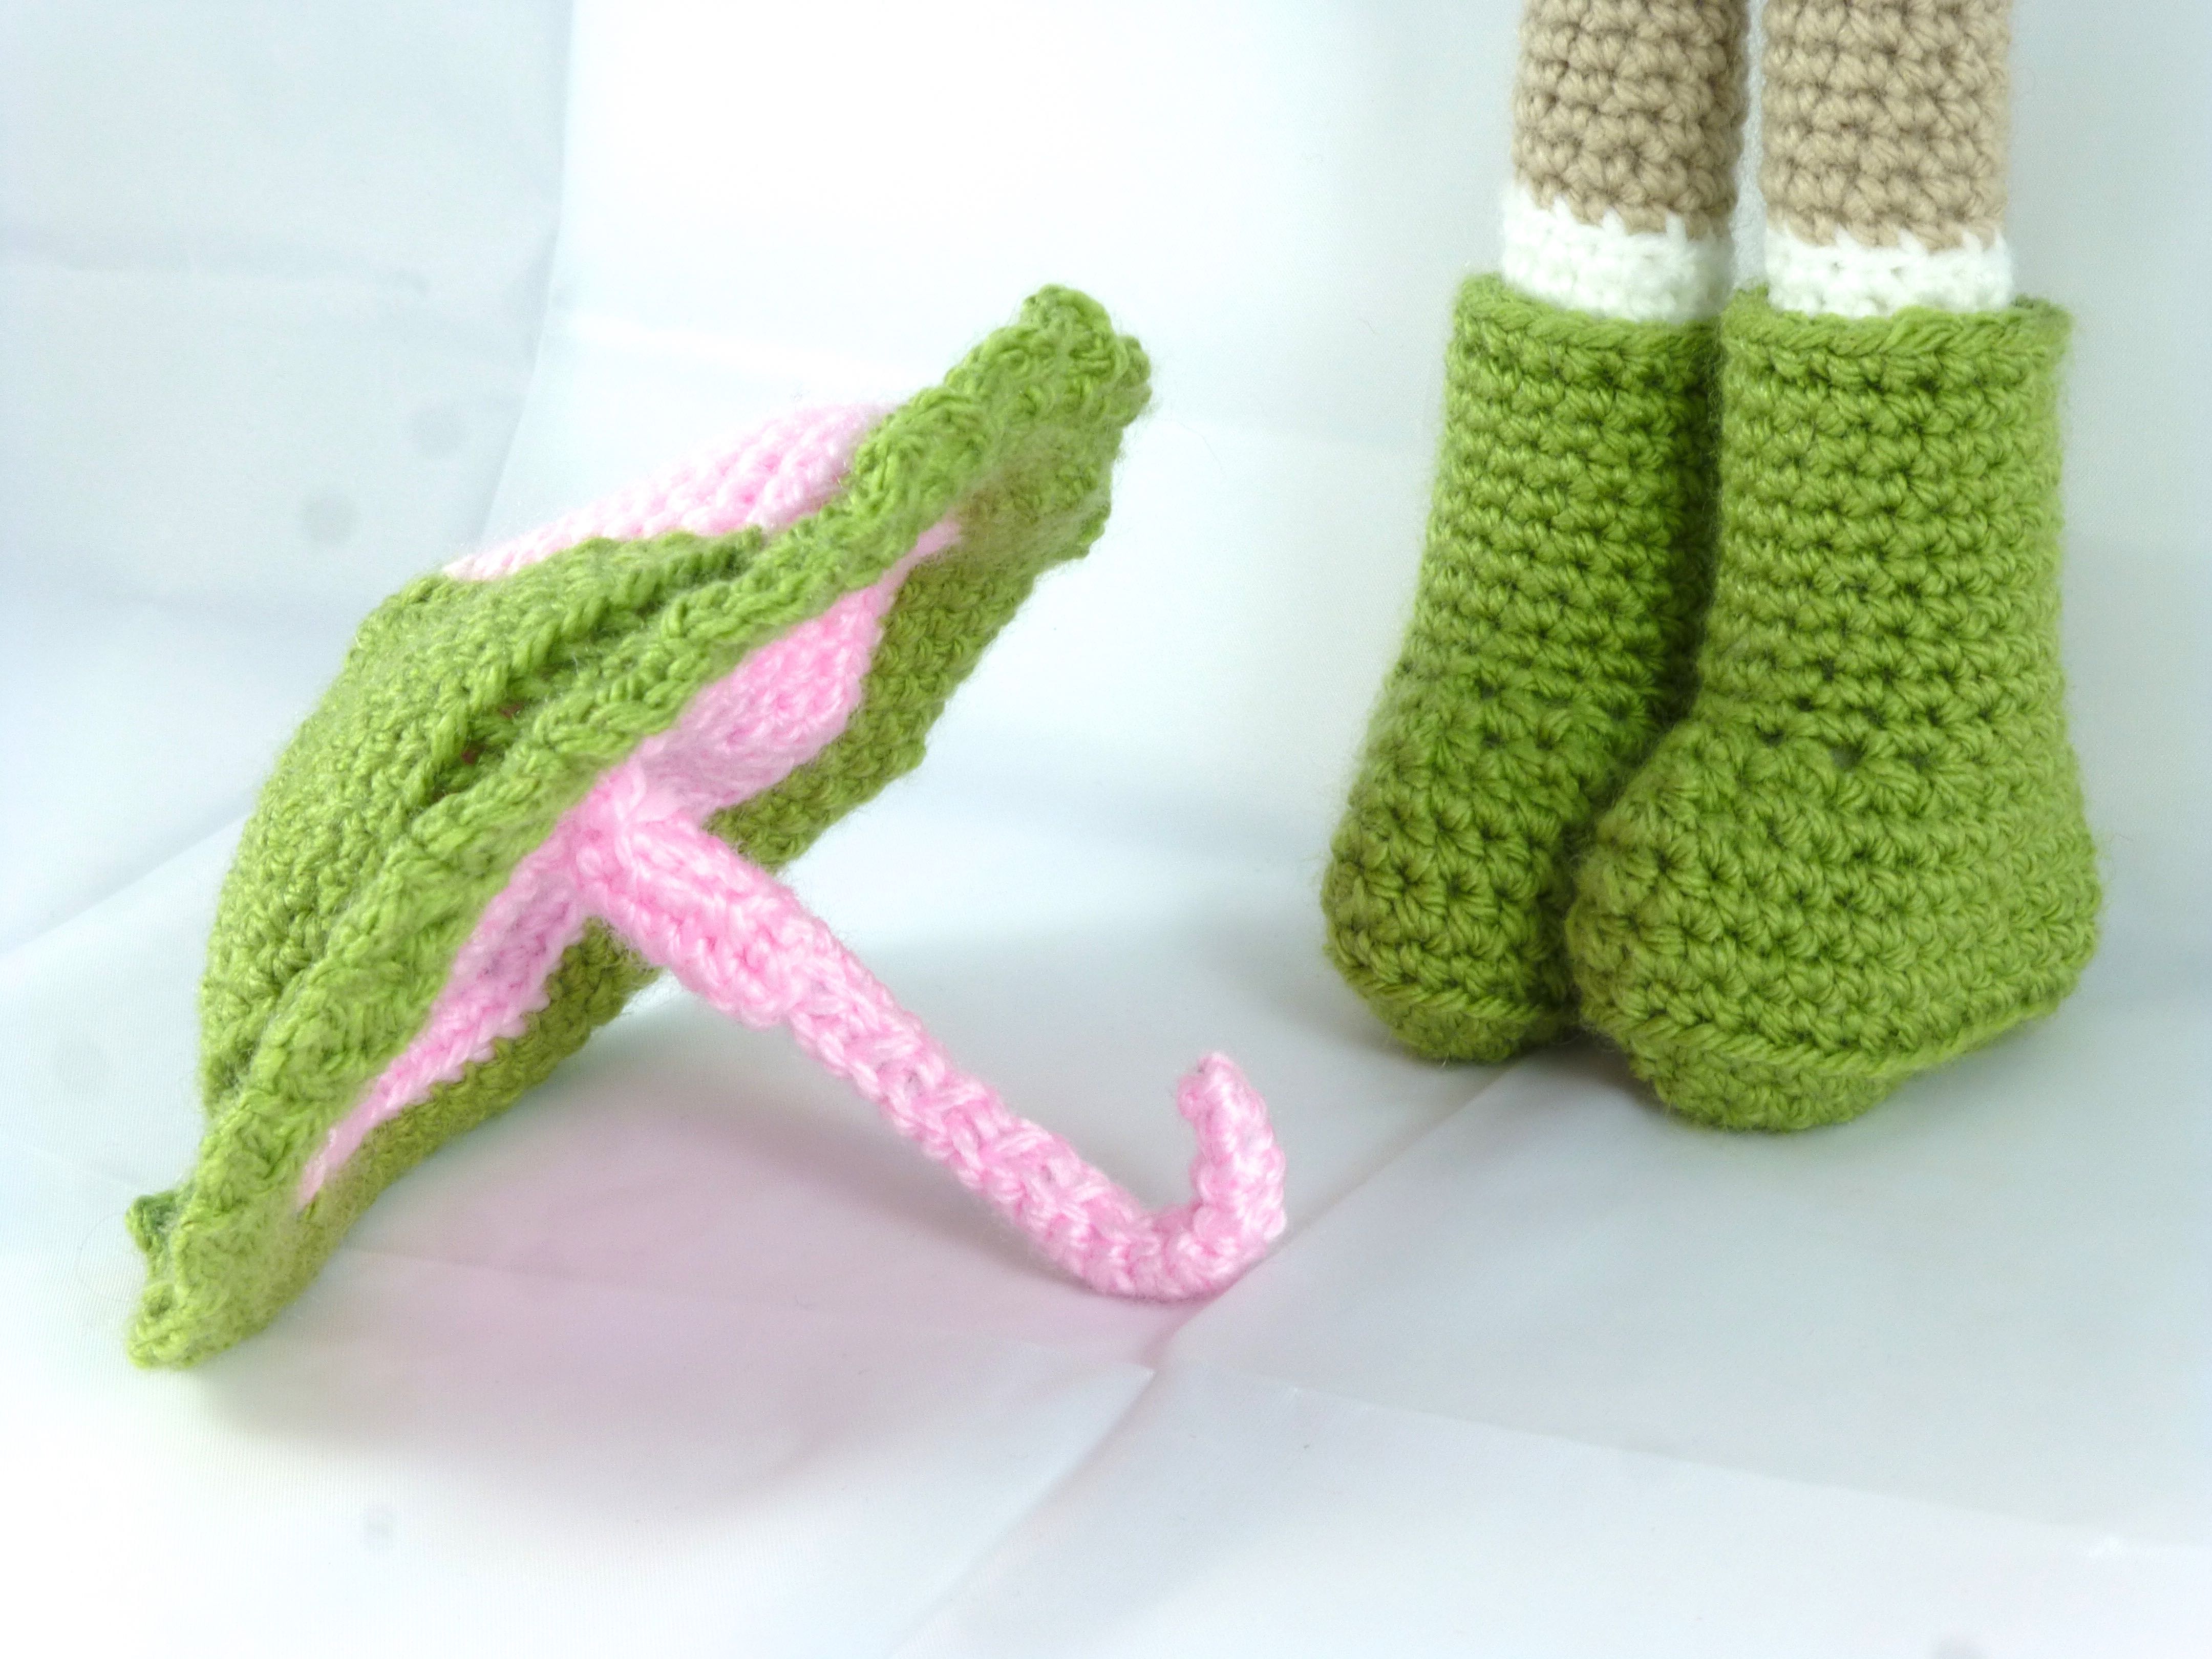
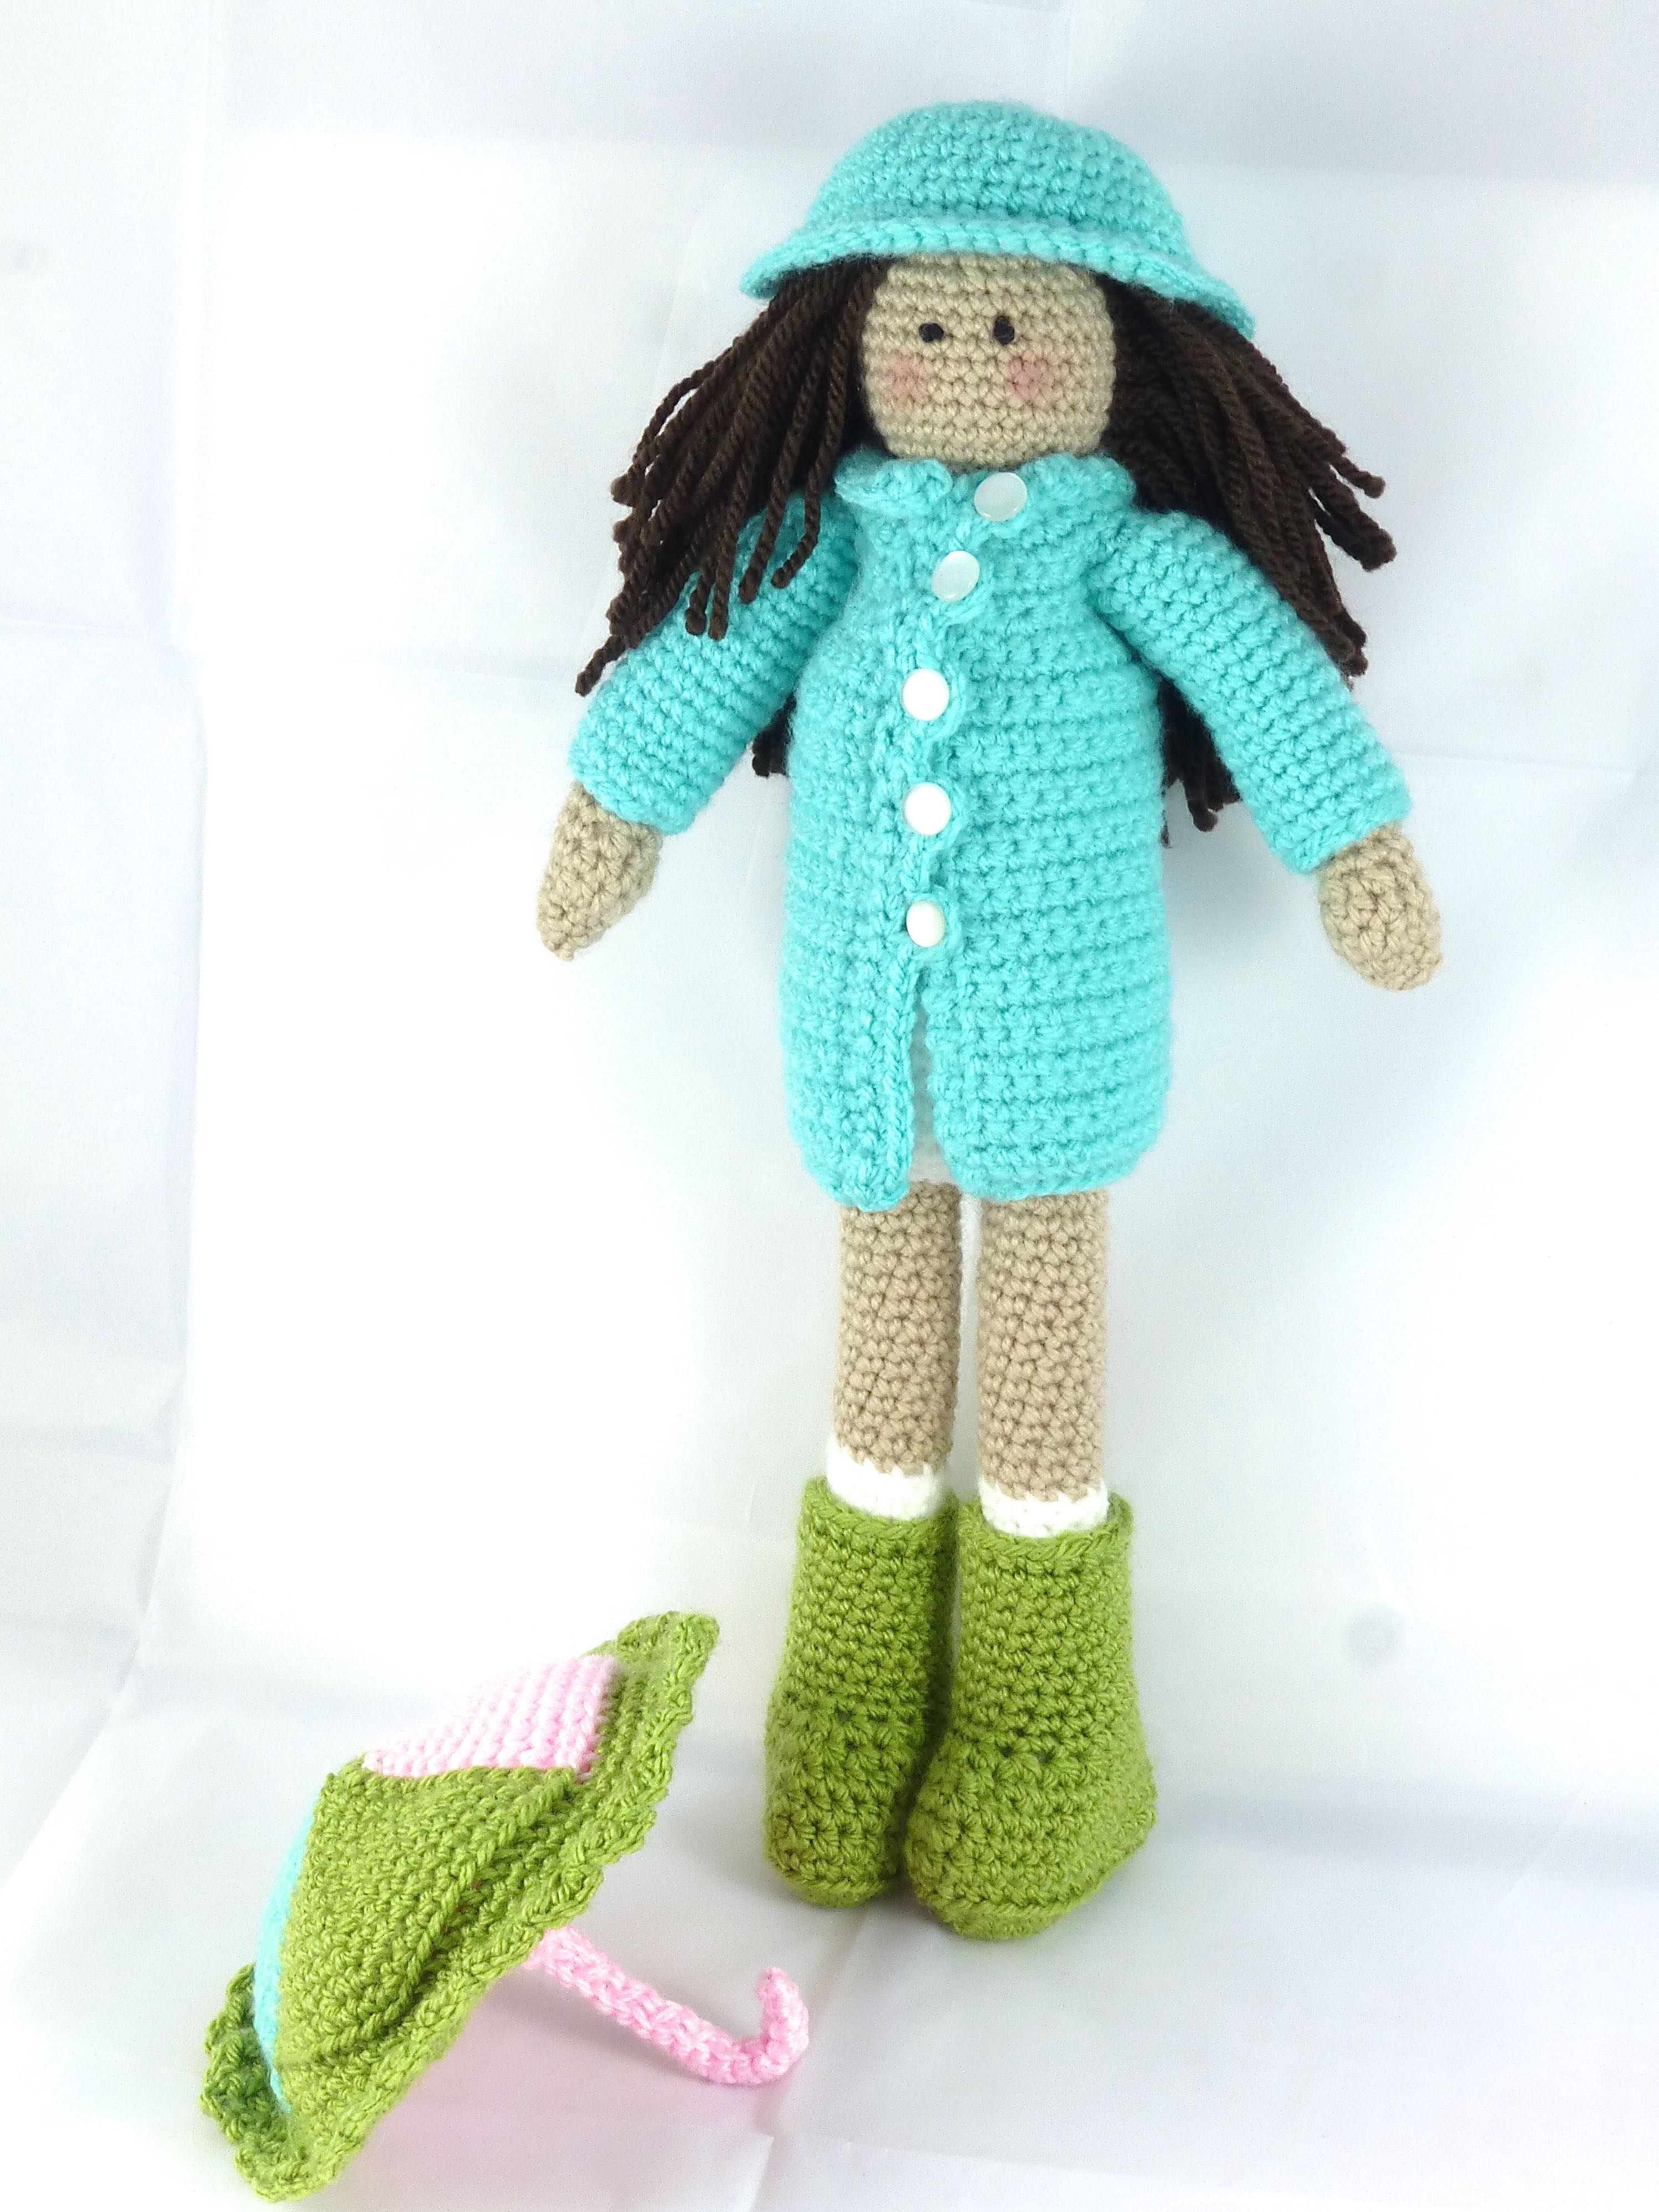
“Bella Ann” is an outdoorsy type who loves to get dressed up in a macintosh with matching hat.
She even has wellies and her own umbrella!
So here’s my “Bella Ann” – TADAH!
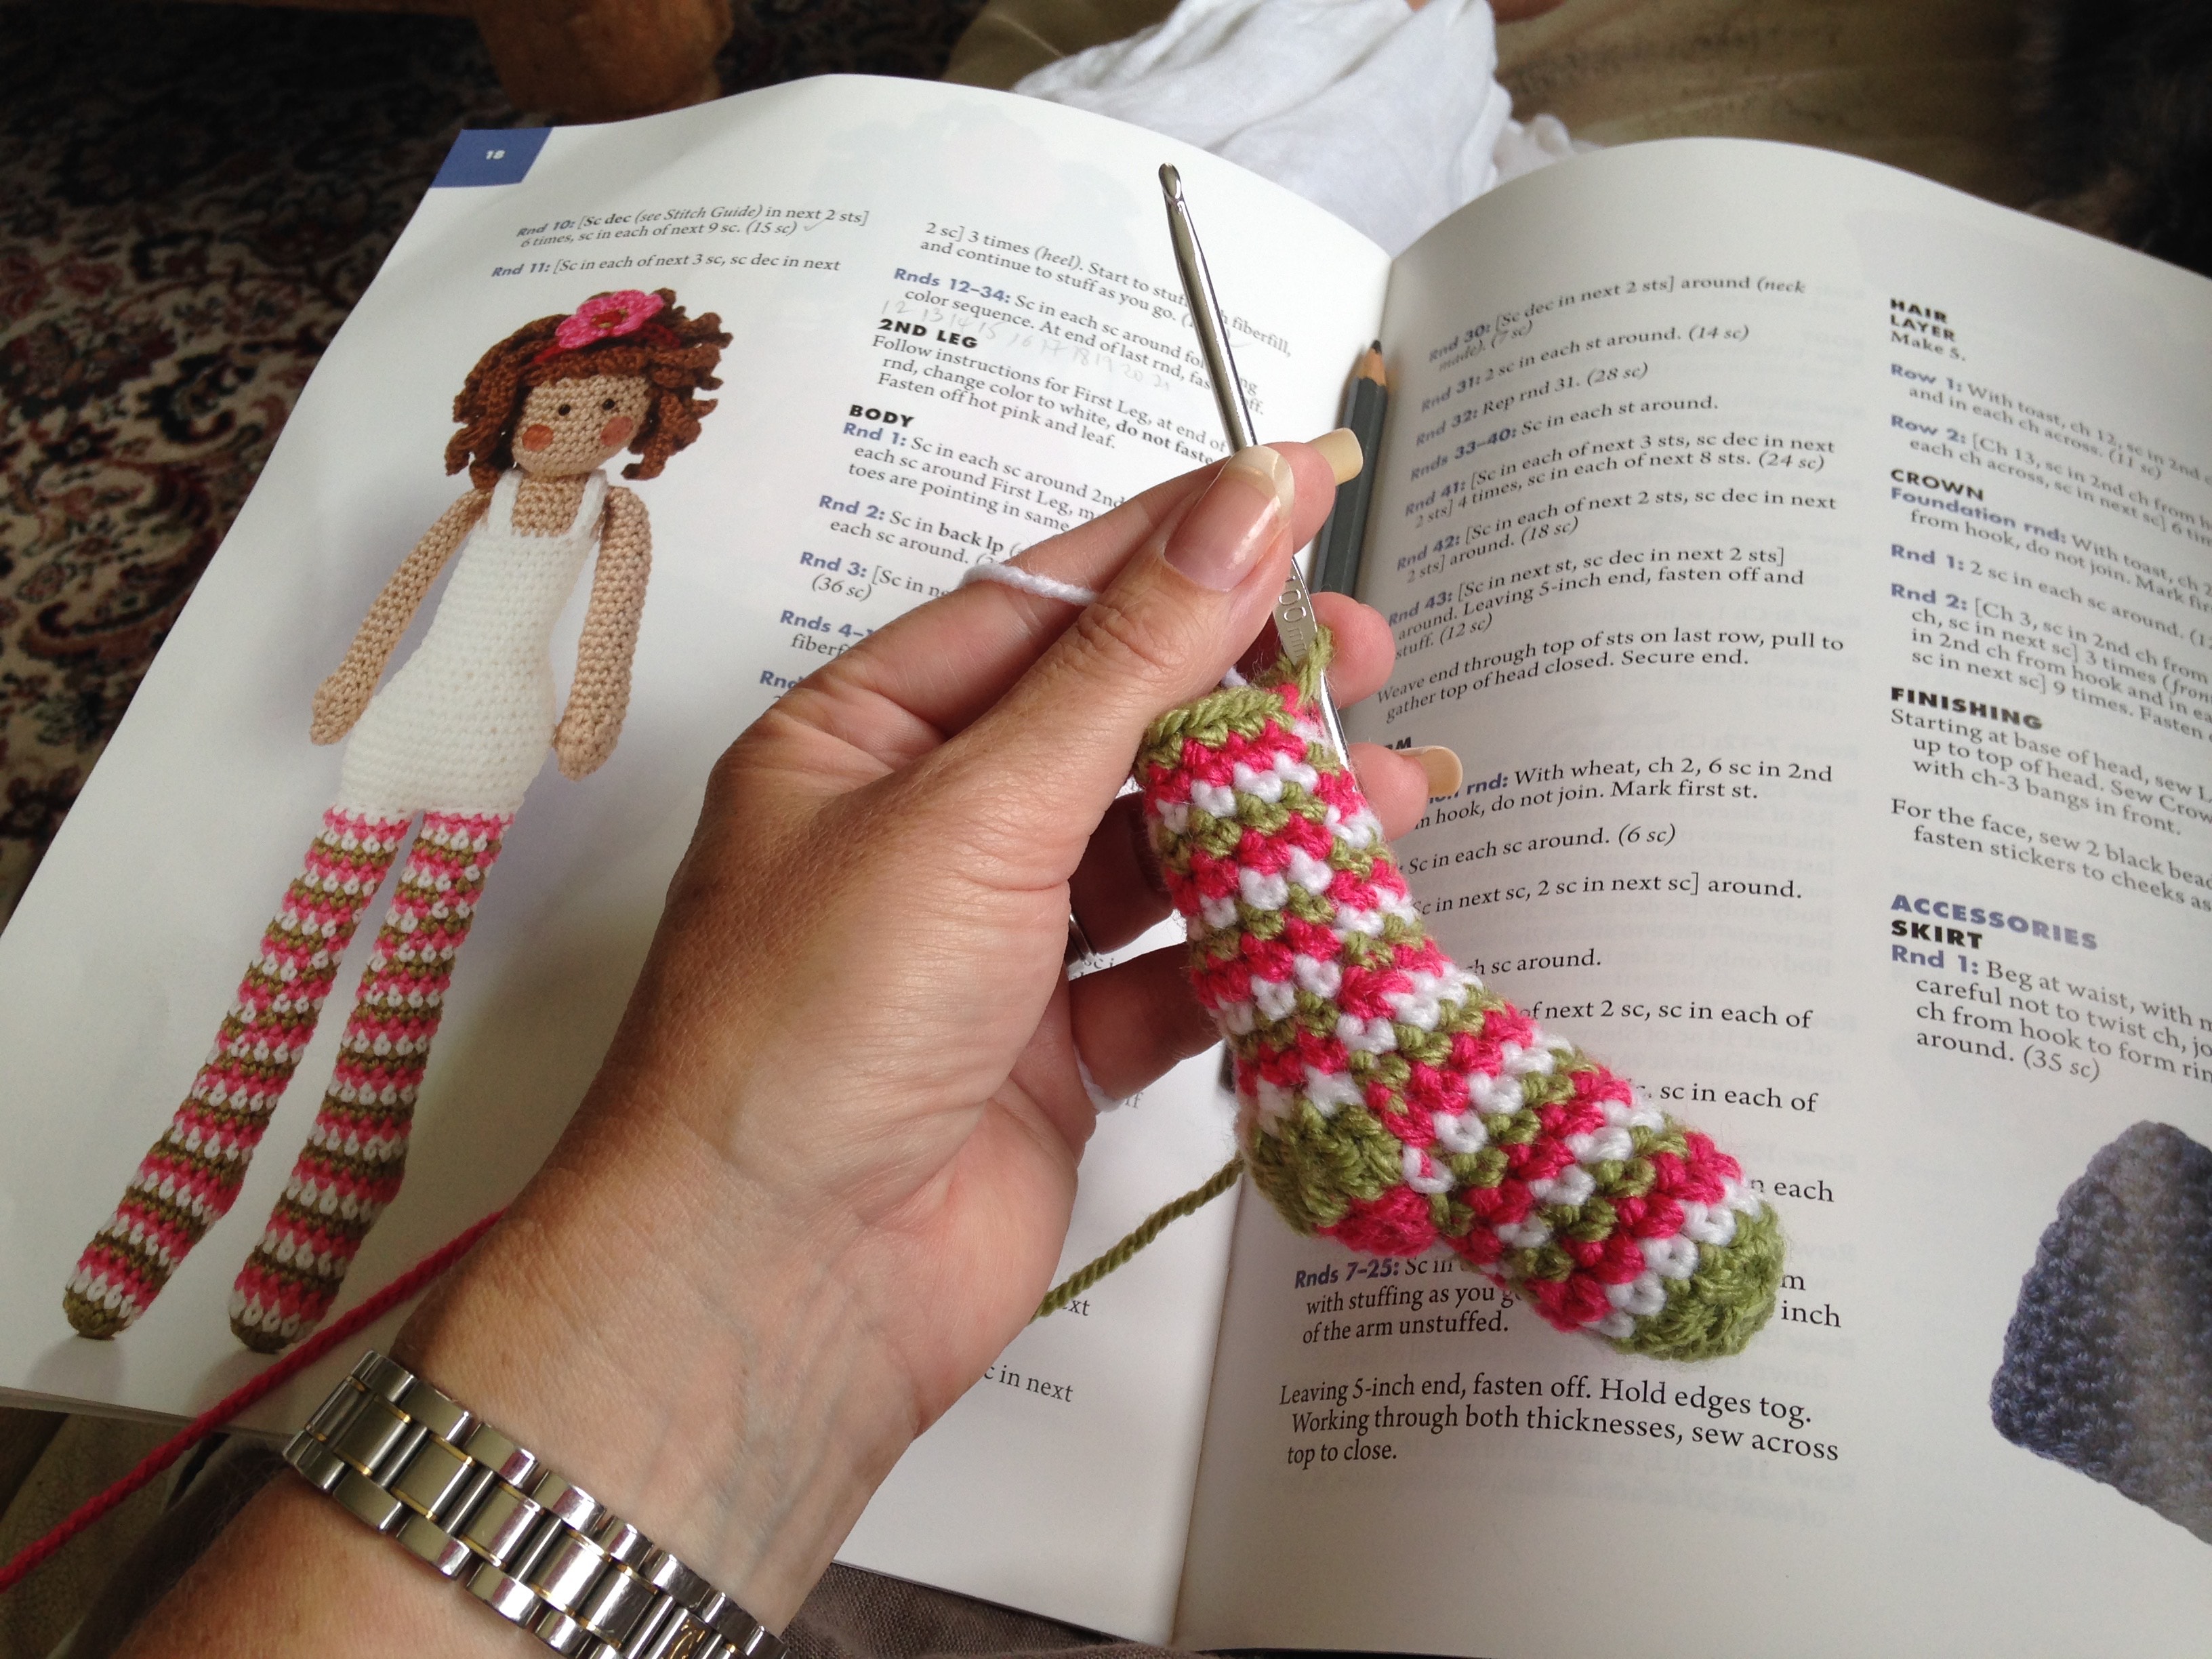
Next up was “Ginger Blue”, a college girl wearing trendy tights and a denim mini-skirt.
Remember I said you could chuck them in your handbag and crochet almost anywhere? This is Ginger’s skirt in process whilst sat in the car in a field for five hours while The Boys played in a football tournament on the way to Cornwall…..
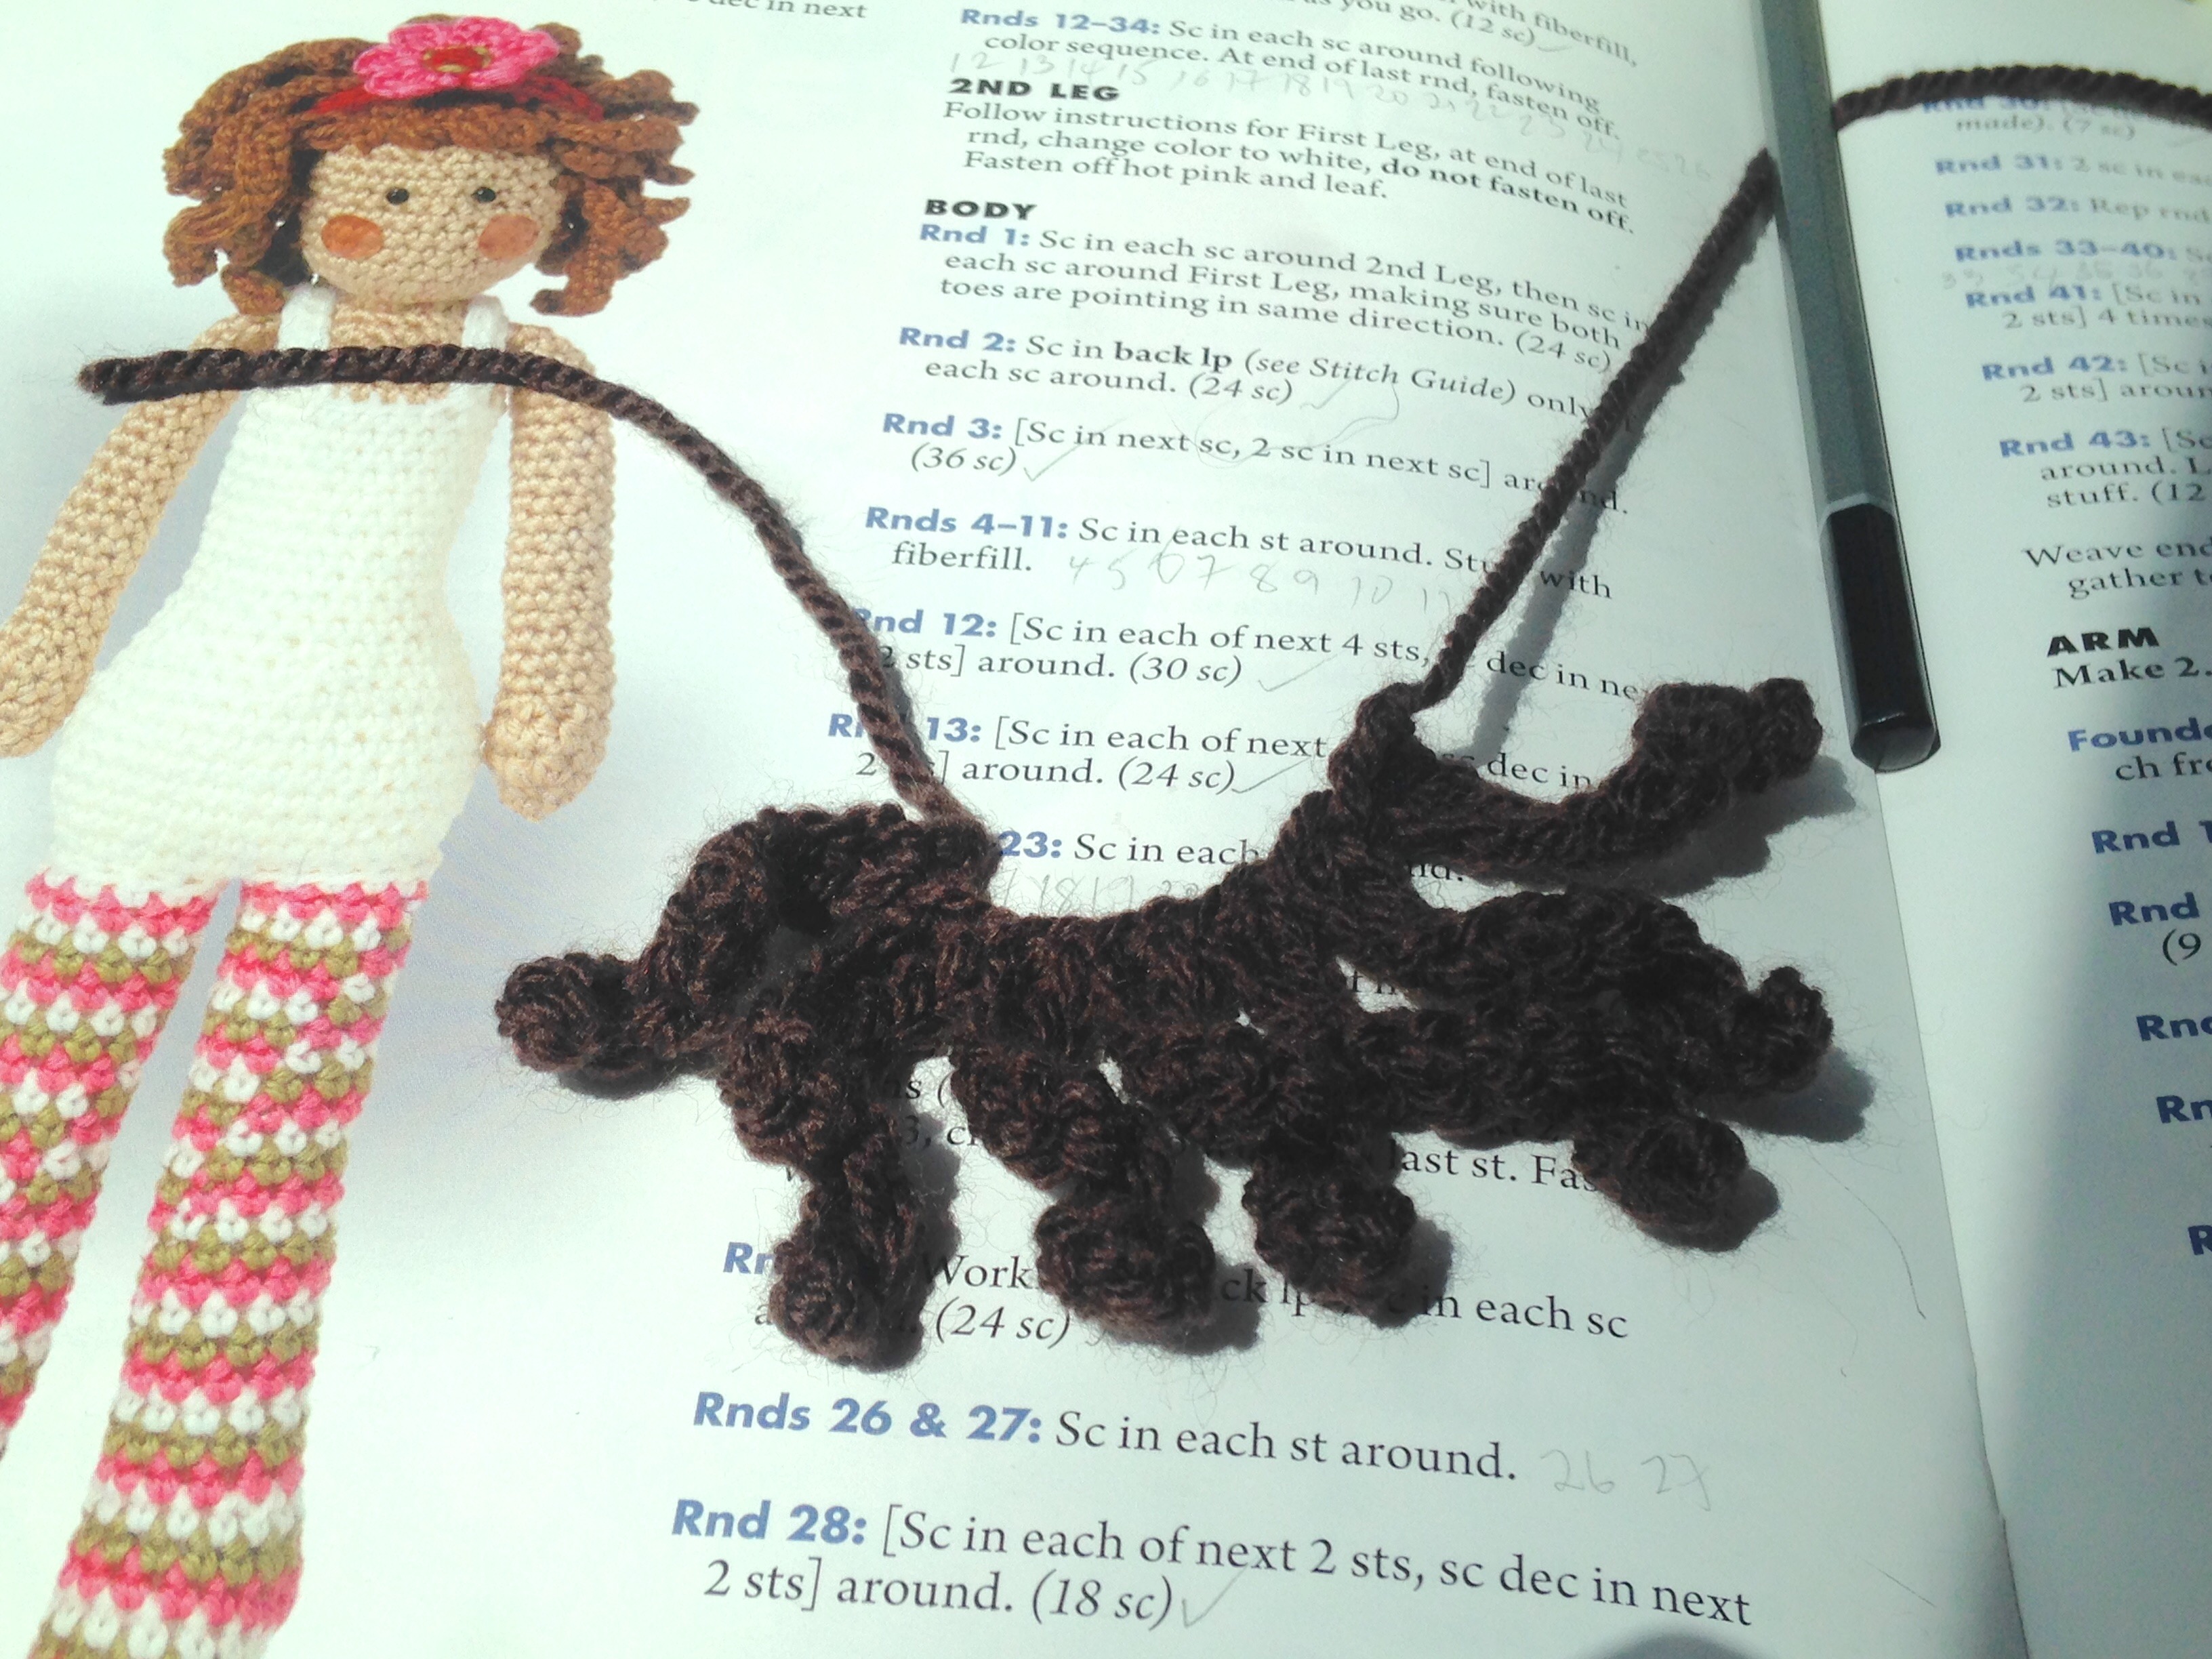
My favourite part of the whole process was definitely making the hair. Each doll had a different method which were all very imaginative and extremely effective.
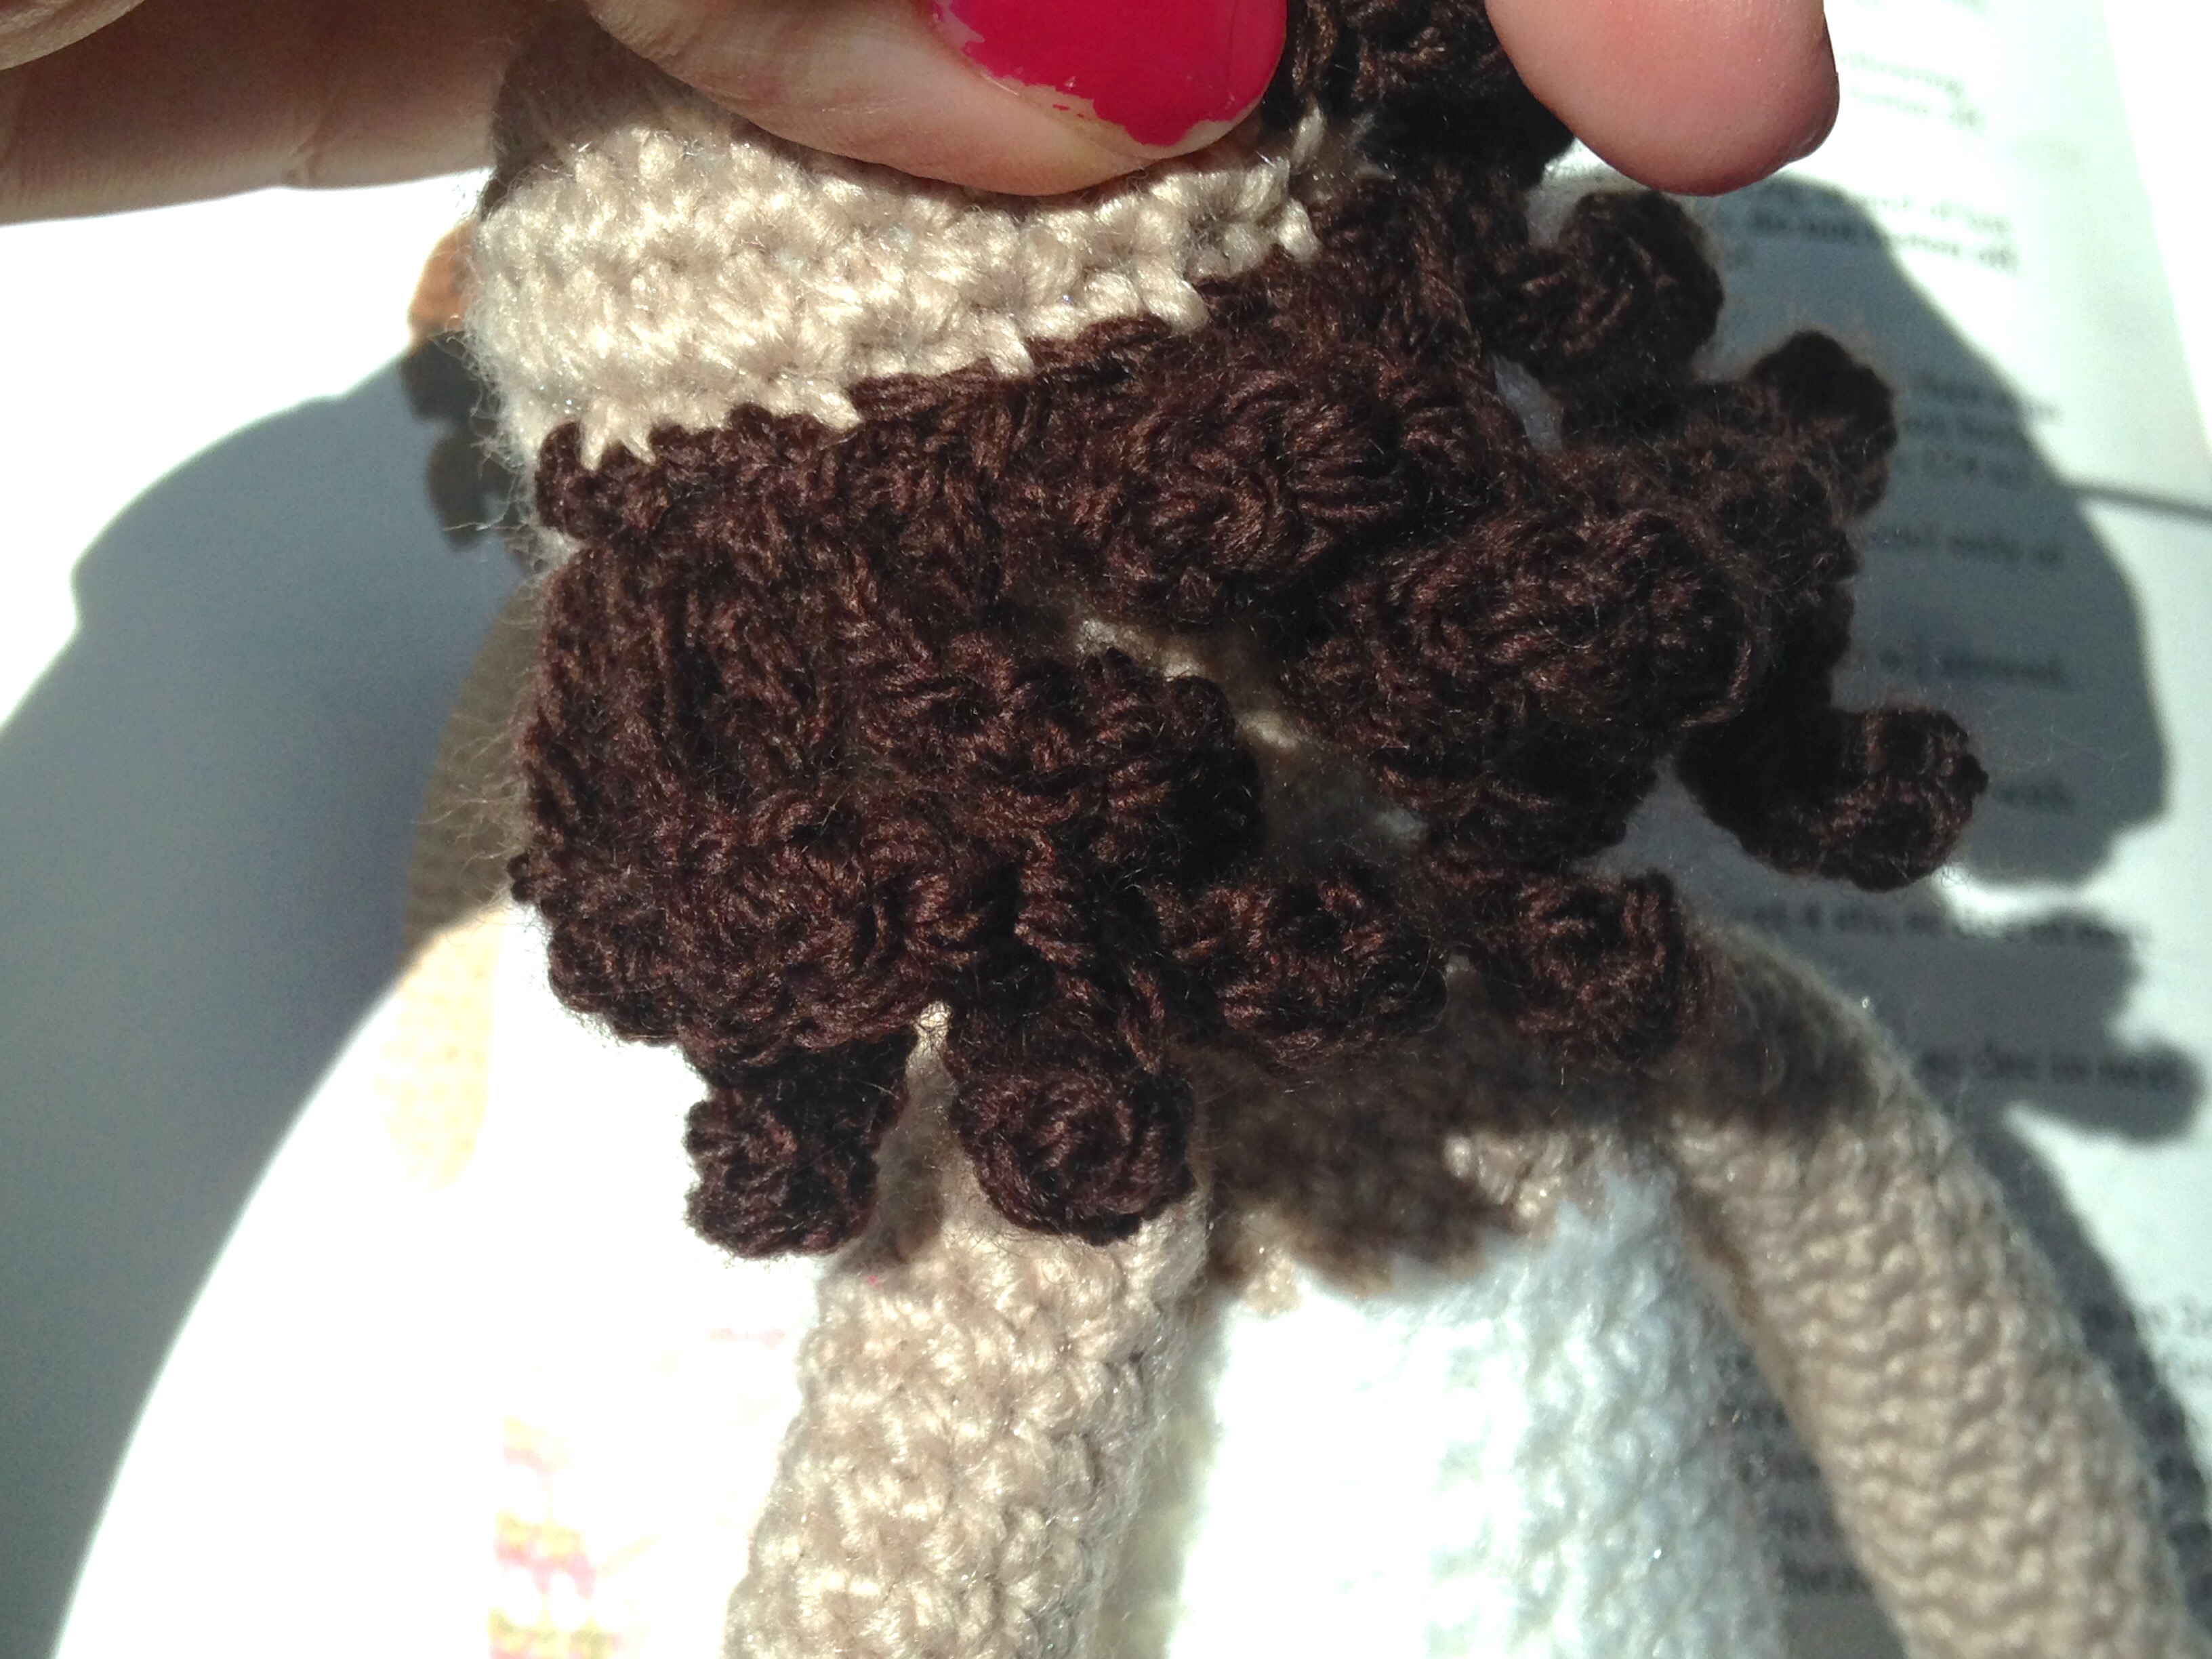
Ginger’s seemed to be based on an Afro and was worked in five curly layers plus a crown.
The finished layers were sewn horizontally upwards from the base of the head.
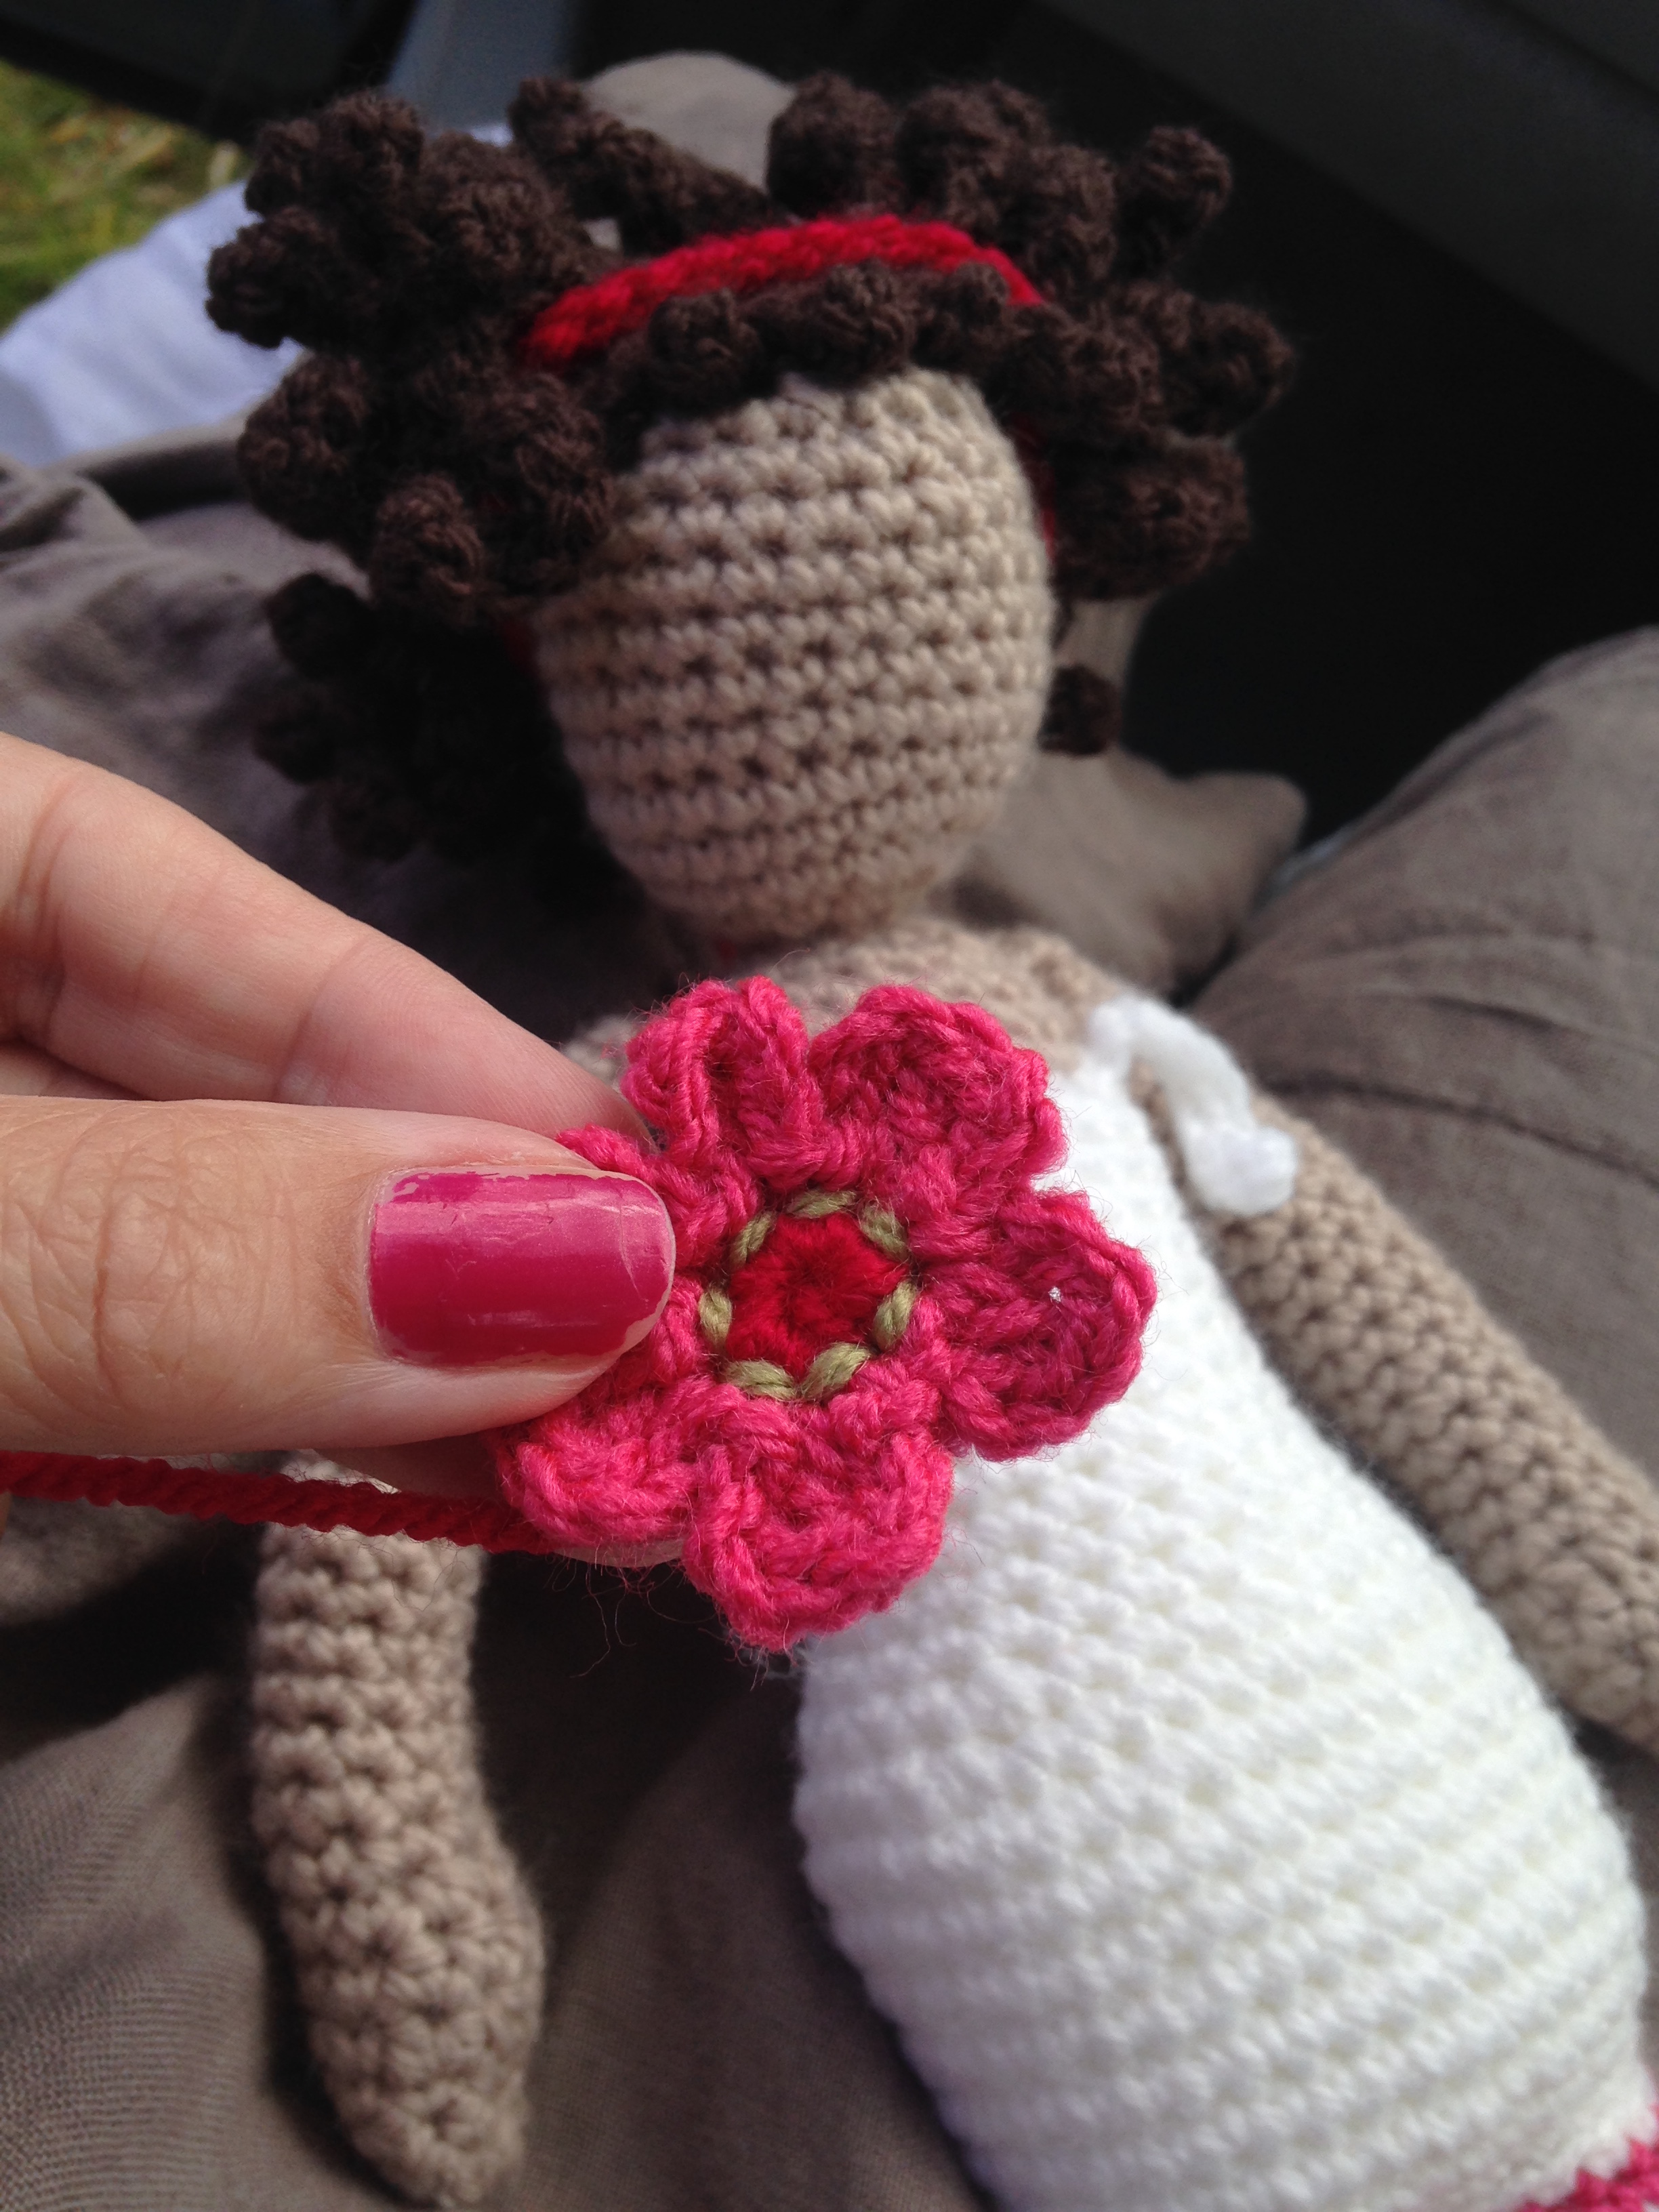
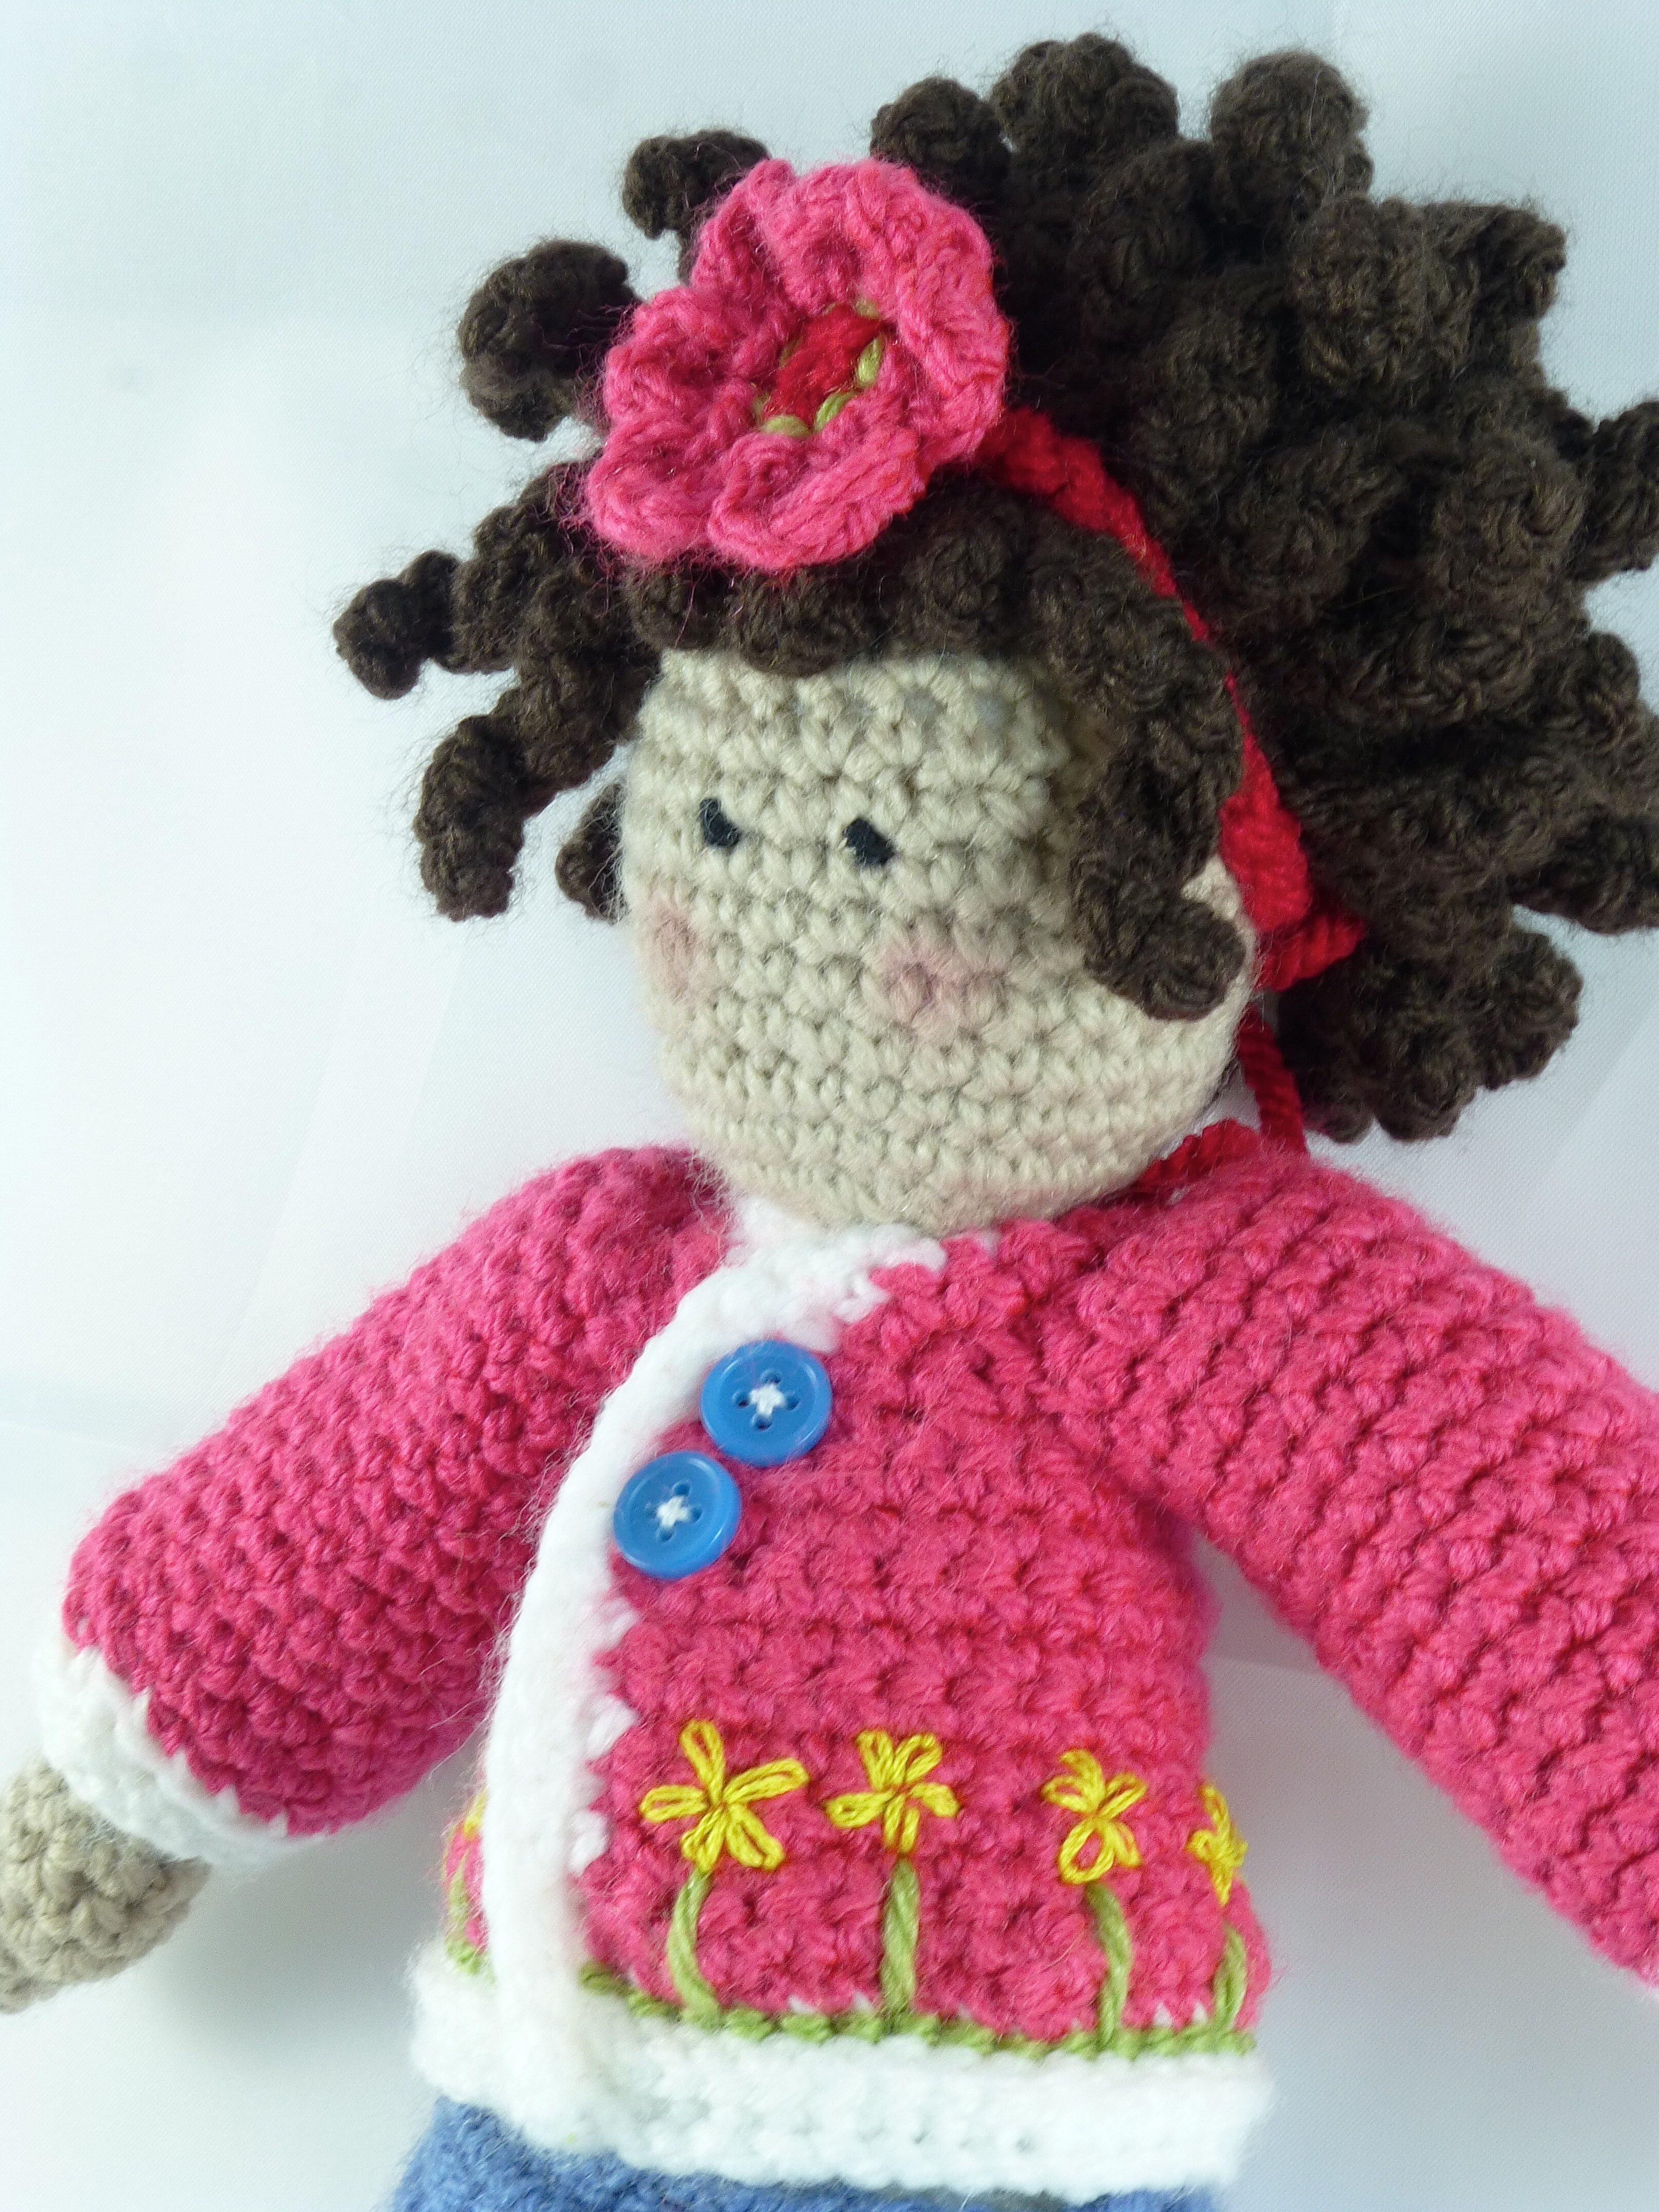
The whole was topped off with a cute little flower headband.
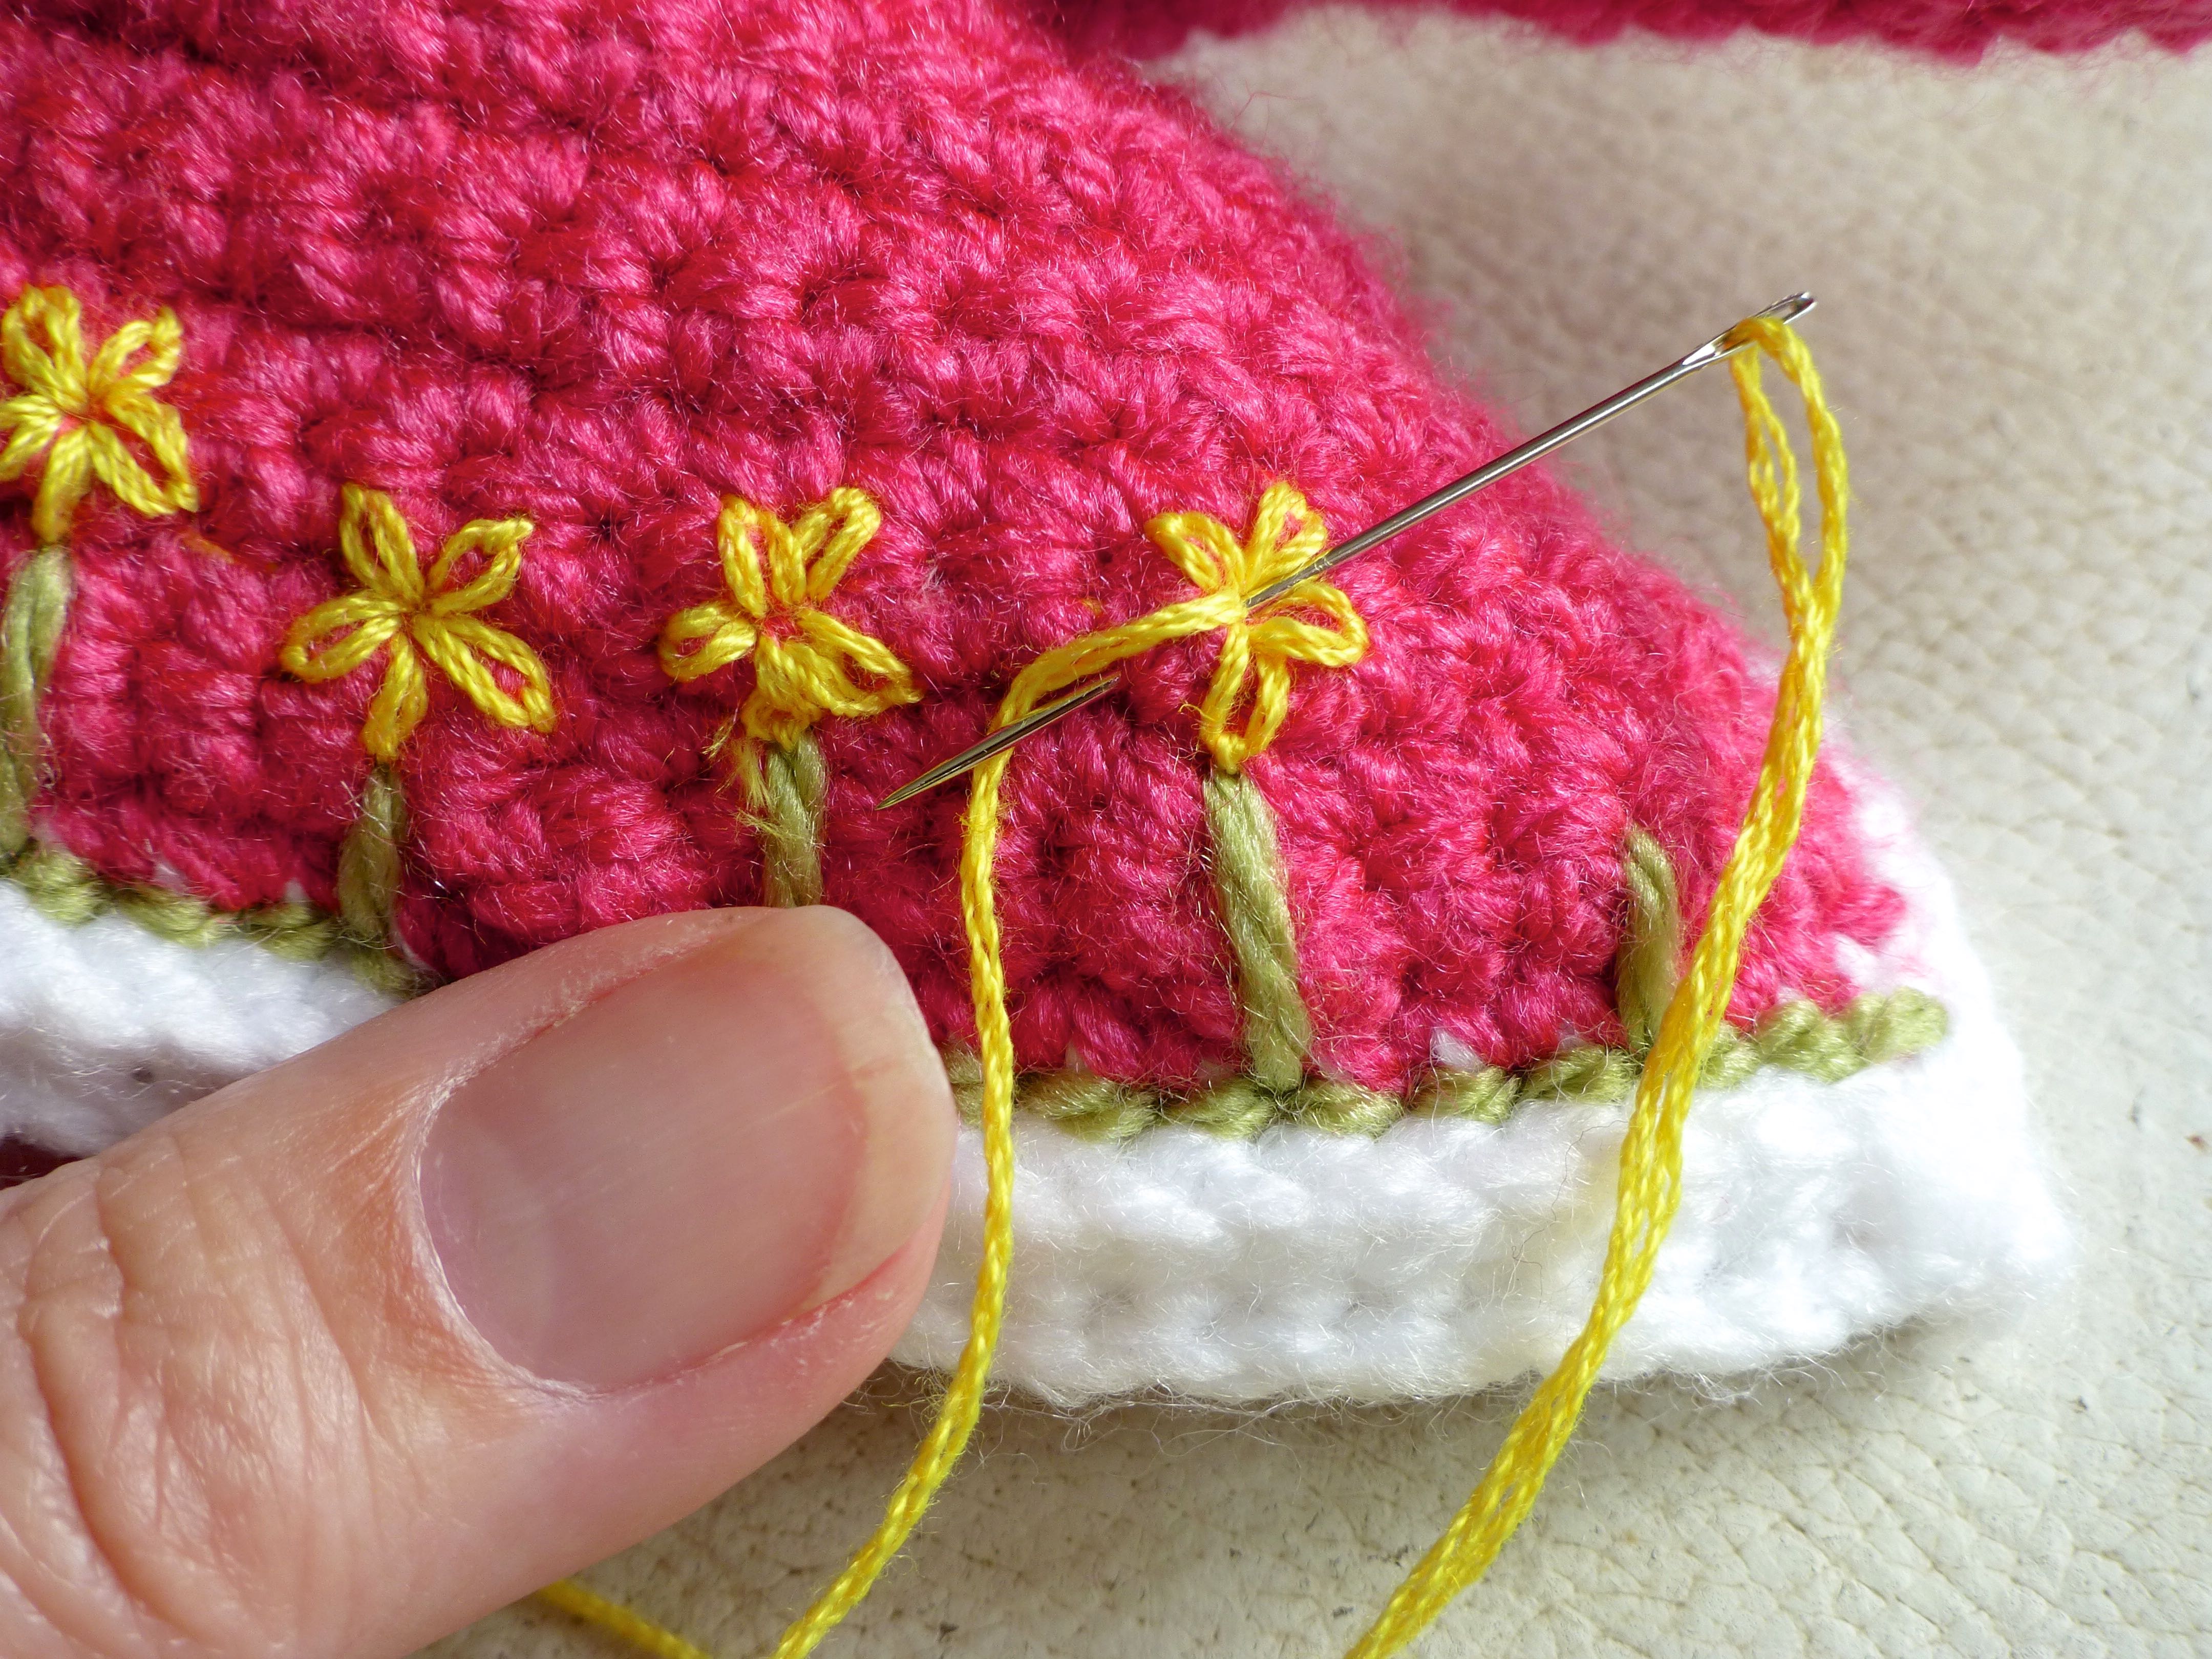
The cardigan pattern called for tiny buttons to be used for the flower heads, but I embroidered a series of chain stitches instead to form a Lazy Daisy.
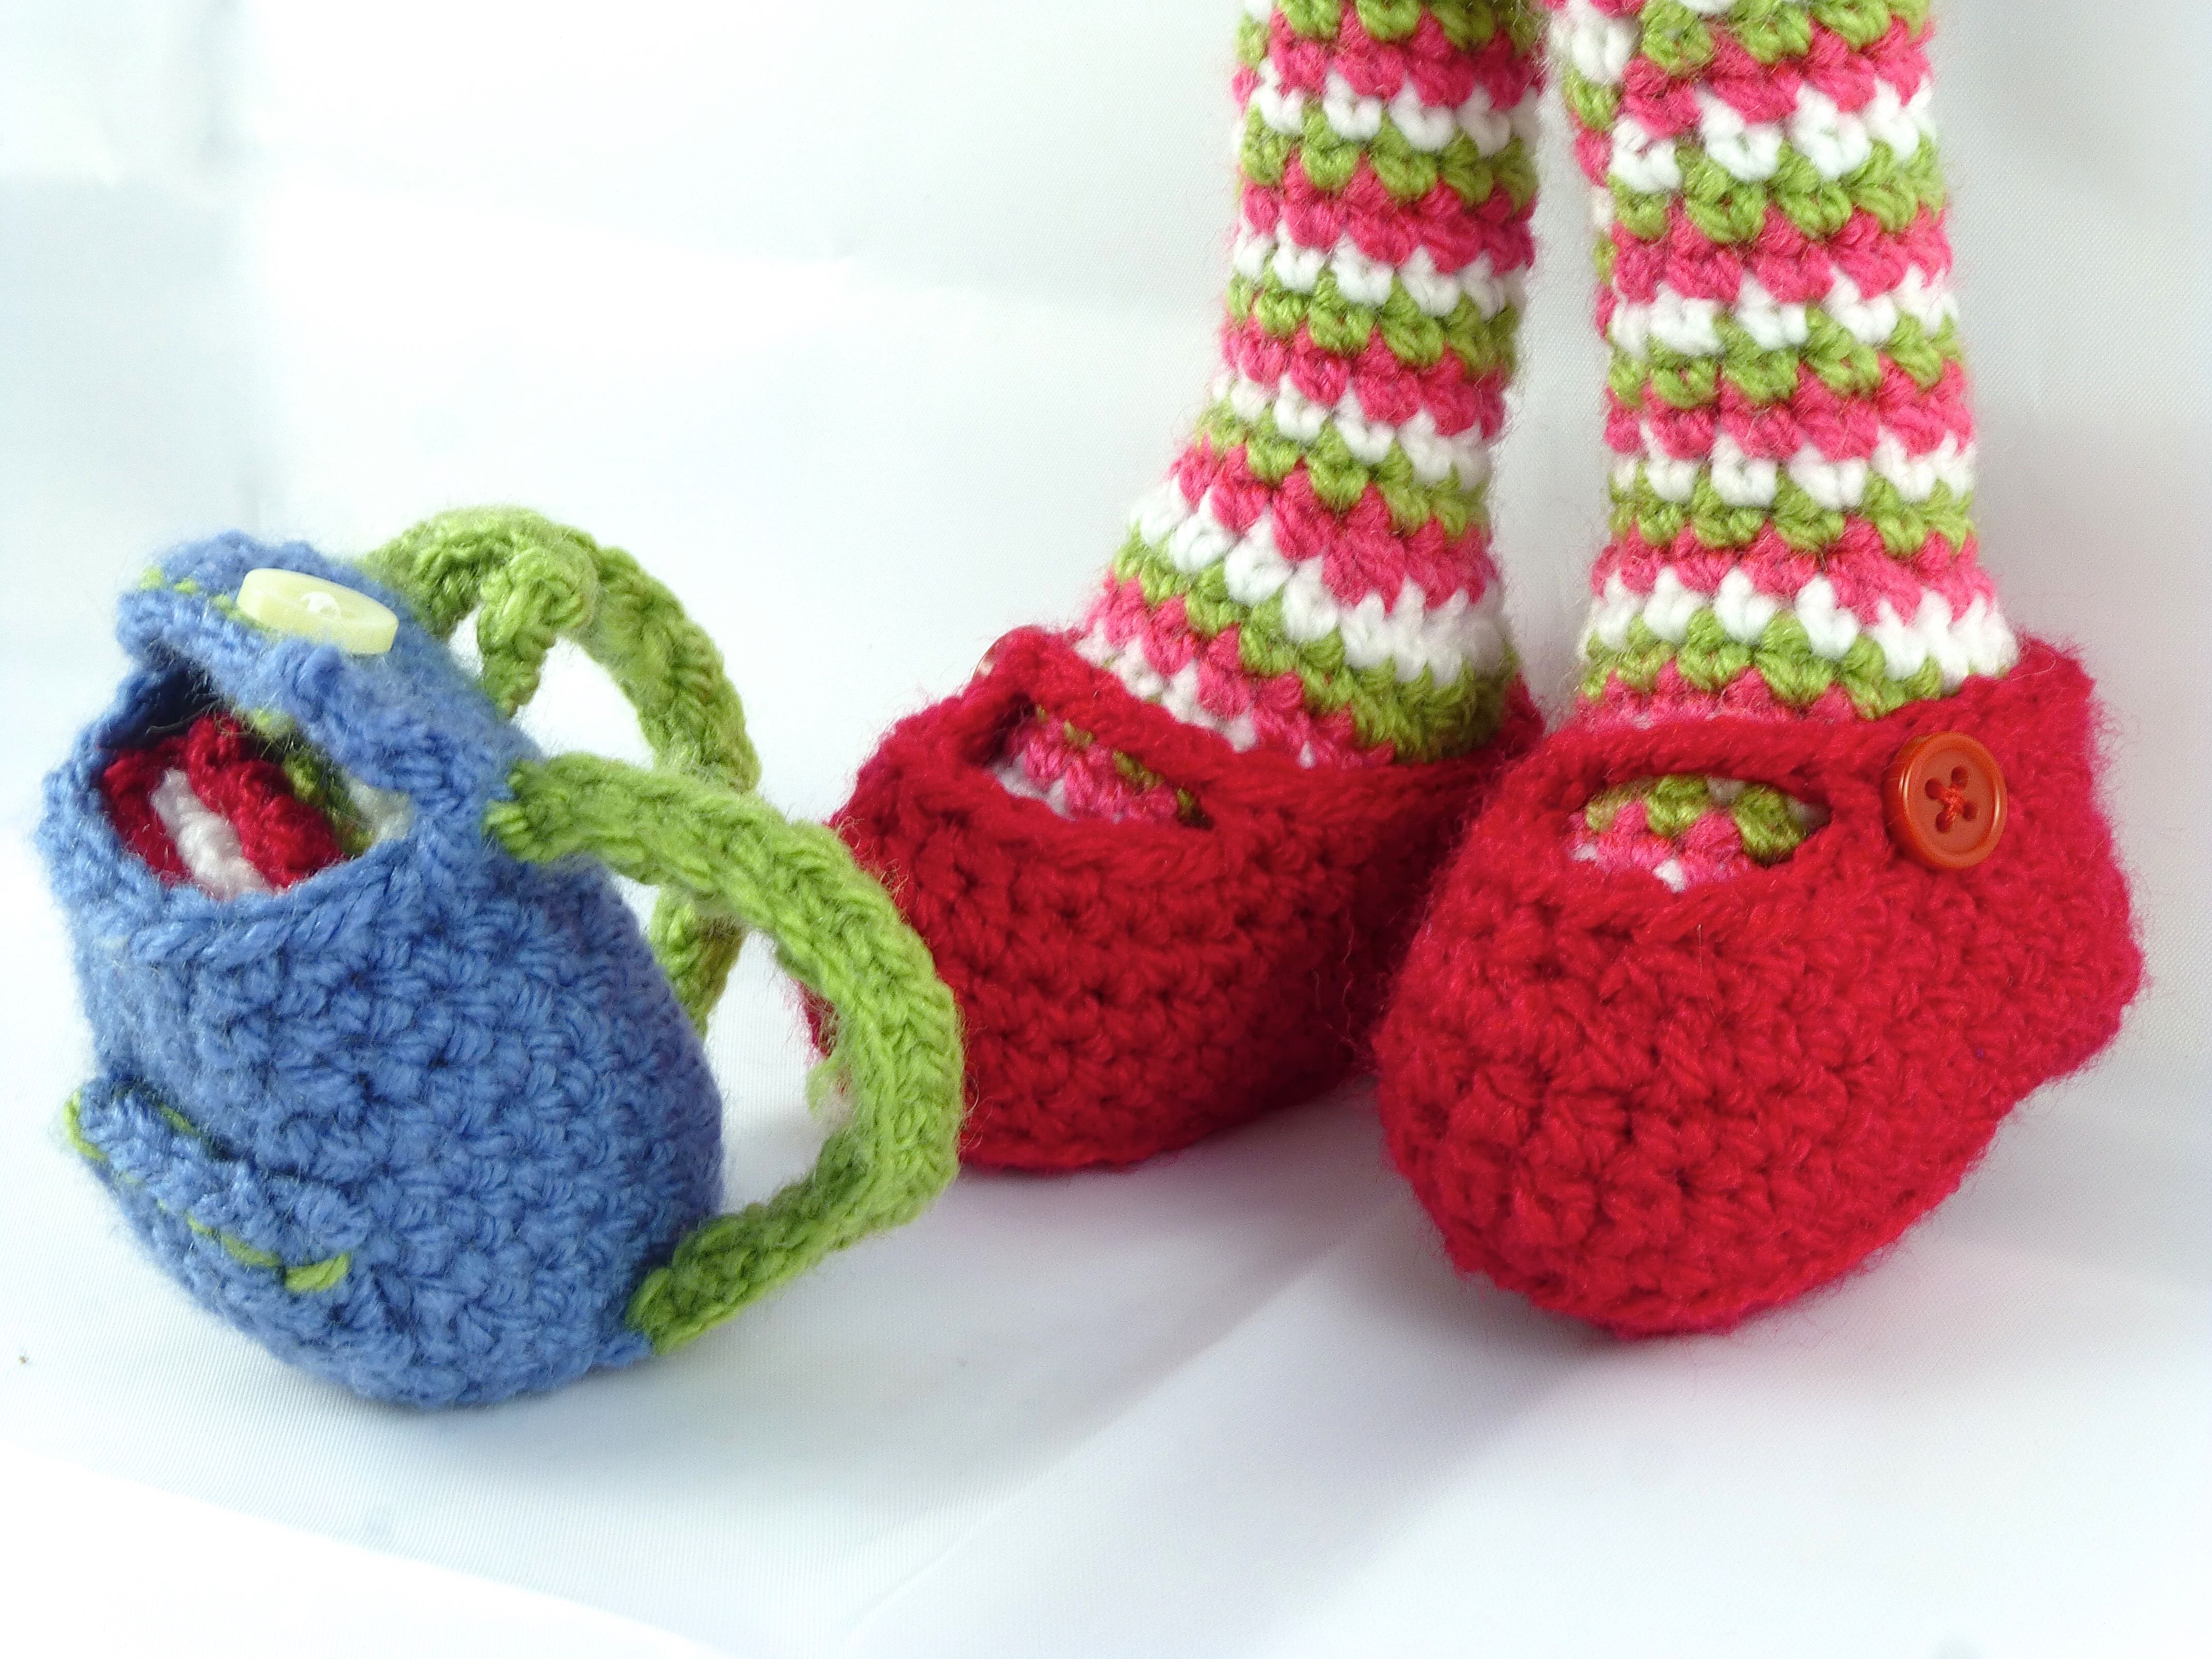
Two tiny blue shirt buttons reclaimed from the Child’s Play Tent are a brightly coloured addition.
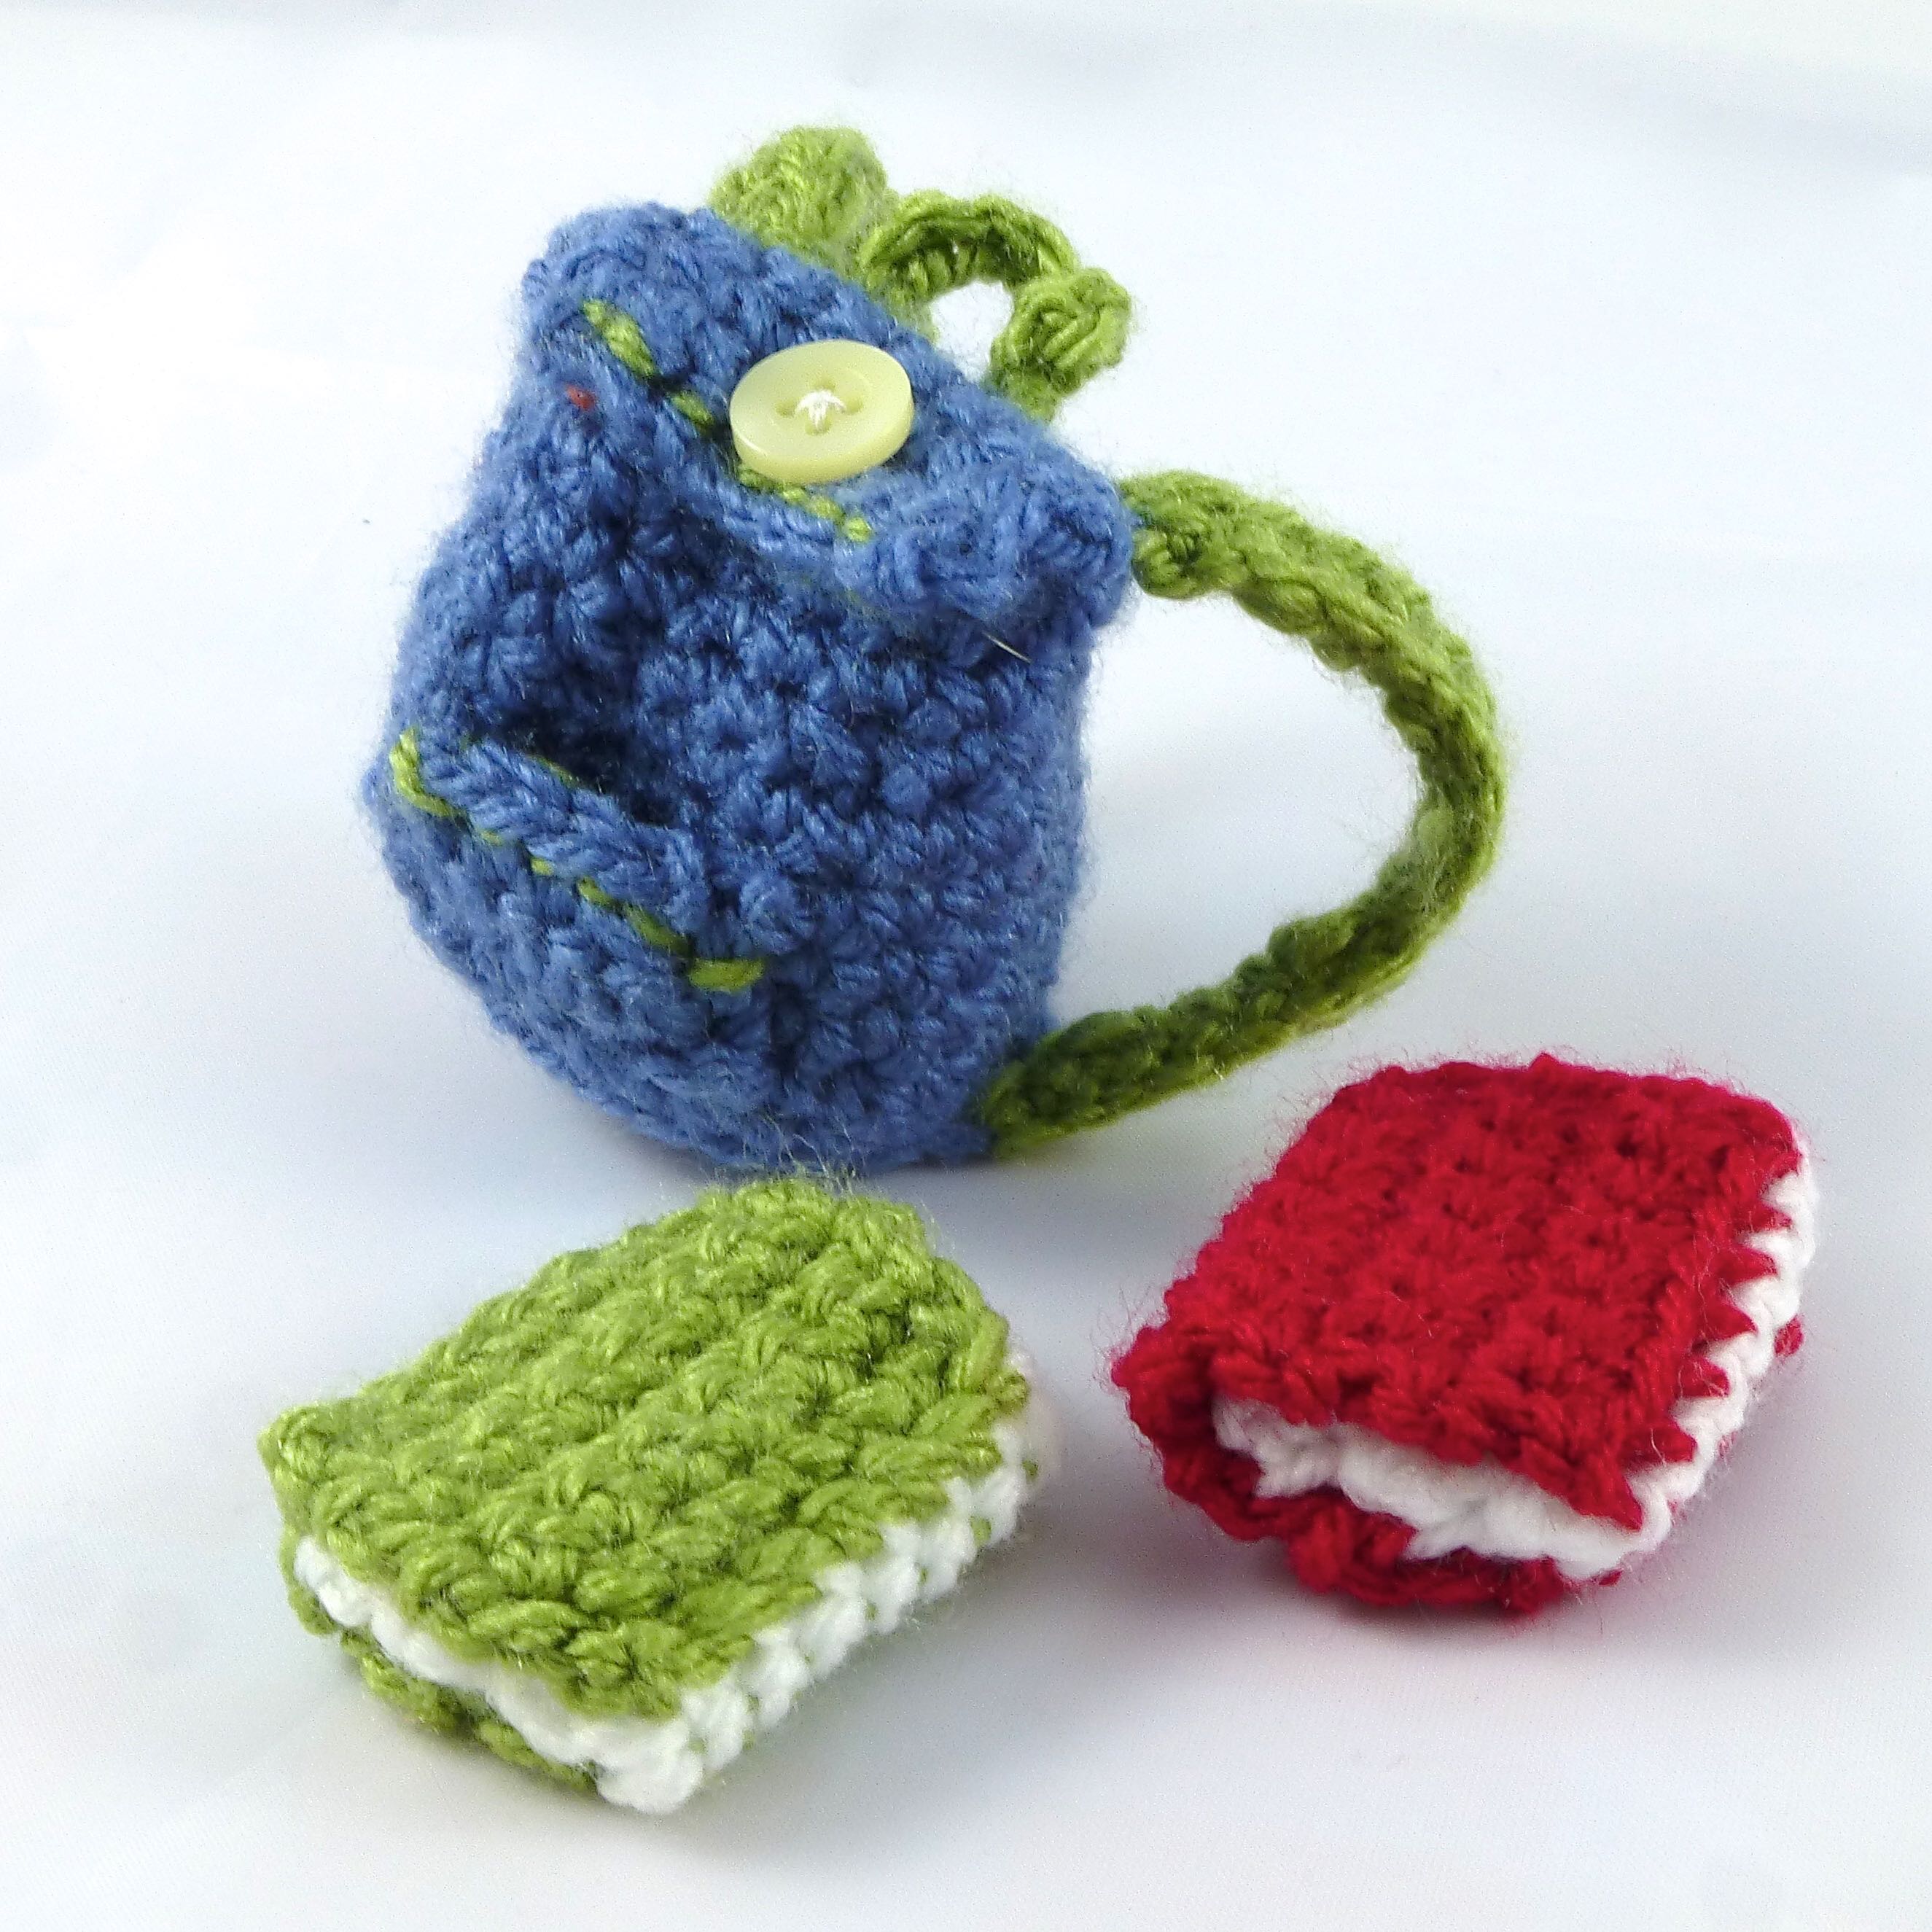
Being a college girl, the obligatory accompanying rucksack even has tiny crocheted textbooks that fit inside!
Mary-Jane shoes are adorned with more reclaimed shirt buttons, this time in Cherry Red.
And now for the “Ginger Blue” – TADAH!
And so, on to “Dani Rae”, a sun-worshipper who loves nothing more than a day at the seaside and whose outfit of choice is a one-piece swimsuit.
Dani Rae’s hair was the most fun to make and was crocheted in wig format before being stitched on to the head in its entirety. I love the way the hair curls out at the ends – such great design detail.
Just look at those flip-flops and flippers!
Of course, every girl needs a sun hat to prevent sun stroke and, if it has a flower on it, so much the better.
A ‘rubber’ ring is the essential remaining accessory for fun in the waves.
Here is “Dani Rae” in all her finery ready for her “TADAH!” moment.
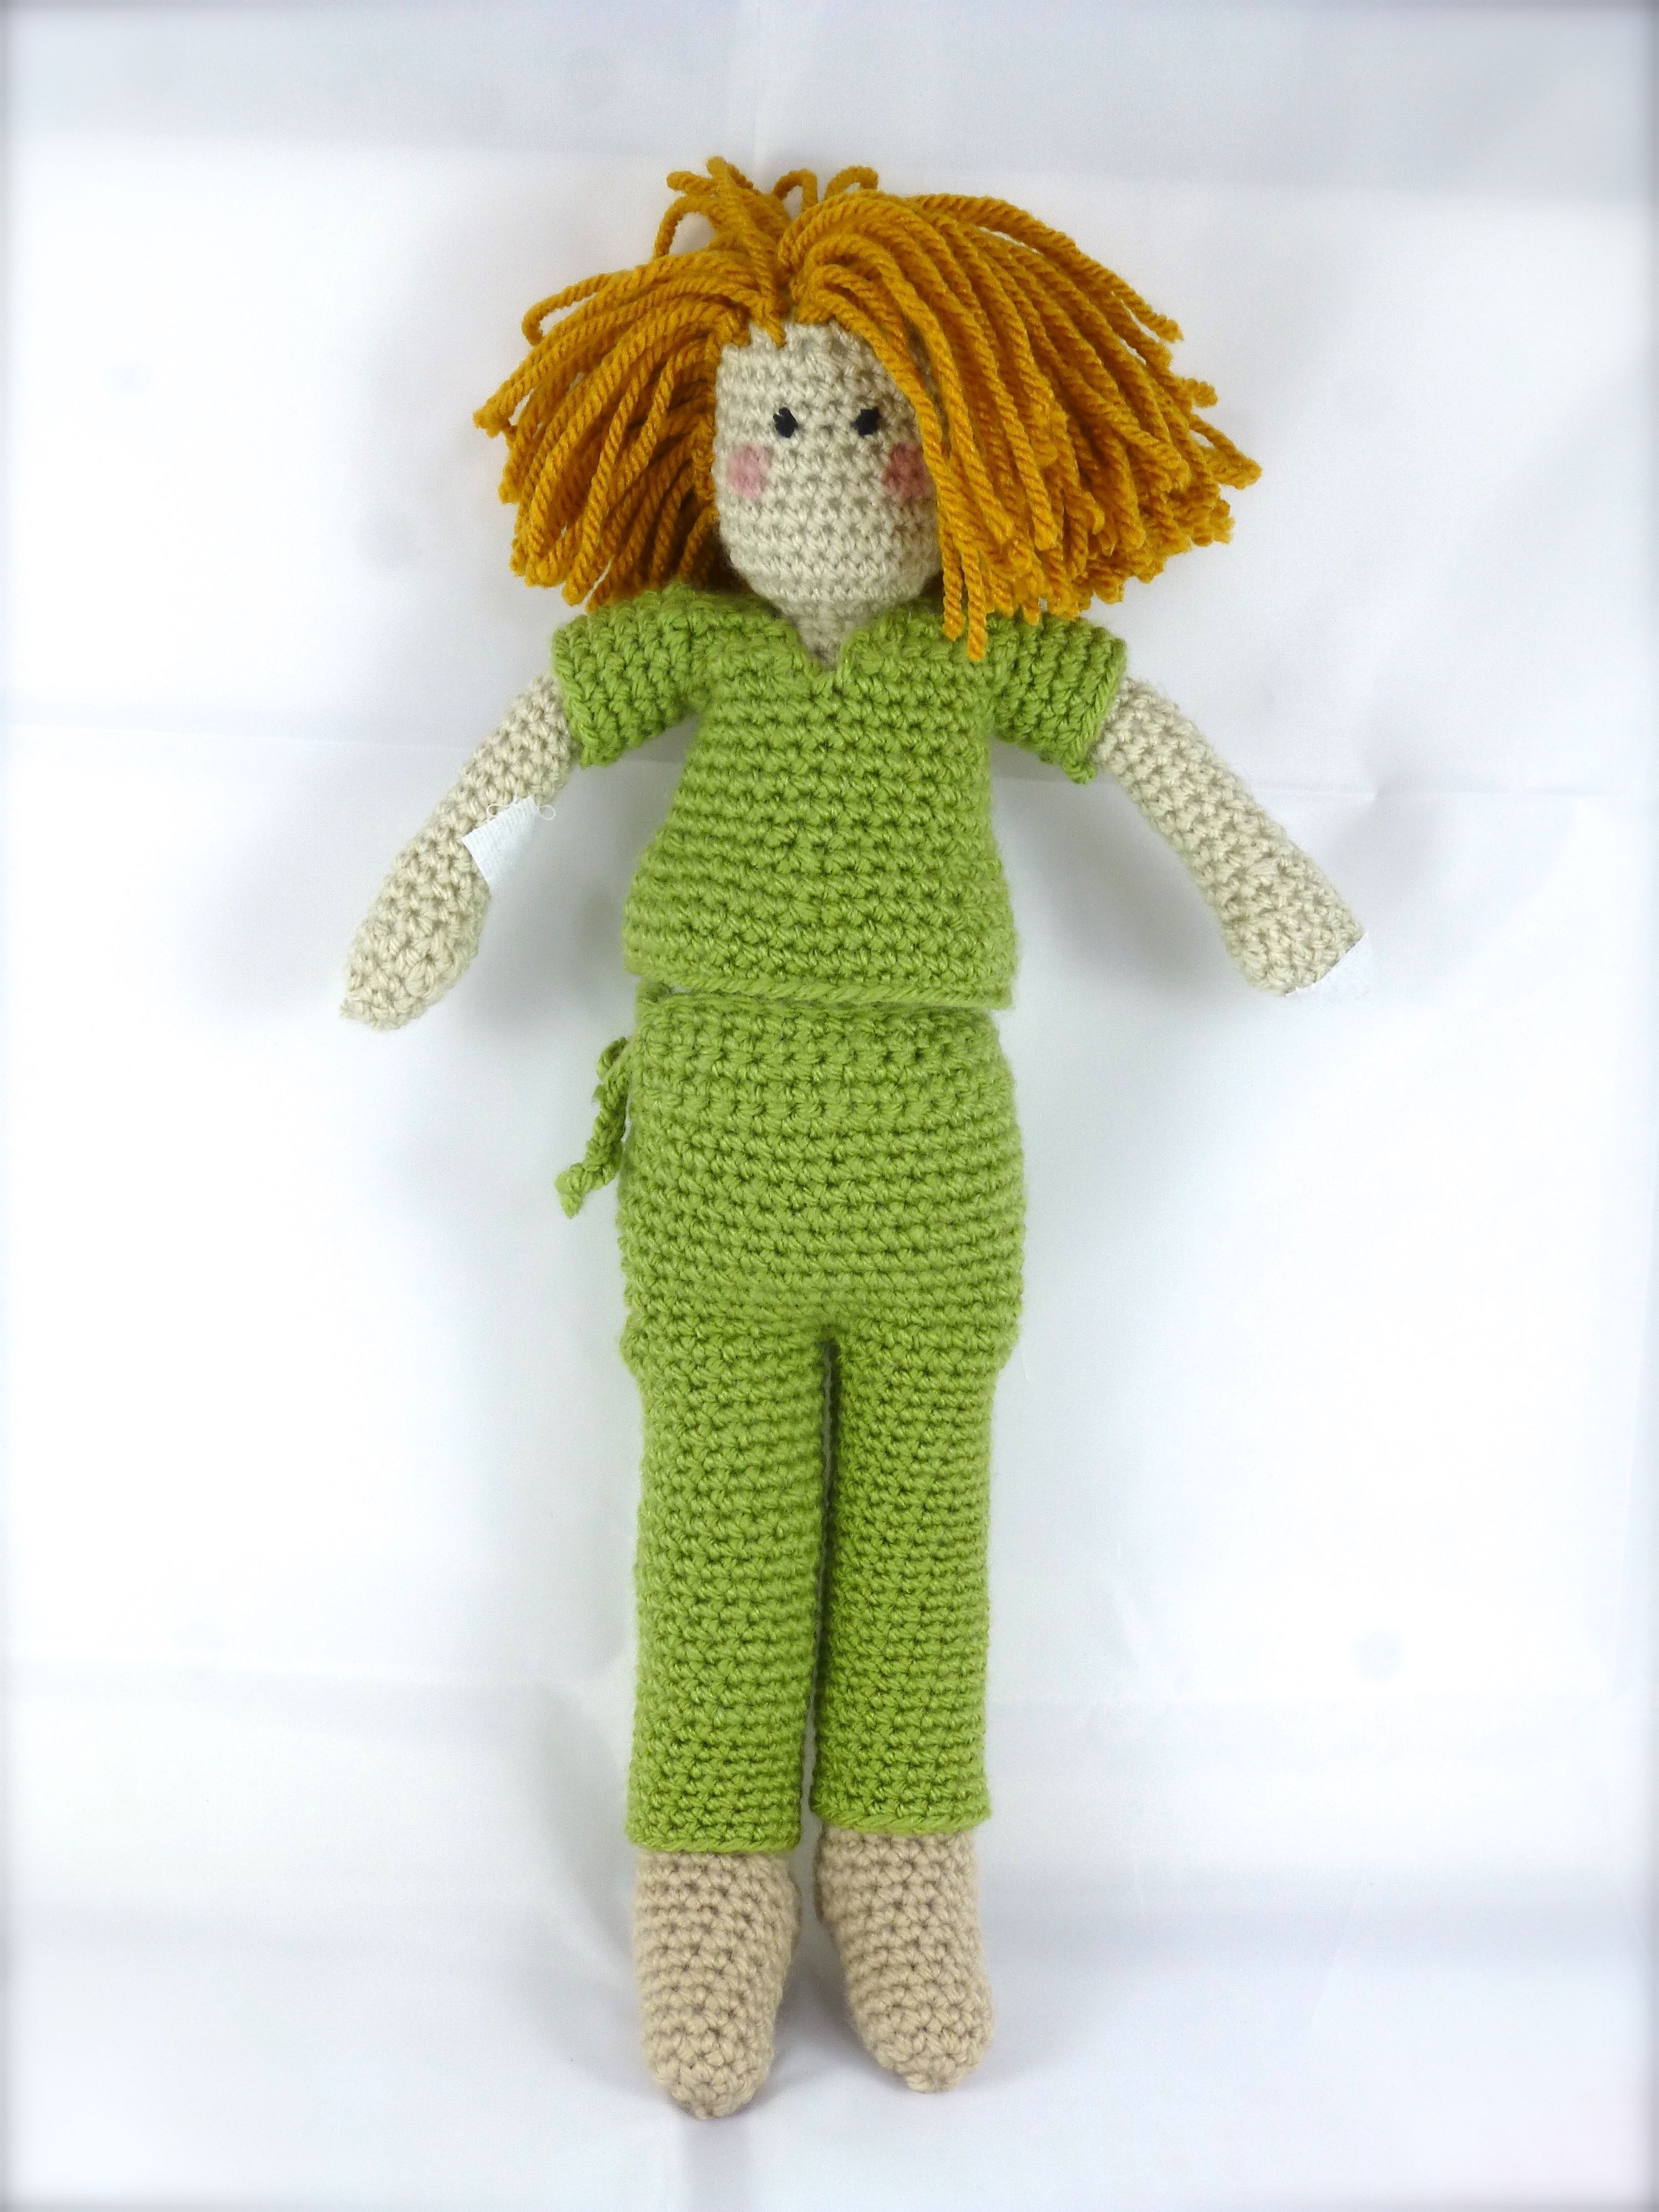
Finally, we move on to “Nurse Deb”, a midwife of the highest distinction, dressed in theatre scrubs.
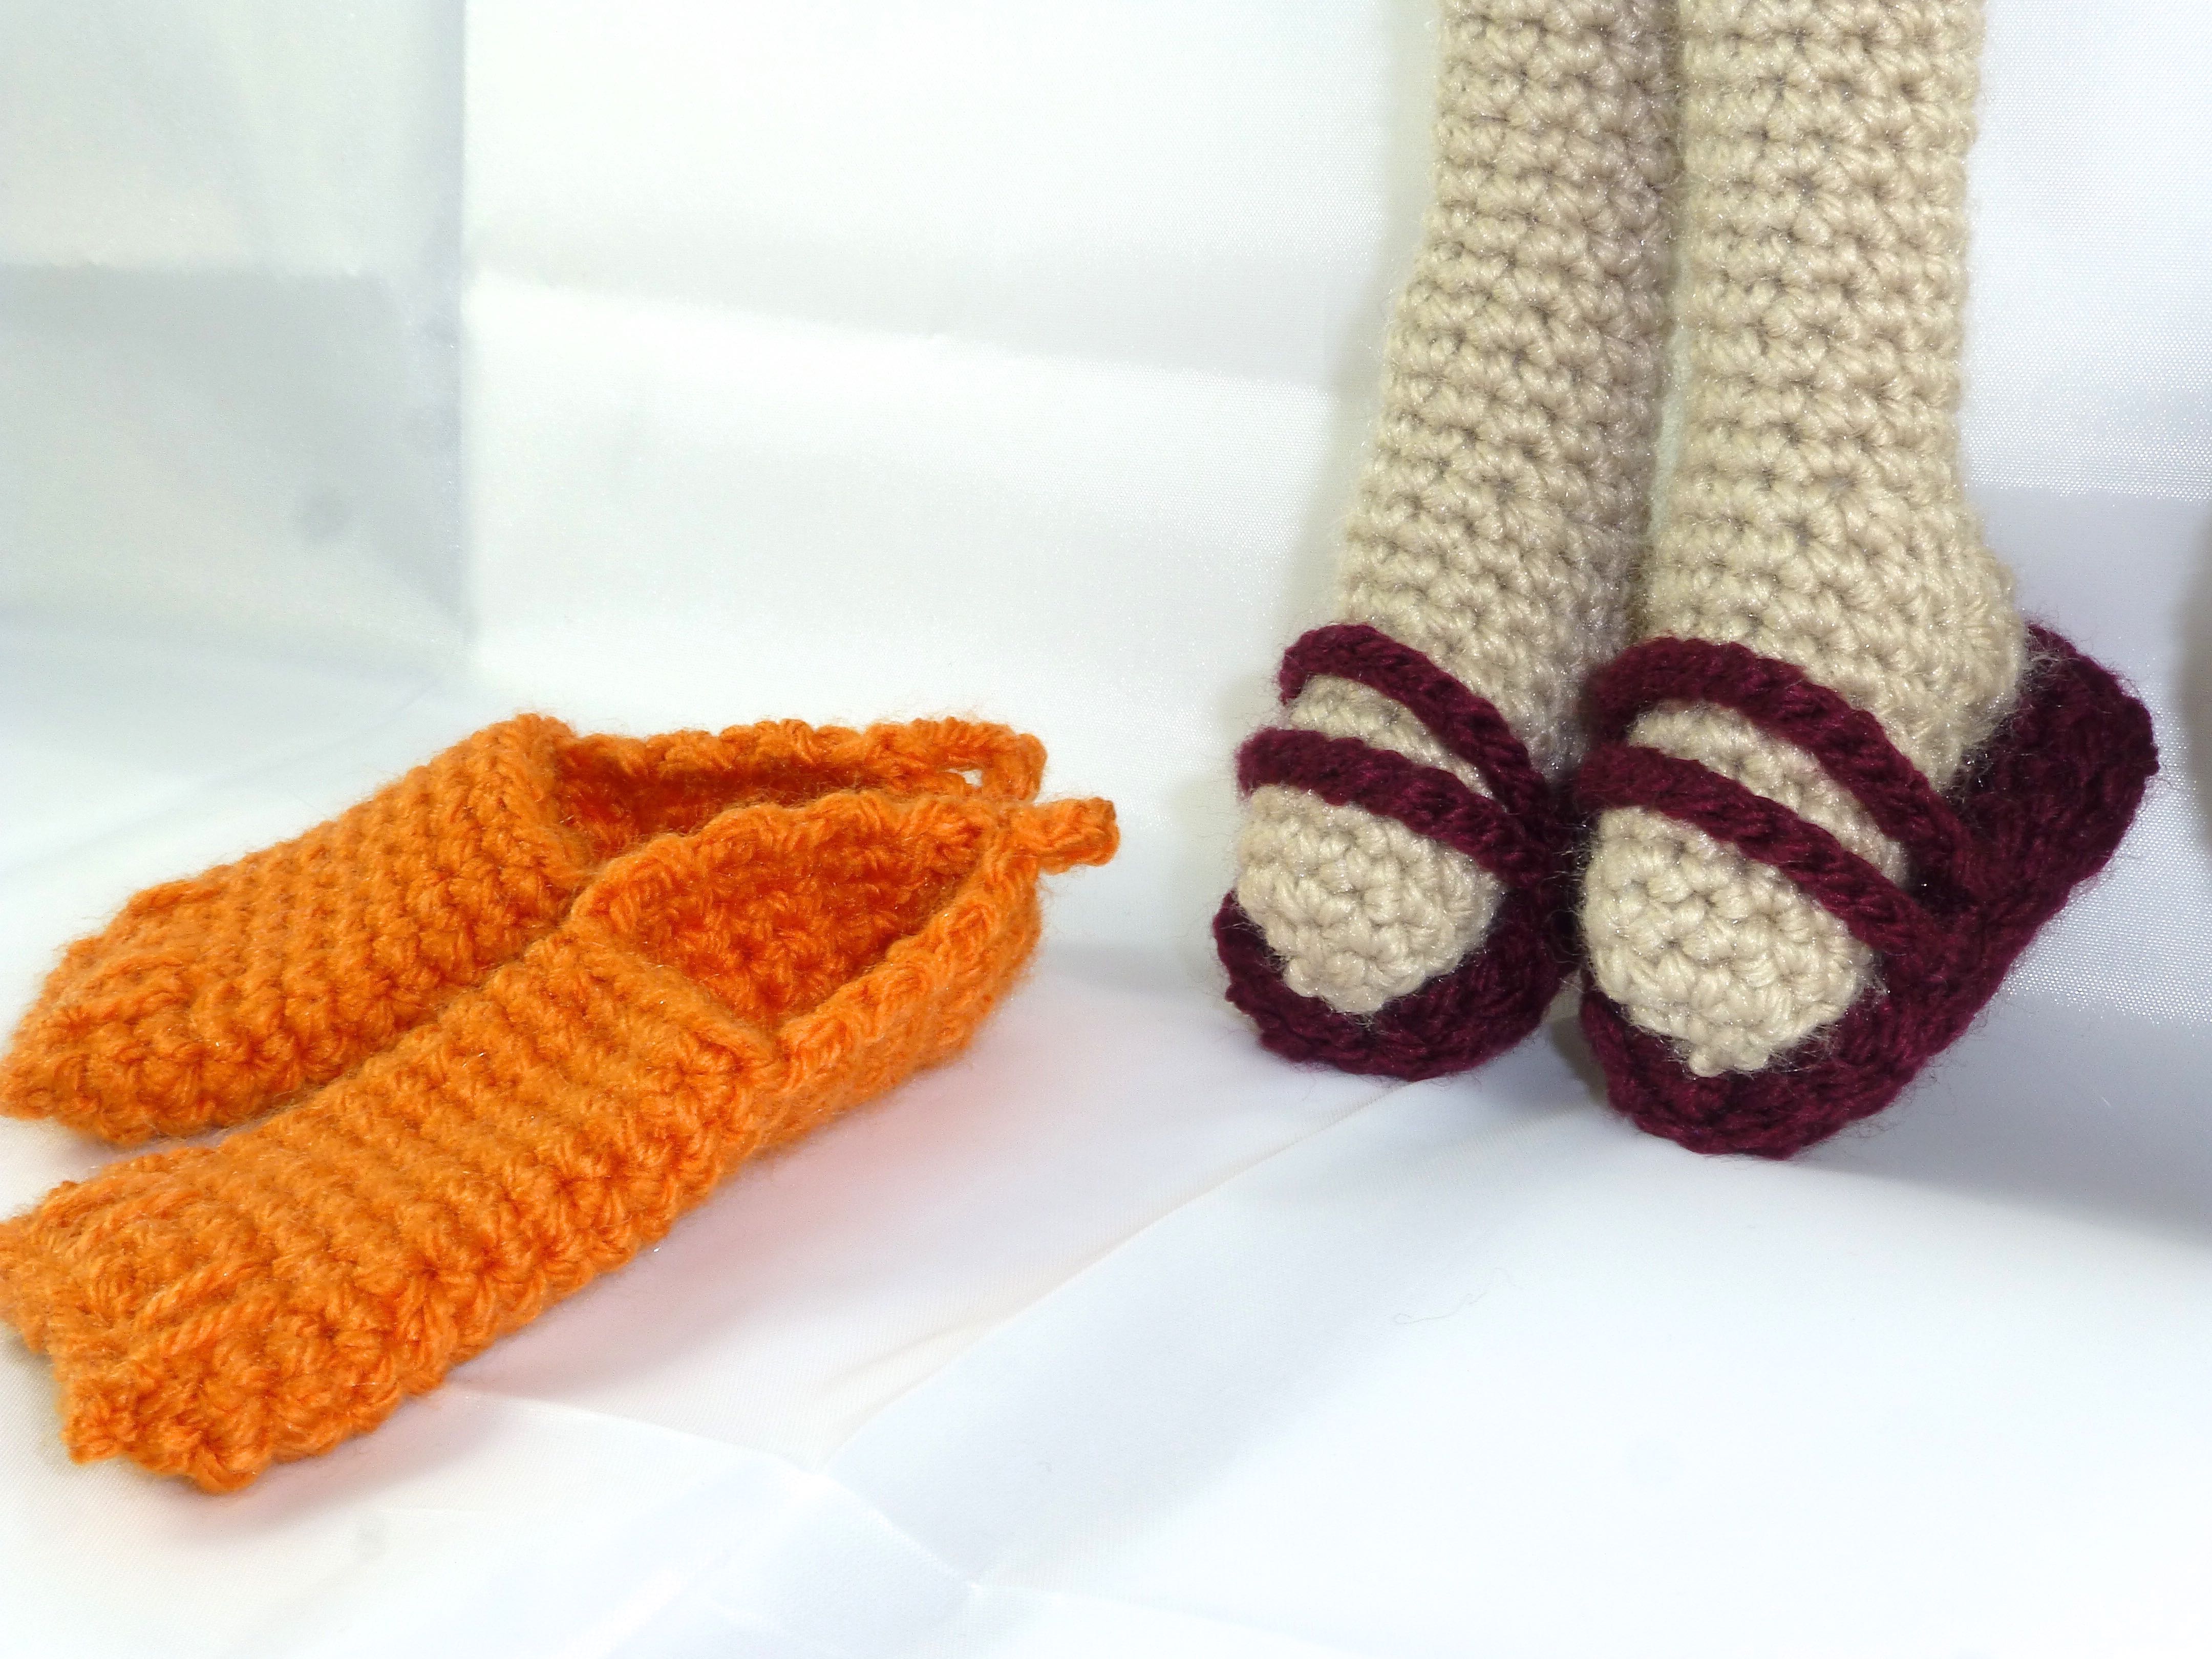
She wears the typical clogs/’Crocs’ that appear to be the footwear favoured by so many hospital staff nowadays.
Nurse Deb’s hair was made in the same way as Bella Ann – each of 135 strands knotted on individually to single stitches on the head in rows…..
……and then trimmed into a neat graduated bob shape to ring the changes.
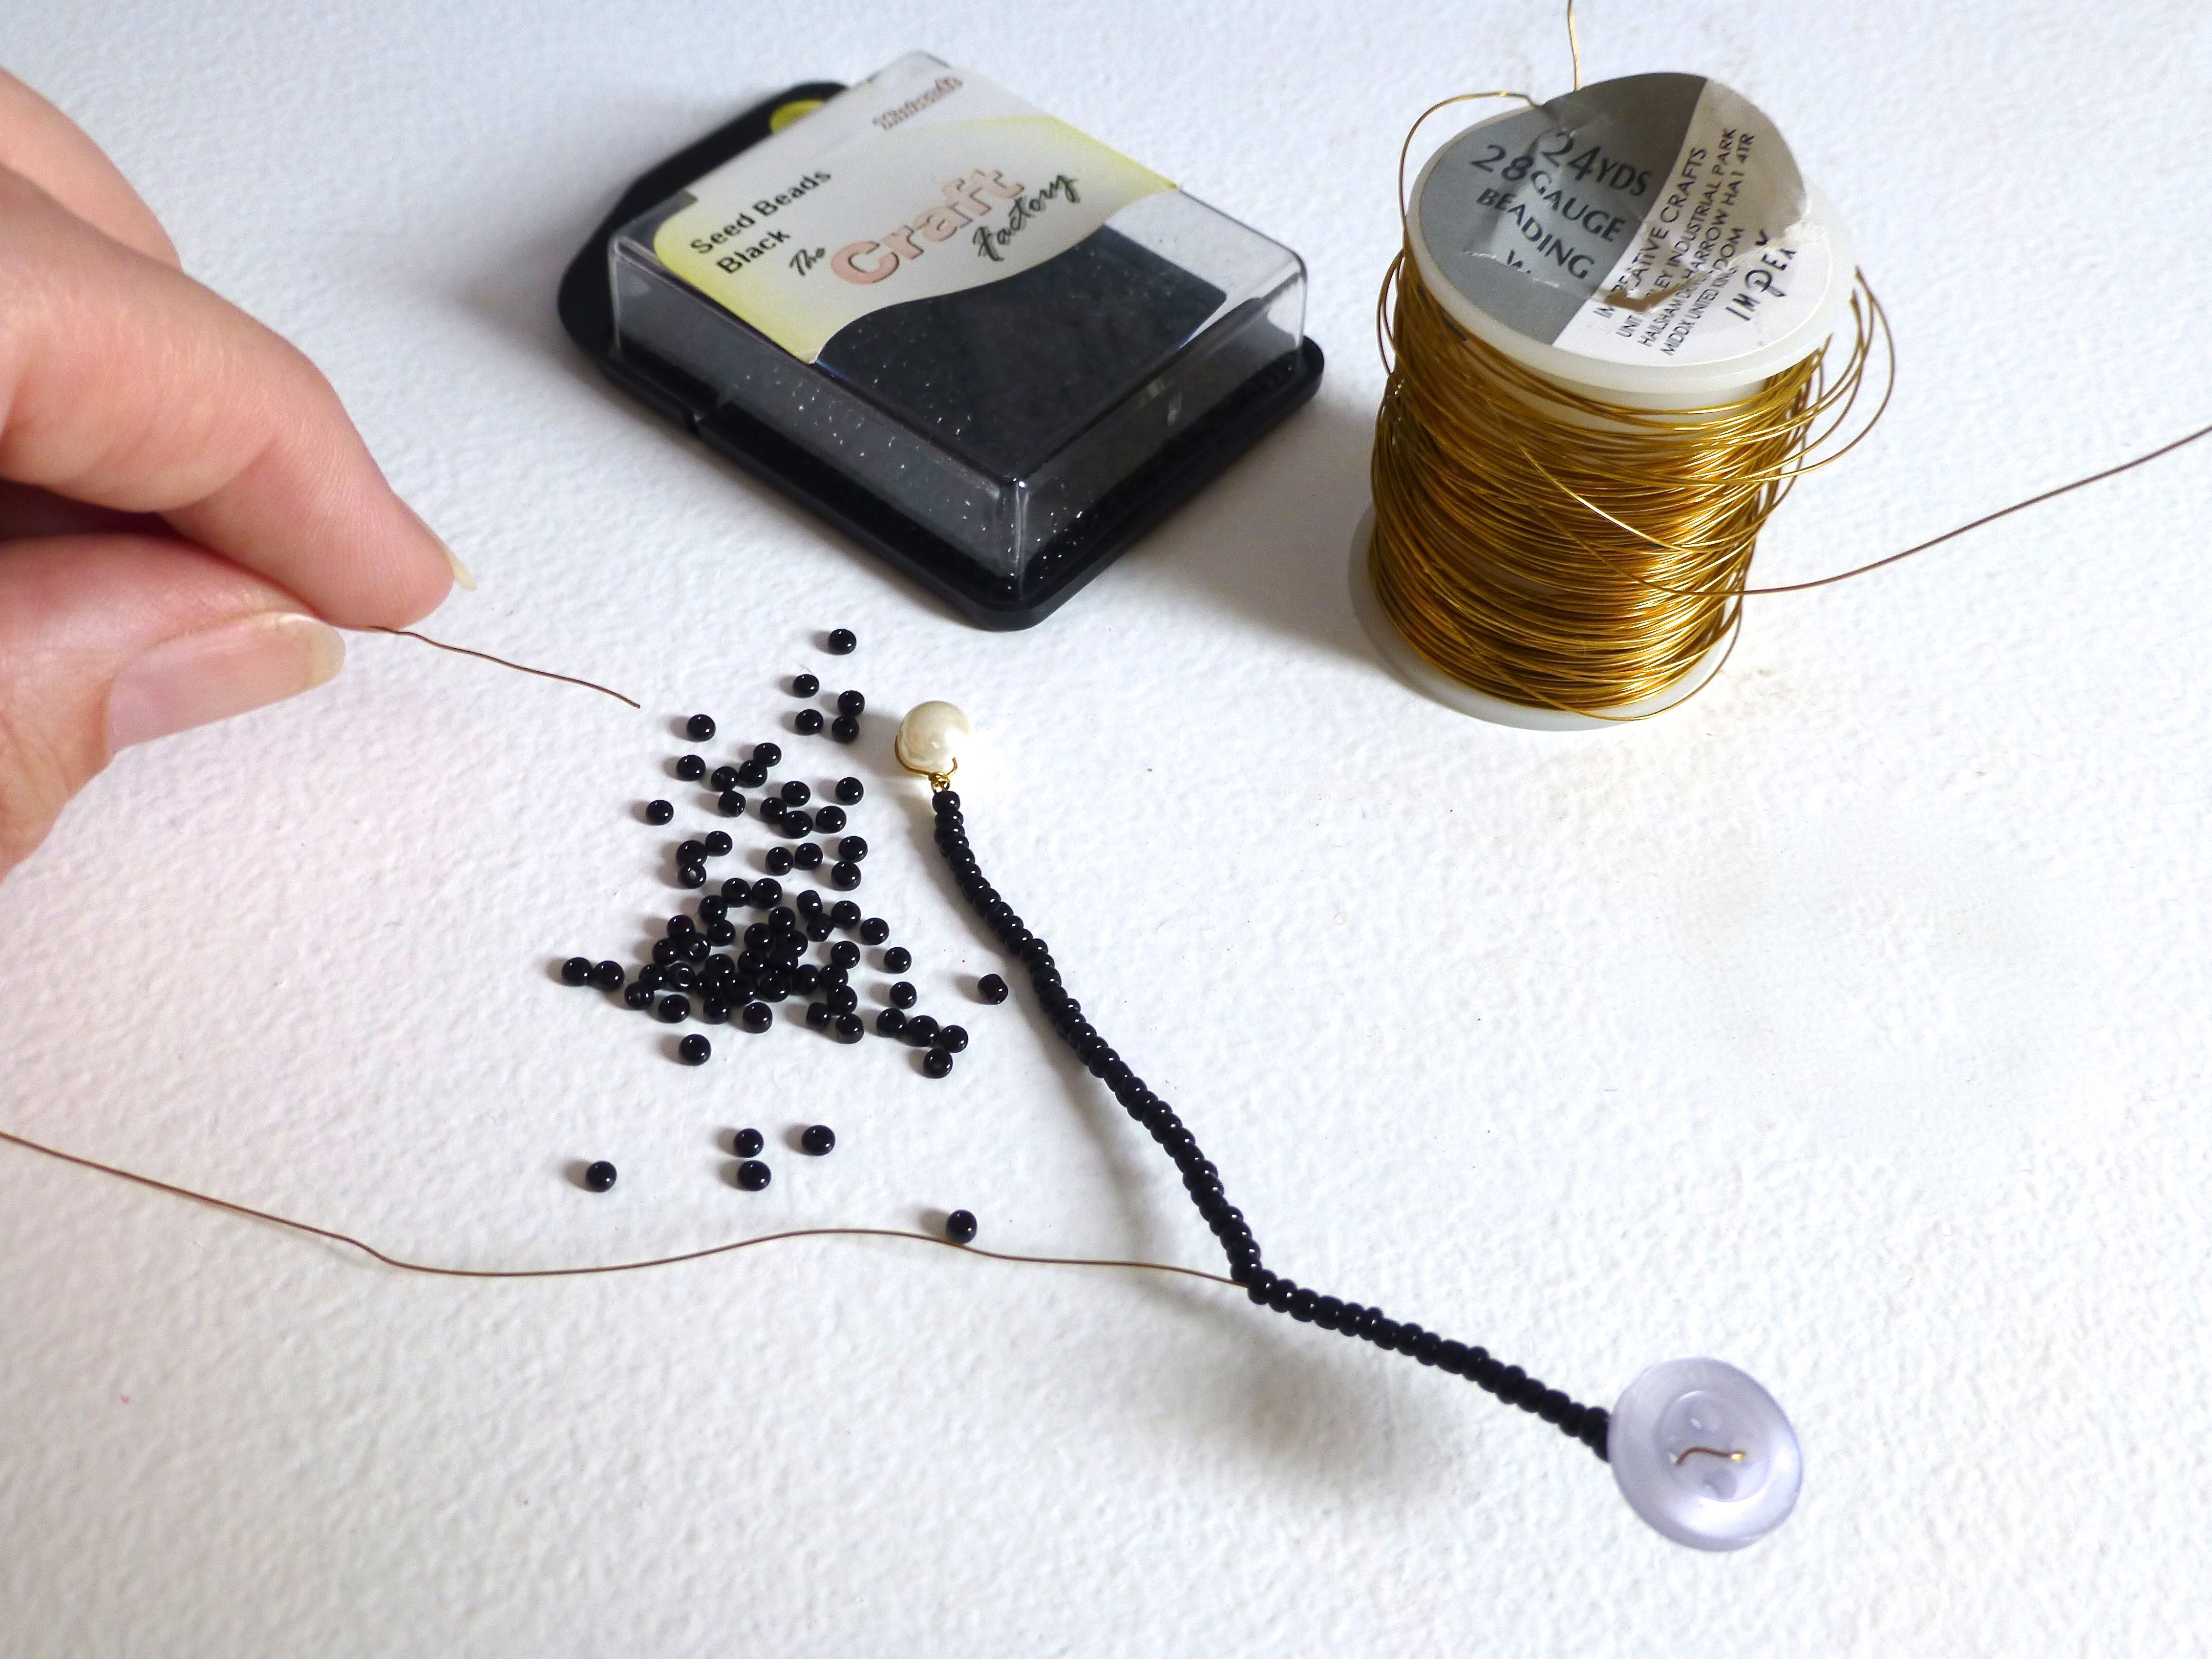
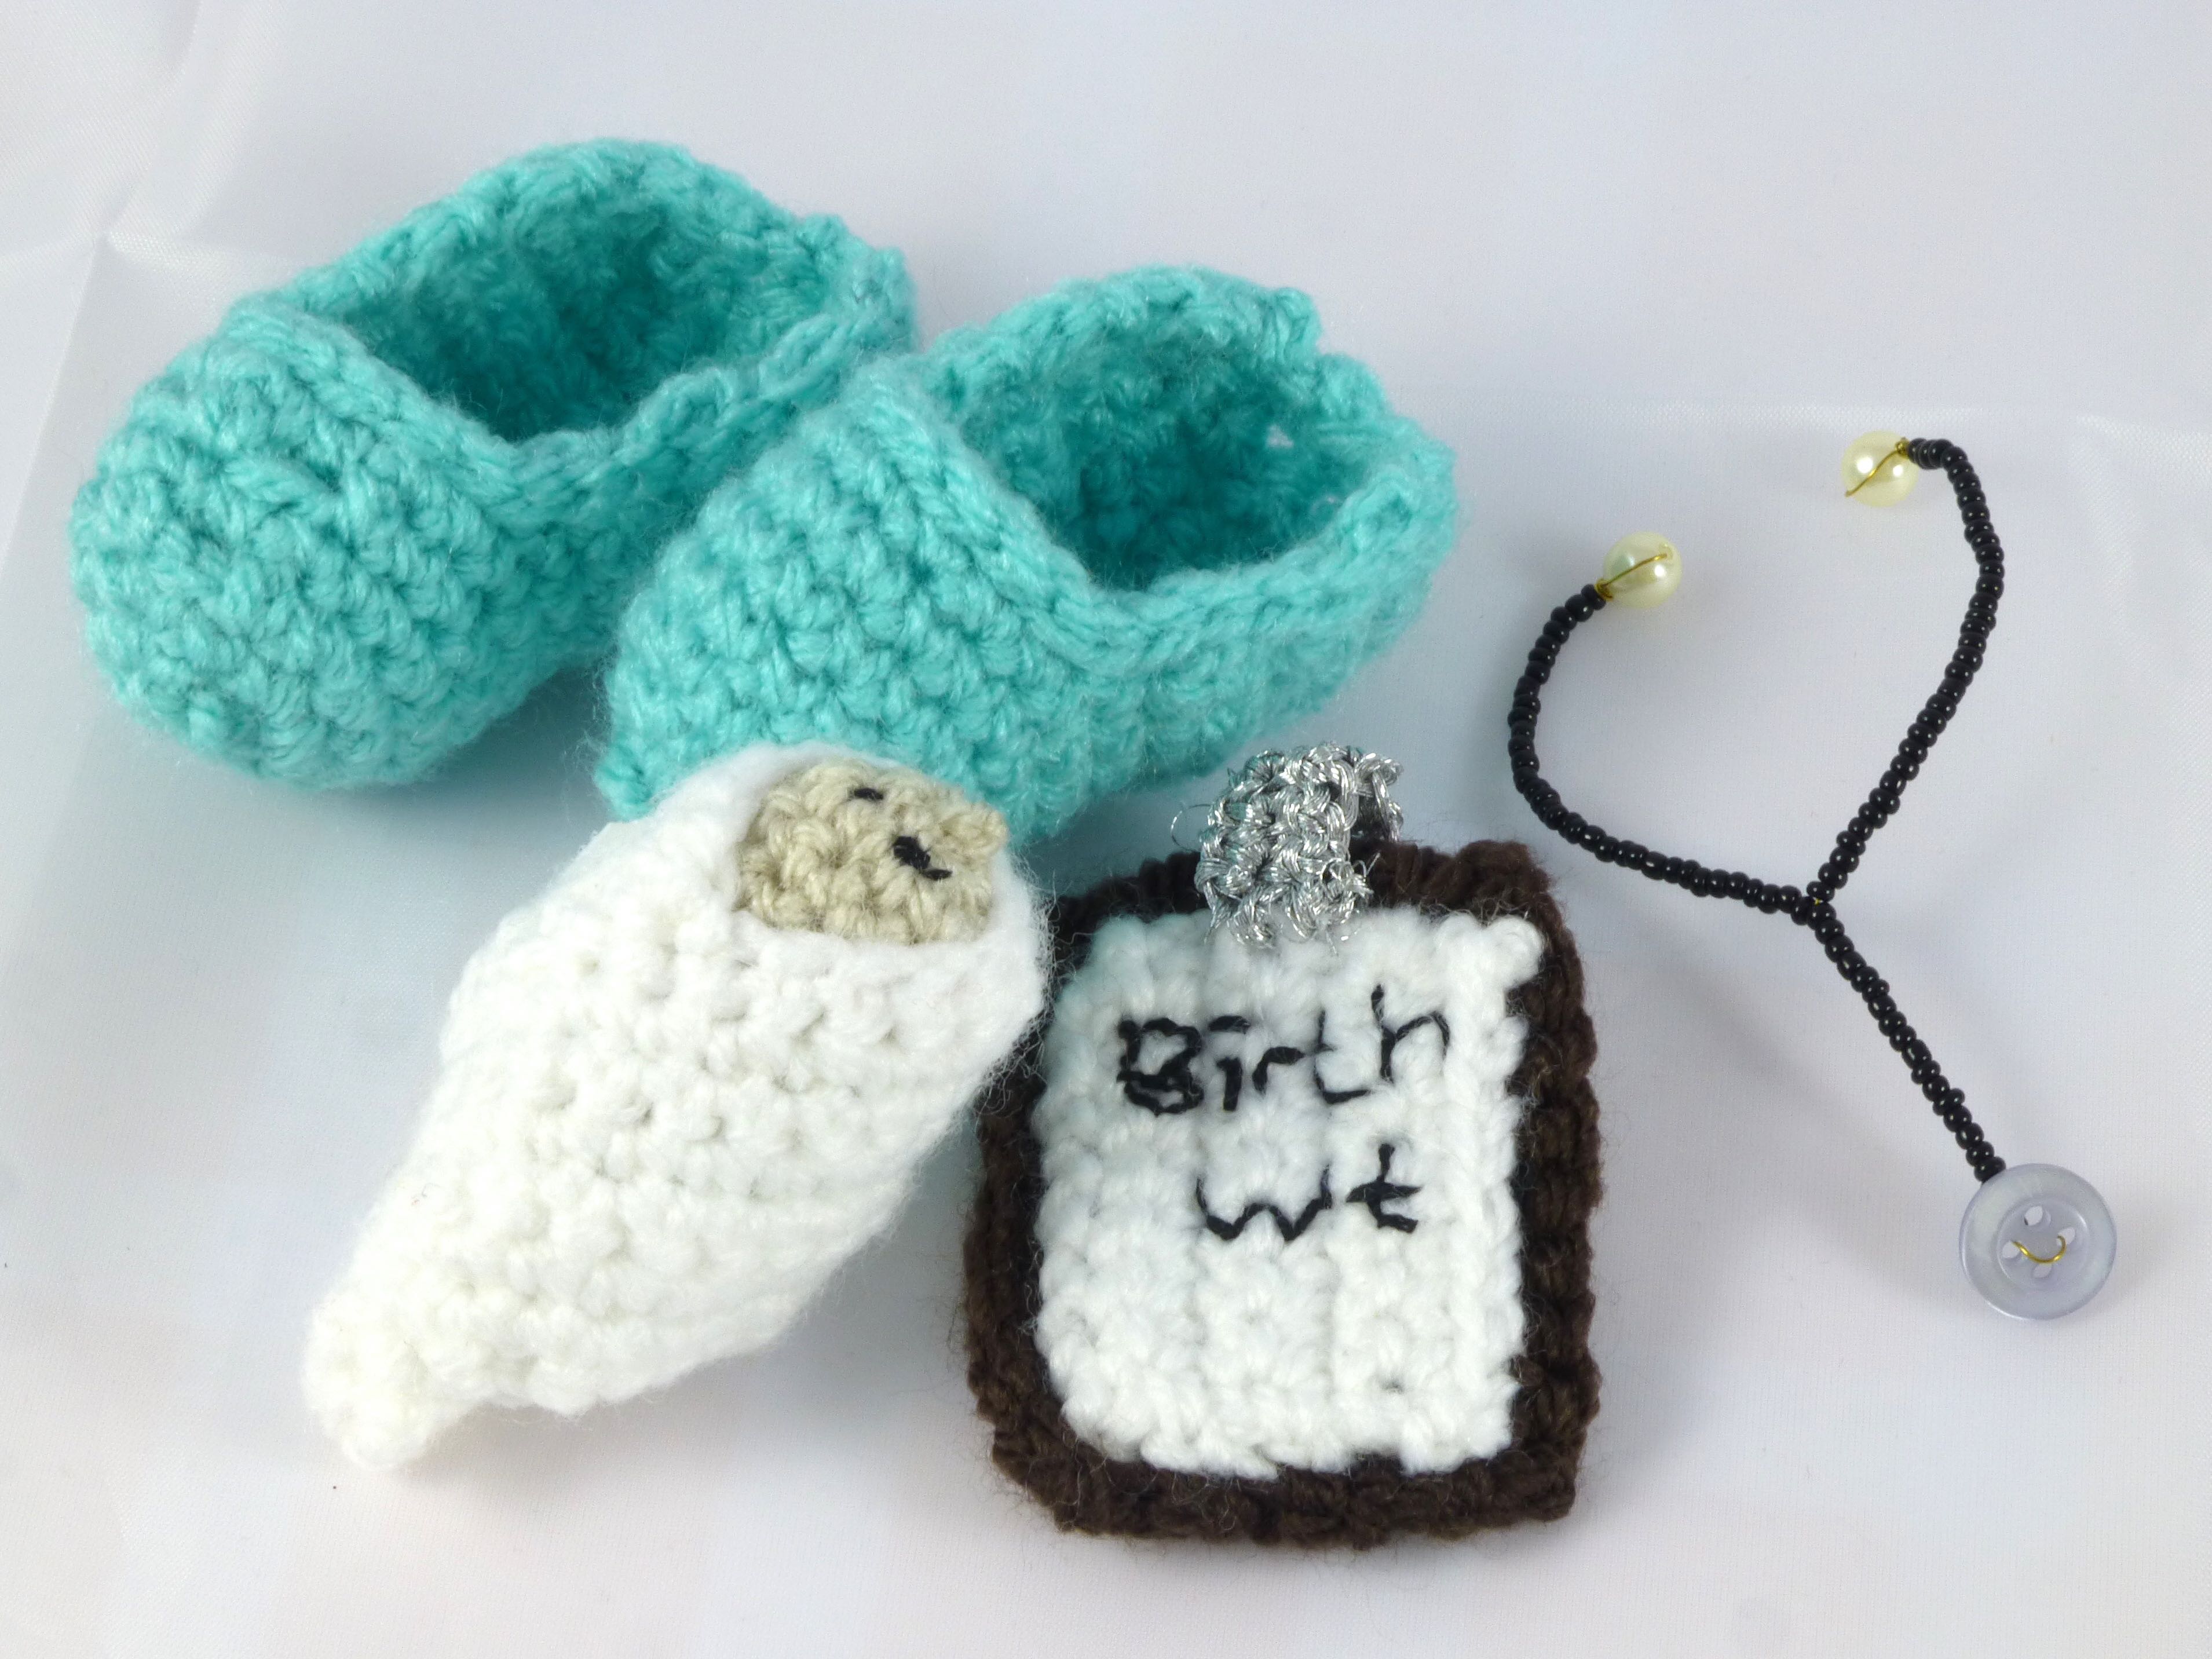
A stethoscope was made from thin wire and seed beads, adding pearls for the eartips and a button for the chestpiece. Quite fiddly to put together, but it looks ace!
She cradles a newborn baby in her arms…..
…..and a medical chart in her other hand.
The instructions were to sew both of these permanently in place but, as half the fun is undressing the doll and putting baby in a crib, this would have been impossible, so I used hook and loop fastener instead to make them removable.
This is “Nurse Deb” posing for her “TADAH”!
Would you like to see them all together?
T A D A H ! ! !
Well, that’s it, all done and dusted and I have to admit that I’m a little bit sad.
I have thoroughly enjoyed the process and seeing all the elements emerge successfully from the unfamiliar-to-me instructions. I can only imagine the fun that this little girl is going to have when she opens these on Christmas morning, and all the adventures the dolls are going to be involved in coming from the imagination of a child.
If you know a little girl who would love these dolls, or you just want the fun of making them yourself, head on over to Minerva Crafts where you can buy the book and all the yarn needed to make all four dolls.
Marcy Tilton 8813 – Vogue Linen Dress
If you have been following my blog this Summer, you may have noticed my penchant for linen and the ‘Lagenlook’ style of clothing.
Linen is not only comfortable to wear and brilliant for keeping you cool on those long, hot Summer days, (not that we had many of those in England this year) but it also gets better with washing – softer and more drapey.
The pattern I wanted to try was V8813 by Marcy Tilton for Vogue which called for a lightweight linen or jersey. Obviously I chose a linen, and went for a stunning Pillar Box Red 100% linen from Minerva Crafts. It has a subtle sheen to it which is quite unlike the linens I have bought before.
This is what arrived in the post: –
As we’re heading into Autumn, short sleeves were not an option so I opted for view B with three-quarter length sleeves.
Although not immediately obvious on the pattern envelope, the oversized pockets have a pleat in them which is held in place by a button. As the fabric is plain, I decided to make a statement with these swirly patterned buttons which are very striking and quite unusual; they look like they’re hand painted.
The dress came together very easily but, although I washed the fabric before starting to sew, it is still stiffer than I’d like. A few more washes will soften the linen more and more though, and those pockets will drape better eventually – they just look a little too structured at the moment.
After the main body of the dress has been constructed, the centre front panel is inserted and then the gathered detail is added.
Having read several other blogs featuring this pattern, it seems some people are finding that it is less fiddly to complete the gathers prior to inserting the front panel. However, I am used to using Vogue patterns and decided to follow their instructions which worked for me.
The pattern includes a great way to get really even gathers so I thought I’d show it in more detail as it’s a technique that would transfer to many other projects.
You cut lengths of cord twice as long as the guide lines – I used a baker’s twine but any thin cord will do.
Pin the cord in place along the guidelines.
Set your stitch width to a wide zig zag.
Choose a medium stitch length.
Zig zag over the cord being careful not to catch the cord in the stitching. I found that it just stayed in the groove of the sewing machine foot which made it easy.
When all the cord has been enclosed, secure one end of each of the cords by wrapping it around a pin in a figure of eight motion.
Then simply pull the other end of the cord to create even gathers across the entire length.
Secure with another pin at the other end and steam the gathers so they stay in place.
Finally, top stitch from the right side in two rows either side of the previous zig zag stitching.
This is my favourite way to create gathers which are nice and even – it might take a little longer than the usual method of just pulling up the bobbin thread, but it’s much more professional looking and well worth perfecting the technique.
I amended the design by adding a row of top stitching to the shoulder seams as it’s always a nice finishing touch.
I prefer to leave the sleeve hems and bottom hem to the very end so deviated from the instructions at this point.
The very last thing to do was to sew those wonderful buttons in place!
Can you see the slight sheen? It’s almost like silk.
It is SUCH a comfortable dress to wear and will drape more softly after a few more washes. I can see myself teaming it with a pair of tights and boots for the colder weather.
If you are tempted to try this pattern, there’s never been a better time as it is half price at the moment!
Here’s the link: – V8813 Marcy Tilton
Bellville Sassoon Dress For Ascot
Well, I’ve had a wonderful two days virtually locked away in my studio, only surfacing for the occasional fuel break – No.1 Son has even been making sure my G&T levels didn’t drop below a critical level!
What have I been so immersed in?
This year’s dress for Ascot – Vogue 1108 by Bellville Sassoon.
It has been BRILLIANT getting my teeth into a proper Couture make again.
Don’t get me wrong though, I love quick and easy dressmaking projects but, once in a while it’s just fantastic to challenge myself with something a bit more meaty, so to speak.
Vogue classify this as an ‘Average’ make in terms of difficulty, and I agree – I have made much more complicated dresses than this.
I love the labels that come with each designer pattern for you to sew into the garment:)
This bundle of fabric arrived from Minerva Crafts – several different types of fabric in a glorious shade of Fuschia: –
There was Bengaline for the main body of the dress, organza for interfacing, lining and habotai for the foundation layer and, yes, that is boning you see sat on top of the lot!
Let me tell you now that there are over SIXTY pieces of fabric holding this dress together and only FIVE are visible from the outside!
That is a hell of a lot of construction hidden inside and I used up two entire 100m reels of thread in the process!
I love a good puzzle and this pattern had a few to solve, such as all those pleats on the left front:
I won’t take you through much of the process because that would take up more space that any blog post should do – I’ll just whizz through the main bits.
First, you make the pleats and darts in the front and back sections.
Next, you make the foundation which is the middle bit of the dress sandwiched between the outer dress and the lining.
It consists of a lining layer, fully interfaced, which has the boning sewn to it.
The instructions called for boning in its own casing but, as I couldn’t get any, I made my own using normal boning and some offcuts of habotai.
Voilà!
This is the inside showing the boning in place….
….and this is what it looks like from the right side.
Very nice.
It’s almost a shame that all this beautiful work will be completely hidden from view:)
The foundation sections are then sewn to the body of the dress….
….and the front is stitched to the back at the side seams, leaving an opening for the zip.
Now, I have never used a dedicated foot to insert invisible zips, I learned to sew them using a normal zipper foot and don’t find it an issue.
I don’t know if you can see, but I open the zip up and sew really close to the teeth in the same way a specialized foot would do.
There, pretty invisible, wouldn’t you agree?
The zip needed shortening which is just a case of sewing a new stopper from thread and cutting off the excess below.
Now, onto the lining.
Of course, all the way through we’re sewing princess seams – isn’t it a little bit of magic when you fit the fabric around the curve? Like fitting a square peg into a round hole, it doesn’t seem possible at first.
A few clips to the stay-stitching and job done!
Lining completed.
The lining is slipped over the dress and foundation and sewn right sides together around the neckline and armhole edges.
The bow, which is stiffened with organza, was made and secured in place amongst the pleats.
The hem was faced with organza and turned up with herringbone stitch.
The lining was slip stitched to the hem, leaving a folded pleat as ease.
Looking at the inside when finished, you’d have no idea of what it’s hiding underneath!
The quality of the fabrics is amazing – the bengaline handles beautifully and has a discreet watermark to it.
The polyester habotai was chosen as an alternative to china silk for the foundation and looks and feels superb – such a shame it’s hidden!
This dress does not photograph well on the hanger – all those pleats only sit properly on a real body.
Oops – better press the hemline before Ascot!
So, what will I accessorize with?
I made two jackets for Ascot last year – this is the other one (see last year’s post).
The boning means I shouldn’t have to wear a bra but, looking at this photo I definitely do. My bust is too heavy and is dragging the front down causing it to gape – a strapless bra will do the trick.
So this is me, all ready for Ladies Day on Thursday and there’s just one more thing left to do…..
…. get my French manicure redone – it’s all stained from handling all that pink fabric!!