Sewchet

Sewing, crochet, crafts, accessories, baking, tutorials,


10 Comments

Yarndale People (and a possible “Yarnvale”?)

And Finally….the third (and last) post showcasing just a tiny proportion of the wonderful weekend that was Yarndale 2014.

Today, it’s all about the people.

The warm, friendly, talented, generous and sharing stallholders that make Yarndale the success that it is.

180 stallholders embraced 6,000 yarn-mad ladies (and a couple of men!) with open arms for not just one, but two crafty days, most of whom were still smiling by end of play at 4.30pm on Sunday.

Most were there to sell an amazing variety of hand made goodies and supplies, but there were also a number of organizations spreading the word about their groups.

One such collaboration was the Skipton branch of The Embroiderer’s Guild. Their 3D map of the Yorkshire Dales National Park was outstanding and featured numerous different stitching styles. The ladies running the stall were eager to tell you all about their work and couldn’t have been friendlier. Obviously it highlighted the Tour de France route:)

IMG_1049

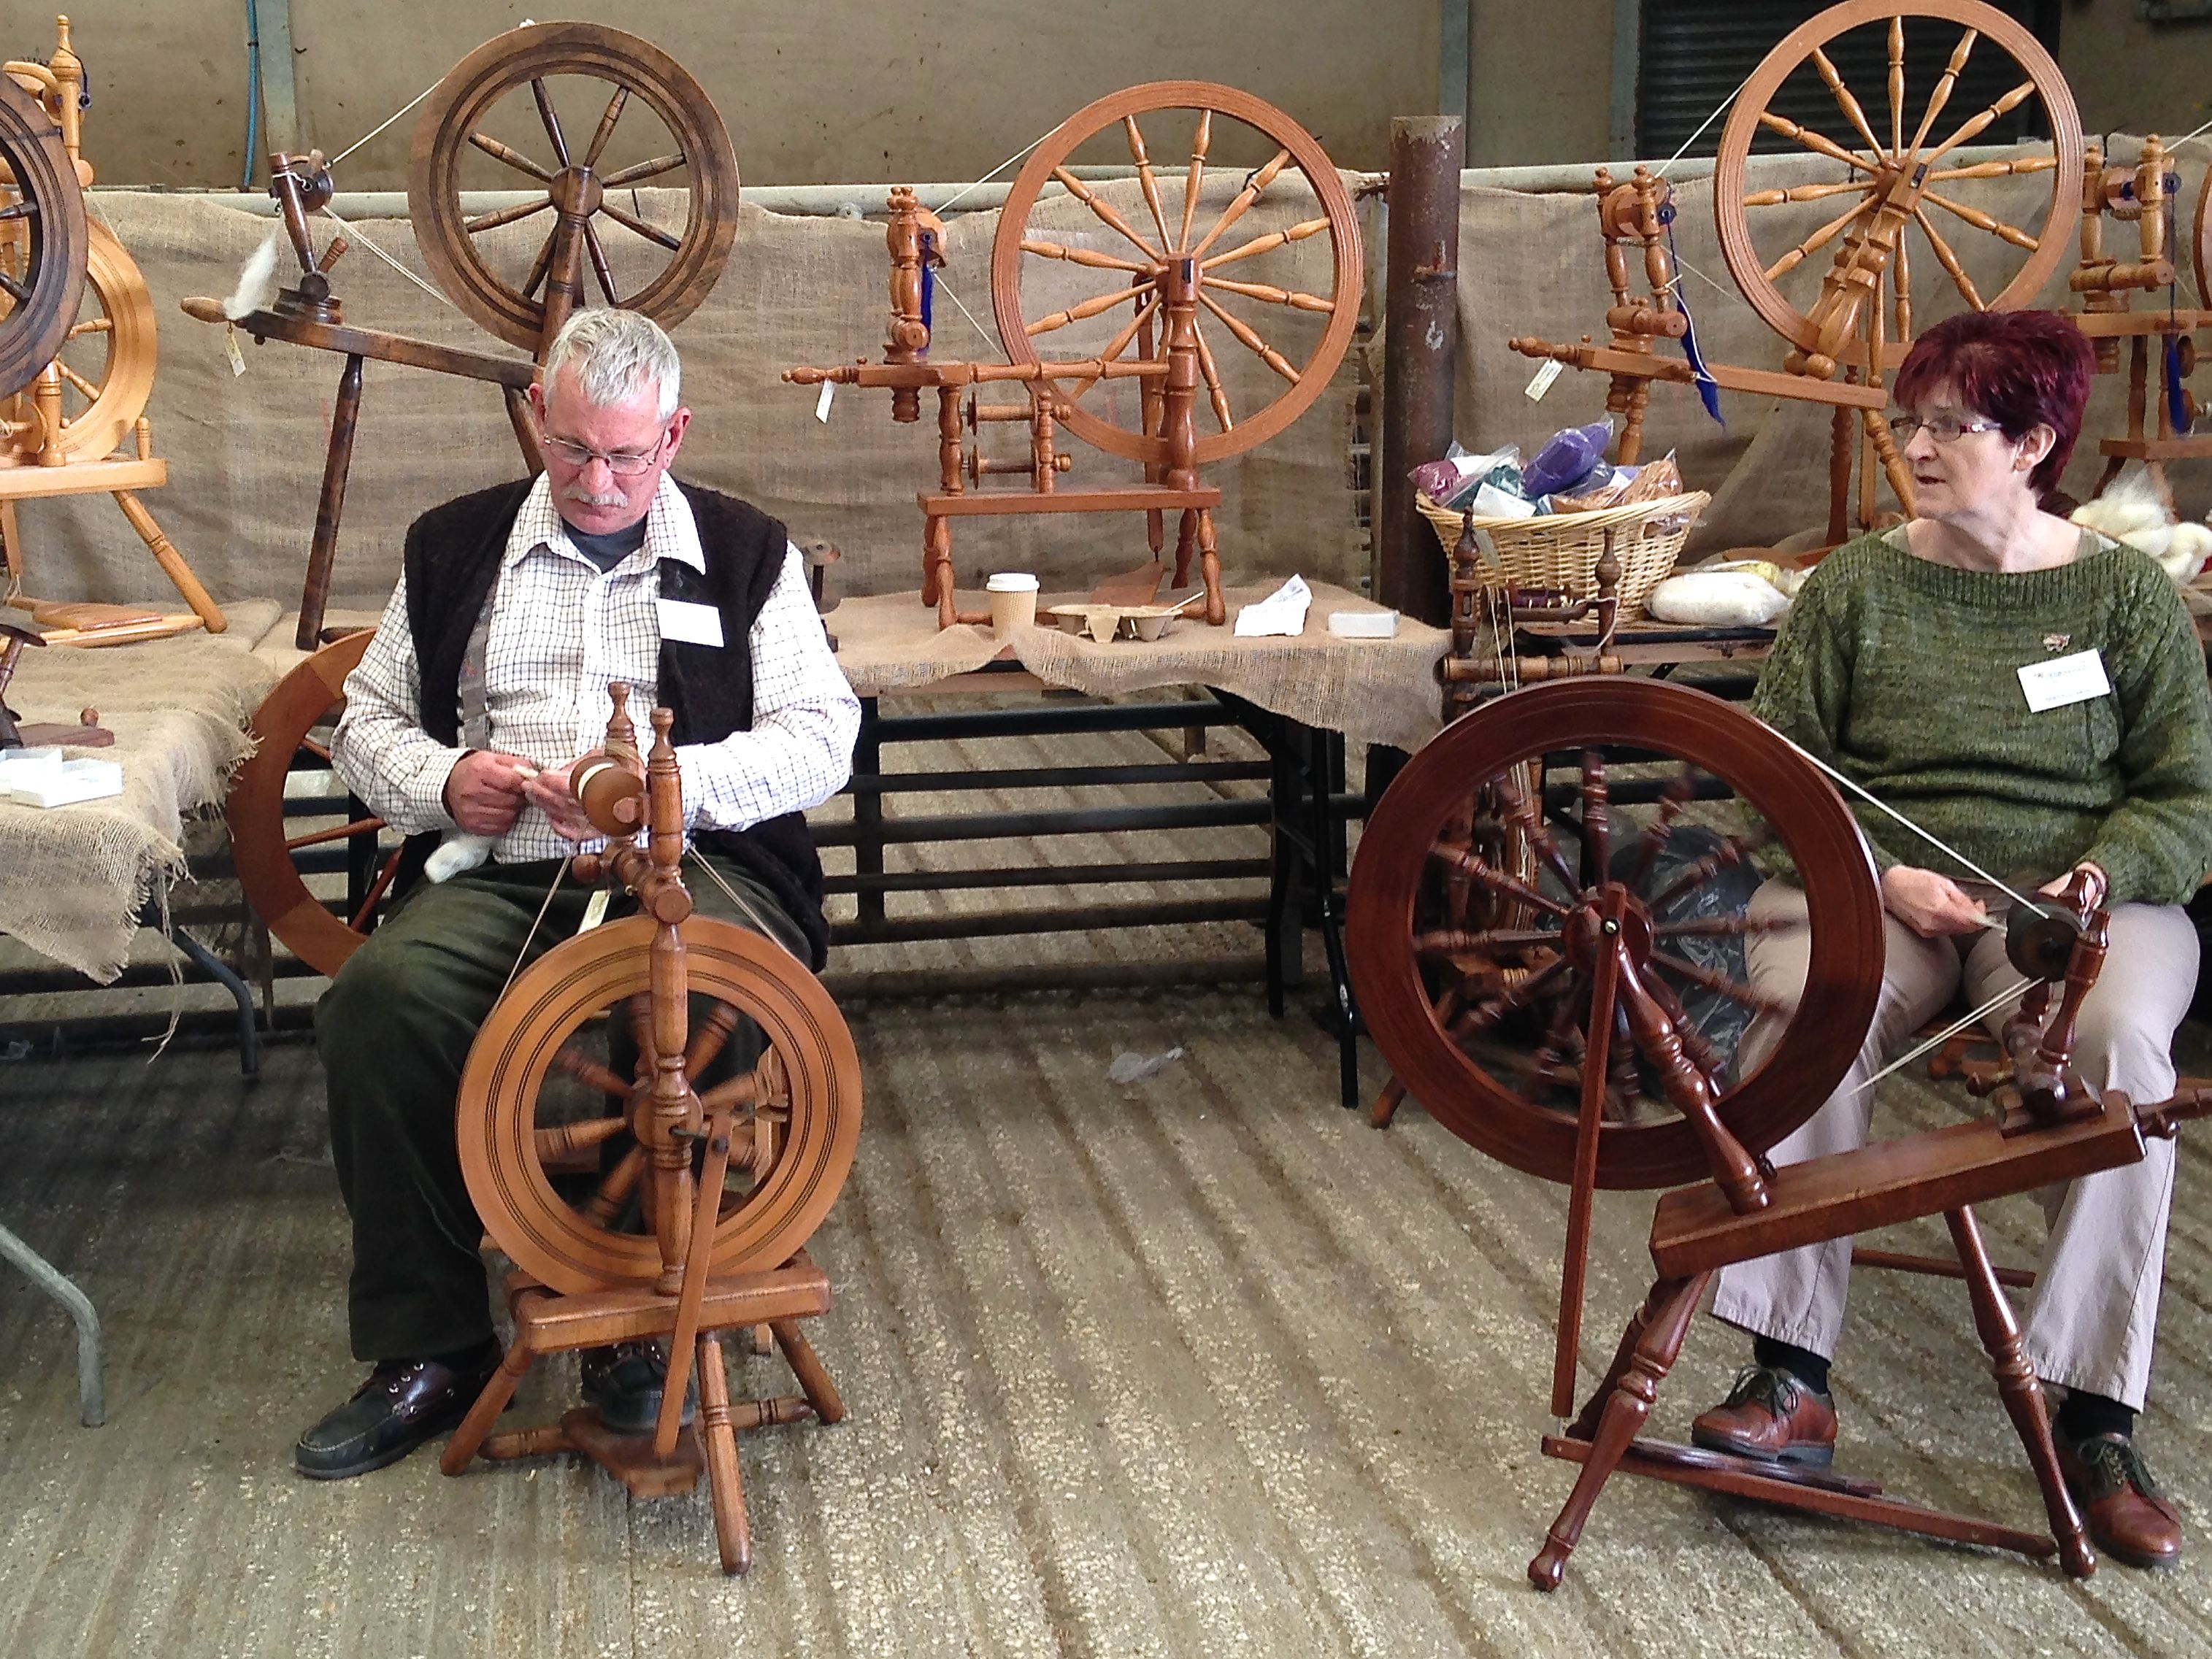
There were several spinning demonstrations going on…

IMG_1052

…and the lovely ladies from the Craven Guild of Lacemakers even let me loose with their bobbins!

photo 2-4

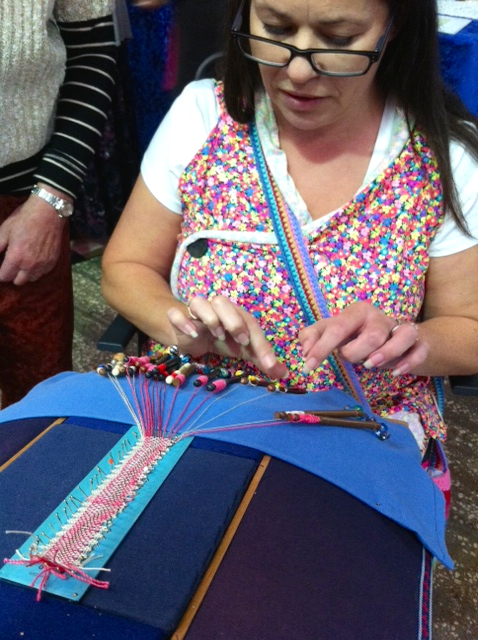
Look at all those pins!

IMG_1060

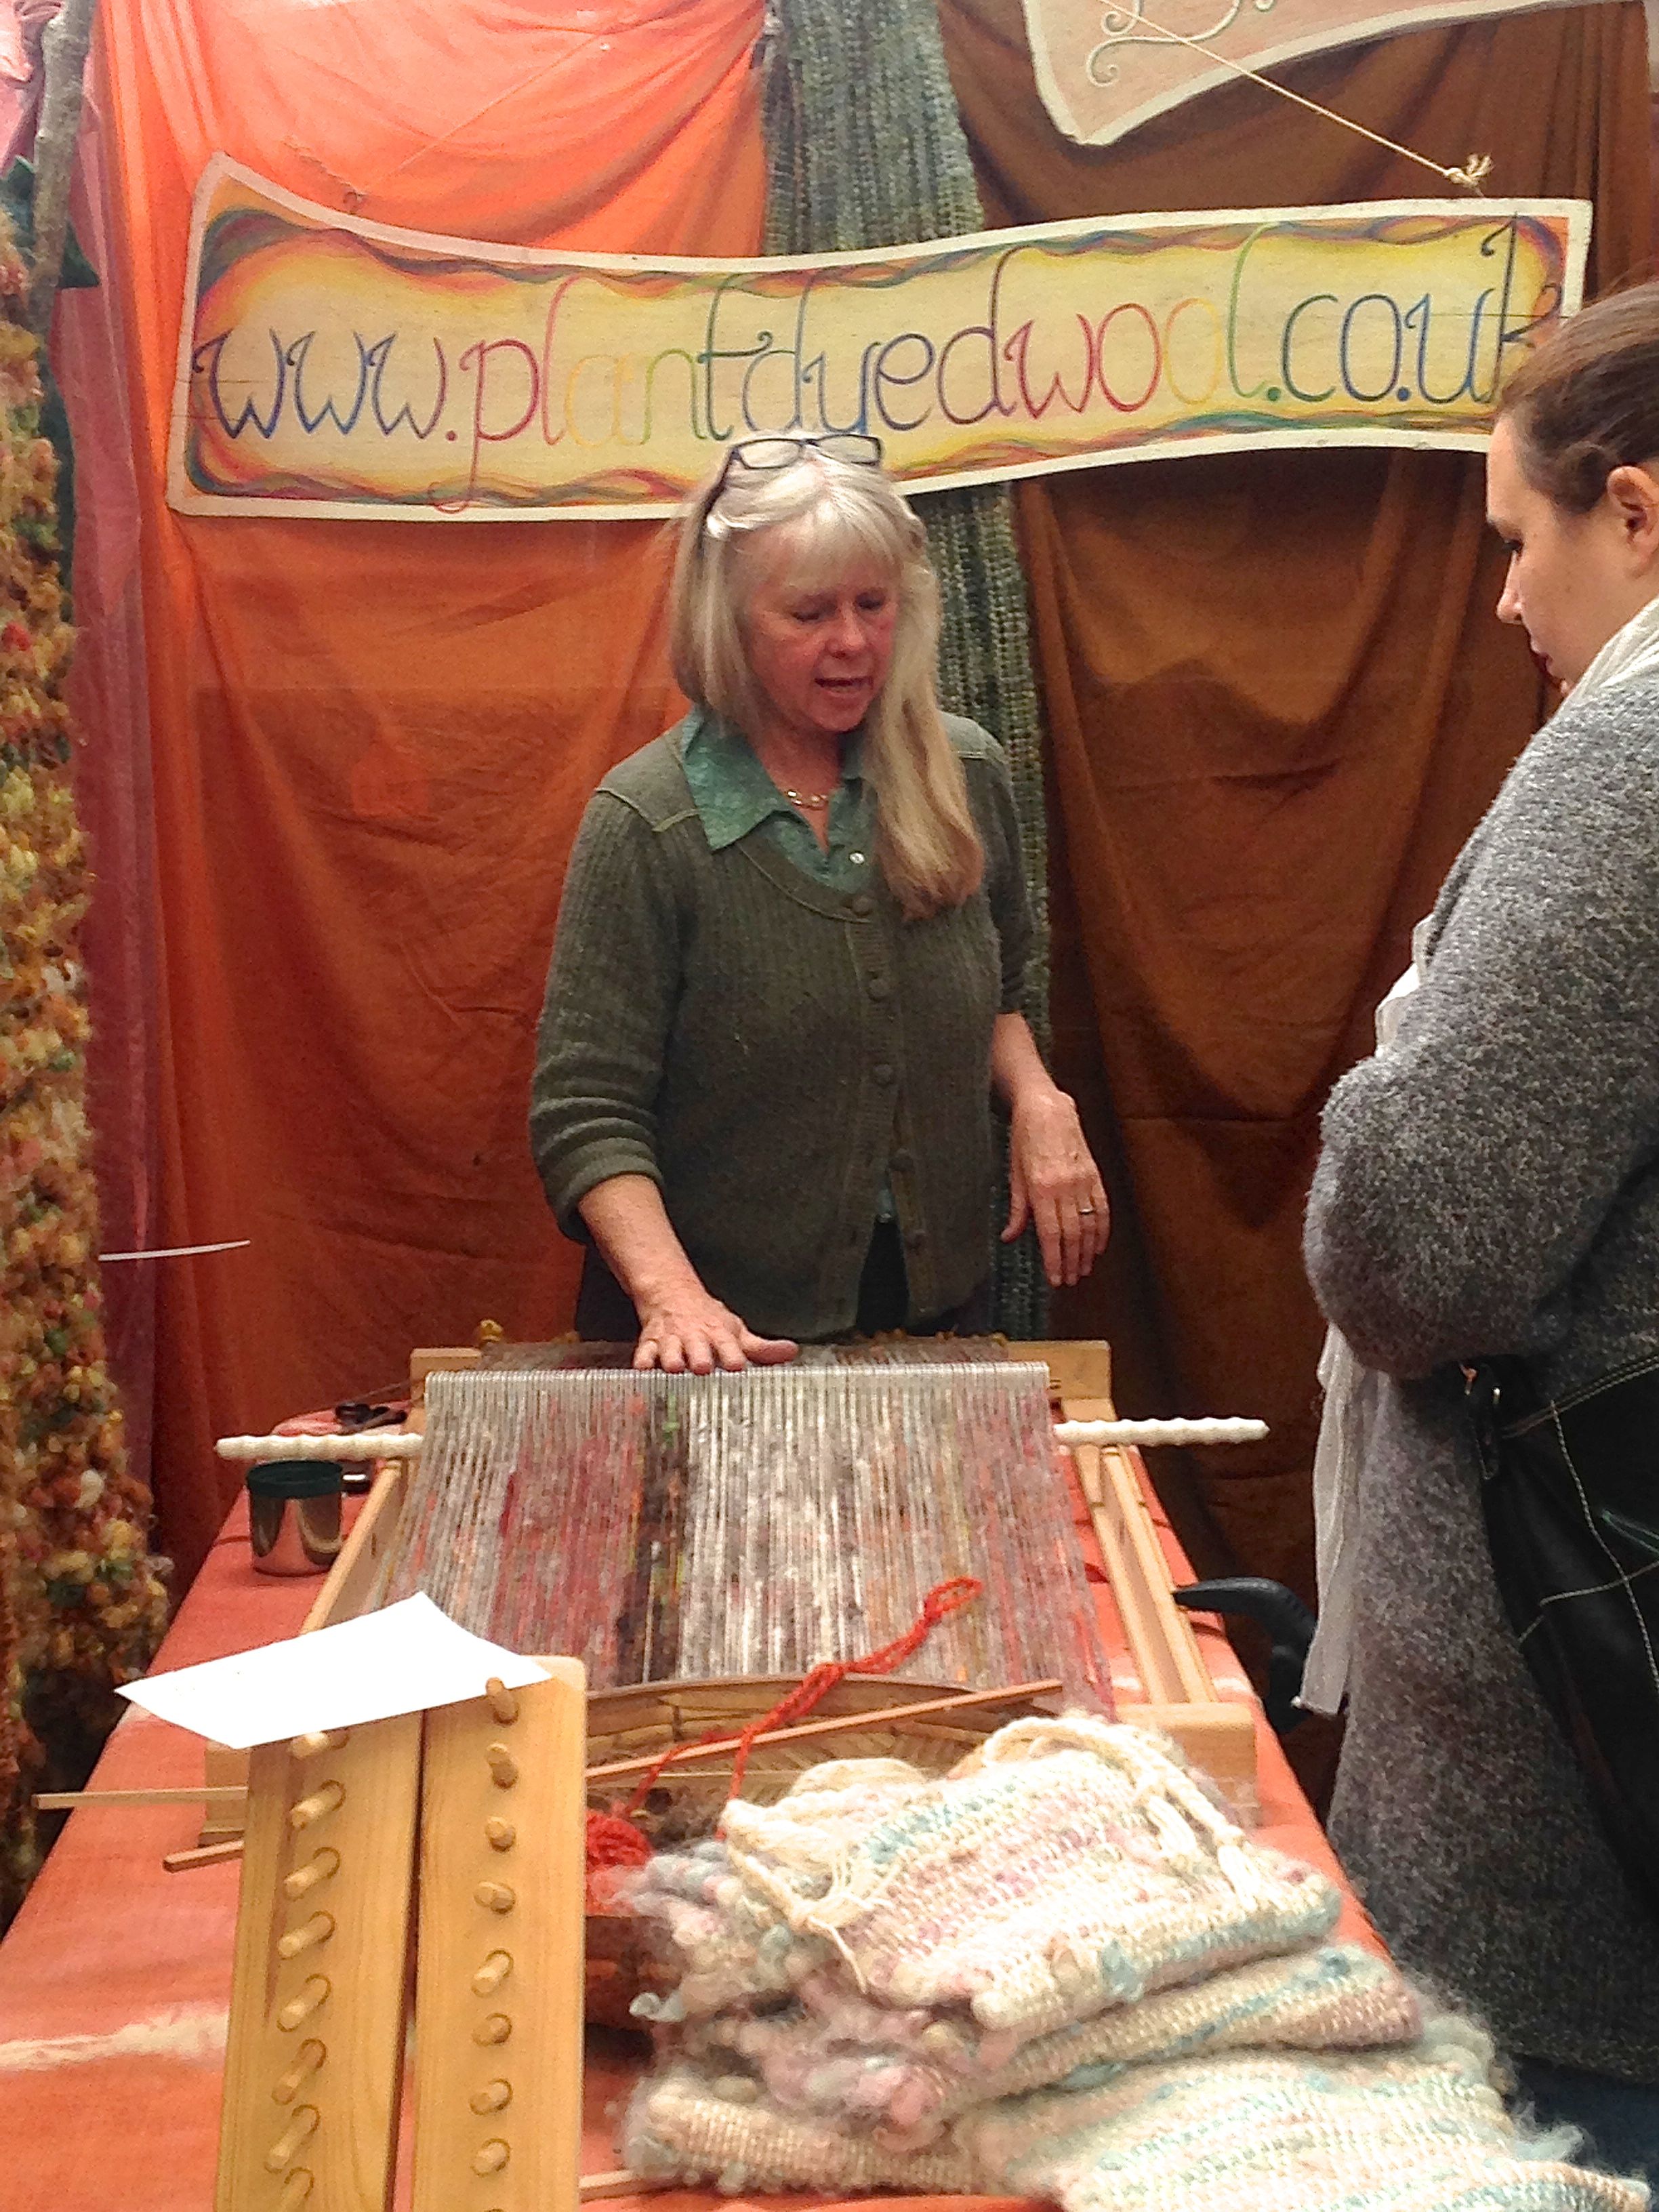
Plant Dyed Wools were demonstrating loom weaving with wool dyed and spun from their own rare breed sheep;

IMG_1057

Big Wigs Angora brought along half a dozen of their rabbits to effectively demonstrate the rabbit-to-yarn chain. You have never felt anything so soft in your life as the fur of the Angora rabbit!

IMG_1051

This is Rachel Coopey of Coop Knits signing copies of her books;

IMG_1059

Gam Farm Rare Breeds also brought a few of their sheep to the show – this one was particularly friendly and loved all the petting;

IMG_1053

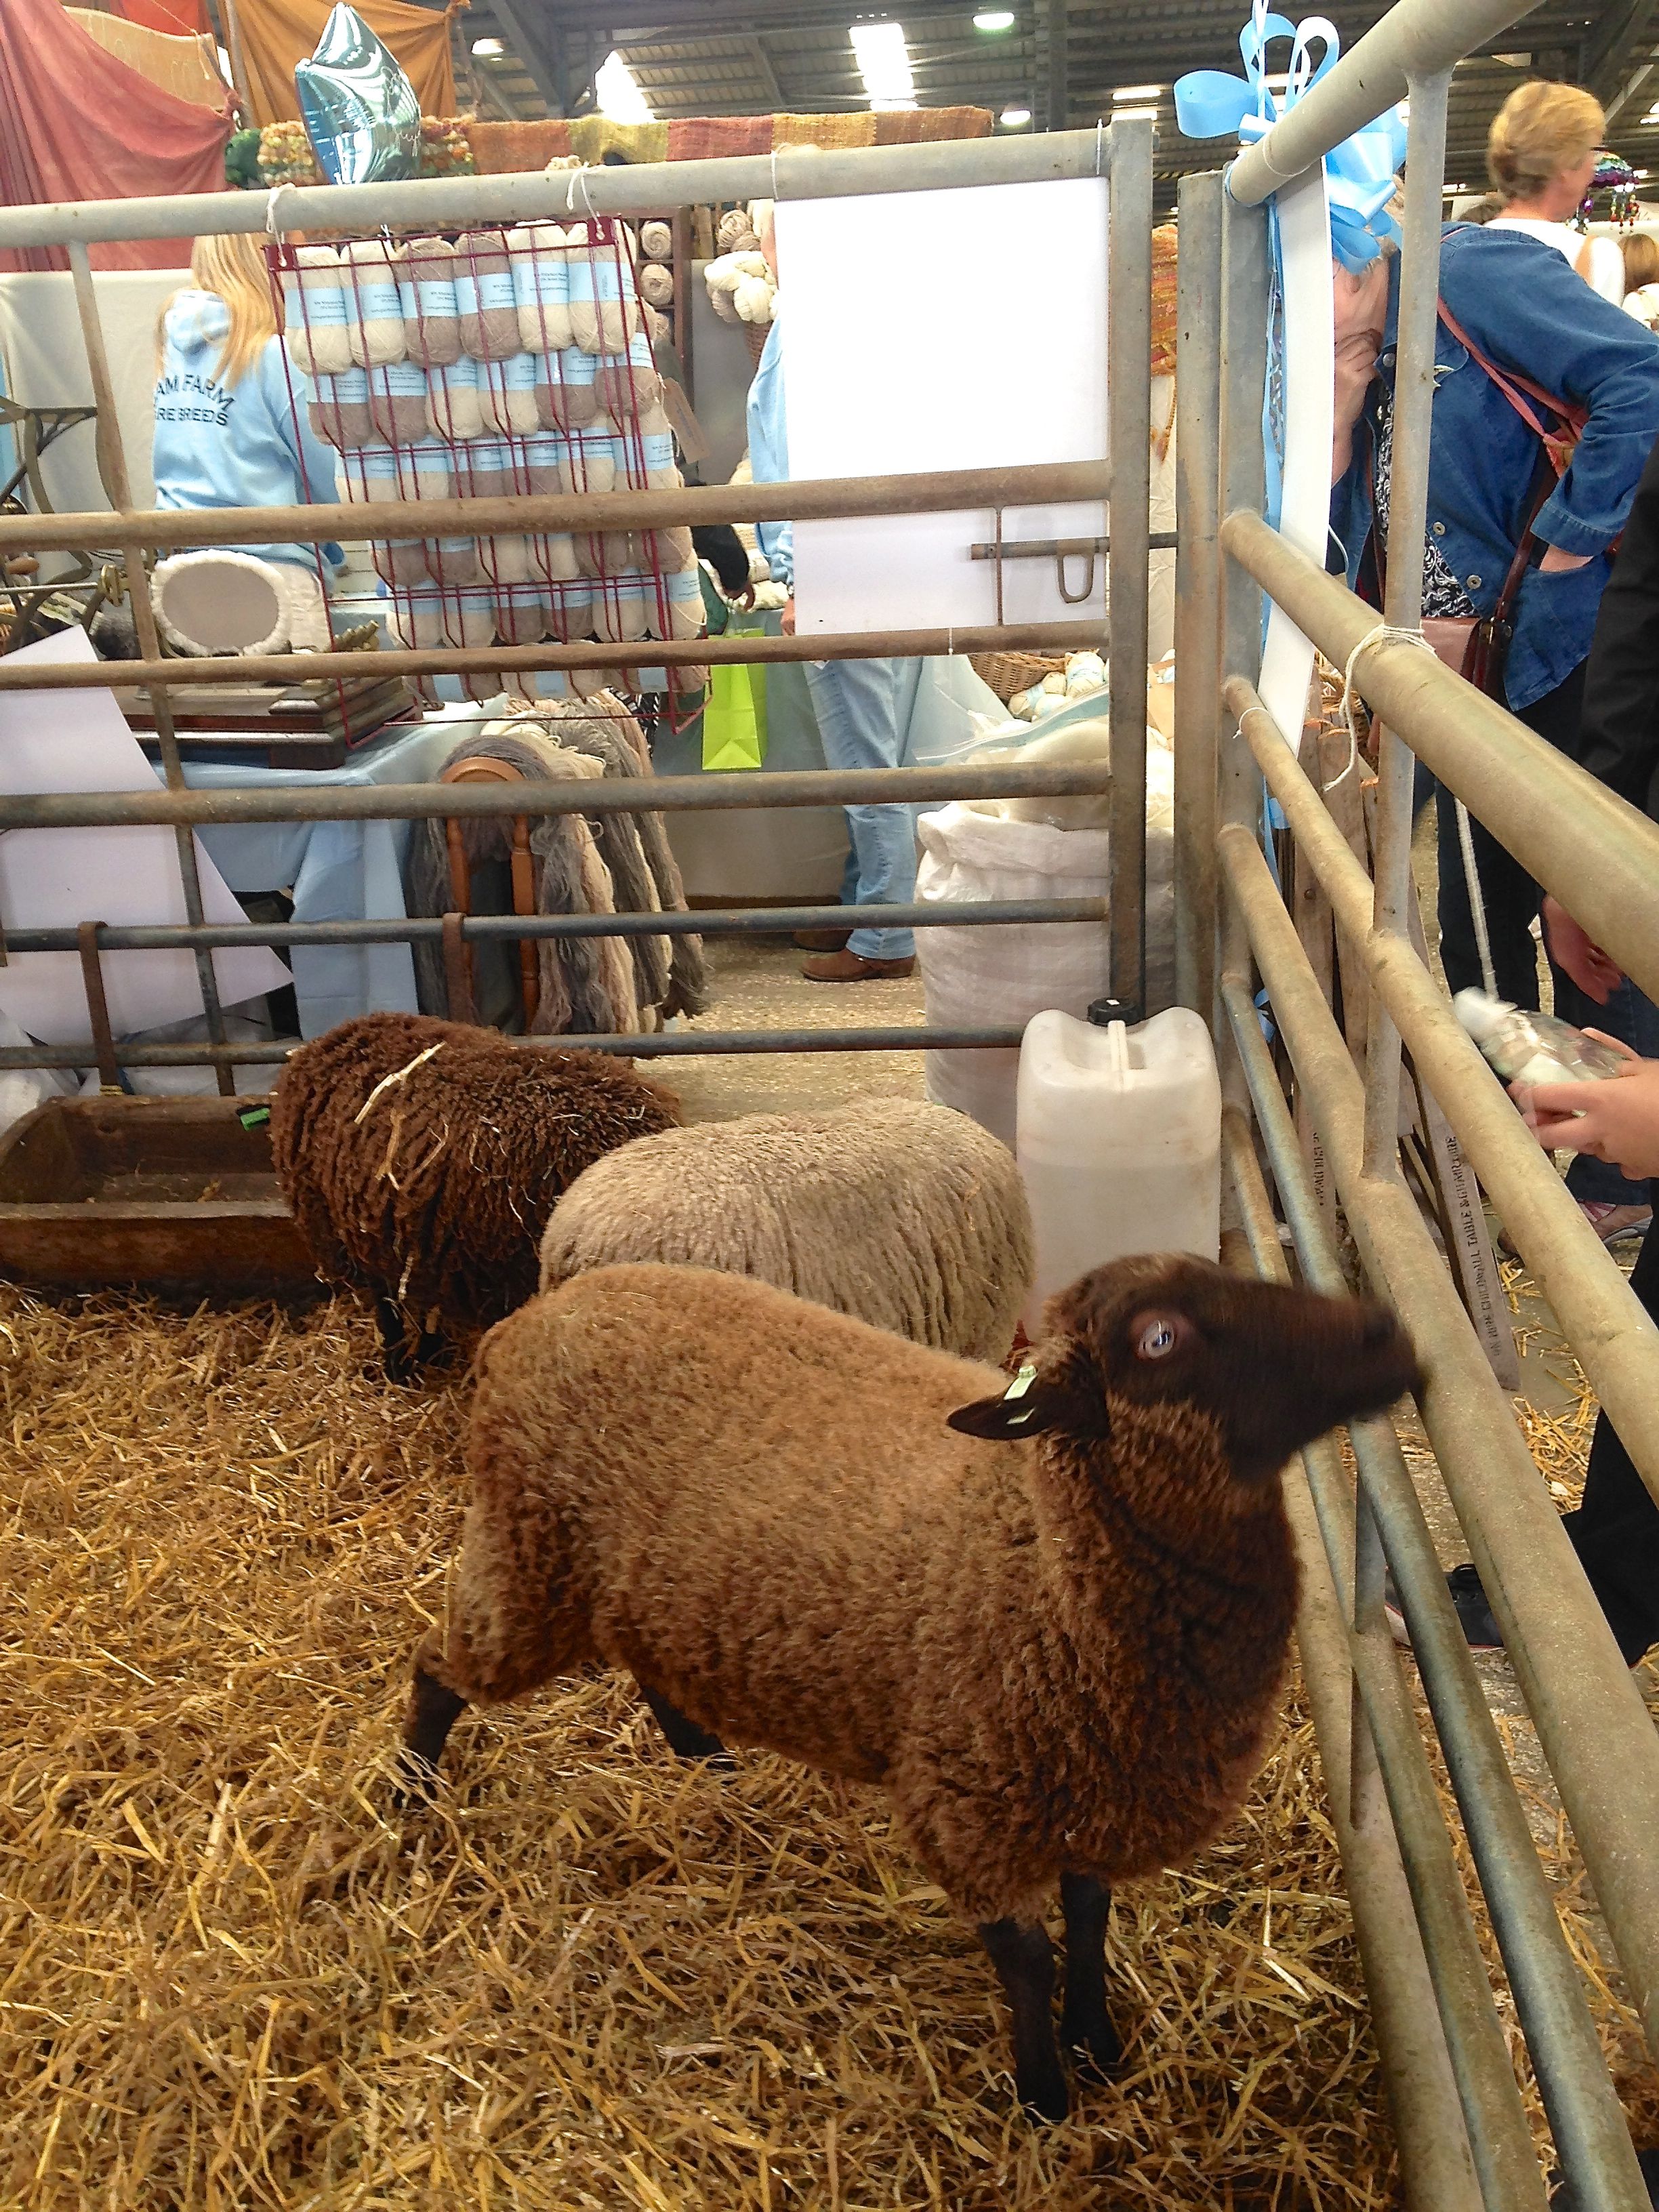
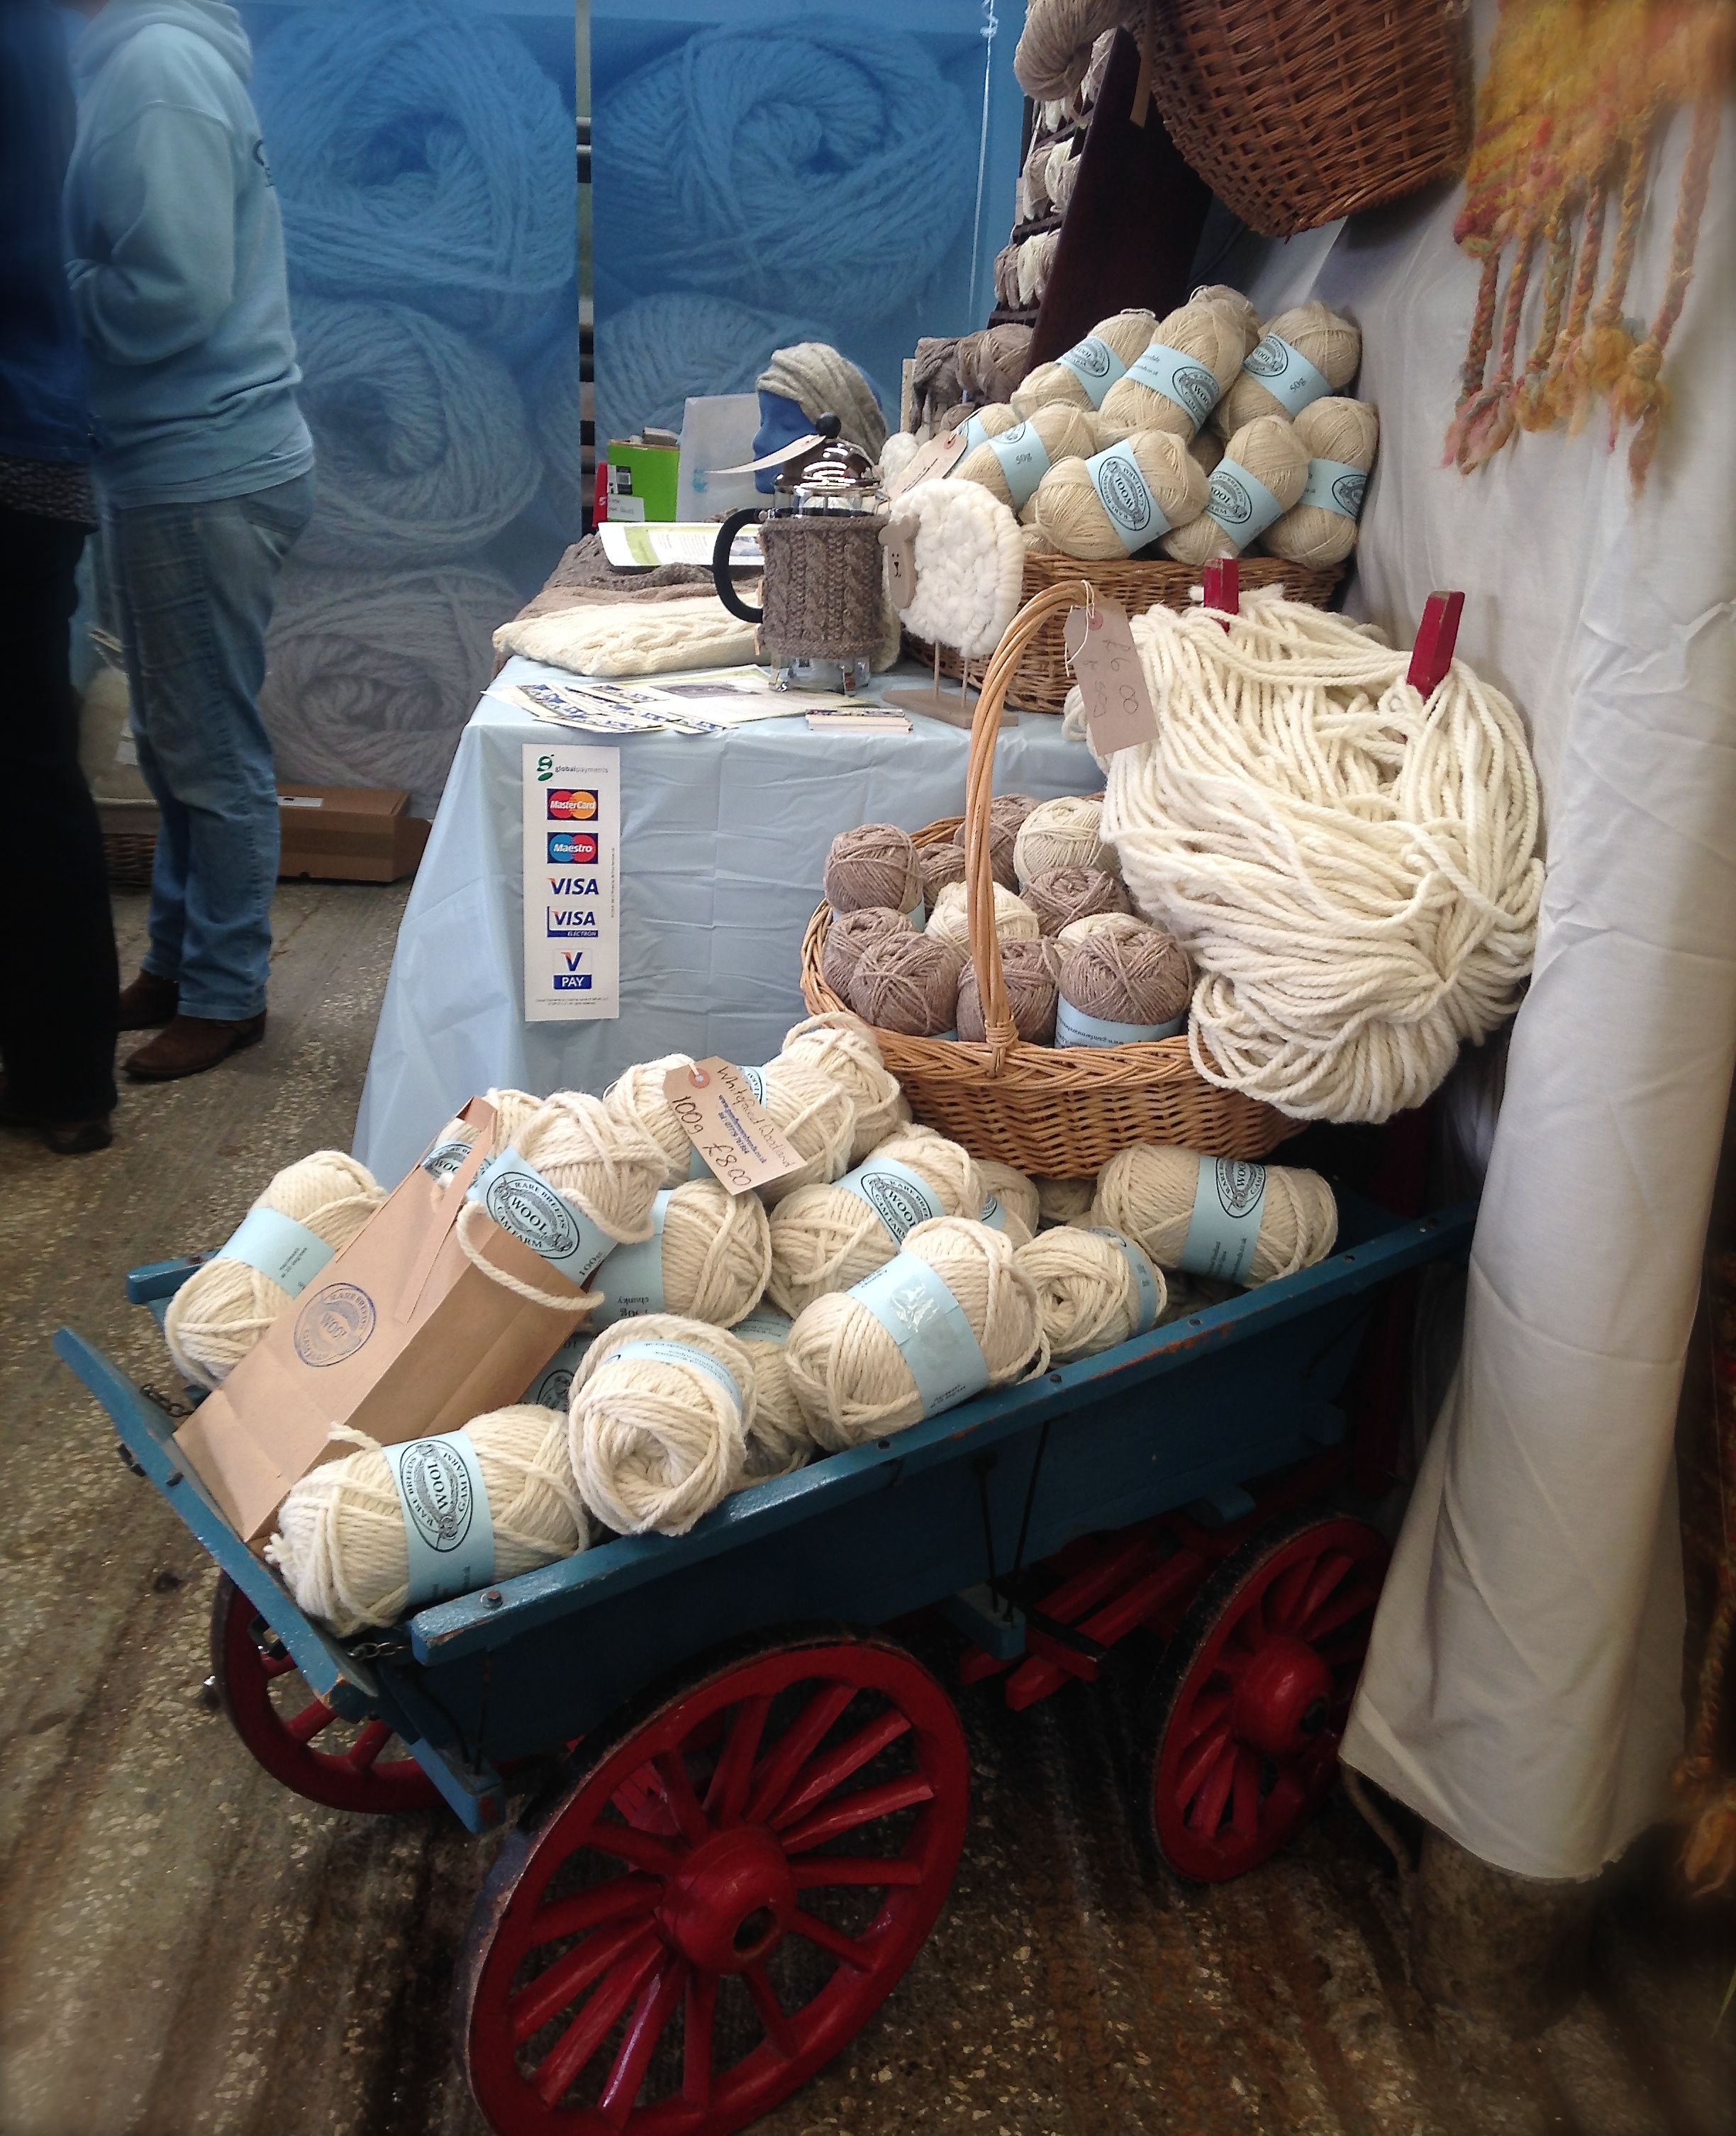
As with many of the stalls, their wares were imaginatively laid out;

IMG_1056

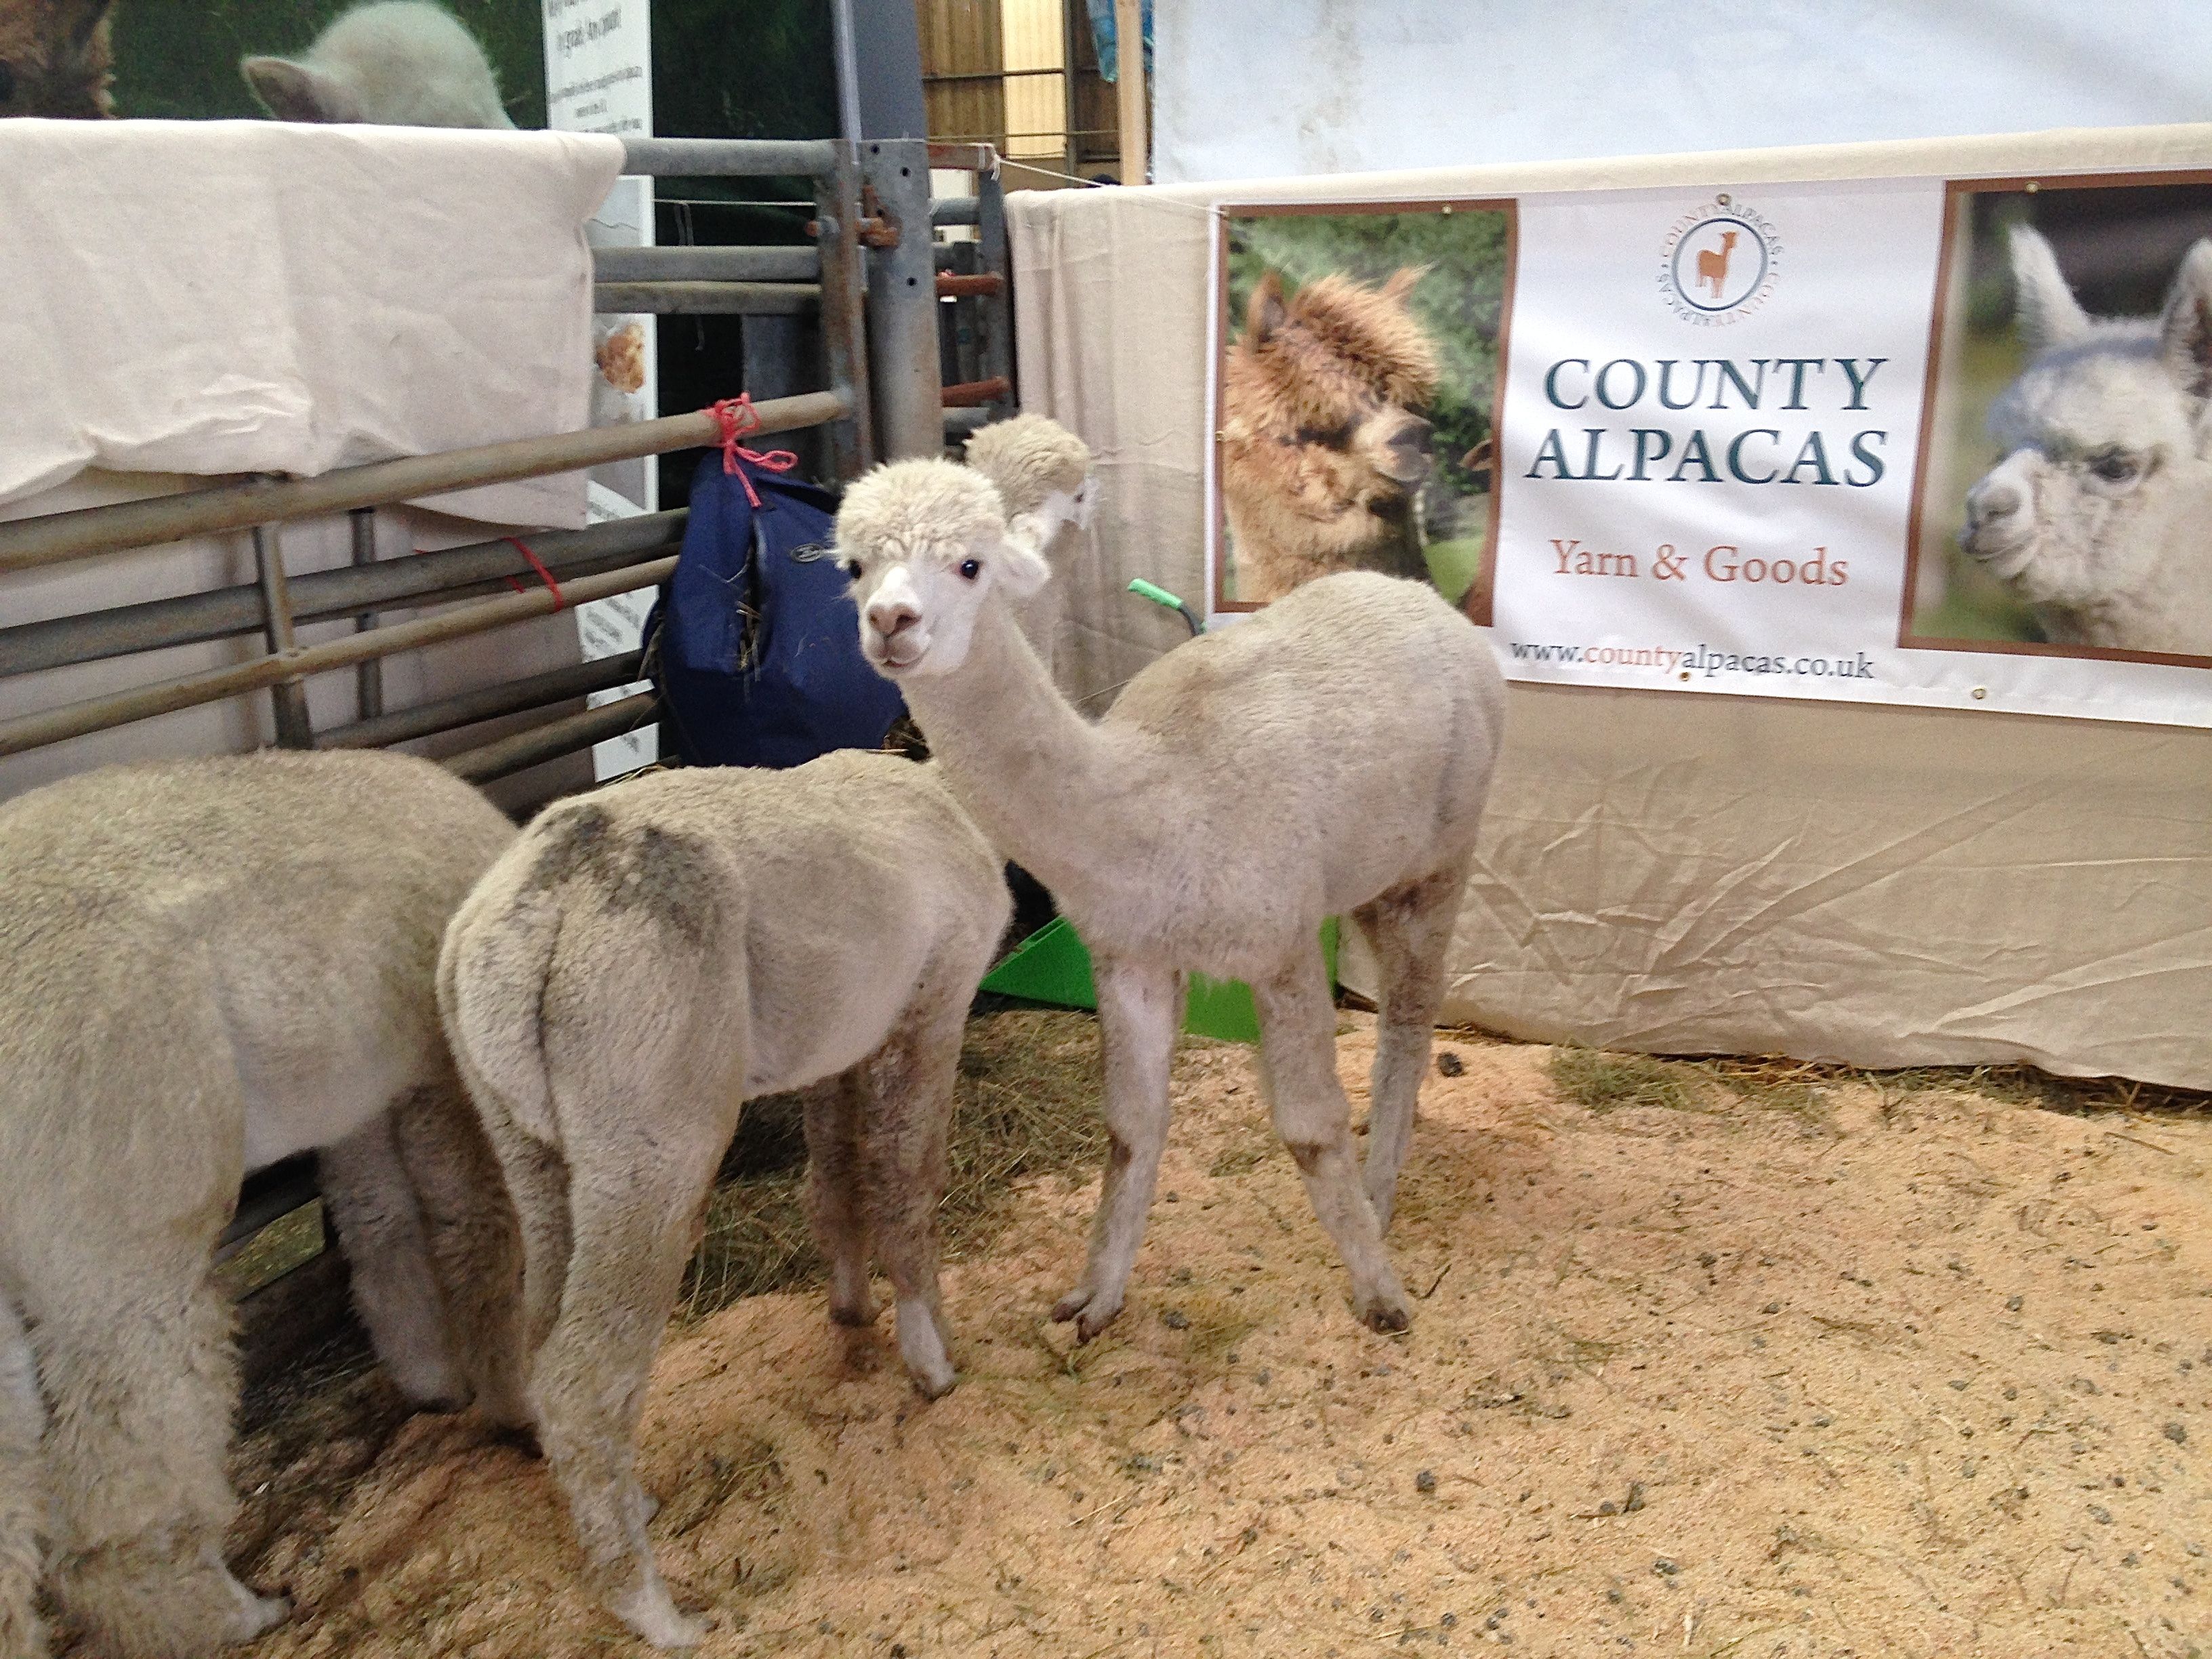
County Alpacas were very popular with their angel-faced creatures that stole the show;

IMG_1063

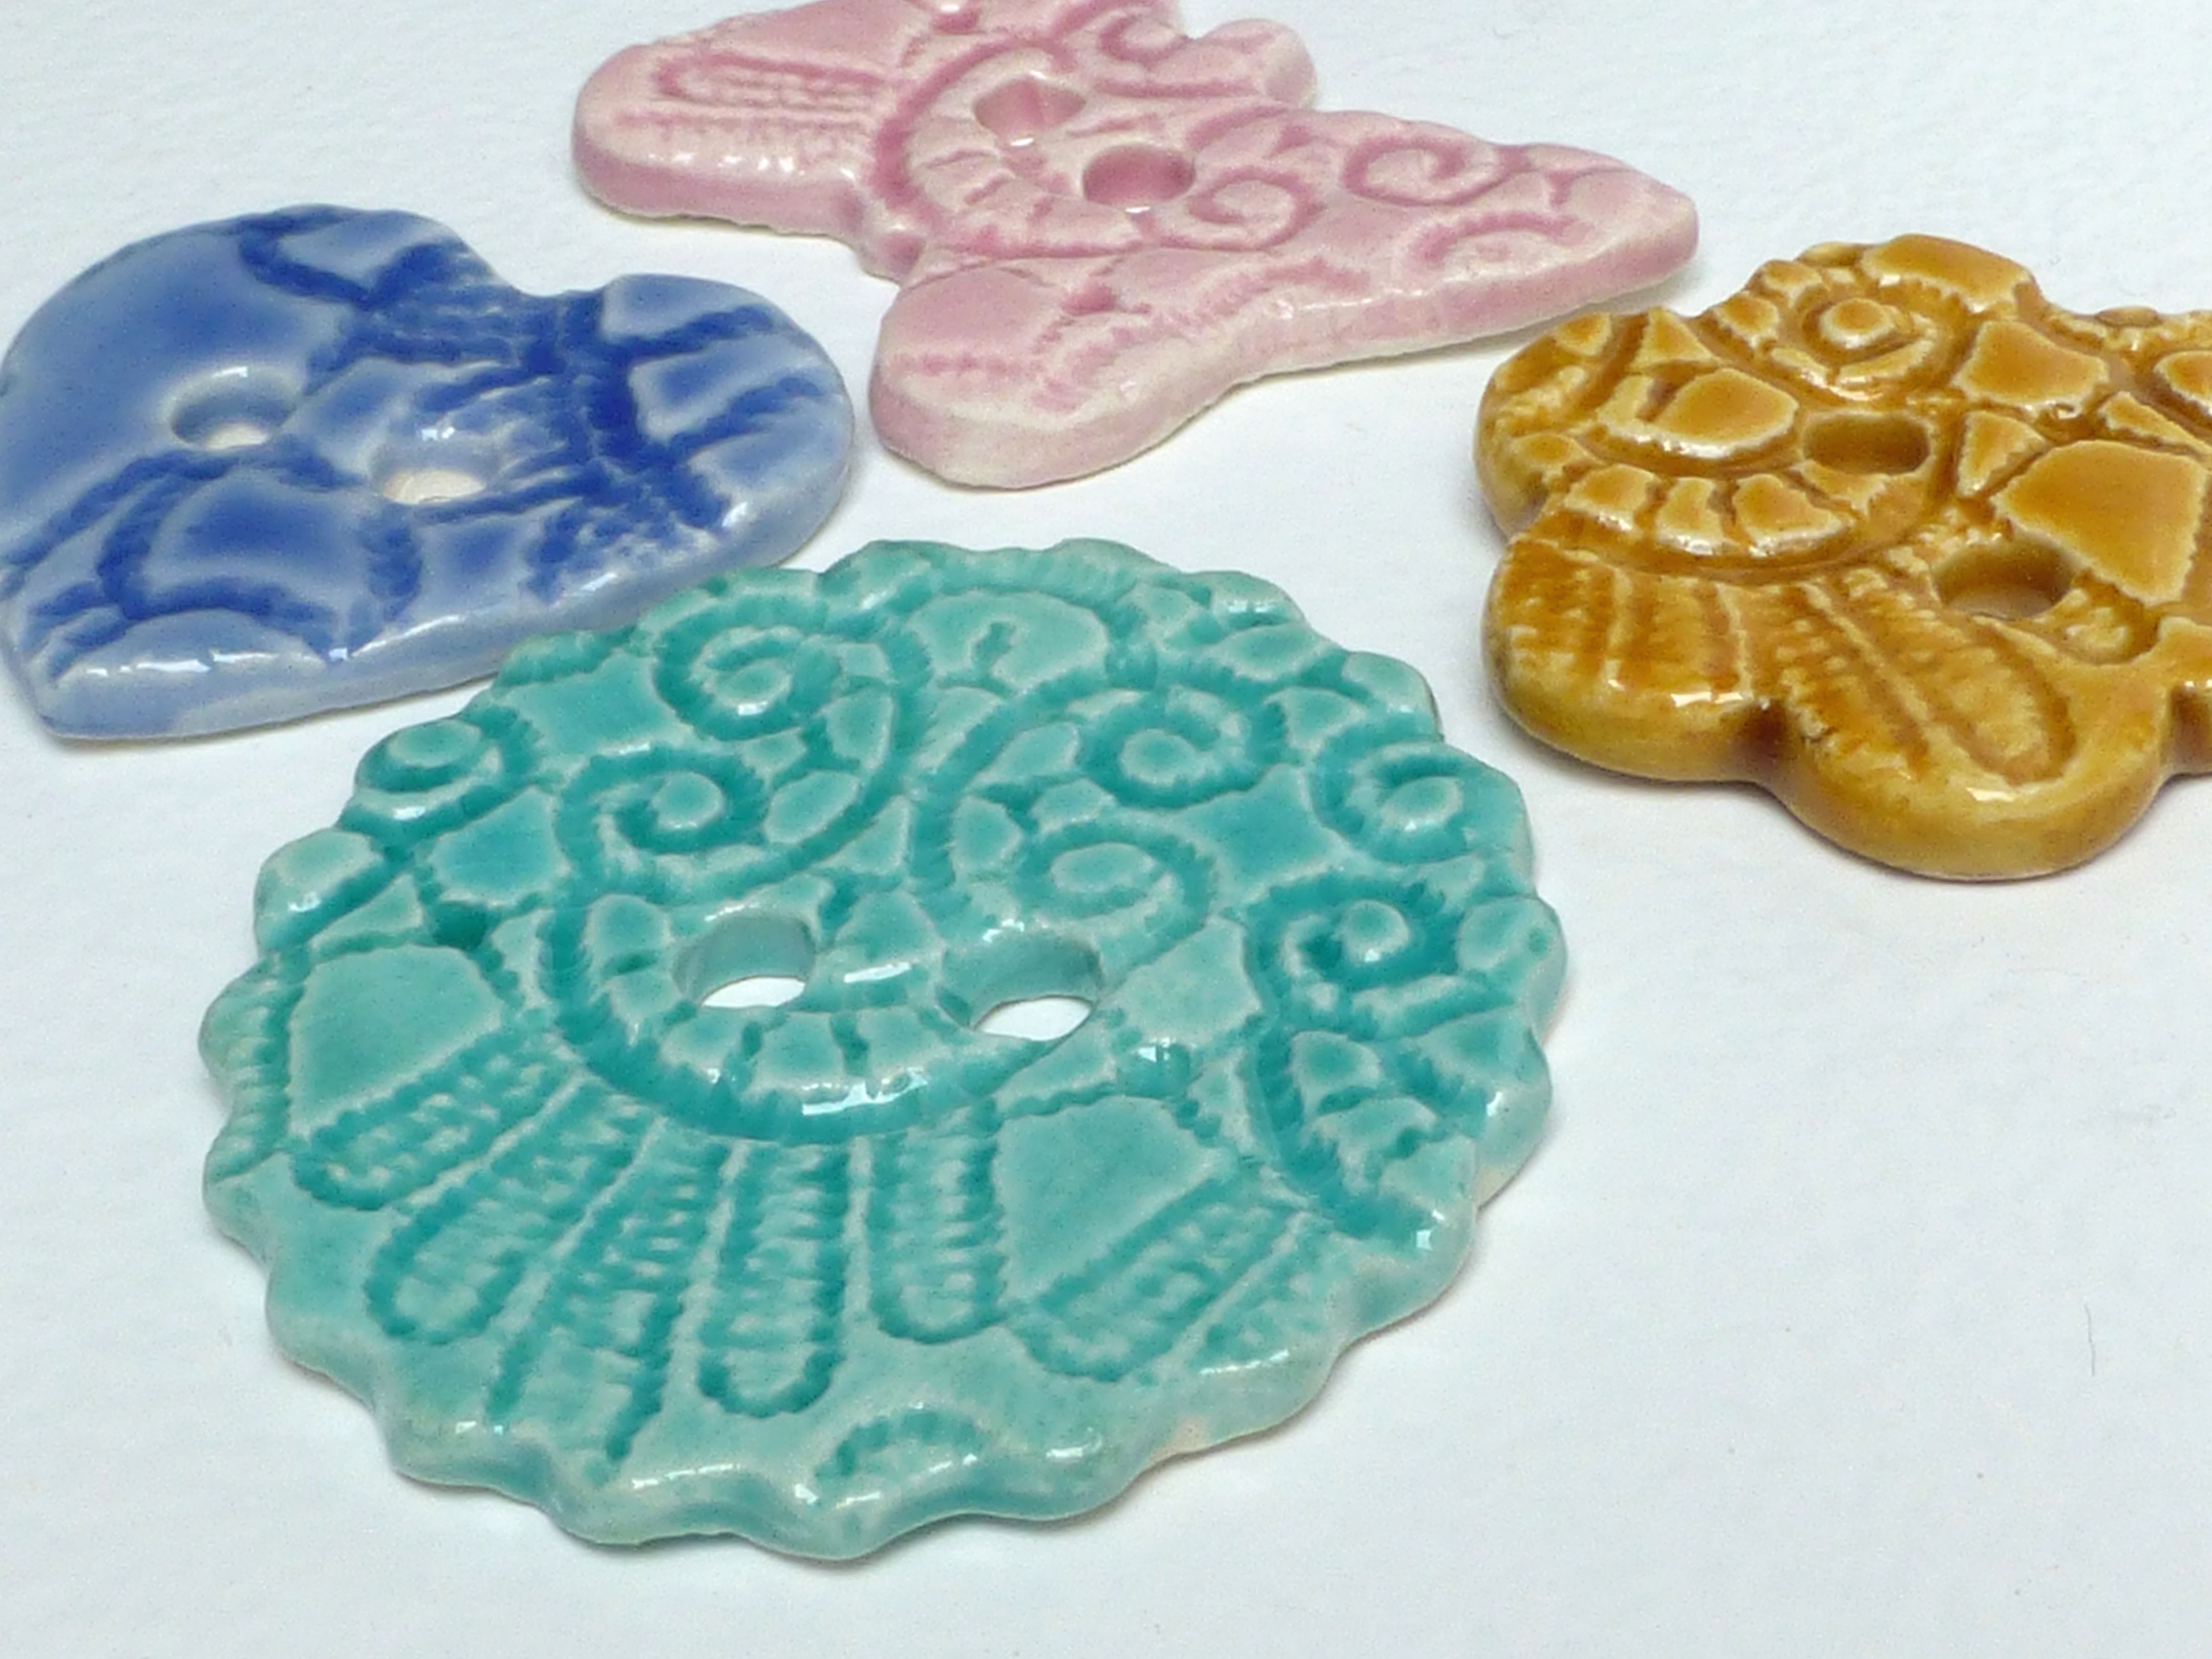
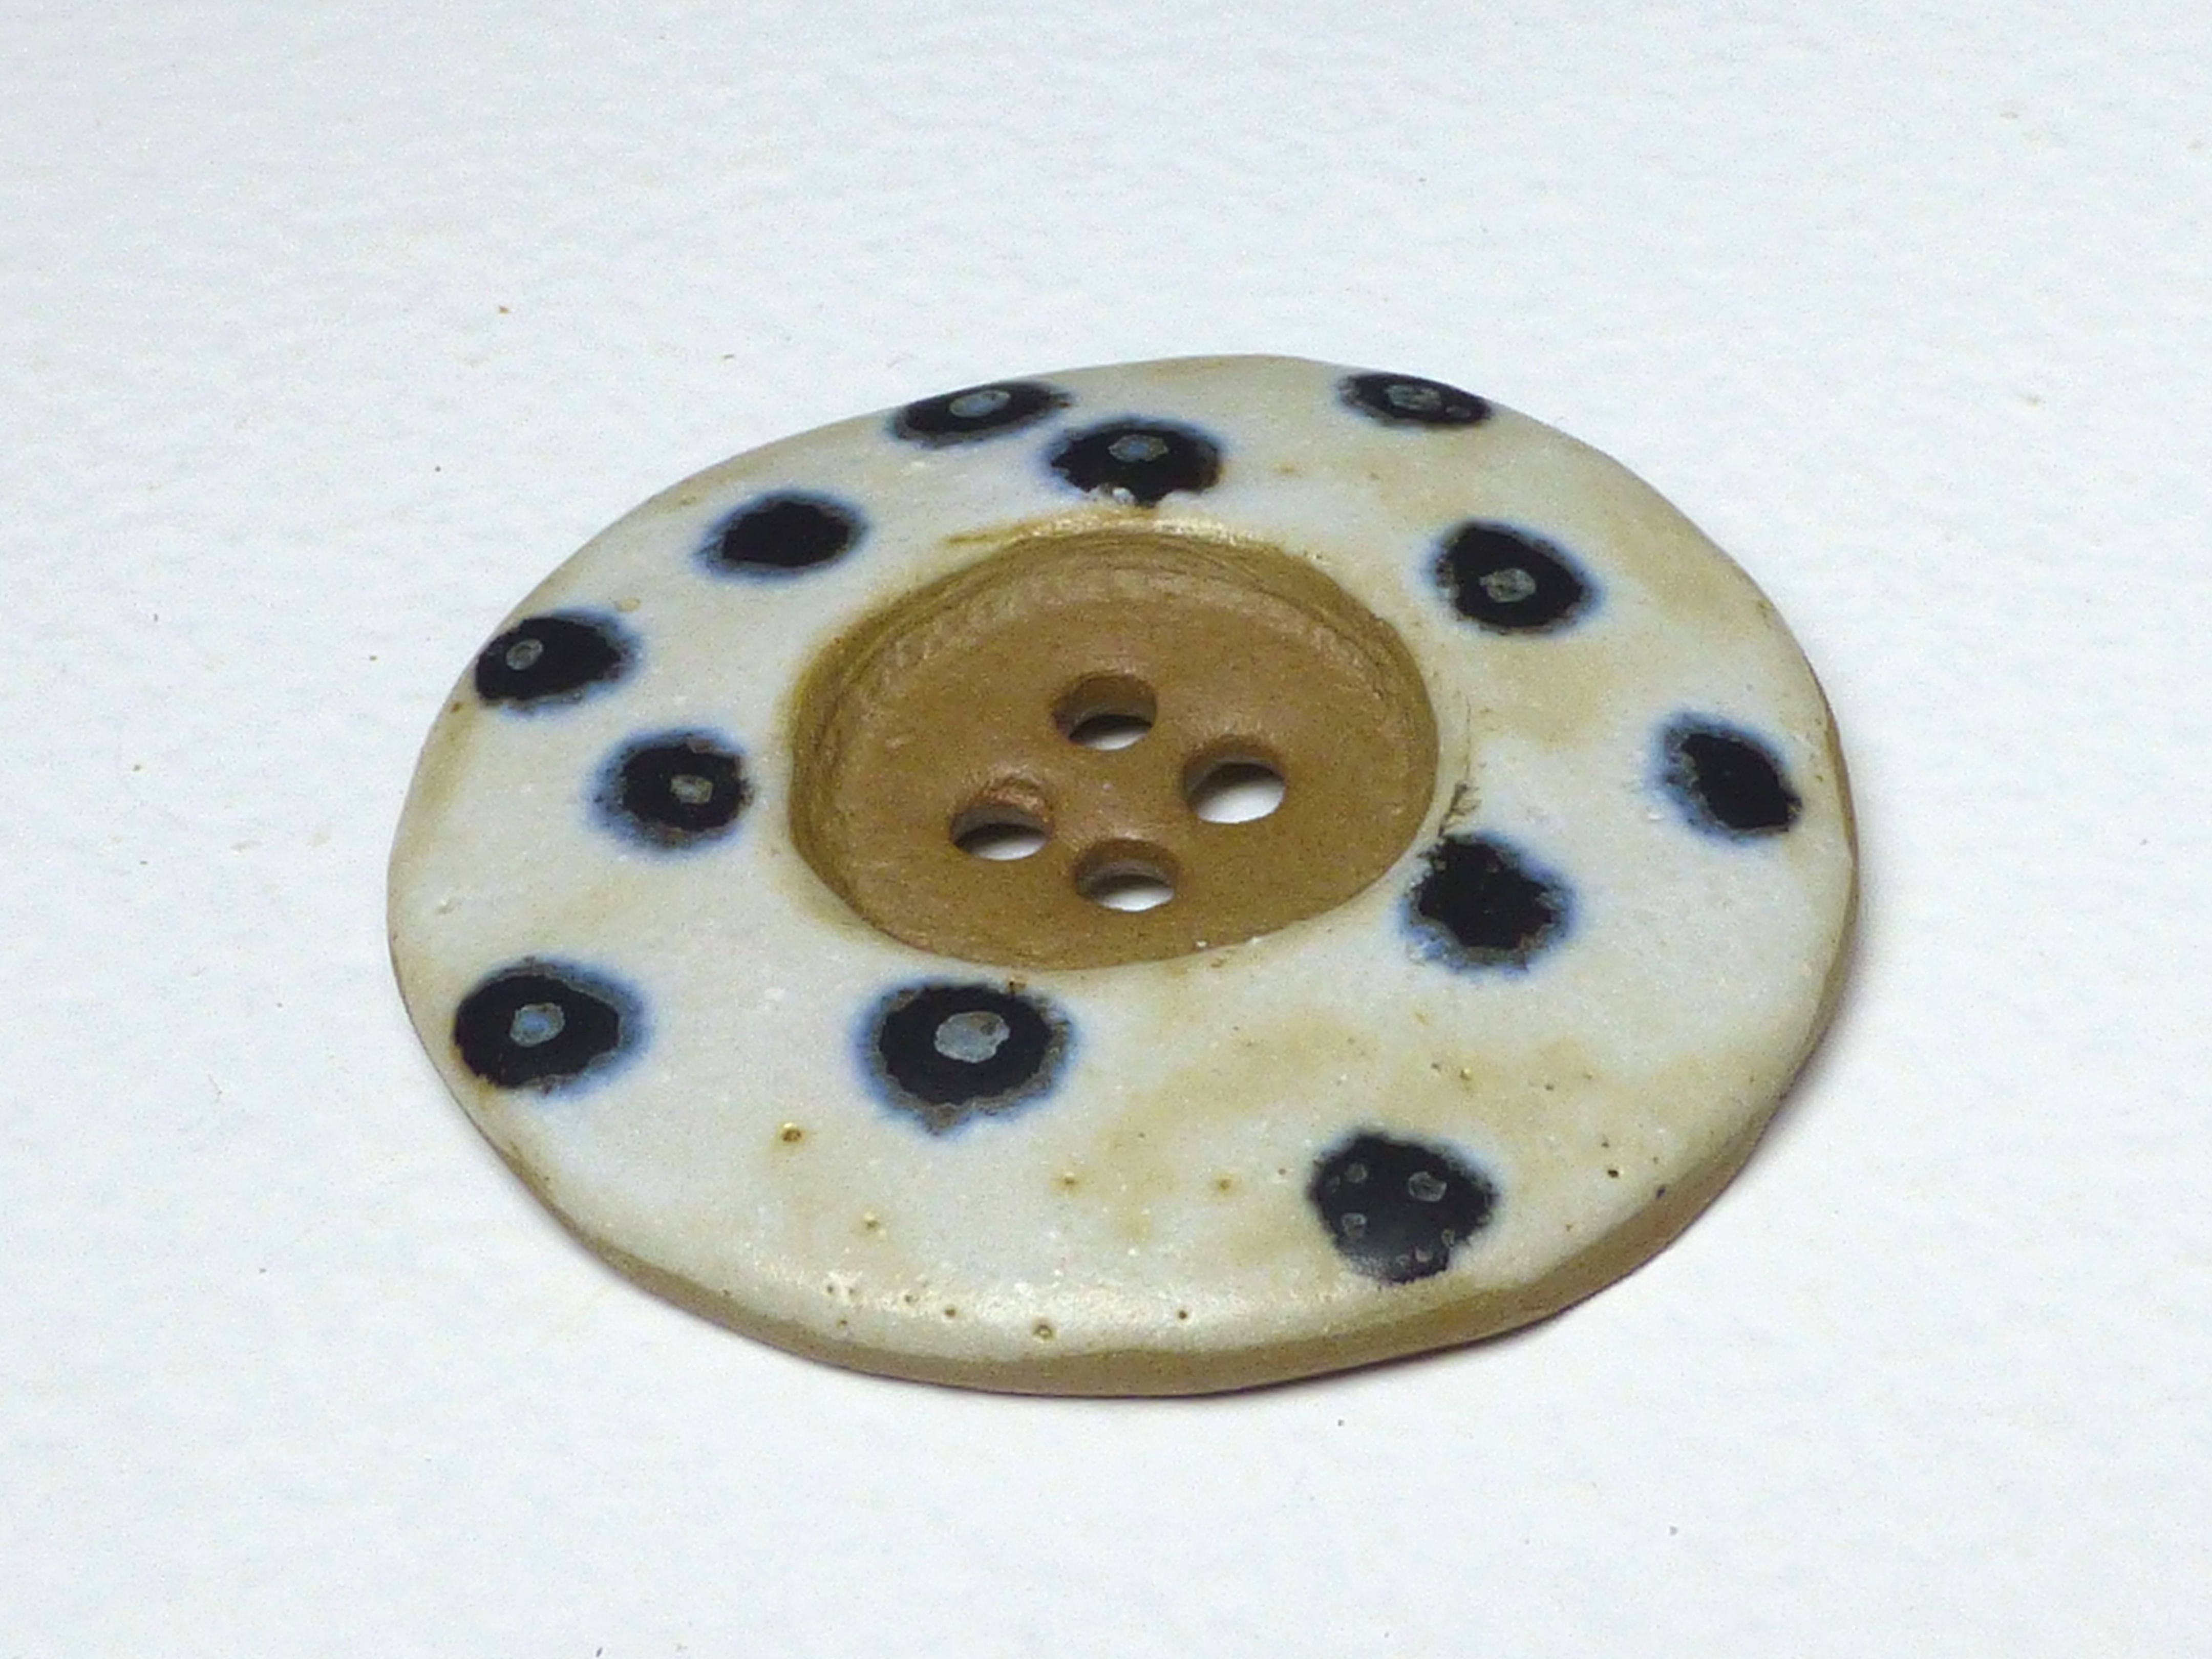
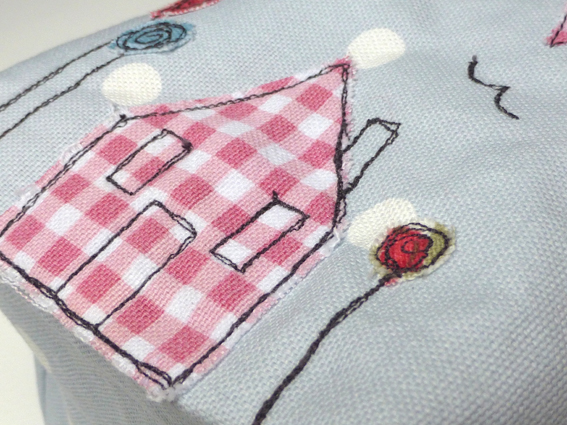
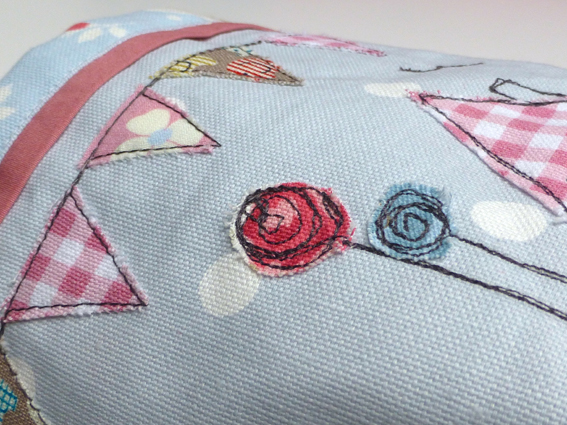
Jackie Lunn Textiles created a very attractive display…..

 IMG_1064

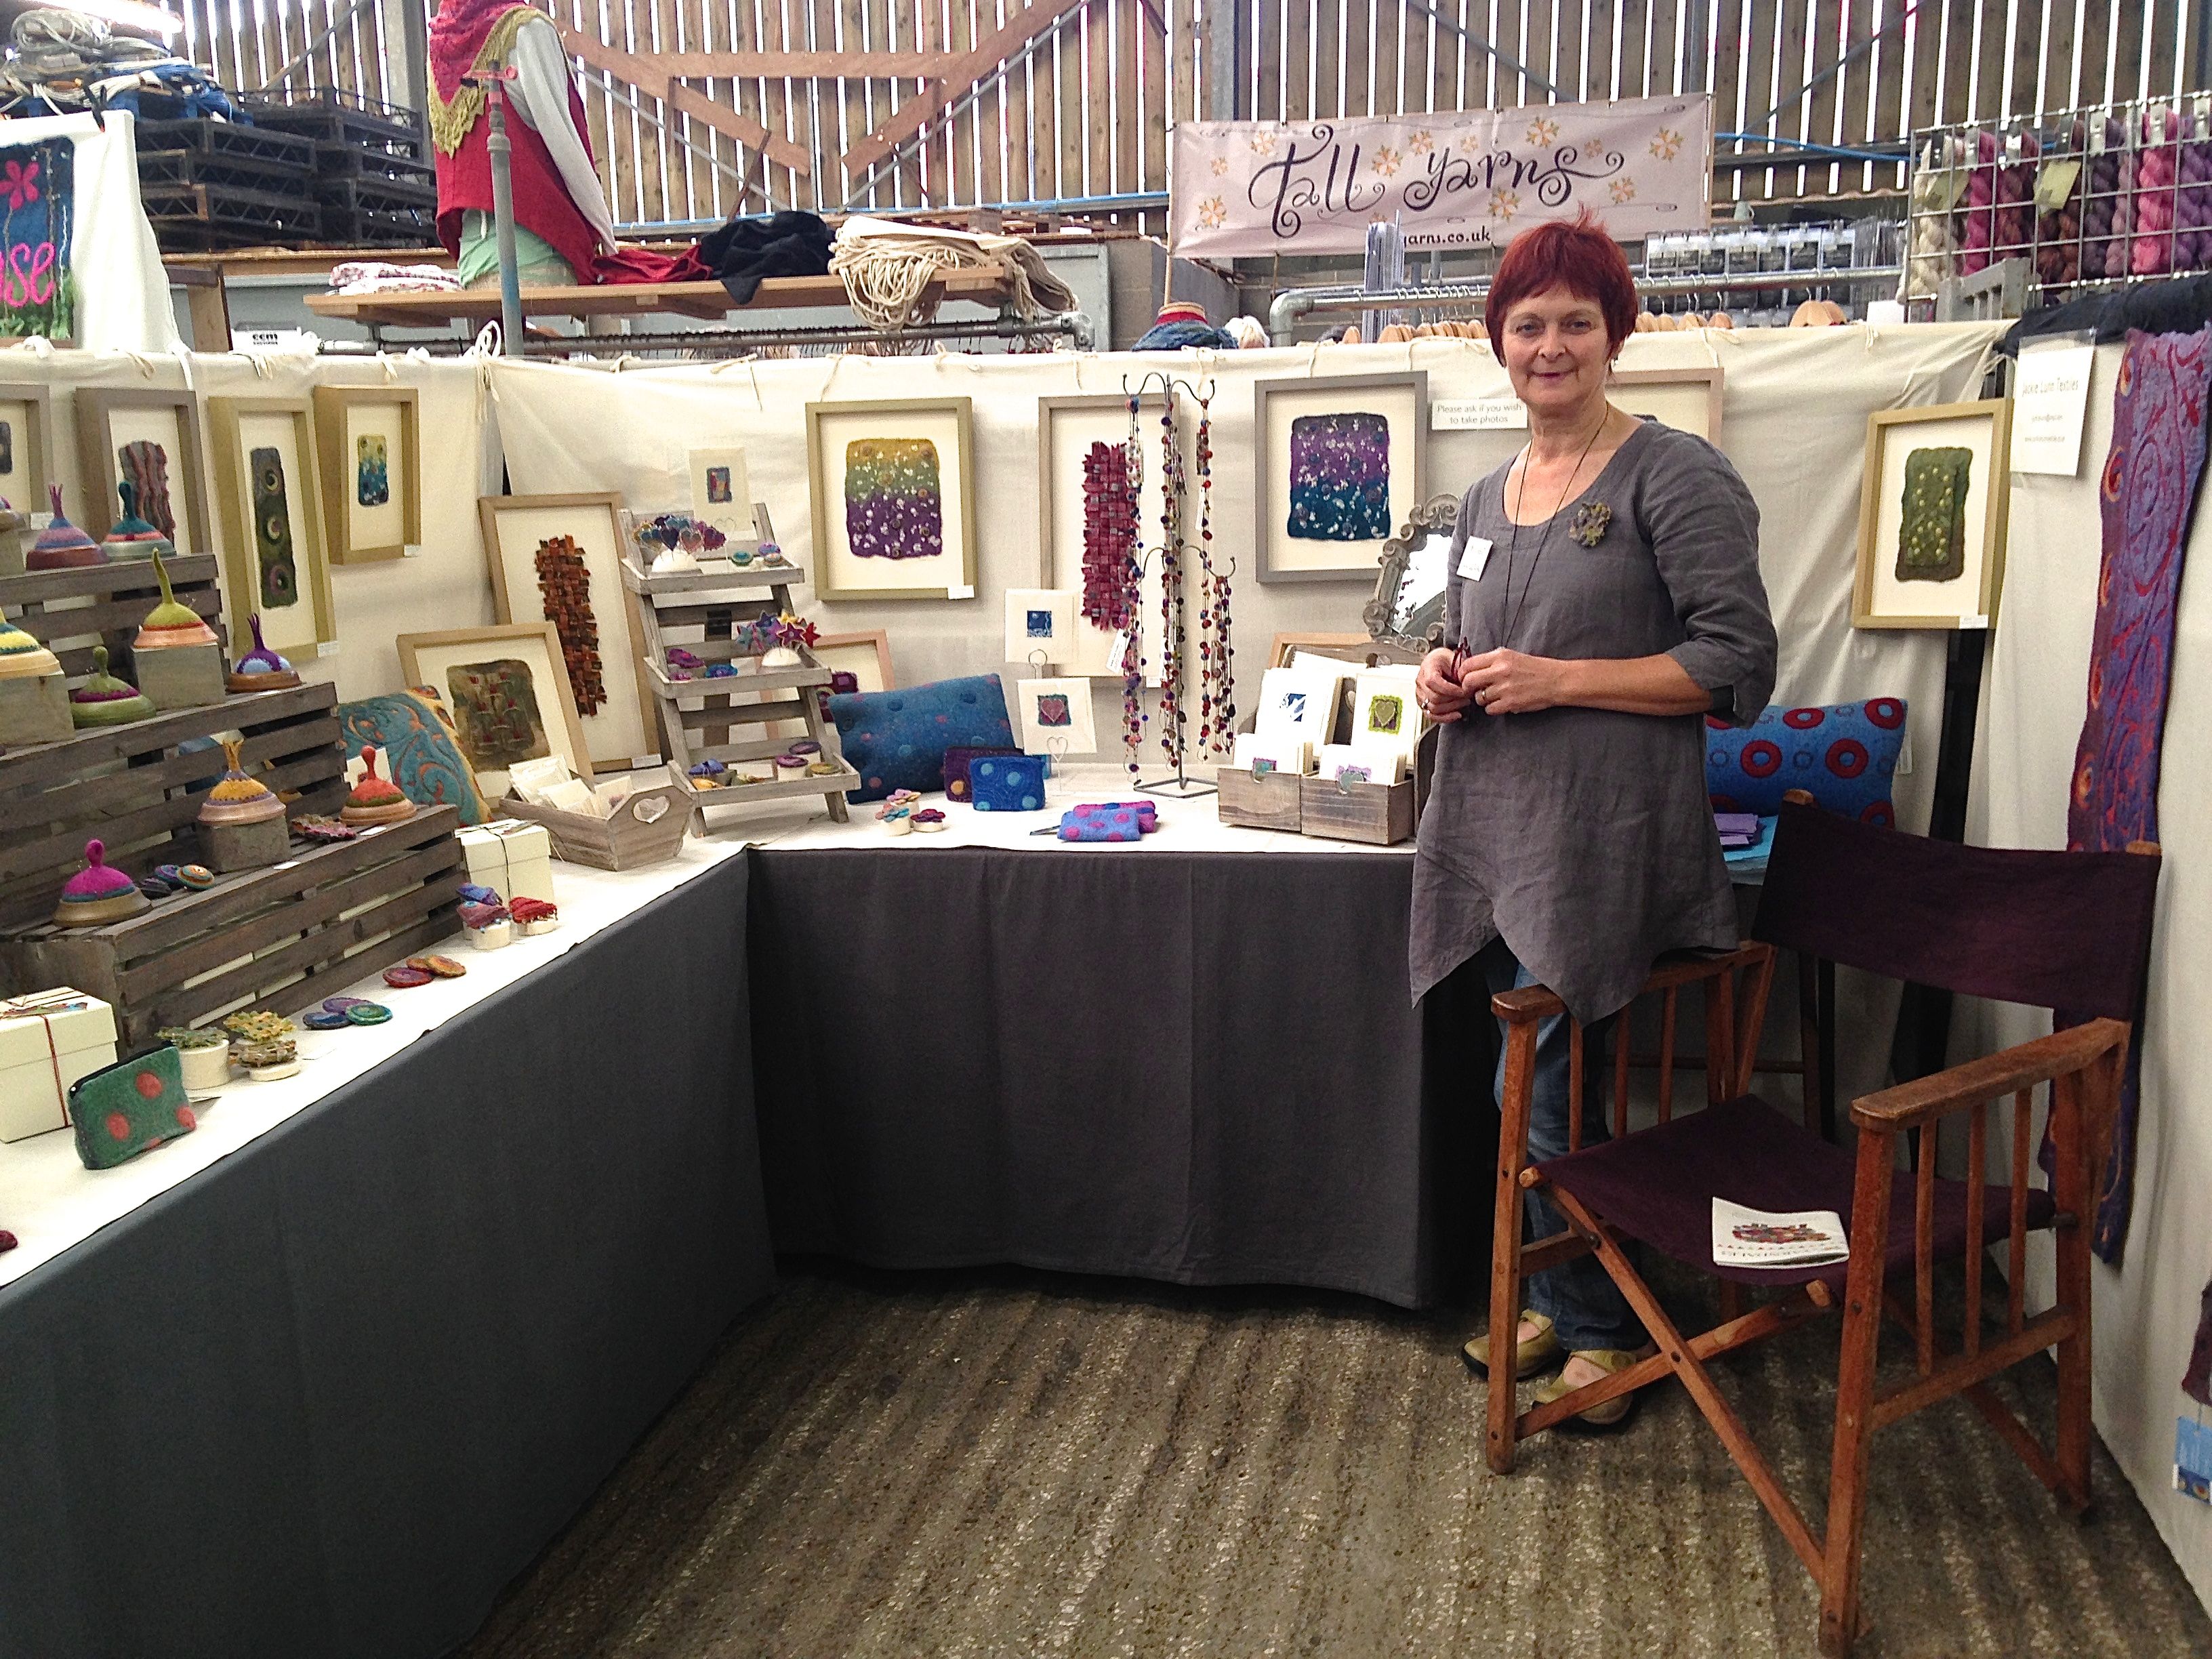
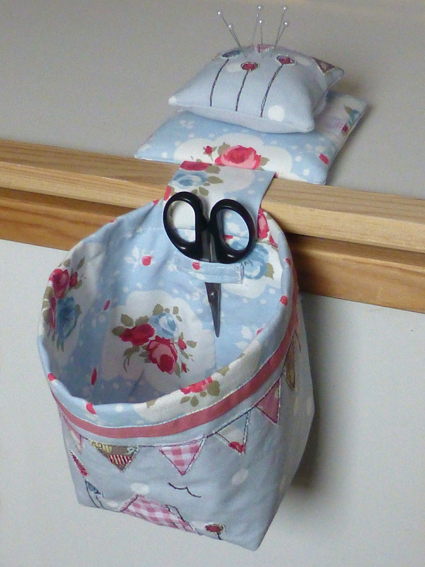
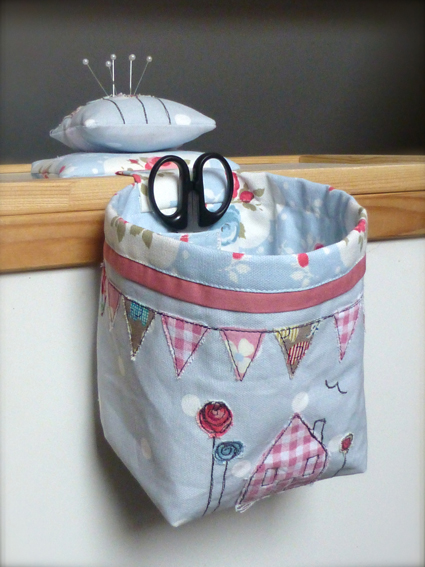
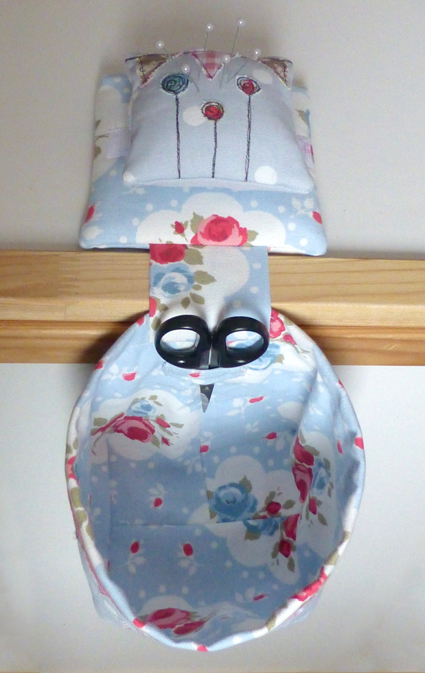
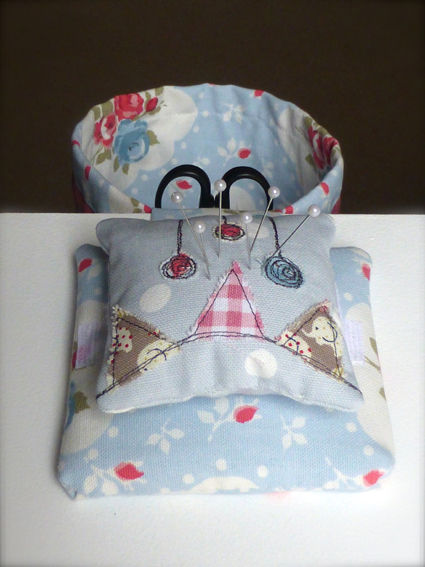
…and her pin cushions were little works of art on their own!

pincushions

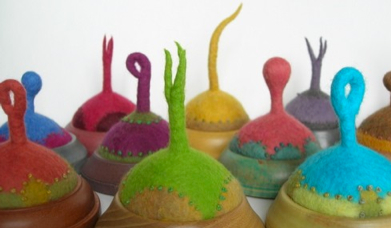
Her wet-felted circles inspired my first efforts at needle felting shown in yesterday’s post here.

circles

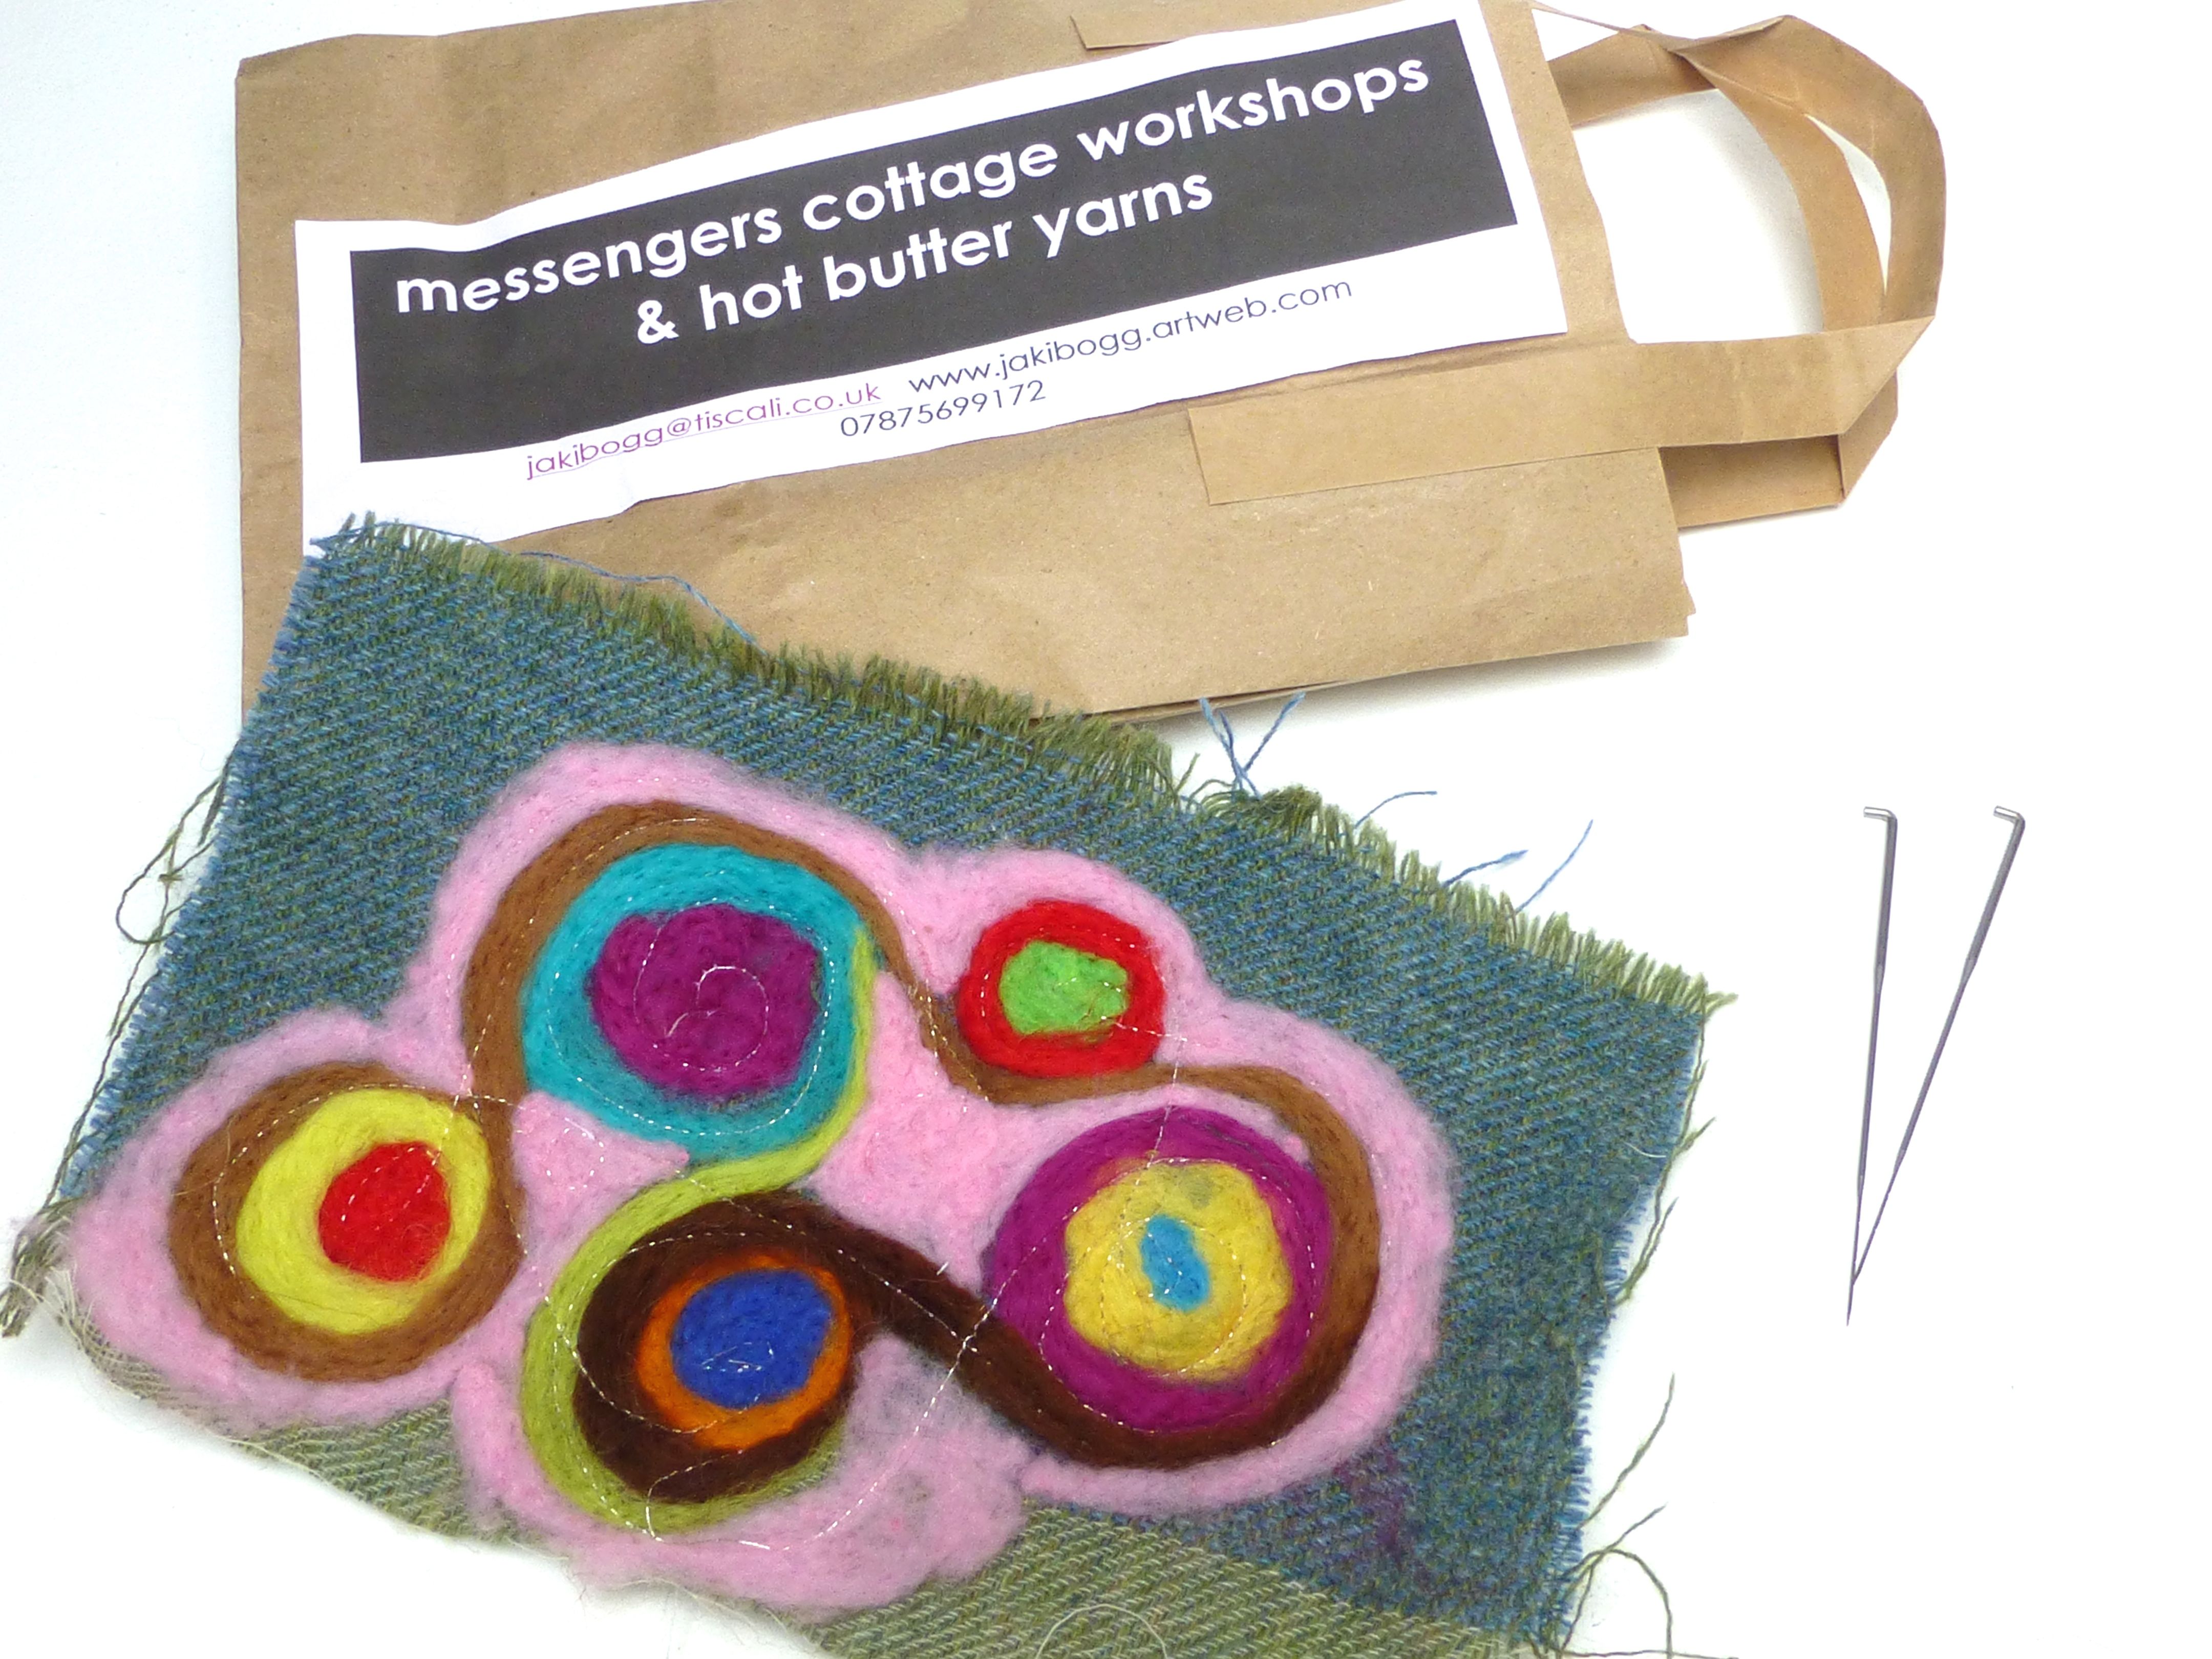
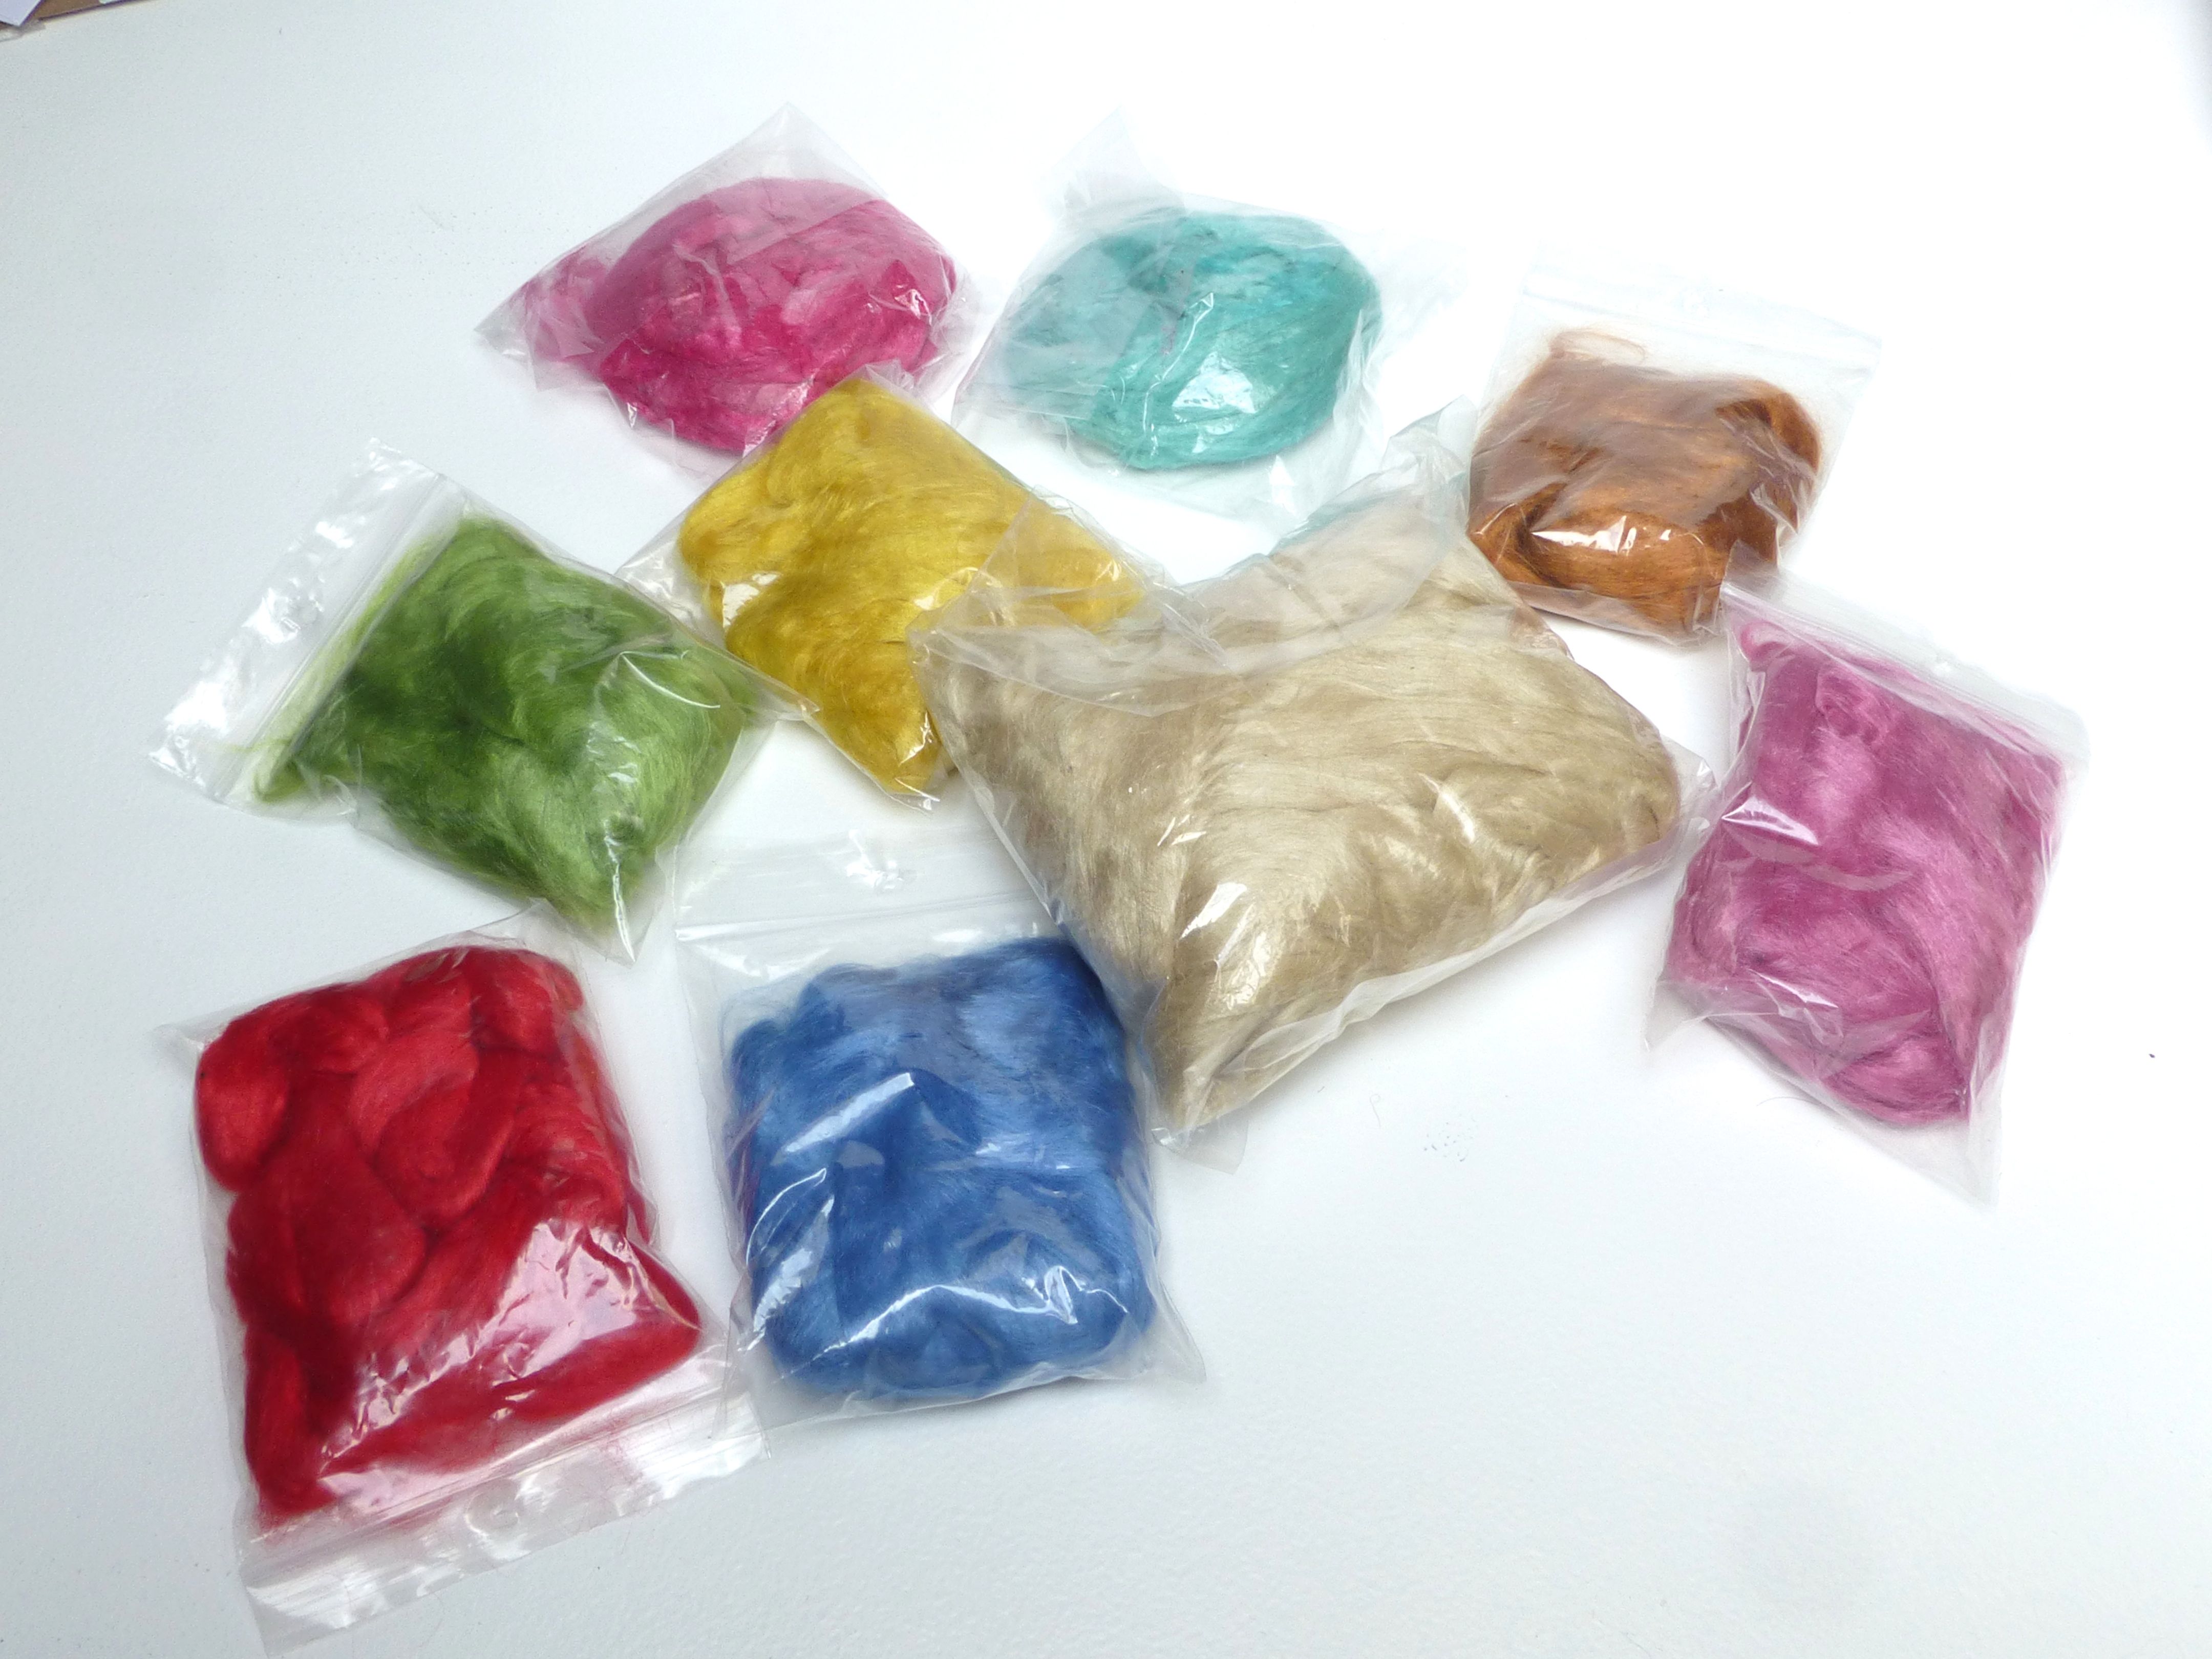
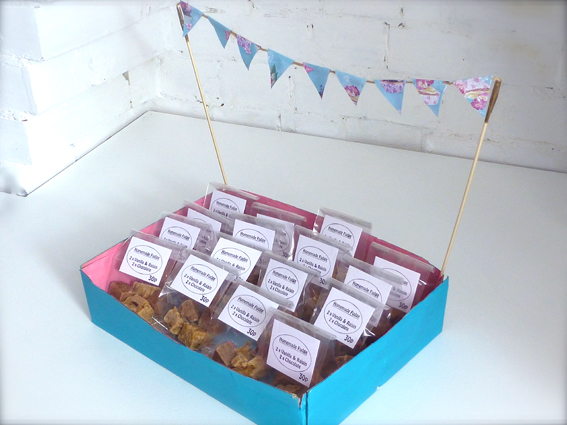
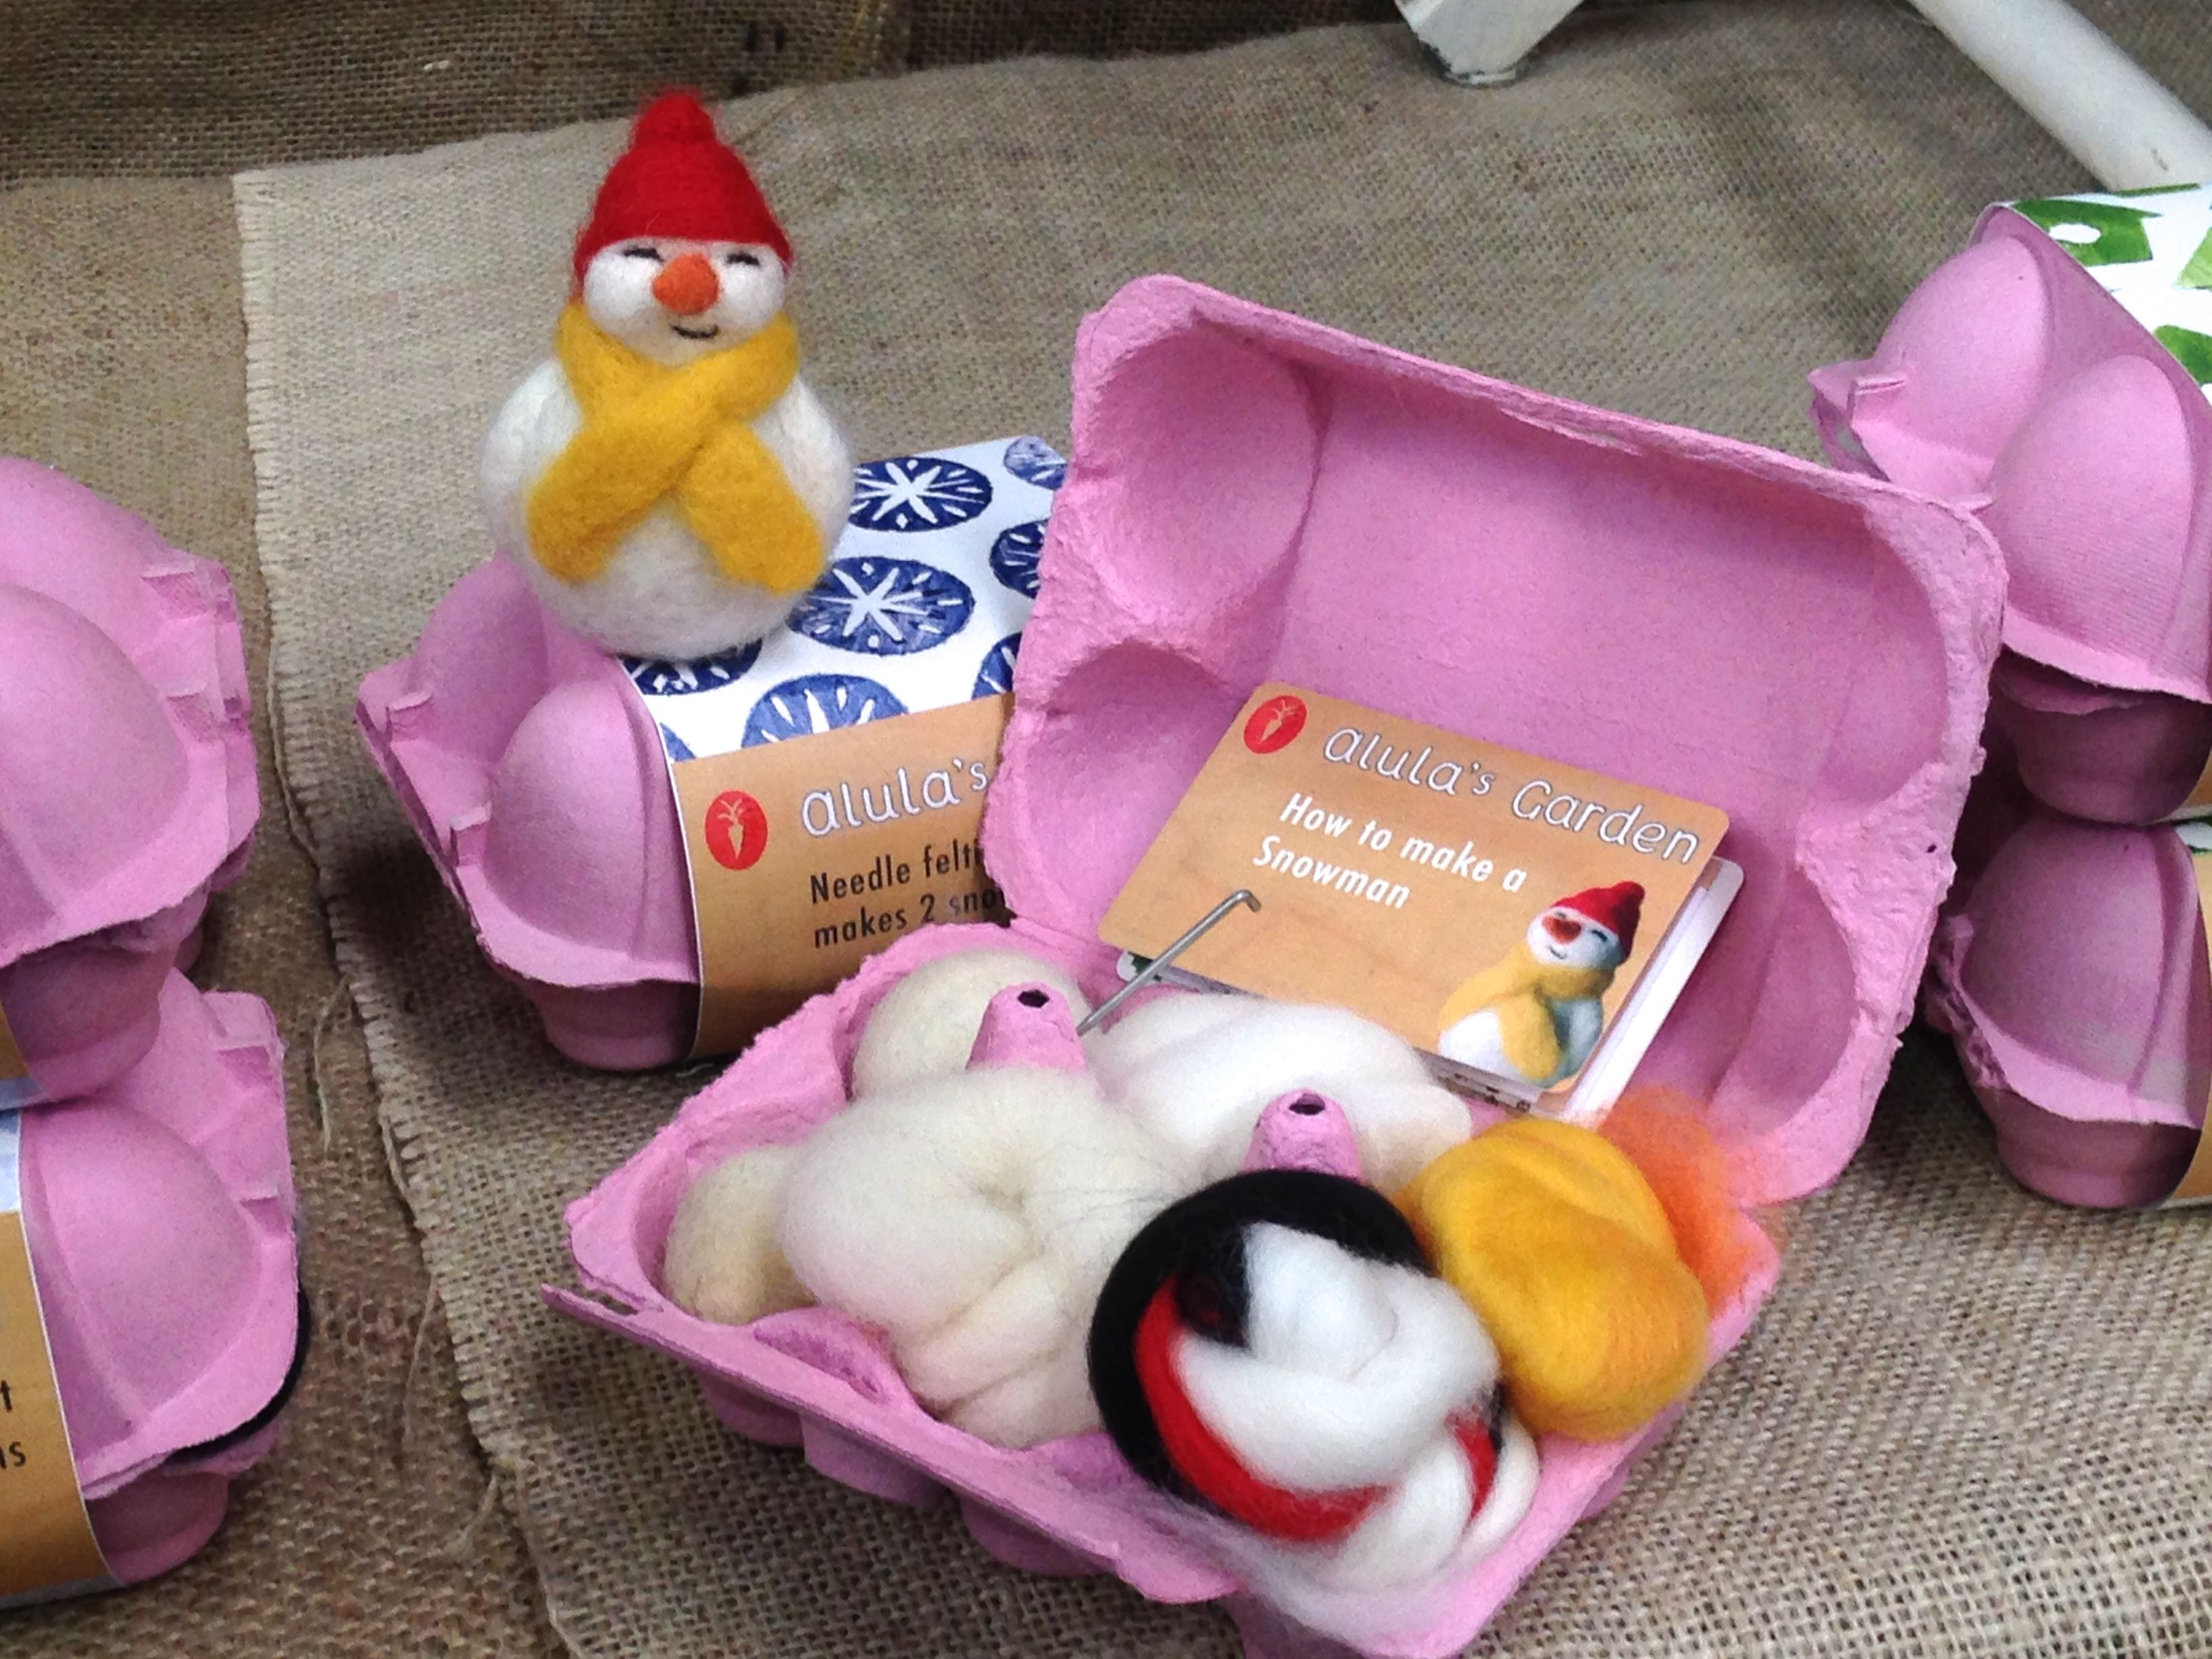
Kits were selling like hot cakes – these by Alula’s Garden were presented in a thoroughly original way;

IMG_1043

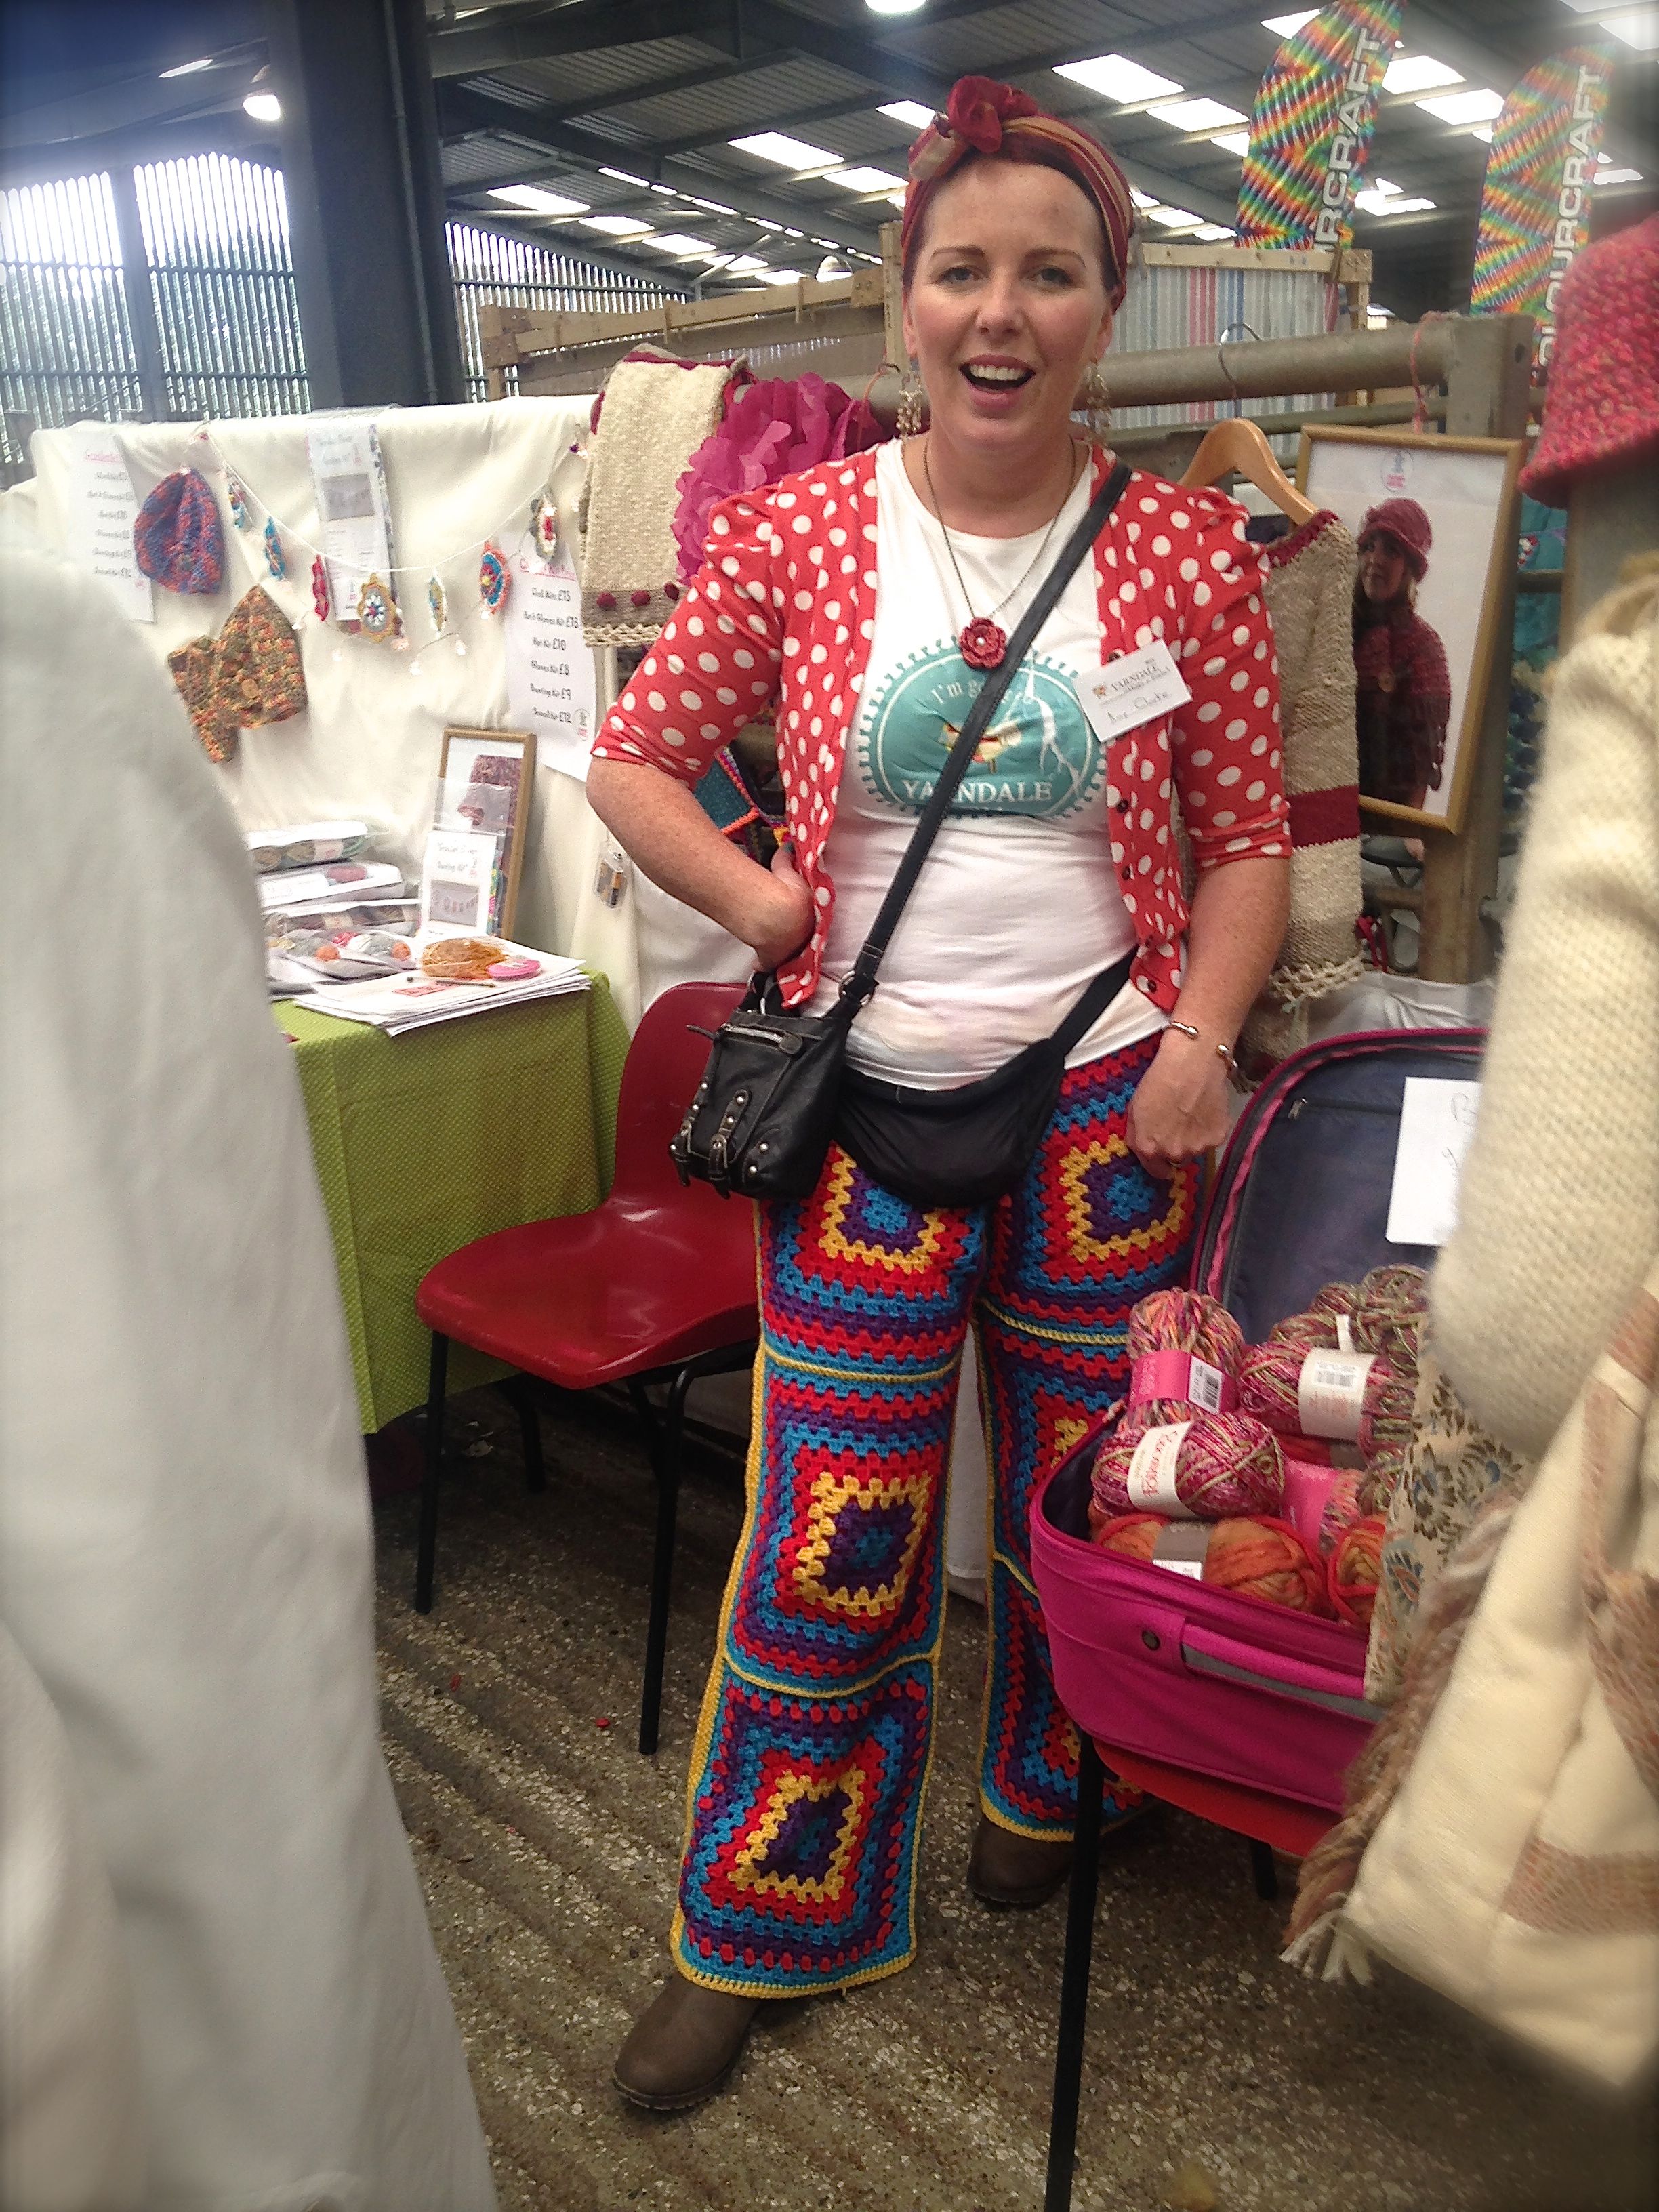
The ladies at Tall Yarns were so helpful and enthusiastic about their clothes that I ended up trying nearly every design on! I was wearing a red linen dress on Sunday that I made and it just so happened that it worked very well with most of their designs.

IMG_1066

IMG_1067

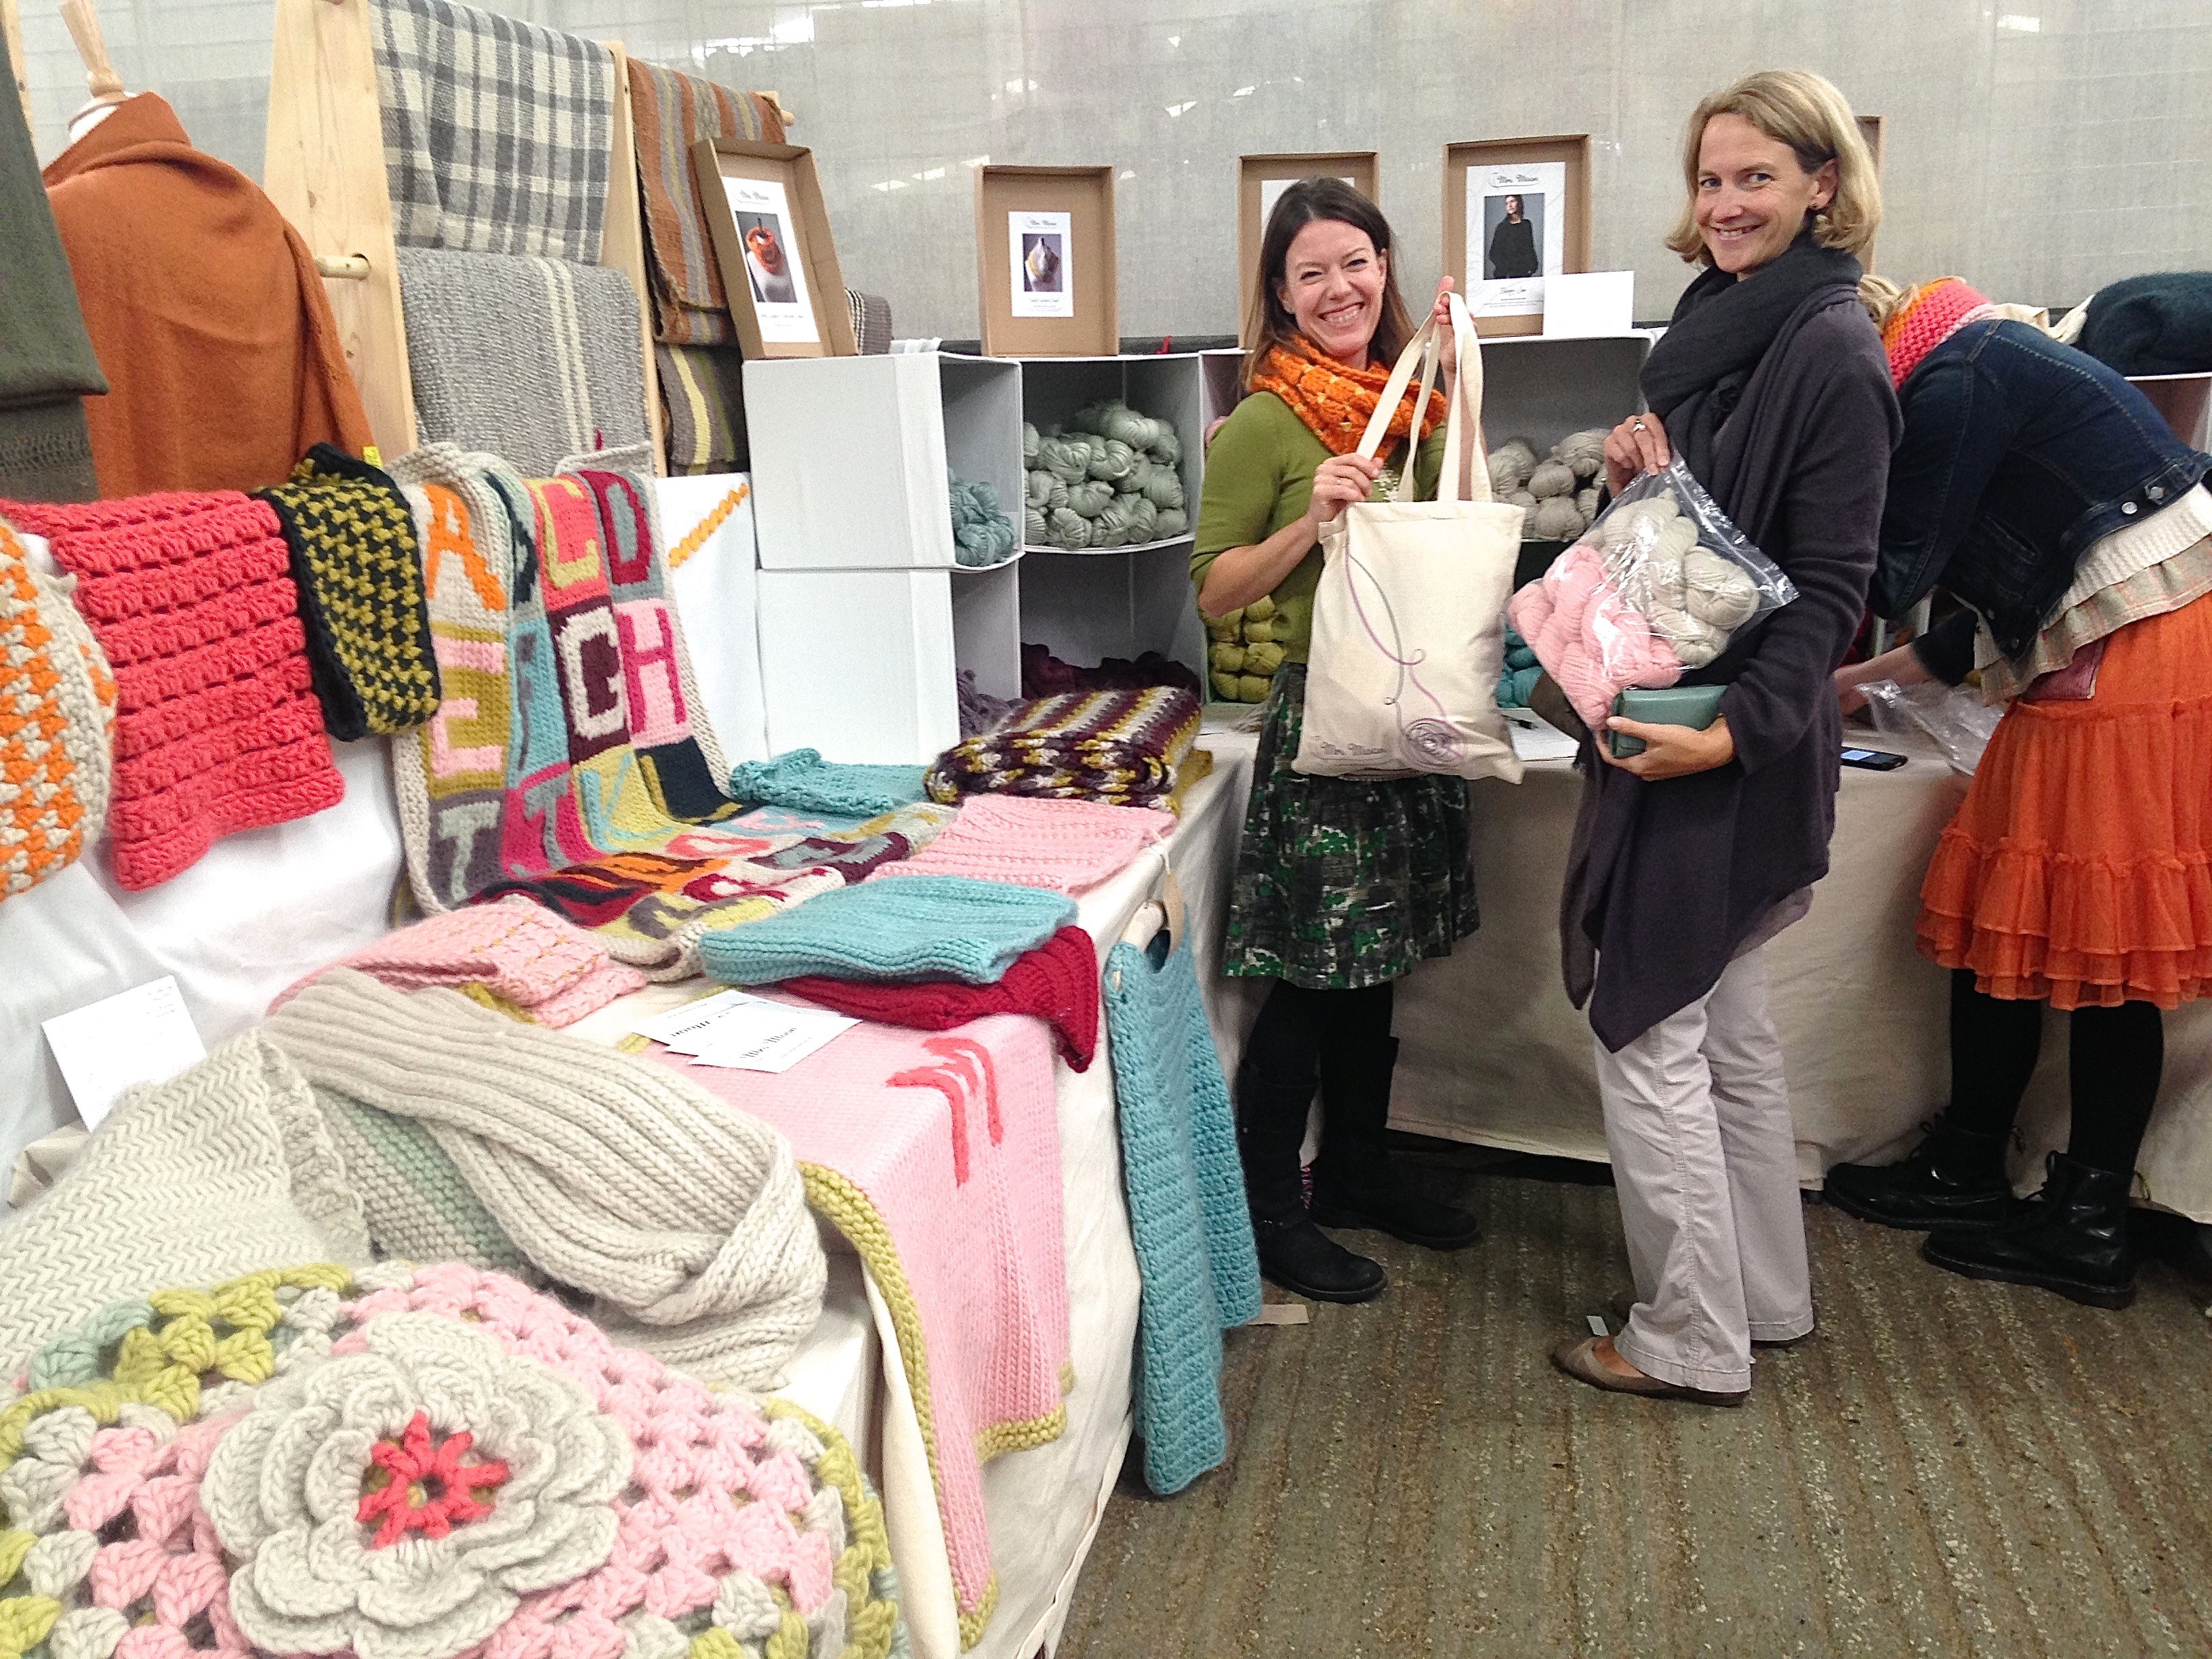
The stall that gets my vote for the softest yarn in the most beautiful ice-cream shades is Mrs Moon – what an utter delight! Here is Roz from The Velvet Cow making a huge purchase for a new crocheted blanket for her bed.

IMG_1065

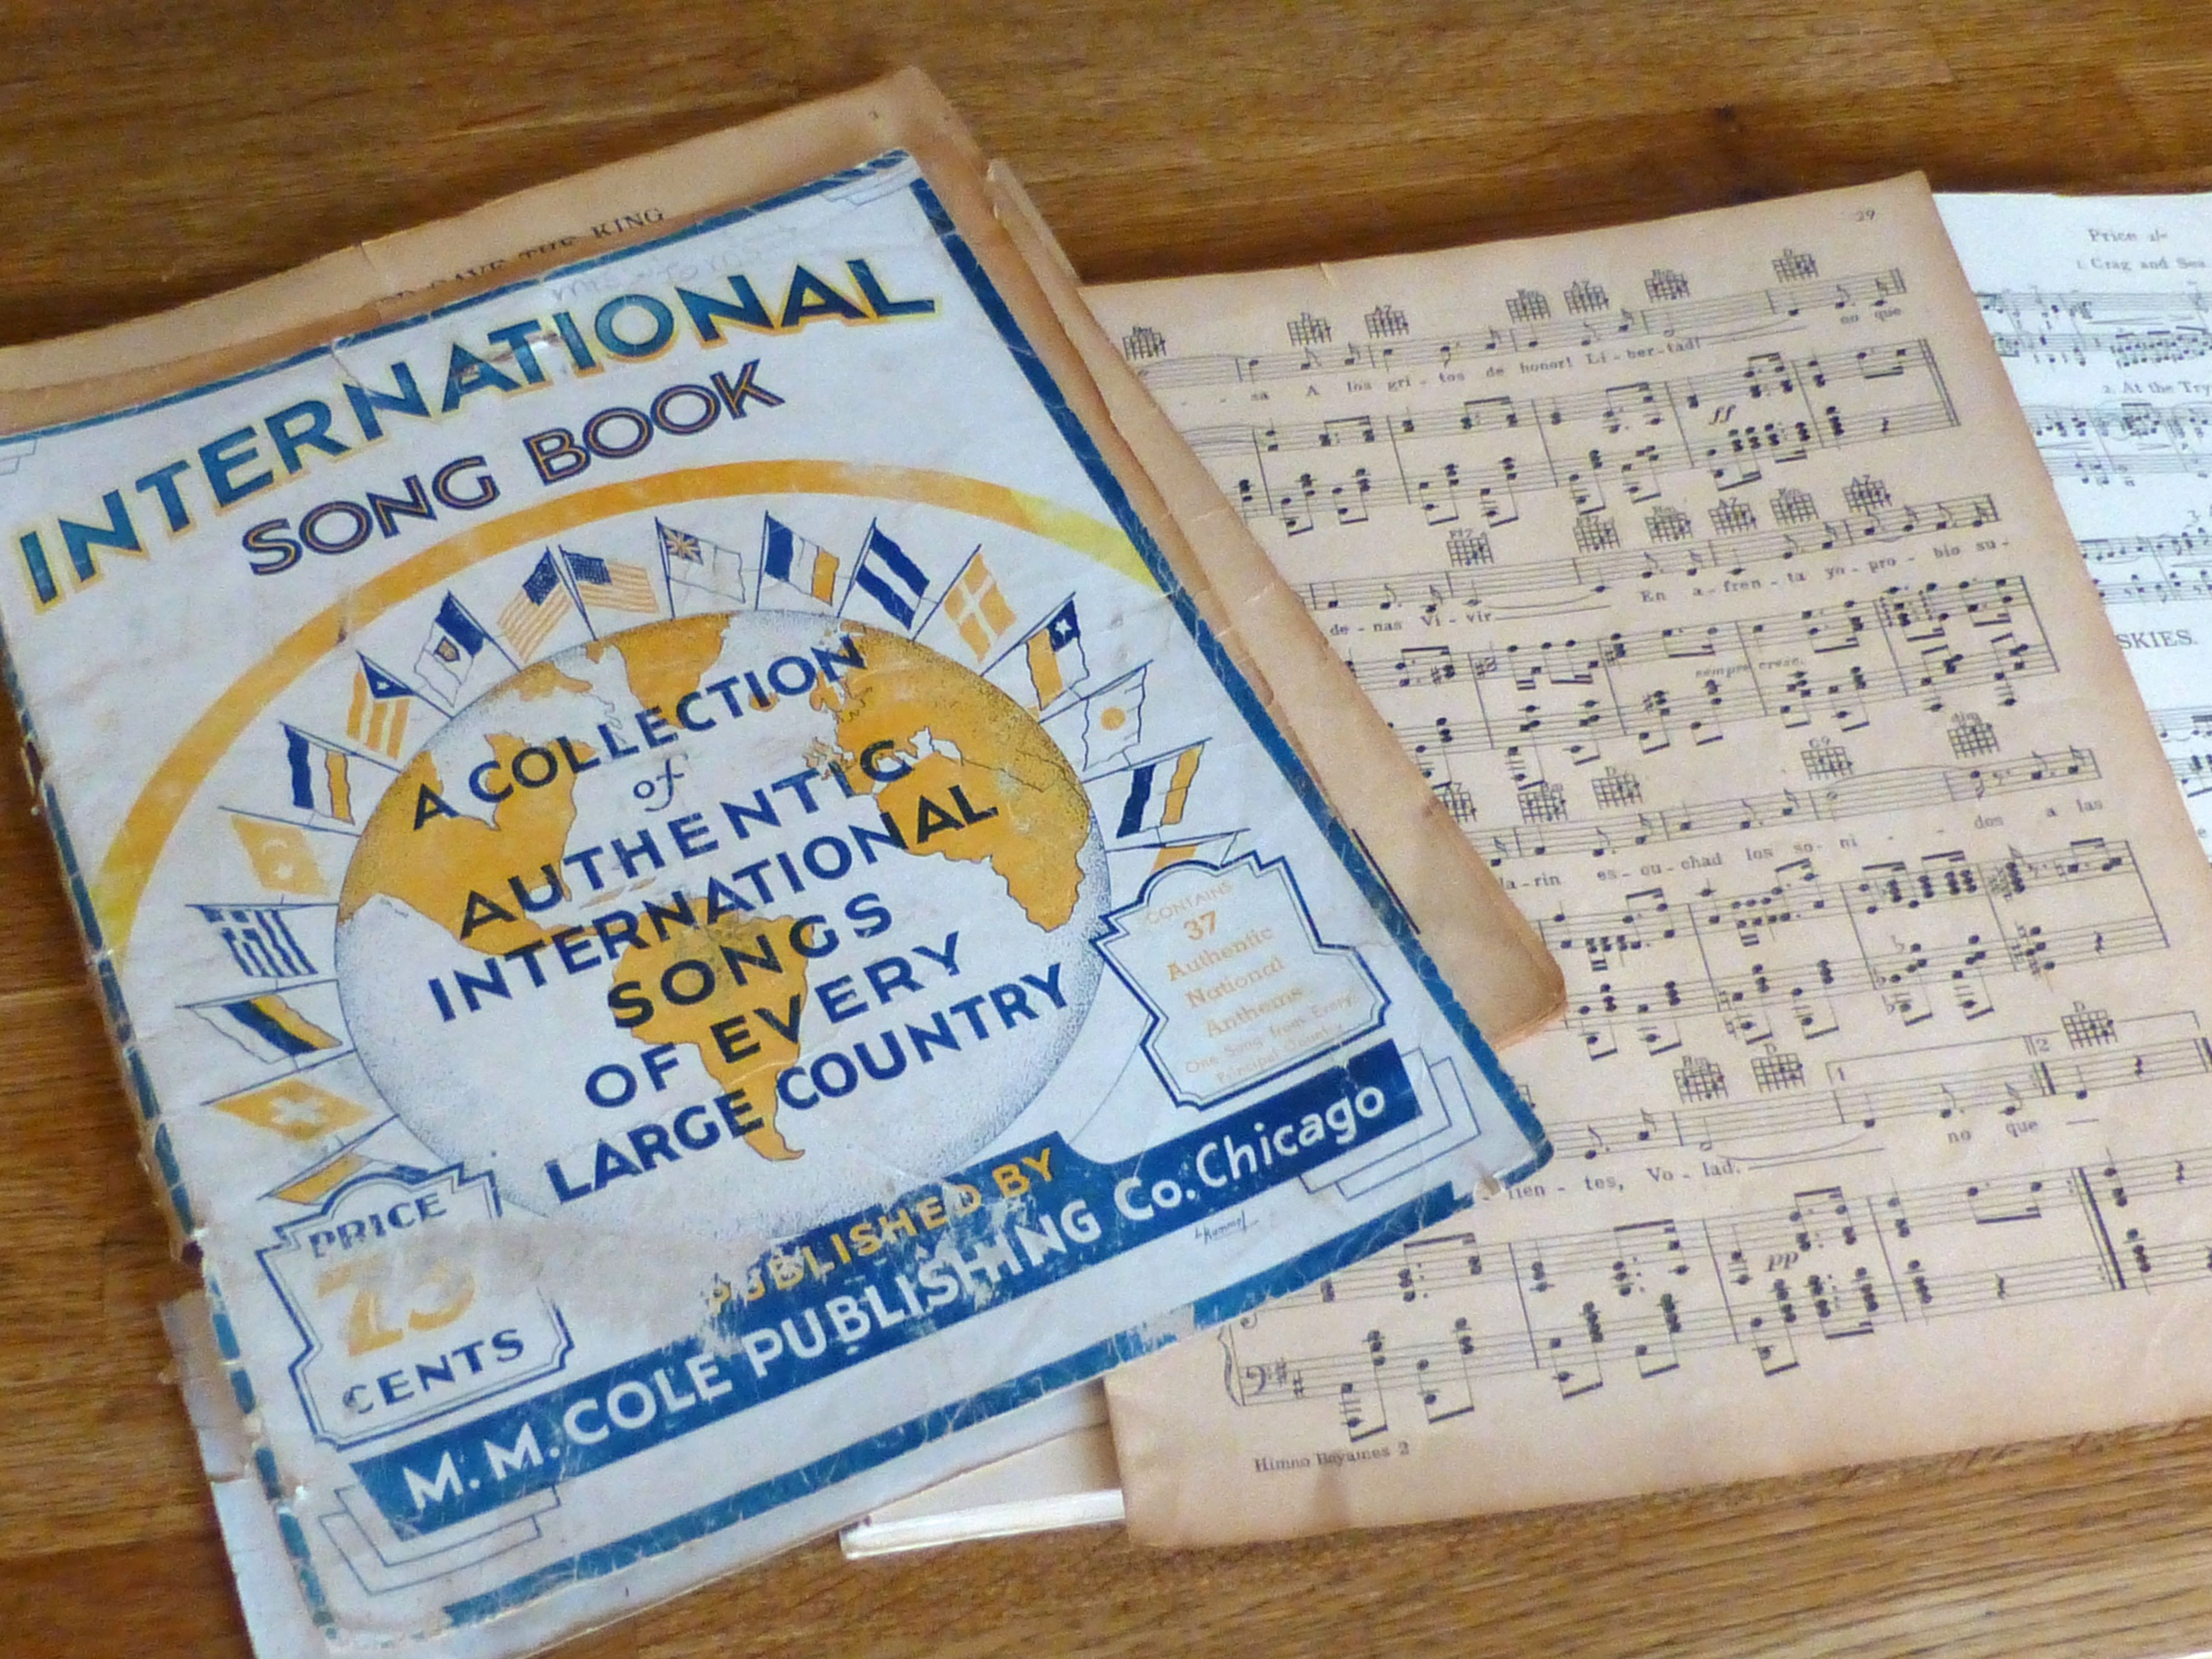
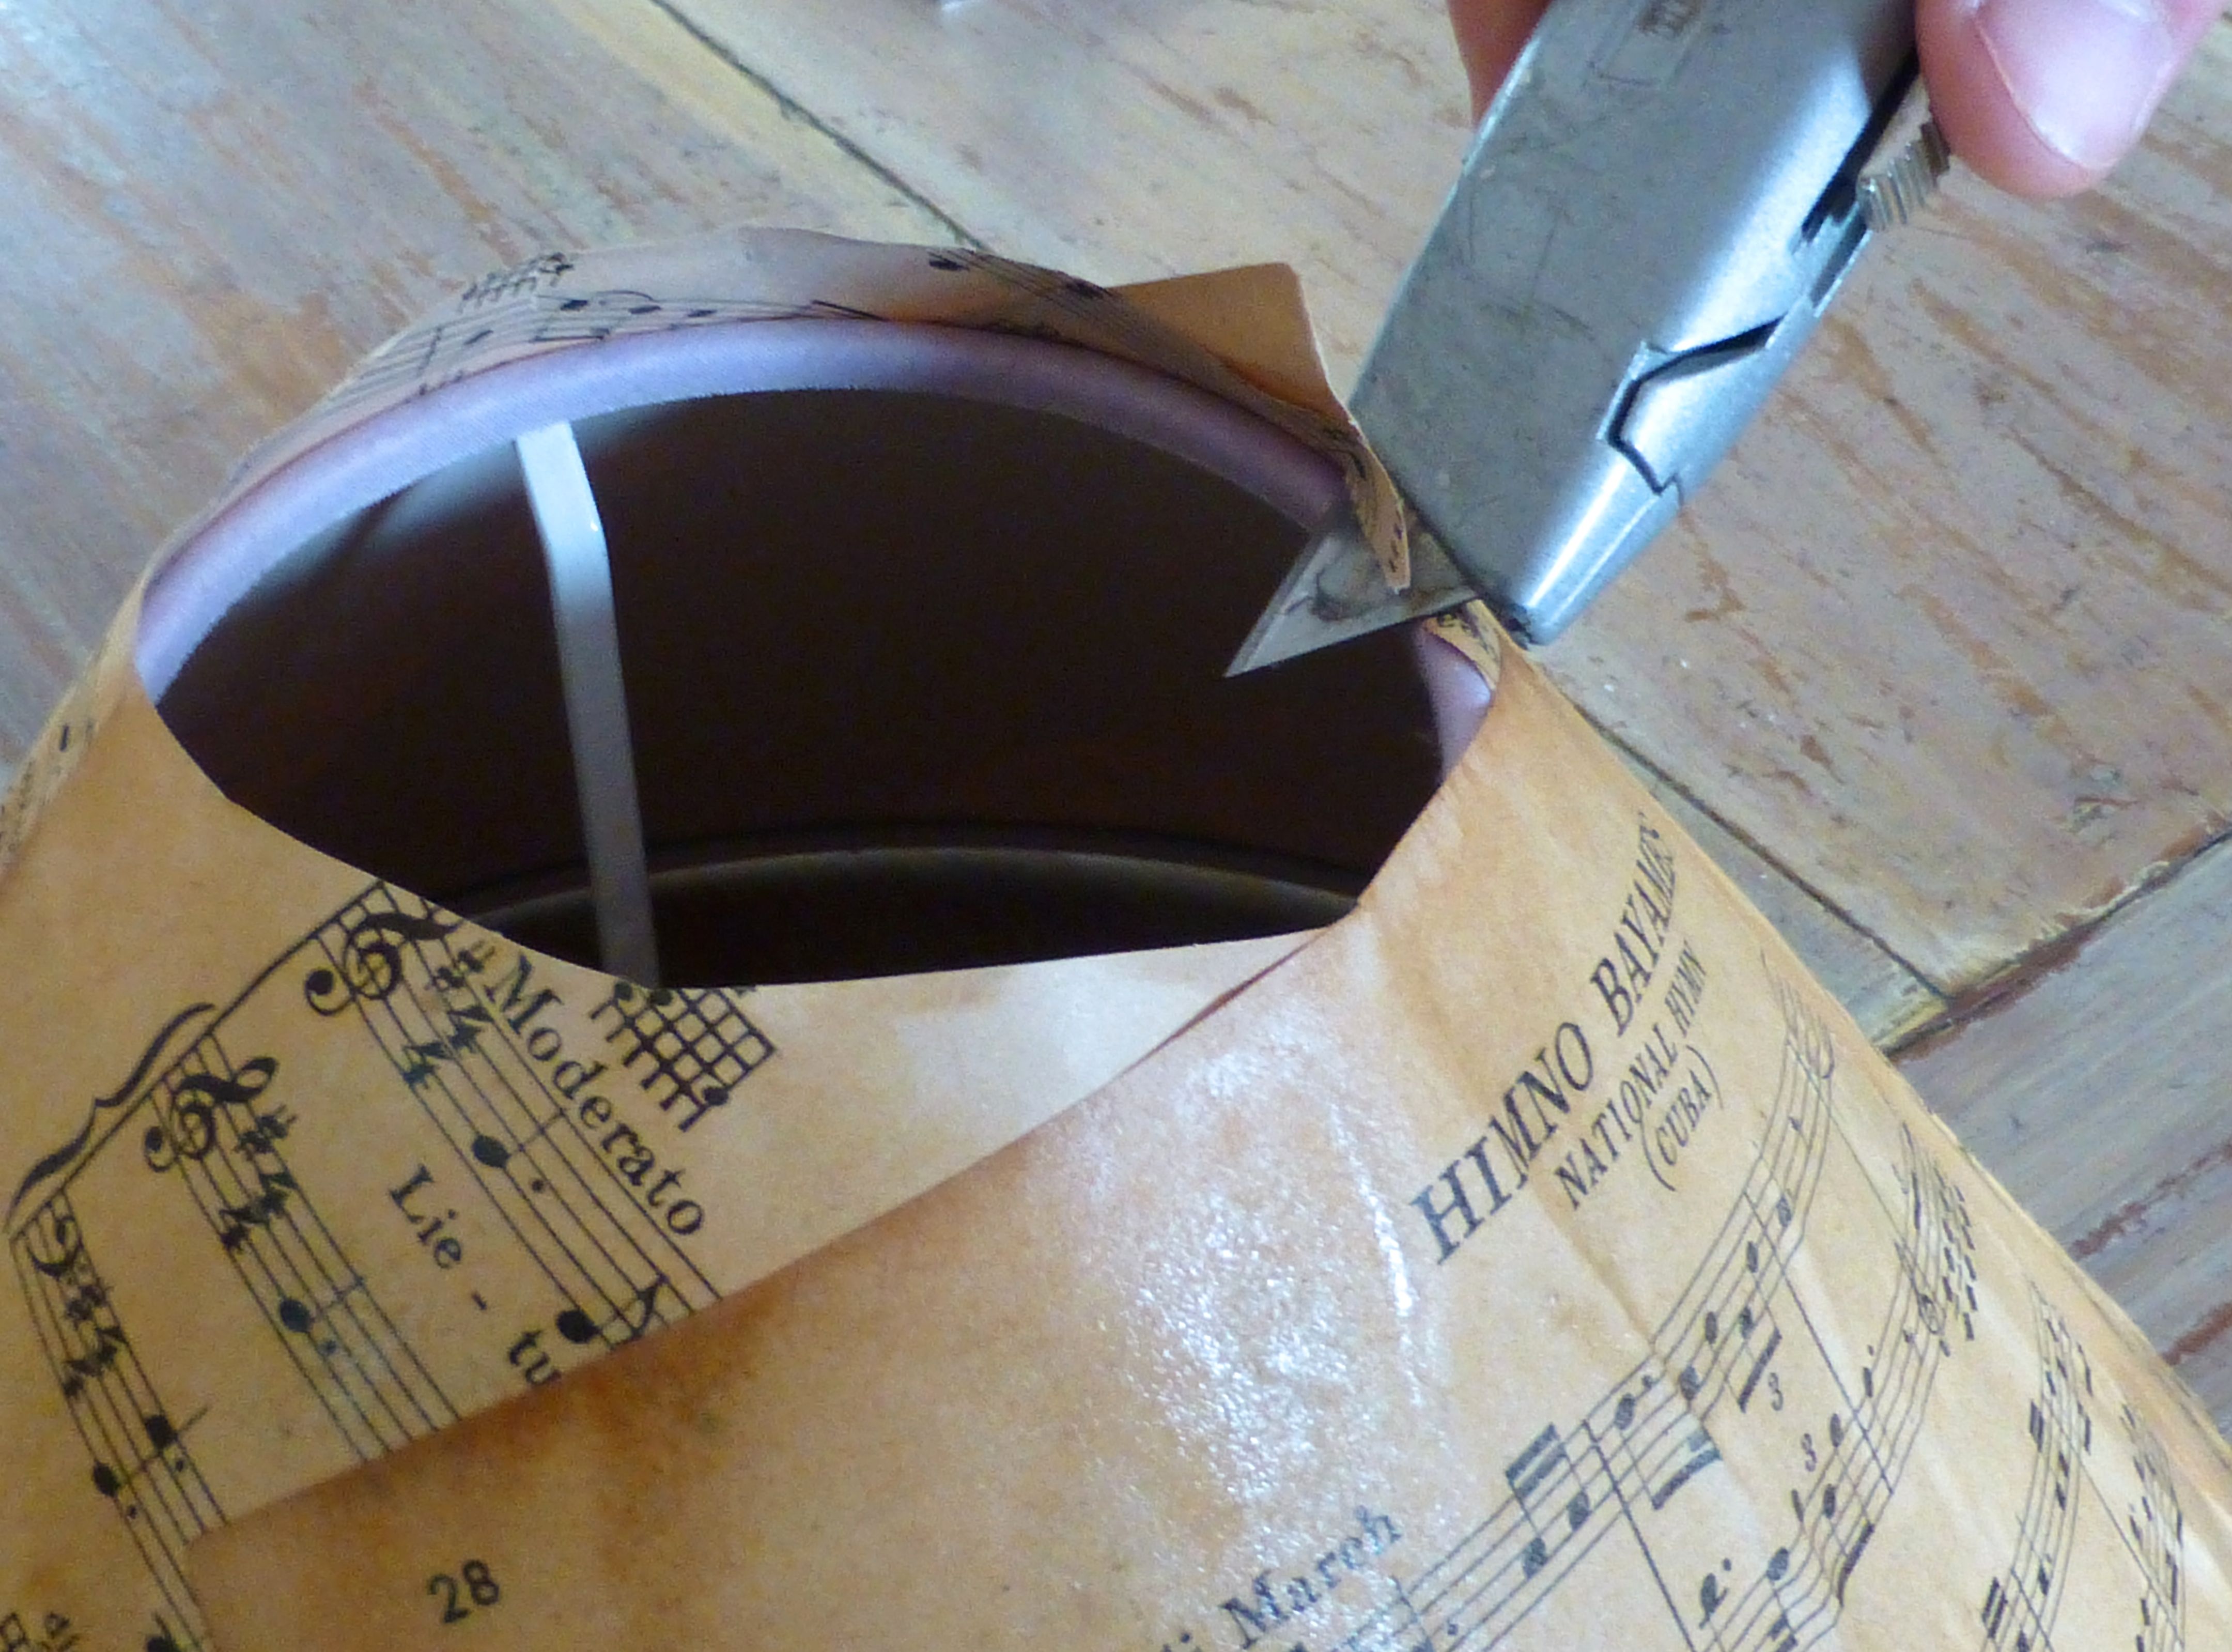
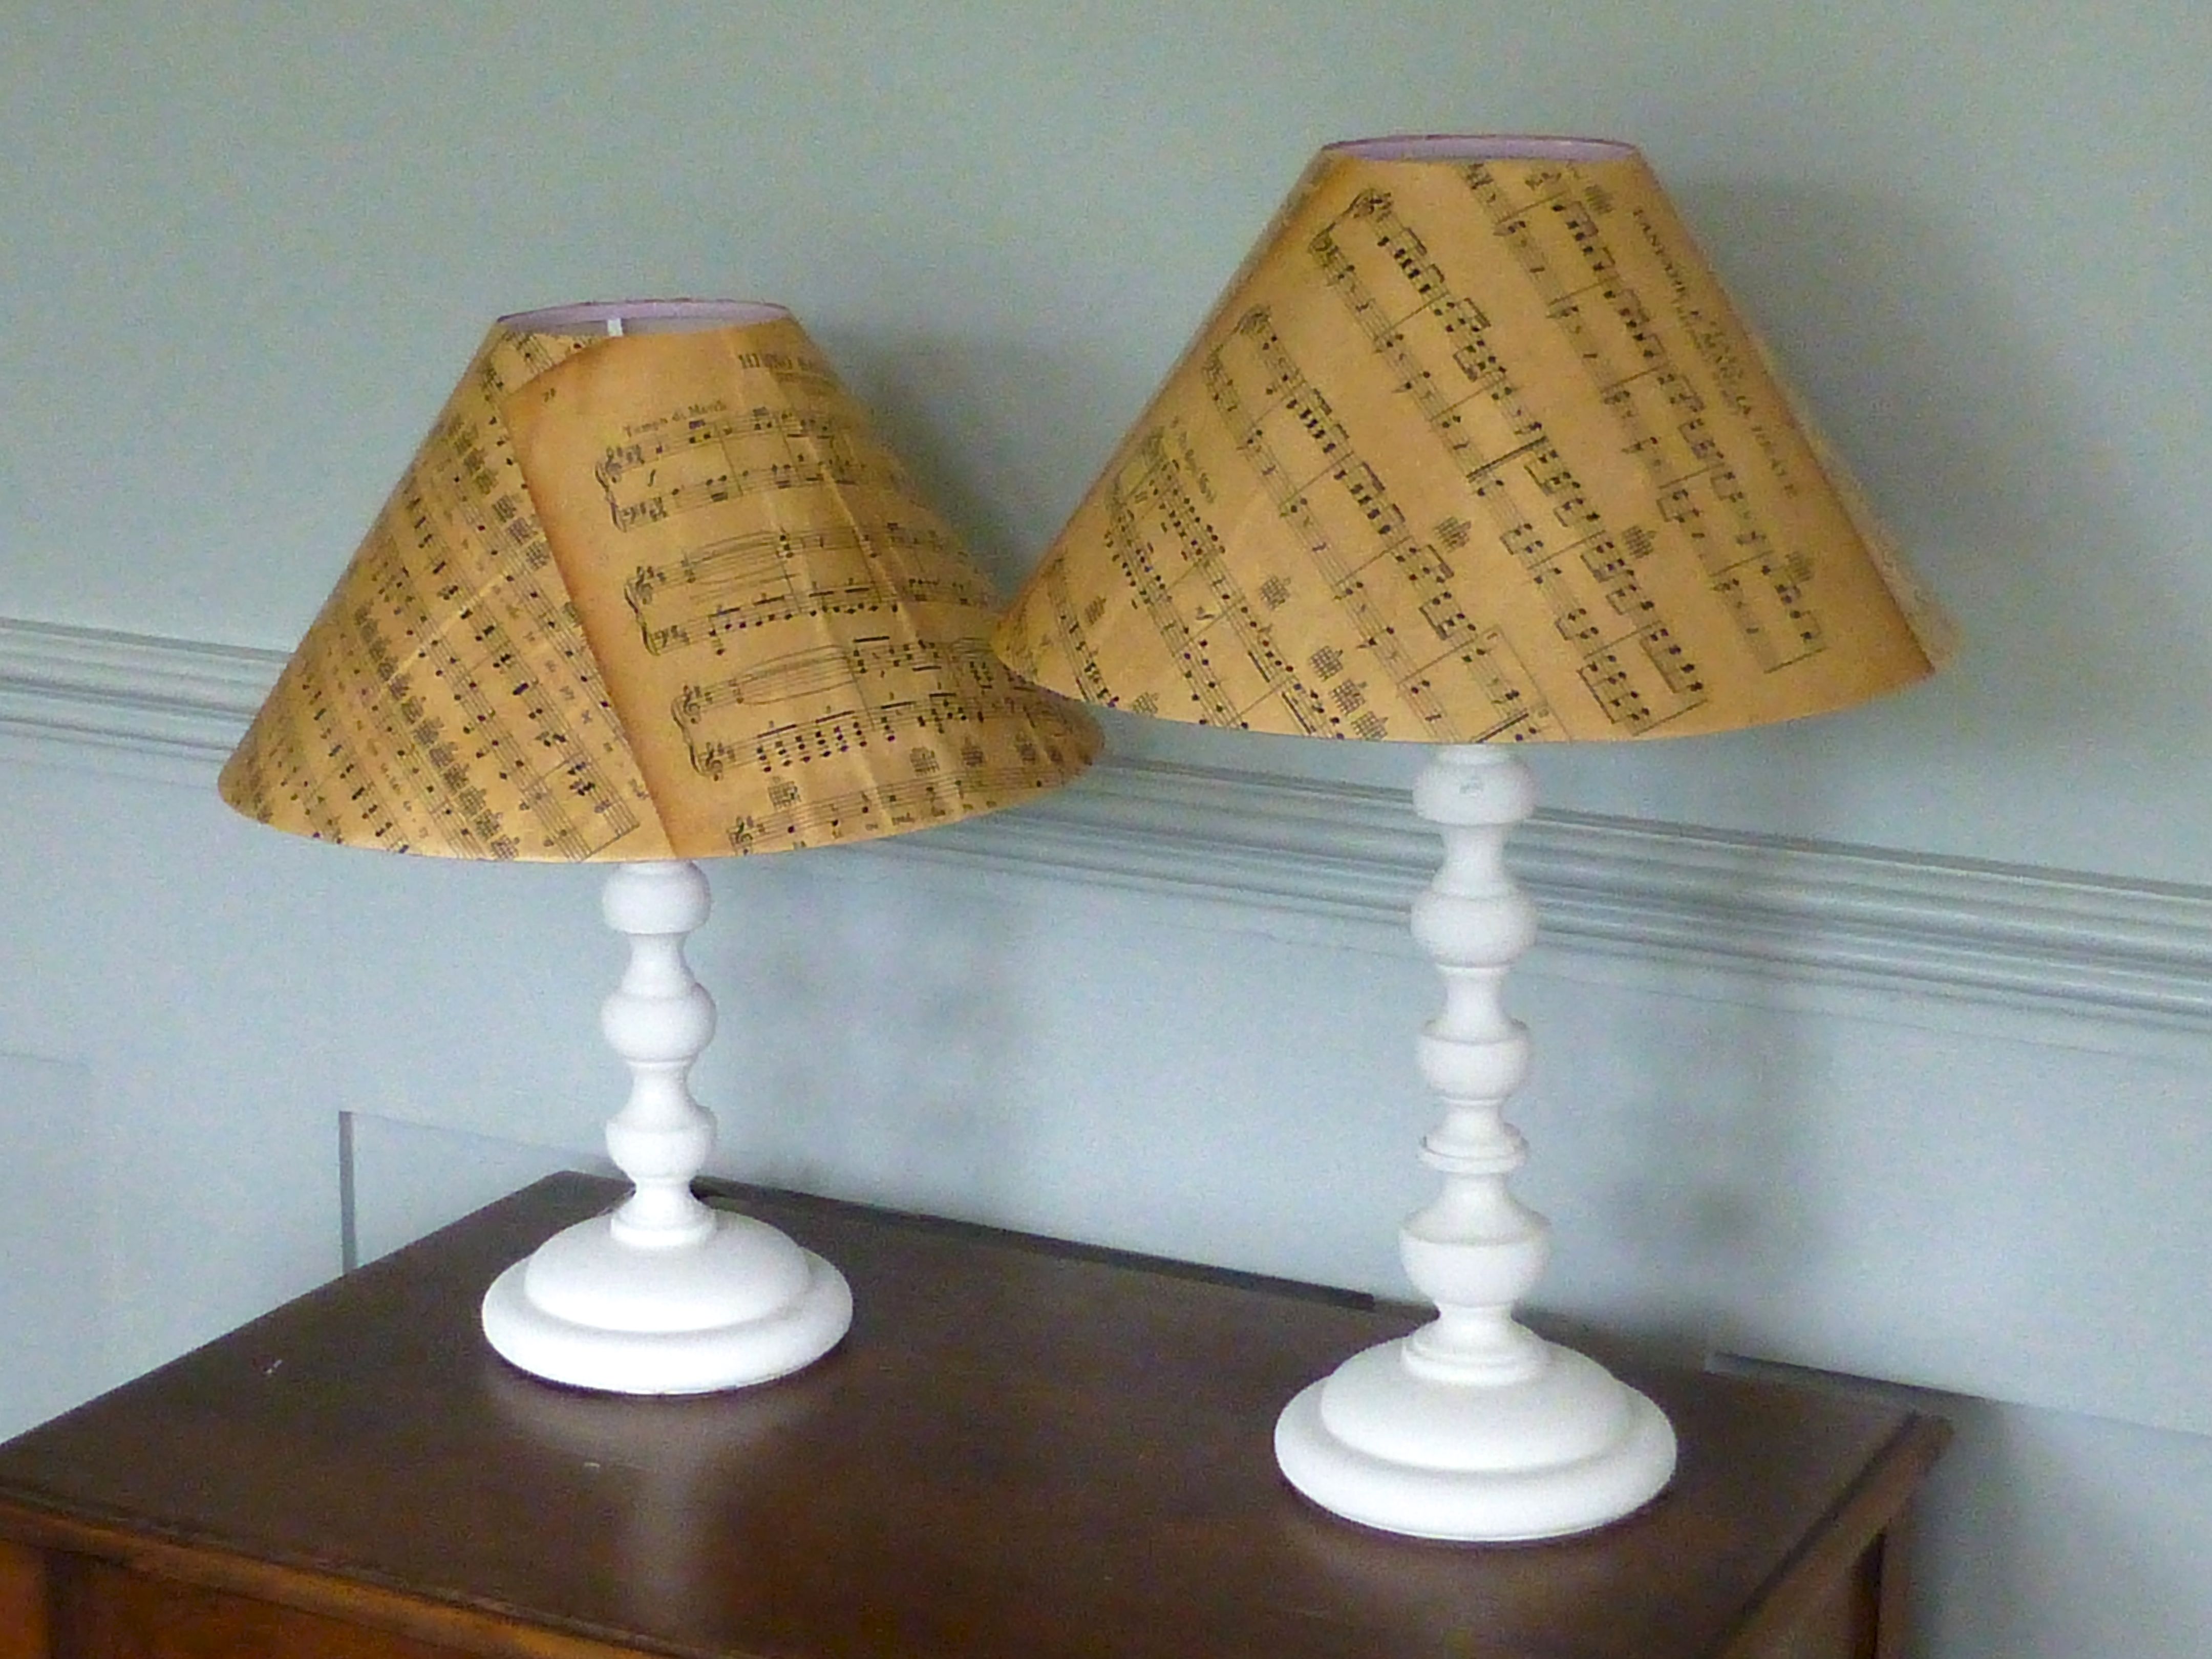
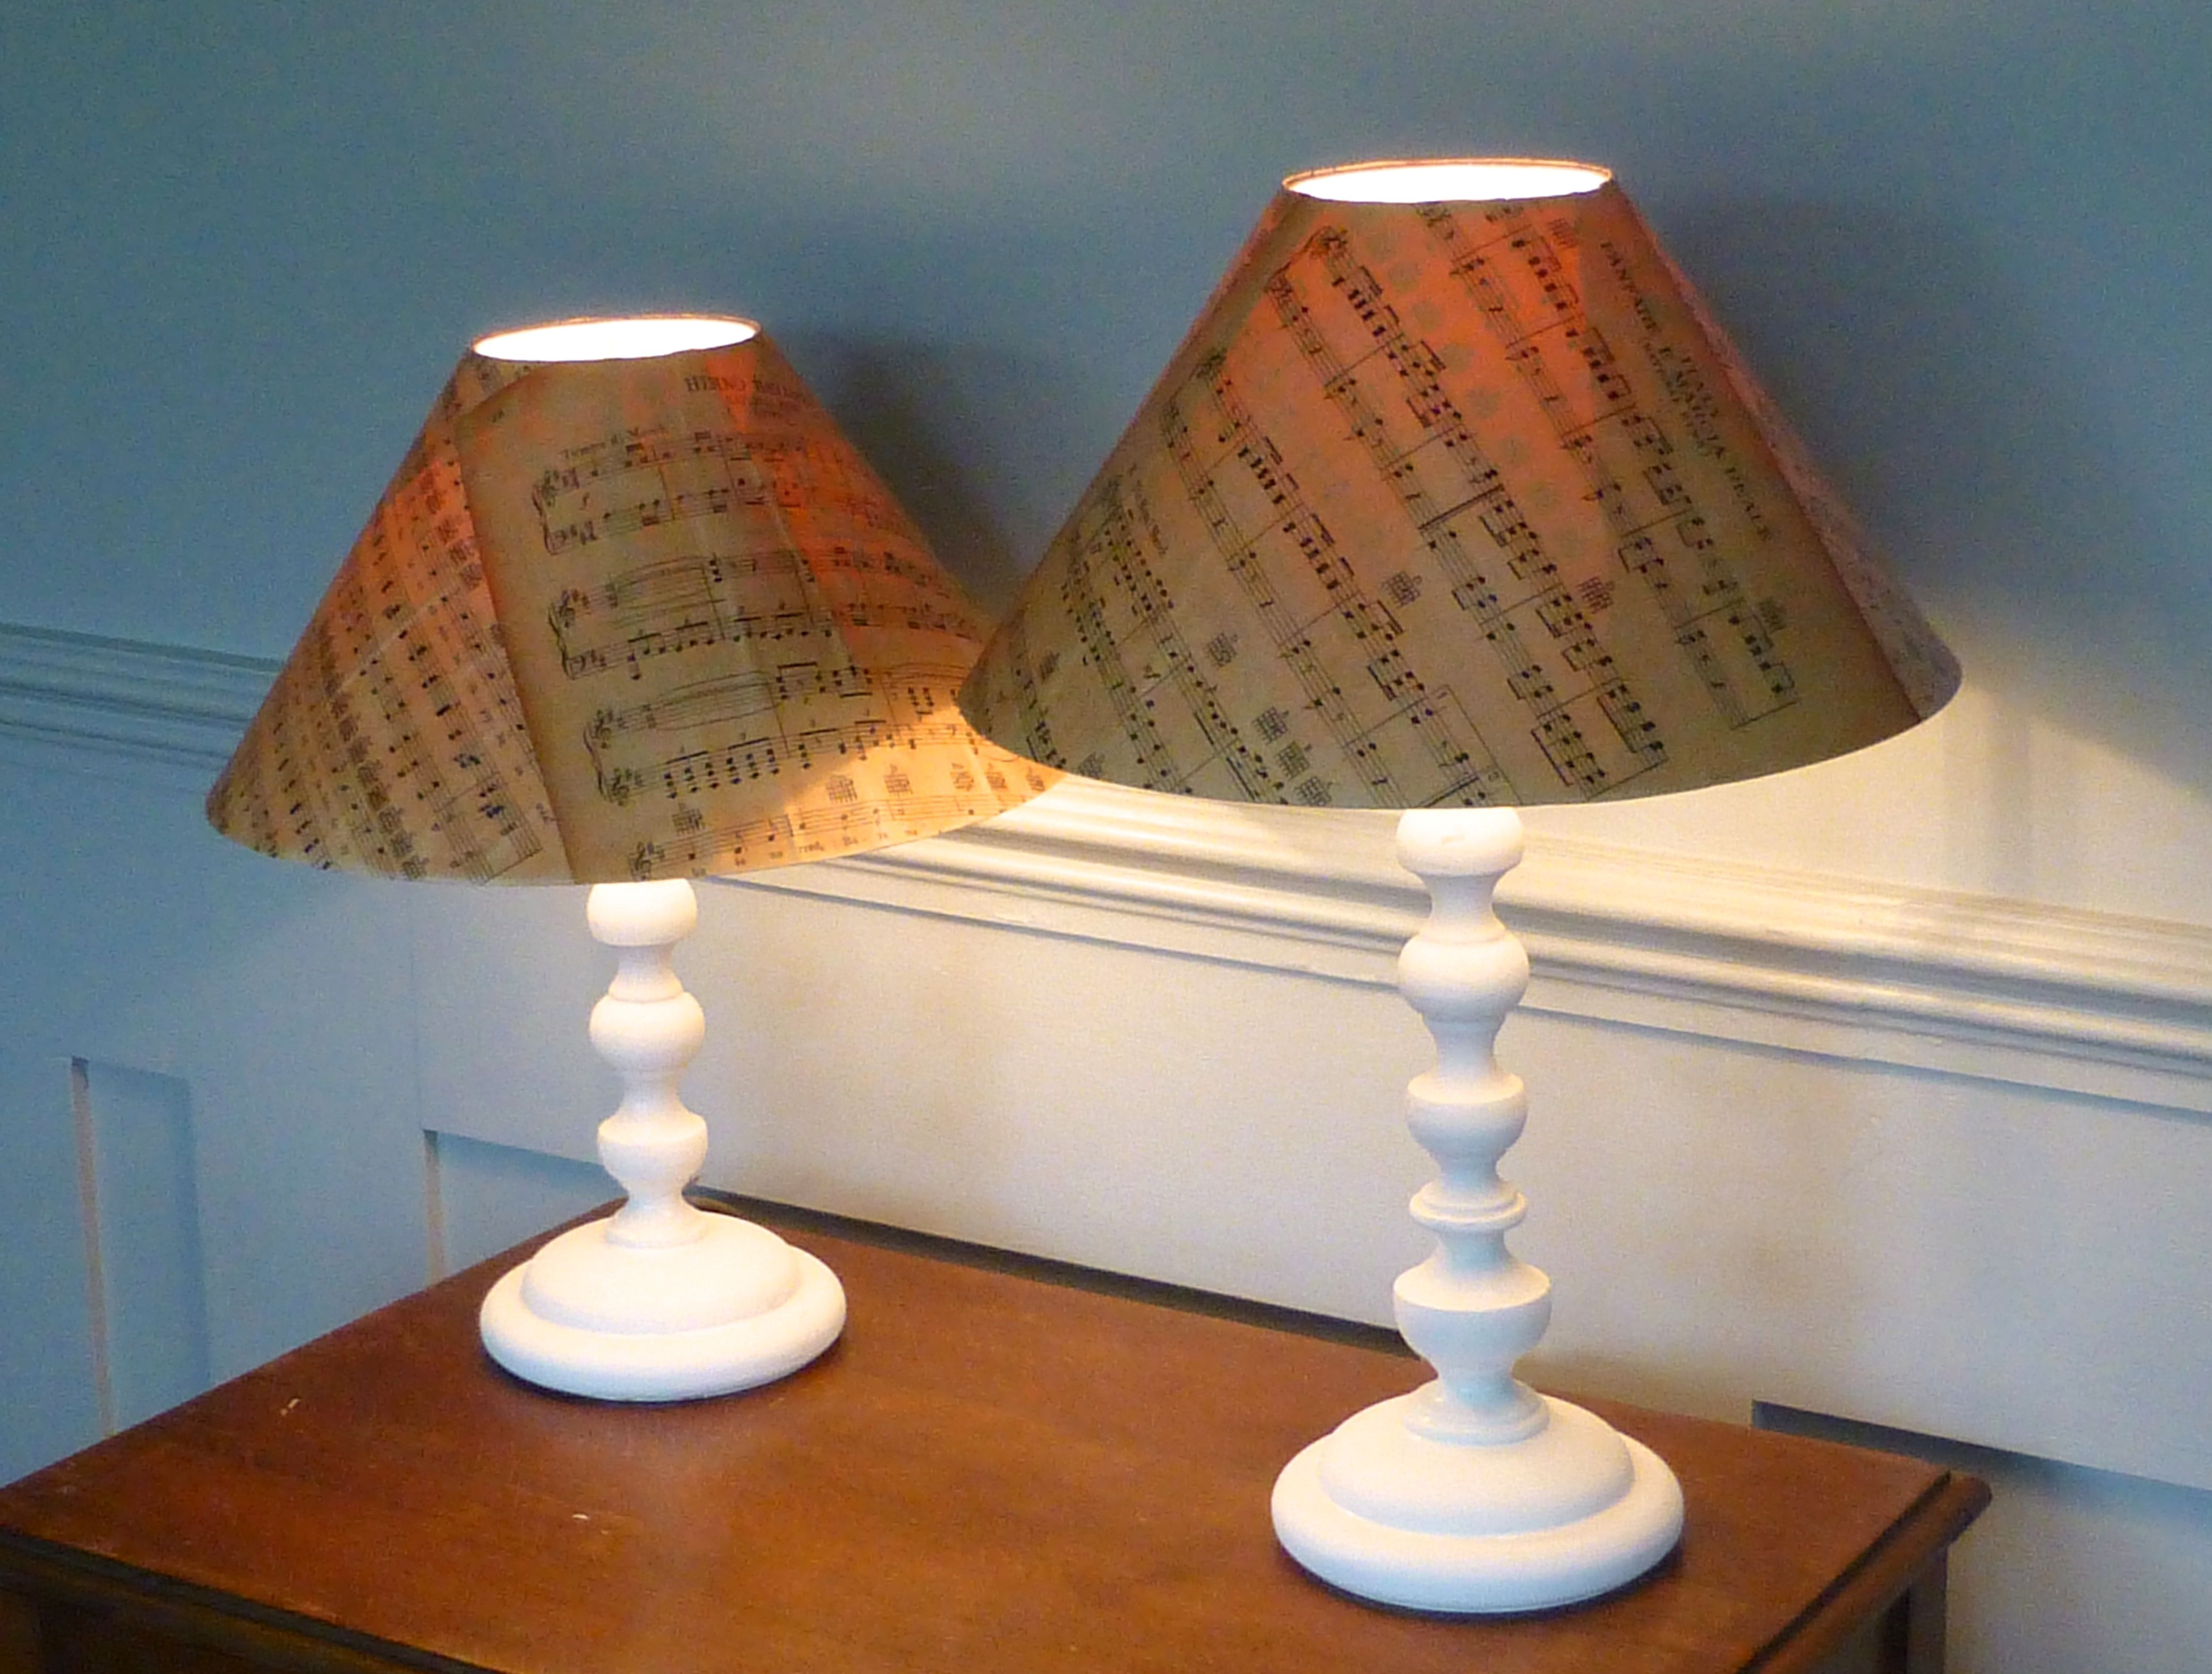
For me, the most inspirational stall had to be H-anne-made.

Her textile art incorporated all kinds of mixed media collaged and stitched to a canvas frame.

Hannemade

Maps, music scores, pages from novels; these were all used to create a kind of ‘memory’ art. Her sketchbook itself was a fascinating insight to the way she works.

IMG_1071

After spending Saturday having a good look at all 180 stalls, we went back on Sunday to purchase one of Anne’s lovely kits only to find that she had sold out!

This was yet another imaginative display to accessorize the Skein Queen’s stand;

IMG_1058

Not only were TOFT showcasing their endearing line of amigurumi animals….

eds animals

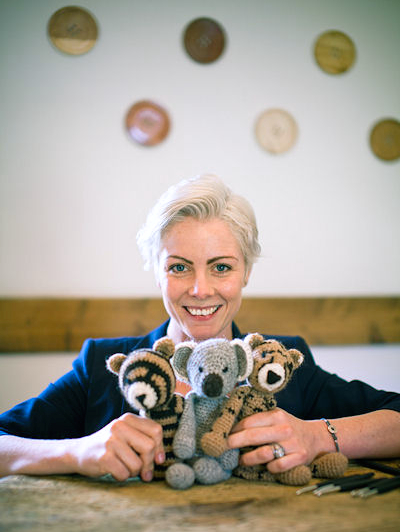
…but, like so many generous artisans, were giving away free patterns (and, in this case, an Alpaca pom pom) with their yarns;

hat

Last, but by no means least, are these adorable needle felt sculptures by Jenny Barnett;

dogs

They are so lifelike it is uncanny – check her blog out for details of her workshops.

Well that, my Blogging Buddies, is it.

Yarn enthusiasts came from far and wide and put a sticker on their home town. When I placed mine, we seemed to have travelled the furthest in the UK! Our sticker is the green one outlined in black;

map2

There is just one last photo I’d like to share with you…..

Lucy Attic24

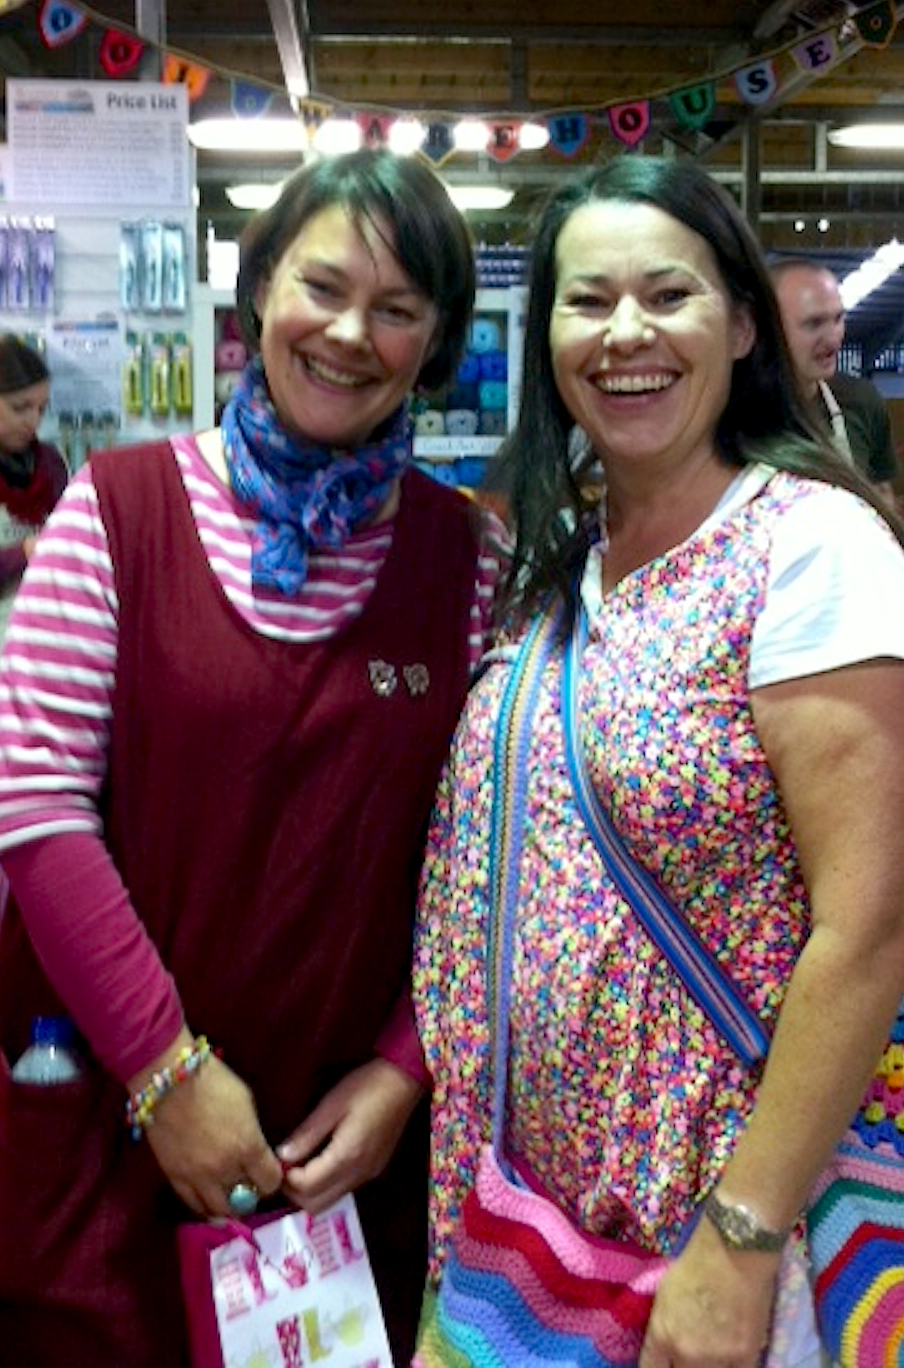
It had to be Lucy, didn’t it?

One of the founders of the yarnfest that is Yarndale, she is such a genuine, lovely and down to earth lady. She smiled from dawn ’til dusk all weekend, never once got fed up with photo requests and seemed truly interested in every single one of the individuals that queued up to meet her.

We waited until close to closing time on Saturday when the crowds had dissipated and then introduced ourselves.

We briefly discussed our plans for a sister event in the Blackmore Vale in the South West and Lucy asked if we would get in touch if we decide to go ahead as she is aware of a gap in the market for such a venue.

We would love to be affiliated with Yarndale and thought “Yarnvale” could be the southern equivalent in the Spring.

What do you reckon???


13 Comments

Yarndale Booty

As I am still trying to match my photographs of stallholders to their websites, I thought I’d do a quick little post showing you the treasures that tempted me into parting with my cash.

First of all, you must understand that I love buttons. All shapes and sizes, but all handmade and each one unique. The right button can transform the ‘good’ into ‘great’ and catapult your lovingly handcrafted item into another league.

I was barely in the door two minutes when I made my first purchase. A couple of stalls in and I lingered long enough to lose the girls for the rest of the morning. Tile Productions make the most fabulous handmade tiles for kitchens and, to use up the leftovers, they make buttons. Well, we were queuing four-deep to rummage through those little baskets of gems and no-one so much as glanced at the stunning tiles in the background! They had no idea that their gorgeous little glazed, ceramic buttons would create such interest, especially as they are essentially a by-product!

These are the four that hopped into my basket;

P1030568

More buttons soon beckoned and these little iridescent beauties are by Textile Garden – coconut shell with a turquoise glaze and silver edge;

P1030565

Injabulo is a specialist Fair Trade seller of hand made buttons and baskets from Africa as well as supporting the British Wool Industry with gorgeous wool blankets and cushions from Wales.

I fell in love with this fabulous button;

P1030566

Longwood Blankets were were selling the most glorious plaid throws – I came home with this one;

P1030573

There were lots, I mean loads, of stalls selling home grown wool with a clear provenance from sheep/rabbit/alpaca to skein. Overseeing the entire process through shearing, dyeing and spinning must be satisfying in the extreme and I rather think I would like to have a go. (Cue research into keeping Angora rabbits for their supremely soft fur.)

In the meantime I shall have a go at spinning. Not with a spinning wheel Sleeping Beauty style, but with a Drop Spindle. This consists of a very simple contraption that looks incredibly easy to use when demonstrated by the experts, although in reality I anticipate some rather choice language will be peppering the air!

This kit was supplied by Wheeldale Woolcrafts and included some hand dyed and carded Corriedale wool fibres ready to spin;

P1030581

With a dozen or more workshops on offer we were spoilt for choice really, but I booked Layers Of Texture which was essentially a short course in needle felting.

Jaki Bogg was efficient in her introduction, talking us through the basics and leaving us the best part of an hour and a half to have a go.

This was my very first effort:(

P1030582

P1030583

It was enormous fun and I think I’m addicted so I bought a bargain mixed bag of roving in the bright colours I love so much;

P1030585

I also decided to buy some luxury silk tops produced by the Tussah Silkworm. (Adelaide Walker and Wingham Wool Work) They are completely gorgeous and shimmer in the light. I’m thinking luxury brooches finished with tiny beads and silver thread…..

P1030586

Another skill that I have been procrastinating about for ages (Tajana!) is that of sock knitting. I shall dither no more though, as the lovely Rachel Coopey’s (of Coop Knits) book Coop Knits Socks convinced me to finally bite the bullet. She even signed it for me too:)

P1030574

I then hot-footed it over to Purlescence where they had the most fabulous 100% Merino wool skeins in a zingy shade of yellow. I just had to have it. I don’t do subtle:)

P1030580

They were also able to advise and supply the requisite 80cm long 2.25mm circular knitting needle (a lot less scary than four double pointed needles methinks!)

A pretty little stitchmarker was thrown in by some kindly stallholder with a friend’s wool purchase and she very generously gave it to me for my socks;

P1030577

My last, and arguably favourite, purchase were these beautiful 2″ wooden buttons.

Perfection.

P1030567


11 Comments

Yarndale (and a chat with Lucy!)

What a fabulous, yarntastic weekend!

Yarndale 2014 was all it promised to be – and more.

Conceived and organized by a group of five yarnaholics (including the very popular Lucy of Attic24), Yarndale’s inaugural festival of 2013 was followed up with an equally successful event this year.

Three friends and I endured the 250 mile car journey north to Skipton, Yorkshire, which took a mammoth seven hours from South Somerset due to a typically busy Friday night’s traffic. We enjoyed real five star hospitality in luxury surroundings from Pam Gregory at Cononley Hall  – these were our two rooms: –

4 Poster

Twin room

We really couldn’t fault it at all – the perfect place to relax and unwind after a full day on our feet (our heads were buzzing from inspiration overload!).

We set off Saturday morning after an amazing full English; just a five minute stroll to the station (which turned into a sprint as we saw our train on the platform from halfway up the road!) followed by one stop on the train to Skipton. There were two (free) buses put on this year to ferry passengers to and from the station and they set the tone for the whole weekend….

IMG_1041

….yes, even the double-deckers had been yarn-bombed both inside and out!

We were at the front of the queue so managed to snap a couple of photos – this was pretty much the only man amongst 6,000 crochet-mad women in the entire place!!

IMG_1040

The event was held in Skipton Auction Mart which, when we viewed the site from the hill, was enormous! Can you see just how vast the covered area is? I’ve circled it in red below: –

Auction Mart

The approach through the park (for those walking) was well signposted with crocheted signs in various styles….

IMG_1083

IMG_1080

Local schools joined in with unique interpretations on bicycle yarn-bombing;

IMG_1091

IMG_1087

The walk took you past the picturesque canal…

IMG_1092

…until you arrived at the site…

IMG_1079

…which marked your wooly destination with yarn-bombed trees!

IMG_1078

Apologies for the poor quality of the photos (and me, a professional photographer too!) but I left the camera at home and went with the iPhone. They’re not great but, hopefully, you get an idea of the atmosphere surrounding the event and the amount of thought and effort that went into organizing such a huge project:)

Once inside, a colourful gallery of all 1,182 mandalas sent to Lucy greeted you, stretching the entire width of the venue;

IMG_1050

The Yarndale Hub (centre of operations!) was, again, strung wall-to-wall with last year’s contributions of 6,212 bunting triangles sent in from all over the world. Here we are, the only photograph of the four of us taken over all four days!

IMG_1074

Can you guess where this is?

IMG_1062

Of course you can – it’s the Knit & Natter lounge hosted by our favourite Lucy!

IMG_1061

This creative lady sums up the yarn obsession shared by everyone at the show!

IMG_1068

I think that’s more than enough for one post but do come back again when I have details of a little plan that we discussed briefly with Lucy and photos of some of the many stalls that were so beautifully displaying their wares.


18 Comments

Tutorial: How To Cover A Lampshade and use Chalk Paint to upcycle table lamps

You may remember a post from earlier this week when I mentioned that I had been bargain hunting in charity shops for Number One Son’s return to Uni. Part of our haul included two utterly minging shiny brass-effect table lamps complete with two equally vile lilac lampshades.

I snapped them up solely because they were in perfect working order and only cost a meagre £3.00 in total. No.1 would never have bought them but, as I was paying, he was grateful for anything and I convinced him that we could do something, anything, with them to increase their aesthetic appeal.

Quite frankly setting a match to them would make them more attractive so my plan to paint the bases and cover the shades was over and above, I think!

My lovely friend Roz over at The Velvet Cow has been extolling the virtues of Annie Sloan’s Chalk Paint for a while now and very kindly lent me a pot of Old White and a paintbrush for the afternoon. (Be sure to check her blog out to see the wonderful things she has done with it!)

We started painting before I remembered to take photos, but you get an idea of what we were up against: –

P1030526

P1030529

The great thing about Chalk Paints (we used Annie Sloan but Autentico also has an extensive range of colours) is that they eliminate the need for laborious preparation. No sanding necessary, just wipe clean and paint – it truly is that simple!

So we did…

P1030527

One coat was all they needed before being left to dry. A coat of wax should then really be applied as a protective layer but, as these were table lamps, not table legs, we figured they weren’t going to get bashed about that much to warrant it. And we didn’t have any anyway:)

P1030542

Much better.

Now to start on the lampshades.

Having mixed some PVA glue with an equal amount of water, it was slopped on the the shades very quickly.

P1030531

Another charity shop find that I couldn’t resist ages ago was this book of musical scores, each one the National Anthem of a different country. It’s so old that the pages are the authentic tobacco-stained brown that is so often faked with cold tea; a lovely contrast to the white base.

P1030528

We literally tore pages from the book and pasted them with more PVA onto the shades, smoothing it as we went.

P1030532

Extra pages are slapped on, overlapping where necessary, until the whole shade is covered.

P1030533

When dry, use a Stanley knife or (similar craft knife) to cut away the overhanging edges. (Tip: make sure you use a fresh blade or you risk ripping the paper).

P1030537

P1030540

I can’t wait to show you the result so, without further ado…..

….TADAH!

P1030539

No.1 is understandably chuffed with our efforts and I think they will add a cosy touch to his Uni digs. They look especially lovely at night time.

P1030541

It’s amazing what you can do with very little cash and lots of imagination, isn’t it?


15 Comments

Pin Cushion & Thread Catcher ‘Tadah!’

I don’t know about you but, although I do a LOT of sewing, I don’t even have a pin cushion which means grappling with loose pins from the tub and dropping most of them on the floor….so I thought it was about time I made one.

A pretty one. Not just a functional one.

When I first had my own studio I promised myself that I would indulge my girly desires to make pretty accessories whenever the need arose – and now the need has arisen.

After browsing Pinterest for pin cushion designs, I came across this one by Curry Bungalow – genius!!

thread catcher

It consists of a detachable pin cushion and a thread catcher weighed down by a covered bathroom tile. Such a clever idea and, hopefully, it will save me hoovering after every sewing session:)

You can buy the pattern here as an instant download PDF which is what I did as soon as I saw it! You just know when something is exactly what you’ve been looking for don’t you and, if you’re anything like me, can’t wait to get started.

One of my favourite textile artists is Pants and Paper and I love this particular design of hers on an iPad mini case:-

iPad mini case

One of the reasons I bought my new sewing machine was to do more free machine embroidery as my old one just wasn’t up to the job. I could never seem to get consistent stitching and it was always missing stitches despite using a new needle each time. My new one is ace, so simple and quick to set up and the results are fantastic even for a free machine embroidery novice like me.

I kind of already had an idea how to combine the original pattern with the design I had in mind, and I just had to adapt it to the size tile that I had leftover from a kitchen refit ten years ago in my old house (well, I can’t throw spare tiles away; they might come in handy one day!!)

The entire project was created using scraps of fabric leftover from various other makes, so it satisfied my craving for a craft fix without costing a single penny – bonus!

This is the detachable pin cushion which fastens to the thread catcher via a strip of velcro (hook and loop tape) on the covered tile;

Pincushion thread catcher - 13

Pincushion thread catcher - 03 Pincushion thread catcher - 05

Here’s the thread catcher with a handy little loop for storing your embroidery scissors;

Pincushion thread catcher - 07

Here’s how it looks from the front;

Pincushion thread catcher - 02

Some close up detail…..

Pincushion thread catcher - 06 Pincushion thread catcher - 04

And finally….

TADAH!

Pincushion thread catcher - 09 Pincushion thread catcher - 01Pincushion thread catcher - 10 Pincushion thread catcher - 08

I chose some scraps of ‘Rosetta’ by Clarke & Clarke for the lining so the inside is just as pretty as the outside!

Pincushion thread catcher - 11

The tile does a brilliant job of securing the whole thing to the worktop right next to the sewing machine. In fact the entire design works so well that I have no idea how I’ve managed over forty years of sewing without one!Pincushion thread catcher - 12

I’m thrilled to bits with it and it looks soooo pretty in my studio. In case you missed it, here’s the link to the pattern again Pin Cushion Thread Catcher so why not have a go at making one for yourself?


6 Comments

How To Make A Dog Bed From An Old Suitcase

I had an exciting delivery earlier this week – a new sewing machine!  It arrived on Tuesday but I only had chance to open the box today and still haven’t tried it out.  My first sewing machine wore out after fifteen years of hard labour and I’ve had my second one for fifteen too, although there’s nothing wrong with it – I just fancied treating myself to an upgrade.  

I didn’t want a computerized one with all the bells and whistles or hundreds of embroidery stitches that I know I’ll never use, so ended up choosing the Janome 525s which seemed perfect for the way I work. I have since found out that it is the very same machine as used by The Great British Sewing Bee and the Kirstie Allsopp programmes, so hopefully I made a good choice.

Apologies for the rubbish photos all through this post, but hubby took my little camera to work so I used the iPhone and they weren’t worth putting through Photoshop so…..photo-28Talking of Kirstie, I watched one of her recent “Fill Your House For Free” programmes where she upcycled an old suitcase to make a dog bed. Now I know it’s nothing new, but I had acquired an old leather suitcase with this very project in mind as the puppy had all but destroyed her bed. So, instead of trying out my new toy, I made something that didn’t involve any sewing whatsoever.

Which makes this a great project for those of you who can’t/don’t like sewing.

Here goes….

Tutorial: How To Make A Dog Bed From An Old Suitcase

Acquire a strong, suitably sized suitcase – I managed to find a brilliant leather one on eBay.photo 1

photo 2Now you can leave the lid on, but you will have to fix it in the upright position permanently so as not to give your dog a nasty headache.

I decided not to take this risk, and removed it by cutting through the leather straps and unpicking the stitching that held it together.photo 2

photo 1At this point you could insert a piece of chipboard to the inside of the base for added strength depending on the size of your dog but, as mine is for two tiny Yorkies, it wasn’t necessary.

I had every intention of attaching beautiful bun feet to the base and waxing them a gorgeous shade of tan to compliment the vintage patina of the leather. But at twenty quid for four including postage, I thought that rather defeated the object.

A quick visit to the woodpile turned up a perfectly adequate length of 2 x 3 which, with a little imagination, would do just fine.

I marked the timber at 7cm intervals (just under 3 inches in old money) and sawed four square-ish stumps for the feet. (What can I say? Hubby was at work and I was far too impatient to wait for him to come home and do it properly!)photo 4

photo 3Sand the rough edges away to get rid of any splinters and also to provide a smooth surface for the paint.photo 3Mark the centre of each block of wood with a pencil and, if you don’t have self-driving screws, make a pilot hole with a drill or bradawl.photo 1Mark where you want your feet to go on the outside of the base and turn your screw until it pierces the leather.photo 4Remove and screw from the inside, through the hole you have just made and into the centre mark of the foot.

I found this to be the simplest method of transferring the markings and getting the holes in the right place!

My husband would probably have done it differently but as I said, I’m impatient…photo 2If your wood is untreated as mine was, paint one coat of a suitable primer to seal.

I had some tester pots lurking in my understairs cupboard (as you do) which I knew would come in handy one day, and picked Parma Grey as a lovely modern contrast to the old leather. Two coats of paint seemed to be plenty.photo 3When dry, turn up the right way.

I had a feather pillow surplus to requirements which fits perfectly, but you could have a piece of foam cut to size if you prefer.

Whatever you choose to use as padding needs to be be waterproof really, so I used a waterproof pillowcase to protect it.

The existing dog blanket was wrapped around for comfort and….

“Ta dah!”photo 4Both dogs hopped in immediately and settled down to sleep so I guess it’s a hit!photo 3By using stuff I had lying around the house already, I didn’t spend any money at all on the project so it was true upcycling.

The initial cost of the suitcase was twenty pounds and, although there are cheaper ones to be found, I wanted a sturdy leather one with strong stitching and a good base. I think twenty pounds for a unique, (luxury?) dog basket is a bargain quite frankly, and I’m really pleased with it! 

What do you think? Have you been inspired by anything you’ve seen on TV?


5 Comments

Passing on traditional skills to the next generation

A baby of the Sixties and growing up in the Seventies (with no television) meant, as children, we made our own entertainment.  We were either outside making dens from dawn ’til dusk or inside playing board games or……making things.

Grannies the country over were teaching their young grandchildren their make-do-and-mend skills – borne out of necessity, but usually incredibly beautiful to boot.                                            Fascinated, we watched with admiration and awe the speed at which these ‘old’ women worked those needles to create something useful in order to extend the life out of something seemingly knackered. (In reality, my Gran was only forty-odd – but they didn’t age as well back then, did they?!)

Wisely, knowing that in order to succeed the idea has to come from the child and not suggested by the adult, my Gran waited until we inevitably begged to be taught how to do ‘it’ too. Gradually we learnt how to knit, sew and crochet with the most patient of teachers to guide us.

I can’t really express how grateful I feel to be given such a gift by my late Grandmother; the pleasure I get from these skills she taught me is immeasurable. I even made a living from sewing in my twenties, but now I just pick up the needles (or hook) for relaxation and the sheer joy of it.

So, when my eight year old son came running in from a tennis tournament, threw his stuff down and said “Now will you teach me how to crochet please?”, I knew the time was right!

This is the very first time Bertie picked up a crochet hook, still hot and sweaty from tennis…

Bertie crocheting

And it doesn’t stop there!

My son’s girlfriend, Frankie, is twenty-three and she wanted to learn…..

Frankie

…..and my sixteen year old niece, Alice, was next in the queue;

Alice small

Alice's crochet small

Bertie also drew up plans for a doll that he wanted to make;

Doll

Here he is, sewing all the bits by hand;

Doll2smallDoll3small

I am sooo thrilled that I have been able to pass these skills on  – I only hope that the popularity of crafting continues so that they will in turn hand down the skills to the next generation.  Just ten years ago, pre-recession, I was convinced the arts of sewing, knitting and crochet were to be lost forever and it’s fabulous to see more and more people wanting to learn.

At the end of a long crafting day, the kids were desperate to sleep outside.  The boys slept in a tent and Alice stayed over especially so she could sleep on the day bed – I did tell you that it was comfy, right?  Here they all are, reading books just after sun down and just before the fairy lights start twinkling automatically at dusk….perfect!

Sleeping outsidesmallHave you passed on your traditional crafting skills to anyone, or created a lovely outside crafting space?


Leave a comment

Crochet Glastonbury Festival Bag!

Well, the festival season is here upon us once again and I happen to live near to the biggest and best – Glastonbury! 

Whilst I’m not actually going this year, two of our daughters are stewarding for free tickets and the eldest son is taking the traditional route in.  By that, I mean he bought a ticket and is not planning to climb over the fence.  (Did you know that Michael Eavis is on record as saying how disappointed he is at the lack of ingenuity shown by would-be festival crashers when trying to sneak in for nothing?).

We used to be able to hear the music from our house but, since moving seven miles further east, no longer have that (dubious) pleasure.

I digress….

The first event was in 1979 and attracted 1,500 party-goers at the cost of £1 each (including FREE milk from the farm!), but it wasn’t until ten years later that Eavis used it as a fundraiser for CND, raising £20,000 for the cause. 

Image

Last year (2013) saw 175,00 ticket holders paying £210 each and raised £2,000,000 for charities and local good causes!

So what images spring to mind when thinking of the Glastonbury (or, more accurately, Pilton) Pop Festival?  Think hippies, rainbows, love, peace, cannabis, wellies, mud, sunburn etc. (although my husband refers to the annual migrants as “smelly soap-dodgers”!)

Taking the optimistic view and thinking ‘sunshine and rainbows’, I designed some free-form crochet bags in the “Hippy-Chic” style.

Would you like to see them?

Of course you would!

Here is my very lovely daughter modelling them together with that other festival staple – wellies (well, my Dubarry’s actually): –

Image

Here’s a close up of the front showing that gorgeous “ripple” pattern…

Image

…and the back is felted wool.  Fully lined with contrasting blue fabric with white polka dots, there is a pocket inside for your mobile ‘phone and it closes with a magnetic clasp.

Image

Here’s the other one: –

Image

This was made in one piece so the back is a continuation of the front.

Image

Lovely spotty fabric for the lining and this shows the ‘phone pocket and magnetic clasp –

Image

Are they “Festival” enough for you?  Both crochet Glastonbury Festival bags are available from my shop on the link at the top of the page – go on, unleash the hippy in you!


2 Comments

Handmade Recycled Greetings Cards For School Fair Or Summer Fête

Blimey I’ve been a busy bee creating all manner of loveliness for the School Fair tomorrow!

Earlier in the week I made some fudge and then I designed a summer fête inspired box in which to display them.  I was trying to think of some quick, easy and cheap ideas for making something which would sell at the fair, when I remembered the forty-or-so sheets of recycled brown card left over from making our wedding invitations last year.  Bingo!  Greetings Cards would be all those things and should make a good profit for the school.

I sketched and cut out some card templates of several different designs, then cut the shapes out of scraps of wrapping paper.  Keeping in mind the necessity to appeal to all ages and both sexes, I chose a mixture of colours and cut out the following; bunting, balloons, kites and ties.

I stitched the shapes with a basic straight stitch on the sewing machine and embellished some of them with glued-on paper clouds.  The cards were left blank to make them suitable for any occasion, apart from a few that were printed with ‘Father’s Day’ as it is the day after the fair.  I wrote my website on the reverse so that, if they don’t sell, I can put them in my shop for sale:)

Image

So far forty cards have cost nothing, so I bought 50 manilla envelopes for £1.29 and 50 see-through bags for £2.75.  They look MUCH more professional presented this way and each card has still only cost 8p! (Not including my time, obviously).  This serves another purpose though, as it protects the cards from damage and dirt as they get handled.

Image

Now, what to do about a box?

Knowing that people like to rummage through everything easily, I decided to customize a shoe box to make a long, thin “shelf” type display box.  This is what they look like….

Image

I’m secretly quite chuffed with the whole thing!  Hopefully that’s given you an idea of a quick and easy craft make for your school fair or summer fête – handmade greetings cards for just a few pence each.


4 Comments

Presentation Box With Bunting

If you saw yesterday’s post about the handmade fudge I created for the school fair, you may remember that I was just going to take it along in a bread basket.

Well, I thought that, since I had gone to the trouble of making the fudge and packaging it nicely, I could be a bit more creative with the presentation. 

An hour later I had made this: –

Image

Inspired by this tiny scrap of leftover “Afternoon Tea” wrapping paper which was just too pretty to throw away…

Image

…I decided the colour scheme could be pink and blue with paper bunting.

Here’s what I did….

  1. Paint the outside of a shallow cardboard box (I used the lid off a box of photocopier paper) in blue and the inside in pink.  I used acrylic paints which dried super-quickly.
  2. Using parcel tape, stick two wooden skewers at an angle to the inside-rear of the box.  Paint pink.


Image

3.  Using PVA adhesive, glue down a piece of wrapping paper to the inside base of the box.  (I didn’t have enough to cover the entire       base, so I painted a strip down each side in pink beforehand).

Image

4.  Attach a length of string between the top of the skewers using parcel tape.

5.  Draw a small triangle onto a piece of card and cut out to make a template for the bunting.  Fold your wrapping paper and place the template short edge along the fold.  Draw around, and cut out.

Image

Image

6.  Paste a small amount of glue onto the inside of your bunting pennant, hang over the string and press together.

Image

Image

And there you have it – a suitably themed box in which to present your homemade goodies for sale.  They look much cuter in this rather than the bread basket, don’t they?

Image

A presentation box complete with “Afternoon Tea” wrapping-paper bunting – perfect for selling sweets, chocolates or small gifts on your stall at your school fair or Summer fête.