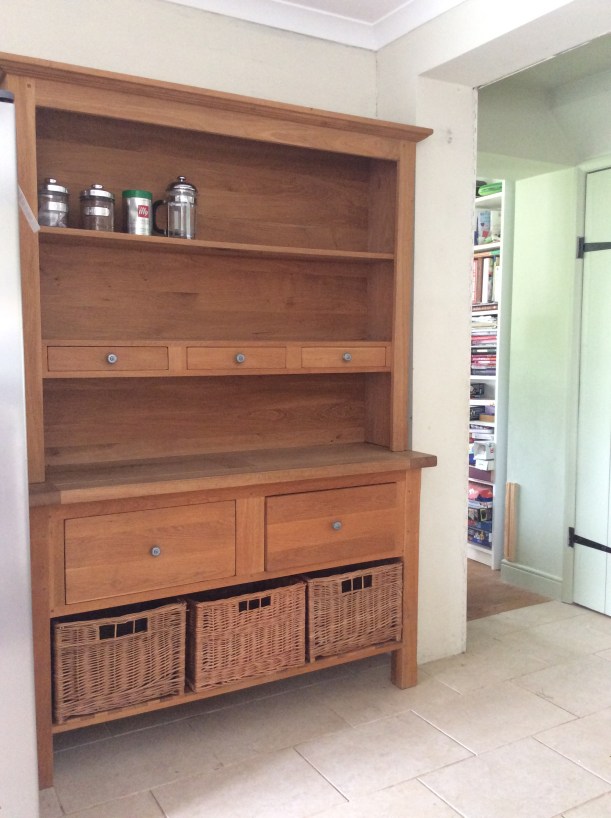
A couple of months ago, I was lucky enough to buy this solid oak dresser on eBay for just £96.00.
Now, I know there’s nothing wrong with it and it is, indeed, a beautiful piece of furniture just as it is, but I had plans to paint it.
We have a large kitchen diner with a LOT of wood in it, so yet another ‘heavy’ piece was never going to look right. I spent months searching for the right dresser at the right price and the right size and eventually found this modern one, which was beautifully made and really solid.
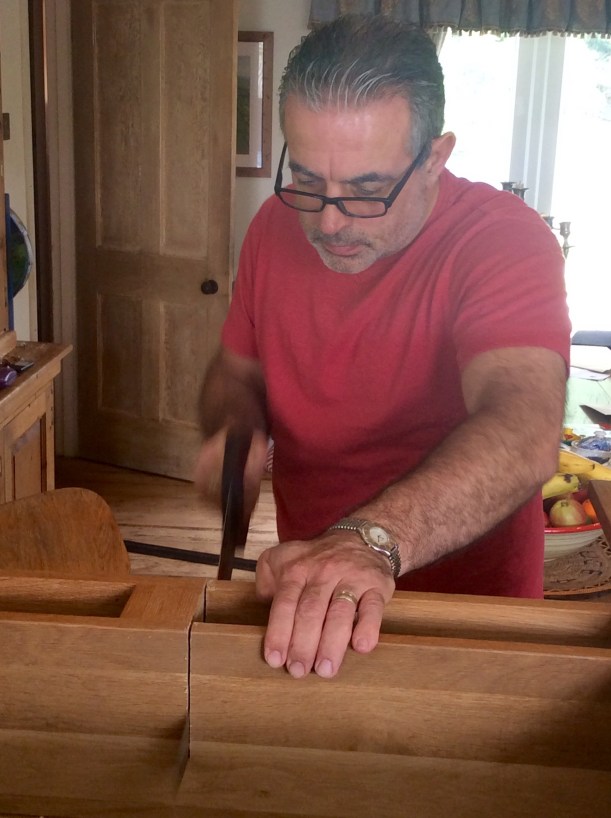
Mr H-L drove for over an hour to go and collect it and wasn’t particularly happy about it being painted, but resigned himself to the fact that I was going to, anyway. What he DID object to, though, was that I wanted him to chop a section of the dresser out, in order to fit our coffee machine in.
I won that debate, too:)
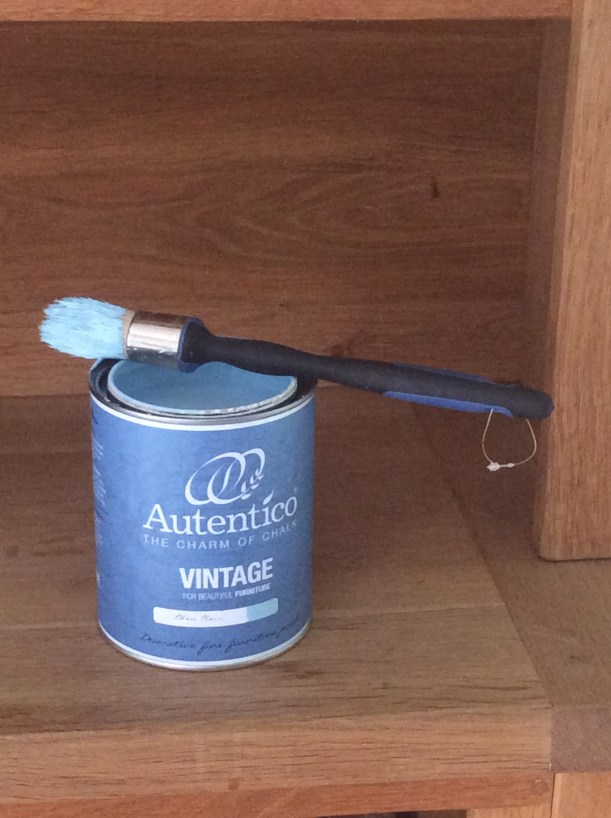
Having used Annie Sloan and Rustoleum chalk paint successfully in the past (guest room makeover), I opted for ‘Bleu Clair’ by Autentico, purely because they had the exact shade of blue that I was looking for.
The main reason that I chose chalk paint in the first place is that there is no need for preparation on most surfaces – you just slap it on.
Two coats are usually needed for good coverage, especially when covering dark with light.
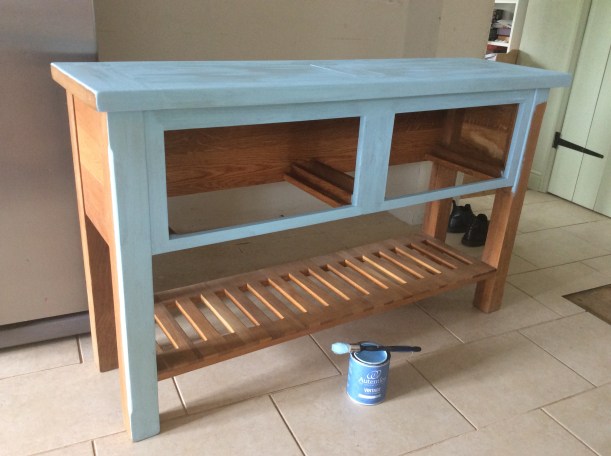
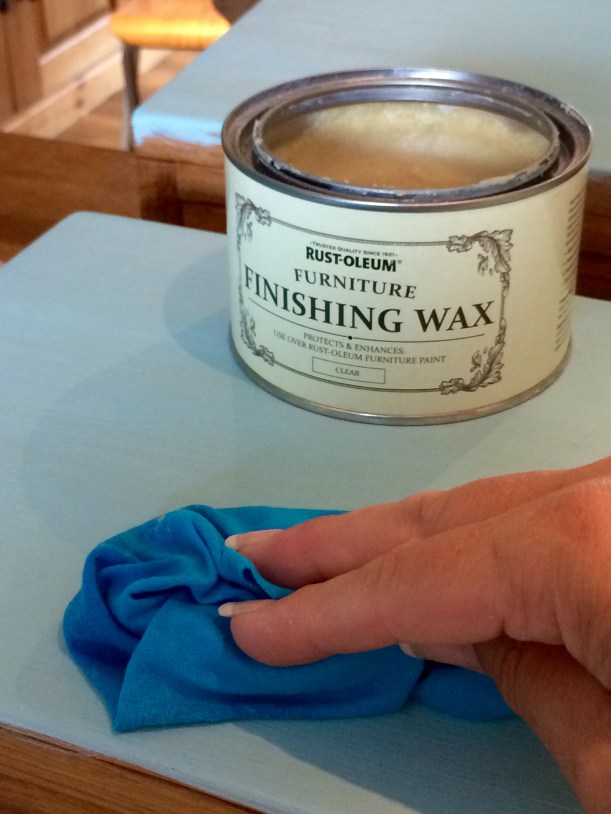
When the paint was totally dry, a coat of finishing wax was rubbed in and buffed to a sheen to protect the surfaces.
I’m told it takes a month to cure completely, so be careful until then. It’s been over a month now, and the finish is still blemish free.
With a bit of determination (for which, read ‘impatience’), I managed to get two coats of paint and a coat of wax on in just one day.
Then I left it for a month.
Or two.
And decided that the knobs had to go.
I dug out four wooden knobs leftover from the kitchen cabinet doors and painted them with two coats of ‘Walnut’ wood stain and a coat of Matt varnish.
Now they match the kitchen units.
So this is the finished article, brightening up the other end of the kitchen part of the room, and I have to say that I’m very pleased with it.
The coffee station works brilliantly with everything in one place – all I need now are some beautiful mugs to hang on the new hooks we installed.
Turn around 180 degrees and this is what greets you, so you can see that both the style and the colour work really well as a whole.
Before and after: –
I love it both ways, but it just sits in our kitchen better now it’s painted and if I ever change my mind, it should be easy to get dipped back to the plain oak.
A couple of weeks ago I had the pleasure of hosting a free motion embroidery workshop for four lovely ladies who, very grudgingly, allowed me to take just one photo of them!
The workshop was a birthday present for the lady on the far right and, apart from the sewing, included lots of lovely tapas-style food and prosecco – not a good combination and, yes, one glass did get knocked over on the table!
None of them had ever attempted this type of machine sewing before but, after giving them a run through of the basics and a demonstration, they all managed to accomplish a few little samples.
If I remember correctly, the lady who created the brilliant musical notes below doesn’t even own a sewing machine!
About an hour in and after much laughter and false starts, everyone seemed to be enjoying themselves and got the hang of it – I love these seed heads.
My advice was to keep it simple to begin with and make sure the backing fabric isn’t too small to manoeuvre under the needle.
All the ladies said they thoroughly enjoyed the workshop and could see how addictive it could become.
I have dabbled a little, myself, with free motion embroidery, with things like this: –
But what I would REALLY love to do is something as fabulous as this! (image courtesy of DaysInDesign).
A course with Katie Essam is top of my wishlist right now…..
It has been totally brilliant, not to mention ridiculously exciting, to watch all your #stitchingsanta parcels coming together over the last couple of months.
I’ve loved seeing how thoughtful and creative everyone has been, really getting to know their recipient through their blog and sending the most appropriate gifts possible.
For those of you new to this concept, and for anyone considering joining in next year (yes, I’m going to organise another one!), here’s the link to show you what it’s all about – #stitchingsanta 2015.
I took part in both the knitting/crochet swap and the sewing swap but, before I show you all the amazing things I received, I thought I’d show you the final handmade gift that I included in my sewing swap parcel.
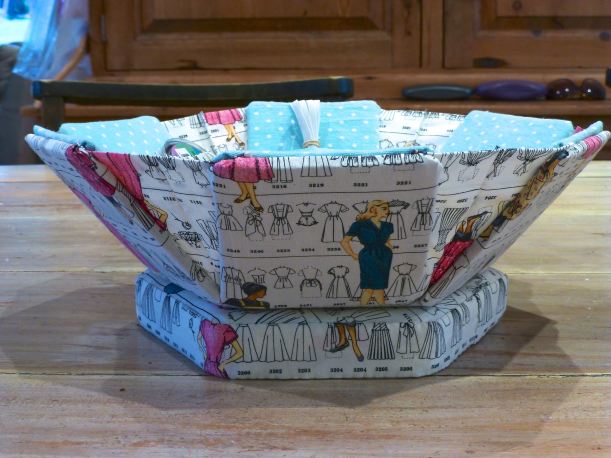
A hexagonal French ‘Cartonnage’ sewing box (pattern by Tialys on Etsy) which nearly didn’t get sent as I only finished it an hour before the deadline for Christmas post!
It took quite a few hours of construction over a week or so to complete, the glued parts needing overnight to dry before moving on to the next bit.
It’s a lovely pattern though, and I thoroughly enjoyed making it – I first saw it on Lucie’s blog as she was a tester for the pattern before its release and it is designed by the talented Lynn who blogs over at Tialys.
The box made it into the parcel along with the other things which I blogged about here and was posted to the loopy-but-lovely Ali, better known by many of you as THIMBERLINA.
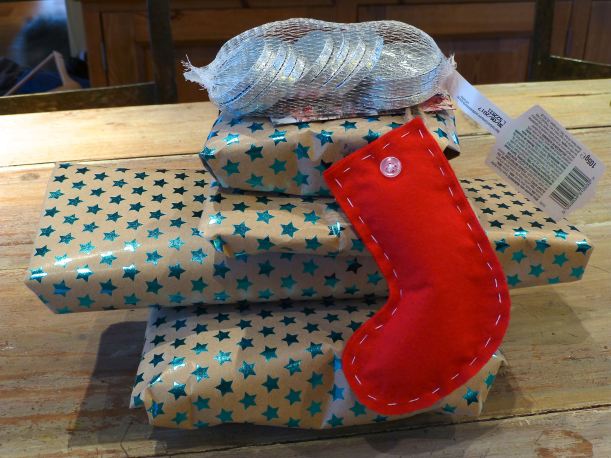
Below is the bundle of presents (blogged about here) that went off to my knitting swap recipient, Pippa, from Beads & Barnacles.
The first I knew of Pippa was when she signed up for the swap, so I spent some time looking through her blog to see what kind of things she might like before deciding on a few. There are fewer handmade items obviously, as knitting takes so much longer than sewing.
I took a chance by not adding sender’s details on either parcel so they would be a surprise until the last moment, as I had blogged in detail about all the handmade elements in the run up to Christmas.
Ali, bless her, hadn’t even received my parcel but had already sent me these lush quilted coasters as a ‘thank you’ for organising the swap!
The fabric she used was ace and had funny, and perfectly apt, little quotes in speech bubbles all over it. Thanks Ali – I love them!!!
Now, onto the myriad of gorgeous things that I was gifted.
As the organiser, two people had to draw the short straw and have me as their swap partner, so neither were able to blog about their parcels.
I chose Joey, from Littleblackdogsa, to be my knitting partner as she lives in South Africa and the post can be notoriously unpredictable. It wouldn’t matter if her parcel didn’t reach me for a few months but, in fact, it arrived in plenty of time!
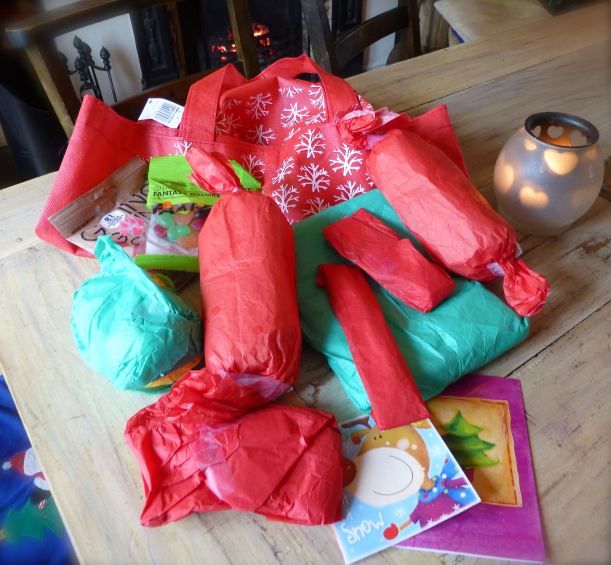
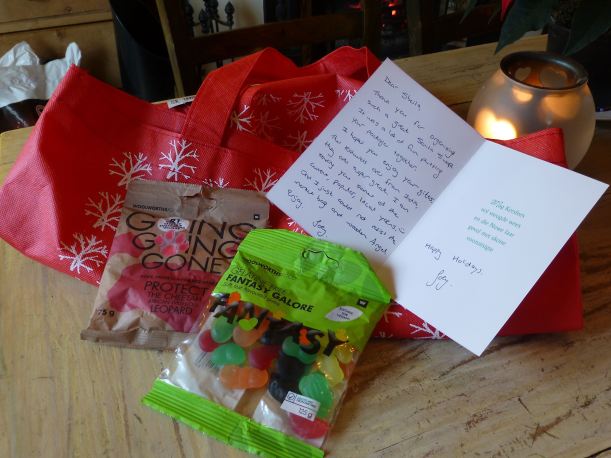
The outer bag was quite badly damaged when it arrived, but the contents were intact so I put everything in the bright red bag that she sent with it and it stayed under the tree until yesterday.
Yes, you read that correctly, yesterday – Boxing night to be exact. Why? Well, it certainly wasn’t because I have masses of will power or patience (quite the opposite, in fact) but because we host Christmas for the family and I spend two days cooking, tidying and making sure everyone is having a good time. I wanted to wait until lunch was over and they were all watching a festive film in the lounge so I could open and photograph my parcels at leisure.
And this is what Joey sent me!
Would you like to see them in more detail?
Firstly, there are two Indian cotton tea towels onto both of which Joey had crocheted a beautiful border. Far too nice to use, really, but I will.
A pretty pin cushion in the shape of a pear. Can you believe I only have one pin cushion which I keep in my sewing room? This one will be used on a daily basis by the children in my sewing classes – I think they’re going to love it.
Four fab cakes of organic cotton yarn, local to South Africa, which I am thrilled with and can’t wait to use – crochet hooks included!
A length of festive cotton tape featuring the music of “Jingle Bells”, some hand sewing needles and an atmospheric South African sunset disguised as a fridge magnet.
I love the little rustic angel that she included, too – I am guessing it is handmade from recycled materials?
Finally, there were some sweets, a project bag and a card with a lovely message inside. Thank you so much Joey – I am thrilled with all the thoughtful gifts that you obviously spent a lot of time putting together for me!
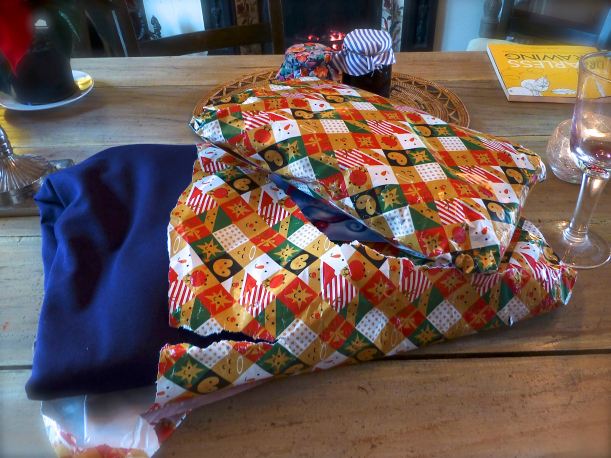
By the time I had finished opening and photographing Joey’s parcel, I was dying to open the one from my sewing swap gifter and almost forgot to take a picture of the parcels themselves!
Teresa, the smiley one who blogs over at Navybluethreads, sent her gifts in two separate packages which arrived a day apart – I only knew there was going to be another parcel when the first one arrived labelled ‘Part 2’!
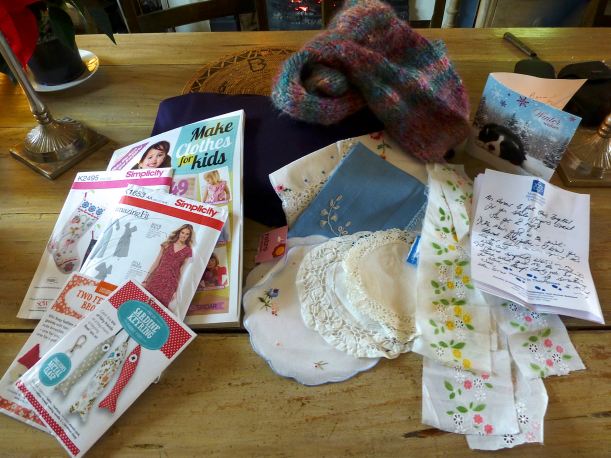
Look at all this!
There were Christmas cards and a letter – Teresa, you should be a doctor with writing like that, beautiful but illegible!!! No.1 Son and I worked it out in the end though!
With the help of the newly-translated letter, this is what Teresa sent: –
Loads of amethyst-coloured knit fabric which WILL be made into the dress on the pattern that she included. She knows that I like strong colours and, being a lady of ample bosom herself, obviously knows that the wrap dress is perfect for that. I will make the long sleeved version and wear it with long boots during the Winter.
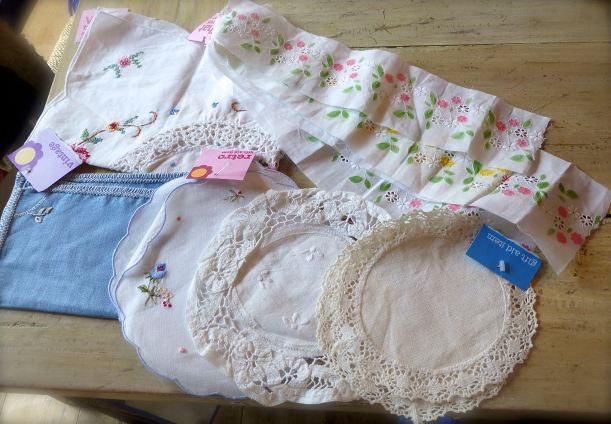
I simply cannot resist any pretty vintage lace, fabric or doilies that I come across in charity shops, so when I opened these I was beside myself with excitement! I believe most of these came from Teresa’s stash so I am doubly grateful – I wouldn’t be able to part with any of mine!
With my new sewing school, The Stitch Academy, in mind, she kindly sent me a publication that would be ideal for the children to use as their skills improve. The stocking pattern is brilliant, too, but I already have it so I hope she won’t mind if I pass it forward to somebody else to enjoy?
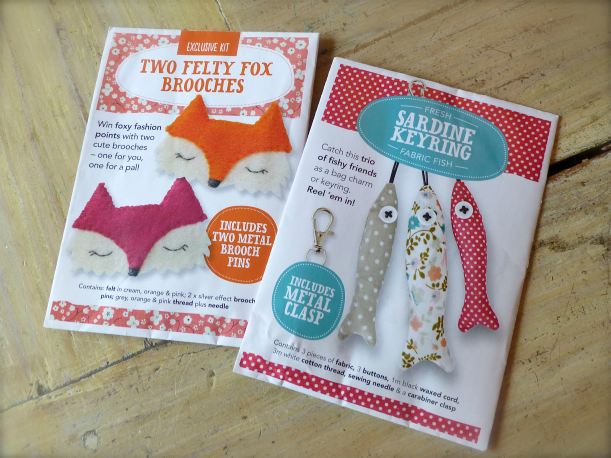
Teresa even thought of The Boys – they will absolutely LOVE making these fox brooches and fishy keyrings!!
So many generous and thoughtful gifts but my favourite from Teresa has to be this one – a beautifully soft infinity scarf, handknitted by the lovely lady herself, in a self-striping yarn of various jewel shades which looks exactly like it does in the photo. I just love it!
What more can I say, except a huge ‘Thank You’ to Joey and Teresa for all the fabulous gifts, and a massive pat on the back to all the #stitchingsantas that signed up for this swap and made it so successful and enjoyable.
I hope you all had as much fun as I did – judging by the blog posts I have seen so far, you did and I wasn’t the only one who was more excited about this present under my tree than any of the others!
Look out for the swap again next year when I get the feeling we’ll have an even longer list of participants than the thirty-five that took part this time.
For me, it’s day trips to the coast, balmy evenings sat outdoors until after sundown, weekend breakfasts in the garden, outdoor concerts in the grounds of old ruins……in short – being outside.
And being outside is made all the more perfect if you take that most quintessentially English thing with you – a picnic. Dressed down with sandwiches and a flask of tea at the seaside, or glammed up with champagne and a candelabra for a classical concert, everyone loves a picnic, with a soft, warm, waterproof picnic blanket to relax on in comfort…….
……except we haven’t got one.
Well, we didn’t have until recently when I decided to take advantage of being part of the Minerva Crafts Blogger Network and make one.
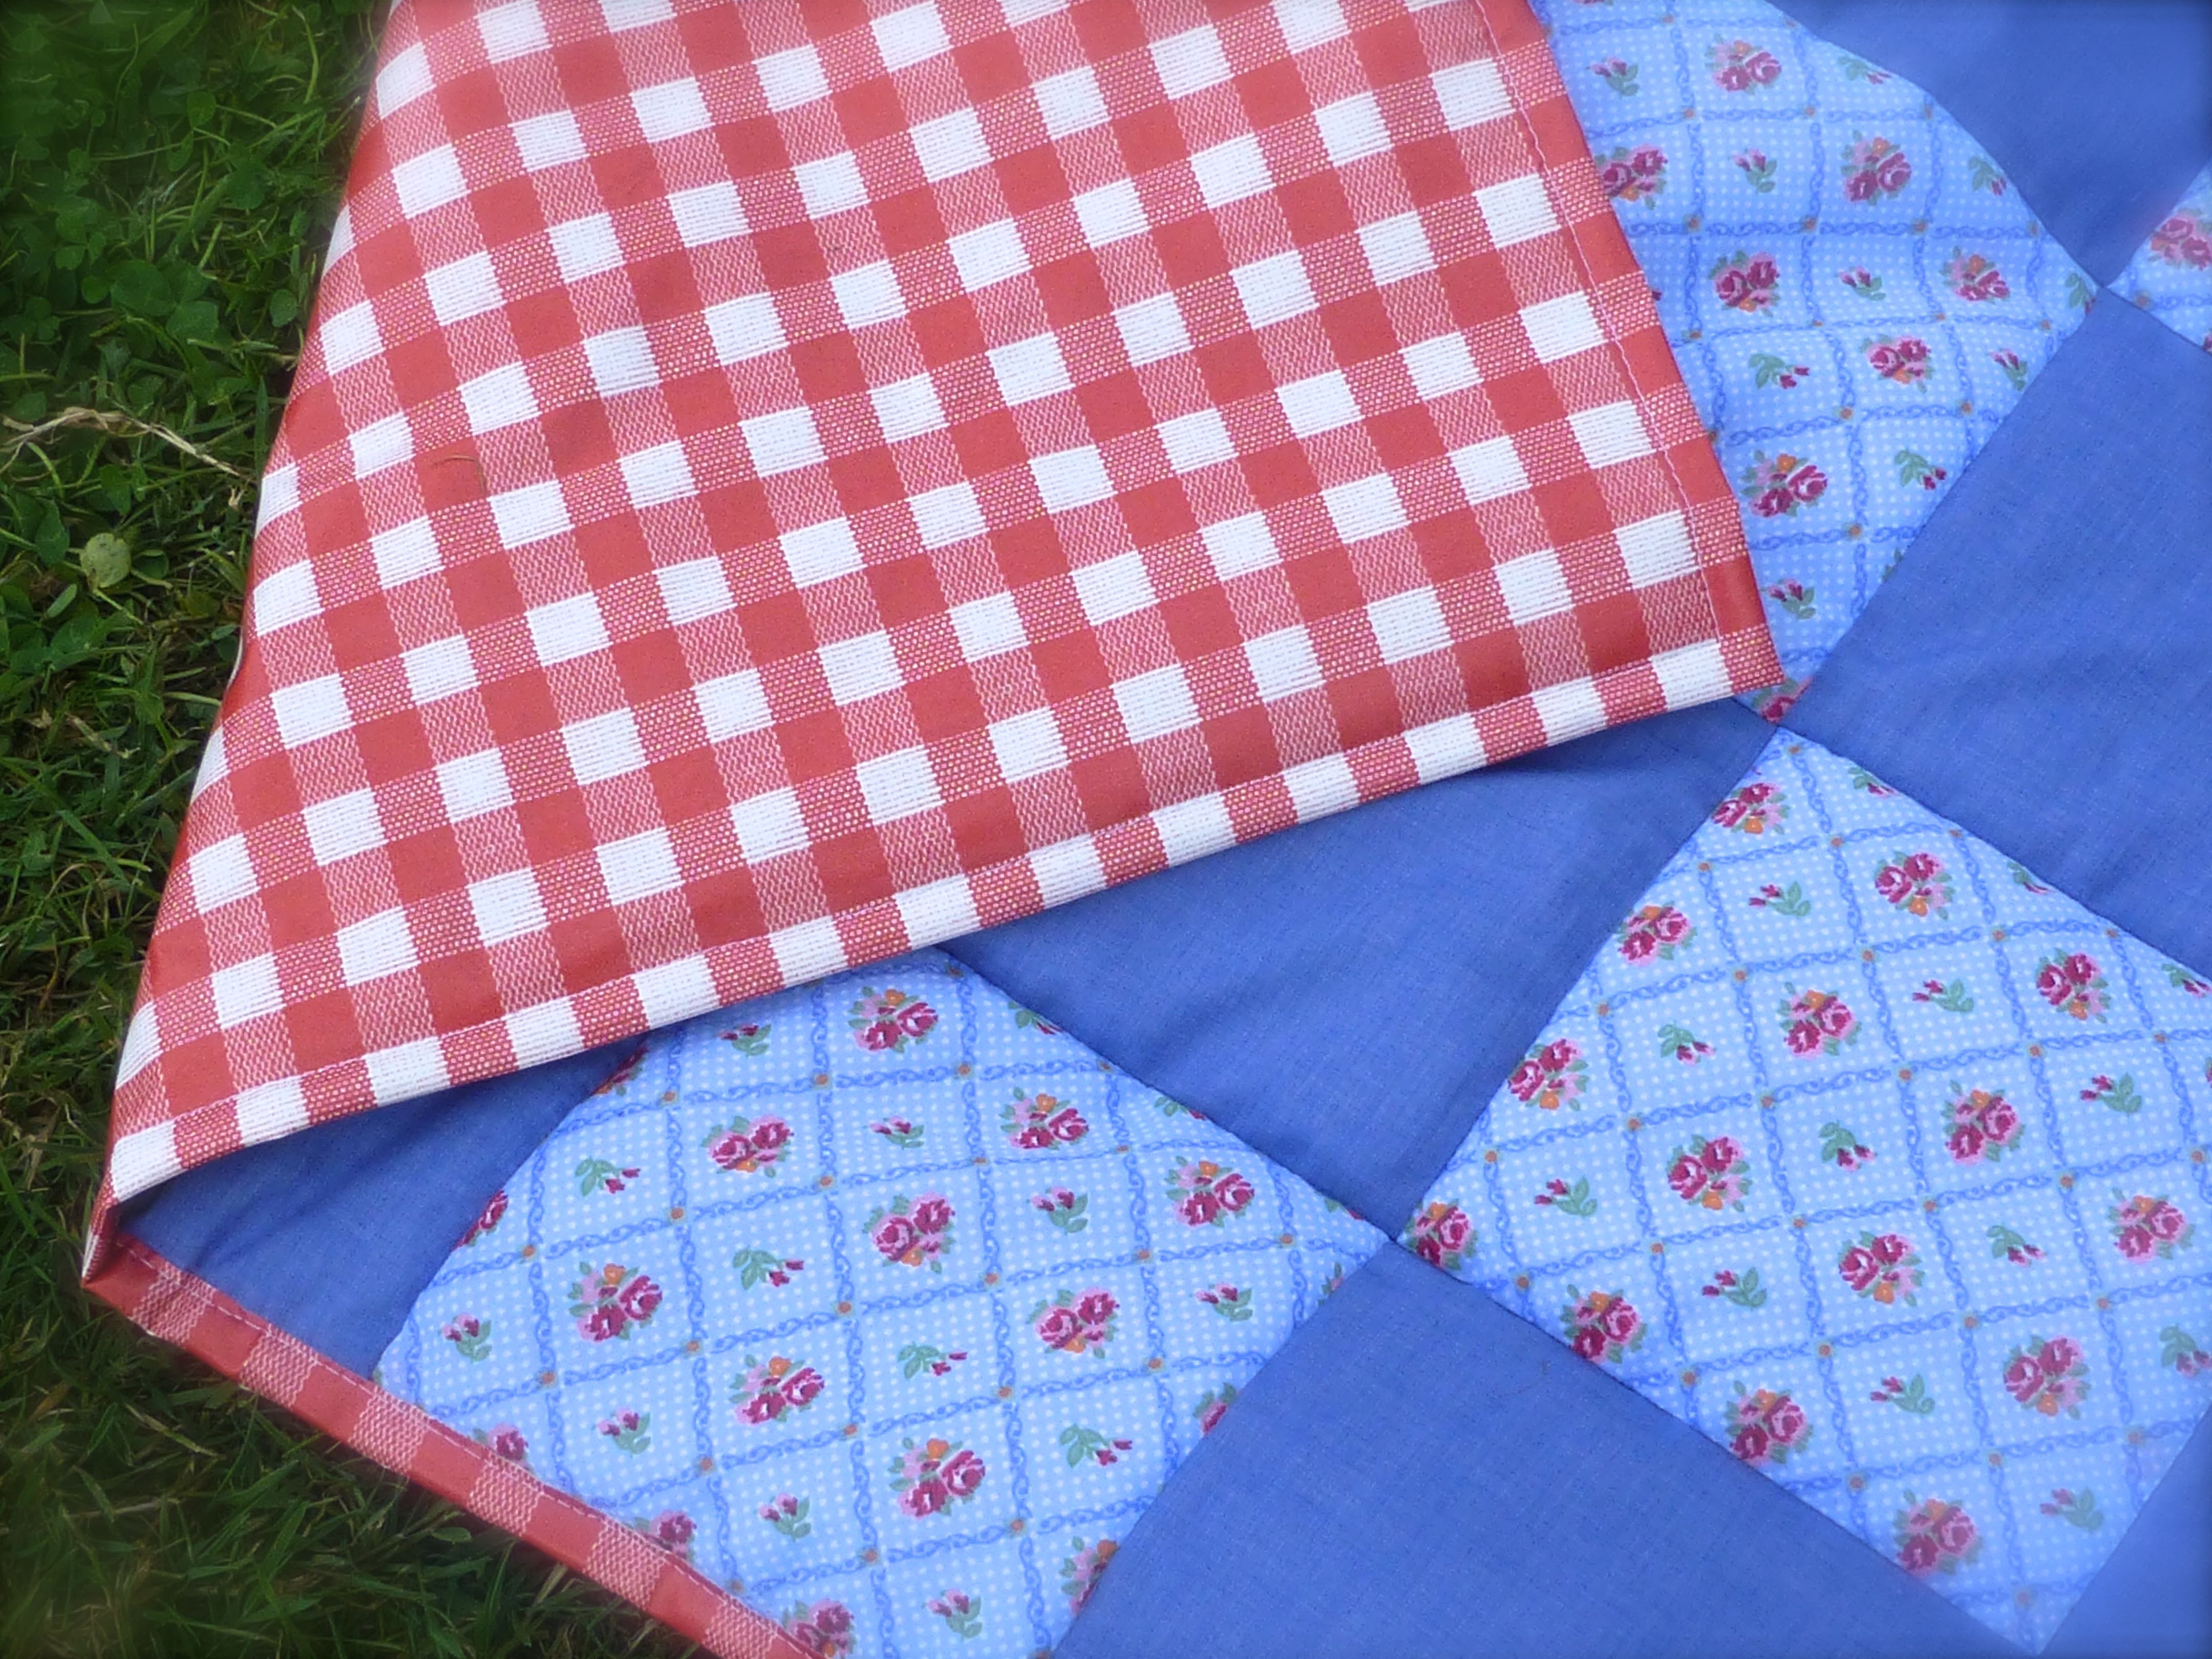
I didn’t want to make just any old picnic blanket, oh no, I wanted the ‘deluxe’ version, something a bit special, so decided to make a patchwork blanket with a waterproof backing and a carry handle. As there are four boys in the house (if you include Mr H-L), anything too pink and girly was out of the question, but I thought I could get away with a small floral print if the main colour was blue.
My Olfa Quiltmaking Kit came with this mat, rotary cutter and 6.5″ square ruler, so I kept things simple by cutting the patchwork squares the same size as the ruler.
Cutting through folded fabric made short work of all those squares as I could cut through four layers at a time – using a rotary cutter and the quilting ruler ensured that they were accurately cut, which is essential in patchwork.
In no time at all I had two piles of neatly stacked patchwork squares, 36 of the floral and 45 of the plain making 81 in total.
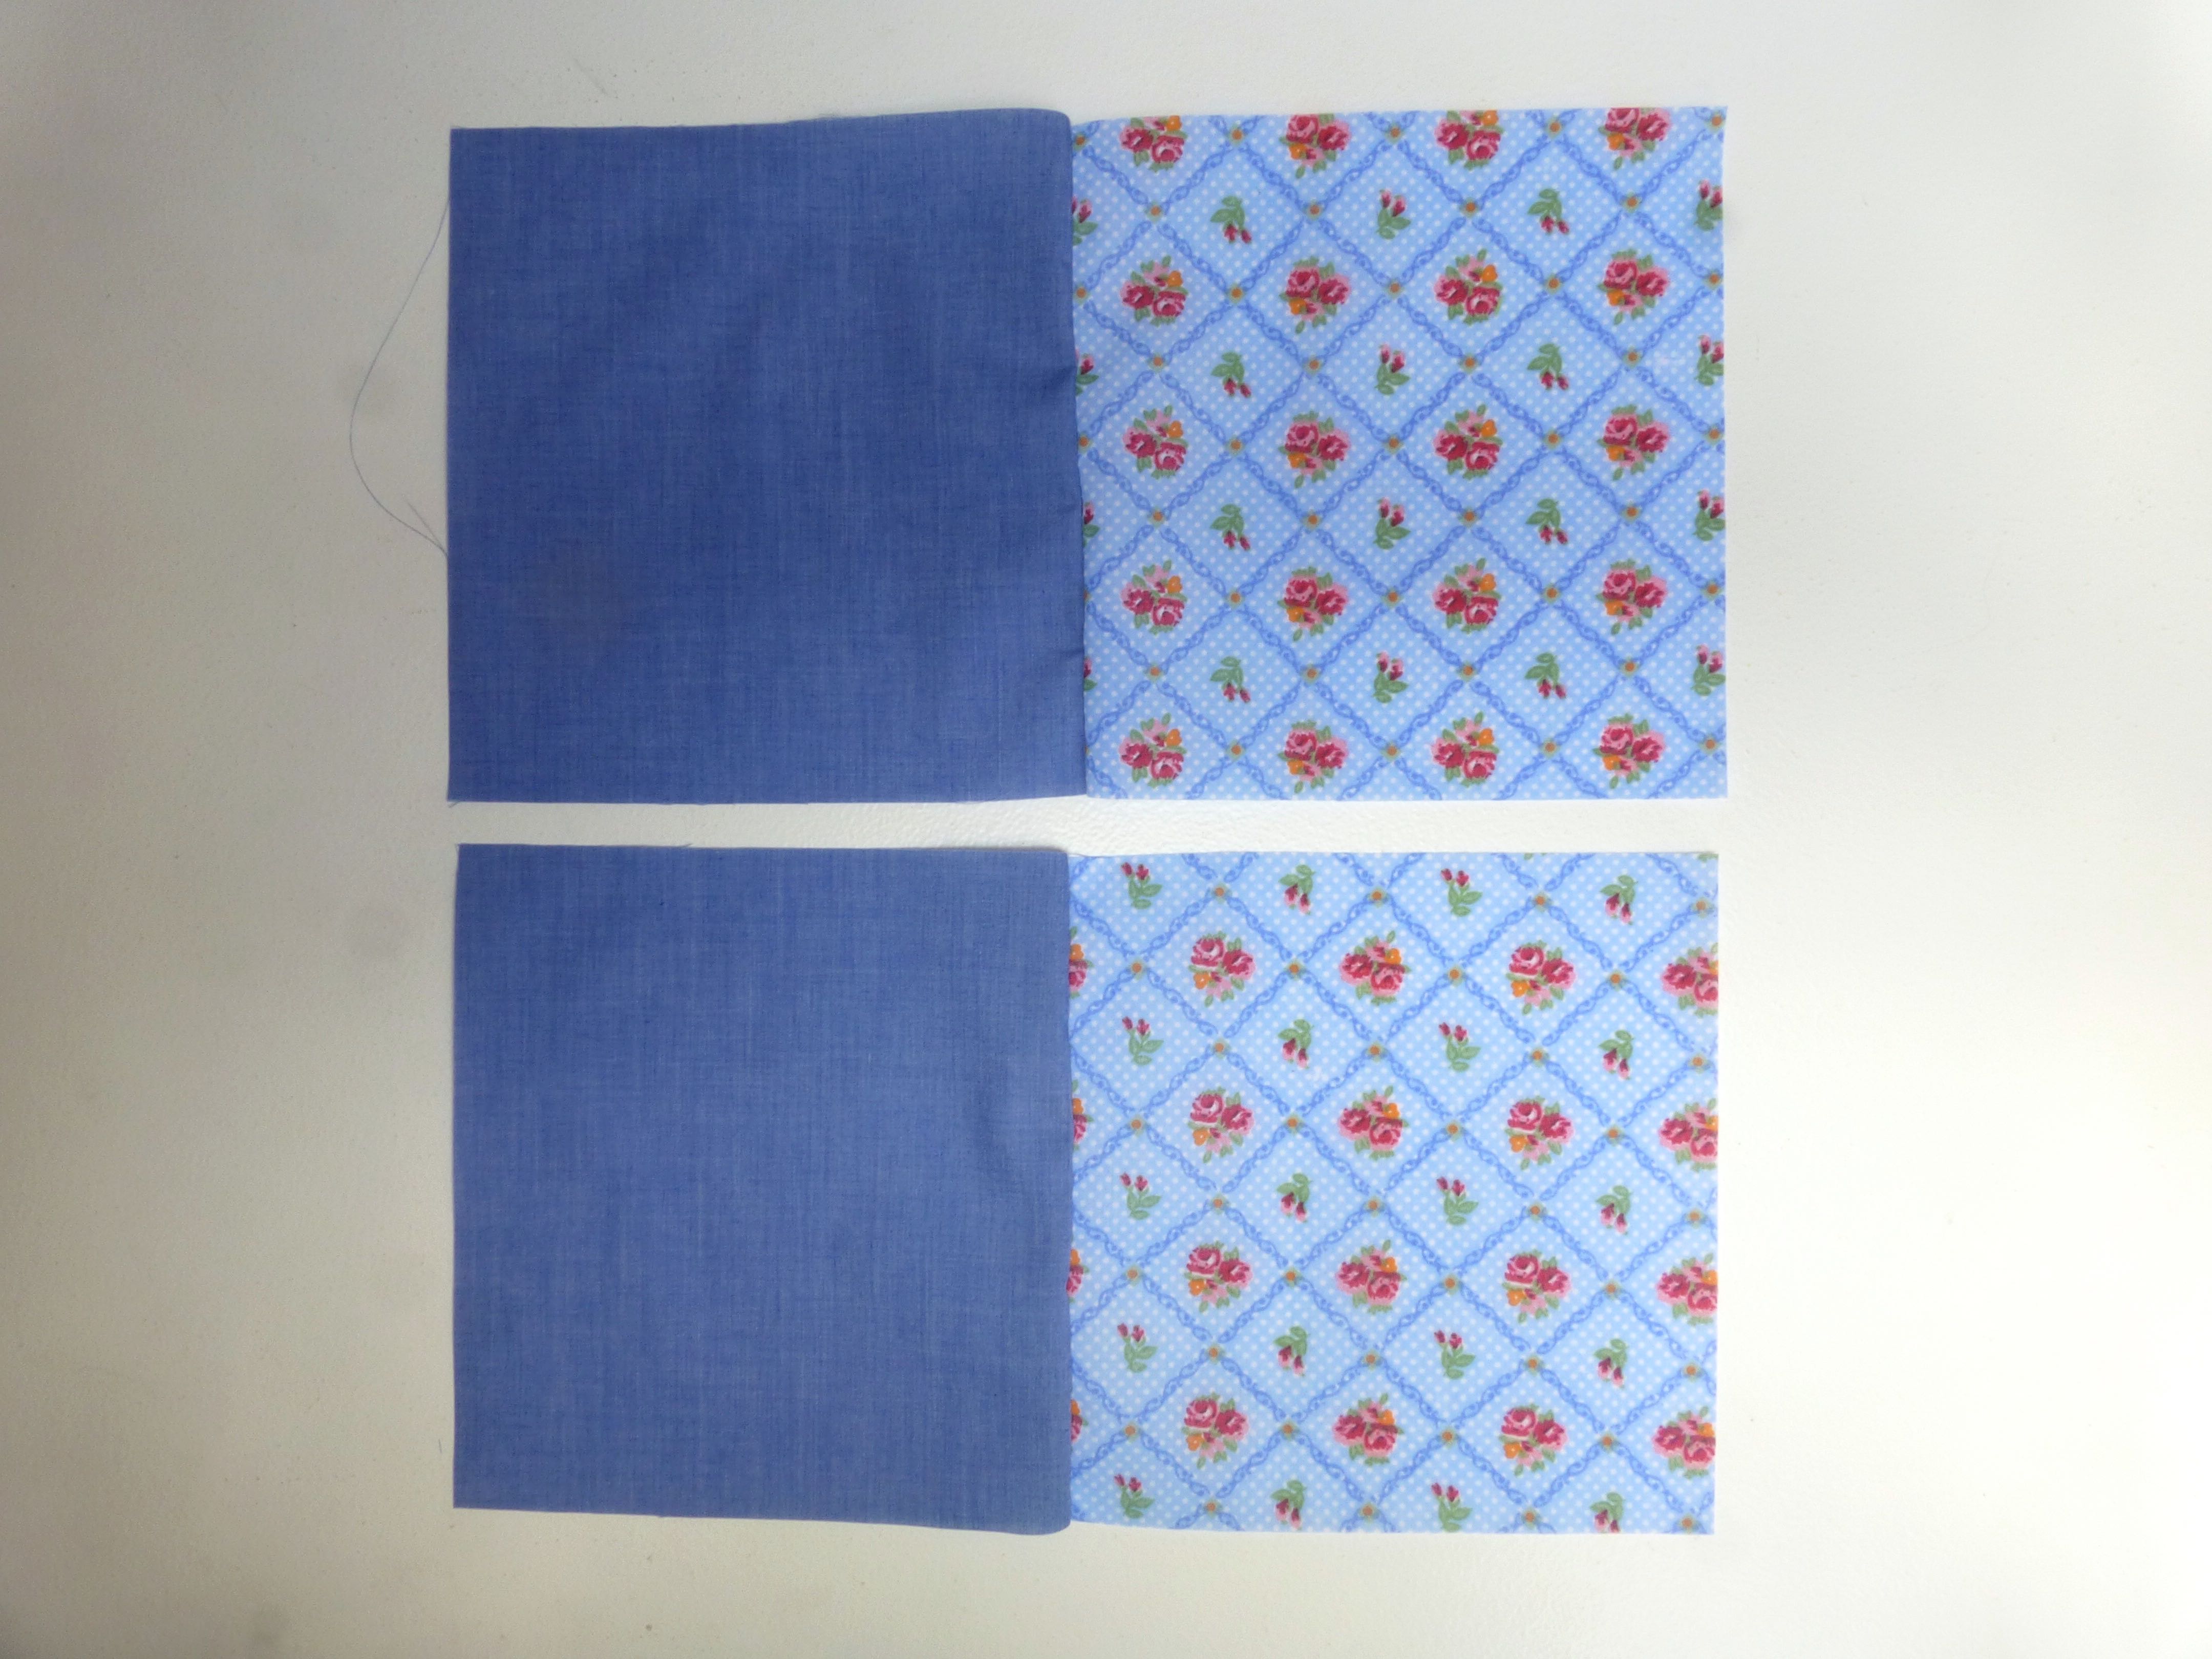
The easiest way to keep accurate seam allowances is to line up the edge of the fabric with the edge of the machine foot, the needle in the central position. On my machine, that means a seam allowance of 1cm throughout.
Whilst it may sound obvious, there is a quick way to whizz through all those squares.
Start by sewing them in pairs, each floral with a plain, right sides together. You will need to make 36 pairs which should leave you with 9 spare squares – 5 plain and 4 floral.
Don’t bother reversing your stitching at the beginning and end of each set, cutting the thread and repeating with the next pair – just keep feeding the pairs through the machine one after the other as shown below.
When all the pairs of squares are sewn, snip the joining stitches to separate them.
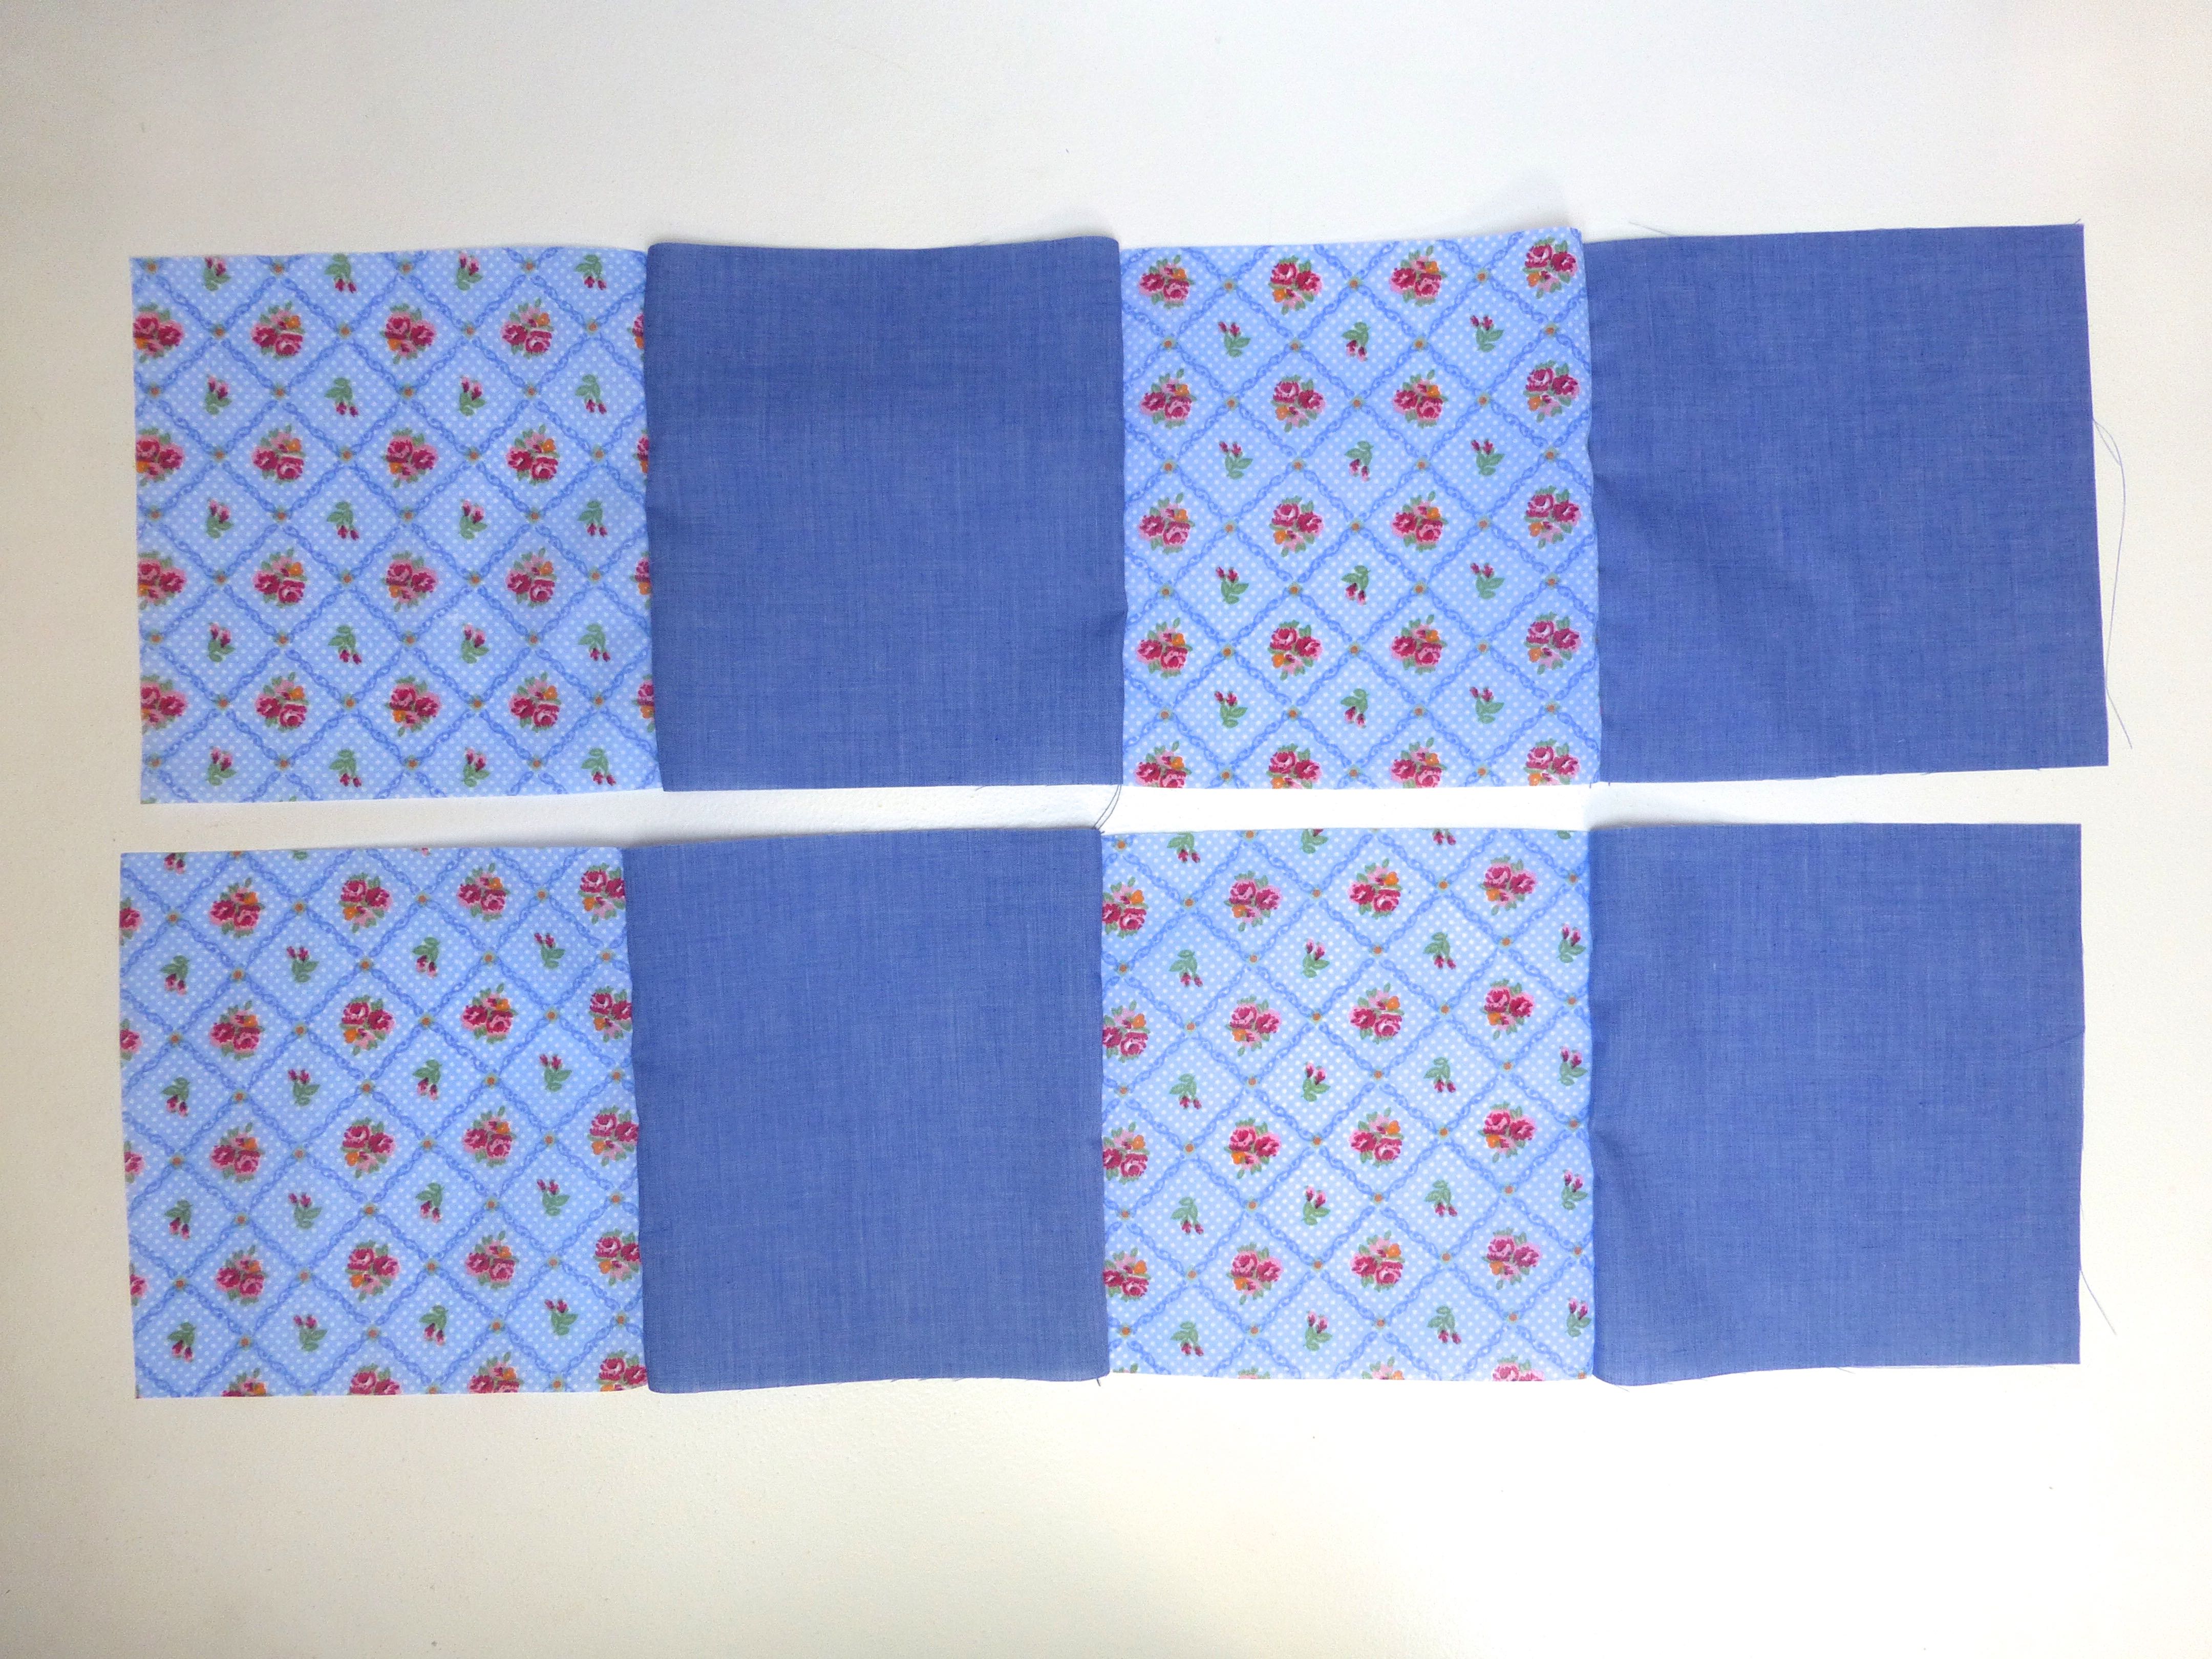
Repeat this process with the pairs of squares…
….until you have rows of 4….
….then sew the rows of 4 together to make rows of 8. Now add one of your left over squares to the end of each row.
You should now have 9 rows of 9 squares.
Press all the seam allowances to one side.
To minimise any bulk at the seams, you may wish to alternate the direction in which you press them flat.
Join these rows along the long edges, matching and pinning the seams as you go.
Continue until all your strips of patchwork are sewn together into one large square.
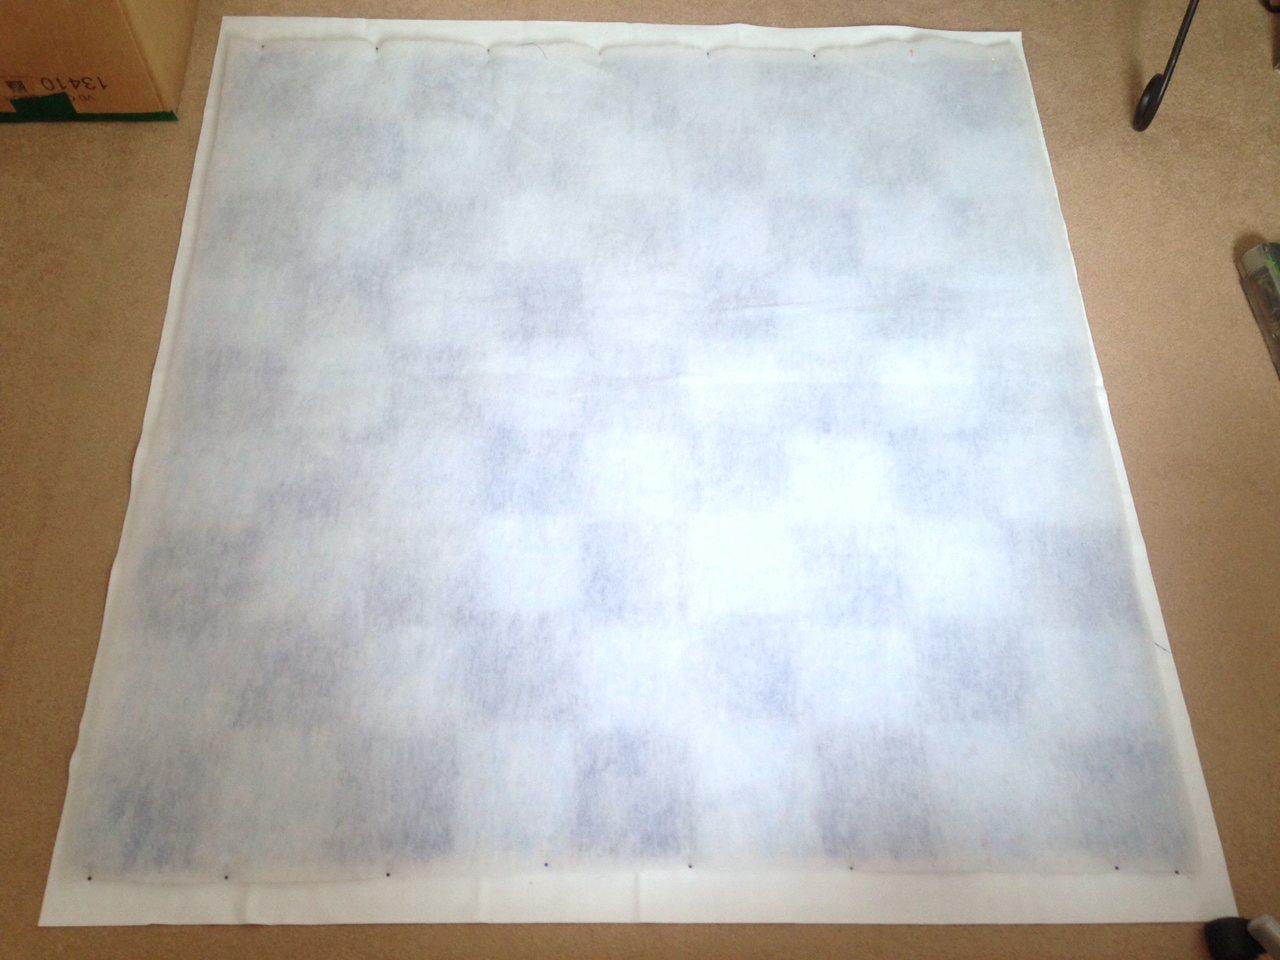
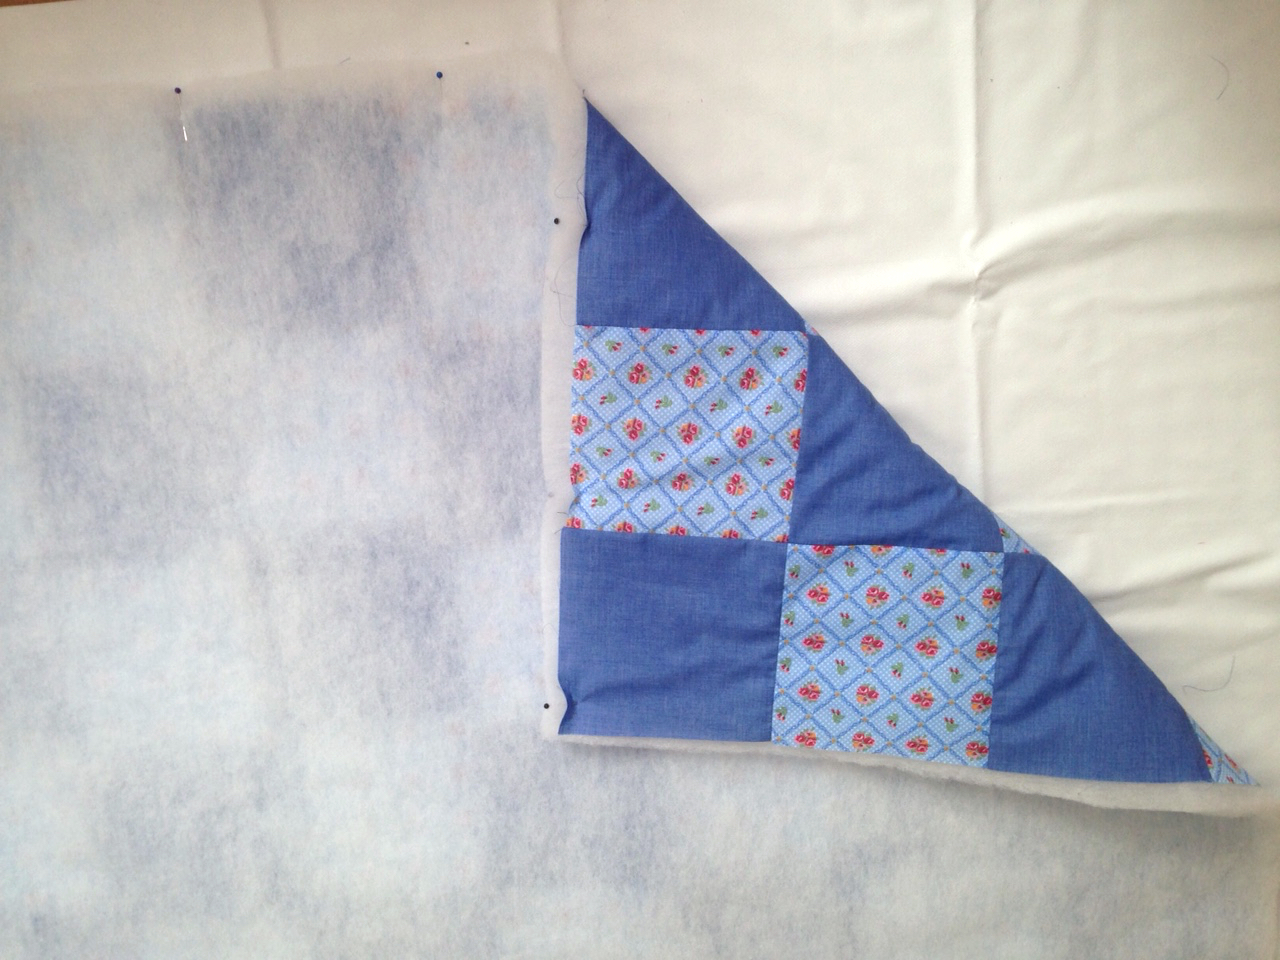
As I reached this stage, I made the spontaneous decision to add a layer of wadding between this top layer and the bottom layer. (I had plenty in my stash, but you can buy it here.)
I cut a square of wadding slightly larger all the way around than the patchwork piece, laid it on top of the wrong side of the patchwork and pinned it around the entire edge.
Stitch close to the raw edges all around the outside and trim the excess wadding as shown.
Now the wadding is secured, you can use large tacking stitches through both layers to stop them shifting whilst quilting.
Stitch in the ‘ditch’ using a long stitch length until the whole blanket has been quilted along the seam lines.
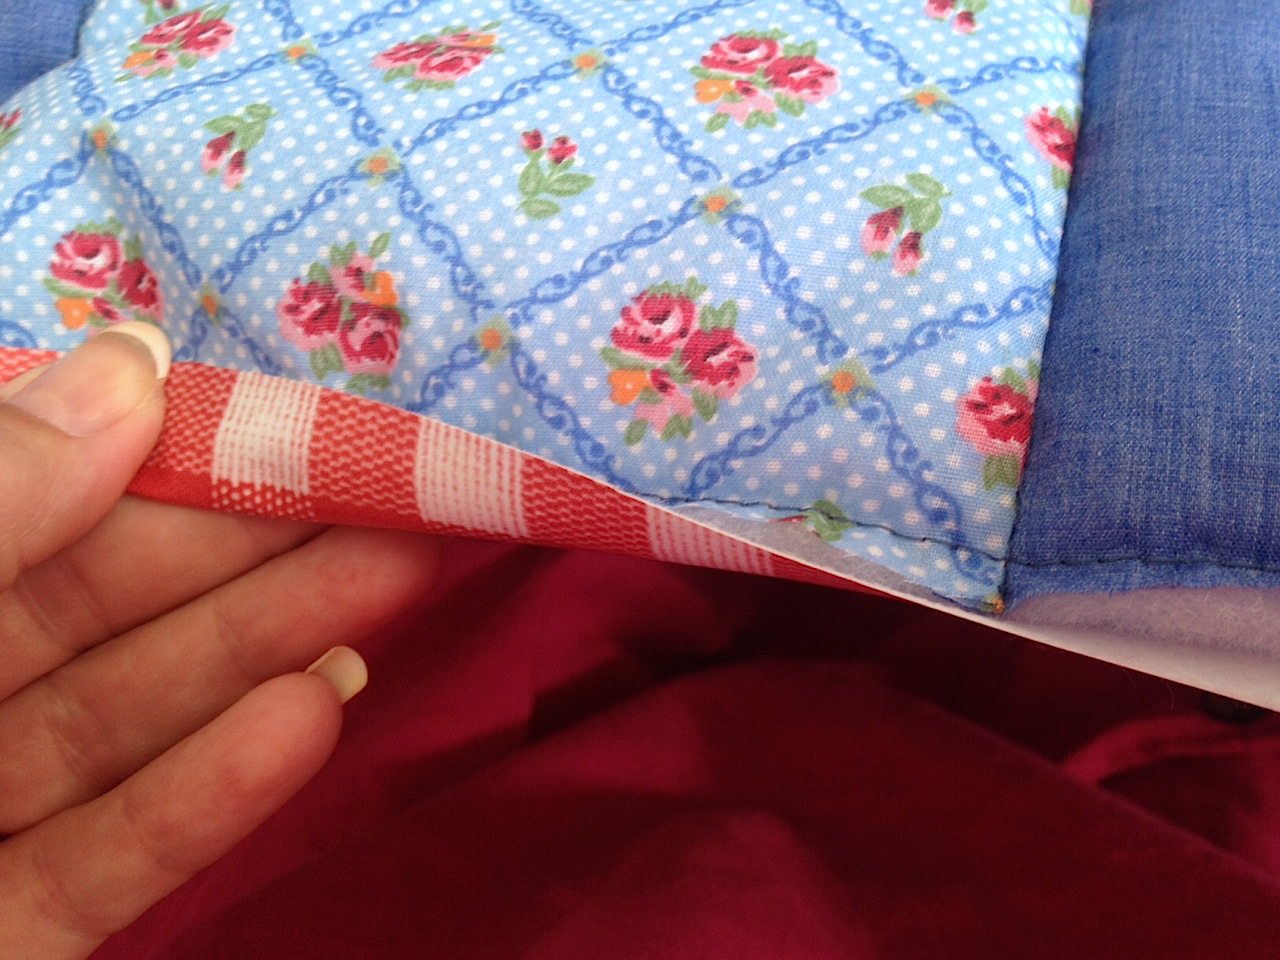
Place the quilted layer onto the vinyl backing, wrong sides together, and trim the backing so that it is 1.5cm bigger than the top all the way around.
Using clips, fold the excess vinyl over to the right side of the blanket and secure in place.
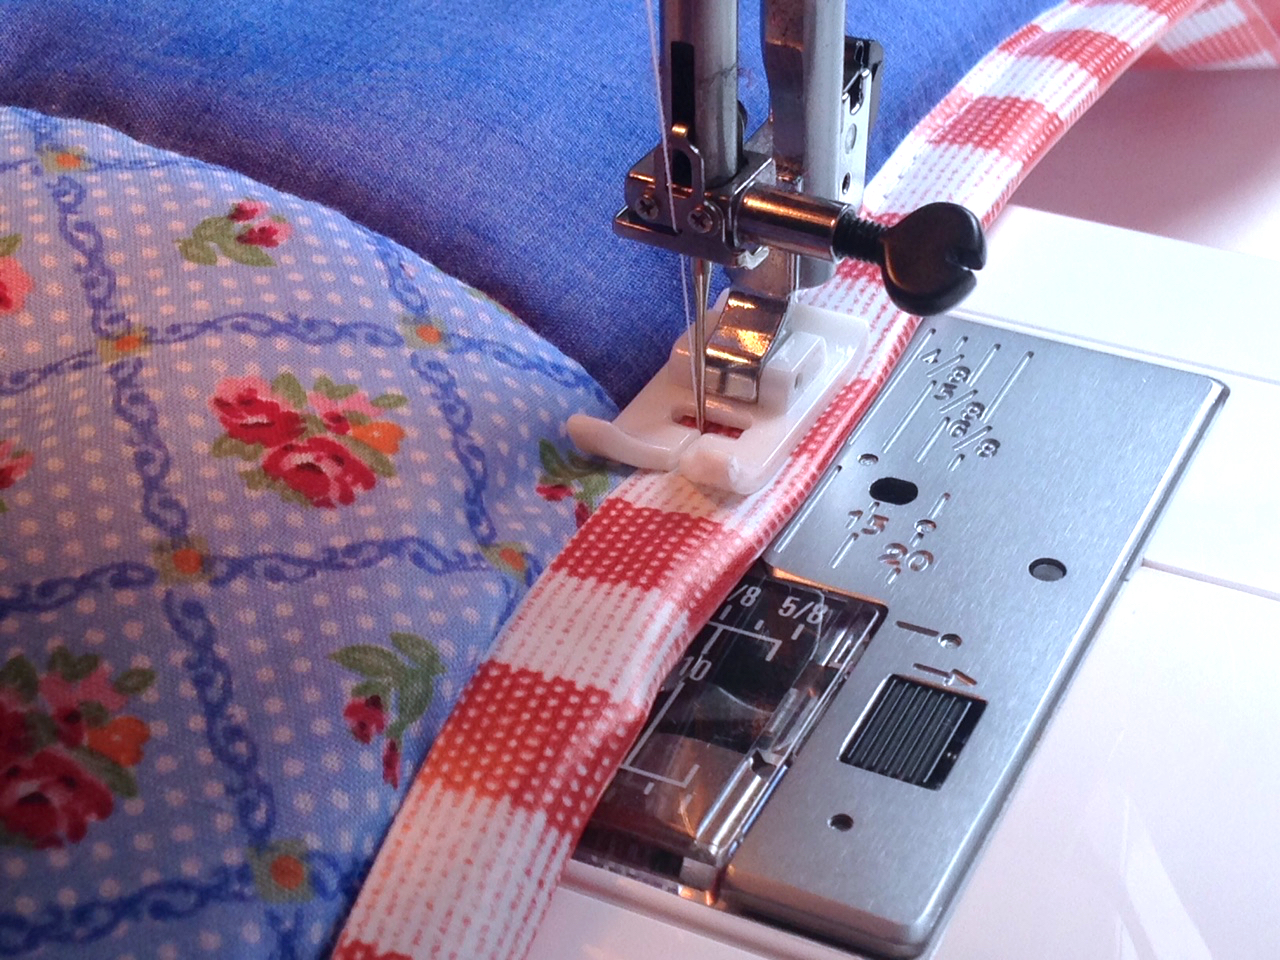
A teflon foot makes the vinyl move smoothly through the machine, and a leather needle with its wedged shape will stop any skipped stitches (discovered through trial and error!)
A simple long straight stitch close to the raw edge of the vinyl is all that is needed.
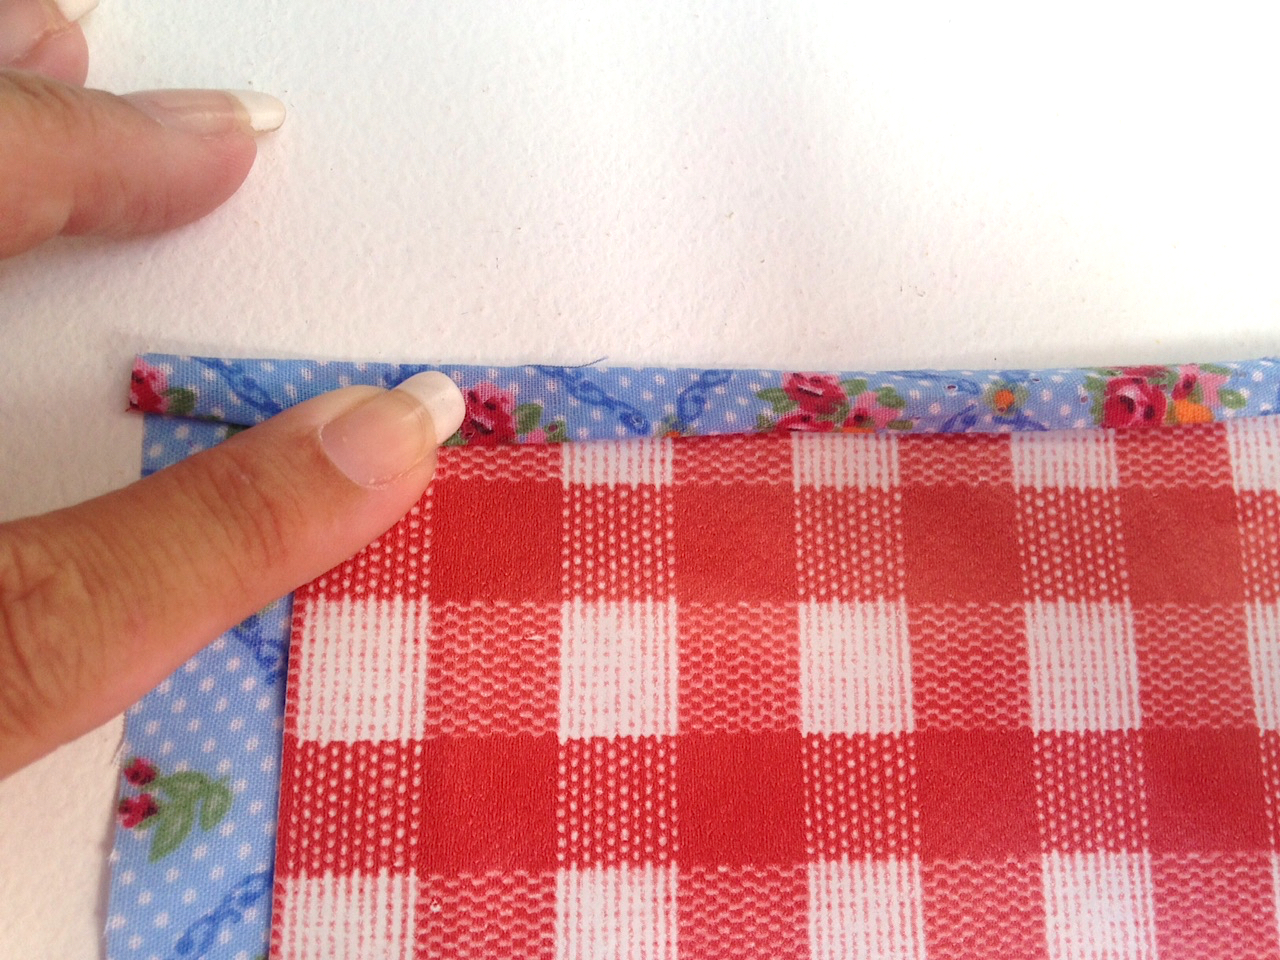
Mitre the corners as you go for a neat finish.
I was left with a few scraps of fabric and vinyl, so I also designed a fabric roll to act as a carry pack for the blanket.
For the carry pack, cut 3 floral and 2 plain squares the same size as before and sew them all together in a single row. Press.
Cut a piece of spare vinyl 1.5cm smaller than the patchwork strip and place in the centre of the strip, wrong sides together.
Turn a narrow hem…..
….and stitch in place close to the inner folded edge around all 4 sides, mitring the corners as you go.
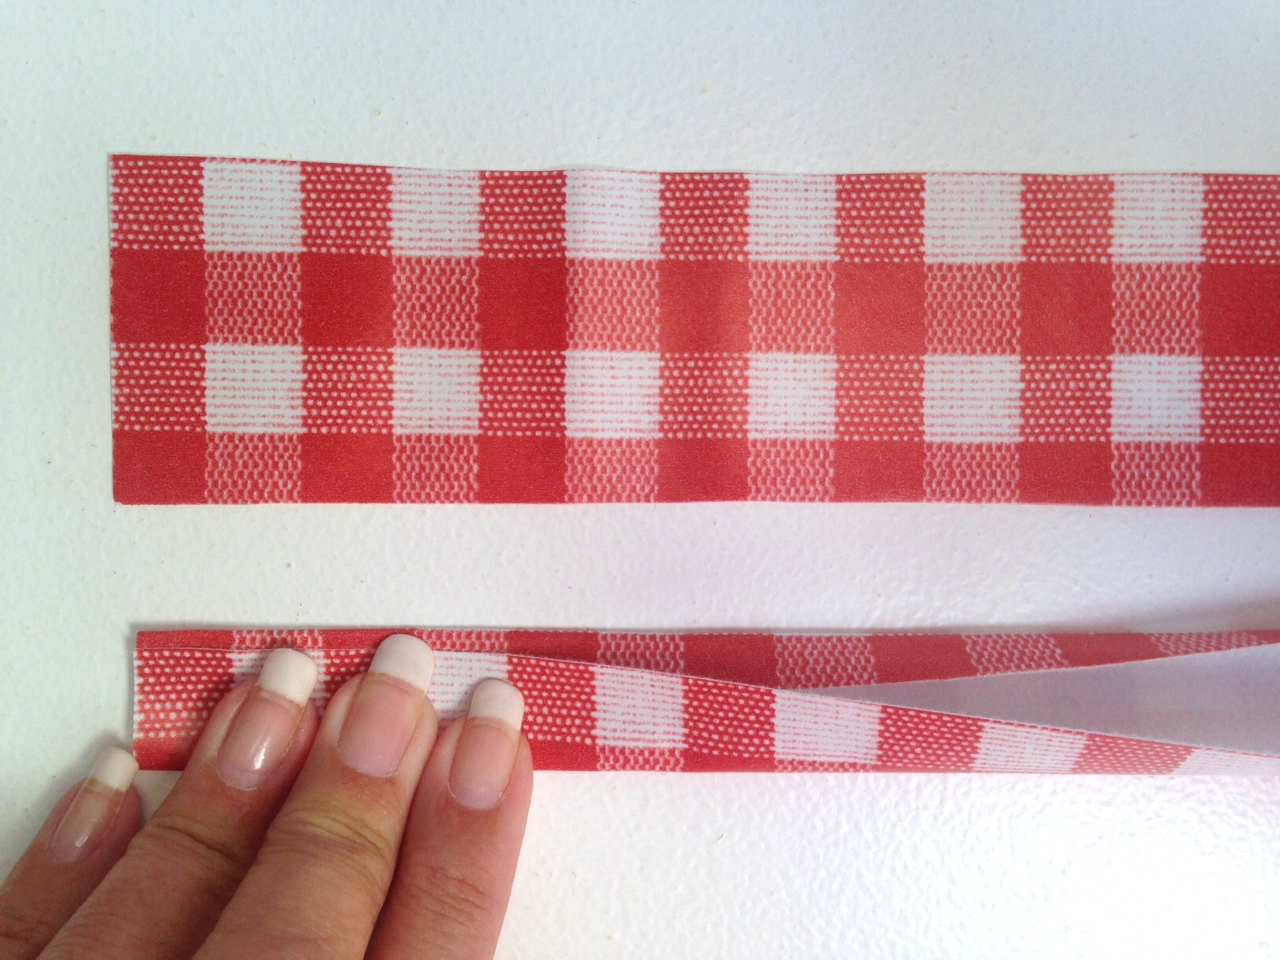
Cut two pieces of vinyl for the handles, each measuring 20cm x 5cm.
Fold the long upper edge in to the wrong side by 1cm, and bring the lower edge up to meet it, overlapping a little to encase the raw edge as shown below.
Stitch close to the raw edge.
Repeat with the second handle.
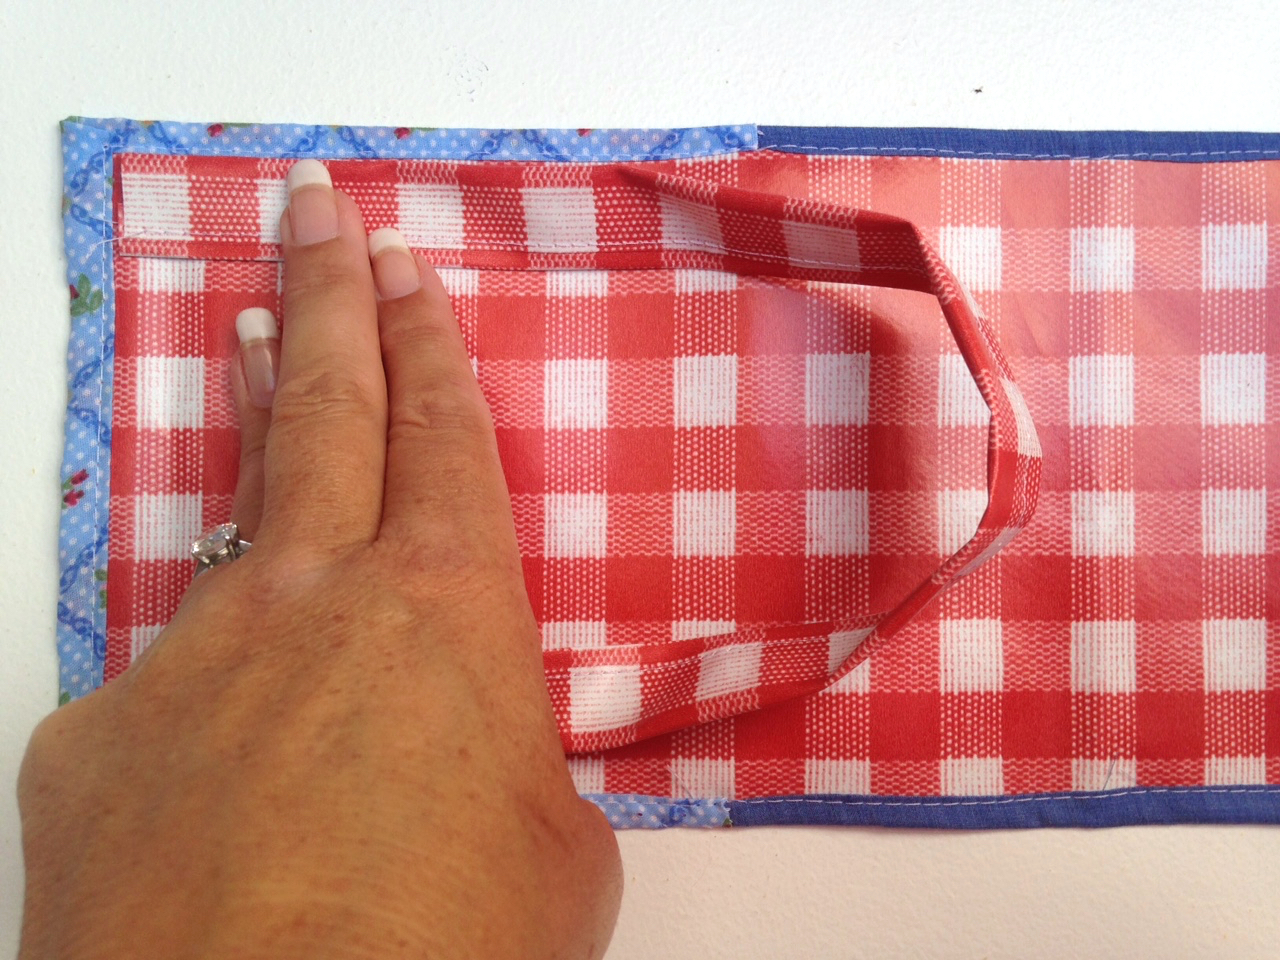
Position the two ends of the handle in the corner of the carry pack using the photograph as a guide.
Stitch in place with a 1cm seam.
Fold the handle to the outside and turn over, vinyl side down.
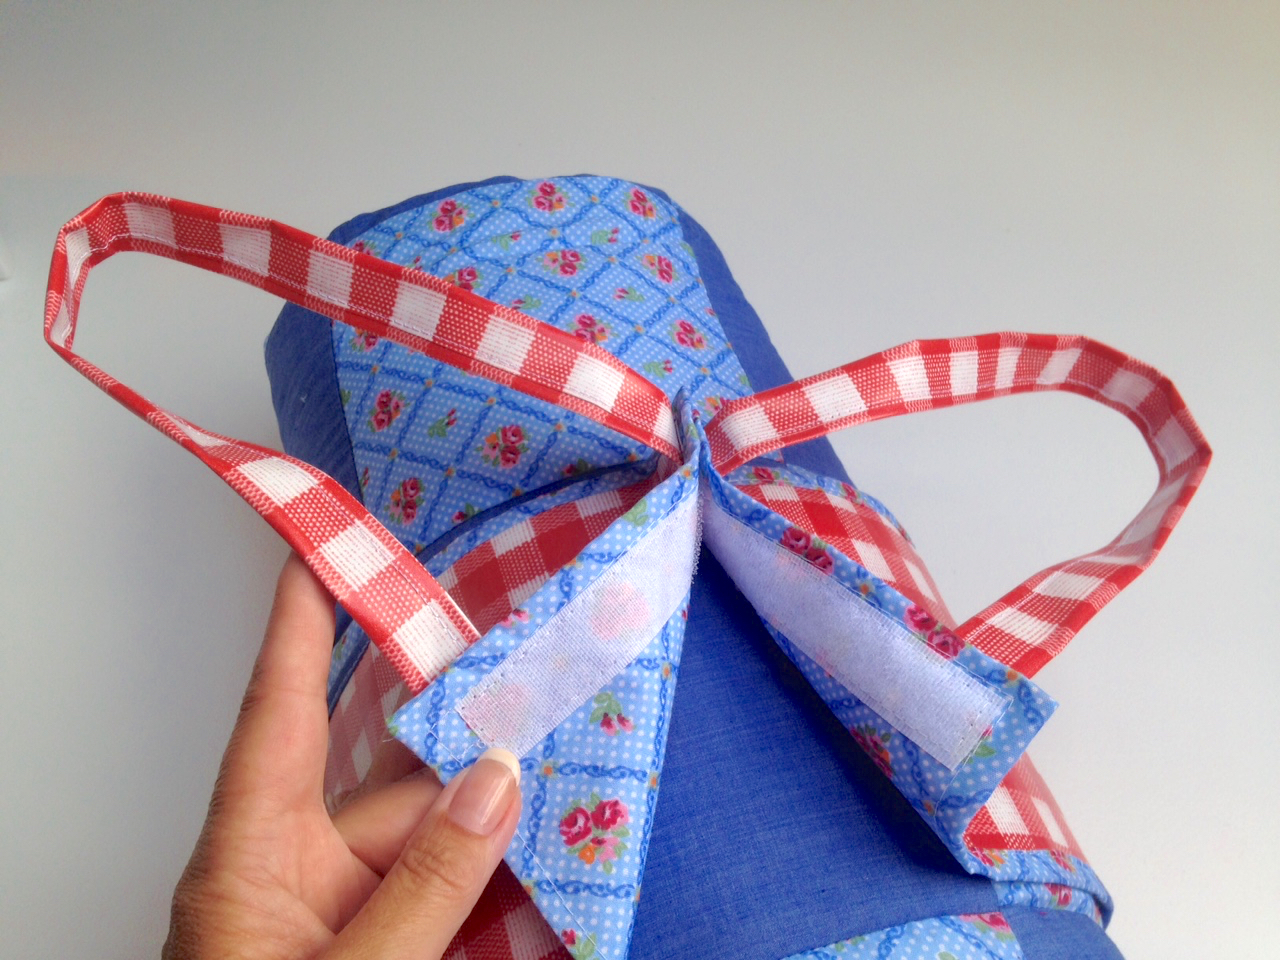
Cut a 12cm strip of velcro hook and loop fastener and sew the hook side to the fabric side of the carry pack, being sure to catch the handle in the ‘up’ position, securing it in place at the same time.
Repeat with the loop side at the other end of the carrier.
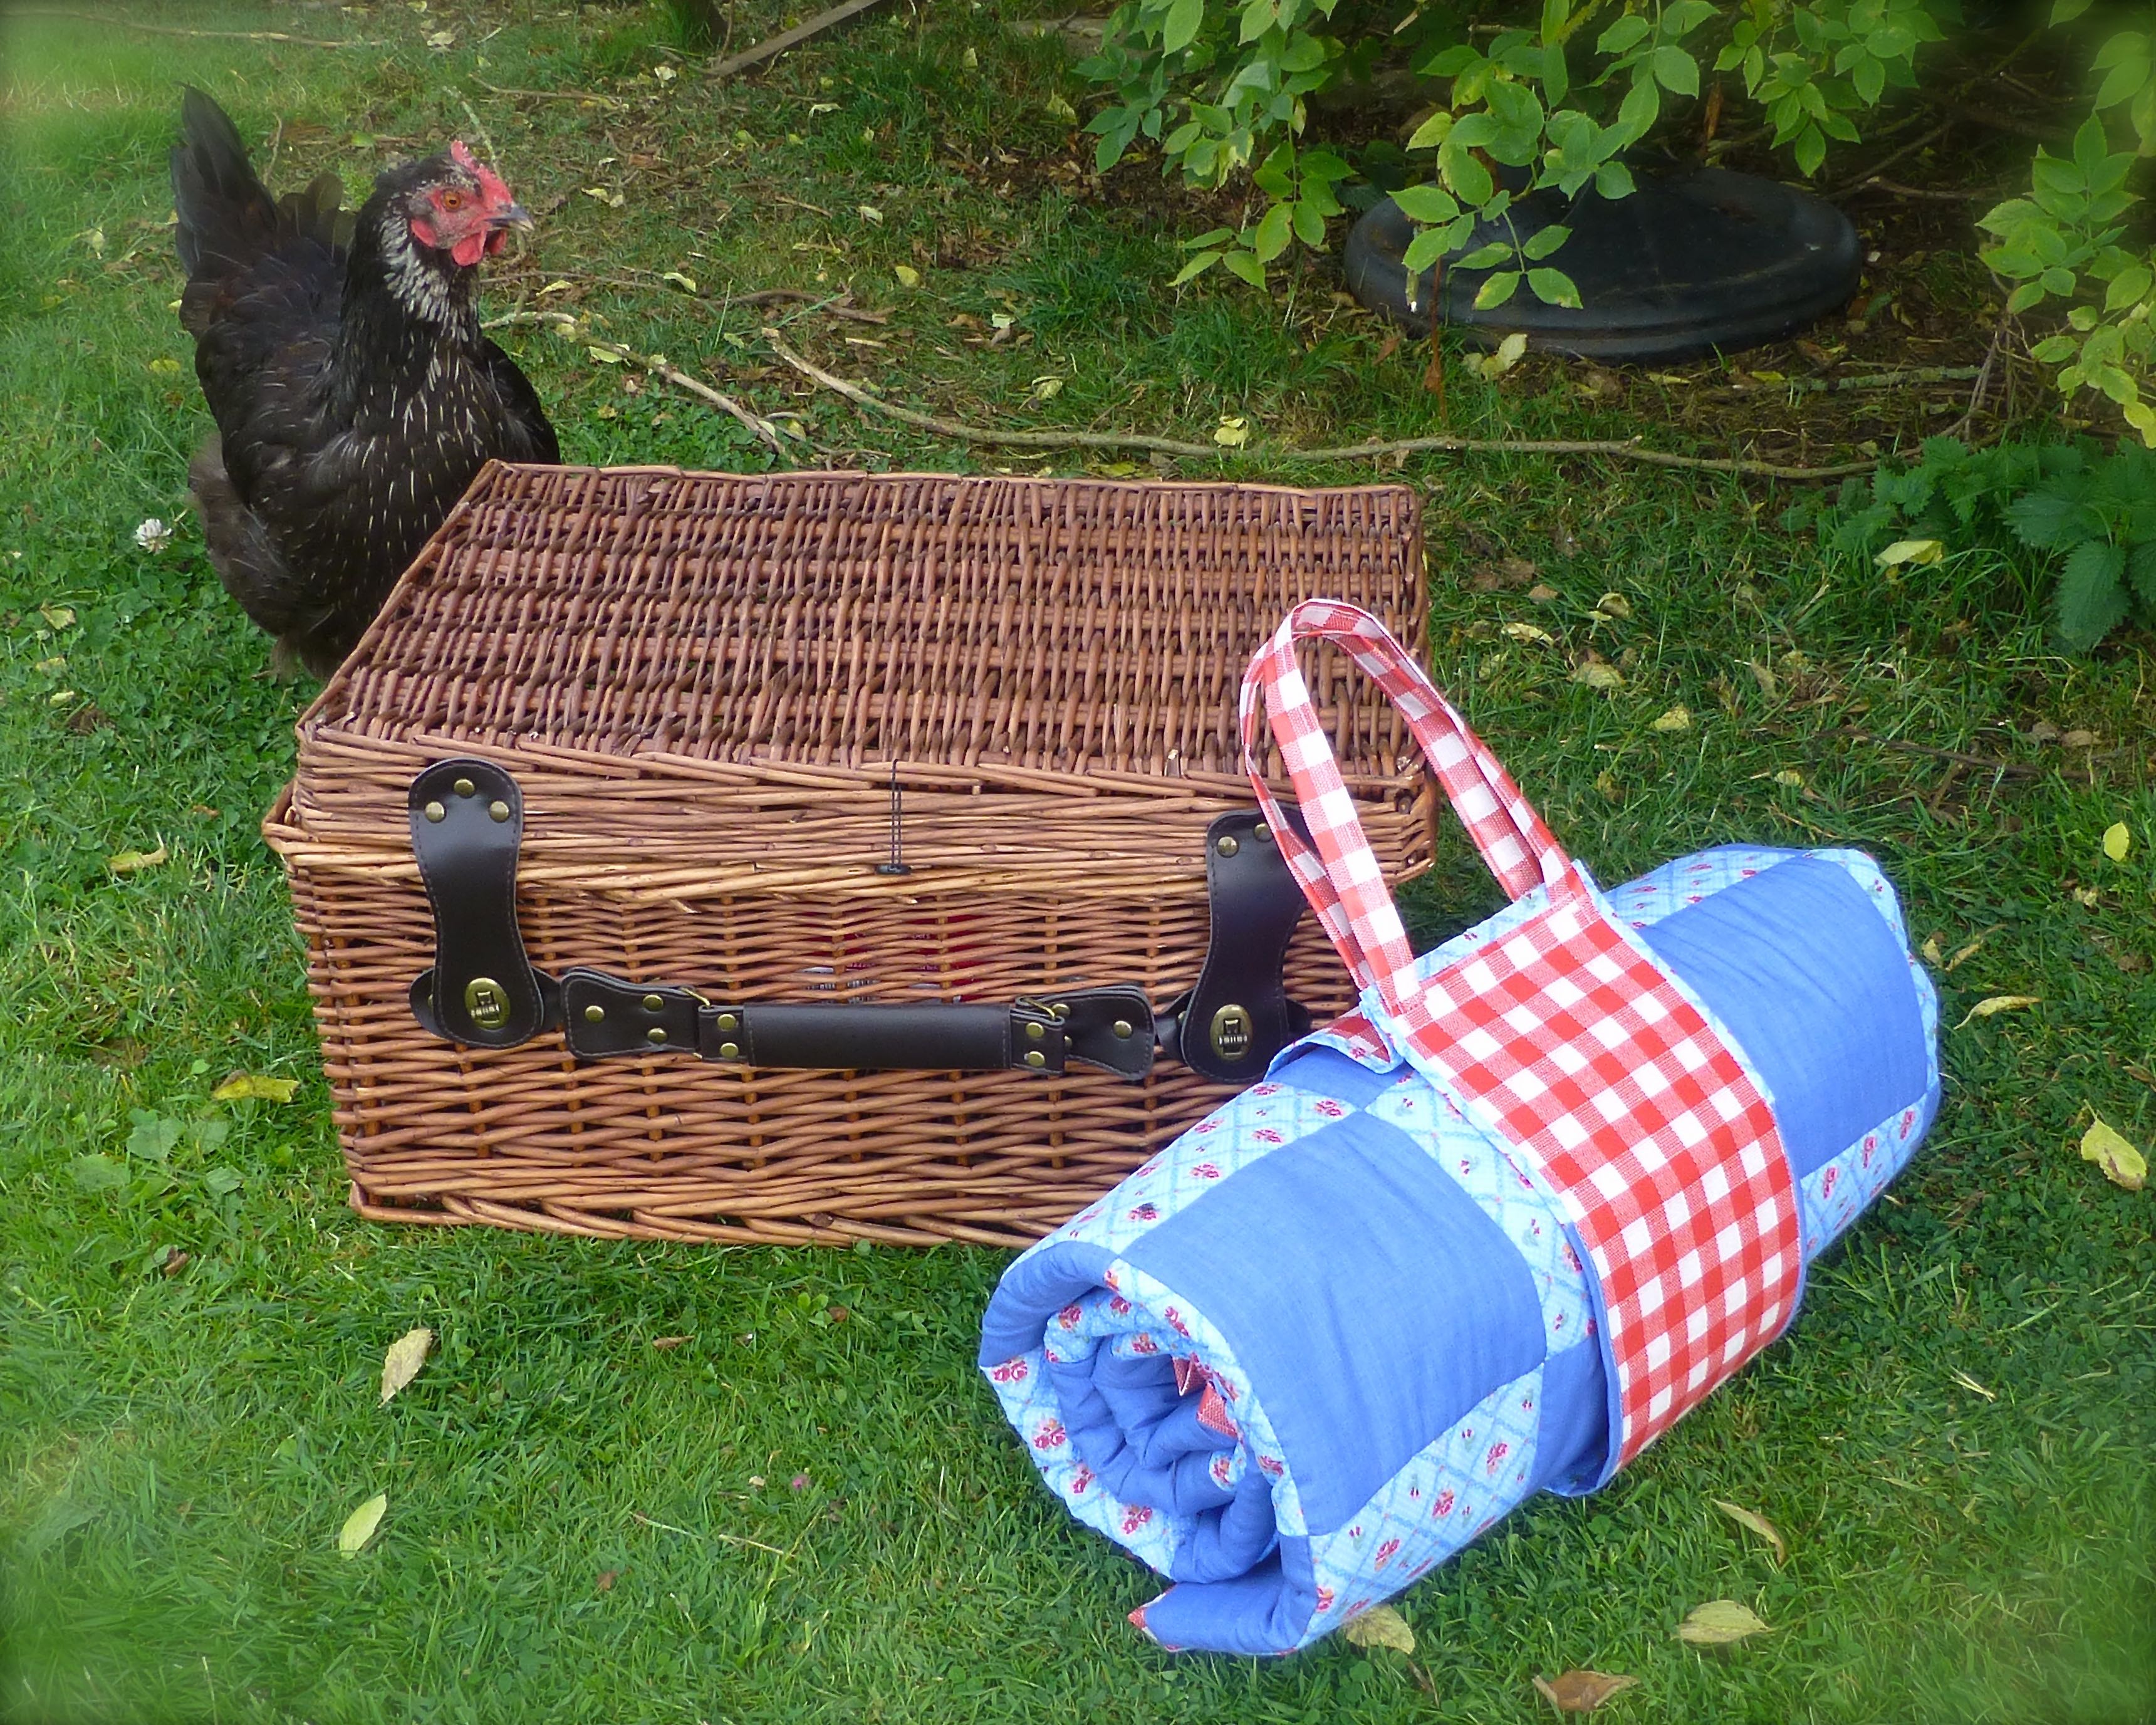
When the blanket is rolled up, wrap the carry pack around it and press the velcro strips together.
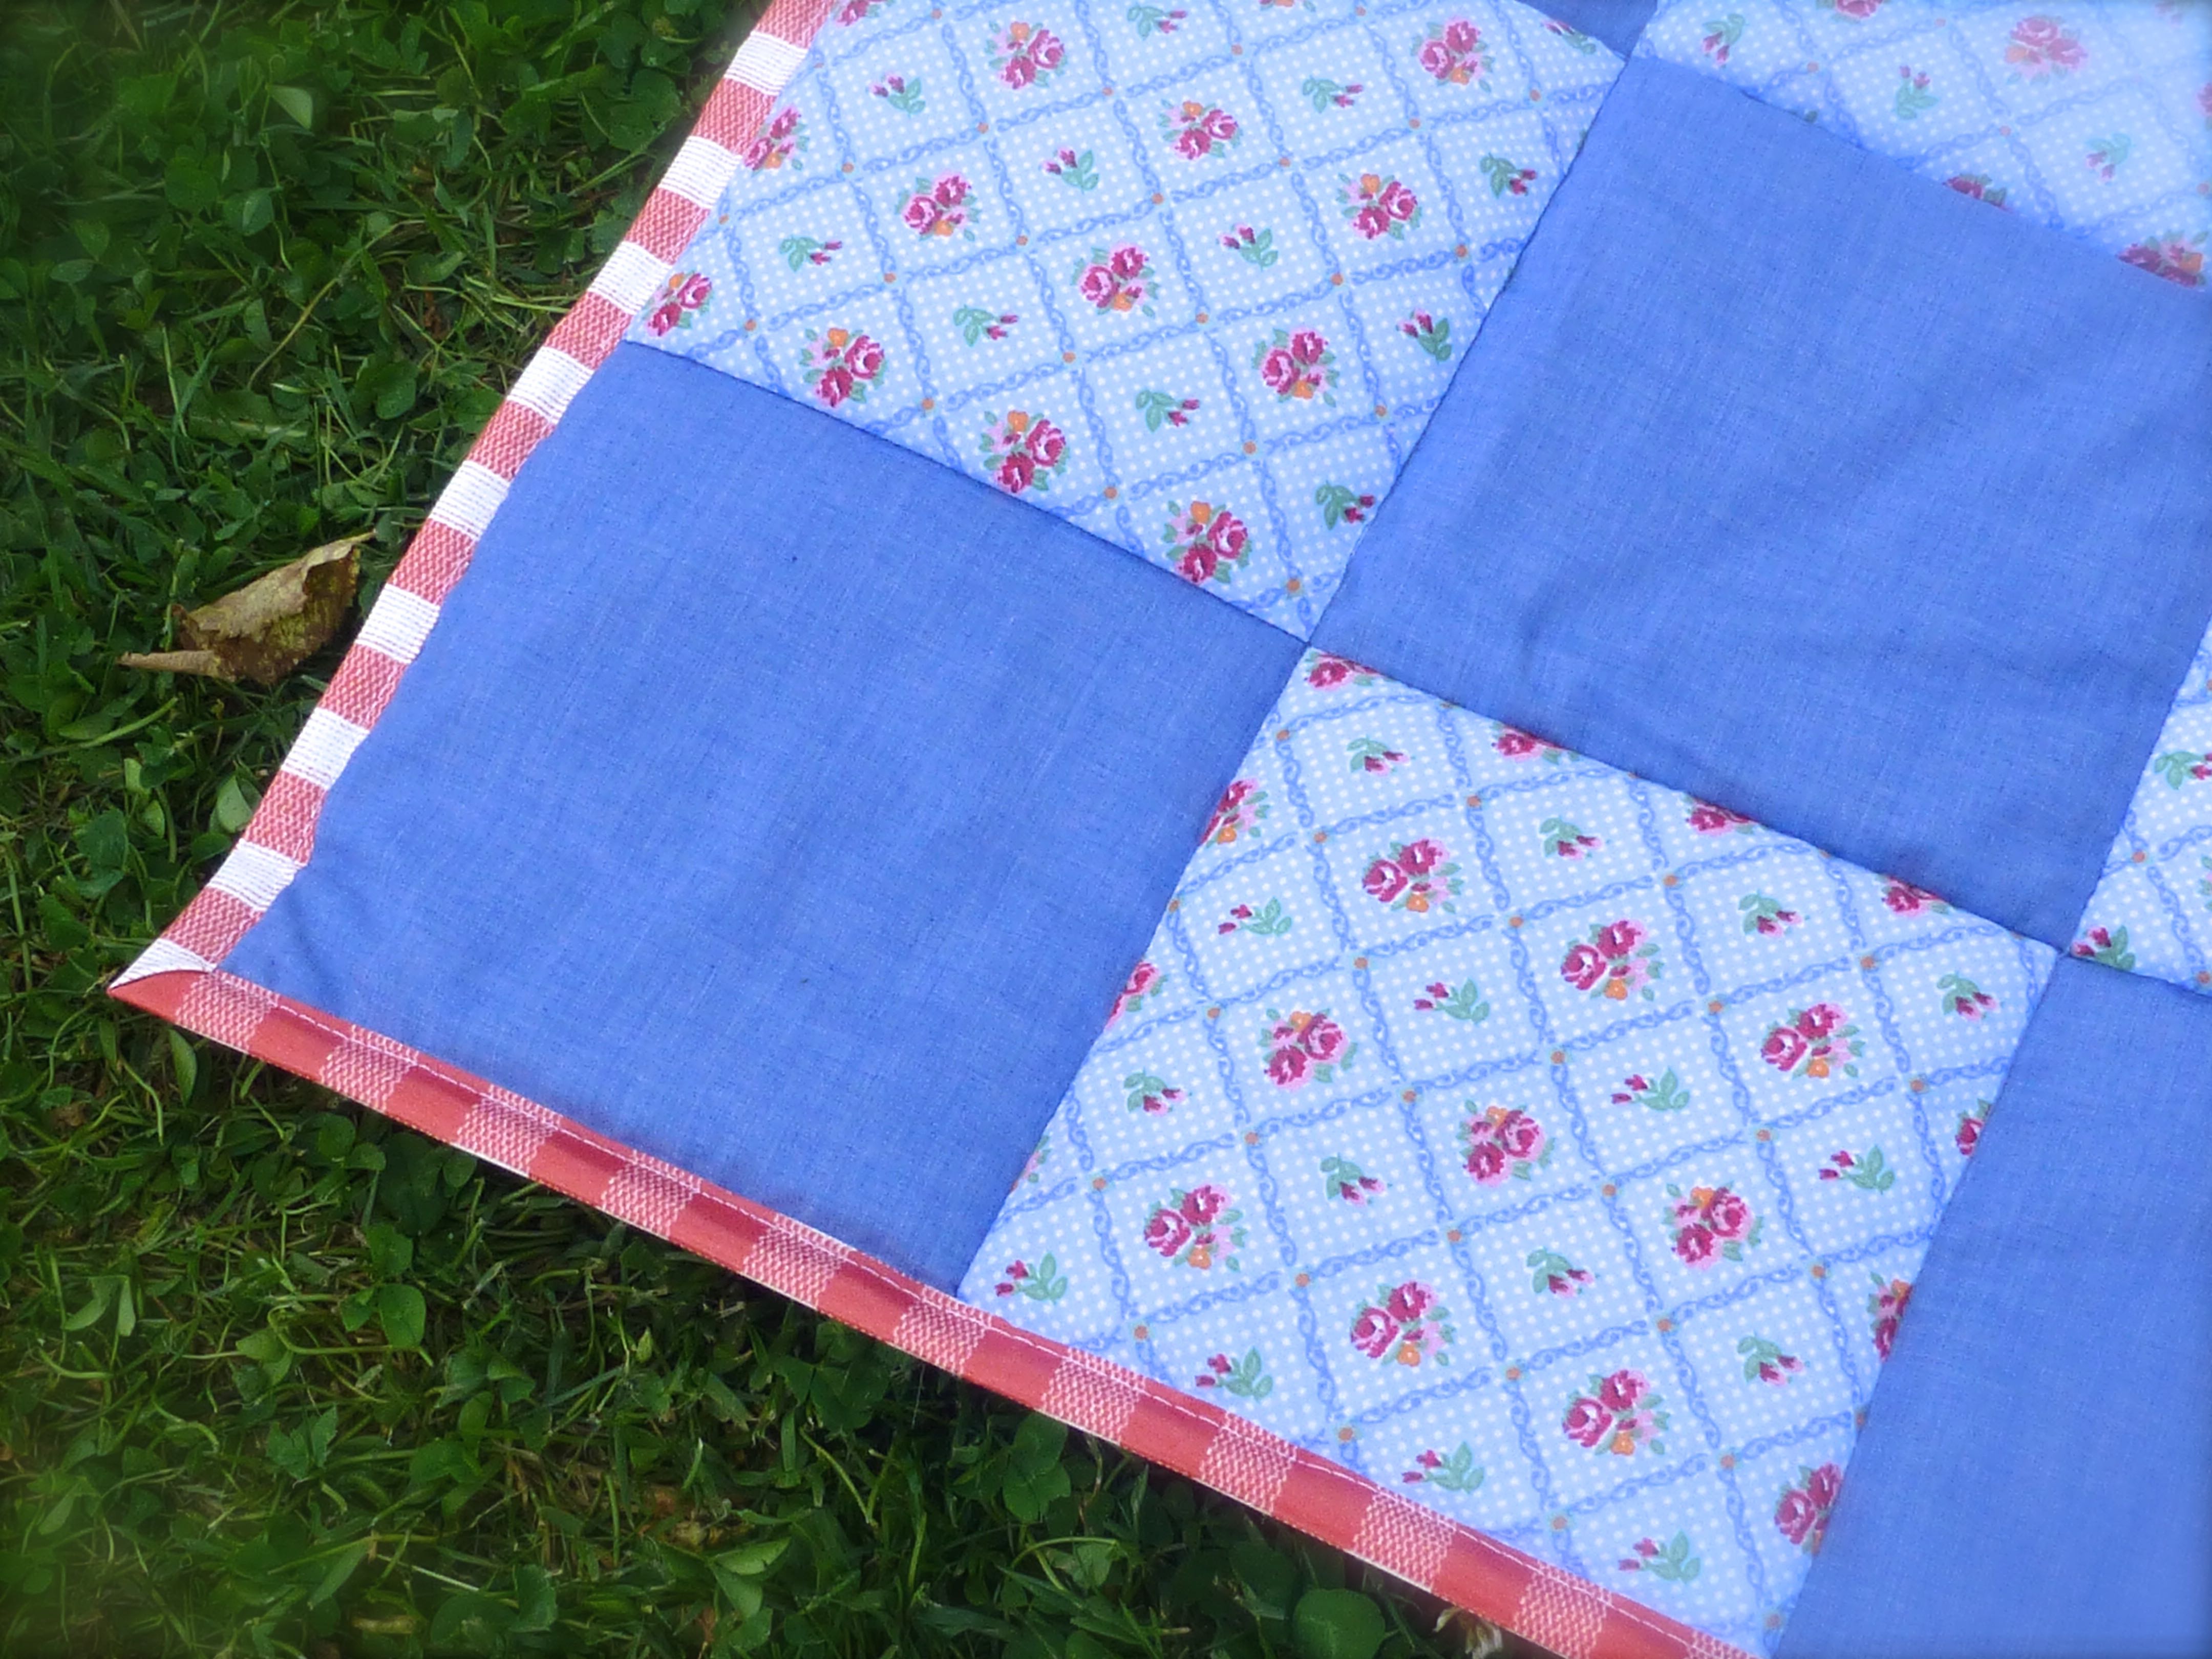
For a picnic in the garden (or anywhere), just add bunting, a squishy cushion and a hamper full of goodies.
Sun is a bonus for a picnic, but not when taking photographs (too much contrast)…
The perfect fusion of girl/boy styling that anyone would be happy to sit on.
No more damp bums!
A lovely layer of wadding for added comfort.
The carry pack with handles means that it’s compact and easy to transport.
Marley was interested to see what was going on – sometimes our hens are just a little bit too friendly!
Now all we need is for Summer to return so we can actually use our lovely new picnic blanket!!
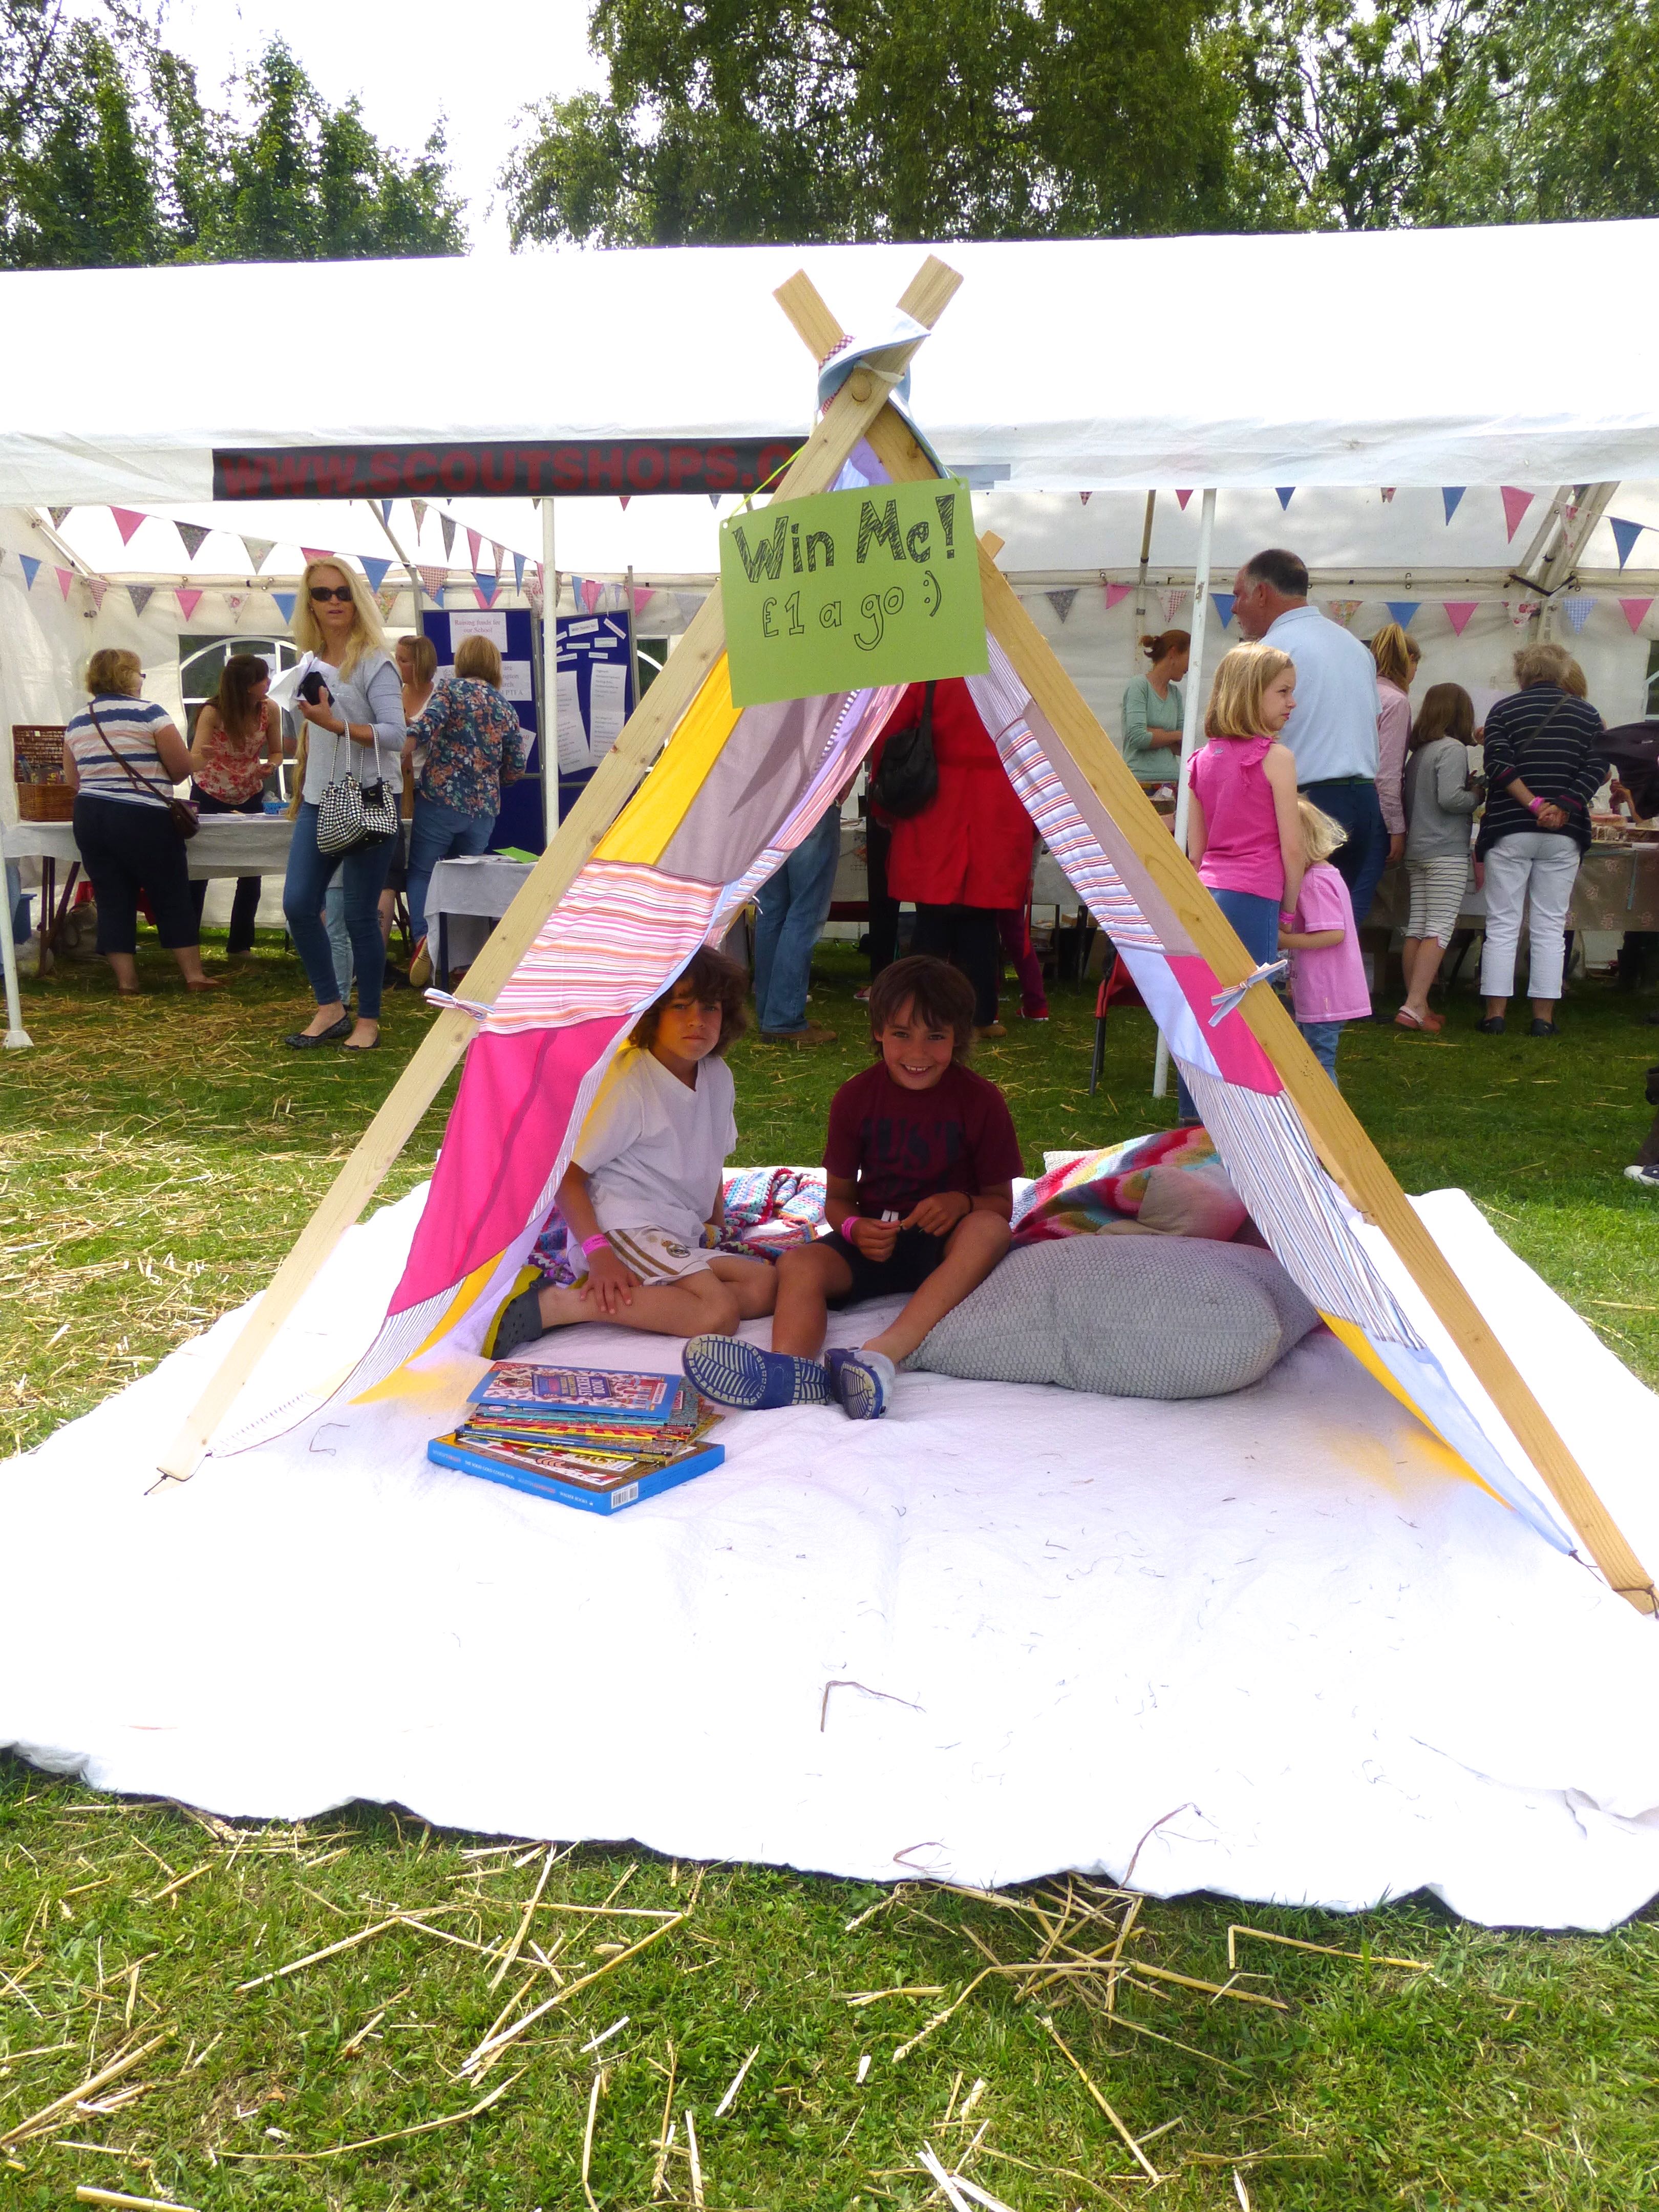
Last week it was our school’s Summer Fête and, as well as many edible goodies, I made a play tent for the PTFA to raffle off for their funds.
All week I had been making jam, marmalade, fudge….
….Elderflower Cordial….
…….and scones.
The day before the fair, Mr H-L had a delivery of some new shirts for work and decided to have a wardrobe clear out resulting in the eviction of nine of his ‘old’ ones.
Some of the shirts had never actually been worn and even those that had were still in great condition so, when he asked me to take them to the charity shop, and idea sprung to mind.
Why not upcycle them and make a patchwork play tent to raffle off for the school funds?
This ended up making far more money than they would have achieved in a charity shop, and the money was still going to a good cause, so off to my studio I went to formulate a plan.
I made a similar tent for The Boys last year which I never got around to blogging about, so I based it on that.
YOU WILL NEED: –
Nine men’s cotton shirts
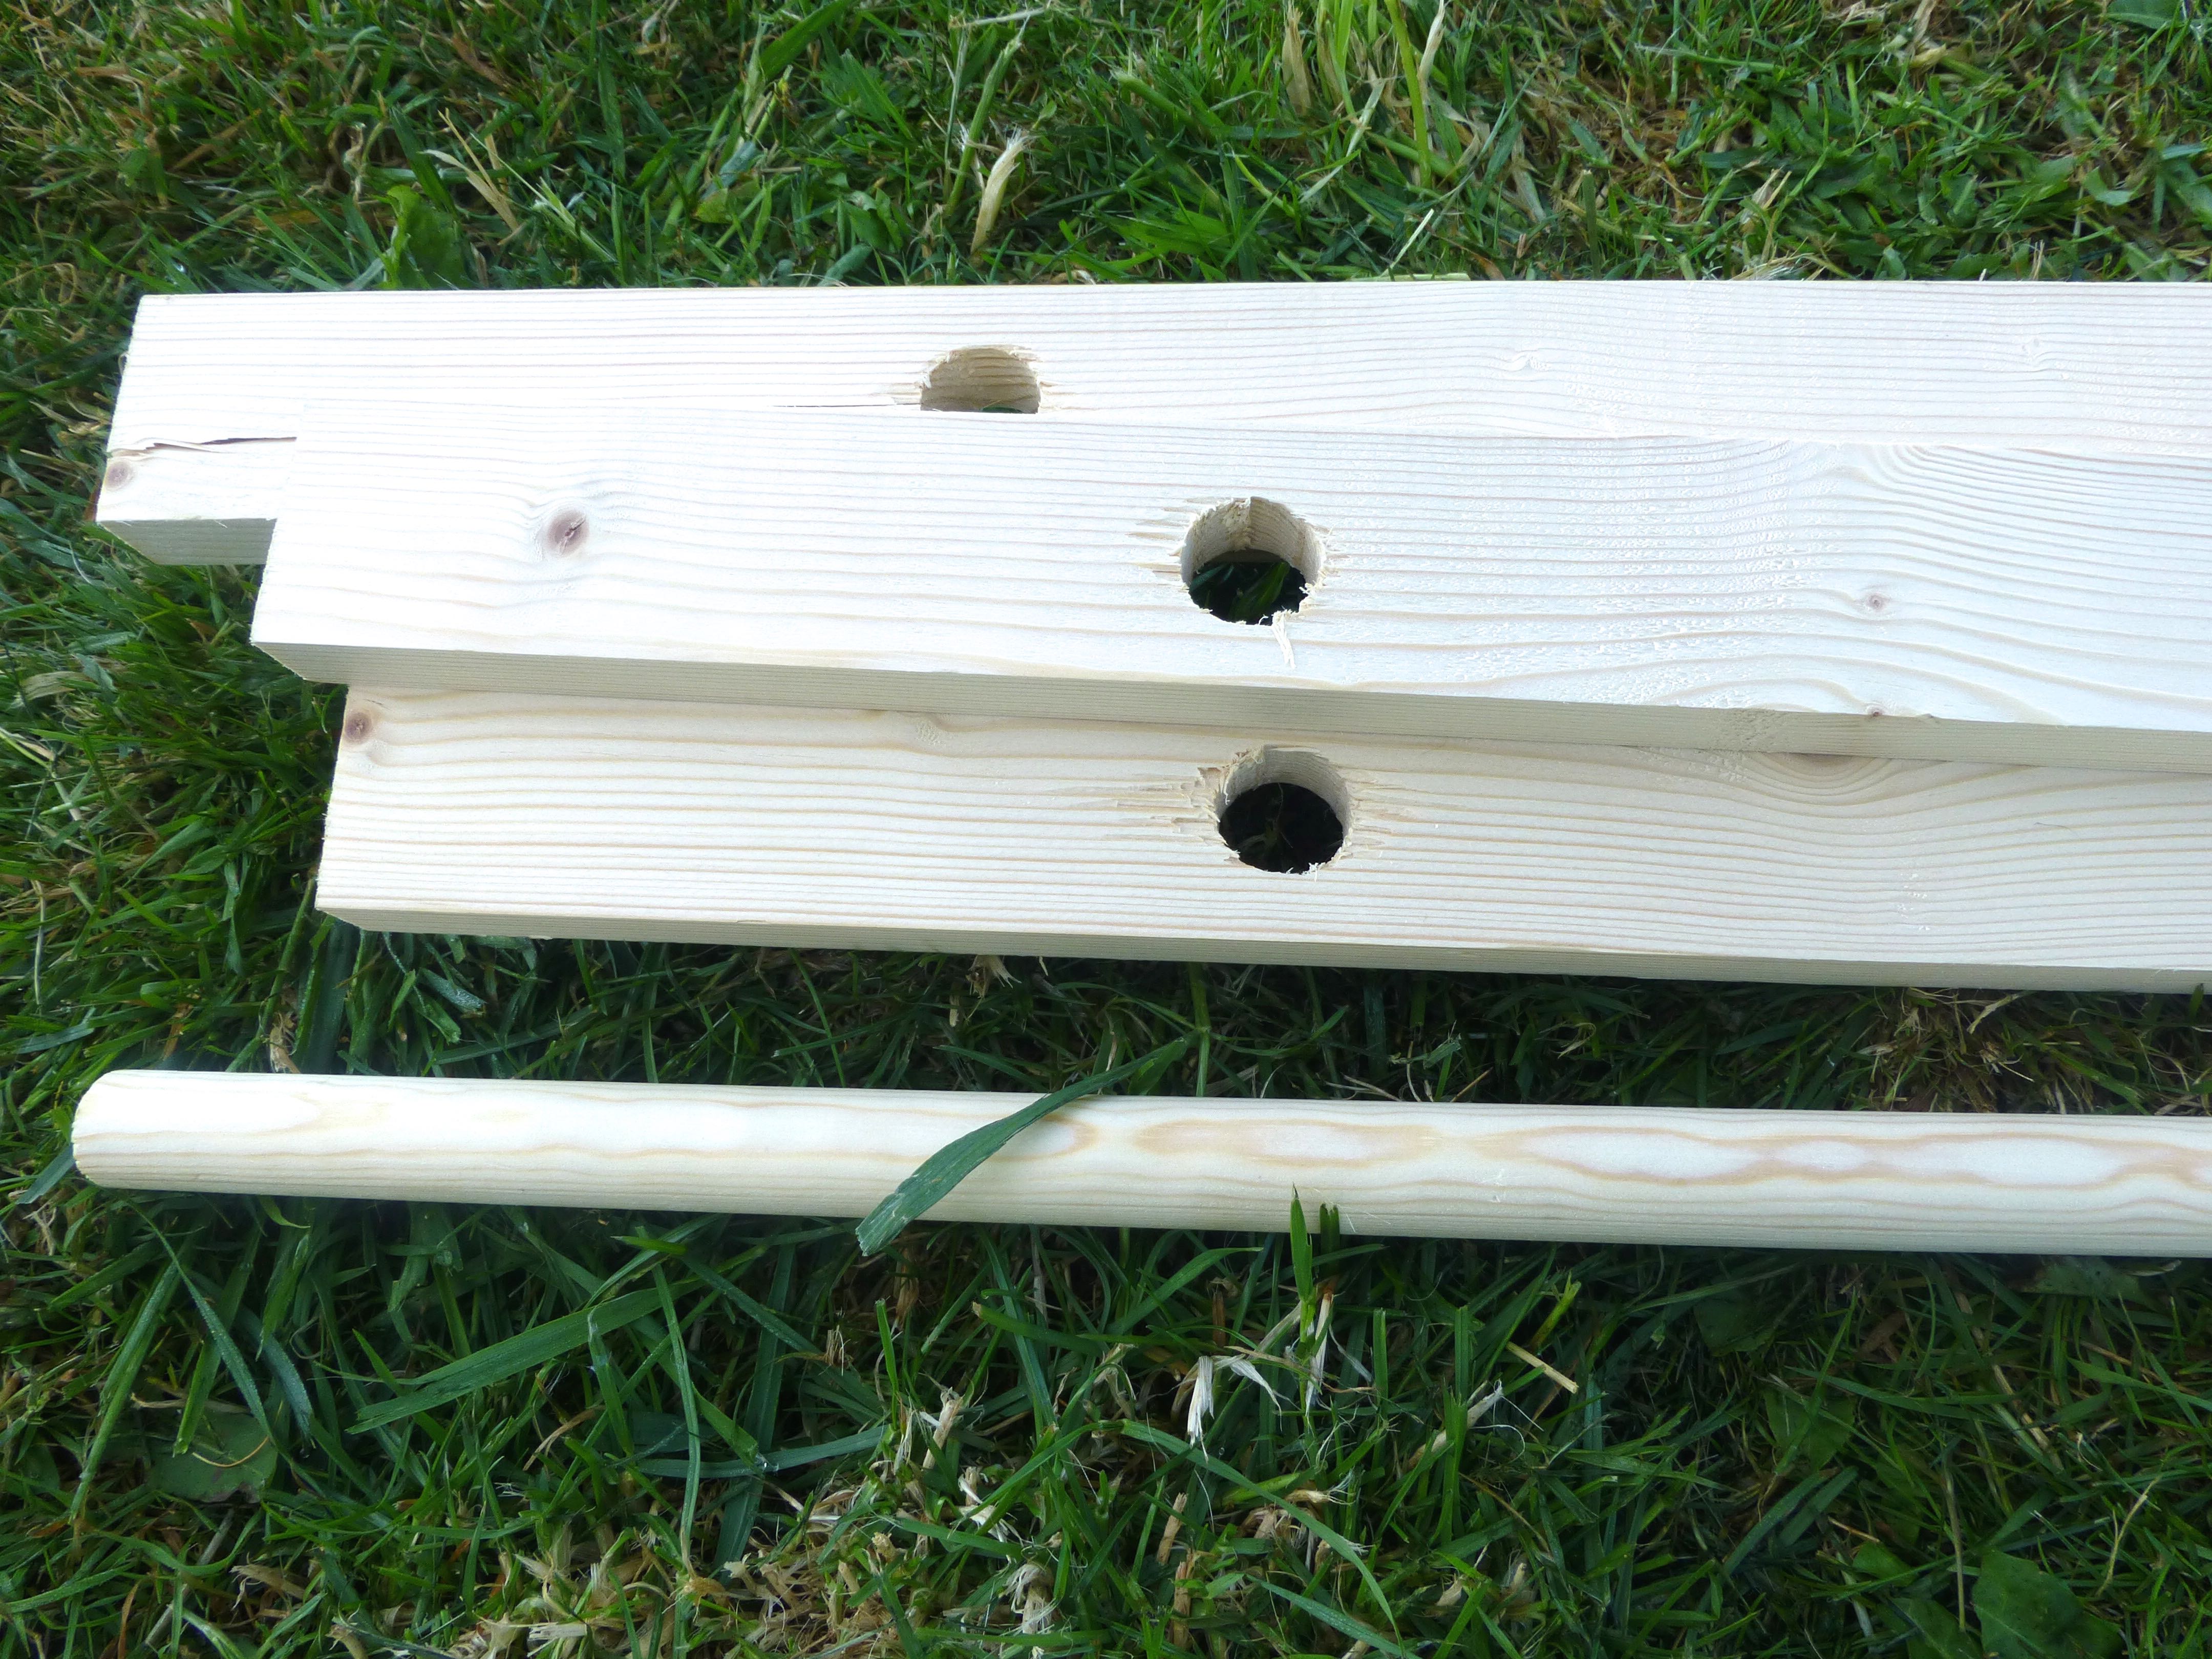
1 x dowelling (2000mm x 25mm)
4 x planed timber (1800mm x 44mm x 18mm)
4 x eyelets
2m elastic cord
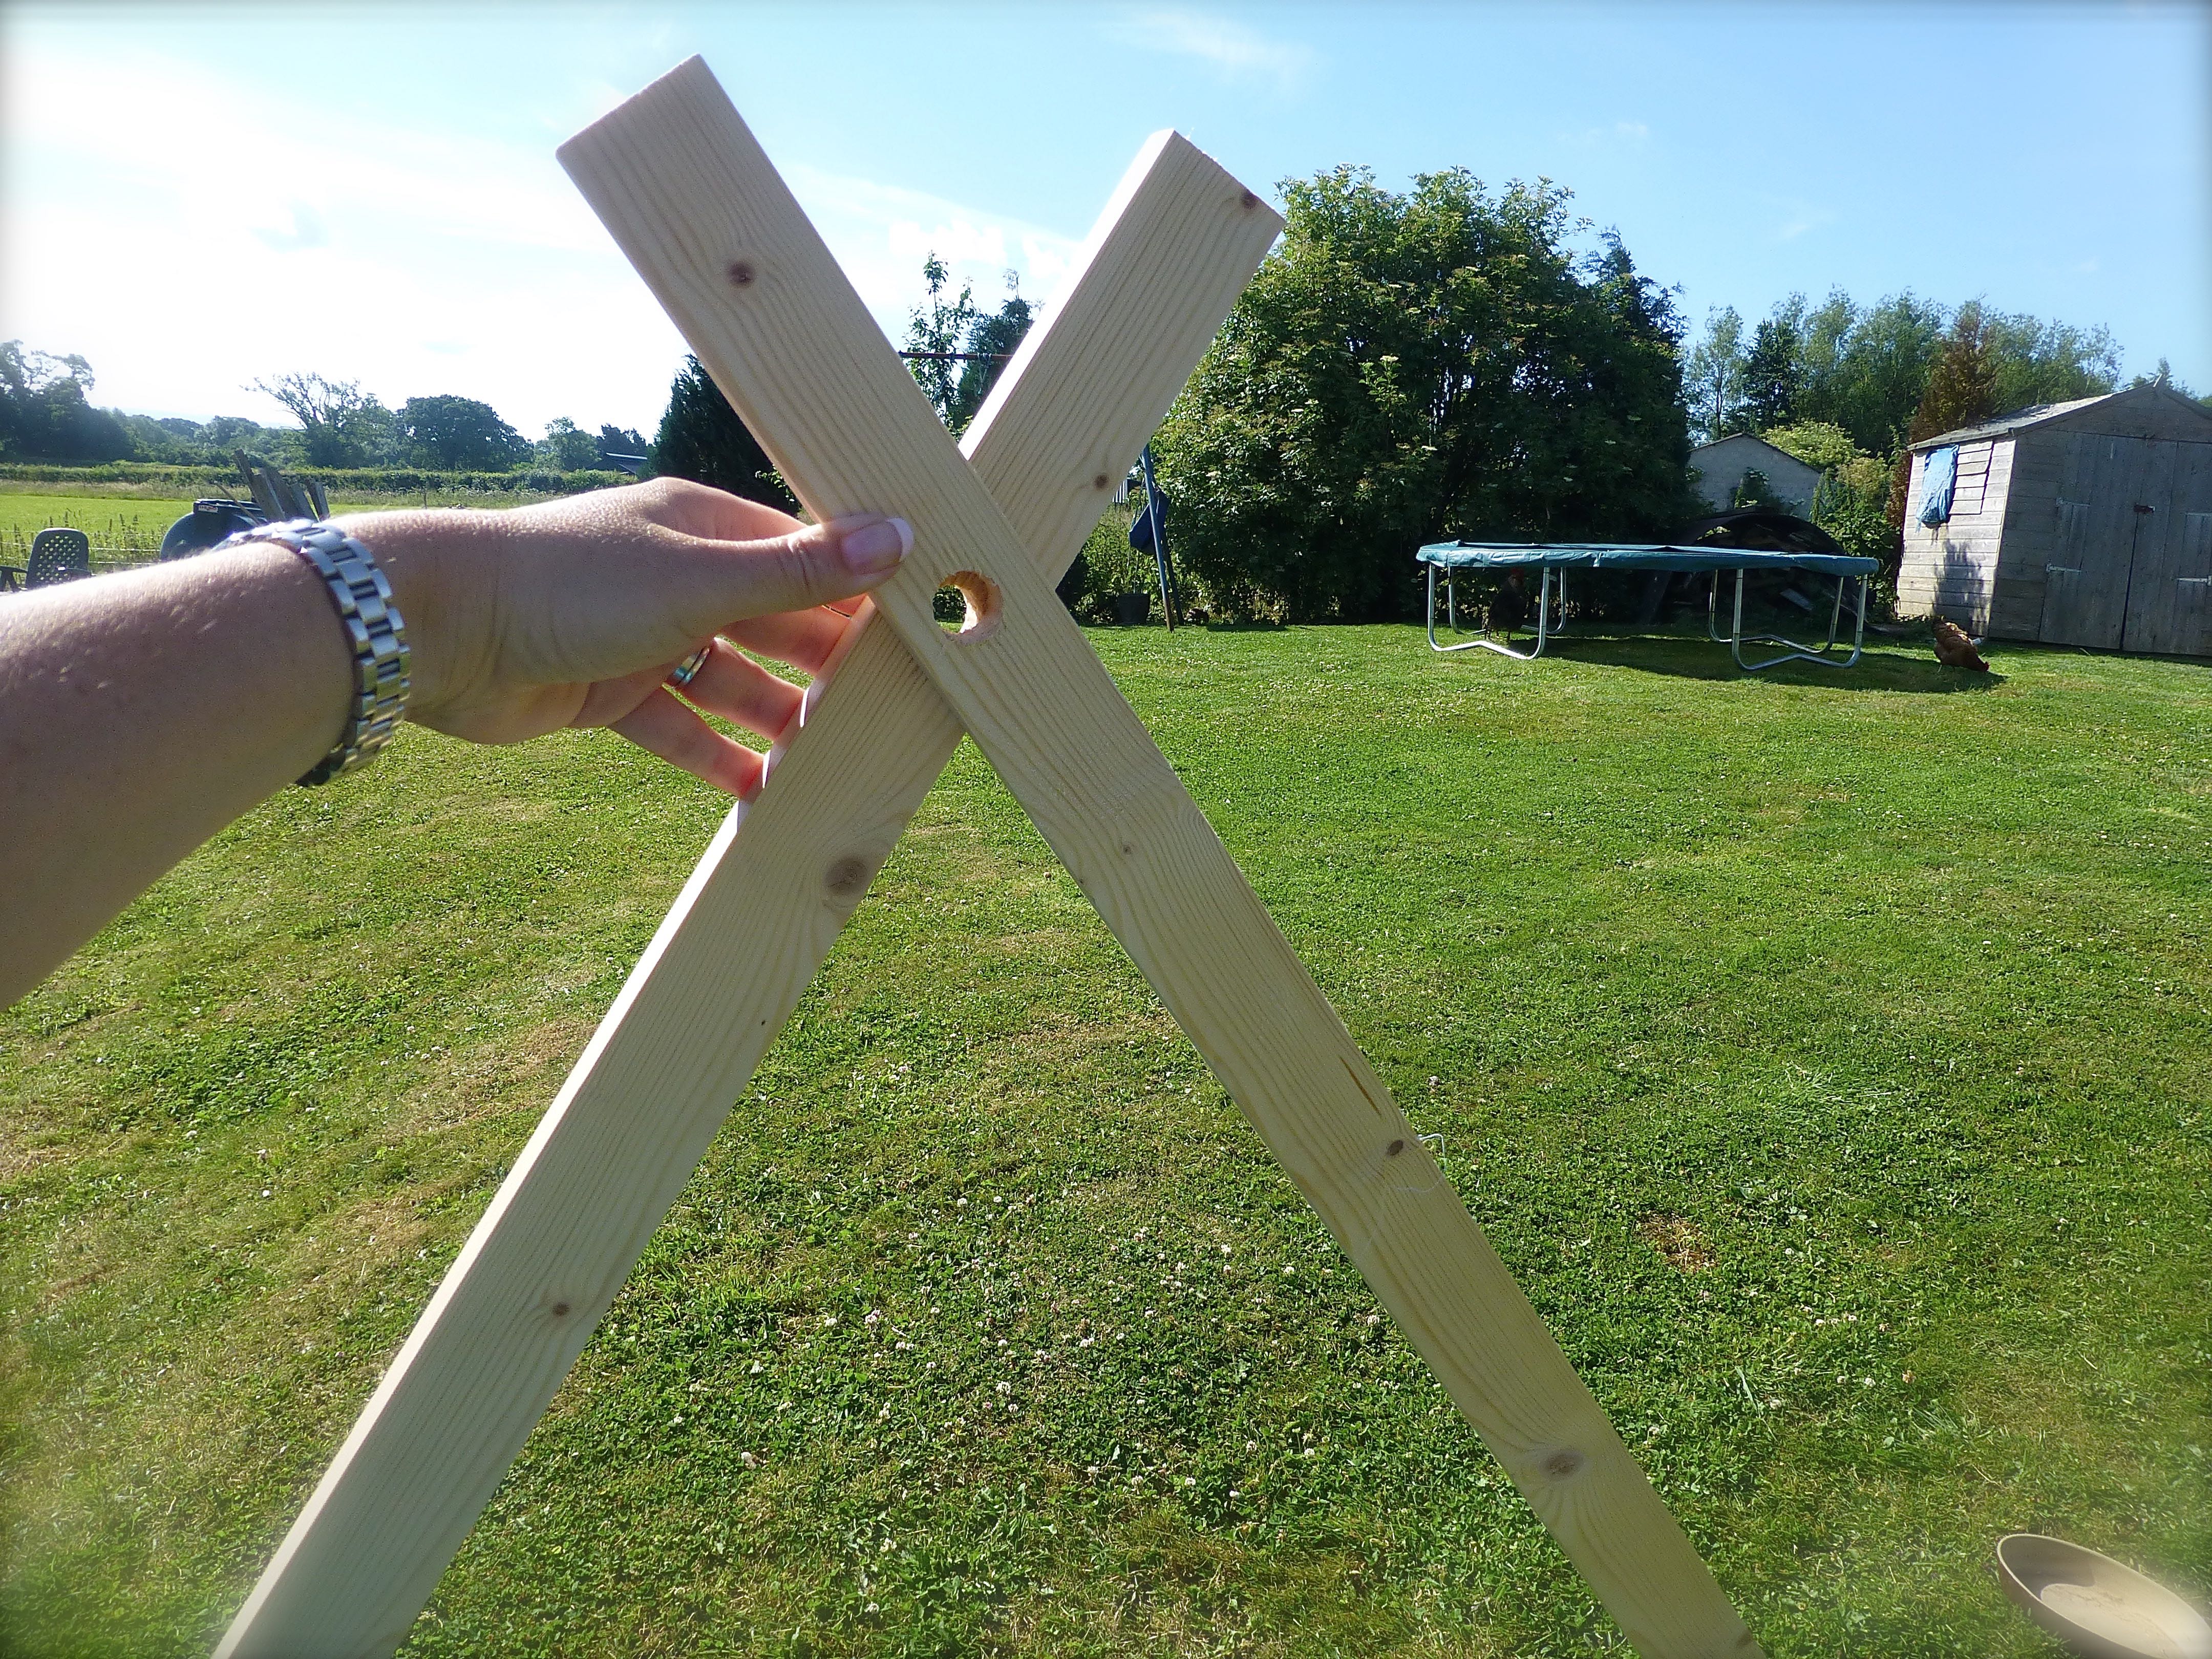
Drill a hole 15cm in from one end of each of the bits of planed timber using a spade bit the same size as your dowelling.
You now need to create one single piece of fabric that measures 1.60m x 3.20m.
The first job was to cut up the shirts into as many usable sections as possible using my rotary cutter for speed.
I started by removing the button flaps, cuffs and collars.
Look at all the buttons I rescued!
I wasn’t at all precise in my cutting as I intended to fit each piece as I went – very liberating and totally the opposite of normal patchwork!
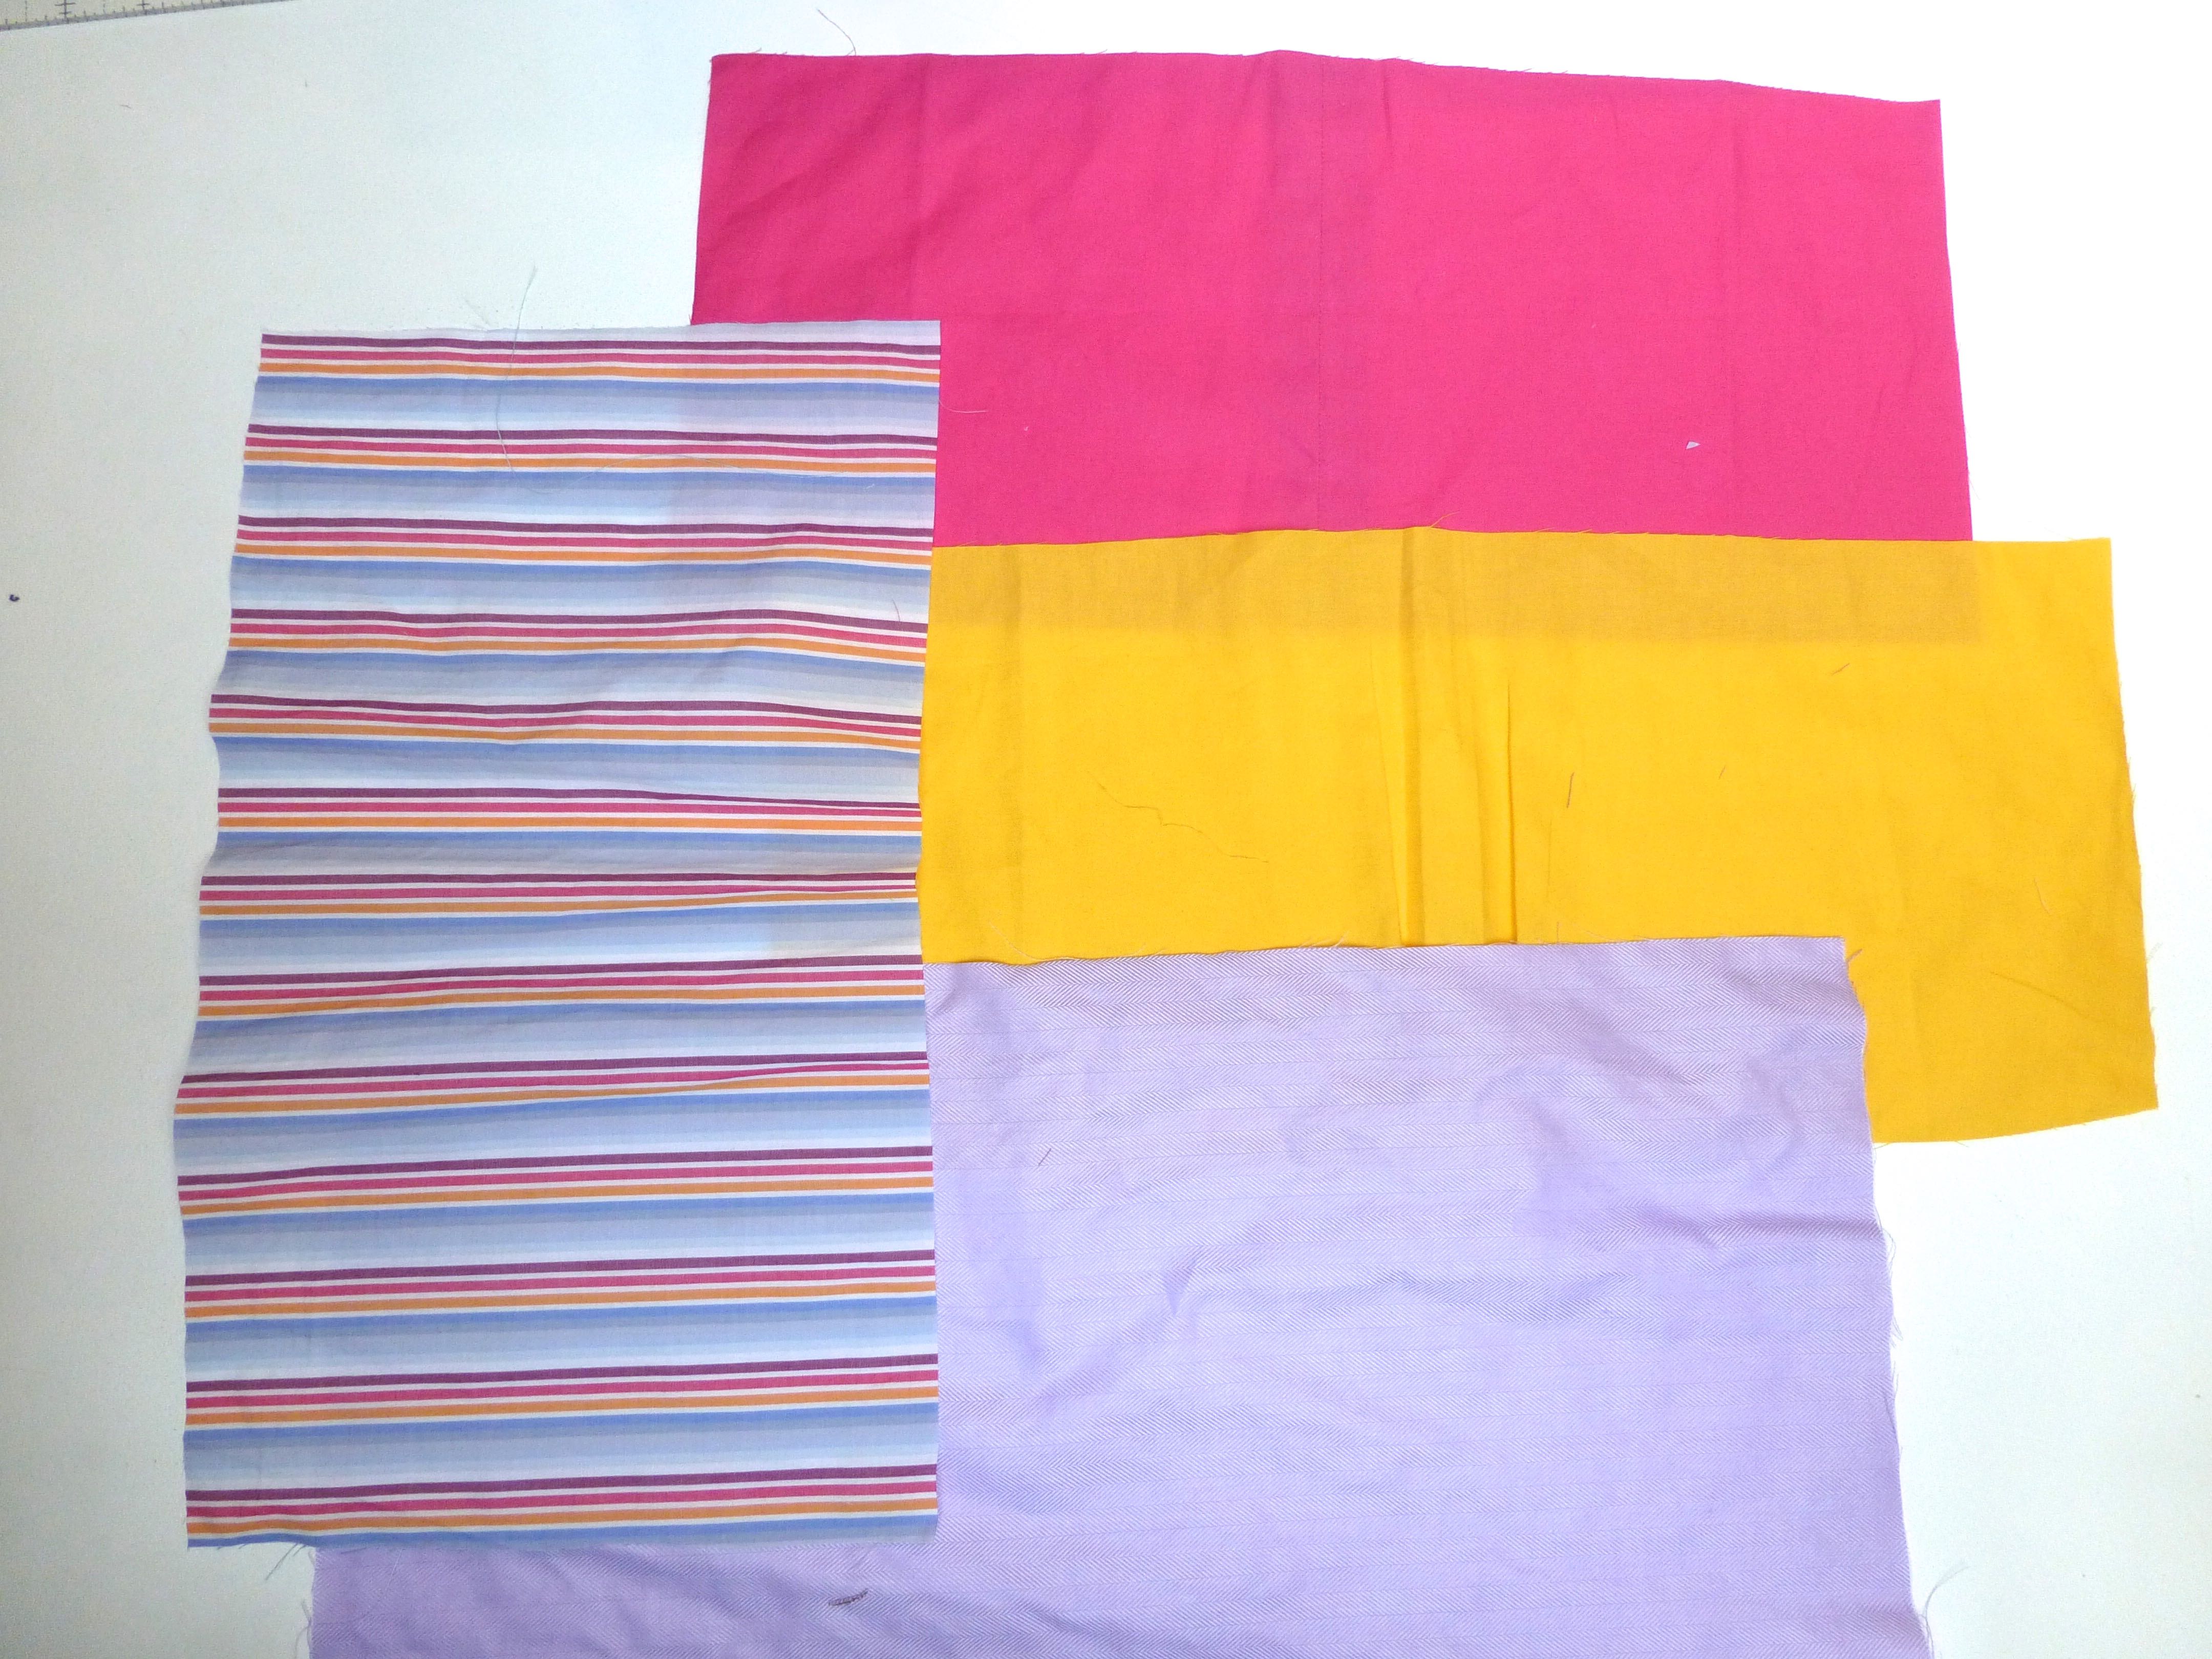
I laid all the bits out on the floor and arranged them in a pleasing order, being sure to space out evenly the more brightly coloured yellow and pink.
This would not have quite the same impact with the more conservative blue or white work shirts, but you could always appliqué onto the patches for added interest.
I didn’t need to – Mr H-L likes a shirt that stands out:)
As you can see from the picture below, I sewed the pieces of fabric VERY roughly together into strips. The edges were then trimmed into a neat line before stitching the strips of patchwork together along their long sides.
As both sides of the tent were going to be visible, I used Flat Fell seams throughout.
This type of seam leaves a smart finish and adds strength to the seam.
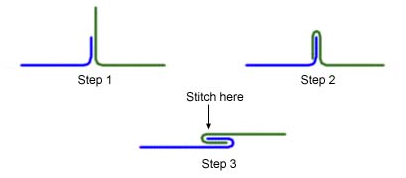
Here’s a line drawing to show the construction: –
Image courtesy of Google images
In photographs, here’s what I did: –
Stitch a staggered seam where the lower fabric (pink) sticks out 1cm more than the top fabric.
Open the two fabrics flat with the raw edges of the seam uppermost.
Fold the seam to the left and tuck the (pink) overhang over the raw edge of the other (striped) fabric, enclosing all raw edges in the process.
Stitch close to the folded edge.
As I said, a very neat finish which I used as the outside of the tent.
Keep going until you have one piece of fabric measuring 1.60m x 3.20m.
Hem all around the outer edges.
In each of the four corners of the tent, fix an eyelet through which you need to attach a 50cm length of elastic cording as shown below.
Tie the ends of the cord in a knot to form a loop through which the tent poles will pass.
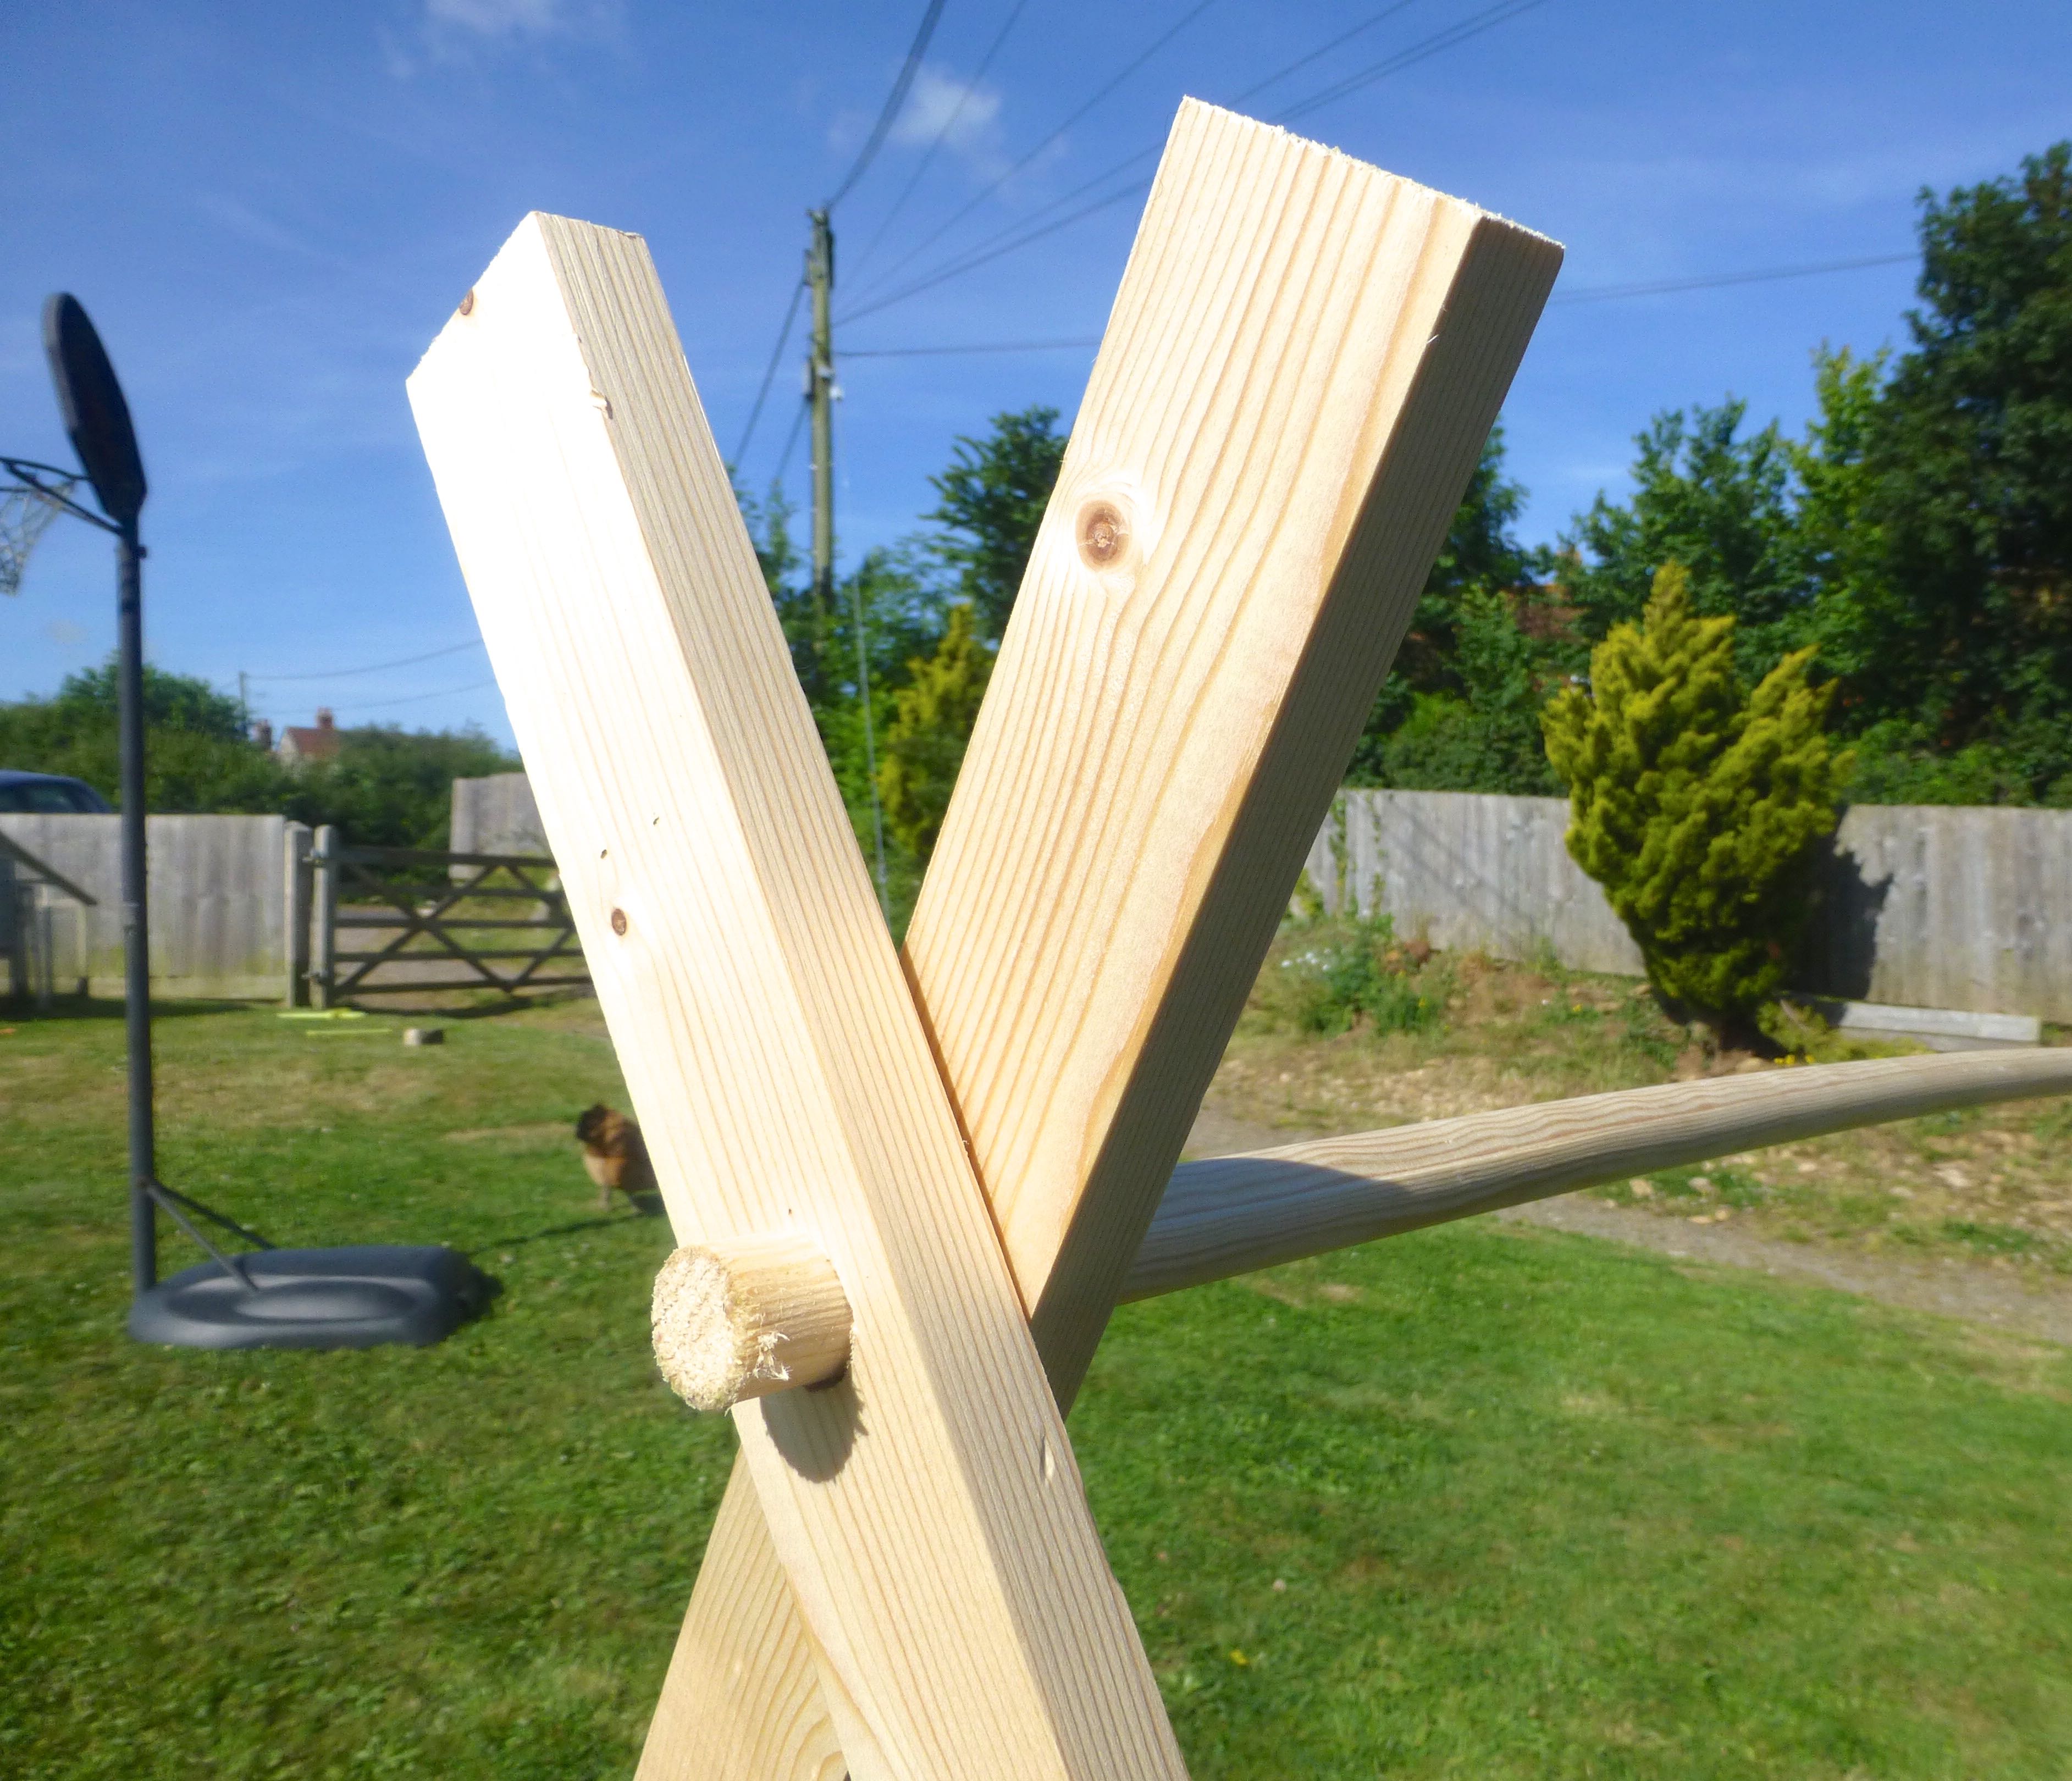
Align the holes in the tent poles….
….and insert the length of dowelling.
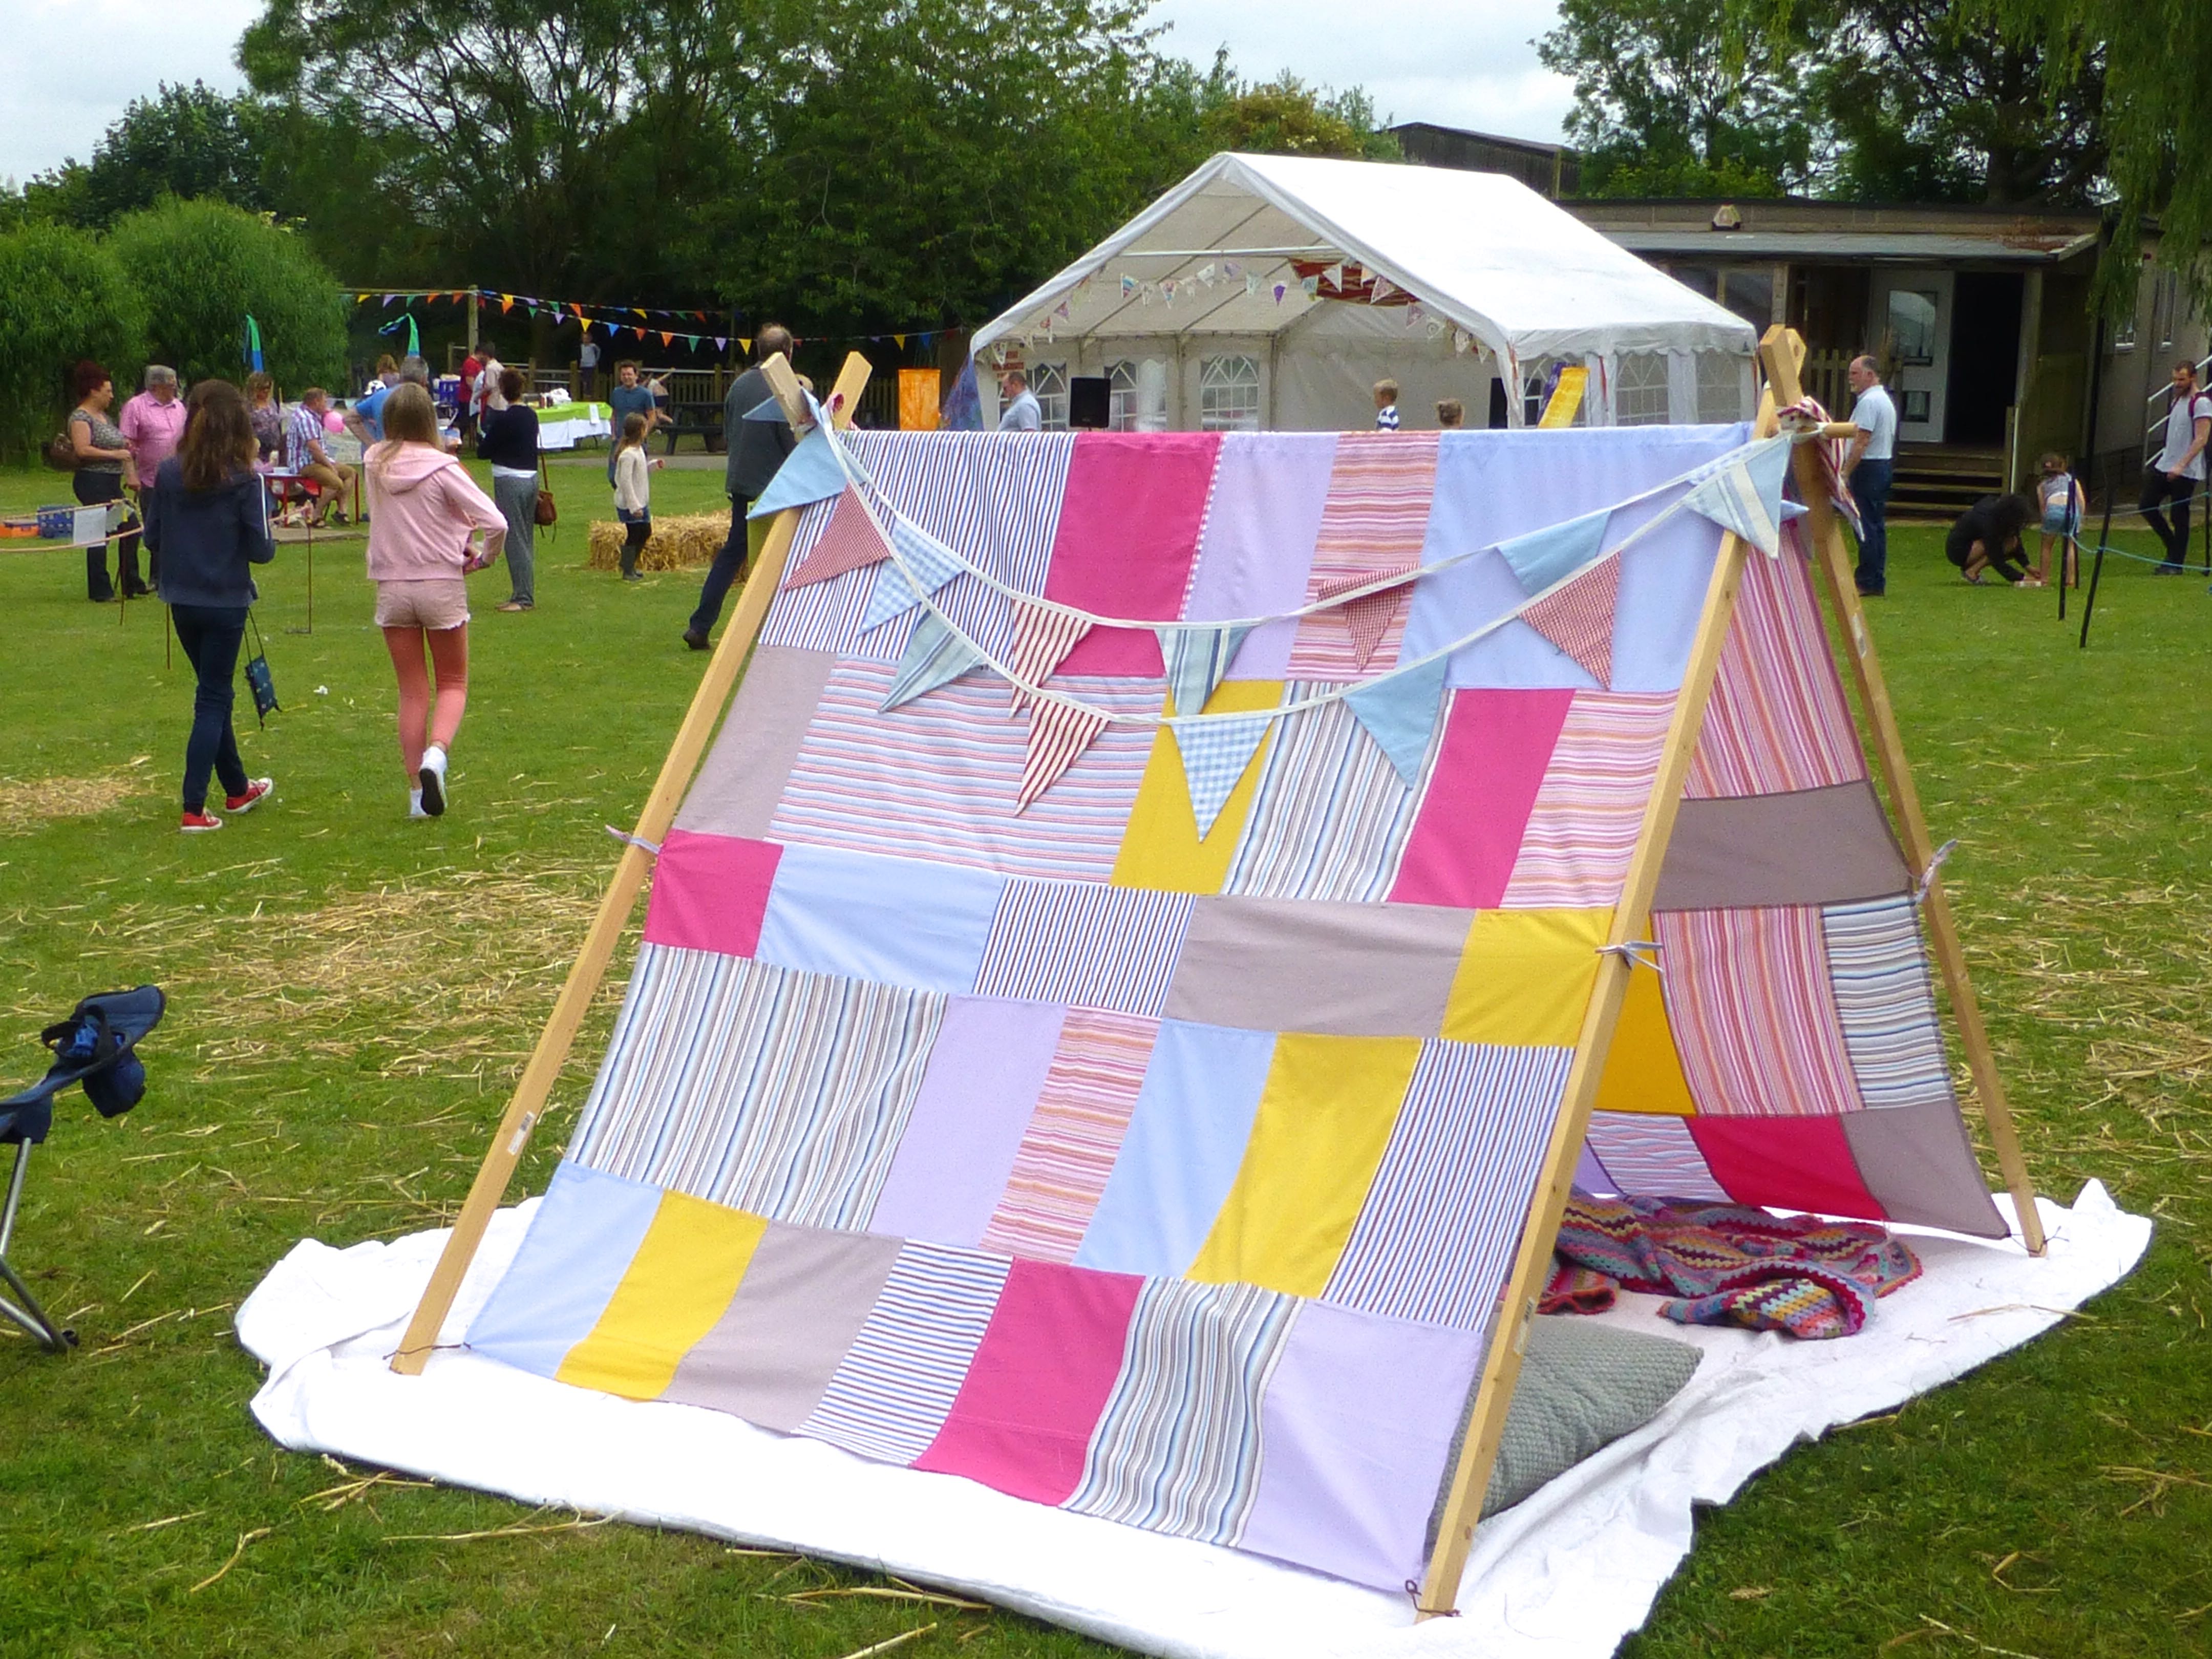
Lay the tent over the central dowel and pass the poles through the elastic cords at the bottom edge.
I also added a tie half way up each side of the tent – but, in my haste, forgot to document it. Basically, four 50cm long ties were made using scarps of leftover shirt fabric and sewn to the seam. These hold the tent more tautly to the frame.
We also decided to saw a shallow groove on the outer edge of the pole where the elastic cord sits – this helps stop the cord from riding up the pole.
With the addition of some bunting, a blanket and some cushions, it makes a lovely spot for young children to play.
Or the perfect place for No.1 Son to shade his cider from the afternoon sun!
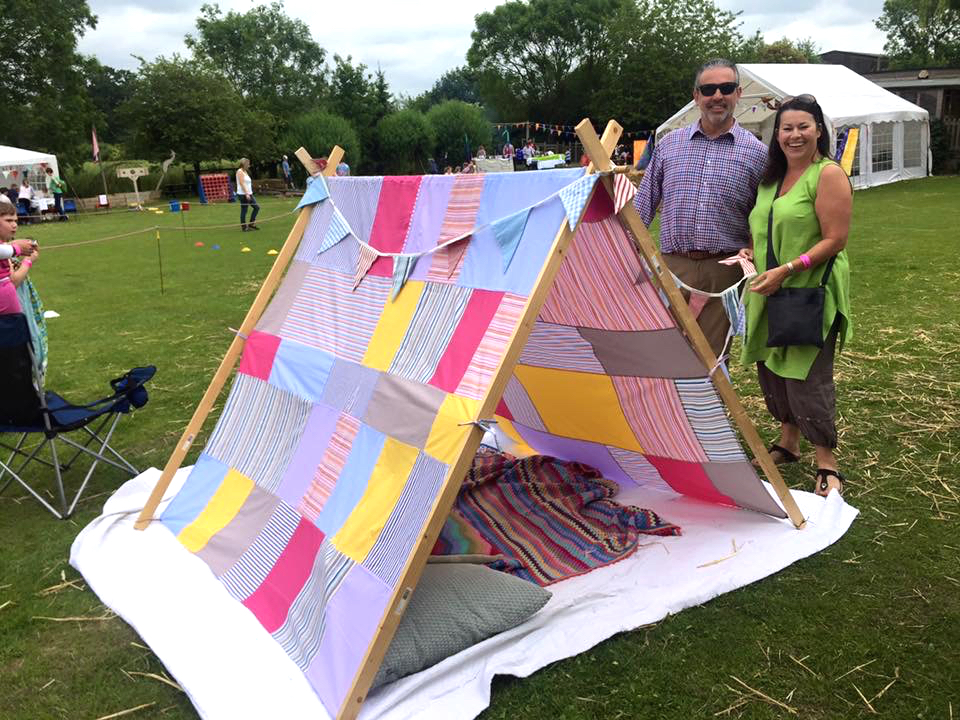
We sold raffle tickets for the tent and raised almost seventy pounds for the school funds!
The lucky winner was thrilled to bits to win it for her little girls and, as it was such a success, I think I’m going to be asked to make one for next year’s fête.
Watch out Mr. H-L, I’ve got my eye on your shirts…..
I turned on my computer this morning and this popped up in my notifications: –
I thought it was next week but I’ll go with WordPress and celebrate today as my One Year Anniversary, rather comically referred to as a Bloggiversary (my interpretation of spelling, seeing as it is a made up word!).
I’d planned to do a giveaway as a small gesture of thanks to everyone who has followed, visited or commented over the past twelve months as, without such unfailing support, this blog would not be here now. You can’t continue without constant encouragement, can you?
I can’t put into words quite how much I have enjoyed blogging – both the creative process and (even more) discovering the multitude of fantastic blogs out there. That so many lovely (mostly) ladies are happy to share so unselfishly their ideas and creations, quite overwhelmed me in the beginning and gave me the confidence to join in and nervously share some of my own makes.
I fully expected criticism as part of the deal, but can honestly say that I haven’t had a single negative comment – all words have been constructive and, most importantly, kind. I feel as if I ‘know’ a lot of you and hopefully will somehow meet some of you wonderful, like-minded people in the future. (A get-together anyone?!)
Anyway – back to the giveaway.
Remember the hugely successful Crafternoon that I held for Comic Relief, raising £340 in total? I did a couple of posts (here and here) in the run up showing you the things I’d made prior to the day itself.
Would anyone like to win ALL of them?
To enter, just make sure you ‘Follow’ the blog then leave a comment below.
No. 3 Son will pull a name out of the hat after the closing date of midnight on Saturday 18th April – so be quick!
As a reminder, here’s what’s up for grabs: –
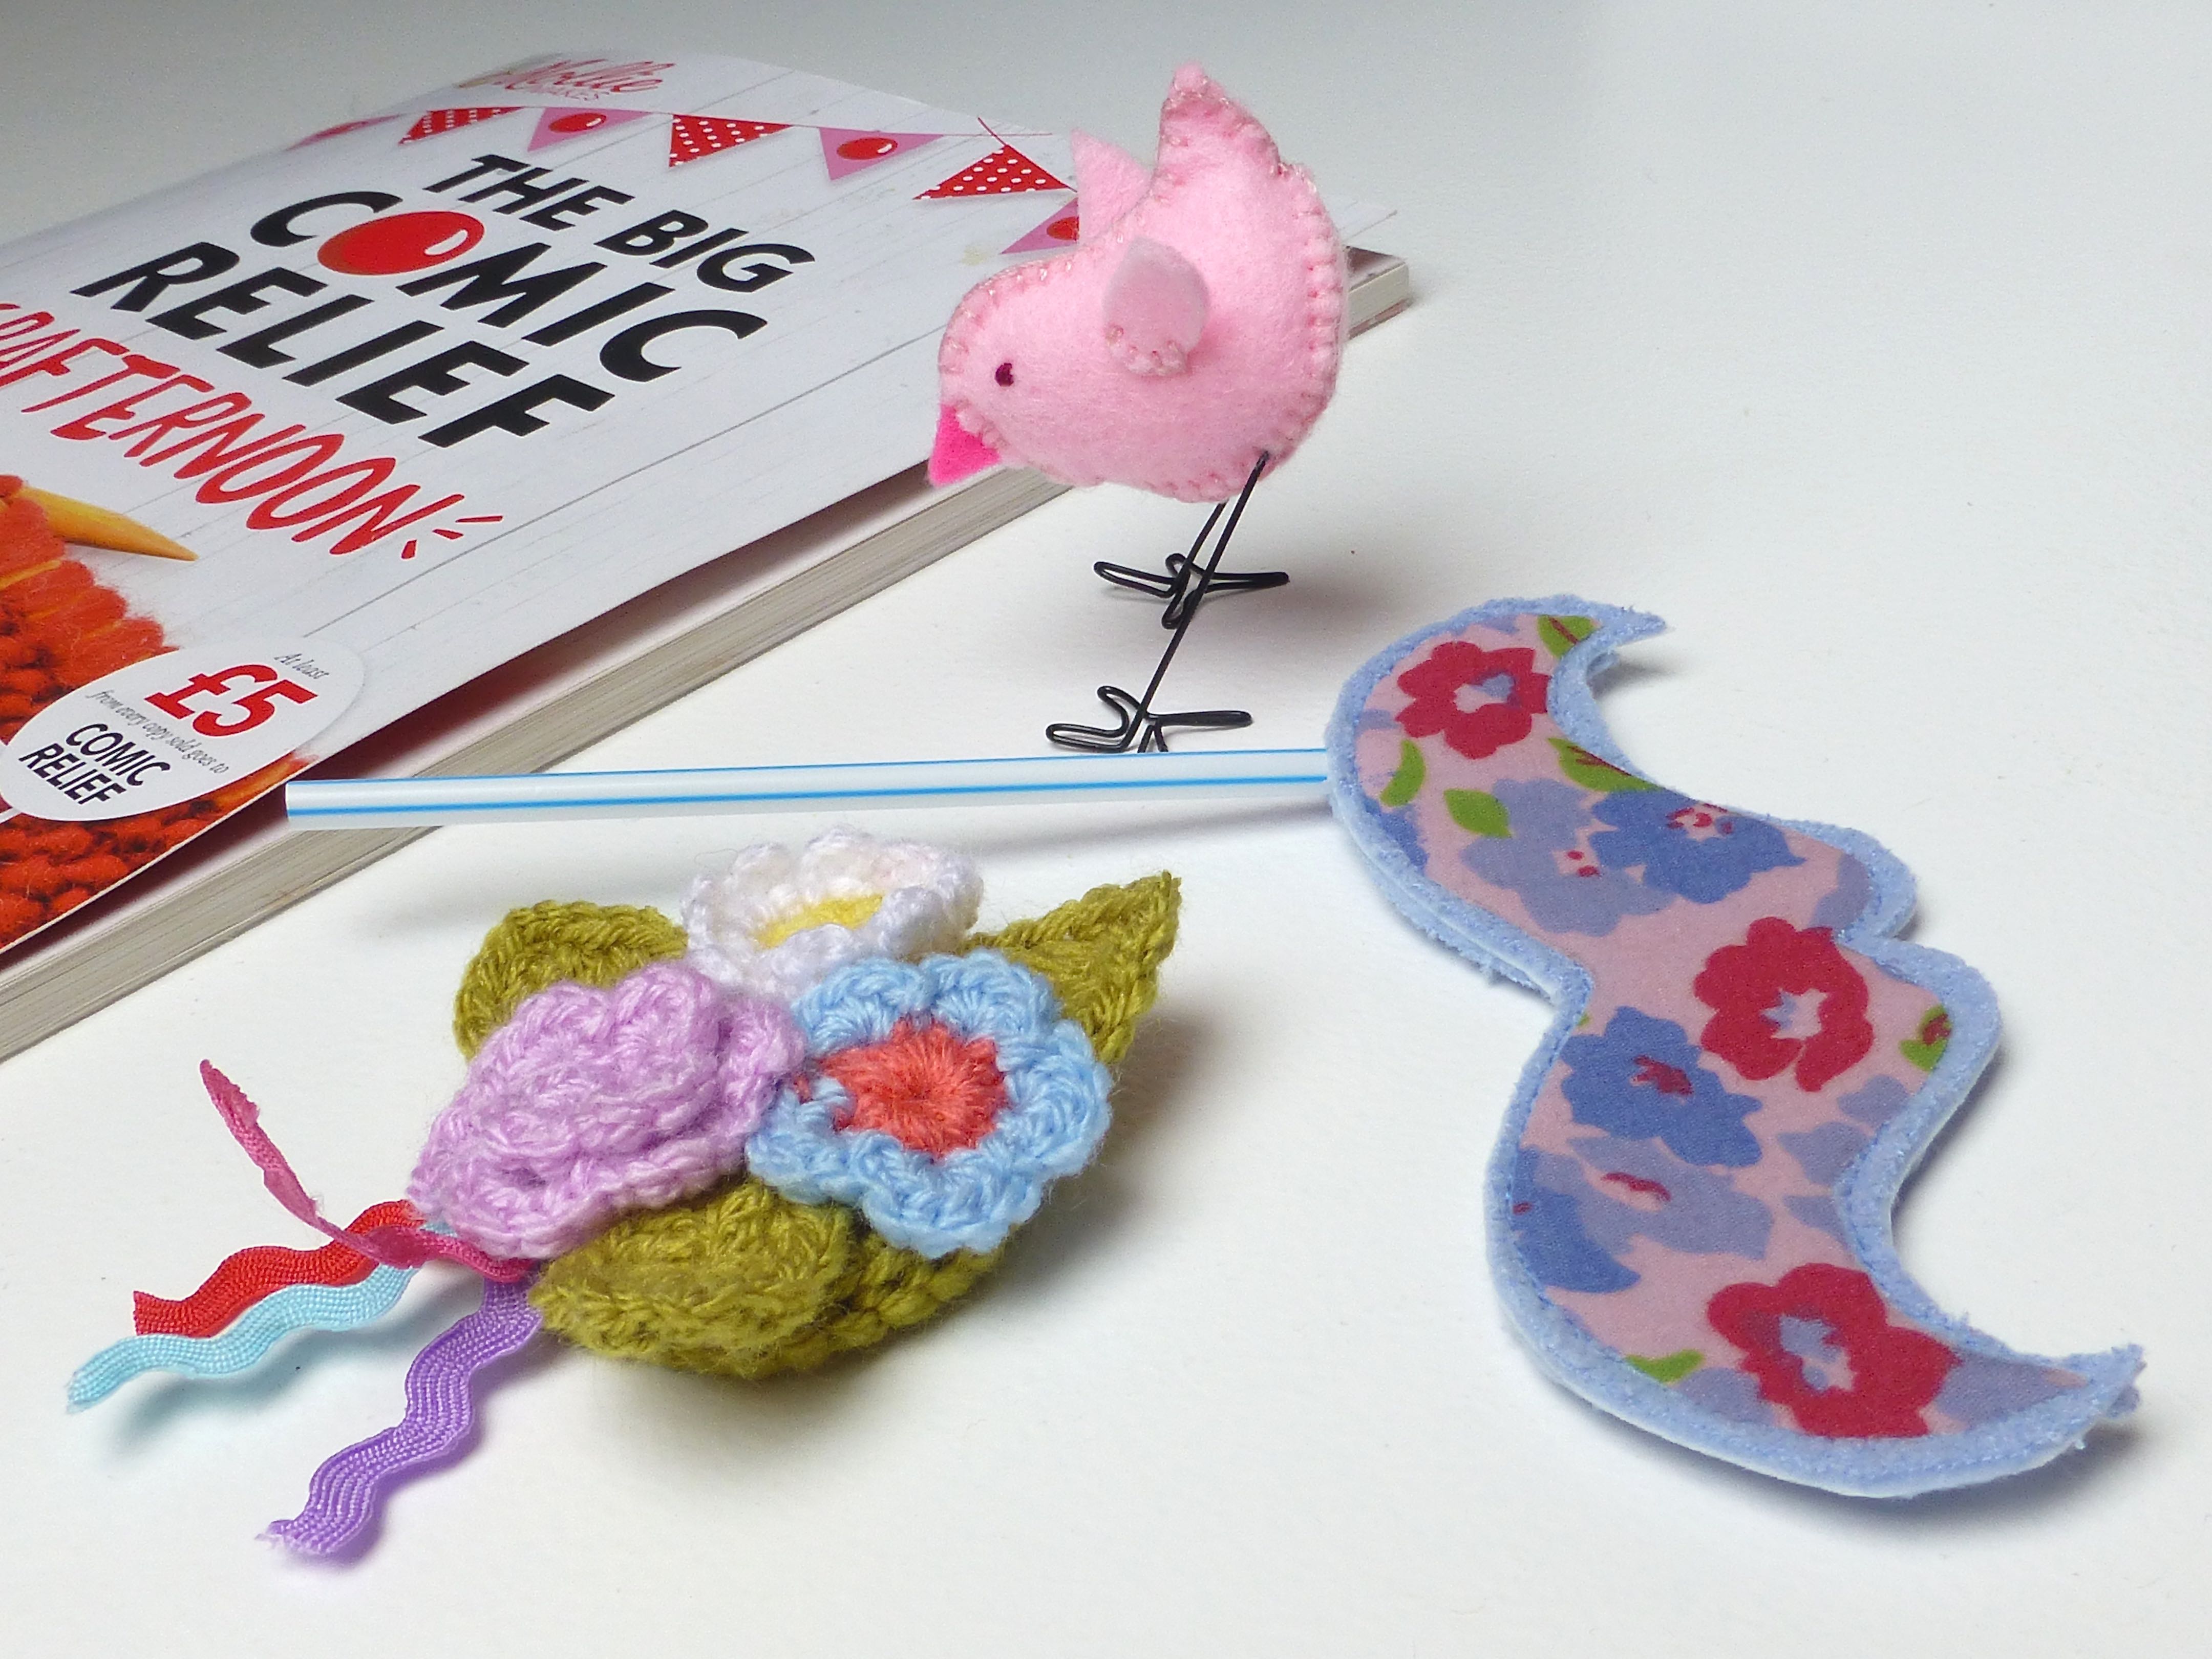
Pear Pin Cushion
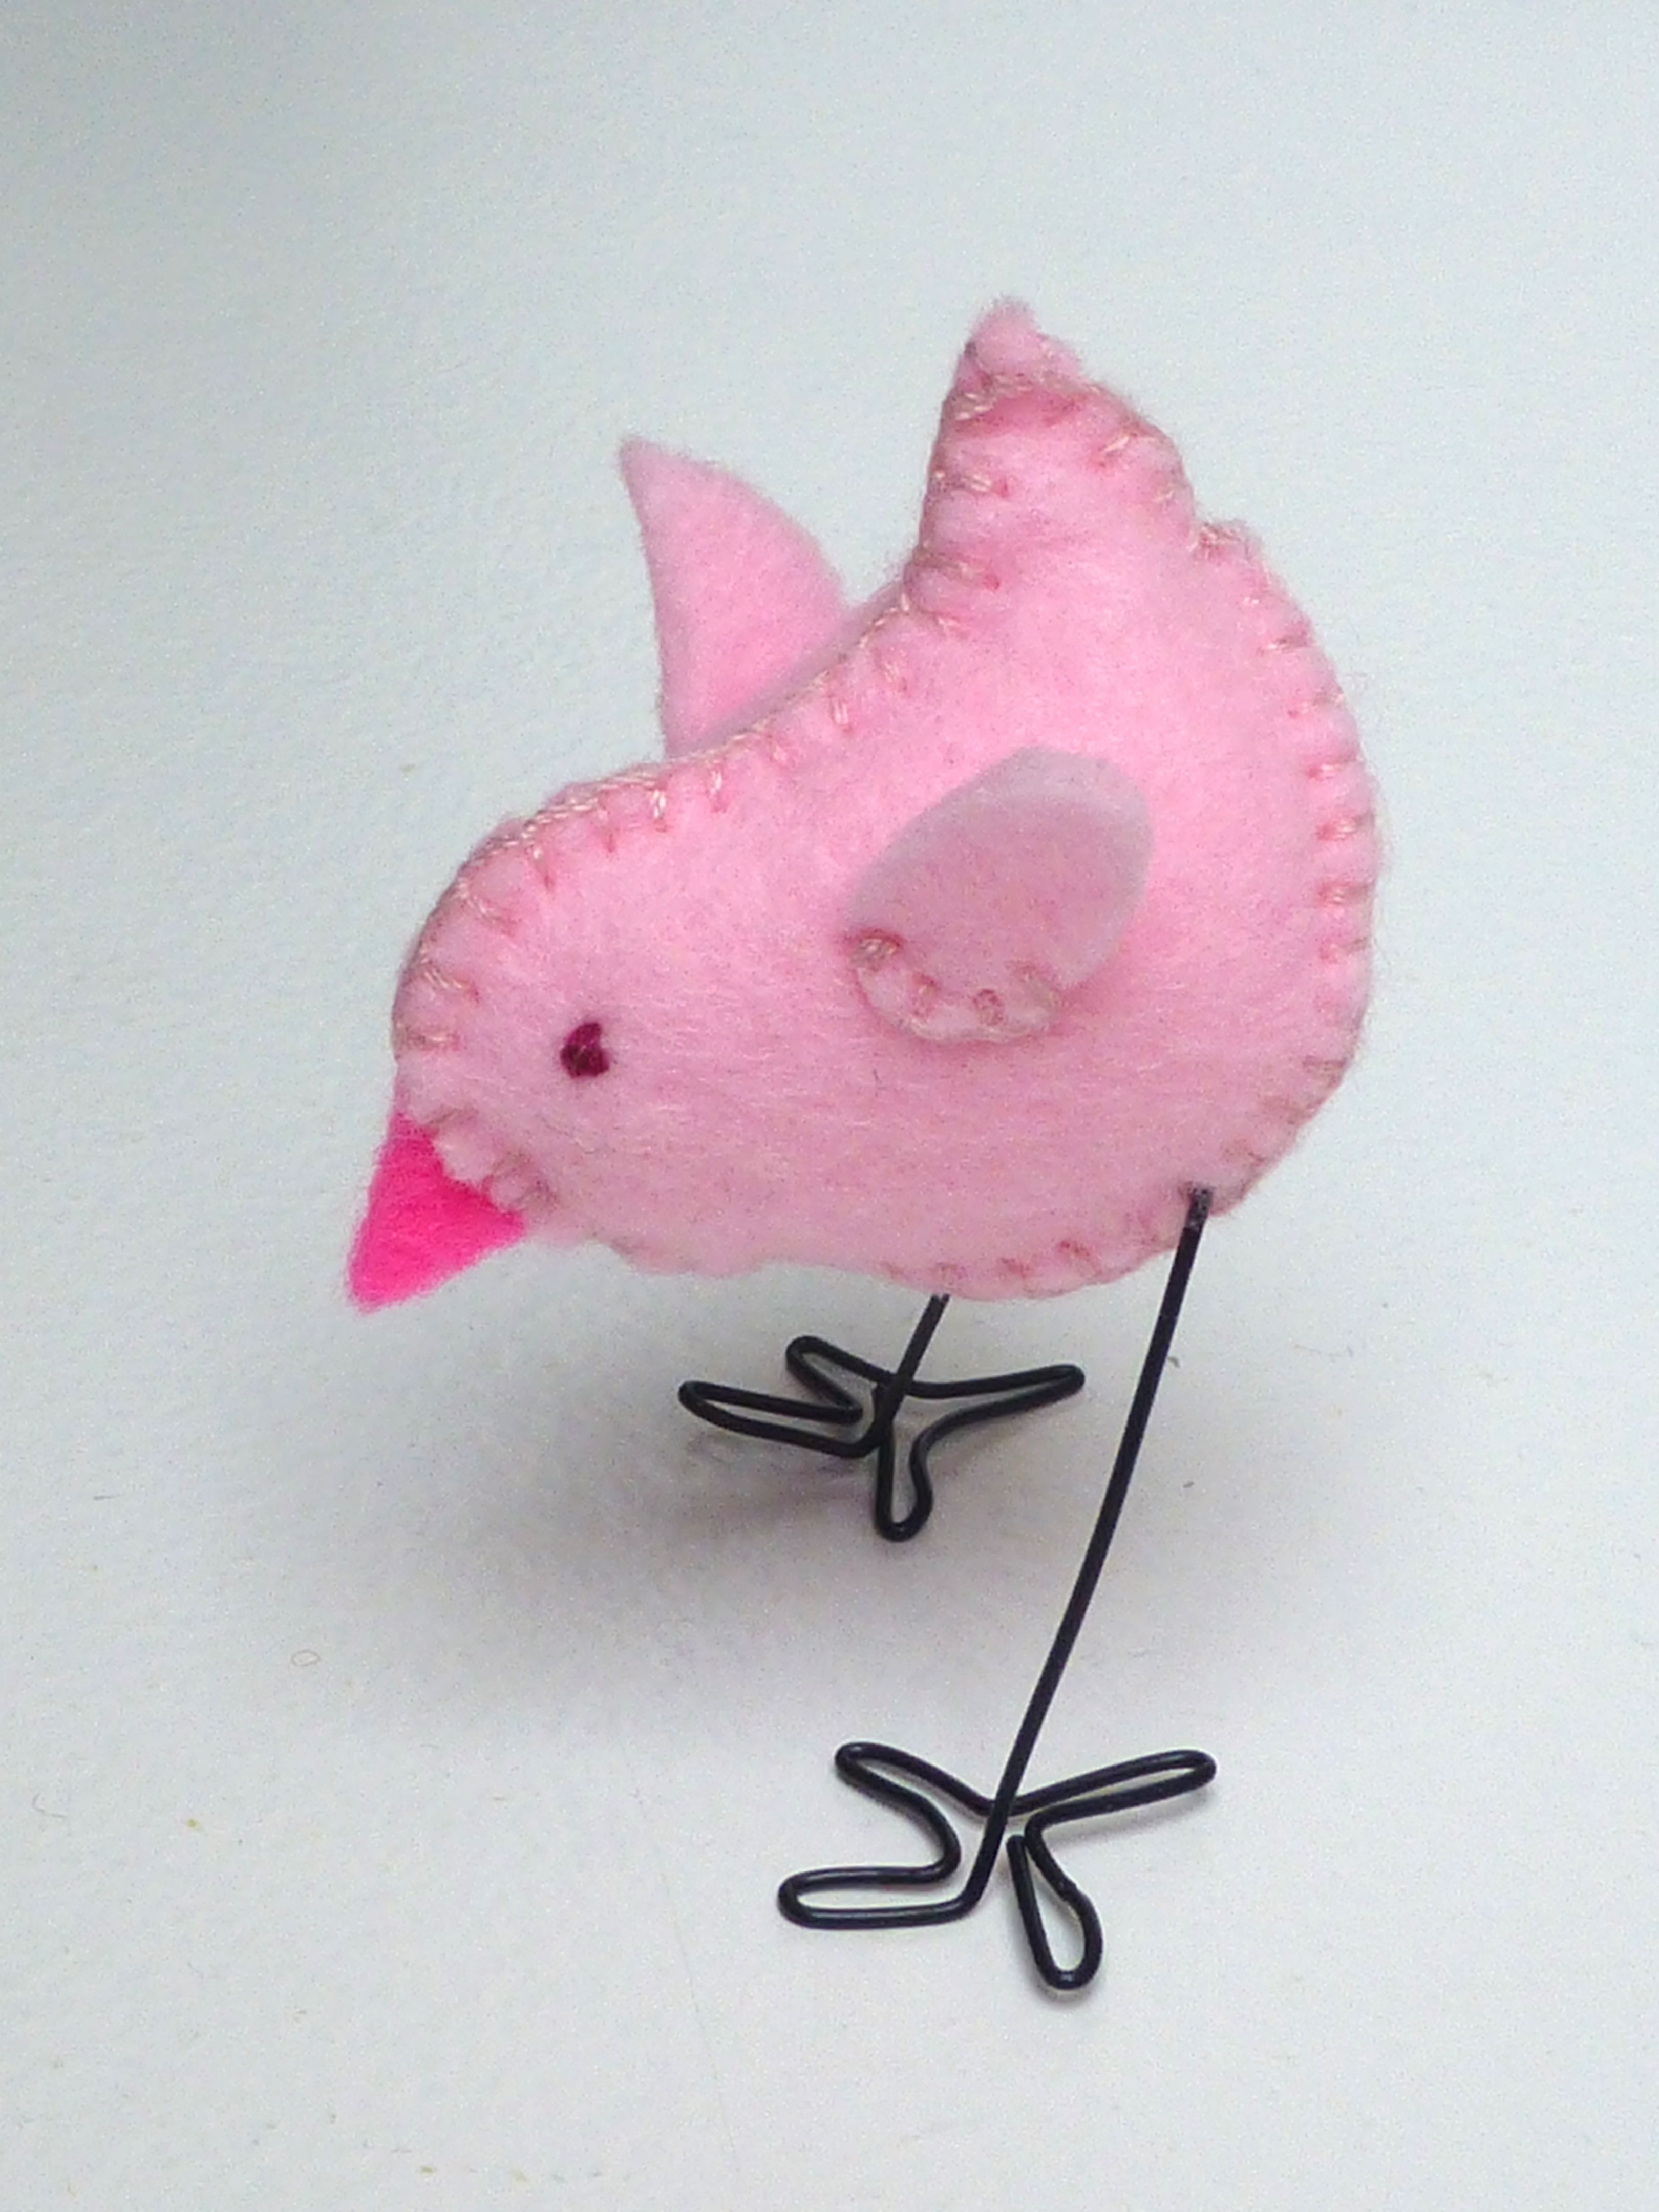
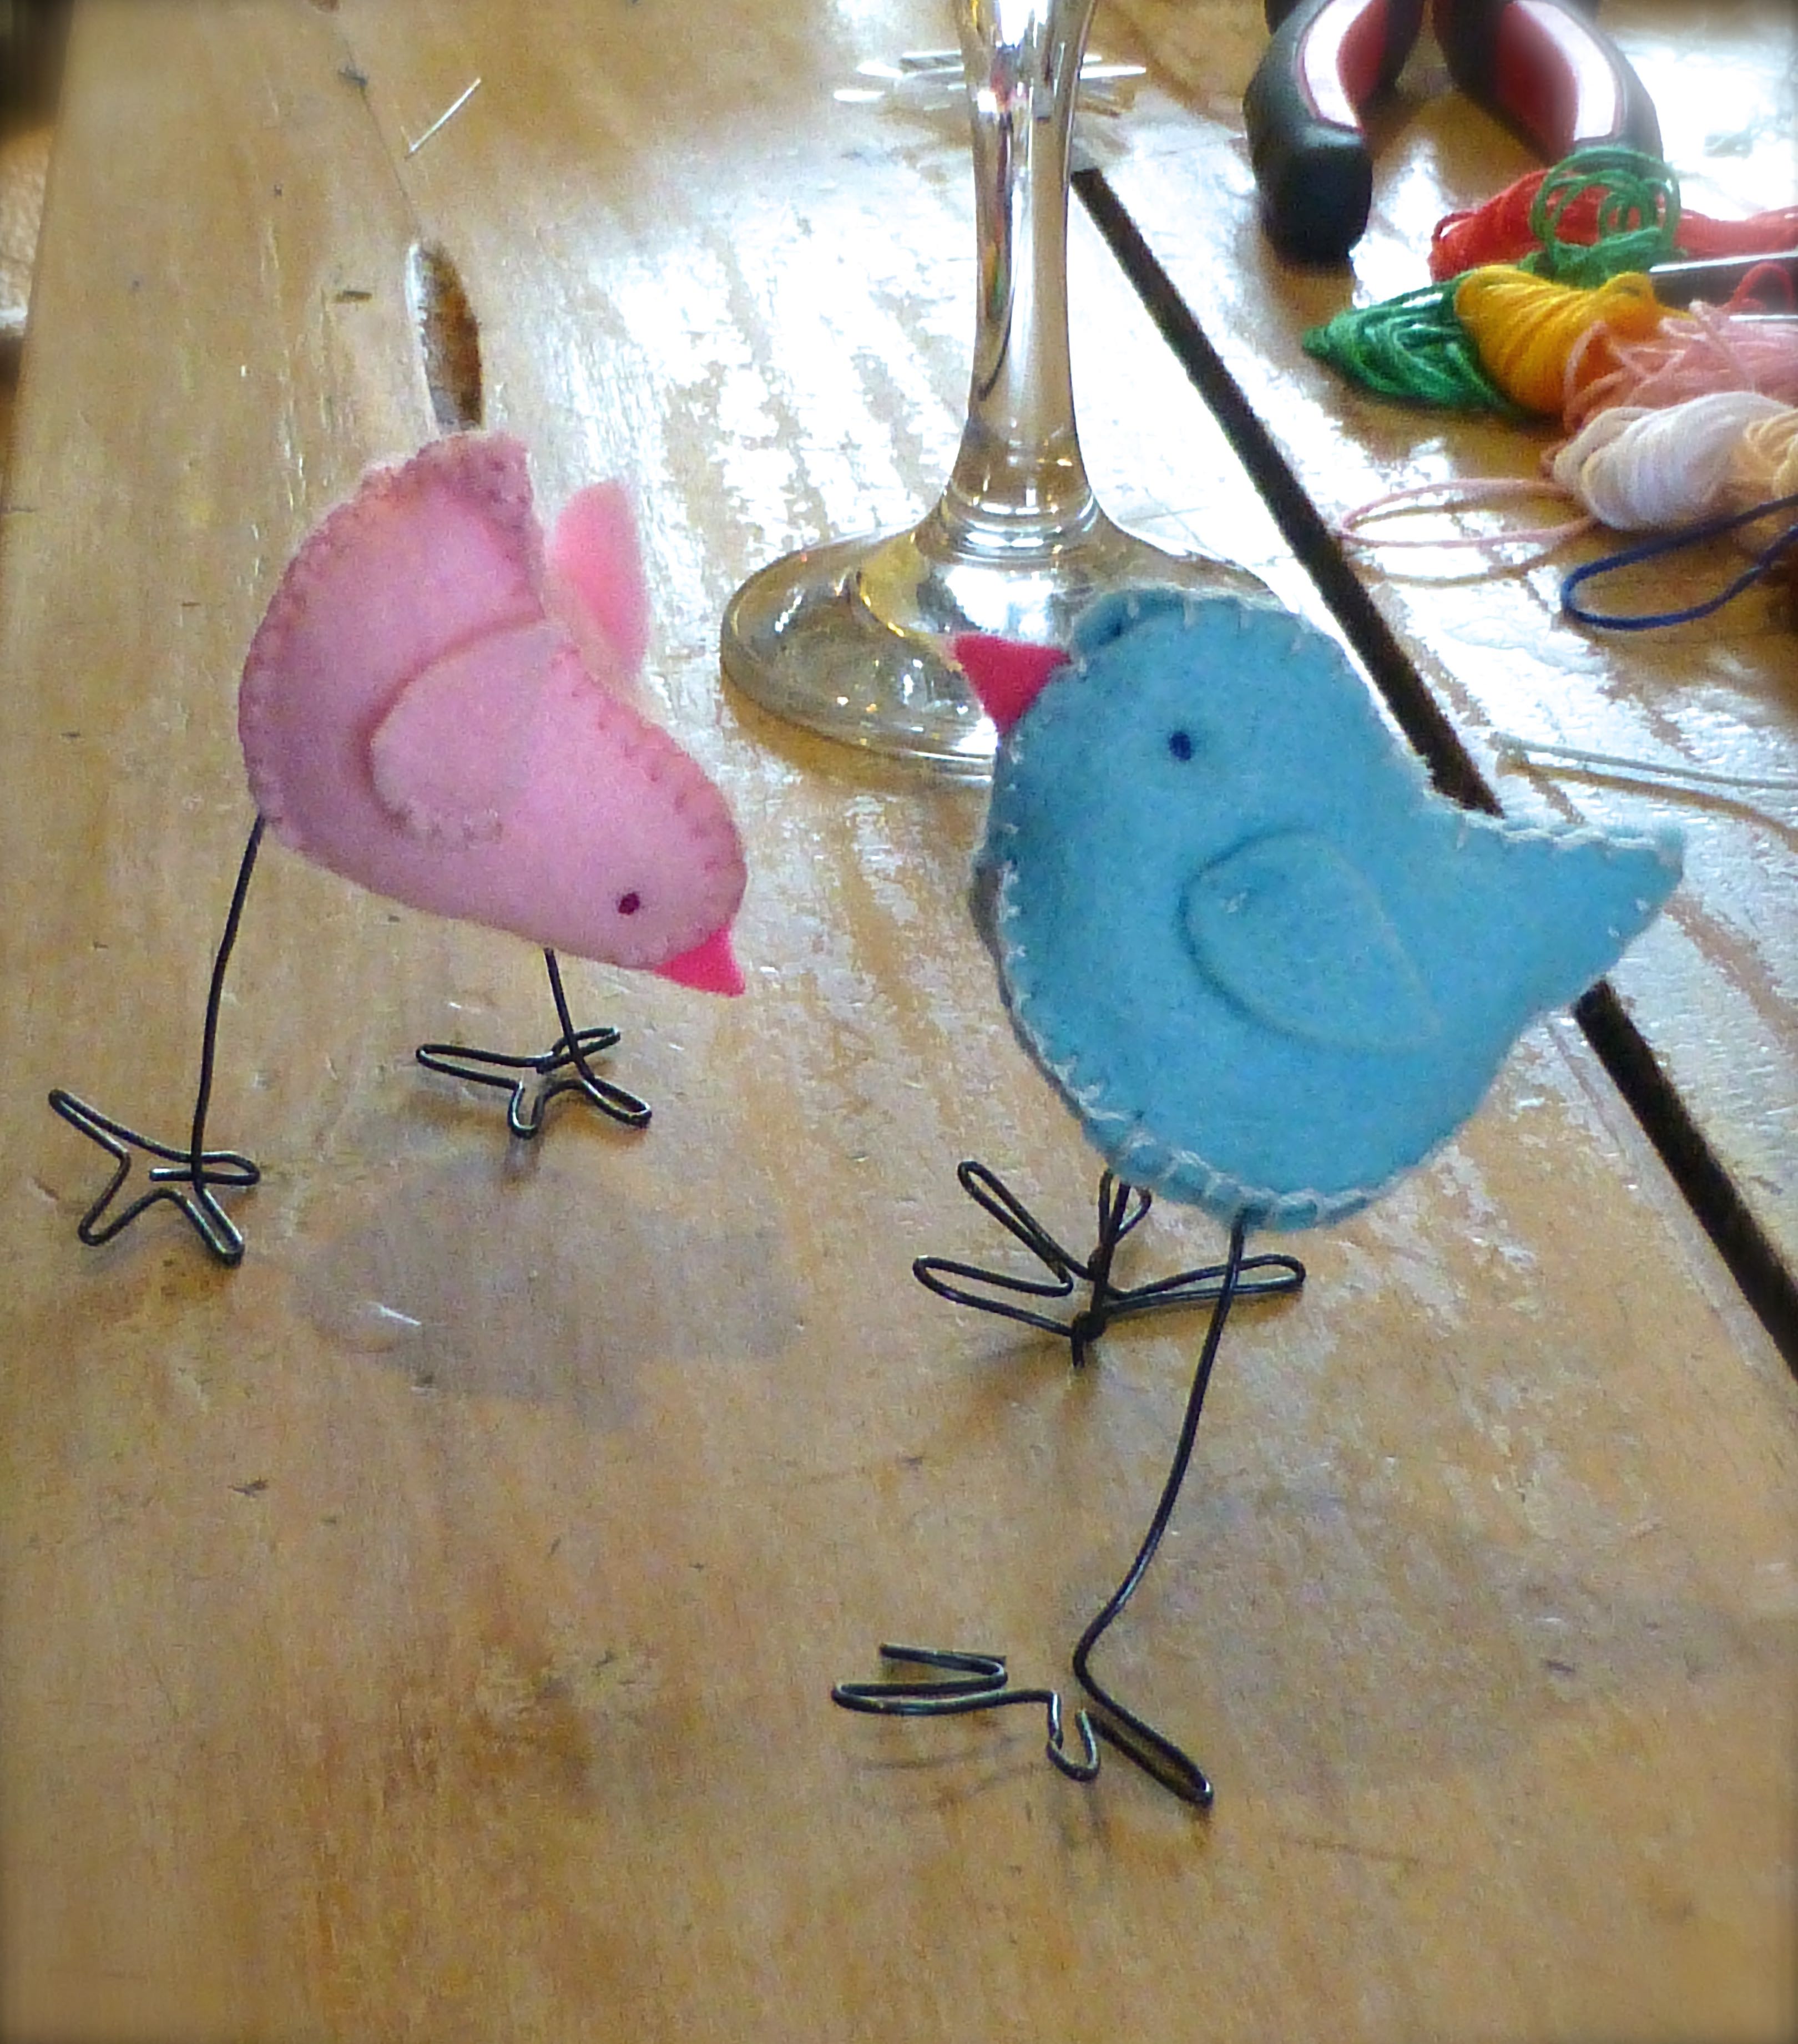
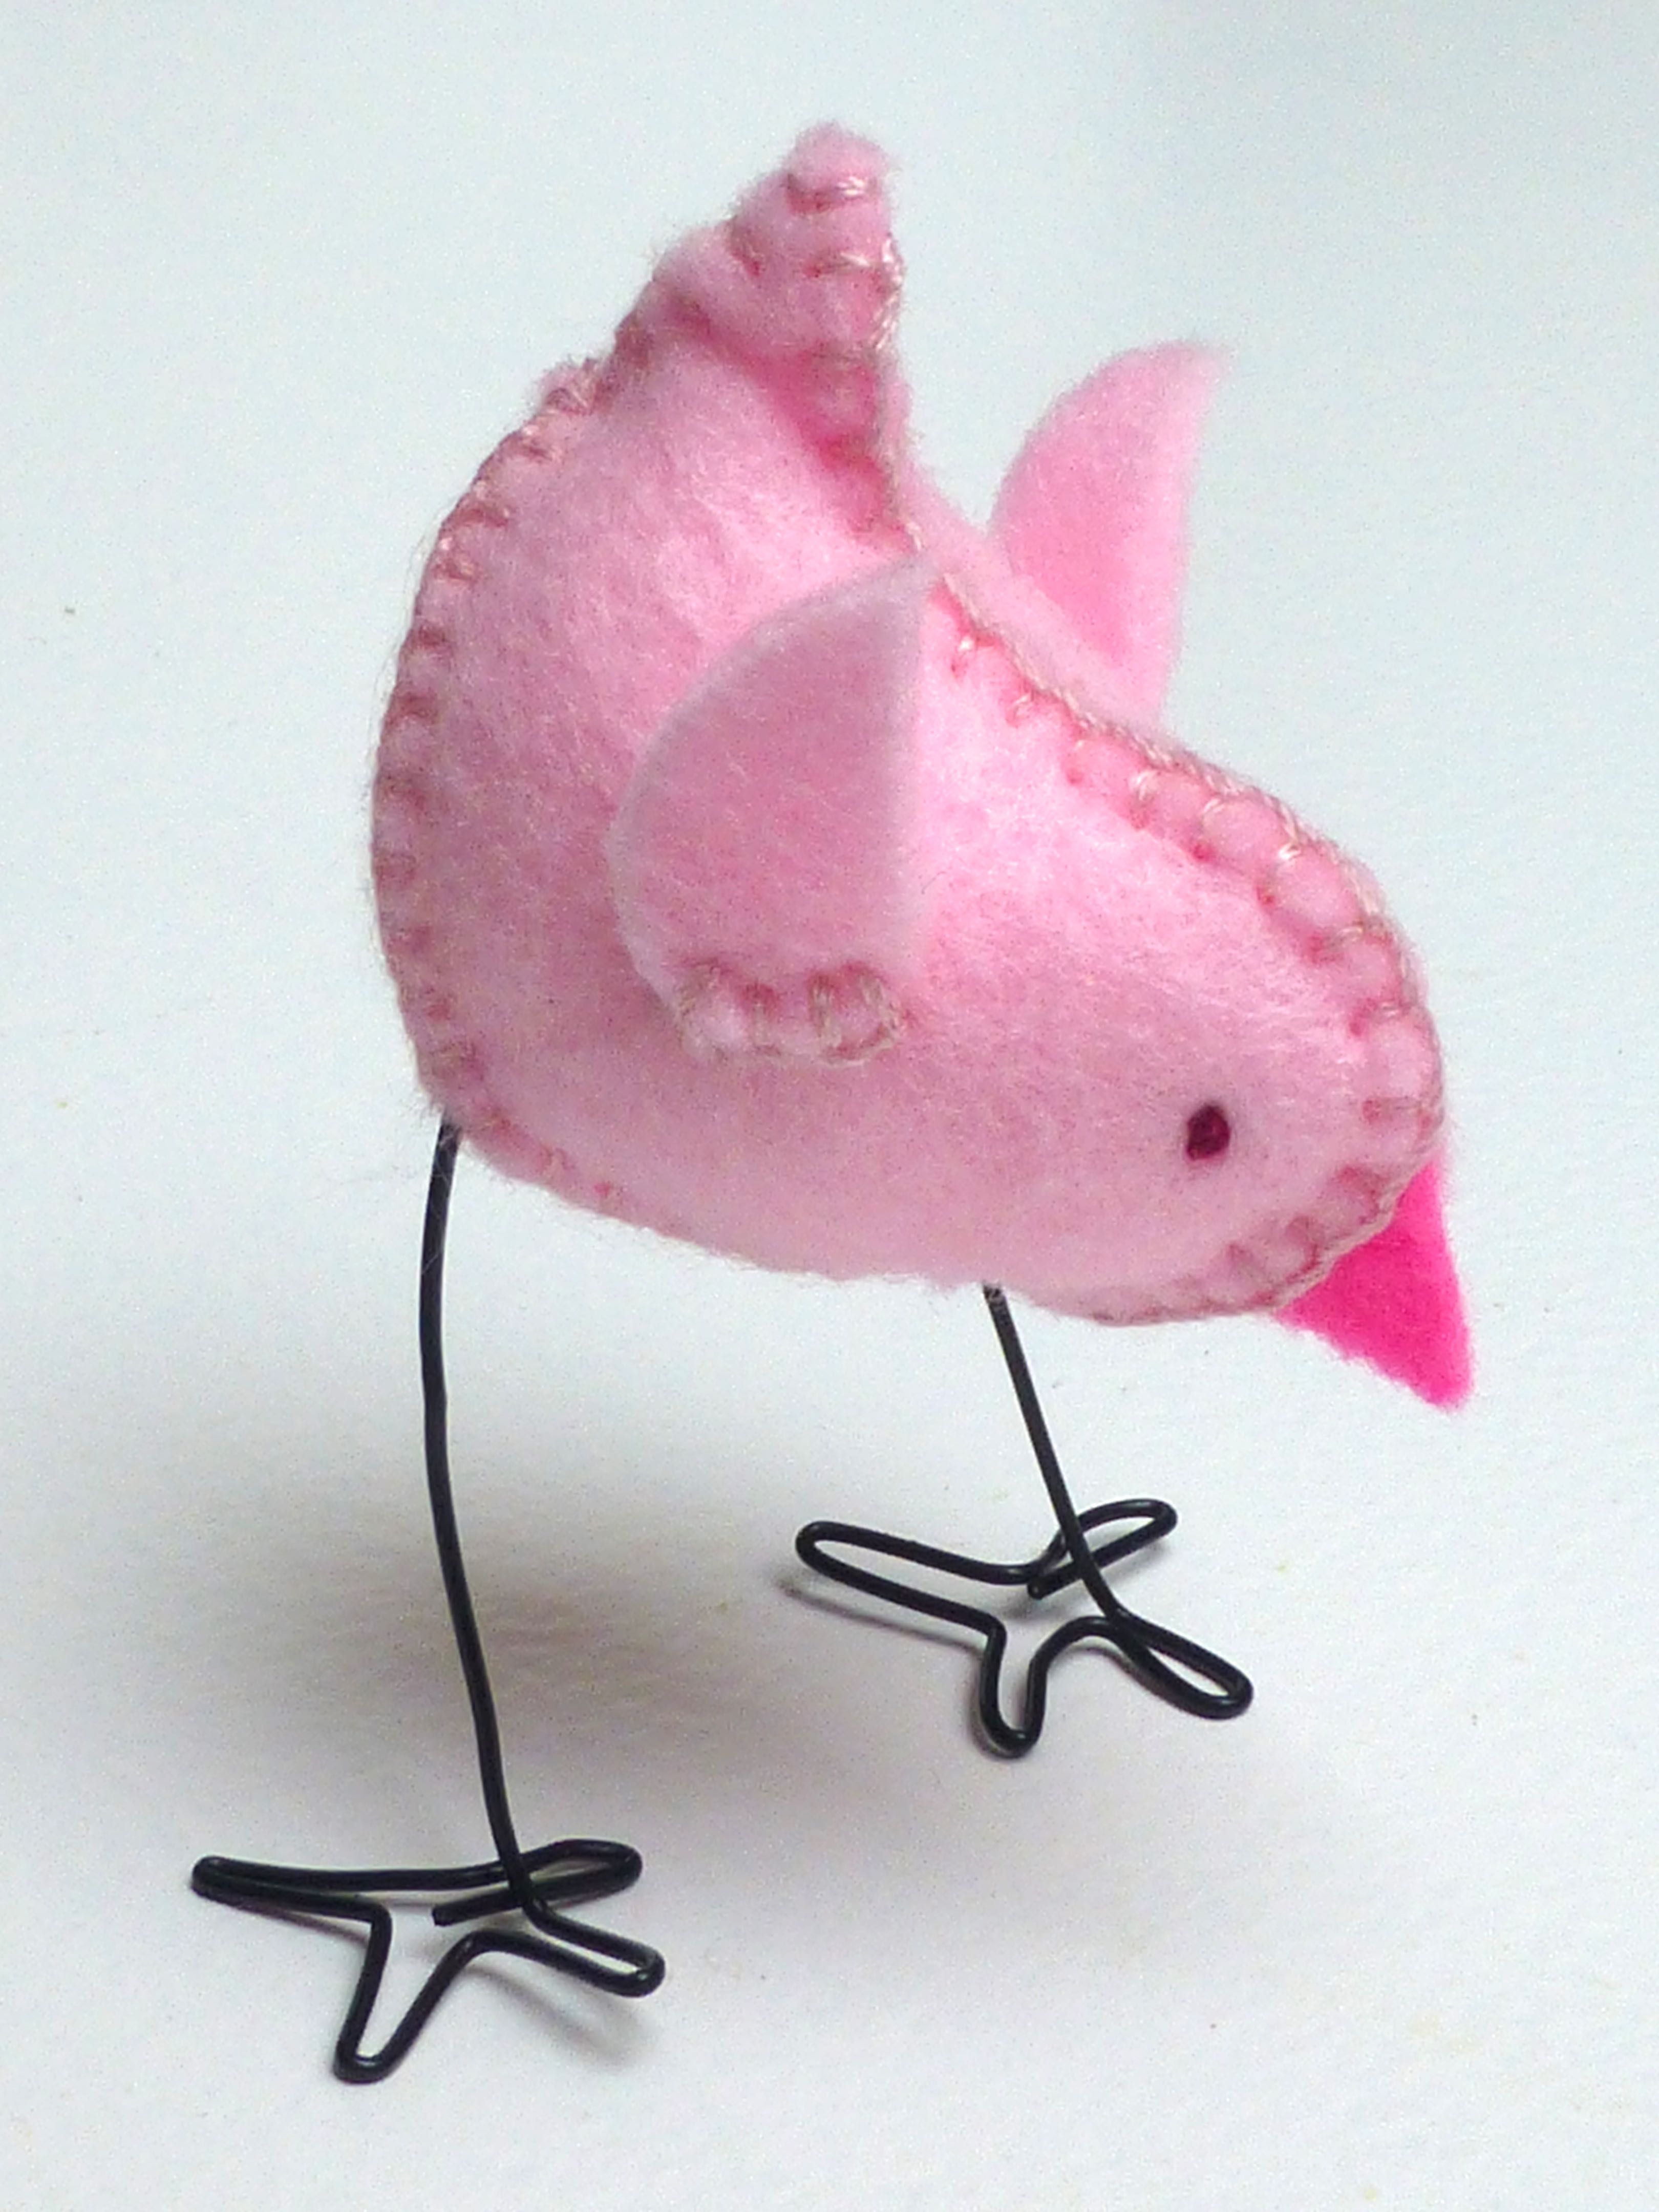
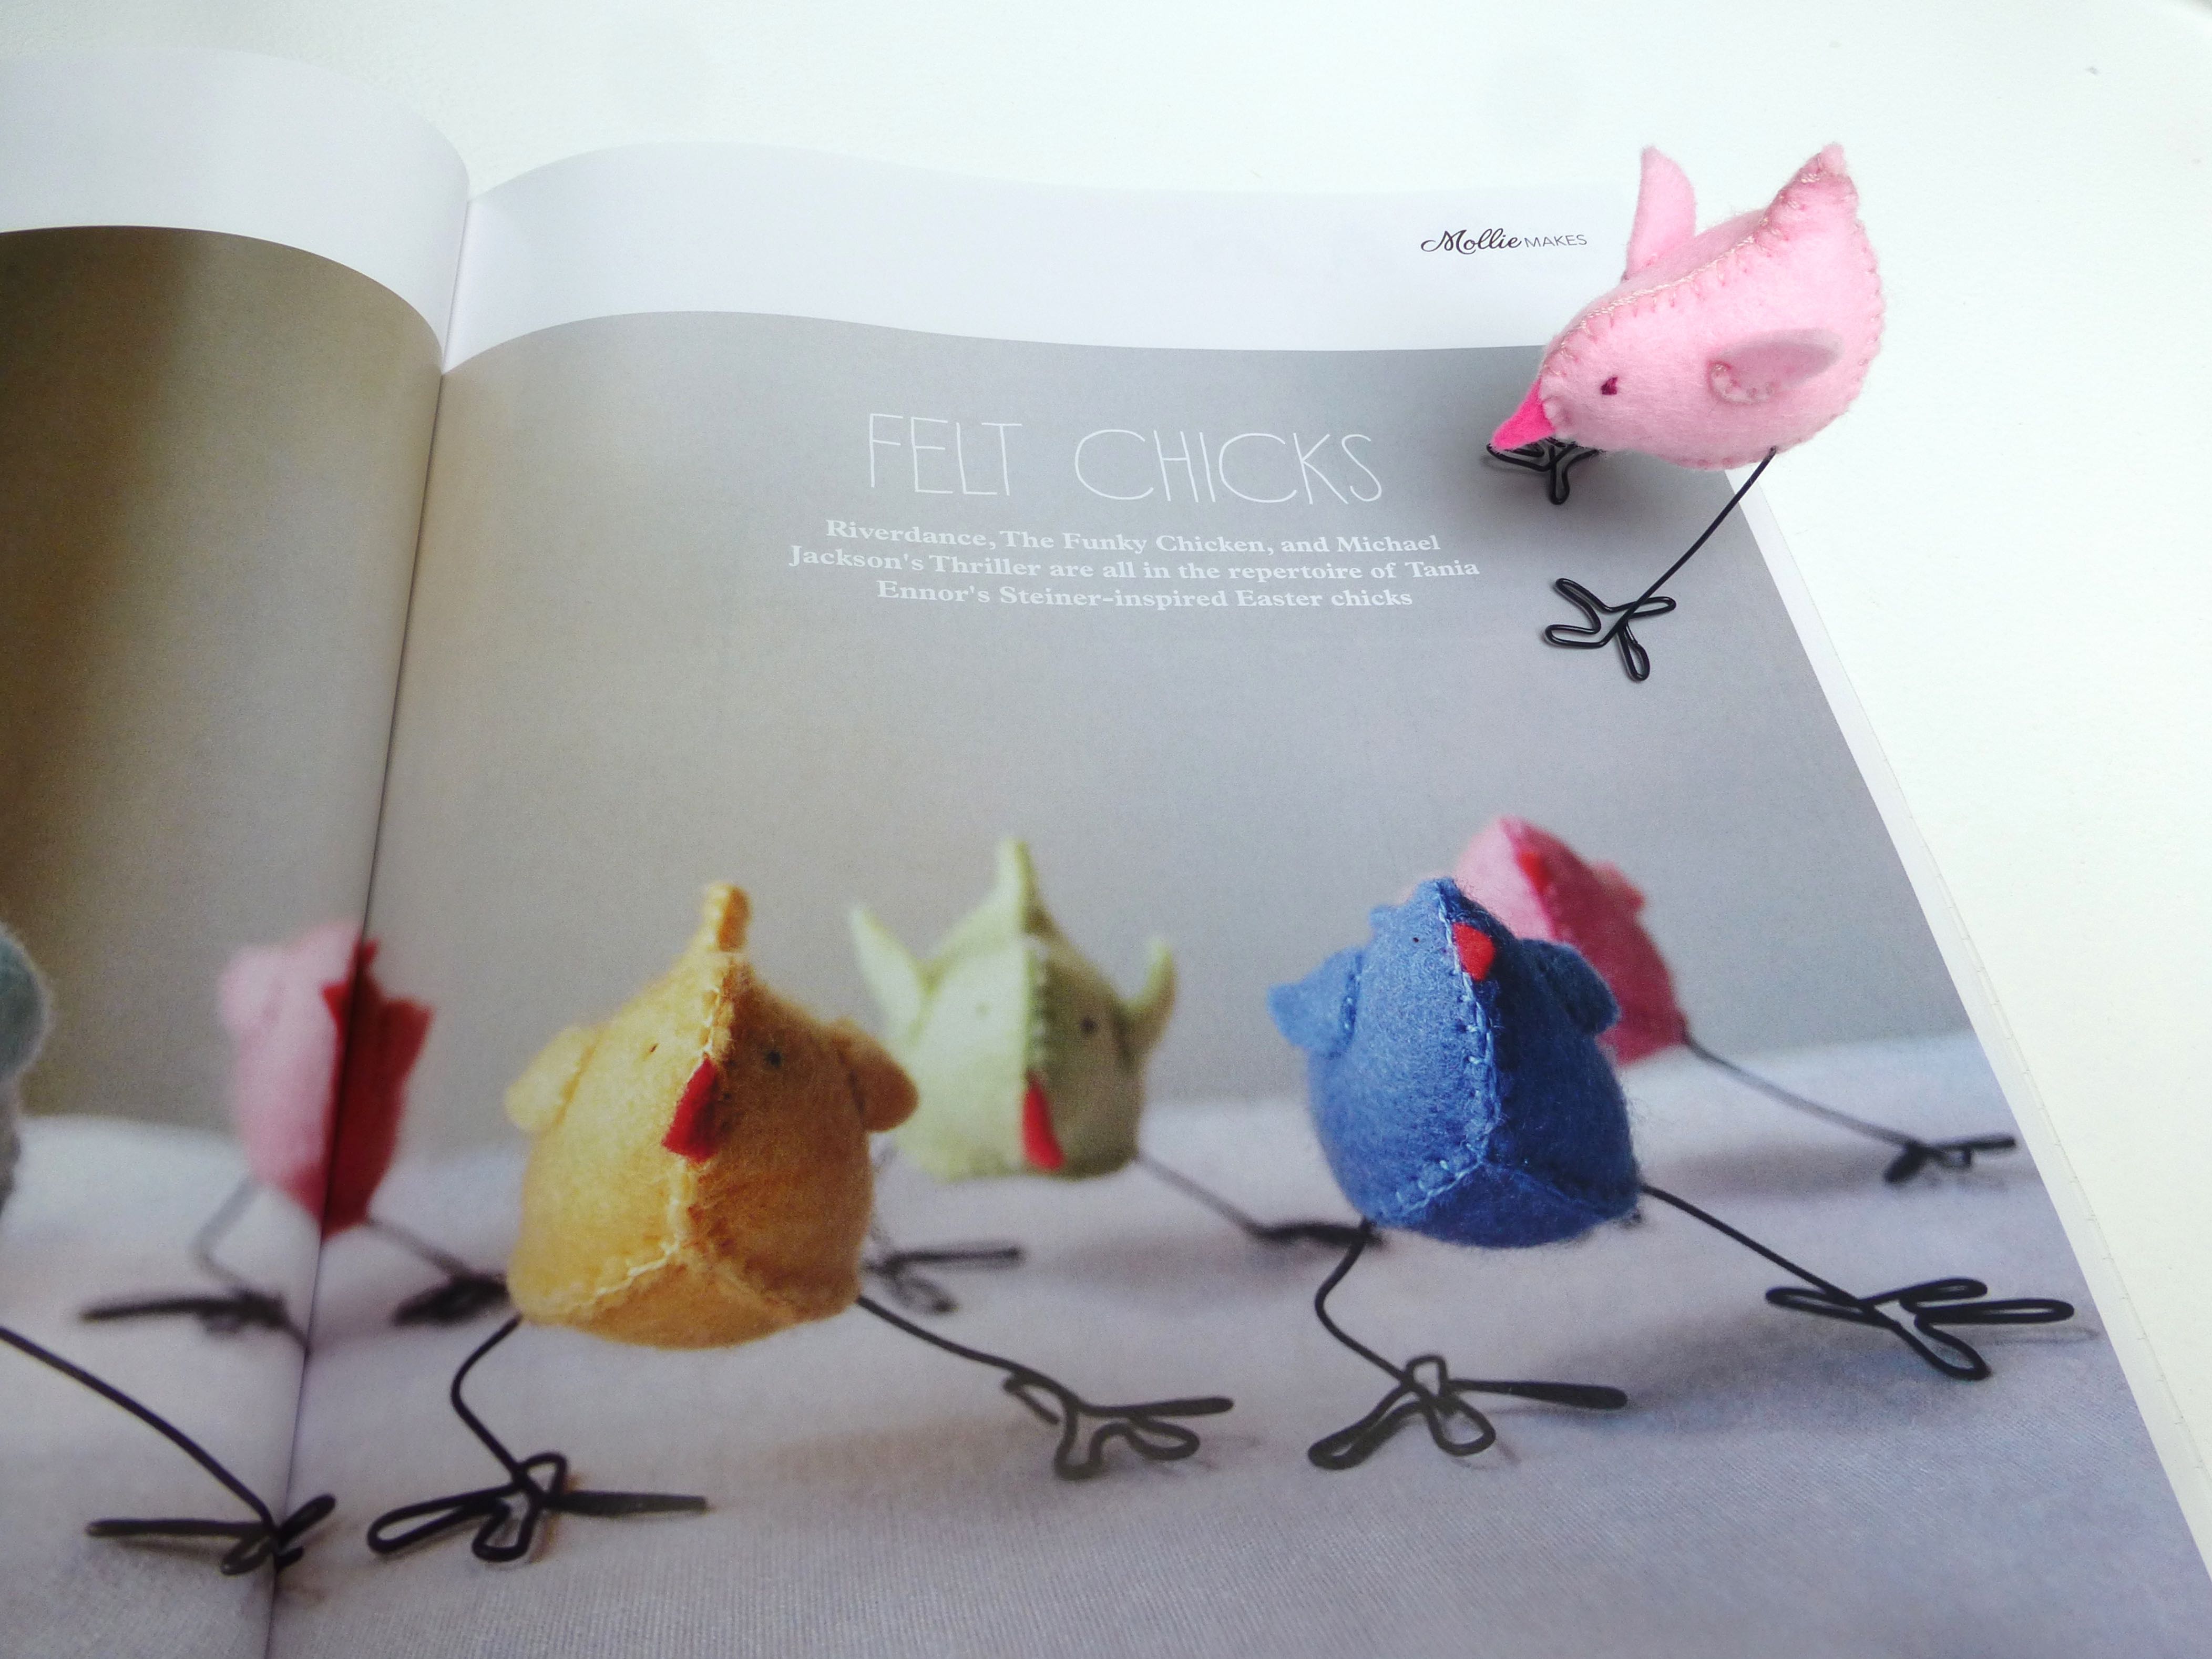
Felt Chick
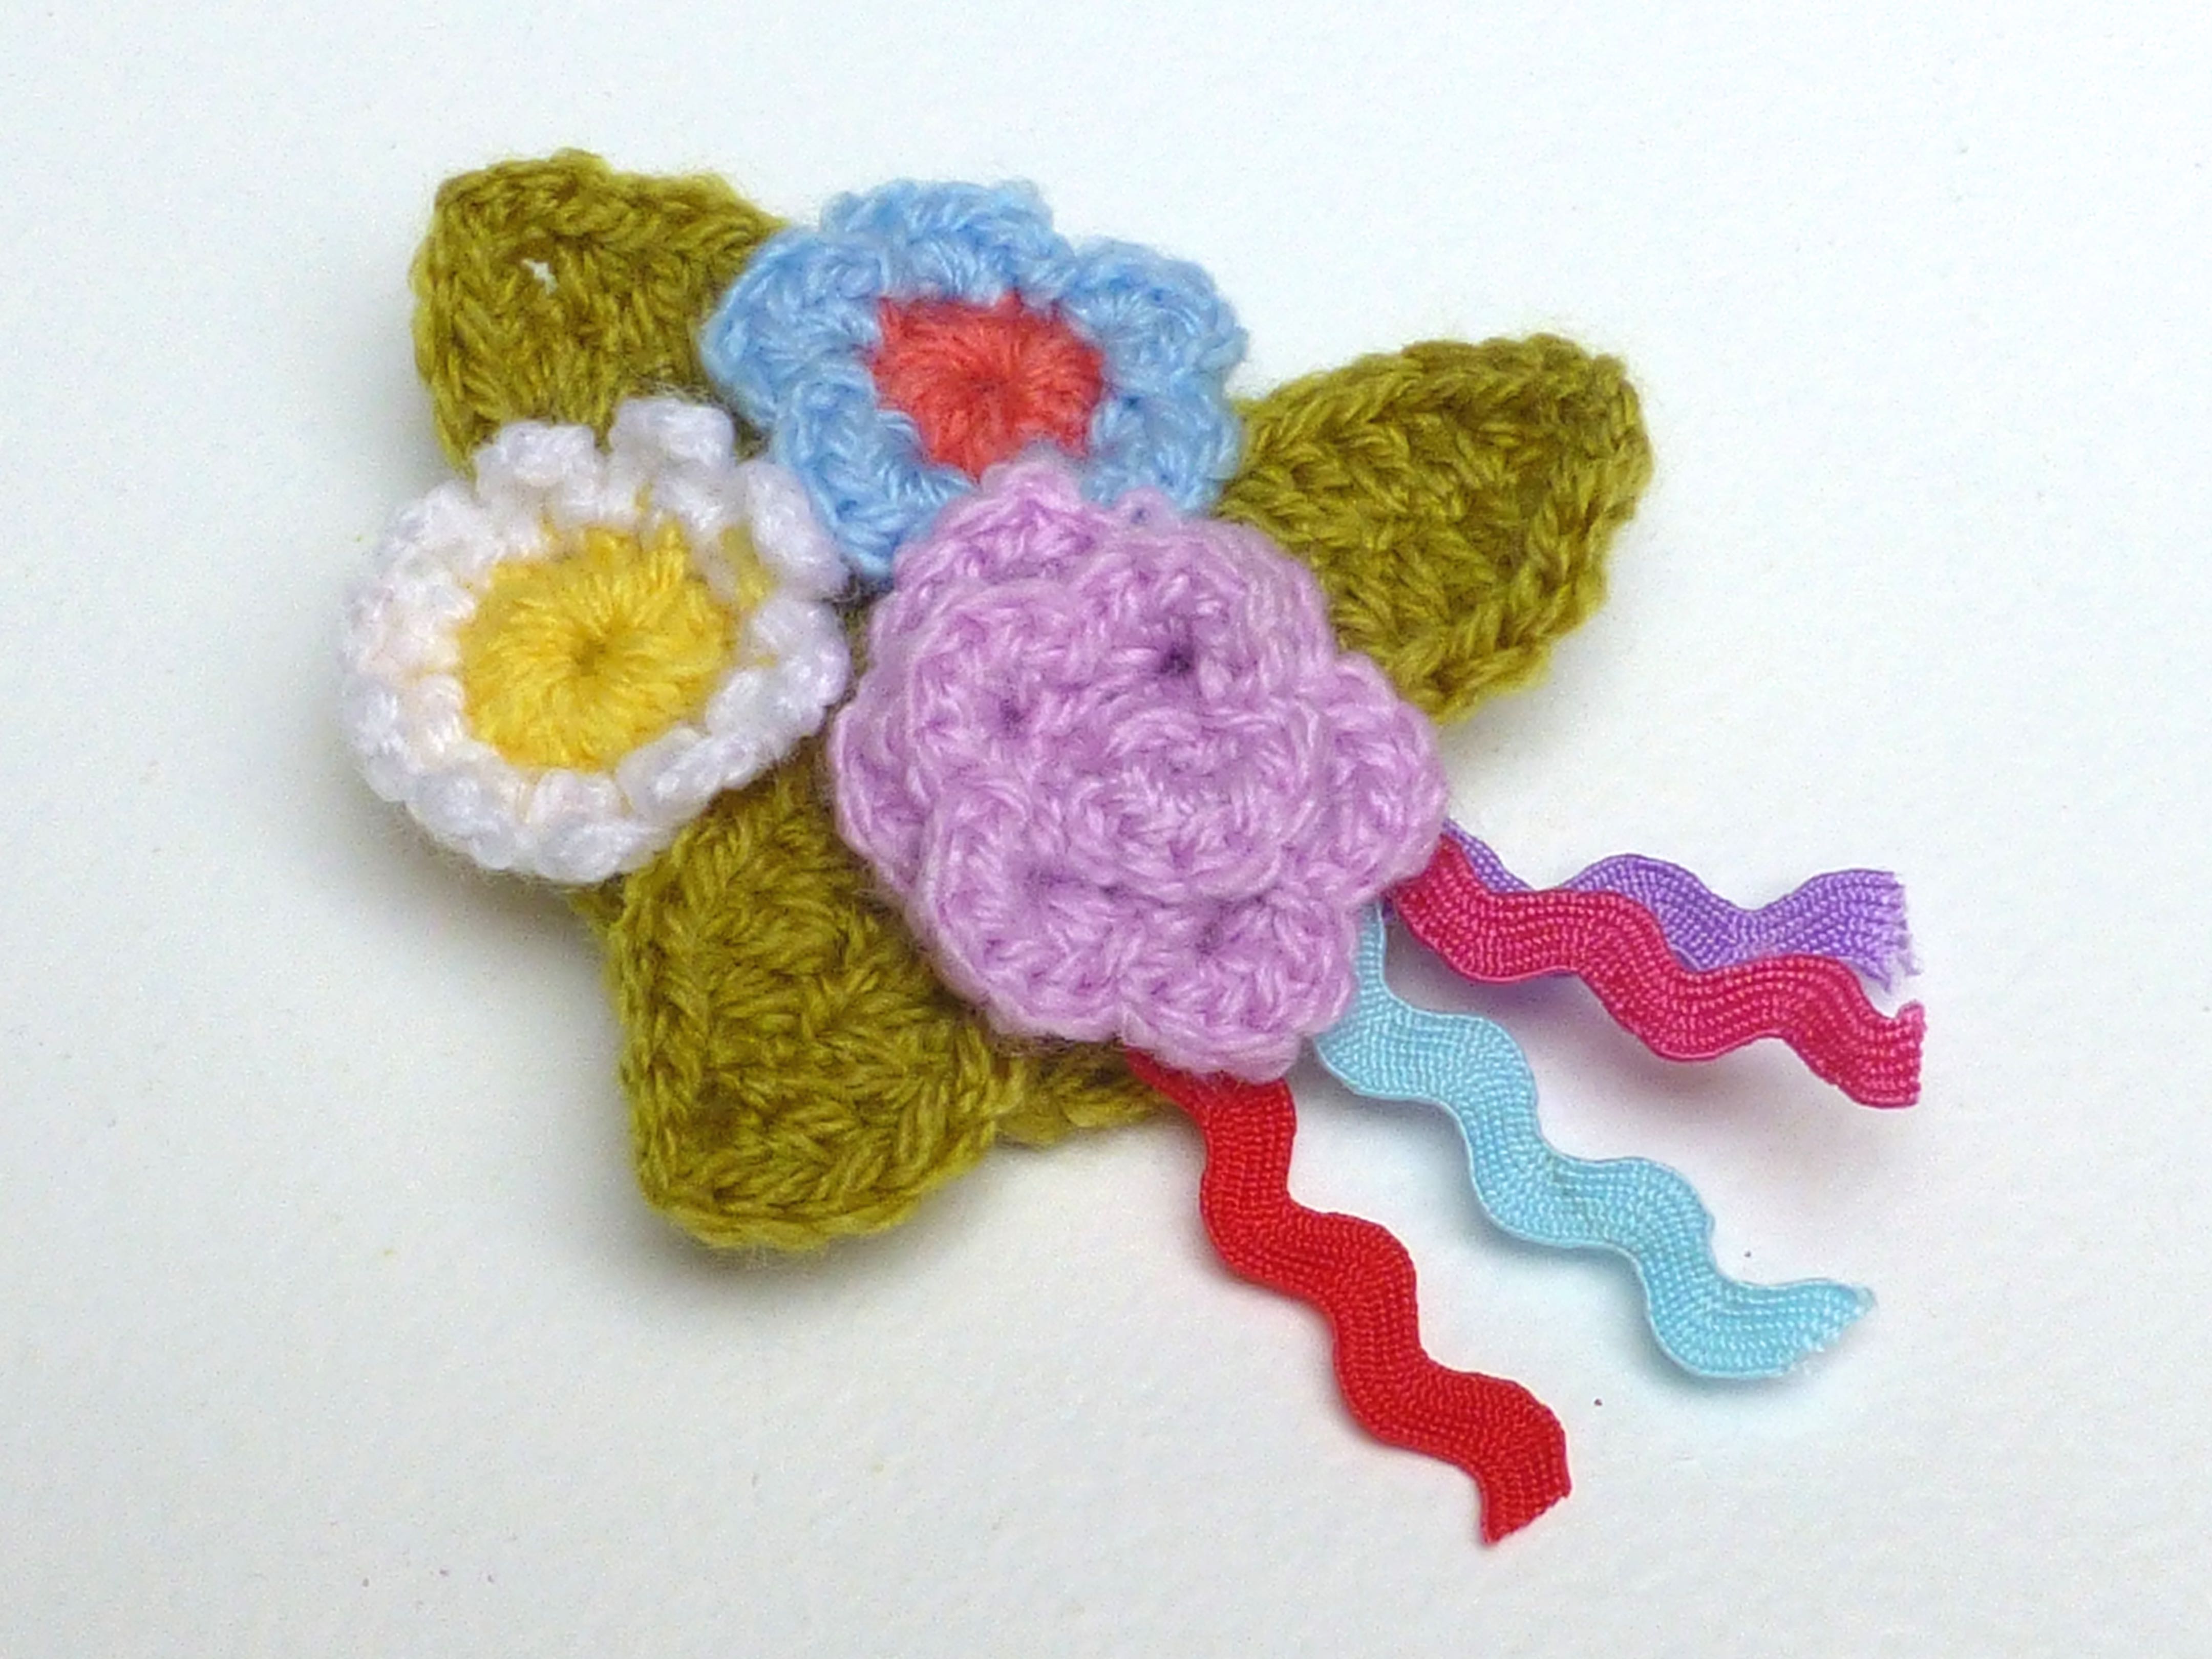
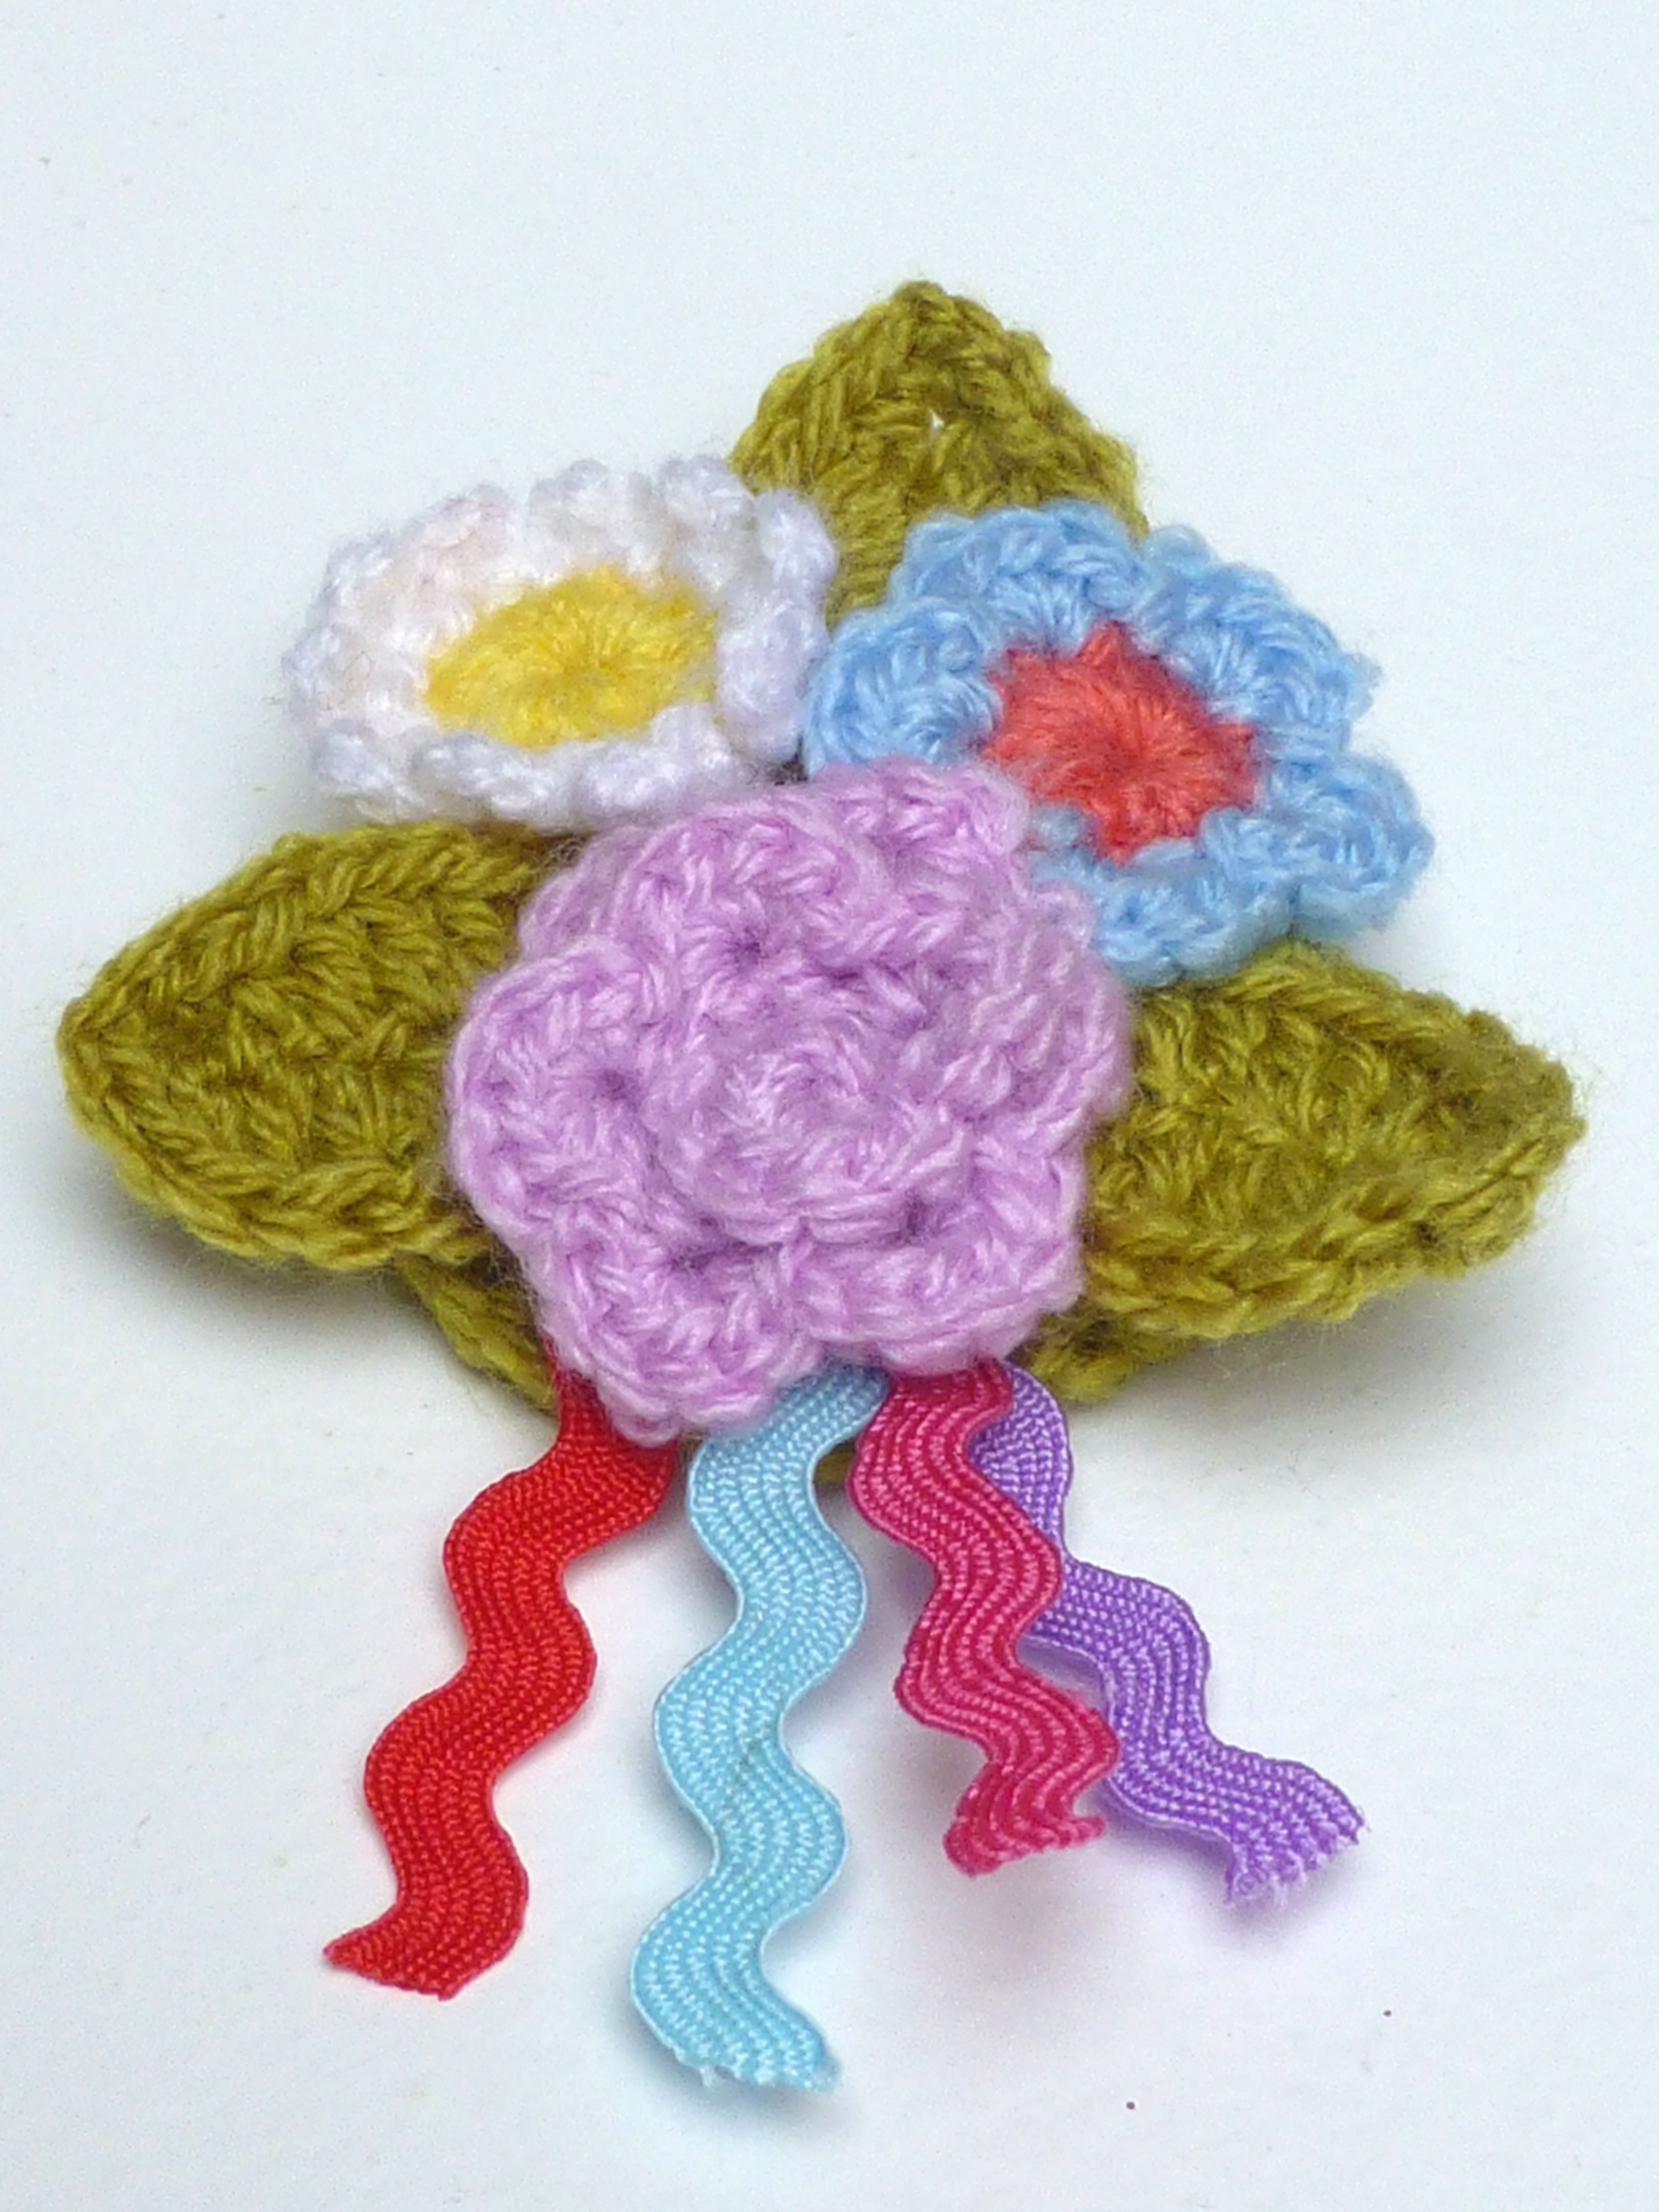
Attic 24’s Spring Posy Brooch
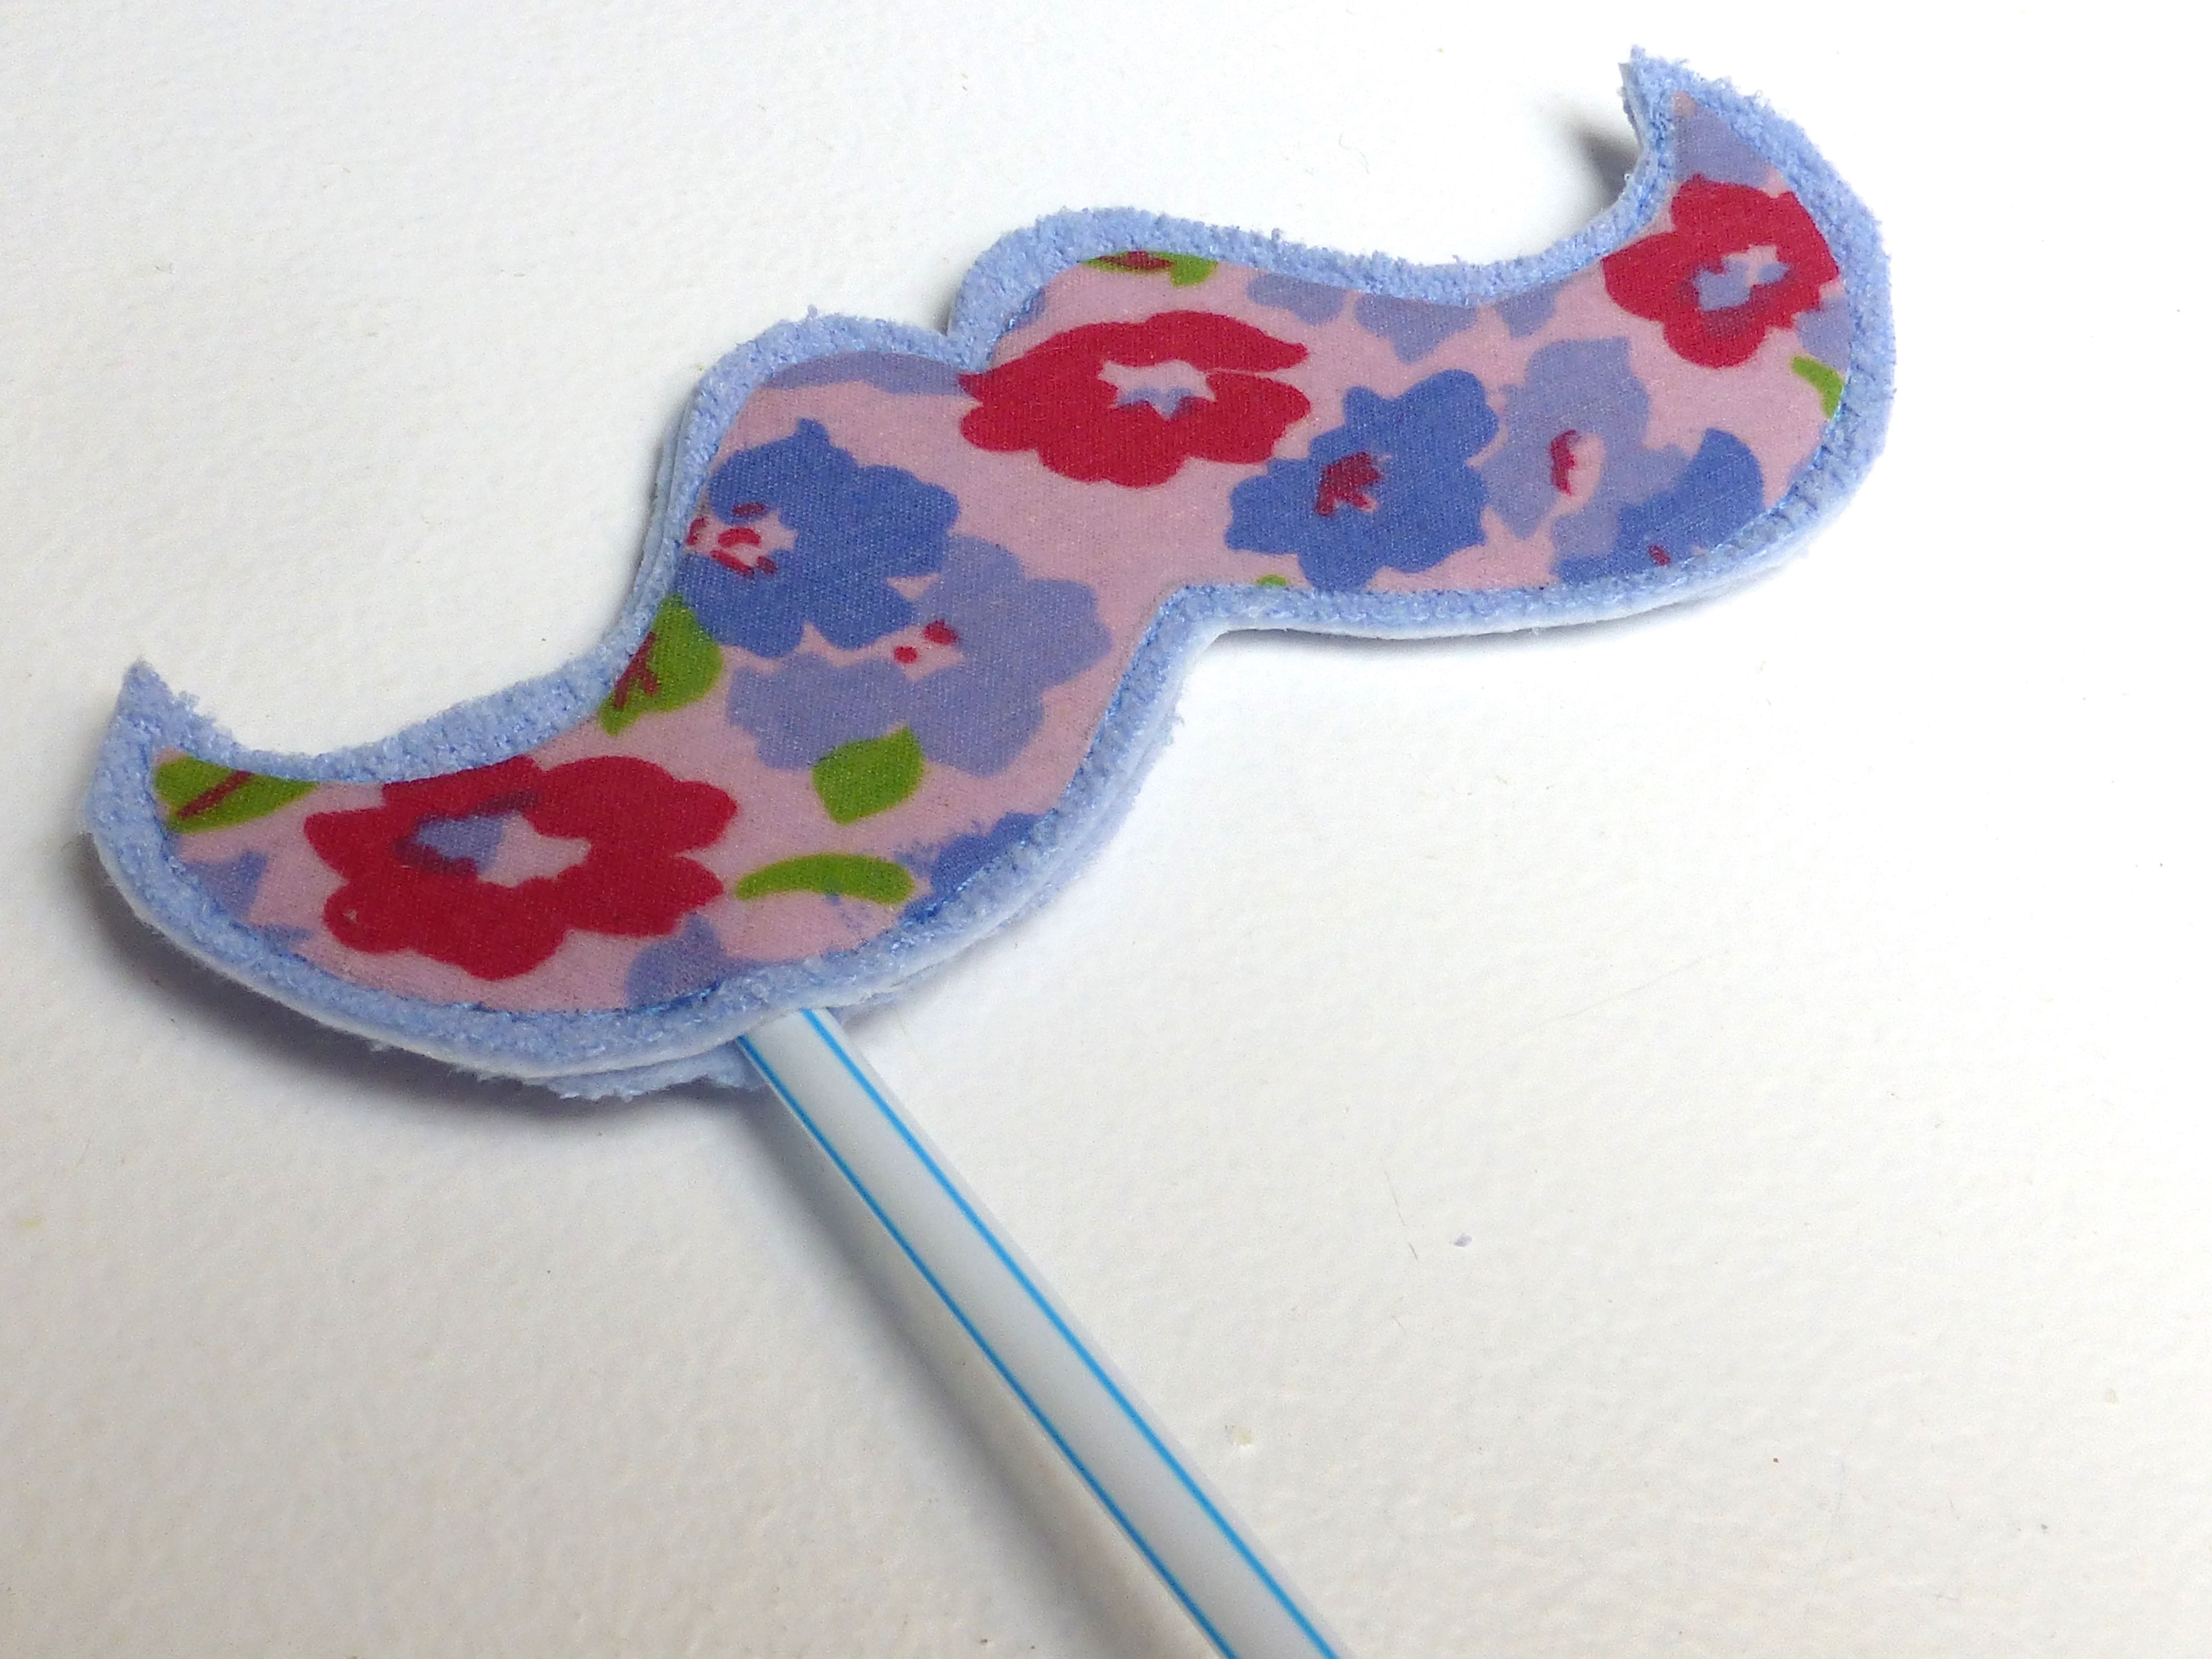
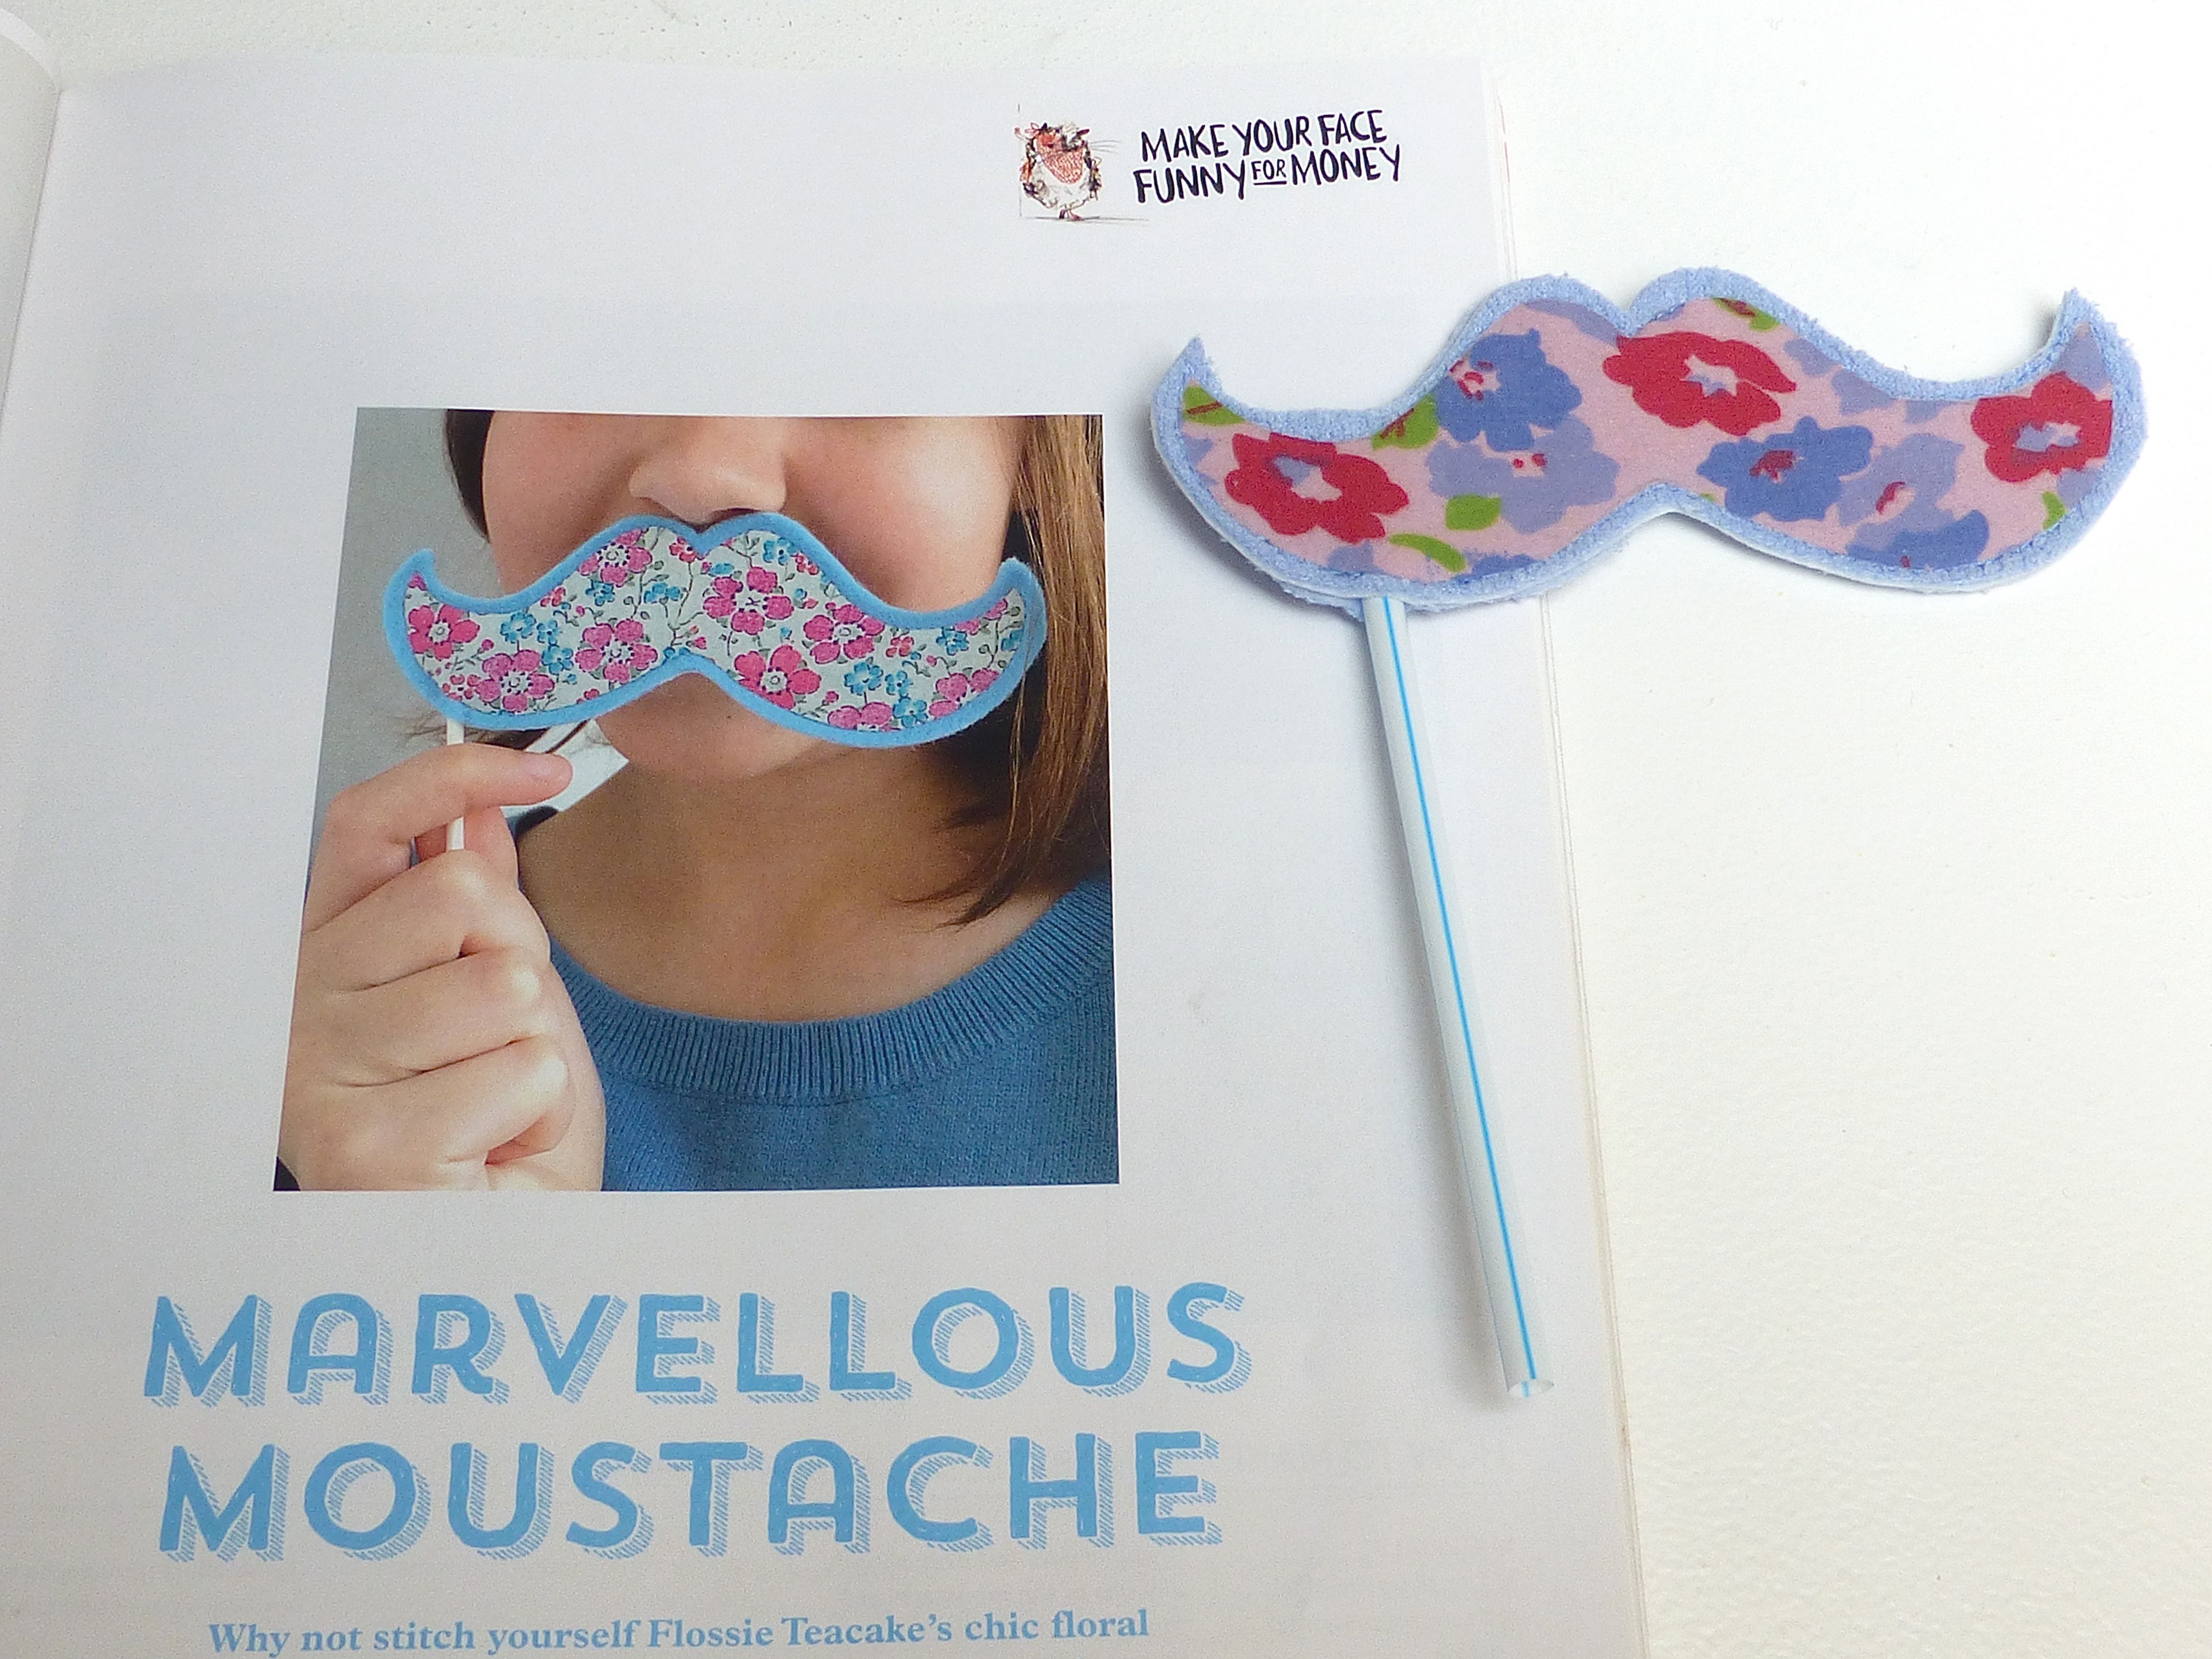
‘Make your face funny for money’ Moustache
Felt Cloud Mobile
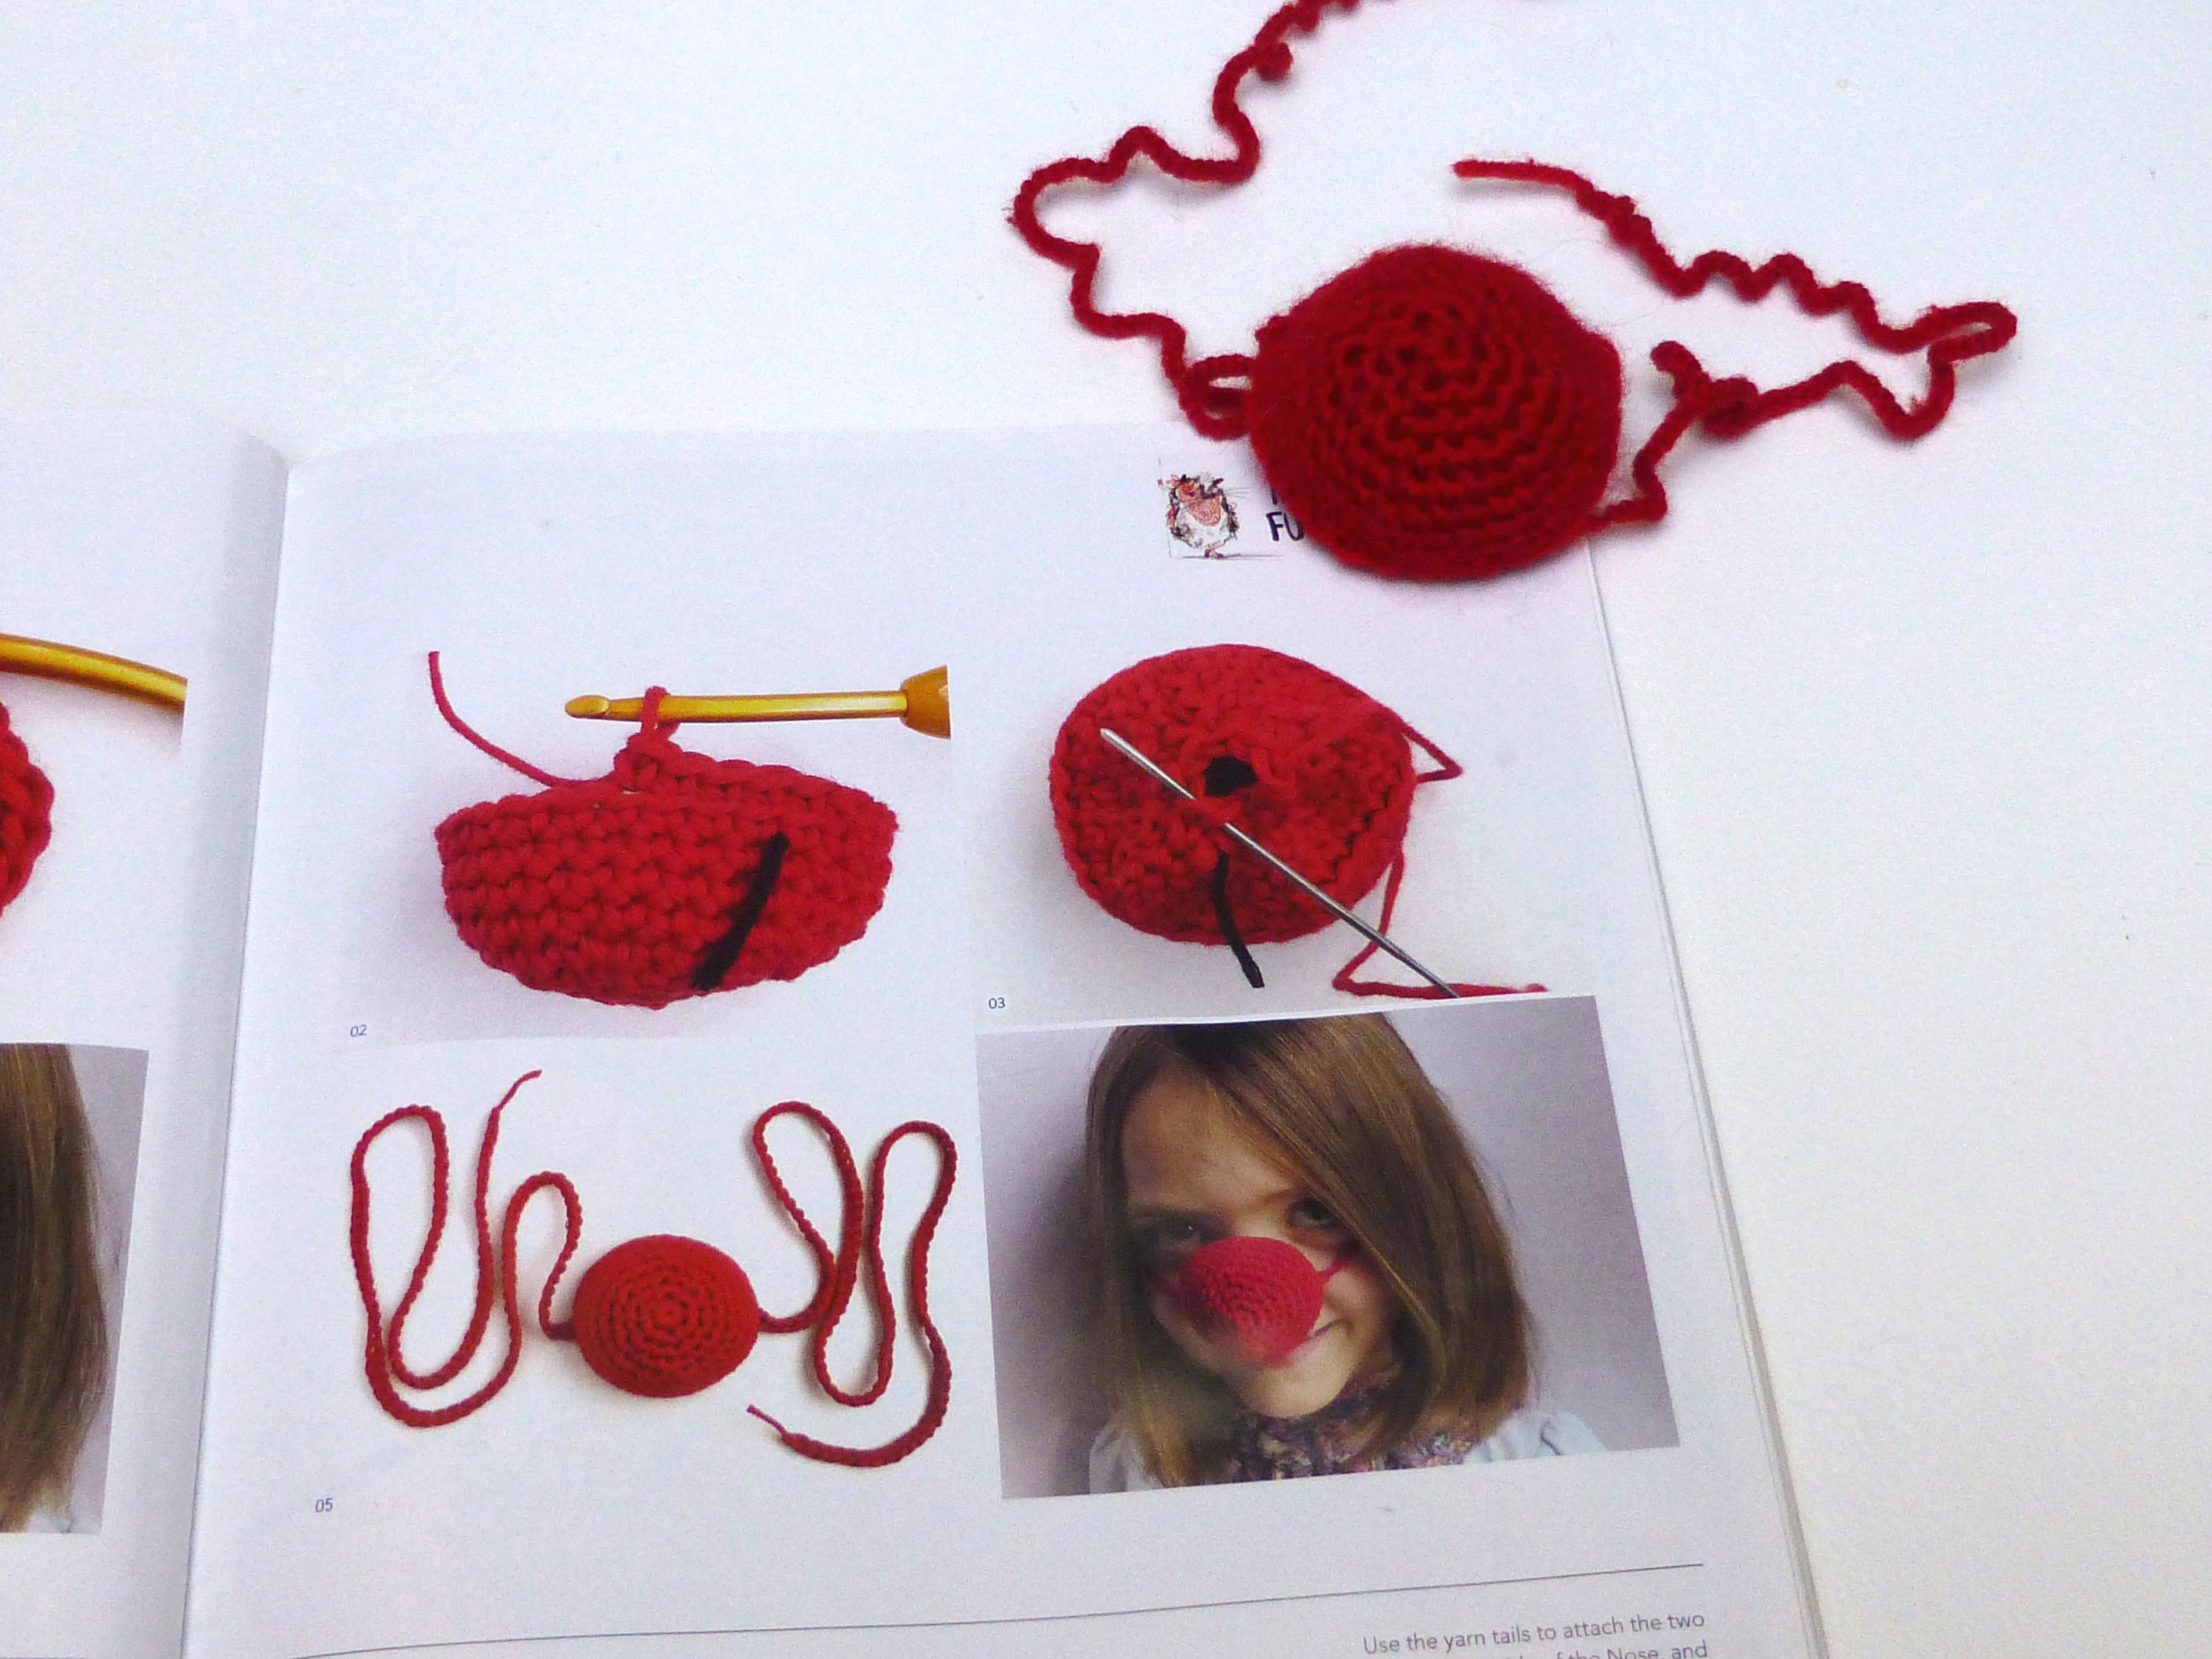
Crocheted Red Nose
Thanks again to EVERYONE for your brilliantness (definitely a word)!
Wow, what an afternoon, or should I say “Crafternoon”?
A houseful of lovely people busily crafting away to the tune of “Café Olé” on the stereo, fuelled by home-grown egg sandwiches, scones with jam and cream and Red Nose fairy cakes.
Oh, and gallons of Bucks Fizz:)
The dining table was laden with masses of fabric and supplies, together with printouts of the projects on offer.
The coffee table in the lounge housed yet more felt and yarn for what turned out to be a good variety of crafts for everyone to choose from.
Mr. H-L played Butler in his lunch break as he was working from home.
The felt chicks were very popular makes.
Two ladies made good headway with their Cloud mobiles and took them home to finish off.
A classic Red Nose at the start of its crochet journey…..
More cakes….
My daughter’s very first attempt at sewing….
….a cushion for her boyfriend to take on his fishing trips.
Didn’t she do well?!
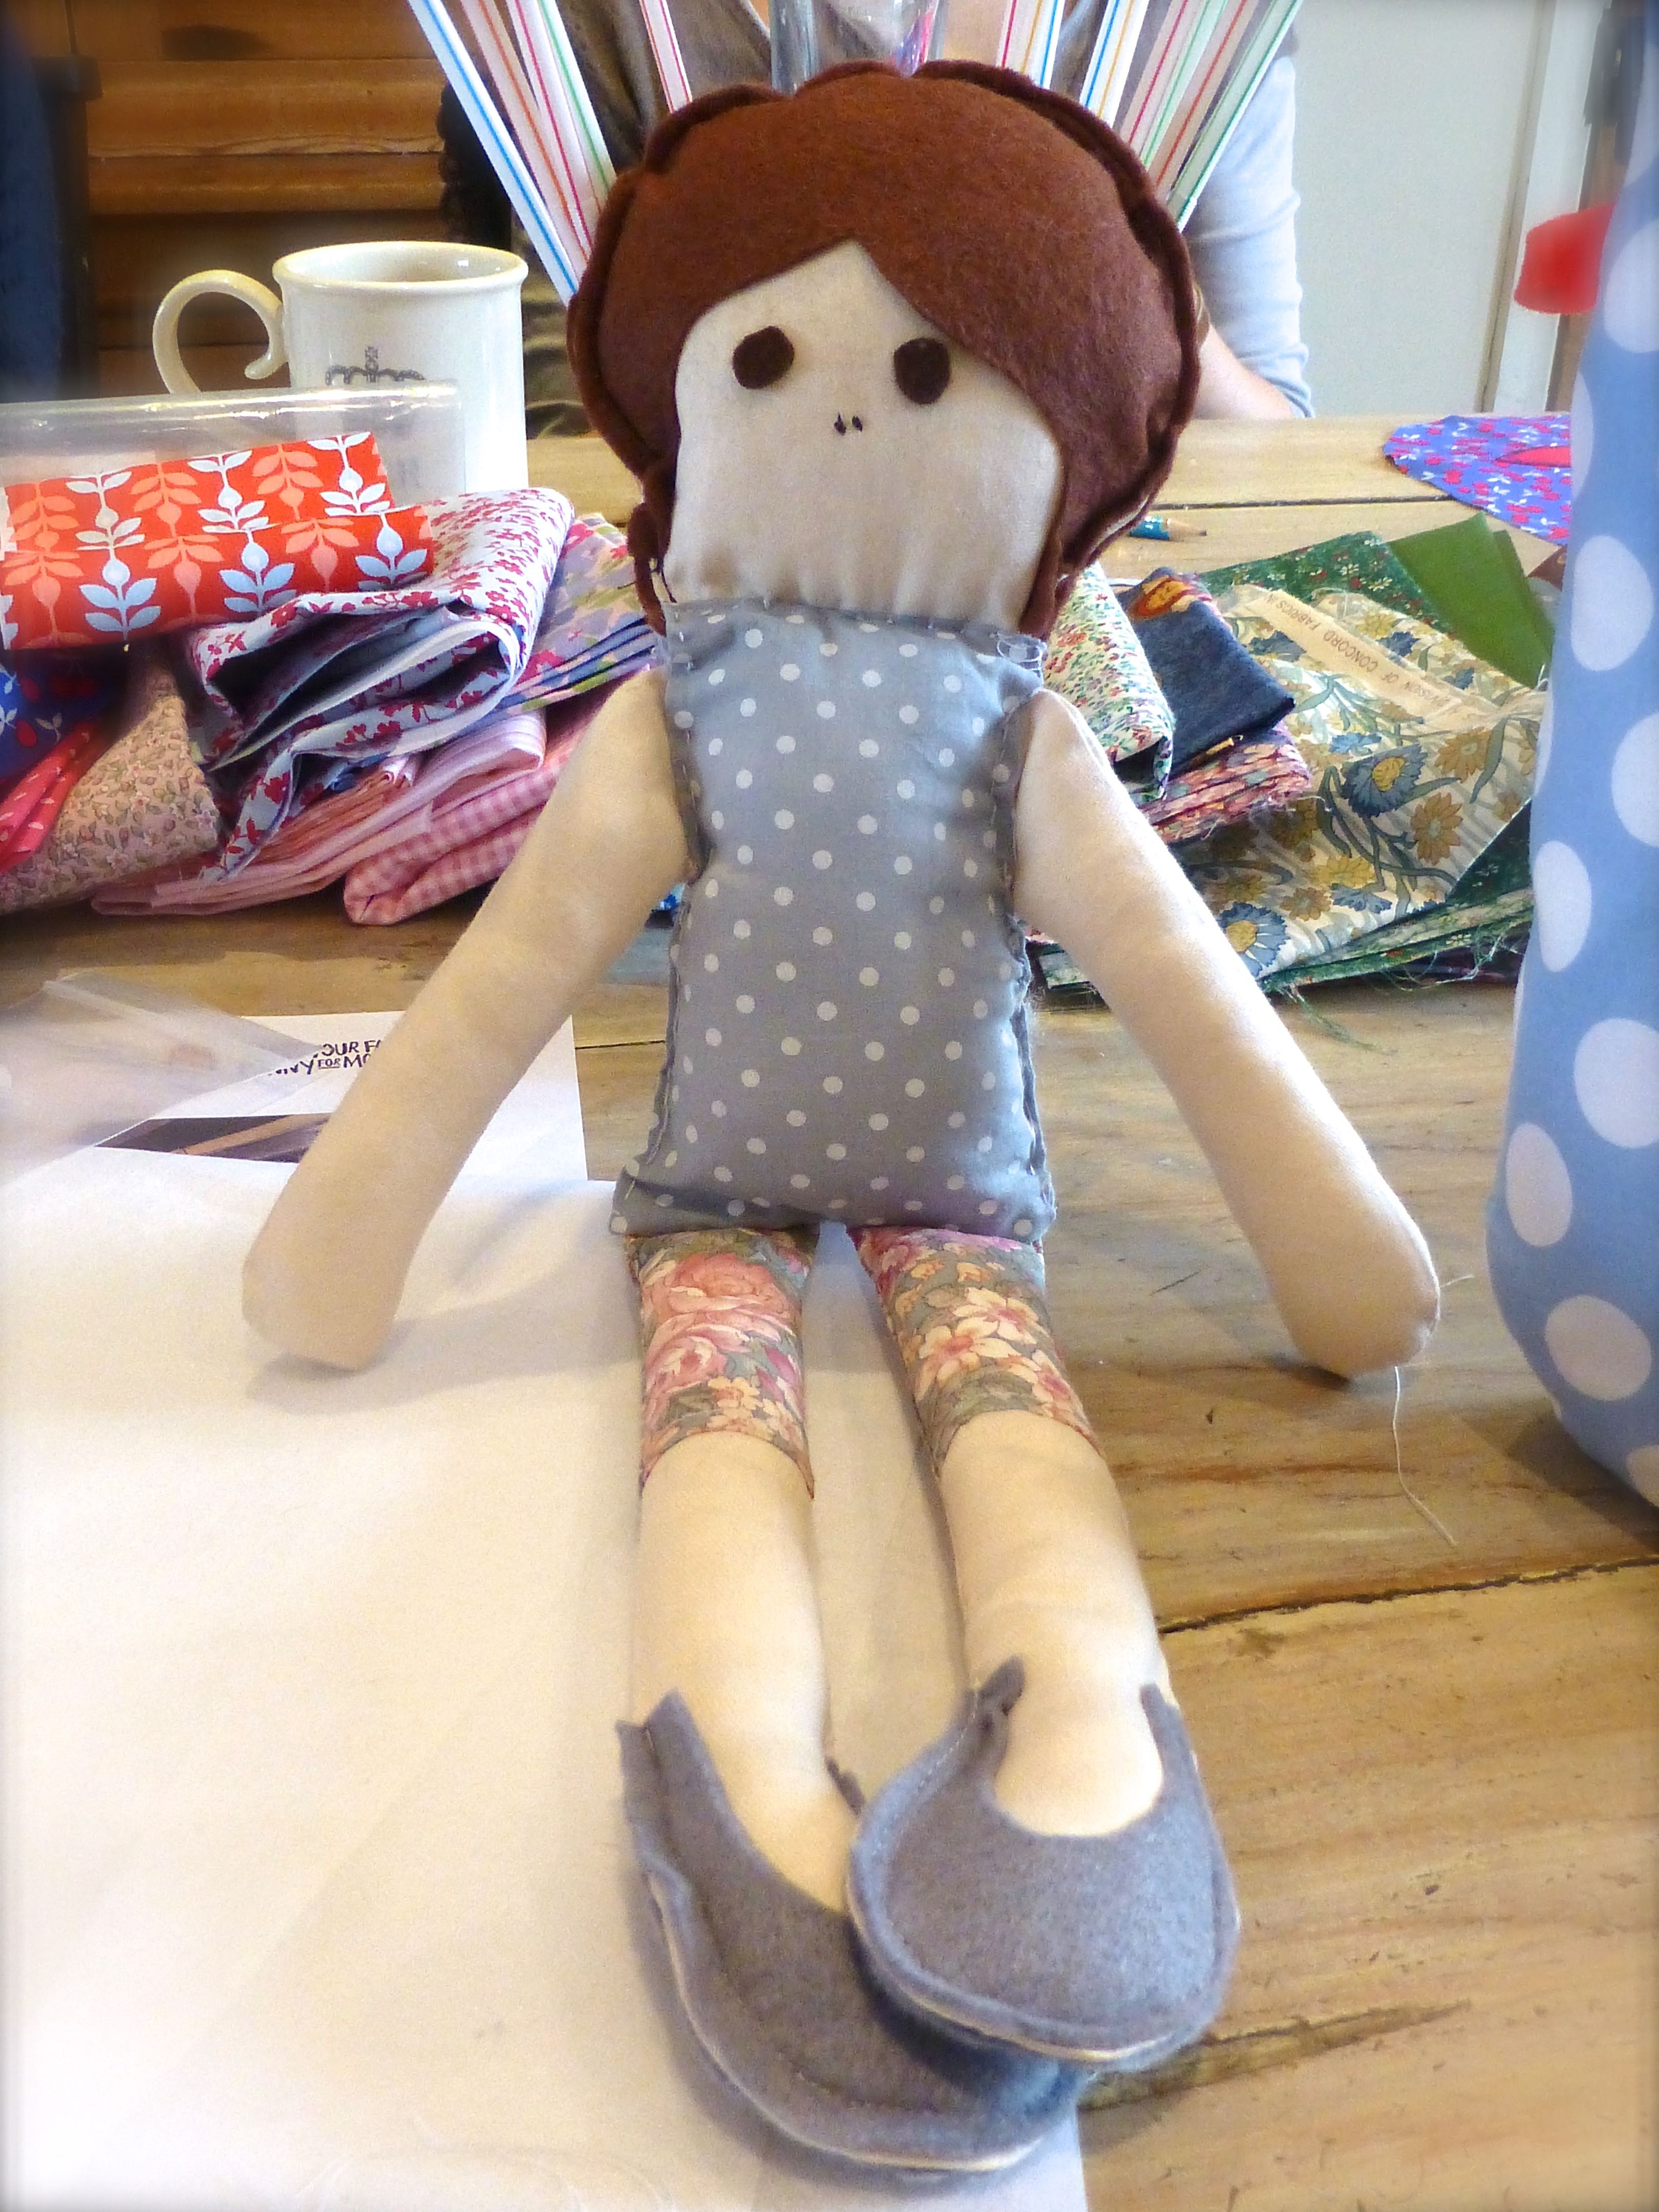
Mollie Makes’ own rag doll, Mollie, was lovingly crafted as a joint effort between a mother-daughter combo.
Just the eyelashes and mouth to add at close of play.
A Hen doorstop (as seen in an earlier blog post) reached the stuffing stage before the school run ended play.
I am assured photos of all finished off items will be winging their way to me in due course.
All in all, a very jolly and productive three hours was had by everyone…..
….and £265 raised so far with further pledges yet to be collected!
I would like to express HUGE thanks to Ali of Thimberlina, Kerri of Bristol Crochet and Sarah Holmes for their very generous donation of supplies for this event, without which such a great choice of materials would not have been available.
It’s just seven days until the Big Comic Relief Crafternoon on Friday 13th March – well, six days until I host mine because it’s my birthday on Friday and I will be otherwise engaged:)
If you saw my earlier post about the samples I have been making from the official Red Nose Day magazine, you will remember that I’ve been giving a number of the free patterns a test run, so to speak, to see which projects can be made in the three hours of my Crafternoon event. I will then set up individual areas with all the materials needed for each project, together with the instruction sheets, for everyone attending to help themselves to.
If you haven’t got your magazine yet, they are only available to buy in Sainsburys, nowhere else, and they are being snapped up extremely quickly so get a move on!
£5.00 out of the cover price of £7.99 goes straight to Comic Relief which is fantastic. Comic Relief get your donation and you get something for your money – a fab “Mollie Makes” Red Nose Day Special magazine with a load of fab projects for you to make.
So, onto the latest additions to the party!
Well, I had to crochet the red nose, didn’t I?
I loved making this Cloud Mobile – all hand stitched in less than three hours!
I think this is my favourite make though…..
….a Pear Pin Cushion!
And when Ali (AKA Thimberlina) revealed her makeshift excuse for a pin cushion (sorry Ali!), I had the perfect reason to make the matching Apple shaped one. I snapped a couple of quick photos and sent it off that same afternoon.
I love the attention to detail that has gone into this particular design, especially the two pieces of contrasting felt rolled together to make the stem. Although this part was completely omitted from the instructions, it was easy enough to work out how it was done.
Ali has very generously sent me a bundle of supplies for my Crafternoon so it was lovely to be able to make her a little something off her wish list as a thank you. Just look at everything she donated!
I still have room for a few more, so if you’re free next Thursday 12th March between 12pm and 3pm, please, PLEASE try to come along. I’d love to get a full house so that I can send off the maximum amount of money to Comic Relief.
I’m also thinking of either auctioning off all the bits I’ve made, or raffle them on the day so bring an extra couple of pounds – it’s for such a good cause!!
With four weeks to go before Comic Relief’s Big Crafternoon, I have been busy.
Busy making up samples of some of the things that will be available to make on the day, all of which feature in the Mollie Makes Red Nose Day special magazine, and I thought that people would probably like to see and feel examples of what the finished articles are like.
I’m planning on having a dedicated crafting table for each of the items that can be made, so that all the materials for each project are to hand and won’t get mixed up with materials needed for any of the other crafts.
Each area will have a copy of the magazine open at the relevant pages, a selection of fabrics/yarn from which to choose, together with all the sundry items required to complete their chosen item.
I’ve manged to source most of the sundry bits and pieces that will be needed, but NOT round lolly sticks – so I’ve substituted with a straw instead which works perfectly well!
For those of you who have been following my blog, you will remember the “Sew Retro” bag I recently designed for storing all those WIPs, large and small. You can read about how these came about here and here.
Well, I’m thrilled to announce that this pattern is now available to buy from my Folksy Shop!
For just £4.99 the pattern is in PDF format with printable instructions for two sizes, perfect for every work in progress from small knitting projects through to the largest quilts.
The pattern has clear step-by-step instructions and is accompanied by full colour photographs throughout.
Lucie from Love, Lucie agreed to test the pattern for me before it was made available for purchase to check that it the instructions were clear and easy to follow.
She tested the pattern by making the smaller bag following the steps exactly – if you would like to see her review follow this link.
This is Lucie’s finished bag – didn’t she do a fantastic job?
I was nervous that Lucie would feel under pressure to write nice things but, after seeing how much she really enjoyed making the sewing bag, I am pleased to say that she likes it so much that she is already planning to make more for herself in the form of beach bags!
You can’t get a more positive review than that, can you?
Previously Boys and Chickens, I have created a new blog to share my sewing adventure as 2018 is they year I plan to teach myself to sew! There will also be bits of crochet and cooking too.
My challenge: One year - I will not buy clothes - I will upcycle to make what I need - everything from underwear to evening wear! Join me for tips, exclusive BrawHem makes, and inevitably some hilarious disasters...