We were invited to No.1 Son’s girlfriend’s parent’s house (are you with me?) at the weekend, for a barbeque.
It was his girlfriend’s mother’s birthday (keep up!) so we wanted to take a suitable present, but there was a tiny problem – we’d never met, so I had no idea what she would like.
Obviously I was going to make a gift and, after a little indecision, settled on a purse (wallet, for our U.S. friends) and a matching tote.
I had some leftover vinyl from the One Hour Ikea Bag and searched through my (massive) stash before whittling it down to these grey and pink coordinating cottons, using just the dotty ones in the end.
The tutorial is pretty comprehensive and soon I had put the main pieces together.
After sewing the outside to the inside, it was simply a matter of turning through to the right side and top stitching.
Et voilá – one (very pretty) vinyl purse!
I chose to fit a magnetic snap closure simply because I’ve got loads of them and they really do give the best finish.
The inside is a purse of two halves – one side is pink, the other is grey.
The grey side holds all the real money.
Coins are kept safe in the zipped pocket….
….which is lined with the contrasting pink.
Notes are stashed in the open pocket below.
The pink side houses the ‘pretend’ money and can accommodate up to eight credit cards or similar.
Just in case there was any doubt I included a label from Hobbycraft.
I whipped up a simple tote using the same principle as the One Hour Ikea Bag but with dimensions and handles more suited to a shopper.
Box corners makes for a more spacious interior.
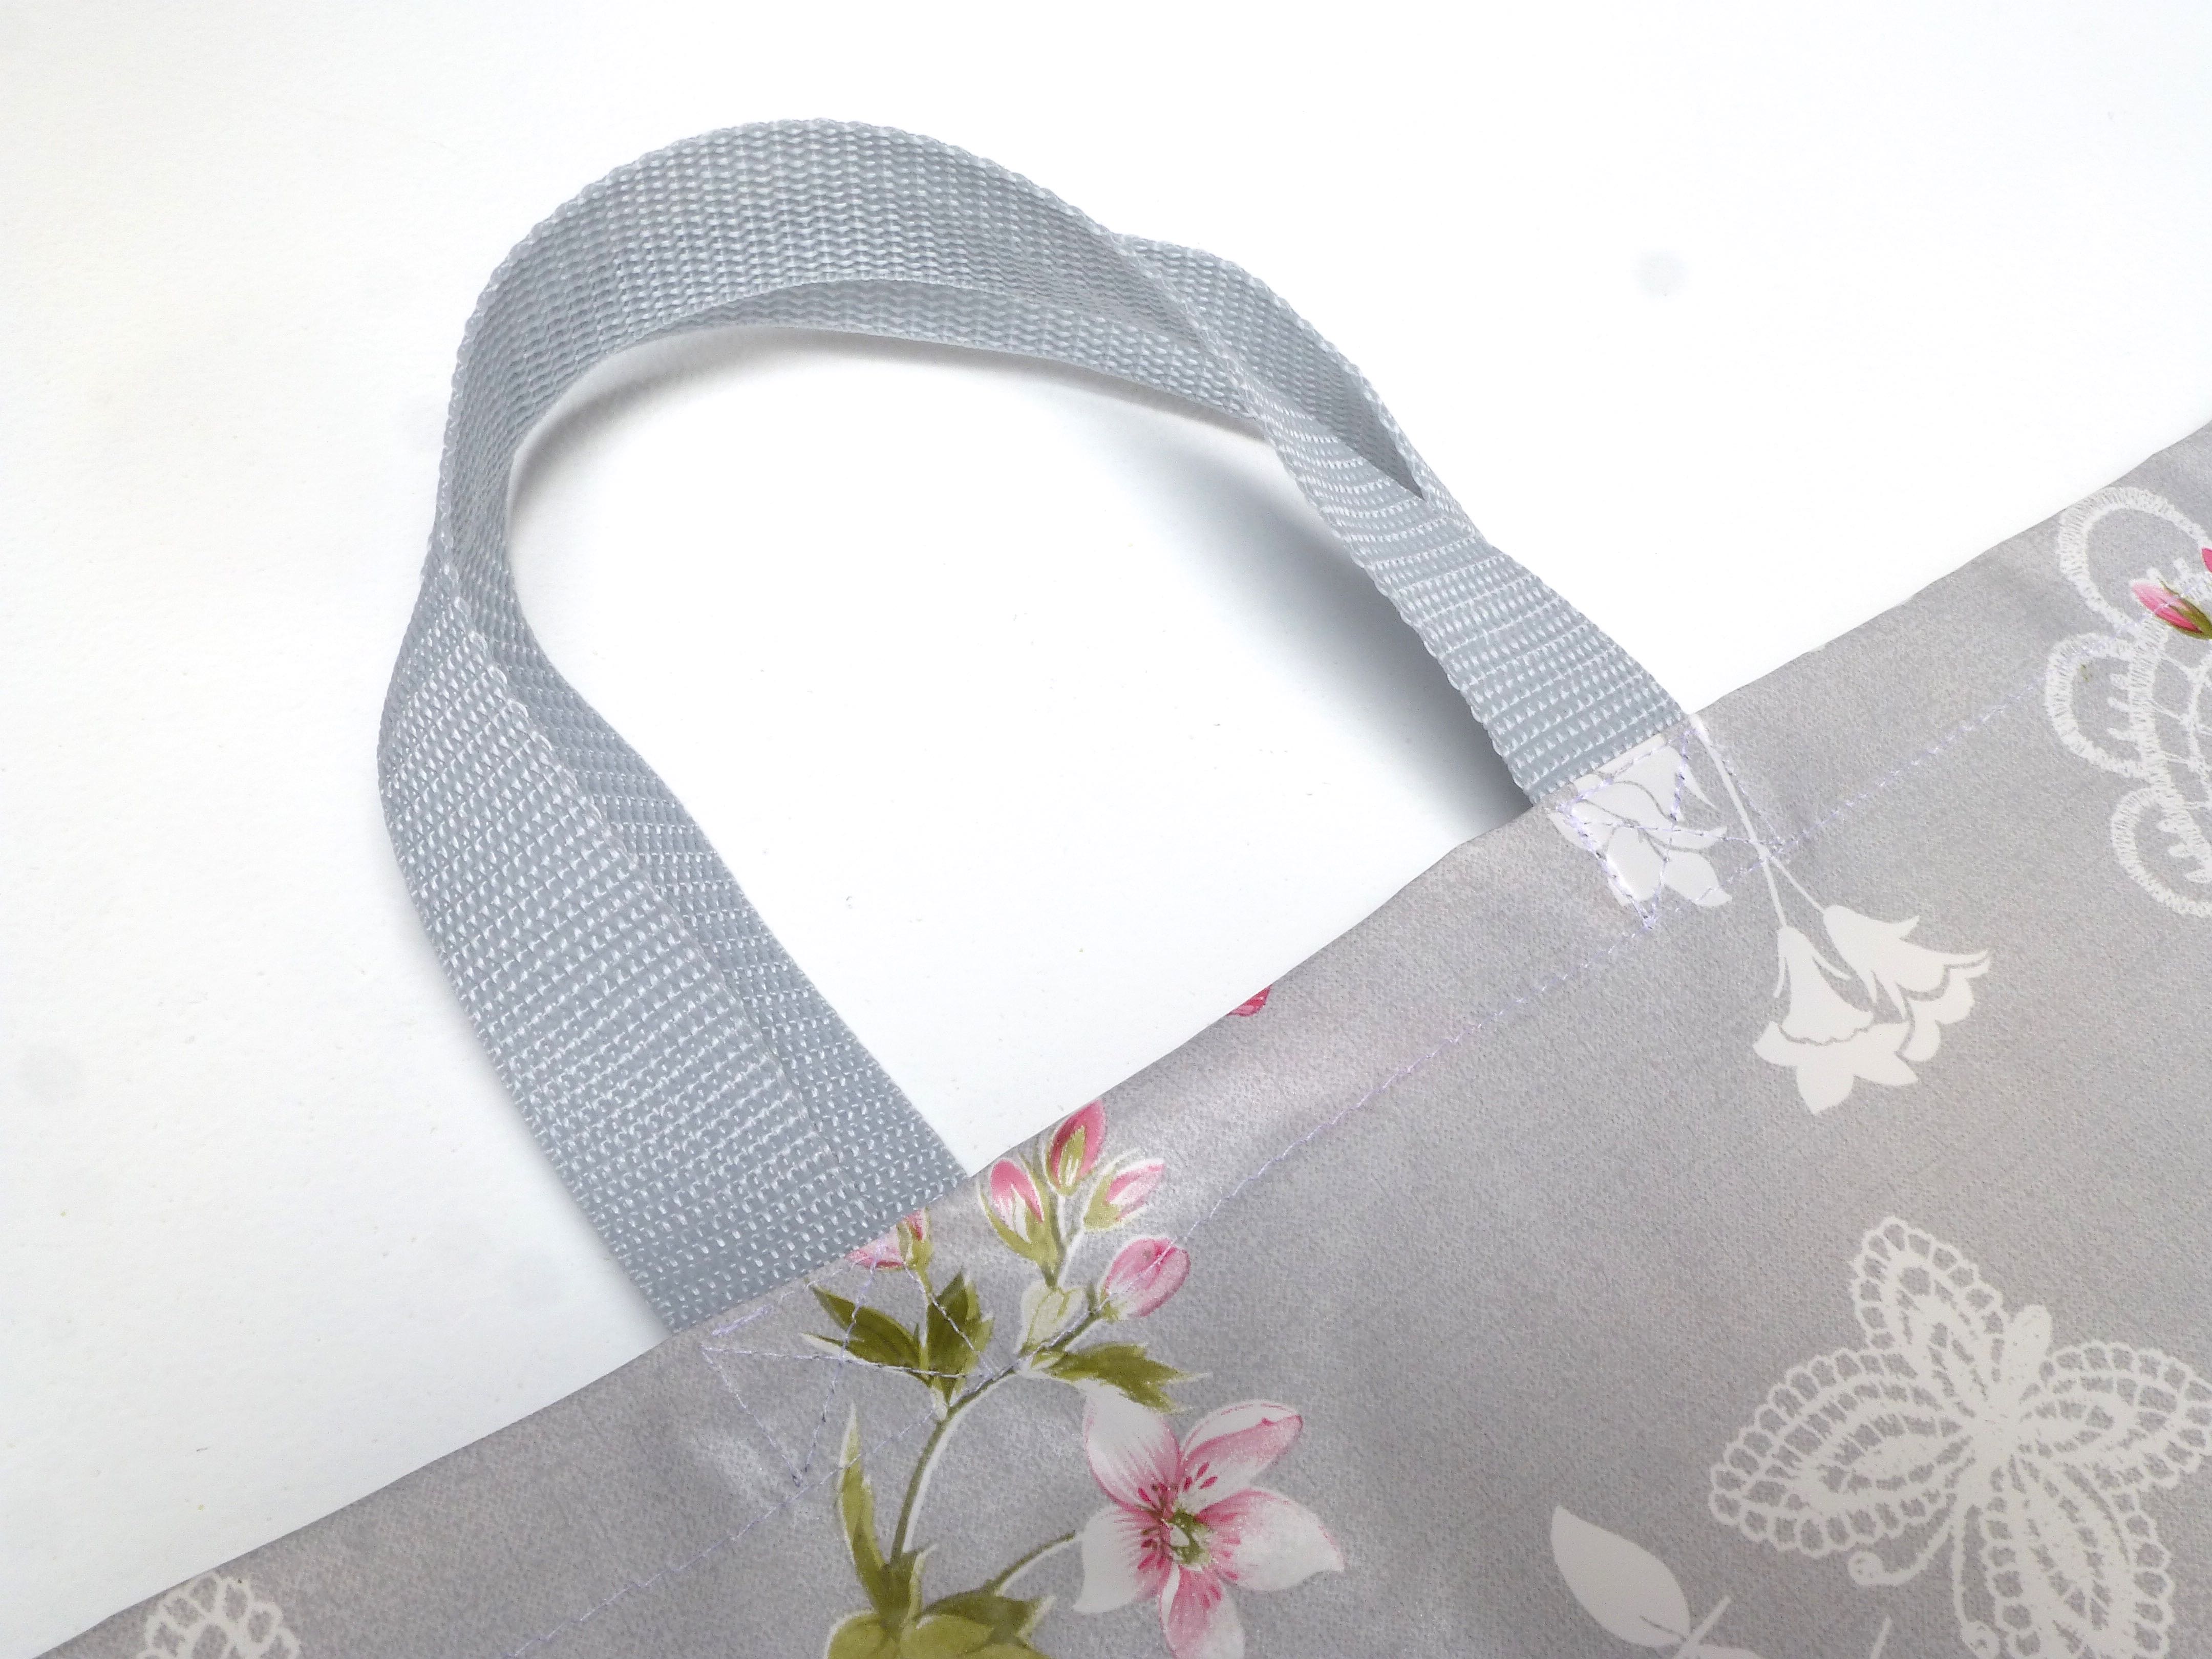
Matching grey webbing is perfect for two short handles.
I think they make quite a smart set for nipping down to the corner shop for a loaf of bread and a pint of milk. (In my dreams. We don’t have a shop in our village.)
All wrapped up and ready to go – complete with handmade birthday card!
Update: The handmade purse (wallet) and matching shopper was a huge success fortunately – she loved it!
For me, it’s day trips to the coast, balmy evenings sat outdoors until after sundown, weekend breakfasts in the garden, outdoor concerts in the grounds of old ruins……in short – being outside.
And being outside is made all the more perfect if you take that most quintessentially English thing with you – a picnic. Dressed down with sandwiches and a flask of tea at the seaside, or glammed up with champagne and a candelabra for a classical concert, everyone loves a picnic, with a soft, warm, waterproof picnic blanket to relax on in comfort…….
……except we haven’t got one.
Well, we didn’t have until recently when I decided to take advantage of being part of the Minerva Crafts Blogger Network and make one.
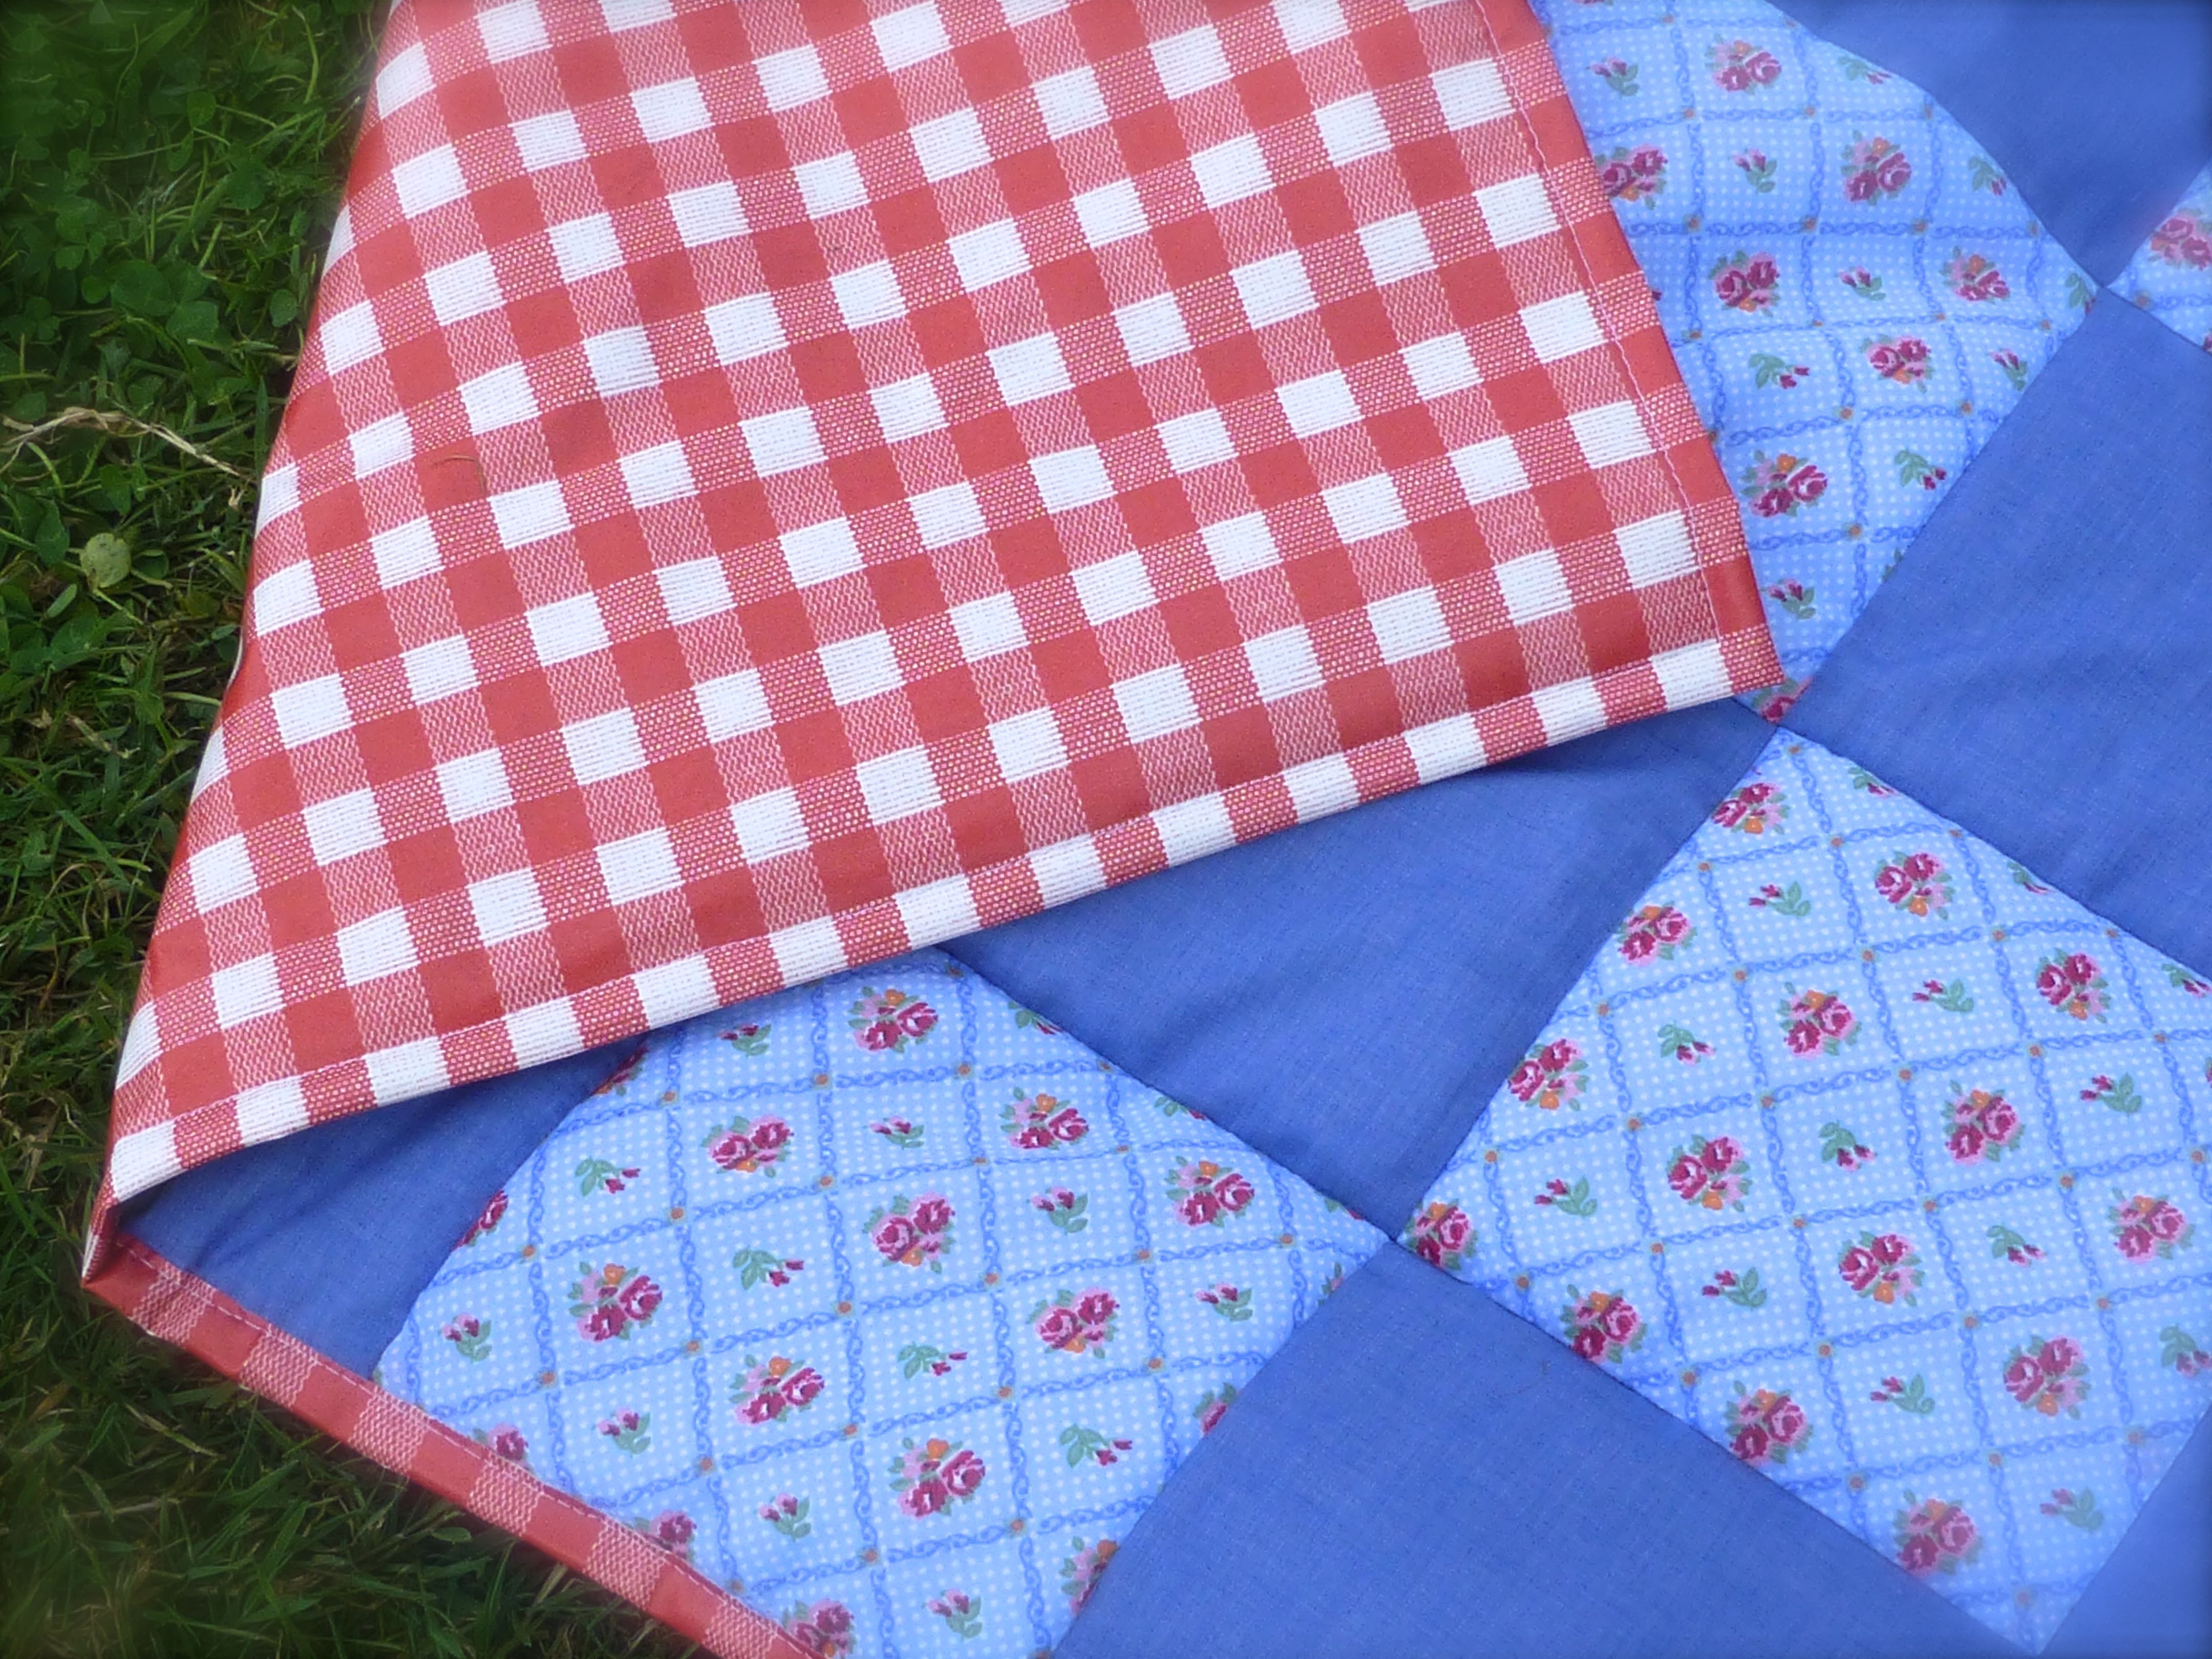
I didn’t want to make just any old picnic blanket, oh no, I wanted the ‘deluxe’ version, something a bit special, so decided to make a patchwork blanket with a waterproof backing and a carry handle. As there are four boys in the house (if you include Mr H-L), anything too pink and girly was out of the question, but I thought I could get away with a small floral print if the main colour was blue.
My Olfa Quiltmaking Kit came with this mat, rotary cutter and 6.5″ square ruler, so I kept things simple by cutting the patchwork squares the same size as the ruler.
Cutting through folded fabric made short work of all those squares as I could cut through four layers at a time – using a rotary cutter and the quilting ruler ensured that they were accurately cut, which is essential in patchwork.
In no time at all I had two piles of neatly stacked patchwork squares, 36 of the floral and 45 of the plain making 81 in total.
The easiest way to keep accurate seam allowances is to line up the edge of the fabric with the edge of the machine foot, the needle in the central position. On my machine, that means a seam allowance of 1cm throughout.
Whilst it may sound obvious, there is a quick way to whizz through all those squares.
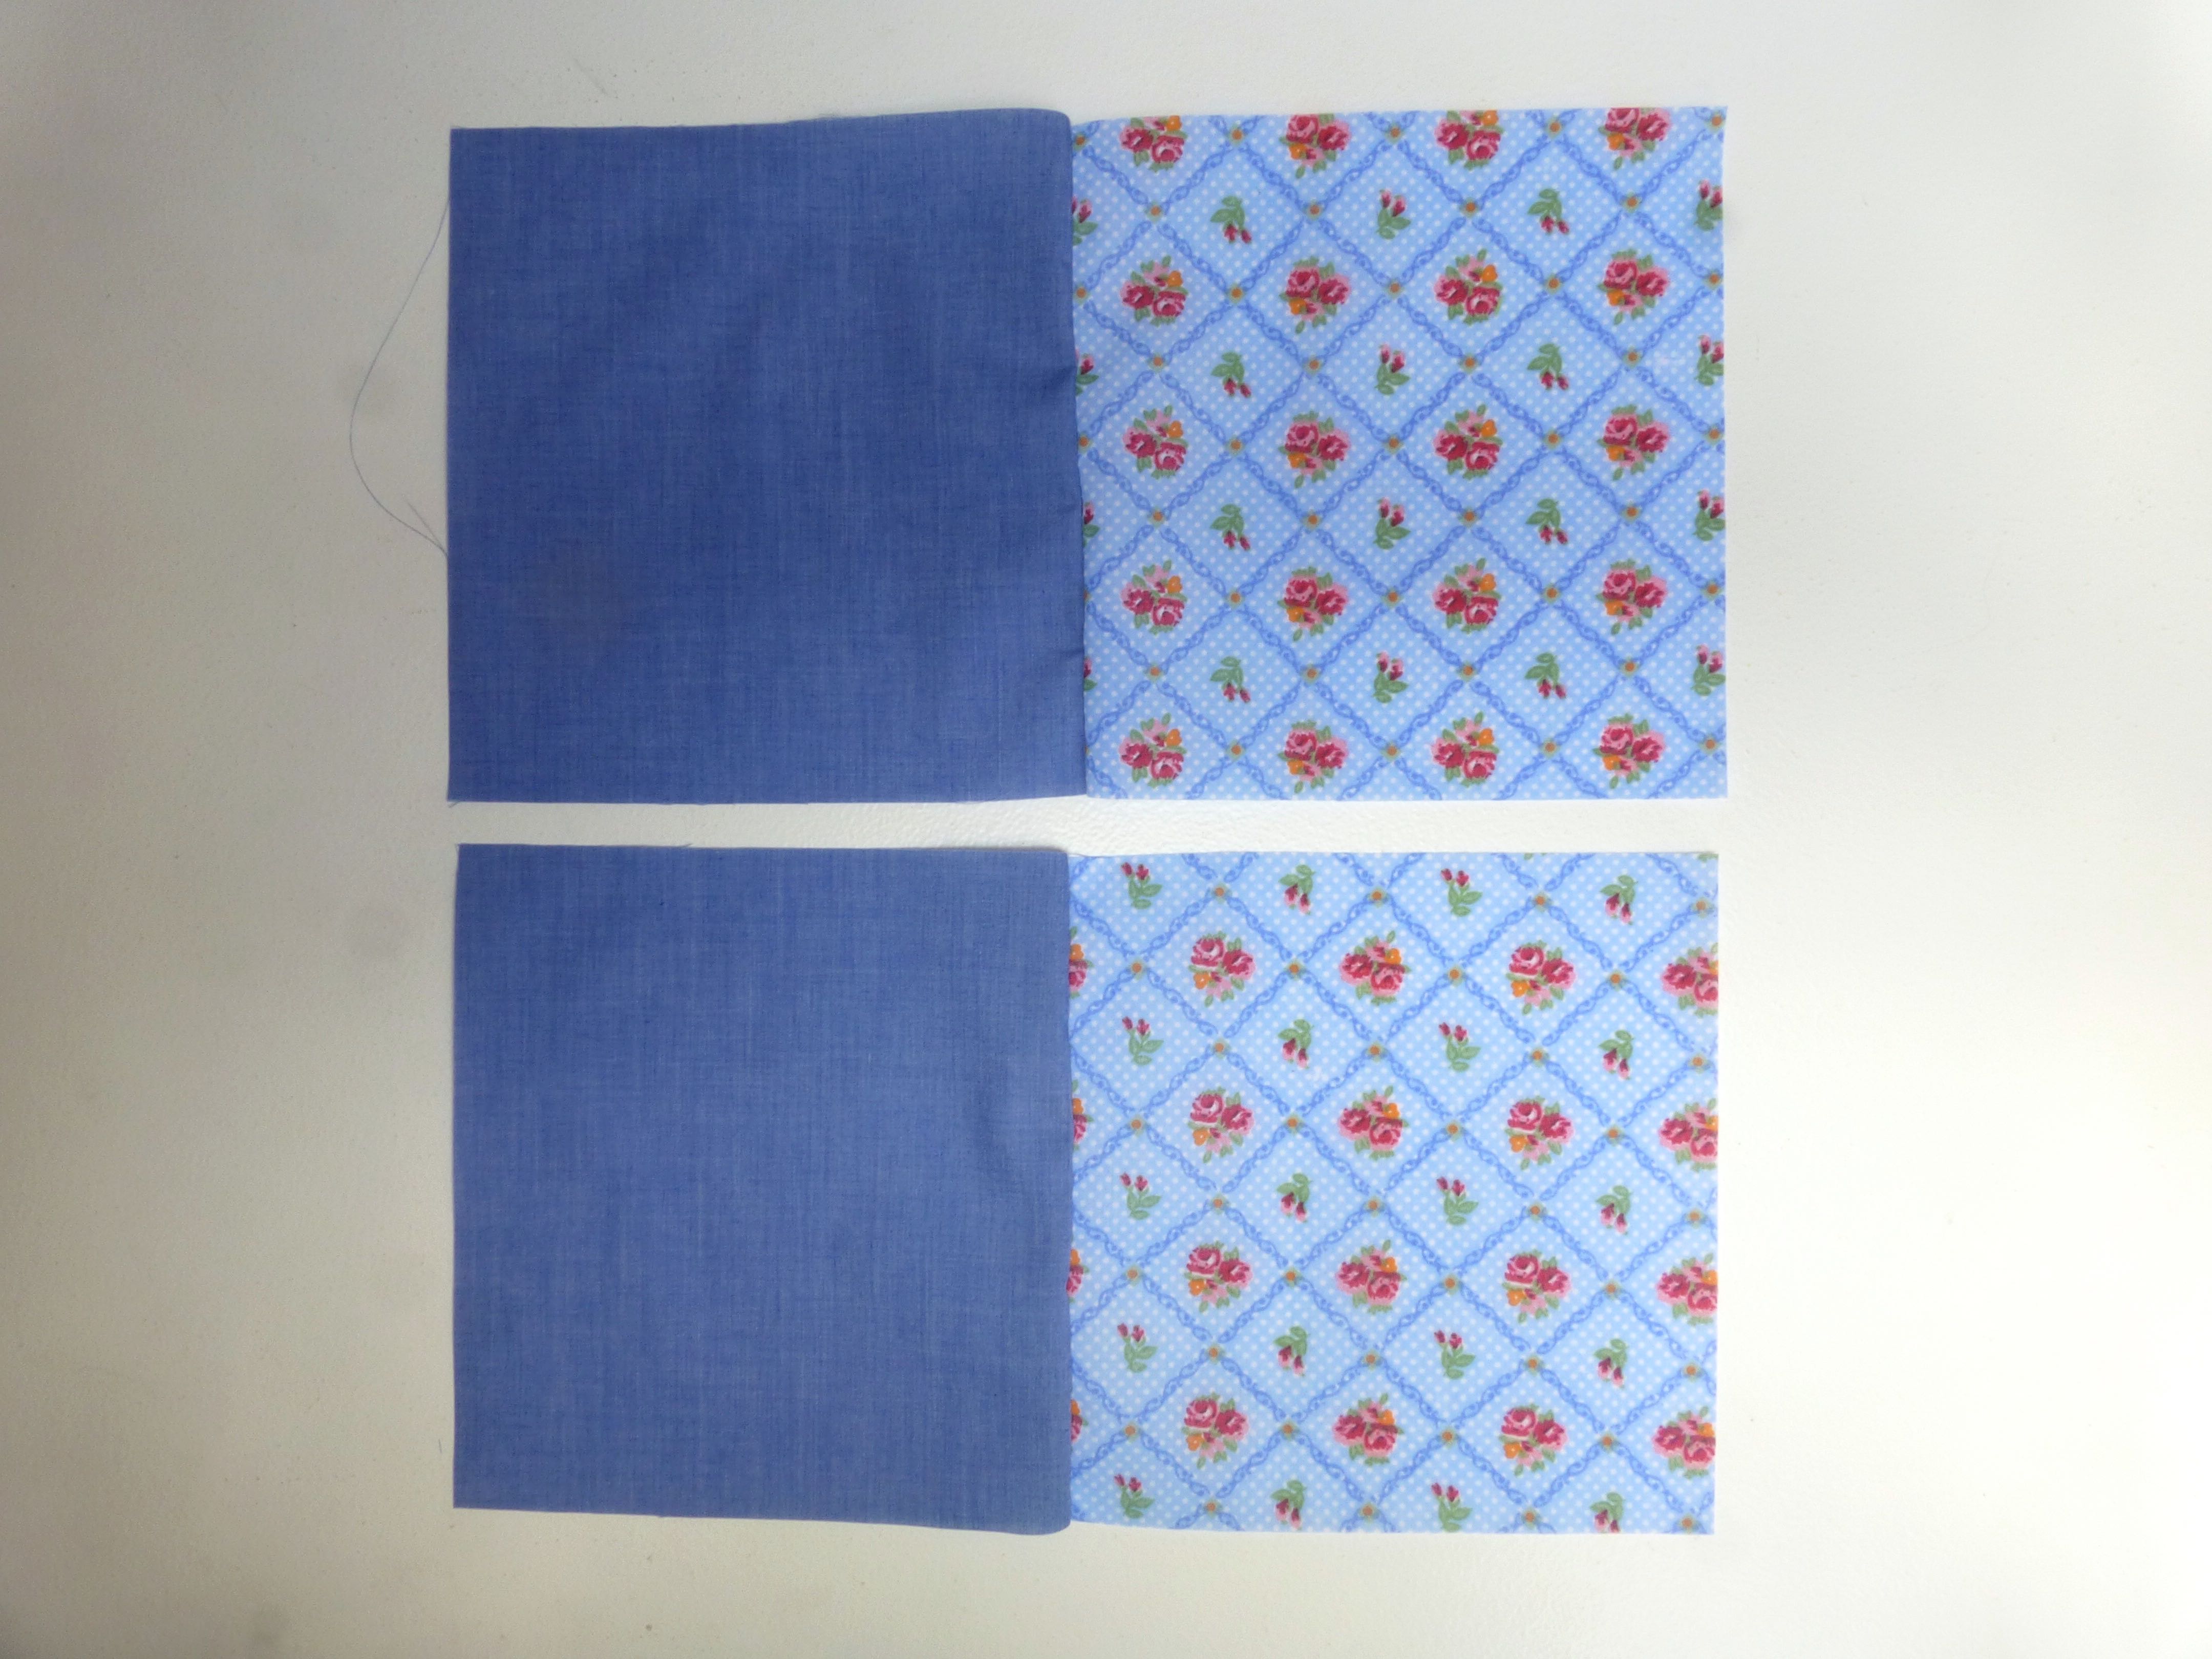
Start by sewing them in pairs, each floral with a plain, right sides together. You will need to make 36 pairs which should leave you with 9 spare squares – 5 plain and 4 floral.
Don’t bother reversing your stitching at the beginning and end of each set, cutting the thread and repeating with the next pair – just keep feeding the pairs through the machine one after the other as shown below.
When all the pairs of squares are sewn, snip the joining stitches to separate them.
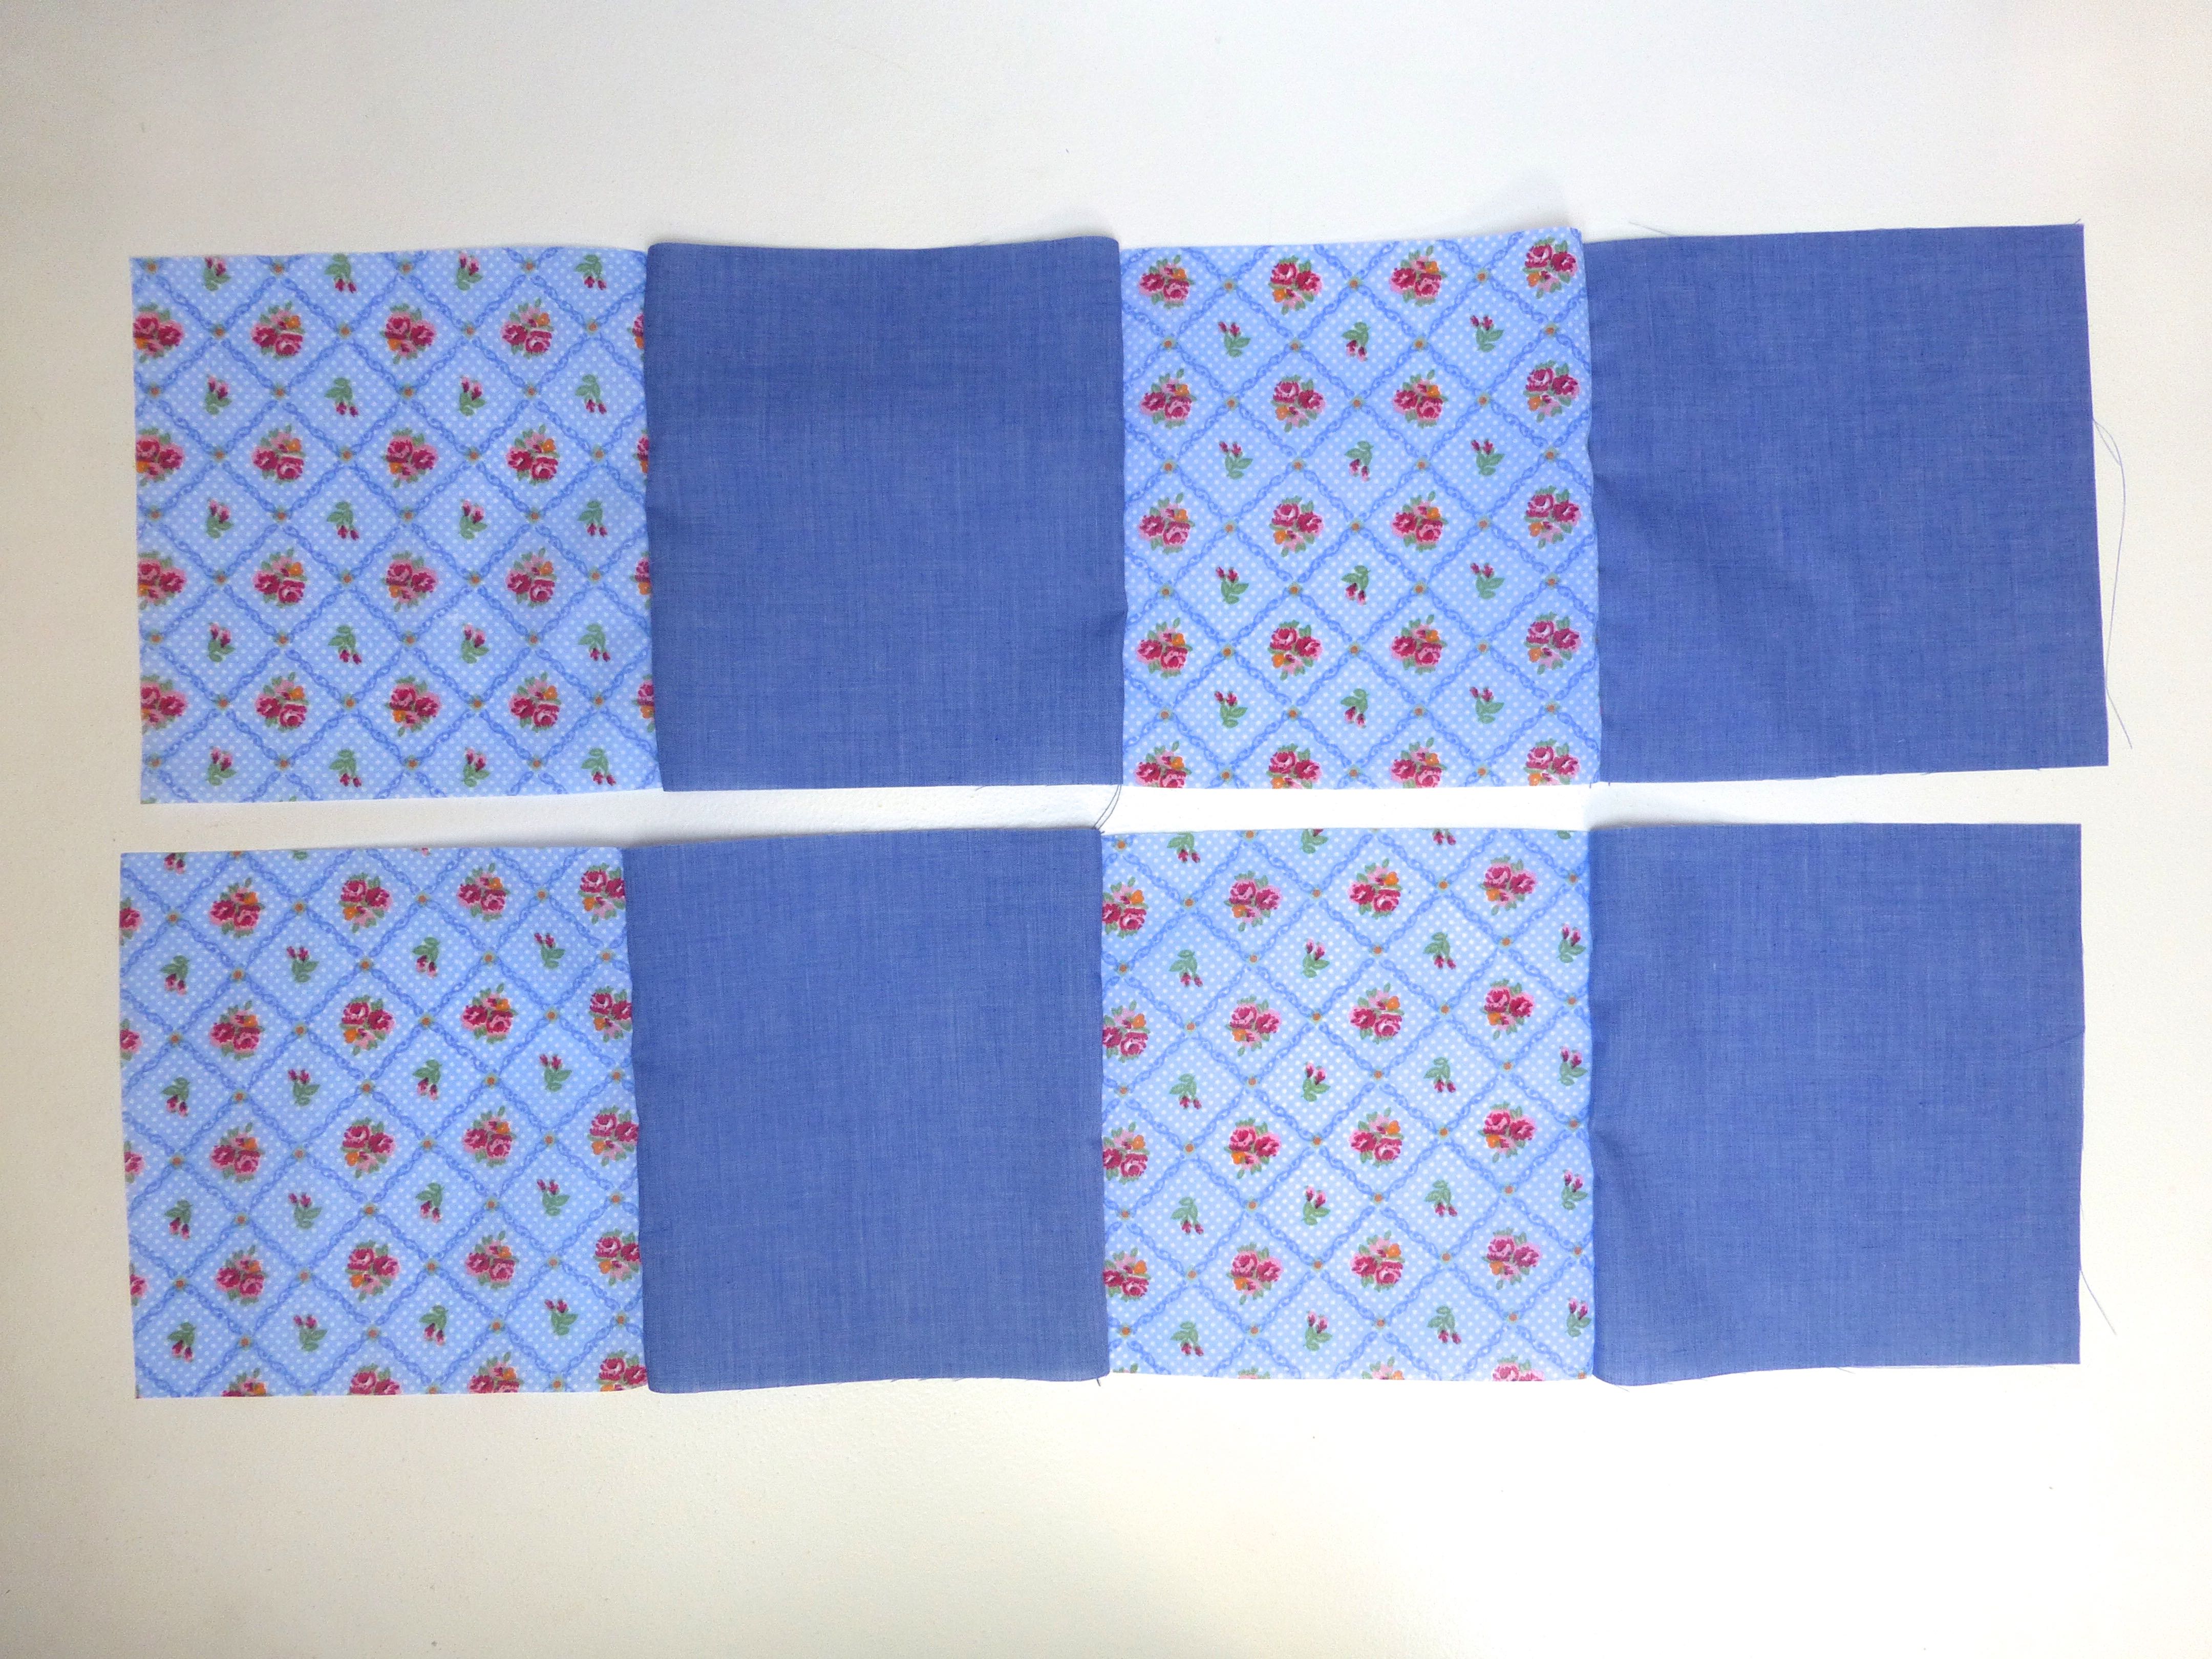
Repeat this process with the pairs of squares…
….until you have rows of 4….
….then sew the rows of 4 together to make rows of 8. Now add one of your left over squares to the end of each row.
You should now have 9 rows of 9 squares.
Press all the seam allowances to one side.
To minimise any bulk at the seams, you may wish to alternate the direction in which you press them flat.
Join these rows along the long edges, matching and pinning the seams as you go.
Continue until all your strips of patchwork are sewn together into one large square.
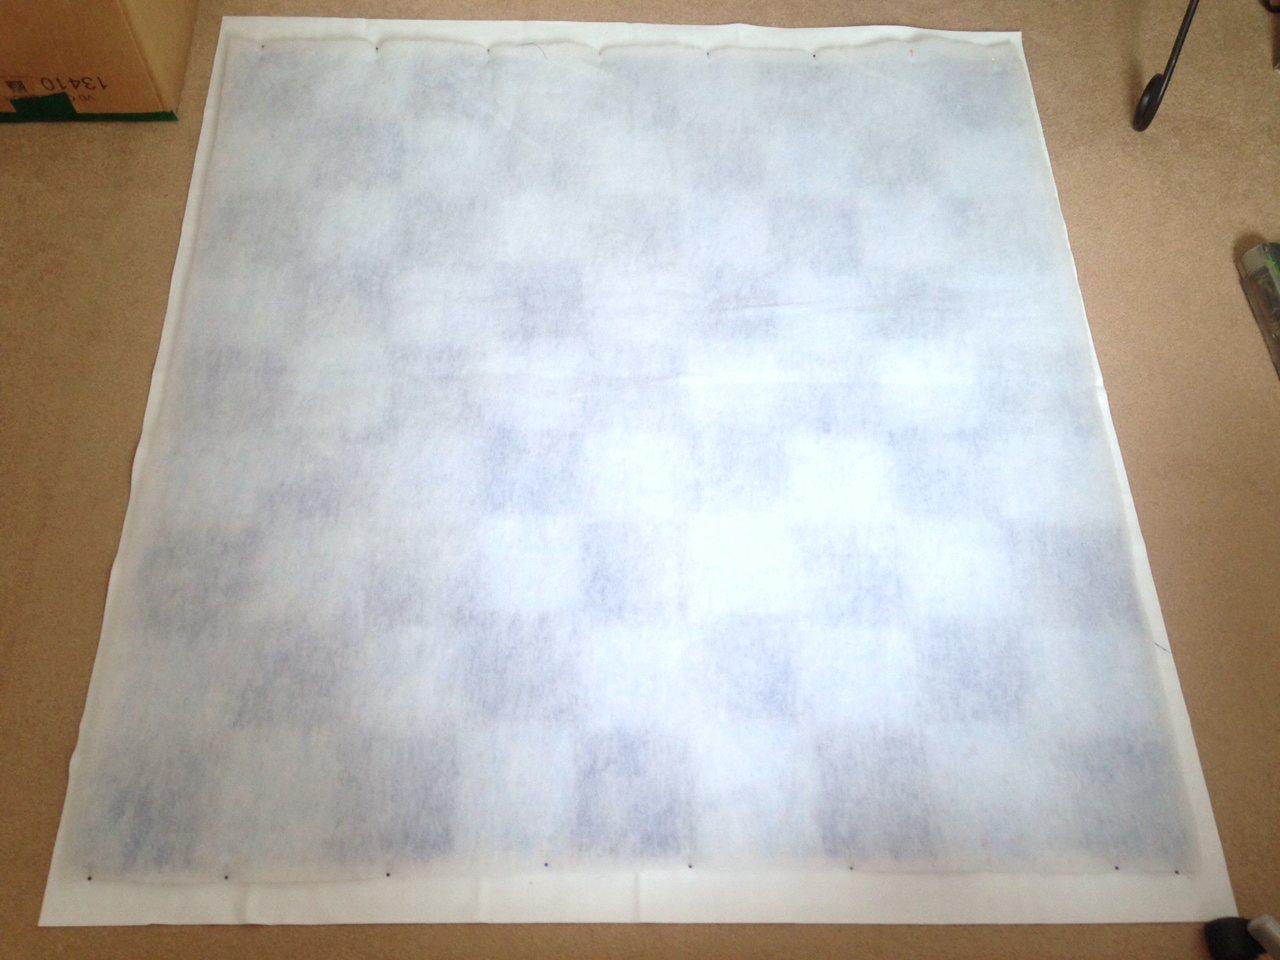
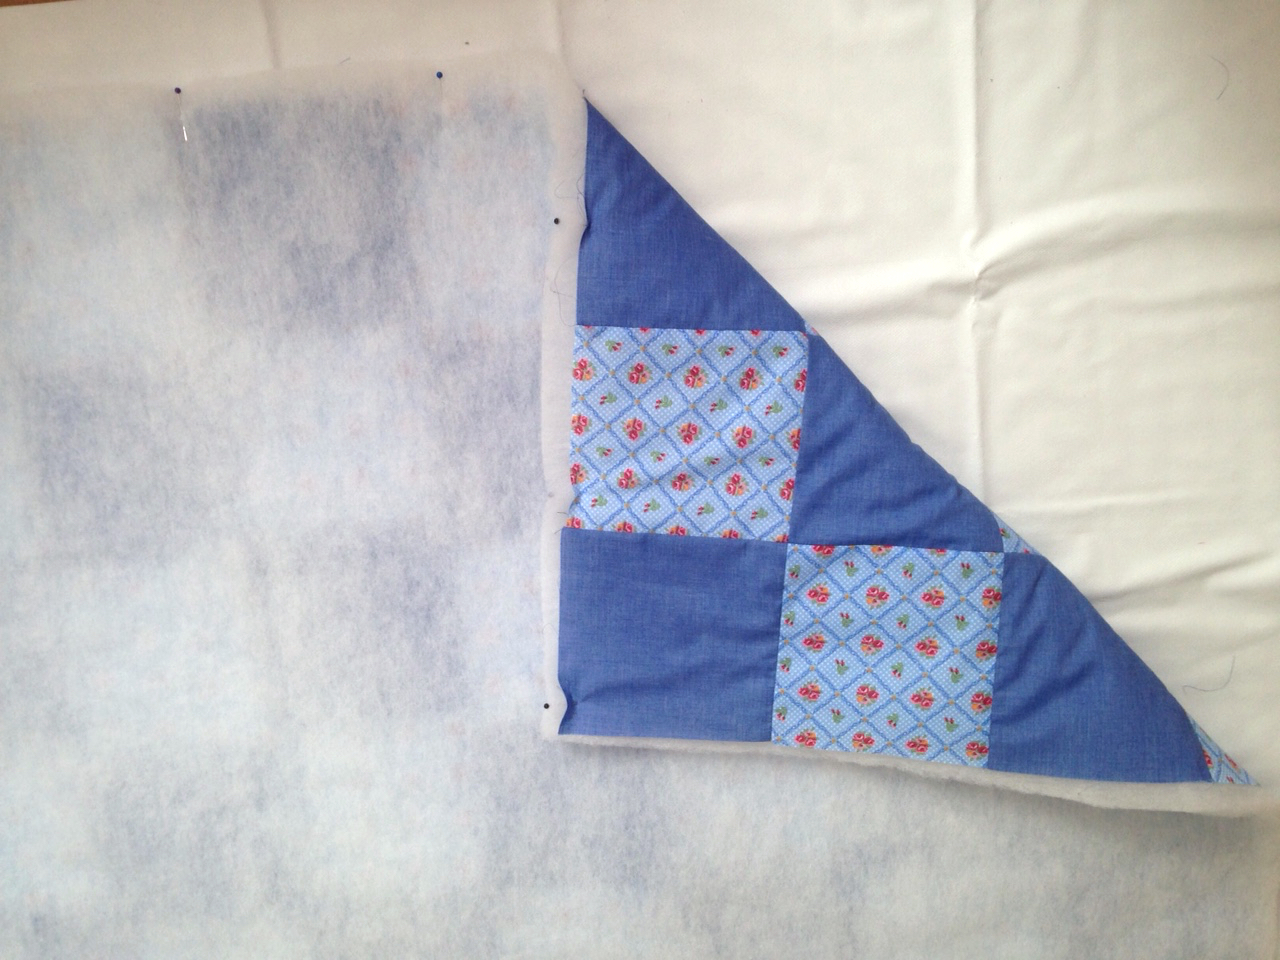
As I reached this stage, I made the spontaneous decision to add a layer of wadding between this top layer and the bottom layer. (I had plenty in my stash, but you can buy it here.)
I cut a square of wadding slightly larger all the way around than the patchwork piece, laid it on top of the wrong side of the patchwork and pinned it around the entire edge.
Stitch close to the raw edges all around the outside and trim the excess wadding as shown.
Now the wadding is secured, you can use large tacking stitches through both layers to stop them shifting whilst quilting.
Stitch in the ‘ditch’ using a long stitch length until the whole blanket has been quilted along the seam lines.
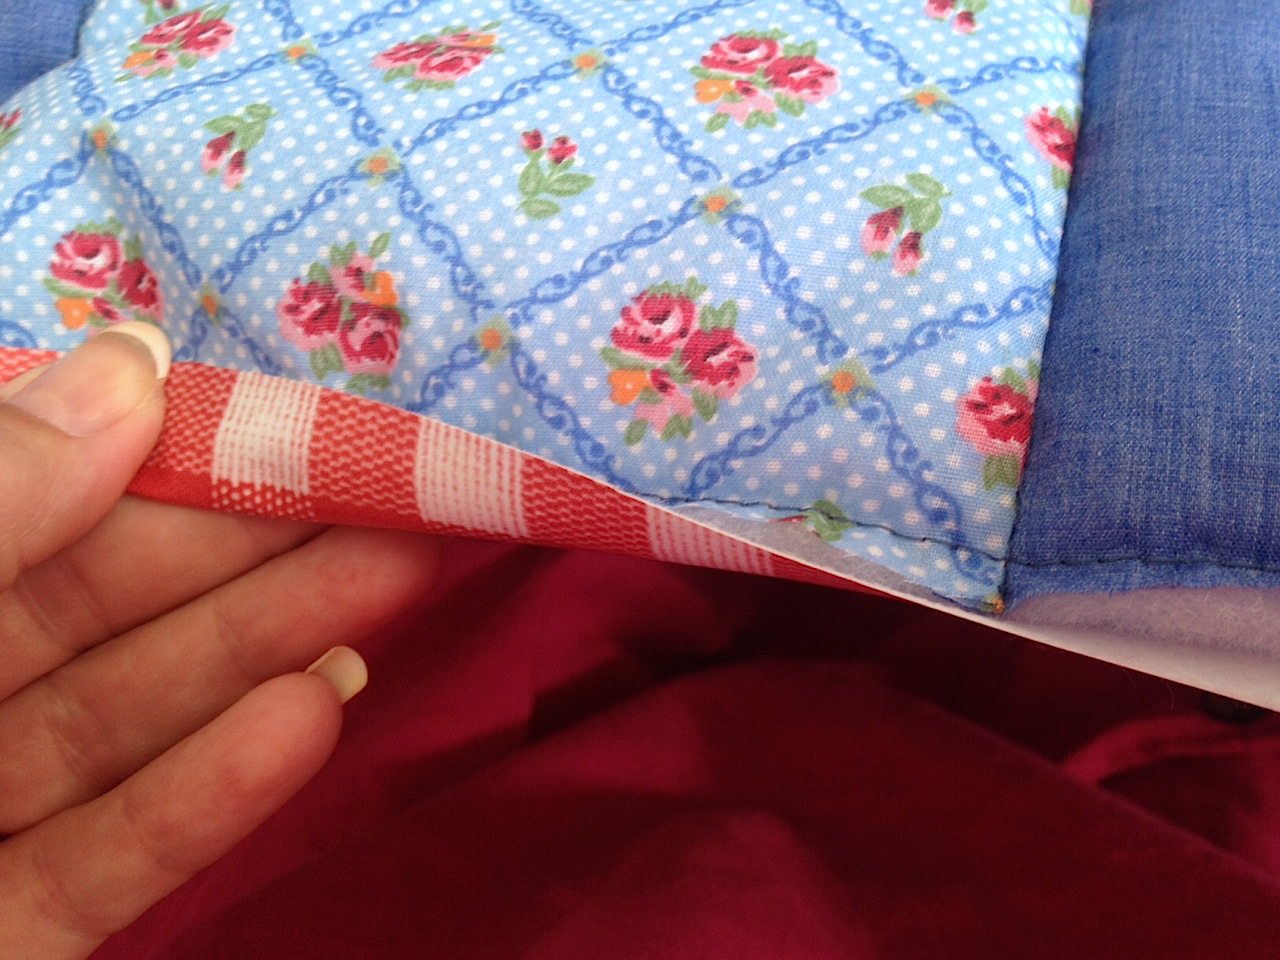
Place the quilted layer onto the vinyl backing, wrong sides together, and trim the backing so that it is 1.5cm bigger than the top all the way around.
Using clips, fold the excess vinyl over to the right side of the blanket and secure in place.
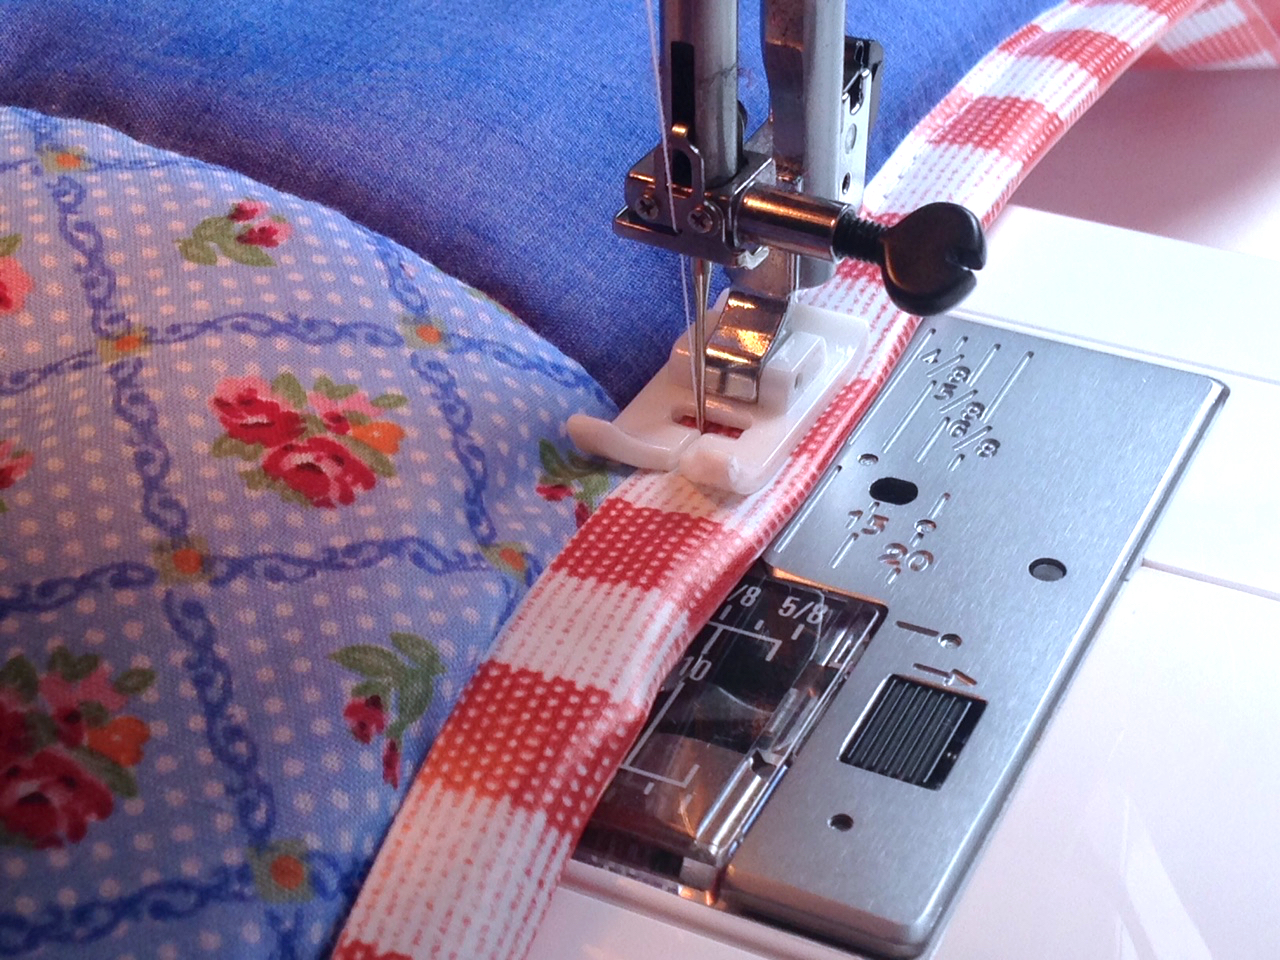
A teflon foot makes the vinyl move smoothly through the machine, and a leather needle with its wedged shape will stop any skipped stitches (discovered through trial and error!)
A simple long straight stitch close to the raw edge of the vinyl is all that is needed.
Mitre the corners as you go for a neat finish.
I was left with a few scraps of fabric and vinyl, so I also designed a fabric roll to act as a carry pack for the blanket.
For the carry pack, cut 3 floral and 2 plain squares the same size as before and sew them all together in a single row. Press.
Cut a piece of spare vinyl 1.5cm smaller than the patchwork strip and place in the centre of the strip, wrong sides together.
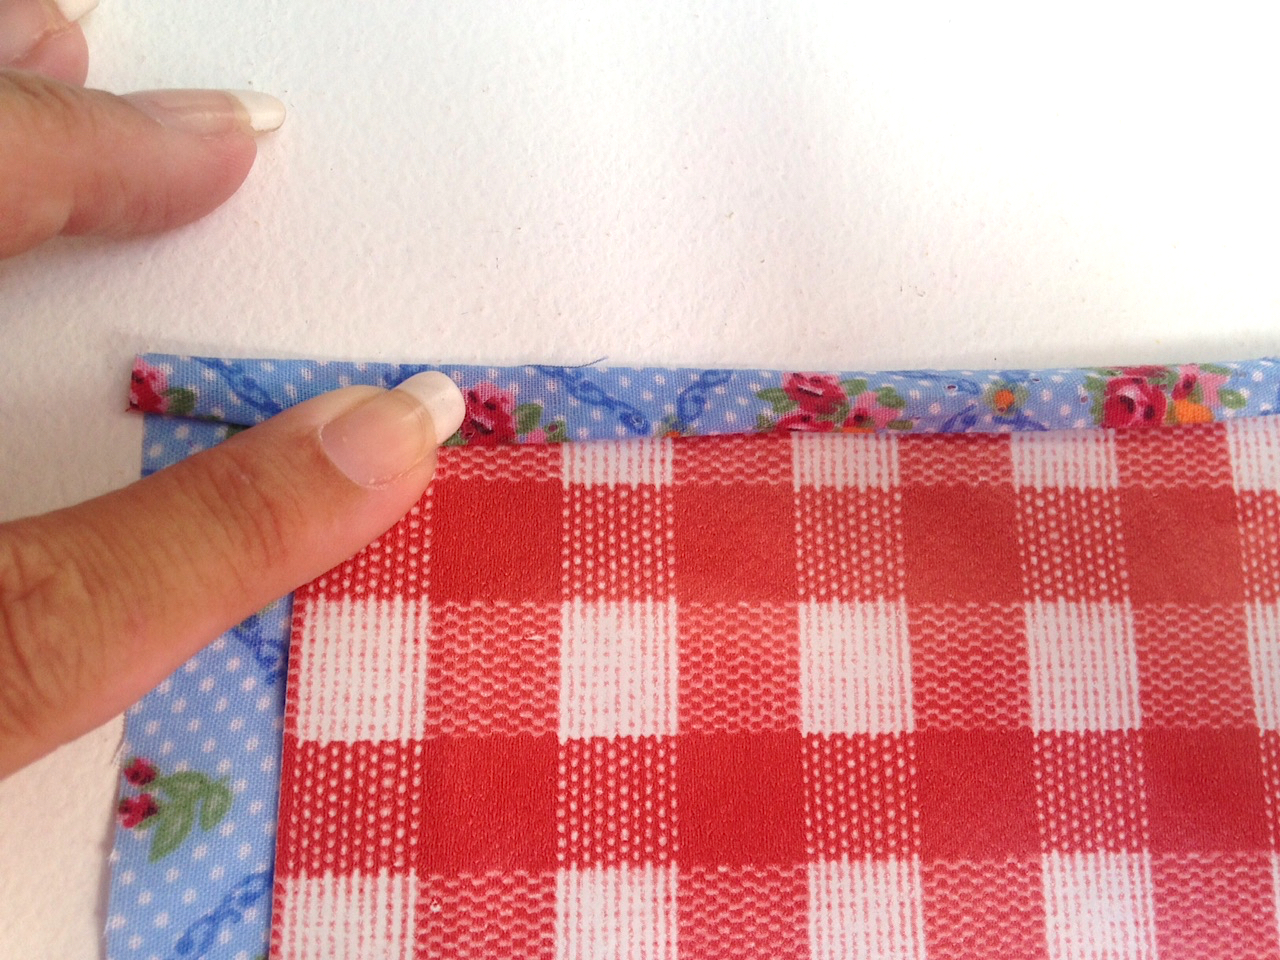
Turn a narrow hem…..
….and stitch in place close to the inner folded edge around all 4 sides, mitring the corners as you go.
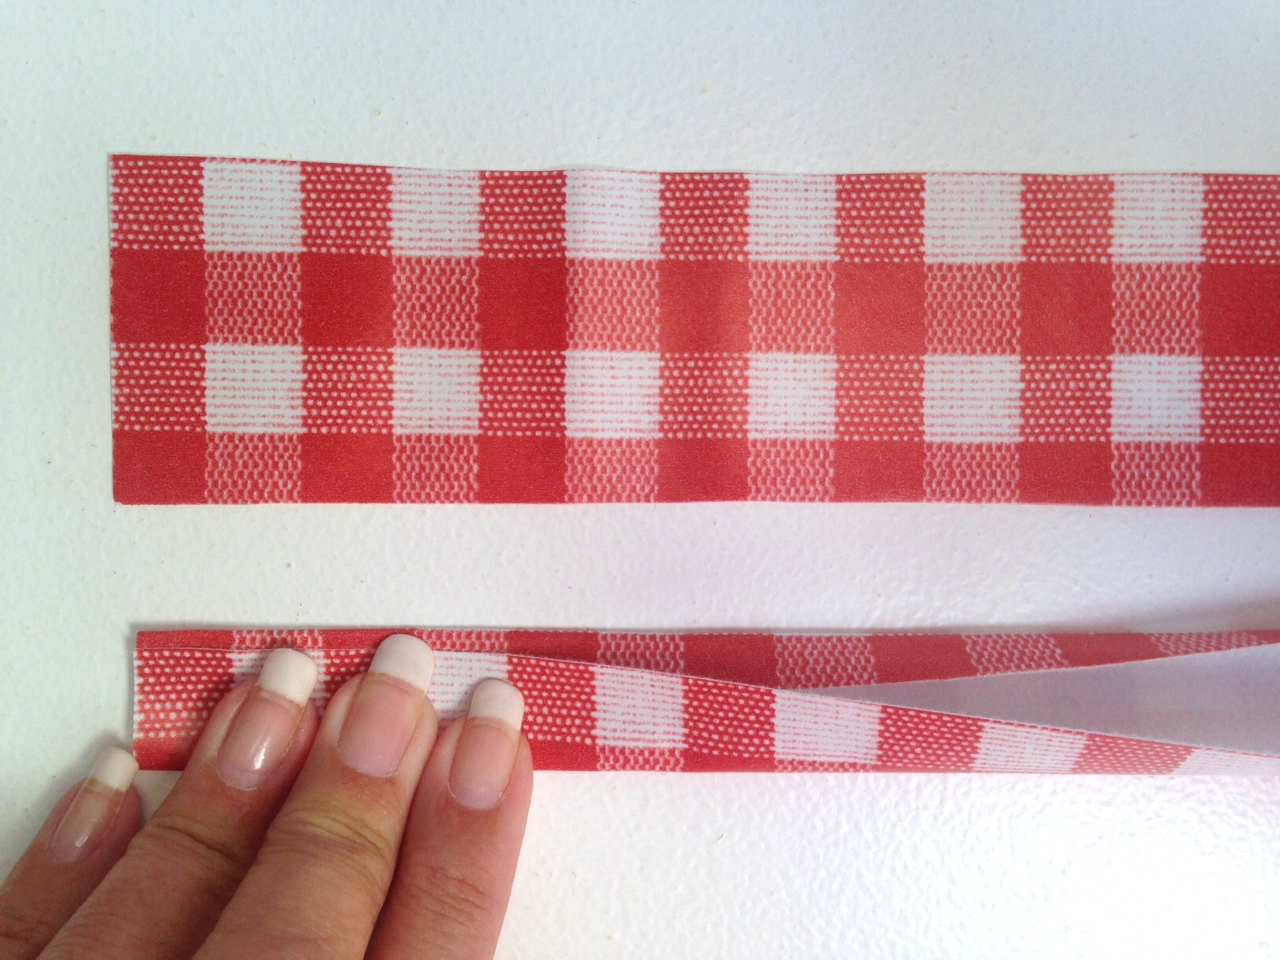
Cut two pieces of vinyl for the handles, each measuring 20cm x 5cm.
Fold the long upper edge in to the wrong side by 1cm, and bring the lower edge up to meet it, overlapping a little to encase the raw edge as shown below.
Stitch close to the raw edge.
Repeat with the second handle.
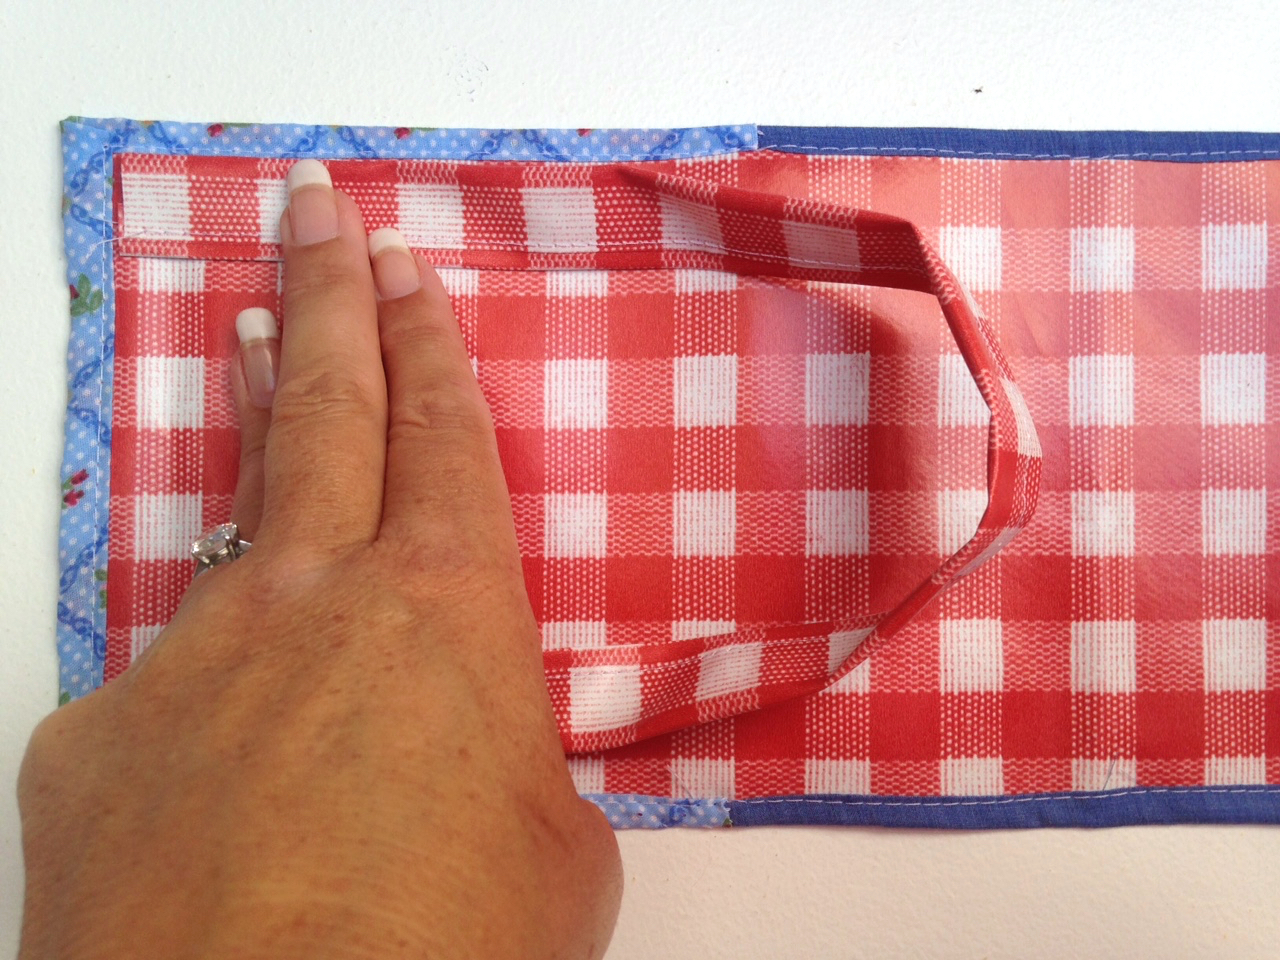
Position the two ends of the handle in the corner of the carry pack using the photograph as a guide.
Stitch in place with a 1cm seam.
Fold the handle to the outside and turn over, vinyl side down.
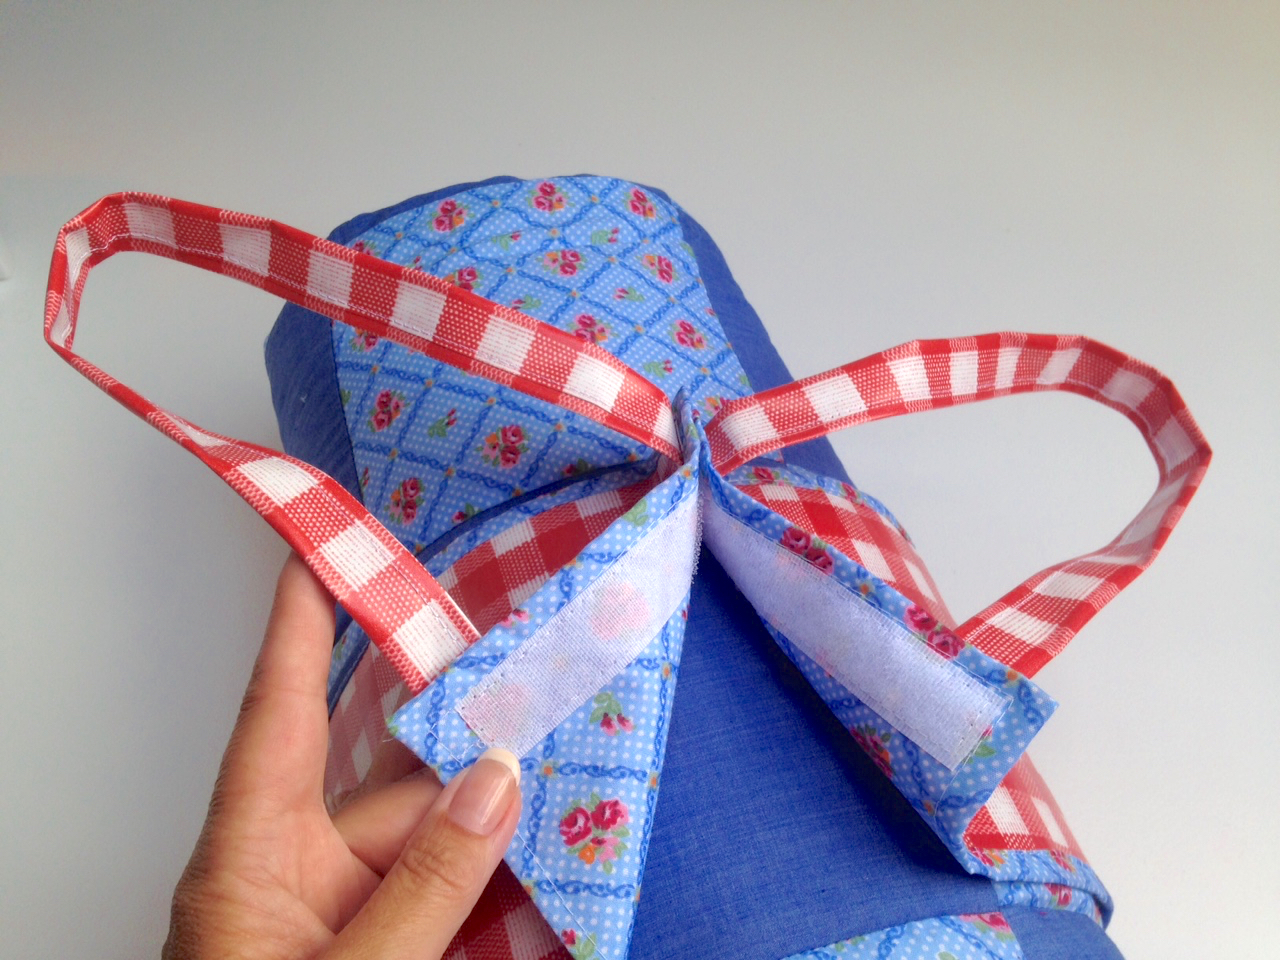
Cut a 12cm strip of velcro hook and loop fastener and sew the hook side to the fabric side of the carry pack, being sure to catch the handle in the ‘up’ position, securing it in place at the same time.
Repeat with the loop side at the other end of the carrier.
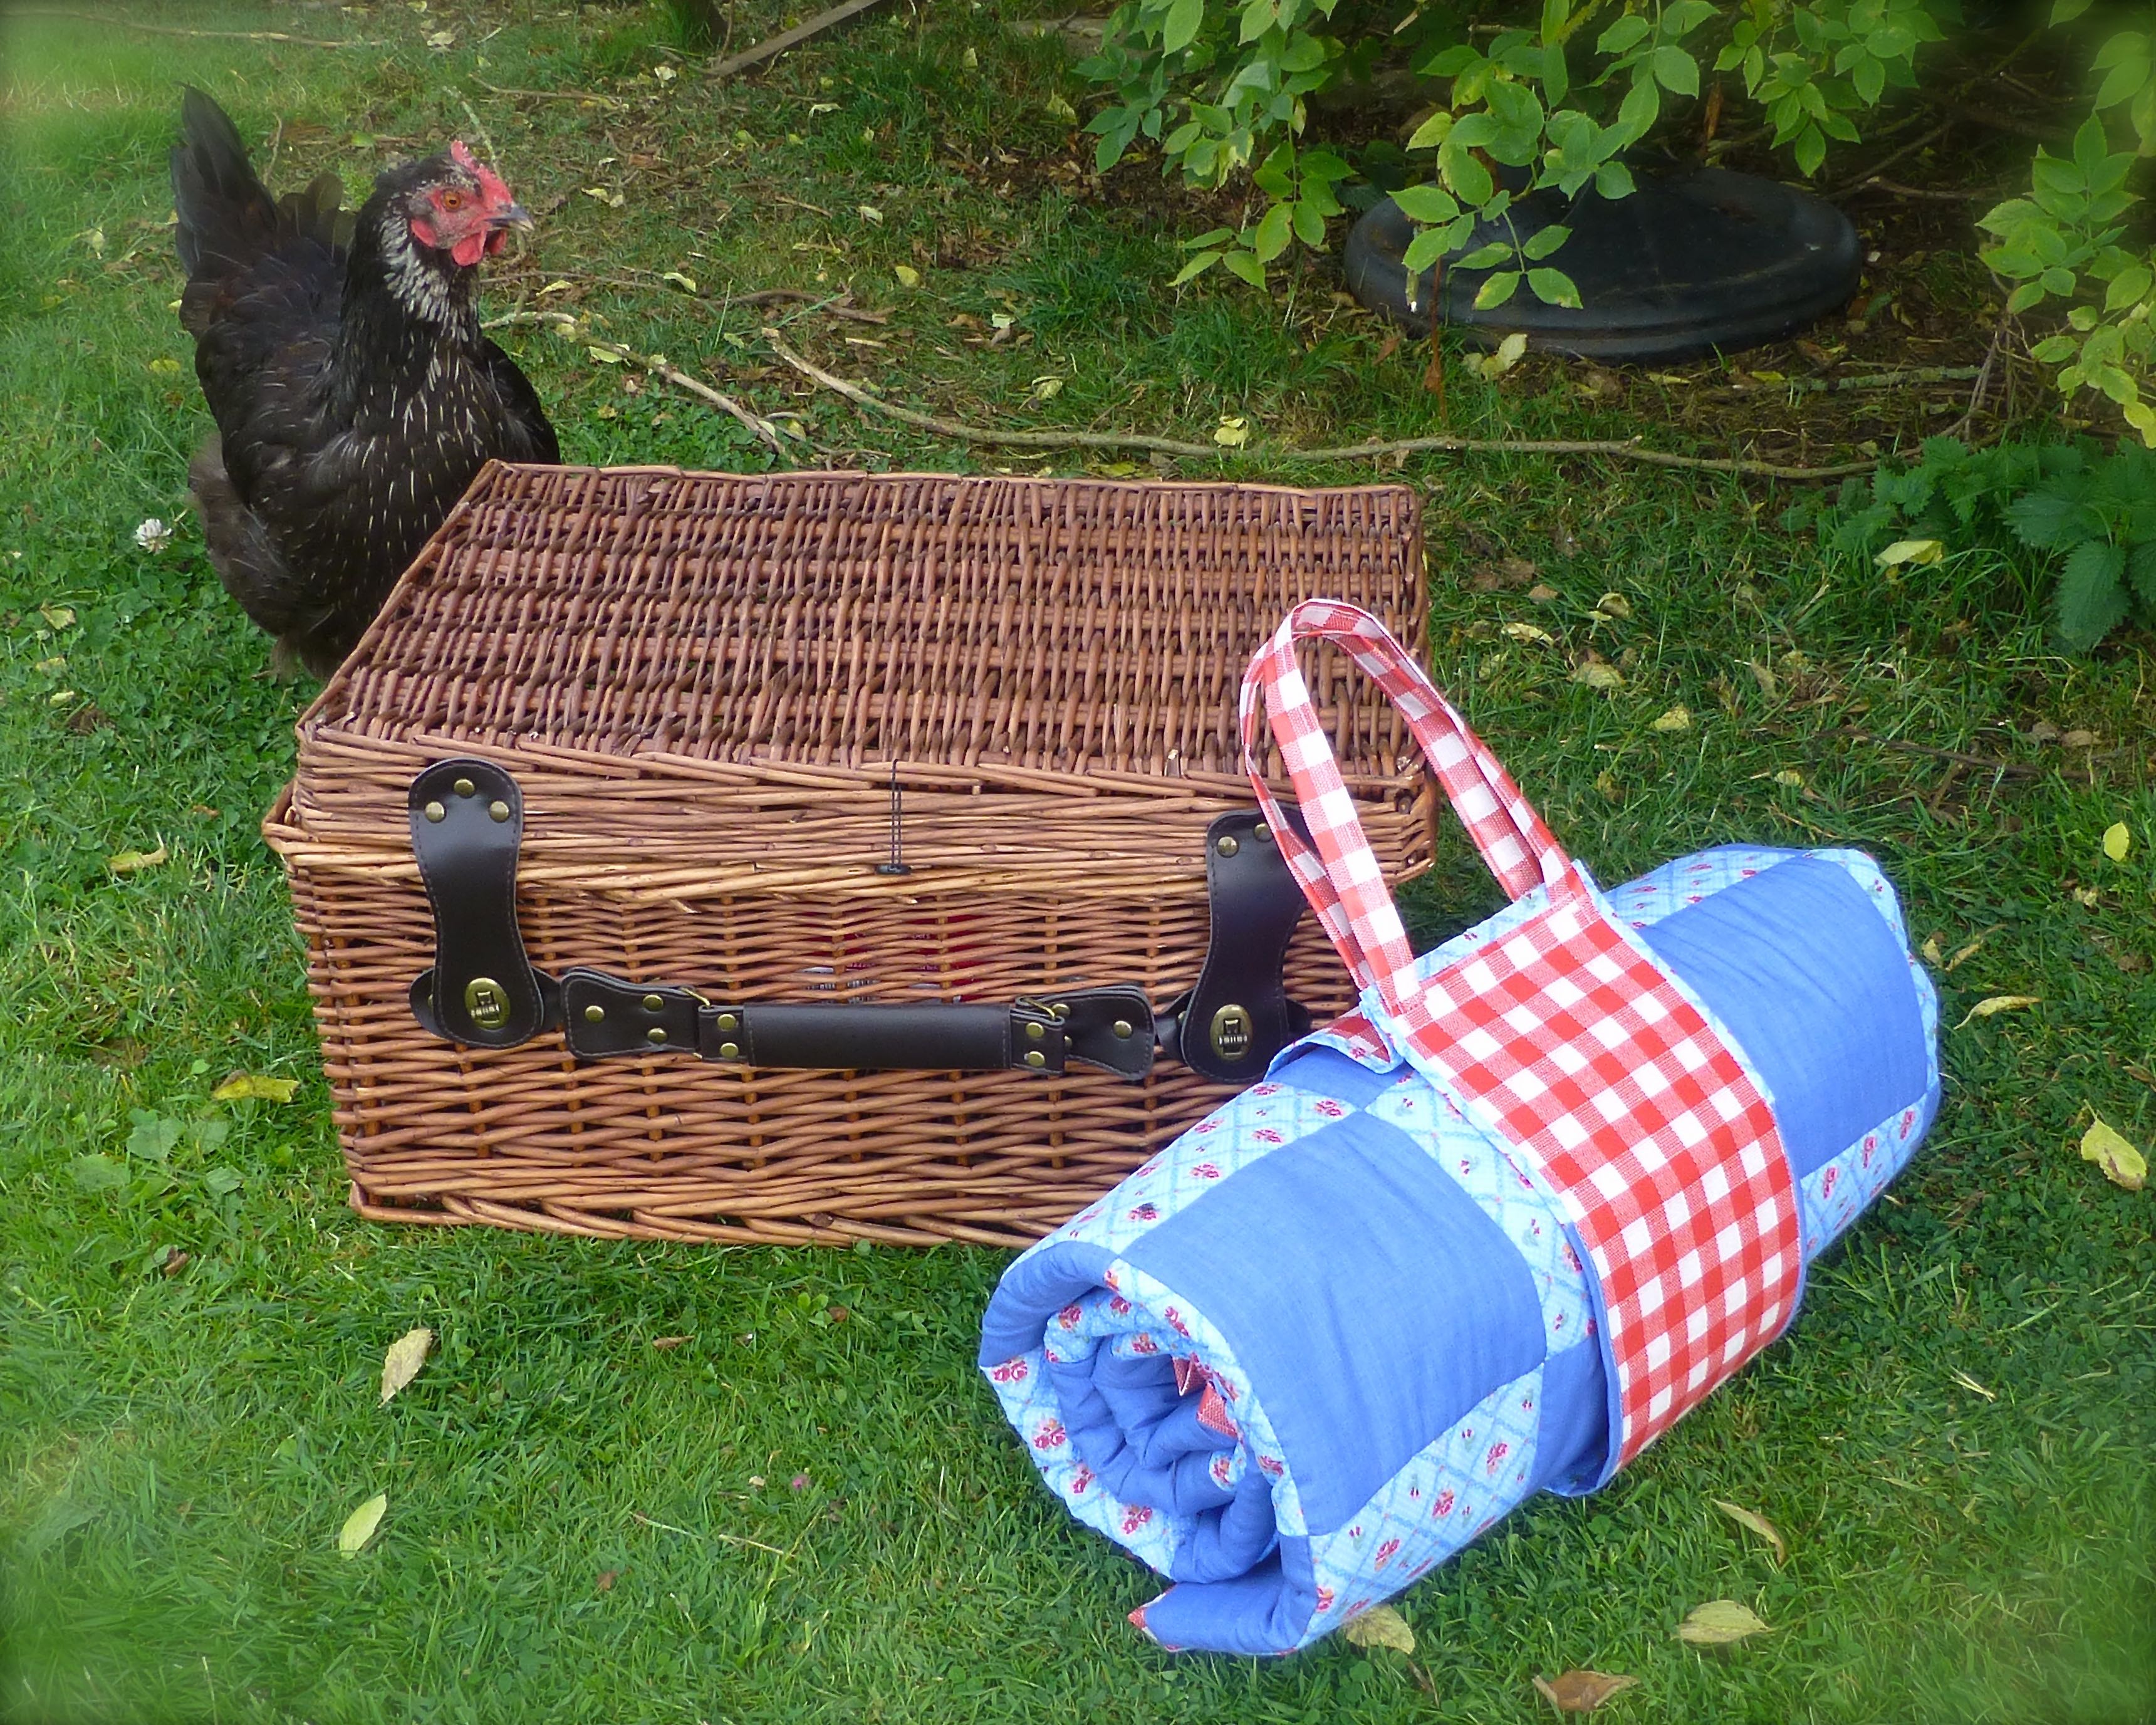
When the blanket is rolled up, wrap the carry pack around it and press the velcro strips together.
For a picnic in the garden (or anywhere), just add bunting, a squishy cushion and a hamper full of goodies.
Sun is a bonus for a picnic, but not when taking photographs (too much contrast)…
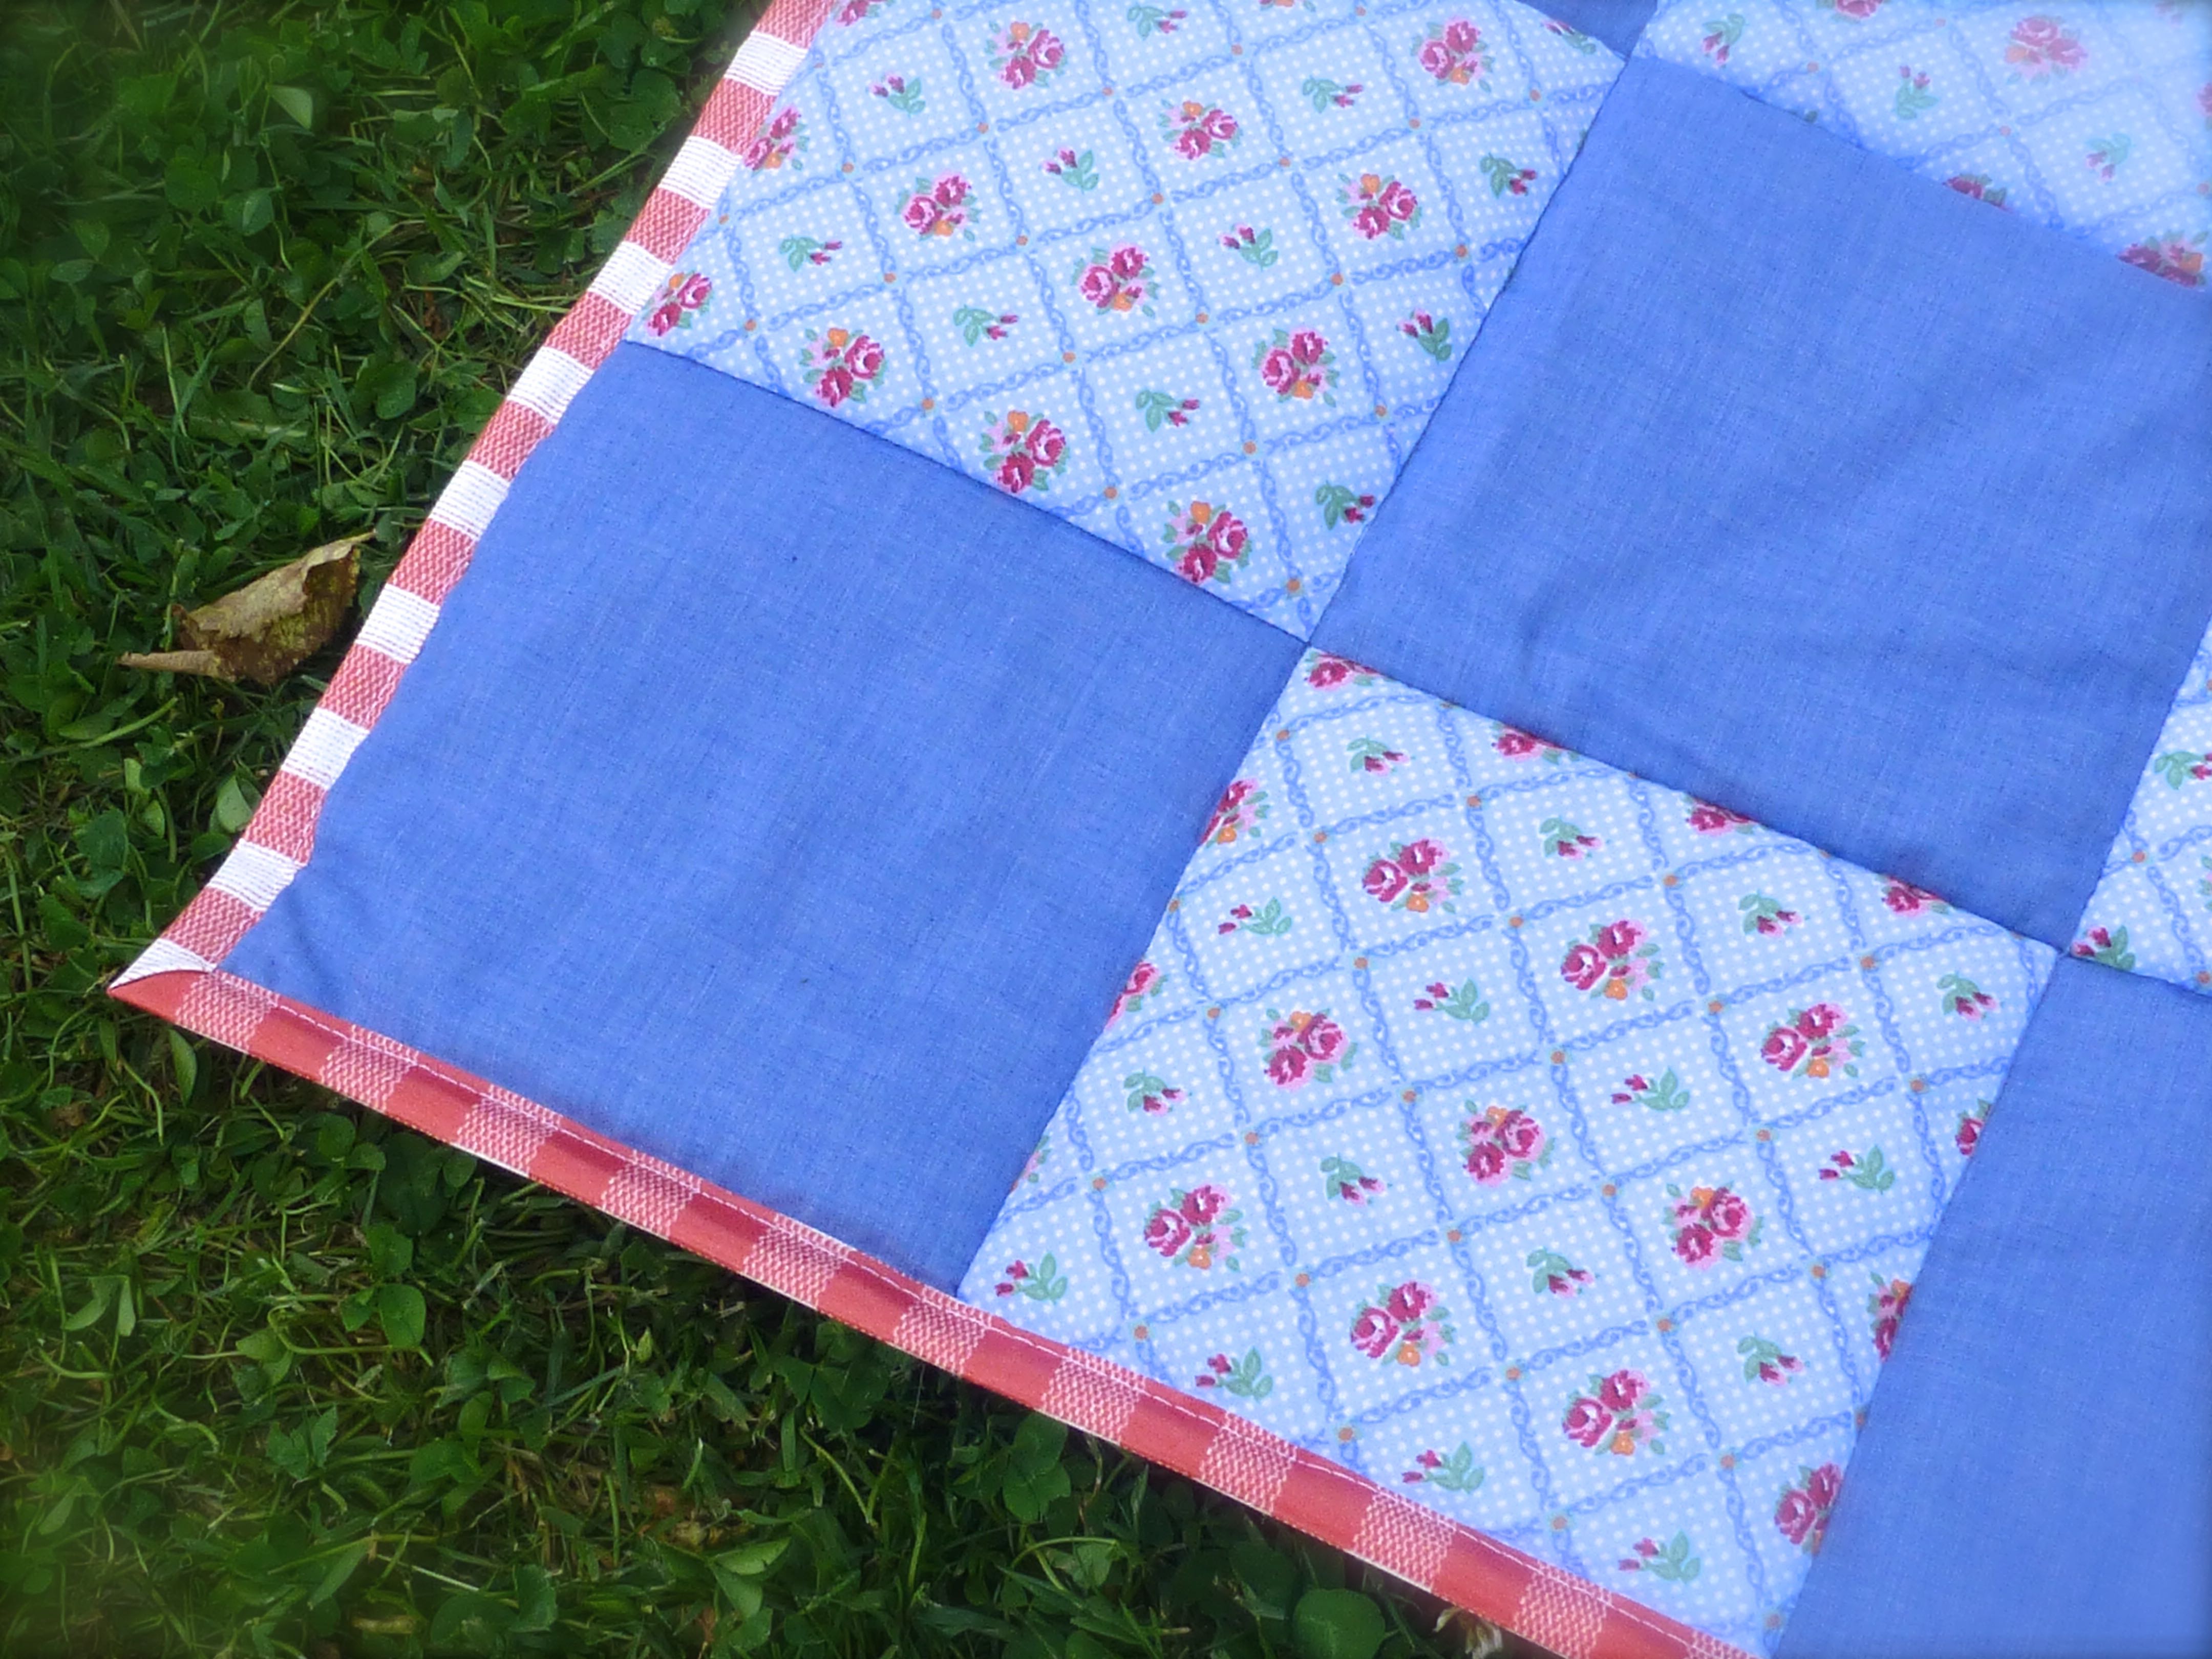
The perfect fusion of girl/boy styling that anyone would be happy to sit on.
No more damp bums!
A lovely layer of wadding for added comfort.
The carry pack with handles means that it’s compact and easy to transport.
Marley was interested to see what was going on – sometimes our hens are just a little bit too friendly!
Now all we need is for Summer to return so we can actually use our lovely new picnic blanket!!
I wanted something along the same lines for the fuschia linen, another loose fitting, easy-to-wear item that would be a delight to wander around in on even the hottest day.
In the end I decided to make a dress based mainly on the tunic but, this time, with sleeves, albeit short ones.
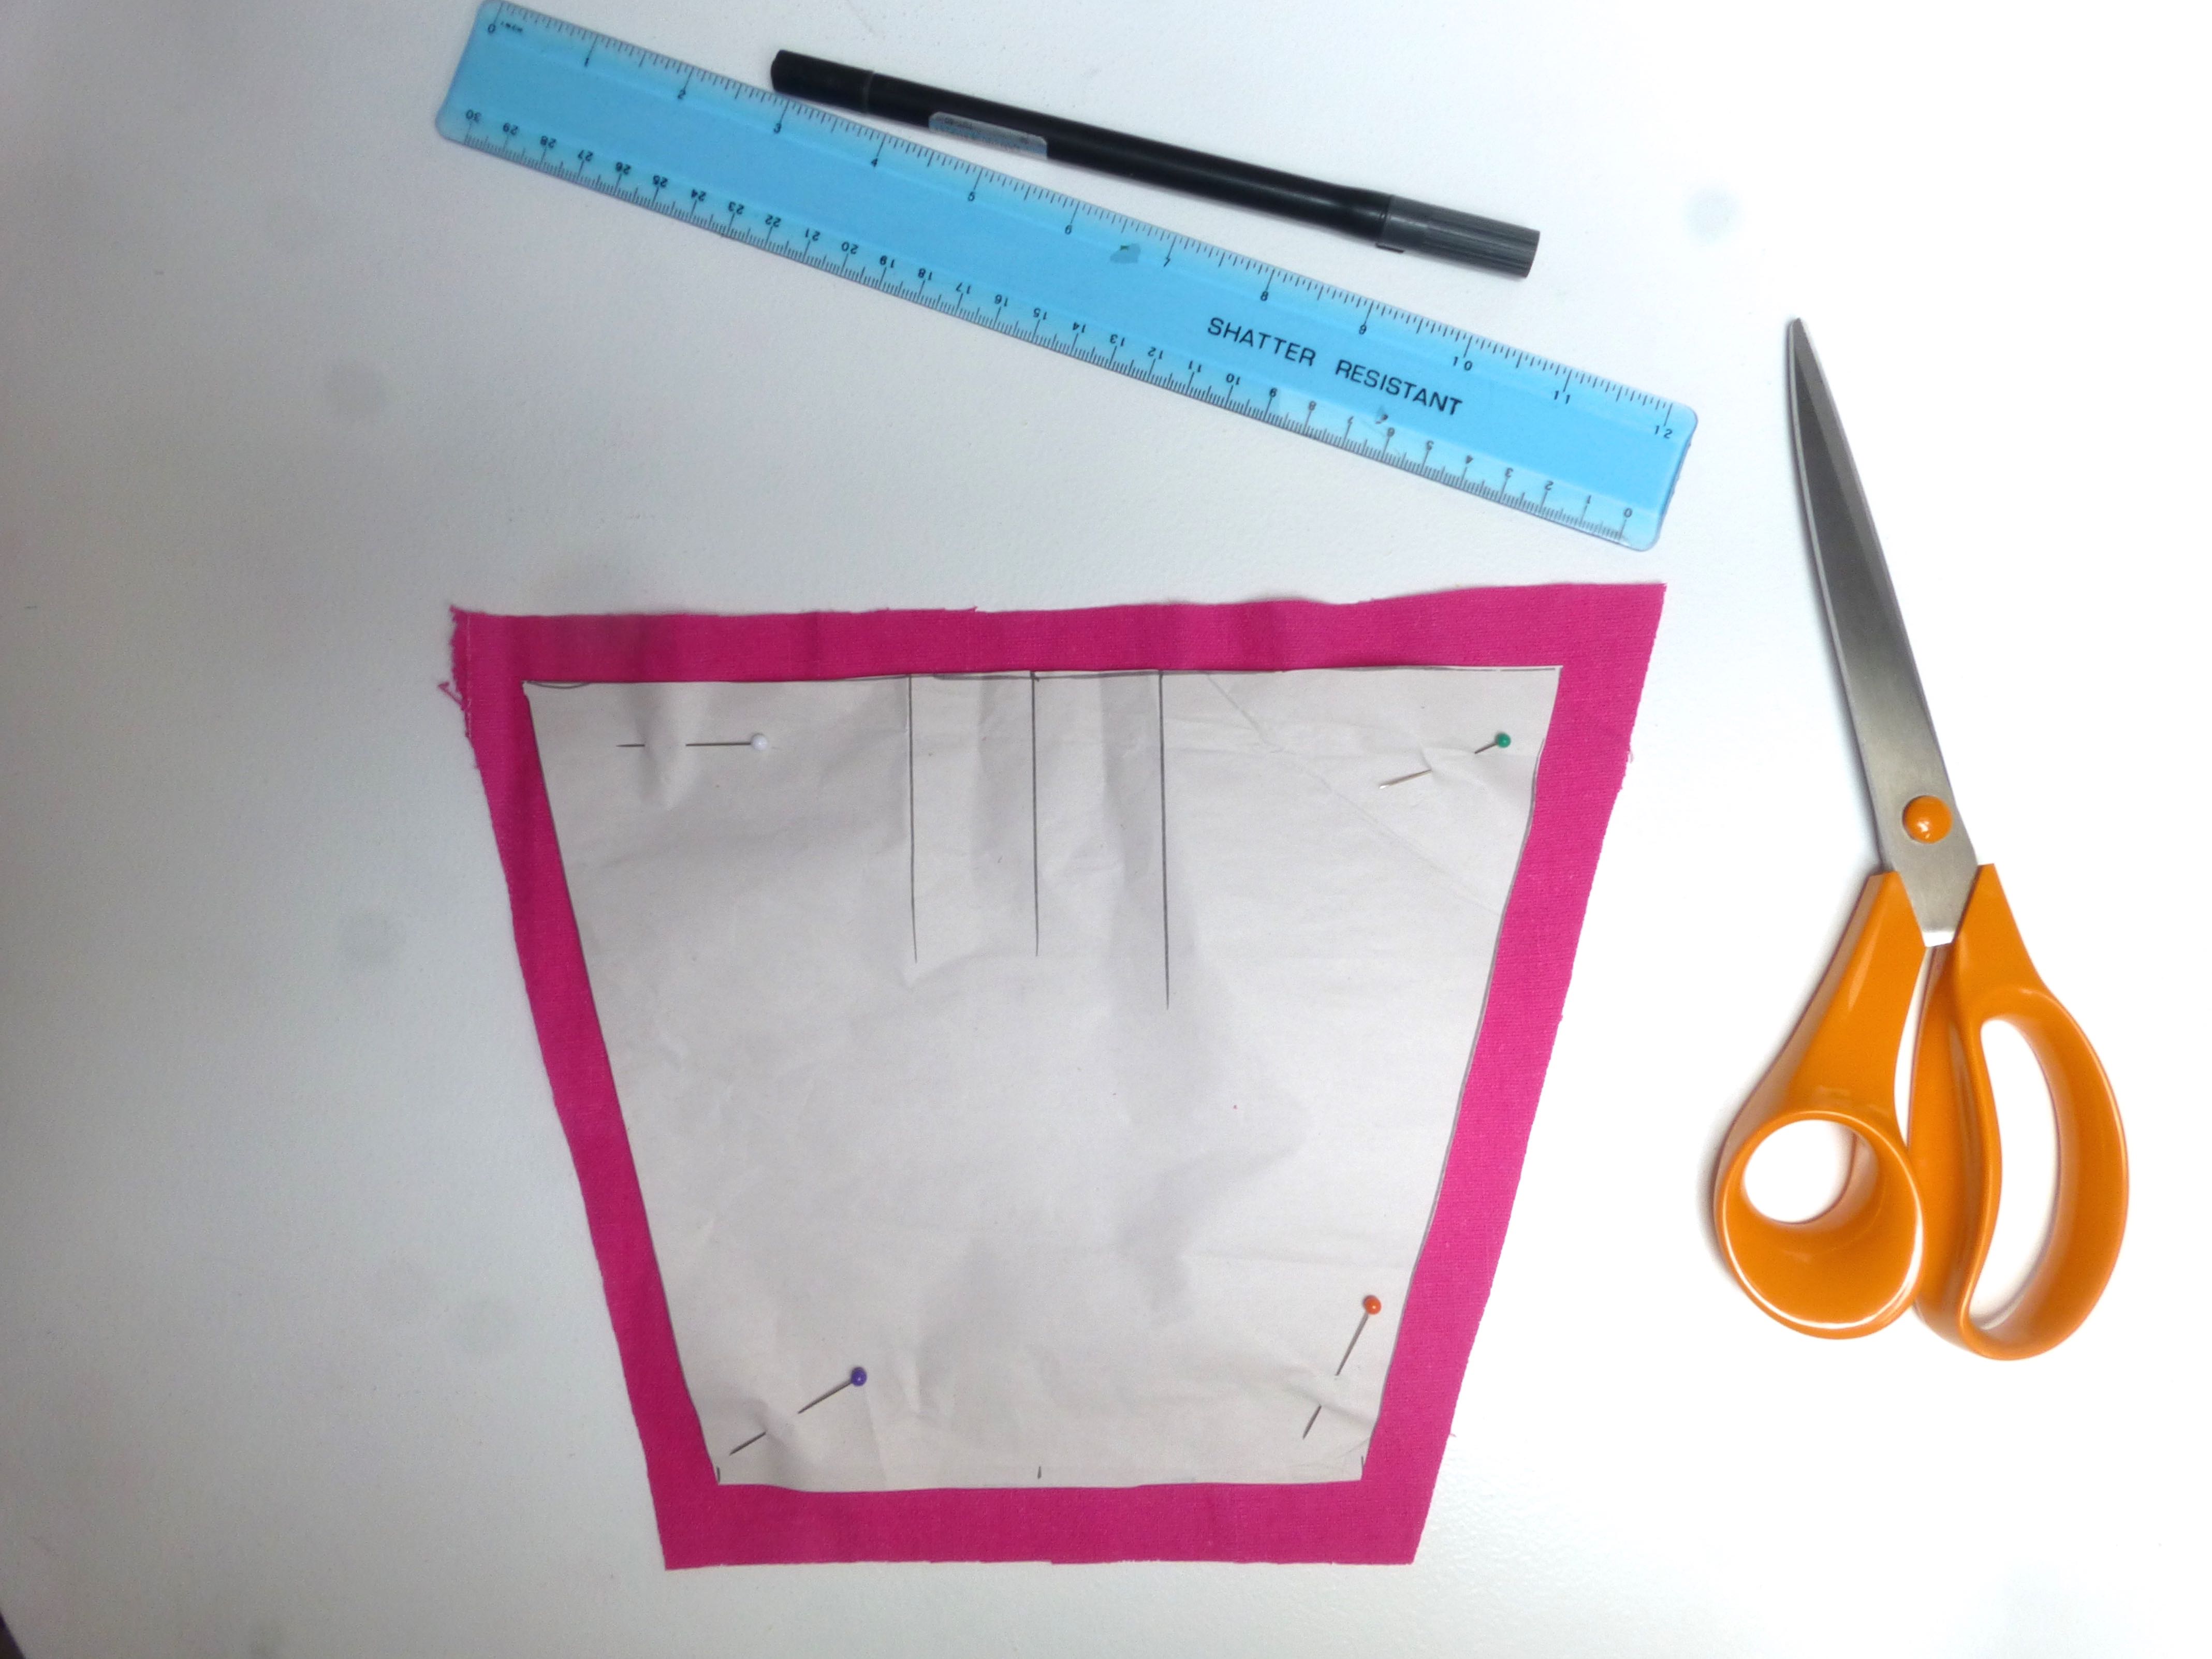
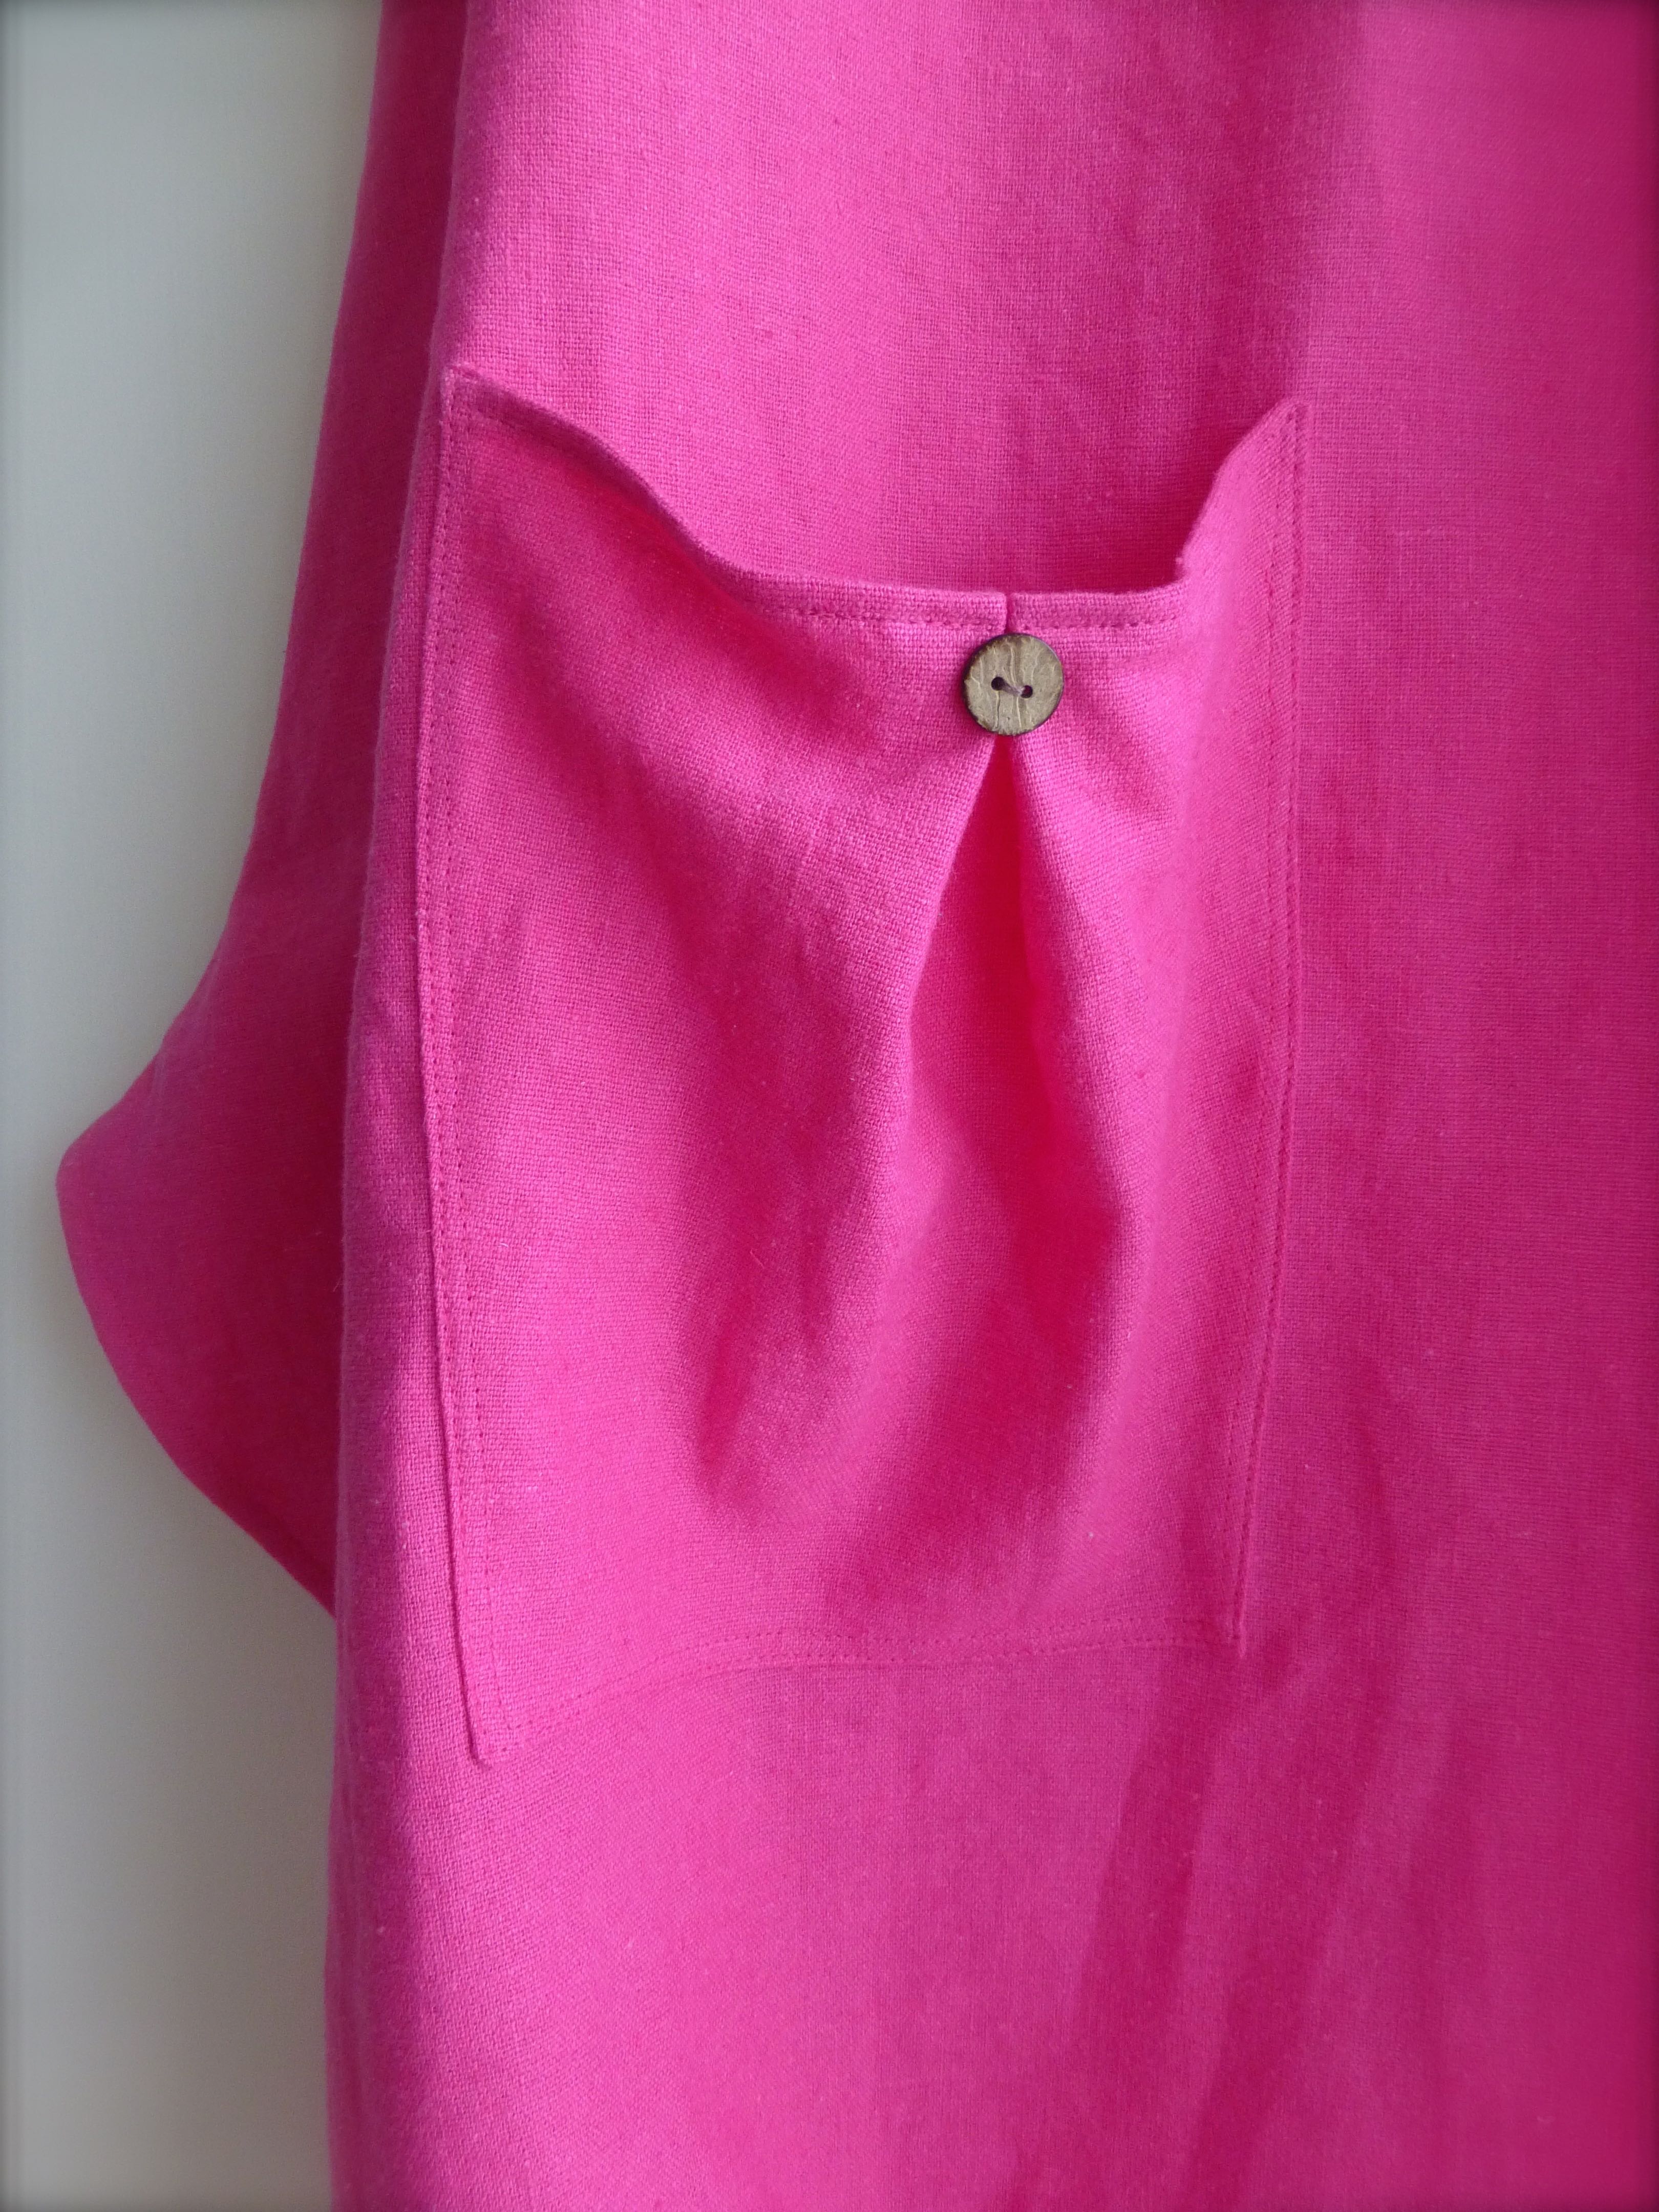
This is what I came up with for the pockets, the lines marking the placement for an inverted pleat.
I used a combination of flat fell seams and French seams for the construction.
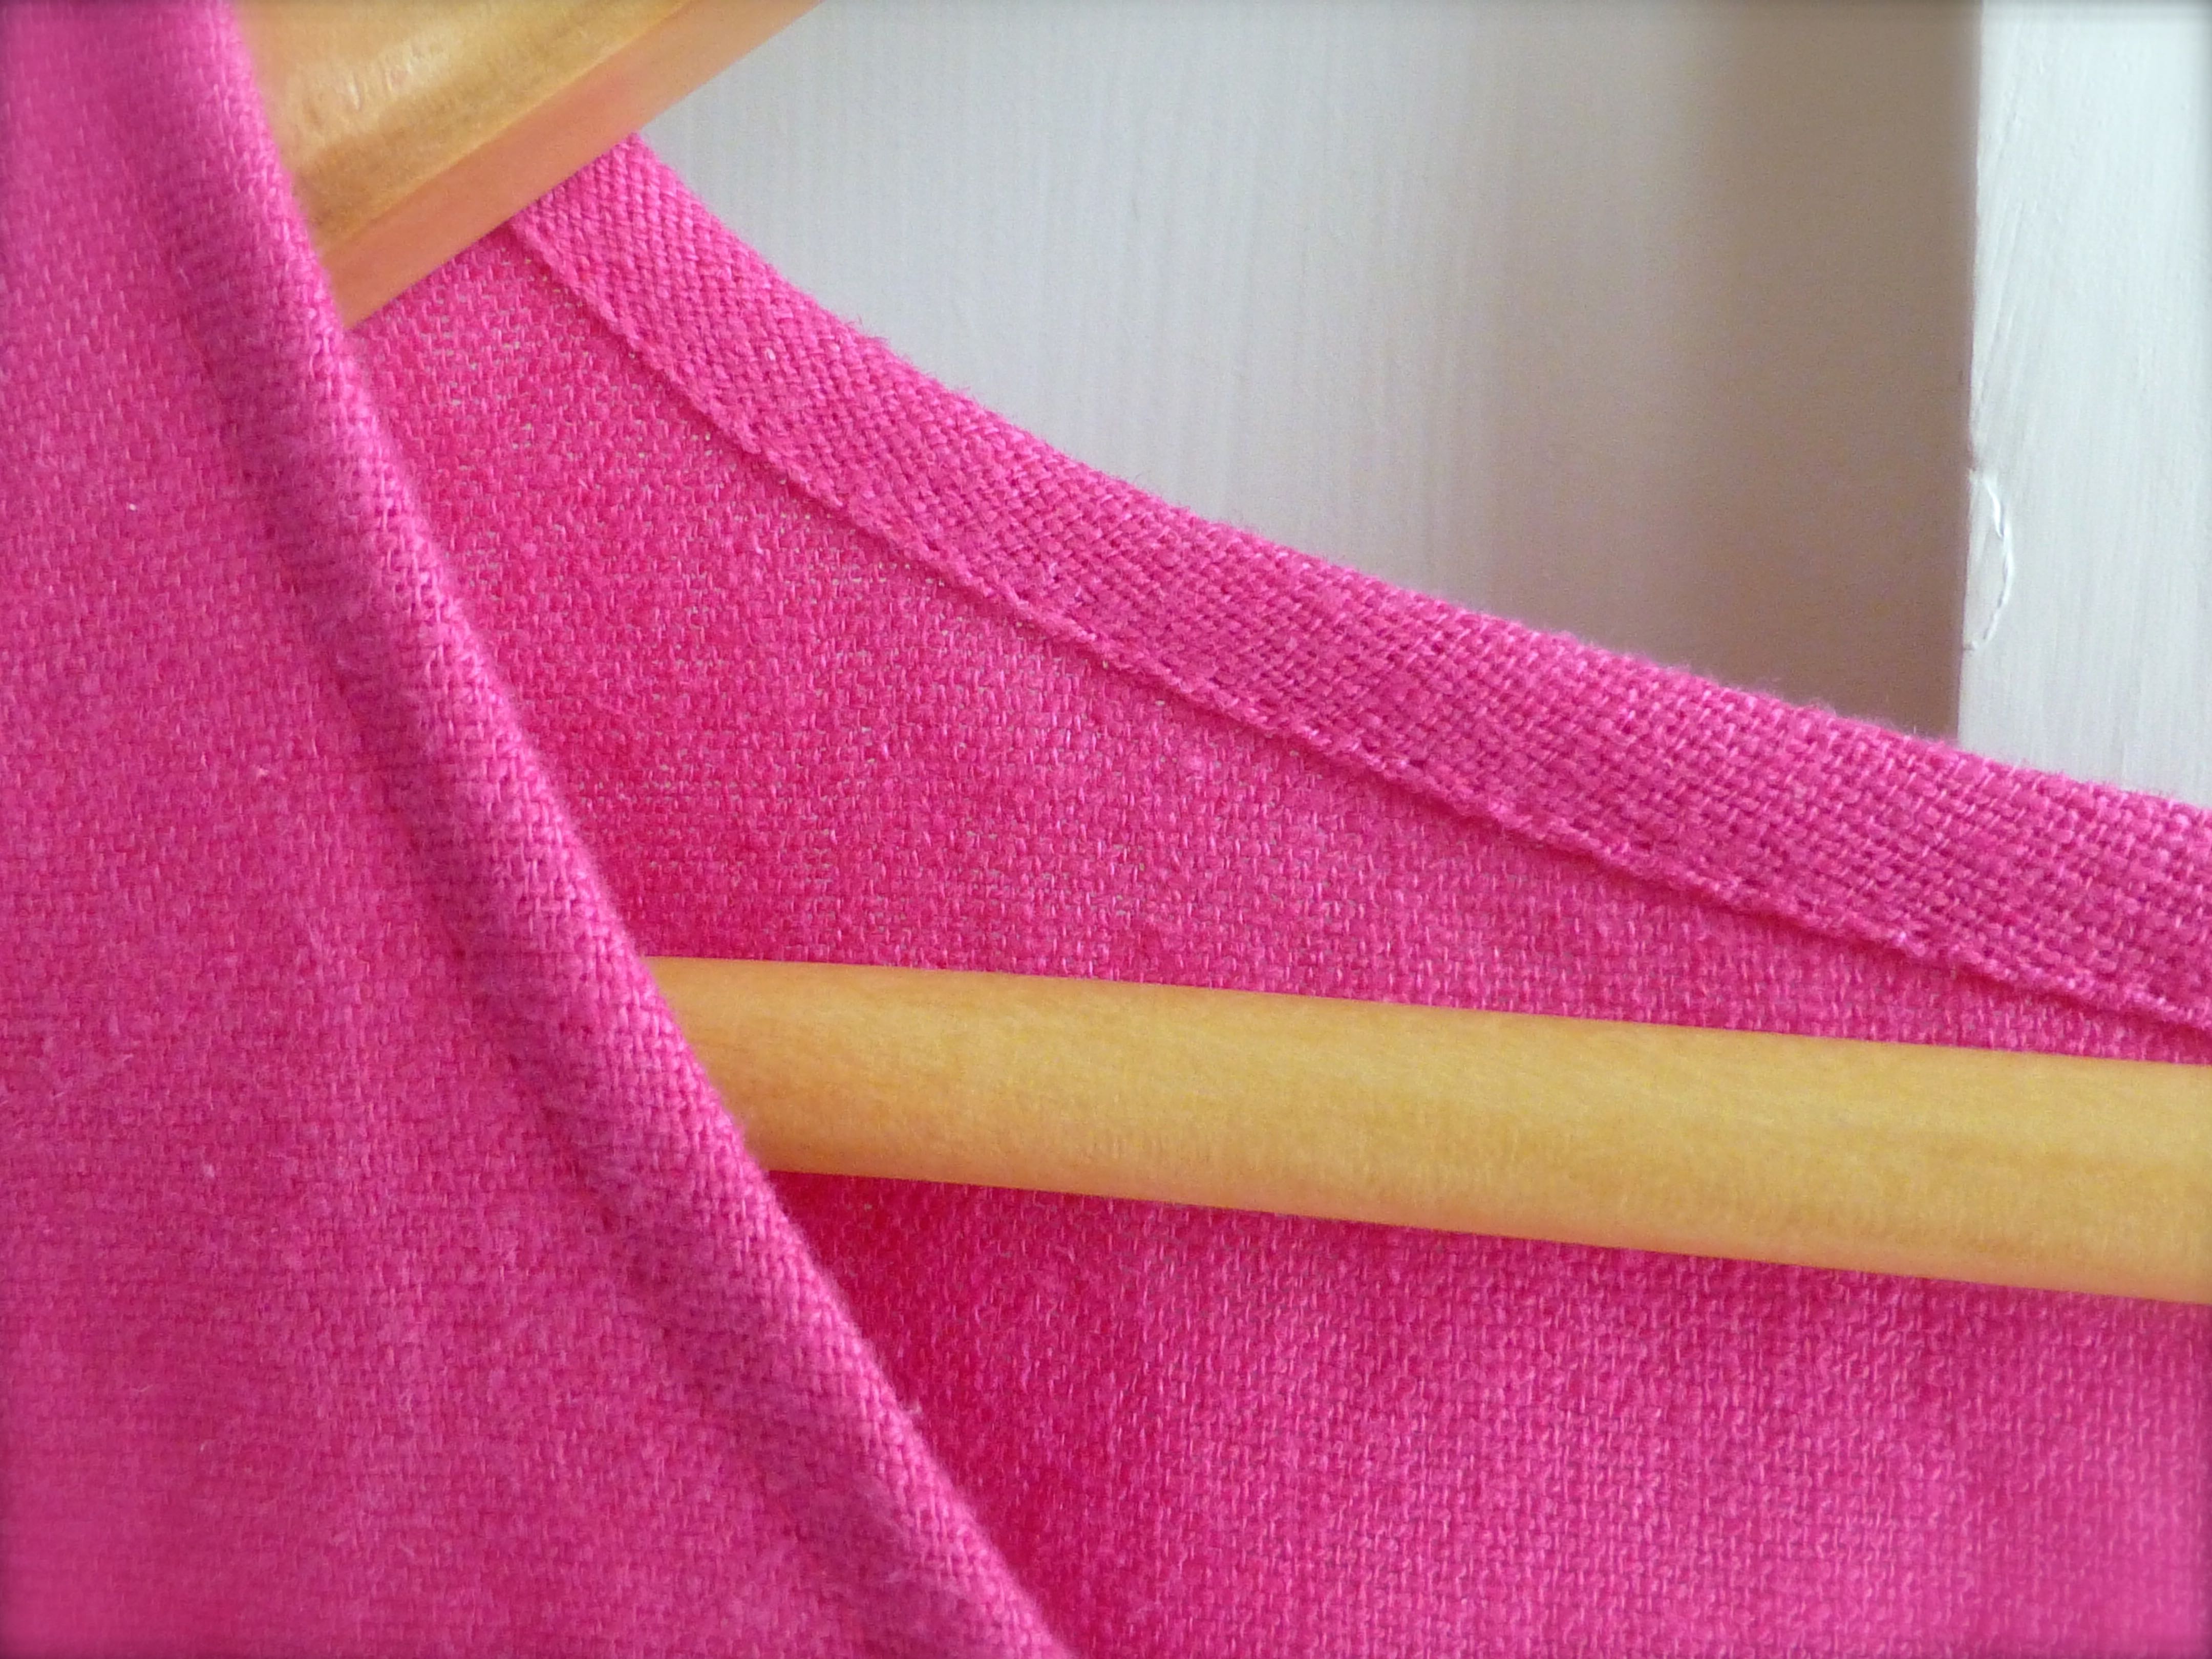
Narrow hems were made throughout, so no need for facings.
I really liked the details in the tunic so I applied them to this dress as well.
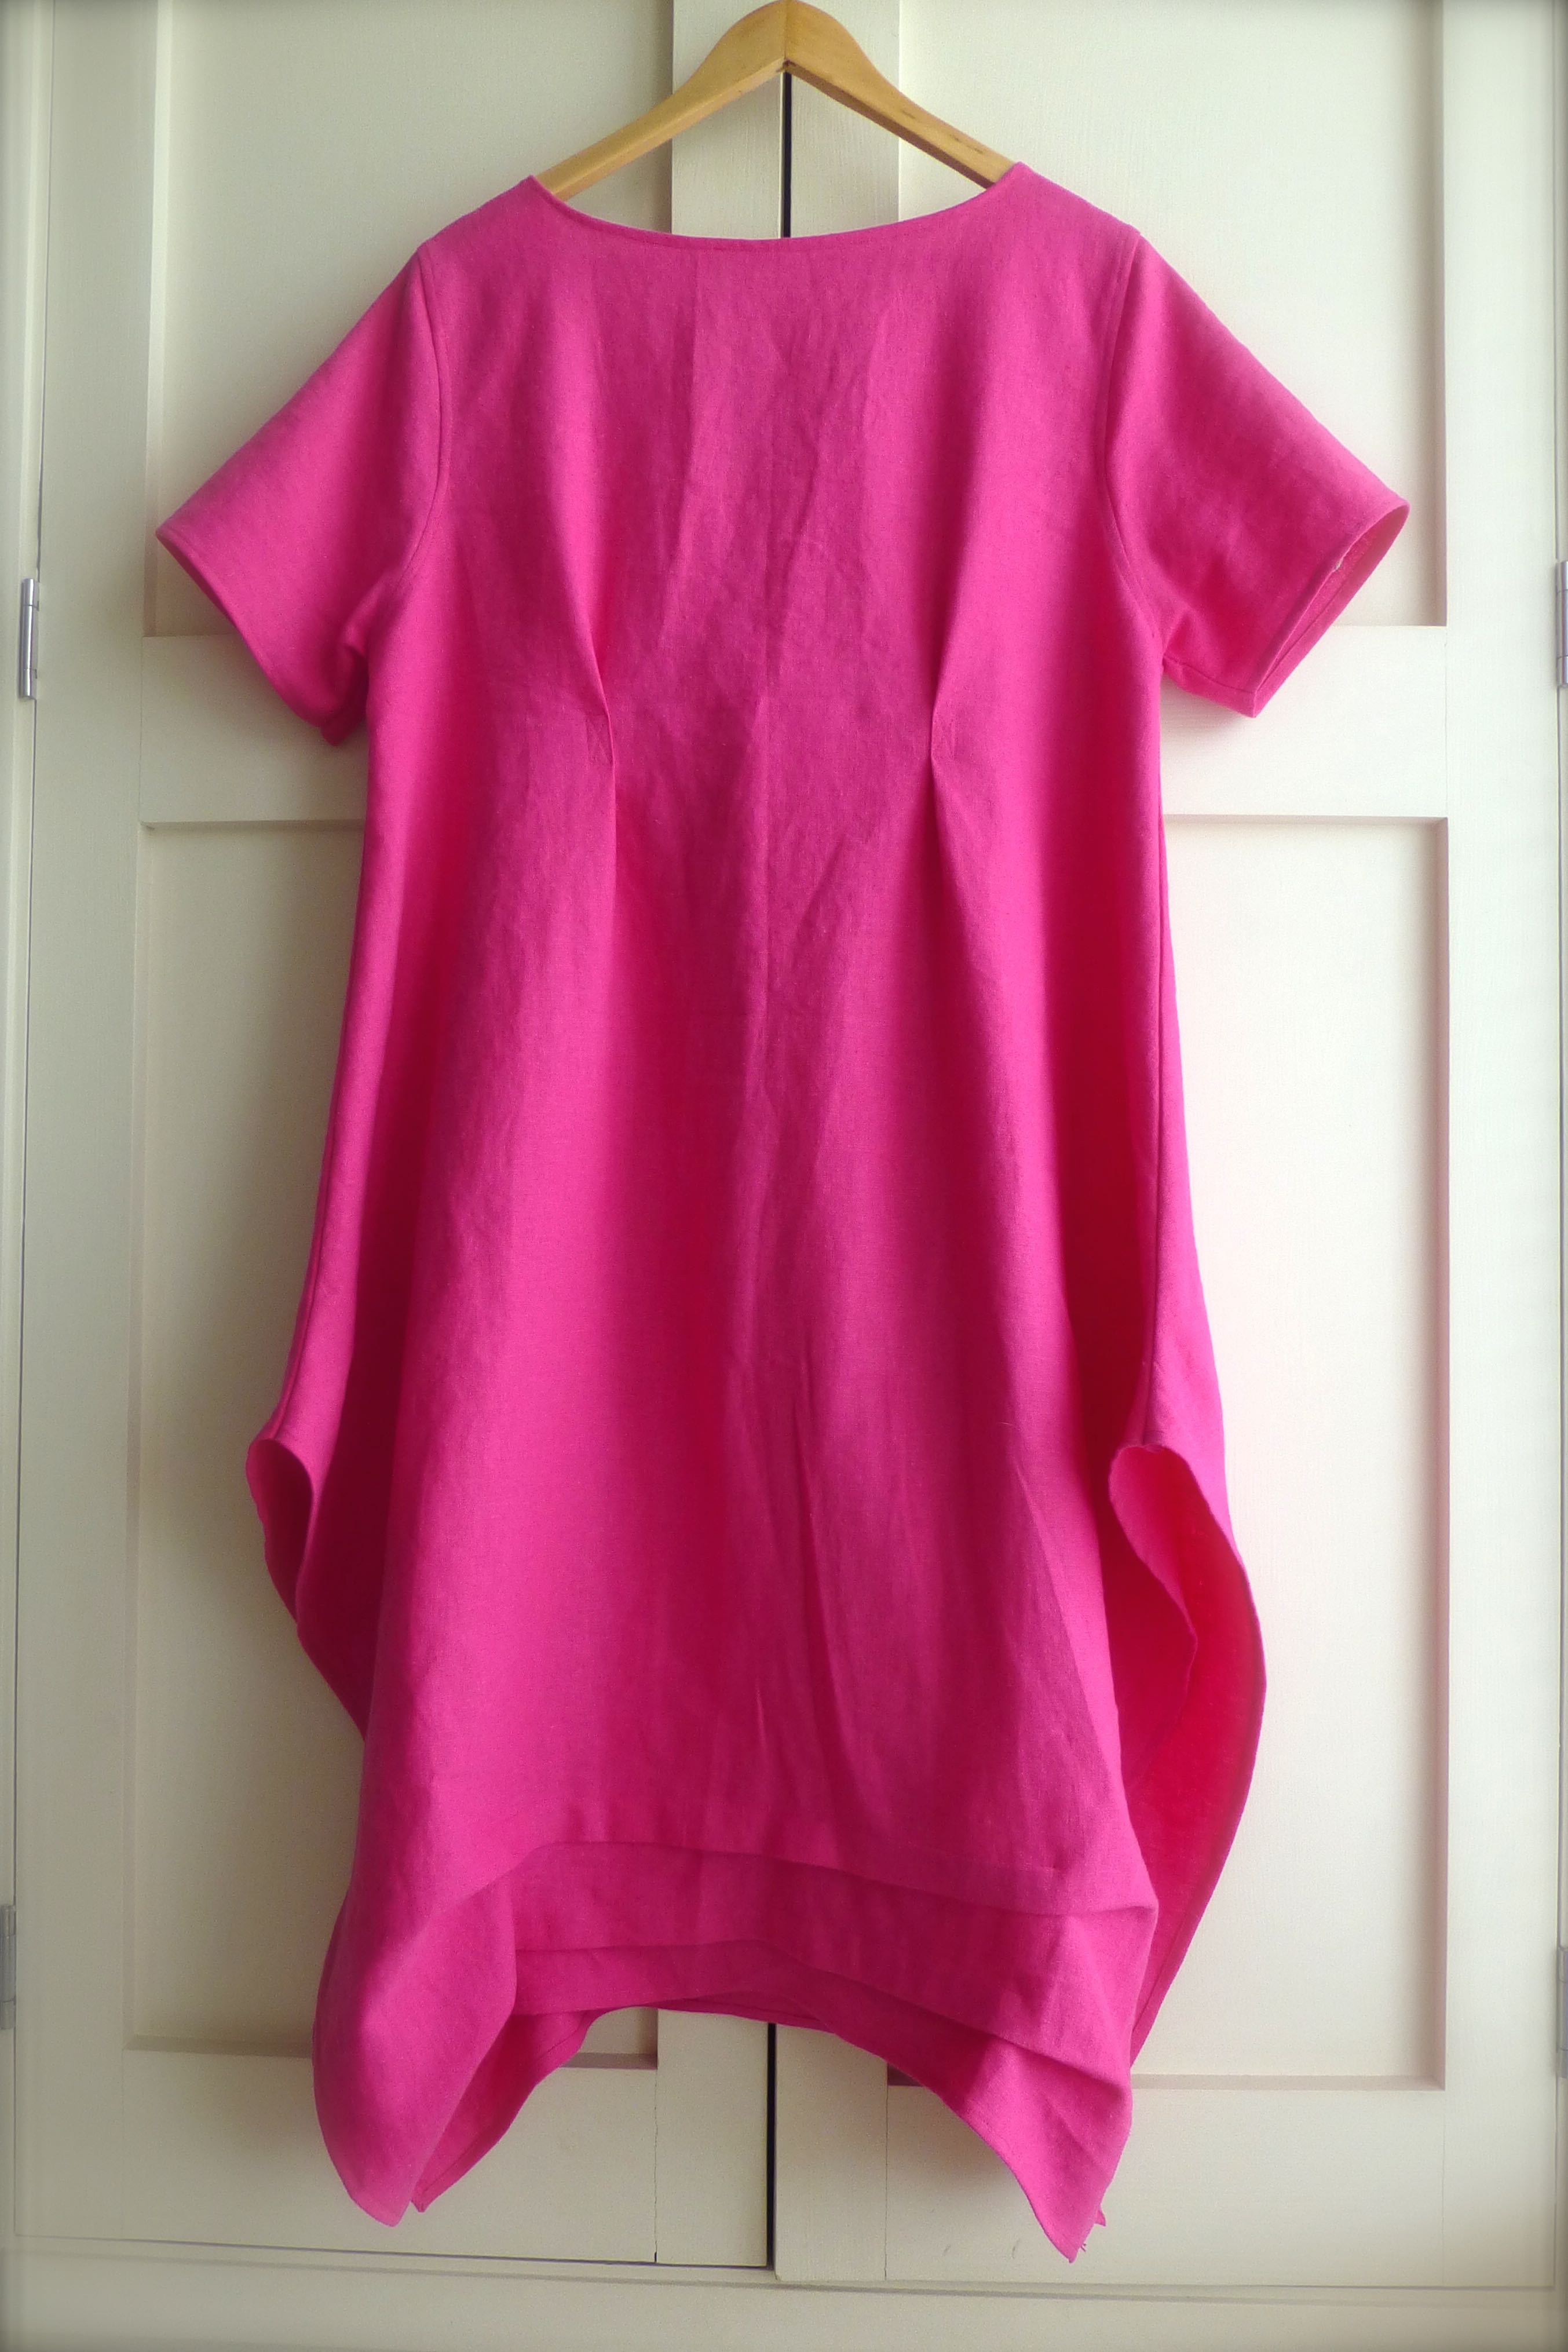
The parallel pleats on the front and back which draw the centre upwards and allow the edges to hang lower in an interesting shape….
…the exterior pleats on the back which add shape as an alternative to darts…
….and the inverted centre front pleat adorned with two coconut shell buttons.
I added two pockets this time, in a slightly different style….
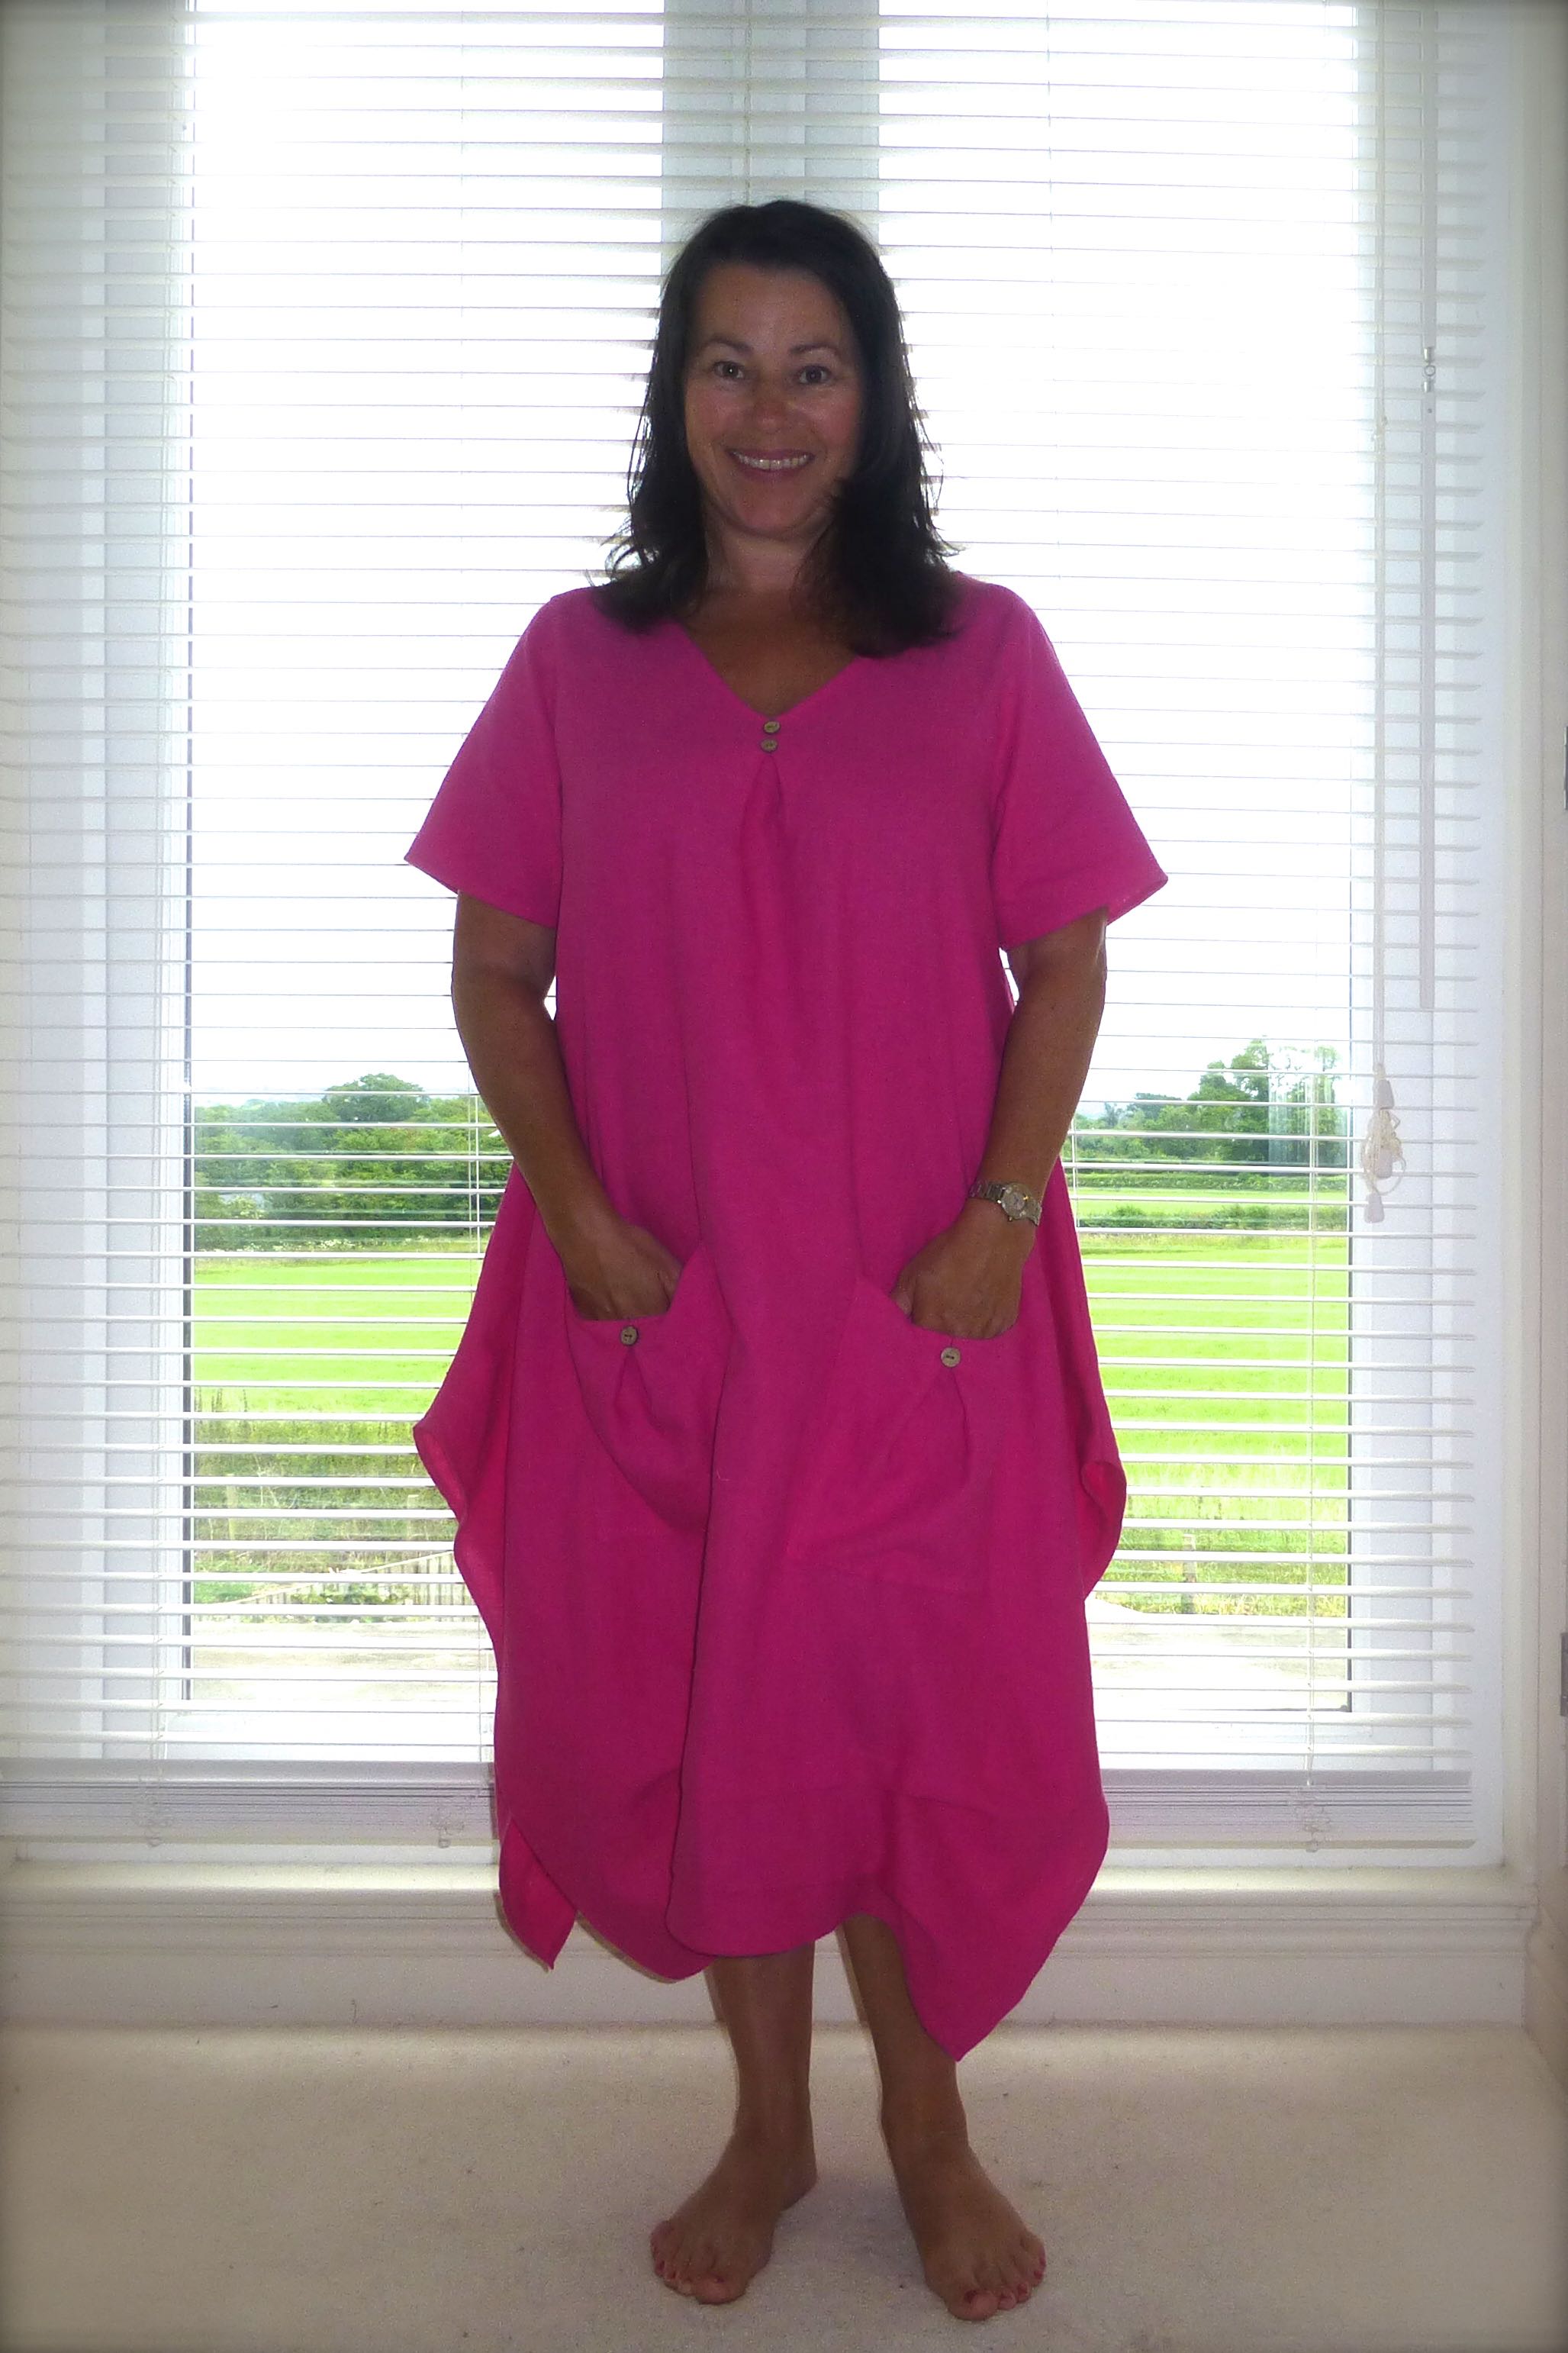
…and this is the finished article!
The sides are split to mid thigh level which lets the breeze in to keep me nice and cool!
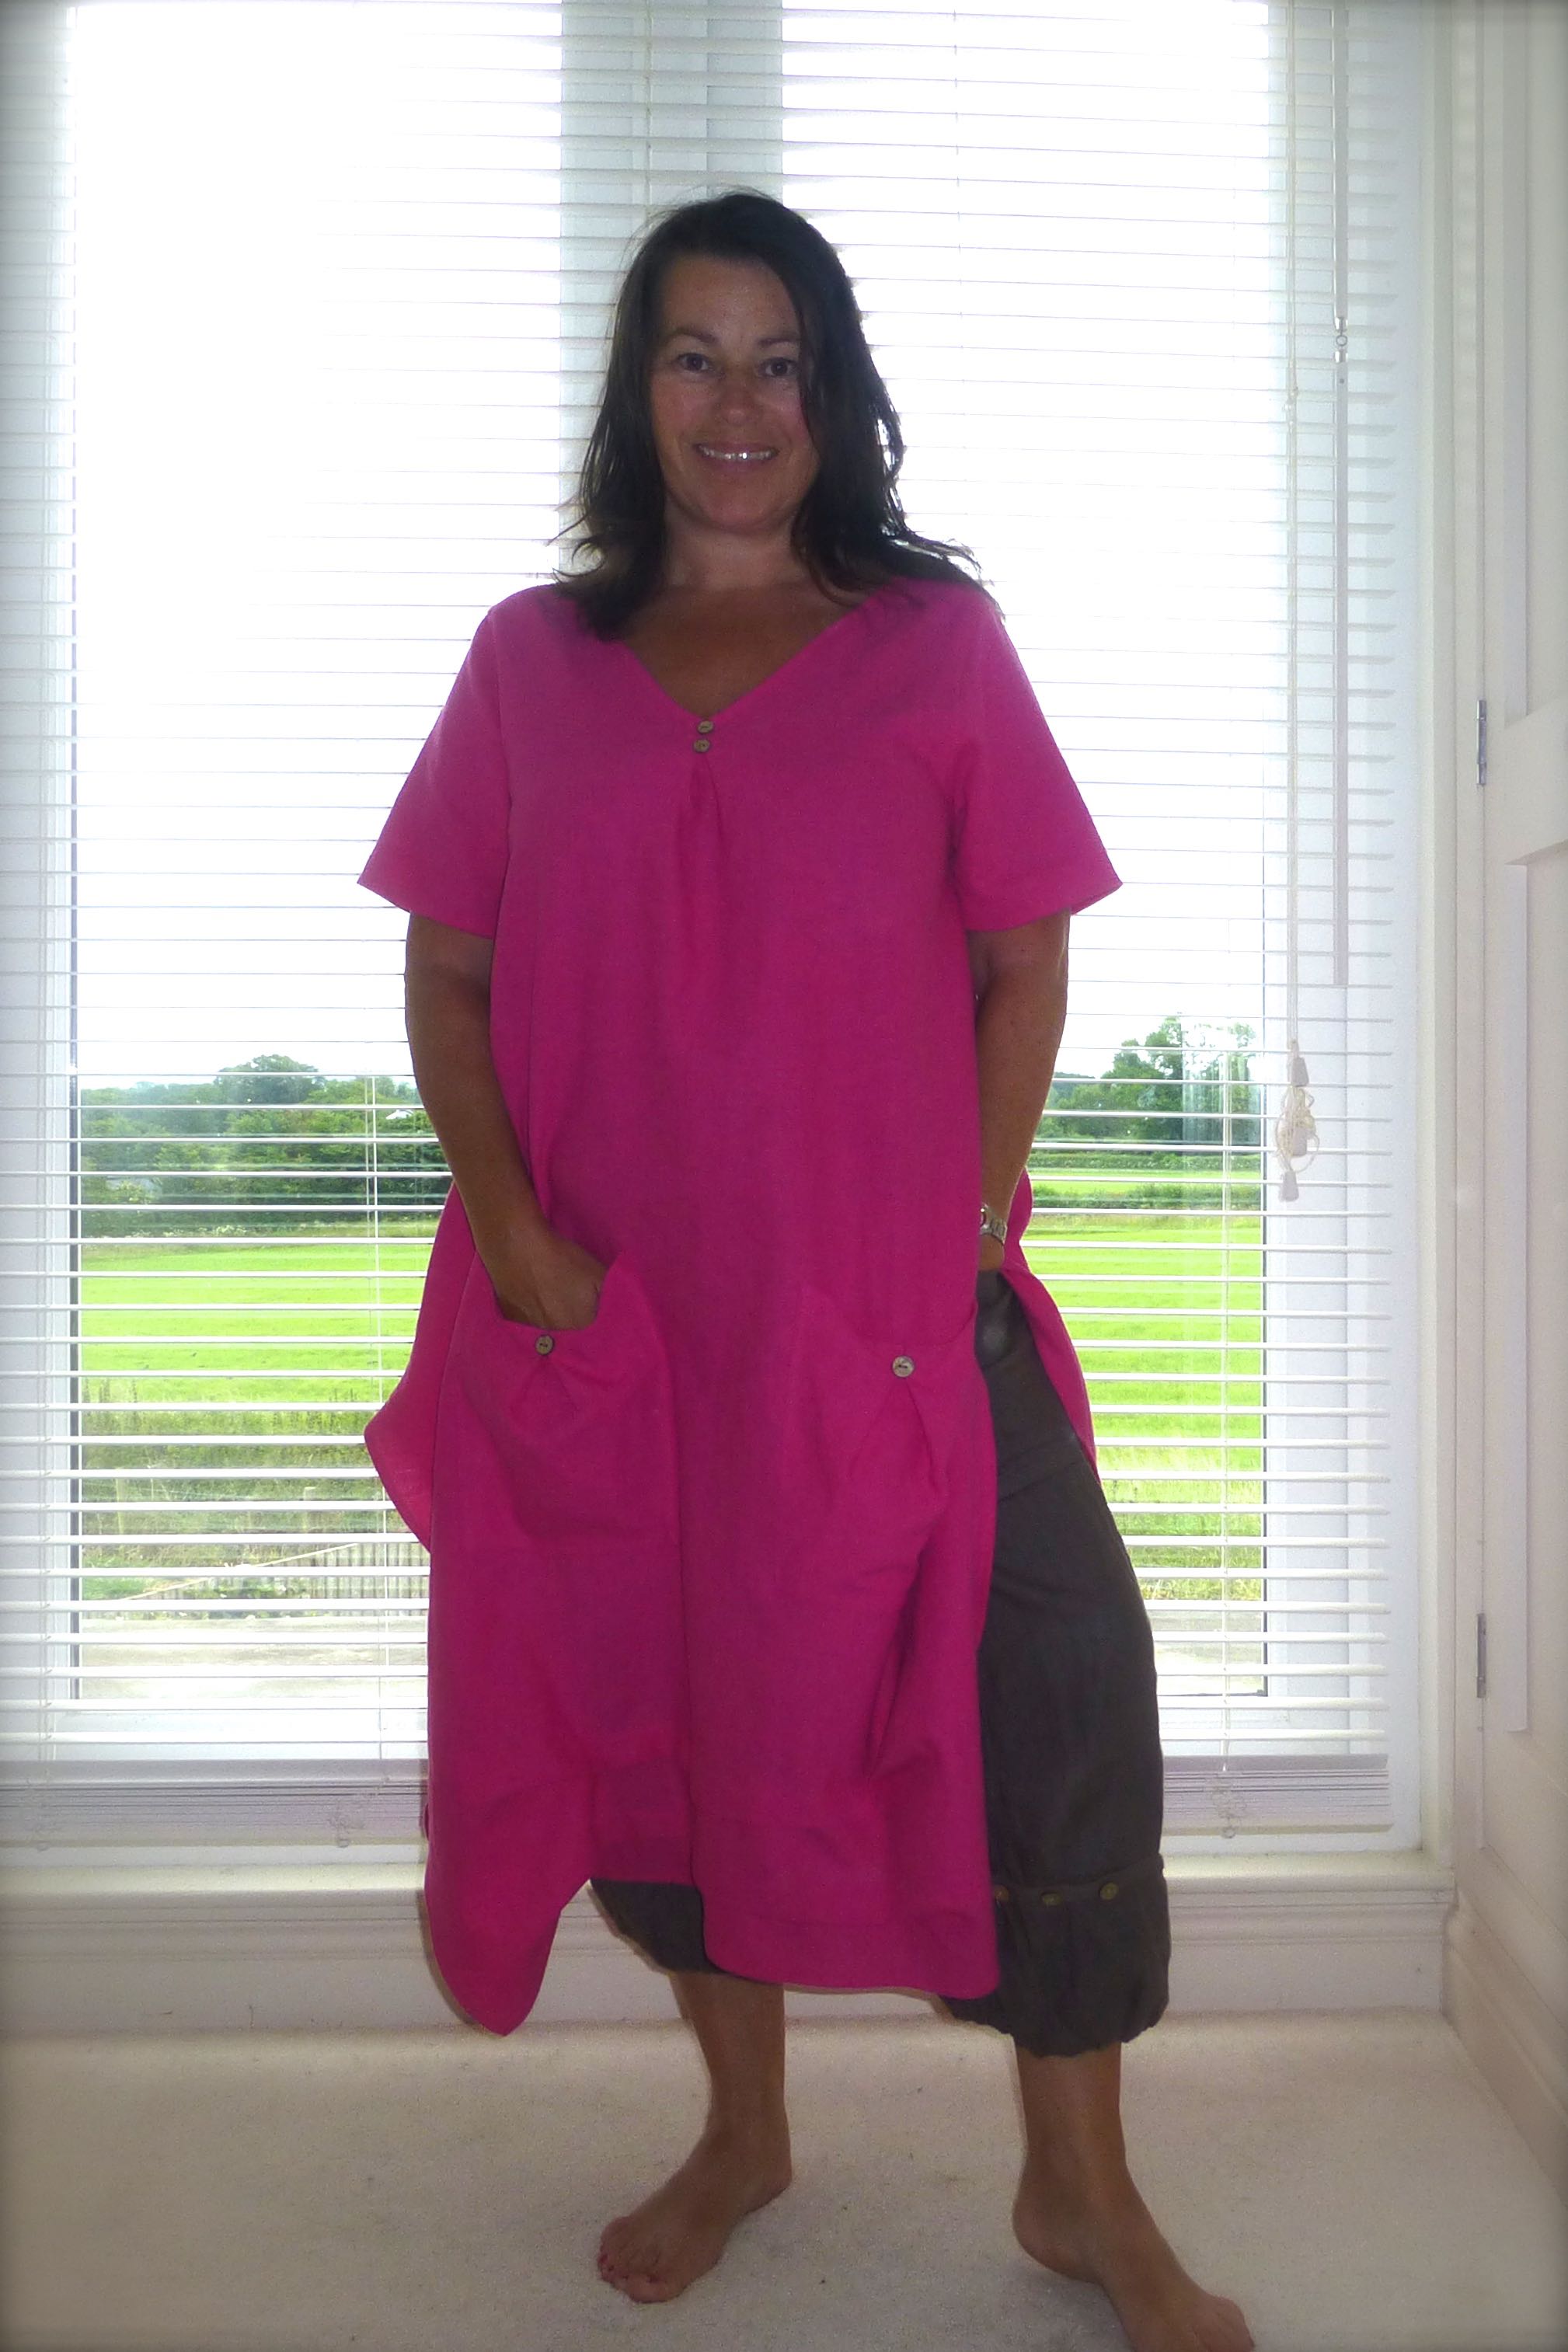
I can also wear linen trousers underneath for a different look (or if it gets cooler).
Very casual, comfortable and cool – three reasons why I LOVE linen!
A couple of months ago I refashioned and repaired an old T-shirt discarded by my father-in-law in favour of some new ones, and made a perfectly wearable ‘new’ T-shirt for No.3 Son. (Blogged about here.)
I also had these two still waiting to be transformed into something The Boys would happily wear.
I was flicking through my old Love Sewing magazines when I came upon this pattern in Issue 10: –
The last T-shirt refashion was drafted from an existing shirt but, stupidly, I didn’t make a paper copy of it, so when I saw this one in Love Sewing, I thought I’d give it a whirl.
(Talking of Love Sewing, look out for my feature in the next issue!)
The sleeves would have to be short though, and the neckline is a bit too wide and ‘girly’ for my boys.
I cut out the largest size age 8-9 as No.3 Son is 8 next week and No.2 Son is 9. Perfect.
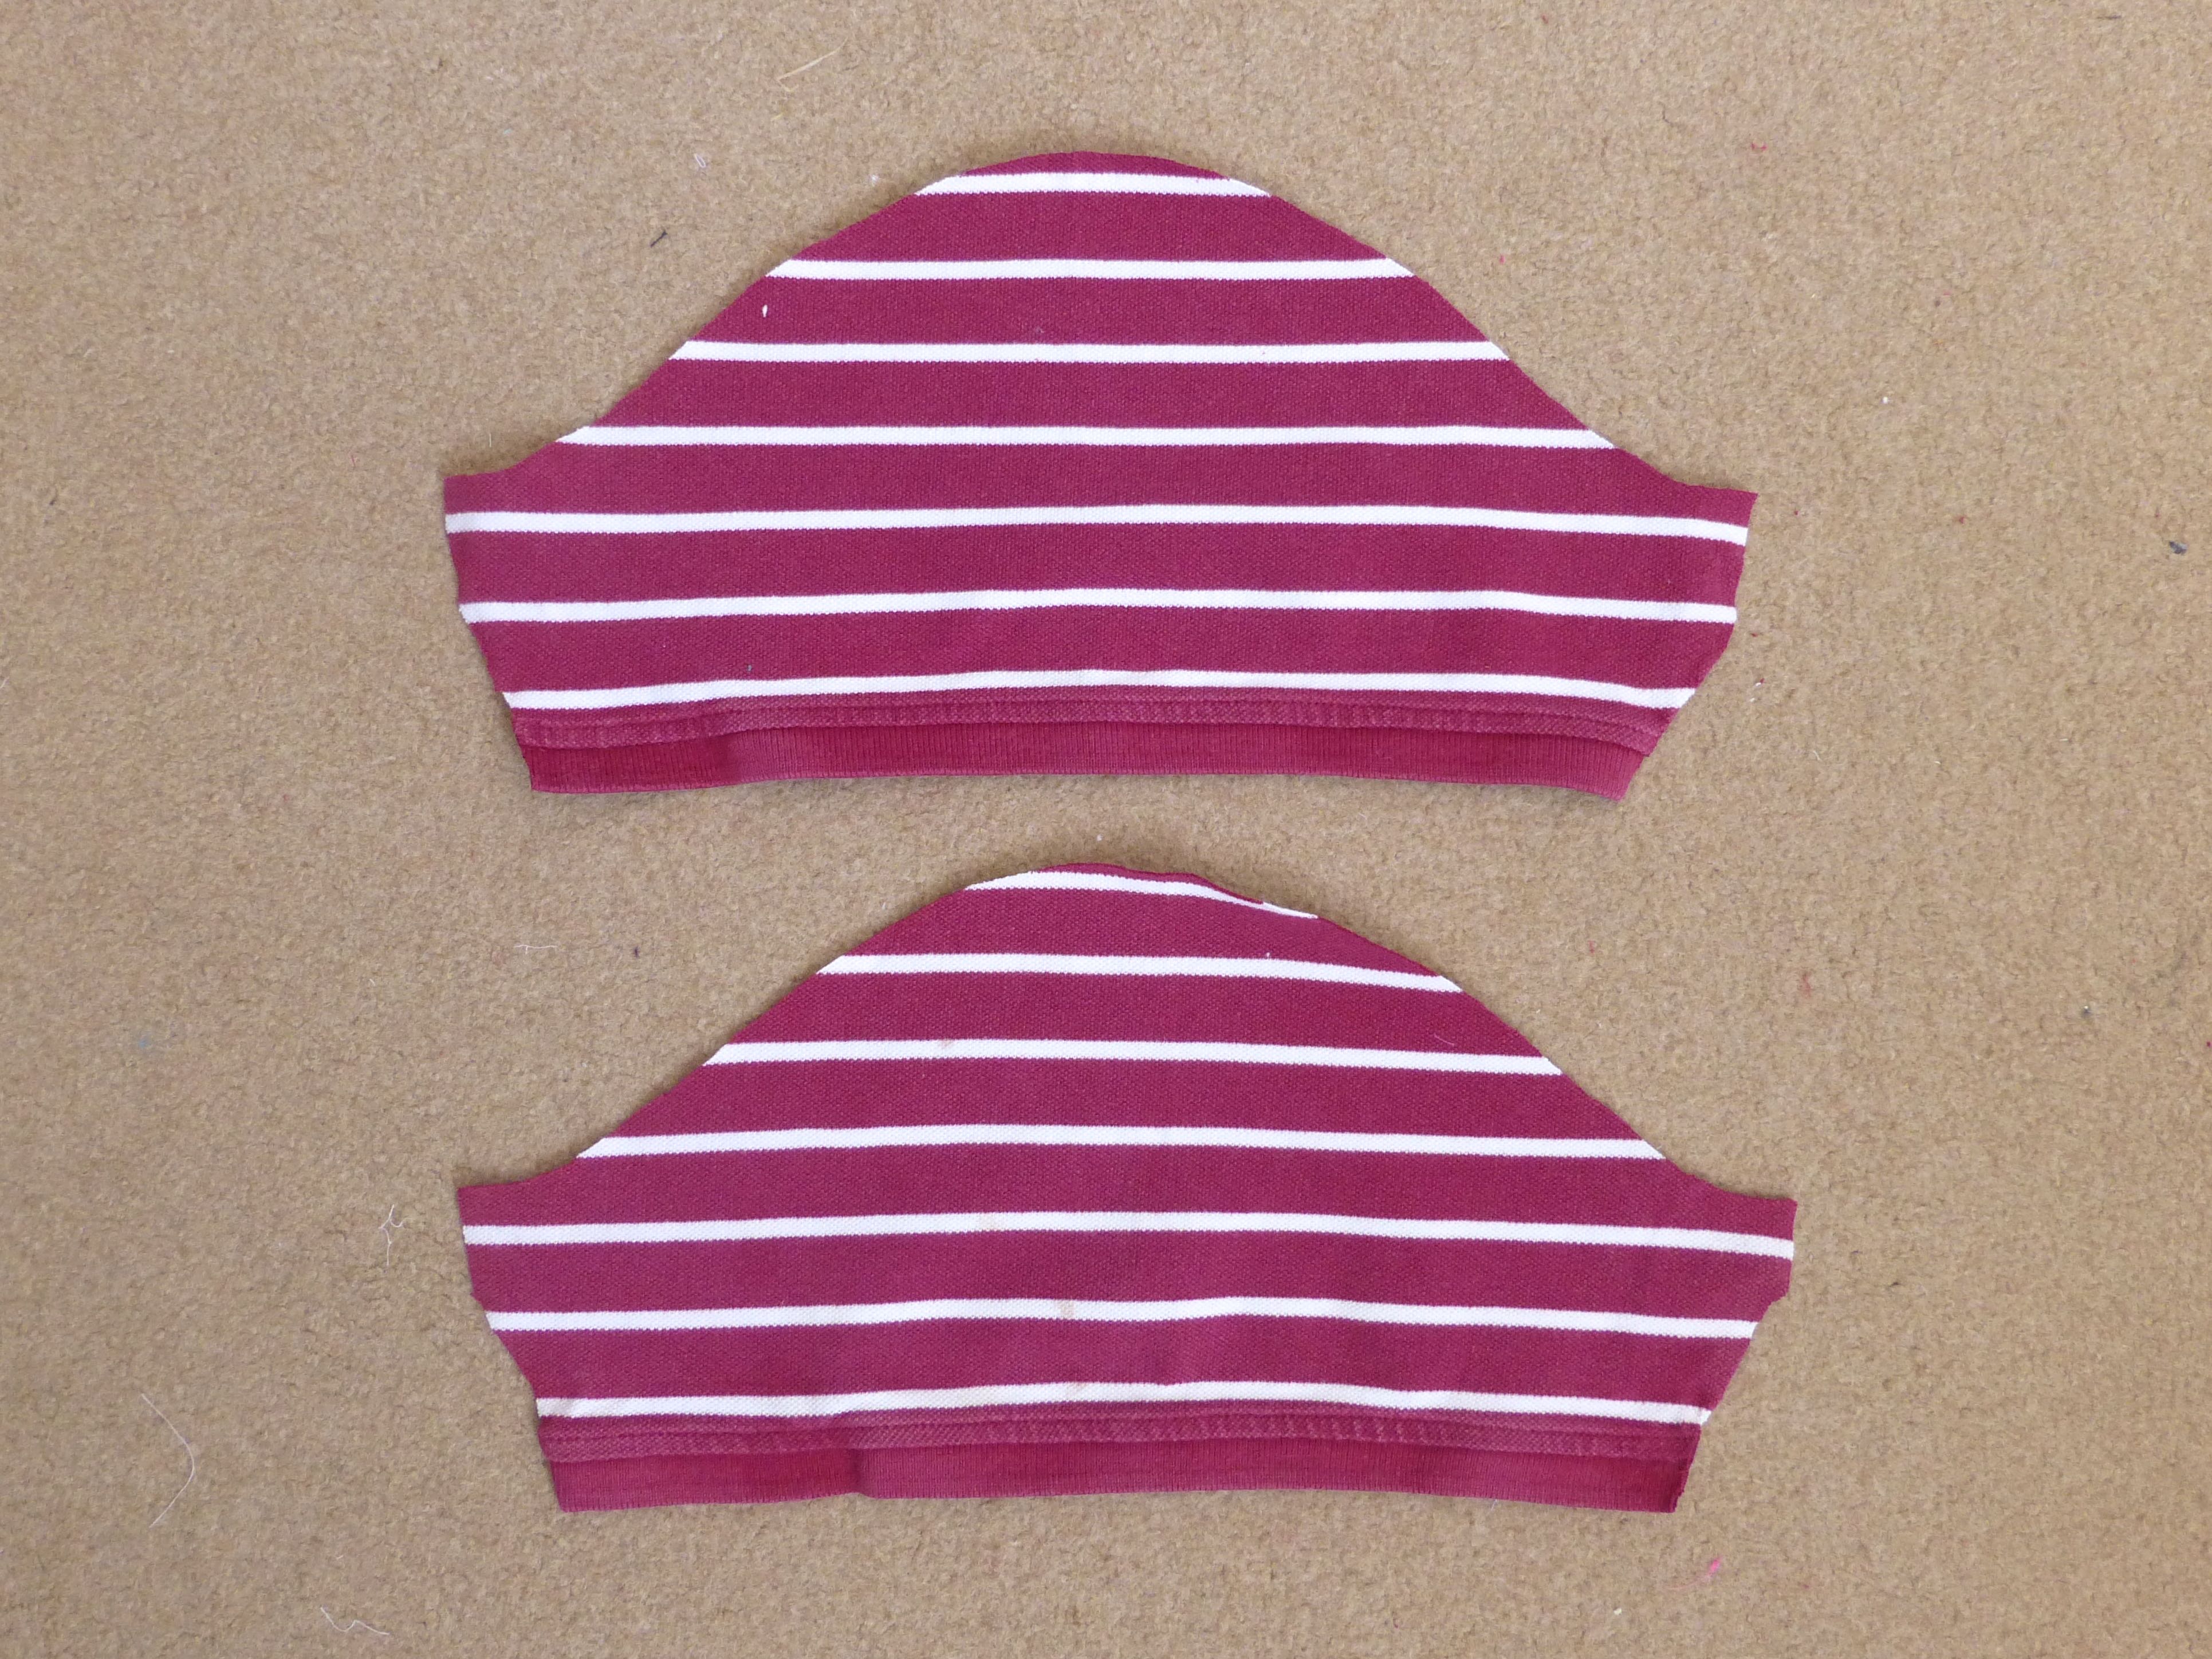
The two remaining shirts were different coloured versions of each other, so I decided to funk them up a little by swapping the sleeves as part of the remake.
I left all the original hems attached so these were both whipped up within a couple of hours – including tracing the pattern!
I used plain cotton tape to face the neckline as it was all I had to hand and it works perfectly.
Here they are waiting for The Boys to wreck them – they are mightily hard on their clothes!
Yep, they fit a treat – thanks, Love Sewing, for the free pattern!
So that’s another two items upcycled and given a new lease of life – fun, this sewing lark, isn’t it?
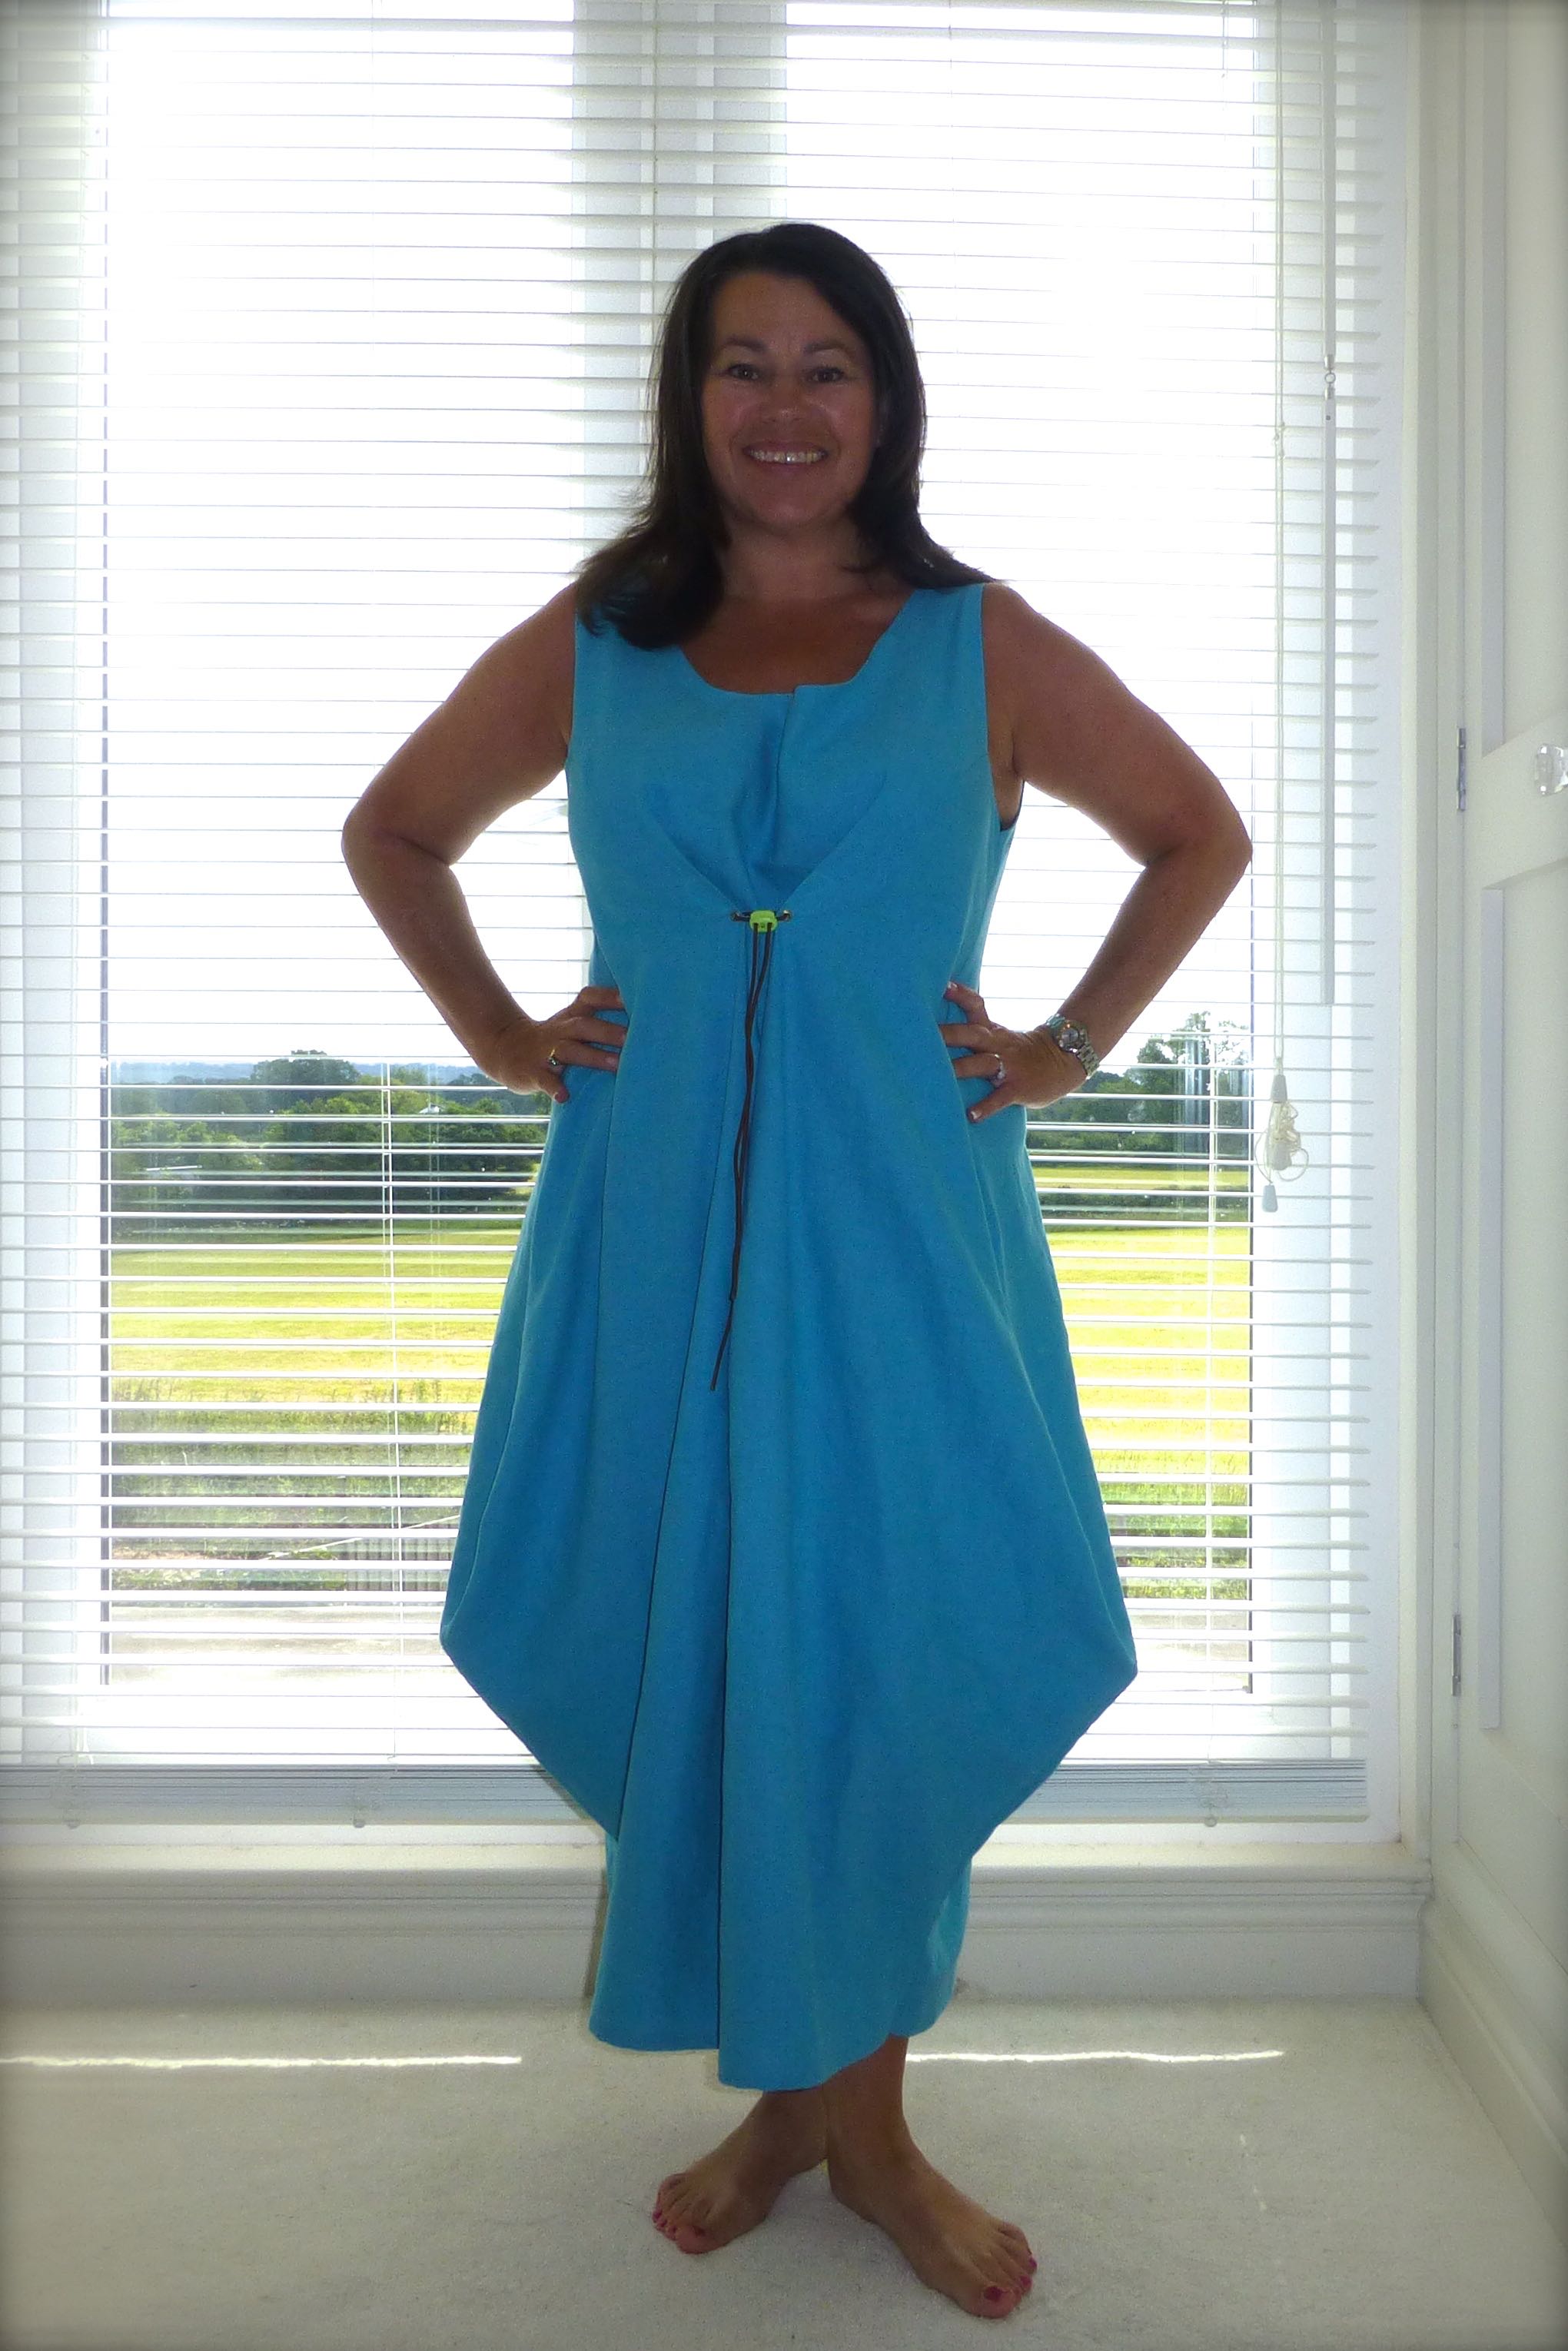
You may remember that a few weeks ago I showed you some brightly coloured linen that I bought from Calico Laine.
I made this Vogue designer Summer dress from the ‘Pool Blue’ and blogged about it here.
The gorgeous ‘Leaf Green’ was destined to become a tunic top of sorts, but I couldn’t find an off the shelf pattern that I liked enough so I decided to draft my own.
I had several features in mind from other tops I own that I wanted to incorporate, so I played around awhile until I came up with this: –
A one-piece front with a centre front pleat and two horizontal partial pleats running parallel to the hem.
The back was also to be one-piece and would have some added shape in the form of external darts.
It was also to be shorter than the front and there would be slits on both sides.
This is the finished tunic which, from the creases, you can see has been worn quite a bit already.
The inverted centre front pleat was reinforced with a line of top stitching….
…and a couple of coconut shell buttons.
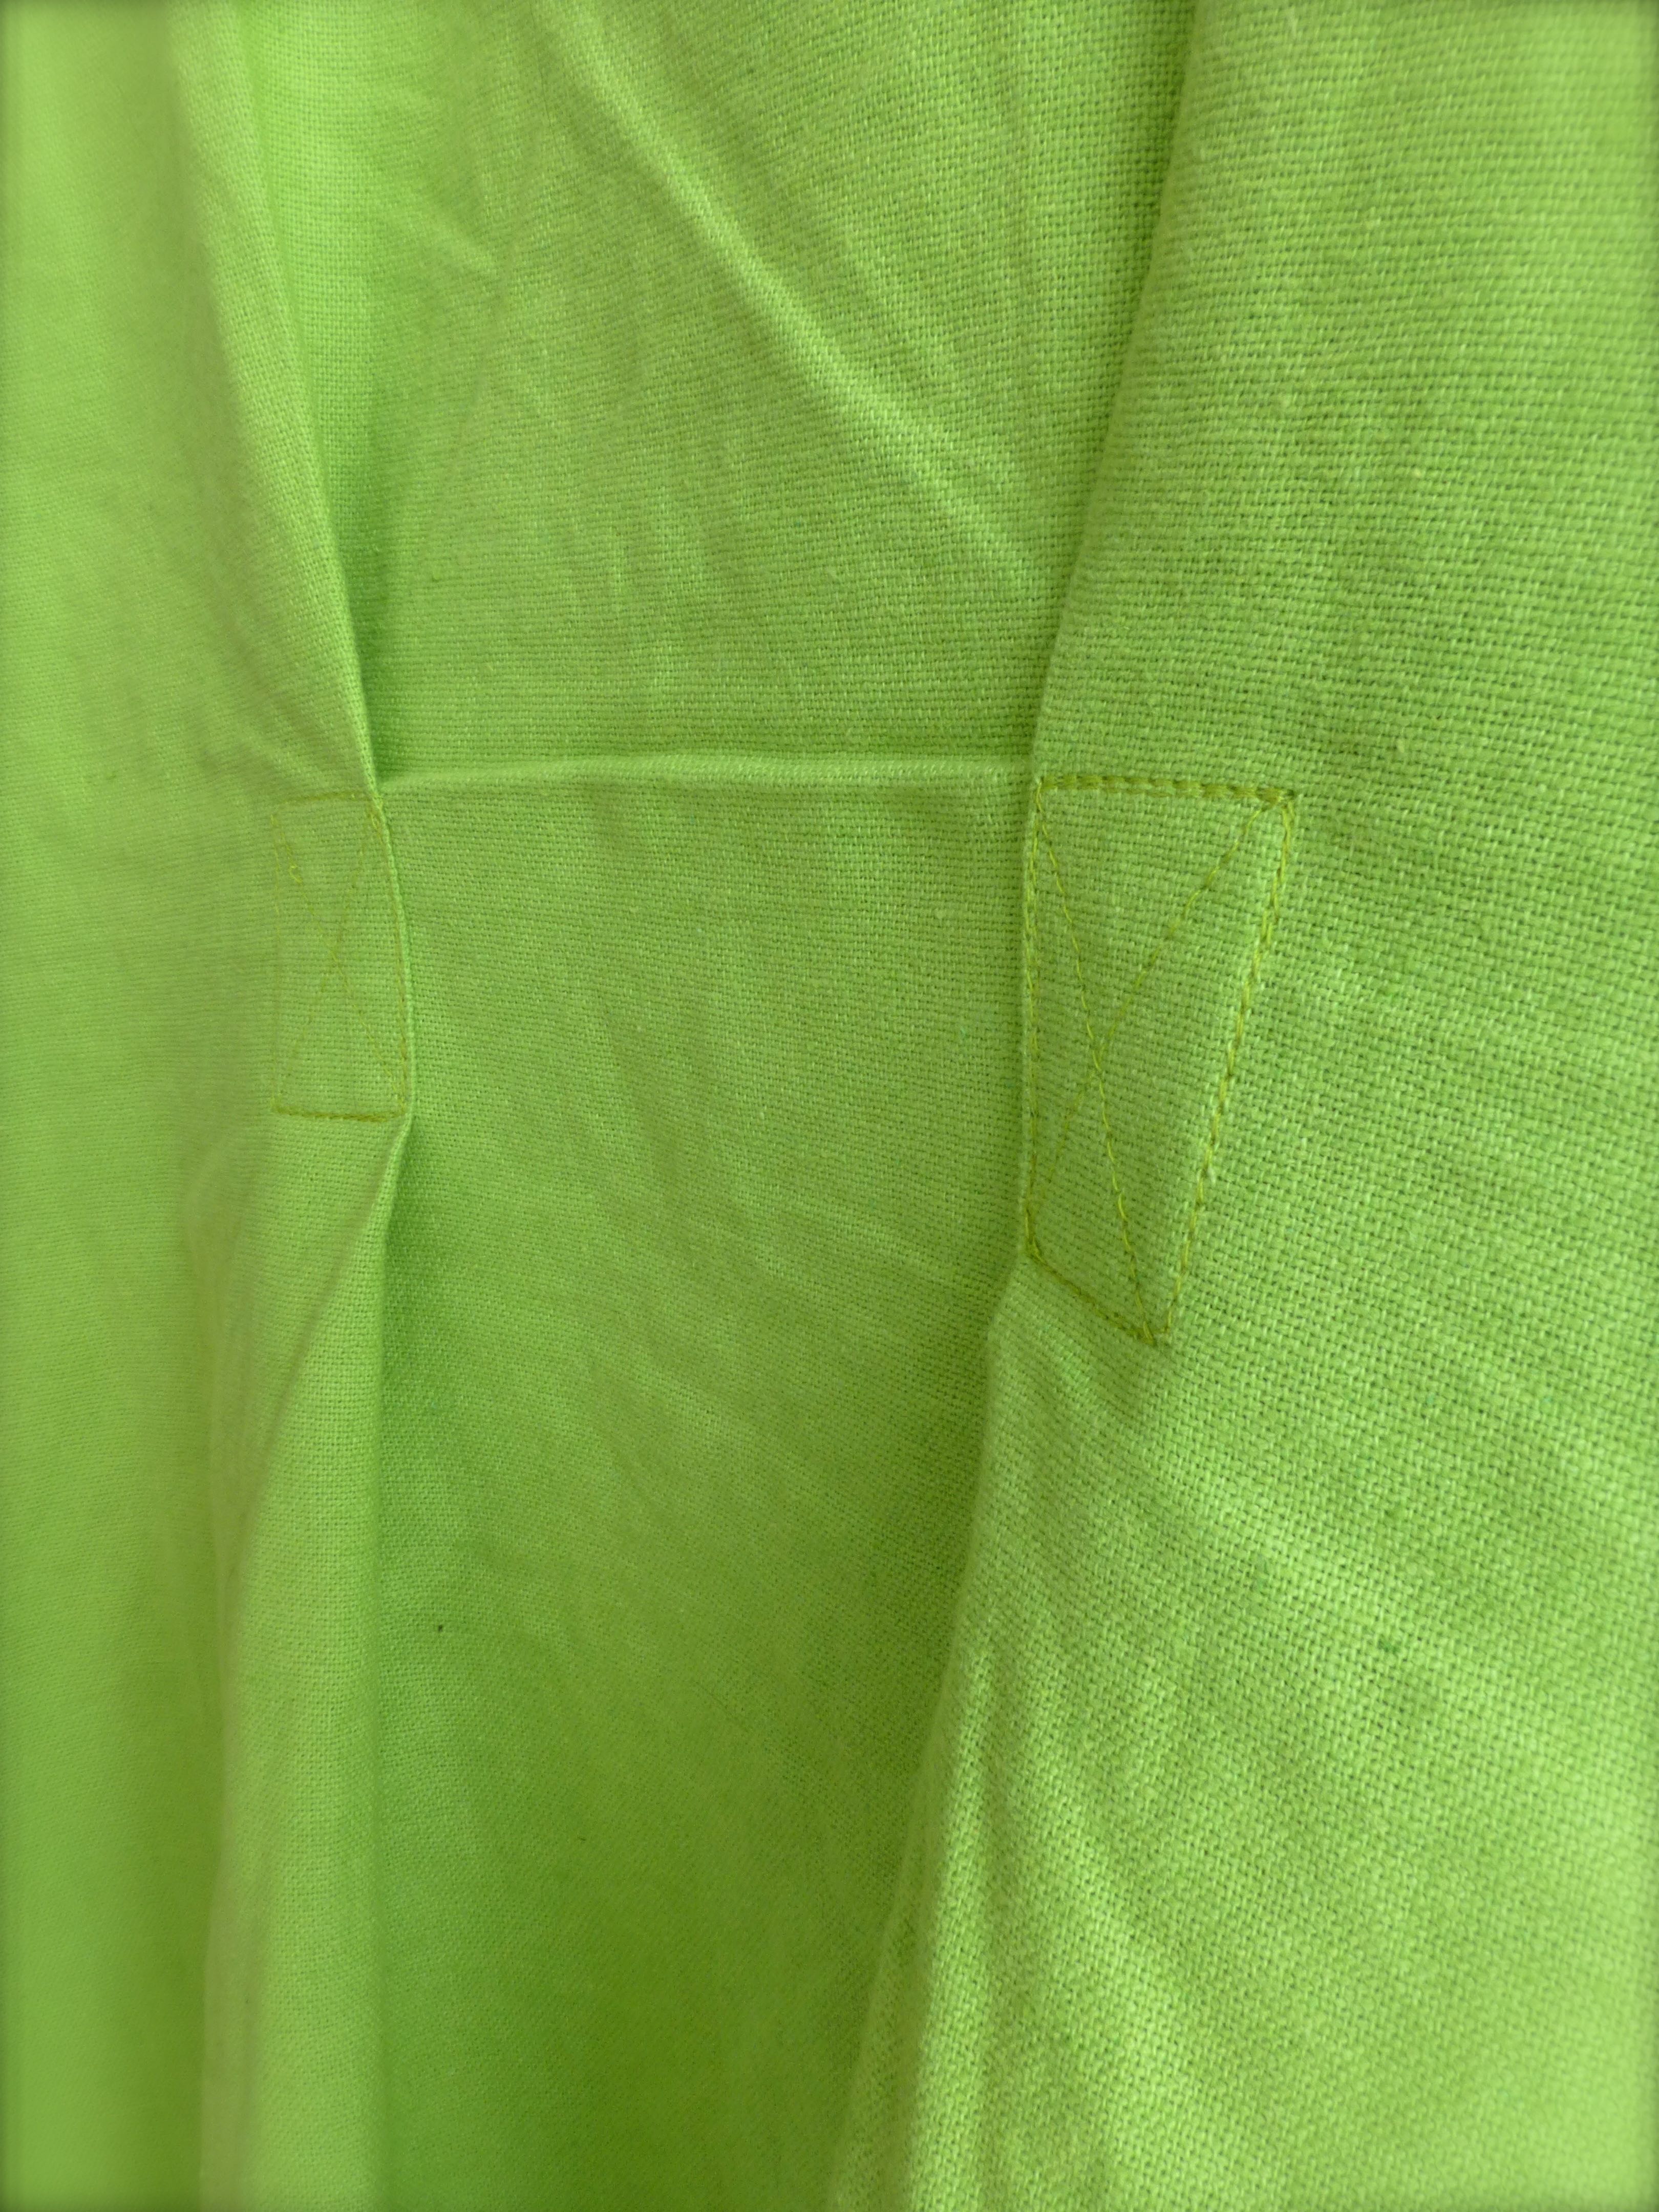
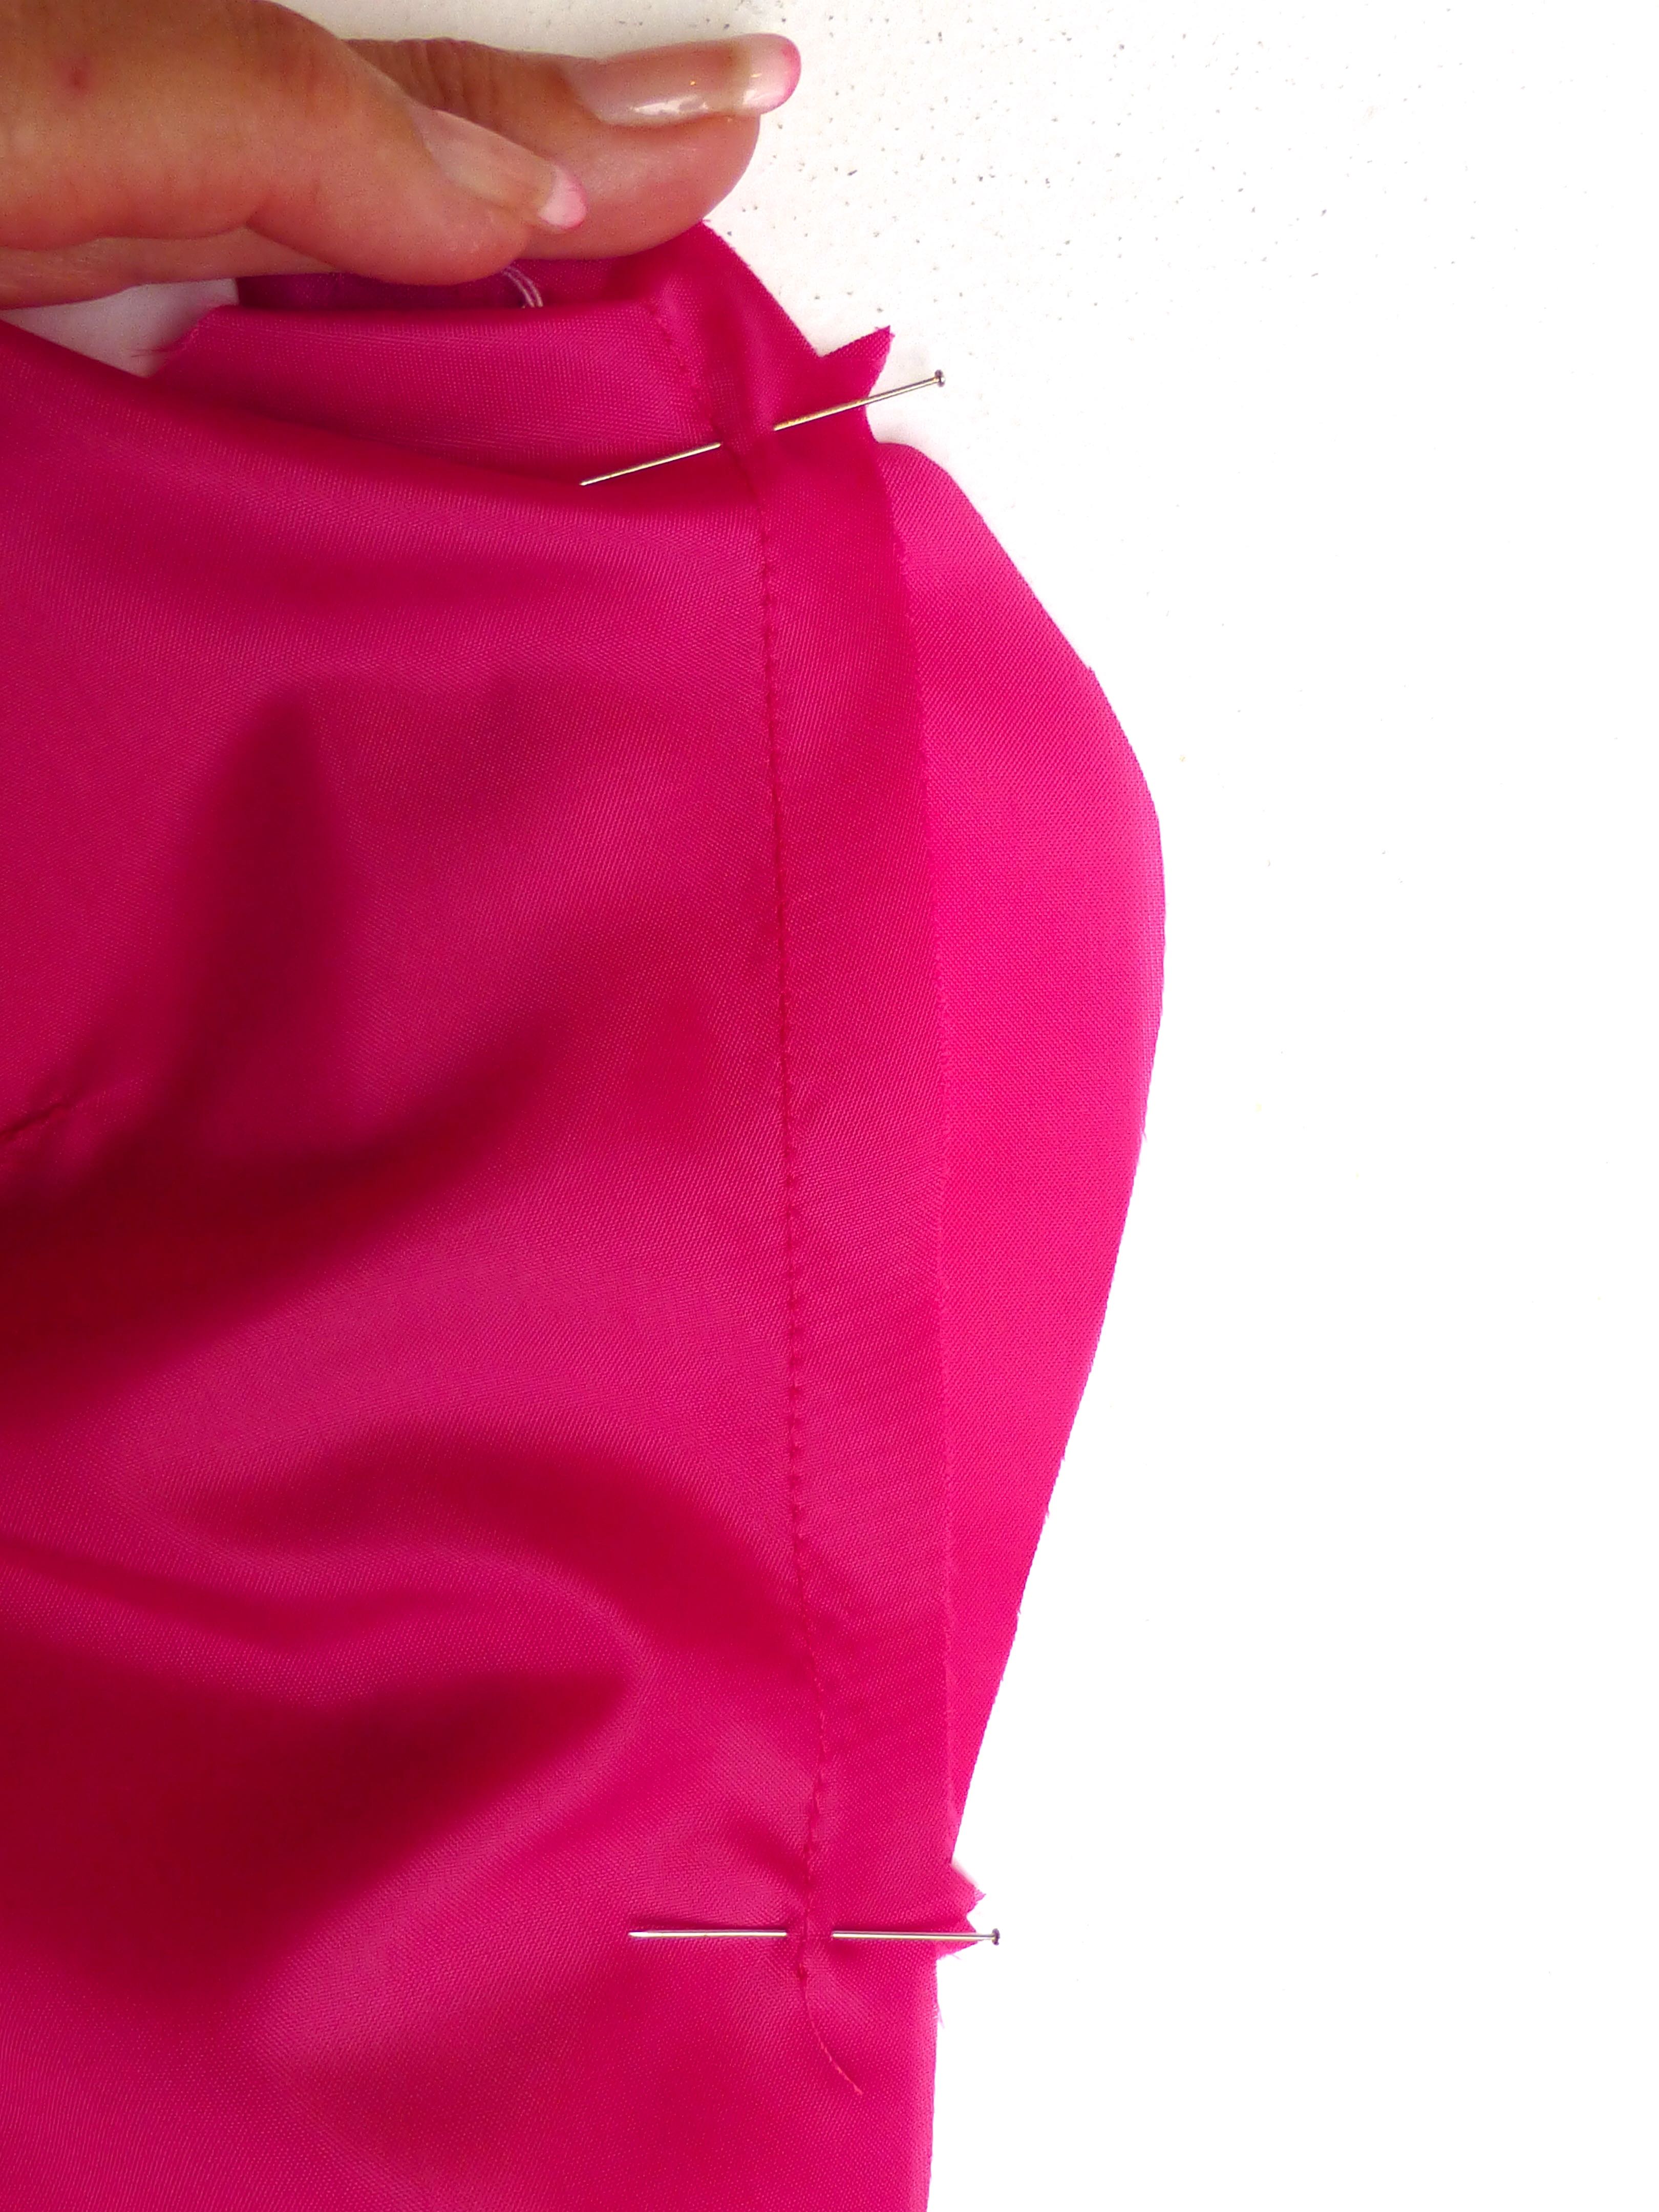
The parallel pleats at the bottom were designed to lift the tunic in the middle leaving the sides to drape lower.
To acheive the desired effect, the pleats were only partial and I only sewed between the pins as shown below.
I like the darts from the dress I made but was happier after securing them flat against the back, so I did the same with this tunic.
Much better!
French seams and narrow hems were used throughout.
The front pleats hang exactly as envisioned….
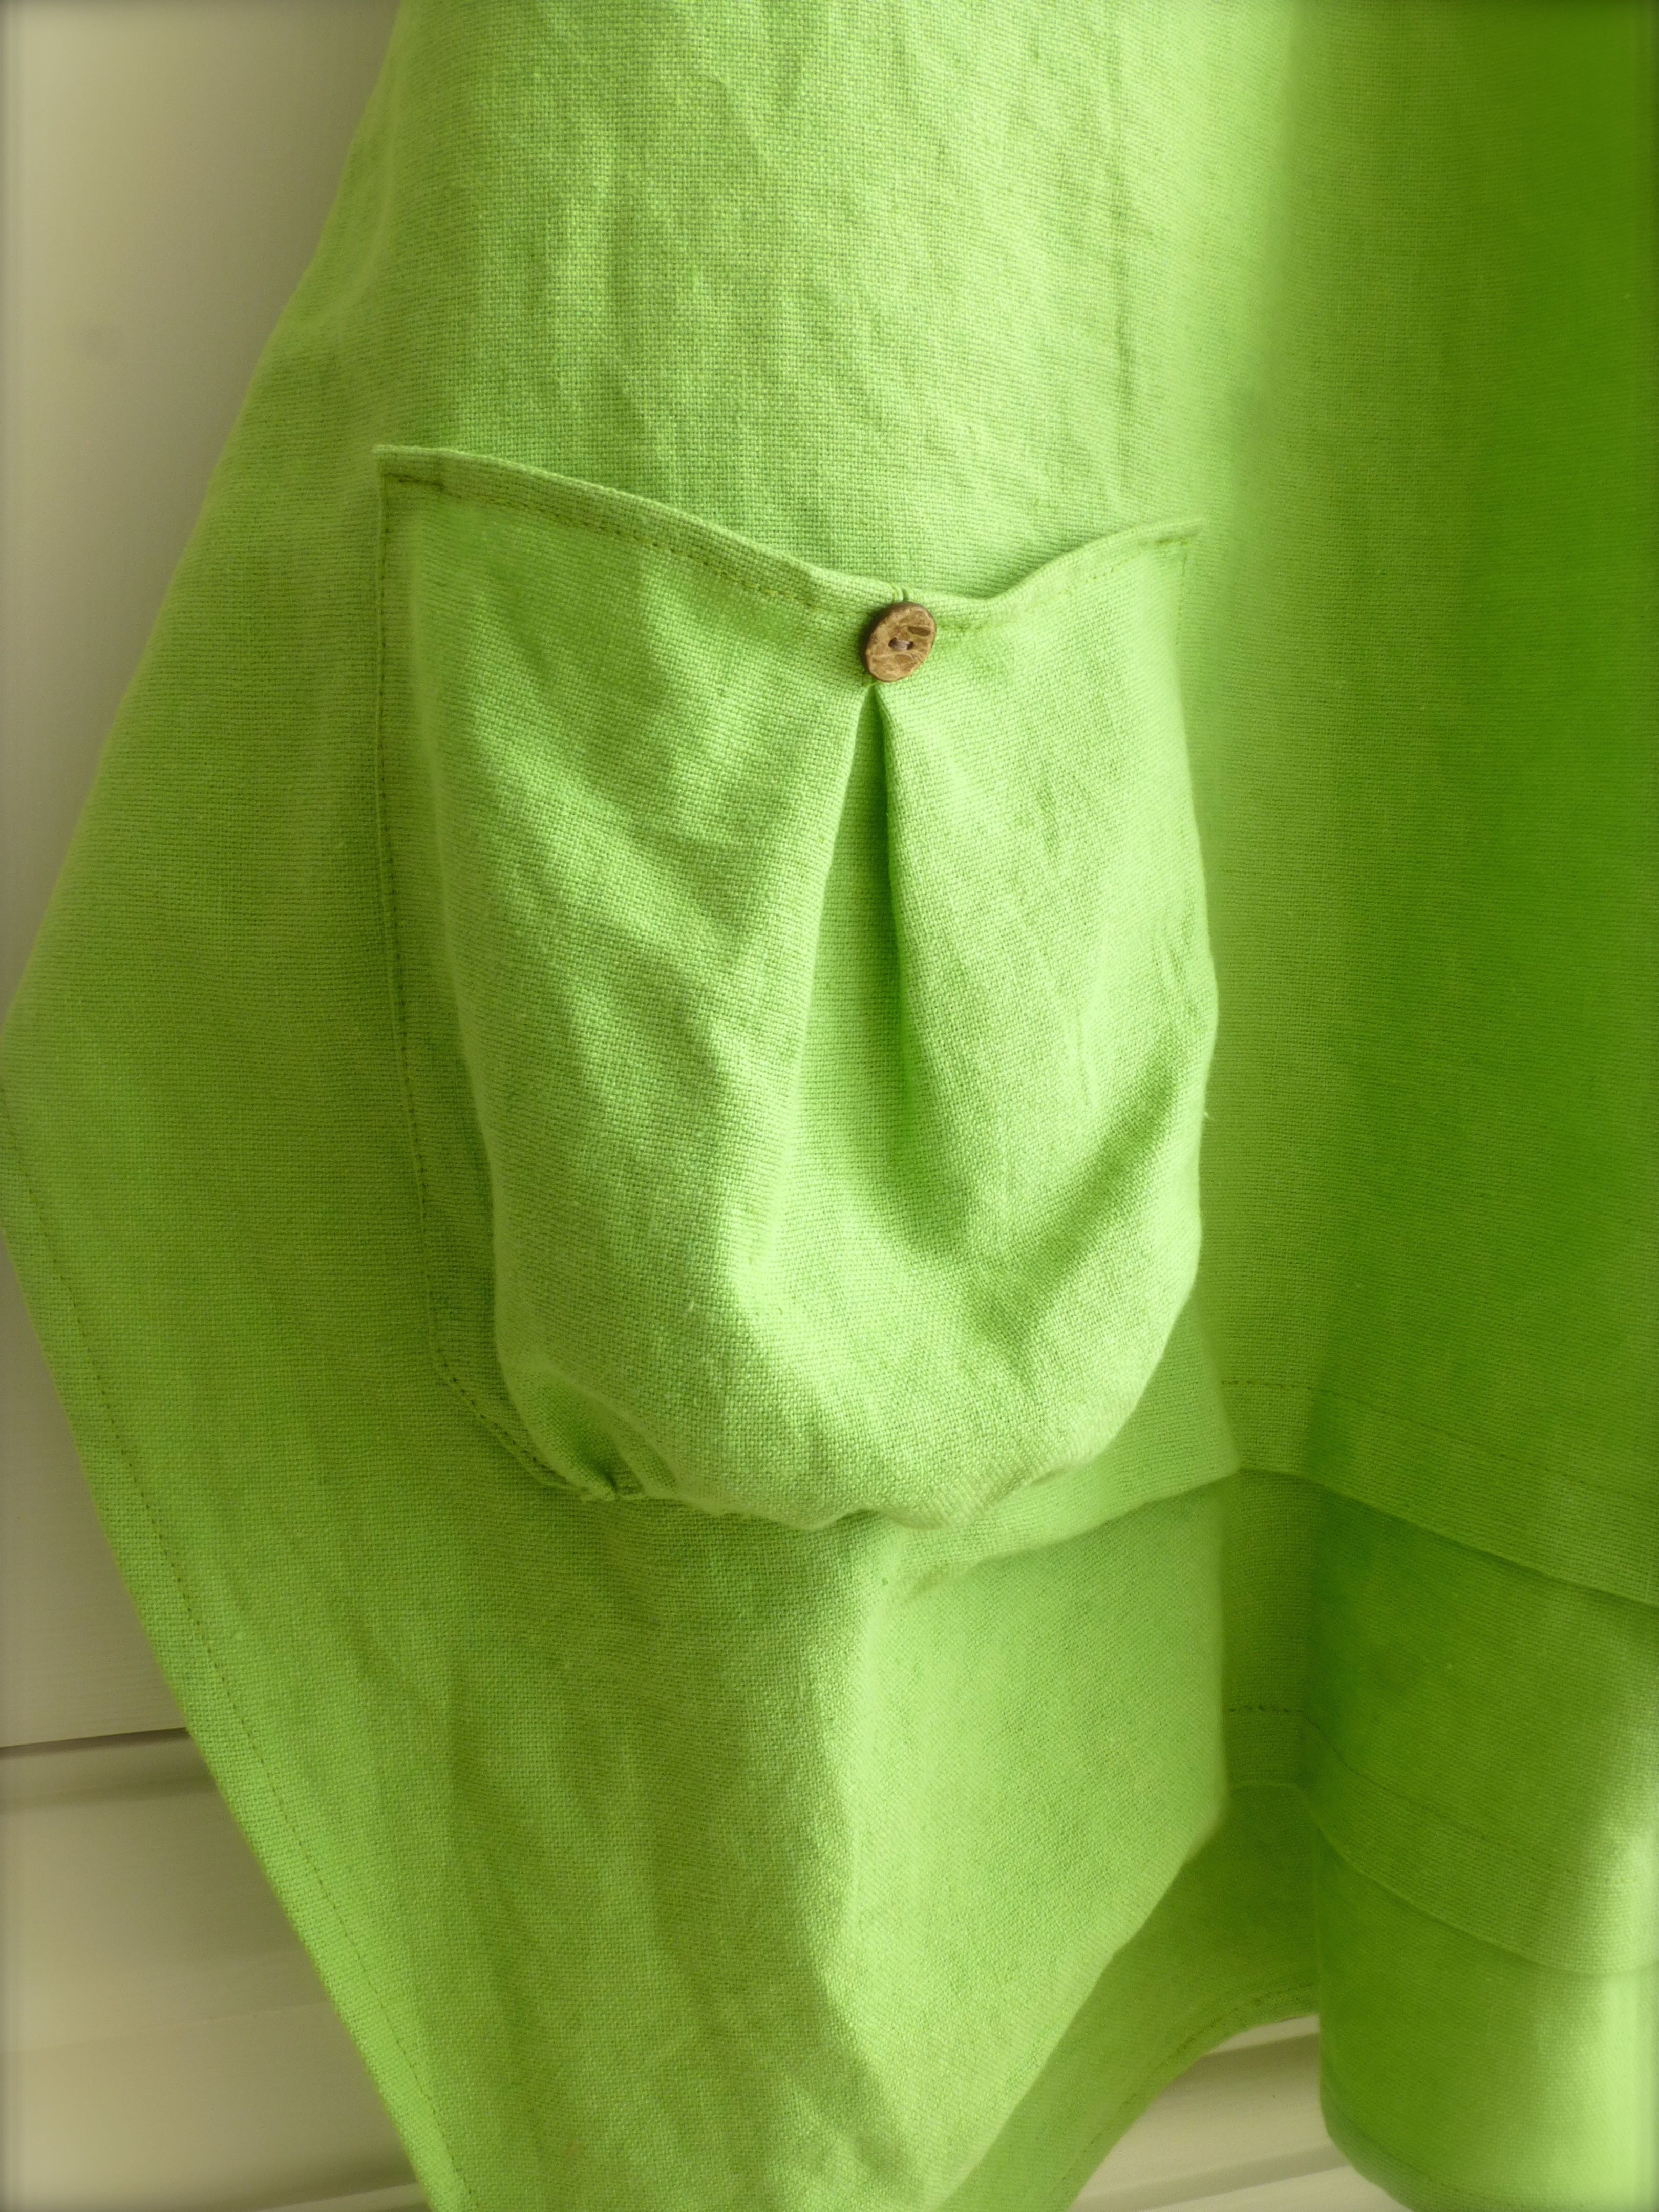
…and I added a gathered pocket at the last minute, matching the style with a pleat and another coconut shell button.
It’s a little bit stiff at the moment but will soften after the first wash.
I love it – the perfect loose, linen tunic to throw on over a pair of comfy linen trousers and mess around in the garden.
So cool and easy to wear and a lovely cheerful shade of lime green!
I could have brushed my hair for the photo though – I look like a tree with a bird’s nest on the top:)
Last week it was our school’s Summer Fête and, as well as many edible goodies, I made a play tent for the PTFA to raffle off for their funds.
All week I had been making jam, marmalade, fudge….
….Elderflower Cordial….
…….and scones.
The day before the fair, Mr H-L had a delivery of some new shirts for work and decided to have a wardrobe clear out resulting in the eviction of nine of his ‘old’ ones.
Some of the shirts had never actually been worn and even those that had were still in great condition so, when he asked me to take them to the charity shop, and idea sprung to mind.
Why not upcycle them and make a patchwork play tent to raffle off for the school funds?
This ended up making far more money than they would have achieved in a charity shop, and the money was still going to a good cause, so off to my studio I went to formulate a plan.
I made a similar tent for The Boys last year which I never got around to blogging about, so I based it on that.
YOU WILL NEED: –
Nine men’s cotton shirts
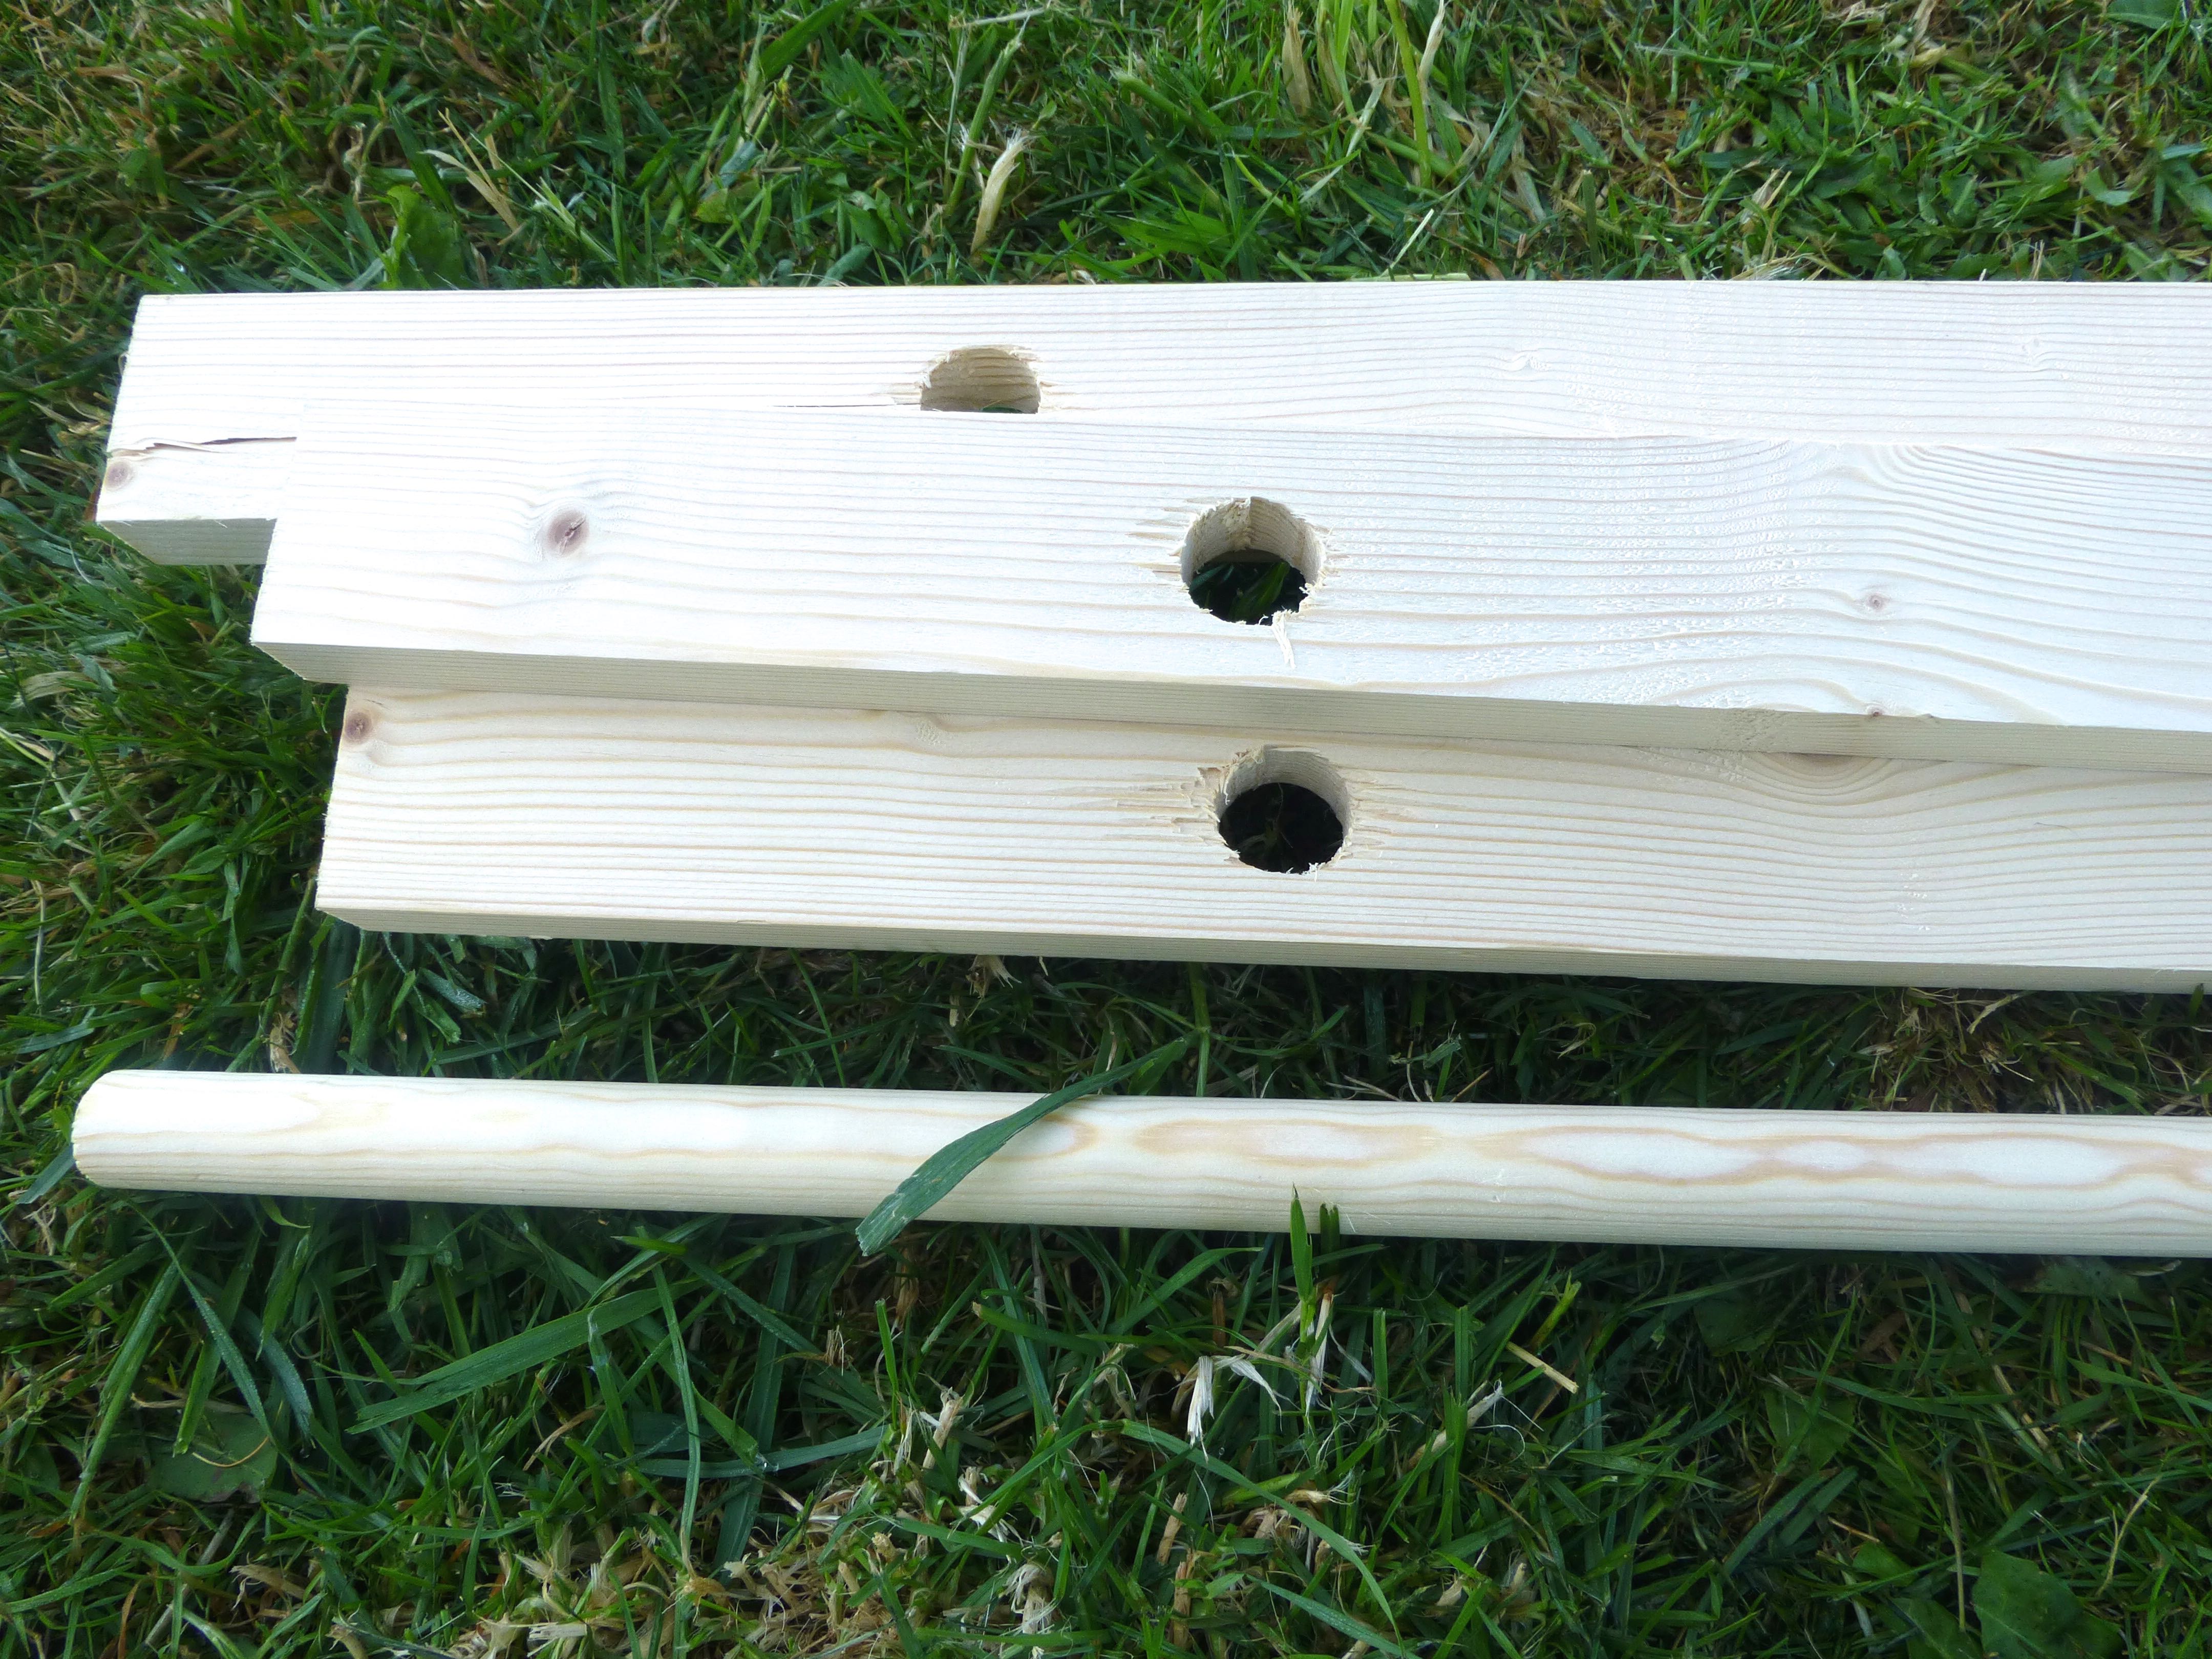
1 x dowelling (2000mm x 25mm)
4 x planed timber (1800mm x 44mm x 18mm)
4 x eyelets
2m elastic cord
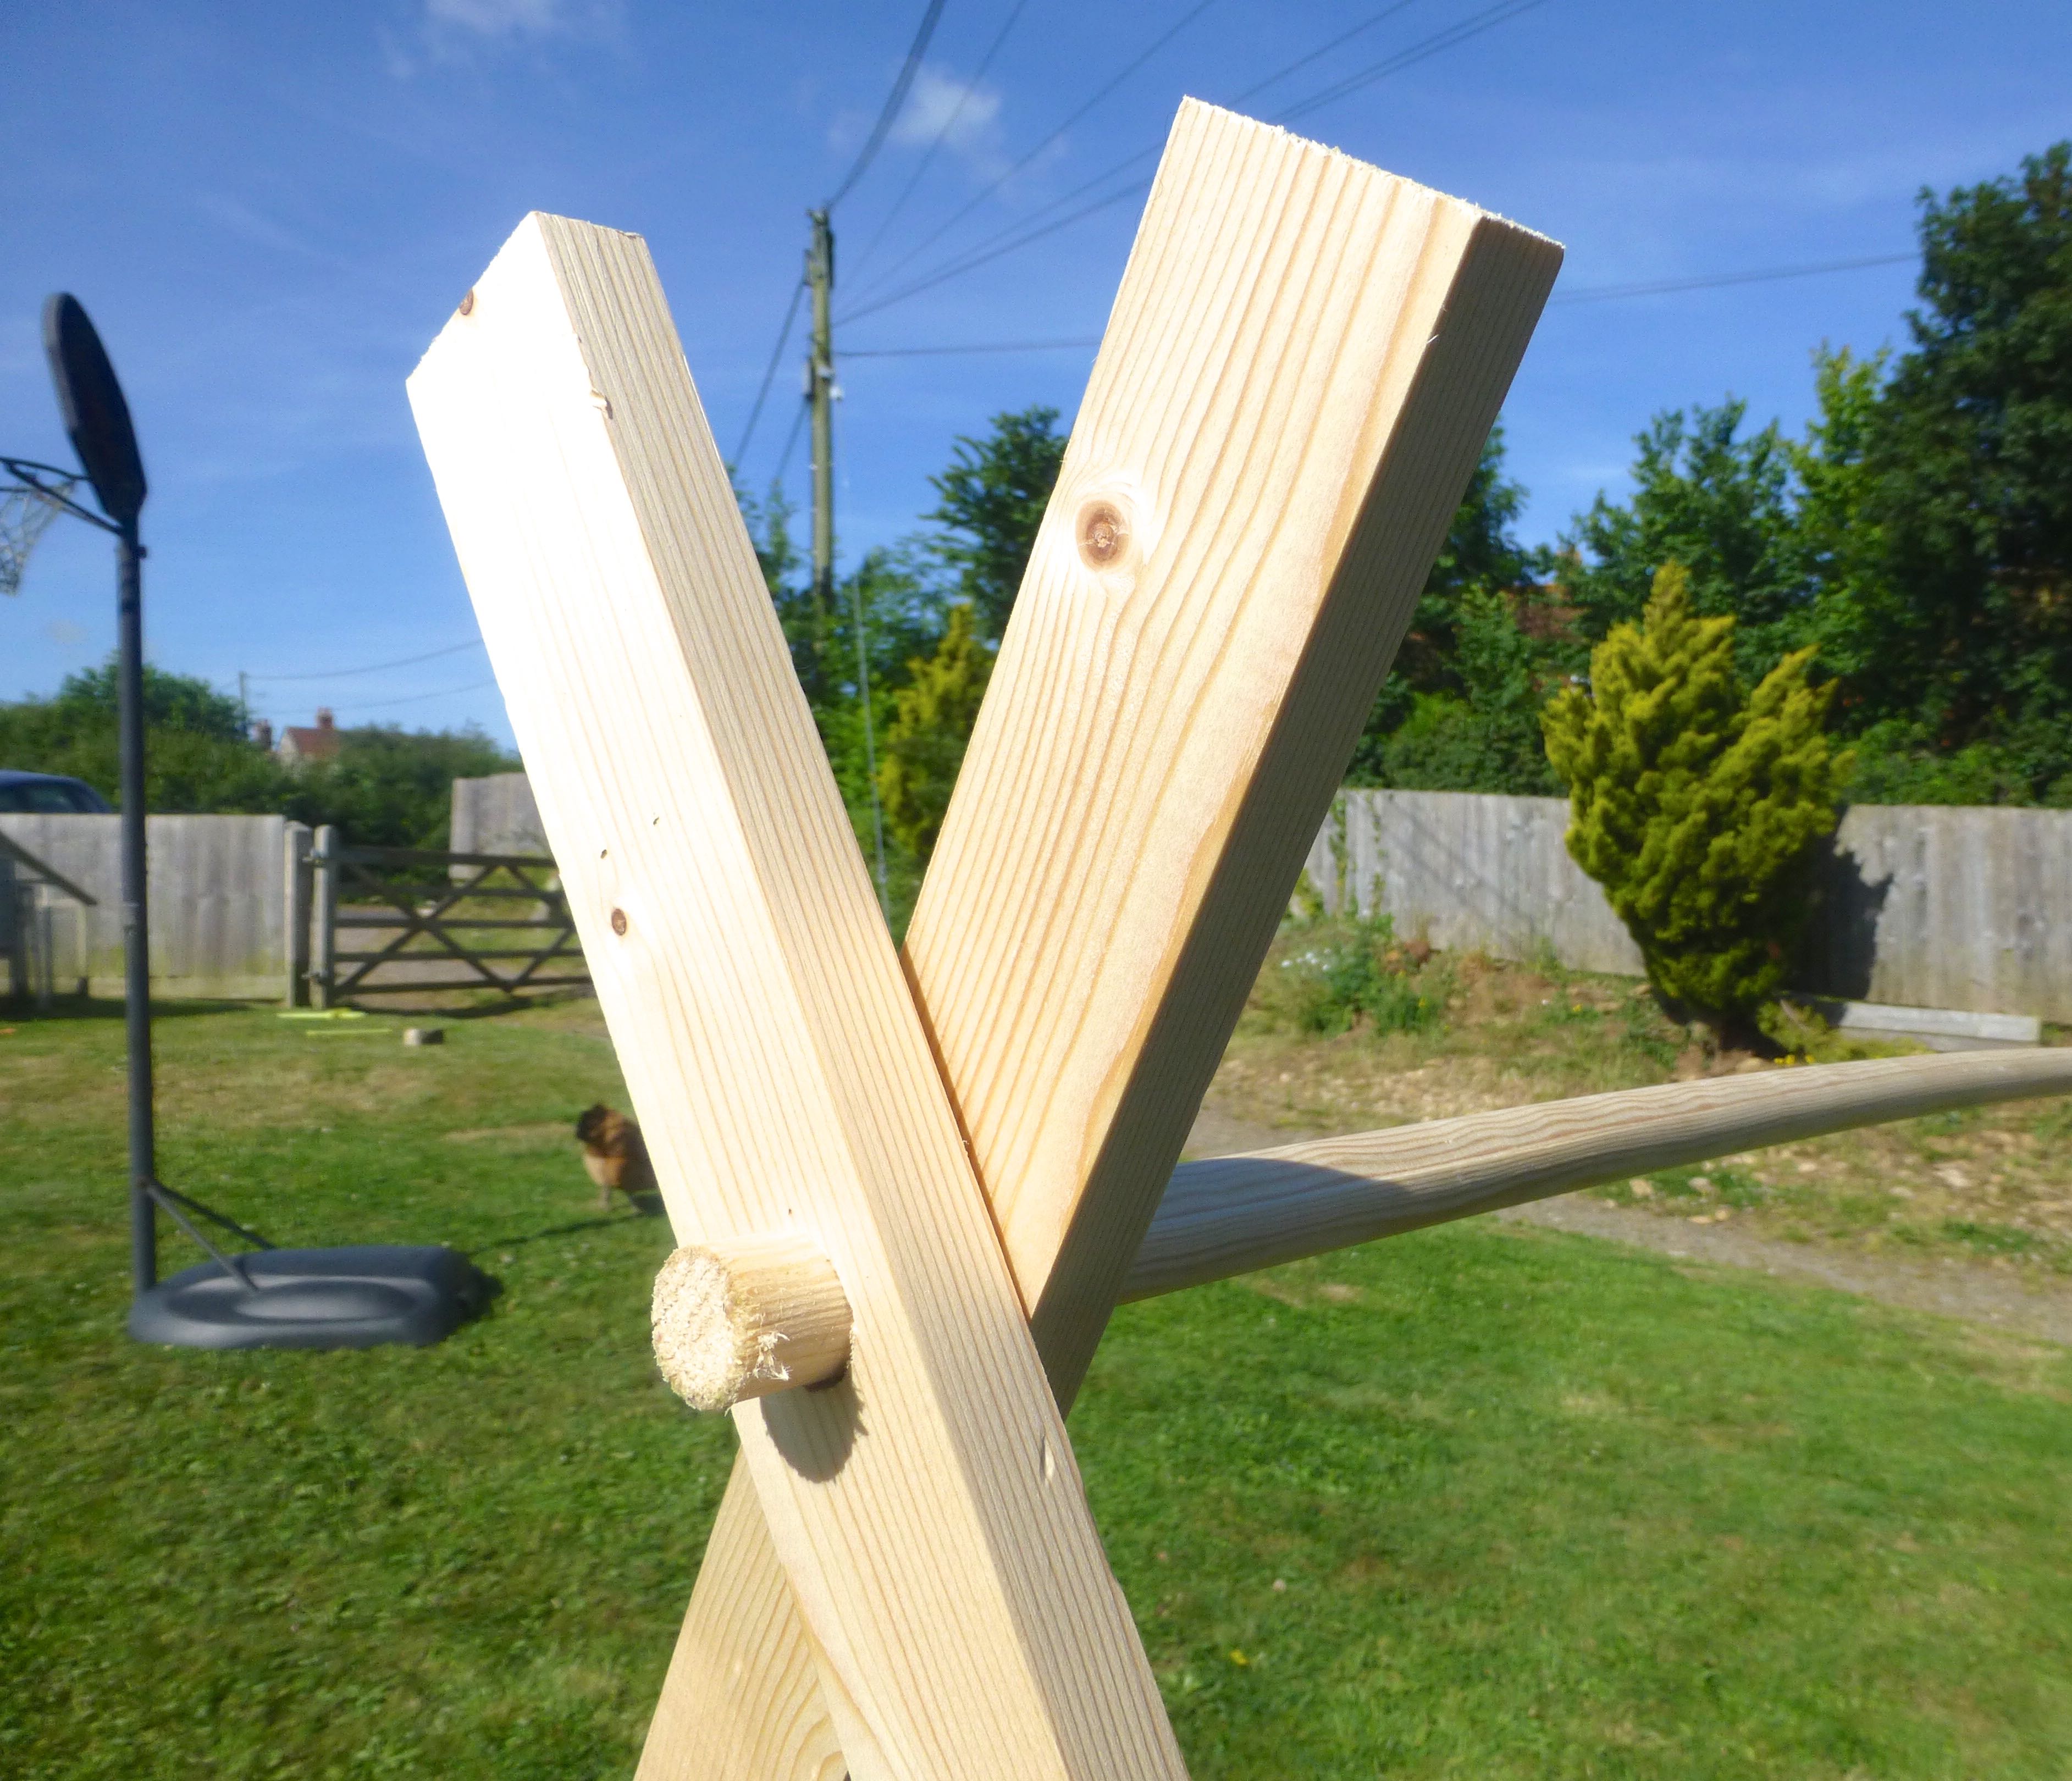
Drill a hole 15cm in from one end of each of the bits of planed timber using a spade bit the same size as your dowelling.
You now need to create one single piece of fabric that measures 1.60m x 3.20m.
The first job was to cut up the shirts into as many usable sections as possible using my rotary cutter for speed.
I started by removing the button flaps, cuffs and collars.
Look at all the buttons I rescued!
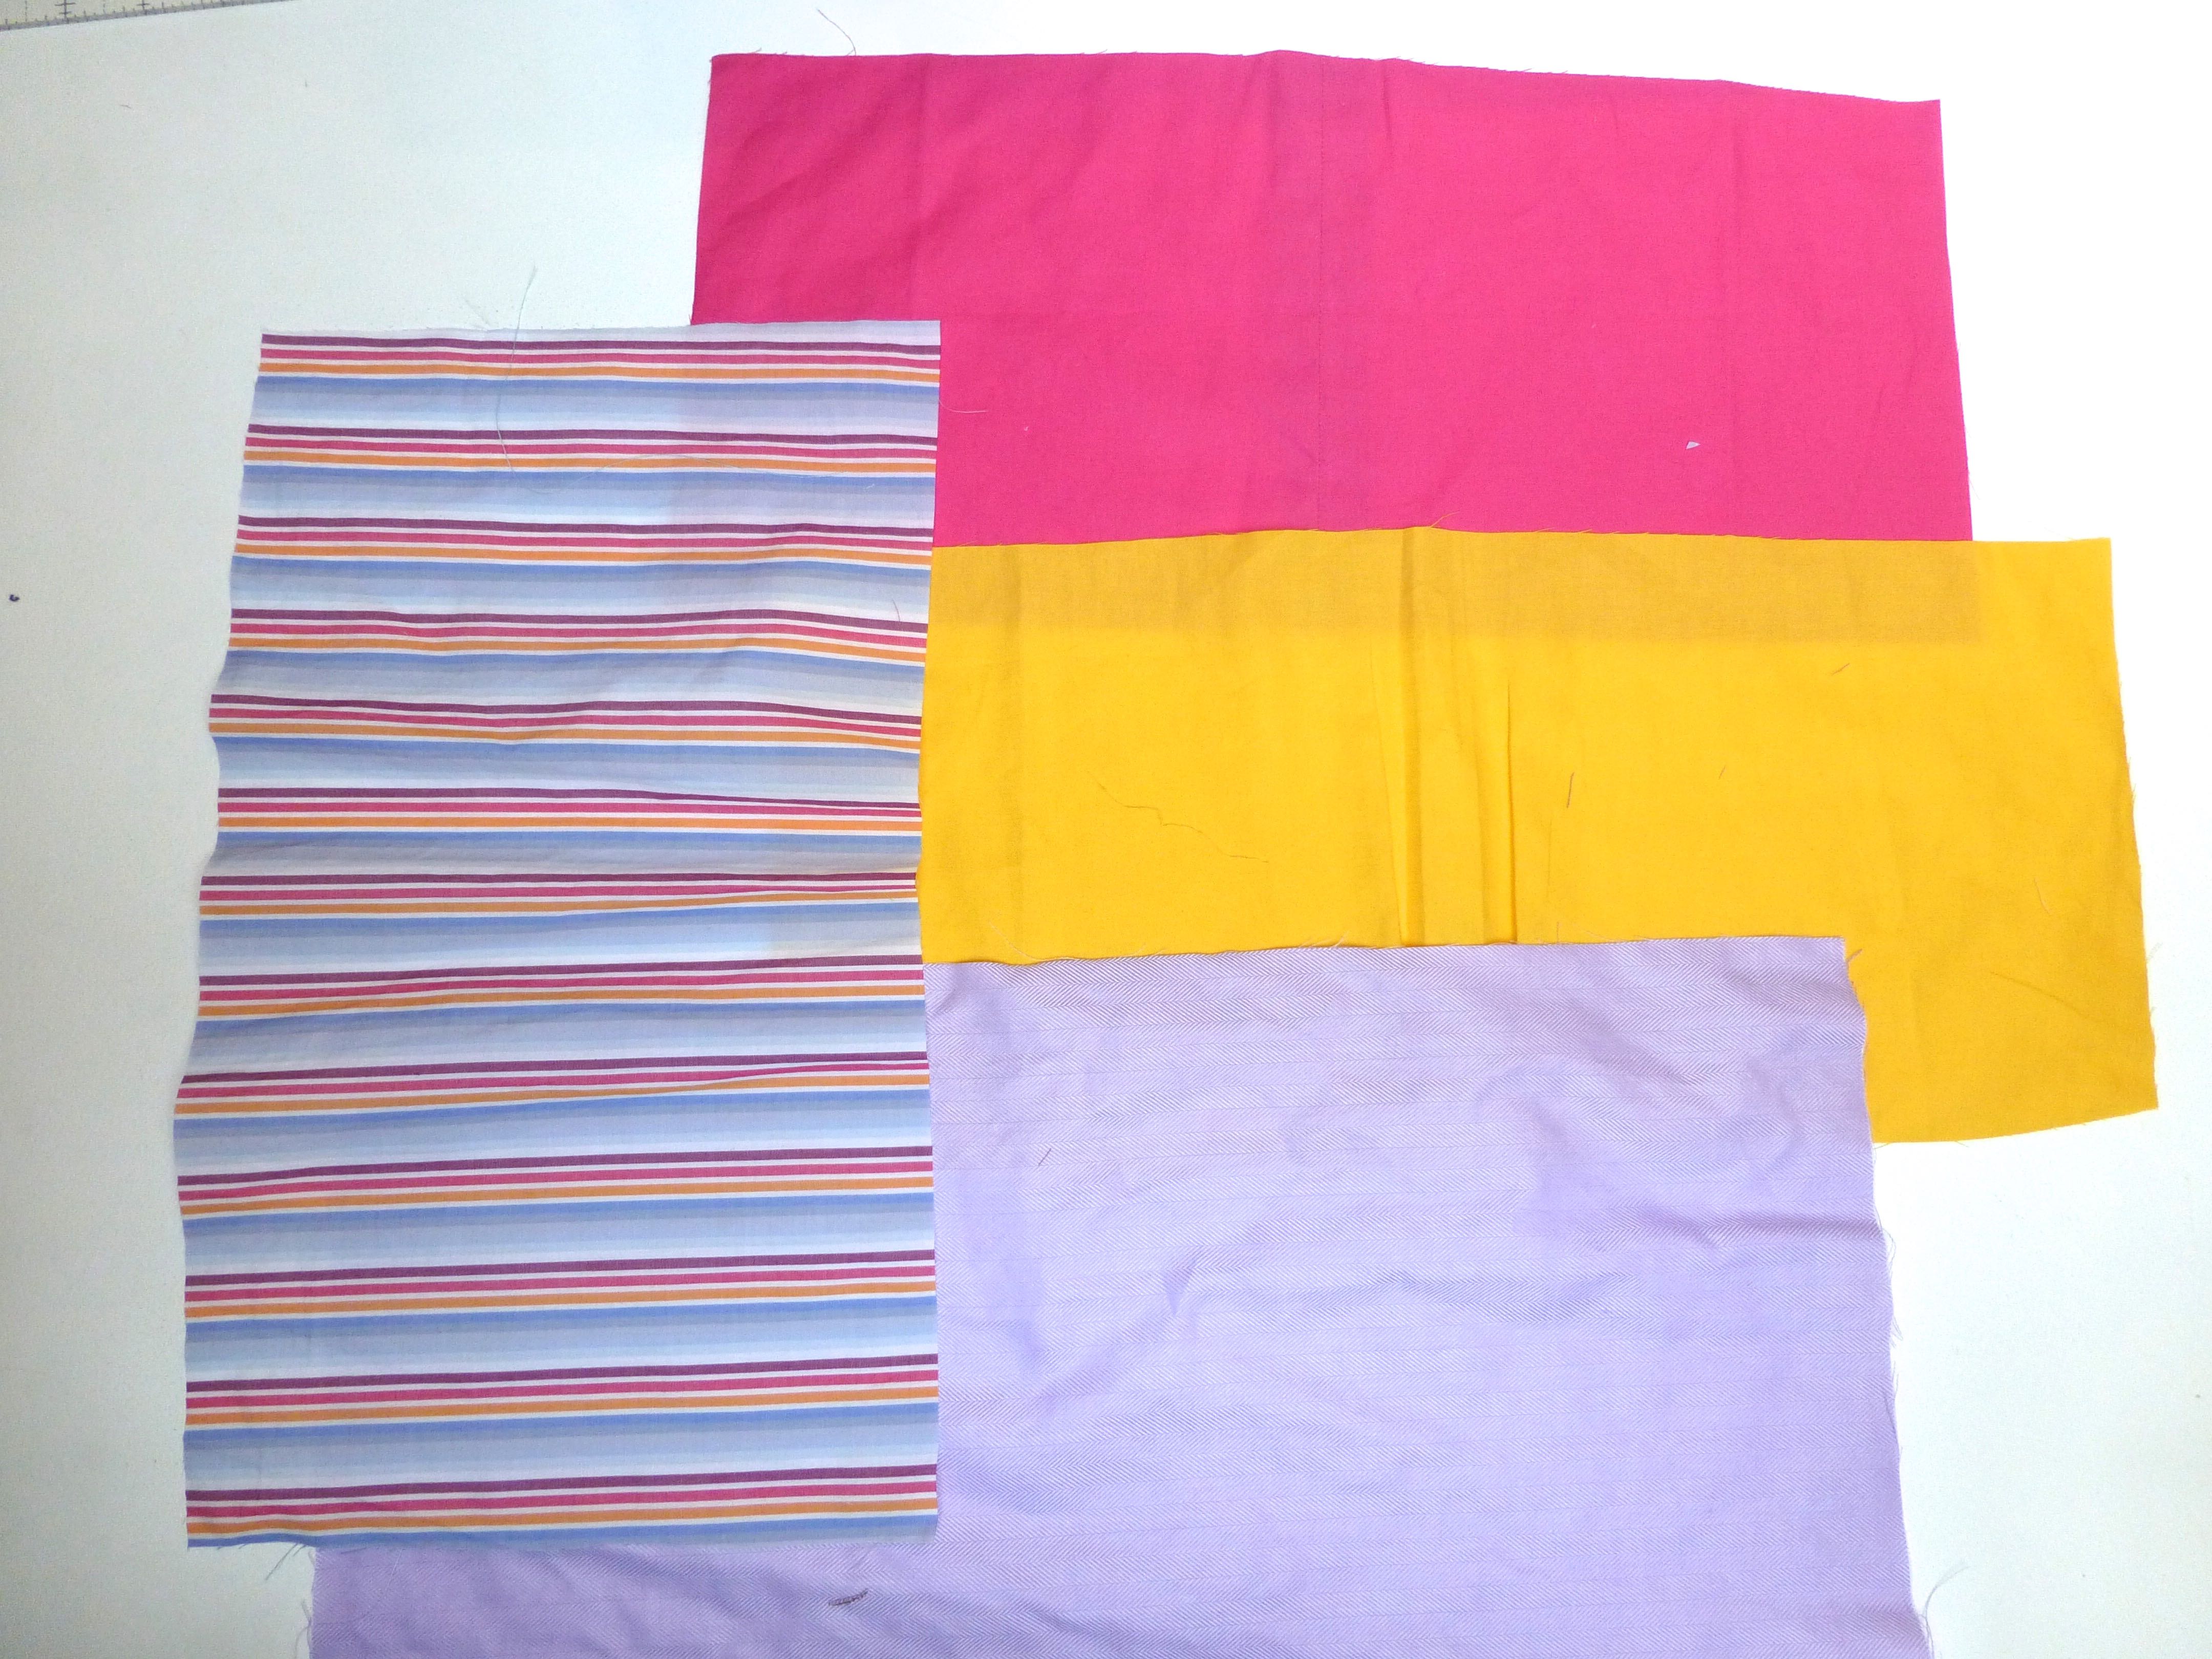
I wasn’t at all precise in my cutting as I intended to fit each piece as I went – very liberating and totally the opposite of normal patchwork!
I laid all the bits out on the floor and arranged them in a pleasing order, being sure to space out evenly the more brightly coloured yellow and pink.
This would not have quite the same impact with the more conservative blue or white work shirts, but you could always appliqué onto the patches for added interest.
I didn’t need to – Mr H-L likes a shirt that stands out:)
As you can see from the picture below, I sewed the pieces of fabric VERY roughly together into strips. The edges were then trimmed into a neat line before stitching the strips of patchwork together along their long sides.
As both sides of the tent were going to be visible, I used Flat Fell seams throughout.
This type of seam leaves a smart finish and adds strength to the seam.
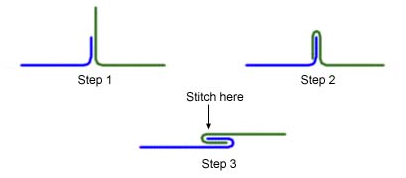
Here’s a line drawing to show the construction: –
Image courtesy of Google images
In photographs, here’s what I did: –
Stitch a staggered seam where the lower fabric (pink) sticks out 1cm more than the top fabric.
Open the two fabrics flat with the raw edges of the seam uppermost.
Fold the seam to the left and tuck the (pink) overhang over the raw edge of the other (striped) fabric, enclosing all raw edges in the process.
Stitch close to the folded edge.
As I said, a very neat finish which I used as the outside of the tent.
Keep going until you have one piece of fabric measuring 1.60m x 3.20m.
Hem all around the outer edges.
In each of the four corners of the tent, fix an eyelet through which you need to attach a 50cm length of elastic cording as shown below.
Tie the ends of the cord in a knot to form a loop through which the tent poles will pass.
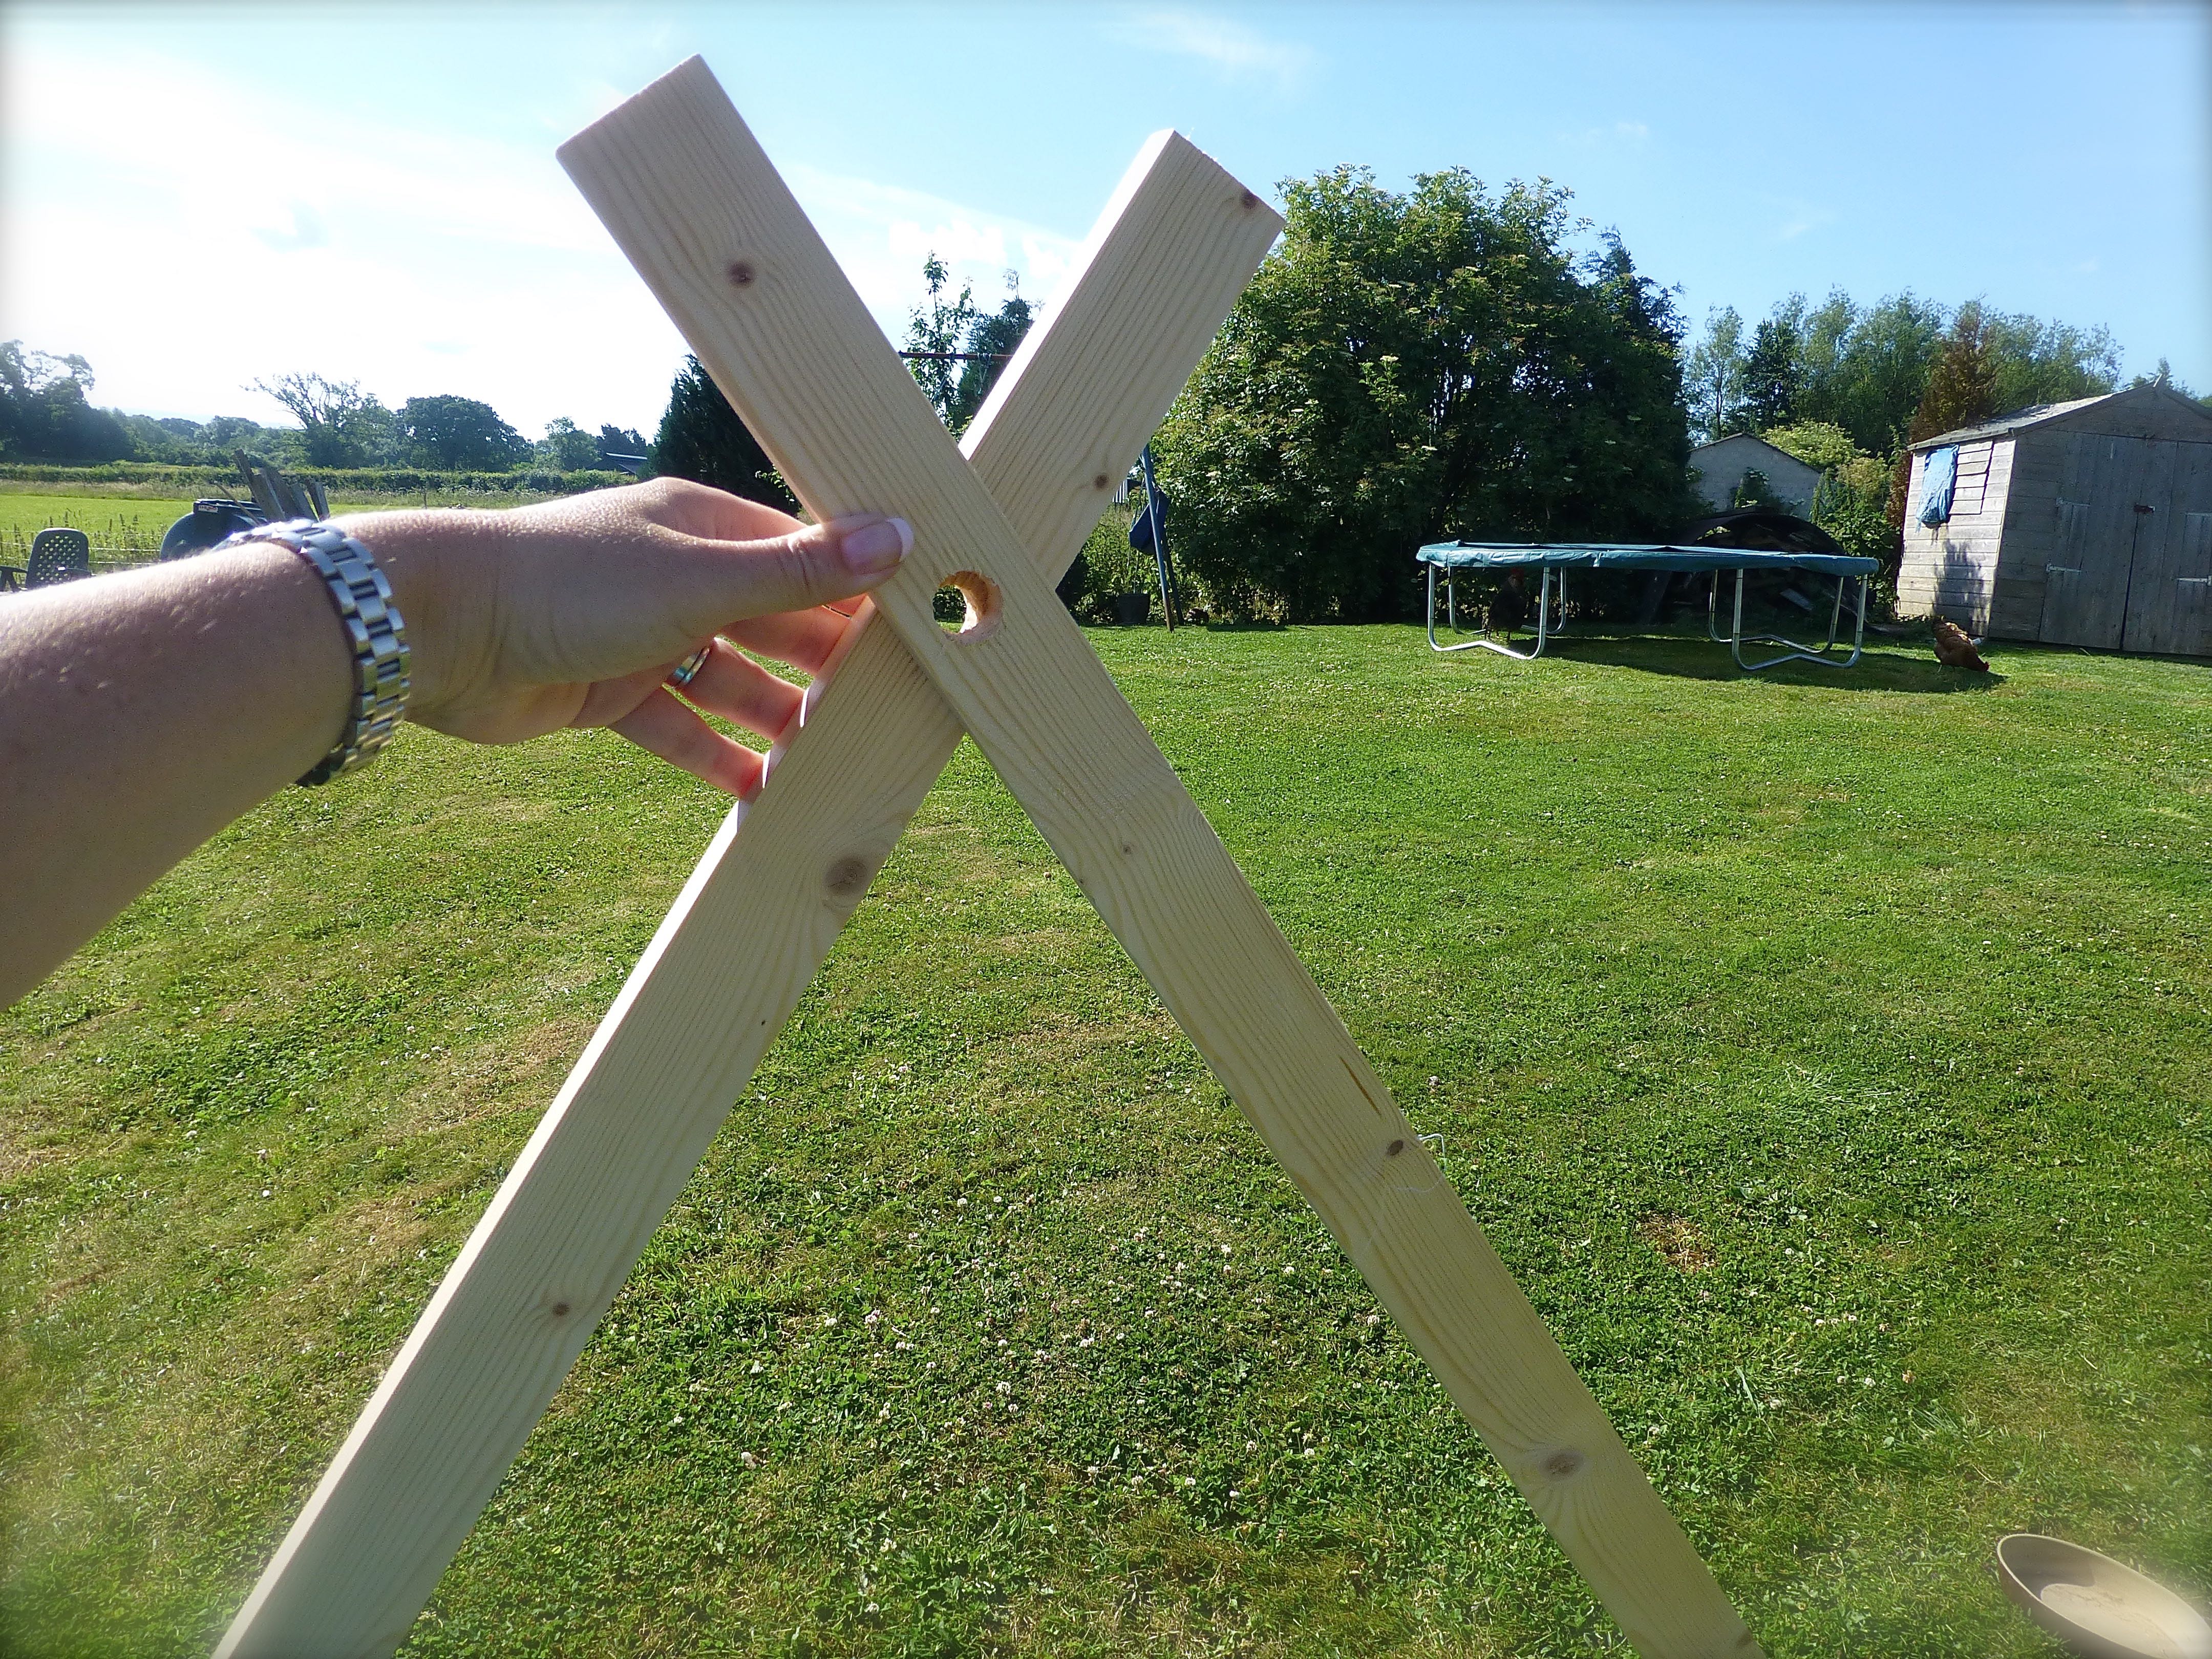
Align the holes in the tent poles….
….and insert the length of dowelling.
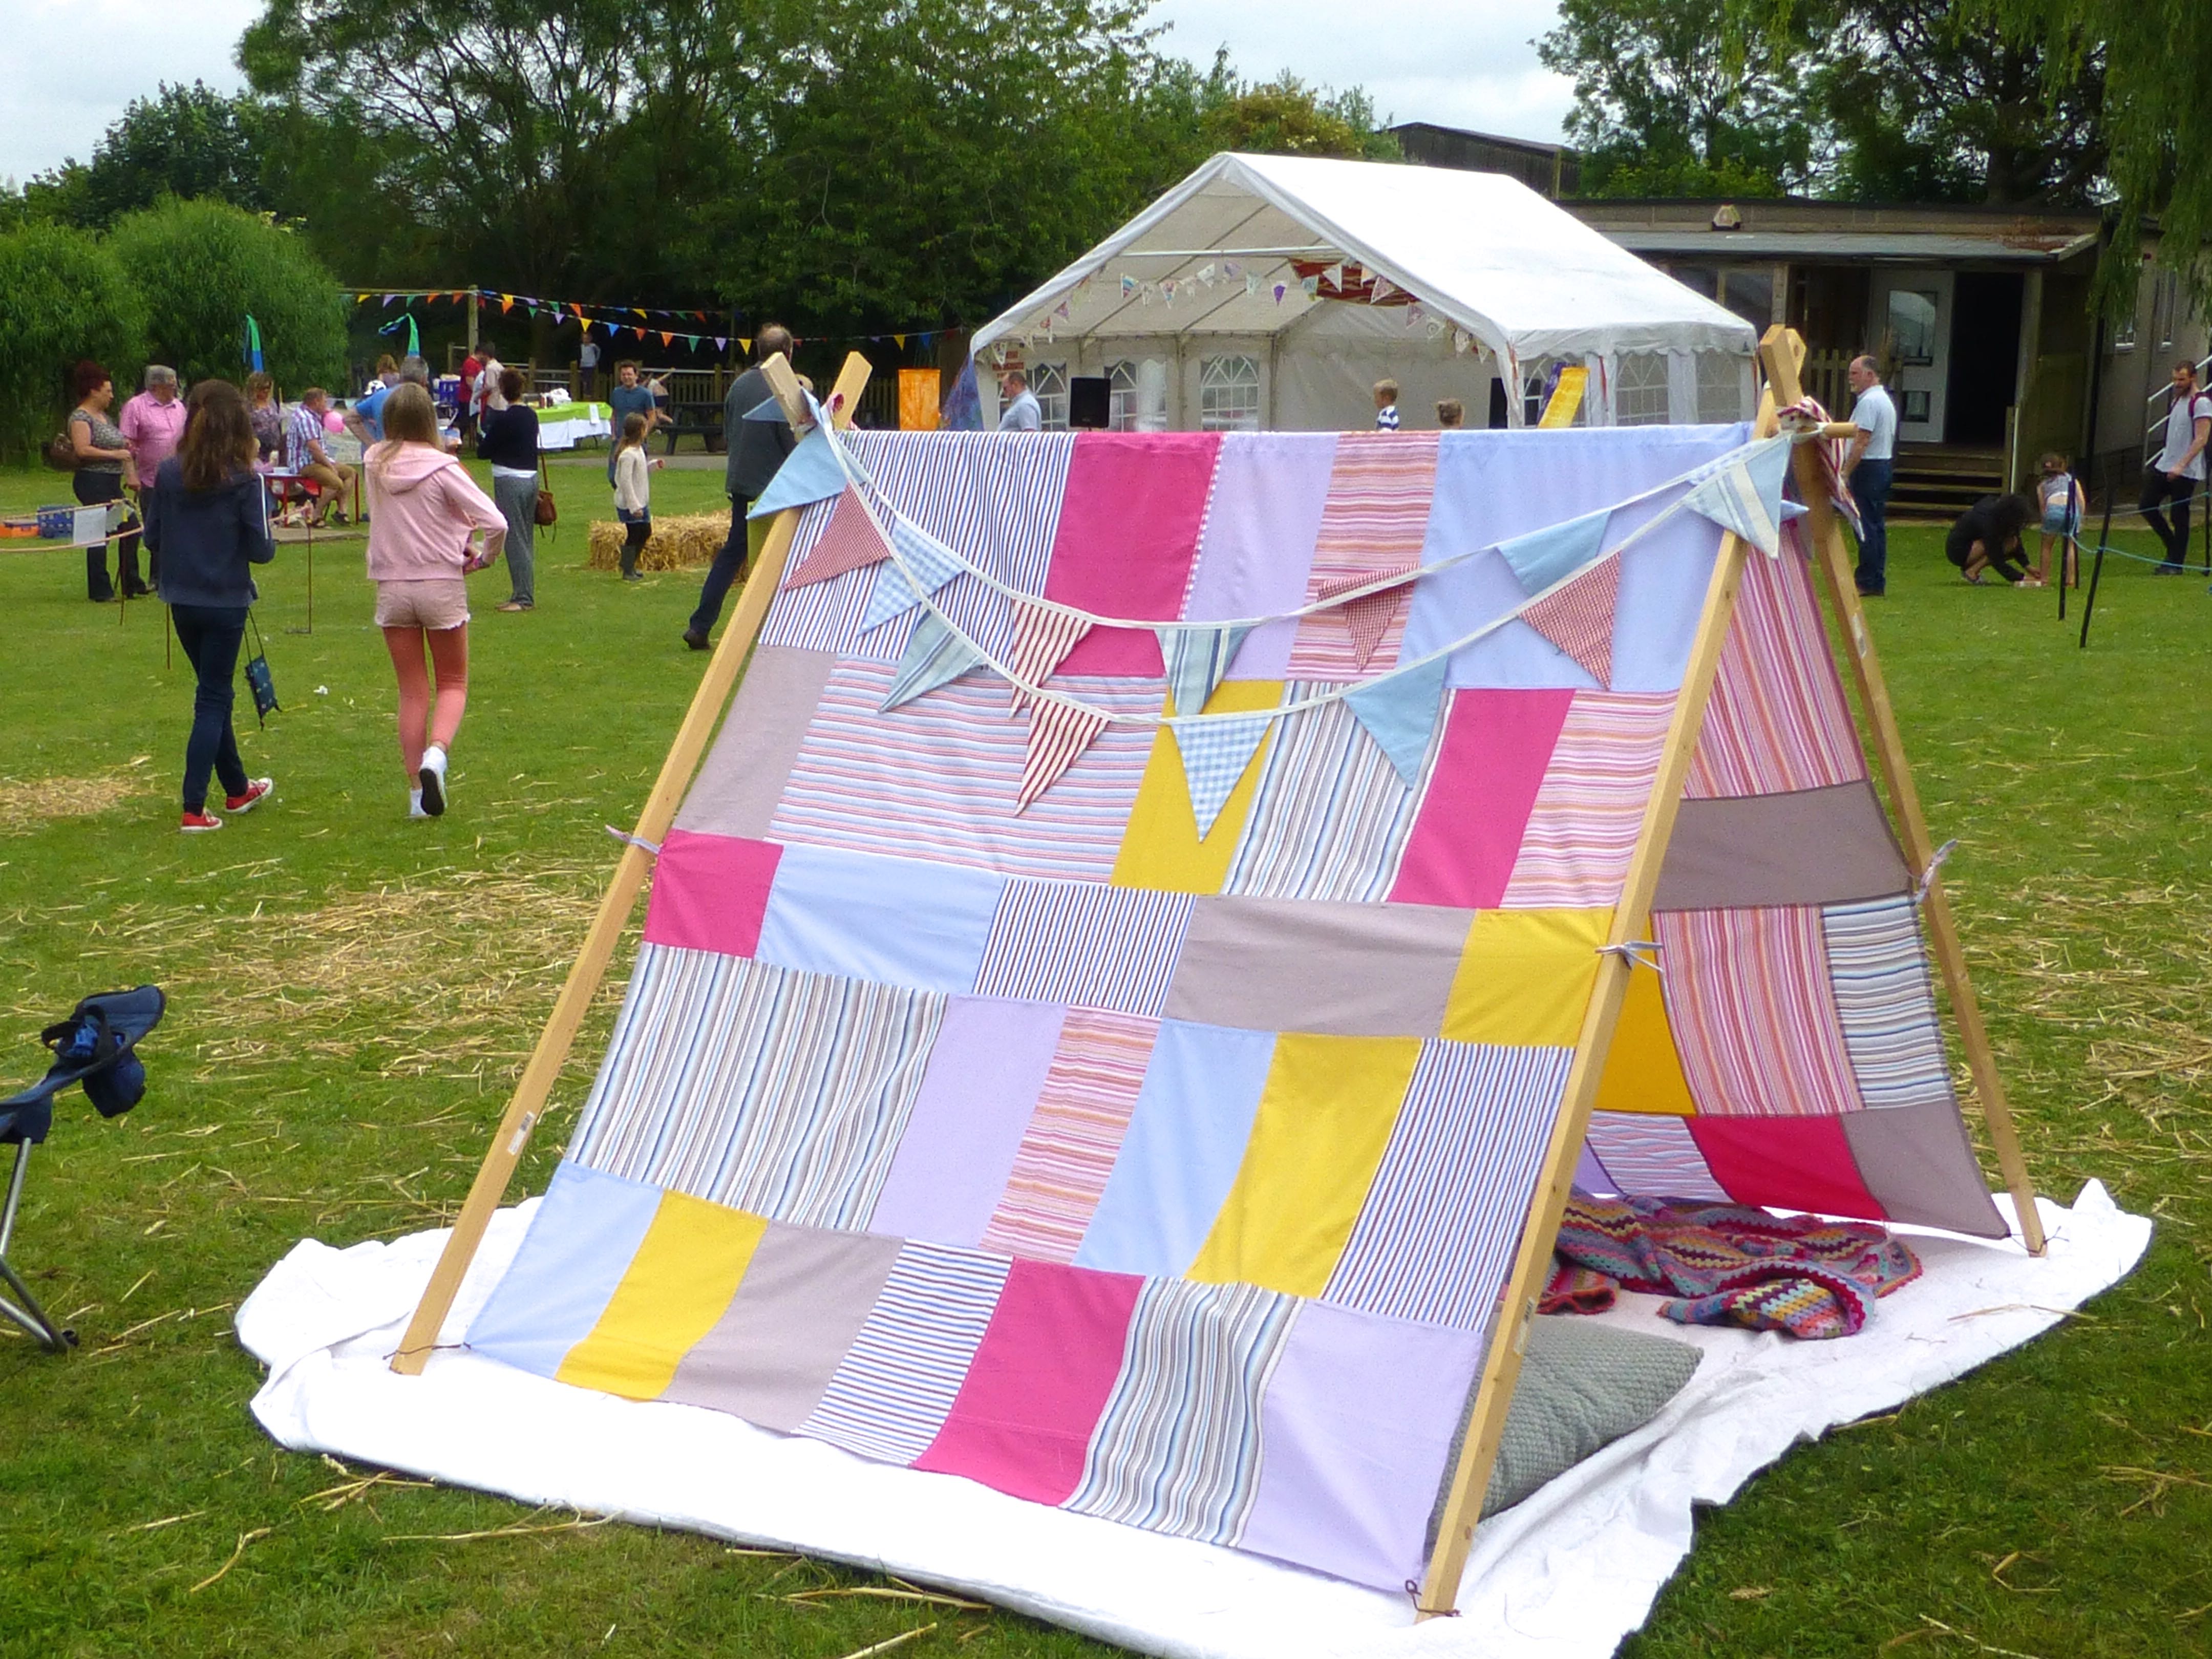
Lay the tent over the central dowel and pass the poles through the elastic cords at the bottom edge.
I also added a tie half way up each side of the tent – but, in my haste, forgot to document it. Basically, four 50cm long ties were made using scarps of leftover shirt fabric and sewn to the seam. These hold the tent more tautly to the frame.
We also decided to saw a shallow groove on the outer edge of the pole where the elastic cord sits – this helps stop the cord from riding up the pole.
With the addition of some bunting, a blanket and some cushions, it makes a lovely spot for young children to play.
Or the perfect place for No.1 Son to shade his cider from the afternoon sun!
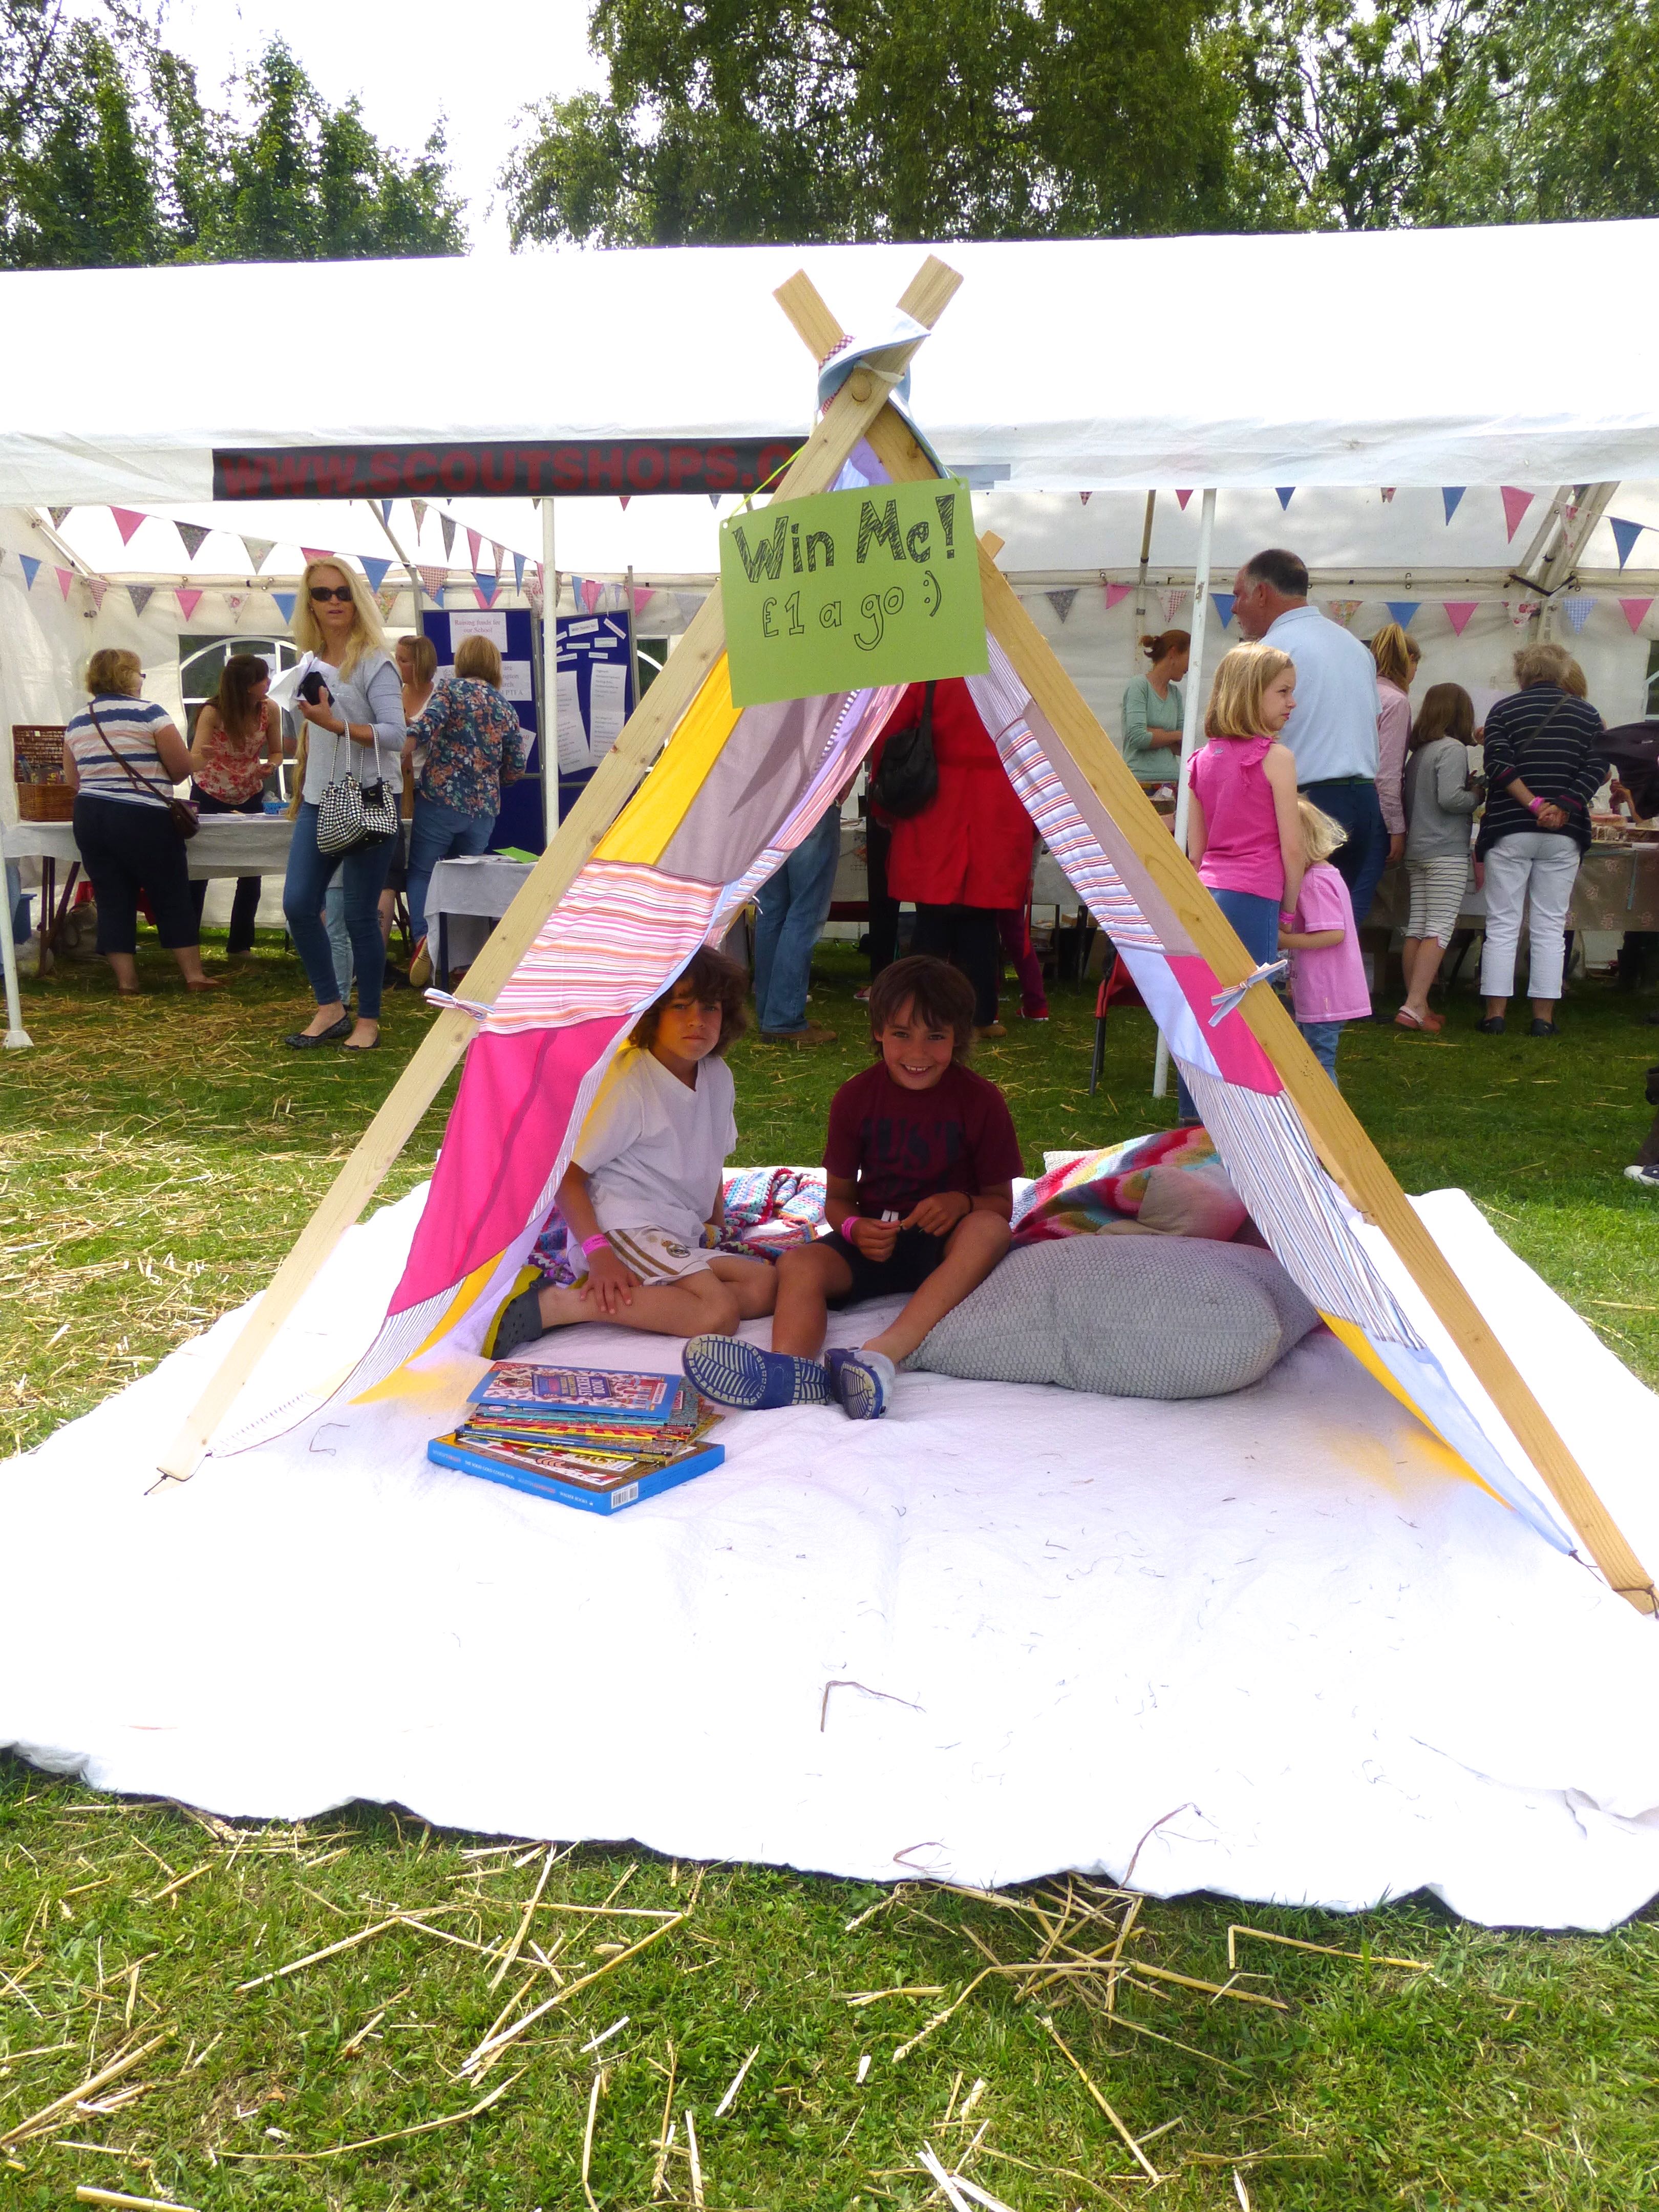
We sold raffle tickets for the tent and raised almost seventy pounds for the school funds!
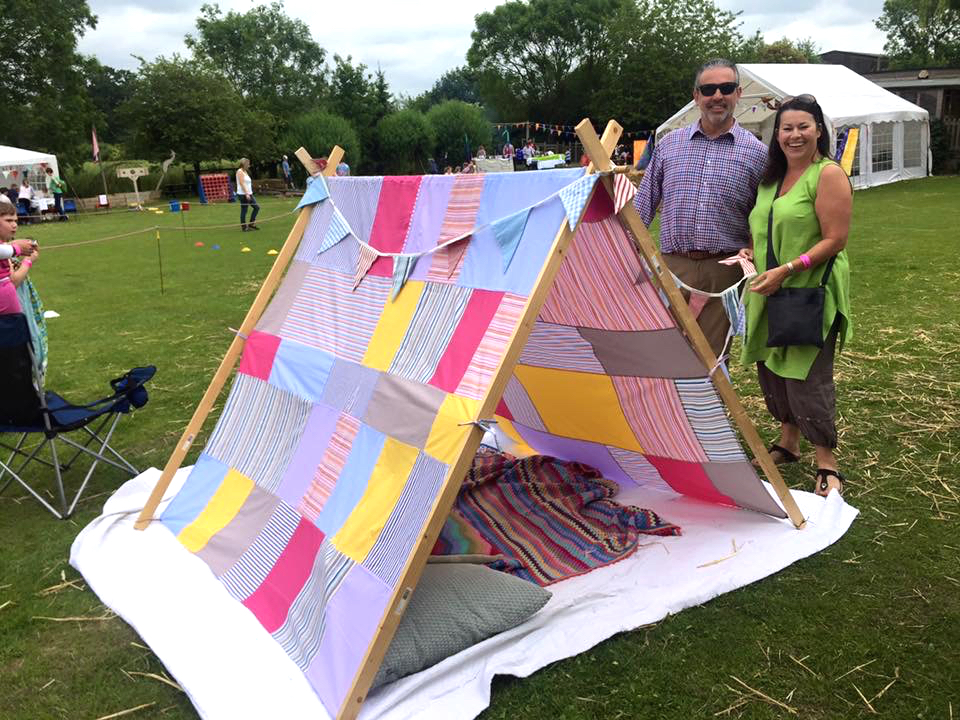
The lucky winner was thrilled to bits to win it for her little girls and, as it was such a success, I think I’m going to be asked to make one for next year’s fête.
Watch out Mr. H-L, I’ve got my eye on your shirts…..
Well, I’ve had a wonderful two days virtually locked away in my studio, only surfacing for the occasional fuel break – No.1 Son has even been making sure my G&T levels didn’t drop below a critical level!
What have I been so immersed in?
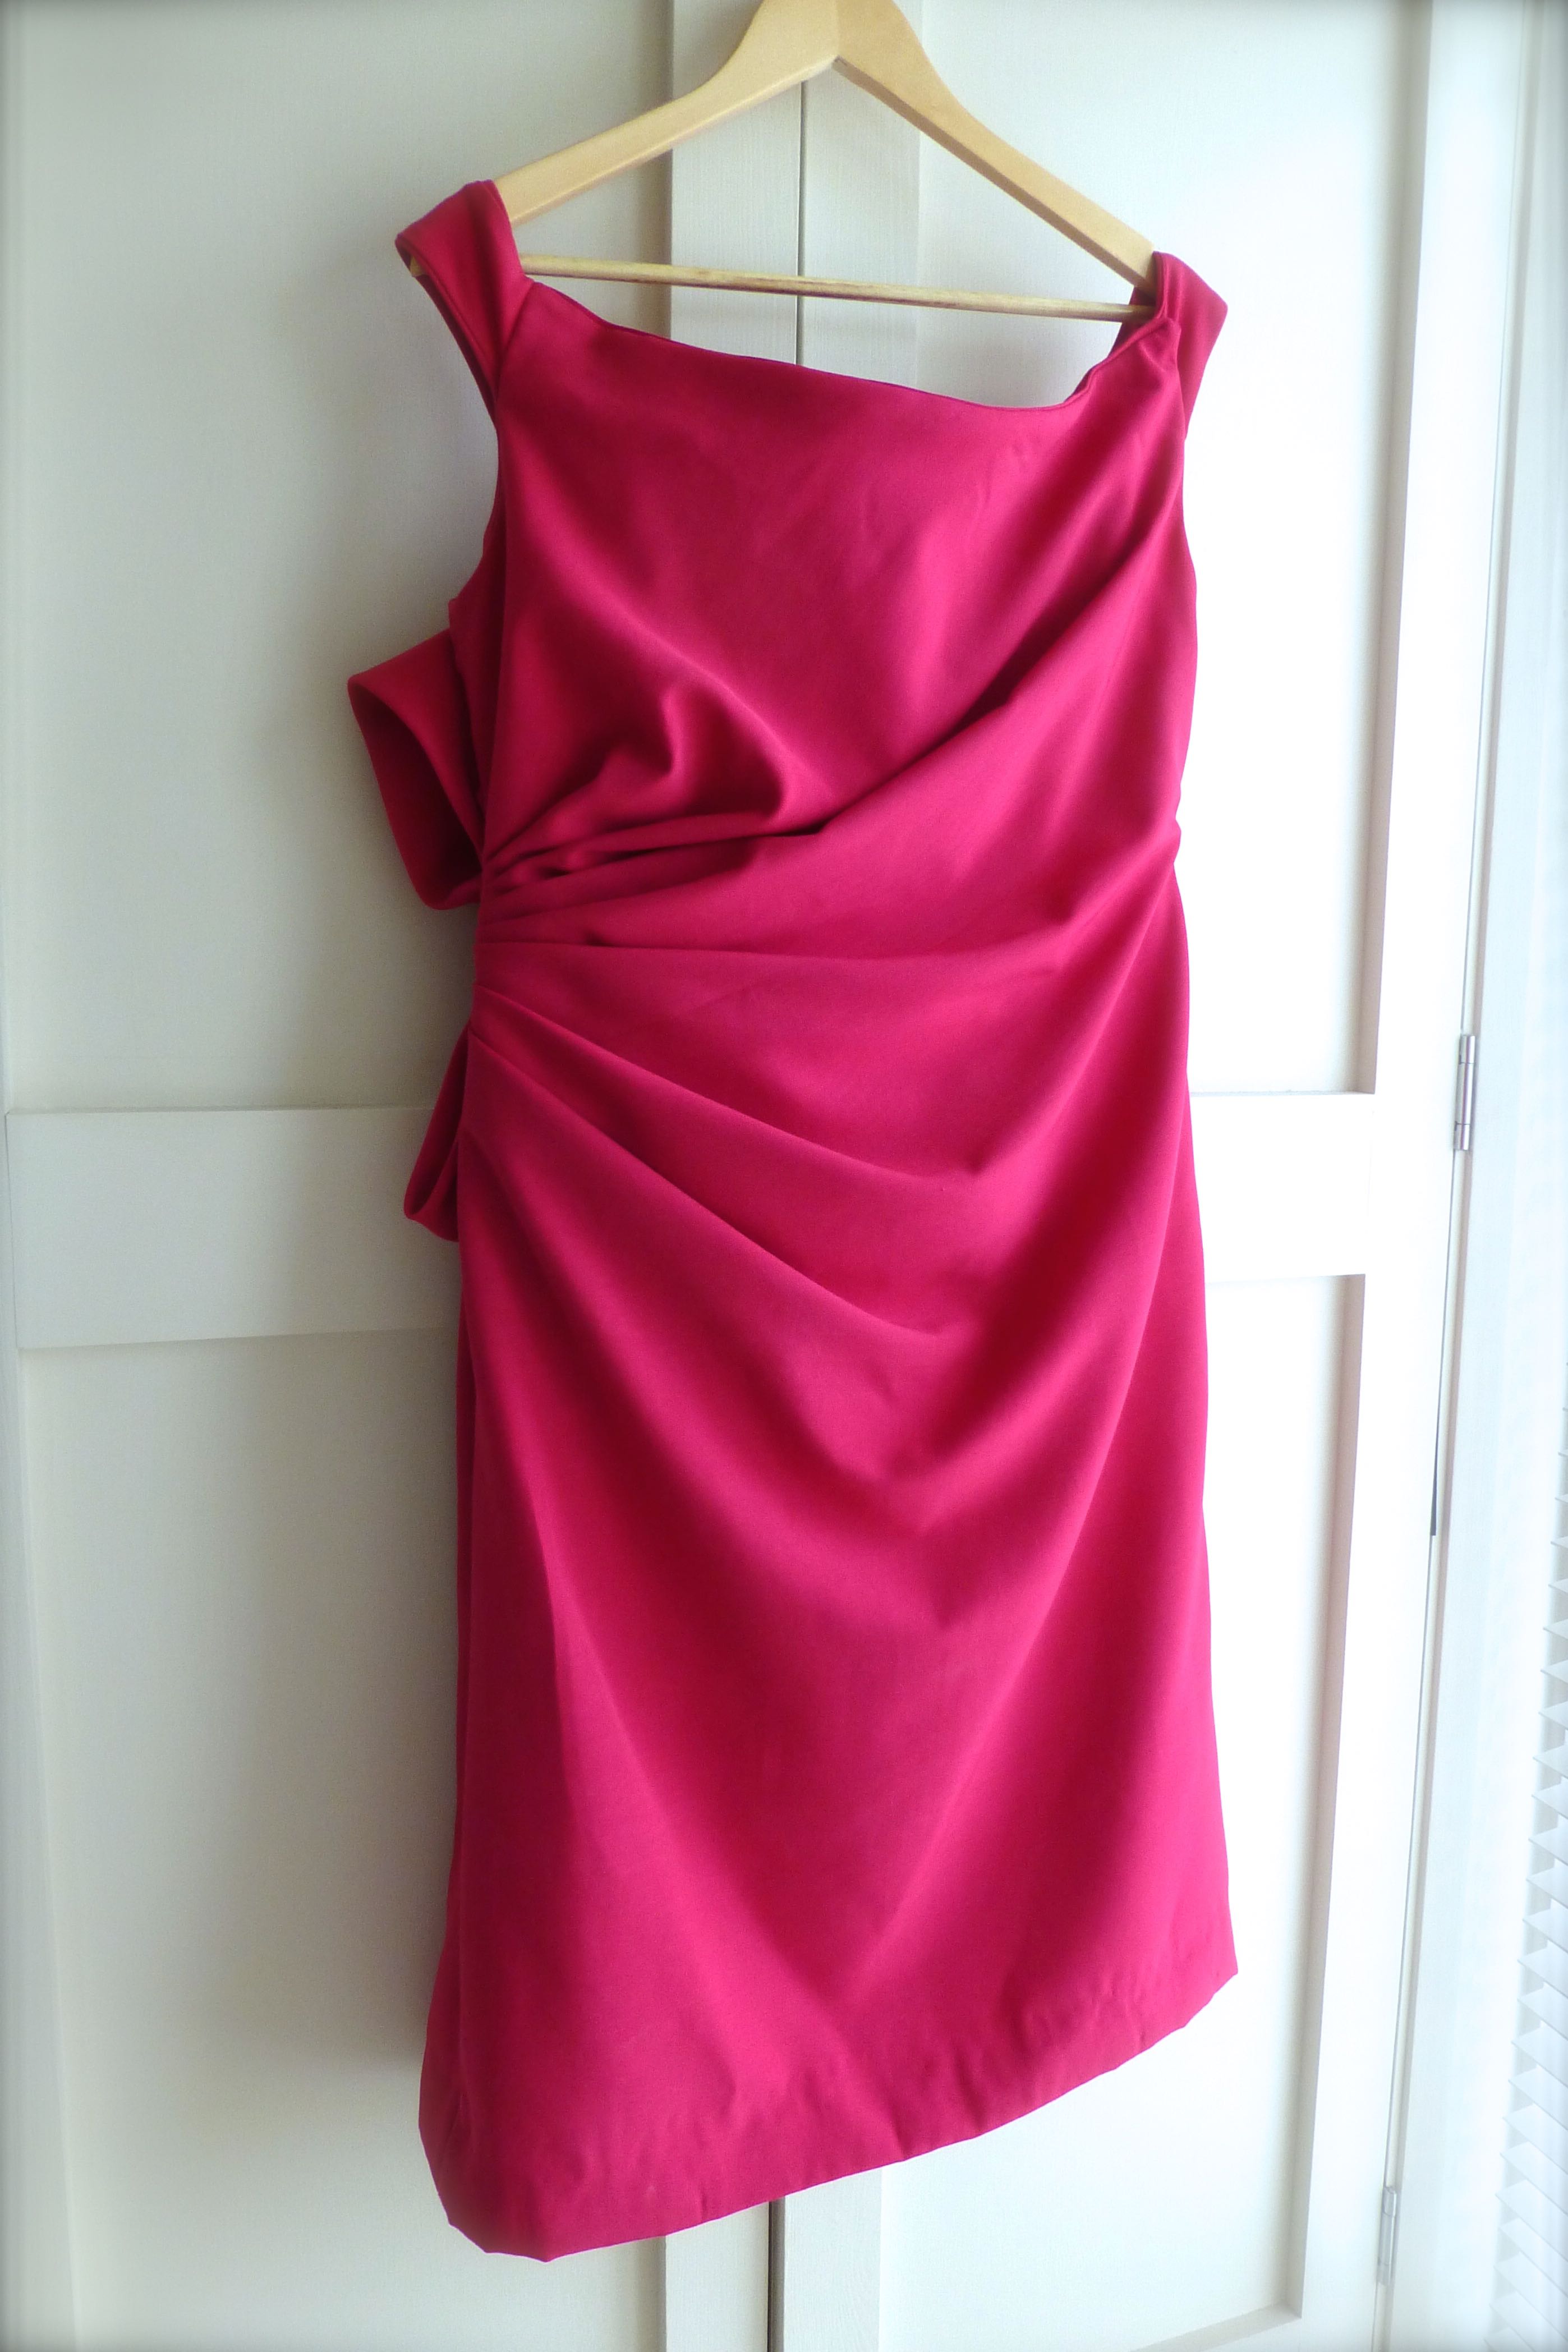
This year’s dress for Ascot – Vogue 1108 by Bellville Sassoon.
It has been BRILLIANT getting my teeth into a proper Couture make again.
Don’t get me wrong though, I love quick and easy dressmaking projects but, once in a while it’s just fantastic to challenge myself with something a bit more meaty, so to speak.
Vogue classify this as an ‘Average’ make in terms of difficulty, and I agree – I have made much more complicated dresses than this.
I love the labels that come with each designer pattern for you to sew into the garment:)
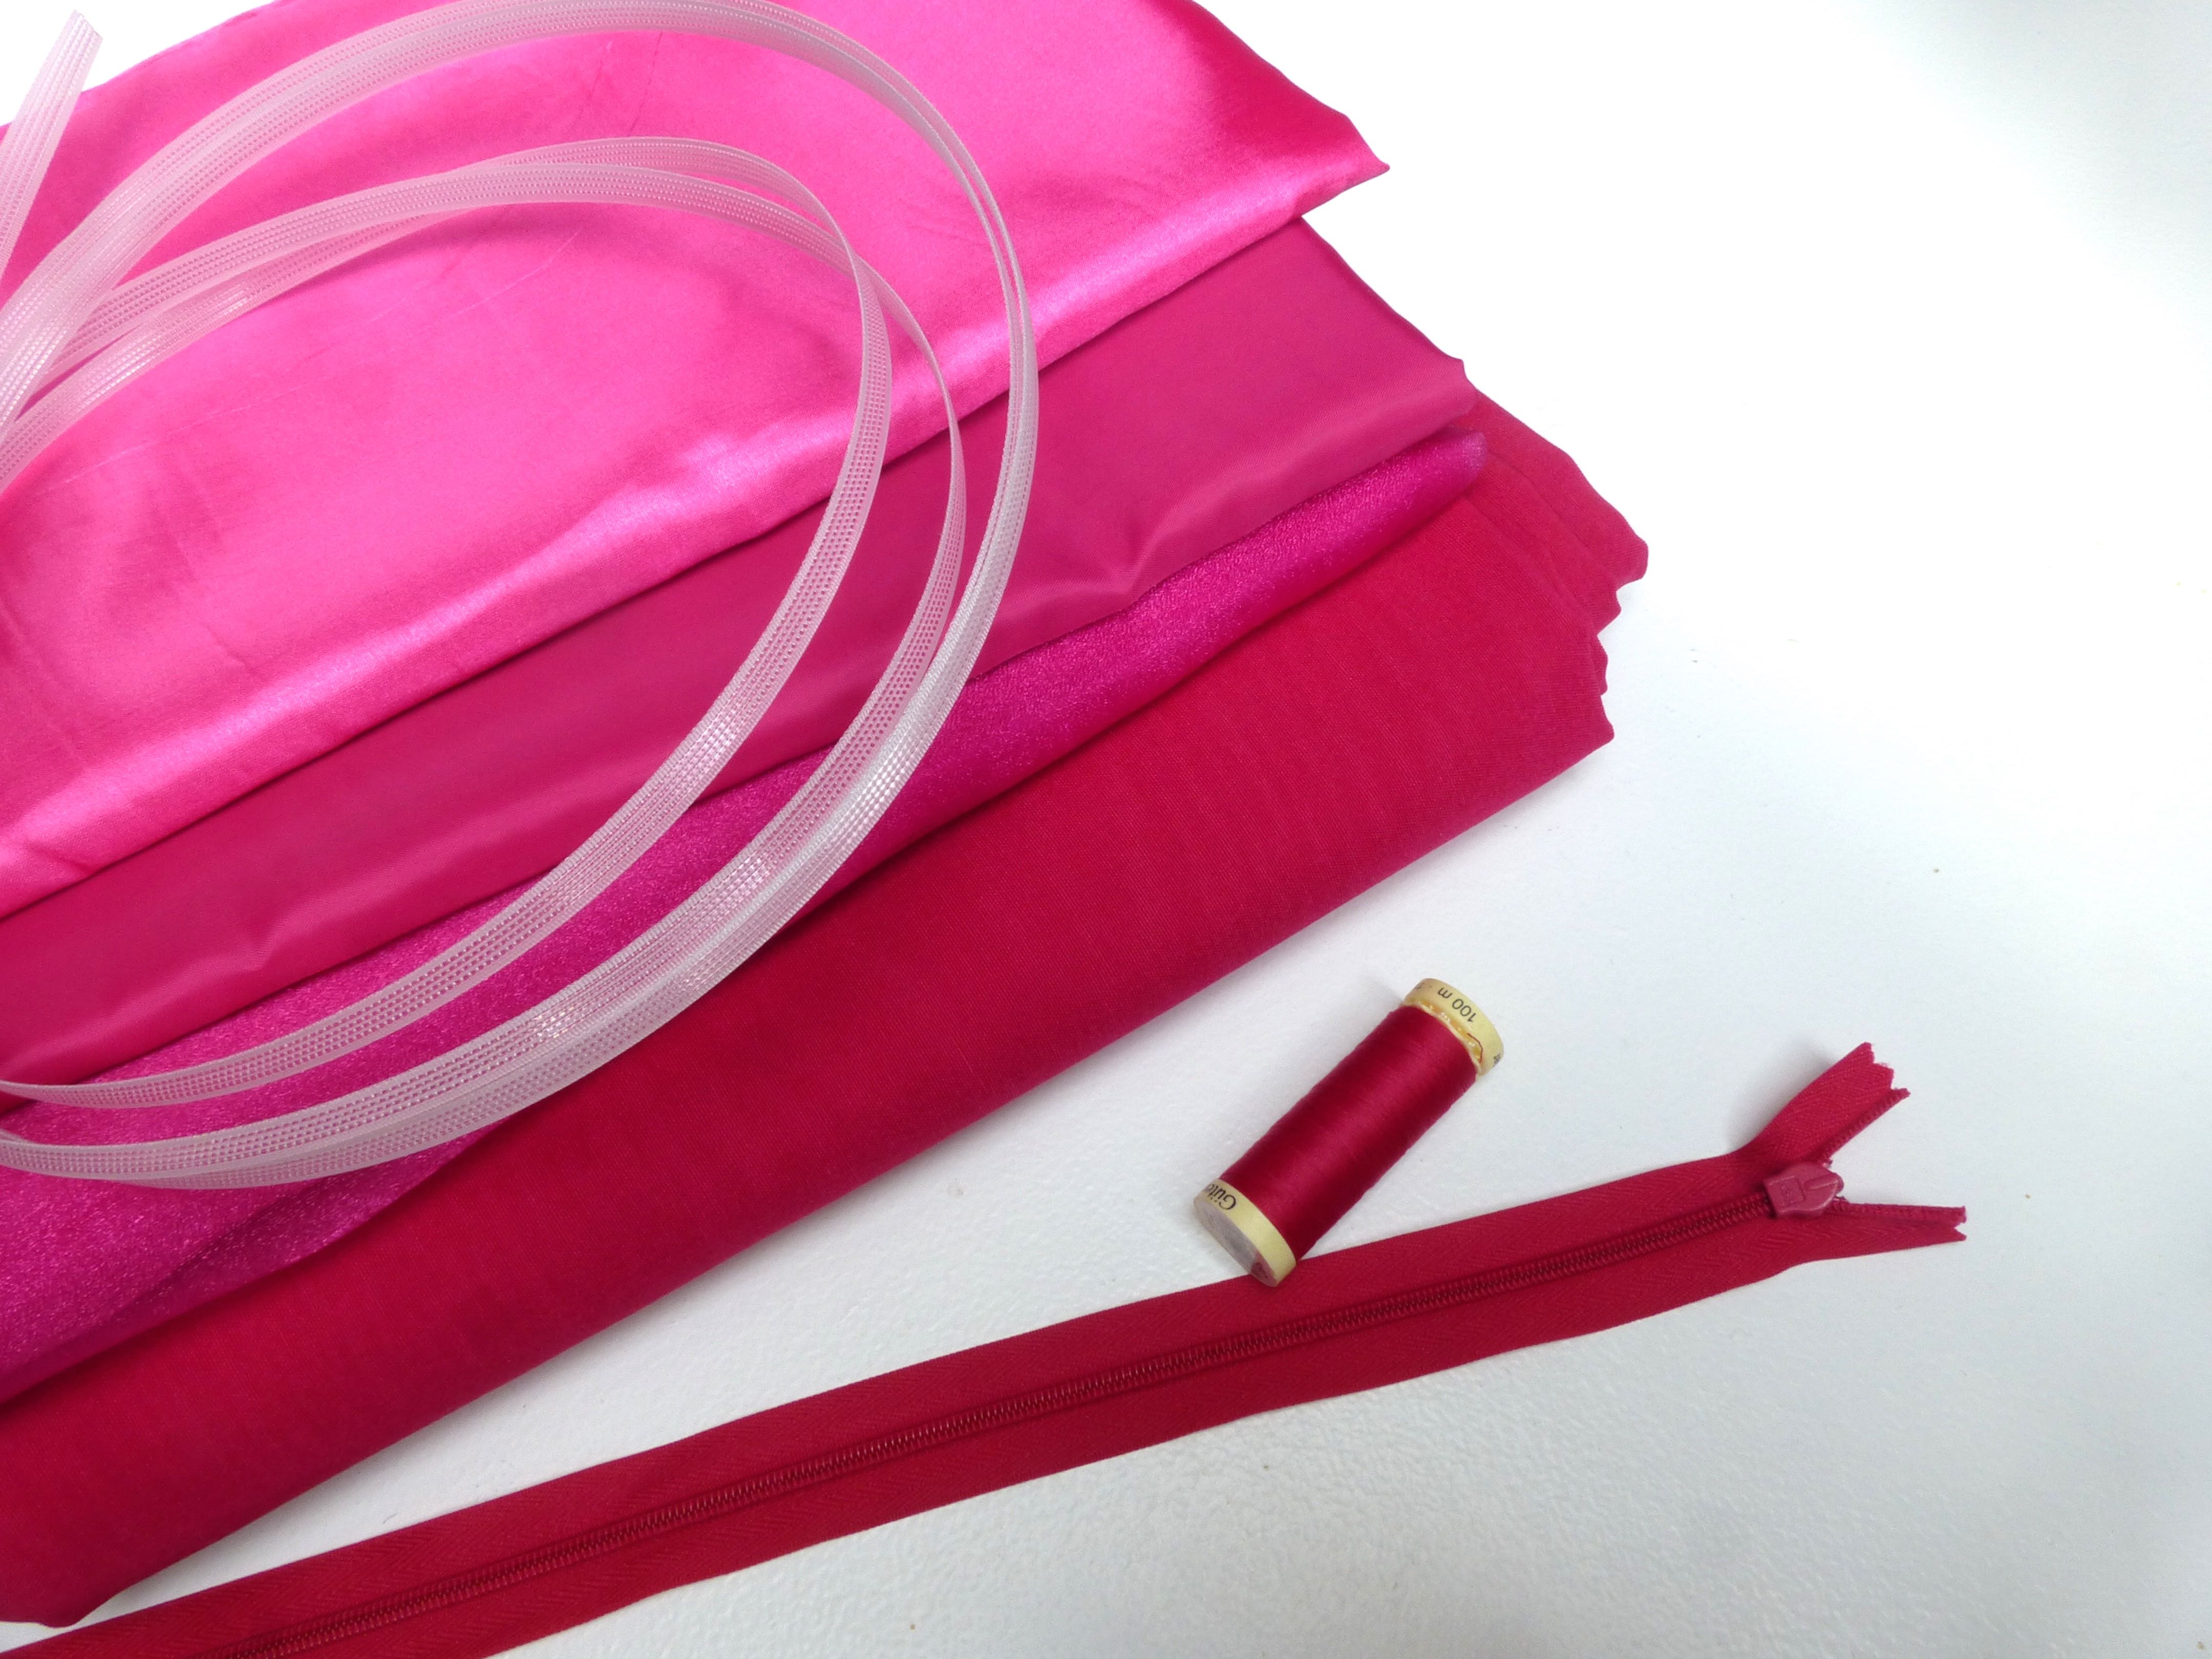
This bundle of fabric arrived from Minerva Crafts – several different types of fabric in a glorious shade of Fuschia: –
There was Bengaline for the main body of the dress, organza for interfacing, lining and habotai for the foundation layer and, yes, that is boning you see sat on top of the lot!
Let me tell you now that there are over SIXTY pieces of fabric holding this dress together and only FIVE are visible from the outside!
That is a hell of a lot of construction hidden inside and I used up two entire 100m reels of thread in the process!
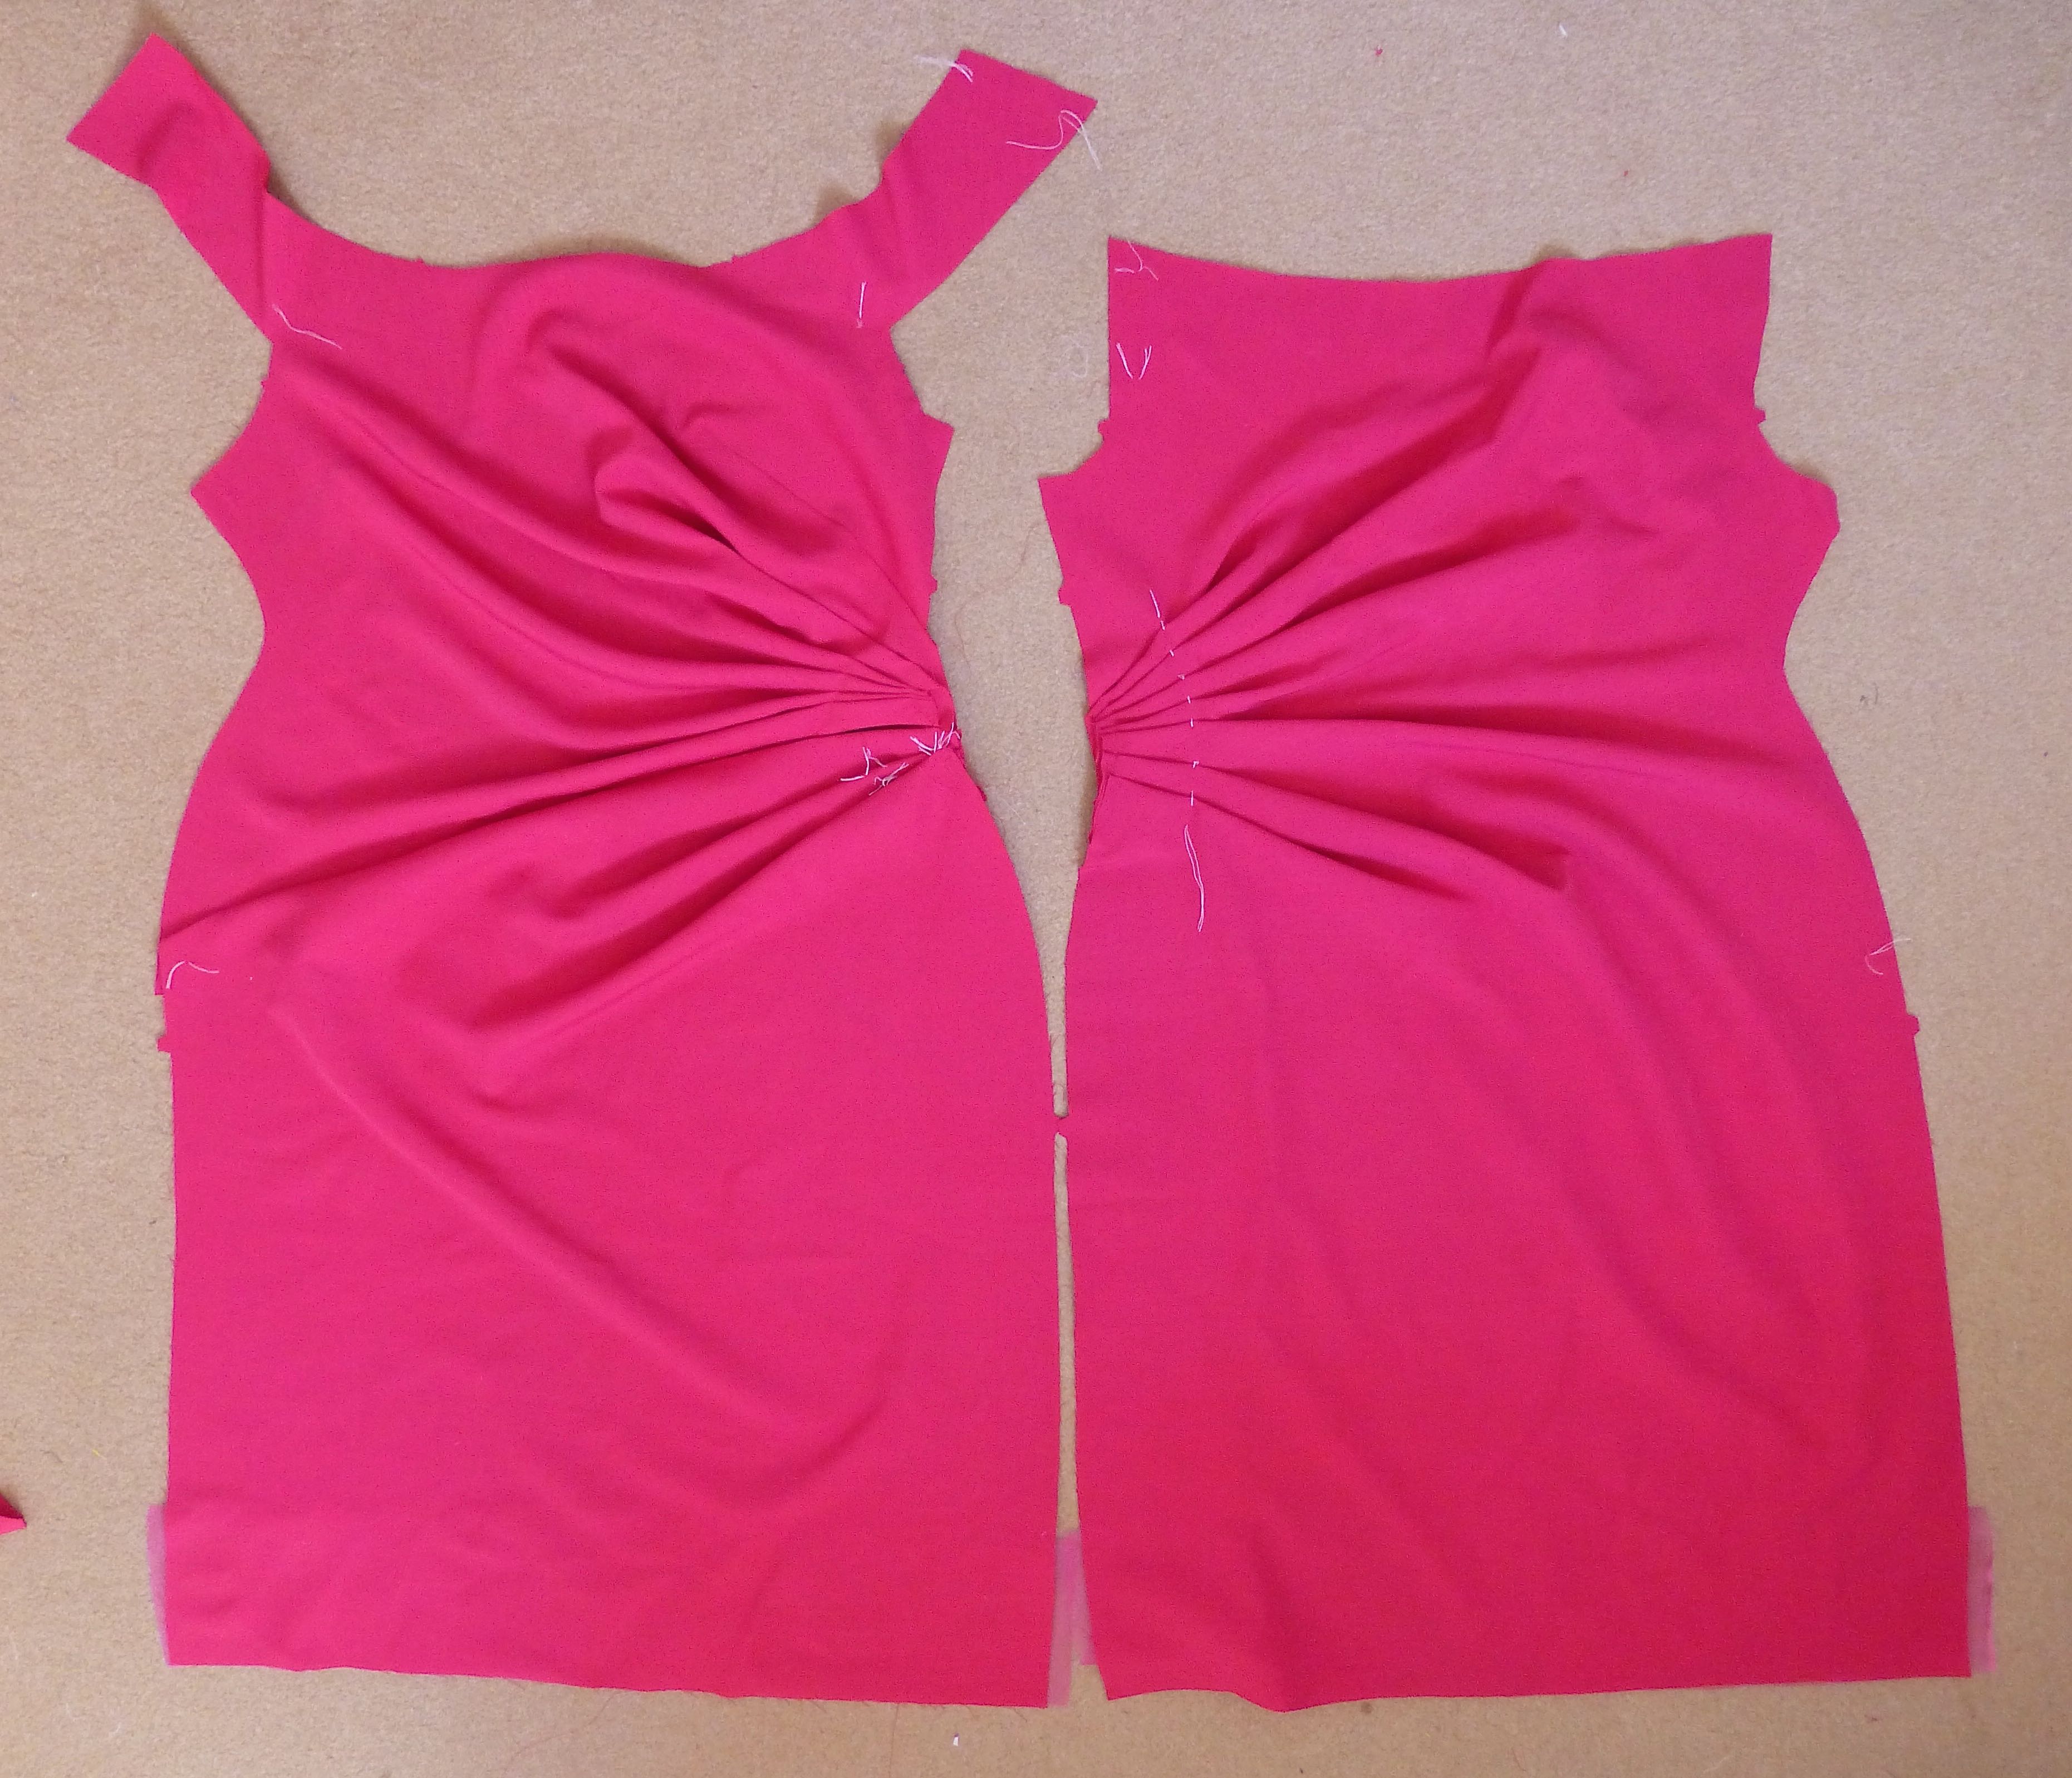
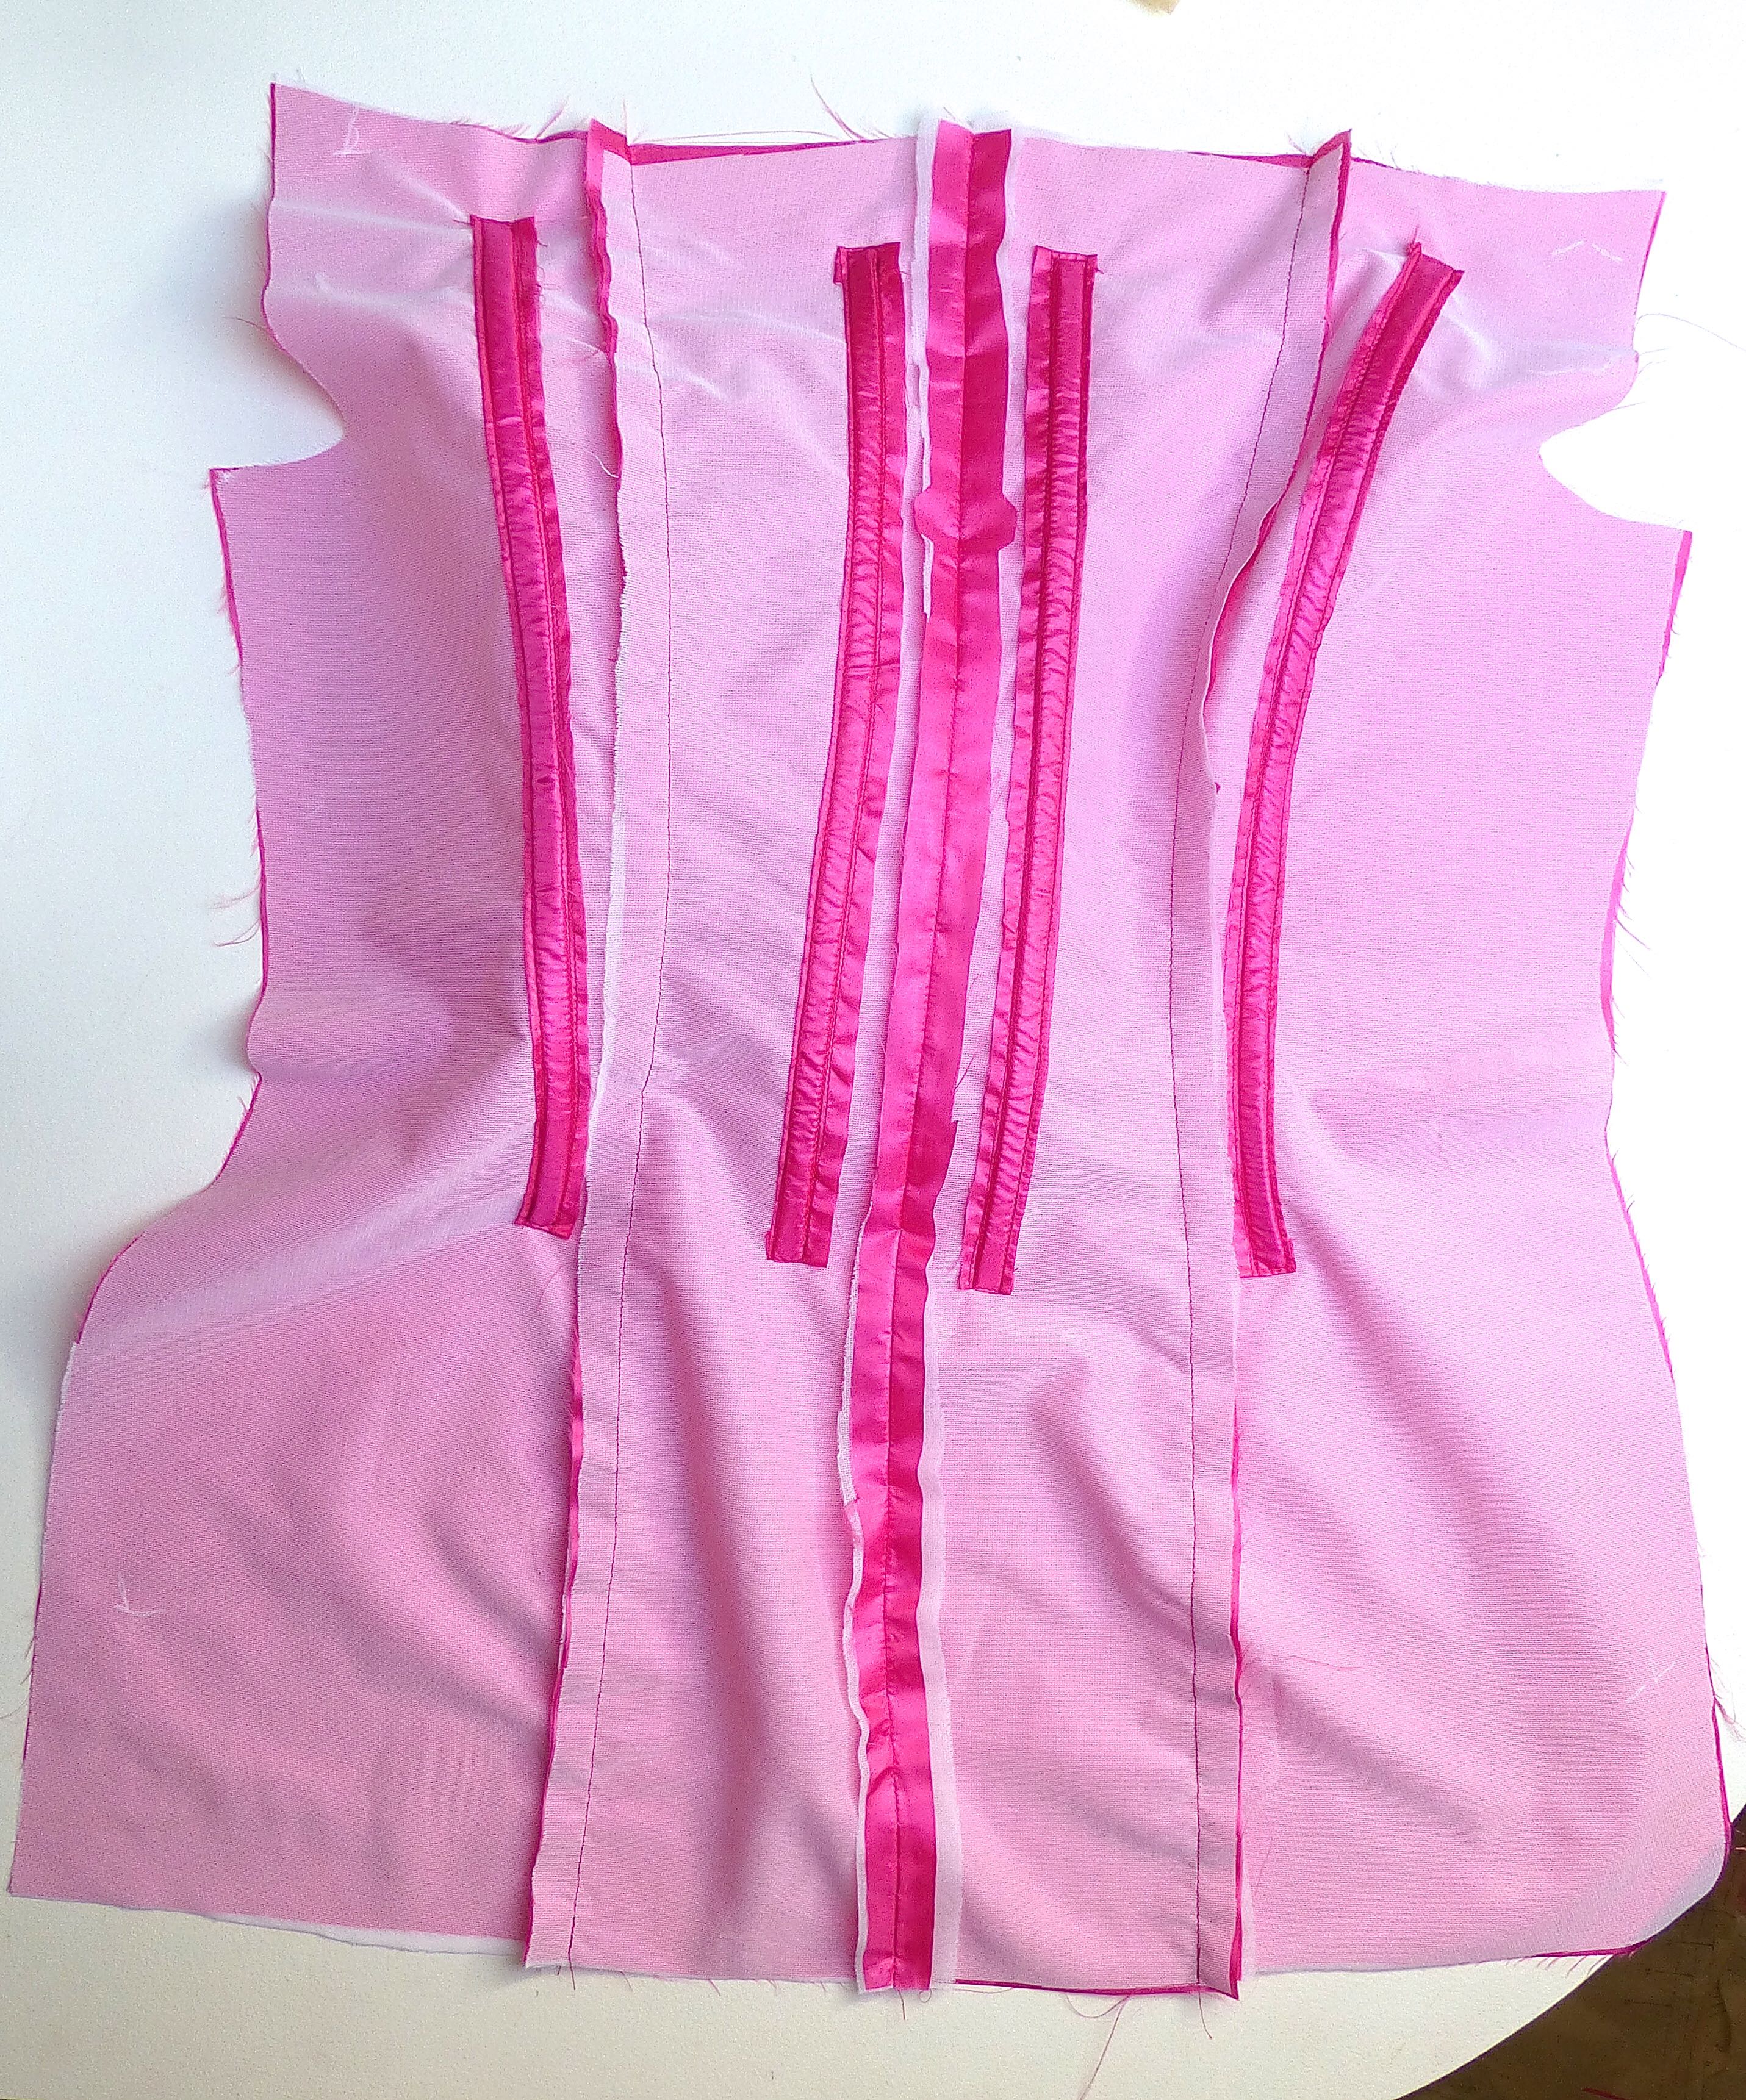
I love a good puzzle and this pattern had a few to solve, such as all those pleats on the left front:
I won’t take you through much of the process because that would take up more space that any blog post should do – I’ll just whizz through the main bits.
First, you make the pleats and darts in the front and back sections.
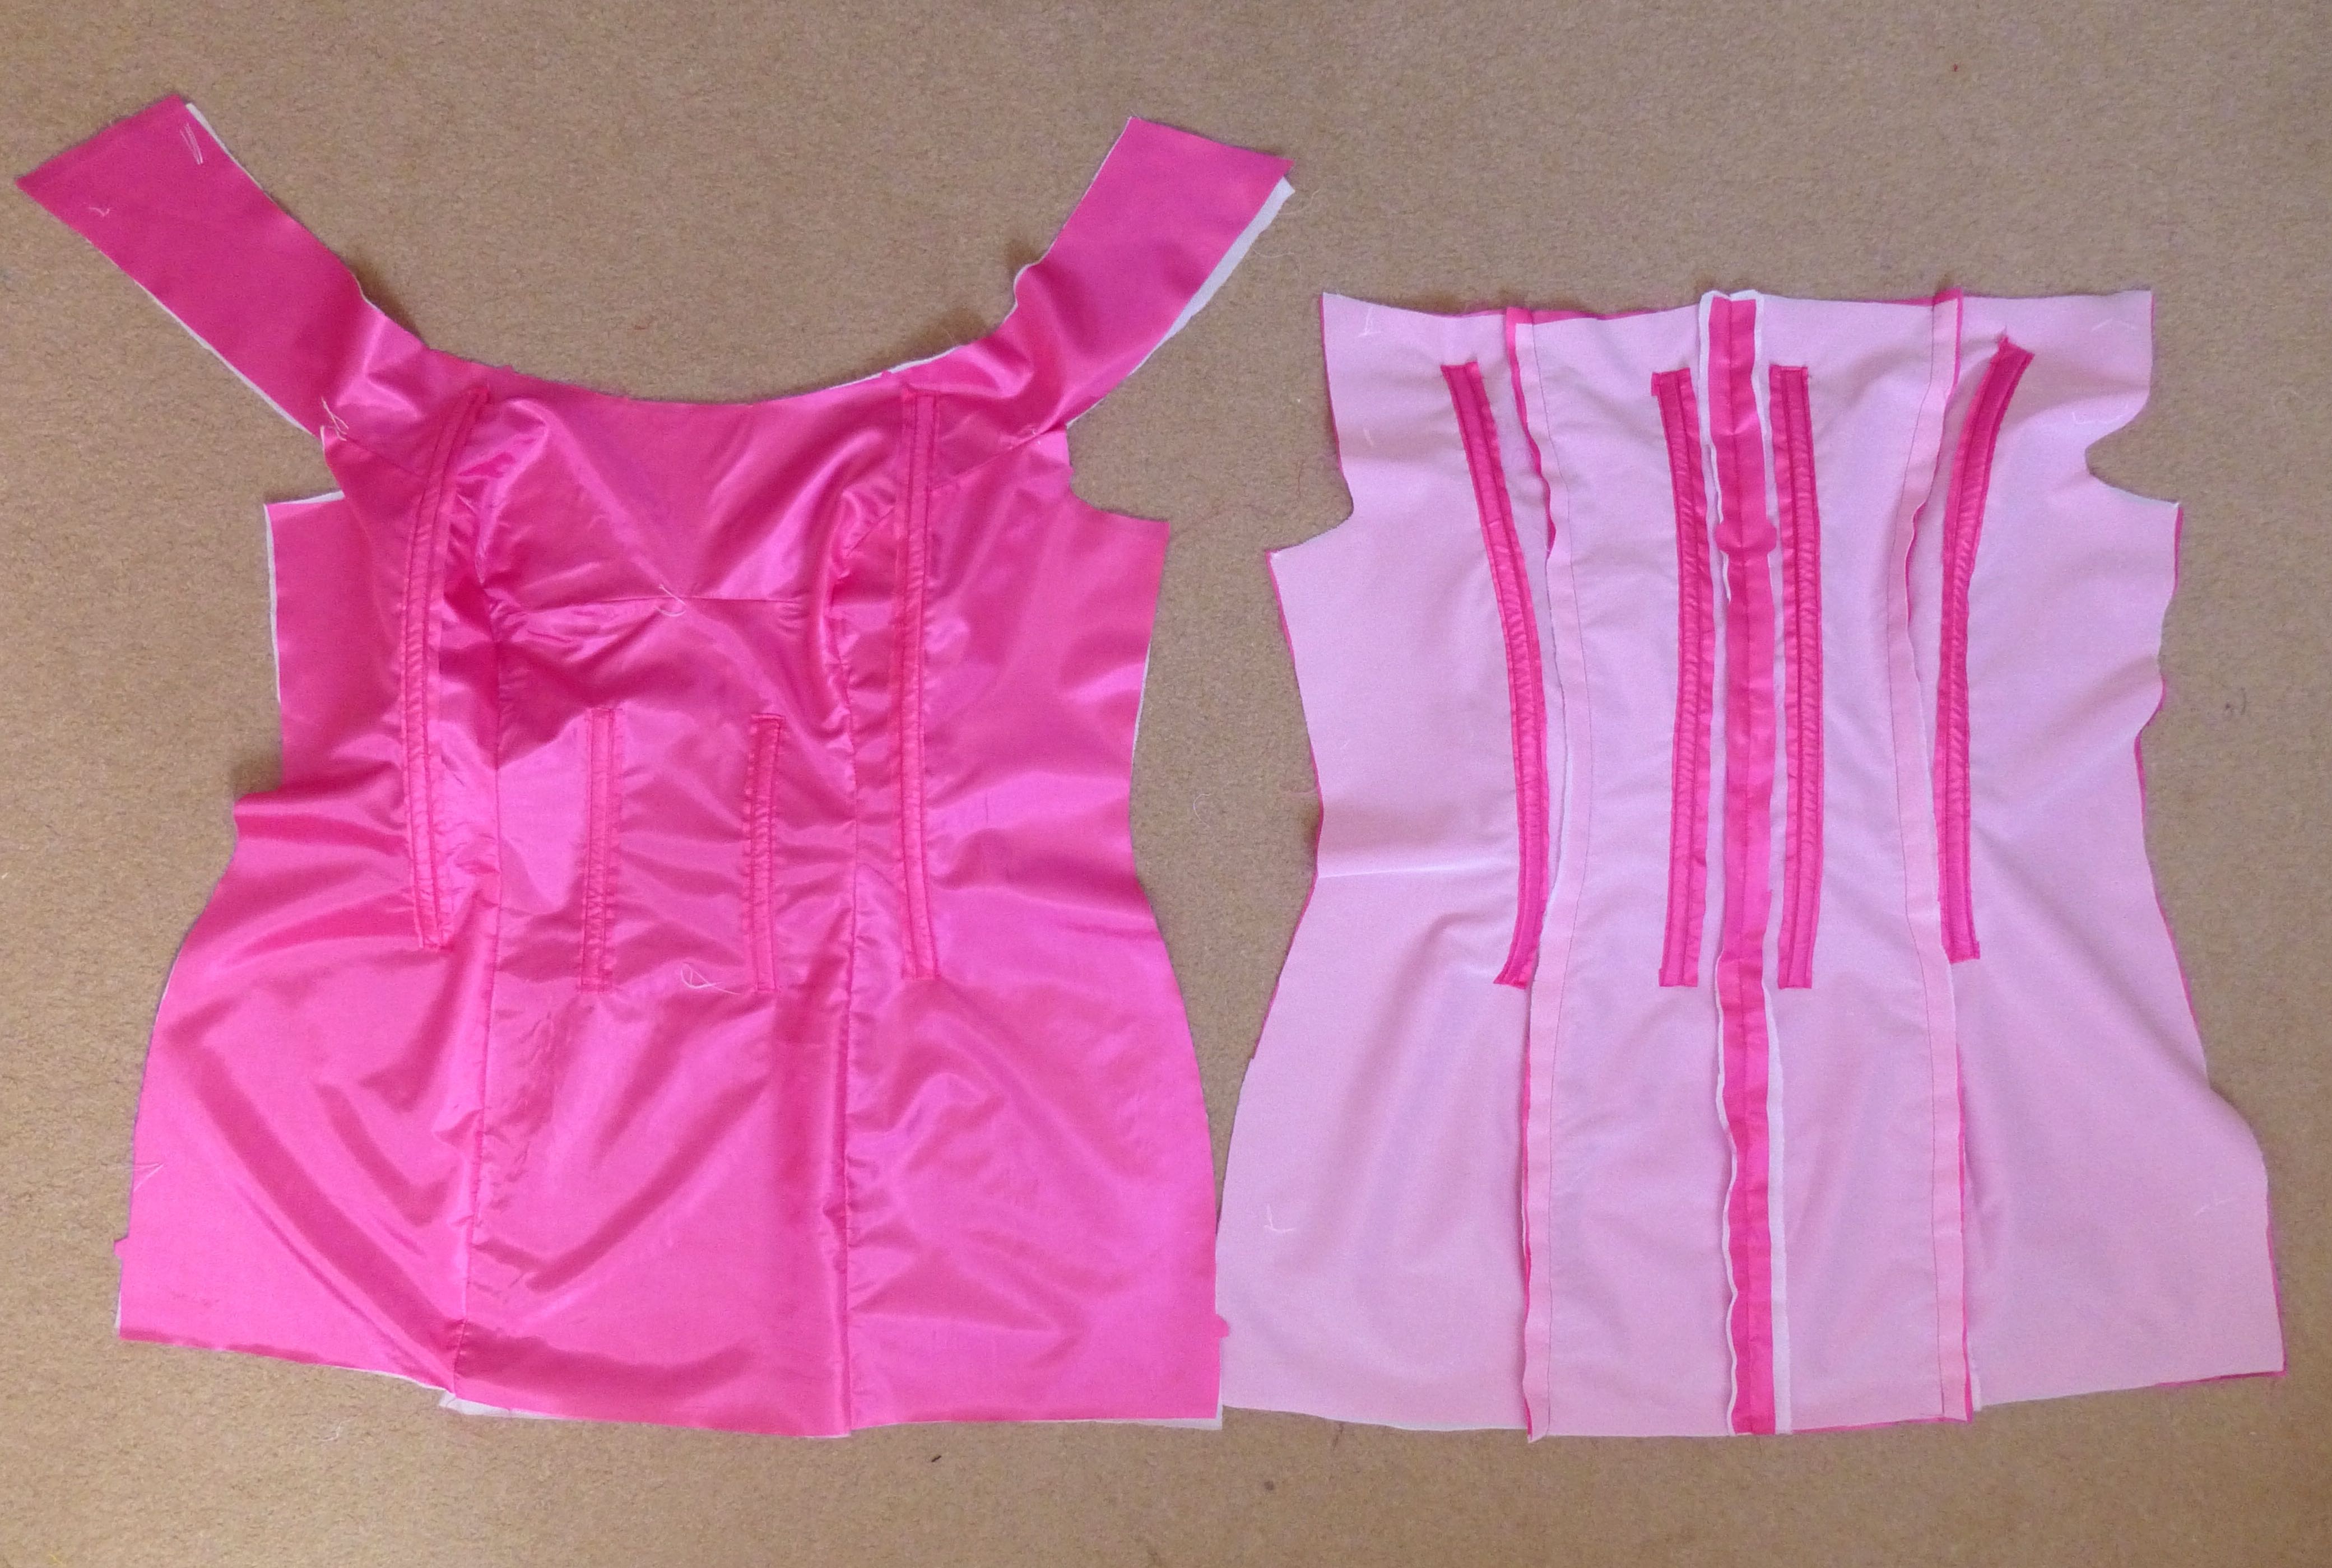
Next, you make the foundation which is the middle bit of the dress sandwiched between the outer dress and the lining.
It consists of a lining layer, fully interfaced, which has the boning sewn to it.
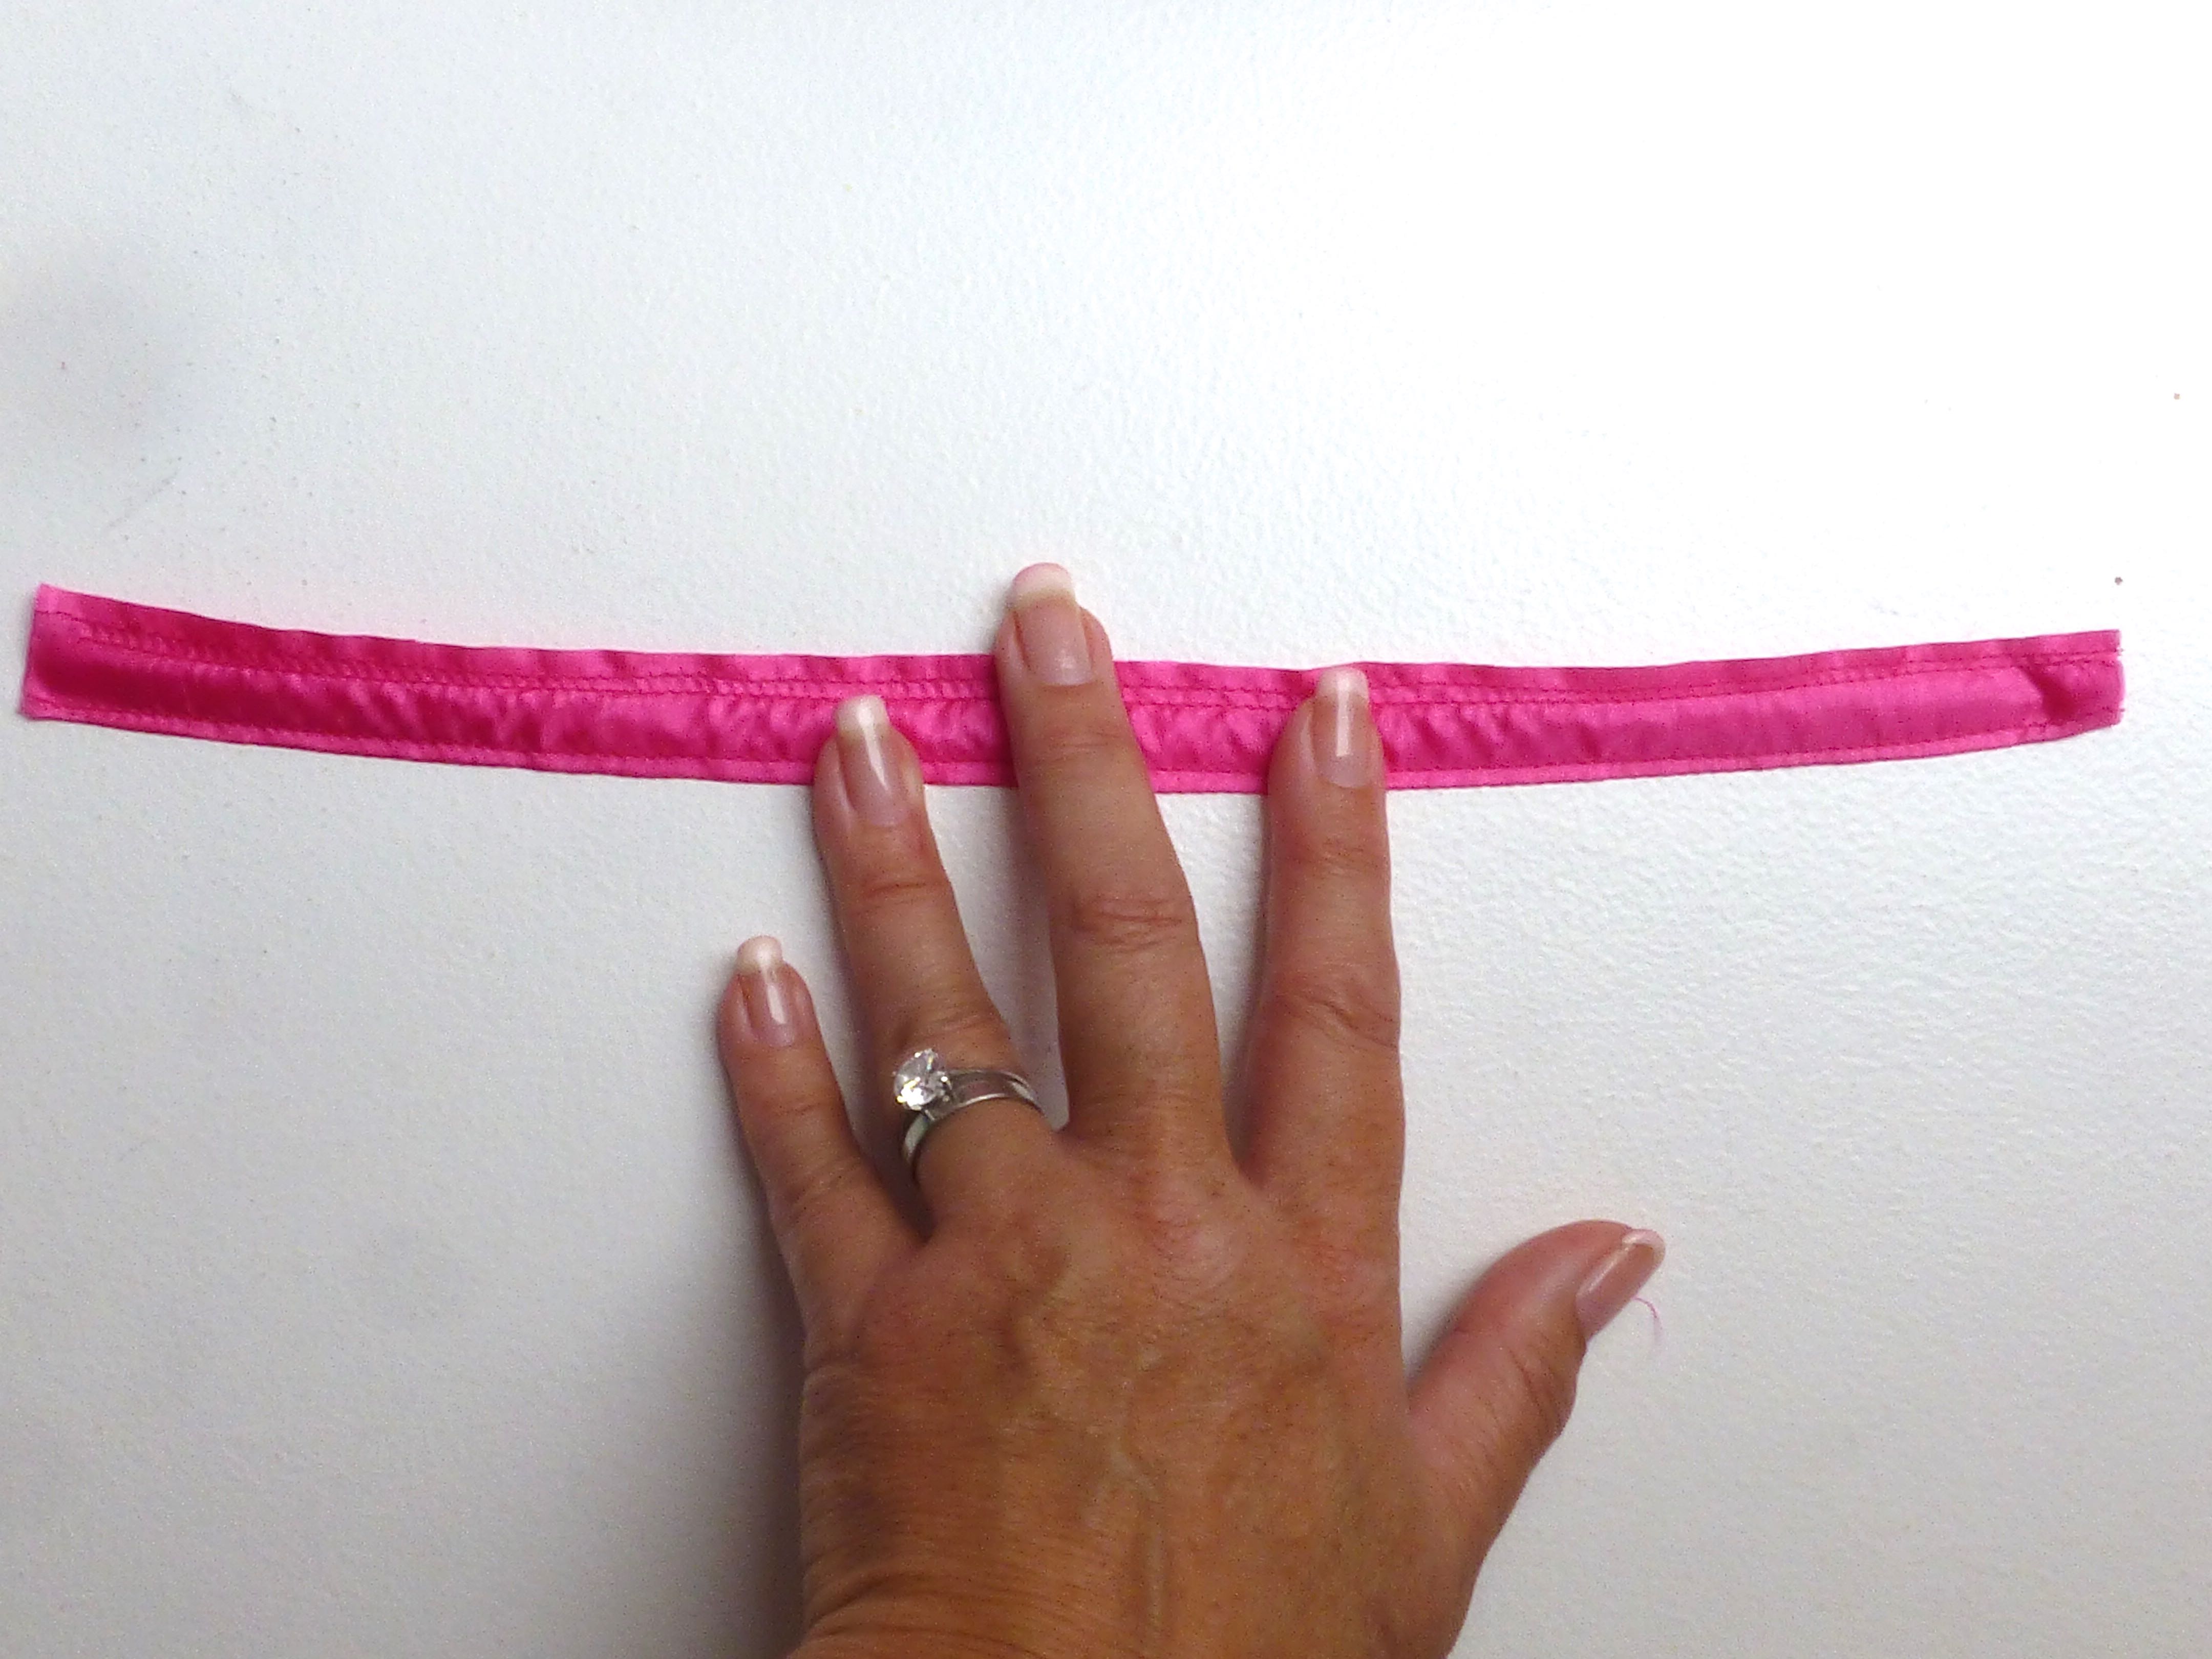
The instructions called for boning in its own casing but, as I couldn’t get any, I made my own using normal boning and some offcuts of habotai.
Voilà!
This is the inside showing the boning in place….
….and this is what it looks like from the right side.
Very nice.
It’s almost a shame that all this beautiful work will be completely hidden from view:)
The foundation sections are then sewn to the body of the dress….
….and the front is stitched to the back at the side seams, leaving an opening for the zip.
Now, I have never used a dedicated foot to insert invisible zips, I learned to sew them using a normal zipper foot and don’t find it an issue.
I don’t know if you can see, but I open the zip up and sew really close to the teeth in the same way a specialized foot would do.
There, pretty invisible, wouldn’t you agree?
The zip needed shortening which is just a case of sewing a new stopper from thread and cutting off the excess below.
Now, onto the lining.
Of course, all the way through we’re sewing princess seams – isn’t it a little bit of magic when you fit the fabric around the curve? Like fitting a square peg into a round hole, it doesn’t seem possible at first.
A few clips to the stay-stitching and job done!
Lining completed.
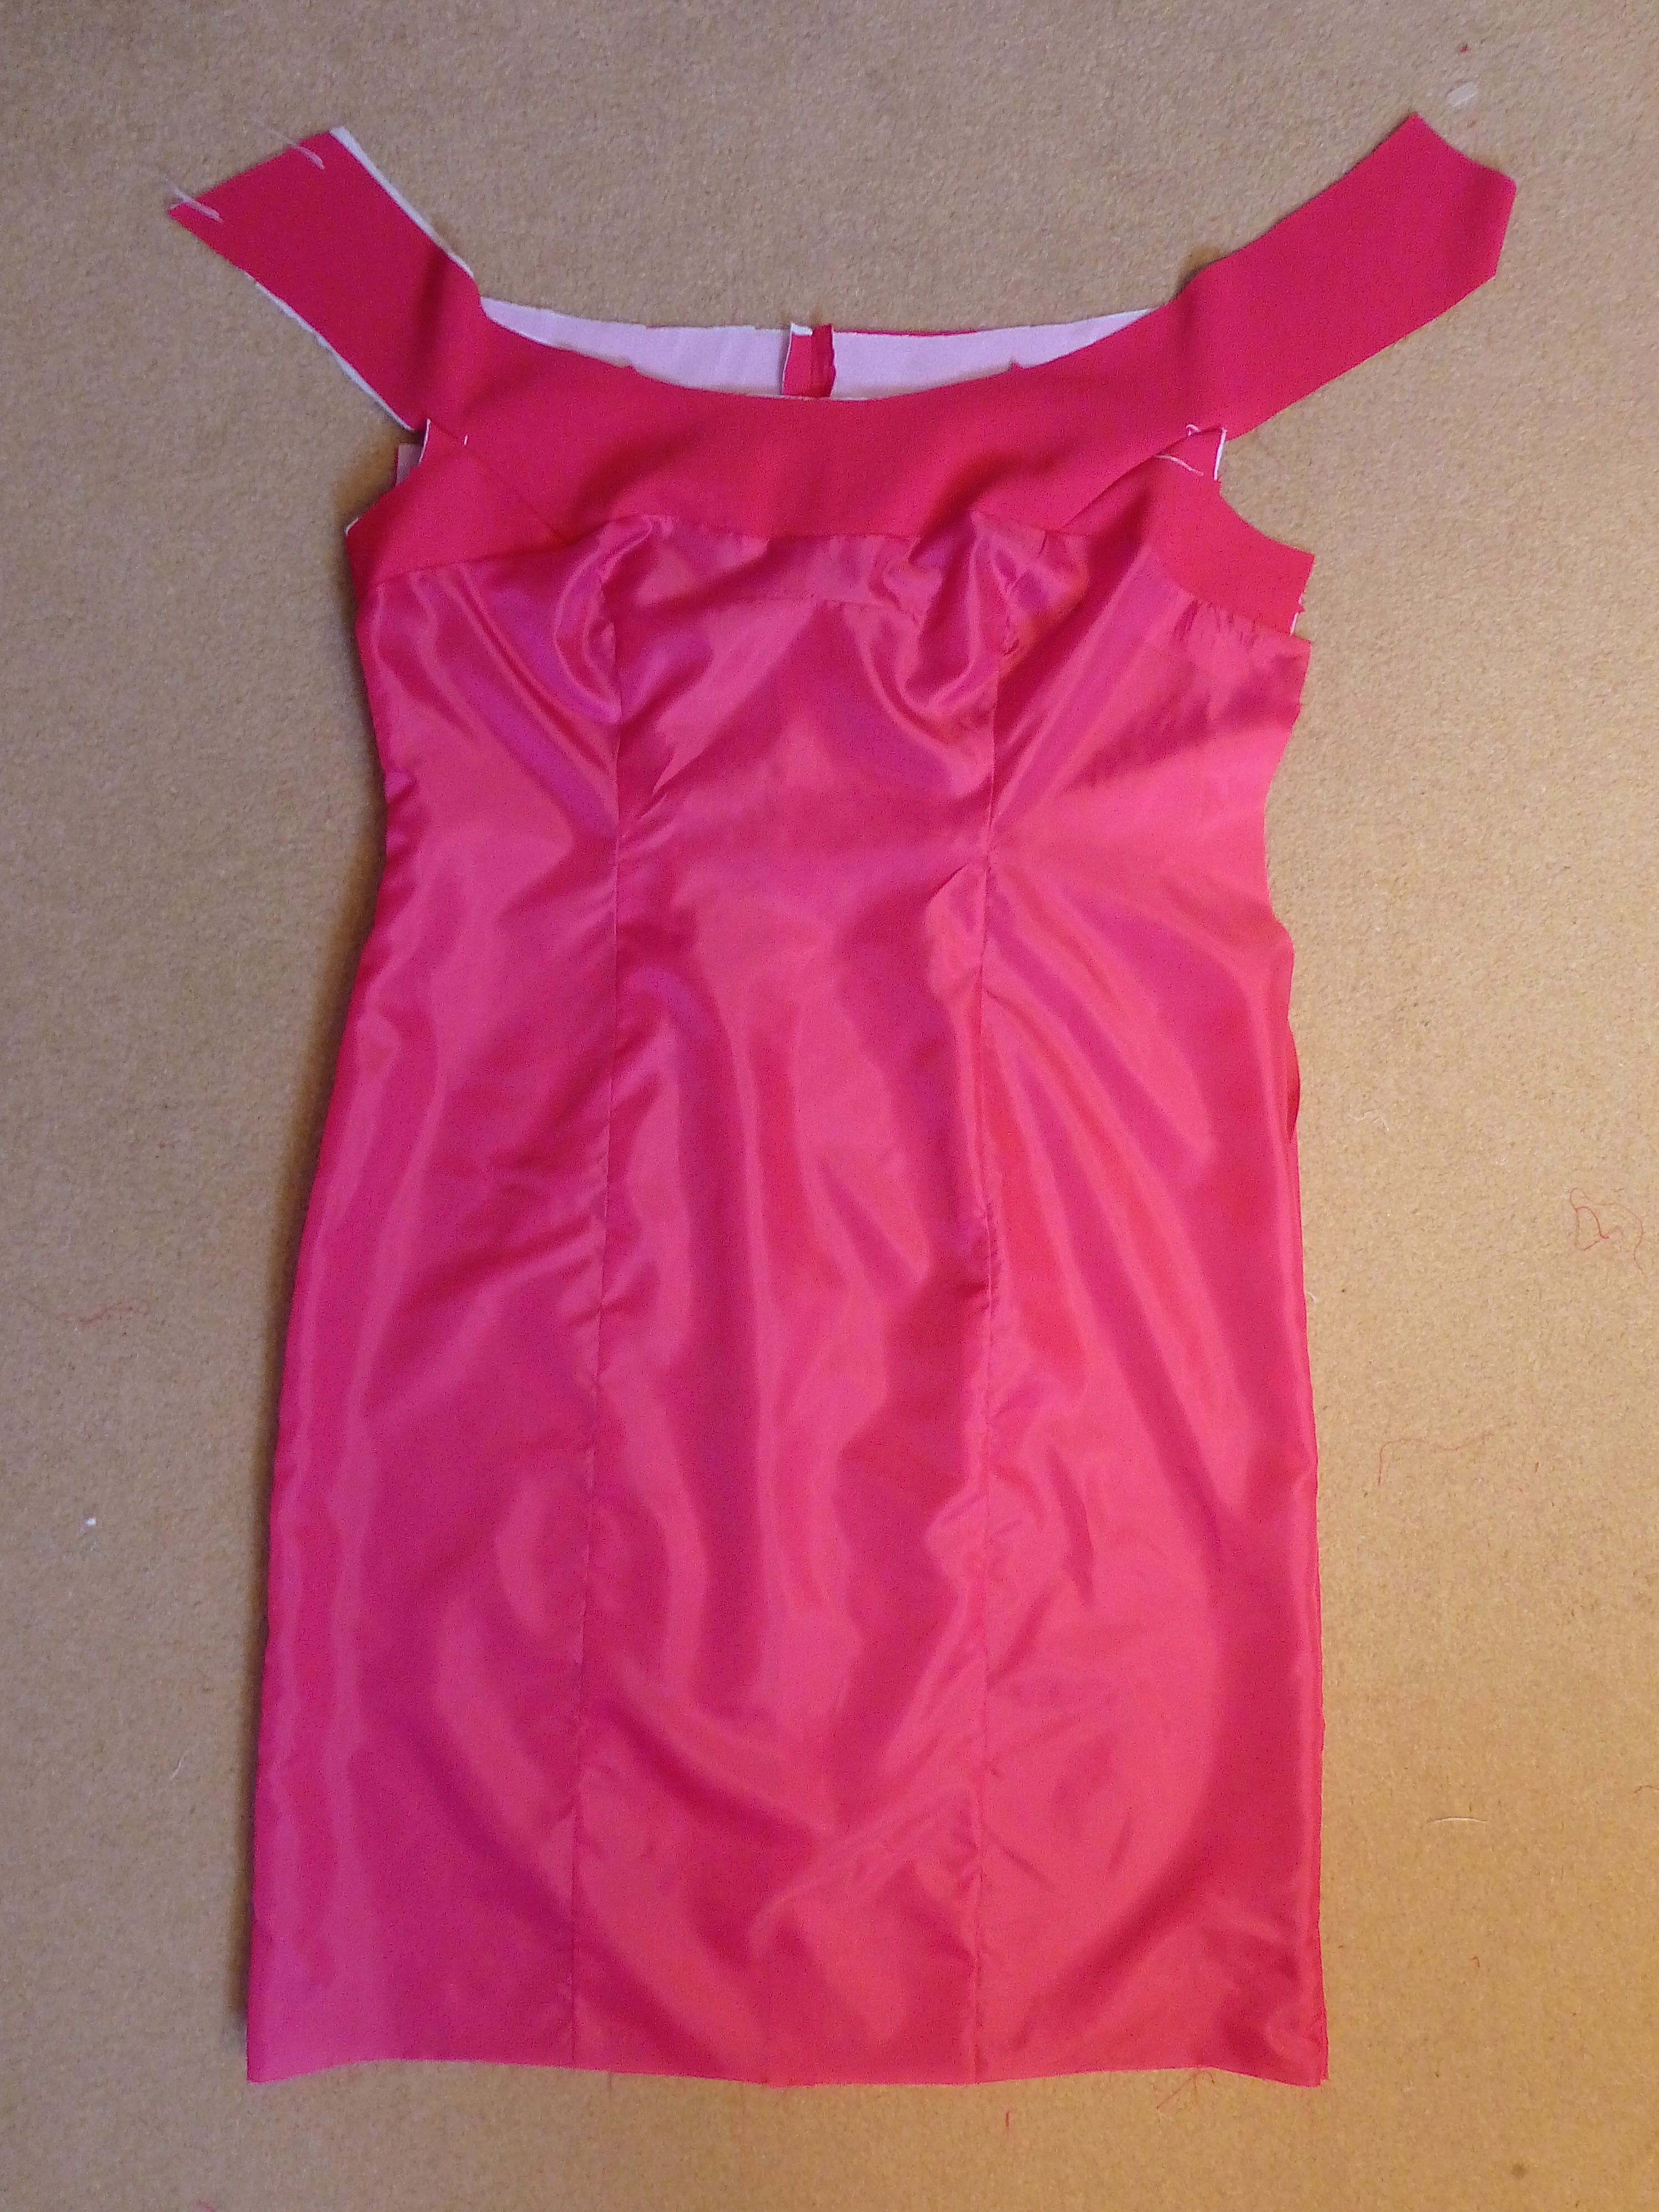
The lining is slipped over the dress and foundation and sewn right sides together around the neckline and armhole edges.
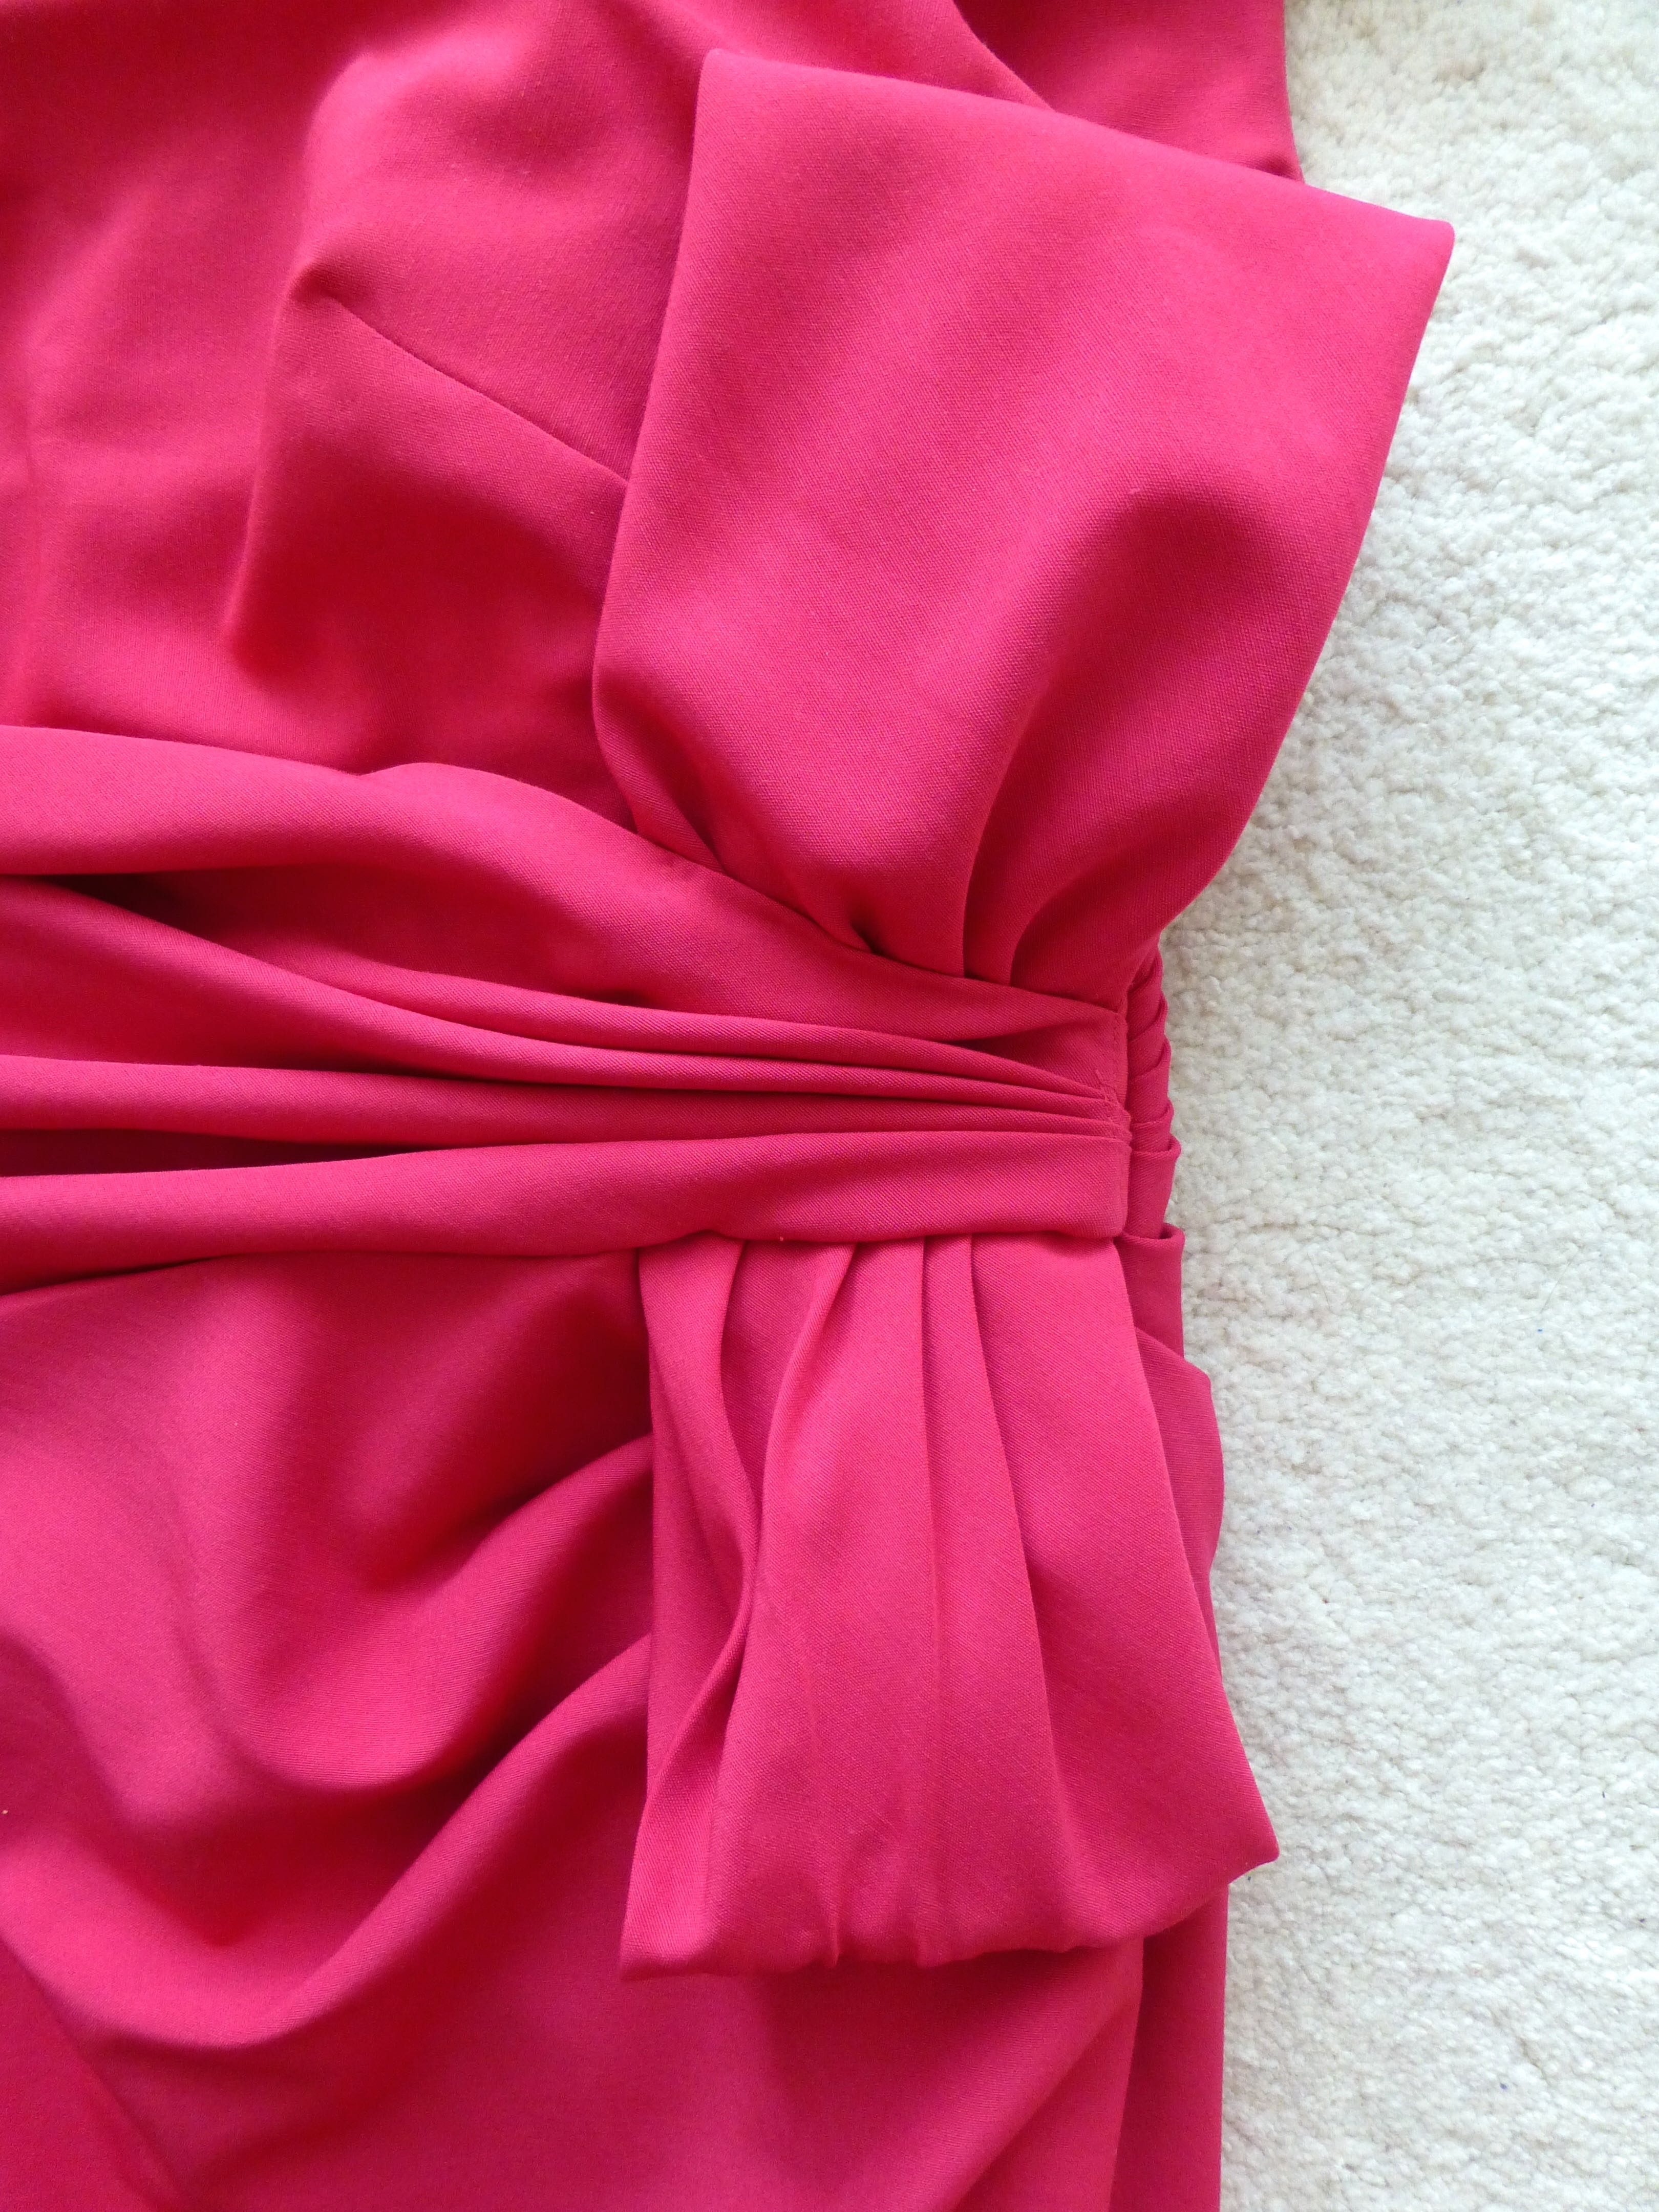
The bow, which is stiffened with organza, was made and secured in place amongst the pleats.
The hem was faced with organza and turned up with herringbone stitch.
The lining was slip stitched to the hem, leaving a folded pleat as ease.
Looking at the inside when finished, you’d have no idea of what it’s hiding underneath!
The quality of the fabrics is amazing – the bengaline handles beautifully and has a discreet watermark to it.
The polyester habotai was chosen as an alternative to china silk for the foundation and looks and feels superb – such a shame it’s hidden!
This dress does not photograph well on the hanger – all those pleats only sit properly on a real body.
The boning means I shouldn’t have to wear a bra but, looking at this photo I definitely do. My bust is too heavy and is dragging the front down causing it to gape – a strapless bra will do the trick.
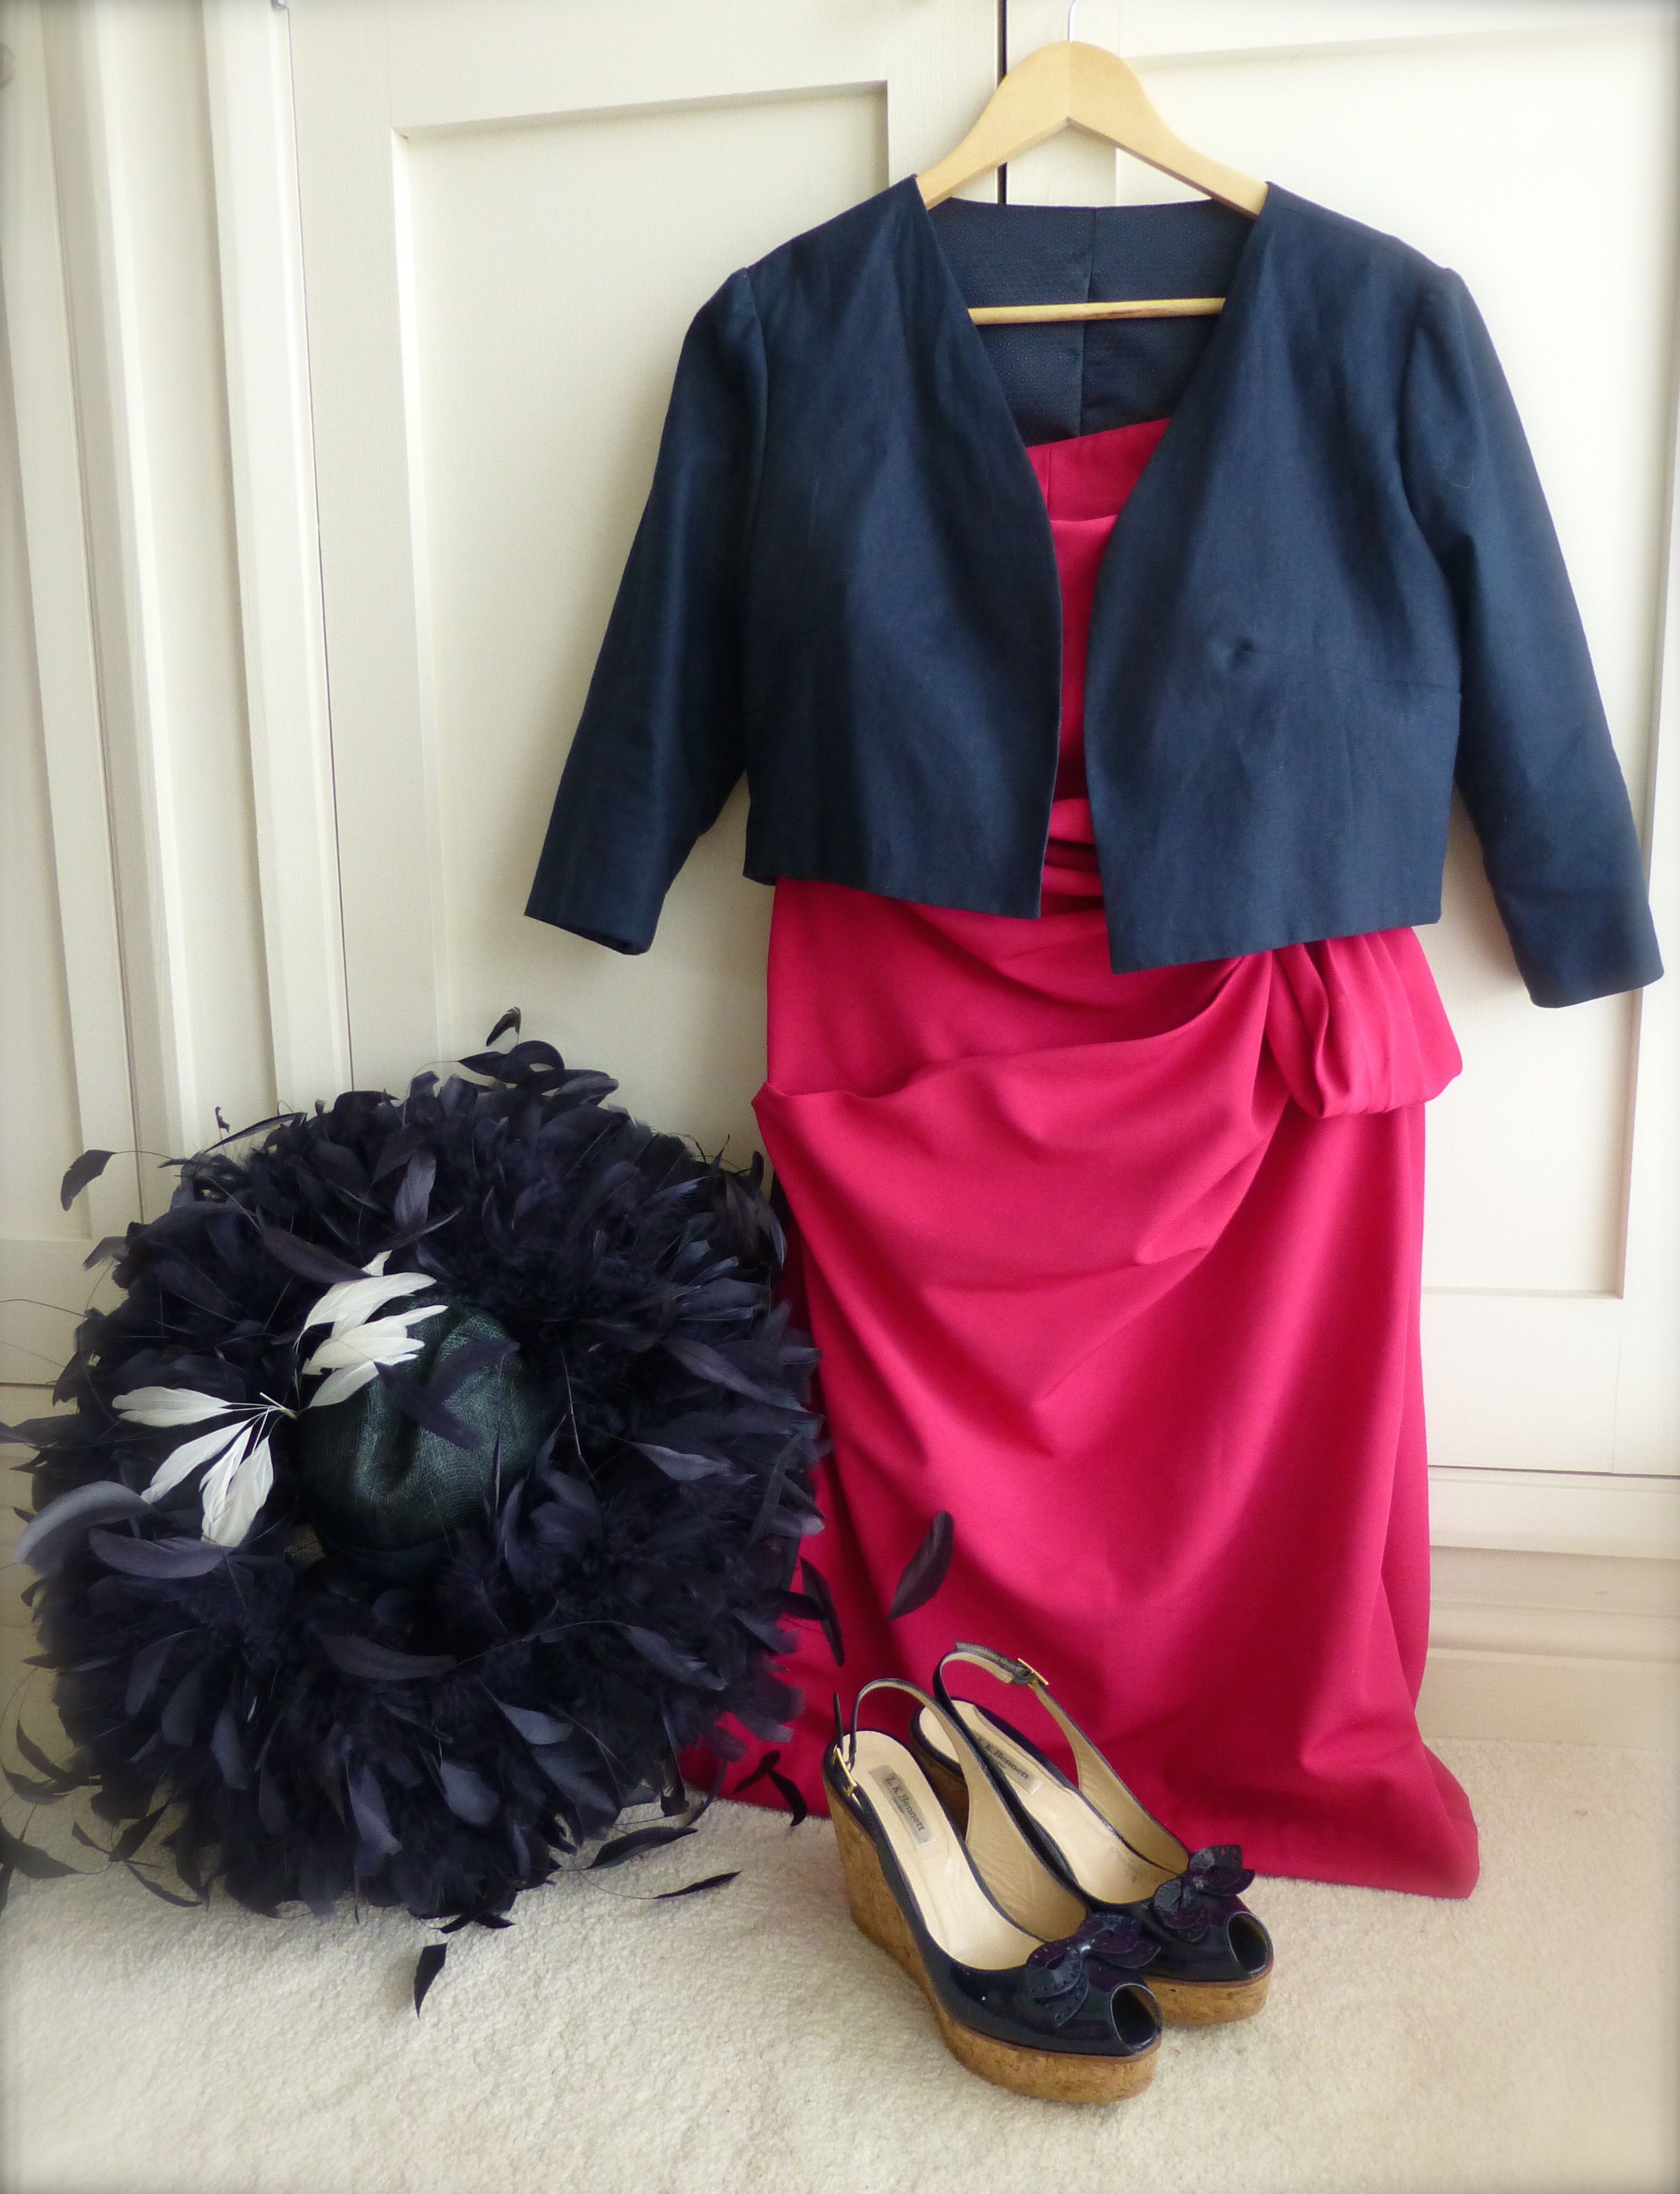
So this is me, all ready for Ladies Day on Thursday and there’s just one more thing left to do…..
…. get my French manicure redone – it’s all stained from handling all that pink fabric!!
Forgive me, Bloggers, for I have sinned – it’s been a week since my last blog post….but with good reason.
My ‘phone died.
Kaput.
It is an ex-phone.
I had faithfully recorded images of my week for #sundaysevens (including some lovely Spanish sunsets) but could not share them with you…yet. It is in the gadget hospital as we speak so, hopefully, the techy bloke will work his magic and retrieve some of the lost photos for a later post.
As you know, we recently hopped over to Andalucia in Spain for a couple of weeks to stay with my Auntie and her partner.
This is Auntie, looking very glamorous and stylish. Not your average ex-pat, I think you’ll agree.
Boy, do I hope I’ve inherited her genes – hardly a grey hair in sight and she’s seventy-six this year!
Auntie wears a lot of linen.
With temperatures well into the high thirties in the height of Summer, it’s the coolest and most comfortable fabric to wear, after all, you can’t walk around naked all the time, can you?
Having long admired this style of clothing, I persuaded Auntie to take me to the Tuesday market in Albox (photo amongst the many lost in the depths of my iPhone) to buy something similar in an effort to keep cool in the blistering heat.
Apparently, it was a balmy 26°C and pleasantly cool for the locals.
I was sweating my t**ts off.
You’re talking to someone who gets the shorts and flip-flops out as soon as the thermometer reaches double figures for seven days in a row:)
The Boys stayed at home frolicking in the pool for the morning whilst we spent a blissful few hours wandering around the market, stopping occasionally for Tapas and the odd chilled beer.
I came back with a dress, one top, two tunics and two pairs of trousers, all Italian and made in 100% linen for €108, which is about £78!
The remainder of our holiday was enjoyed in cool, linen comfort and I vowed to make more things in this magical fabric on our return to England.
The wonders of online shopping resulted in this little lot being delivered within a few days of arriving home.
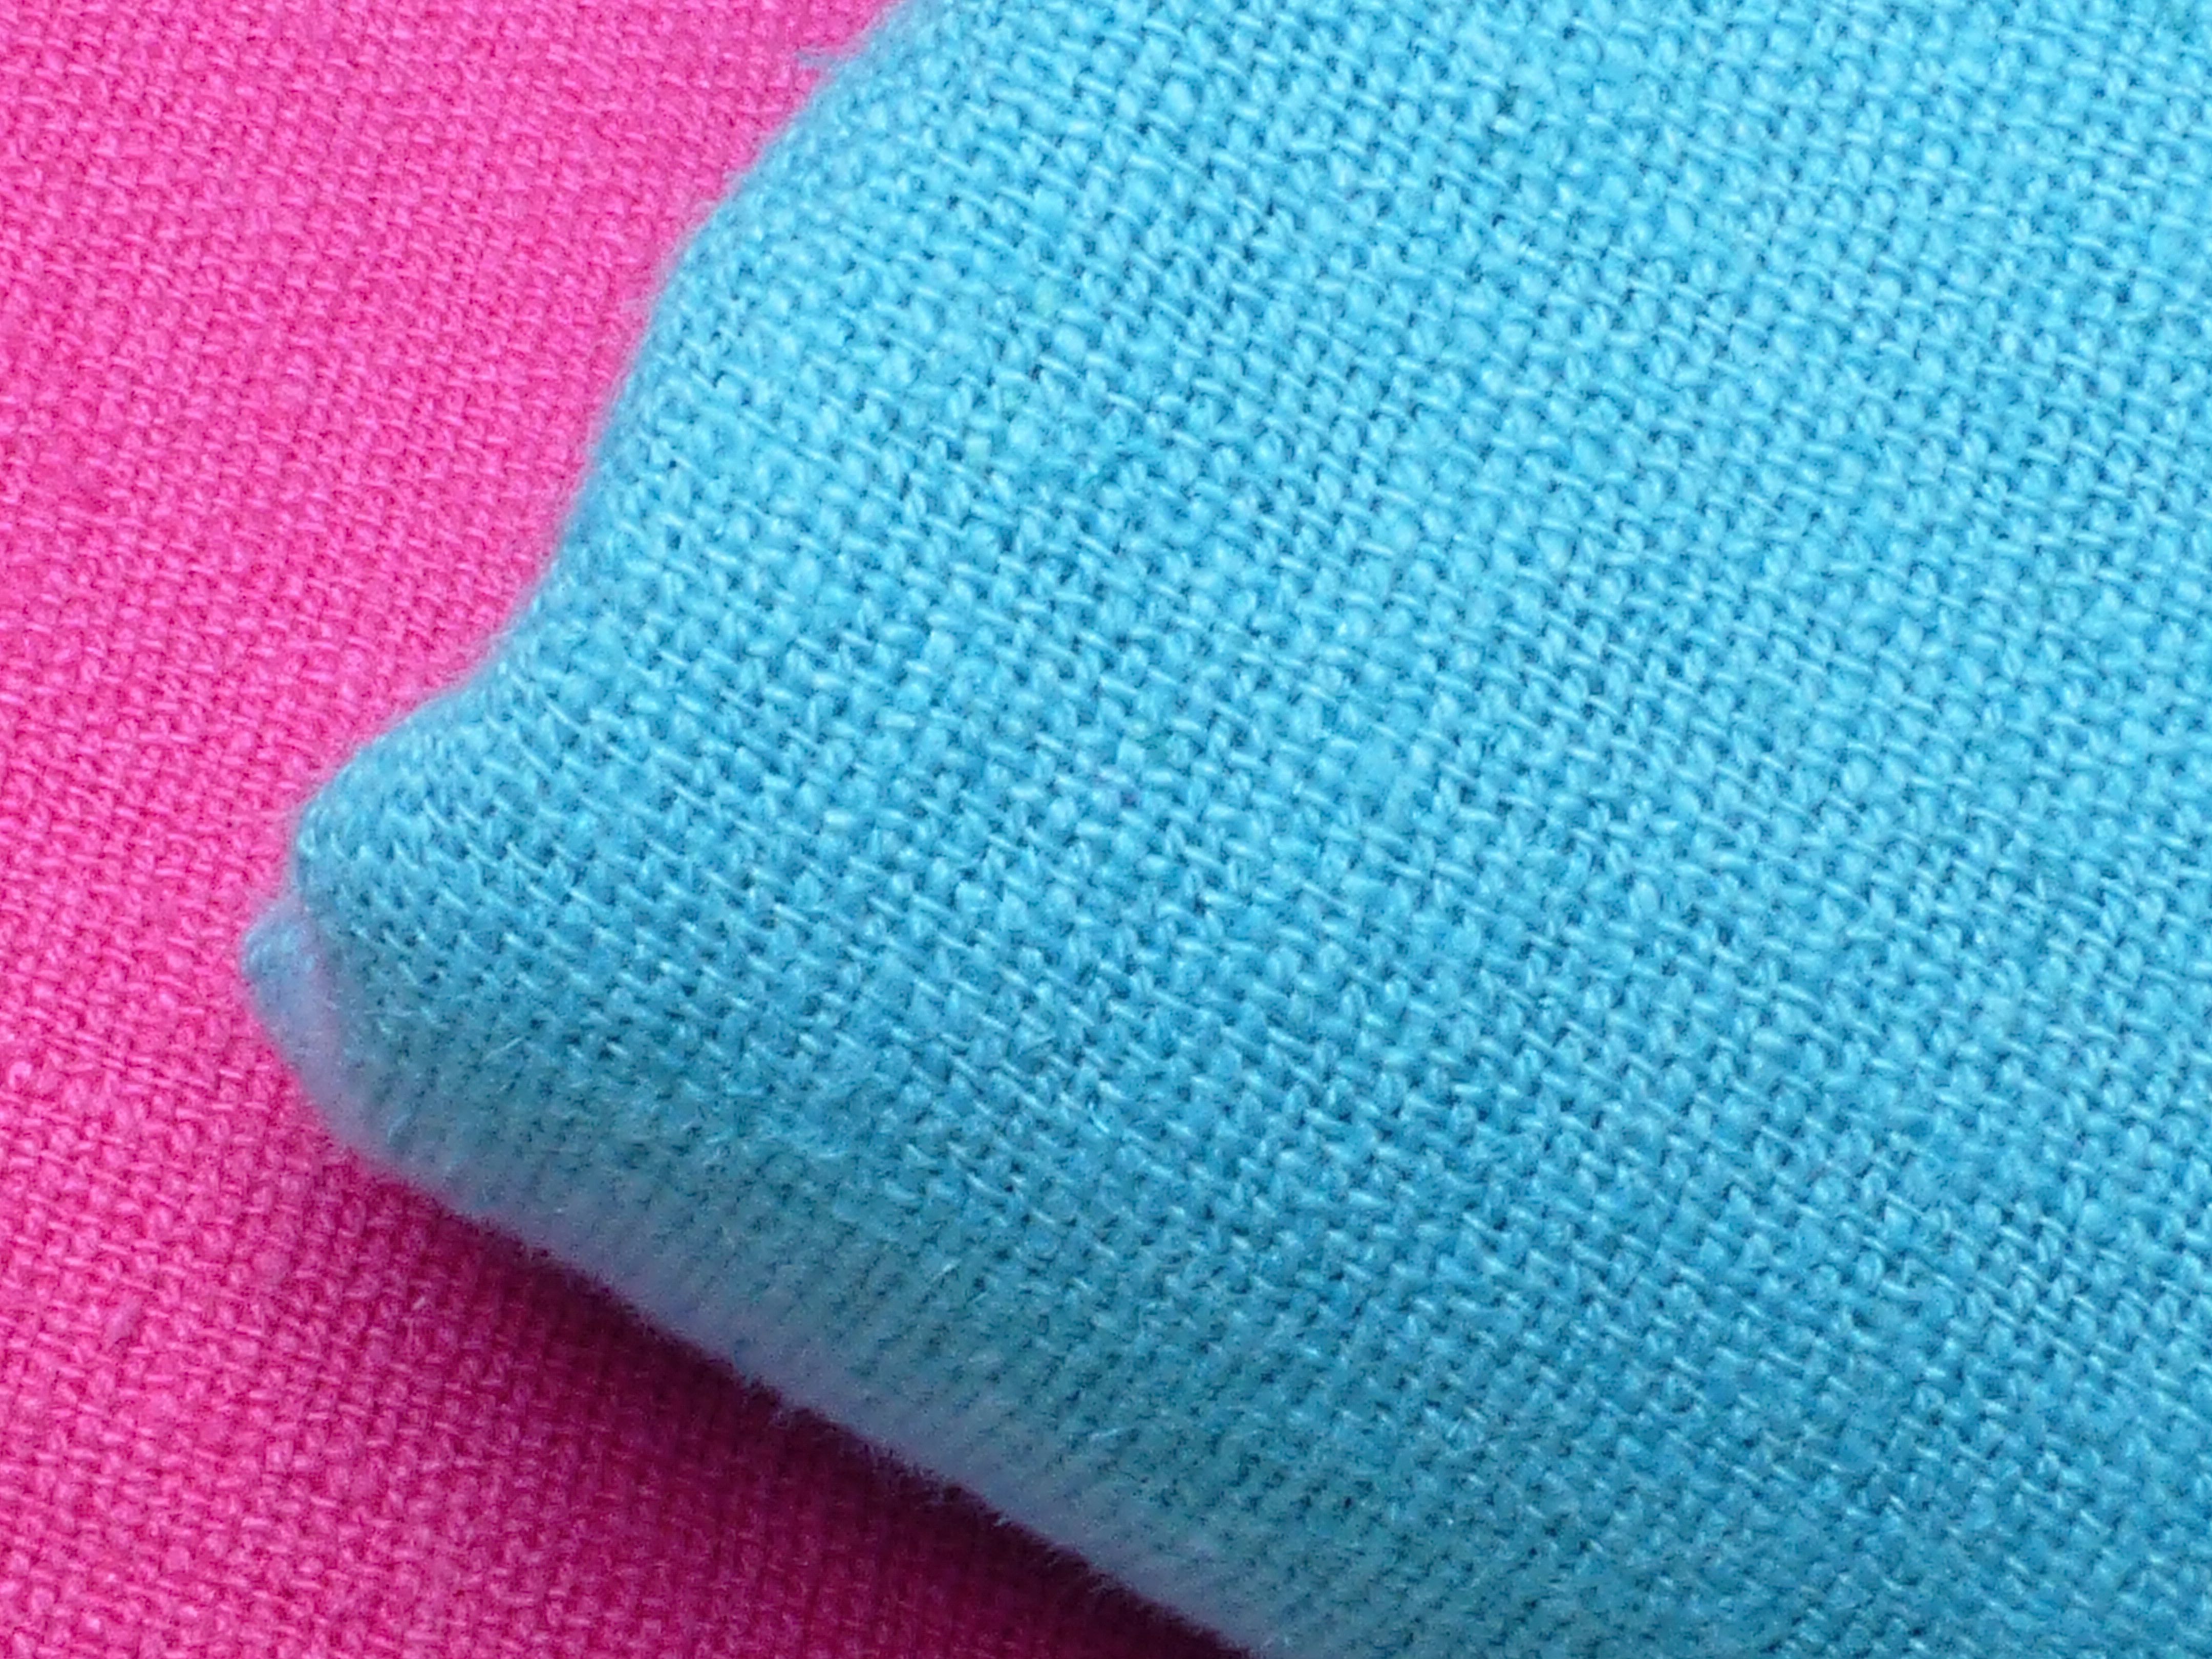
I chose this fabric from Calico Laine, a blend of 55% linen and 45% cotton, in three shades, ‘Leaf’, ‘Fuchsia’ and ‘Pool Blue’.
As I wasn’t entirely sure what I was going to actually make yet, I bought three metres of each which would be plenty for any single garment.
At £8.99 per metre, it is much cheaper than pure linen with the added bonus that it shouldn’t crease quite as much.
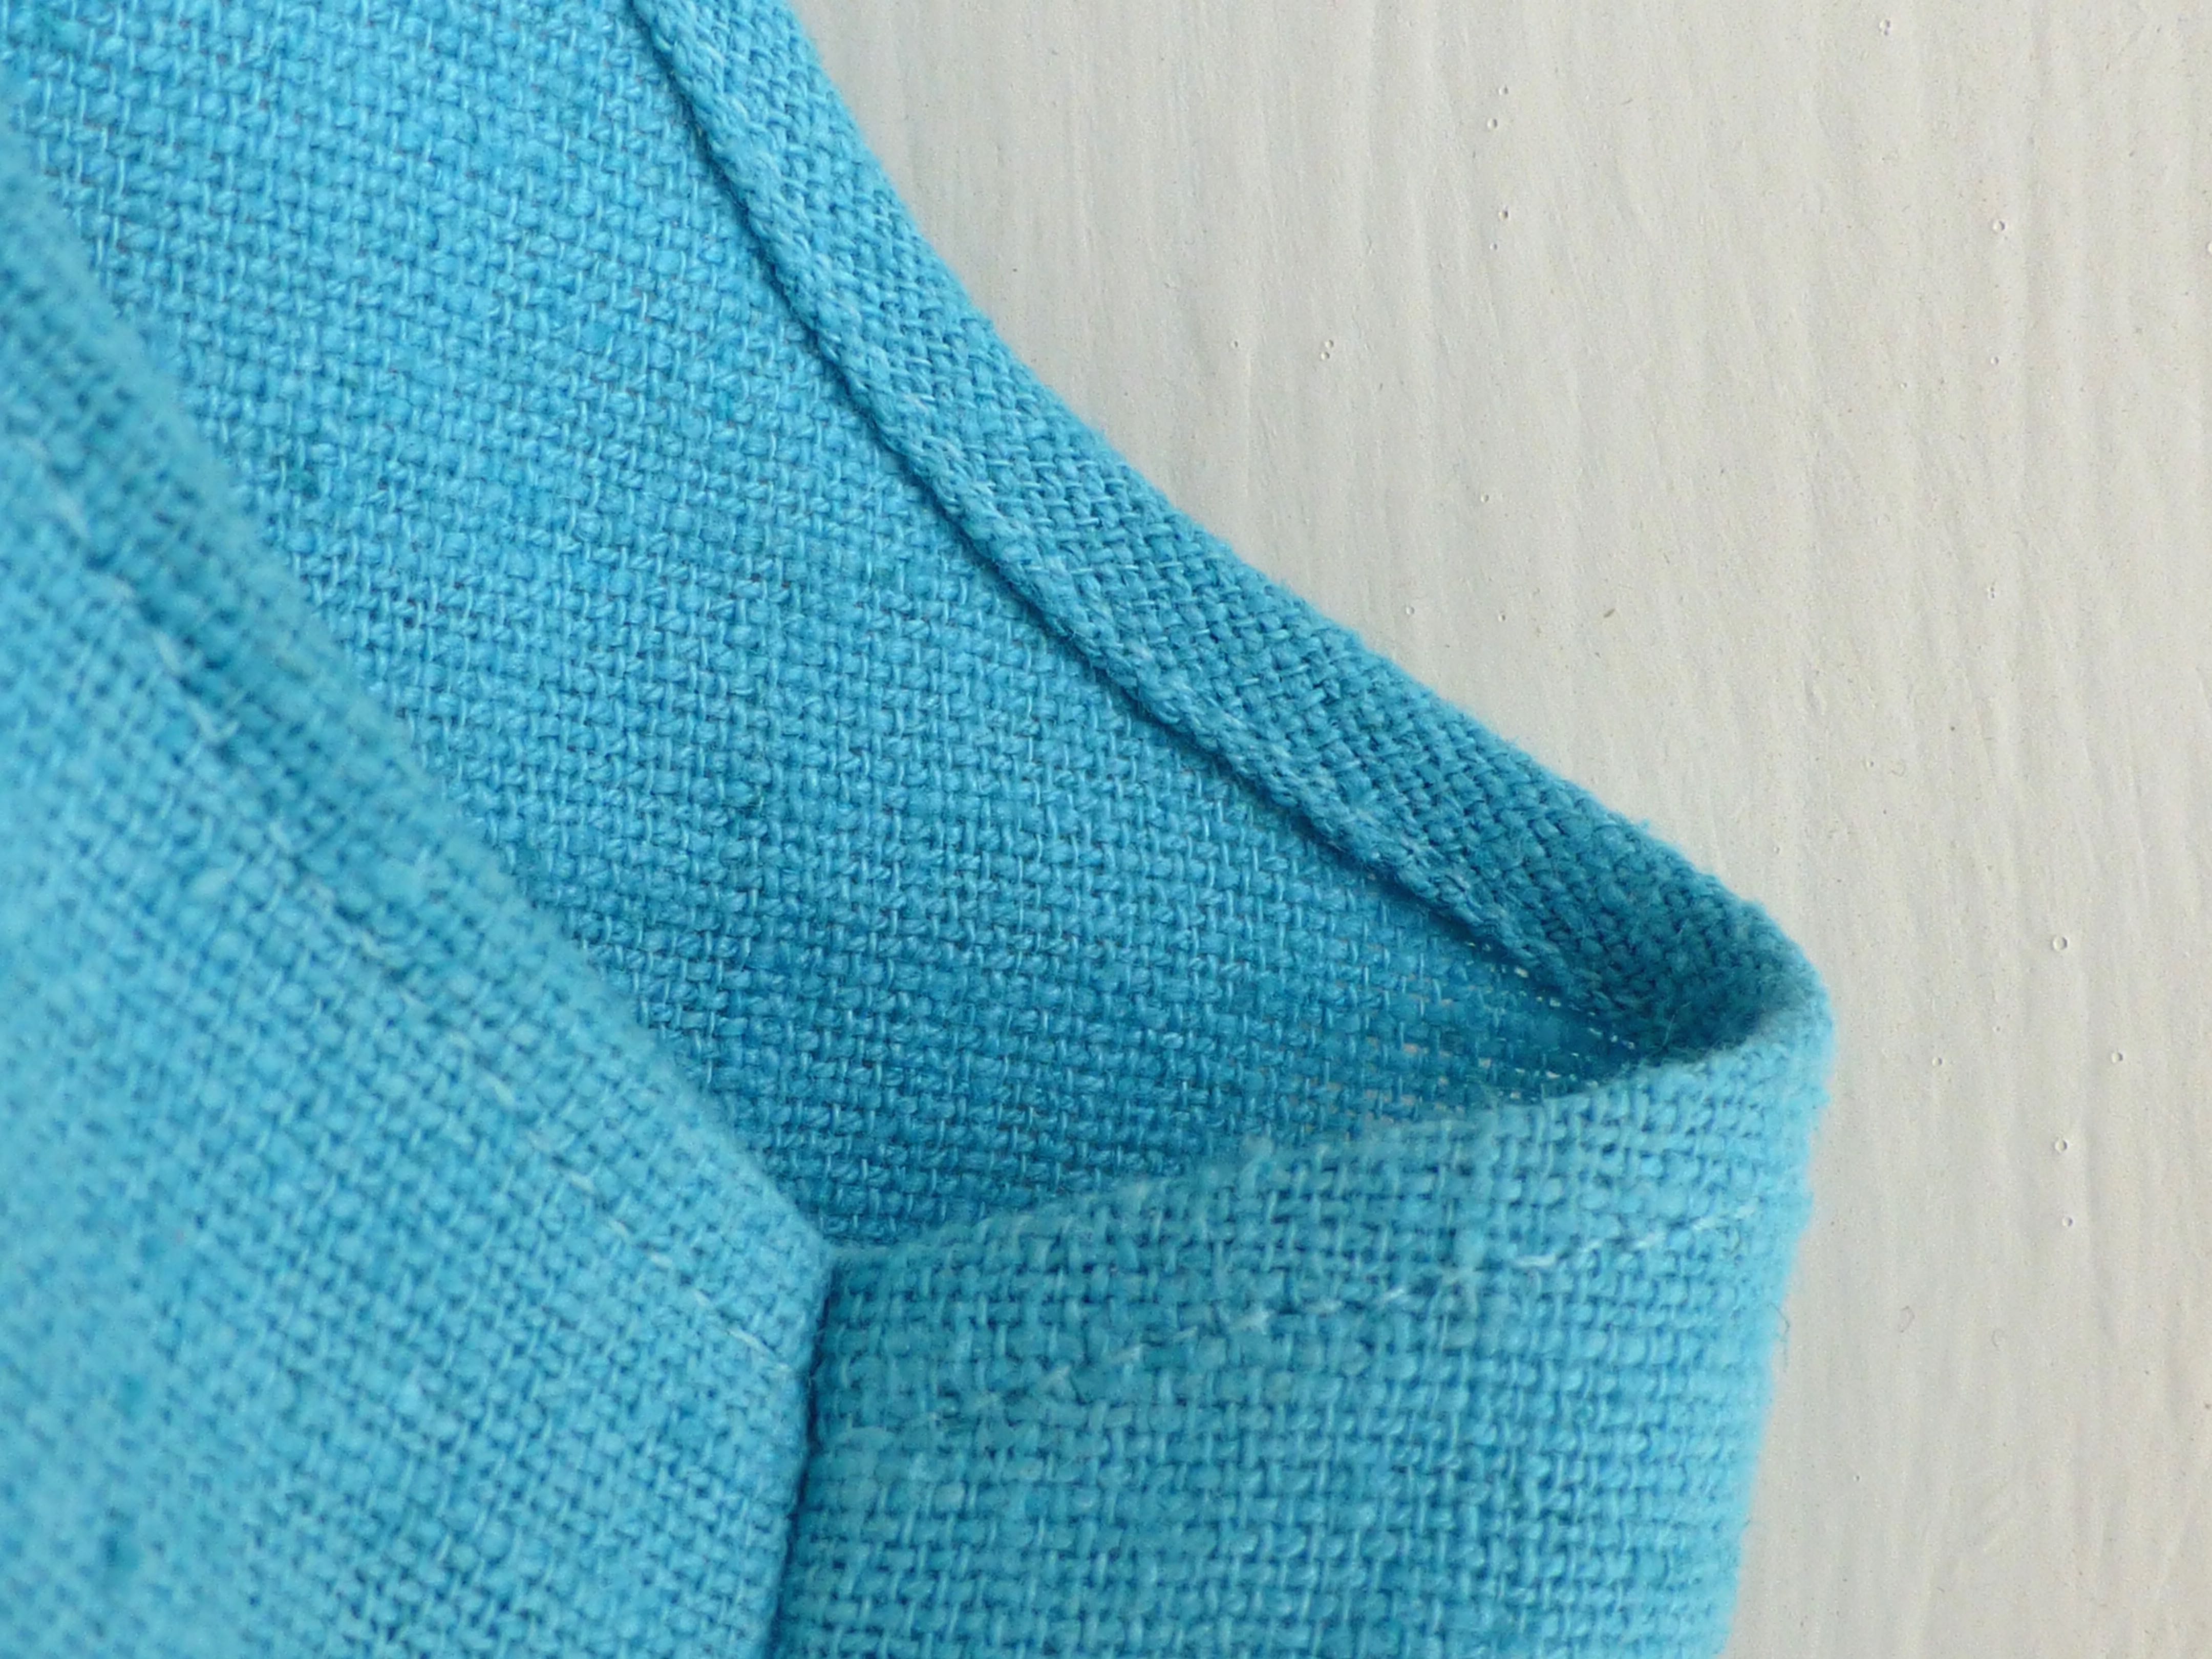
Look at that lovely loose weave – fabulous texture!
After having a mooch around online, I settled on this pattern by Lynn Mizono for Vogue.
I love Vogue patterns, especially the ‘Designer’ range, as you’re always guaranteed to find something a bit different to the norm, which I like.
Whilst linen wasn’t on the list of suggested fabrics, silk dupioni was and, as they are similar in weight and characteristics, I knew it would be perfect for this design.
Described as a “very loose fitting pullover dress……with three adjustable lengths”, it seemed ideal for the look I was after – something cool and comfortable to move around easily in, yet still stylish enough to make it look as if I’ve made an effort when clearly I haven’t.
Then I realised I’d made a silly mistake – I’d ordered a size 14 forgetting that the US equivalent is a size 18!
I added a couple of inches to the bustline and lowered the shoulder seams by half an inch – problem solved.
Construction was simple – just two pattern pieces; a front and a back.
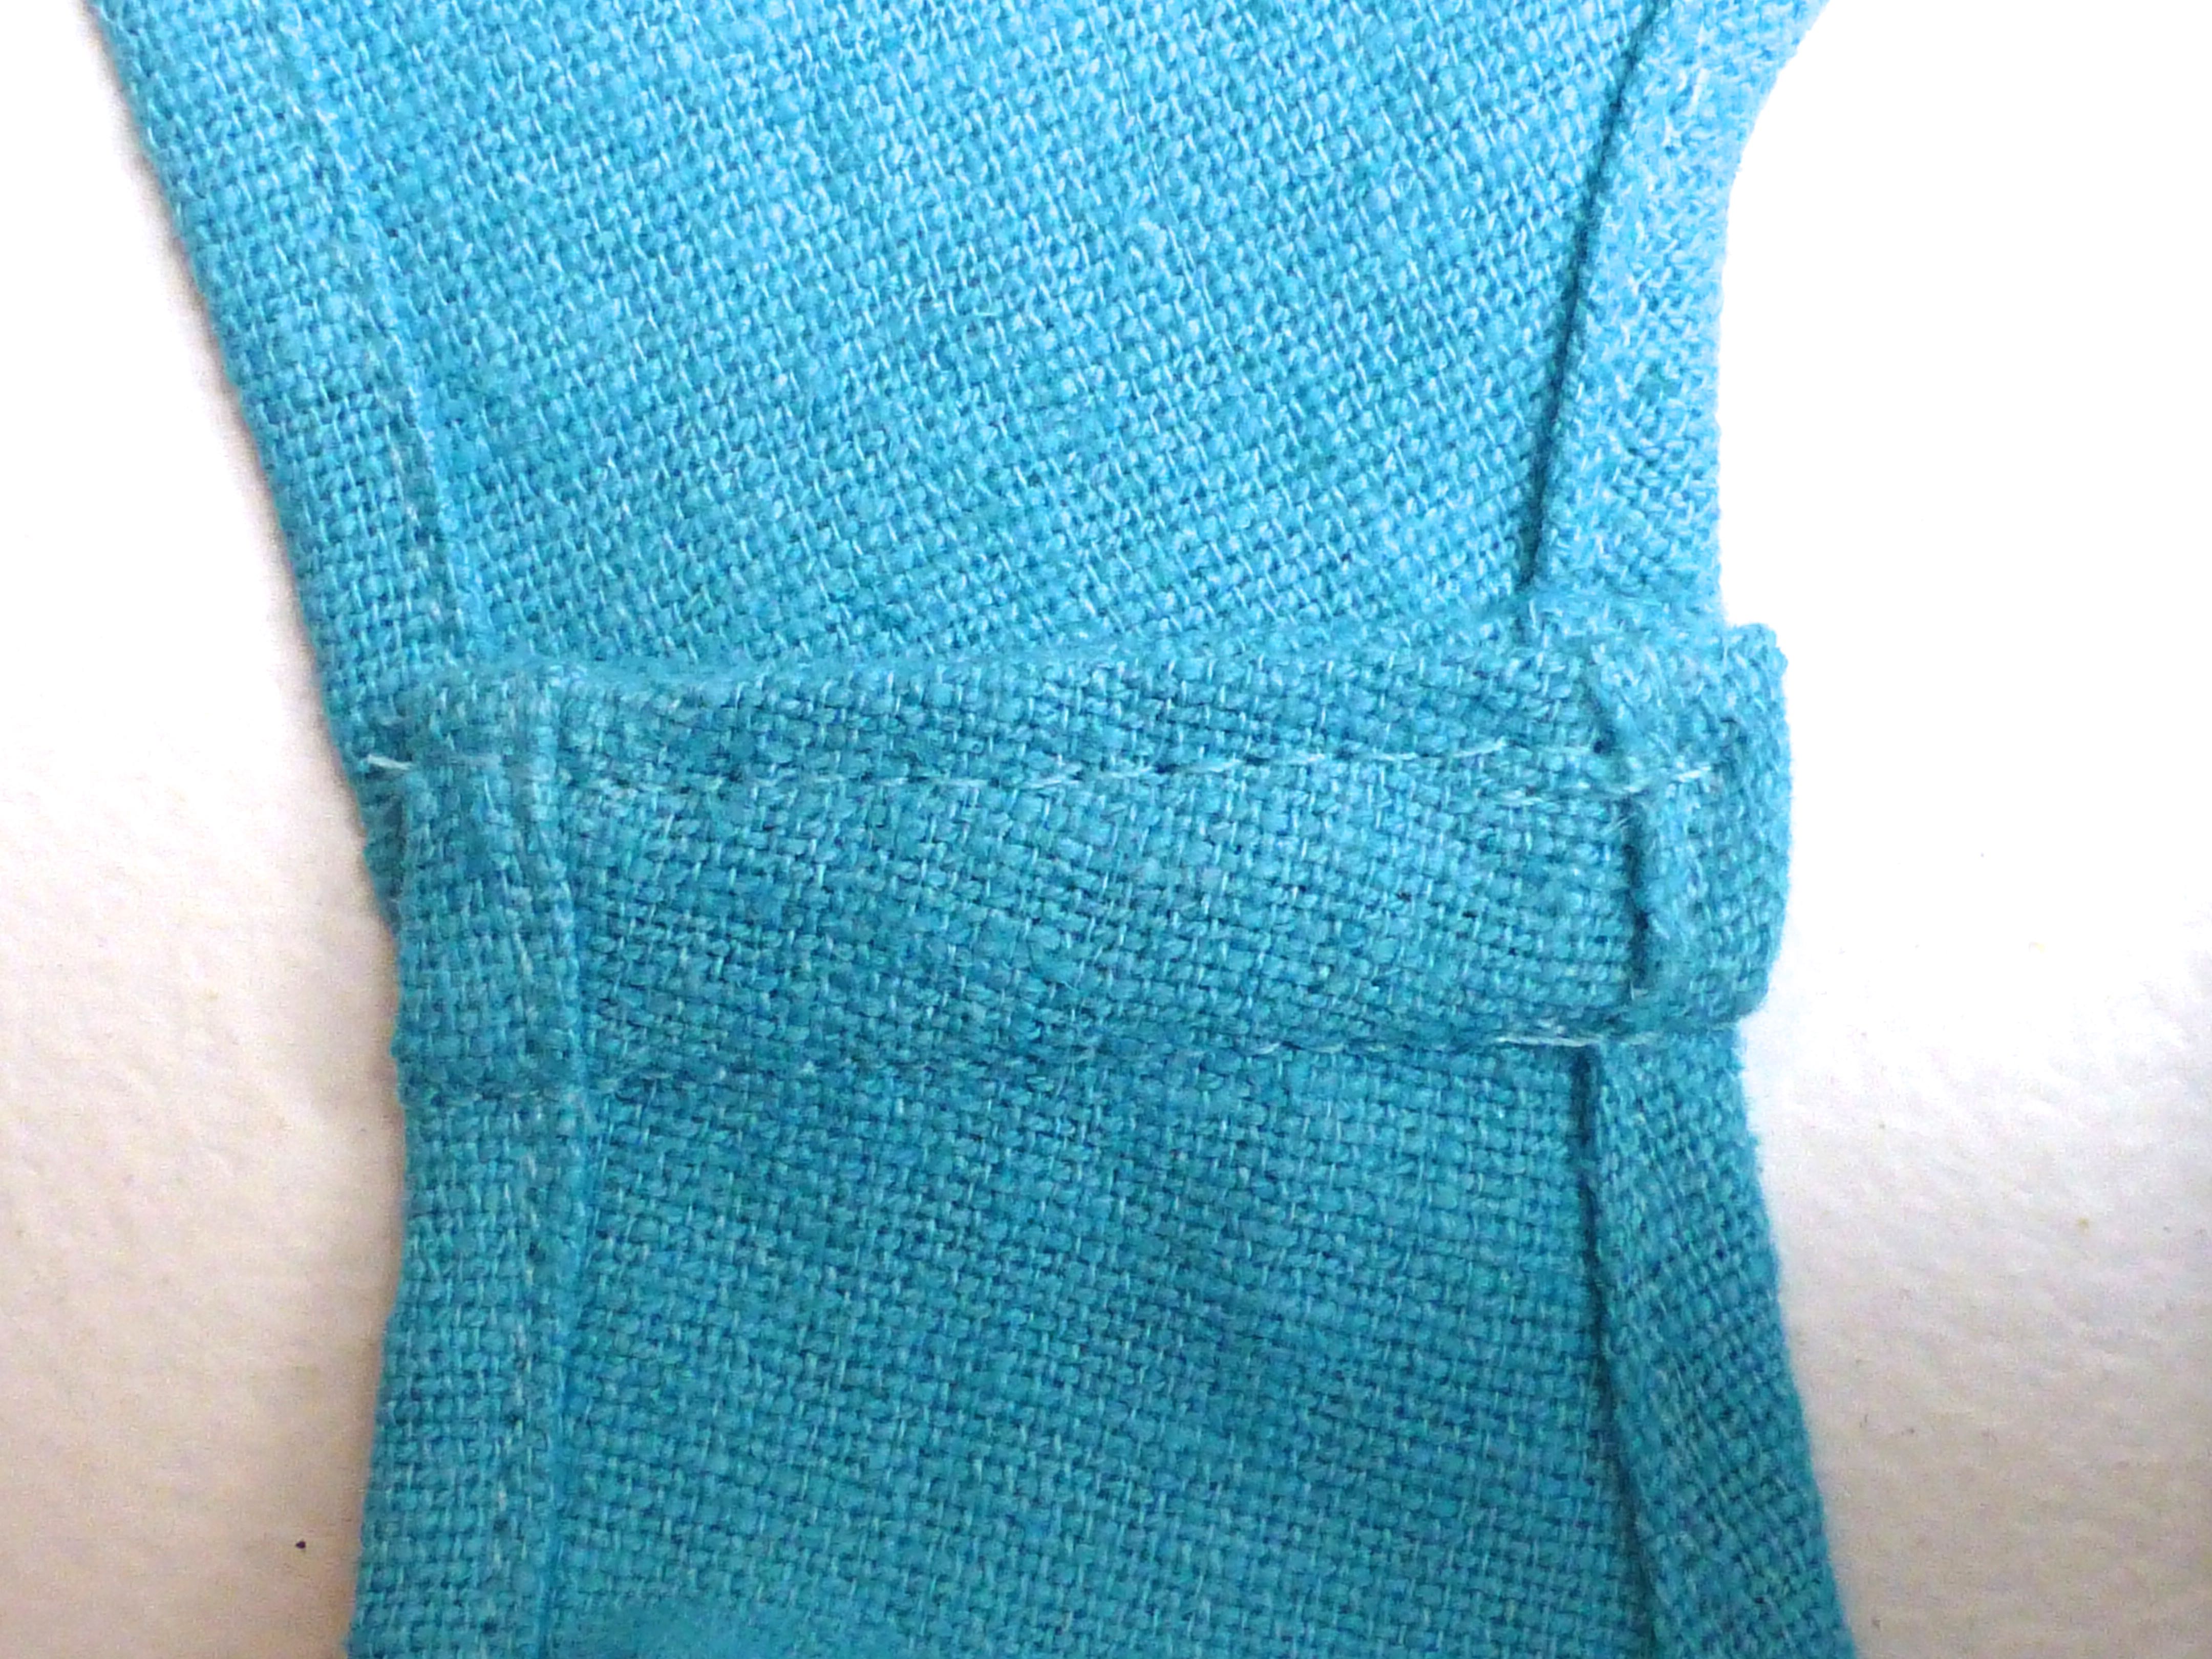
French seams were used throughout, making the seams nice and tidy with absolutely NO chance of fraying – a real problem with linen.
Narrow hems finished off the neck and armhole edges beautifully.
This finish can be tricky in other fabrics but, with linen, it’s very easy as the loose weave makes for a flexible fabric.
I didn’t even bother pressing under the seam allowance first, just folded and pushed under the raw edge with my fingernail as I went.
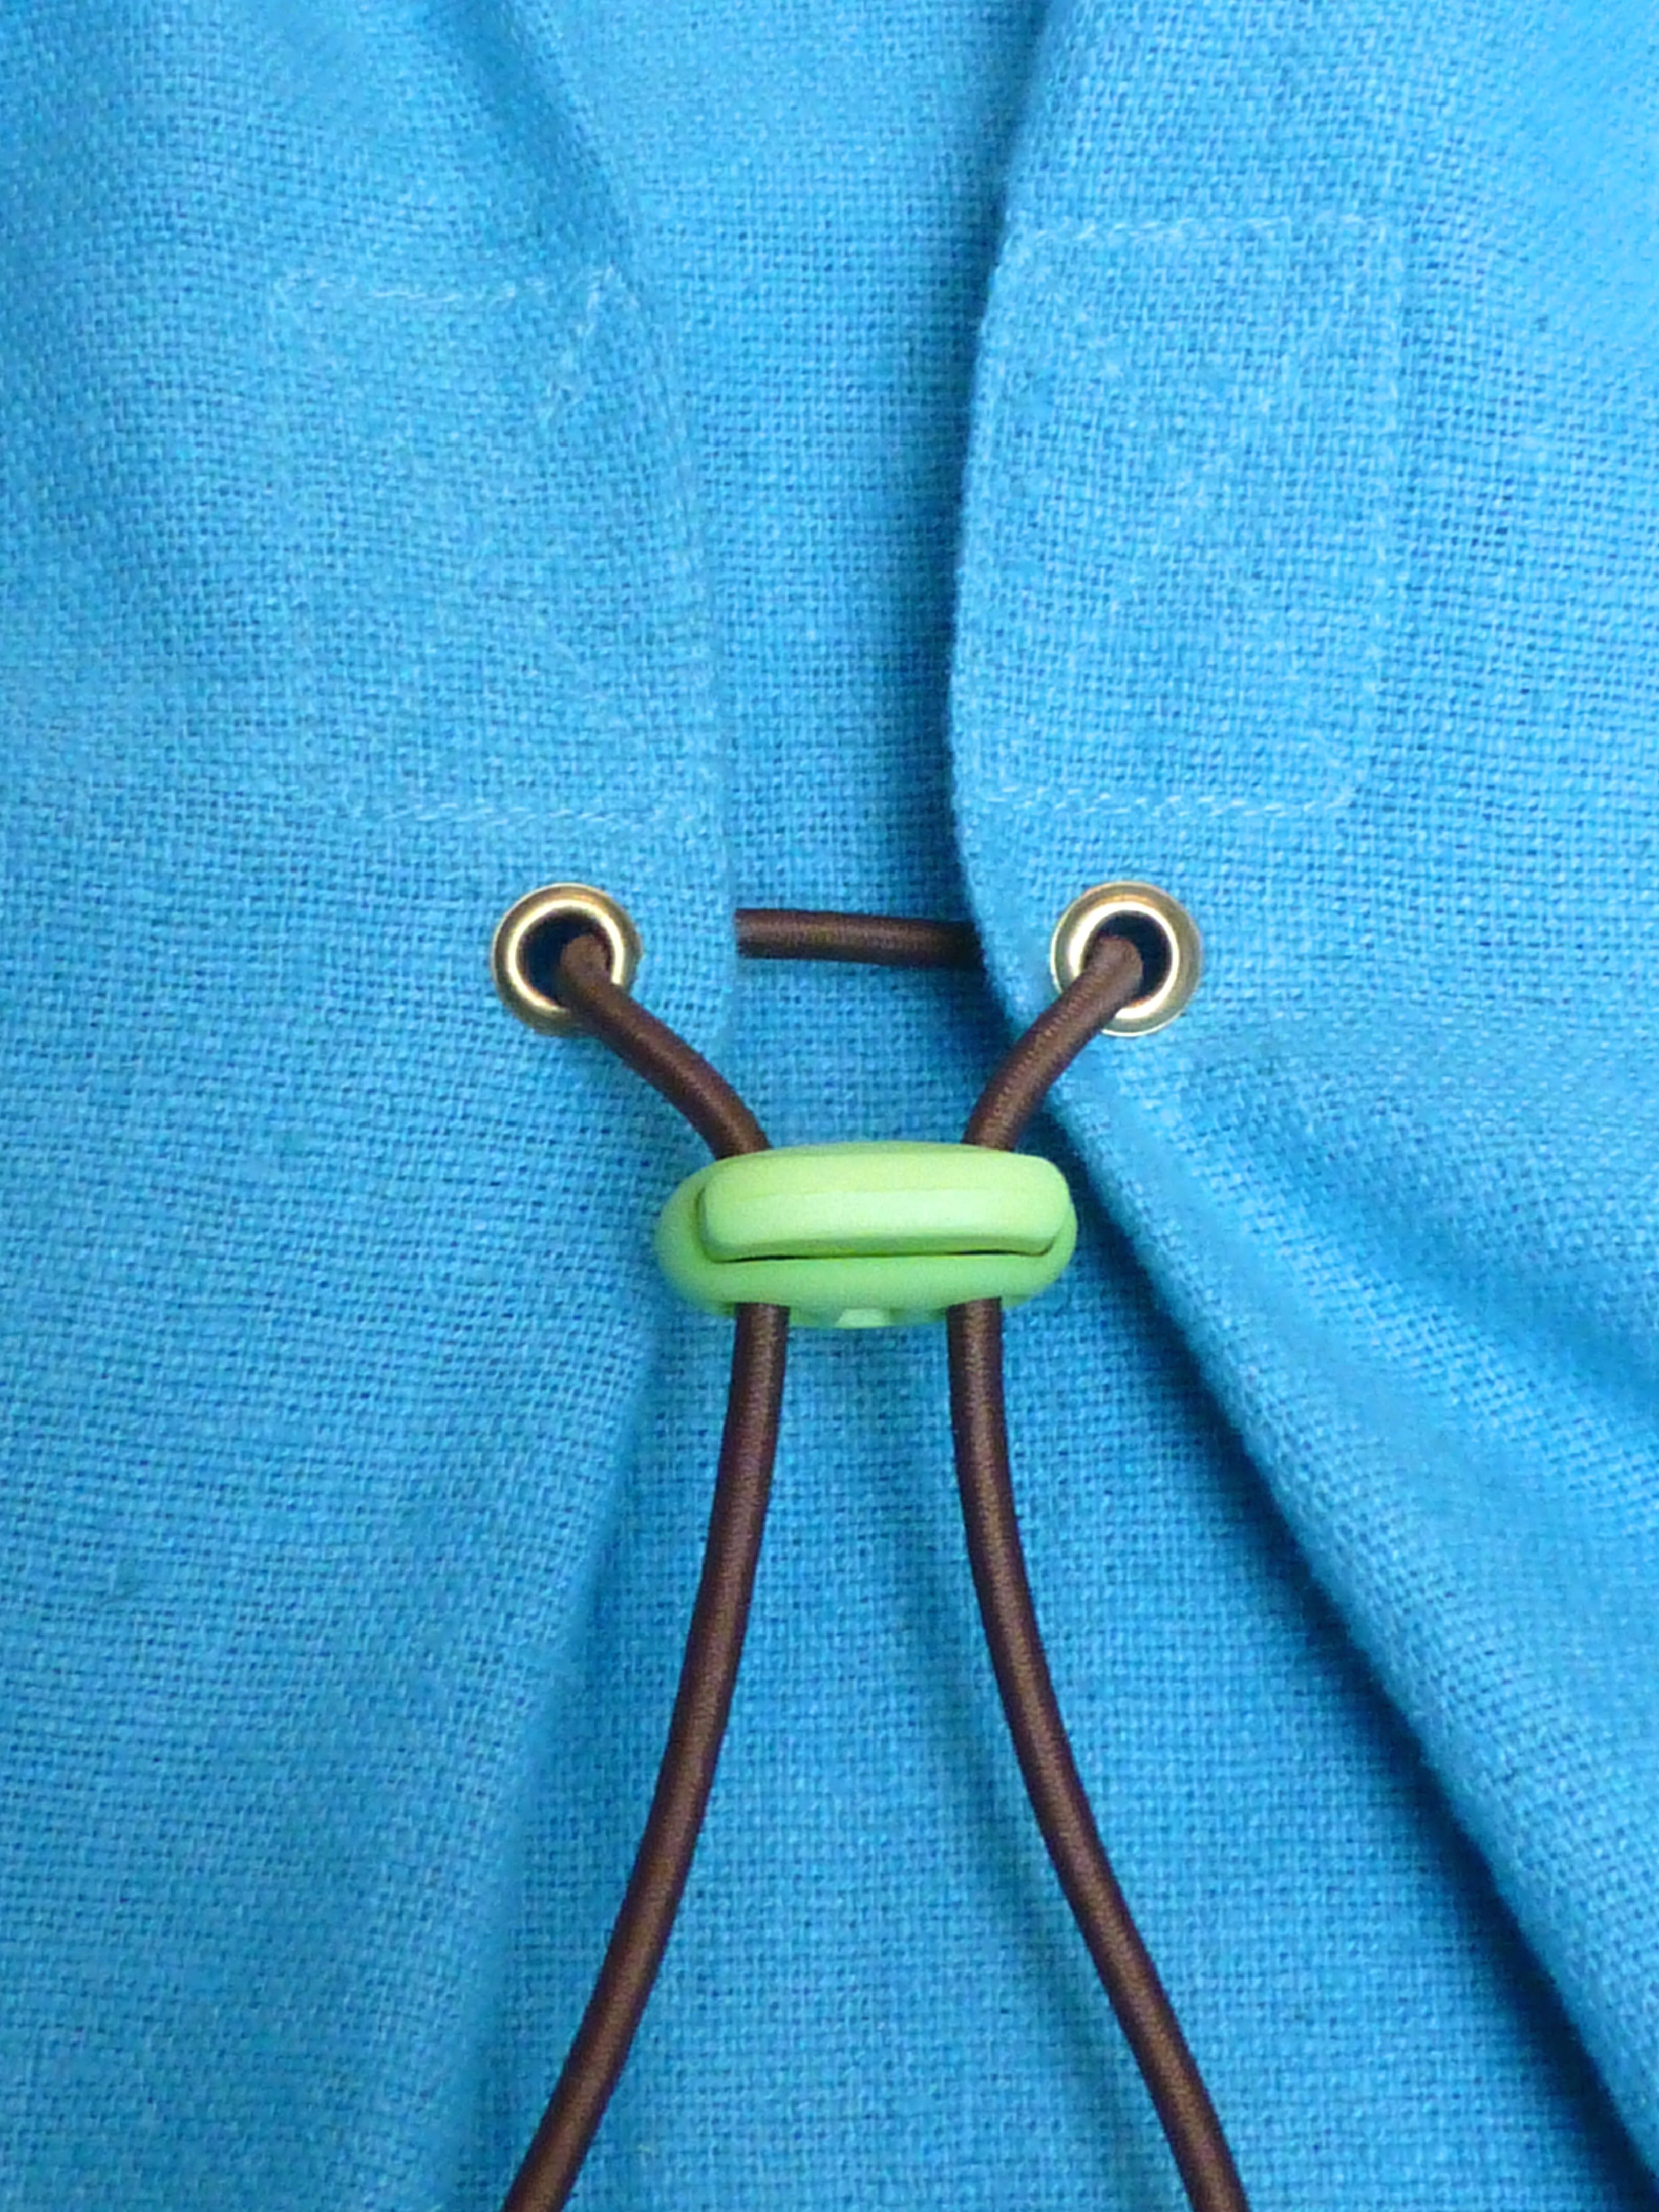
The instructions called for two buttonholes in the front pleats for the cord to pass through, but I replaced these with eyelets as I thought they would look neater and place less stress on the linen.
I only had a lime green cord stop left over from the pack purchased when making this crocheted back pack.
Hmmm…..I’m not sure whether to change if for a brown one.
There were a couple of things I wasn’t happy with – the armholes gaped a little so I added a dart each side for a better fit.
The back pleats are left ‘hanging’ according to the instructions.
I’m wondering if they would look better stitched flat against the body.
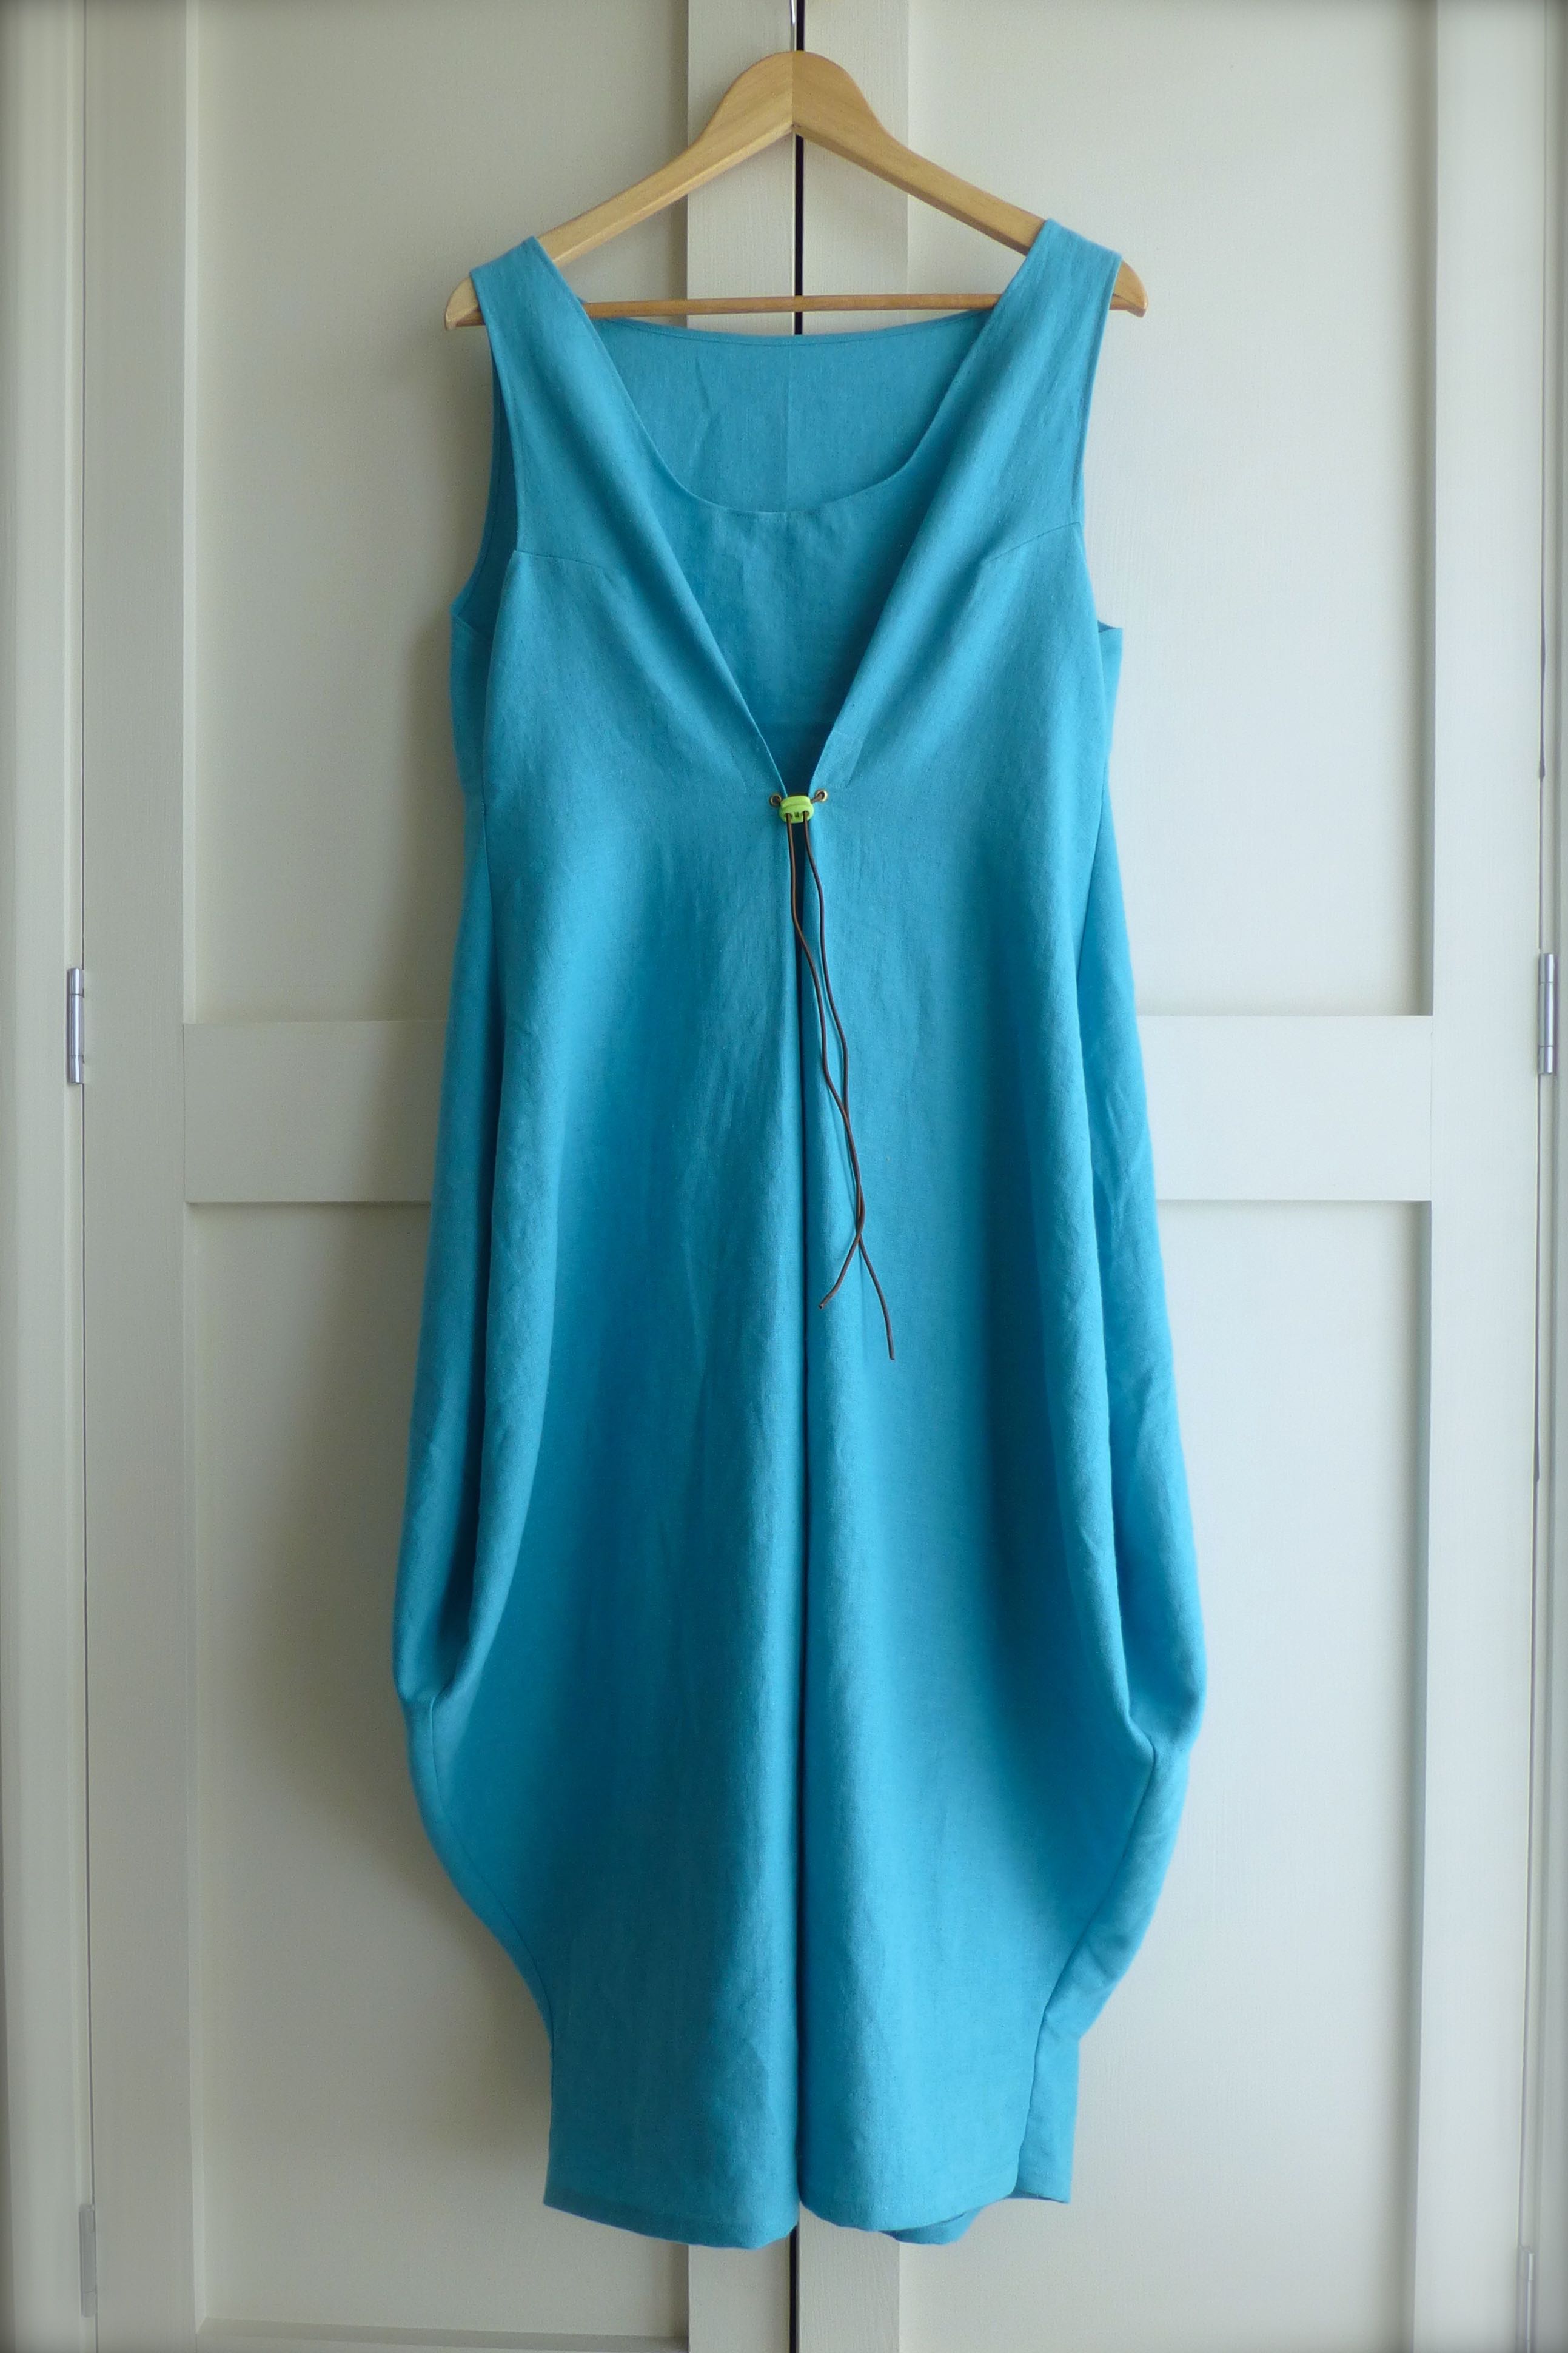
Overall, though, the finished dress is just as I pictured it.
An interesting shape, casual but quite stylish.
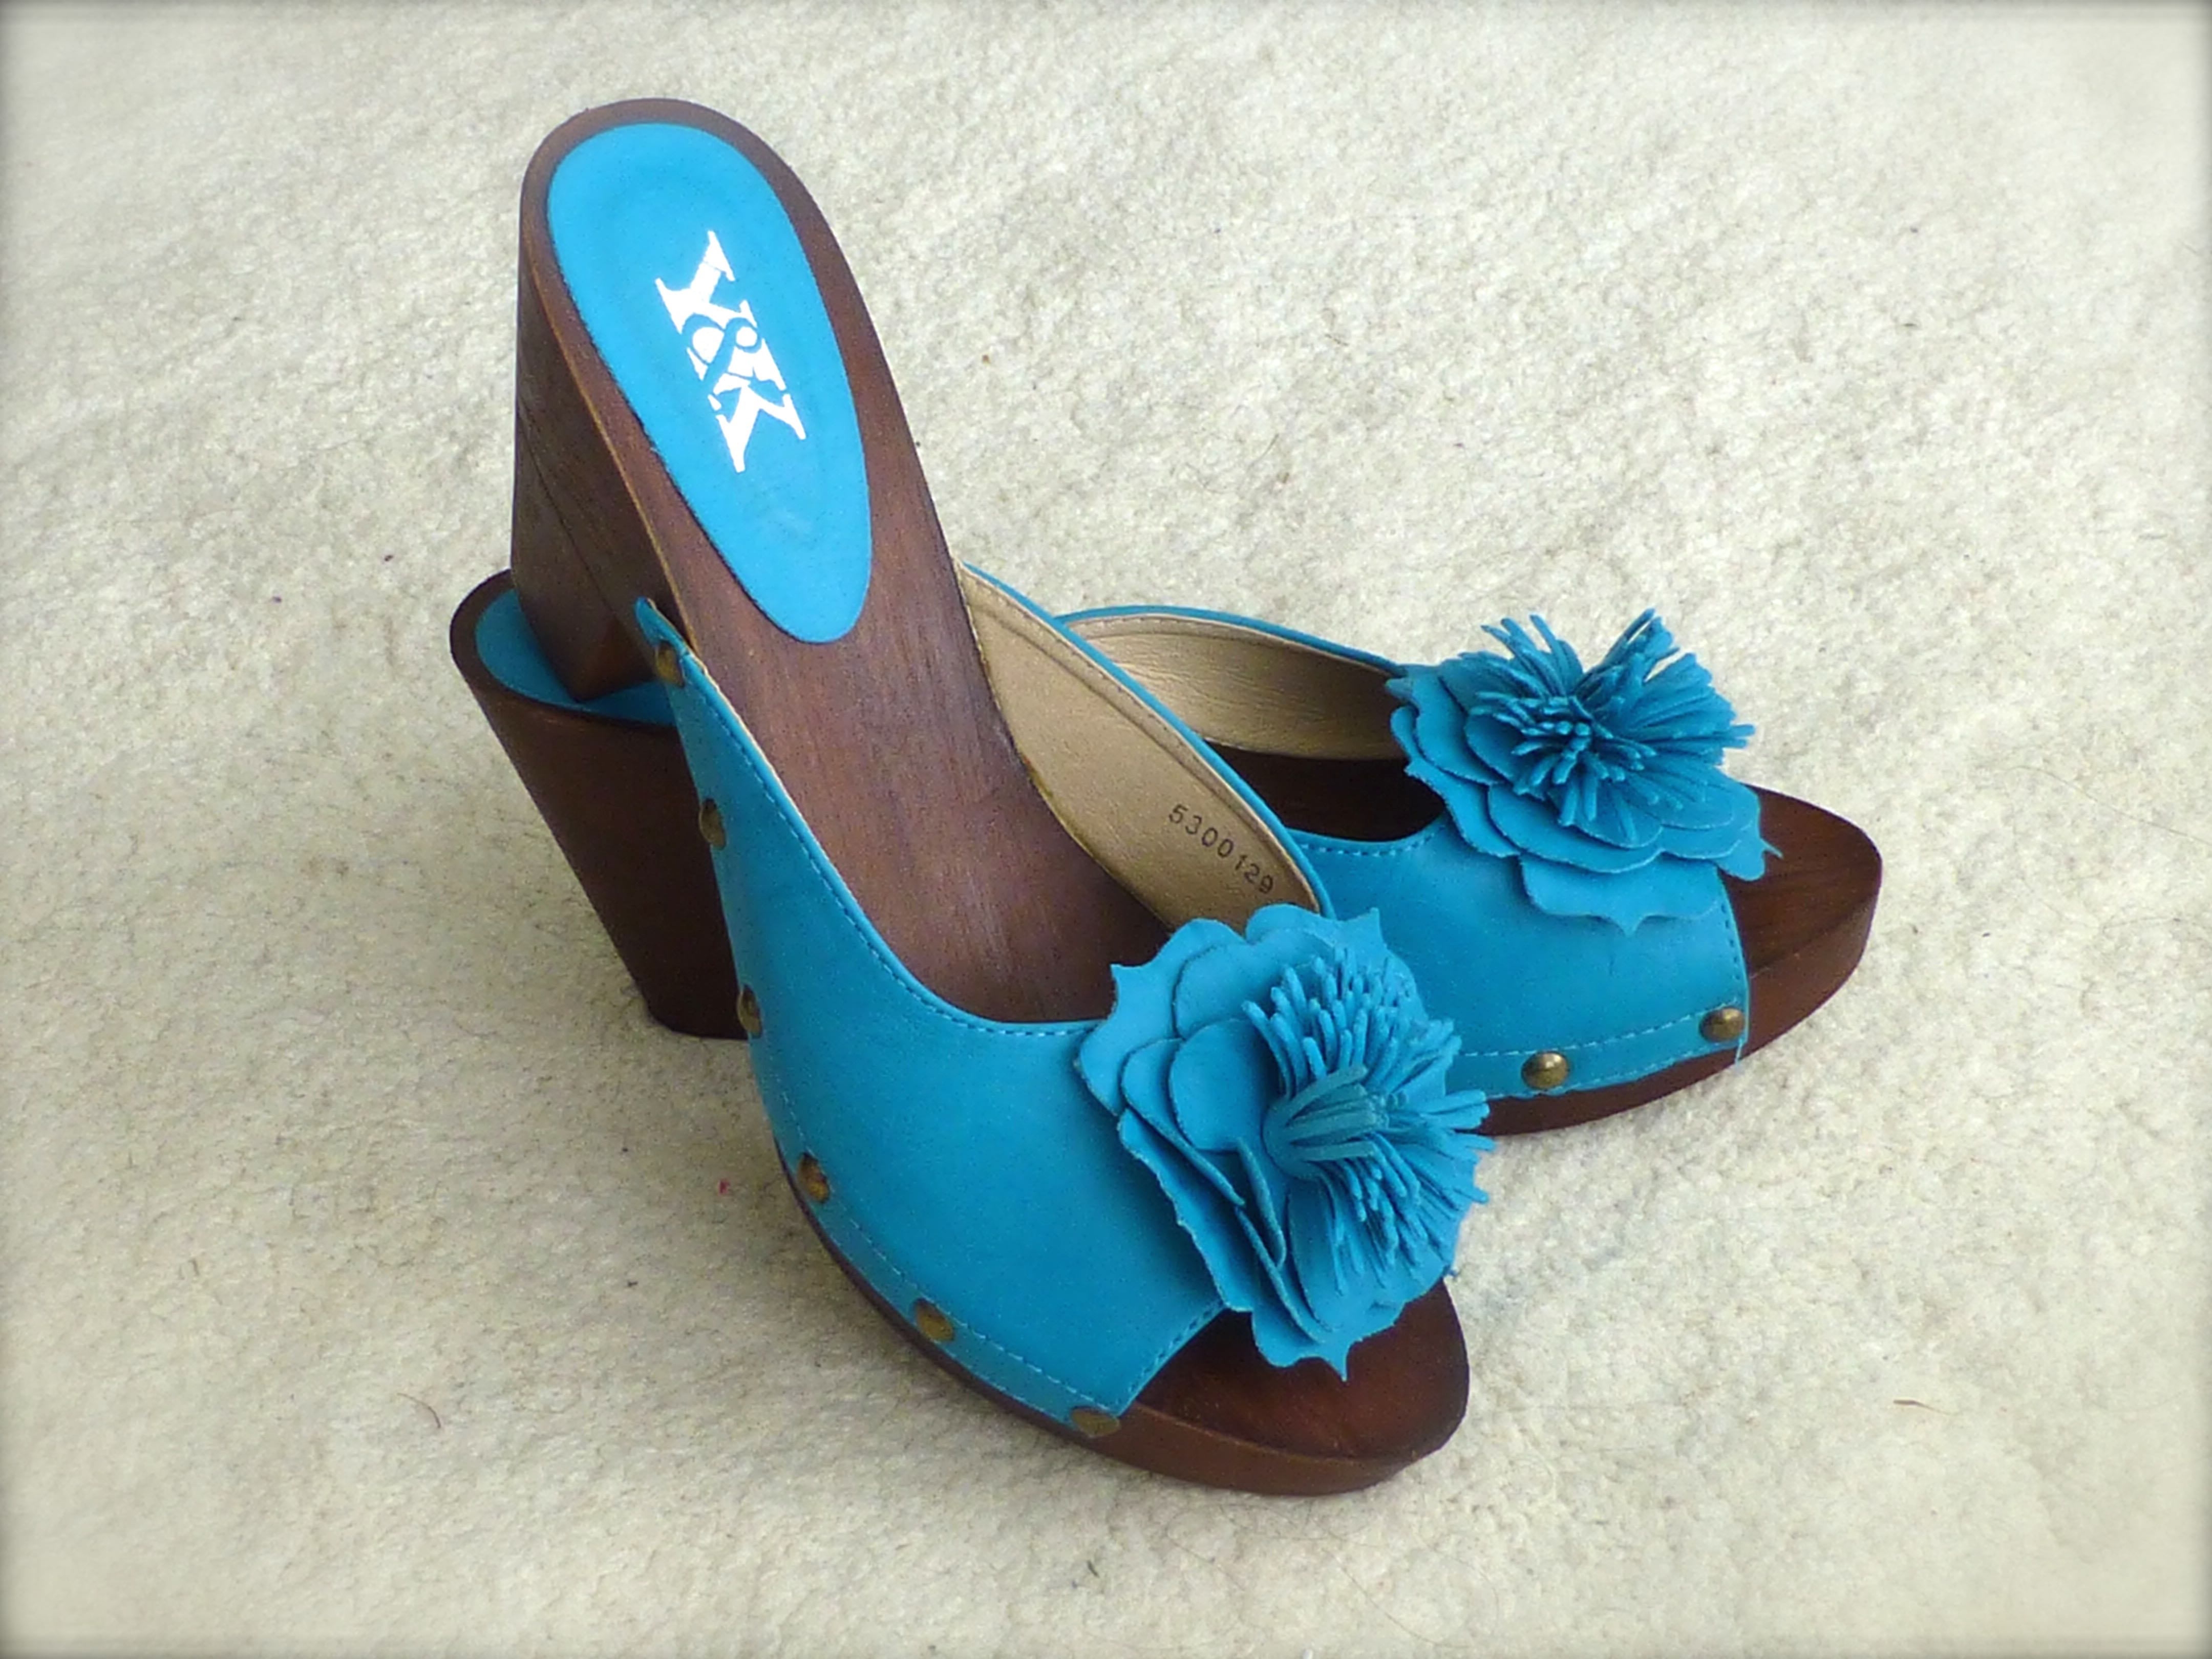
I bought these gorgeous clogs in another Spanish market a few years ago.
The perfect shade of turquoise that matches exactly!
Of course, I forgot to put them on for the obligatory selfie….
It’s pretty versatile, too – I reckon it could be dressed up for the evening with those clogs, a statement necklace and an up-do, or teamed with flip-flops, floppy hat and shades for a day at the beach (perish the thought – I hate sand!).
Right, now to catch up on all your blog posts that I’ve missed since the ‘phone died.
Better settle down and get comfy with a G&T – could be here a while….:)
Hmm, it’s 8pm, we have to be up at 3am to travel to the airport, and I’ve just finished sewing my last top for holiday! (This post was scheduled to go live whilst we were away)
Does that sound familiar to anyone, or is it just me?
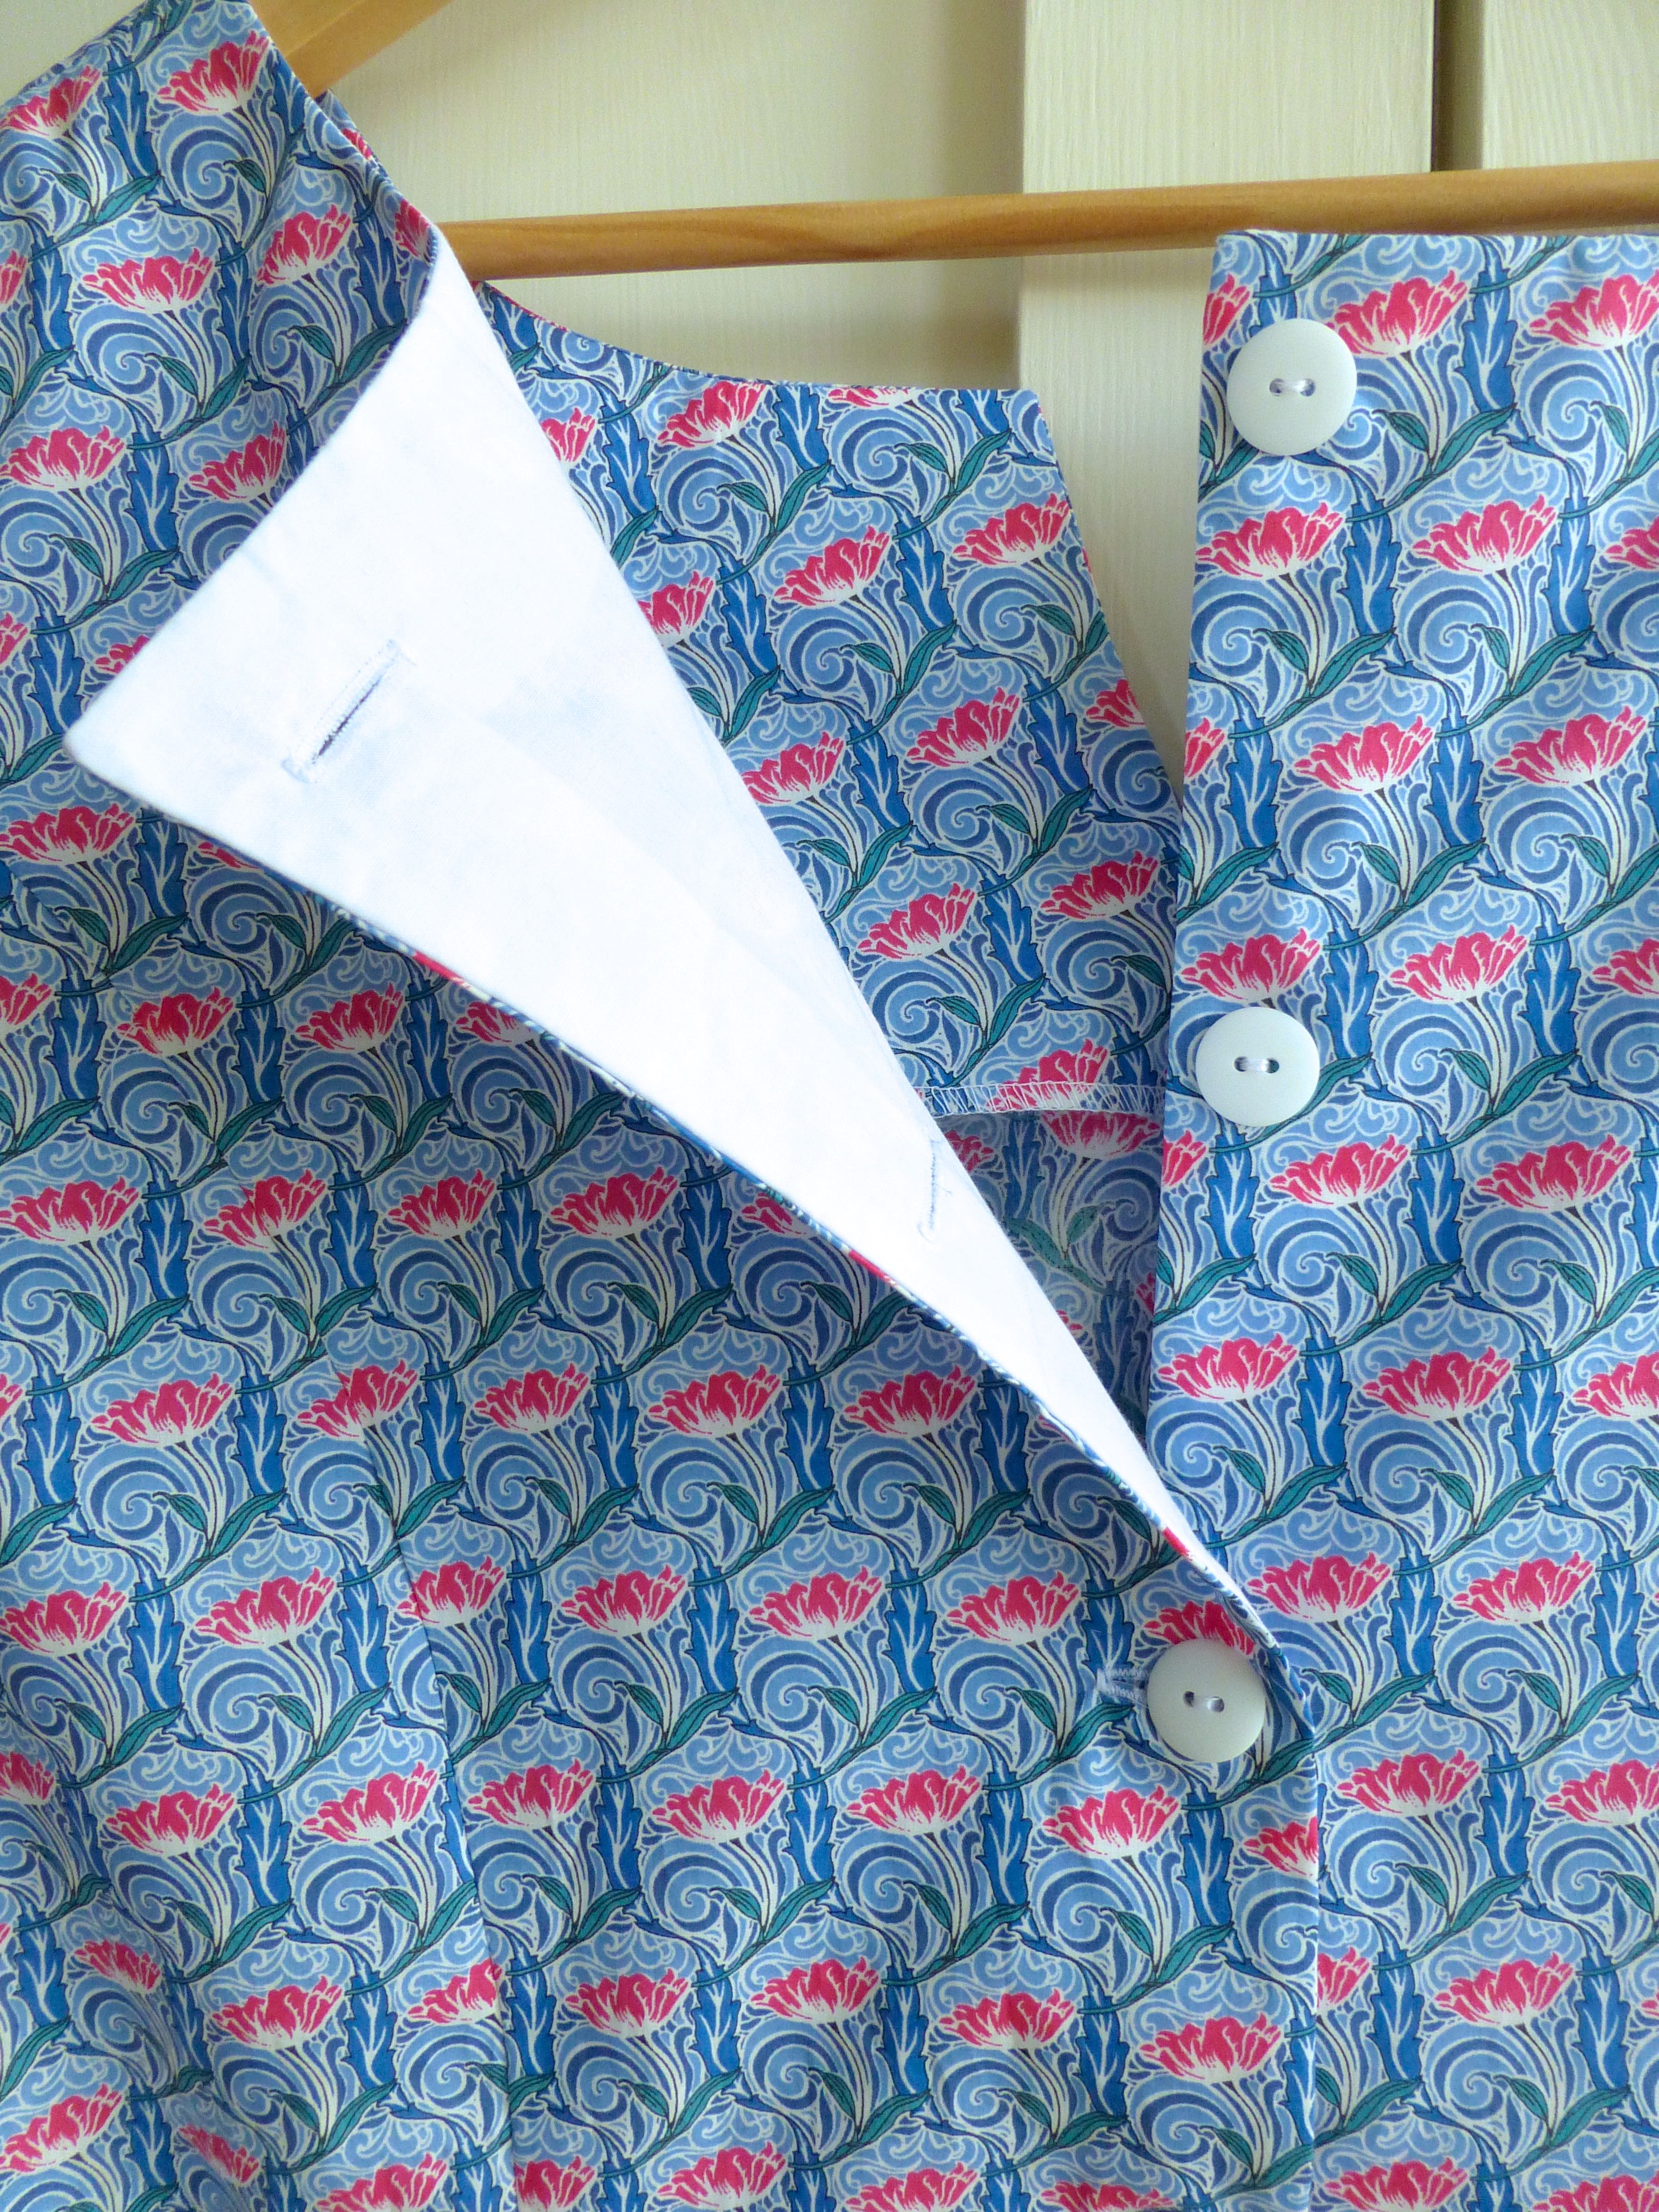
Back in April I went to Liberty’s London store and bought a metre of this lovely fabric.
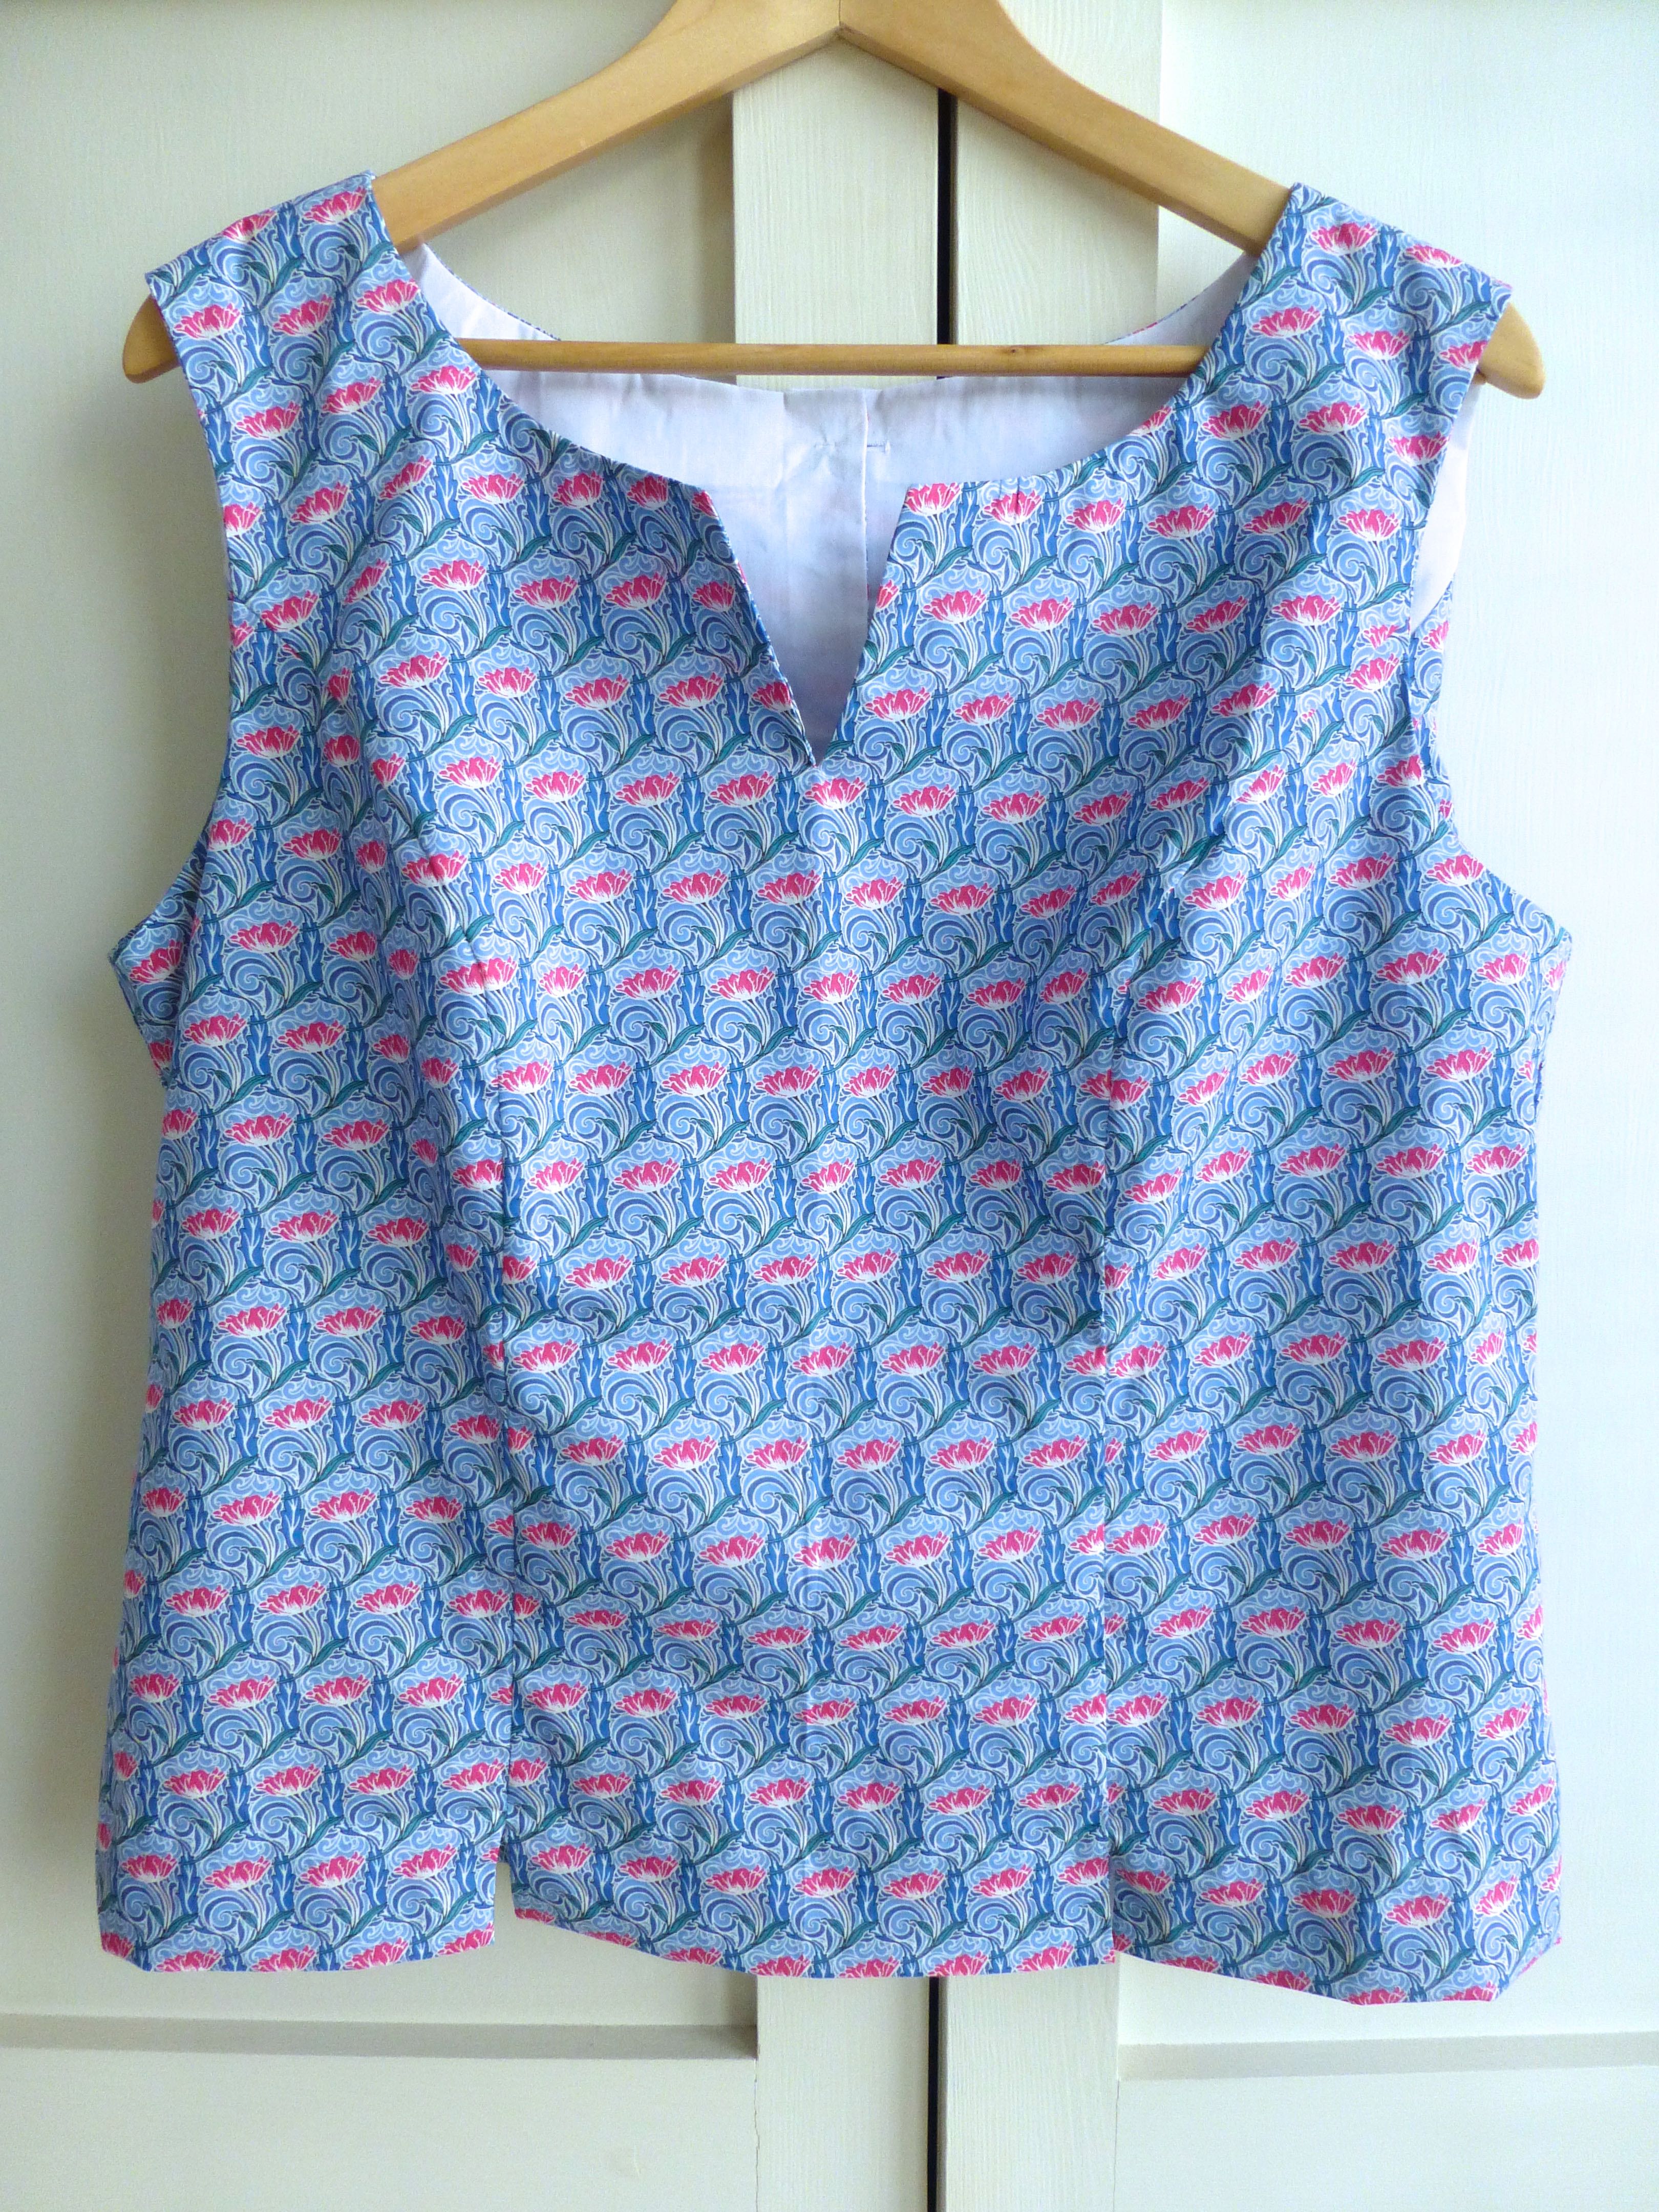
I chose McCall’s 2818, view ‘D’ which is bottom left on the envelope front.
The pattern called for 1.5m of fabric and I had the last 1.10m on the roll, so I knew it was going to be tight, even at 150cm wide. Reading through the instructions first (as you always should!) I reckoned I could get away with it if I used plain white cotton of the same weight to make the back facings.
To ensure that the print matched at the hem, I lined all the pieces up so the bottom edges lay on the same line of flowers. I couldn’t match at the side seams as they were all Princess seams and curved.
The instructions required full interfacing on all the facings but, as the cotton is very thin, I thought it would be too stiff so I just used a strip around the neck edges and the buttonhole edge. This worked perfectly.
The white cotton was fine as the back facing.
Not as pleasing on the inside as the Liberty print would have been, but it would have cost £12.50 just to buy half a metre to make the back facings – so I figured the plain white cotton would do.
The inside front is better:)
The hem at the side backs and side fronts have a cute little split detail. (Just spotted some thread that needs trimming…)
The neckline with its sharp ‘V’ cutout makes a nice change.
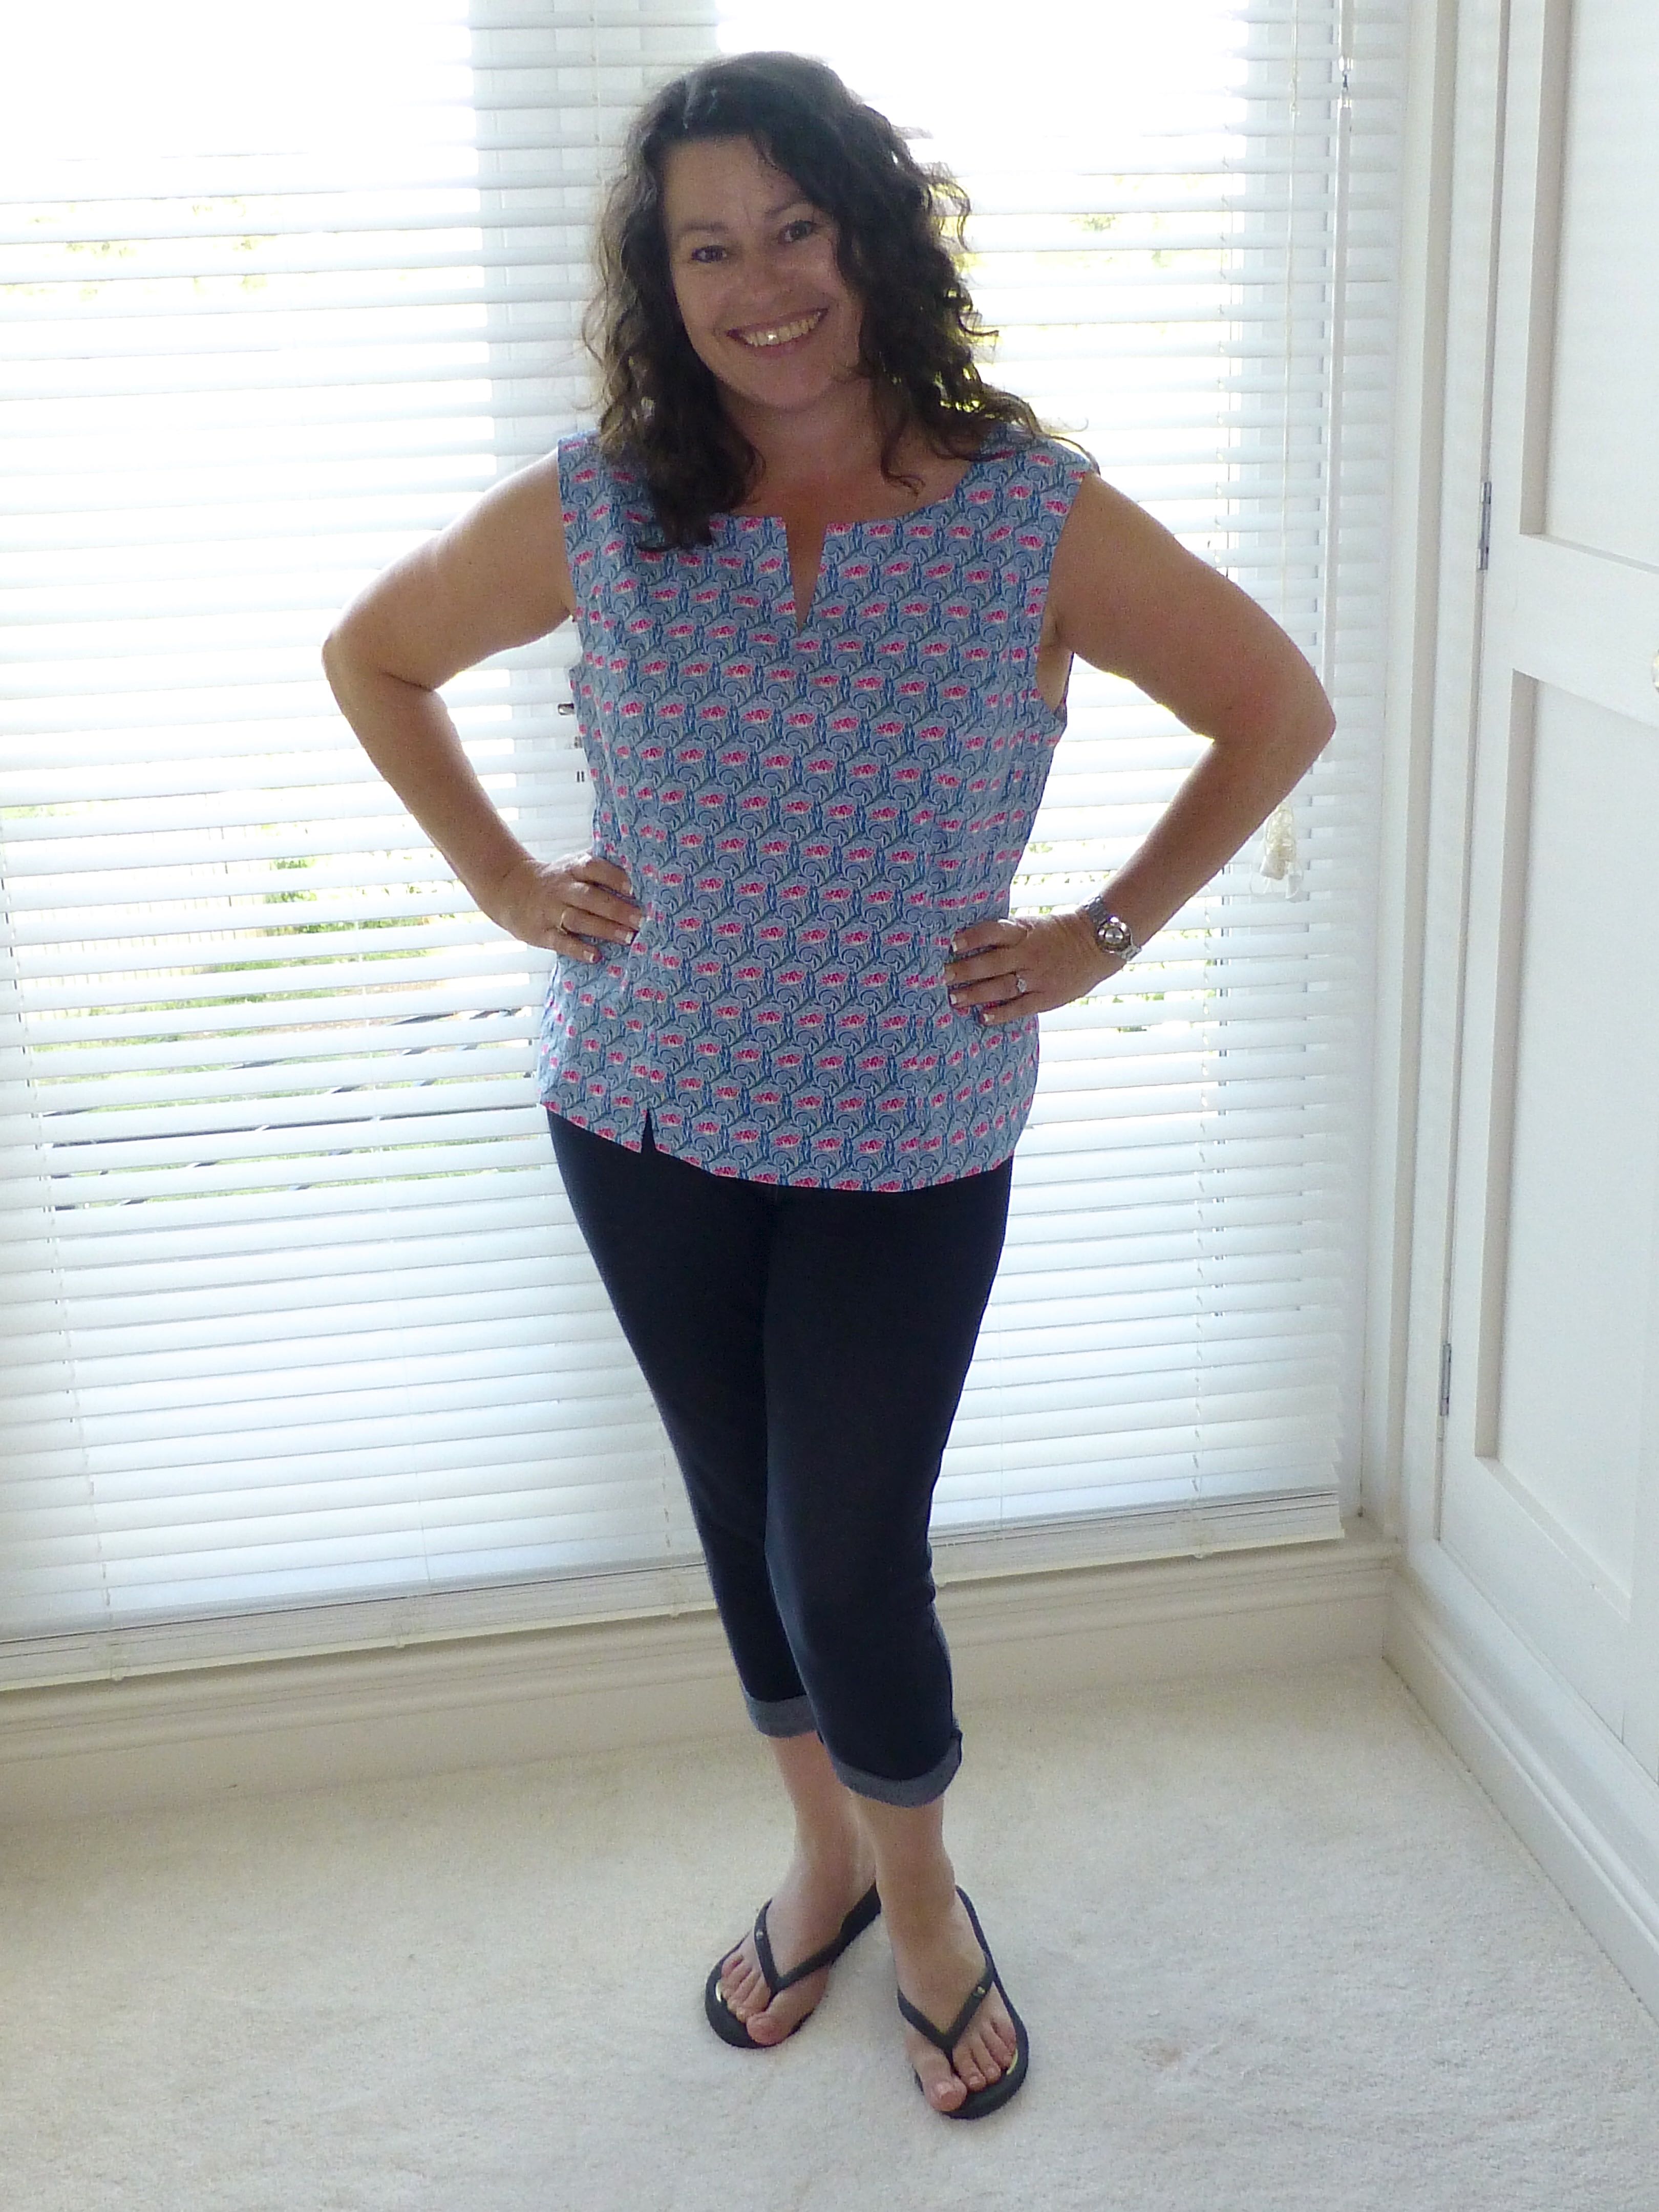
Top made, now into my wardrobe to see what it might go with.
Rolled up jeggings and navy wedge-heeled flip-flops?
Ah, the wonders of technology – I’m probably sat around the pool in Andalucia, sunning myself with a cheeky G&T for company as you read this, as I planned ahead and scheduled this post in advance!
If you saw my post ‘Holiday Sewing’, you’ll know that I wanted to make a few new things to wear, so this is the second in the series, so to speak.
You may have noticed over the past year of my blogging journey, that colour is a recurring theme – and lots of it, preferably clashing.
The wackier the print, the more likely I am to want it and, as The High Street doesn’t often float my boat, I source fabrics online to conjure up my own creations.
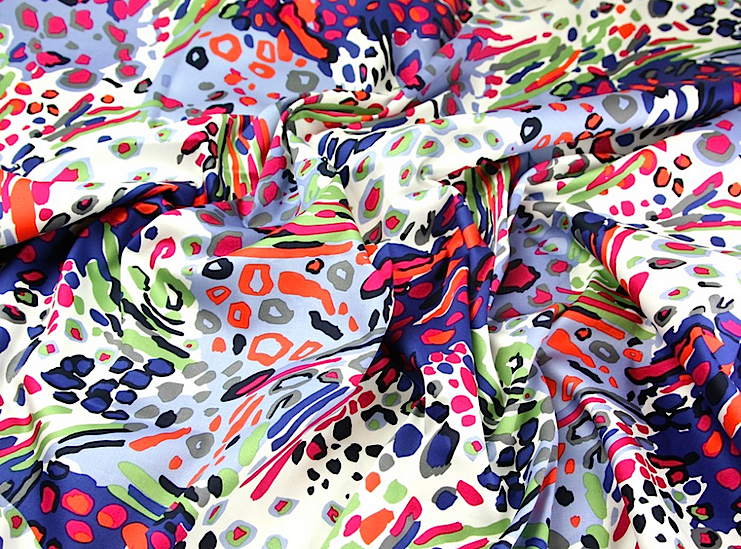
“Where have I seen that wacky animal print before?” I hear you all cry.
Well, unbeknown to me at the time, Lucie of Love,Lucie had also fallen for its charms and has since used it to make a stunning Summer dress (click here to see the Wow! dress).
It’s a supremely soft textured Stretch Cotton Sateen which has proved so popular that Minerva are having to restock!
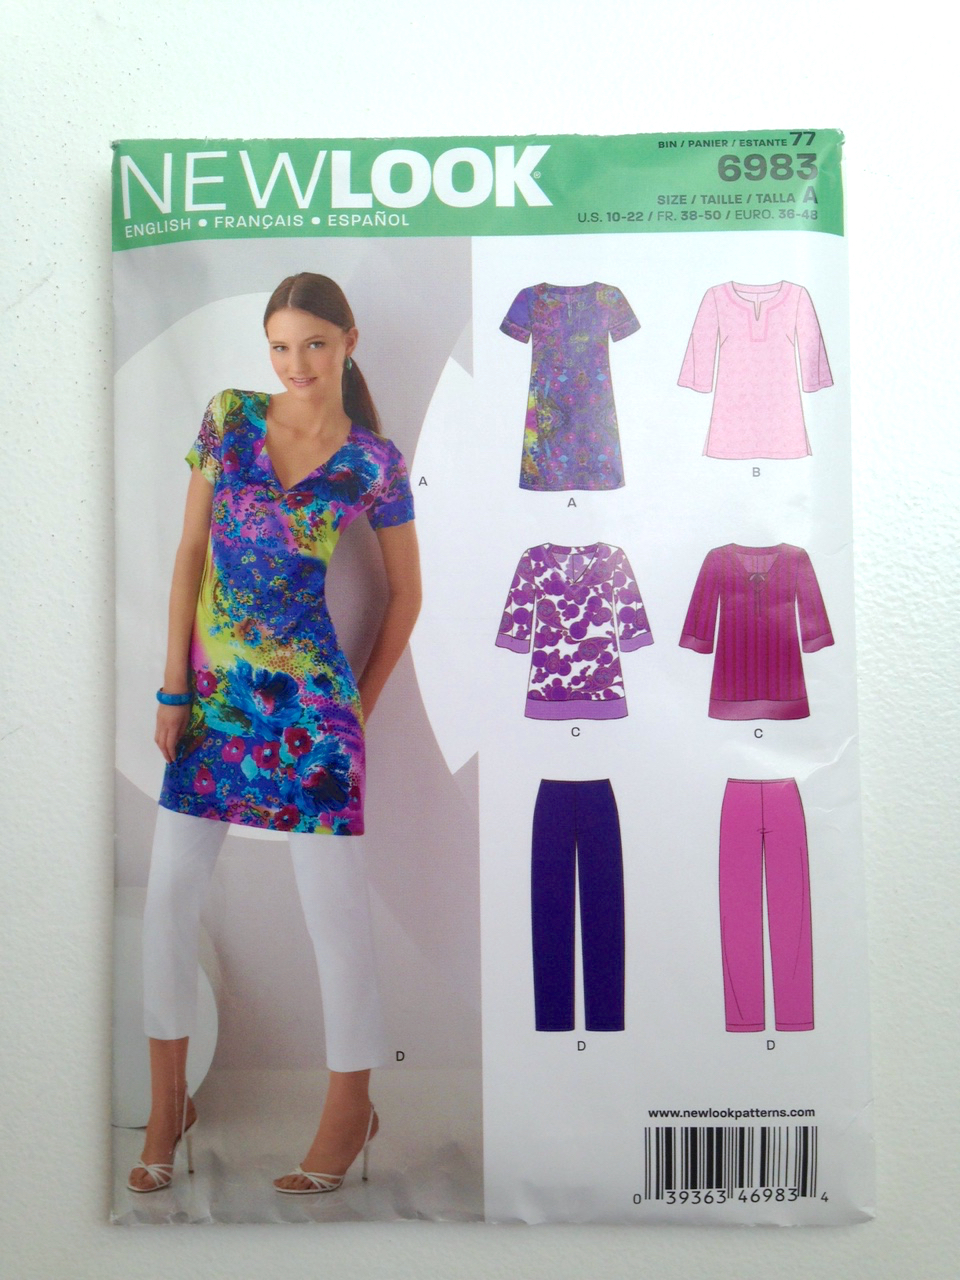
The pattern is New Look 6983 and includes cropped trousers as well as variations on a tunic.
Liking the look of a bold print tunic worn with a pair of Daz-white three-quarter lengths, I also ordered some of the same fabric in plain white.
So, onto the construction of the top which consisted of three basic pieces – a front, back (with facings) and sleeves. Shaping was in the form of two bust darts so, really, it couldn’t be simpler for even a beginner to do.
After putting together the basic shape, including the darts, I always try garments on inside out. This way you get a better idea of how well/badly it actually fits without being distracted by the pattern, and you can also pin any adjustments that need to be made.
Obviously a dressform would be ideal, but I outgrew my old one while I was pregnant ten years ago and have decided the two stone of baby weight is here to stay:)
Again, being a UK size 14, I cut out the US equivalent of size 18.
This time, it really was too big by quite a long way and I ended up taking it in all the way by a whole dress size.
The pattern is very straightforward but included nice details like understitching of the neck facing to create a neater, flatter finish.
I’m really pleased with the way it turned out – it has already attracted many comments:)
The cropped trousers (well, they weren’t until I shortened them by three inches at the “lengthen/shorthen here” mark!) were also too big initially, so I took them in by a whole dress size too.
There was no waistband for a change, just a facing of petersham ribbon-type tape which lends a clean, minimal look to the trousers and also makes them super comfortable to wear.
The lapped zip is always a neat addition when inserting into a side seam.
A tip is to reinforce at the bottom with several lines of stitching though, as I’ve done here.
They fit well and the stretch in the cotton means that they will be a pleasure to wear – and somewhat smarter than the white leggings that I usually favour!
So, how does the outfit look as a whole?
Just as I had hoped, actually and feels even better due to the stretch in both fabrics.
The New Look pattern was easy to understand and the instructions simple to follow.
The cotton sateen is heavy enough to add structure and the stretch makes for incredible comfort.
Sunnies on and I’m ready to go!
Why not pop over to Minerva Crafts to find your own piece of fabric heaven?
Previously Boys and Chickens, I have created a new blog to share my sewing adventure as 2018 is they year I plan to teach myself to sew! There will also be bits of crochet and cooking too.
My challenge: One year - I will not buy clothes - I will upcycle to make what I need - everything from underwear to evening wear! Join me for tips, exclusive BrawHem makes, and inevitably some hilarious disasters...