Sewchet

Sewing, crochet, crafts, accessories, baking, tutorials,


Leave a comment

Crochet Glastonbury Festival Bag!

Well, the festival season is here upon us once again and I happen to live near to the biggest and best – Glastonbury! 

Whilst I’m not actually going this year, two of our daughters are stewarding for free tickets and the eldest son is taking the traditional route in.  By that, I mean he bought a ticket and is not planning to climb over the fence.  (Did you know that Michael Eavis is on record as saying how disappointed he is at the lack of ingenuity shown by would-be festival crashers when trying to sneak in for nothing?).

We used to be able to hear the music from our house but, since moving seven miles further east, no longer have that (dubious) pleasure.

I digress….

The first event was in 1979 and attracted 1,500 party-goers at the cost of £1 each (including FREE milk from the farm!), but it wasn’t until ten years later that Eavis used it as a fundraiser for CND, raising £20,000 for the cause. 

Image

Last year (2013) saw 175,00 ticket holders paying £210 each and raised £2,000,000 for charities and local good causes!

So what images spring to mind when thinking of the Glastonbury (or, more accurately, Pilton) Pop Festival?  Think hippies, rainbows, love, peace, cannabis, wellies, mud, sunburn etc. (although my husband refers to the annual migrants as “smelly soap-dodgers”!)

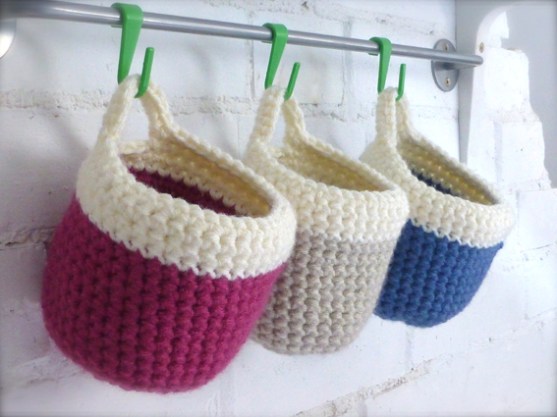
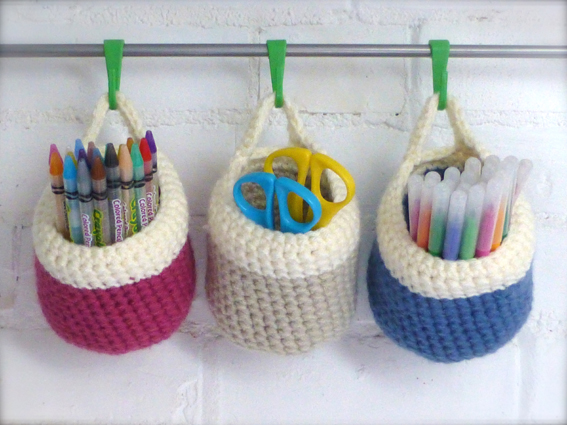
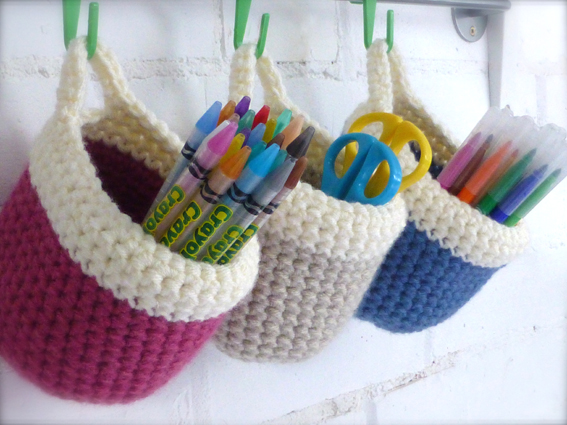
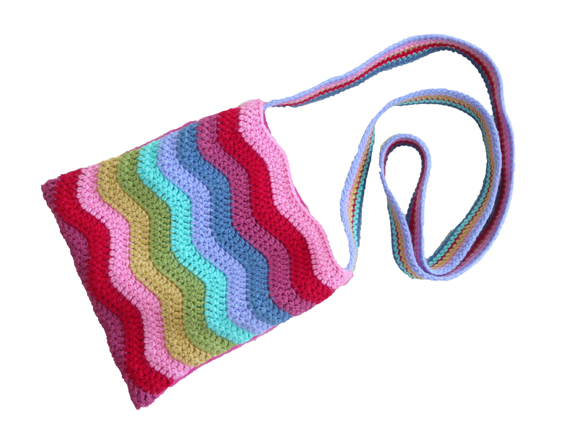
Taking the optimistic view and thinking ‘sunshine and rainbows’, I designed some free-form crochet bags in the “Hippy-Chic” style.

Would you like to see them?

Of course you would!

Here is my very lovely daughter modelling them together with that other festival staple – wellies (well, my Dubarry’s actually): –

Image

Here’s a close up of the front showing that gorgeous “ripple” pattern…

Image

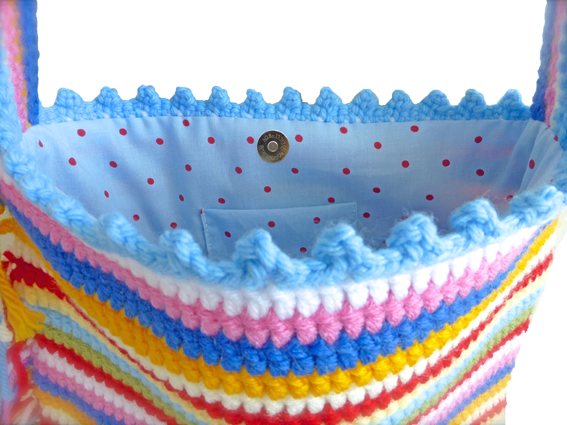
…and the back is felted wool.  Fully lined with contrasting blue fabric with white polka dots, there is a pocket inside for your mobile ‘phone and it closes with a magnetic clasp.

Image

Here’s the other one: –

Image

This was made in one piece so the back is a continuation of the front.

Image

Lovely spotty fabric for the lining and this shows the ‘phone pocket and magnetic clasp –

Image

Are they “Festival” enough for you?  Both crochet Glastonbury Festival bags are available from my shop on the link at the top of the page – go on, unleash the hippy in you!


2 Comments

Handmade Recycled Greetings Cards For School Fair Or Summer Fête

Blimey I’ve been a busy bee creating all manner of loveliness for the School Fair tomorrow!

Earlier in the week I made some fudge and then I designed a summer fête inspired box in which to display them.  I was trying to think of some quick, easy and cheap ideas for making something which would sell at the fair, when I remembered the forty-or-so sheets of recycled brown card left over from making our wedding invitations last year.  Bingo!  Greetings Cards would be all those things and should make a good profit for the school.

I sketched and cut out some card templates of several different designs, then cut the shapes out of scraps of wrapping paper.  Keeping in mind the necessity to appeal to all ages and both sexes, I chose a mixture of colours and cut out the following; bunting, balloons, kites and ties.

I stitched the shapes with a basic straight stitch on the sewing machine and embellished some of them with glued-on paper clouds.  The cards were left blank to make them suitable for any occasion, apart from a few that were printed with ‘Father’s Day’ as it is the day after the fair.  I wrote my website on the reverse so that, if they don’t sell, I can put them in my shop for sale:)

Image

So far forty cards have cost nothing, so I bought 50 manilla envelopes for £1.29 and 50 see-through bags for £2.75.  They look MUCH more professional presented this way and each card has still only cost 8p! (Not including my time, obviously).  This serves another purpose though, as it protects the cards from damage and dirt as they get handled.

Image

Now, what to do about a box?

Knowing that people like to rummage through everything easily, I decided to customize a shoe box to make a long, thin “shelf” type display box.  This is what they look like….

Image

I’m secretly quite chuffed with the whole thing!  Hopefully that’s given you an idea of a quick and easy craft make for your school fair or summer fête – handmade greetings cards for just a few pence each.


4 Comments

Presentation Box With Bunting

If you saw yesterday’s post about the handmade fudge I created for the school fair, you may remember that I was just going to take it along in a bread basket.

Well, I thought that, since I had gone to the trouble of making the fudge and packaging it nicely, I could be a bit more creative with the presentation. 

An hour later I had made this: –

Image

Inspired by this tiny scrap of leftover “Afternoon Tea” wrapping paper which was just too pretty to throw away…

Image

…I decided the colour scheme could be pink and blue with paper bunting.

Here’s what I did….

  1. Paint the outside of a shallow cardboard box (I used the lid off a box of photocopier paper) in blue and the inside in pink.  I used acrylic paints which dried super-quickly.
  2. Using parcel tape, stick two wooden skewers at an angle to the inside-rear of the box.  Paint pink.


Image

3.  Using PVA adhesive, glue down a piece of wrapping paper to the inside base of the box.  (I didn’t have enough to cover the entire       base, so I painted a strip down each side in pink beforehand).

Image

4.  Attach a length of string between the top of the skewers using parcel tape.

5.  Draw a small triangle onto a piece of card and cut out to make a template for the bunting.  Fold your wrapping paper and place the template short edge along the fold.  Draw around, and cut out.

Image

Image

6.  Paste a small amount of glue onto the inside of your bunting pennant, hang over the string and press together.

Image

Image

And there you have it – a suitably themed box in which to present your homemade goodies for sale.  They look much cuter in this rather than the bread basket, don’t they?

Image

A presentation box complete with “Afternoon Tea” wrapping-paper bunting – perfect for selling sweets, chocolates or small gifts on your stall at your school fair or Summer fête.


2 Comments

Homemade Fudge

It’s that time of year again – School Fair!  This begs the question: “What-to-make-that-kids-will-want-to-buy?”. It has to be cheap for two reasons;

  1. It’s a donation – you don’t get costs refunded
  2. Children have about two pounds to stretch around the entire fair


I decided to do something different to the usual fairy cakes and hit upon the idea of fudge in two flavours – “Chocolate” and “Vanilla & Raisin”.

Fudge is sweet (so kids will love it) and simple to make, the ingredients are cheap and I thought I could package it up to look appealing.

This is the Chocolate…

Image

and this is the Vanilla.

Image

Mmmmm, delicious!

Image

Here’s what I did:

Ingredients: –

397g can condensed milk

150ml single cream

450g demerara sugar

115g butter

  1. Melt all the ingredients in a large, non-stick pan over a low heat, stirring until the sugar dissolves.
  2. Bring to the boil then simmer for 10-15 minutes, stirring continuously and scraping the base of the pan.
  3. Continue until a sugar thermometer reads 118°C – this is vital, or the fudge won’t set.
  4. Transfer to a mixer and beat until very thick and only just beginning to set.
  5. Pour into a 20cm square tin, lined with baking parchment, and leave to set before cutting into squares.


For chocolate, add two tablespoons of cocoa powder at step 4.

For vanilla (and raisins) add one teaspoon of vanilla extract (and two tablespoons of chopped raisins) at step 4.

Image

I found some small cellophane bags here www.wrappingsandbows.co.uk

Image

I designed some simple labels to attach to each bag with the price clearly stated.

Image

Pricing is tricky but, as this was my donation, I just added up the cost of the ingredients and packaging and divided it roughly between the number of bags created. I put two squares of each flavour in each bag and made twenty-eight bags, plus plenty of offcuts which could be bagged up and sold off cheaper (if you haven’t already succumbed to temptation and eaten them as you go along!).

Image

I think they look quite saleable, don’t you?

Here they are all lined up in bread baskets, ready to go.

Image

Image

Image

So there you have it – handmade fudge, simple but perfect idea for school or village fairs!


Leave a comment

Vintage Treasures and The Craft Revival!

Unless you’ve been asleep since 2006 (pre-recession), you can’t have failed to notice the revival of traditional crafts and the resurgence in popularity of all things vintage.  

Being a child of the seventies with no television(!), we had to find other ways to entertain ourselves in the long winter evenings after the dusk curfew. My grandmother taught me how to knit and crochet and my mother inspired me to learn how to sew – I have been making things since the age of five. During the eighties I was rarely seen without a garment I had made, whether it was a mohair jumper (itchy, but very trendy back then) or a tailored jacket with “power” shoulder pads (ridiculous on my diminutive 5’2″ stature!).

My house was filled with junk shop and auction “treasures”, and my furniture was comfortably dressed with home made quilts, cushions, curtains and anything else I could make myself. My baby daughter wore the most adorable sets of all-in-one, bonnet and even matching shoes, all lovingly and painstakingly made by hand and shown off with pride.

Then came the late nineties and millennium. Ikea and Primark reigned supreme with their cheap flat-pack furniture and throwaway clothes. Everyone could afford to buy new, discard when they fancied a change and repeat every twelve months (about the length of time the furniture was made to last – only a matter of weeks for the poorly made clothes.)

I was embarrassed to admit that I could knit, sew and crochet. I would let people assume that the ironically fashionable “distressed” furniture were new purchases, not the genuine article having acquired a gorgeous patina during the course of an interesting century or so of being.  I am ashamed to say that, with the end of a long relationship, I succumbed to change and donated twenty years of accumulated “memories” to various charity shops or sold at car boot sales for pennies.

Out went vintage kitchenalia, antique pine dressers and patchwork bedspreads. In came soulless Ikea bookshelves and acrylic throws.

And I hated it.

When the recession took hold I was in a new, happy relationship (we’re now married with two children), in a house we bought together and the need for change took hold of me again.

This time, I reverted to my true nature and gradually filled our home with things I loved, mainly eBay bargains (easier than auctions) or charity shop finds.  Sewing and crochet were still not cool, but I didn’t care and made new heirlooms to replace the ones that I’d foolishly given away.

Gradually “Knit ‘n’ Natter” groups became The Thing, vintage tea rooms popped up on every corner and everyone knew what a Granny Stripe was. Charity shops are the place to be. Second hand is no longer a dirty word and hand made is valued over mass produced.

I’m in my element and I couldn’t be happier about the change – which is the only good thing to come out of the recession!

I thought I’d share with you the lovely bounty of things I bought at our local St. Margaret’s Somerset Hospice this morning.  I spent £12.49 in total, a snip and far more beautiful than anything you can buy today.

This vintage pickle jar complete with fork for all my home made chutneys;

Image

An utterly divine jam pot – I swear my Wild Damson and Port Jam will taste even nicer served up in this!

Image

A tiny mint sauce boat – just perfect.

Image

This table runner, not vintage, but so pretty – brand new and still in its original packing!

Image

Image

All this second hand loveliness for £12.49 – amazing!

Image

Do you love vintage and hand made? Show me your second hand bargains and hand crafted masterpieces – I would love to see them!


Leave a comment

How To Make Elderflower Cordial

To my mind, Spring has finally sprung when the first tender flowers appear on our Elderberry bush and I can look forward to the first batch of Elderflower Cordial fresh from the garden.

Image

The girls and Cock love to shelter from the sun under the seasonal shade the bush provides in our otherwise tree-less garden. (Oh, how I yearn for an orchard…)

Image

The delicate, creamy-white flowers make the most divine Elderflower Cordial and, as the flowers very quickly make way for berries, there is a short window of opportunity in which to harvest them.

Image

The flowers form distinctly separate heads which should be picked in the morning on a dry, sunny day when their aroma will be at its best. Pick a time when you will be able to make the cordial immediately as the flowers are best used within two hours of picking.

Image

My Elderflower Cordial Recipe


You will need: –

15-20 Elderflower heads

1 litre boiling water

1kg granulated sugar

2 large lemons (zest AND juice)

Some recipes call for citric acid as well, but I find using the zest and juice of the lemons works just as well.


Shake the flowers to remove any insects and cut off the stalks. Put the flowers in a large bowl.

Image

Add the sugar to the boiling water in a jug and stir until dissolved, then add the lemon zest and juice.

Image

Pour the syrup over the elderflowers, cover and leave for 3 days, giving it a good stir each morning and night.

Image

Strain the mixture through a piece of muslin, squeezing well to capture every lovely drop!

Image

Decant into sterilized bottles. (To sterilize, wash two one-litre bottles and leave to dry.  Pre-heat an oven to 150′ celsius, lay your bottles on the oven shelf and leave for 15 minutes.  Remove from the oven and allow to cool slightly before filling.)

Image

Voilà!  Delicious, homemade, Elderflower Cordial ready to enjoy!  It will keep up to a year in the fridge, although you’ll be doing well if it lasts until the end of the summer holidays if your kids are anything like mine:)

It also makes a lovely gift if presented in swing-top bottles like these with a hand crafted label and gift tag.

Image

I like it best served with sparkling mineral water (dilute about 1 part cordial to 6 parts water) but it is just as nice made with lemonade apparently – and plenty of ice.

Image

Endorsed by children everywhere (well, six year old Freddy loves it anyway)…

Image

There you have it, your very own, not to mention quick and easy, Elderflower Cordial – luvvly jubbly.


3 Comments

Small Crochet Storage Baskets

When I first kitted out my craft studio I pretty much sourced everything from Ikea just to get started – their storage solutions are ideal, not to mention cheap. But, being the creative person I am, it is all a bit too functional and I’m trying to come up with ways to personalize my space with handmade alternatives.

Take these plastic tubs that are currently in my studio for example: –

Image

They’re the perfect size – just not ‘me’.

I got to thinking about the work-in-progress basket I made a few weeks ago (below) and thought I could come up with something along the same lines, but much smaller.

Image

I came across these little baskets here and love the different, but toning colours, and the band of cream that ties the three baskets together visually. I wanted baskets that could hang from a hook though…

Image

After playing around with size, tension and colours, I made these three little baskets with a single hanging loop which are stiff enough to do the job perfectly.

Image

Image

Image

I love them!  Sooo much nicer and more tactile than the plastic tubs. 

I will work out a tutorial for them so, if you want to make your own small crochet baskets – follow the blog and don’t miss out!


2 Comments

Tea Cosy Tutorial

There has been quite a lot of interest in my ‘Camper Van’ and ‘Hen’ tea cosies, so here is the tutorial I promised.  I would love to see any that you make – post your photos on my Facebook page:)

Image

You will need: –

  • a sheet of A4 paper
  • 1/4 metre of fabric of your choice
  • 1/4 metre lining fabric
  • 1/4 metre polyester wadding
  • motif (for appliqué)
  • iron-on interfacing
  • matching thread
  • cotton tape
  • bias binding

On an A4 sheet of paper, use a large plate to draw the rounded corners of the tea cosy.

Image

Using the paper template you have just made, cut TWO each out of your main fabric, lining and some polyester wadding.

Image

Take your chosen motif (I cut out a Camper Van from the Fryett’s range) and iron onto fusible interfacing.

Image 

Cut roughly around the motif and pin onto one of your main pieces of fabric. Stitch all around the motif three times. You can be as neat as you like, although I “scribble-stitched” using the freehand machine embroidery method.  This allows the fabric to fray very slightly and adds to the rustic charm.  You could use a close zigzag stitch if you prefer, to enclose the raw edges for a neat finish.

Image

Trim the excess fabric from the finished appliqué.

Image

Cut a 4″ (10cm) piece of non-stretch cotton tape.

Image

Fold the tape in half and pin to the right side of one of your main fabric pieces as shown to form a small handle.

Image

Pin your fabric, right sides together, sandwiching the cotton tape in between.  Pin your lining, right sides together.  Stitch all the way around the curved edge, leaving the bottom, straight edge, free.

Image

Turn and press.

Trim the wadding by 1/2″ (1cm) all the way around.

Image

Slip the lining inside the cosy, wrong sides together to hide the seams.  Now insert the wadding in between the fabric and the lining (front and back) as below.

Image

Pin the bias binding around the bottom of the cosy, enclosing all three layers.

Image

When you get to the end, cut to length and fold under before pinning over the cut end.

Image

Sew close to the edge of the binding.

Image

And there you are – finished!

Image

You can customise it to suit your style using any motif.  Here’s a variation with more free machine embroidery.

Image


This is one I made out of beige linen with a hen appliqué.

Image

Feel free to share on your own blog; a link back to this page would be appreciated:)


Leave a comment

Homemade Bread and Butter

I’ve had a very productive day today – not in the studio this time, but in the kitchen. If I’m not in my studio bent over the sewing machine, then I will be found in the kitchen conjuring up some culinary masterpiece (I wish!) for my family.

I cook from scratch pretty much all the time, so baking a couple of loaves was nothing new, but today I really went back to basics and decided to have a go at making the butter too.

I bought this gorgeous book through Country Living magazine (UK version) last year, as much for the lovely photography as for the content itself.

Image

Butter has always been a little bit of an enigma for me and one of the few pre-packaged foods that I buy ready made. If I’m completely honest, making my own has been a scary prospect and shop bought butter (not spread/margarine) has very little in the way of additives so I’ve been happy enough to buy it until now.

The chapter on ‘Dairy’ has been thumbed through plenty of times, and the pictures make it look so simple that this morning I decided to take the plunge and make my own butter.

Image

I have the requisite KitchenAid (in Pistachio Green, no less!) so beating the double cream to the stage where the liquid and solids separate took under a minute. Then it really was just a case of squeezing the butter under a cold running tap to get rid of as much buttermilk as possible and putting it in a dish in the fridge.

That’s it.

Virgin unsalted butter ready to use – amazing! The whole thing took less than five minutes; add another if you want to knead in a little salt to taste.

We tried it immediately on some olive bread that I made yesterday – delicious! And soooo quick and easy that, not only do I wonder why I have never tried before, but I will never buy ready made again. I just need to remember to keep a pot of double cream in the fridge at all times.

Image

You can buy the book at Amazon UK. (I was not asked to review this book, it’s just so great I had to tell you about it:))

P1020860

Ebay now, to try and find a pair of vintage butter pats and stamps…


Leave a comment

Rooster inspired Hen Tea Cosy

We keep hens.

That is to say, when my husband moved down to Somerset from London he made the typical Escape To The Country statement “I-want-to-keep-chickens-and-grow-a-vegetable-patch”.

As a born and bred Somerset lass, the novelty (if there ever was one) of such things has long since waned.  Don’t get me wrong, we loved picking and eating our own home-grown veg, after all, nothing really beats a freshly picked carrot eaten straight from the (pesticide free) soil. As children we even used to set up a stall on the front lawn to sell the surplus to our neighbours down the road.

It’s the laborious journey to this bountiful harvest that I don’t miss, mainly the never-ending removal of waist-high weeds that myself and my three siblings seemed to be constantly battling with. The stinging nettles and thistles fought us every step of the way, not to mention the dreaded slug of which I have almost a phobia (“Limaxaphobia”, apparently).  I had visions of my husband doing the ‘nice’ bits ie. planting and picking, and I would probably be the one left with all the rubbish jobs as he works long hours.

So no vegetable patch.

But what about chickens?

Long story short, I relented and surprised hubby with a build-your-own chicken coop for his birthday a couple of years ago. He’s a blokey type of bloke and enjoyed building the coop and run so much that I nearly didn’t bother with the hens, but Christmas was only three weeks later so present shopping was easy that year.

We started with six hens, two of which quickly became broody and prompted the donation of some fertilized eggs from a farmer friend for them to sit on. Twenty-one days later we had three black chicks which turned out to be two hens and a cockerel.

And what a handsome beast he is! We gave him the unimaginative but obvious name “Cock” and he definitely rules the roost among his harem of girls.

Image

I now thoroughly adore all nine birds and could watch them pecking their way round the garden all day long.

Watching them peck for worms and other tasty titbits reminded me that I had some fabric remnants from a roman blind in my son’s bedroom called “Rooster” by Clarke & Clarke – here’s what I made with it: –

Image

Photos of the hens will be sure to ‘wing’ their way onto these pages before very long and will no doubt inspire some more hen creativity in one form or other.

For those who would like to make a similar tea cosy, a tutorial is on it’s way shortly so “follow” the blog to make sure sure you don’t miss out!