Sewchet

Sewing, crochet, crafts, accessories, baking, tutorials,


44 Comments

One-Hour Poncho!

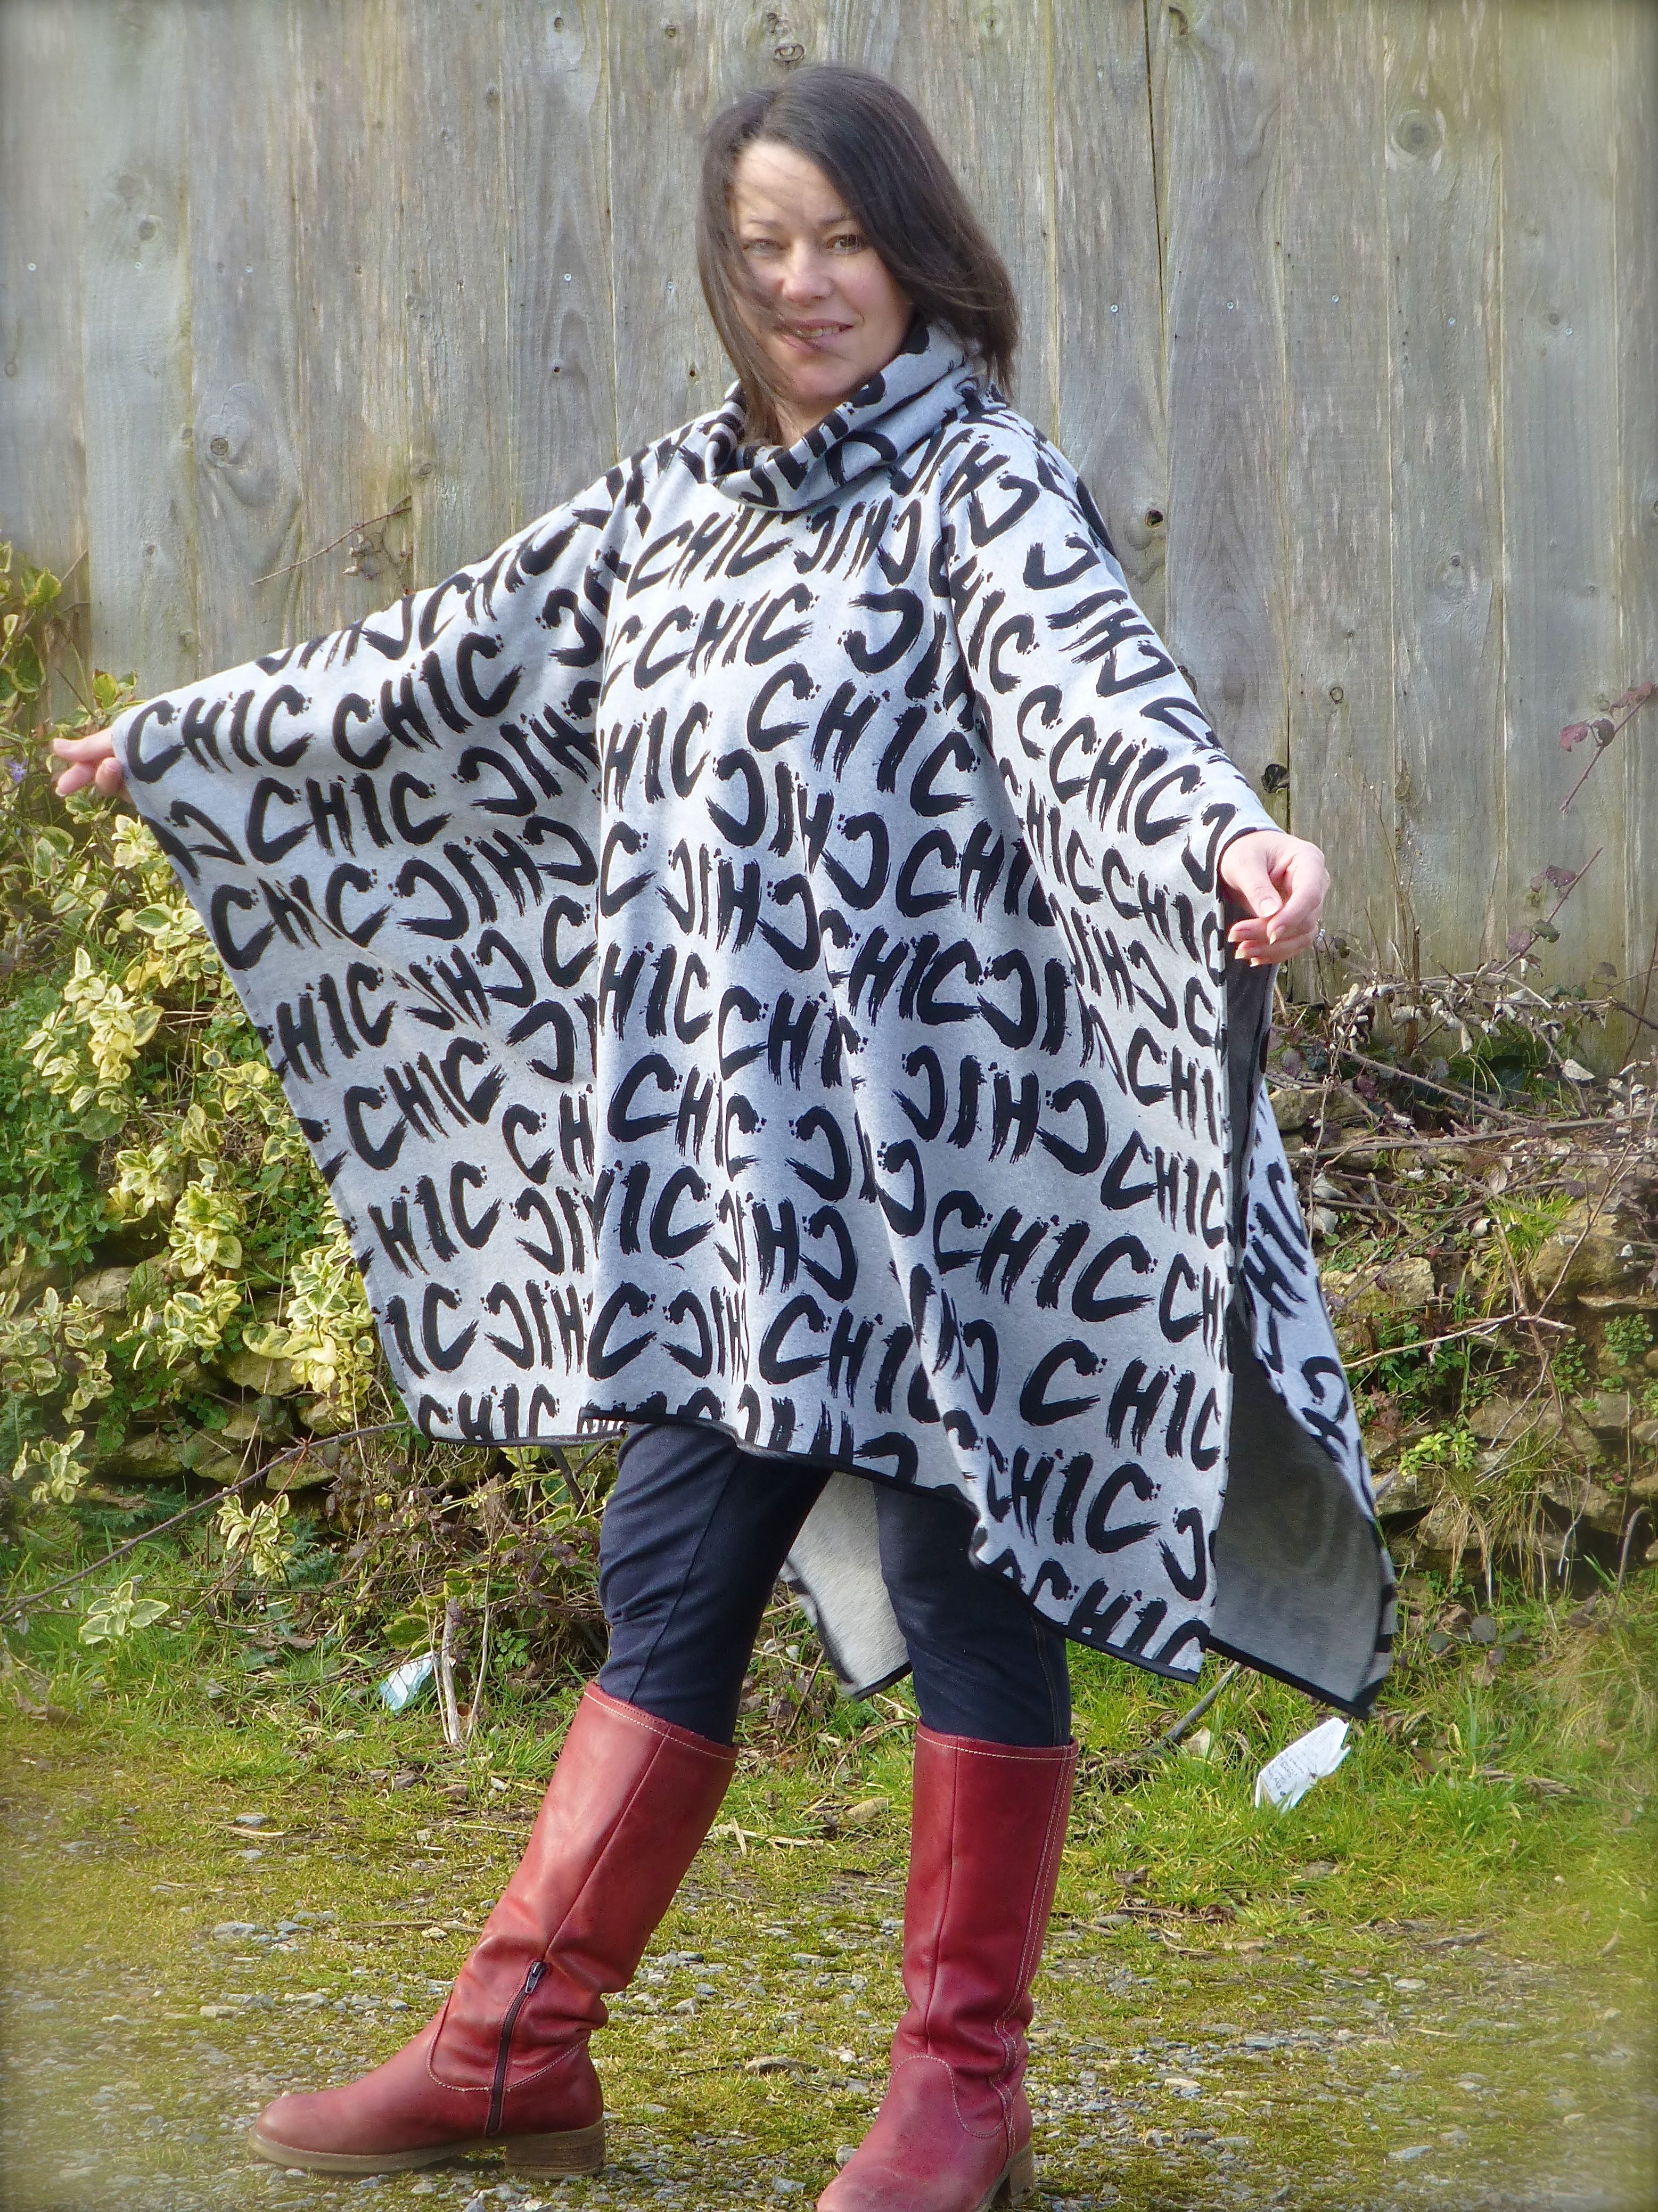
This is my first post as part of the Minerva Crafts Bloggers Network, and this is what I chose for my first make – a bold print Poncho with a cosy cowl neck, perfect for this time of year.

poncho3

If you’re anything like me, you’ve probably got your fingers in several pies and have lots of projects on the go at any one time, many of which are time-heavy and are completed over the course of weeks or even months.

Occasionally, just occasionally, I get impatient and don’t want to add yet another row to a seemingly unending WIP.

Once in a while I feel the need to make something quickly, to achieve something within a couple of hours, to finish something.

Well this is just such a project. In fact it is such a satisfyingly speedy make that it can be whipped up in just one hour!

No, really – look!

one hour poncho

Other than speed, the inspiration for the poncho came from browsing the huge range of fabrics available at Minerva, and happening upon this bold “Chic” print which I thought had a touch of the Parisienne about it – isn’t it fantastic?

P1040557

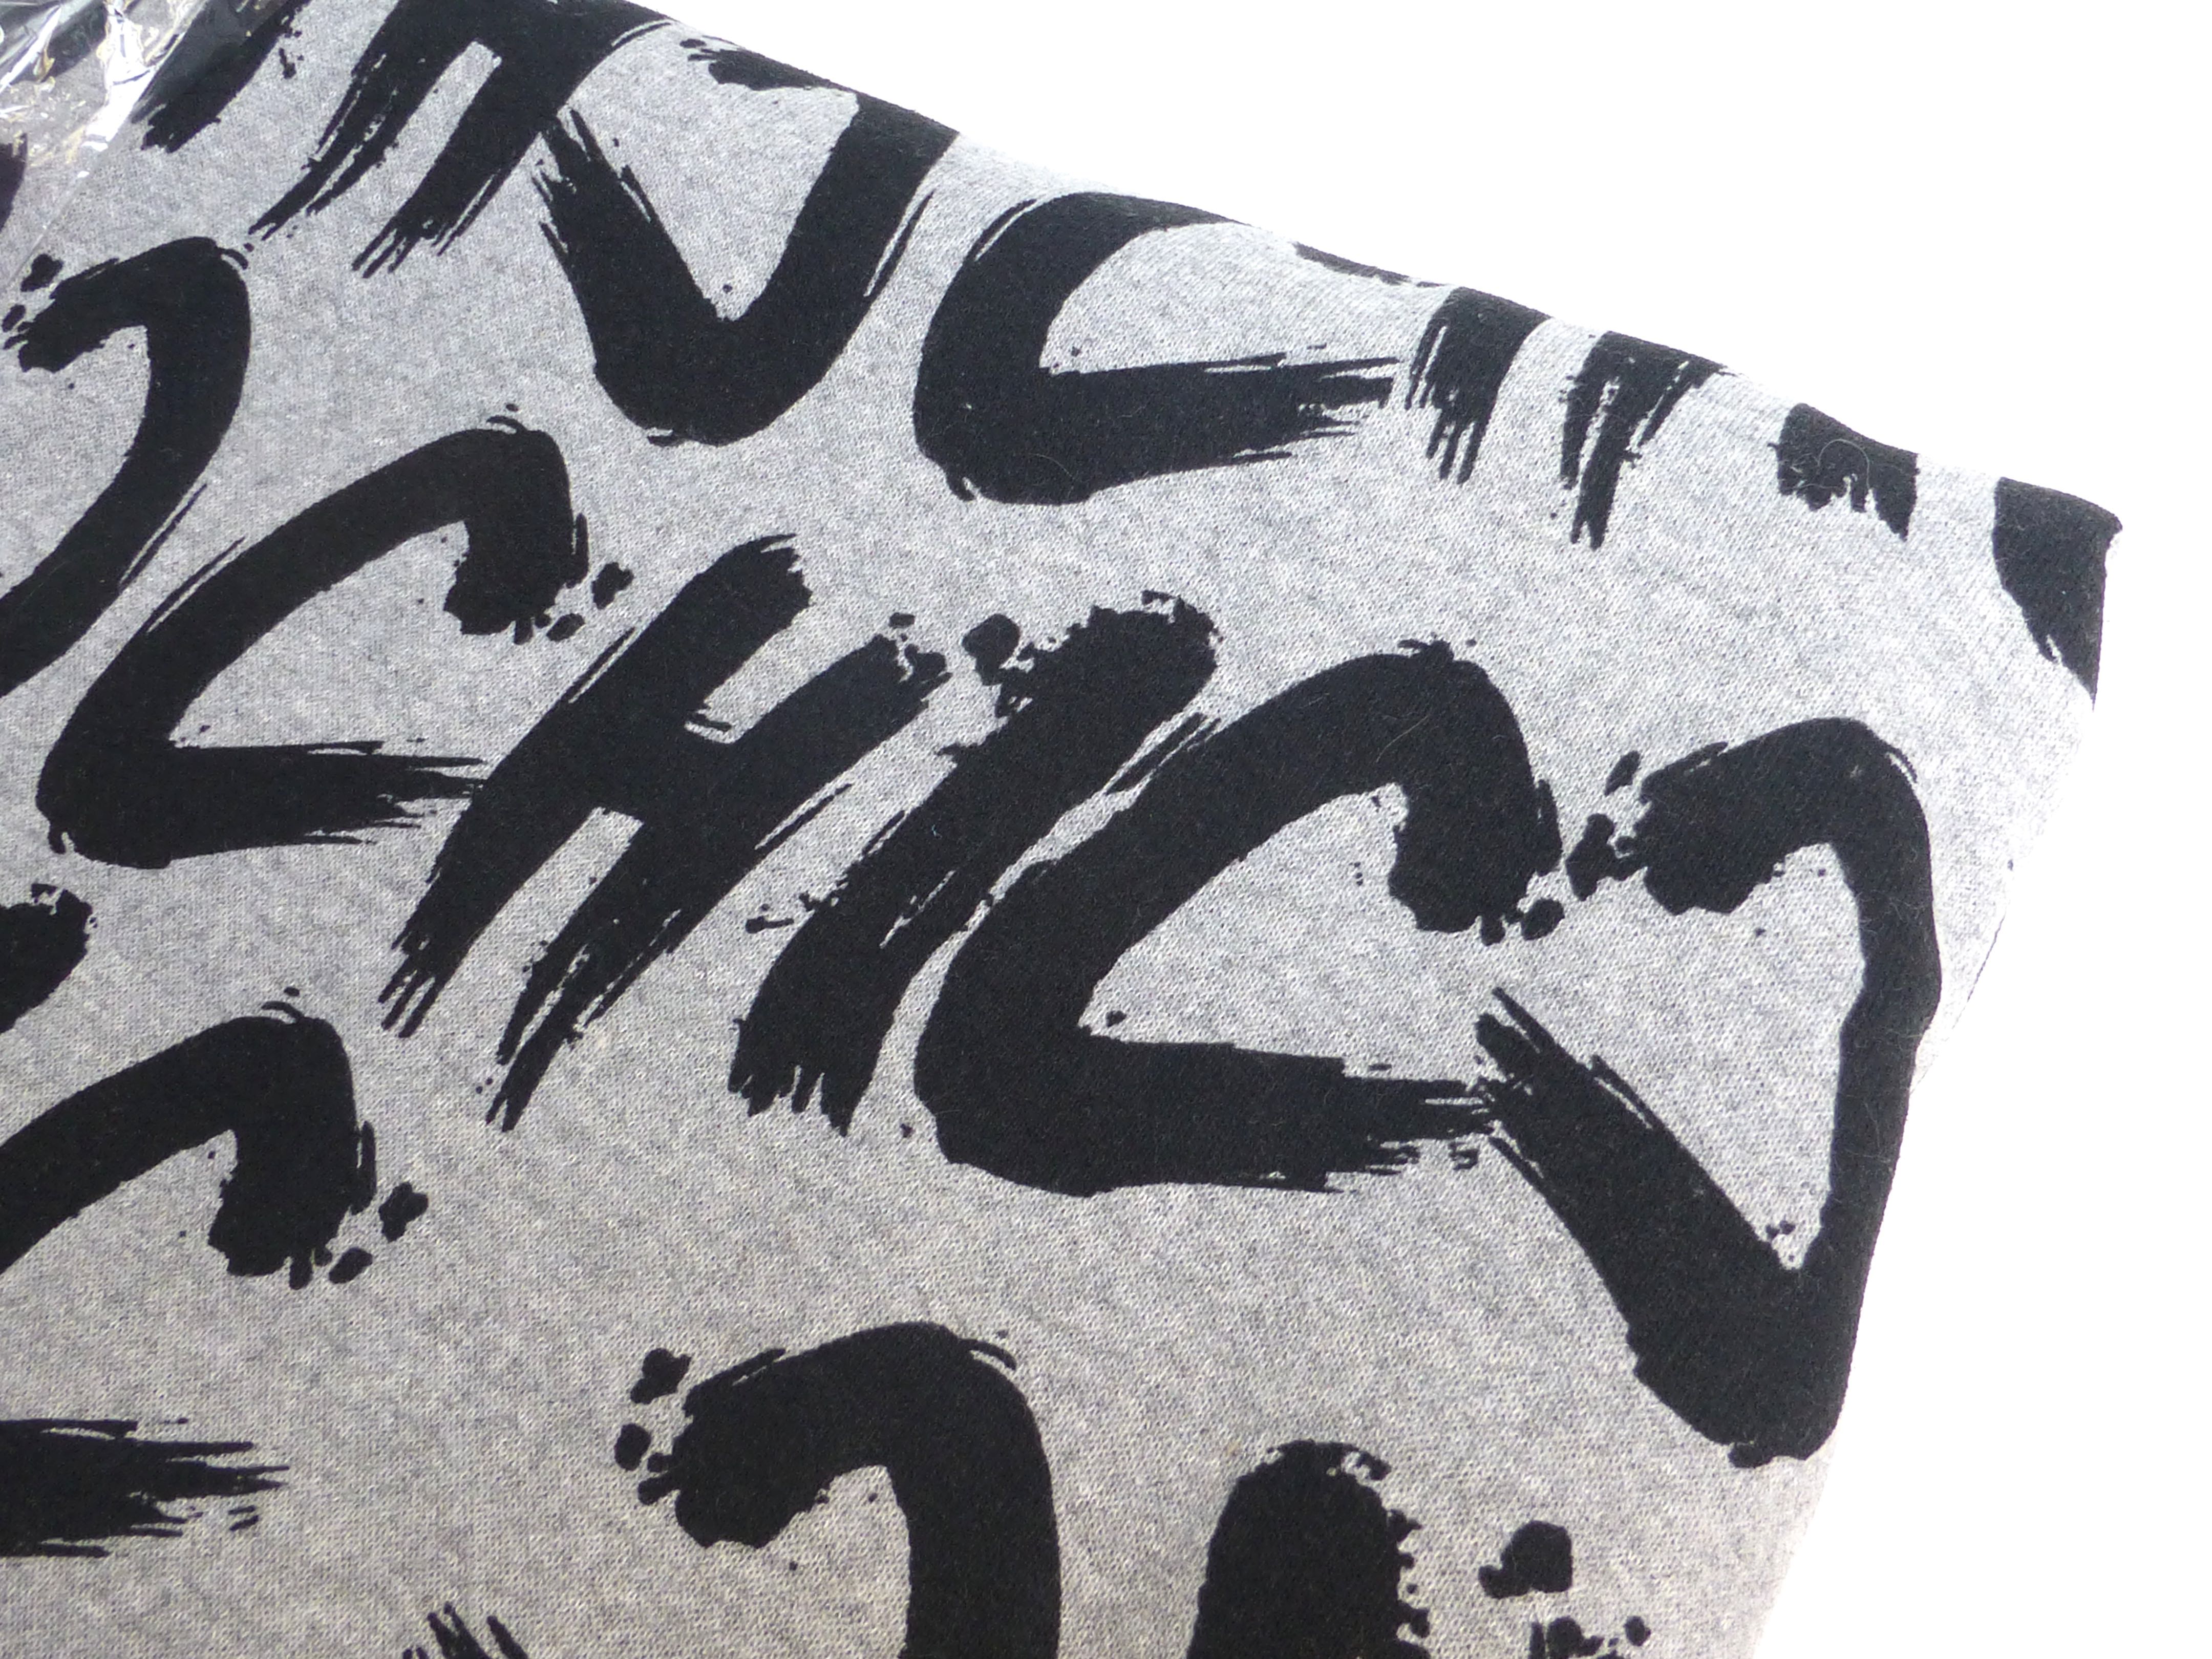
The fabric is described as “….sweatshirt jersey fabric, a lovely heavy weight with a soft fuzzy-textured backing. The print is a fantastic bold design with the word ‘Chic’ printed randomly across the surface….great for making hoodies and comfy jackets”

Please don’t be put off by the word ‘sweatshirt’ – it’s such good quality that it looks deceptively like wool from a distance, the benefits being that it is cheaper and easier to wash.

If you like it, you’d better be quick as it’s on clearance and there are only limited stocks:)

fabric

I’m not a hoodie kind of gal, so I searched for a poncho pattern and found McCall’s 6209 which is half price at the moment, and decided to make view ‘E’ with a cowl neck to keep those chilly winds out.

poncho pattern envelope

I’ve actually got a knit poncho that looks exactly like the one illustrated and I wear it all the time in place of a jumper. It’s not substantial enough to replace a coat though, so I wanted to choose a warmer fabric which drapes loosely for comfort and the jersey does just that.

poncho pattern

I made the cowl up as per the instructions. The fabric has a lovely weight to it that stops it flopping too much.

poncho cowl neck

The top stitching around the neck edge looked so nice that I decided to stray from the directions a little and top stitch from the shoulder to the arm too, on either side of the seams.

poncho top stitching

I overlocked the raw edges before hemming them as a double-turned hem would have been too bulky in this fabric.

poncho overlocked edges

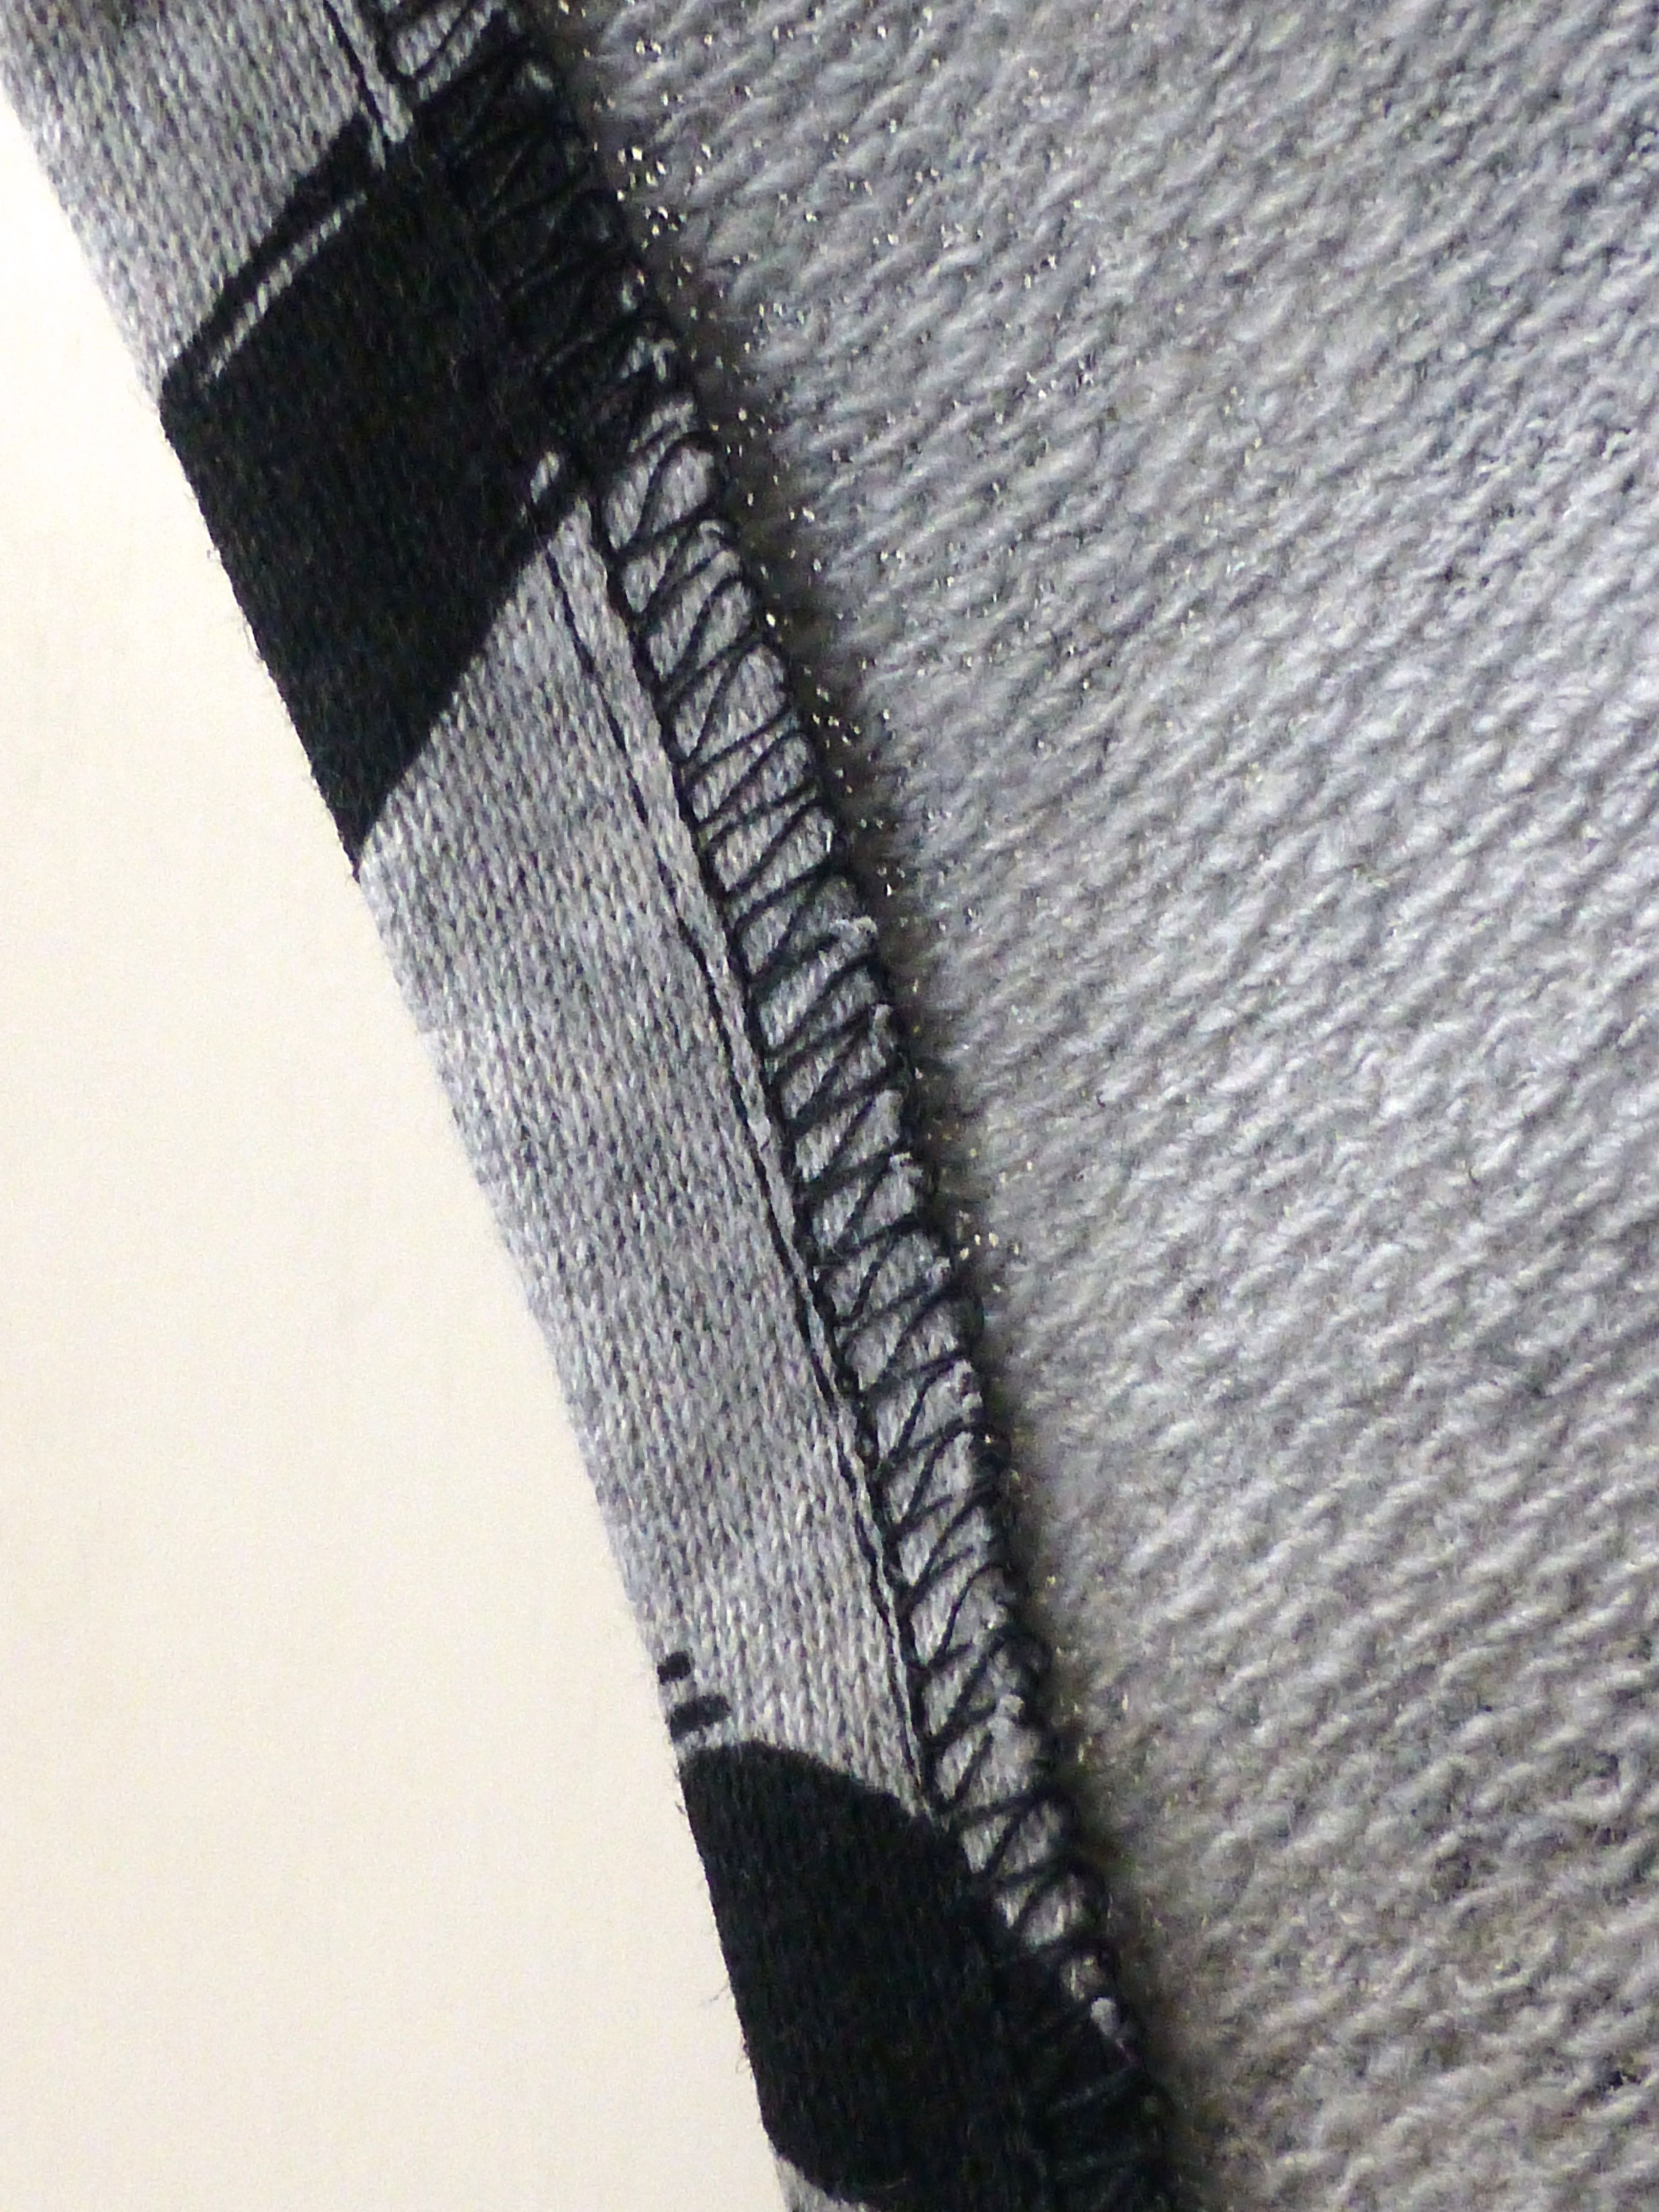
I meandered a little further from the instructions when I also decided to add some satin bias binding all around the lower hem.

This addition creates a more professional finish and the sheen of the satin adds a luxury edge to the poncho.

poncho binding detail

poncho binding

I’m so pleased with the bias binding, I wish I’d ordered more and done the armhole edges too, instead of hemming them.

poncho bias binding

So, one and a half hours later (due to the extra embellishments) all it needed was a cold, windy day to test it out and, being in good old Blighty we are not short of those!

chic poncho

I had no idea the poncho would cause such a stir though and I’ve already had loads of compliments. I suppose it is pretty unique and that in itself will draw comments.

Do you ever get the urge for a quick make?

What have you created in just a couple of hours?


16 Comments

Sunday Sevens #24

For those of you that are new to this concept, this is how Nat from Threads and Bobbins describes it: –

“Sunday Sevens is a weekly blog series where you post 7 photos from your week. Sometimes things happen in our lives that aren’t worth a full blog post but are worth sharing, so here is the blog series to do just that!”

Without further ado, here is my week in summary.

1. Snowdrops, snowdrops, everywhere!

snowdrops

2. No.2 Son wanted to make something for his little brother, so he embroidered his name onto some felt!

IMG_1533

3. Climbing trees – fun for boys of all ages:)

IMG_1521

4. Trying to get a normal photograph of hubby keeping our 12 year old Yorkie warm whilst sitting outside (!) for a pub meal. Here we have the whole gamut of facial expressions. That’s why I never ask him to pose for a photograph – it takes forever!

Untitled-2

IMG_1528

5. A really rather dreadful photo of Stourhead.

Note to self: next time, don’t use your iPhone on full zoom just because you’re too lazy to get the camera out of your bag!

Stourhead

6. Some completely fabuloso porcelain mugs that I bought in Makers gallery in Bristol. The artist is Jessica Thorne, a student at Plymouth University (where my son is in his final year, incidentally). She doesn’t have a website yet but you can ogle her gorgeous collection on Tumblr.

porcelain mugs

7. Italian Chocolate Truffles – I promised someone (sorry, can’t recall who!) that I would share the recipe, so here it is: –

175g/6oz plain chocolate

2 tbsp Cointreau or Grand Marnier

40g/1 1/2oz butter

5 tbsp icing sugar

cocoa powder to dust

Melt chocolate with Cointreau in microwave (gently!), then stir in the butter until it has melted.

Stir in the icing sugar. Leave in a cool place until firm enough to roll into 24 balls.

Roll in cocoa powder and chill in the fridge.

chocolate truffles

grand marnier truffles

Enjoy the rest of your weekend ‘cos it’s back to school on Monday!


32 Comments

Craft Progress For The Big Comic Relief Crafternoon

With four weeks to go before Comic Relief’s Big Crafternoon, I have been busy.

Busy making up samples of some of the things that will be available to make on the day, all of which feature in the Mollie Makes Red Nose Day special magazine, and I thought that people would probably like to see and feel examples of what the finished articles are like.

P1040587

P1040585

P1040588

I’m planning on having a dedicated crafting table for each of the items that can be made, so that all the materials for each project are to hand and won’t get mixed up with materials needed for any of the other crafts.

Each area will have a copy of the magazine open at the relevant pages, a selection of fabrics/yarn from which to choose, together with all the sundry items required to complete their chosen item.

P1040590

P1040592

P1040589

I’ve manged to source most of the sundry bits and pieces that will be needed, but NOT round lolly sticks – so I’ve substituted with a straw instead which works perfectly well!

P1040594

P1040595

P1040601

P1040598

Don’t forget to come along if you can!

A5 flyer with border


41 Comments

Sunday Sevens #23

Nat from Threads and Bobbins organized this link up, whereby you showcase the things that aren’t quite meaty enough to dedicate an entire blog post to.

I’ve got a few things to show you this week and, whilst they only number seven, there are a few more photos than that.

1. A finished off blanket from last month.

P1040542

I love the flower detail in the middle.

P1040544

Such lovely, dusky colours in the softest yarn – Drops Andes.

P1040545

2. I found a 1930s Grandmother clock, perfect for our house which was built in 1937! I’ve been searching for a suitable one for ages and was chuffed to bits when I spotted this in a local antique shop.

P1040549

P1040550

3. I picked up my knitting needles to start on the first jumper I’ve knitted since 1988!

P1040546

This one’s for me and I fancied using a tweedy yarn (Stylecraft’s Aran with 20% wool) to make it a proper country jumper for when I walk the dogs. This is my first attempt at knitting cables though and I think I’ve got it right first time!

P1040547

4. I don’t know if those eagle-eyed amongst you have spotted the new badge in my sidebar? I’m the latest blog to be sponsored by Minerva Crafts to use and review their products.

The materials for my first three months projects have just arrived! Don’t you just love getting parcels like this in the post?

P1040552

My first make will be using this good quality sweatshirt fabric with a very modern “Chic” print.

P1040557

I’ve got a great project in mind for this practical quilted leatherette.

P1040556

I’m really excited about this one though – a gorgeous Chinese print brocade!

P1040555

All these projects will be revealed and blogged about over the next eight weeks or so.

5. A couple of new book purchases (as if I haven’t got enough!). I blame this entirely on Teresa from Navy Blue Threads🙂

P1040558

6. After we finished some amazing tea that was given to us by somebody who insisted they weren’t going to drink it, we hunted down some more.

At a hefty £25.00 for a tiny tin, I think we’d better ration ourselves with this next lot!

P1040559

7. Finally, I whipped up a batch of eighty scones for a little boy’s Christening. Like you do.

P1040541


23 Comments

“Sew Retro” Sewing Knitting WIP Bag PDF Pattern

For those of you who have been following my blog, you will remember the “Sew Retro” bag I recently designed for storing all those WIPs, large and small. You can read about how these came about here and here.

Well, I’m thrilled to announce that this pattern is now available to buy from my Folksy Shop!

Cover

For just £4.99 the pattern is in PDF format with printable instructions for two sizes, perfect for every work in progress from small knitting projects through to the largest quilts.

sewing crochet bag

The pattern has clear step-by-step instructions and is accompanied by full colour photographs throughout.

Page 9

Lucie from Love, Lucie agreed to test the pattern for me before it was made available for purchase to check that it the instructions were clear and easy to follow.

She tested the pattern by making the smaller bag following the steps exactly – if you would like to see her review follow this link.

This is Lucie’s finished bag – didn’t she do a fantastic job?

Lucie's bag

I was nervous that Lucie would feel under pressure to write nice things but, after seeing how much she really enjoyed making the sewing bag, I am pleased to say that she likes it so much that she is already planning to make more for herself in the form of beach bags!

You can’t get a more positive review than that, can you?


61 Comments

How To Make A Rug With Homemade T-Shirt Yarn

How to make T-shirt yarn

I made a rare trip to Lidl the other day, just browsing and looking for nothing in particular.

I’m not a fan of Lidl because they only stock basics and I can never get everything on my list. I loathe the weekly Food Shop and am d*****d if I’m going to go to another shop as well to buy the rest. Once, I had a list of thirteen items and could only buy two of them in Lidl!!

Notwithstanding the above, they have a really good selection of non-food items, especially around Christmas and I’ve snapped up some great things in the past.

Anyway, on this occasion, I spotted some T-shirts on offer. A two-pack was reduced from £5.99 to £2.99 and, in true Lidl fashion, they were only stocking men’s size 4XXXL to fit 68-70″ chest so there was a huge pile of them left unsold!

I’ve fancied making my own T-shirt yarn for a while now but decided wisely that Hubby would be a bit peeved if he came home to find that I’d ‘recycled’ them without his knowledge, particularly as they are largely stain and hole free as yet. So these outsize bargains happened along at the right time and I snapped up a couple of packs.

P1040494

For best results, you need to choose logo-free, 100% cotton T-shirts without side seams. Mine had side seams – you just have to be extra careful not to rip them because they will be weakened after they have been cut through.

My new Olfa cutting mat and rotary cutter were about to have their inaugural outing – how have I lived my entire life without these?!

P1040501

You can, of course, use scissors – it is just easier and quicker with a rotary cutter.

Start by cutting away the main body of the T-shirt below the armholes.

P1040502

Fold together leaving about 1 1/2 inches between side seams (as shown below) and smooth out any creases.

Place the cut edge to the left of your cutting mat.

P1040503

P1040504

Using the quilting square as a guide, cut 1″ wide strips through all layers.

P1040508

Finish cutting about an inch from the second side seam as shown below.

P1040510

Keep going until you reach the end of the fabric.

P1040497

When you get to the end, trim the hem off completely.

P1040511

Insert your hand into the T-shirt at the uncut side seam through all the loops.

P1040512

Slide your hand right through to the other end and let the strips dangle.

Next comes the vital bit.

To create one continuous strip of yarn, you need to cut diagonally from your lower last slit, to the edge of the fabric as shown by the dotted line.

P1040513

P1040514

Keep cutting diagonally….

P1040516

…until you have a nice pool of T-shirt strips on the table!

P1040517

Now for the fun bit.

You need to stretch the strip between your fingers, holding a section and pulling it firmly until it curls, being very careful not to pull the weakened stitches apart at the seamlines.

P1040518

Can you see the difference?

P1040519

Your finished yarn will have increased in length by about 50%.

P1040524

Roll your new yarn into a ball.

P1040525

T-shirt yarn ball

Repeat with the other T-shirts.

T-shirt yarn balls

So now you have all this glorious new yarn, what to do with it?

I decided to crochet a bathmat and based it on this pattern here, using fewer stitches (10) in the first round and a smaller hook (12mm). This resulted in a slightly less dense texture which I love.

T-shirt yarn rug2

T-shirt yarn rug3

T-shirt yarn rug detail

T-shirt yarn rug border

The rug is nice and cosy underfoot and very absorbant.

It can just be chucked in the washing machine and tumble-dried too – easy!

How to make T-shirt yarn

Here’s how it looks in our bathroom. I love the splash of colour it adds.

T-shirt yarn rug

So, if you fancy having a go at making your own T-shirt yarn – what will you make with it?


9 Comments

The Big Comic Relief Crafternoon – Come And Join Us!

I’m hosting a Crafternoon to raise funds for Comic Relief – this Red Nose Day event was thought up by Mollie Makes magazine.

Keep abreast of all the news, including events near you, on The Big Comic Relief Crafternoon Facebook page.

A5 flyer with border


37 Comments

Wrap Dress And Frilly Knickers (Diaper Cover) For A Baby Or Toddler Girl

As I mentioned in the past, I have been sewing for a very long time. After my daughter was born, I made most of her clothes and she was the best dressed baby in town!

My “little” girl is now almost twenty-four and I no longer sew for her, so any excuse to create pretty little outfits is seized – this cute little two-piece is for someone I will be visiting at the weekend.

I had some cute fabric left over from a previous project and there was just enough to make a little wrap over dress using this pattern. I used some coordinating pink checked fabric to line it, making it reversible, and made some matching pants (pattern here).

baby wrap over dress and frilly pants

The back of the dress splits and shows off the adorable frills on the back of the pants.

baby wrap over dress and frilly diaper cover

Two lime green buttons are a bold choice to compliment the bold design.

baby wrap over dress green buttons

Did I mention that it is fully reversible?!

Either for a different look or to get more wear out of it before it hits the laundry bin:)

Not the knickers.  (Although I did once suggest this to No.1 Son when he ran out of clean boxers because he didn’t bring his dirty laundry downstairs).

baby wrap over dress and frilly pants front

Why aren’t more clothes this practical?

Imagine how much less stressful it would be if you stopped for breakfast before a meeting and you spilled ketchup all down the front of your shirt.  Unless you keep a spare in your bag for just such an eventuality (really?), you could just turn it inside out and, hey presto, clean shirt!

baby wrap over dress and frilly pants back

baby wrap over dress red button

No more struggling to pull a dress on over a wriggly babies head either – this one just wraps around and buttons up at the shoulders.

baby wrap over dress

A contrasting pockets adds a bit of interest. Trimmed with coordinating lilac ric-rac, a flower cut from the main fabric has been appliquéd on and a bit of fun free machine embroidery added to finish it off..

baby wrap over dress with pocket

In the words of William Morris; “Have nothing in your house that you do not know to be useful, or believe to be beautiful.”

I like things to be useful and beautiful so pockets fall under this category for me. And what’s the point in having a pocket if there’s nothing to put in it?

So I made a little pink felt bunny that will (hopefully) entrance the wearer sufficiently to displace all notions of filling the pocket with worms. (Yes, little girls do that too!).

toy rabbit in pocket

Bunny has embroidered features so is perfectly safe for inquisitive hands.

toy rabbit front

And a bunny isn’t a bunny without a fluffy white bob-tail, is it?

toy rabbit back

baby wrap over dress and frilly pants with toy rabbit

So there you have it – a gorgeous little wrap dress and frilly knickers for a baby girl or toddler, which is reversible to boot!


32 Comments

Sunday Sevens #21

Guests have gone home, Husband has taken No. 3 Son to play in a tennis tournament and No. 2 Son is watching Toy Story with the dogs which all means…….my Sunday Sevens post is on time!

Seven photos taken during the week to give a little insight to my life as organized by Nat over at Threads & Bobbins.

So, here we go….

1. Homemade Blackberry and Apple Pie with fruit I picked and froze in the summer.

Apple and Blackberry Pie

2. A surprise gift from visiting family!

Chickens Hens Umbrella

3. Thinking about hosting a Red Nose Day Crafternoon…..

Red Nose Day Crafternoon

4. My latest creation to be blogged about shortly.

baby wrap over dress green buttons

5. Guess who has something featured in the next “Country Child” magazine…..?

Country Child

6. Pretty Nostalgic members meet up in Salisbury.

Pretty Nostalgic Meet Up

7. Procrastinated right up until the last minute (well, 57 minutes actually) about filing my Tax Return!

Tax Return