Sewchet

Sewing, crochet, crafts, accessories, baking, tutorials,


25 Comments

Sunday Sevens #28

Sunday Sevens #28 – how did that come around so quickly??

This is how Nat at Threads and Bobbins describes the weekly blog series: –

“Each week, we do things that don’t necessarily warrant a full blog post.  You may have made a nice meal, grabbed some bargains on a shopping trip, had a family day out, spotted some beautiful scenery or just done something you feel you want to share.  A Sunday Sevens blog post is the place to share those things.  You take 7 images from your week and post them every Sunday with a small description.  Tag your post using #sundaysevens on your blog and social media.  I also pin the posts onto the Sunday Sevens Pinterest Board.”

Without further ado, here is my selection for this week.

1. Birthday meal with my little girl – we share the same birthday.

Birthday meal

2. My monogrammed, hand embroidered napkins have been featured in Country Child magazine – they’re bottom left on the page.

sewchet in Country Child

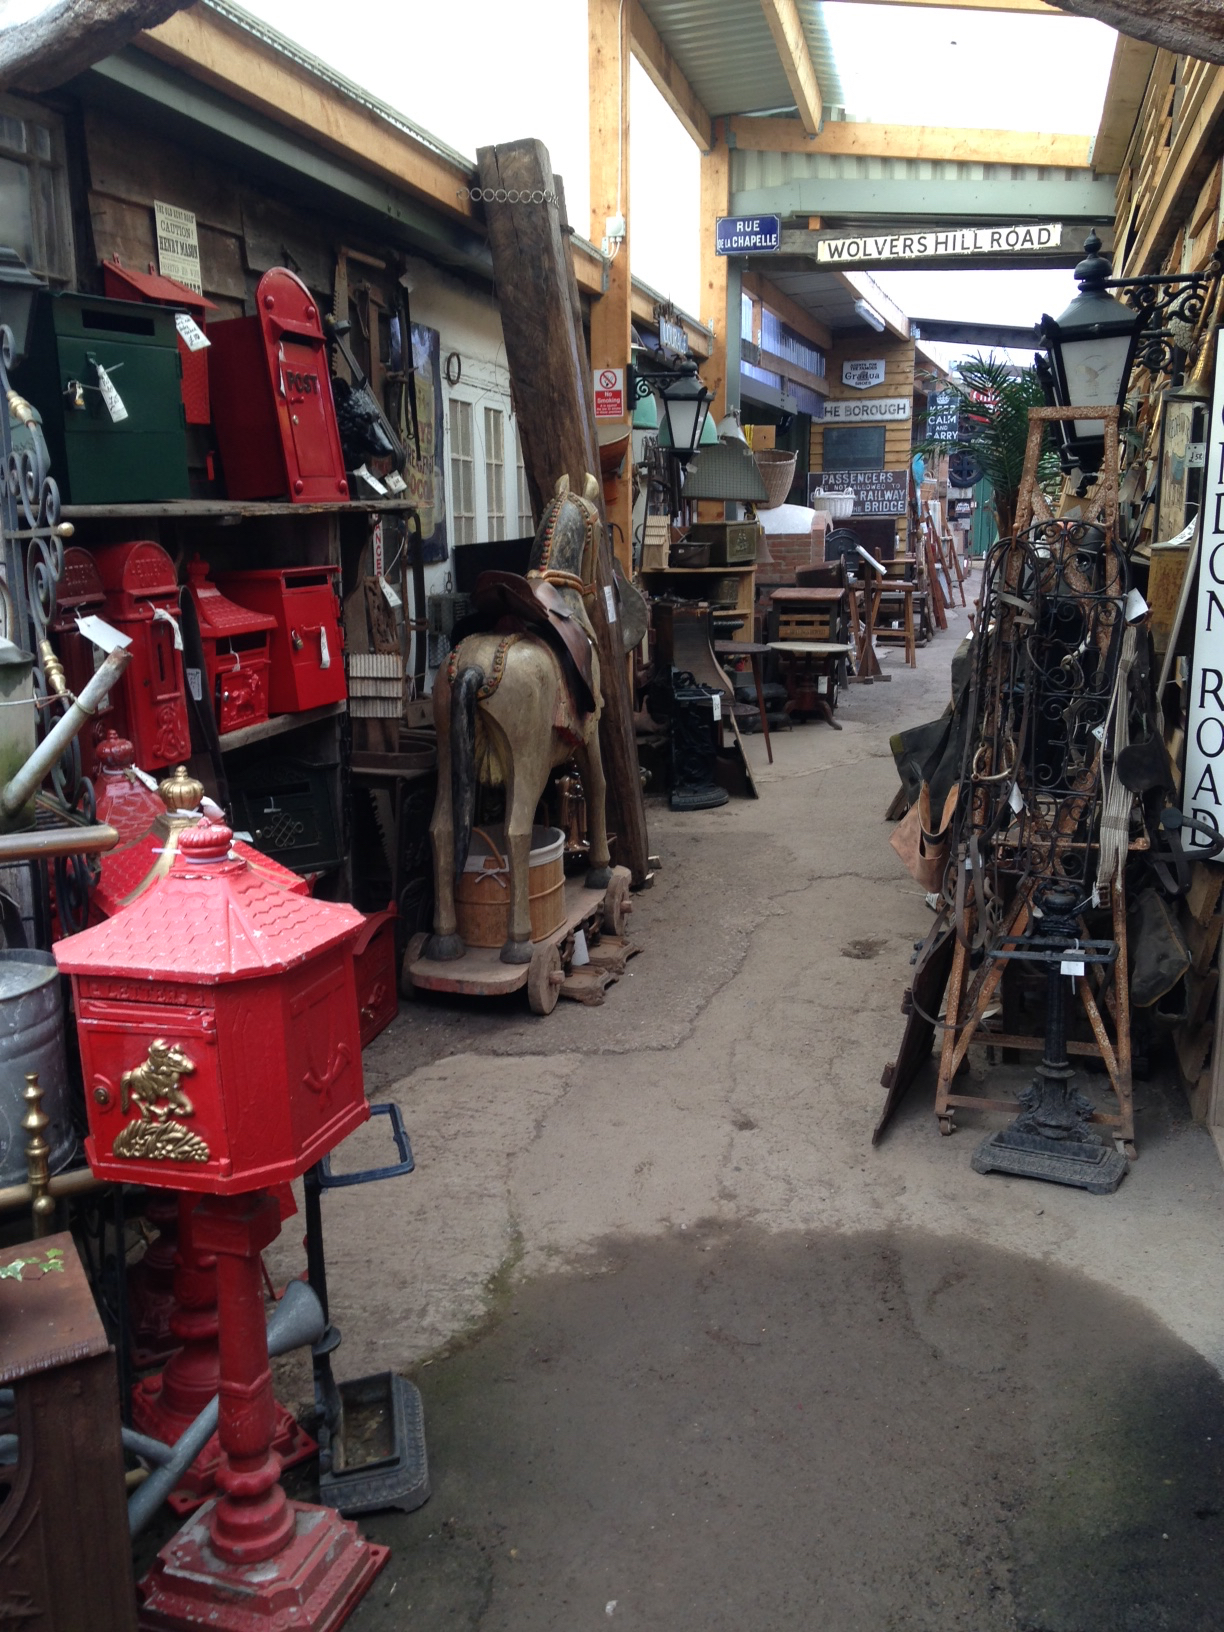
3. A trip to my favourite place, Wells Reclamation. I’m going back for a post box.

Wells Reclamation

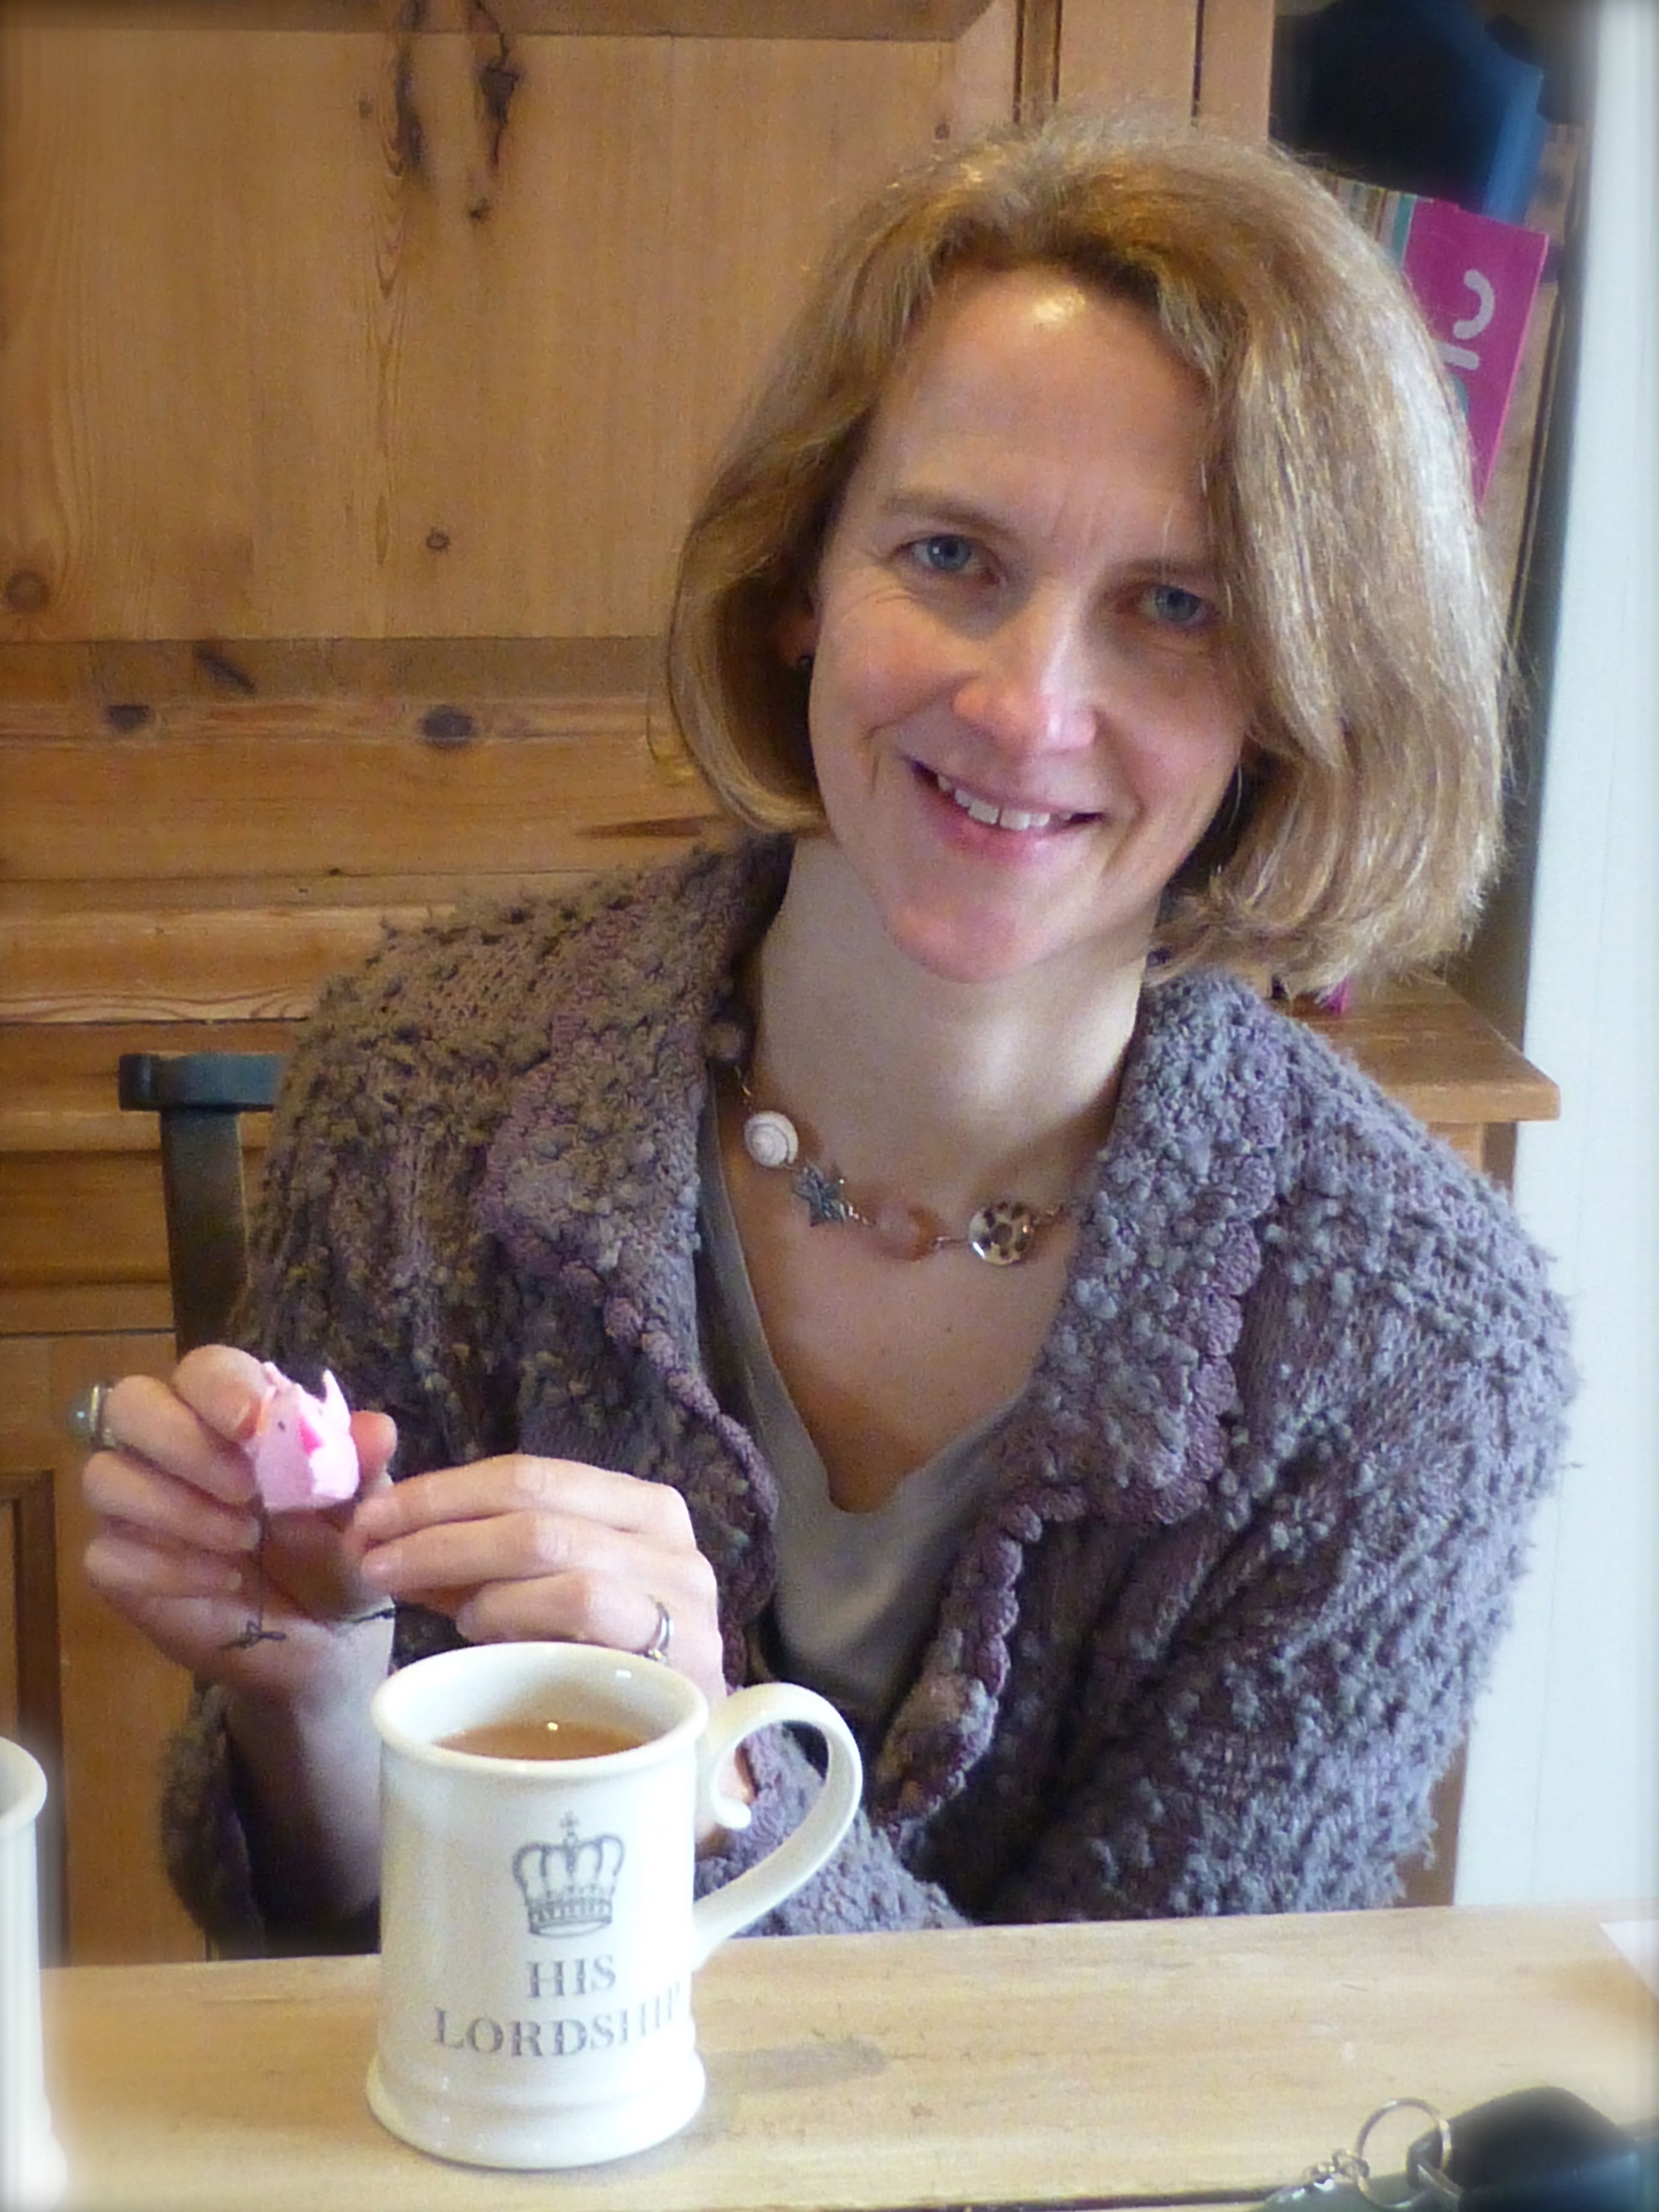
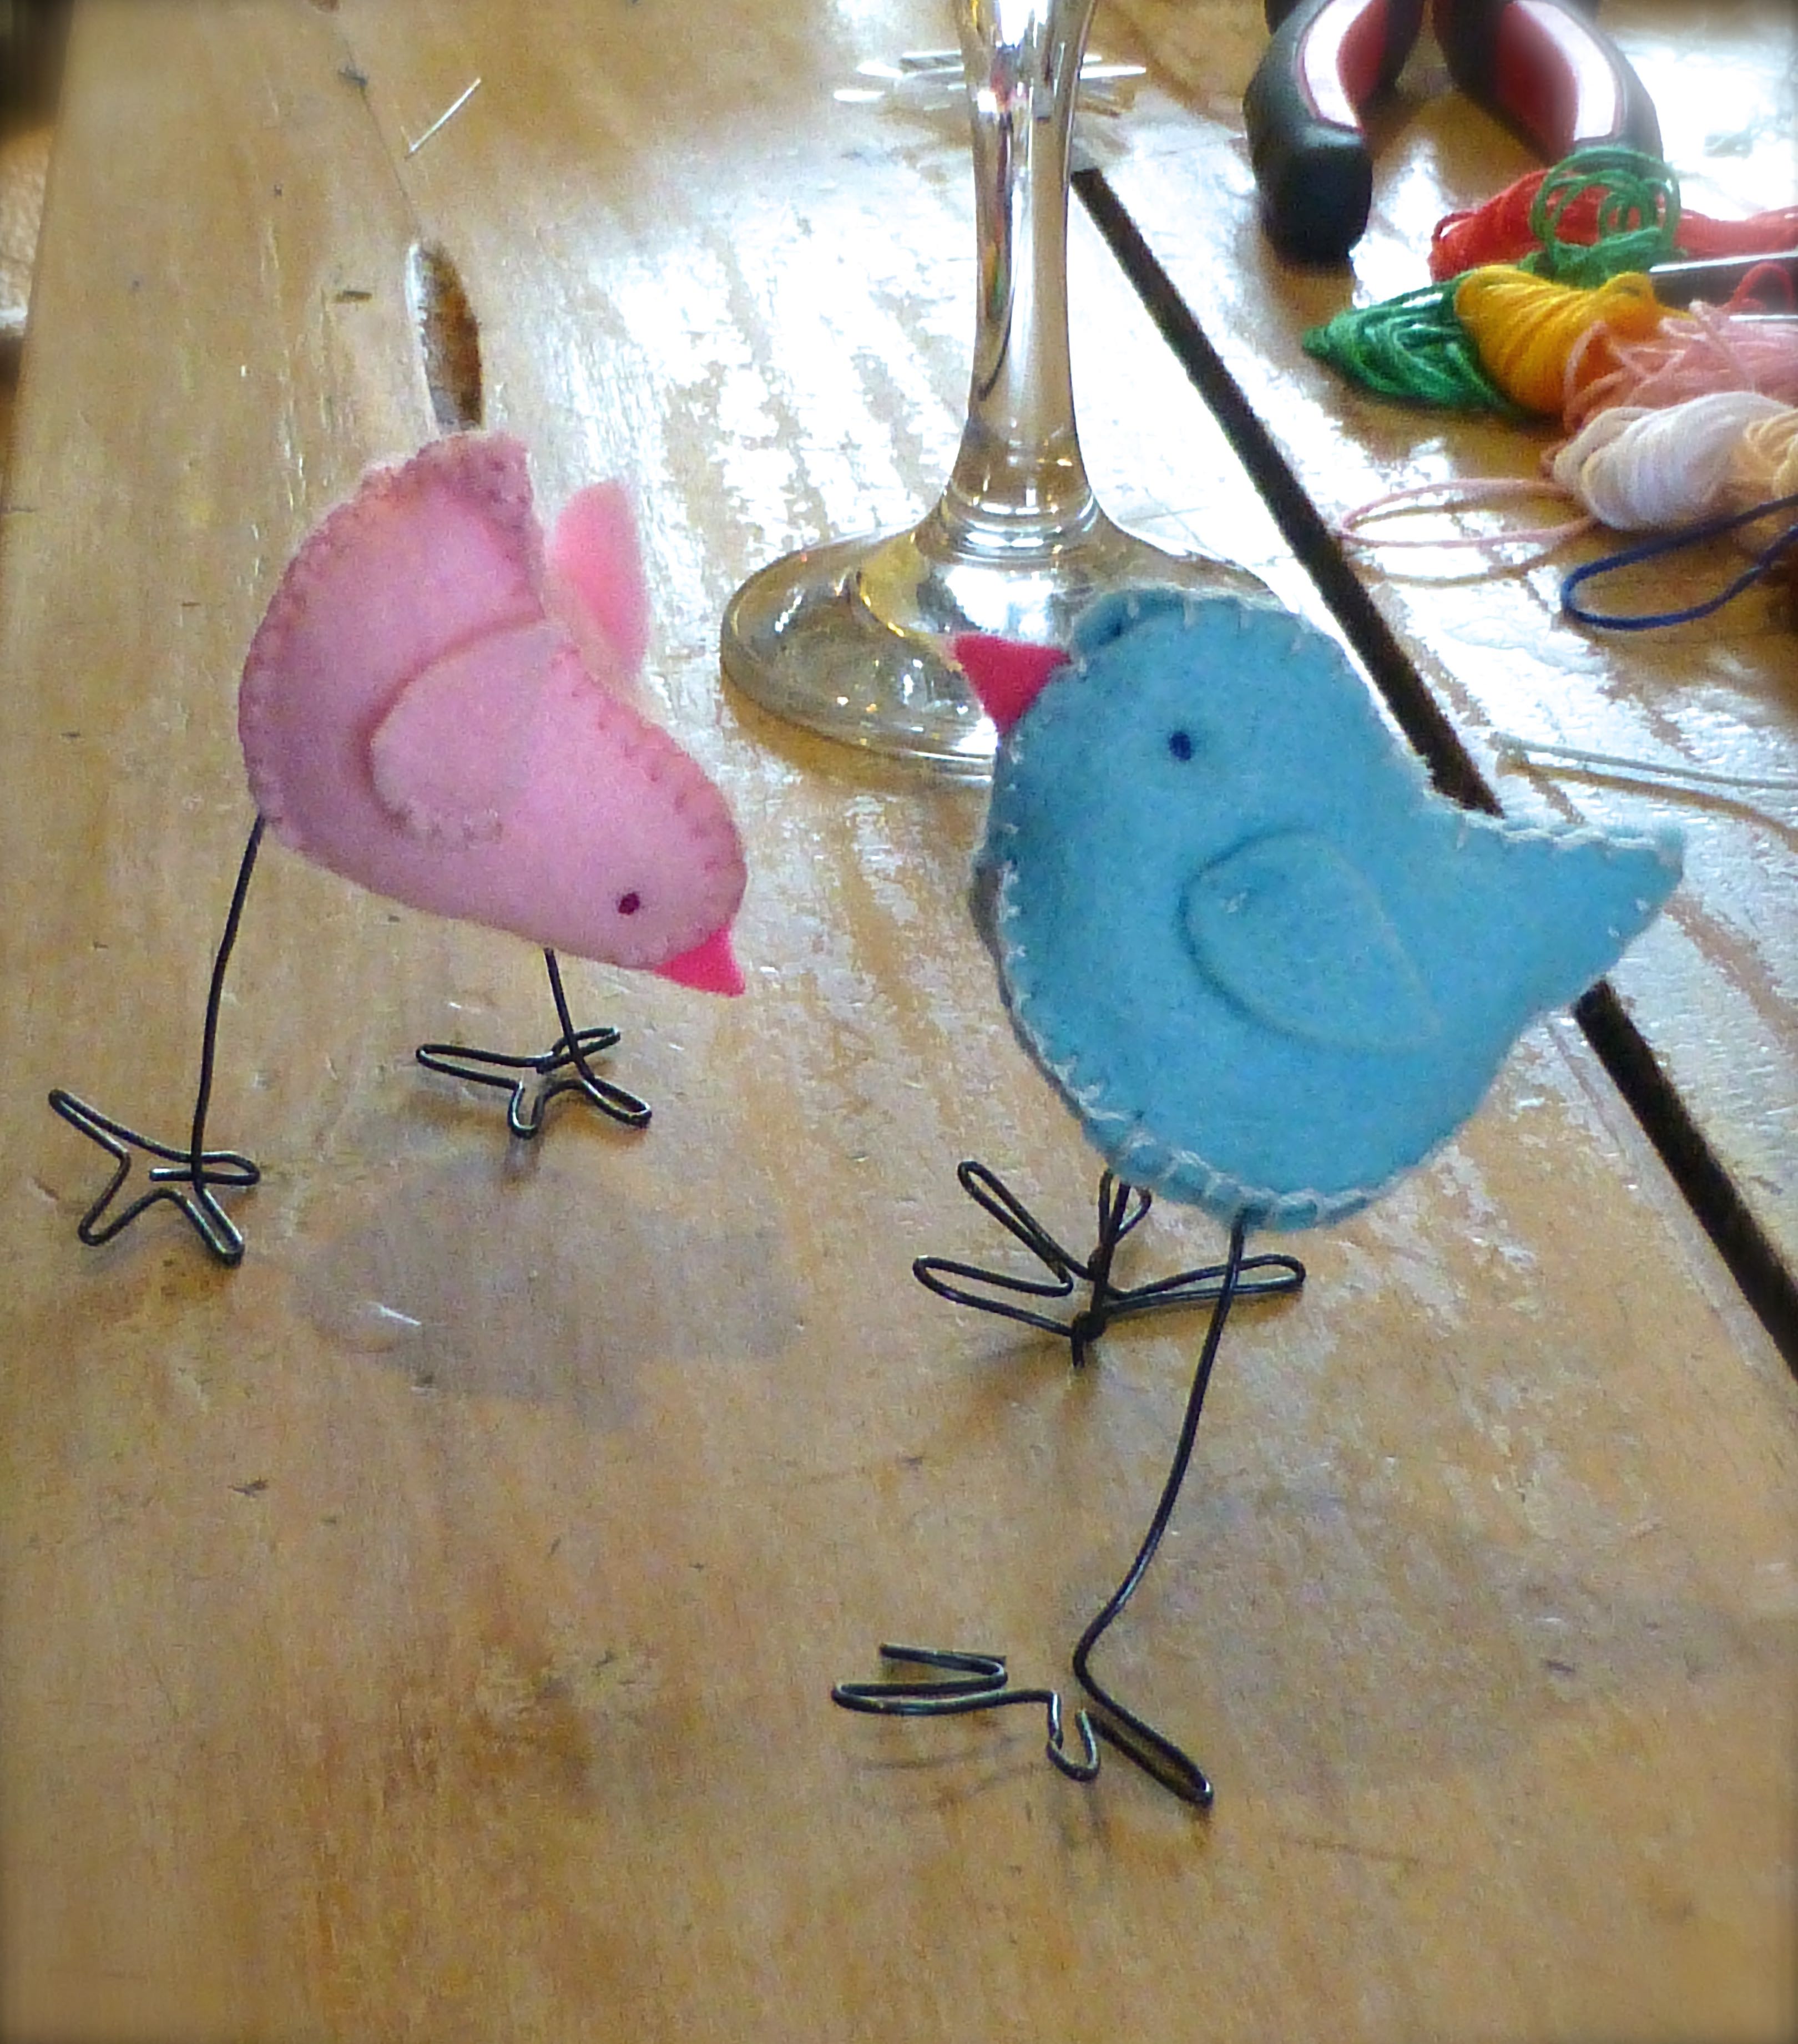
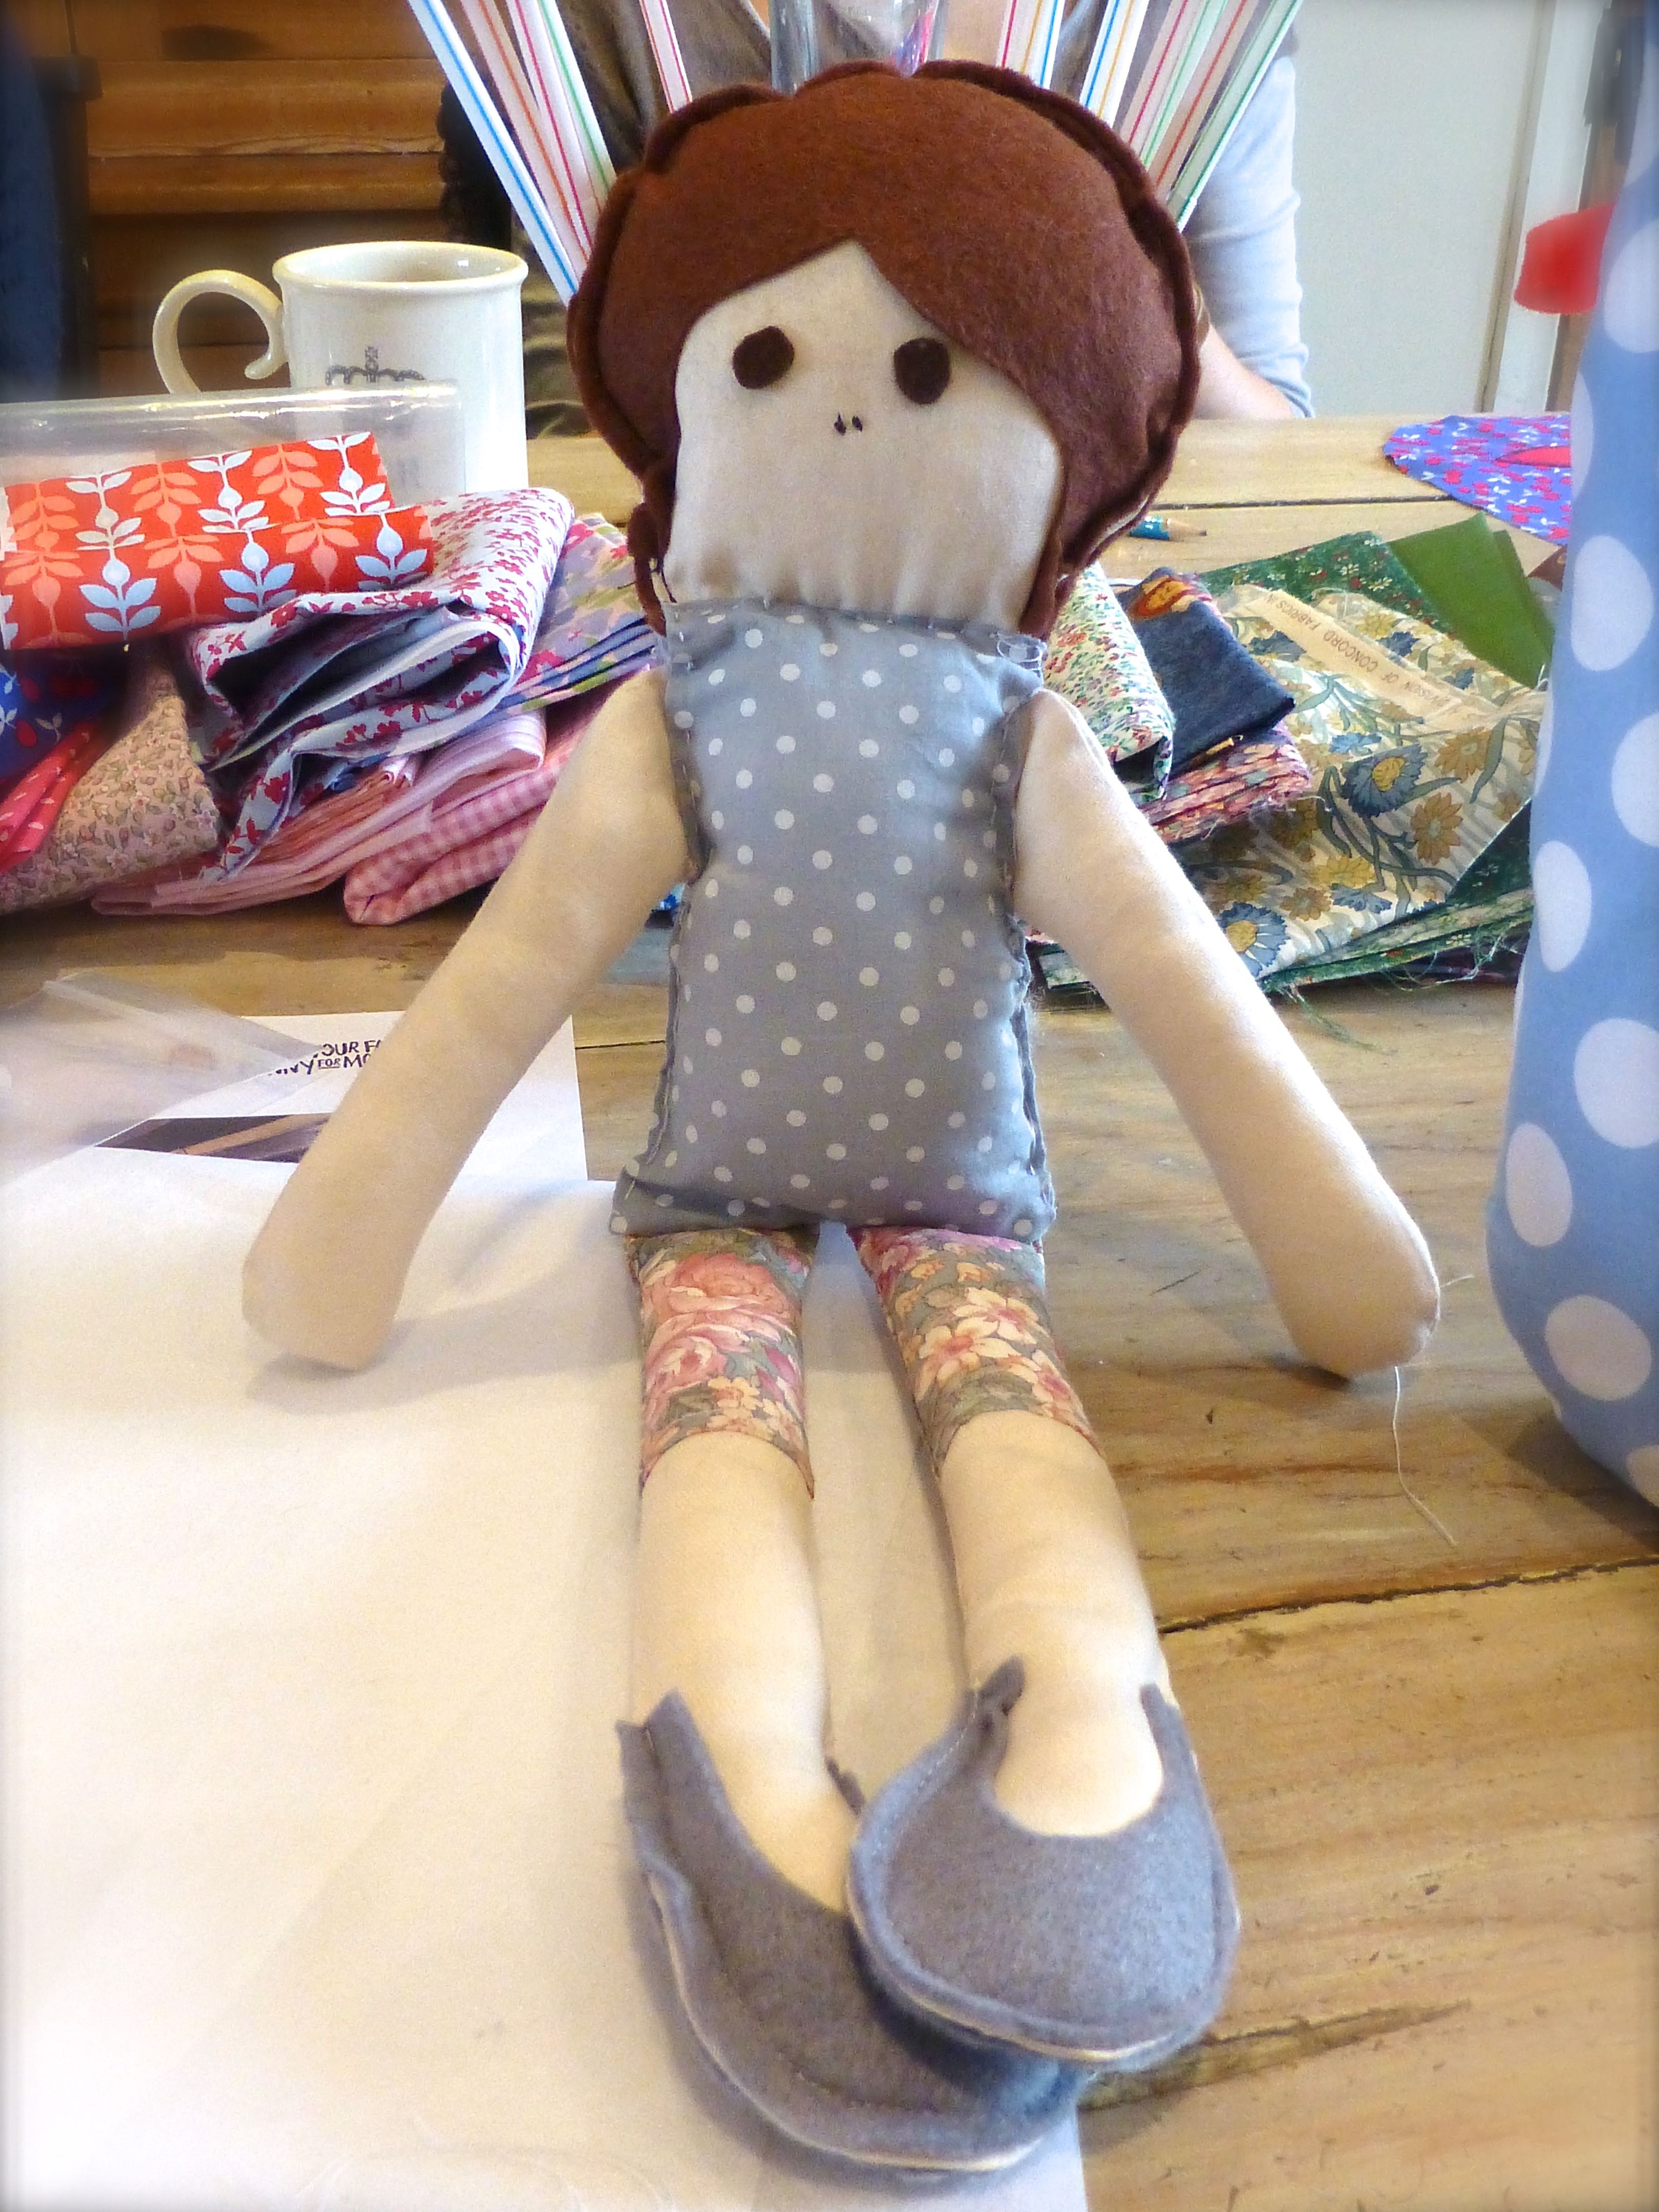
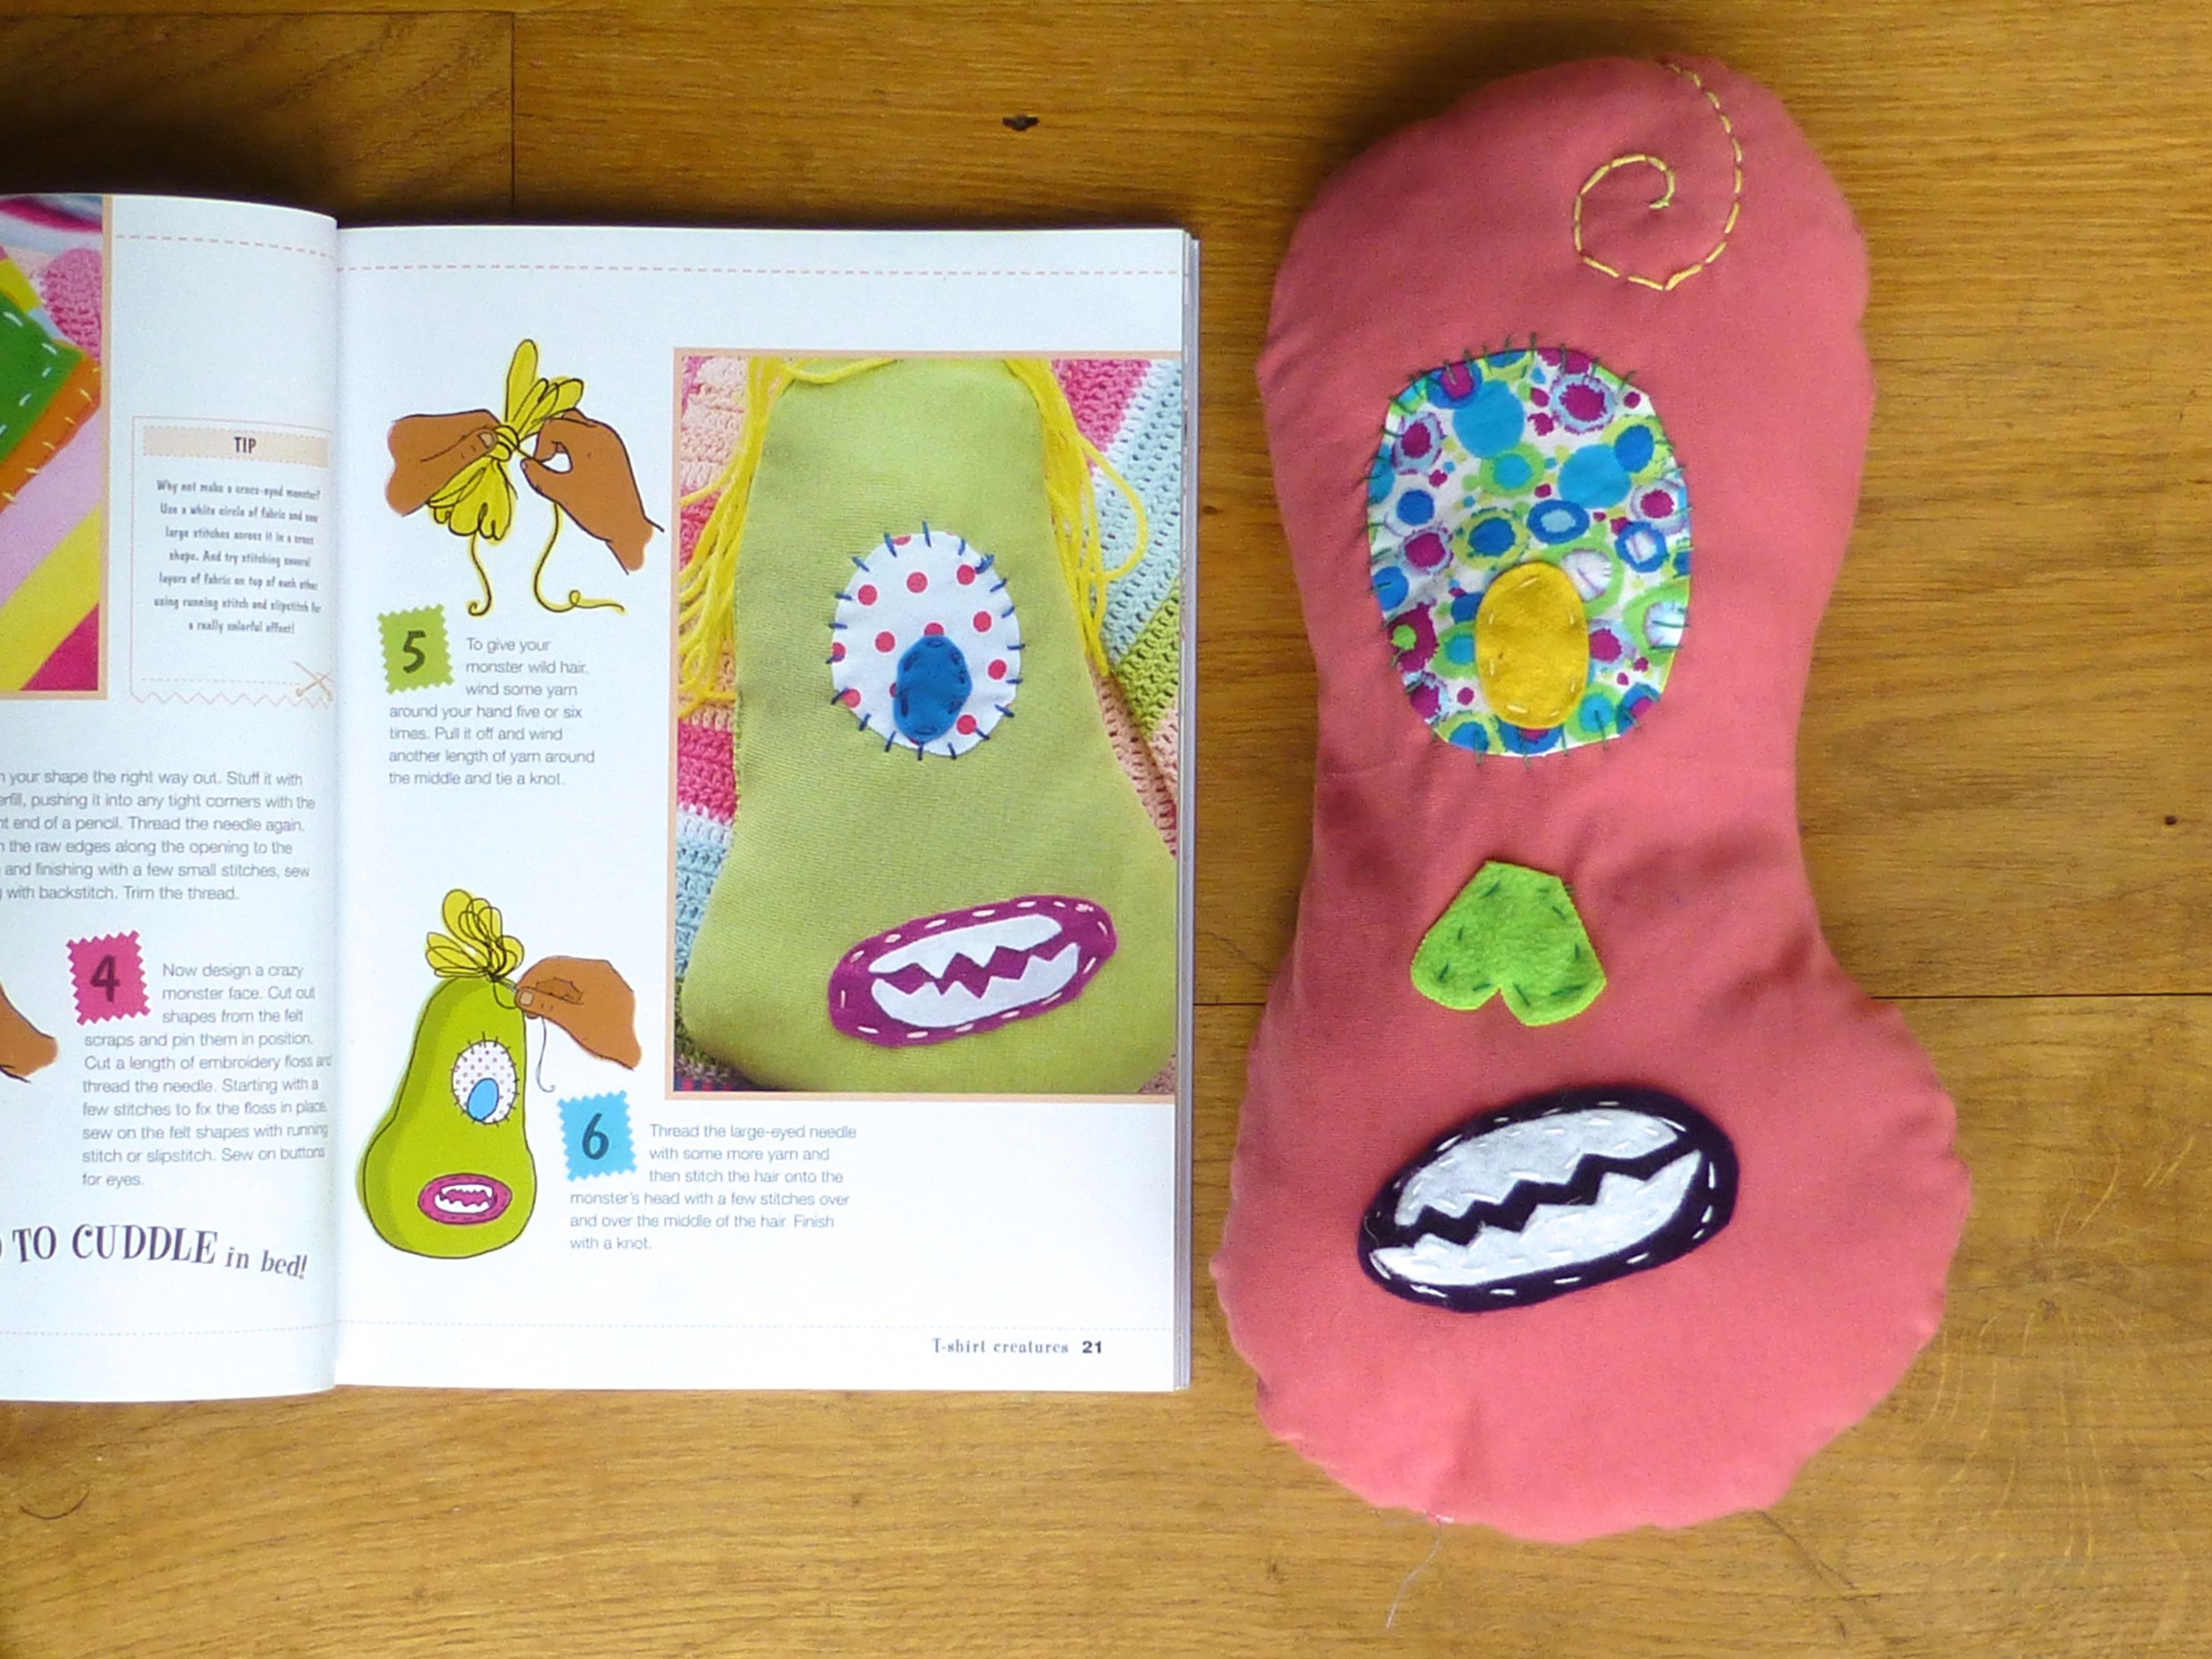
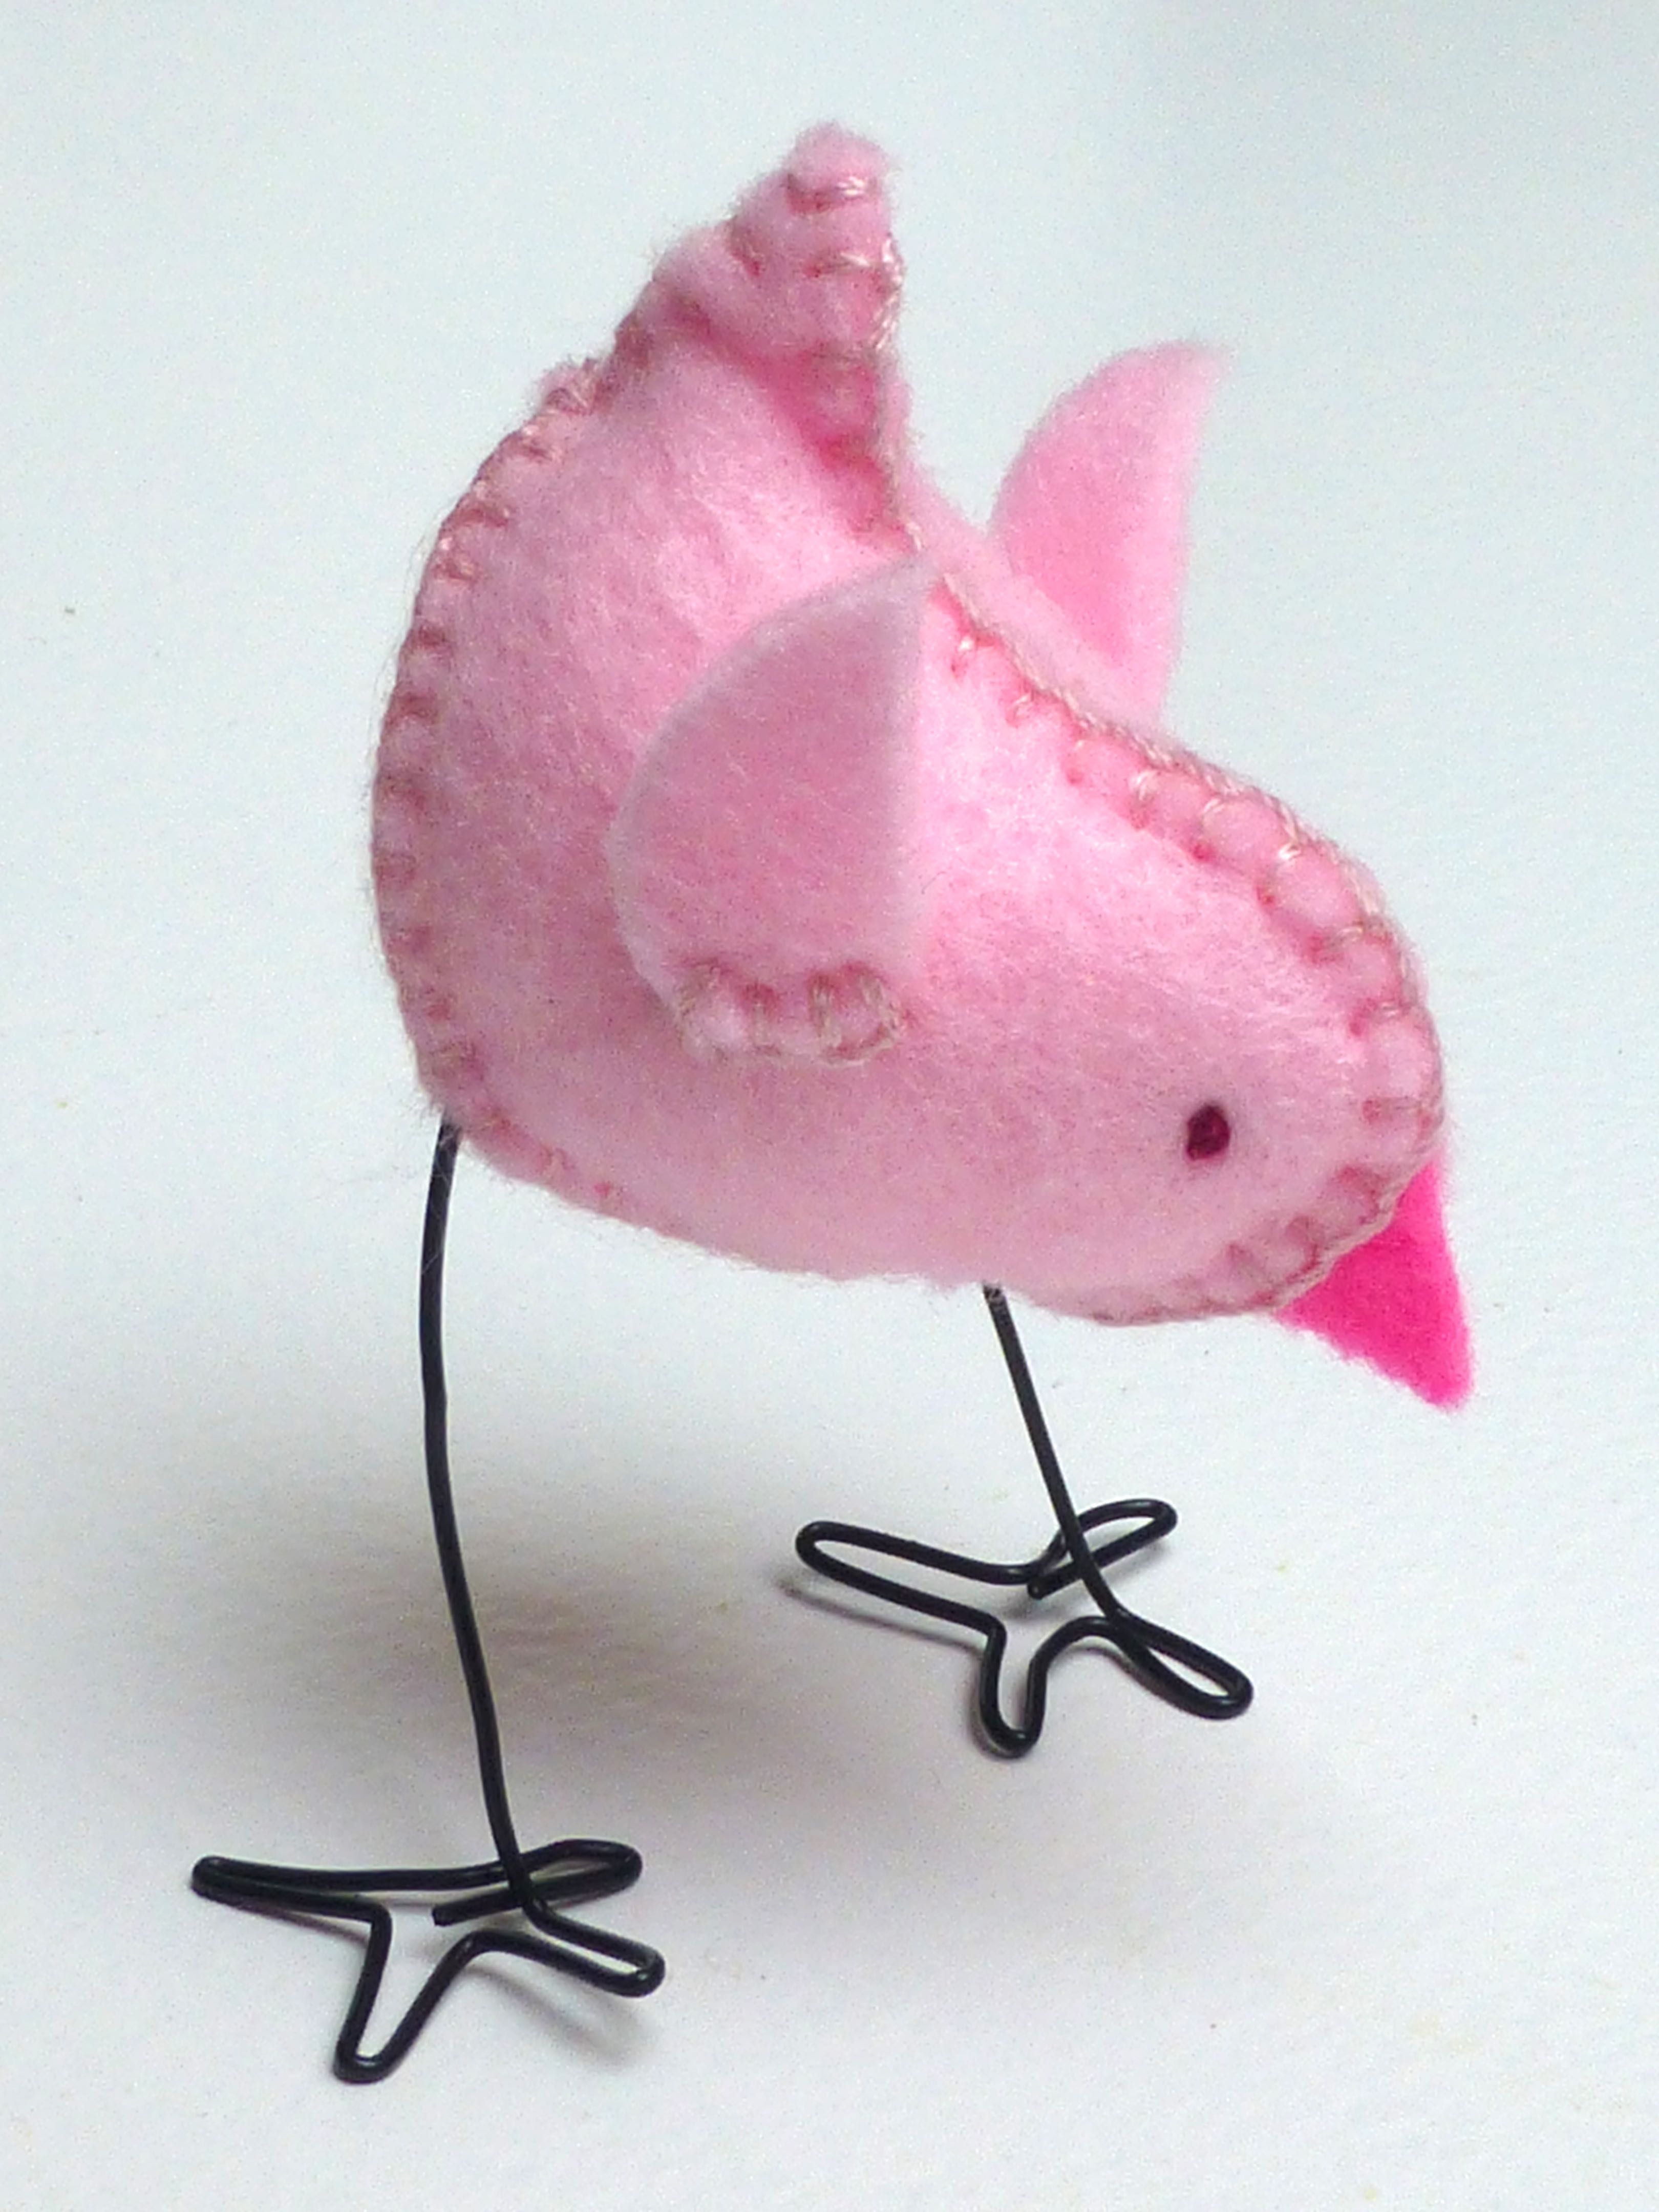
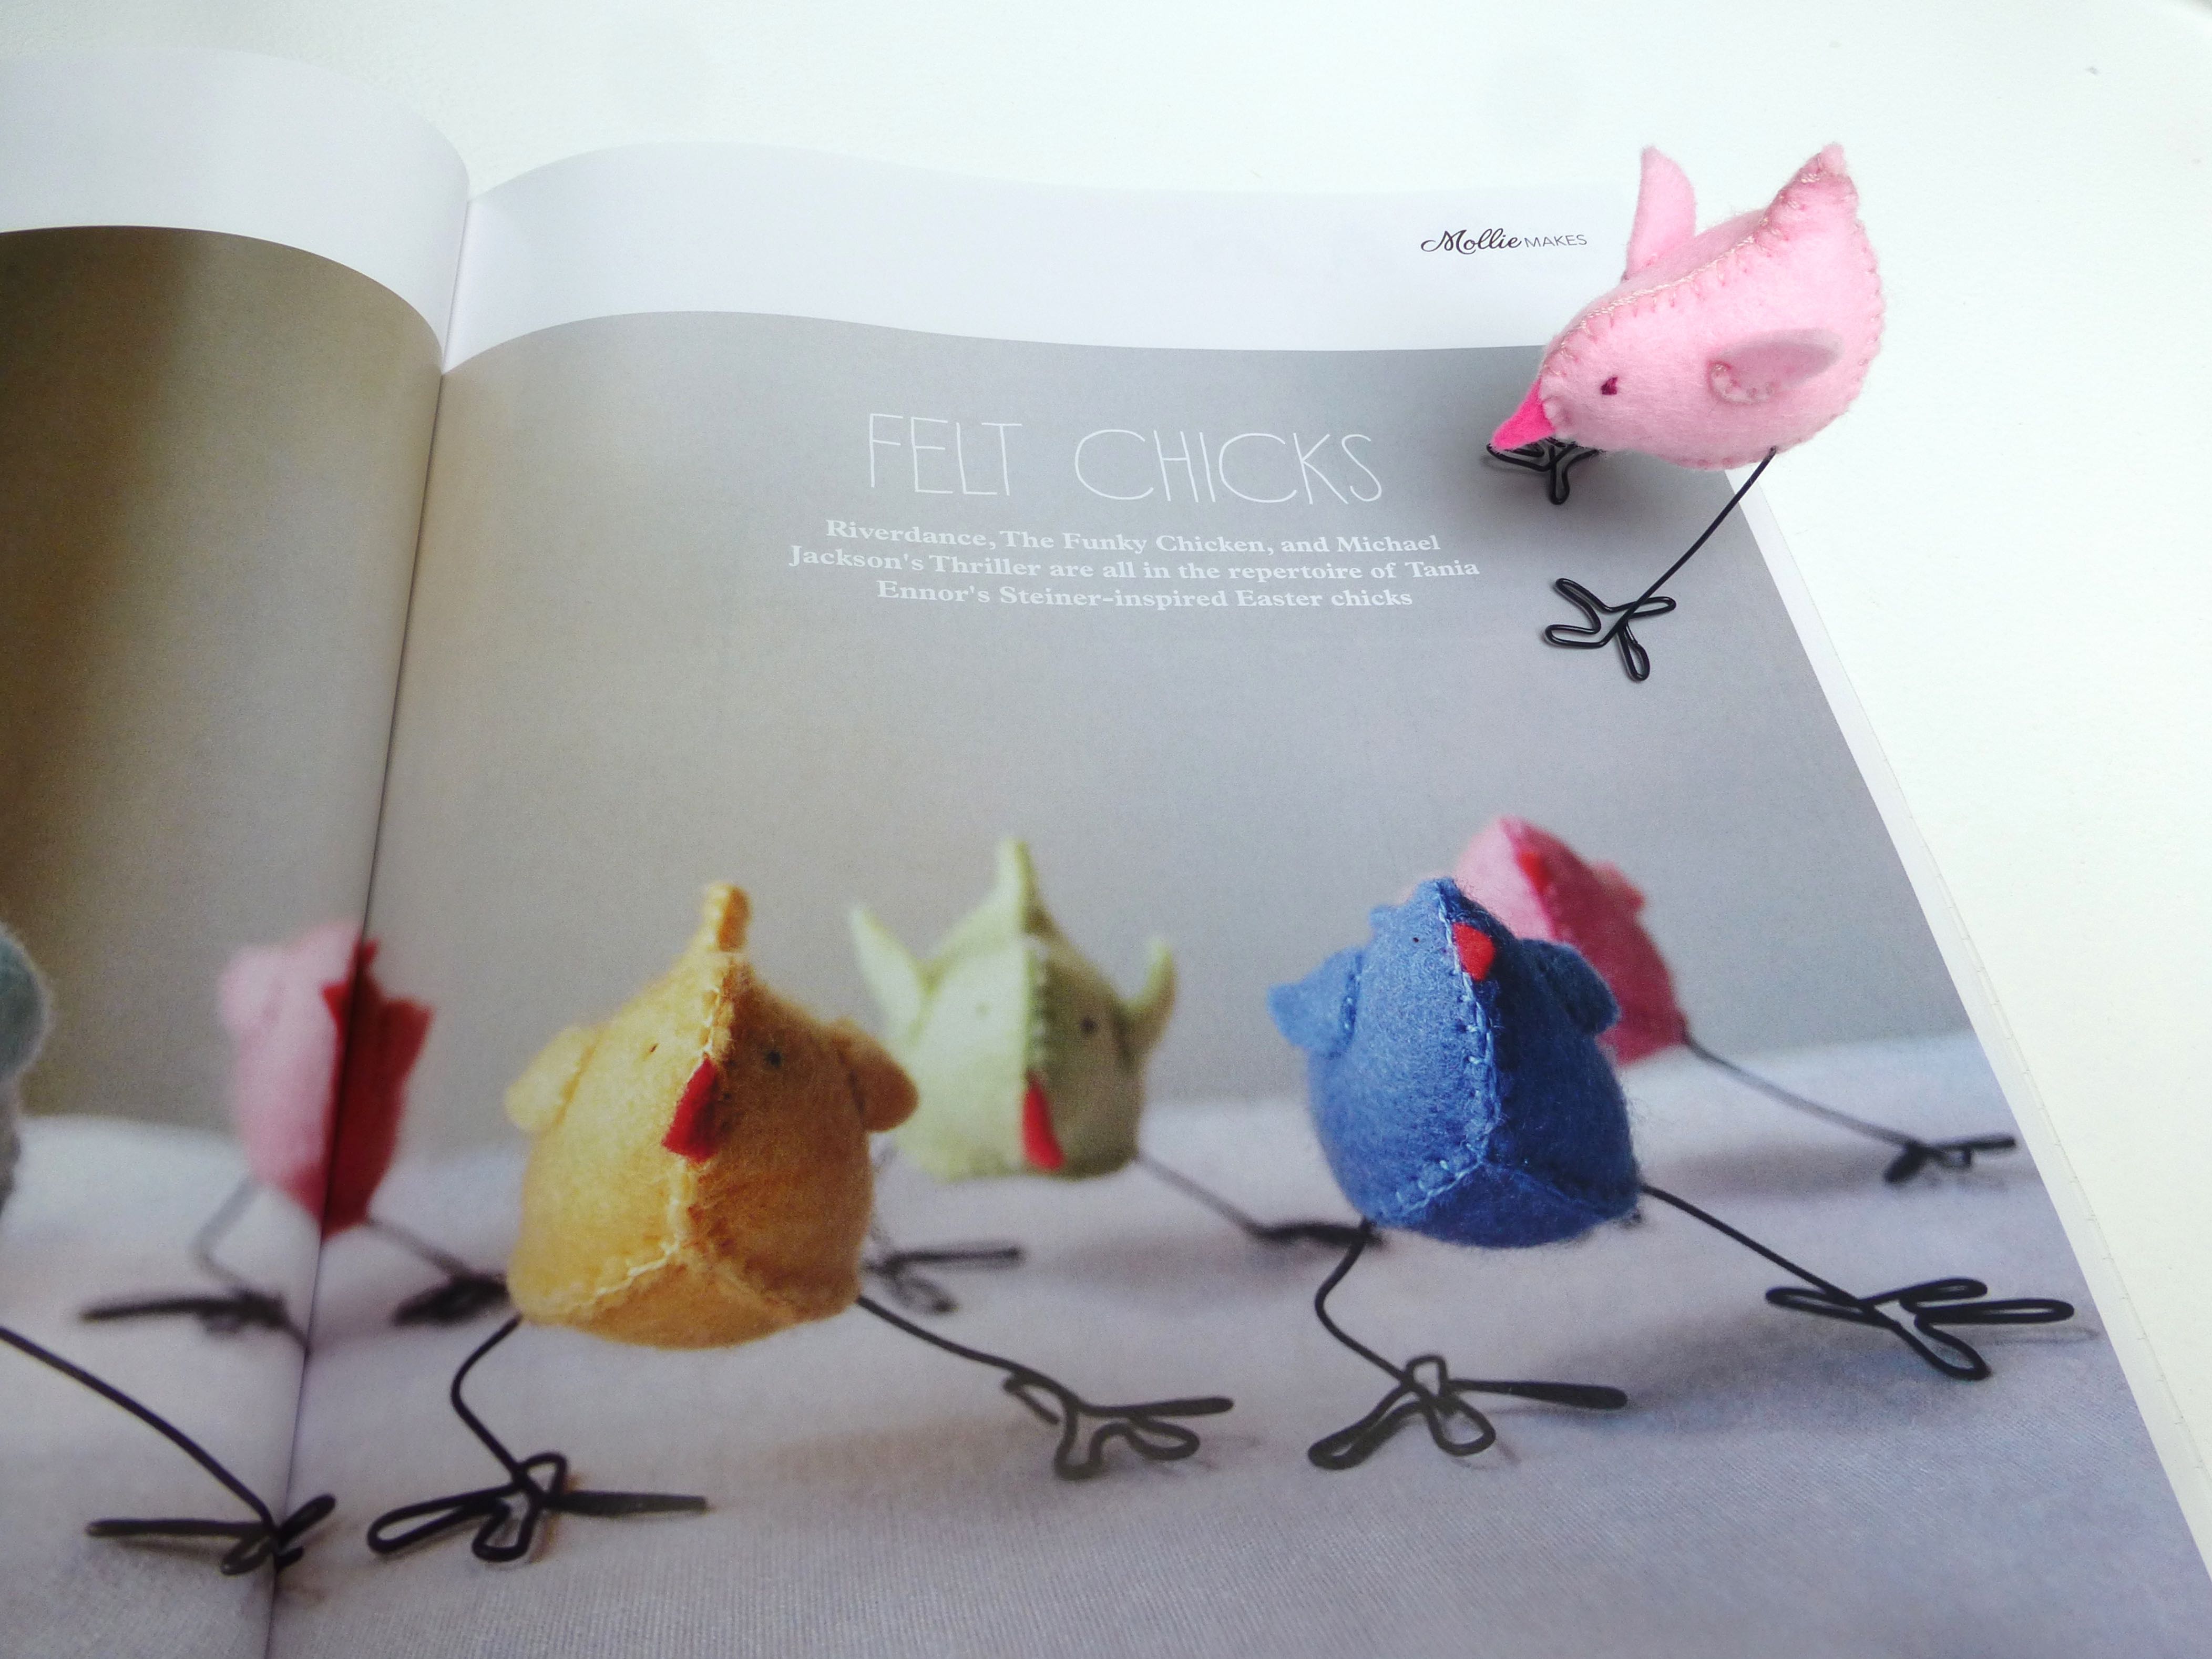
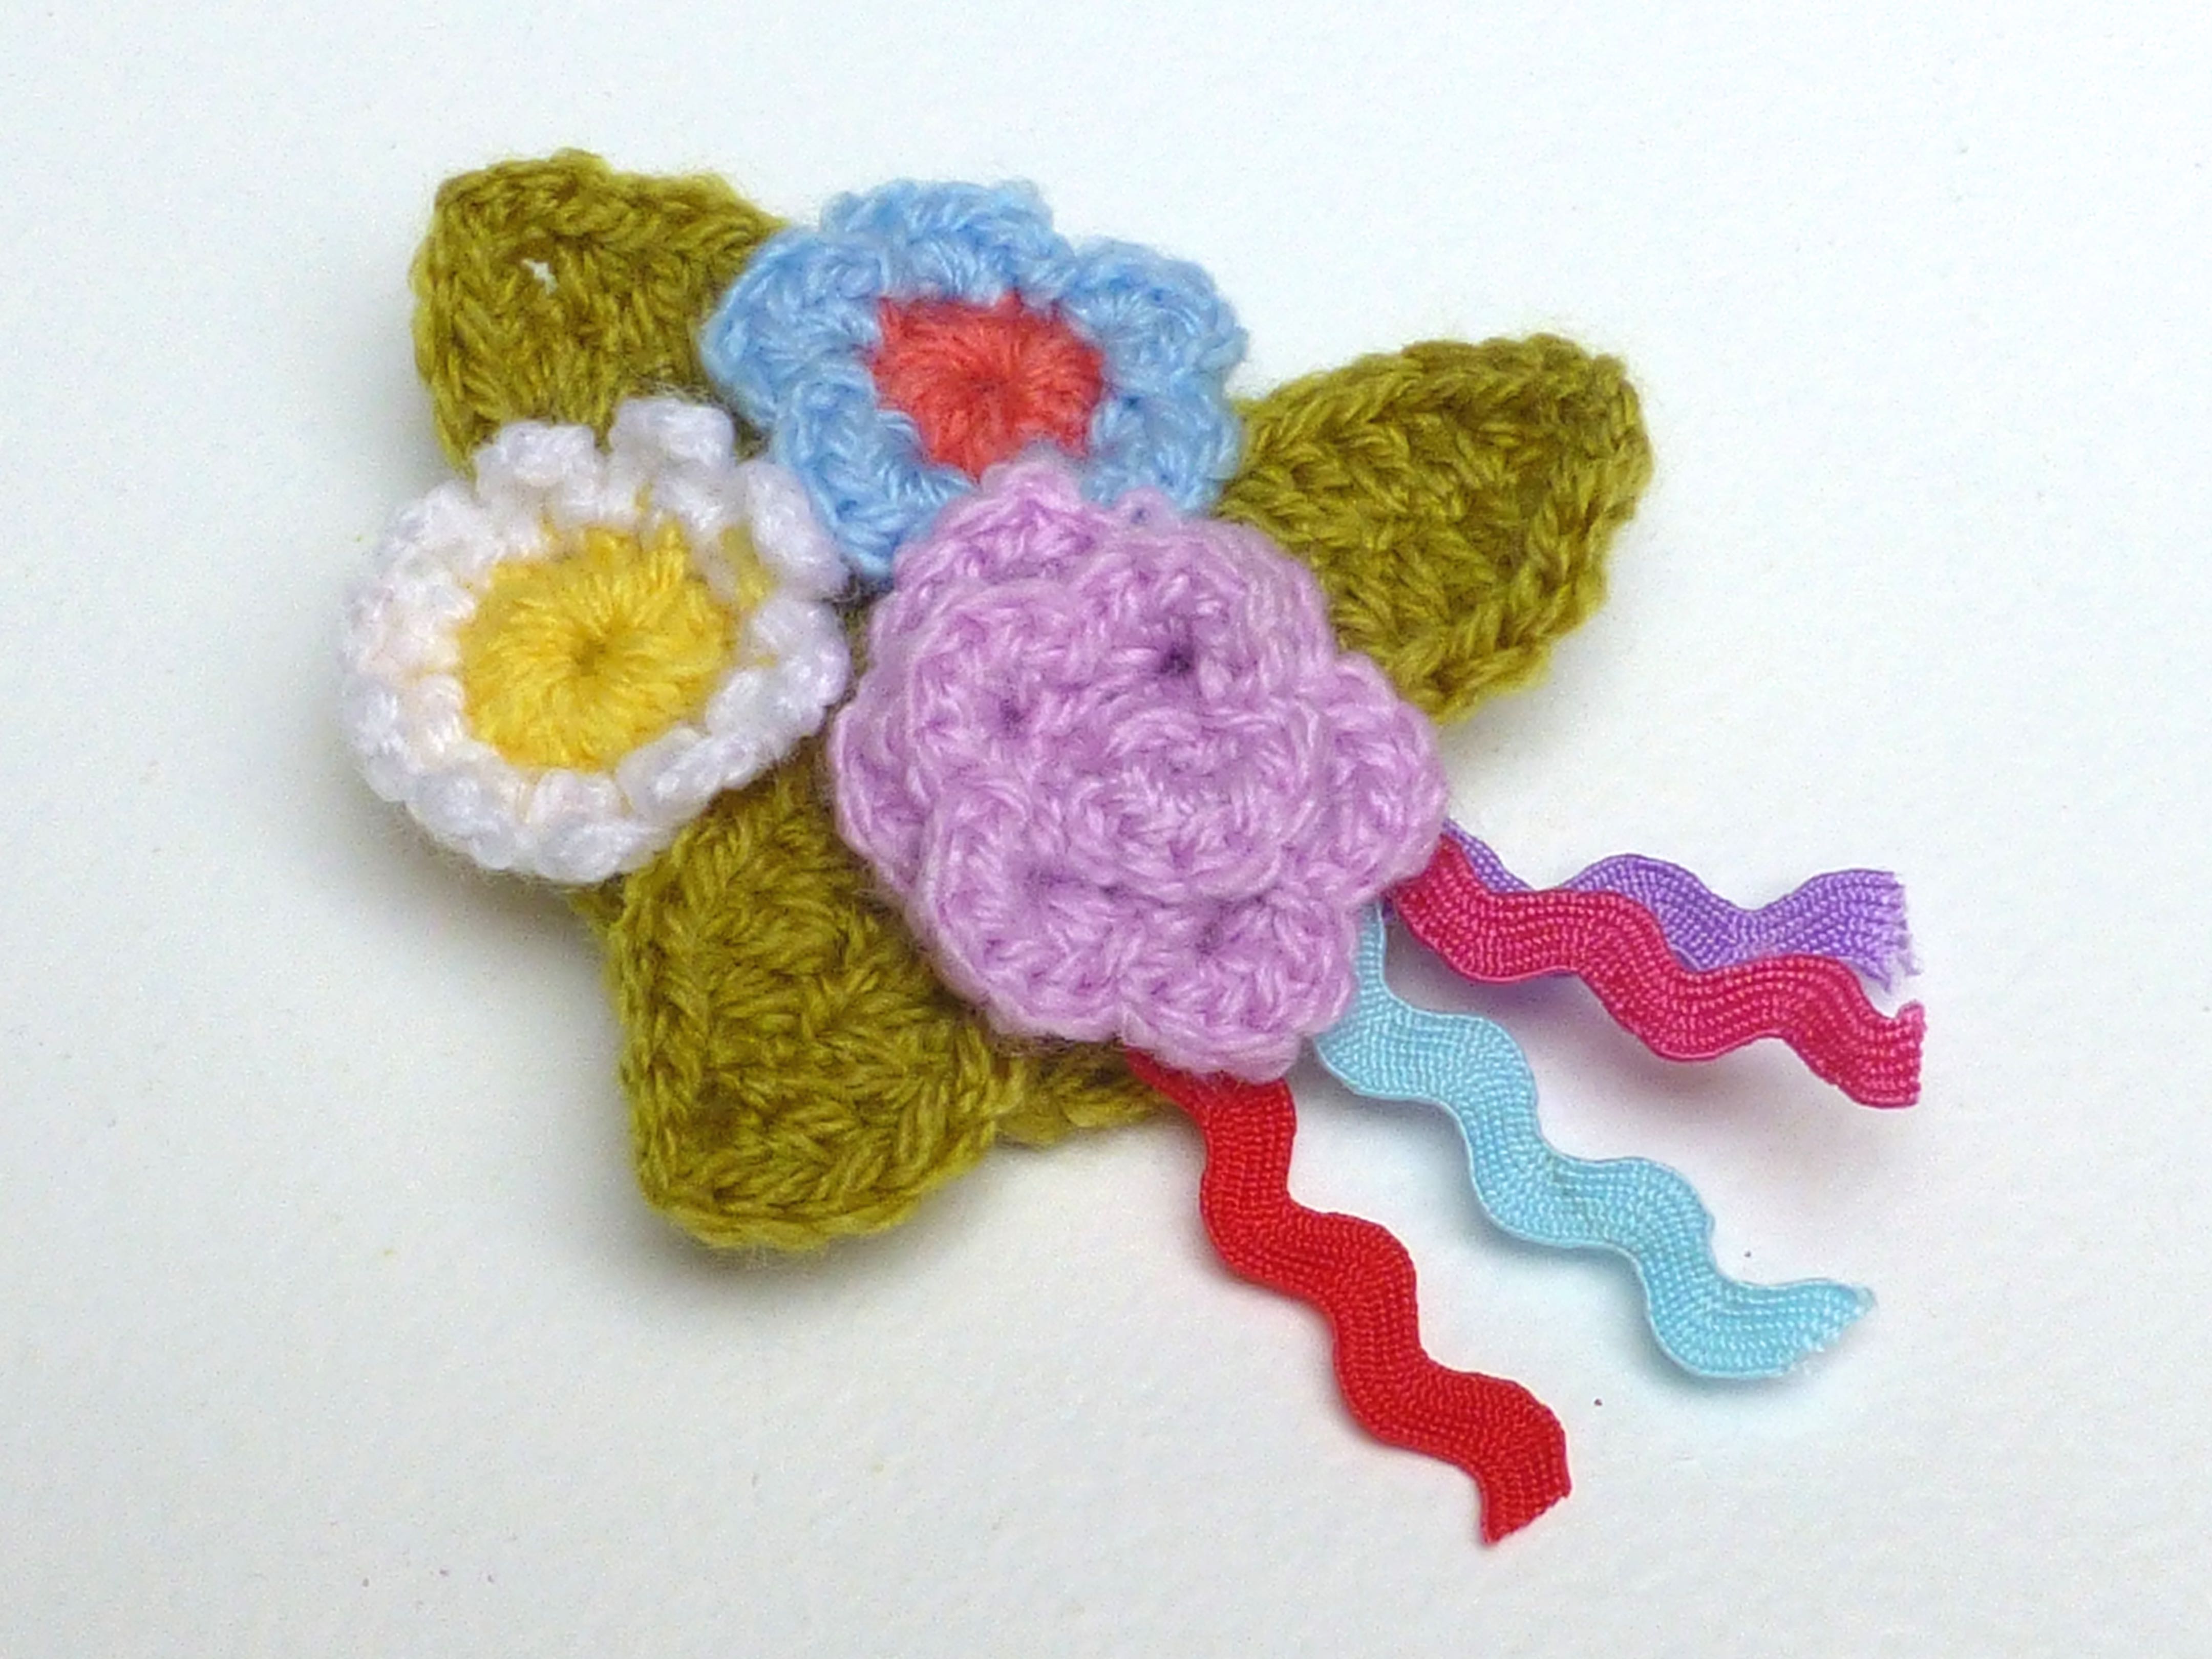
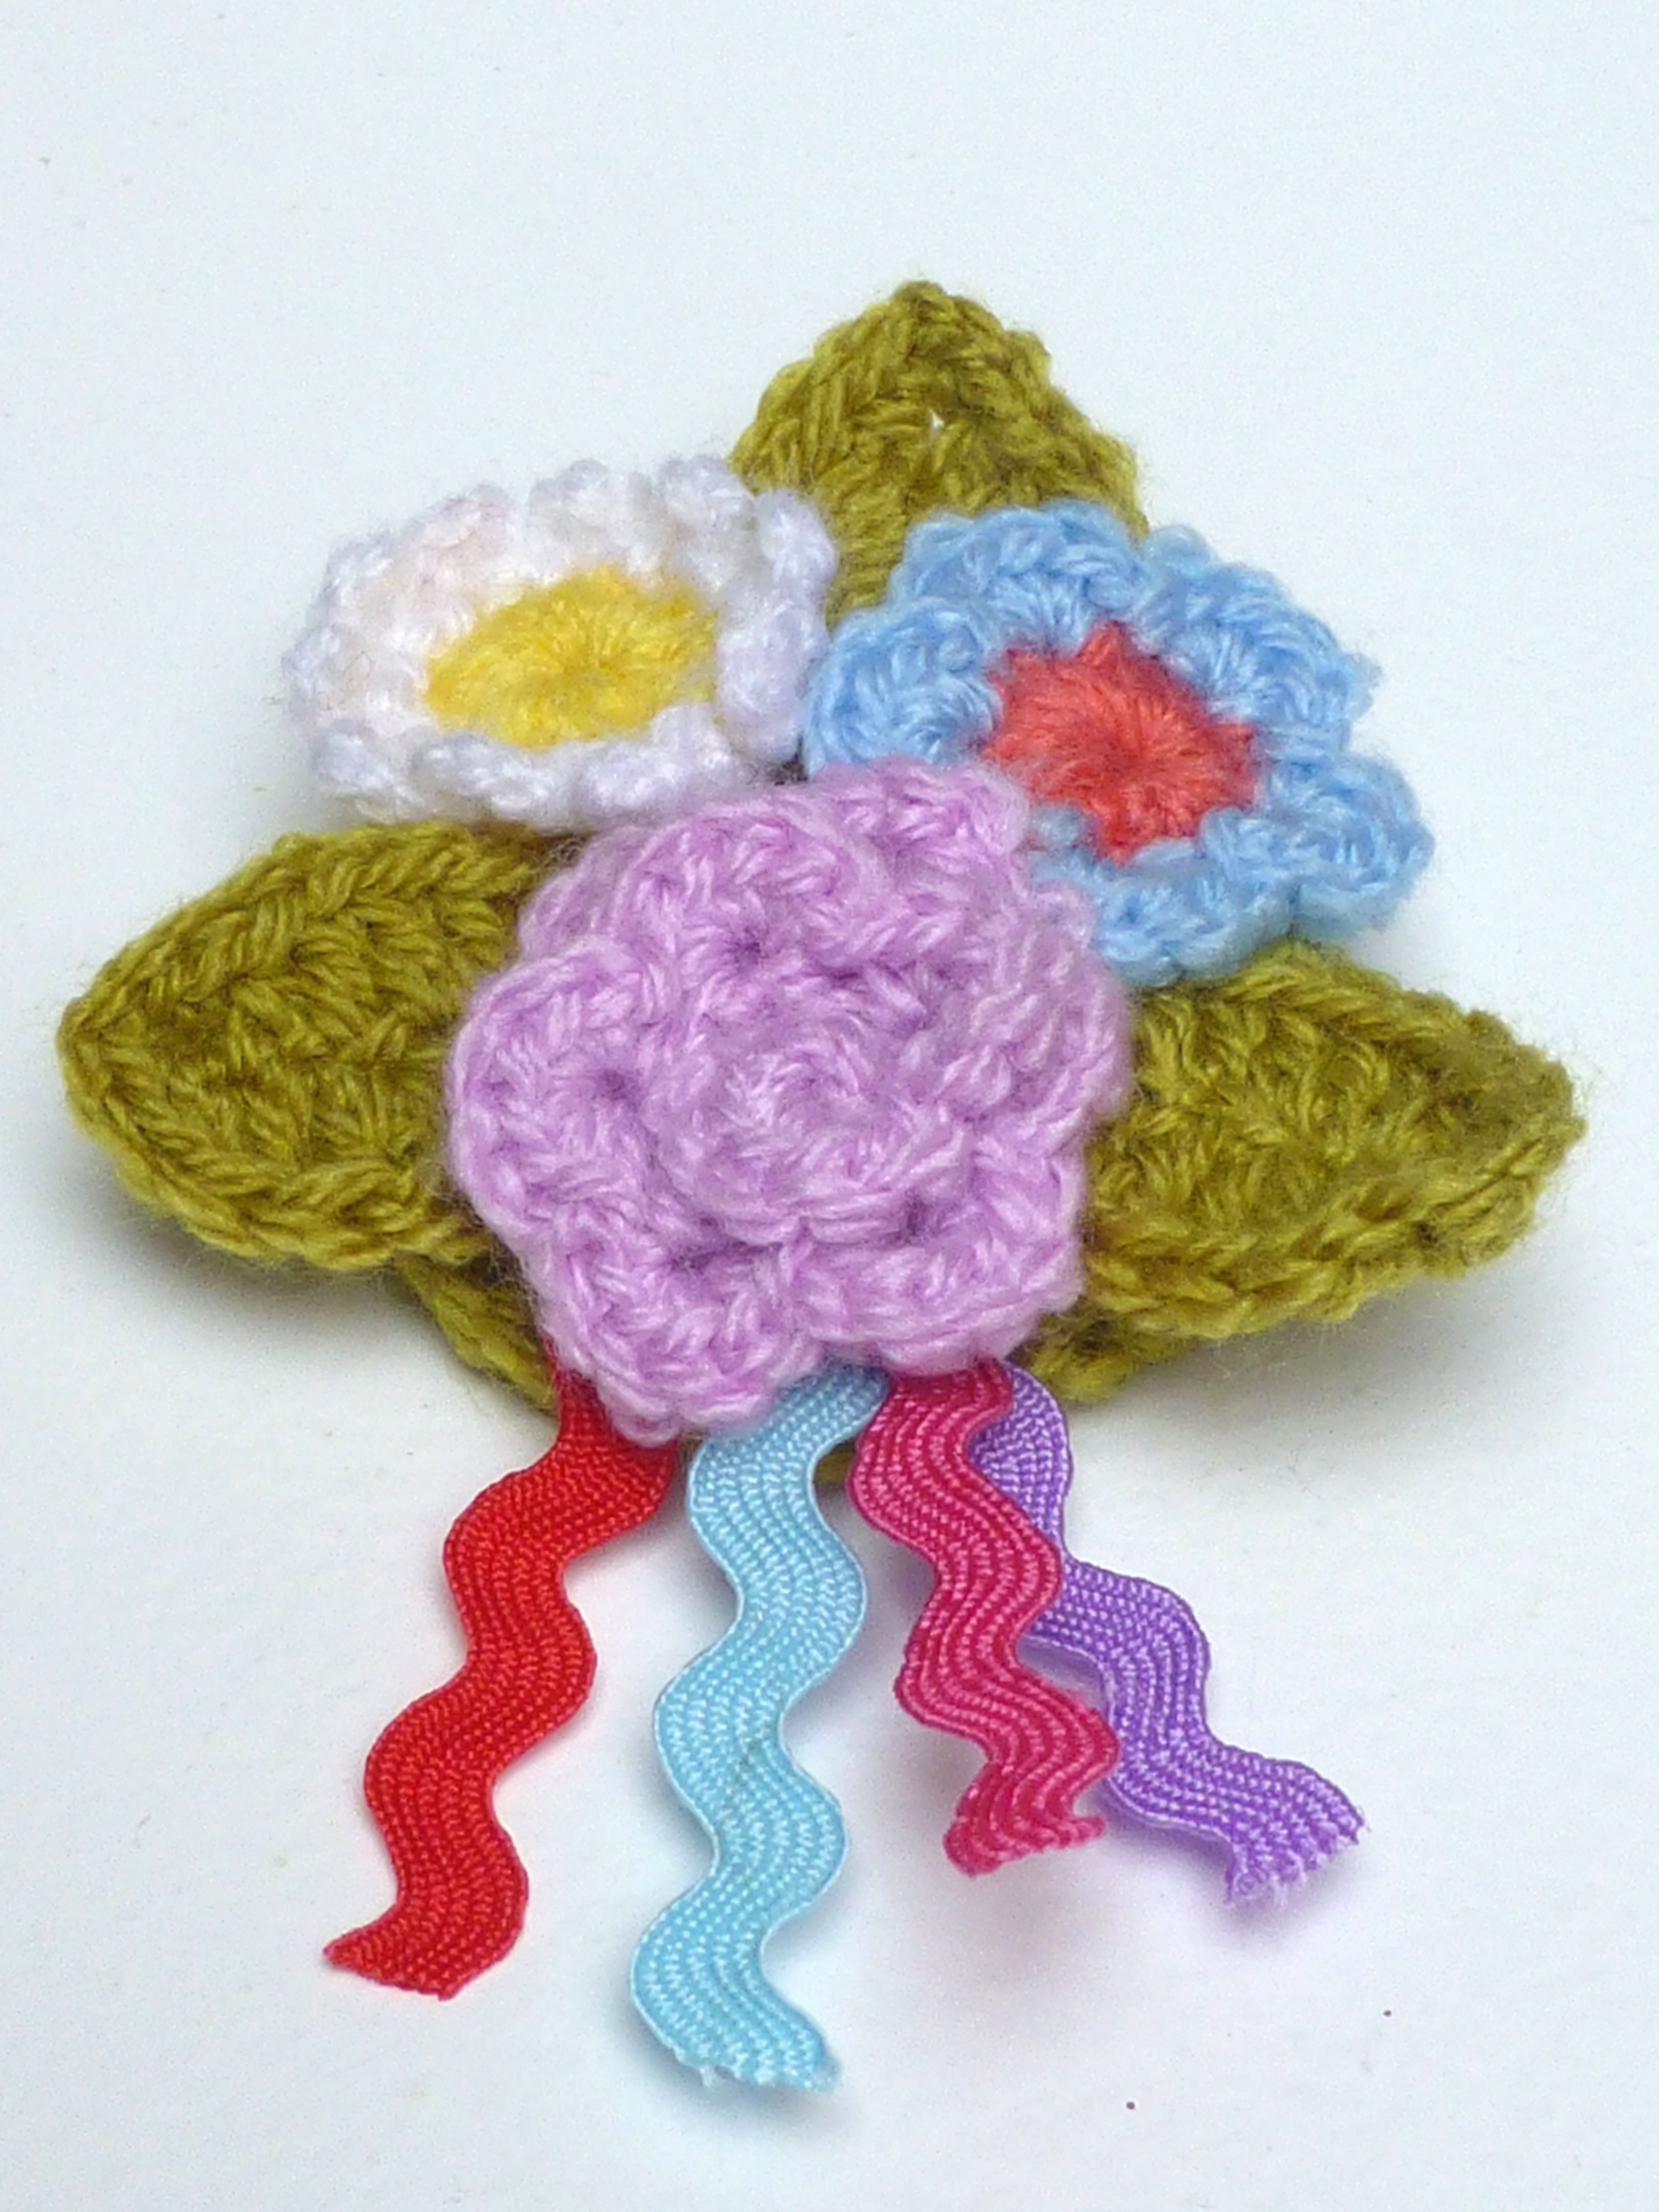
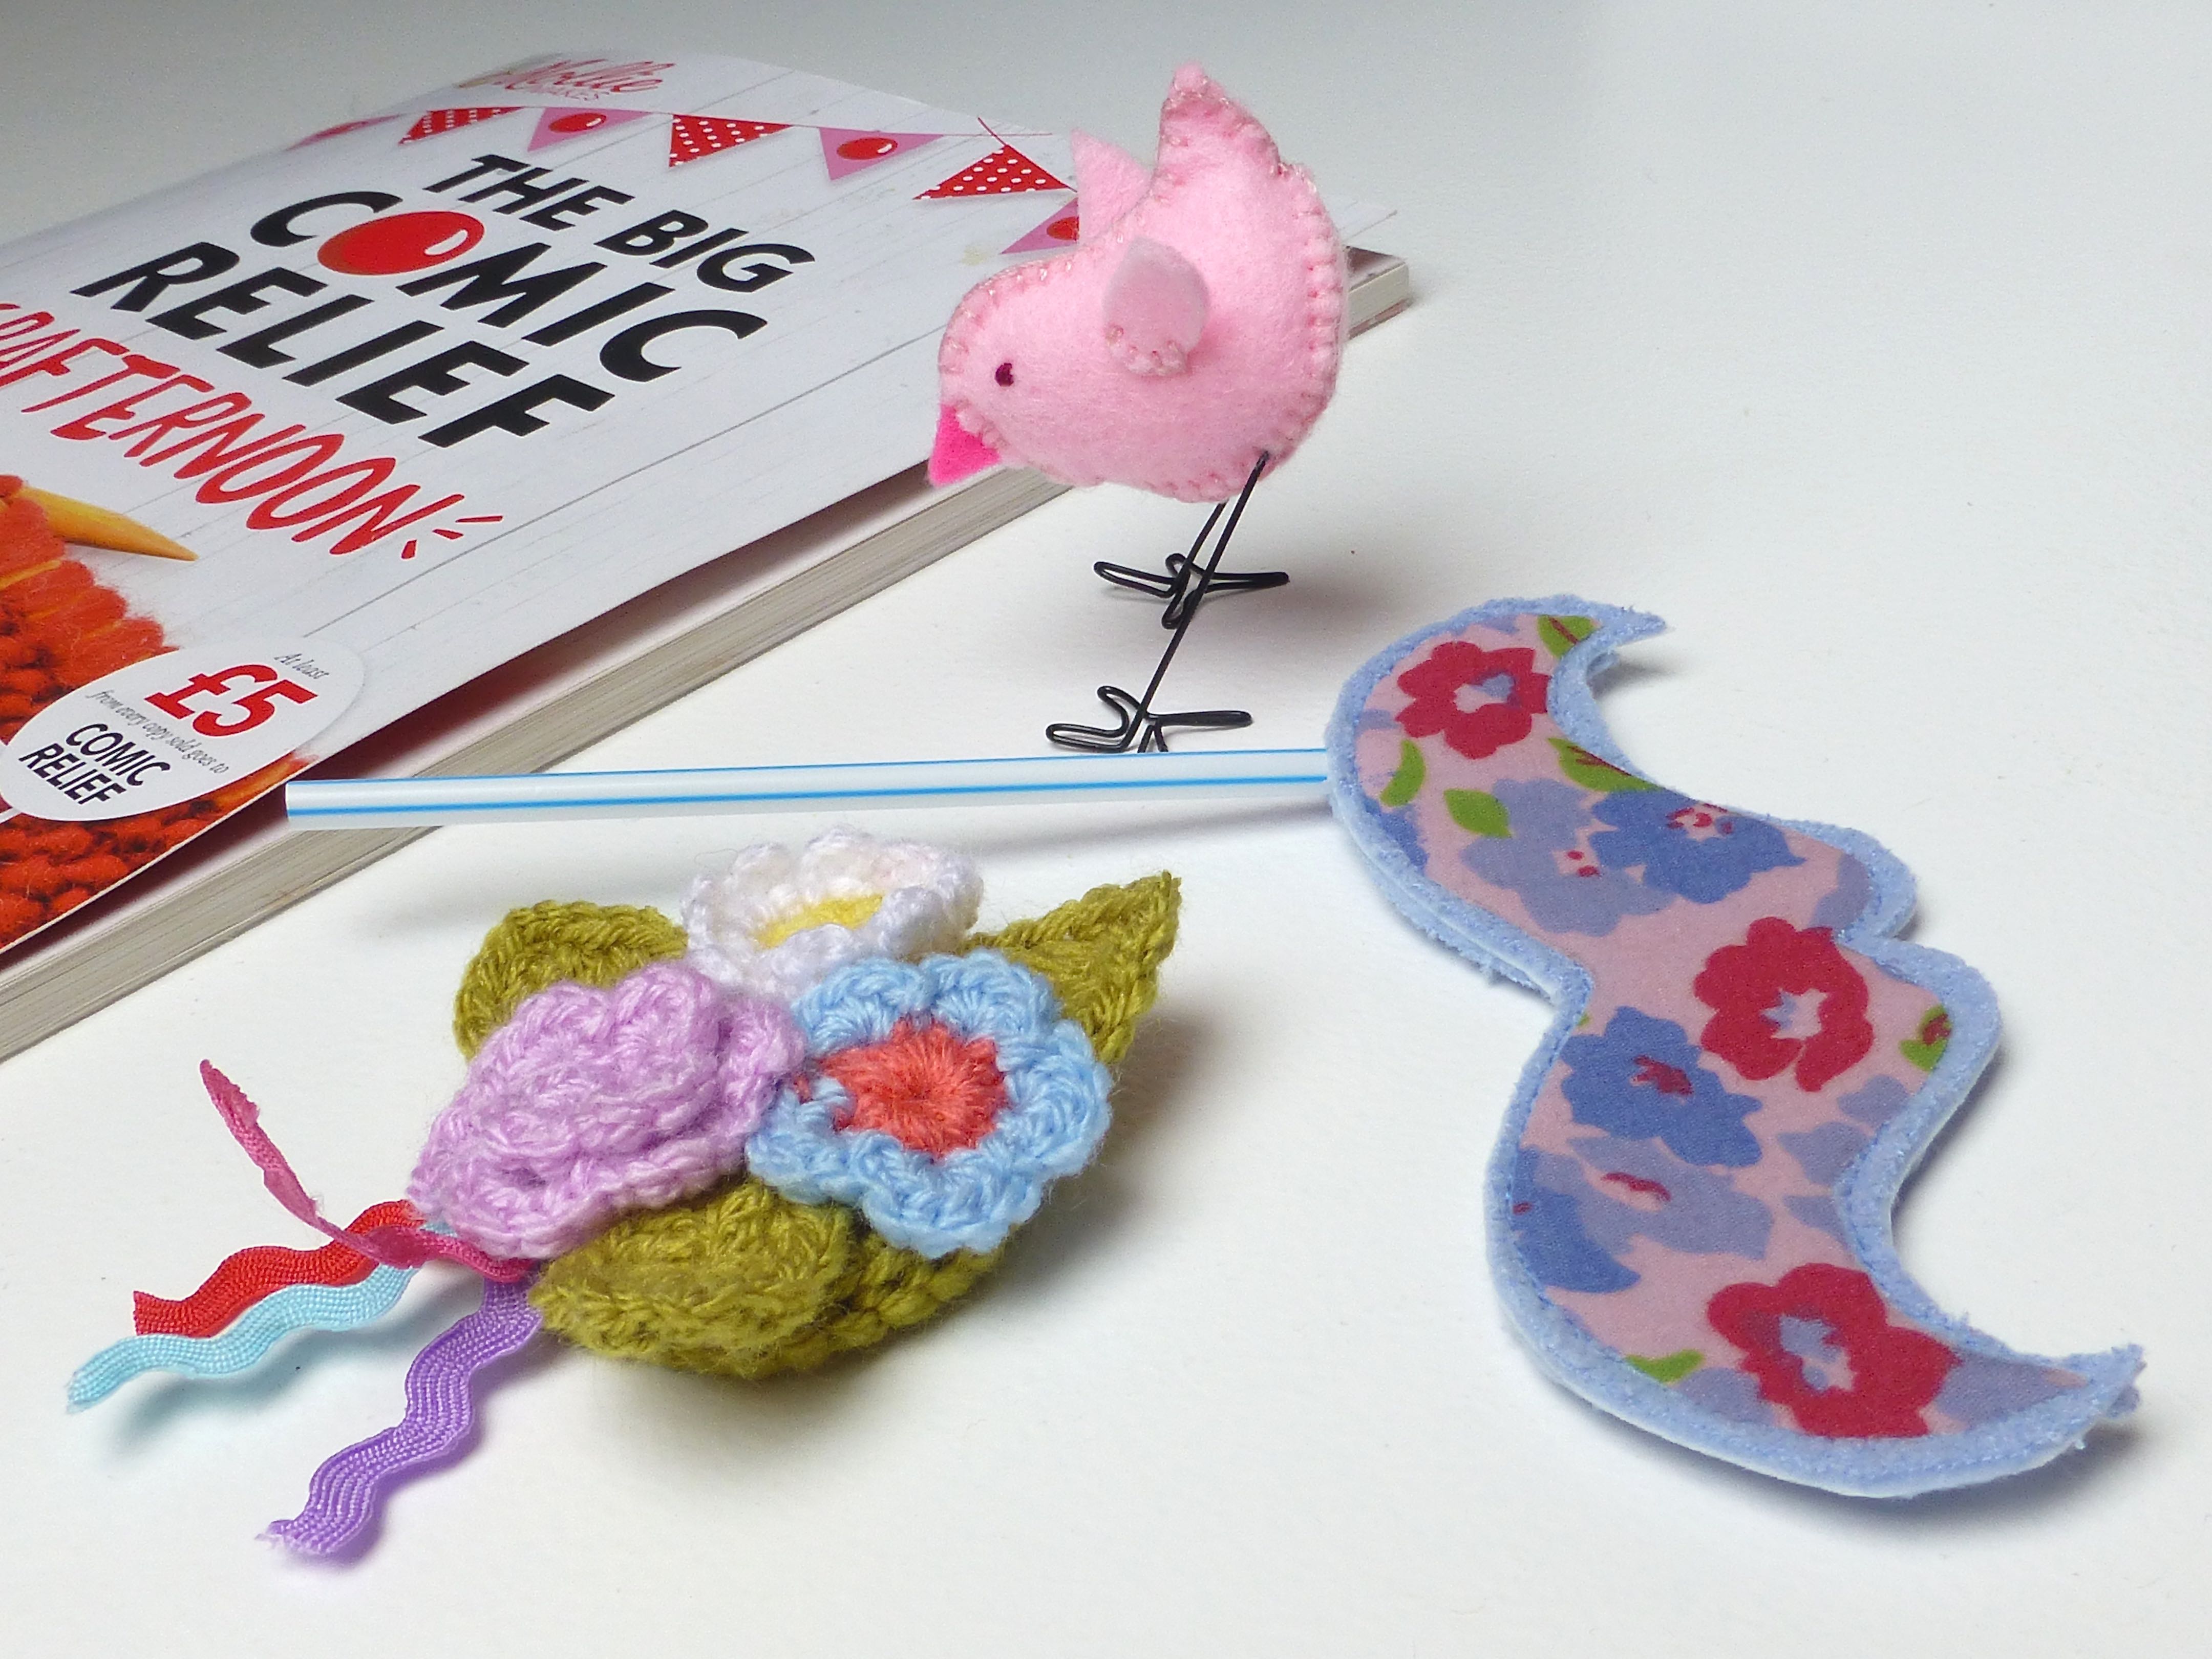
4. One of my Crafternooners sent me a photo of her finished pieces. Aren’t they great? I love the colour coordinated pins she added for the picture! You can read about the Comic Relief Crafternoon in an earlier blog post.

Sarah's Crafternoon chick and pin cushion

5. I managed to sneak into another magazine this week too! Pretty Nostalgic is about vintage values, make do and mend, waste less, make more etc. It’s a great publication with NO adverts which makes it a joy to read. You can download the latest digital copy free to see if you like it before subscribing (it’s a members only publication).

Pictured here (top photo) at a Pretty Nostalgic meet up with Jane Arnold who blogs as The Life Of An Eccentric English Booklady.

Pretty Nostalgic

6. The partial eclipse taken, whilst out running, on my compact camera with a pair of sunglasses over the lens!

partial eclipse

7. Decorating the boys’ bedroom. All painted and the A M A Z I N G wallpaper is up, but waiting for some fabric to make bench seat cushions before I blog about it:)

Cockatoo wallpaper


55 Comments

Crafternoon Success!

And……relax!

Wow, what an afternoon, or should I say “Crafternoon”?

A houseful of lovely people busily crafting away to the tune of “Café Olé” on the stereo, fuelled by home-grown egg sandwiches, scones with jam and cream and Red Nose fairy cakes.

Oh, and gallons of Bucks Fizz:)

P1040840 P1040839 P1040837 P1040824

The dining table was laden with masses of fabric and supplies, together with printouts of the projects on offer.

P1040827

The coffee table in the lounge housed yet more felt and yarn for what turned out to be a good variety of crafts for everyone to choose from.

P1040819

Mr. H-L played Butler in his lunch break as he was working from home.

P1040816 P1040815

P1040811 P1040812

The felt chicks were very popular makes.

P1040813 P1040814

P1040829 P1040825

Two ladies made good headway with their Cloud mobiles and took them home to finish off.

P1040817

P1040835

A classic Red Nose at the start of its crochet journey…..

P1040818

More cakes….

P1040820

My daughter’s very first attempt at sewing….

P1040821

P1040832

….a cushion for her boyfriend to take on his fishing trips.

Didn’t she do well?!

P1040836

Mollie Makes’ own rag doll, Mollie, was lovingly crafted as a joint effort between a mother-daughter combo.

P1040822

P1040828 P1040833

Just the eyelashes and mouth to add at close of play.

P1040834

P1040823

A Hen doorstop (as seen in an earlier blog post) reached the stuffing stage before the school run ended play.

I am assured photos of all finished off items will be winging their way to me in due course.

P1040831

All in all, a very jolly and productive three hours was had by everyone…..

P1040830

….and £265 raised so far with further pledges yet to be collected!

I would like to express HUGE thanks to Ali of Thimberlina, Kerri of Bristol Crochet and Sarah Holmes for their very generous donation of supplies for this event, without which such a great choice of materials would not have been available.

T H A N K  Y O U !


44 Comments

Sunday Sevens #26

Here we are again for another Sunday Sevens post – seven photos that make up part of your week but are not worthy of a dedicated blog post.

To join in, check out Nat’s post over at Threads and Bobbins where she tells you all about it.

1. Tess presiding, as I finish the second sleeve on my jumper – just the blocking to do now!

knitted Jumper

2. The ‘Cockatoo’ fabric and wallpaper arrived for The Boys’ bedroom redecoration.

P1040672

This is the mood board – units from Ikea due to arrive this week then they’ll have proper storage at last!

Will it be enough to enable them to keep their bedroom tidy? I doubt it…..

Design

3. I bought this sewing book for No.2 Son (the one who likes GBSB more than anything!).

We are going to adapt some of the more obviously girly patterns to make them suitable for a nine year old boy which made me think – why are all sewing books aimed at girls?

My first sewing book

His first make was this Monster Plushy.

He needs supervision but does all the sewing himself.

monster plushy

Monster cushion

Funnily enough, whilst he is VERY much a boy, he chose pink fabric from my stash for both projects.

I suppose he sees Hubby wearing pink so doesn’t consider it a girl’s choice and just likes it.

His second make was this pair of Kissing Doves which he wants to hang in his bedroom.

felt kissing doves

4. He also finished off his crochet Granny Square blanket this weekend.

Crochet blanket

He chose all the colours as he went and framed it with three rows of blue to finish.

Isn’t it great?

Blanket

5. Tulips – my favourite Spring flower. These were £2-00 a bunch in Morrisons so I treated myself:)

pink tulips

6. First Primroses spotted in the field- beautiful.

Primroses

7. Hubby cooking Sunday Lunch.

Is it just me, or does food always taste much nicer when somebody else has done the cooking?

P1040799

Hope you had a great week – enjoy what’s left of the weekend!


19 Comments

More Projects For Comic Relief’s Crafternoon

It’s just seven days until the Big Comic Relief Crafternoon on Friday 13th March – well, six days until I host mine because it’s my birthday on Friday and I will be otherwise engaged:)

If you saw my earlier post about the samples I have been making from the official Red Nose Day magazine, you will remember that I’ve been giving a number of the free patterns a test run, so to speak, to see which projects can be made in the three hours of my Crafternoon event. I will then set up individual areas with all the materials needed for each project, together with the instruction sheets, for everyone attending to help themselves to.

If you haven’t got your magazine yet, they are only available to buy in Sainsburys, nowhere else, and they are being snapped up extremely quickly so get a move on!

£5.00 out of the cover price of £7.99 goes straight to Comic Relief which is fantastic. Comic Relief get your donation and you get something for your money – a fab “Mollie Makes” Red Nose Day Special magazine with a load of fab projects for you to make.

So, onto the latest additions to the party!

Well, I had to crochet the red nose, didn’t I?

red nose

crochet red nose

I loved making this Cloud Mobile – all hand stitched in less than three hours!

cloud mobile

P1040663

P1040664

P1040738

I think this is my favourite make though…..

pin cushion

….a Pear Pin Cushion!

pear pin cushion

And when Ali (AKA Thimberlina) revealed her makeshift excuse for a pin cushion (sorry Ali!), I had the perfect reason to make the matching Apple shaped one. I snapped a couple of quick photos and sent it off that same afternoon.

P1040730

I love the attention to detail that has gone into this particular design, especially the two pieces of contrasting felt rolled together to make the stem. Although this part was completely omitted from the instructions, it was easy enough to work out how it was done.

P1040726

Ali has very generously sent me a bundle of supplies for my Crafternoon so it was lovely to be able to make her a little something off her wish list as a thank you. Just look at everything she donated!

crafternoon supplies

I still have room for a few more, so if you’re free next Thursday 12th March between 12pm and 3pm, please, PLEASE try to come along. I’d love to get a full house so that I can send off the maximum amount of money to Comic Relief.

I’m also thinking of either auctioning off all the bits I’ve made, or raffle them on the day so bring an extra couple of pounds – it’s for such a good cause!!

Here’s a reminder of all the details: –

Craftenoon event


71 Comments

One-Hour ‘Ikea’ Bag

Continuing the theme of ‘One-Hour’ makes (well, it wasn’t really a theme until just now when I realised that this project also took less than an hour to make), I’ve designed a simple pattern along the lines of one of those big blue Ikea bags.

You know the ones; they make great laundry bags, shopping bags, picnic hampers etc., but there’s one major design fault – they’re just so damned ugly!

P1040710

There’s a huge choice of suitable vinyl fabric out there, but I fell in love with this “Butterflies” print and ordered a couple of metres online which turned out to be more than enough.

P1040667

I did come across a tutorial but it involved printing off a pattern on about twenty sheets of A4 paper, piecing it all together, sellotaping and then cutting out, all of which would take longer than actually making the entire bag!

There had to be a better way so, after hours and hours of head-scratching, making sample after sample and at least a dozen pattern refinements (not really!), here is my somewhat simpler pattern: –

Cut one piece of vinyl fabric 90cm x 120cm.

That’s it.

P1040674

Now, vinyl is notoriously difficult to iron because, basically, it just melts and welds itself to your iron. So you can either buy it from a shop and ask them to roll it for you or put up with the creases which will eventually disappear. A hairdryer is said to speed up this process.

I didn’t bother:)

The only other supplies you’ll need are 2 1/2m of 2.5cm polyester webbing and some matching thread.

P1040679

P1040677

Stitching vinyl needs a little bit of forethought as it can be tricky. Sewing right sides together is no problem but when top stitching you may need to change to a Teflon coated foot or improvise with masking tape on the bottom of your normal foot. Putting a layer of tissue paper between the machine bed and the vinyl works for the bottom layer, with the added bonus of ripping away easily afterwards.

Use clips instead of pins to avoid any tell-tale holes in the vinyl.

A longer stitch length is used too, as a short stitch can weaken the vinyl and it could rip between the stitches.

P1040682

Start by folding your fabric with right sides together aligning the two short edges and sew a 1cm seam along each side, leaving open along the edge opposite the fold.

P1040683

Bring the seam to the centre and lay flat to form a corner as below. Mark 18cm from the corner along the seam and draw a line all the way across at right angles to the seam as shown.

P1040685

Sew along this line.

P1040686

Trim the excess fabric leaving a 1cm allowance.

P1040688

Repeat with the opposite corner, then turn the bag right sides out.

P1040689

Turn down a 2.5cm hem and stitch close to the raw edge.

Cut some webbing: –

2 x 35cm

2 x 74cm

Lay a short length of webbing on top of a longer length about 1cm from the end as shown.

P1040690

Fold the overhang back over as shown below and tack together through all layers.

P1040691

Repeat with the other ends of the webbing, being careful not to twist it in the process.

Make the other set of handles in the same way.

P1040692

With the raw edges of the handles facing the wrong side of the bag, stitch in place 32cm in from each side seam.

P1040695

P1040697

To ensure that there is plenty of strength at the point where the handles join the bag, I stitched a cross within a square as shown in the photo below.

P1040698

Attach the other pair of handles in the same manner.

P1040699

Finish with a second row of top stitching around the entire top edge about 4mm in from the first row.

P1040700

Fill with laundry and go peg your clothes on the line!

P1040708

P1040709

P1040712

P1040722

P1040719

P1040715

P1040713

P1040724

Well, the girls seem to approve of the stranger in the garden!

Anyone tempted to have a go at making an Ikea style laundry bag?


44 Comments

One-Hour Poncho!

This is my first post as part of the Minerva Crafts Bloggers Network, and this is what I chose for my first make – a bold print Poncho with a cosy cowl neck, perfect for this time of year.

poncho3

If you’re anything like me, you’ve probably got your fingers in several pies and have lots of projects on the go at any one time, many of which are time-heavy and are completed over the course of weeks or even months.

Occasionally, just occasionally, I get impatient and don’t want to add yet another row to a seemingly unending WIP.

Once in a while I feel the need to make something quickly, to achieve something within a couple of hours, to finish something.

Well this is just such a project. In fact it is such a satisfyingly speedy make that it can be whipped up in just one hour!

No, really – look!

one hour poncho

Other than speed, the inspiration for the poncho came from browsing the huge range of fabrics available at Minerva, and happening upon this bold “Chic” print which I thought had a touch of the Parisienne about it – isn’t it fantastic?

P1040557

The fabric is described as “….sweatshirt jersey fabric, a lovely heavy weight with a soft fuzzy-textured backing. The print is a fantastic bold design with the word ‘Chic’ printed randomly across the surface….great for making hoodies and comfy jackets”

Please don’t be put off by the word ‘sweatshirt’ – it’s such good quality that it looks deceptively like wool from a distance, the benefits being that it is cheaper and easier to wash.

If you like it, you’d better be quick as it’s on clearance and there are only limited stocks:)

fabric

I’m not a hoodie kind of gal, so I searched for a poncho pattern and found McCall’s 6209 which is half price at the moment, and decided to make view ‘E’ with a cowl neck to keep those chilly winds out.

poncho pattern envelope

I’ve actually got a knit poncho that looks exactly like the one illustrated and I wear it all the time in place of a jumper. It’s not substantial enough to replace a coat though, so I wanted to choose a warmer fabric which drapes loosely for comfort and the jersey does just that.

poncho pattern

I made the cowl up as per the instructions. The fabric has a lovely weight to it that stops it flopping too much.

poncho cowl neck

The top stitching around the neck edge looked so nice that I decided to stray from the directions a little and top stitch from the shoulder to the arm too, on either side of the seams.

poncho top stitching

I overlocked the raw edges before hemming them as a double-turned hem would have been too bulky in this fabric.

poncho overlocked edges

I meandered a little further from the instructions when I also decided to add some satin bias binding all around the lower hem.

This addition creates a more professional finish and the sheen of the satin adds a luxury edge to the poncho.

poncho binding detail

poncho binding

I’m so pleased with the bias binding, I wish I’d ordered more and done the armhole edges too, instead of hemming them.

poncho bias binding

So, one and a half hours later (due to the extra embellishments) all it needed was a cold, windy day to test it out and, being in good old Blighty we are not short of those!

chic poncho

I had no idea the poncho would cause such a stir though and I’ve already had loads of compliments. I suppose it is pretty unique and that in itself will draw comments.

Do you ever get the urge for a quick make?

What have you created in just a couple of hours?


32 Comments

Craft Progress For The Big Comic Relief Crafternoon

With four weeks to go before Comic Relief’s Big Crafternoon, I have been busy.

Busy making up samples of some of the things that will be available to make on the day, all of which feature in the Mollie Makes Red Nose Day special magazine, and I thought that people would probably like to see and feel examples of what the finished articles are like.

P1040587

P1040585

P1040588

I’m planning on having a dedicated crafting table for each of the items that can be made, so that all the materials for each project are to hand and won’t get mixed up with materials needed for any of the other crafts.

Each area will have a copy of the magazine open at the relevant pages, a selection of fabrics/yarn from which to choose, together with all the sundry items required to complete their chosen item.

P1040590

P1040592

P1040589

I’ve manged to source most of the sundry bits and pieces that will be needed, but NOT round lolly sticks – so I’ve substituted with a straw instead which works perfectly well!

P1040594

P1040595

P1040601

P1040598

Don’t forget to come along if you can!

A5 flyer with border


23 Comments

“Sew Retro” Sewing Knitting WIP Bag PDF Pattern

For those of you who have been following my blog, you will remember the “Sew Retro” bag I recently designed for storing all those WIPs, large and small. You can read about how these came about here and here.

Well, I’m thrilled to announce that this pattern is now available to buy from my Folksy Shop!

Cover

For just £4.99 the pattern is in PDF format with printable instructions for two sizes, perfect for every work in progress from small knitting projects through to the largest quilts.

sewing crochet bag

The pattern has clear step-by-step instructions and is accompanied by full colour photographs throughout.

Page 9

Lucie from Love, Lucie agreed to test the pattern for me before it was made available for purchase to check that it the instructions were clear and easy to follow.

She tested the pattern by making the smaller bag following the steps exactly – if you would like to see her review follow this link.

This is Lucie’s finished bag – didn’t she do a fantastic job?

Lucie's bag

I was nervous that Lucie would feel under pressure to write nice things but, after seeing how much she really enjoyed making the sewing bag, I am pleased to say that she likes it so much that she is already planning to make more for herself in the form of beach bags!

You can’t get a more positive review than that, can you?


9 Comments

The Big Comic Relief Crafternoon – Come And Join Us!

I’m hosting a Crafternoon to raise funds for Comic Relief – this Red Nose Day event was thought up by Mollie Makes magazine.

Keep abreast of all the news, including events near you, on The Big Comic Relief Crafternoon Facebook page.

A5 flyer with border


37 Comments

Wrap Dress And Frilly Knickers (Diaper Cover) For A Baby Or Toddler Girl

As I mentioned in the past, I have been sewing for a very long time. After my daughter was born, I made most of her clothes and she was the best dressed baby in town!

My “little” girl is now almost twenty-four and I no longer sew for her, so any excuse to create pretty little outfits is seized – this cute little two-piece is for someone I will be visiting at the weekend.

I had some cute fabric left over from a previous project and there was just enough to make a little wrap over dress using this pattern. I used some coordinating pink checked fabric to line it, making it reversible, and made some matching pants (pattern here).

baby wrap over dress and frilly pants

The back of the dress splits and shows off the adorable frills on the back of the pants.

baby wrap over dress and frilly diaper cover

Two lime green buttons are a bold choice to compliment the bold design.

baby wrap over dress green buttons

Did I mention that it is fully reversible?!

Either for a different look or to get more wear out of it before it hits the laundry bin:)

Not the knickers.  (Although I did once suggest this to No.1 Son when he ran out of clean boxers because he didn’t bring his dirty laundry downstairs).

baby wrap over dress and frilly pants front

Why aren’t more clothes this practical?

Imagine how much less stressful it would be if you stopped for breakfast before a meeting and you spilled ketchup all down the front of your shirt.  Unless you keep a spare in your bag for just such an eventuality (really?), you could just turn it inside out and, hey presto, clean shirt!

baby wrap over dress and frilly pants back

baby wrap over dress red button

No more struggling to pull a dress on over a wriggly babies head either – this one just wraps around and buttons up at the shoulders.

baby wrap over dress

A contrasting pockets adds a bit of interest. Trimmed with coordinating lilac ric-rac, a flower cut from the main fabric has been appliquéd on and a bit of fun free machine embroidery added to finish it off..

baby wrap over dress with pocket

In the words of William Morris; “Have nothing in your house that you do not know to be useful, or believe to be beautiful.”

I like things to be useful and beautiful so pockets fall under this category for me. And what’s the point in having a pocket if there’s nothing to put in it?

So I made a little pink felt bunny that will (hopefully) entrance the wearer sufficiently to displace all notions of filling the pocket with worms. (Yes, little girls do that too!).

toy rabbit in pocket

Bunny has embroidered features so is perfectly safe for inquisitive hands.

toy rabbit front

And a bunny isn’t a bunny without a fluffy white bob-tail, is it?

toy rabbit back

baby wrap over dress and frilly pants with toy rabbit

So there you have it – a gorgeous little wrap dress and frilly knickers for a baby girl or toddler, which is reversible to boot!