In the West Country the weather was awful this week and both the Saturday and Sunday football matches were cancelled. The dogs refused to set foot outside the front door and No. 2 Son didn’t want to go to the stables either which meant we had a rare weekend with both of The Boys and Mr H-L at home. This gave us the opportunity to do indoor ‘stuff’ (which doesn’t include technology) and I didn’t even turn my computer on – a reasonable excuse for my Sunday Sevens being late!
Hop over to Threads & Bobbins to see what Sunday Sevens is all about and how you can join in if you want to.
Daughter paid us a brief visit to collect her bobble hat, much needed in this weather.
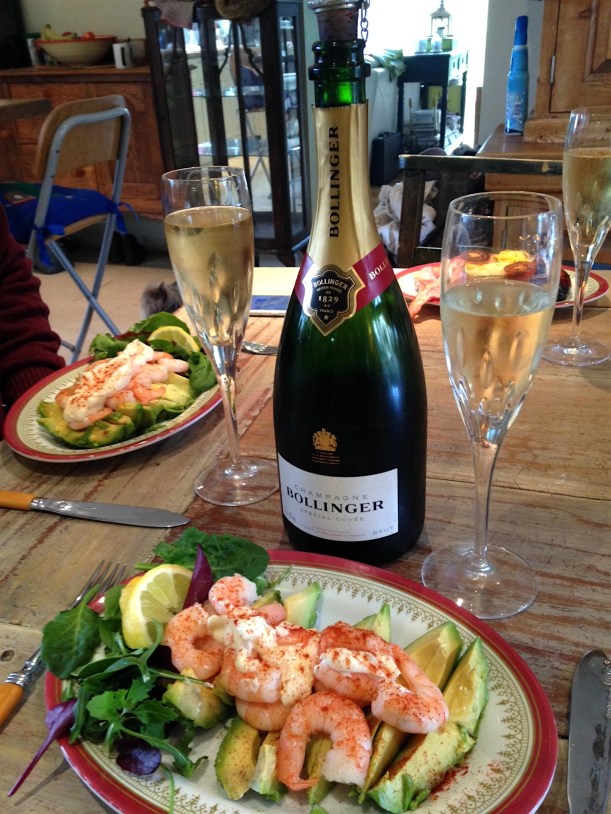
2. Mr H-L and No.1 Son worked from home a couple of days this week and this is what I rustled up for them at lunchtime. No wonder they’d rather not go into the office!
3. I spotted these beautiful crocuses (not ‘croci’ as it’s not derived from Latin!) on a dog walk at the beginning of the week before the dogs vetoed any further walks.
4. The dogs hate the wind and rain so much and this photo says it all really. Fifi climbed up onto the hearth and stared at us until Mr H-L obliged her by lighting the fire!
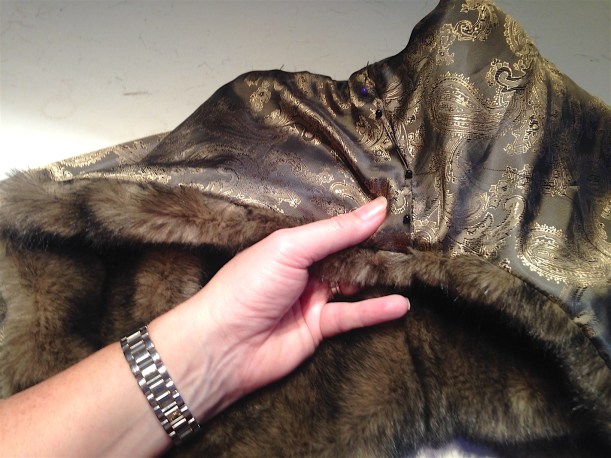
5. I managed to finish this month’s project for the Minerva Craft Blogger Network -a fur gilet with gold Paisley lining. A full blog post will follow next week.
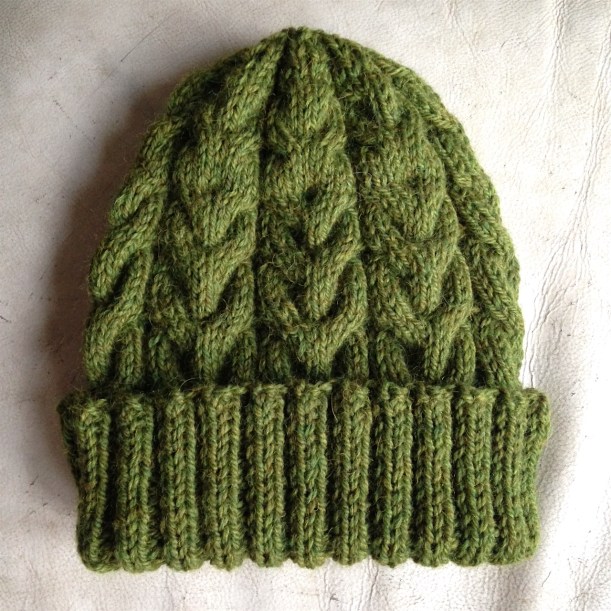
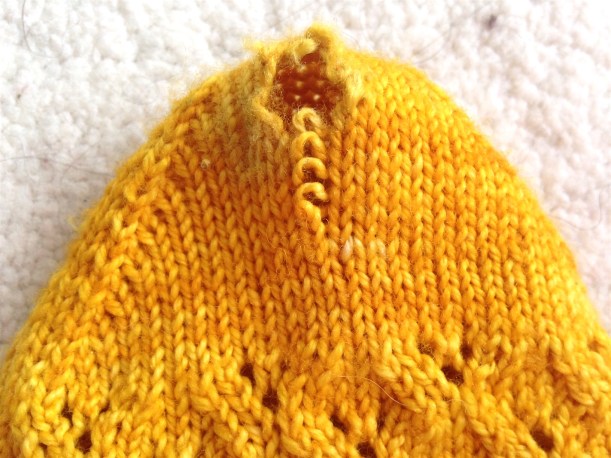
6. I adapted the bobble hat pattern to make a beanie for No.1 Son in his requested colour, Olive Green. One row of cables was dispensed with so the hat was less pointed and more rounded like a beanie should be.
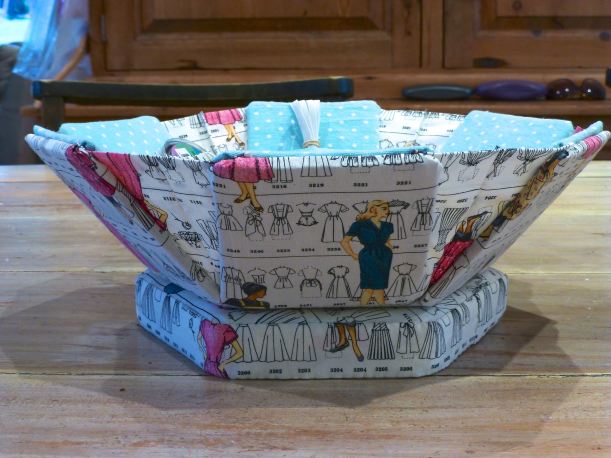
7. I was given this set of notebooks for Christmas, but they are so lovely I can’t bear to use them! They each feature a different vintage McCall’s pattern envelope on the front and back covers.
8. The inside pages are all different, too, some printed with paper pattern excerpts.
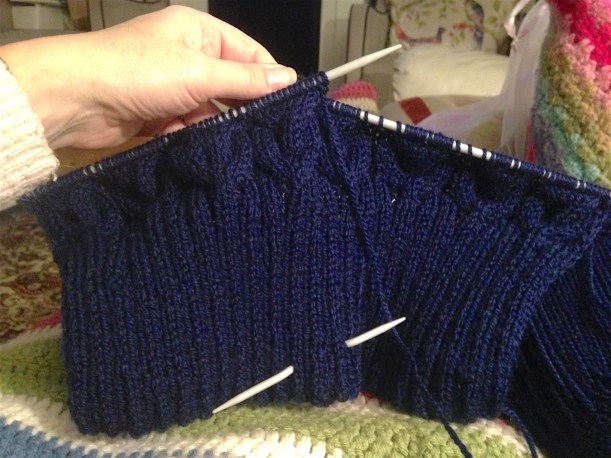
9. Yet another bobble hat was cast on, this time in navy blue for a birthday present for a good friend. Navy is NOT a great colour to knit with in the evening.
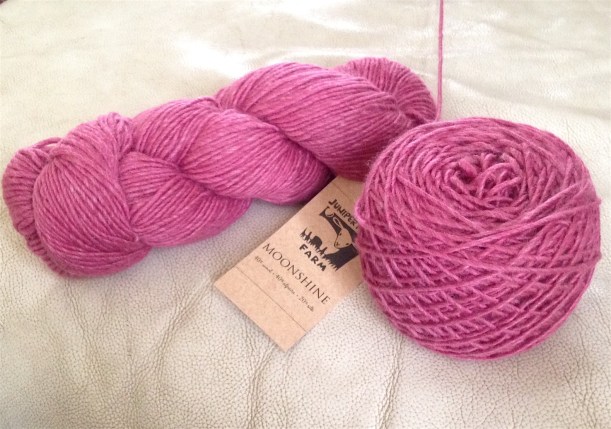
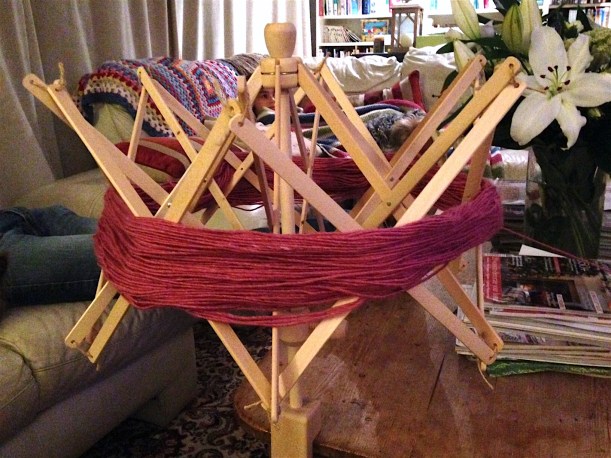
10. How do you get from a skein of wool to a yarn cake?
11. With a swift and yarn winder, of course! I treated myself to this quality wooden swift a couple of weeks ago to give Mr. H-L’s arms a break.
12. The yarn winder was a Christmas present and, between them, they make short work of a previously tedious job.
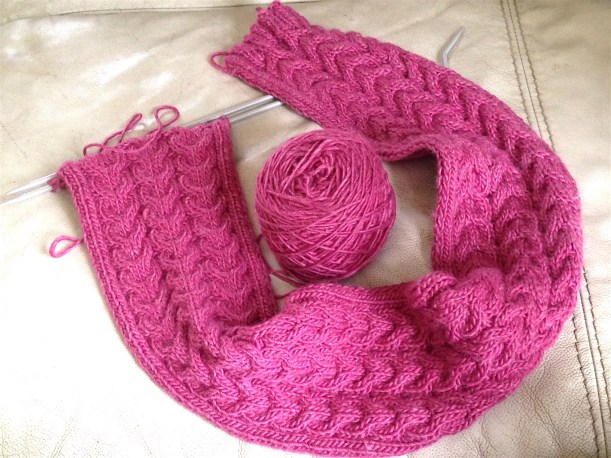
13. I’m still managing to squeeze in a few rows here and there on the scarf to match my pink bobble hat which I made to match my Raspberry Pink boots:)
That’s all folks! Are you more productive in the Winter because of the enforced staying-in?
The other day I was browsing through the latest Love Sewing magazine after it obligingly popped through the letter box whilst The Boys were at football, meaning I could actually sit down for five minutes and read it without interruption.
The cover featured an inset photo with the model wearing a keyhole neck tunic which I rather liked the look of – not in mustard though, I can’t wear mustard.
After a quick glance at the line drawings, I thought I’d give it a go. Not being blessed with model-esque proportions myself, I don’t trust the photographs as I know it’ll never look like that on me!
There were about four metres of thin, loosely woven cotton fabric which, according to the selvedge, was vintage Rose & Hubble.
The top came together pretty quickly and very easily. The neck keyhole opening was simply turned back twice to provide a narrow hem.
I narrow hemmed the bottom of the top, too, as it was such fine cotton.
I made some bias binding for the neck edge.
The pattern called for a continuous strip of binding around the front and back leaving a ‘keyhole’ neckline, but I fancied having ties at the front instead so extended the binding length accordingly.
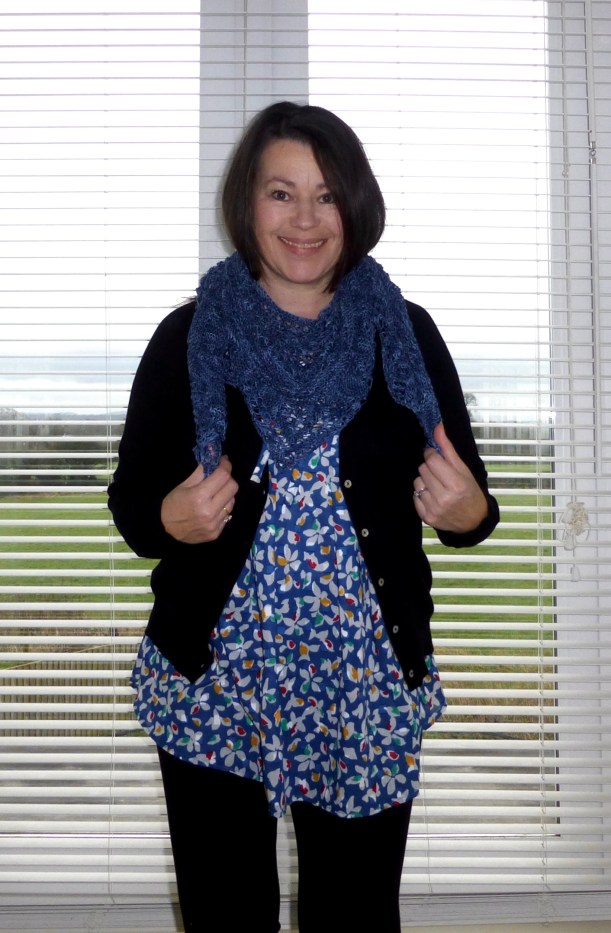
The finished tunic fits my dressform pretty well. You can’t see the pleats because of the patterned fabric but you CAN see how low the front opening is!!
Sure enough, when I put it on, far too much cleavage was displayed. I do like how the front pleats are stitched down and draw the fabric in underneath the bust though, to stop the top hanging like a shapeless sack.
A vest top will definitely have to be worn underneath, which is a bit of a shame.
The shawl that Tajana made for me on a gift exchange (blogged about here) matches the blue in the tunic perfectly so, with a cardigan, it can be worn in the Winter too.
I’m not really a dark blue kind of person, but the shade is more Cobalt and is lifted by spots of red, white, yellow and green, so it feels quite cheerful and bright. The blue scarf stops the black cardigan from looking too gloomy, too, as I don’t like black next to my (almost) black hair.
Has anyone else made this top? What did you think of it?
We live in a lovely little village, not quite a hamlet because, by definition, a hamlet doesn’t have a church.
We have a church. And a village hall. Nothing else.
The pub is a twenty minute walk away in the next village which is great in the Summer. Not so on a cold, wet Winter’s evening when you fancy a pint.
I digress. The point is, being a small community of just 91 dwellings, people are friendly and generous and generally get on rather well. (Remember those flowers?)
A few weeks back, I had an email from an artist living in The Old Stables asking me if I would like first dibs on some textile-y things as she was having a clear out of her studio. Of course, I jumped at the chance and popped round that afternoon to have a look. I ended up coming home with a car load of stuff from fabric remnants a few yards long to tiny 4″ squares of silk oddments.
After being quite strict with myself, I kept only what I knew I would definitely use and, with her permission, bagged up the remainder for the charity shop.
There was also a bin liner stuffed to the brim with feather cushion pads which is where I made a start.
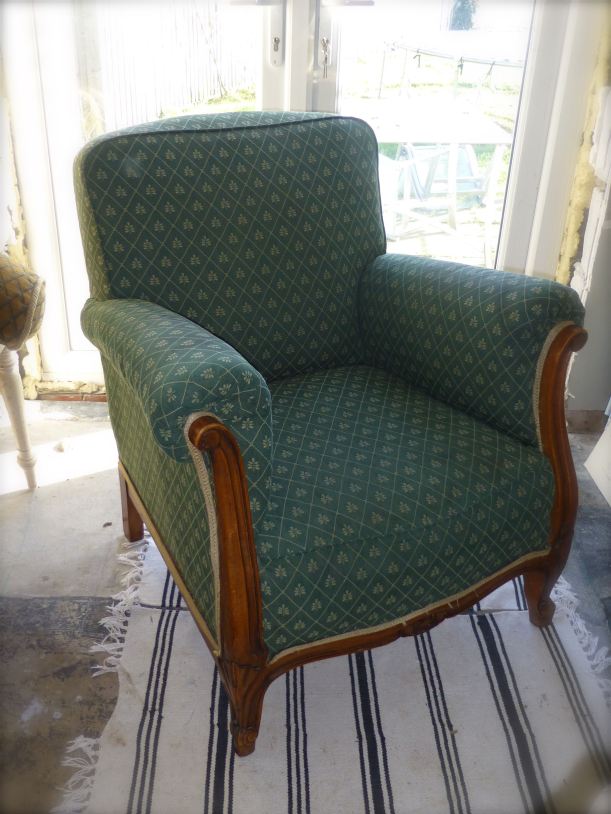
No.1 Son is now twenty-three, has his first post-graduate job and is saving hard for a deposit for his own house. He is also amassing quite a ‘bottom drawer’ in readiness for his new home, the most recent being this cute little Edwardian armchair from eBay.
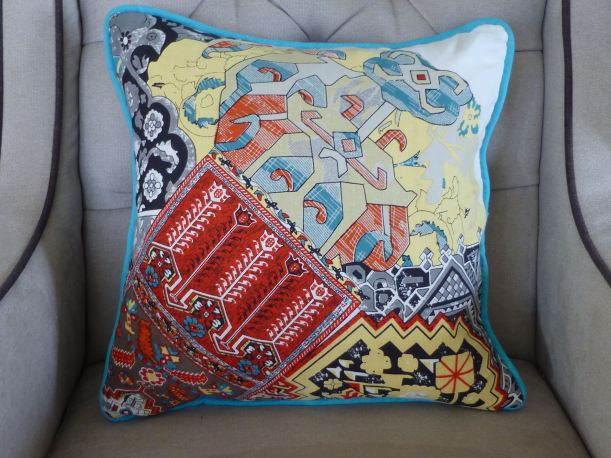
Anyway, amongst the things I found when rooting through the stash of goodies I had been given, was a square of fabric from Anthropologie. Possibly a (very large) napkin in its original incarnation, it was unused with the store tag still attached.
A little bit too ethnic for my taste, I asked said son if he liked it and would he like me to make him a cushion cover from it. Having received a ‘yes’ on both counts, I set to.
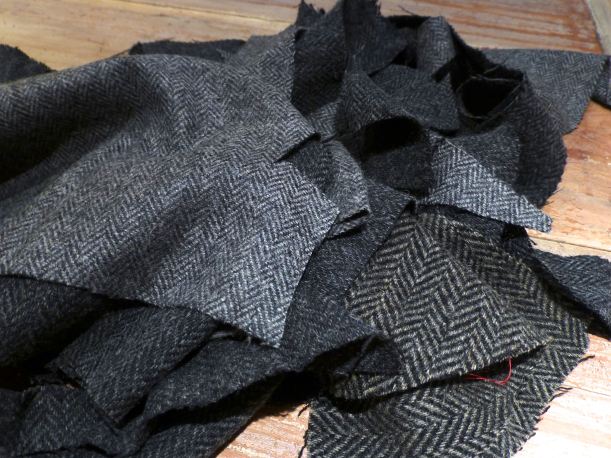
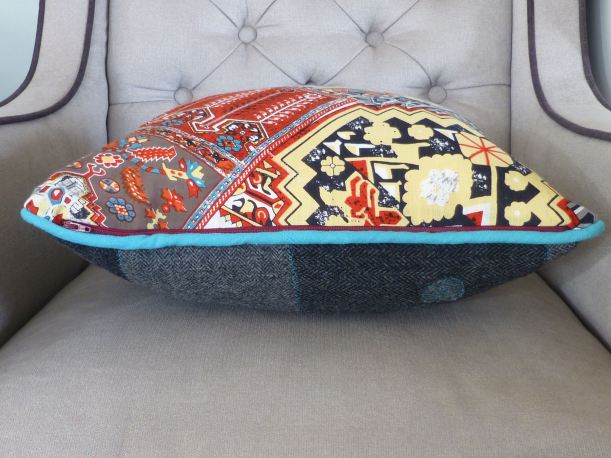
There was a small carrier bag full of bits of top quality wool tweed in several shades of grey which were pretty useless on their own, but which I could see (!) would piece together to make a nice back to the cushion.
See? They go together quite well.
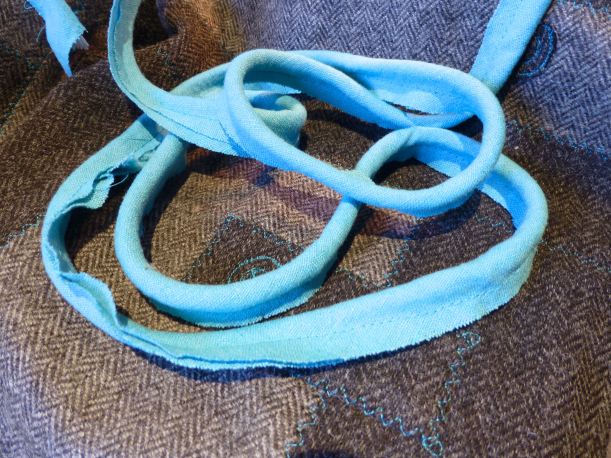
I patchworked some strips together until I had a square measuring 20″, the same as the front.
Then, because it still looked exactly like what it was – scraps of fabric sewn together – I added some detail in the form of turquoise top stitching along all the seams.
It was still a bit ‘functional’ so I thought a few appliquéd swirls wouldn’t go amiss.
And a few more….
There, that’s enough. Now it looks more like a piece of textile art than leftovers!
Using some turquoise linen (left over from this dress), I covered some piping cord in a shade that would pick out the blue in the Anthropologie napkin. See, there was a reason for choosing turquoise?!
Piping was basted on first…
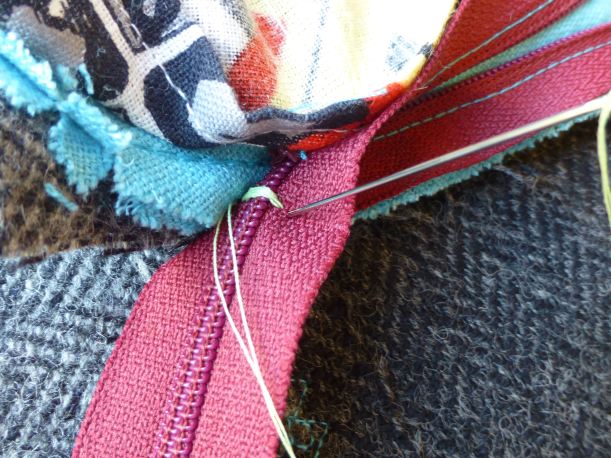
…then a random zip from my collection was inserted.
The zip was too long so I shortened it by sewing a new ‘stop’.
Sew round the remaining three sides, turn inside out and – TADAH!
A tip is to make the cushion cover slightly smaller than the size of the feather insert, then it stays nice and plump like this.
The turquoise piping ties the front in with the back.
Actually, there’s not really a front or back as both sides are deserving of top spot!
I thought it looked quite at home in our lounge and said as much – at which point it was “Thanks, Mum” and whisked off to No.1 Son’s bedroom before I got too attached to it!
Sunday Sevens is a weekly blog series started by Nat from Threads & Bobbins. Why not pop over and see how you can join in?
Disaster – my hand knitted socks have a hole in them! My big toe is so much longer than any of the others that all my socks get thrown away eventually because they get holes in them. There’s no way I’m throwing these away a) because I made them b) because I invested a considerable amount of time in their creation c) because they are quite simply the most comfortable socks I have ever worn.
Guess I’ll have to buy a darning mushroom:(
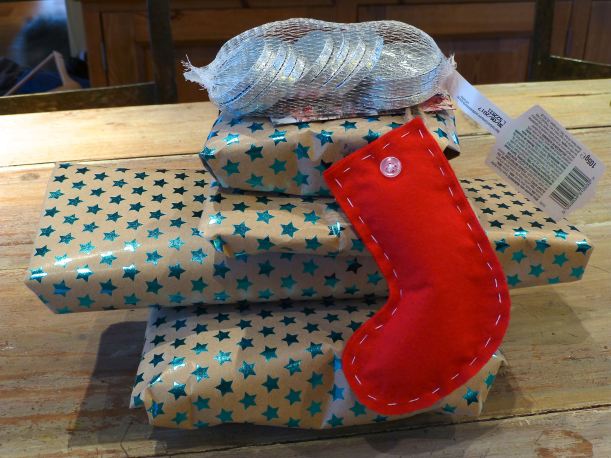
2. We had some late Christmas presents in the post all the way from America (thanks Robin!) – The Boys were thrilled as you can see from their expressions.
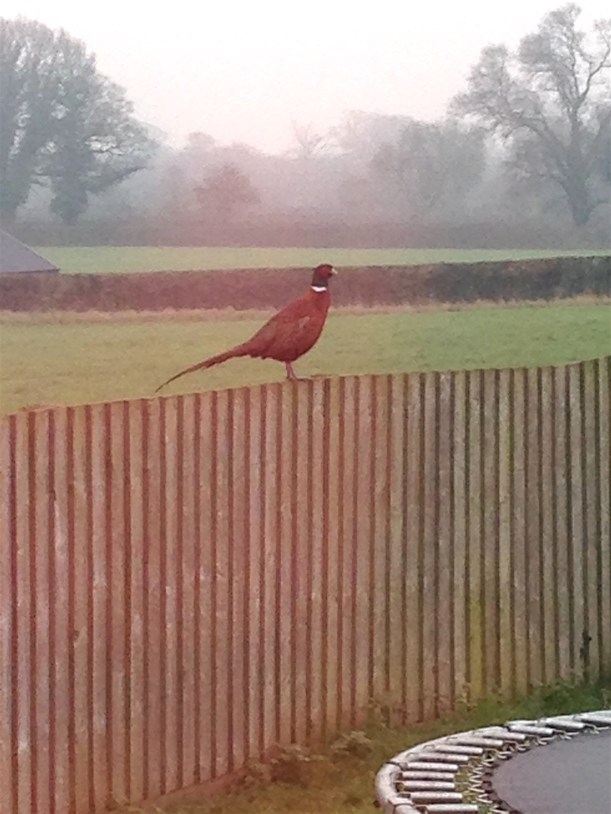
3. This beautiful pheasant has decided it’s safer in our garden than in the fields beyond. I managed to snap it on my iPhone on full zoom, hence the poor quality.
4. I’ve started another bobble hat for a cousin who saw it on Facebook and fancied a pink one.
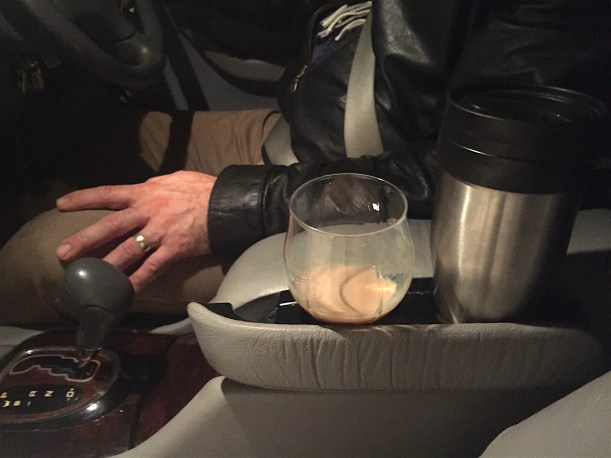
5. Mr H-L’s father died on Friday. He waited until we popped out for lunch and we got the call whilst we were eating pudding. We toasted his memory with a glass of his favourite whisky.
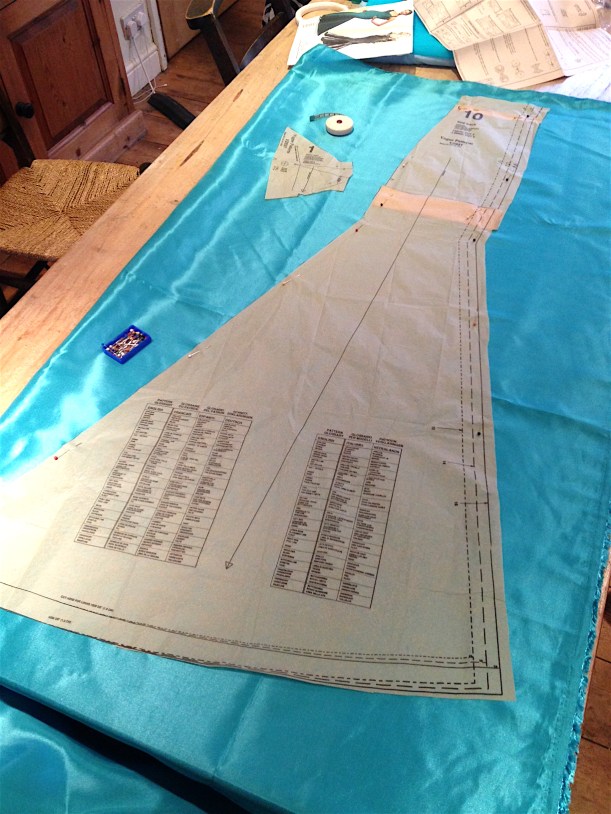
6. I’ve got a bit behind with my sewing so spent all weekend up in my sewing room trying to catch up. It’s good therapy, too.
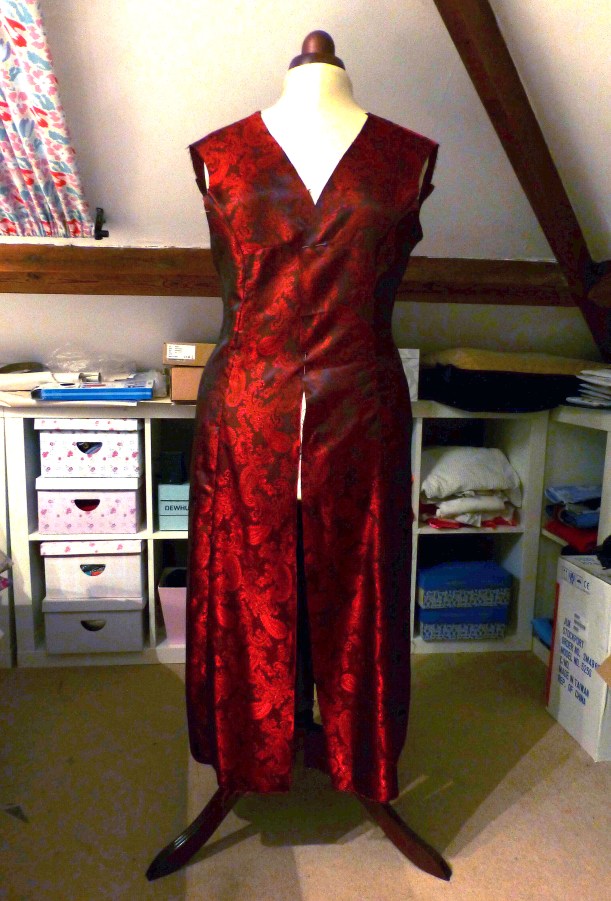
7. No, it’s not a dress, it’s the lining to my new green velvet coat!
8. Mr H-L has been keeping me supplied with refreshments. Not sure that red wine, Pringles and sewing are a good combination…
9. The hens decided that it was far nicer to be inside than wading around in acres of mud outside. They loathe the wind and rain and, if the door is left open for a millisecond, they’ll sneak in.
10. The dogs detest aren’t that keen on sharing their food with the girls so, as soon as they see a hen in the house, they race to their bowls and down the lot as fast as they can.
Sometimes not fast enough.
Right, back to the sewing room for me – just the hem and buttonholes to do!
It has been totally brilliant, not to mention ridiculously exciting, to watch all your #stitchingsanta parcels coming together over the last couple of months.
I’ve loved seeing how thoughtful and creative everyone has been, really getting to know their recipient through their blog and sending the most appropriate gifts possible.
For those of you new to this concept, and for anyone considering joining in next year (yes, I’m going to organise another one!), here’s the link to show you what it’s all about – #stitchingsanta 2015.
I took part in both the knitting/crochet swap and the sewing swap but, before I show you all the amazing things I received, I thought I’d show you the final handmade gift that I included in my sewing swap parcel.
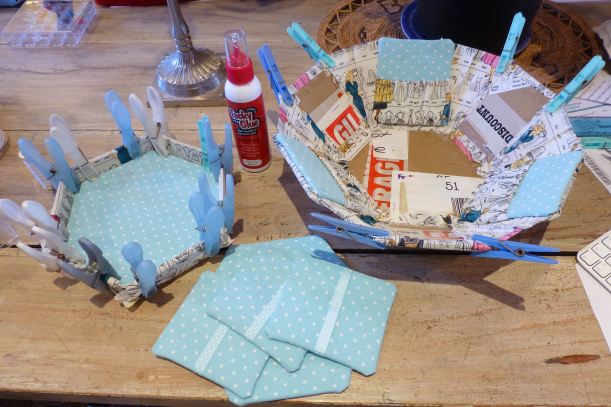
A hexagonal French ‘Cartonnage’ sewing box (pattern by Tialys on Etsy) which nearly didn’t get sent as I only finished it an hour before the deadline for Christmas post!
It took quite a few hours of construction over a week or so to complete, the glued parts needing overnight to dry before moving on to the next bit.
It’s a lovely pattern though, and I thoroughly enjoyed making it – I first saw it on Lucie’s blog as she was a tester for the pattern before its release and it is designed by the talented Lynn who blogs over at Tialys.
The box made it into the parcel along with the other things which I blogged about here and was posted to the loopy-but-lovely Ali, better known by many of you as THIMBERLINA.
Below is the bundle of presents (blogged about here) that went off to my knitting swap recipient, Pippa, from Beads & Barnacles.
The first I knew of Pippa was when she signed up for the swap, so I spent some time looking through her blog to see what kind of things she might like before deciding on a few. There are fewer handmade items obviously, as knitting takes so much longer than sewing.
I took a chance by not adding sender’s details on either parcel so they would be a surprise until the last moment, as I had blogged in detail about all the handmade elements in the run up to Christmas.
Ali, bless her, hadn’t even received my parcel but had already sent me these lush quilted coasters as a ‘thank you’ for organising the swap!
The fabric she used was ace and had funny, and perfectly apt, little quotes in speech bubbles all over it. Thanks Ali – I love them!!!
Now, onto the myriad of gorgeous things that I was gifted.
As the organiser, two people had to draw the short straw and have me as their swap partner, so neither were able to blog about their parcels.
I chose Joey, from Littleblackdogsa, to be my knitting partner as she lives in South Africa and the post can be notoriously unpredictable. It wouldn’t matter if her parcel didn’t reach me for a few months but, in fact, it arrived in plenty of time!
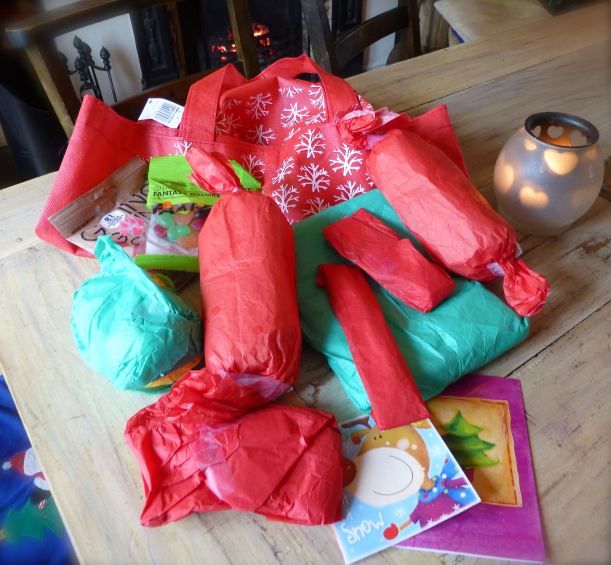
The outer bag was quite badly damaged when it arrived, but the contents were intact so I put everything in the bright red bag that she sent with it and it stayed under the tree until yesterday.
Yes, you read that correctly, yesterday – Boxing night to be exact. Why? Well, it certainly wasn’t because I have masses of will power or patience (quite the opposite, in fact) but because we host Christmas for the family and I spend two days cooking, tidying and making sure everyone is having a good time. I wanted to wait until lunch was over and they were all watching a festive film in the lounge so I could open and photograph my parcels at leisure.
And this is what Joey sent me!
Would you like to see them in more detail?
Firstly, there are two Indian cotton tea towels onto both of which Joey had crocheted a beautiful border. Far too nice to use, really, but I will.
A pretty pin cushion in the shape of a pear. Can you believe I only have one pin cushion which I keep in my sewing room? This one will be used on a daily basis by the children in my sewing classes – I think they’re going to love it.
Four fab cakes of organic cotton yarn, local to South Africa, which I am thrilled with and can’t wait to use – crochet hooks included!
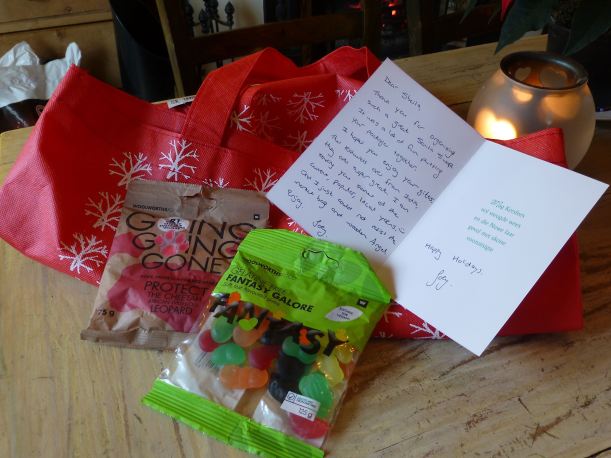
A length of festive cotton tape featuring the music of “Jingle Bells”, some hand sewing needles and an atmospheric South African sunset disguised as a fridge magnet.
I love the little rustic angel that she included, too – I am guessing it is handmade from recycled materials?
Finally, there were some sweets, a project bag and a card with a lovely message inside. Thank you so much Joey – I am thrilled with all the thoughtful gifts that you obviously spent a lot of time putting together for me!
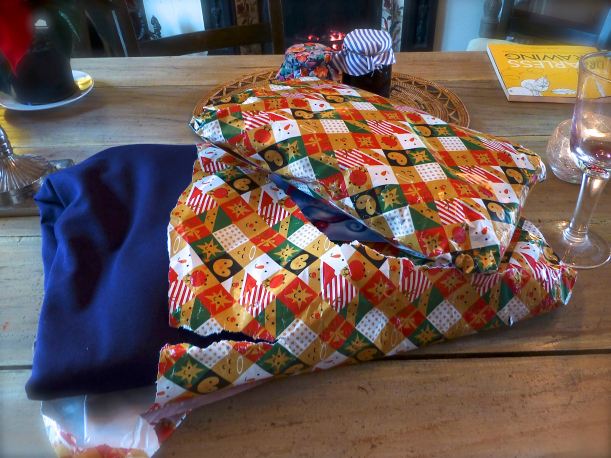
By the time I had finished opening and photographing Joey’s parcel, I was dying to open the one from my sewing swap gifter and almost forgot to take a picture of the parcels themselves!
Teresa, the smiley one who blogs over at Navybluethreads, sent her gifts in two separate packages which arrived a day apart – I only knew there was going to be another parcel when the first one arrived labelled ‘Part 2’!
Look at all this!
There were Christmas cards and a letter – Teresa, you should be a doctor with writing like that, beautiful but illegible!!! No.1 Son and I worked it out in the end though!
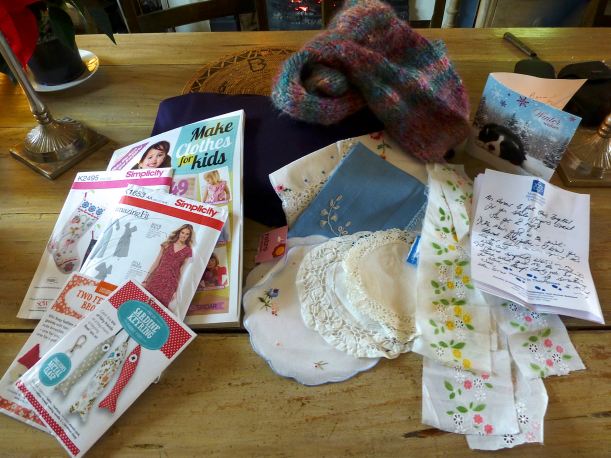
With the help of the newly-translated letter, this is what Teresa sent: –
Loads of amethyst-coloured knit fabric which WILL be made into the dress on the pattern that she included. She knows that I like strong colours and, being a lady of ample bosom herself, obviously knows that the wrap dress is perfect for that. I will make the long sleeved version and wear it with long boots during the Winter.
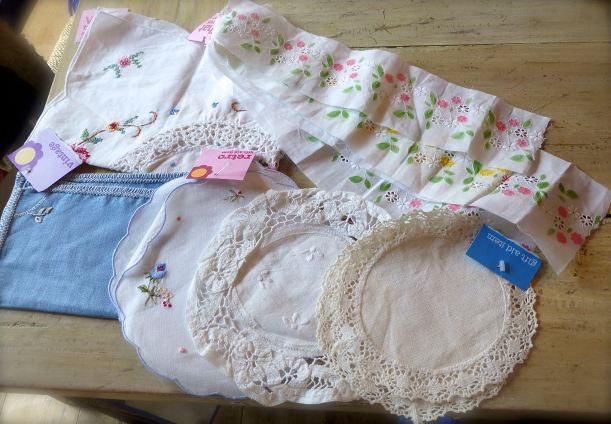
I simply cannot resist any pretty vintage lace, fabric or doilies that I come across in charity shops, so when I opened these I was beside myself with excitement! I believe most of these came from Teresa’s stash so I am doubly grateful – I wouldn’t be able to part with any of mine!
With my new sewing school, The Stitch Academy, in mind, she kindly sent me a publication that would be ideal for the children to use as their skills improve. The stocking pattern is brilliant, too, but I already have it so I hope she won’t mind if I pass it forward to somebody else to enjoy?
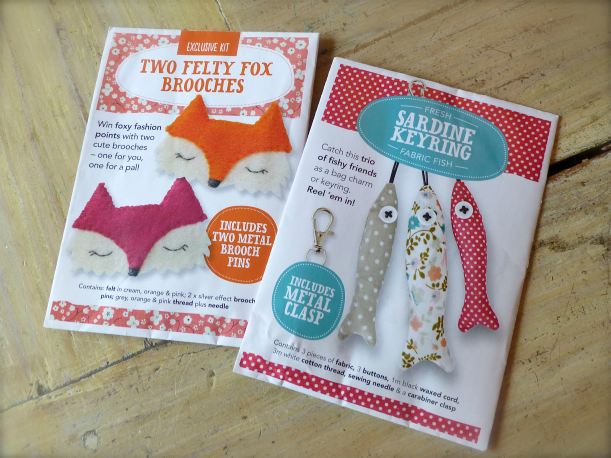
Teresa even thought of The Boys – they will absolutely LOVE making these fox brooches and fishy keyrings!!
So many generous and thoughtful gifts but my favourite from Teresa has to be this one – a beautifully soft infinity scarf, handknitted by the lovely lady herself, in a self-striping yarn of various jewel shades which looks exactly like it does in the photo. I just love it!
What more can I say, except a huge ‘Thank You’ to Joey and Teresa for all the fabulous gifts, and a massive pat on the back to all the #stitchingsantas that signed up for this swap and made it so successful and enjoyable.
I hope you all had as much fun as I did – judging by the blog posts I have seen so far, you did and I wasn’t the only one who was more excited about this present under my tree than any of the others!
Look out for the swap again next year when I get the feeling we’ll have an even longer list of participants than the thirty-five that took part this time.
Sunday Sevens is a weekly blog series where you show seven-ish photos of your week. Visit Nat at Threads & Bobbins to find out how YOU can join in.
We took The Boys to a local farm to choose our Christmas Tree. Don’t you just love the farmer’s hat with tractors on it?
2. The tree stood in the corner of the dining room for a couple of days before we had time to do anything with it ( I was sewing). In the end the men put it up in the corner of the lounge.
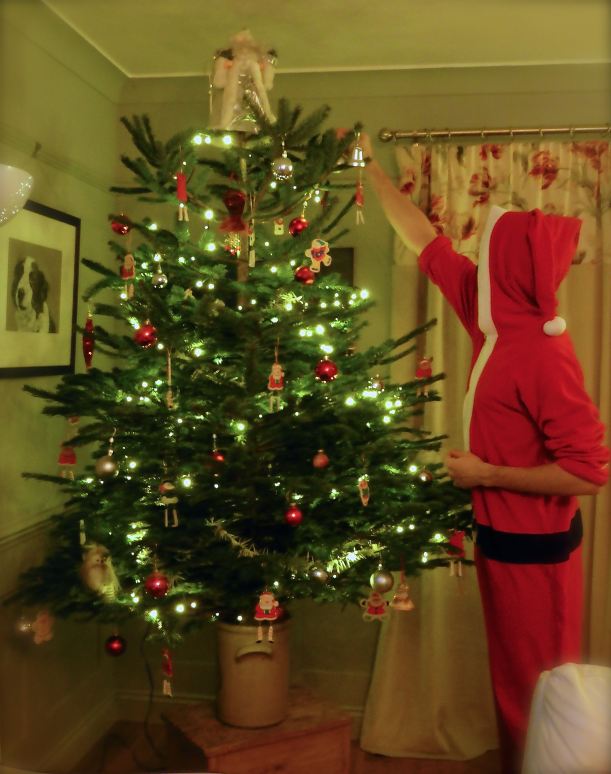
3. Another day passed before No.1 Son realised it wasn’t going to decorate itself so got into his Santa Onesie and did it by himself (whilst I carried on sewing…..)
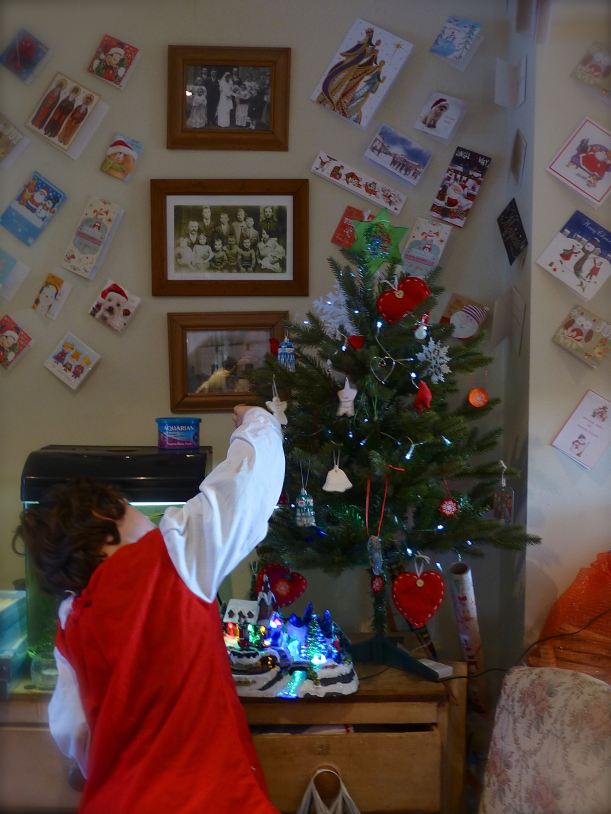
4. No.3 Son decorated the little ‘fake’ tree that we put up in the kitchen room each year whilst dressed up in a Prince’s outfit, as you do.
Meanwhile, I did some sewing.
5. Remember those Angel costumes I made last week for The Boy’s Nativity? We went to said production on Tuesday. What you can see in the photo is the ENTIRE school which amounts to 100 kids aged 4-11.
6. One of the activities in the advent calendar was to get into PJs and drive around looking at the Christmas lights.
7. The Boys took flasks of hot chocolate and I took a glass of Bailey’s:)
8. On Wednesday I started my ball gown for Mr H-L’s annual company ‘do’.
The ‘do’ was two days later.
There were 78 pattern pieces.
It took me over three hours just to cut it out…..
9. My Thursday class finished their skirts in time for Christmas and were VERY pleased with themselves!
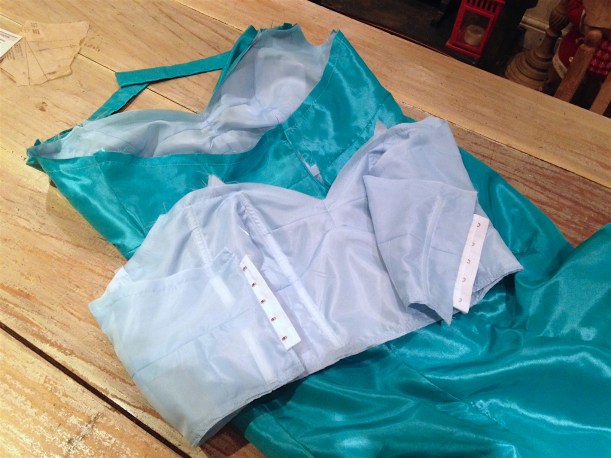
10. I was also very pleased with MYSELF as I finished the dress with an hour to spare on Friday morning. Here it is all lined and ready for the corset to be sewn in.
11. Hubby and I drove the two and a half hours to Stanhill Court Hotel where the company puts us all up overnight and where the party is held.
12. Here’s a sneak peek of my dress laid out ready on the bed.
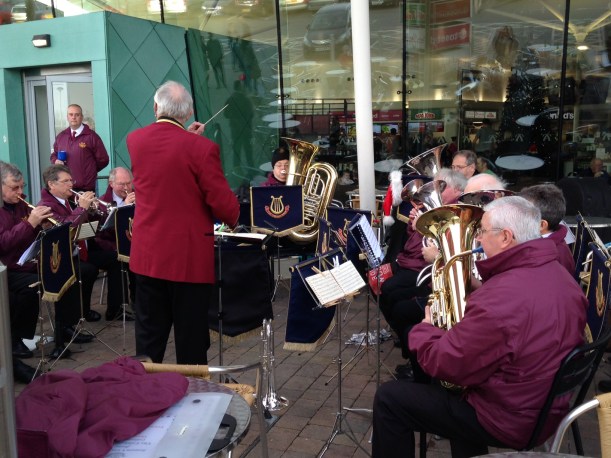
13. We stopped at the services on the way home to rehydrate after the previous night’s excesses. A brass band was playing Christmas carols for charity so we sat outside and enjoyed the music for a while.
14. This morning I’m getting on with the last of my #stitchingsanta gifts which involves glue and……
I have just found out (an hour ago) that somebody who signed up for the #stitchingsanta never received the email from me regarding a swap partner.
If you see your name on the list below, YOU HAVE A PARTNER!
All emails were sent on 4th November and contain full details of the recipient. Please check your junk/spam folders or I can resend the original email.
Please, please get in touch if you haven’t sorted a parcel out for anyone, or there will be some very disappointed people out there – I will help as much as I can.
In fact, could you all please leave a comment at the bottom so that I know who has definitely sent, or is sending, their parcel(s)?
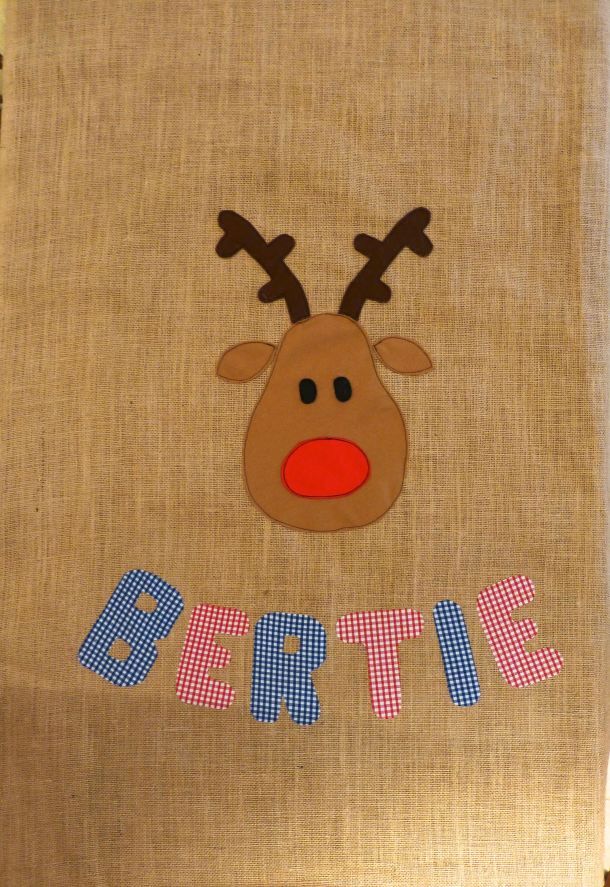
In case you hadn’t noticed, Christmas is just around the corner – nine days, to be precise and I’ve got a great last-minute make for you; a personalised Christmas sack for that special little person in your life.
I’m not joking when I say last-minute as I made TWO personalised sacks yesterday afternoon, each one taking about two and a half hours from start to finish. They’d make great gifts, too, with a little something popped inside and they only cost £12.94 each to make so won’t break the bank.
Trim your gingham fabric to the same size as the hessian – 39″ x 56″.
Put the offcuts to one side as you will use these for the tie and the fabric letters.
Draw a reindeer on a sheet of paper and cut out the individual elements separately.
Cut these out of the felt squares using the picture below as a guide.
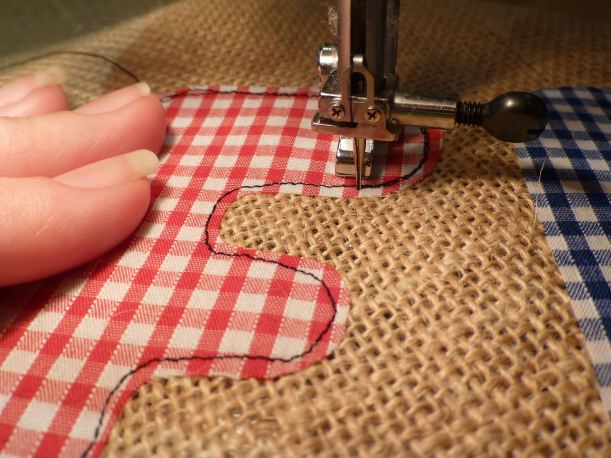
Stitch the nose and eyes onto the felt face – I used free machine embroidery throughout to achieve a ‘scribble’ effect which works well on children’s gifts.
Fold your hessian in half and arrange the felt pieces in the centre as shown.
Hessian has an open weave which tends to move quite a lot, so either tack your appliqués on first or use LOTS of pins to keep them in place while you sew them on.
I loathe tacking so I opted for pin overkill instead.
With the reindeer face stitched securely in place, it’s time to move on to personalising your sack.
You can download a suitable font or just freehand it like I did onto thin card. As I was making two sacks I had both blue and red gingham offcuts to cut the letters from. I also decided to use some paper backed fusible web to secure the letters to the hessian before stitching them.
Arrange the letters evenly in a curve around the bottom of the reindeer, remove the paper backing and iron in place.
Two rounds of stitching on each letter gives a good effect.
When all your stitching is done, sew the top edge of the sack to the top edge of the lining with right sides together (sorry, no photo). Press the seam flat to create a crisp edge.
Then, lay your fabric out on a large table or on the floor and fold in half lengthwise, right sides together to create a ‘tube’.
Pin all the way around, leaving a gap in the lining where shown through which to turn. (I forgot to photograph this step on the first sack so the lining is shown in red).
Put pins at 8″ from the top edge and 9″ from the top edge – this will be a break in the stitching to provide a channel for the tie.
Sew all the way around the three sides with breaks in the stitching as described above.
Trim the corners and turn the sack through to the right side. Sew the lining closed at the gap through which it was turned. Press.
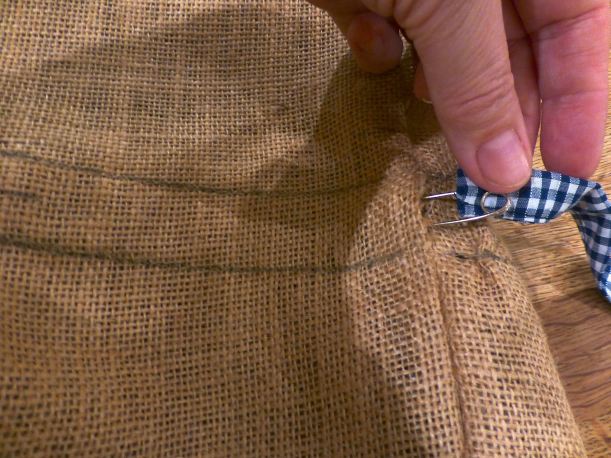
With a soft pencil or tailor’s chalk, mark two parallel lines all the way around at 8″ and 9″ from the top edge of the sack. Pin through both layers of fabric. Stitch along the lines.
For the tie, use your remaining offcuts of gingham to assemble a length that measures about 70″ x 2″.
Fold in and press 1/4″ at each short end.
Fold in and press 1/4″ along each long edge.
Bring the folded long edges together enclosing the raw edges.
Stitch close to the edge to finish your tie.
Use a safety pin to thread the tie through the channel in the gap left for this purpose.
And that’s it – finished!
A beautiful sack which any child would be delighted to have on Christmas Day to pop all their opened presents into.
They’re huge, too, I would have added The Boys to the photo for scale except that the sacks are a surprise for them.
You’ve still got time, so who fancies whipping up a Christmas Sack for their little boy or girl?
I’ve been making steady progress with the handmade items that I’m including in the parcel to my #stitchingsanta recipient and it’s about time I showed you.
I’m taking part in the knitting/crochet swap as well and have already given you a glimpse of the things I’ve made for that – you can have a look here.
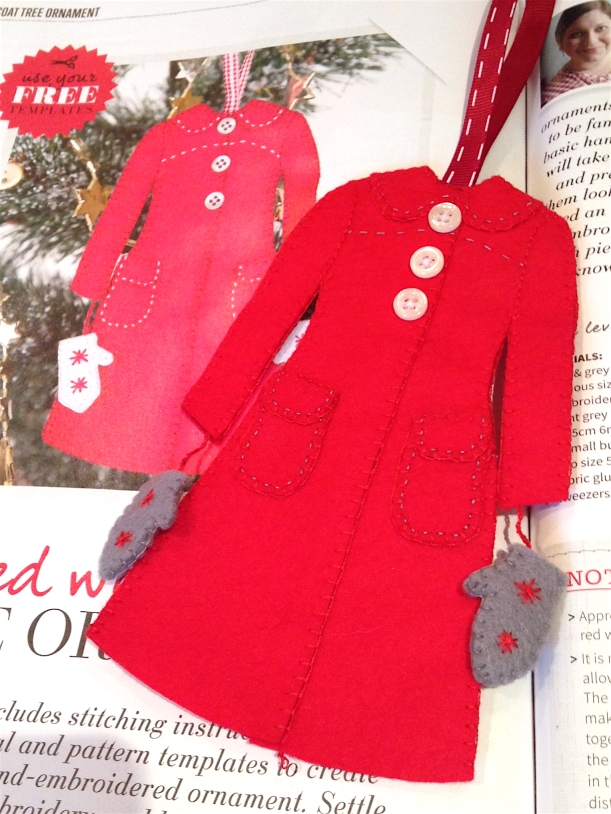
As soon as the latest issue of Love Sewing dropped through the letterbox, I knew I was going to make this cute tree decoration, so that’s going into the parcel – although I’m going to have to make another one for our tree ‘cos I’ve rather fallen in love with it myself:)
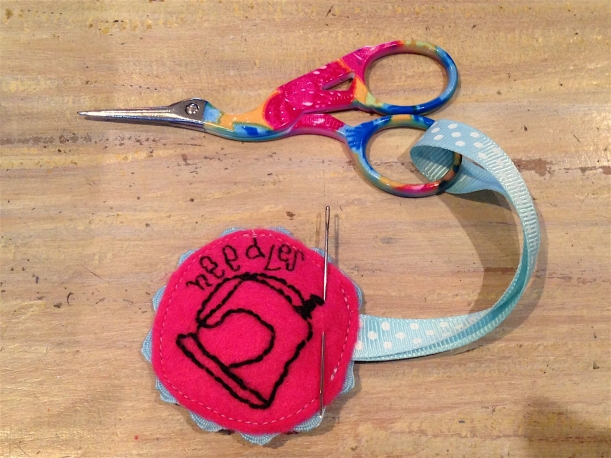
Having bought these colourful stork embroidery scissors, I added a needle-keeper to one of its handles.
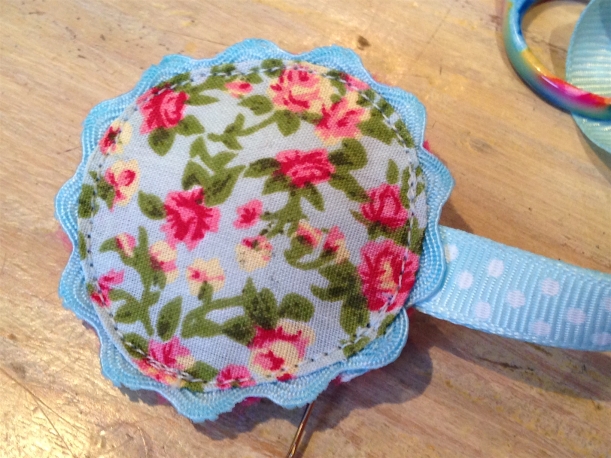
I embroidered an image of a sewing machine on one side together with the word ‘needles’. The other side is kept plain with a tiny floral print cotton.
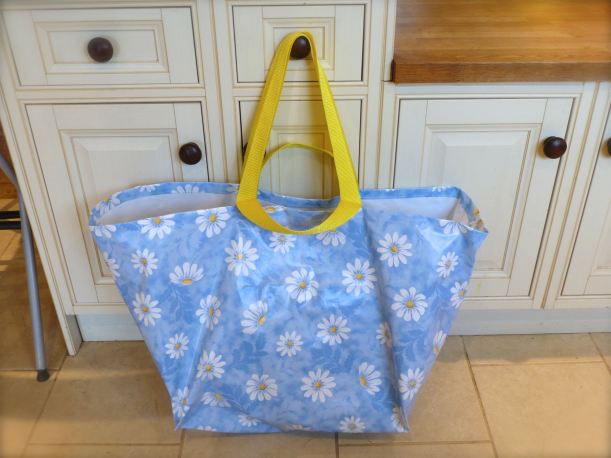
Not a very Christmassy make, I know, but this daisy print ‘Ikea’ bag can be used all year round. I wrote a tutorial on this which you can find here.
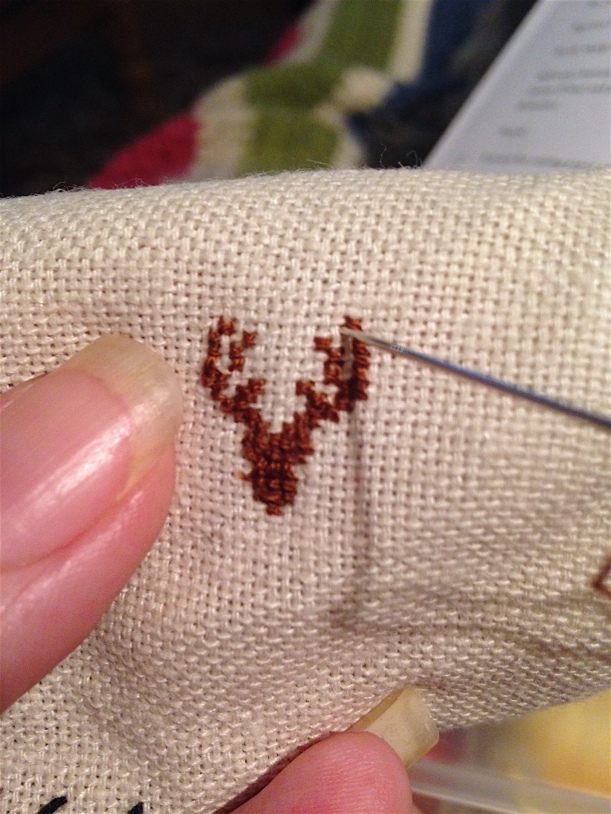
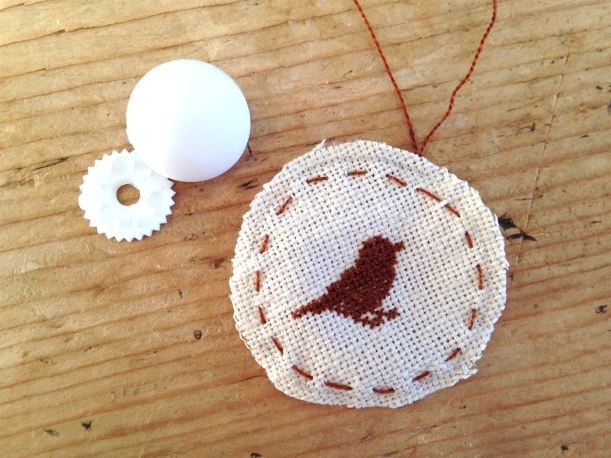
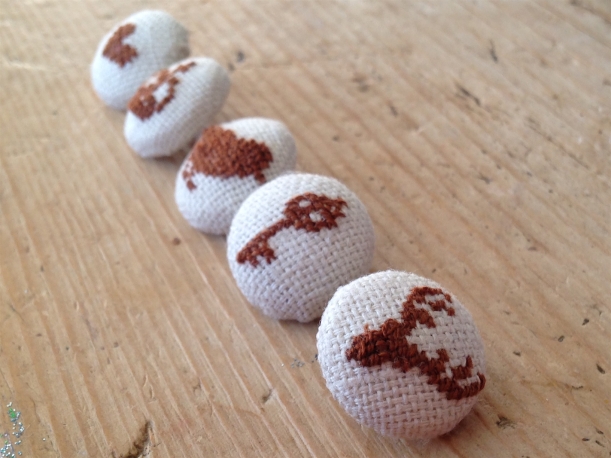
I had a few hours fun covering some buttons with tiny cross stitched motifs. My eyes could barely see to sew such minute stitches!
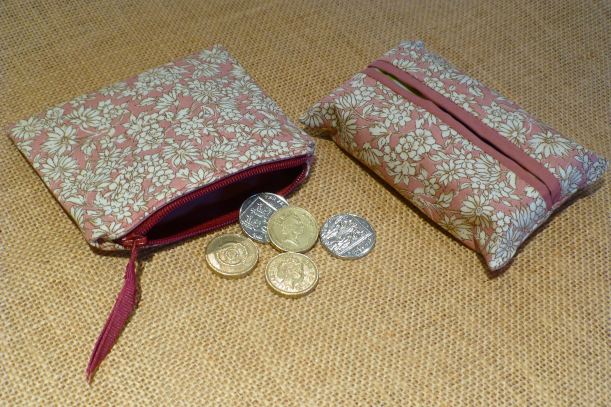
I had a small amount of leftover Rose & Hubble fabric in my stash which was just enough to make a coin purse and matching tissue holder, both handbag size.
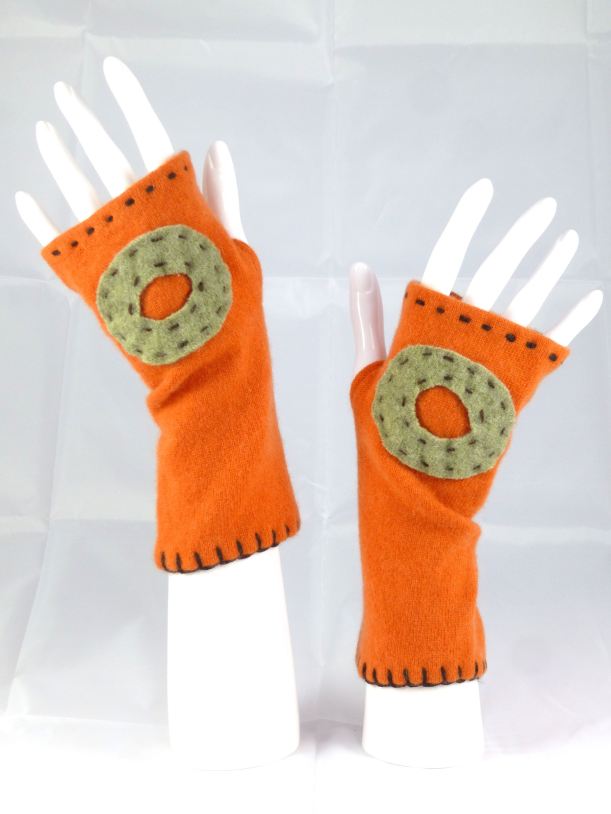
These bright orange gloves are made from the softest cashmere sweater and, although I’ve never seen her wear orange, I think they suit her bubbly personality.
I snapped up this unused Simplicity pattern from a charity shop for just a pound – I can see her looking good in all of these!
There are a few other bought bits and pieces to go in and the main handmade gift – if I can finish it in time!
Just a reminder that the deadline for joining in with the Stitching Santa is midnight tomorrow (GMT), 31st October – if you haven’t yet signed up – DO IT NOW!
Feel free to share on your own blog – here’s the link: – #stitchingsanta
Previously Boys and Chickens, I have created a new blog to share my sewing adventure as 2018 is they year I plan to teach myself to sew! There will also be bits of crochet and cooking too.
My challenge: One year - I will not buy clothes - I will upcycle to make what I need - everything from underwear to evening wear! Join me for tips, exclusive BrawHem makes, and inevitably some hilarious disasters...


 For each sack you will need: