Everyone has a mobile (cell) phone nowadays and cases get tatty pretty quickly what with all that in-out wear and tear, so here’s a quick guide to making a new one.
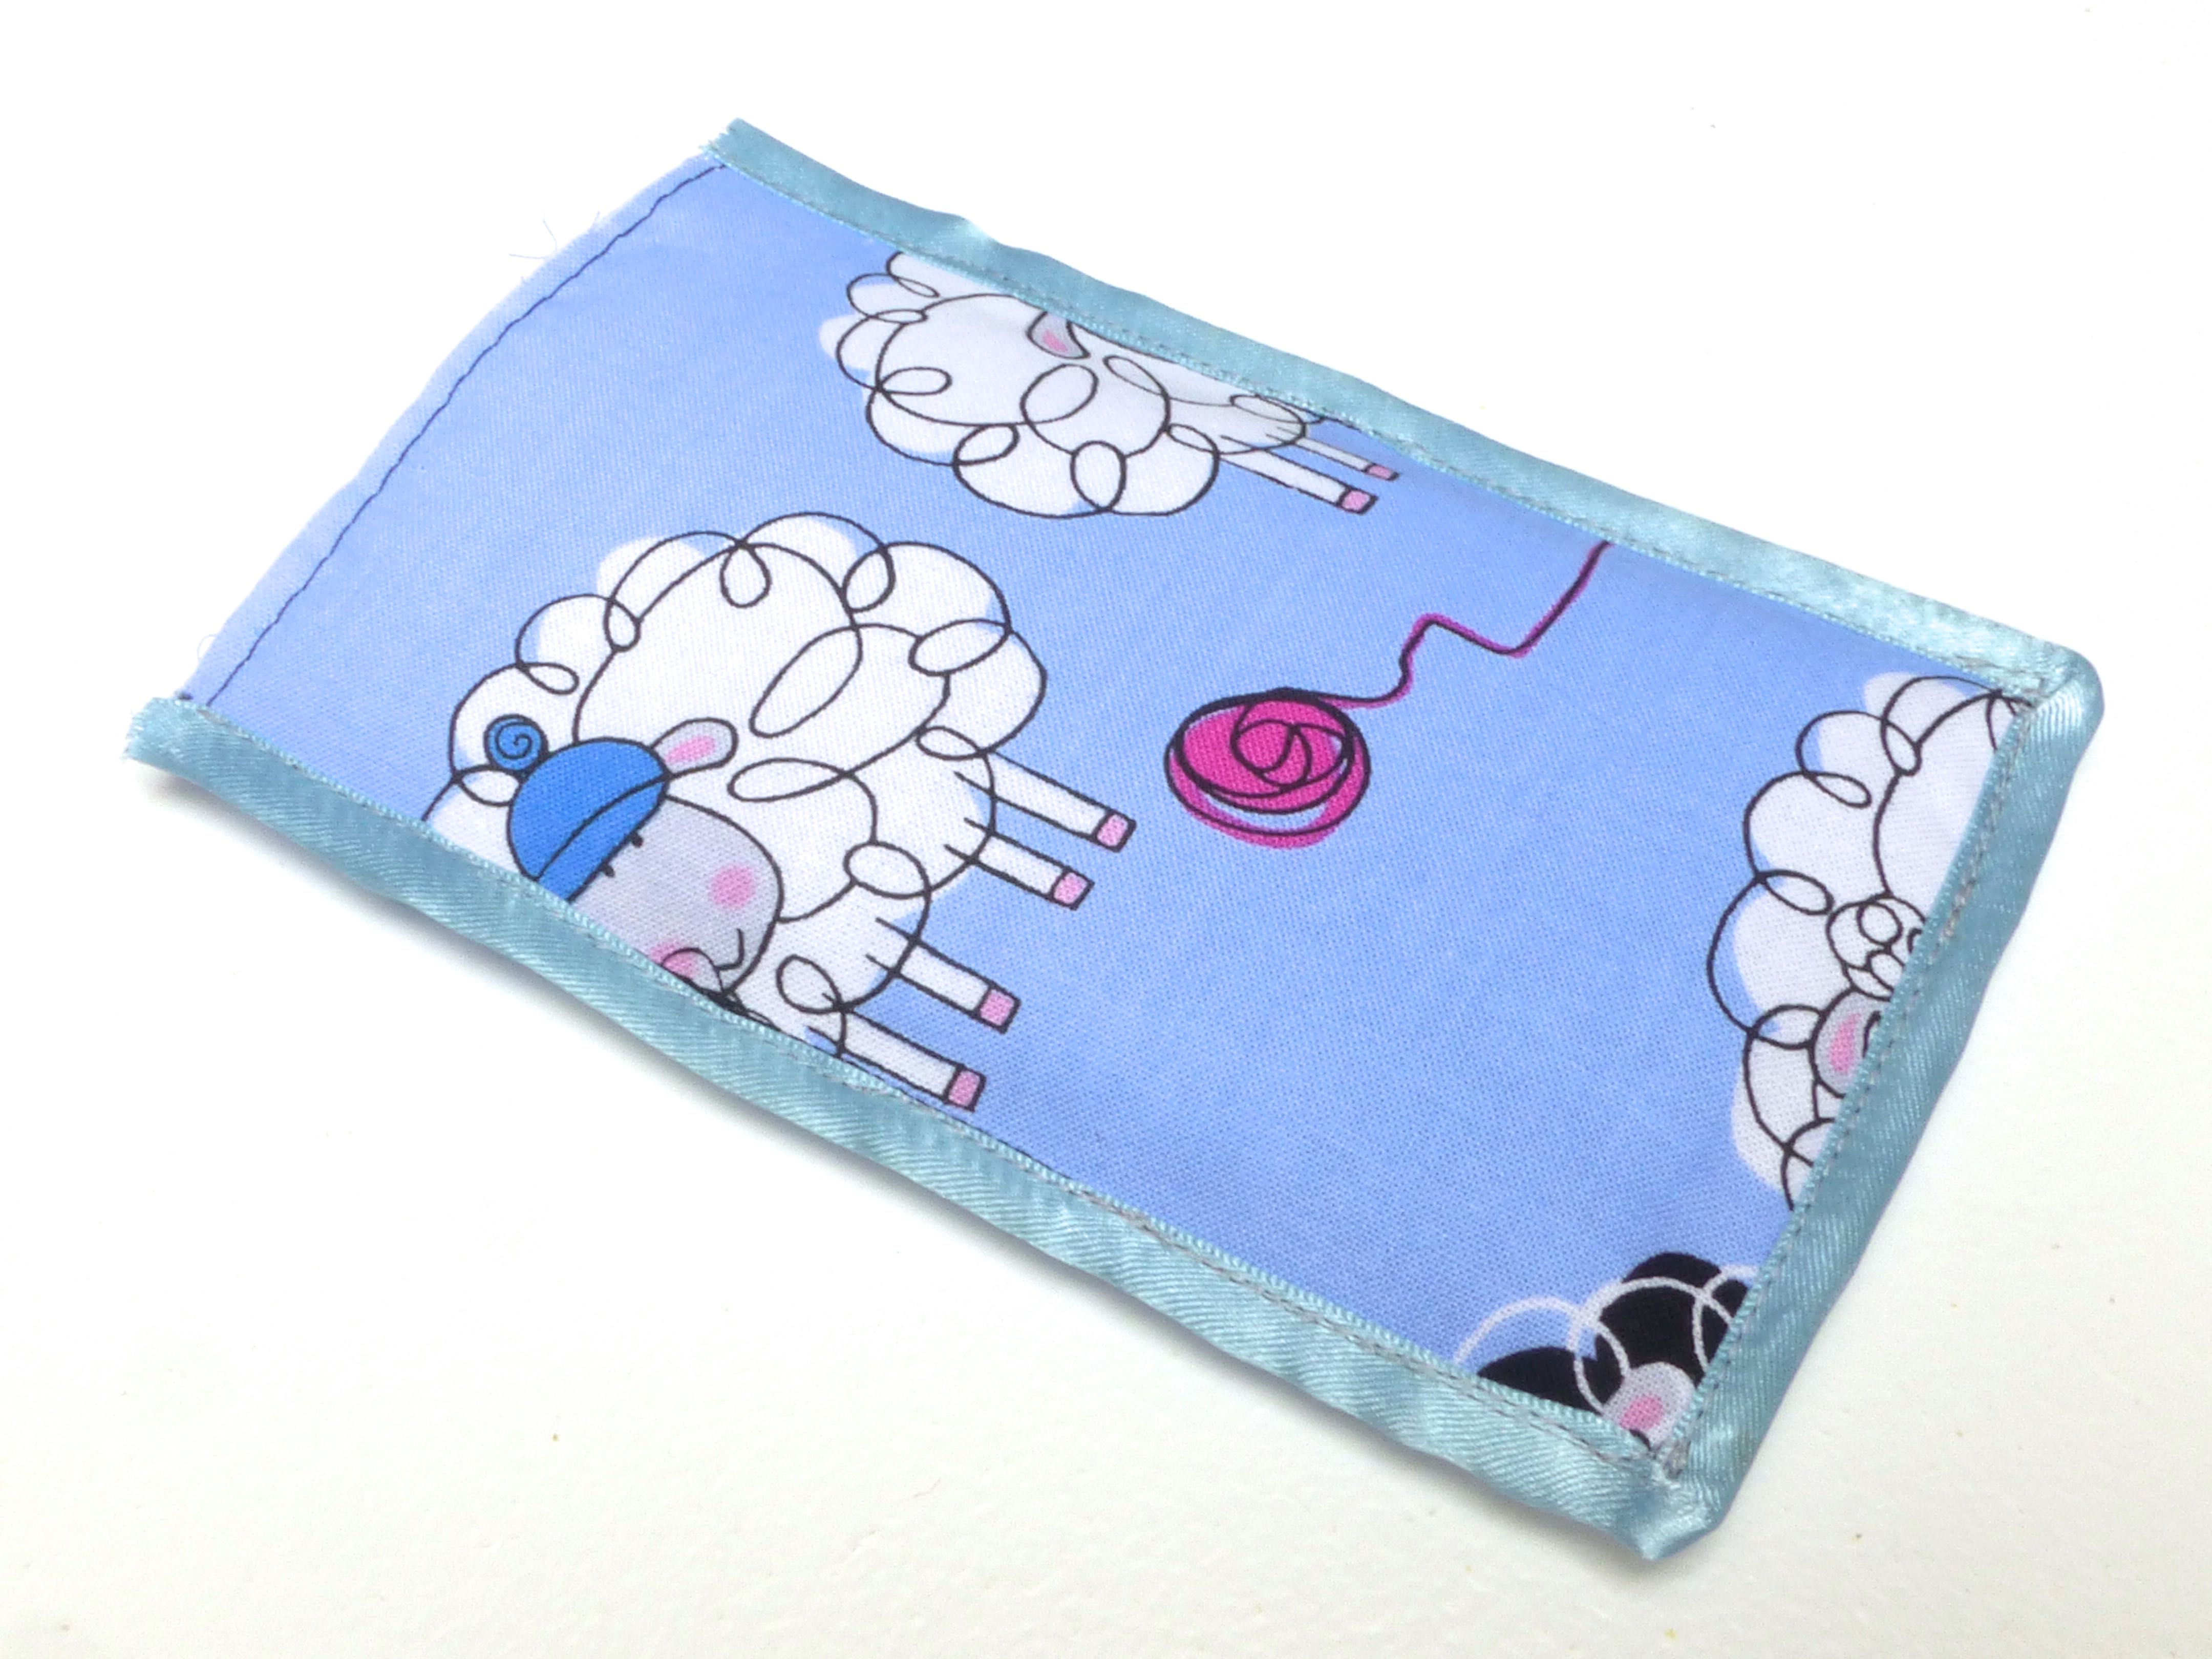
They use so little fabric and are quick to make that they would make a great present, especially if you personalise it like I have done, with a name and motif.
Here’s how: –
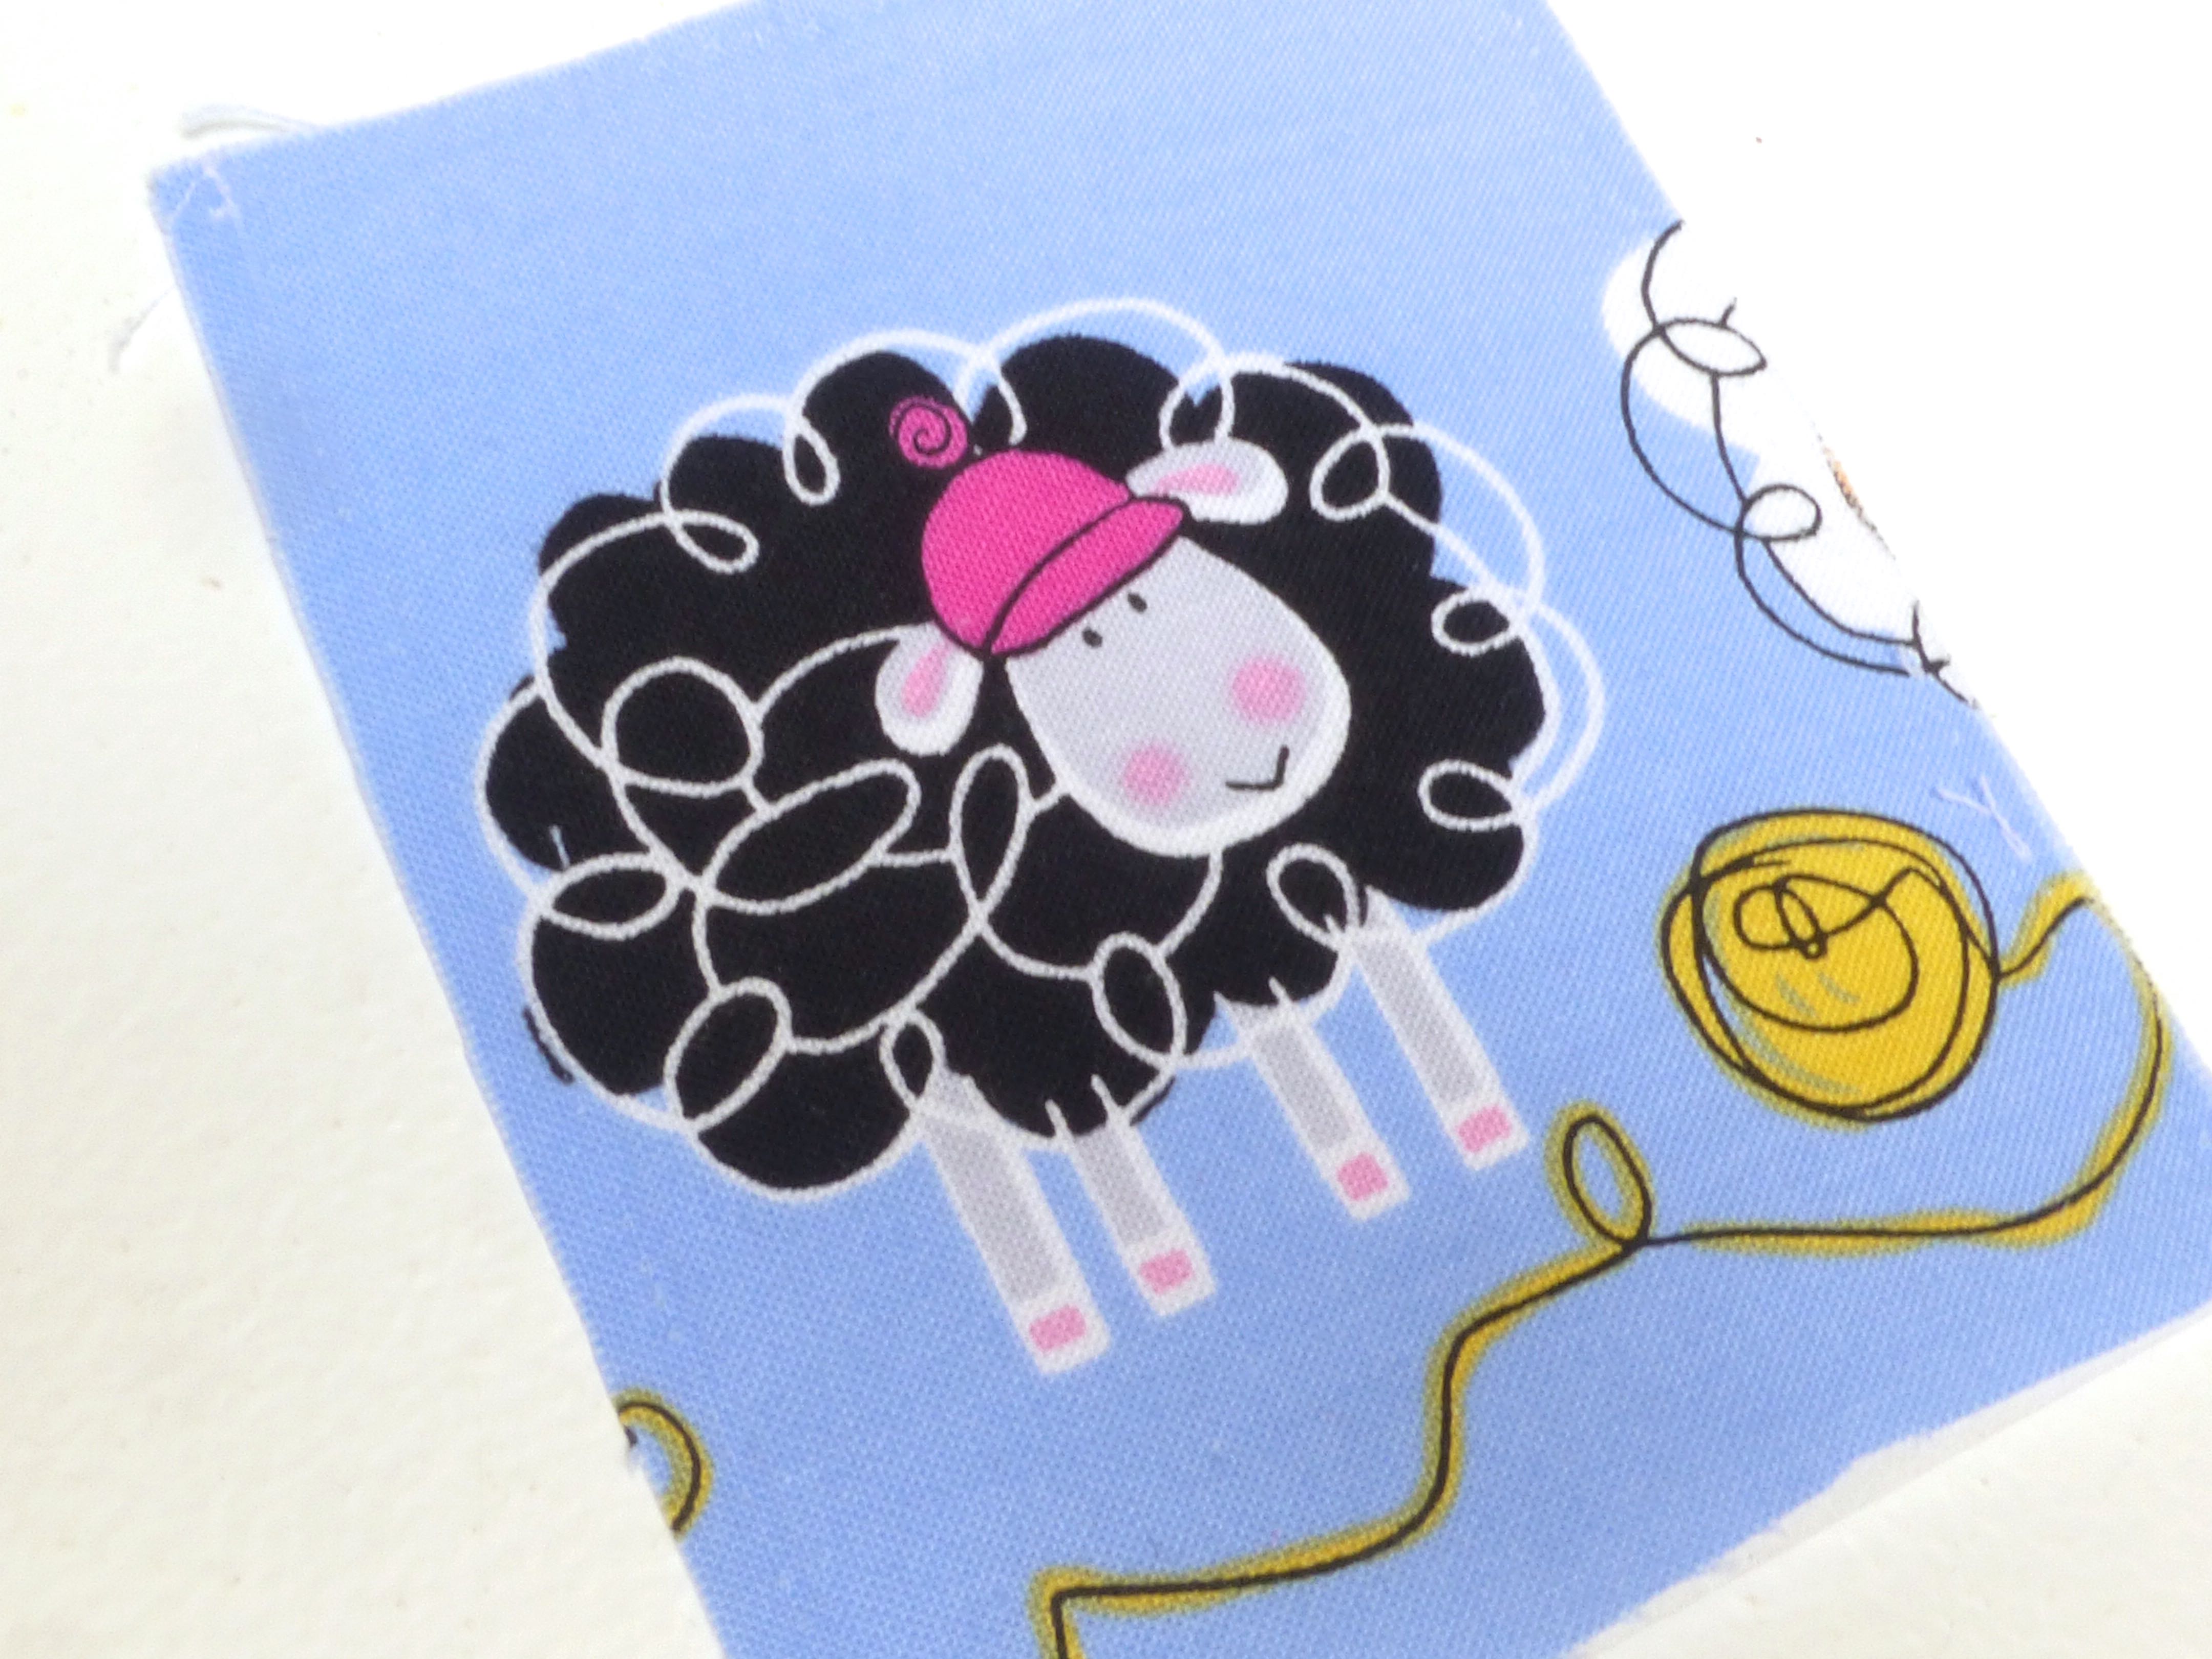
Cut out your motif leaving a little fabric around all sides.
Iron a small pieces of interfacing to the reverse of the motif.
Pin the motif onto the fabric you are going to make the case out of.
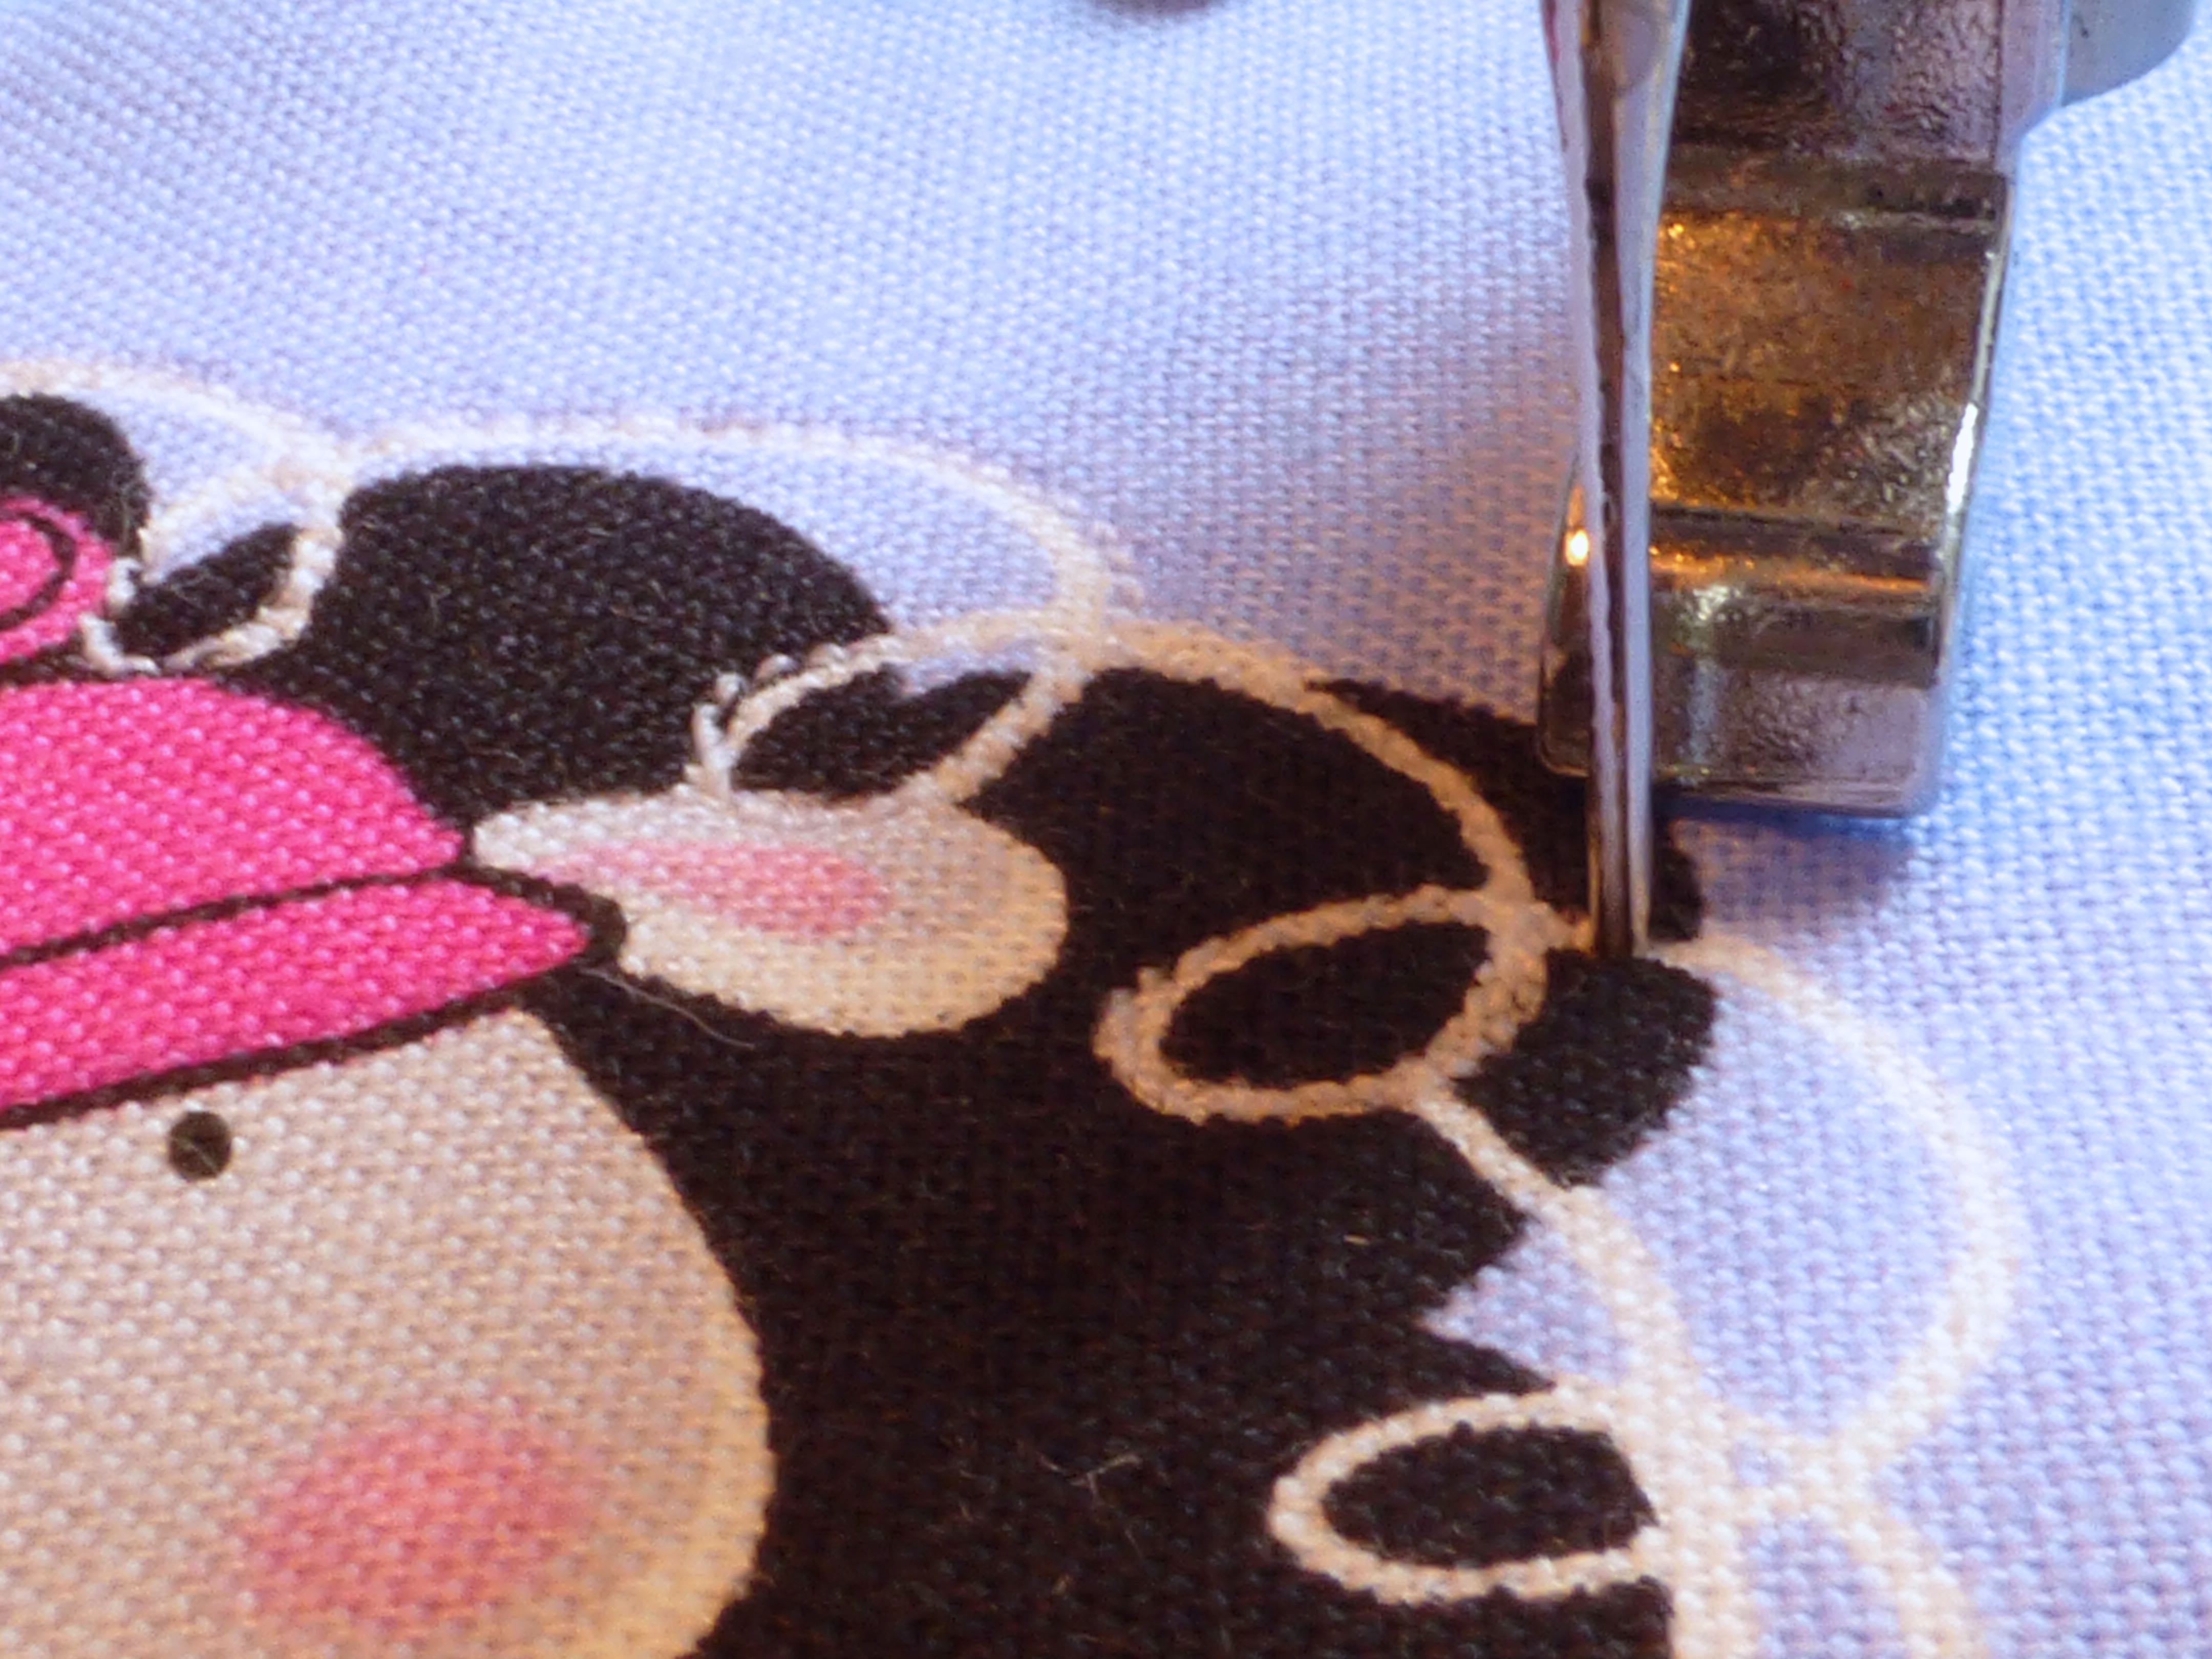
Drop the feed dogs, remove the presser foot and free-machine embroider the motif to the base fabric. In this instance, I just followed the curly white lines with white thread.
(You can use Bondaweb or similar to fuse the motif to the base fabric if you would prefer the no-sew option.)
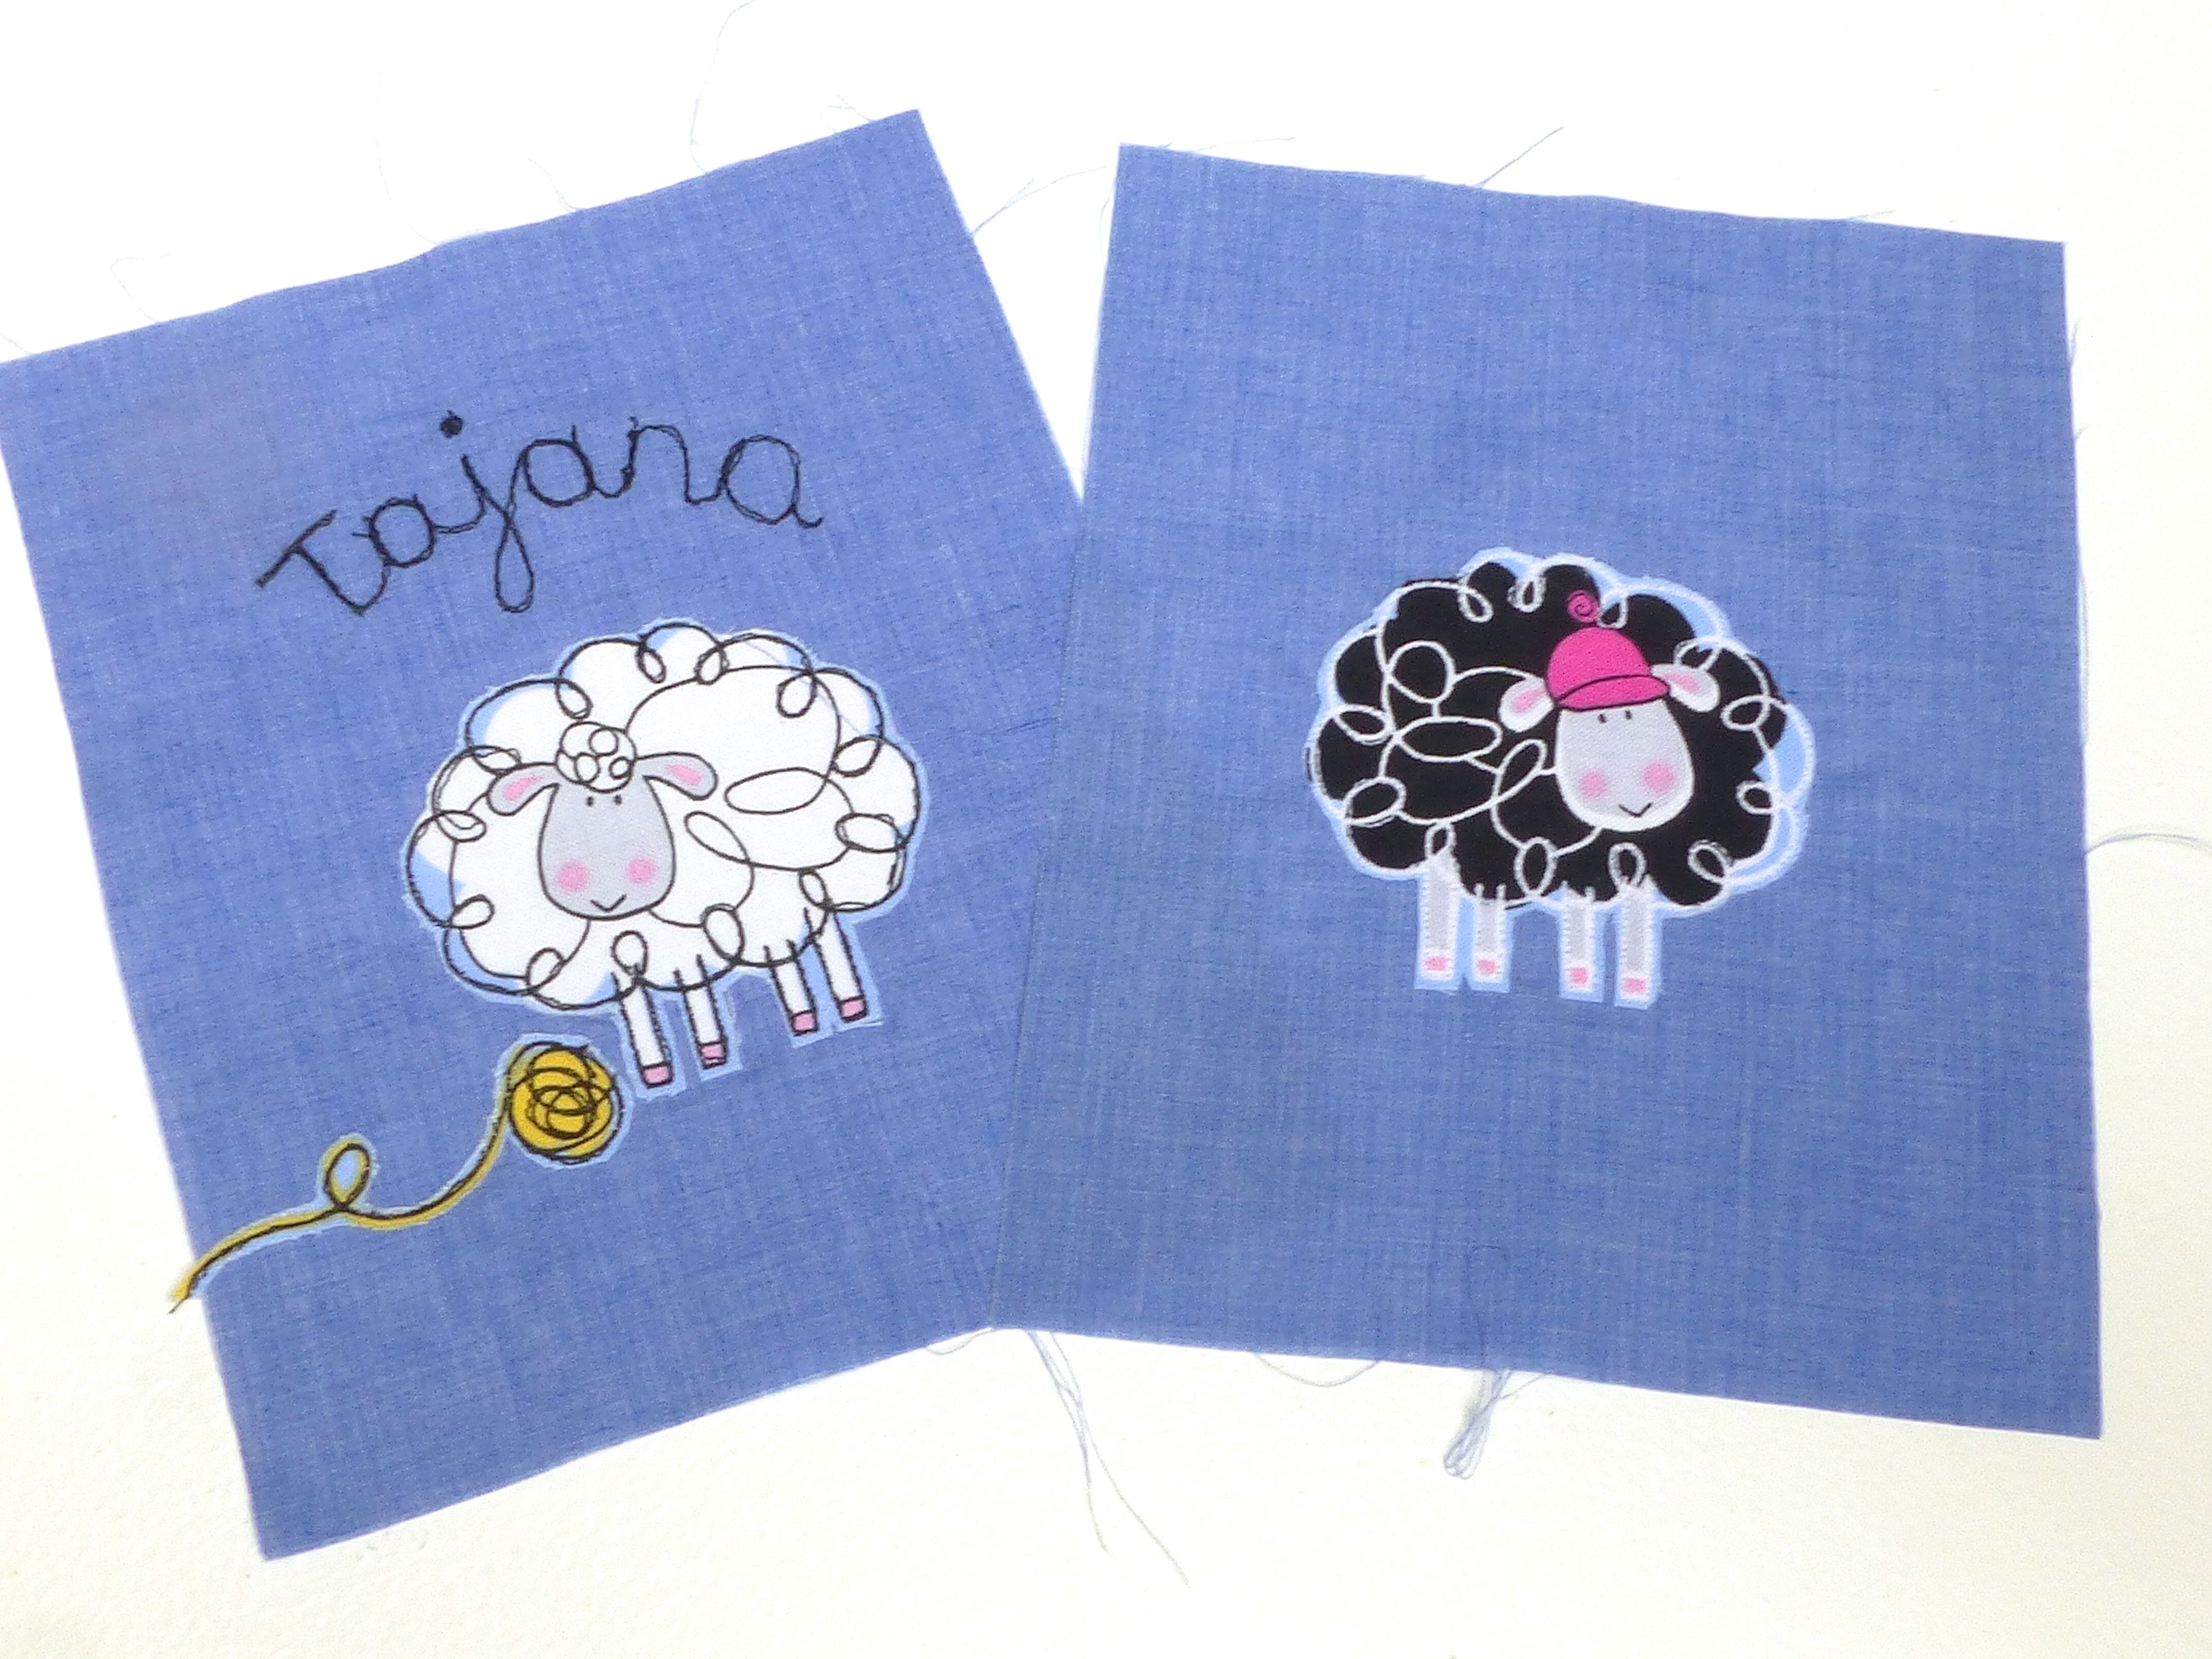
Trim away the excess fabric from the motif, cutting close to the stitching.
Repeat the process for the back and add any other details at this point too – I also embroidered the name of the recipient using the machine.
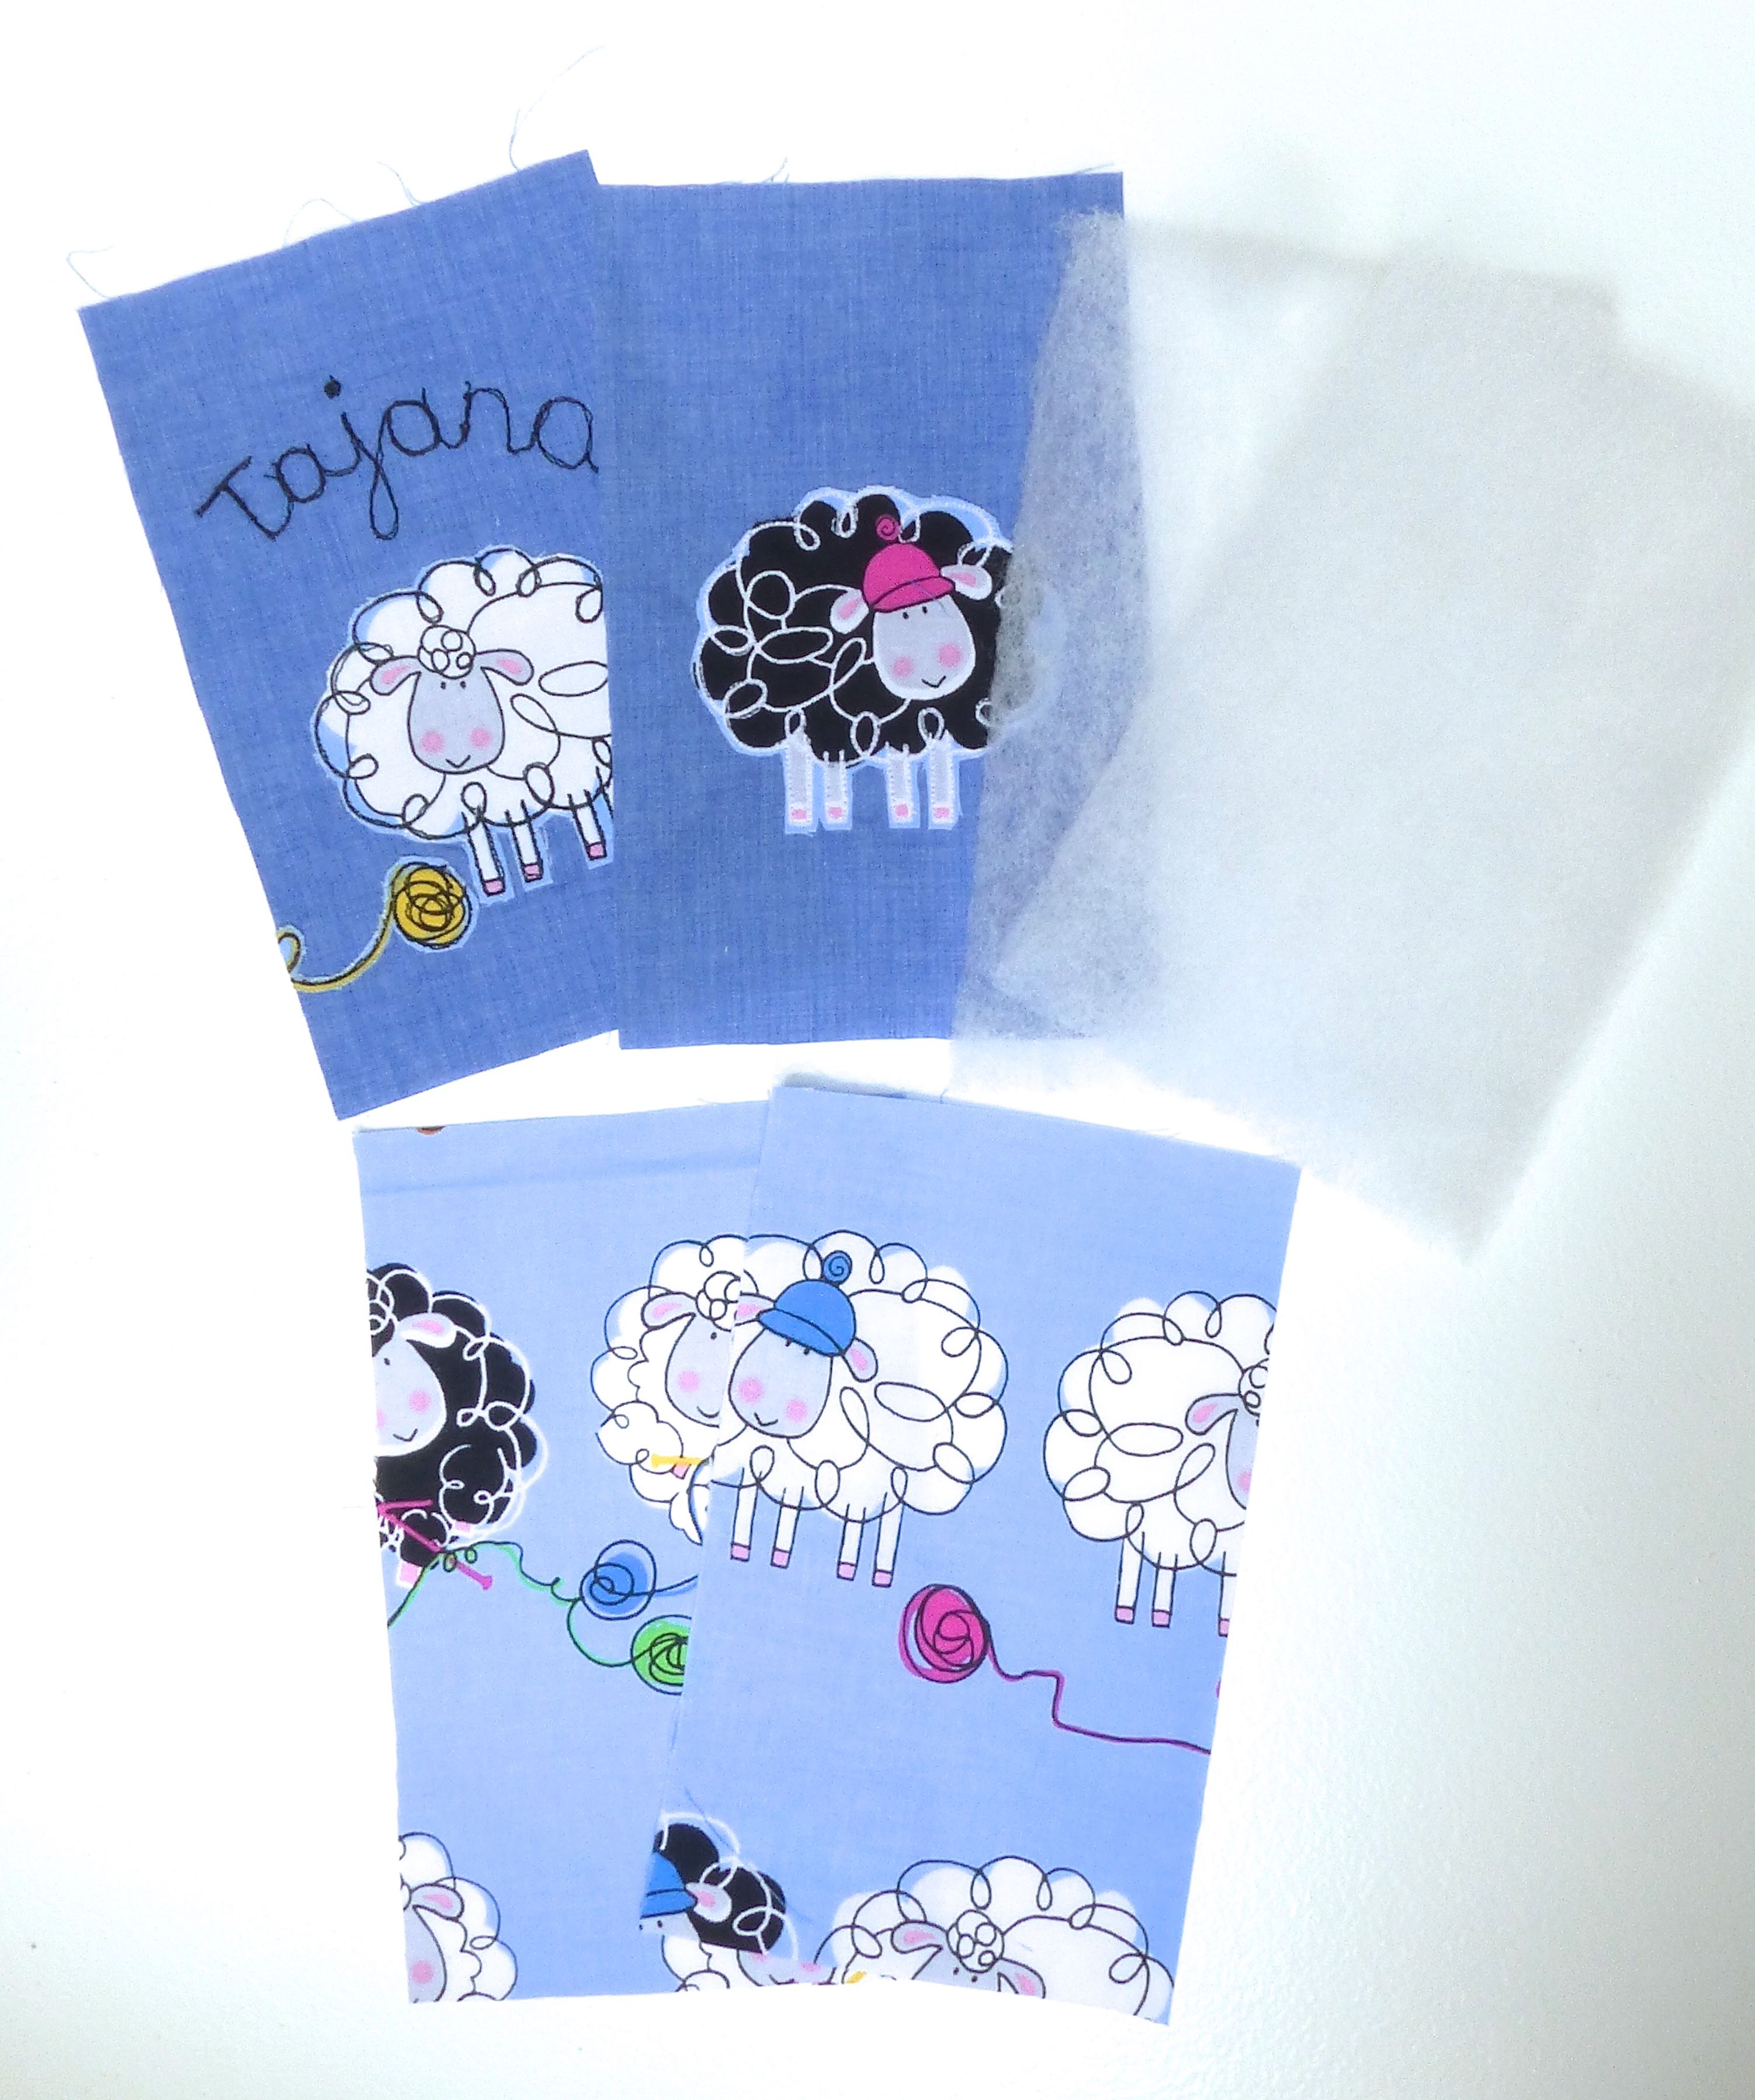
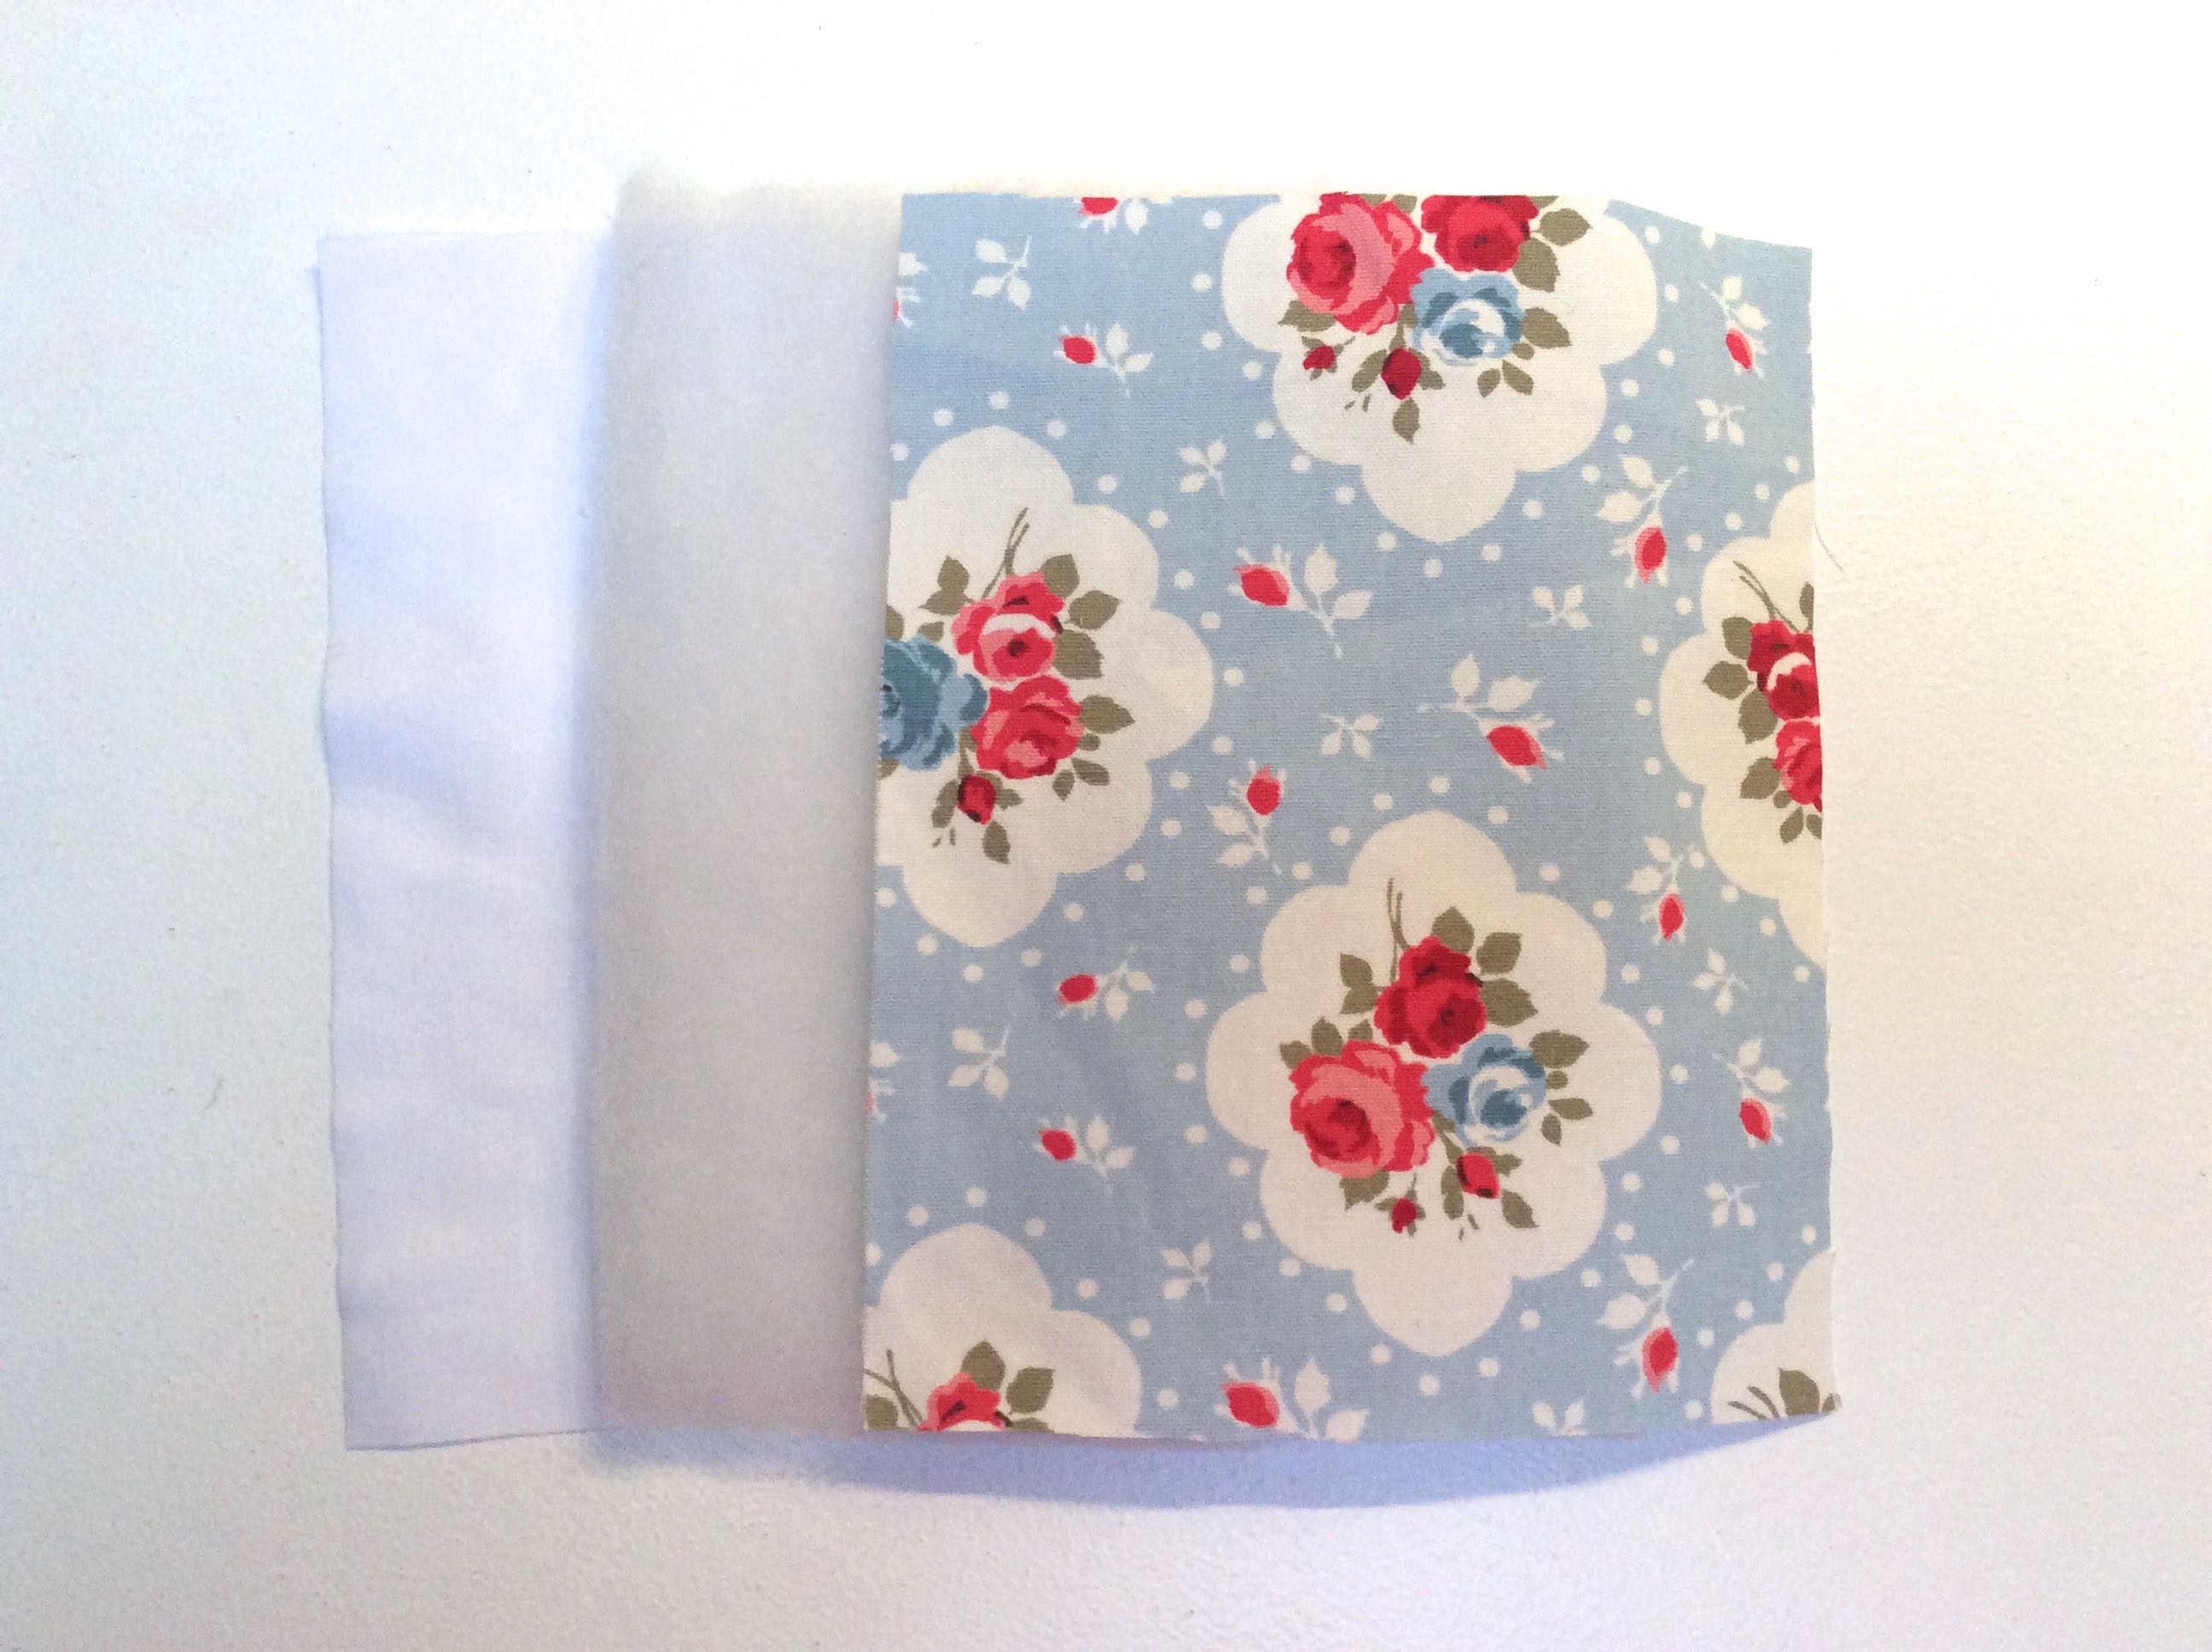
Measure your ‘phone and add a seam allowance, then cut your appliquéd sections, lining and wadding to the same size.
Sandwich a layer of wadding between the lining and main fabric and pin together. Baste through all three layers.
With lining pieces facing out and motifs facing in, pin front to back.
Stitch around the sides and bottom, leaving the top open.
Trim the seams and finish neatly by enclosing in a thin ribbon.
Turn out the right way.
A strip of bias binding is then stitched all the way around the top opening edge to enclose the raw edges.
This will be winging its way to Italy in a few weeks when I have finished the matching yarn bag.
The wooly sheep motif is ideal for a yarn addict like Tajana, but you could easily adapt your design to suit other hobbies or passions.
Maybe a fish motif for a keen fisherman, or a cat/dog for an animal lover?
What would you choose to put on the front if you were making a phone case as a gift?
In my last Sunday Sevens post I mentioned that I treated myself to a little something from the Apple store in Exeter.
It was an iPad mini, which I’ve wanted for a while now, ever since I injured my neck and had to close my photographic business in November (years of carrying heavy equipment around my neck).
Since I no longer have to sit in my office and turn my huge iMac on every day, I thought it would be nice to have something more portable so that I could blog or browse the web from the lounge/garden/kitchen – anywhere but shut away on my own in the office.
Although I also bought a separate Logitech keyboard which affords a little protection to the iPad, I couldn’t wait to pop into my sewing room and whip up a quick and easy sleeve.
The same method could be applied when making a sleeve for any tablet, mobile ‘phone or kindle.
Here’s what I did: –
Measure the device, add a seam allowance to all sides and cut out the following pieces.
1 front
1 back
2 lining
2 wadding
I used scraps and had to have different fabrics for the front and back.
Start by sandwiching a piece of wadding between the front and a lining piece. Pin all layers together and baste all the way around.
Repeat with the back.
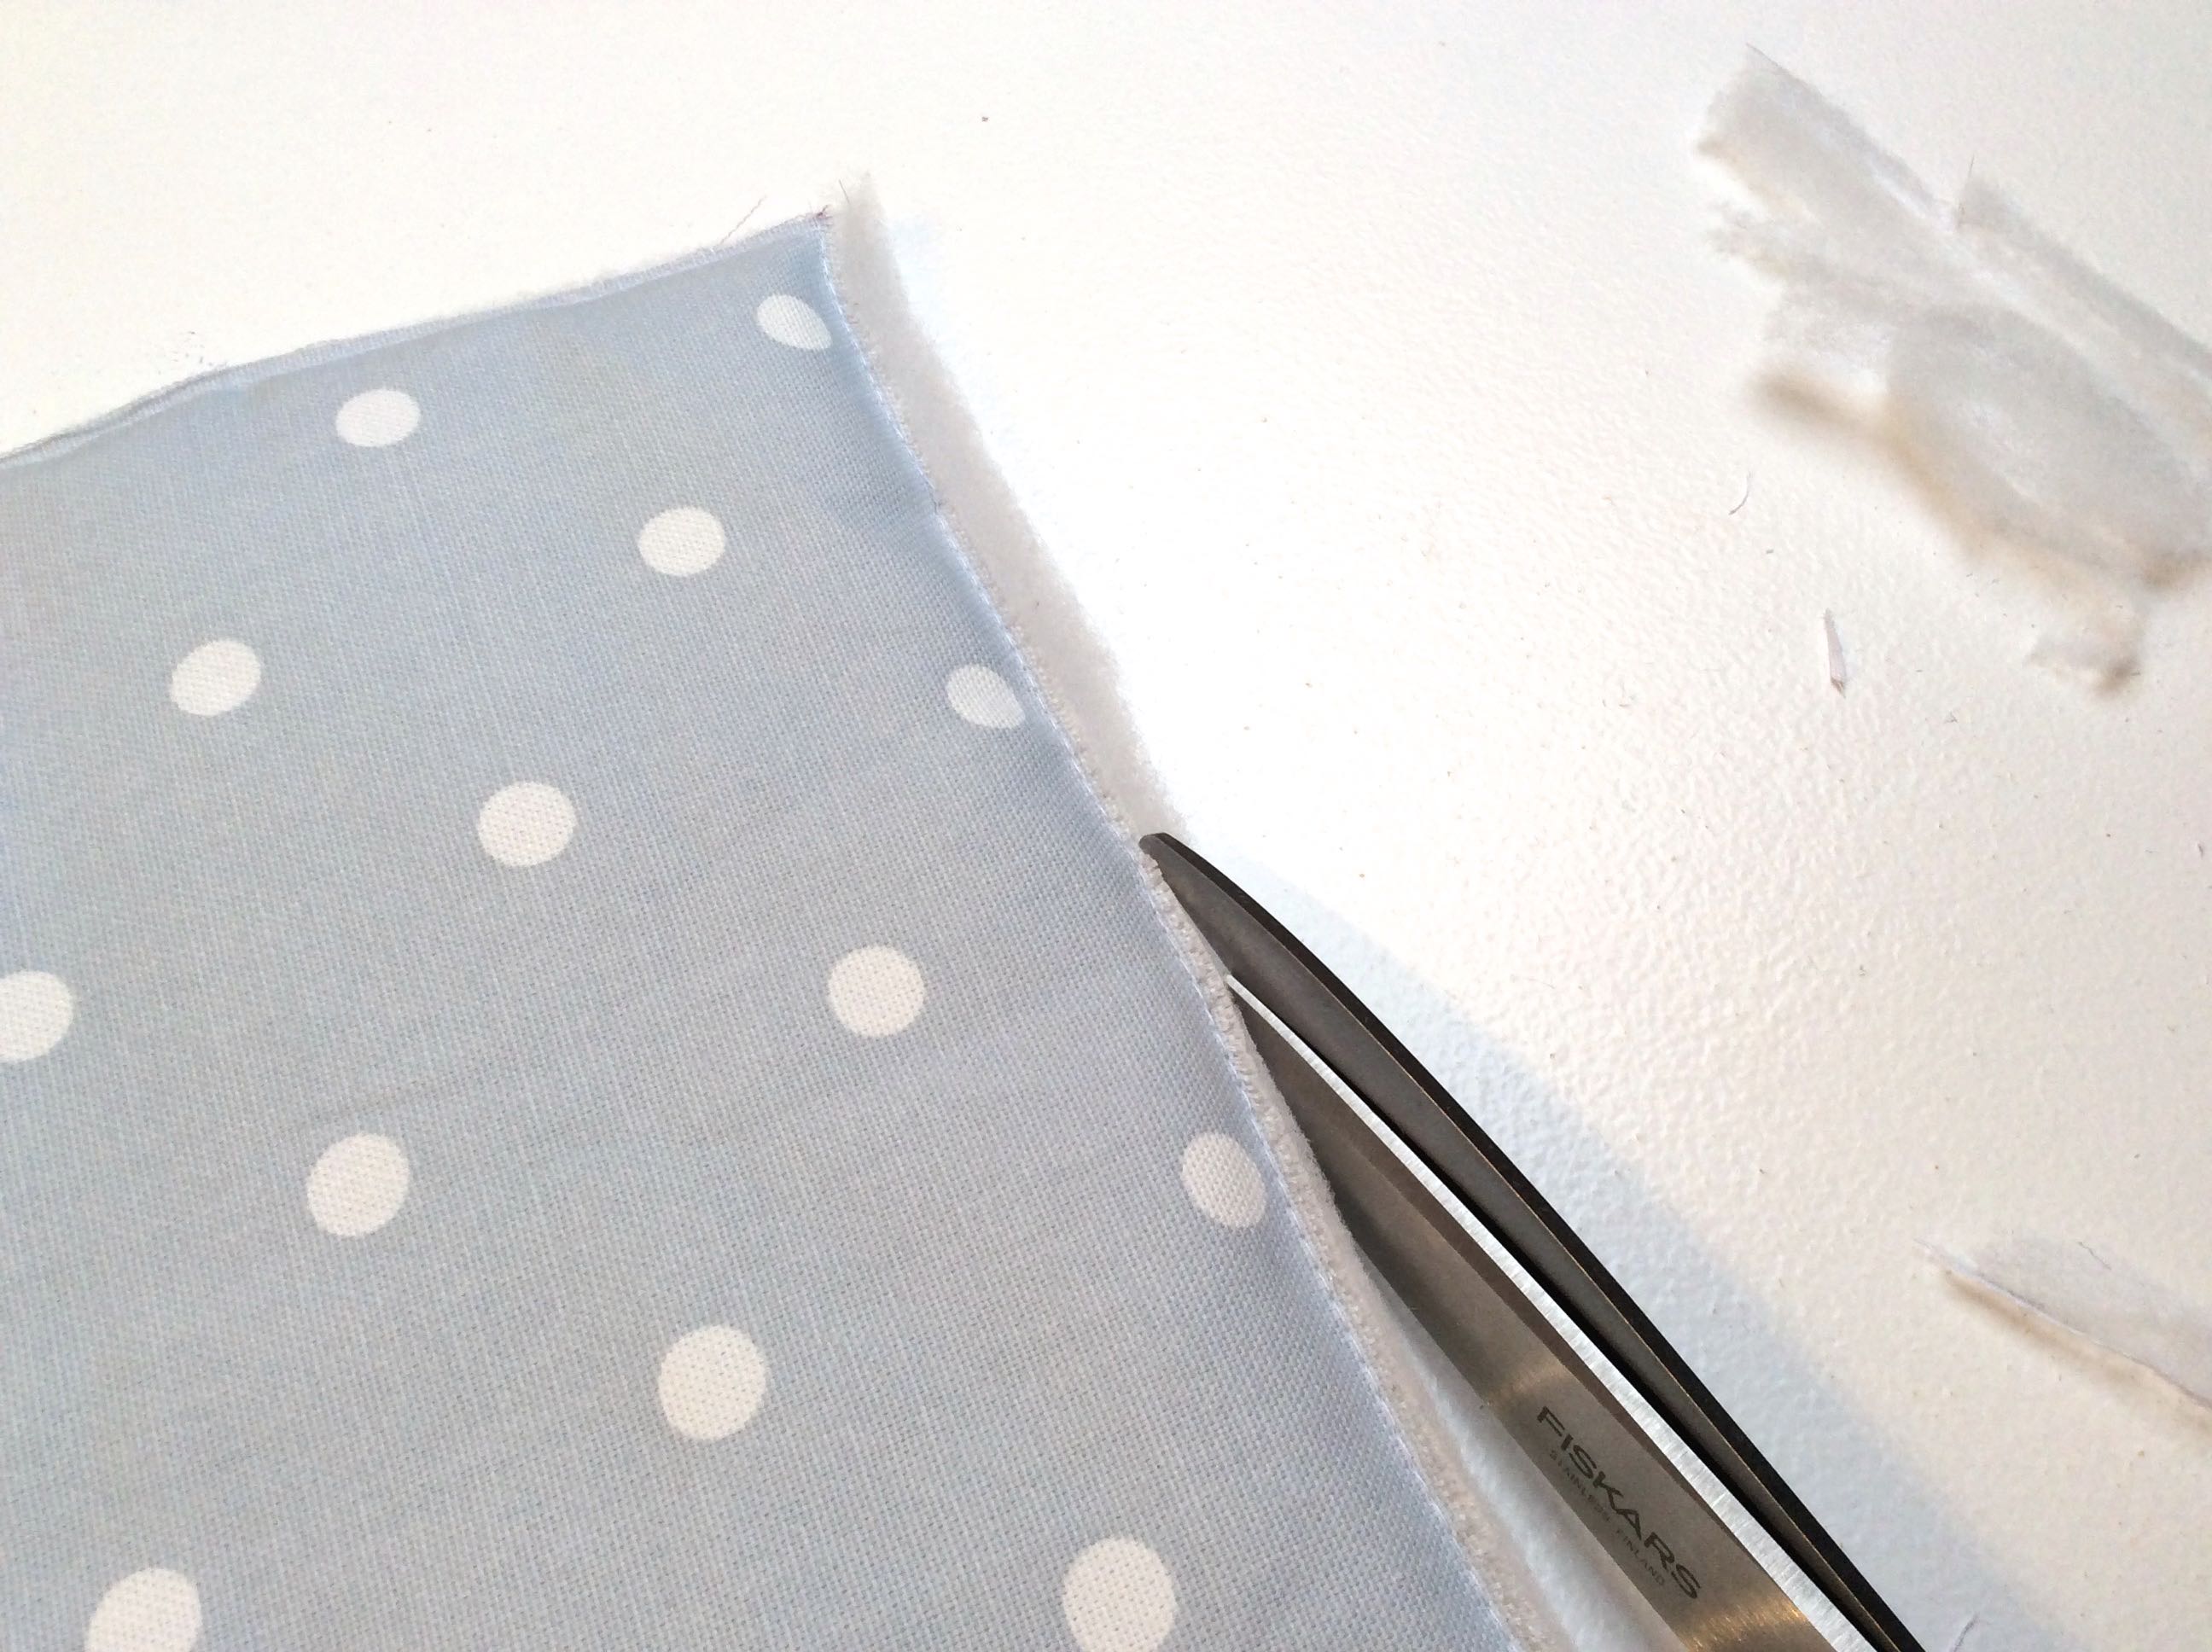
Trim any excess wadding.
Cut enough bias binding to go around all four edges plus an extra length for the opening edge. You can use ready made or follow my tutorial on how to make your own bias binding.
I used an old tea towel!
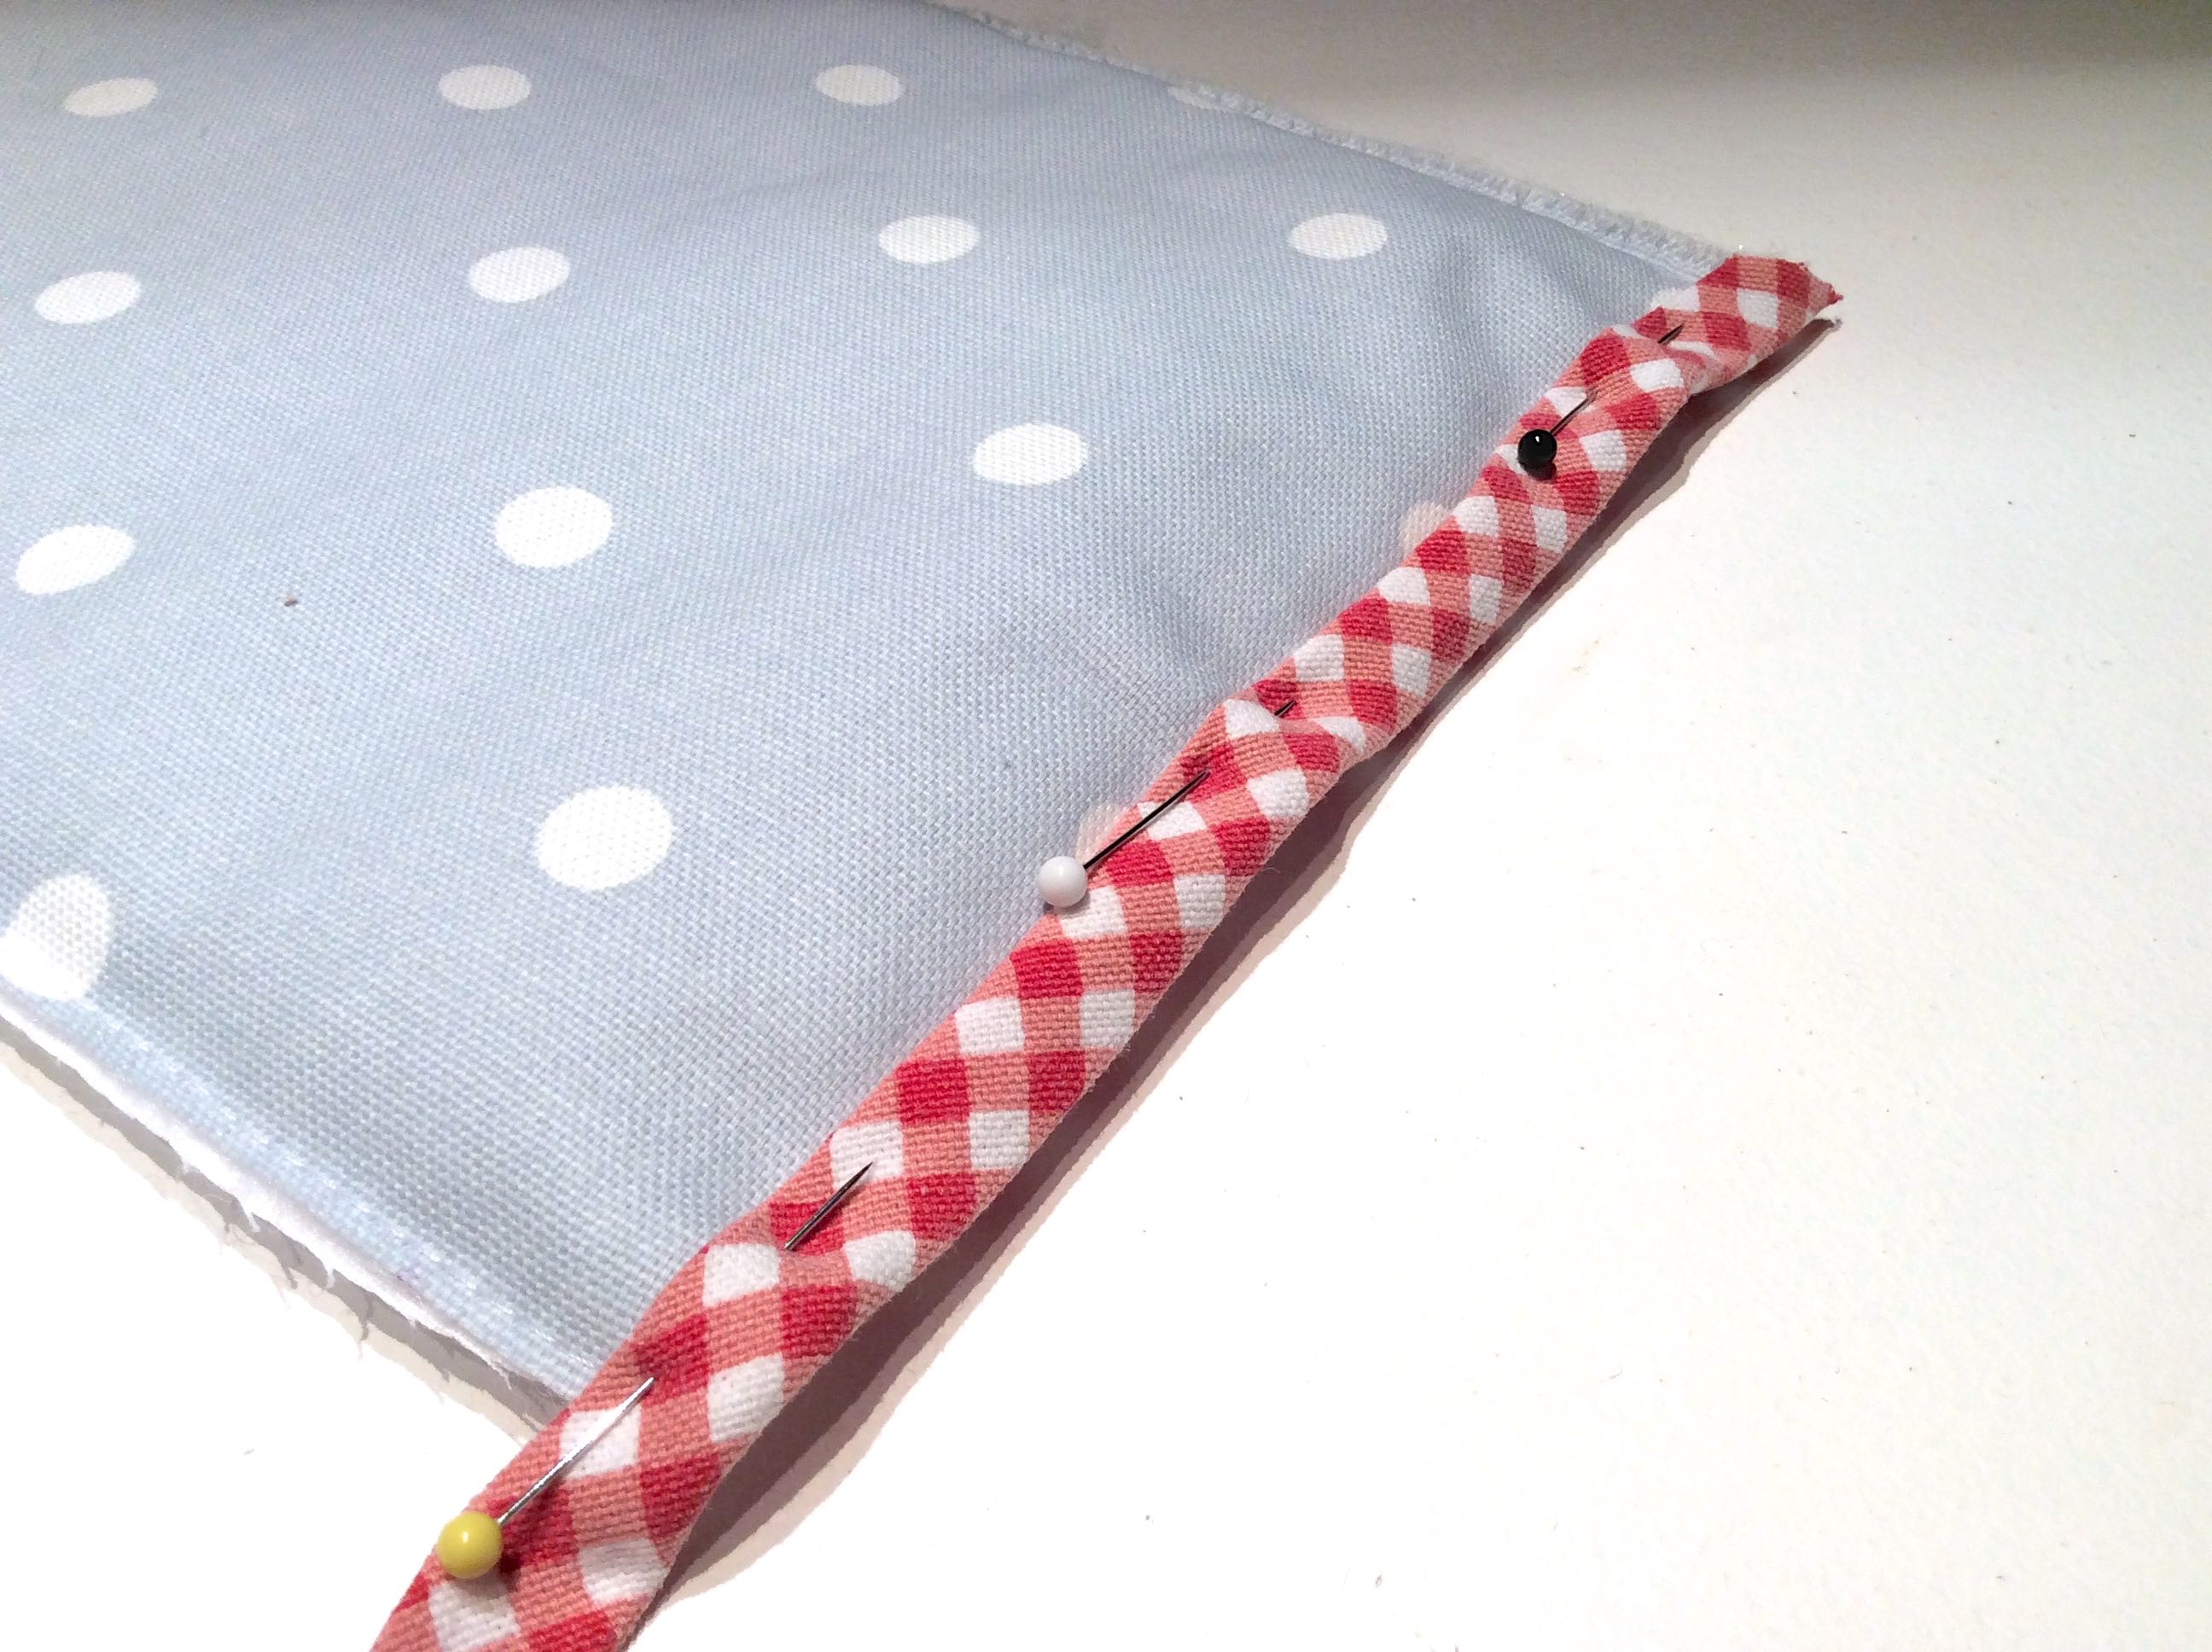
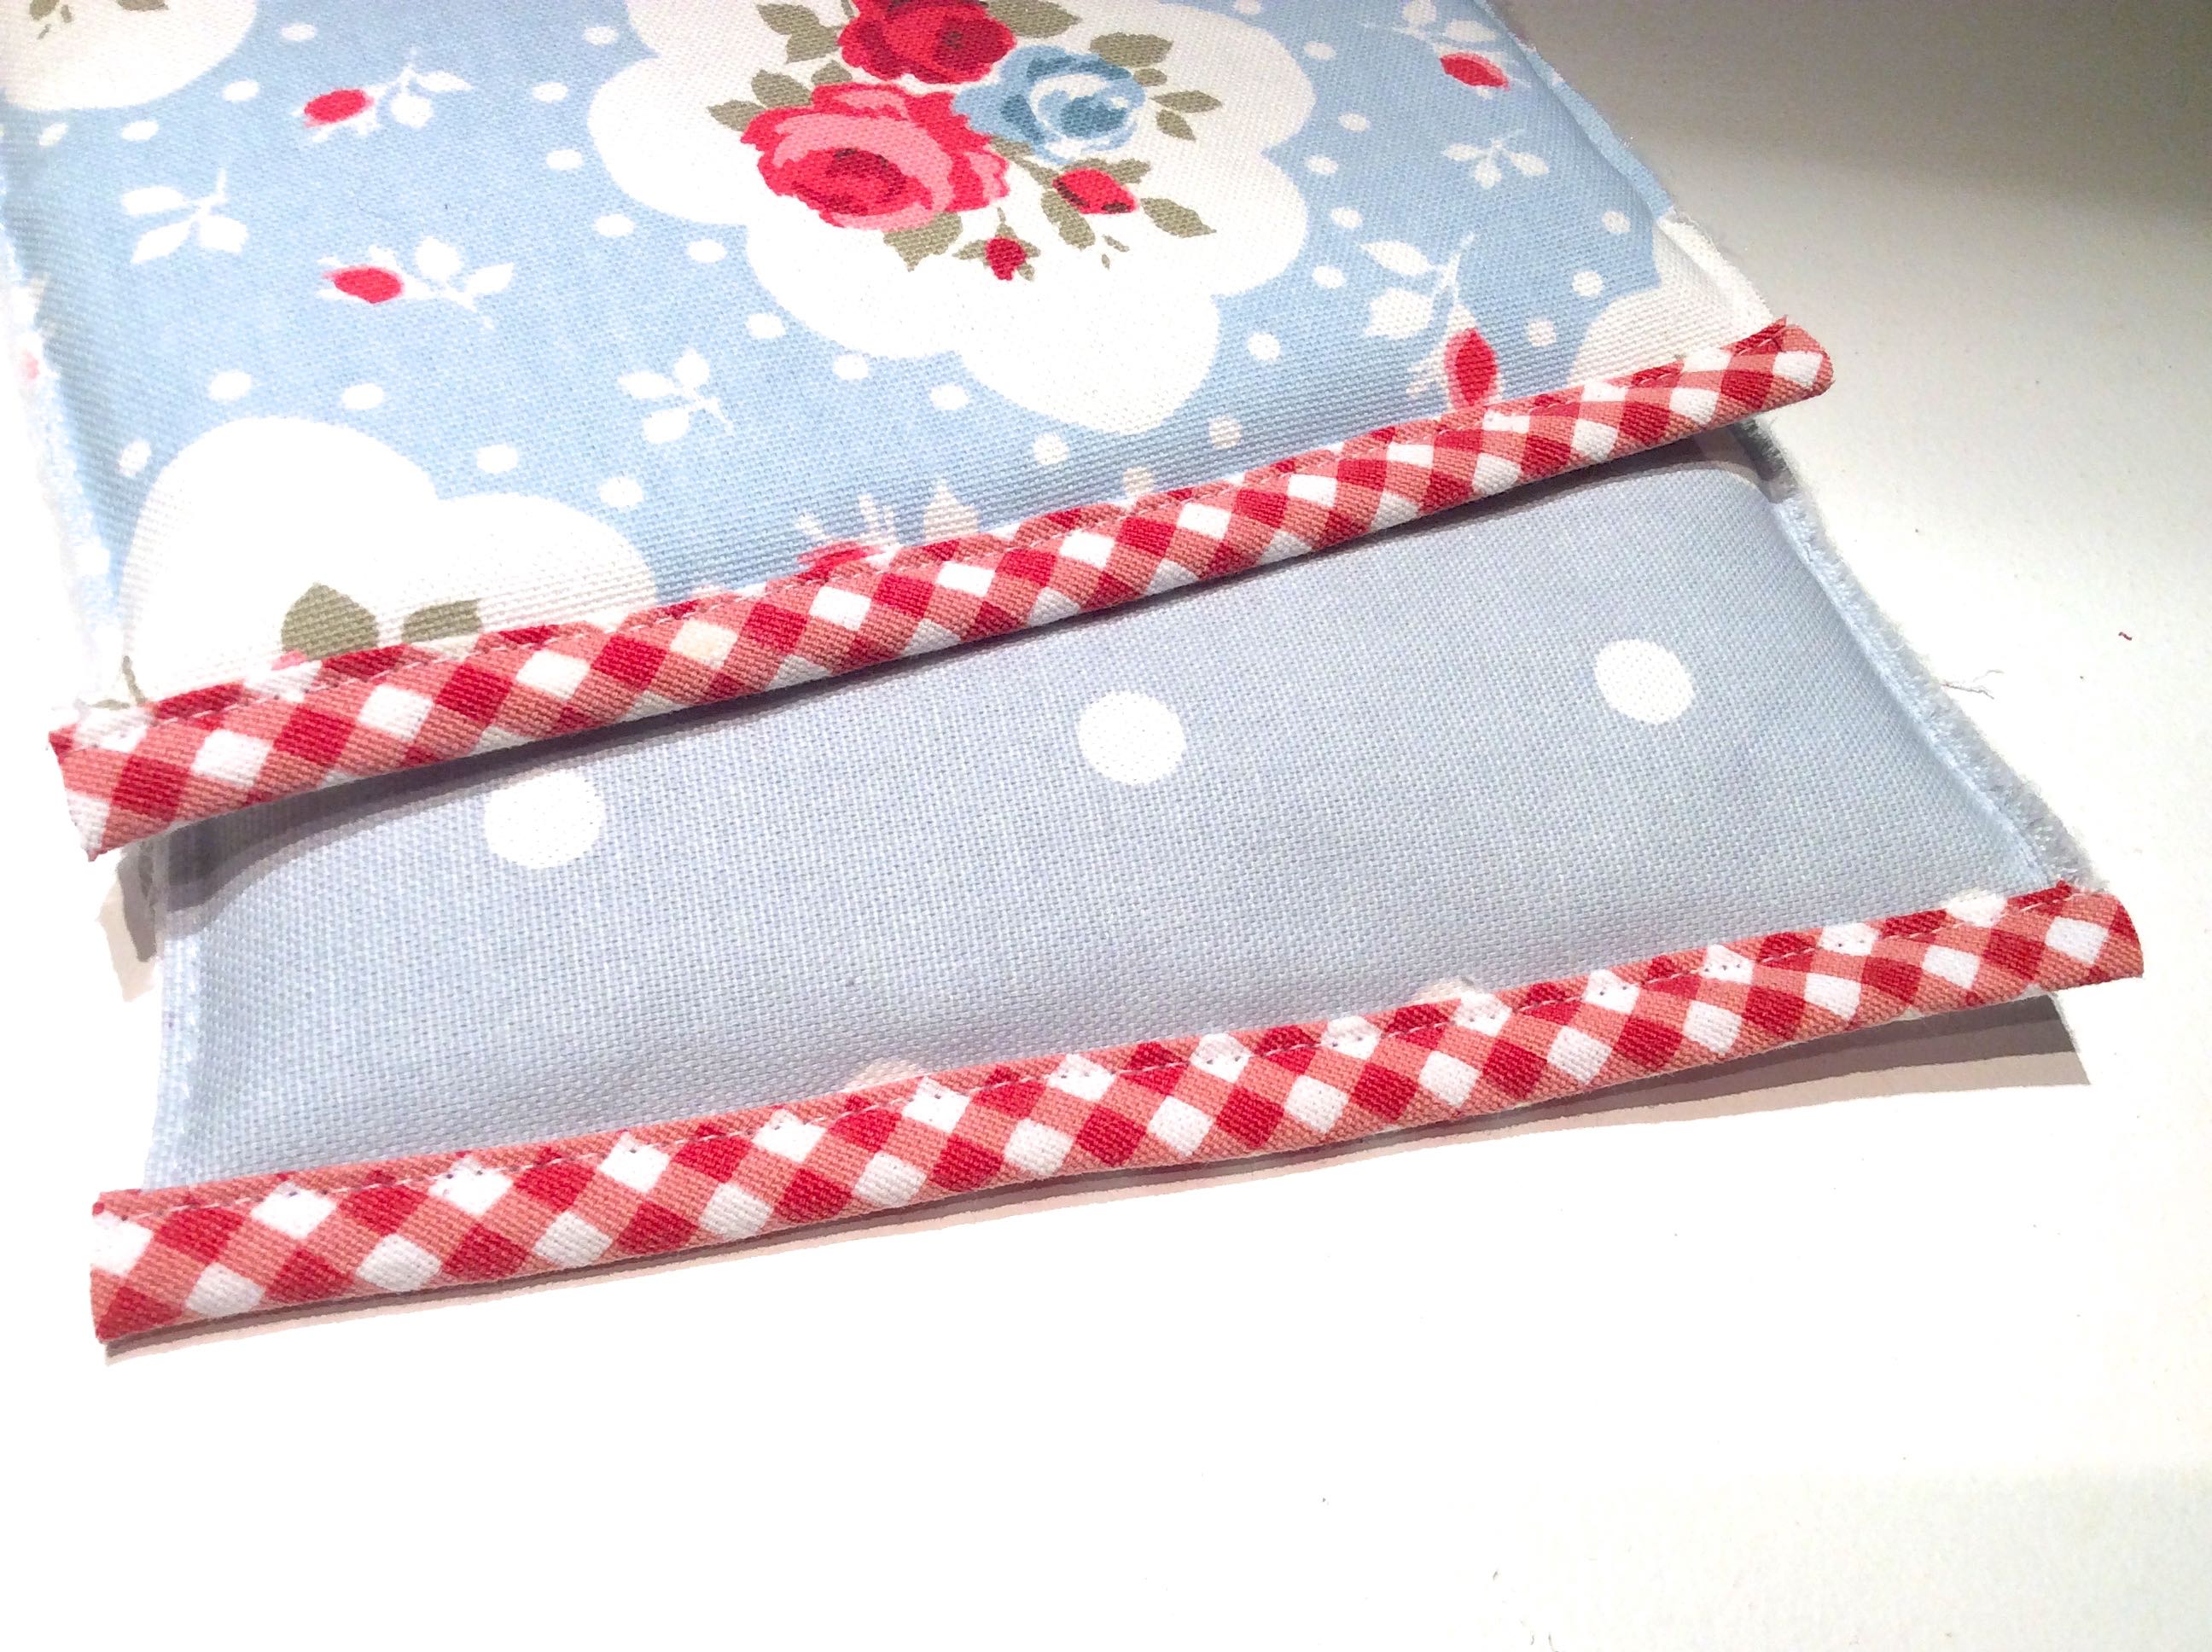
Pin the bias binding to a short edge of the back and stitch in place.
Repeat with the front.
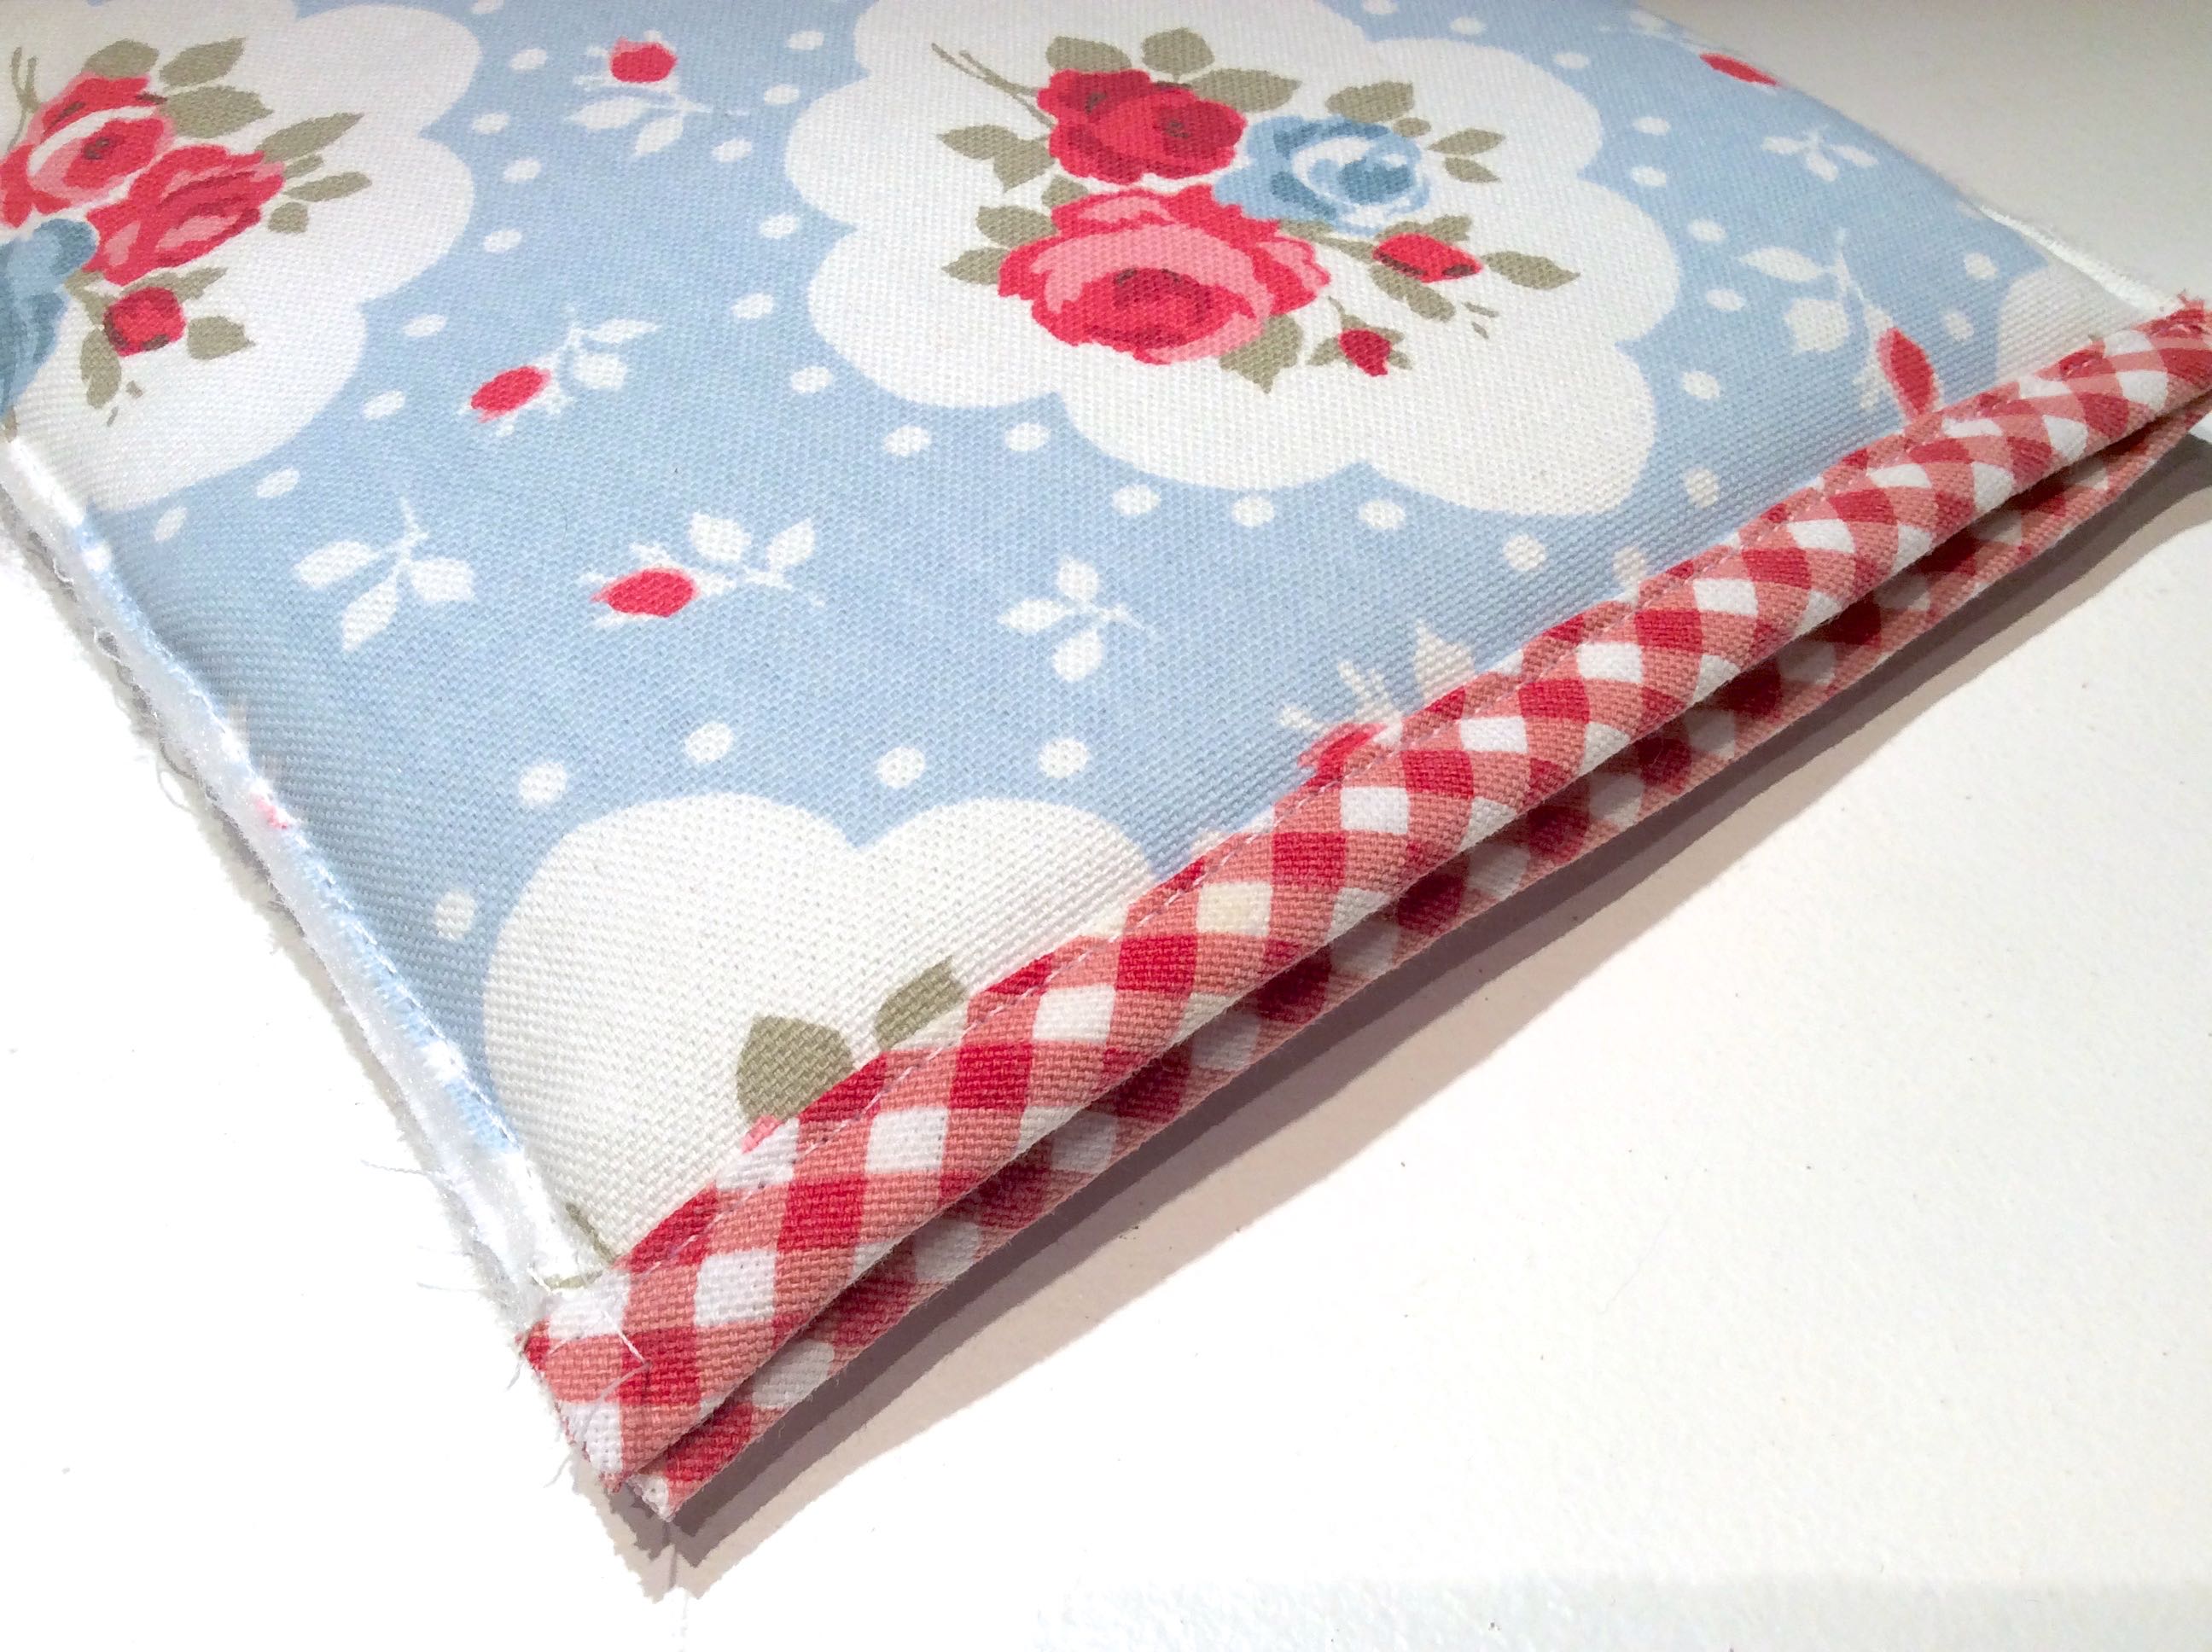
Pin the front to the back and baste together around three sides, leaving the top opening free.
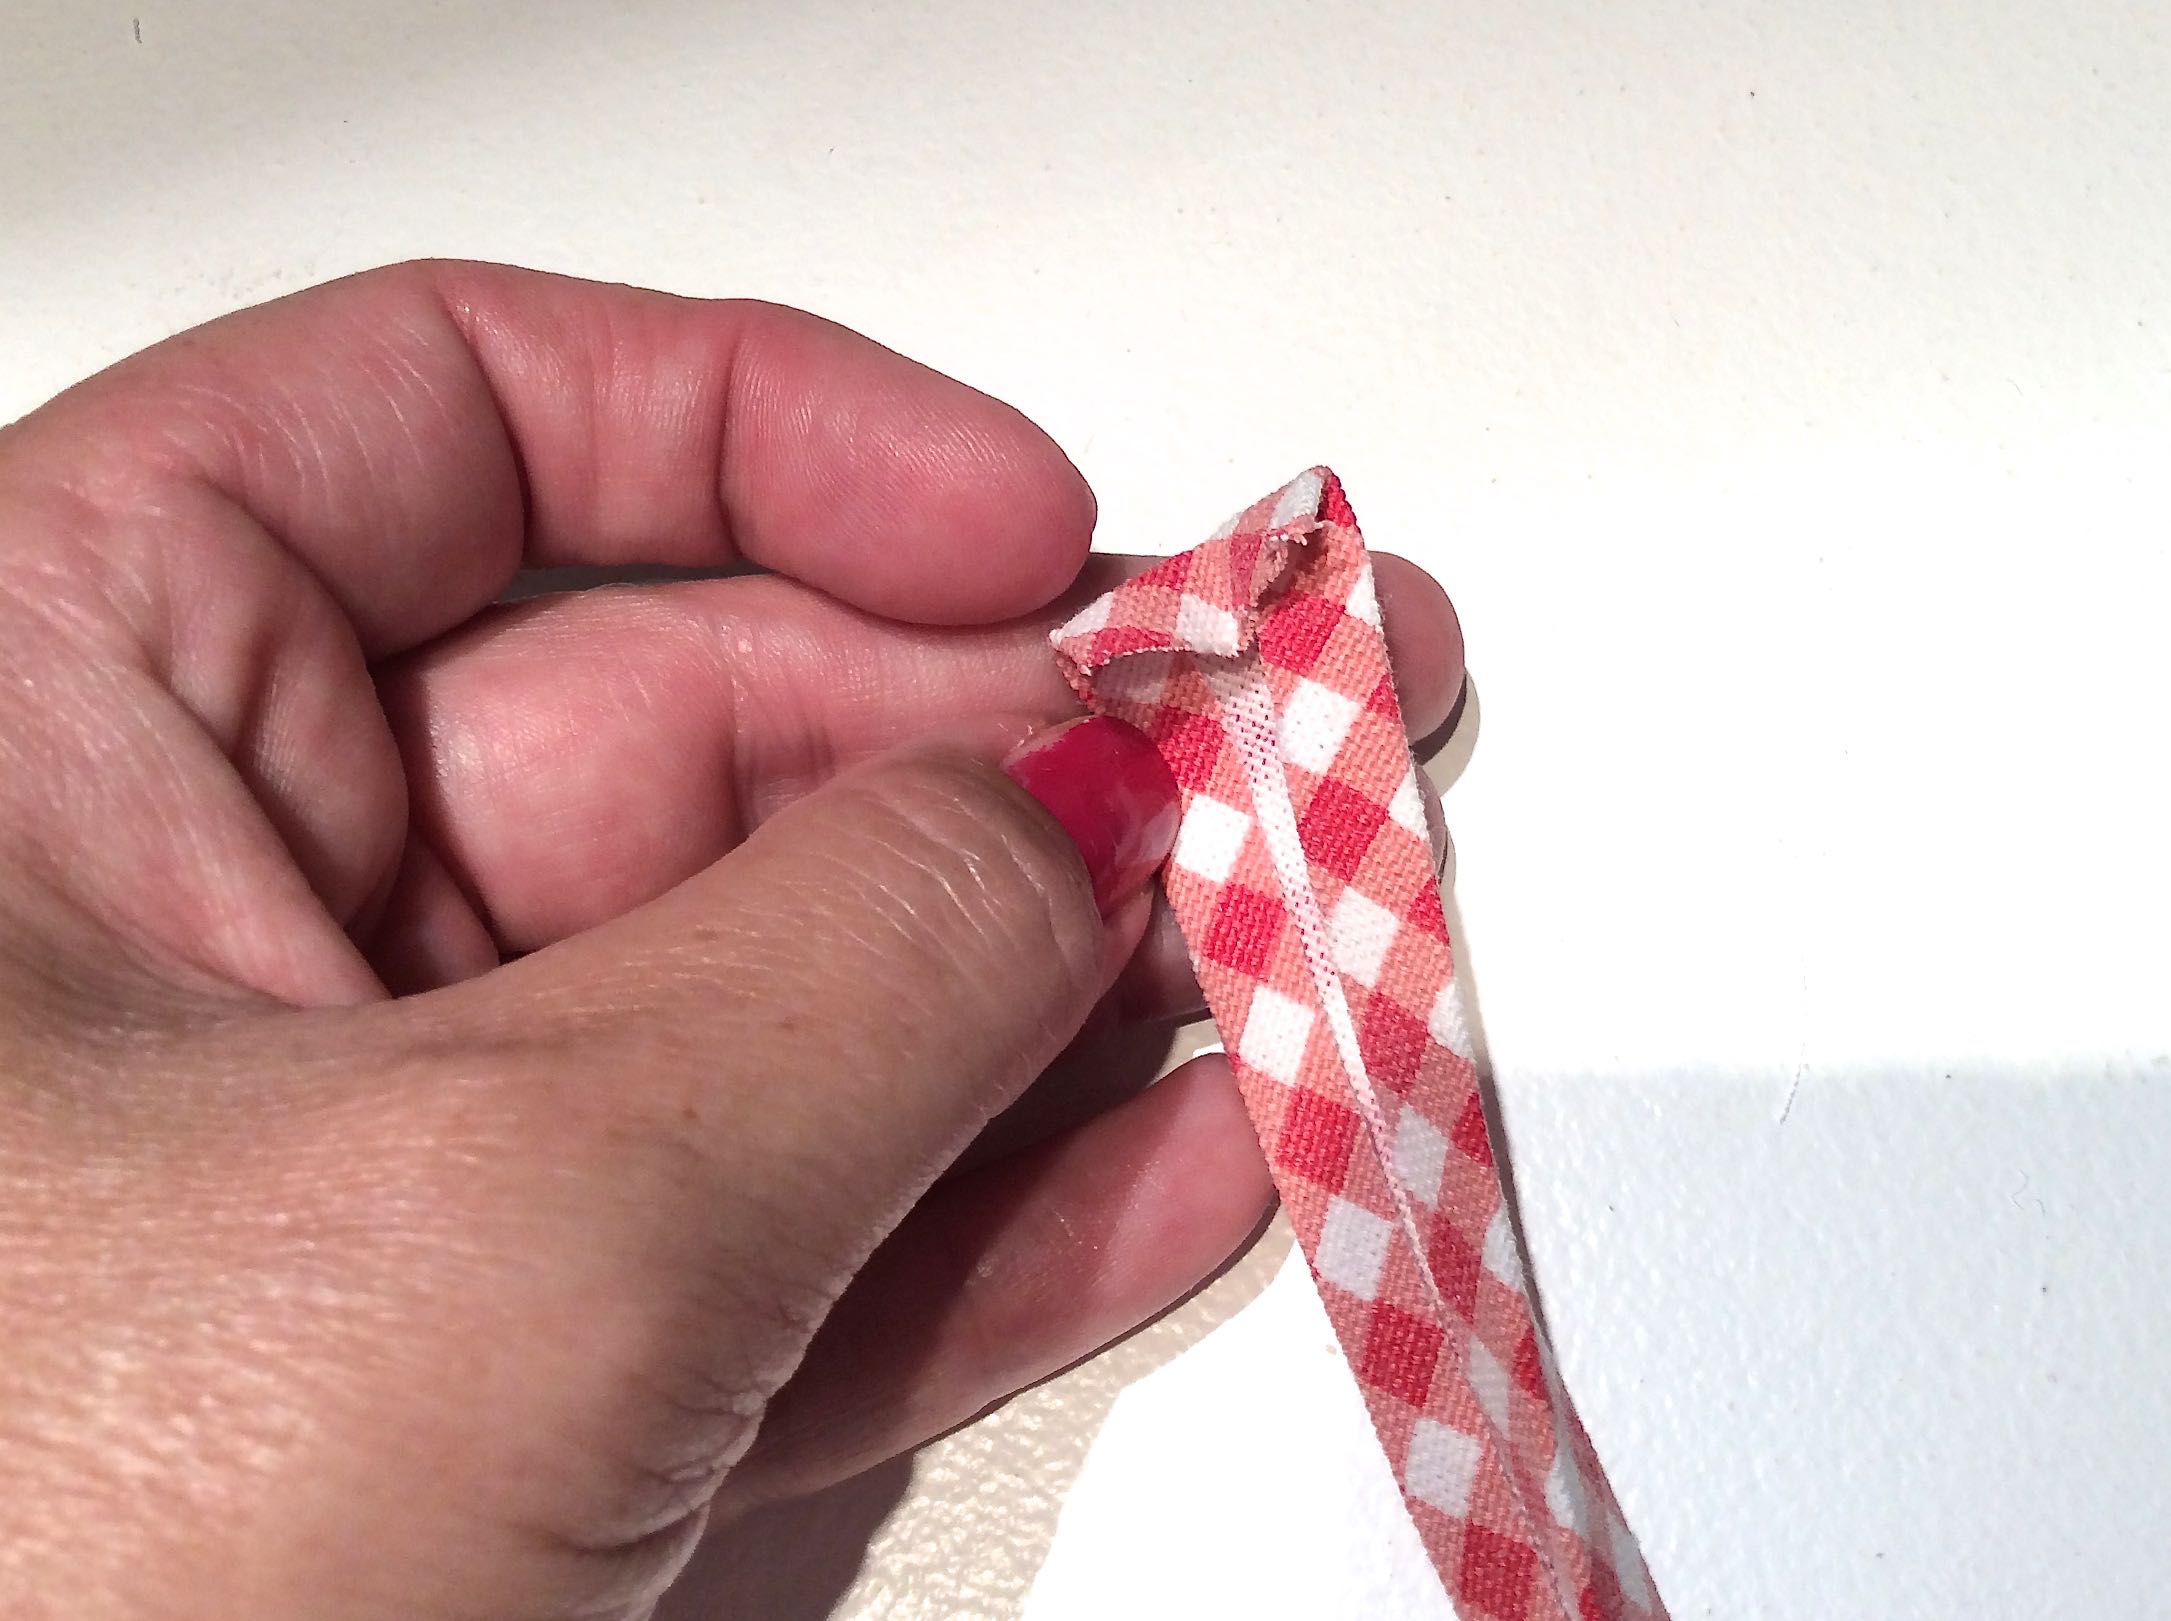
Fold under the raw edge on the remaining bias binding.
Pin the bias binding to the sleeve around the three sides, enclosing all the layers and stitch in place.
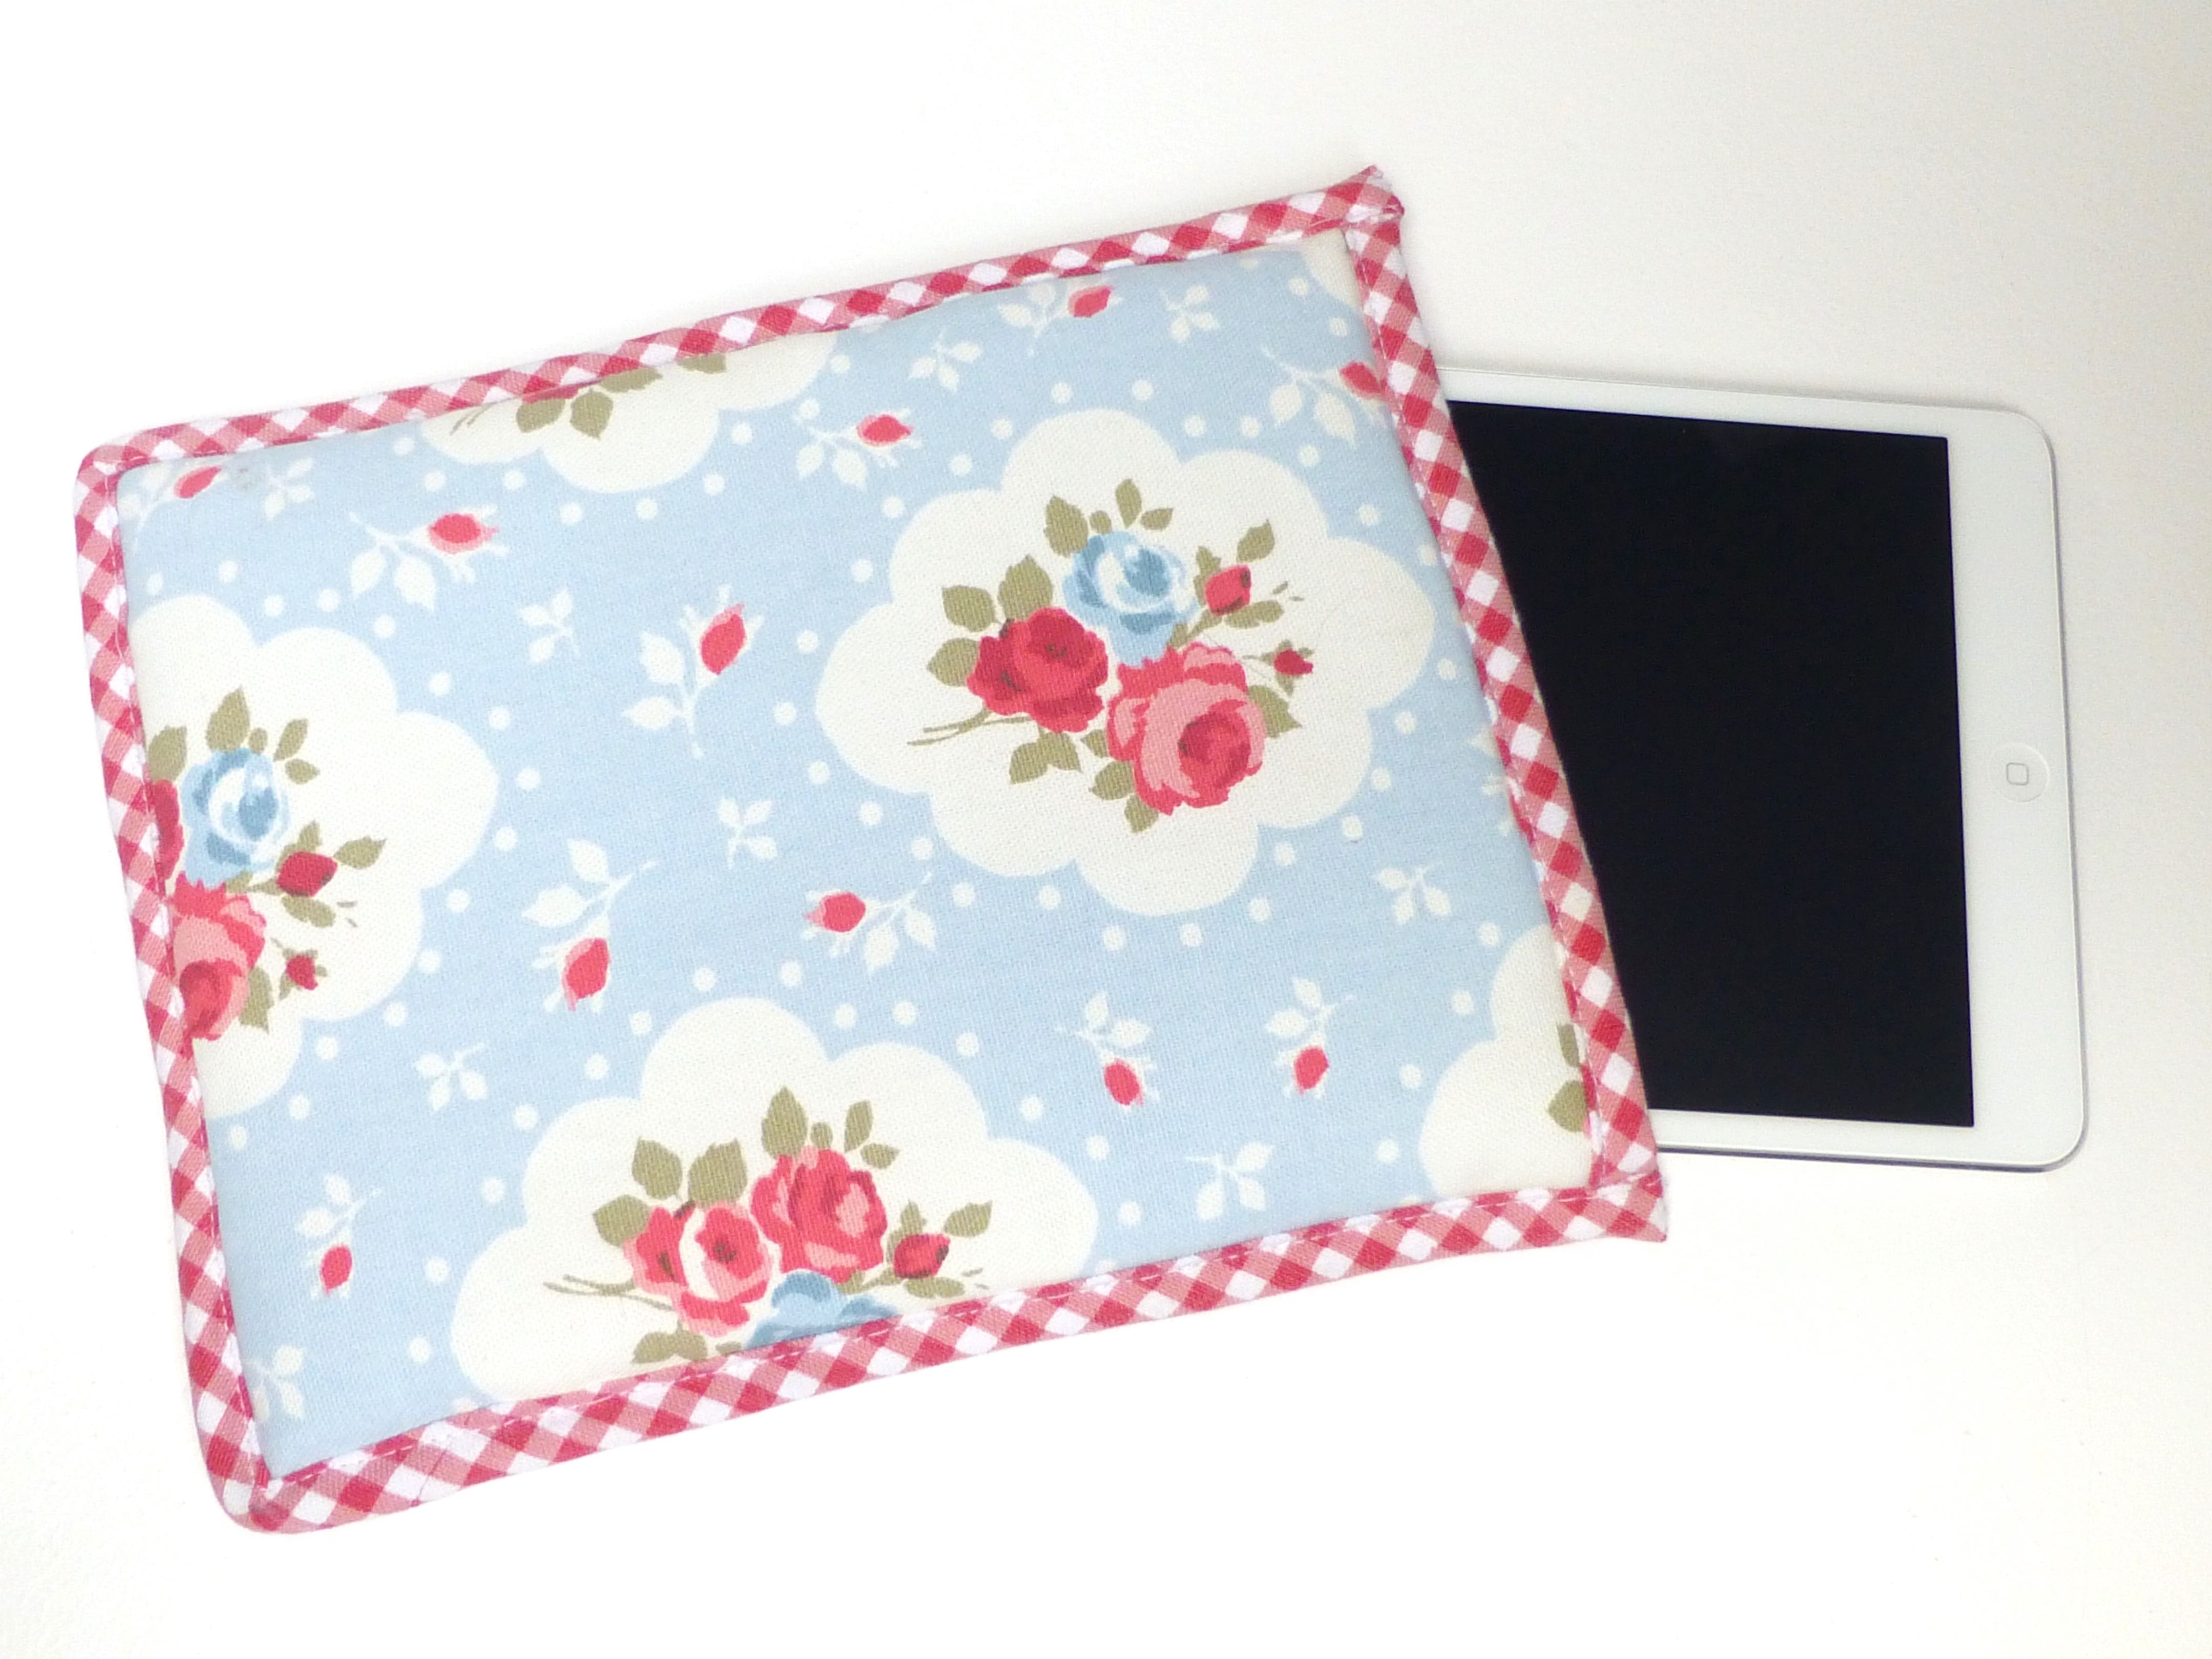
Not my neatest piece of work as it was only for me and whipped up in a hurry whilst supper was cooking, but it was completely free using bits from my stash.
You could spend more time and make it more polished, especially if it is to be a gift for someone.
And there you have it – a quick and easy sleeve for your iPad, iPad mini, mobile ‘phone, laptop, tablet, kindle……….
We were invited to No.1 Son’s girlfriend’s parent’s house (are you with me?) at the weekend, for a barbeque.
It was his girlfriend’s mother’s birthday (keep up!) so we wanted to take a suitable present, but there was a tiny problem – we’d never met, so I had no idea what she would like.
Obviously I was going to make a gift and, after a little indecision, settled on a purse (wallet, for our U.S. friends) and a matching tote.
I had some leftover vinyl from the One Hour Ikea Bag and searched through my (massive) stash before whittling it down to these grey and pink coordinating cottons, using just the dotty ones in the end.
The tutorial is pretty comprehensive and soon I had put the main pieces together.
After sewing the outside to the inside, it was simply a matter of turning through to the right side and top stitching.
Et voilá – one (very pretty) vinyl purse!
I chose to fit a magnetic snap closure simply because I’ve got loads of them and they really do give the best finish.
The inside is a purse of two halves – one side is pink, the other is grey.
The grey side holds all the real money.
Coins are kept safe in the zipped pocket….
….which is lined with the contrasting pink.
Notes are stashed in the open pocket below.
The pink side houses the ‘pretend’ money and can accommodate up to eight credit cards or similar.
Just in case there was any doubt I included a label from Hobbycraft.
I whipped up a simple tote using the same principle as the One Hour Ikea Bag but with dimensions and handles more suited to a shopper.
Box corners makes for a more spacious interior.
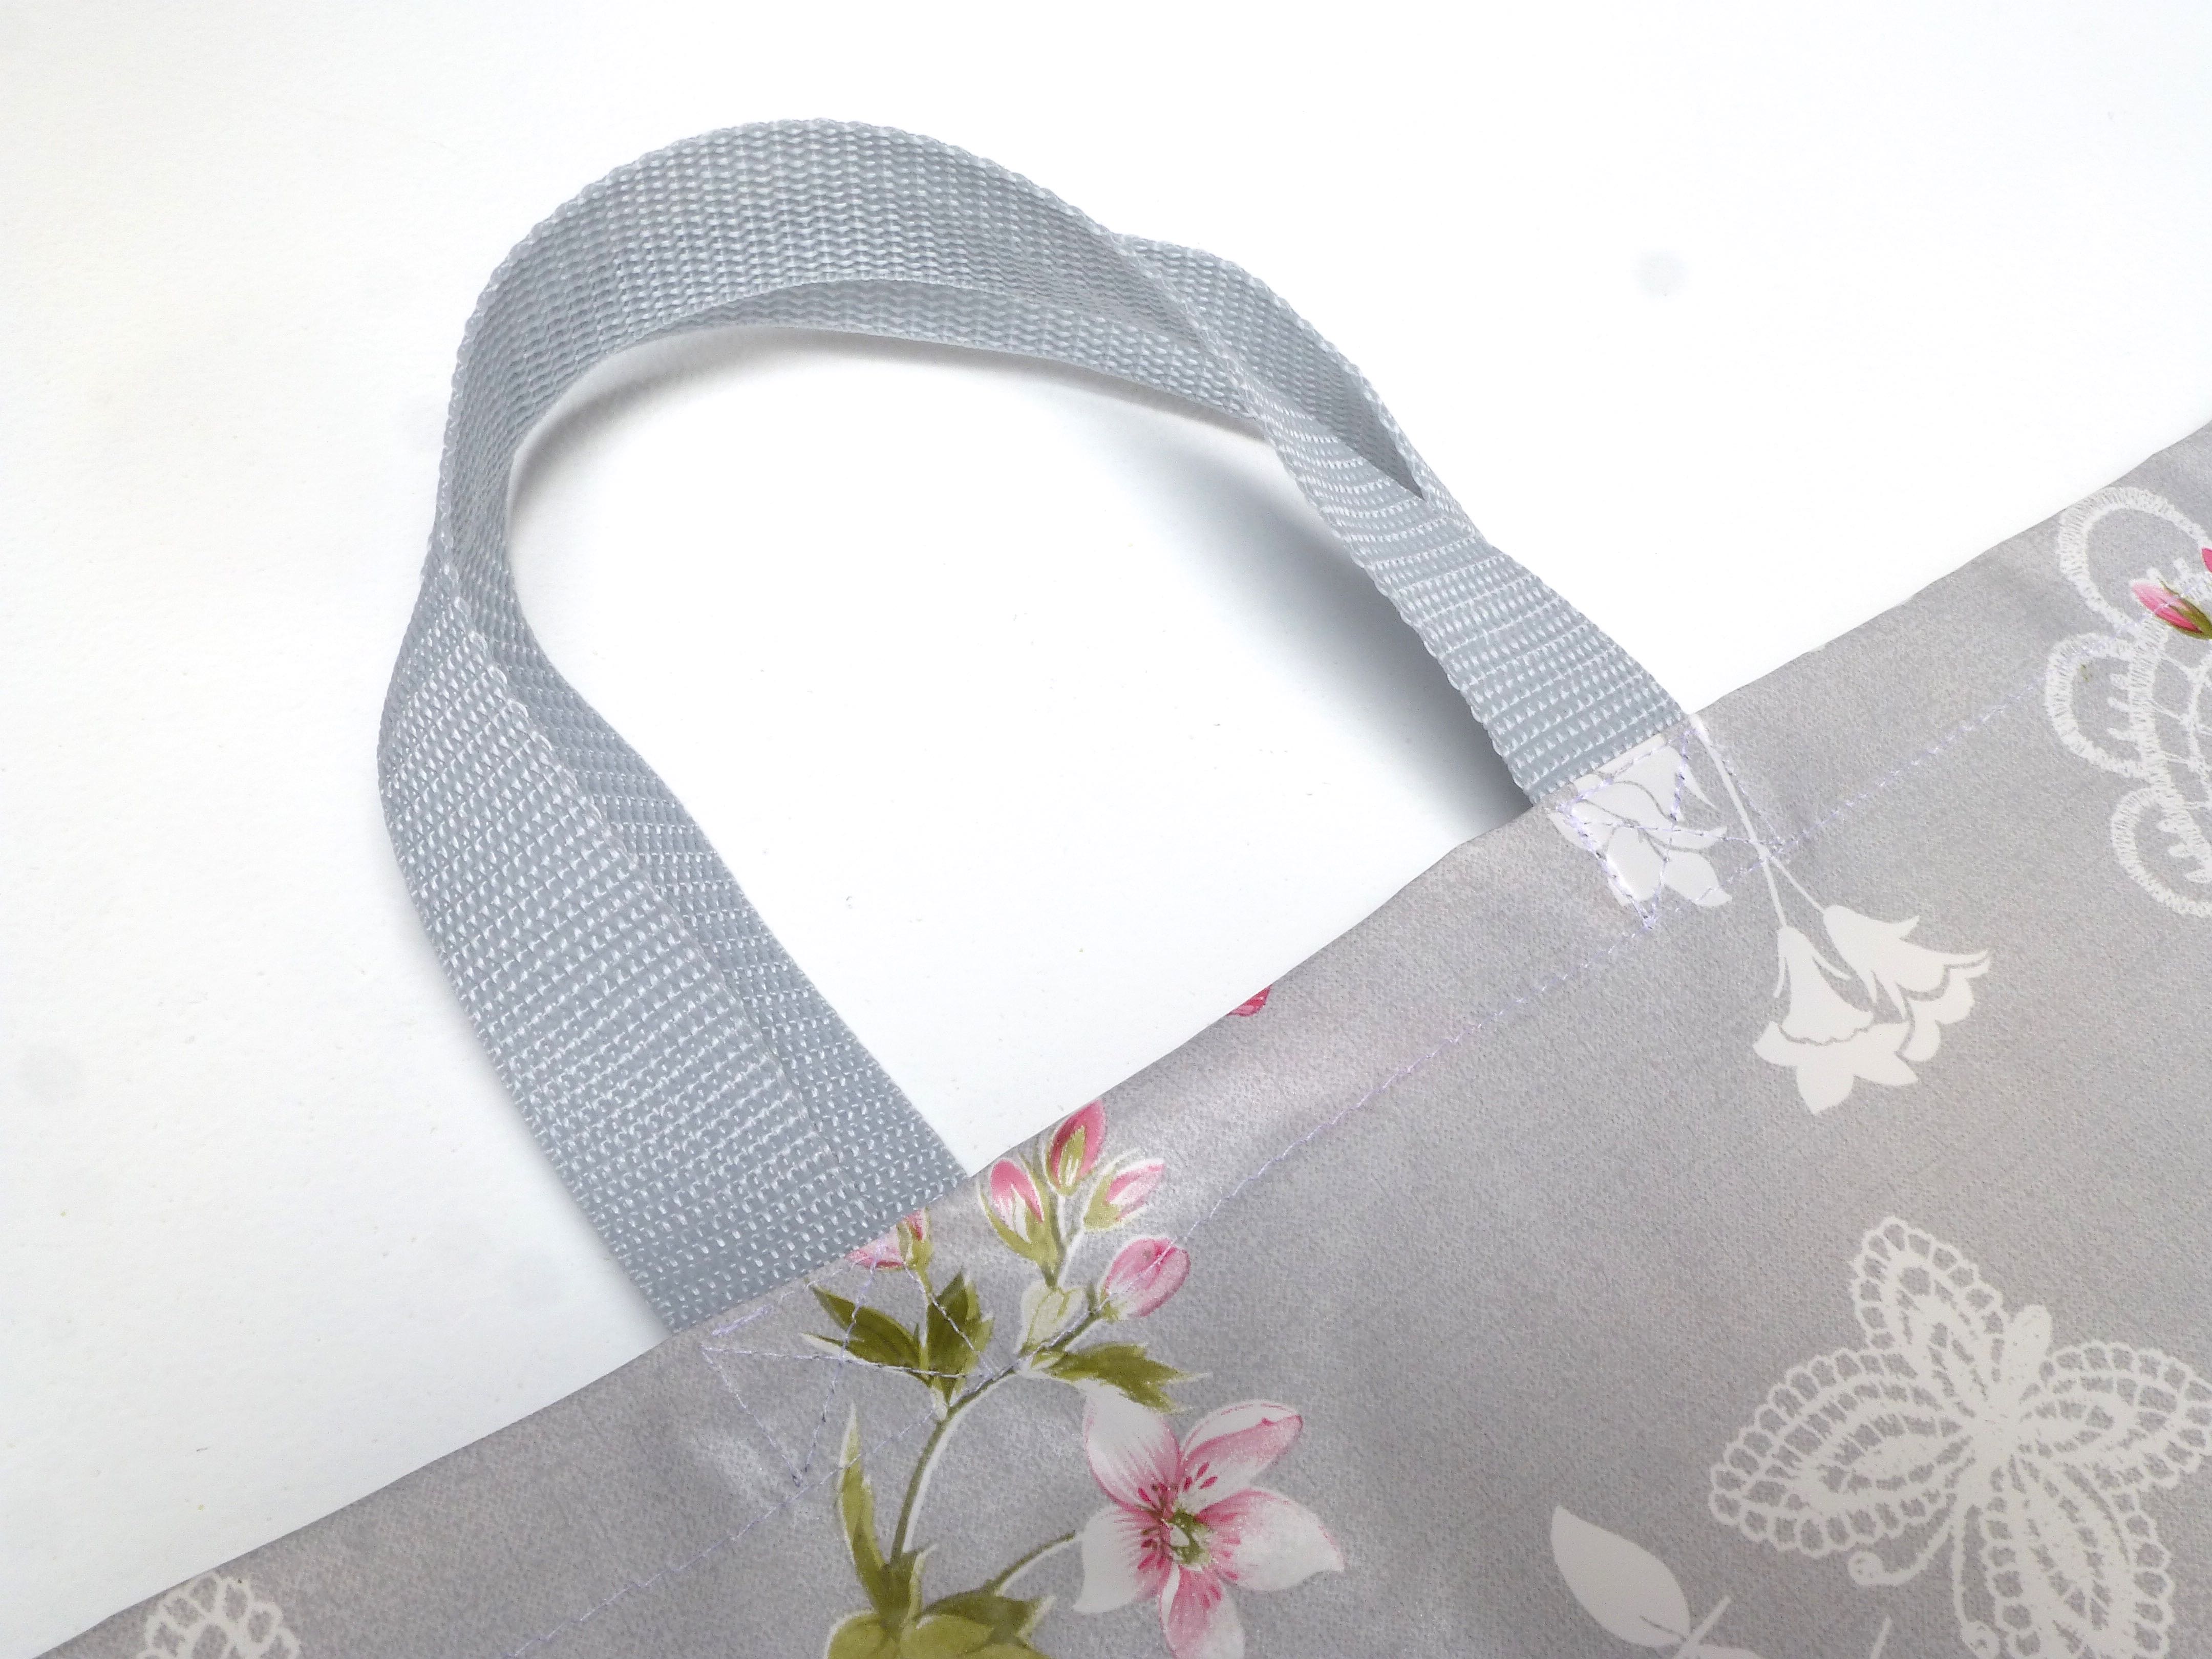
Matching grey webbing is perfect for two short handles.
I think they make quite a smart set for nipping down to the corner shop for a loaf of bread and a pint of milk. (In my dreams. We don’t have a shop in our village.)
All wrapped up and ready to go – complete with handmade birthday card!
Update: The handmade purse (wallet) and matching shopper was a huge success fortunately – she loved it!
For me, it’s day trips to the coast, balmy evenings sat outdoors until after sundown, weekend breakfasts in the garden, outdoor concerts in the grounds of old ruins……in short – being outside.
And being outside is made all the more perfect if you take that most quintessentially English thing with you – a picnic. Dressed down with sandwiches and a flask of tea at the seaside, or glammed up with champagne and a candelabra for a classical concert, everyone loves a picnic, with a soft, warm, waterproof picnic blanket to relax on in comfort…….
……except we haven’t got one.
Well, we didn’t have until recently when I decided to take advantage of being part of the Minerva Crafts Blogger Network and make one.
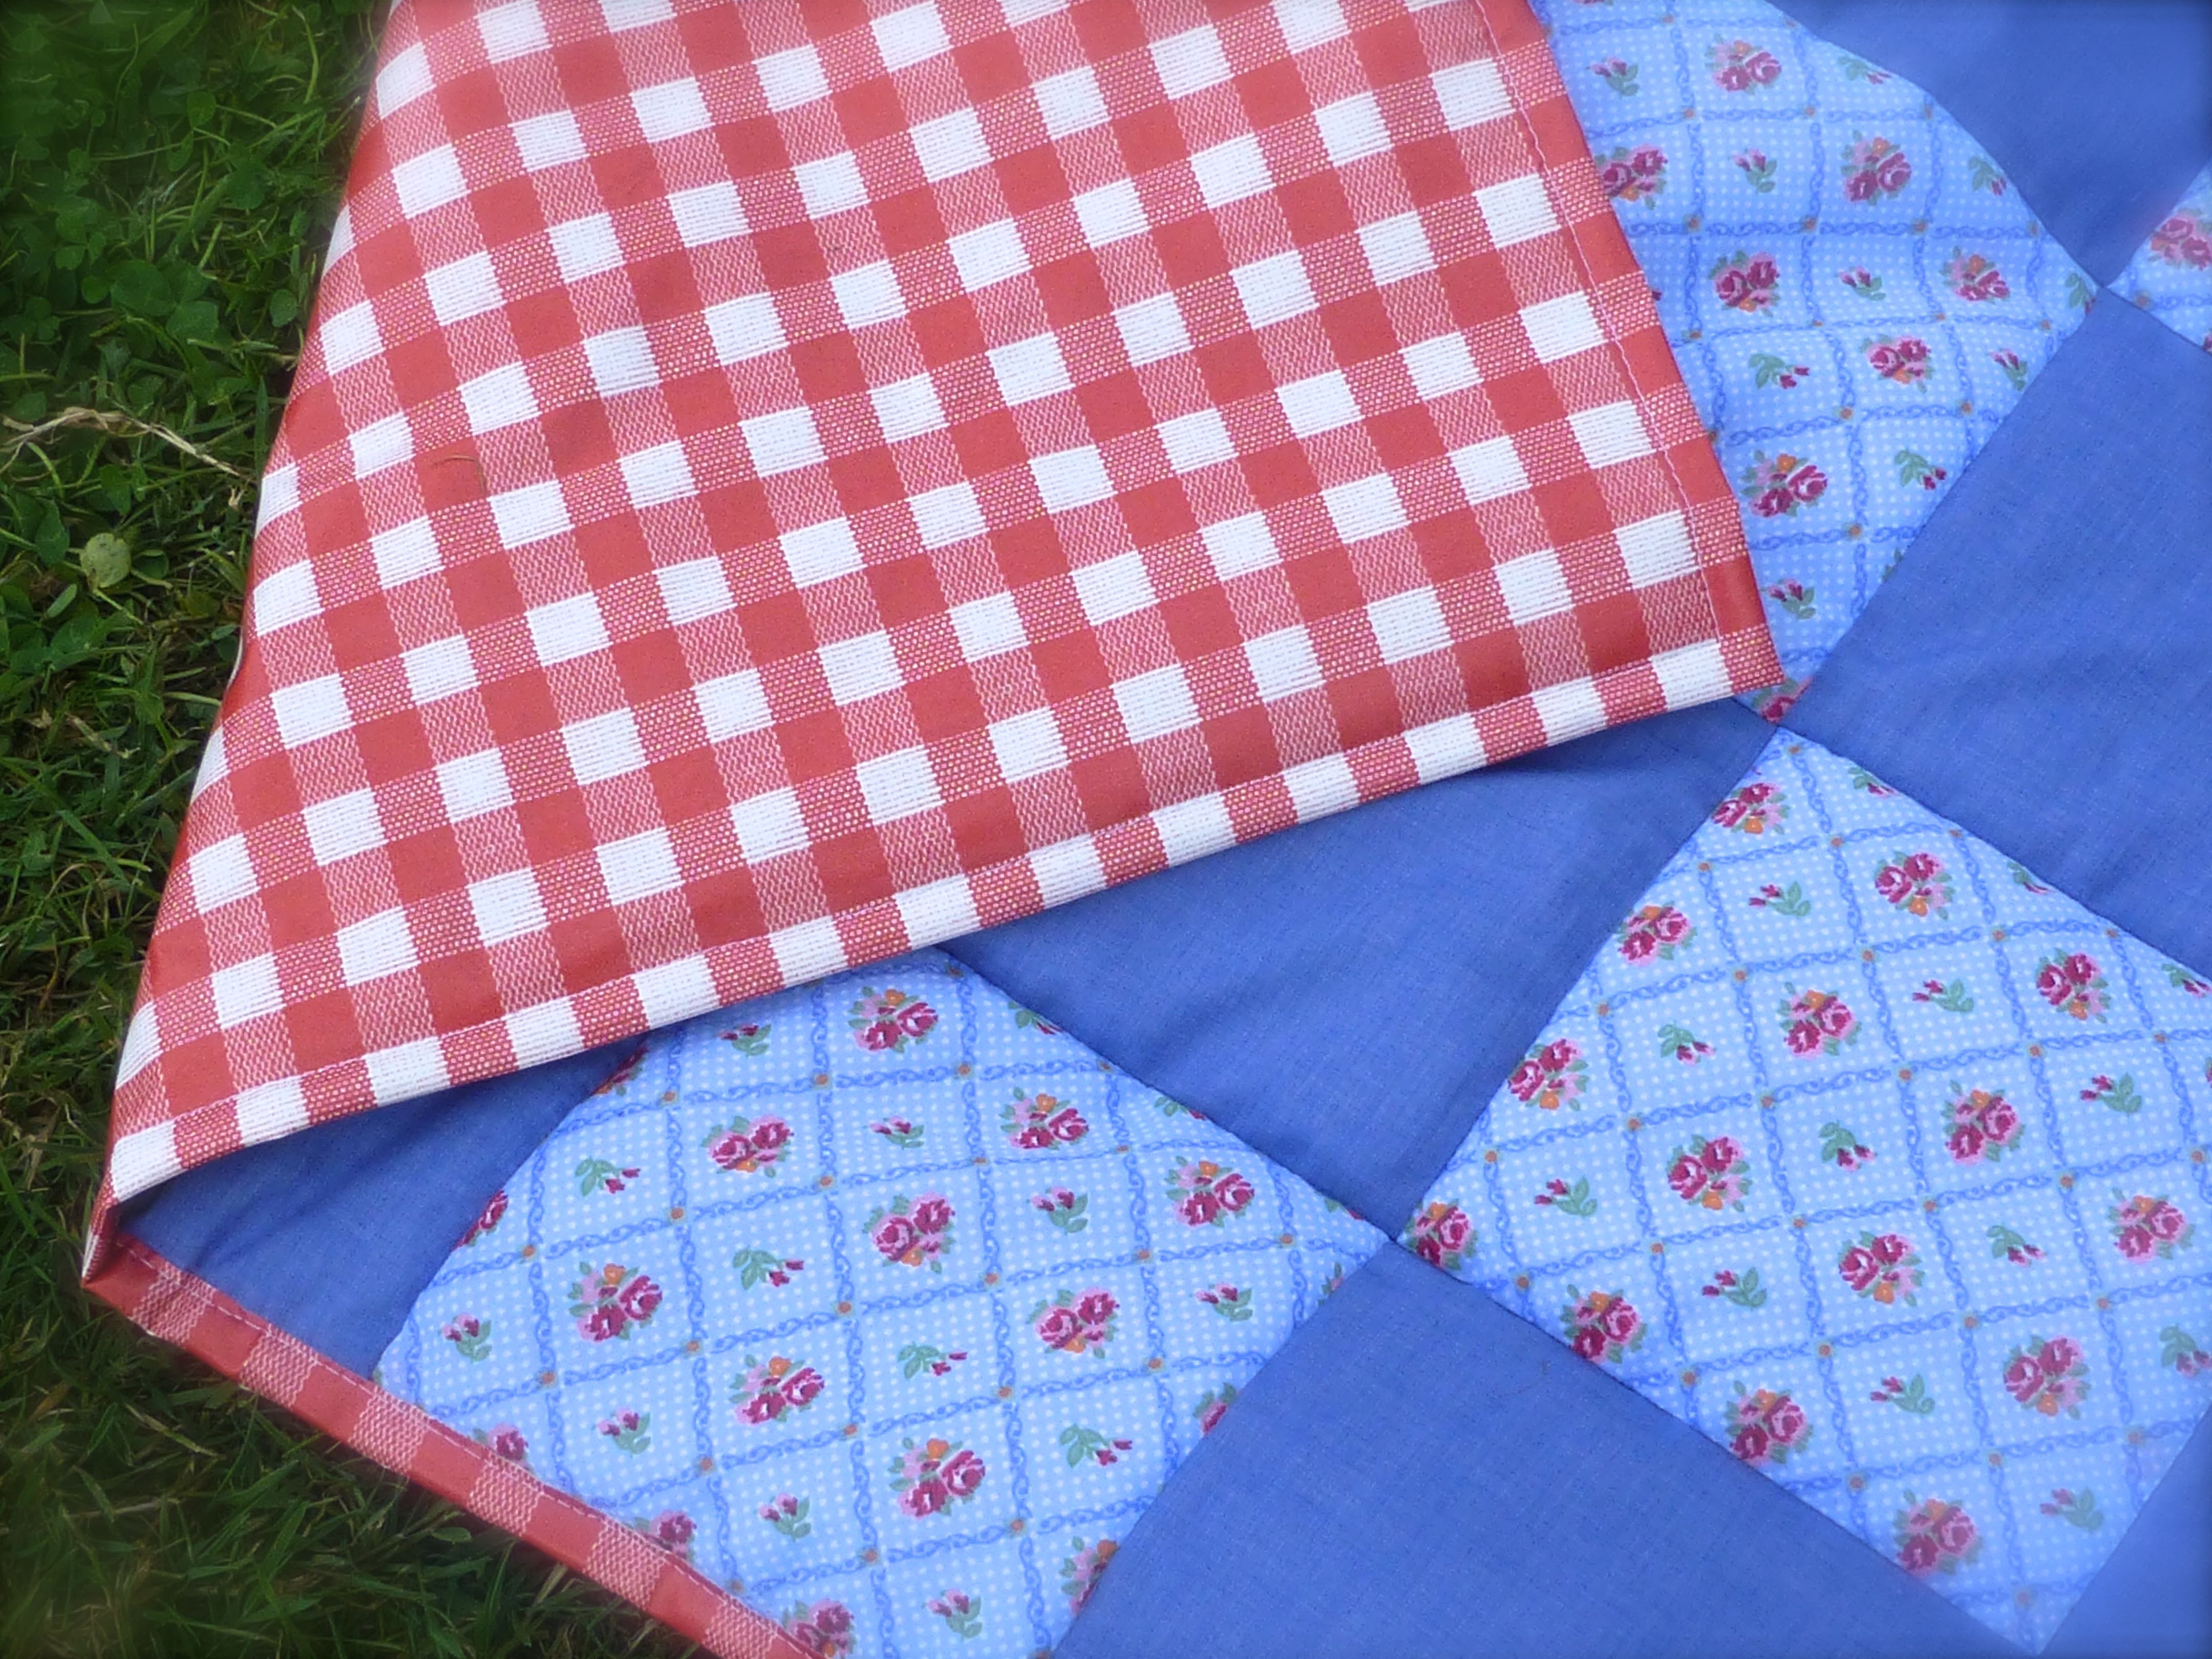
I didn’t want to make just any old picnic blanket, oh no, I wanted the ‘deluxe’ version, something a bit special, so decided to make a patchwork blanket with a waterproof backing and a carry handle. As there are four boys in the house (if you include Mr H-L), anything too pink and girly was out of the question, but I thought I could get away with a small floral print if the main colour was blue.
My Olfa Quiltmaking Kit came with this mat, rotary cutter and 6.5″ square ruler, so I kept things simple by cutting the patchwork squares the same size as the ruler.
Cutting through folded fabric made short work of all those squares as I could cut through four layers at a time – using a rotary cutter and the quilting ruler ensured that they were accurately cut, which is essential in patchwork.
In no time at all I had two piles of neatly stacked patchwork squares, 36 of the floral and 45 of the plain making 81 in total.
The easiest way to keep accurate seam allowances is to line up the edge of the fabric with the edge of the machine foot, the needle in the central position. On my machine, that means a seam allowance of 1cm throughout.
Whilst it may sound obvious, there is a quick way to whizz through all those squares.
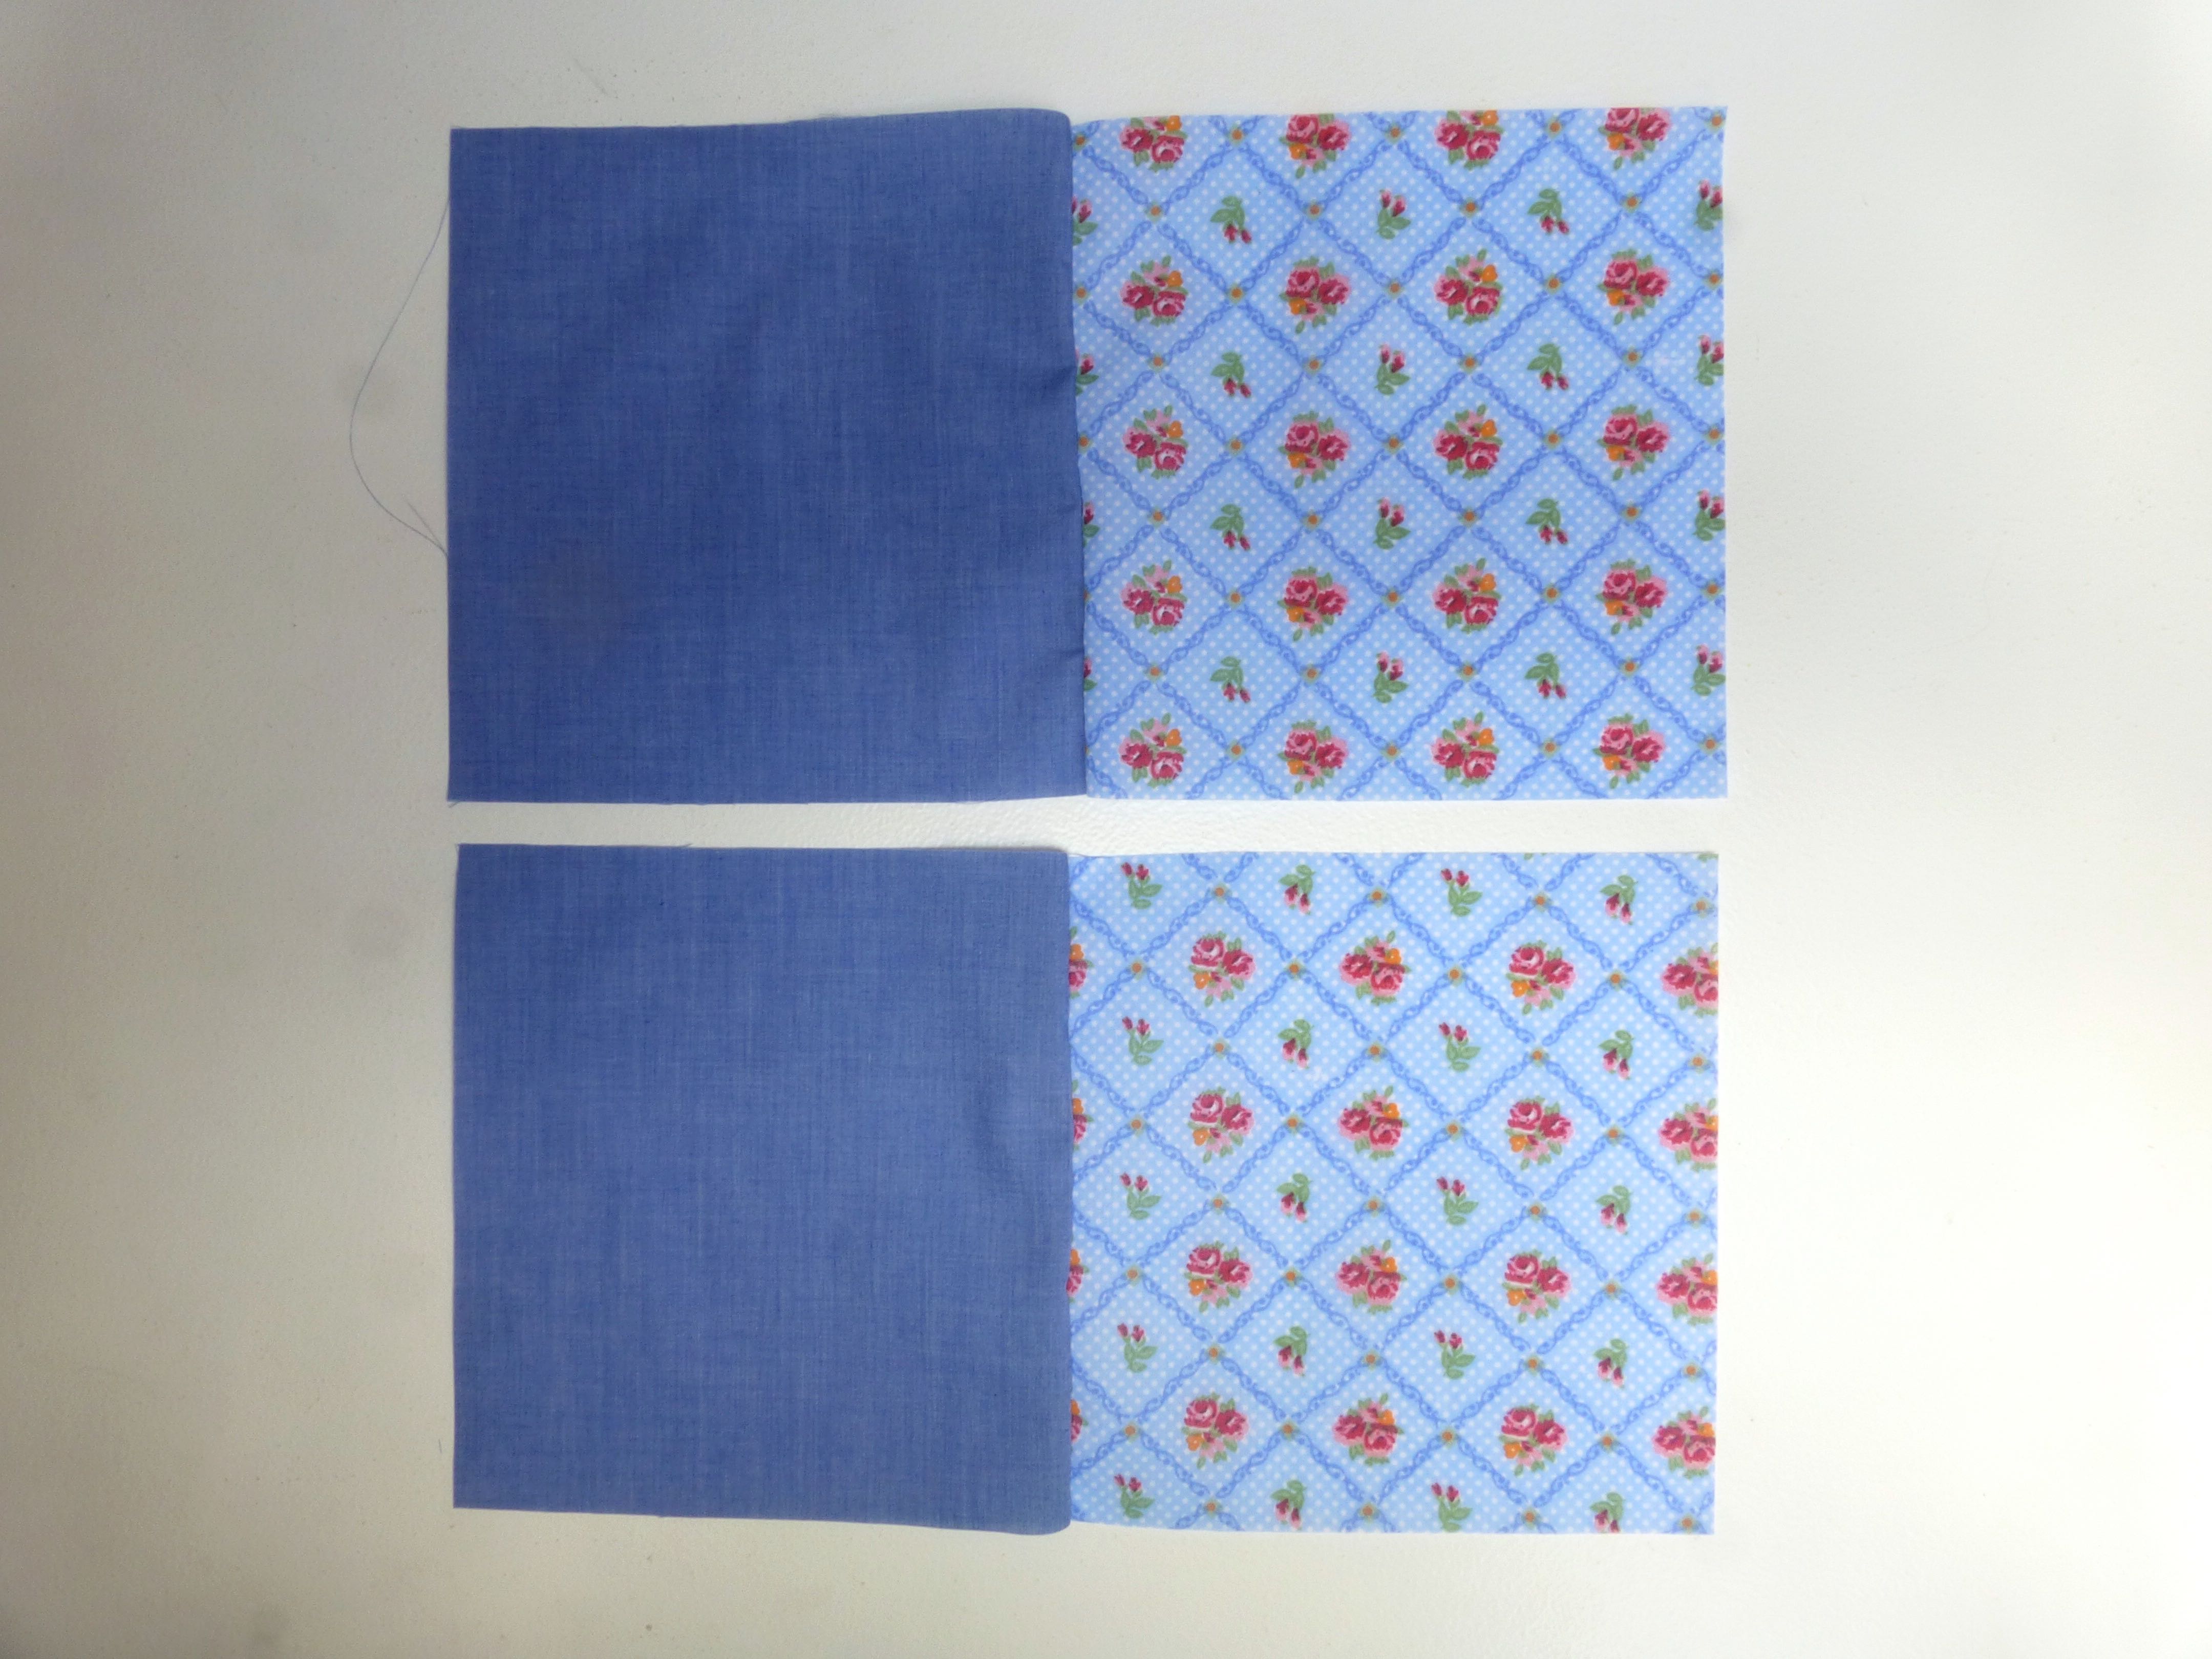
Start by sewing them in pairs, each floral with a plain, right sides together. You will need to make 36 pairs which should leave you with 9 spare squares – 5 plain and 4 floral.
Don’t bother reversing your stitching at the beginning and end of each set, cutting the thread and repeating with the next pair – just keep feeding the pairs through the machine one after the other as shown below.
When all the pairs of squares are sewn, snip the joining stitches to separate them.
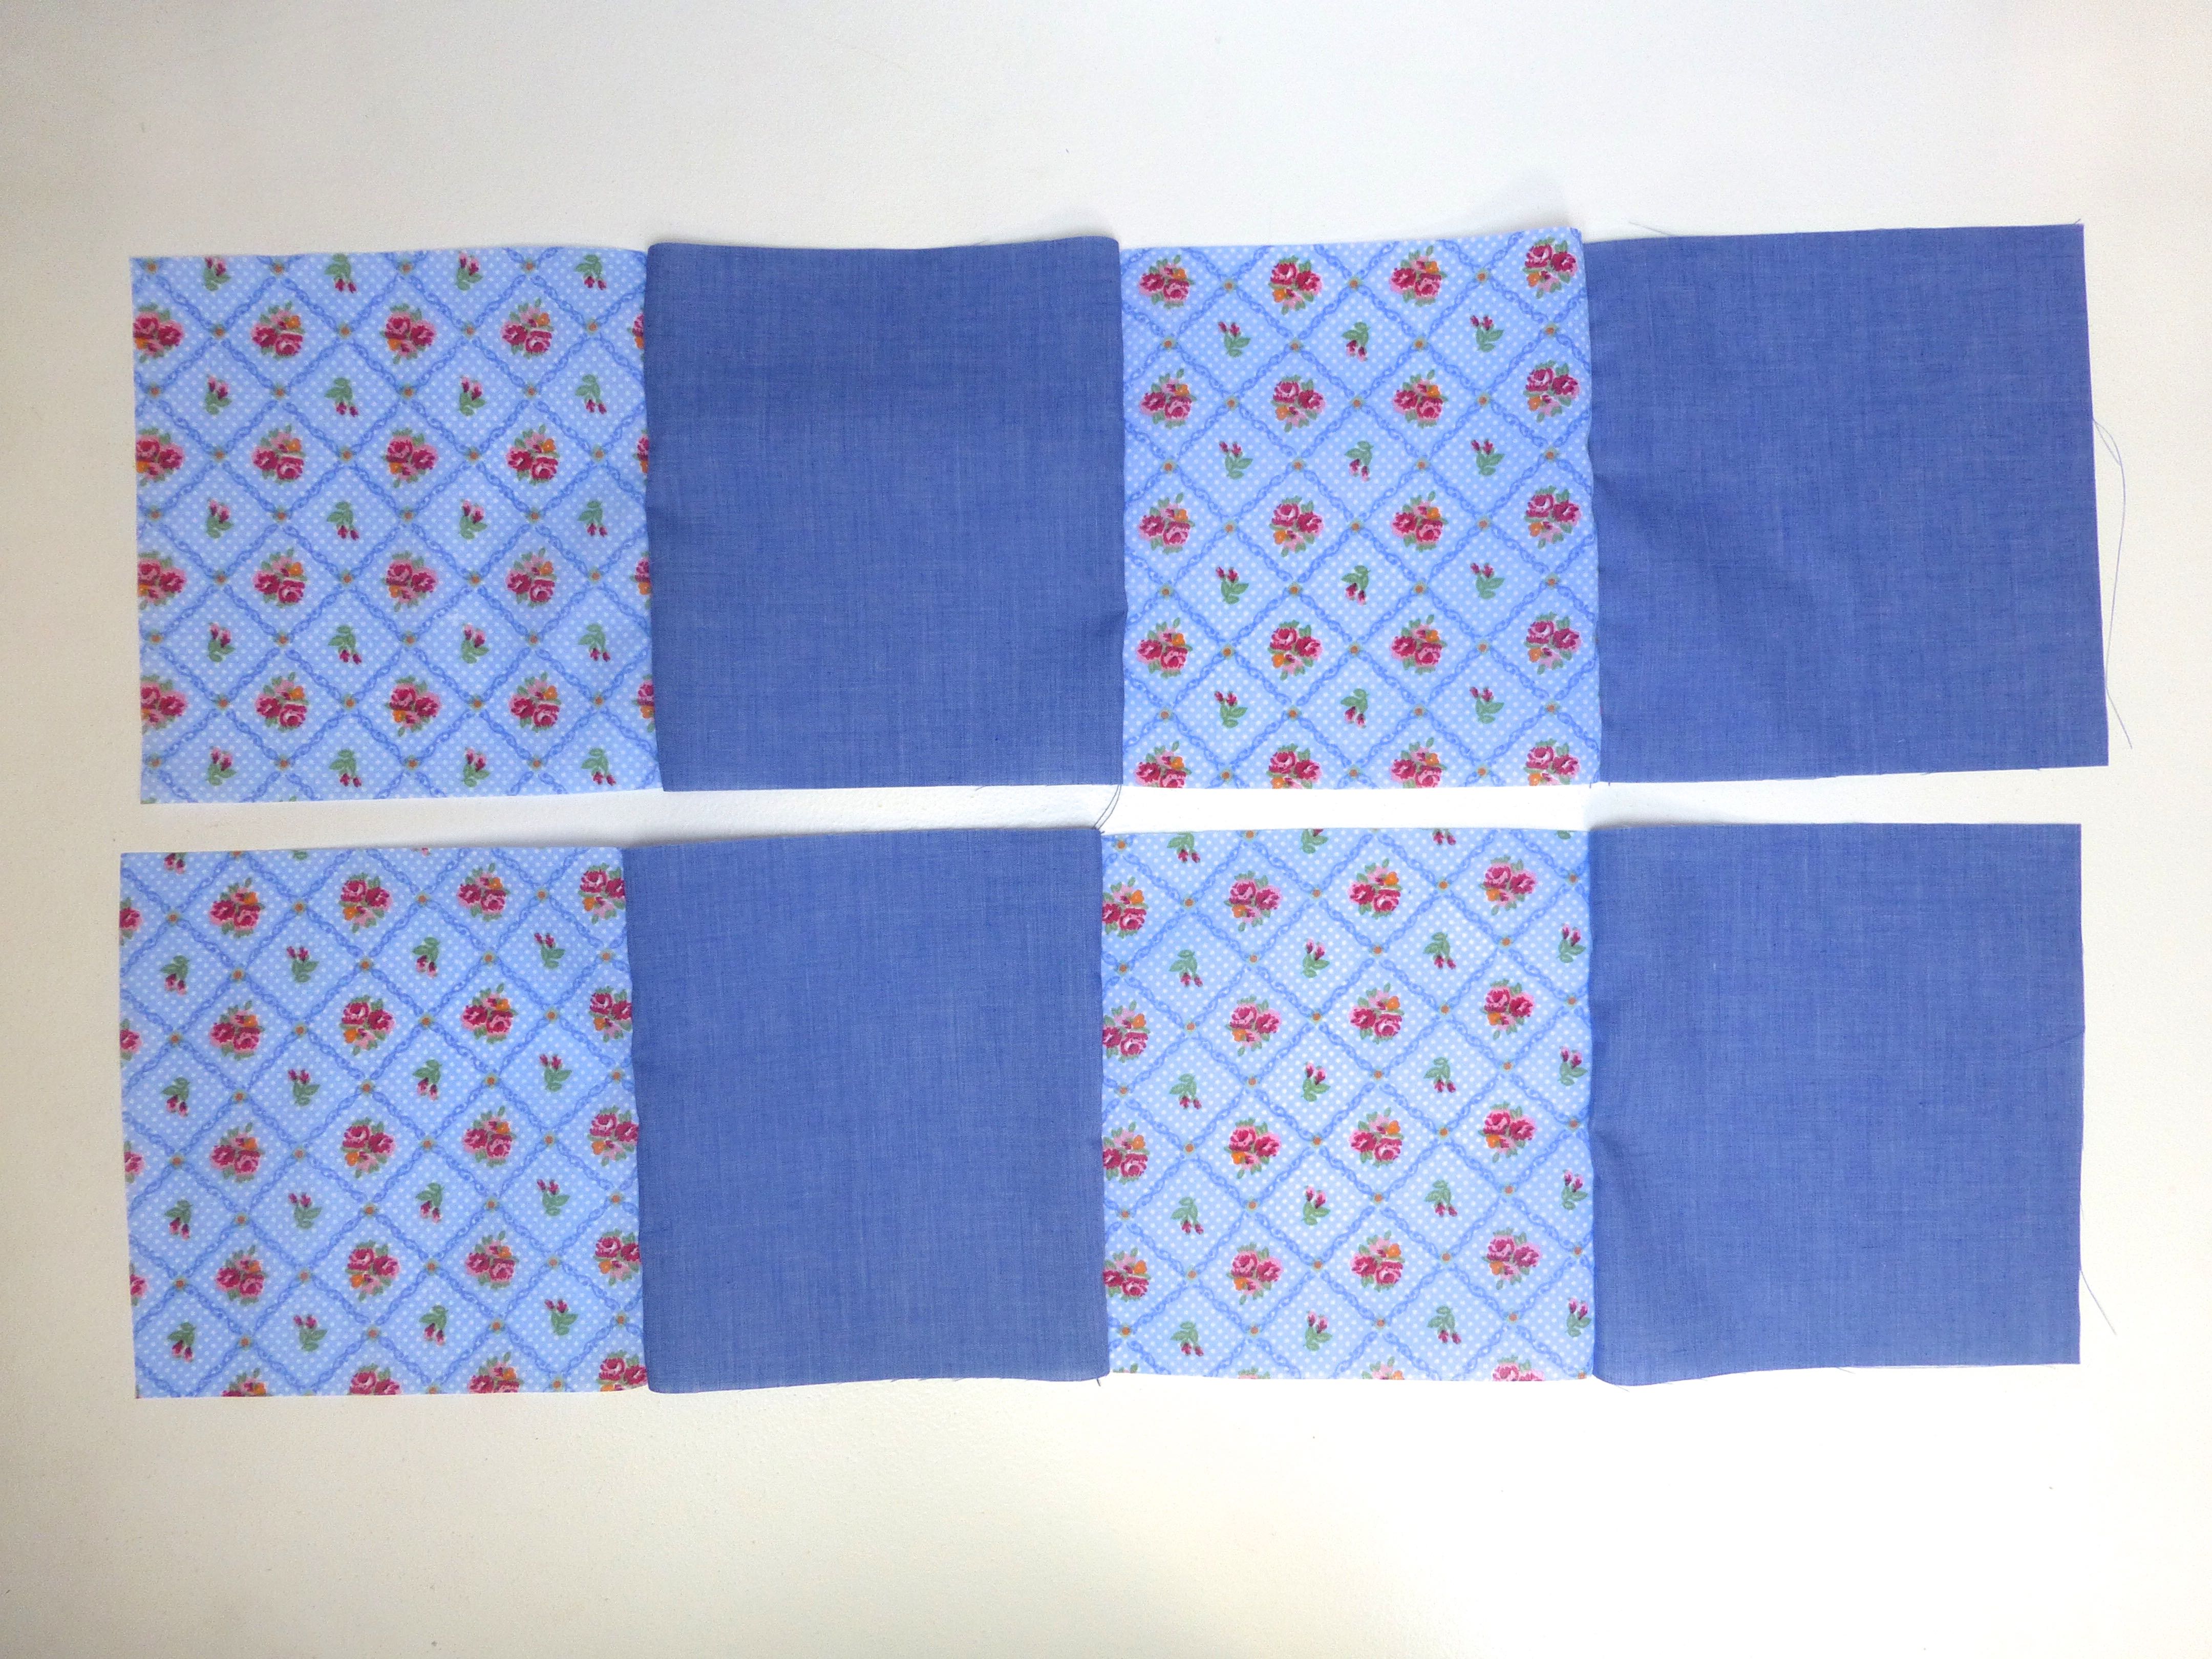
Repeat this process with the pairs of squares…
….until you have rows of 4….
….then sew the rows of 4 together to make rows of 8. Now add one of your left over squares to the end of each row.
You should now have 9 rows of 9 squares.
Press all the seam allowances to one side.
To minimise any bulk at the seams, you may wish to alternate the direction in which you press them flat.
Join these rows along the long edges, matching and pinning the seams as you go.
Continue until all your strips of patchwork are sewn together into one large square.
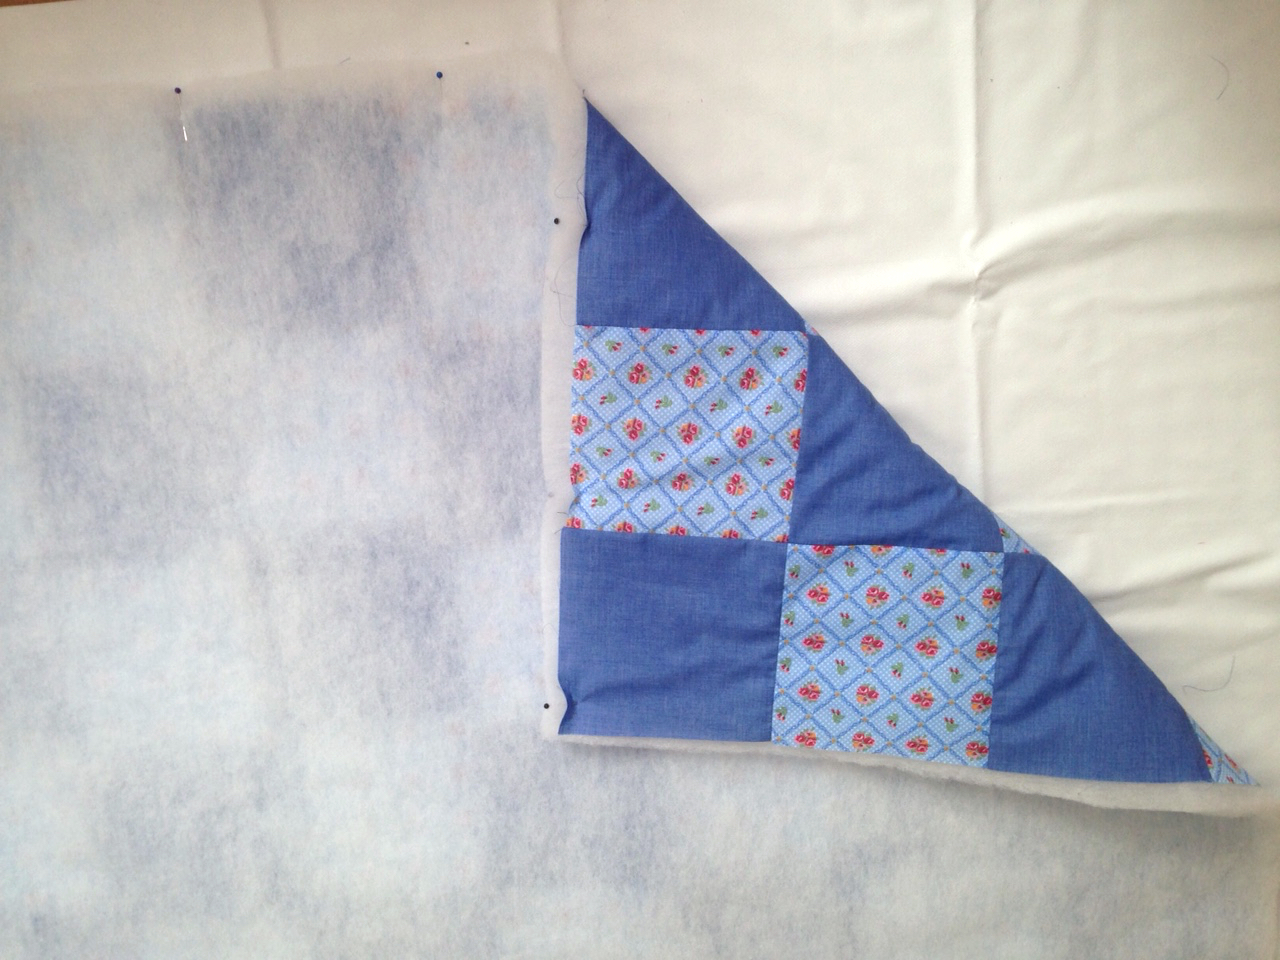
As I reached this stage, I made the spontaneous decision to add a layer of wadding between this top layer and the bottom layer. (I had plenty in my stash, but you can buy it here.)
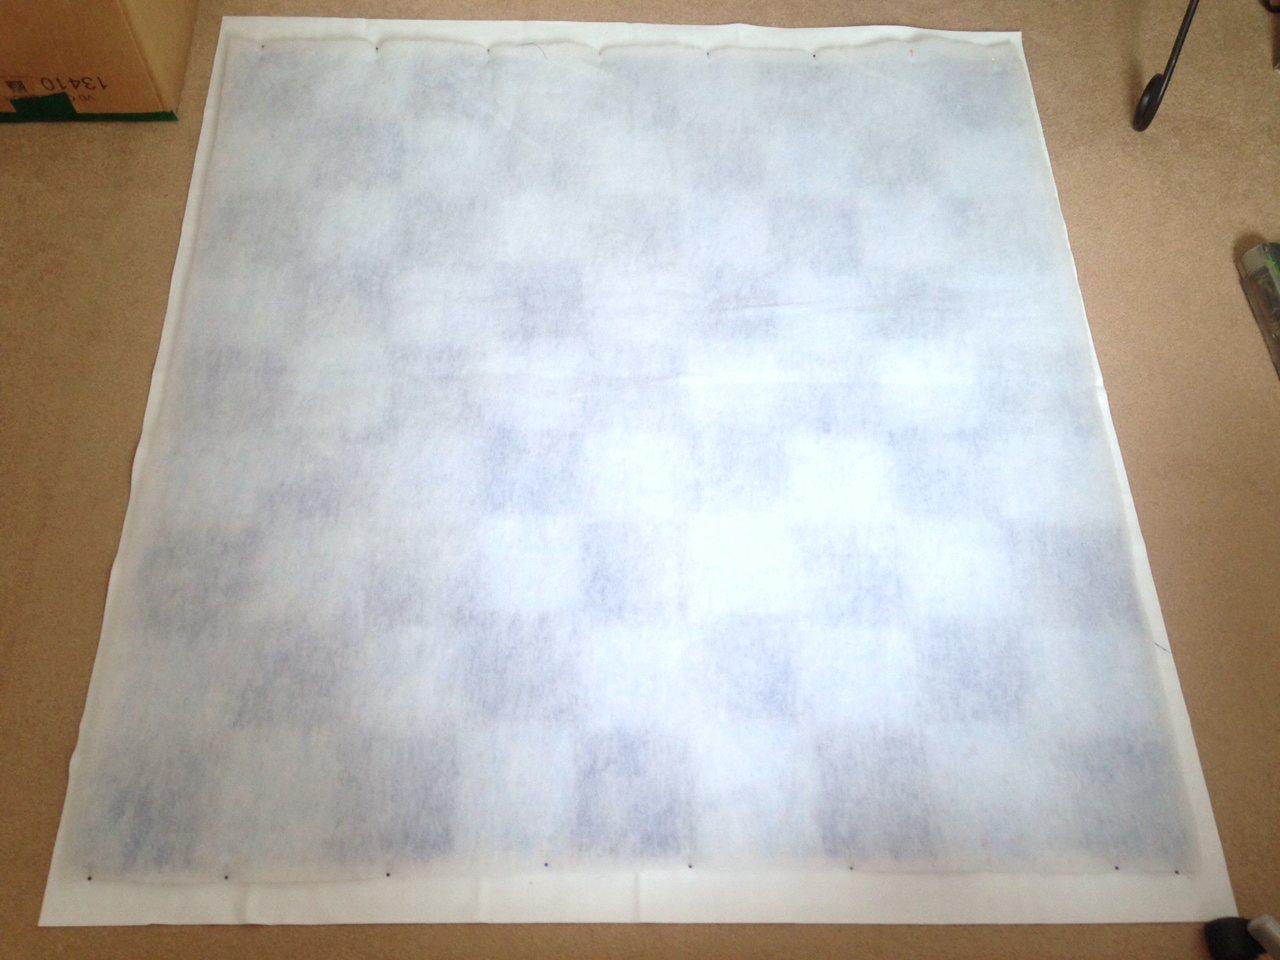
I cut a square of wadding slightly larger all the way around than the patchwork piece, laid it on top of the wrong side of the patchwork and pinned it around the entire edge.
Stitch close to the raw edges all around the outside and trim the excess wadding as shown.
Now the wadding is secured, you can use large tacking stitches through both layers to stop them shifting whilst quilting.
Stitch in the ‘ditch’ using a long stitch length until the whole blanket has been quilted along the seam lines.
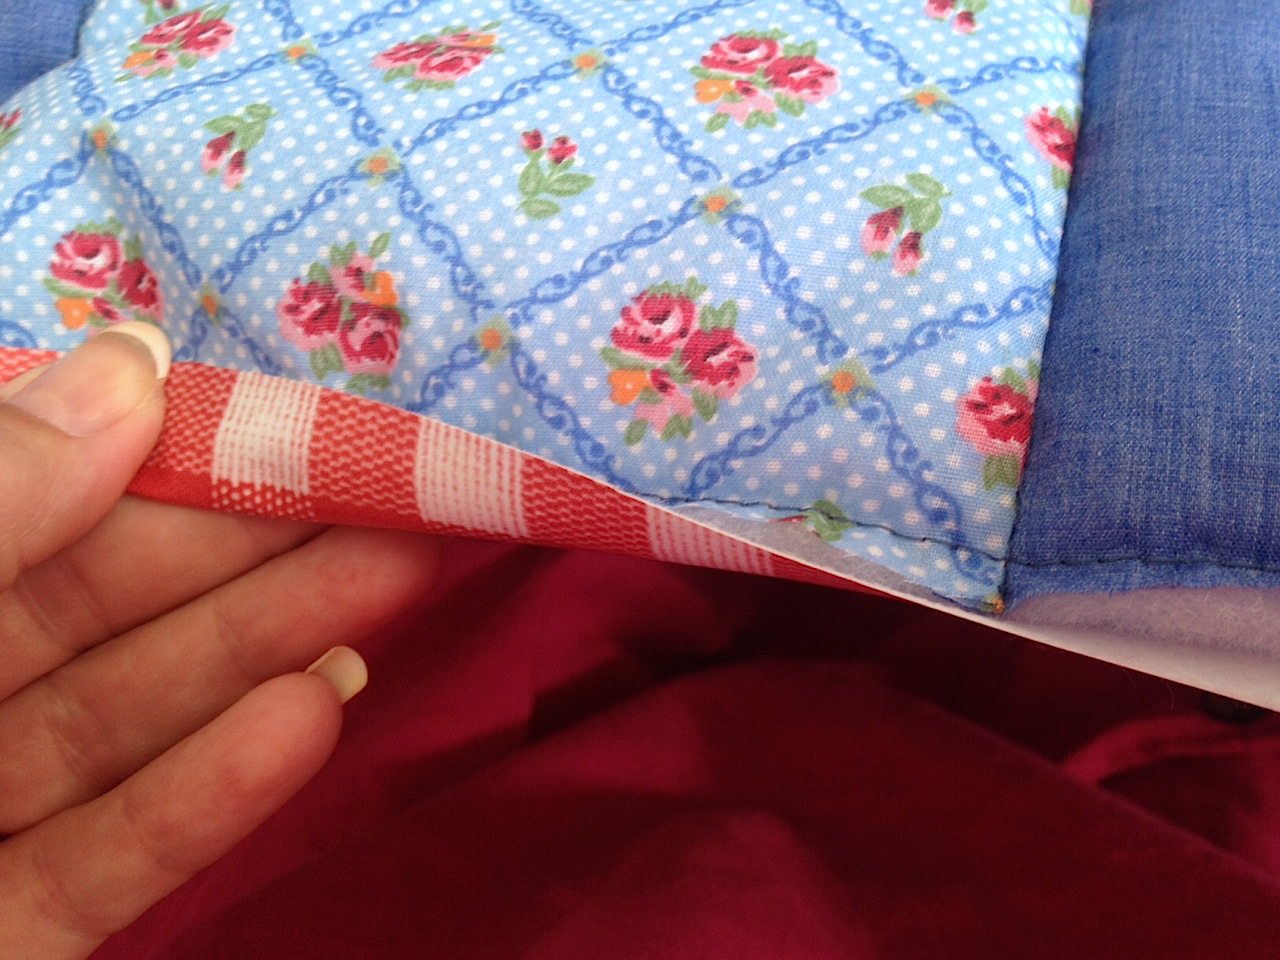
Place the quilted layer onto the vinyl backing, wrong sides together, and trim the backing so that it is 1.5cm bigger than the top all the way around.
Using clips, fold the excess vinyl over to the right side of the blanket and secure in place.
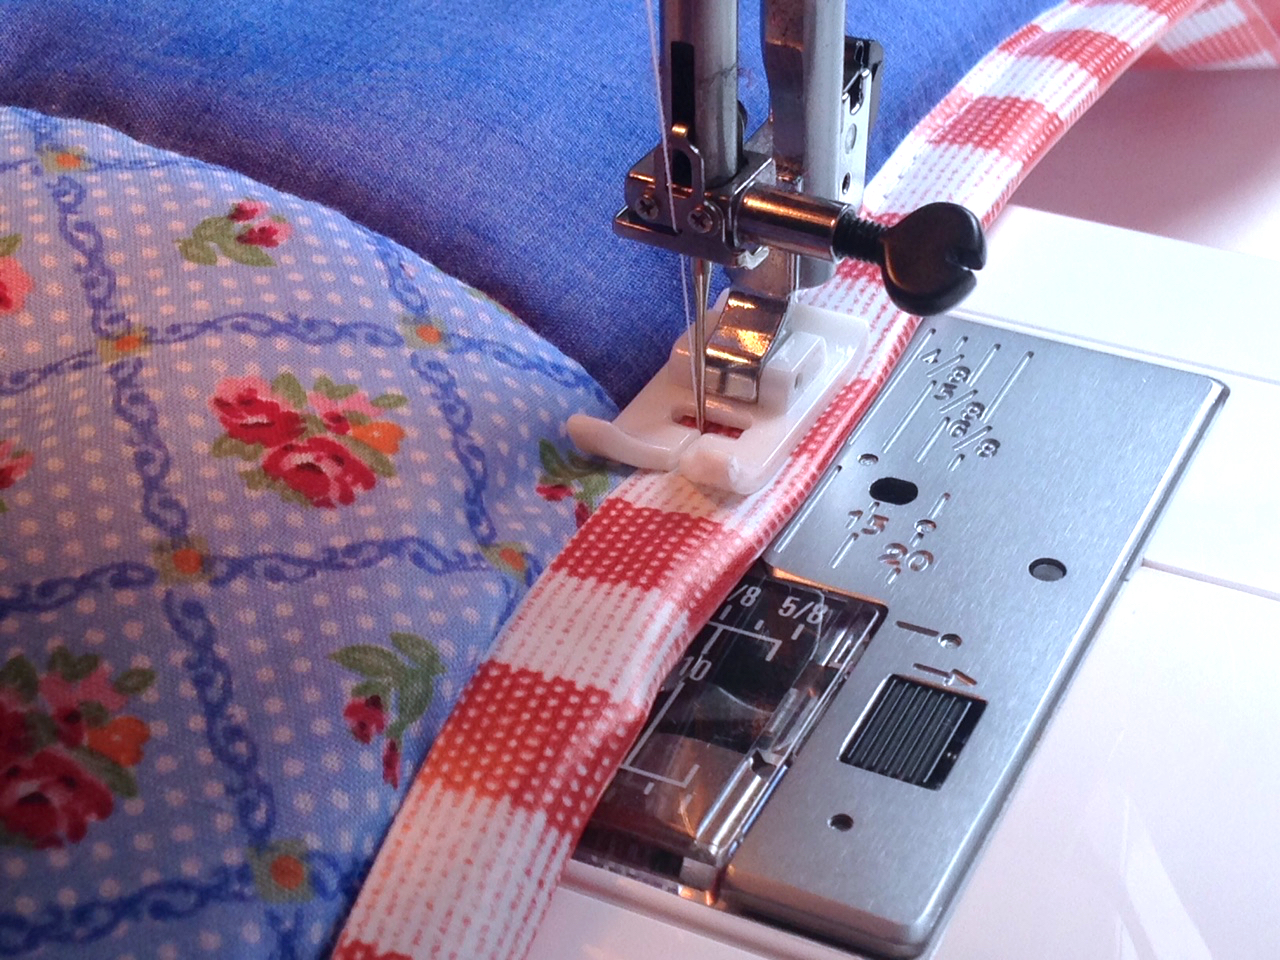
A teflon foot makes the vinyl move smoothly through the machine, and a leather needle with its wedged shape will stop any skipped stitches (discovered through trial and error!)
A simple long straight stitch close to the raw edge of the vinyl is all that is needed.
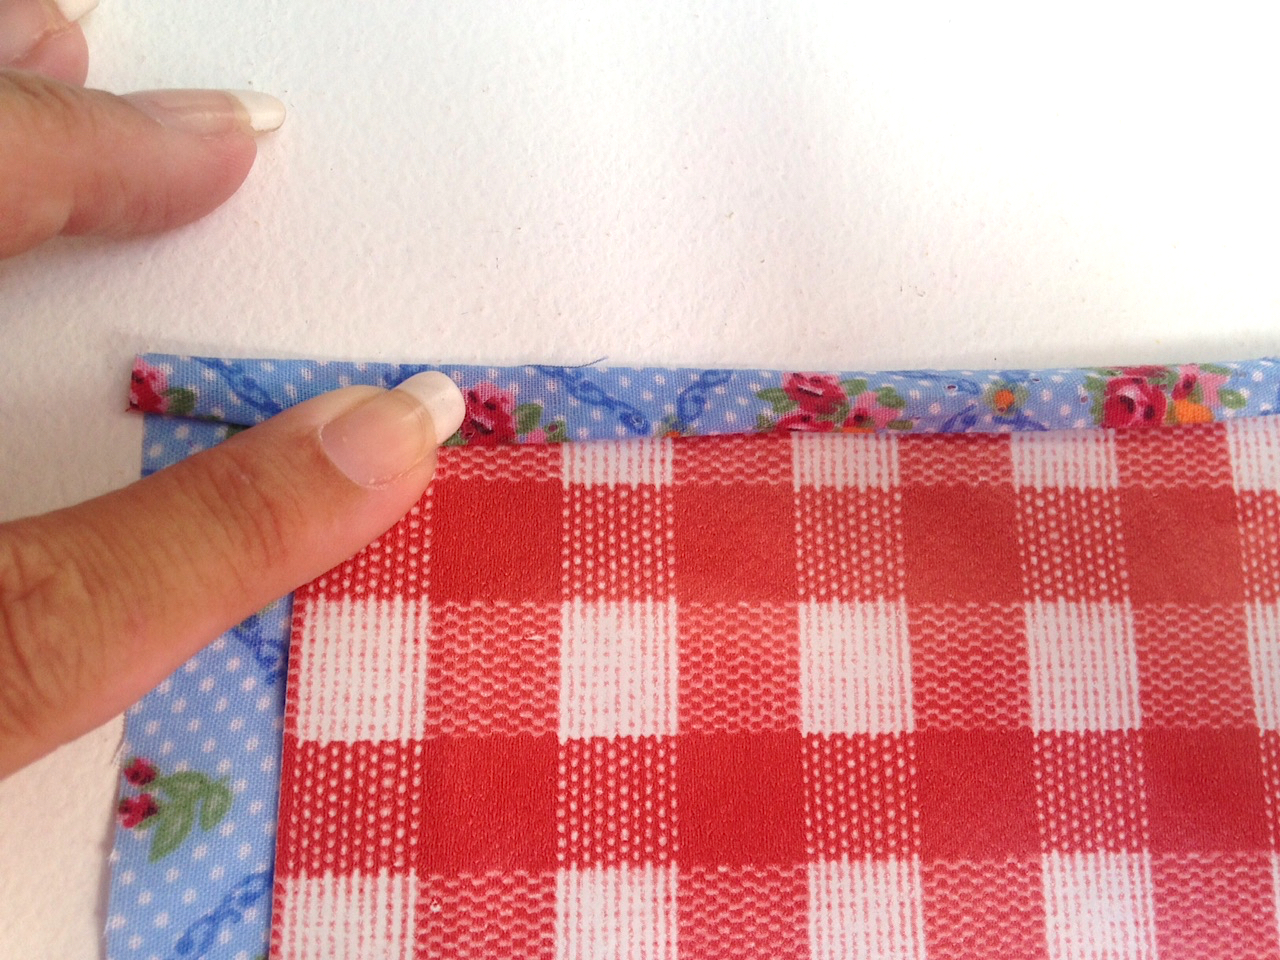
Mitre the corners as you go for a neat finish.
I was left with a few scraps of fabric and vinyl, so I also designed a fabric roll to act as a carry pack for the blanket.
For the carry pack, cut 3 floral and 2 plain squares the same size as before and sew them all together in a single row. Press.
Cut a piece of spare vinyl 1.5cm smaller than the patchwork strip and place in the centre of the strip, wrong sides together.
Turn a narrow hem…..
….and stitch in place close to the inner folded edge around all 4 sides, mitring the corners as you go.
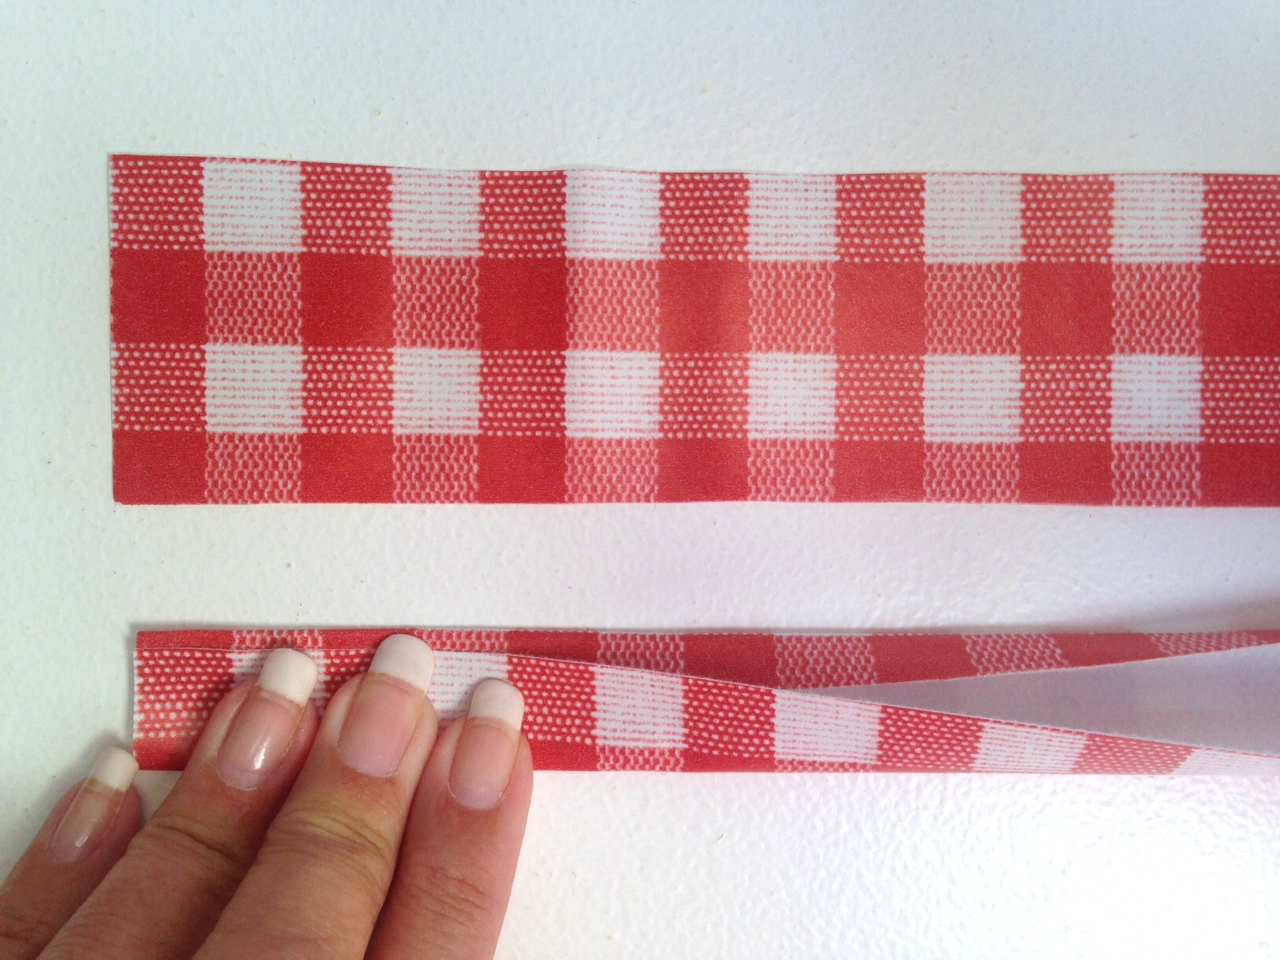
Cut two pieces of vinyl for the handles, each measuring 20cm x 5cm.
Fold the long upper edge in to the wrong side by 1cm, and bring the lower edge up to meet it, overlapping a little to encase the raw edge as shown below.
Stitch close to the raw edge.
Repeat with the second handle.
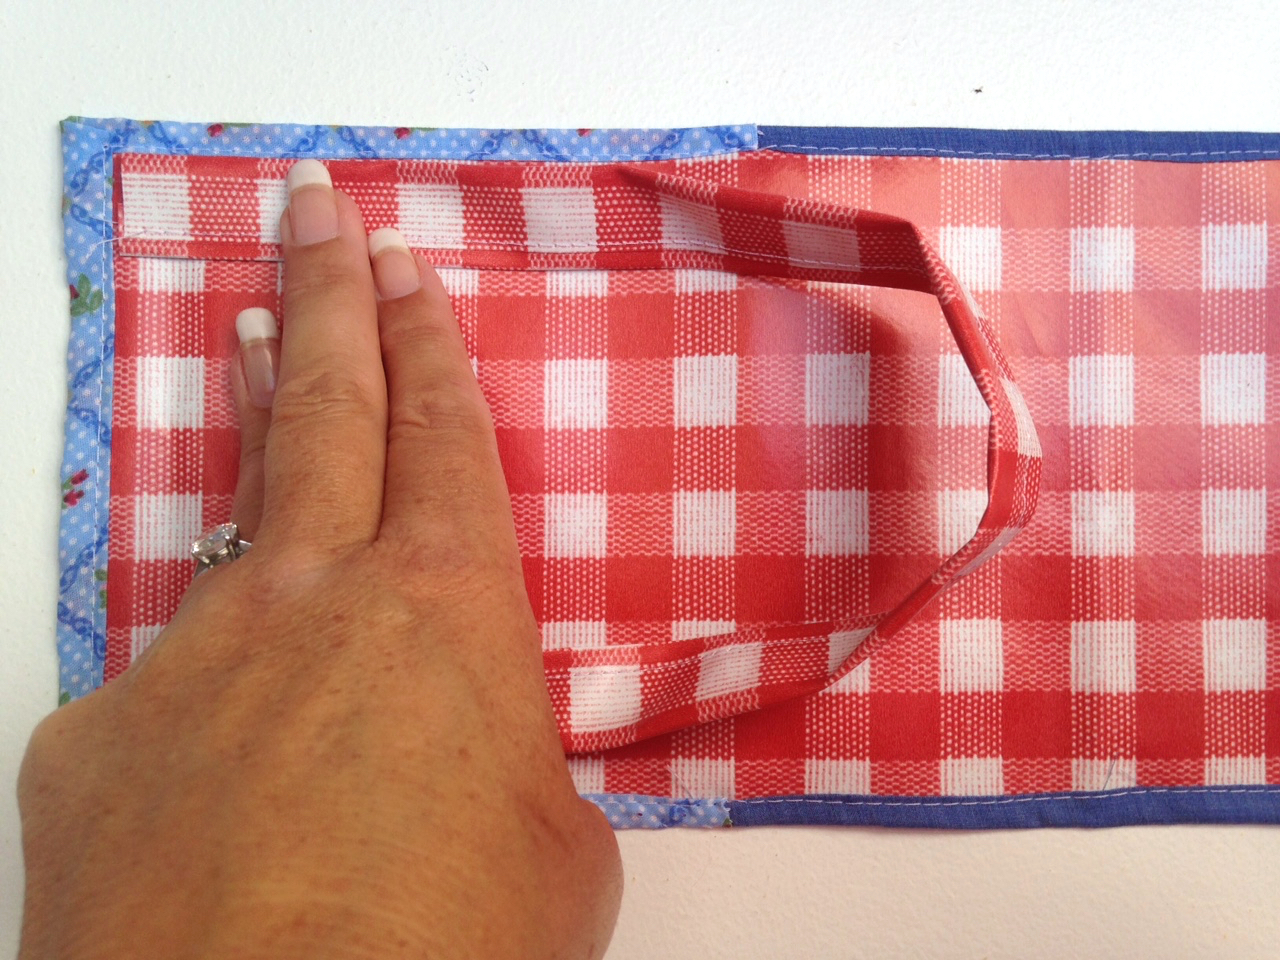
Position the two ends of the handle in the corner of the carry pack using the photograph as a guide.
Stitch in place with a 1cm seam.
Fold the handle to the outside and turn over, vinyl side down.
Cut a 12cm strip of velcro hook and loop fastener and sew the hook side to the fabric side of the carry pack, being sure to catch the handle in the ‘up’ position, securing it in place at the same time.
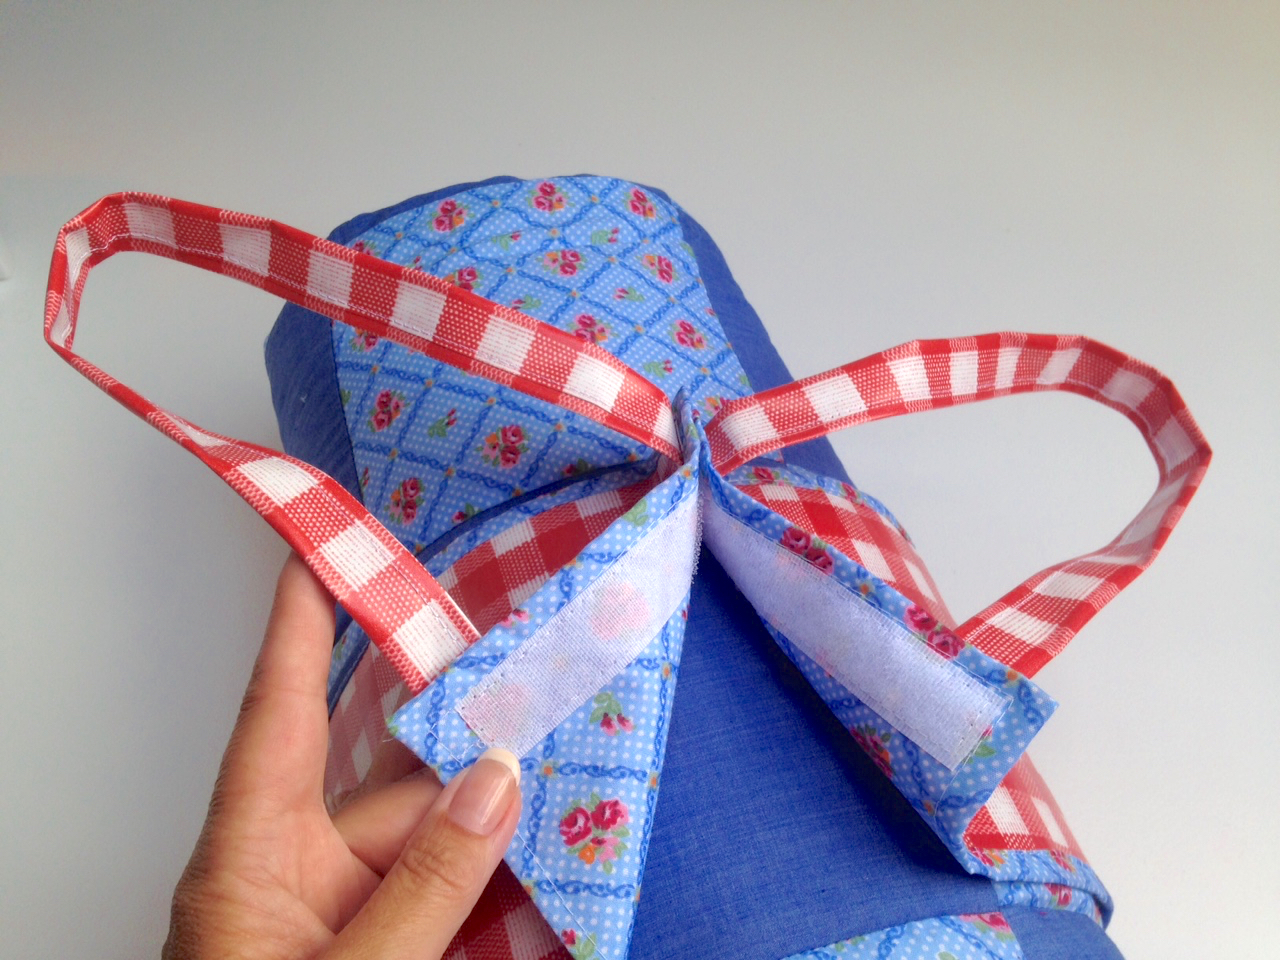
Repeat with the loop side at the other end of the carrier.
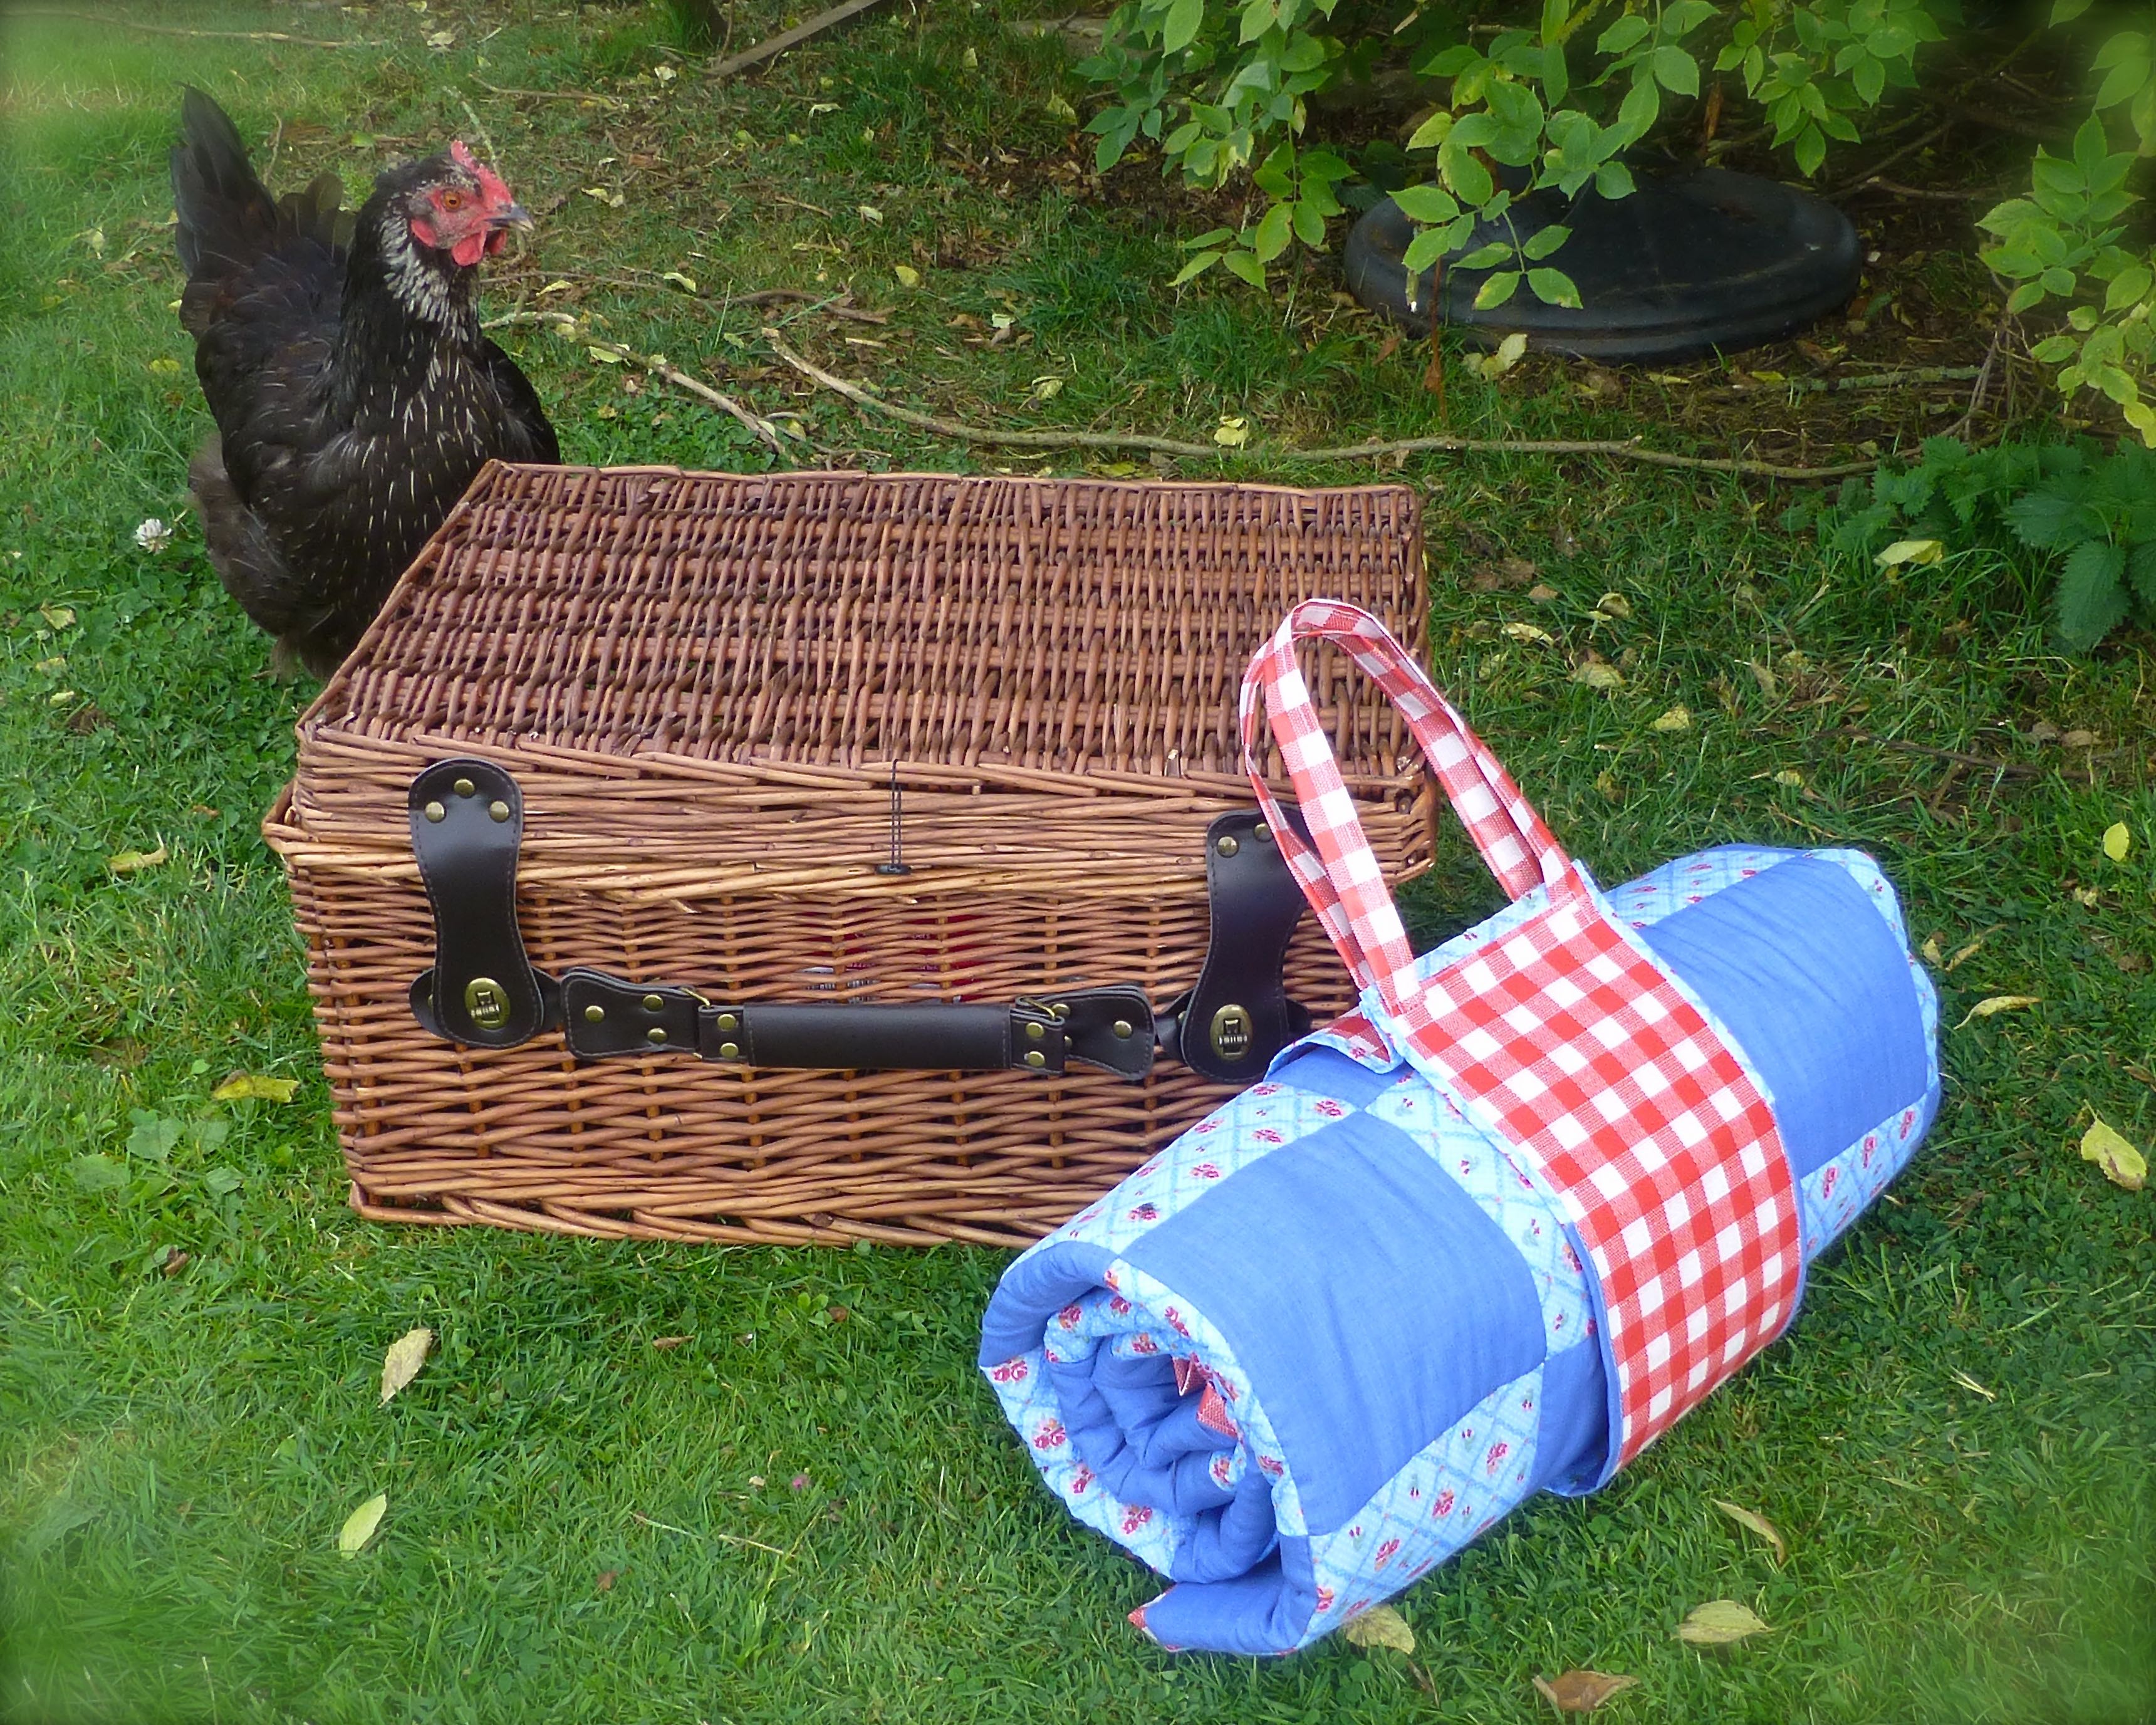
When the blanket is rolled up, wrap the carry pack around it and press the velcro strips together.
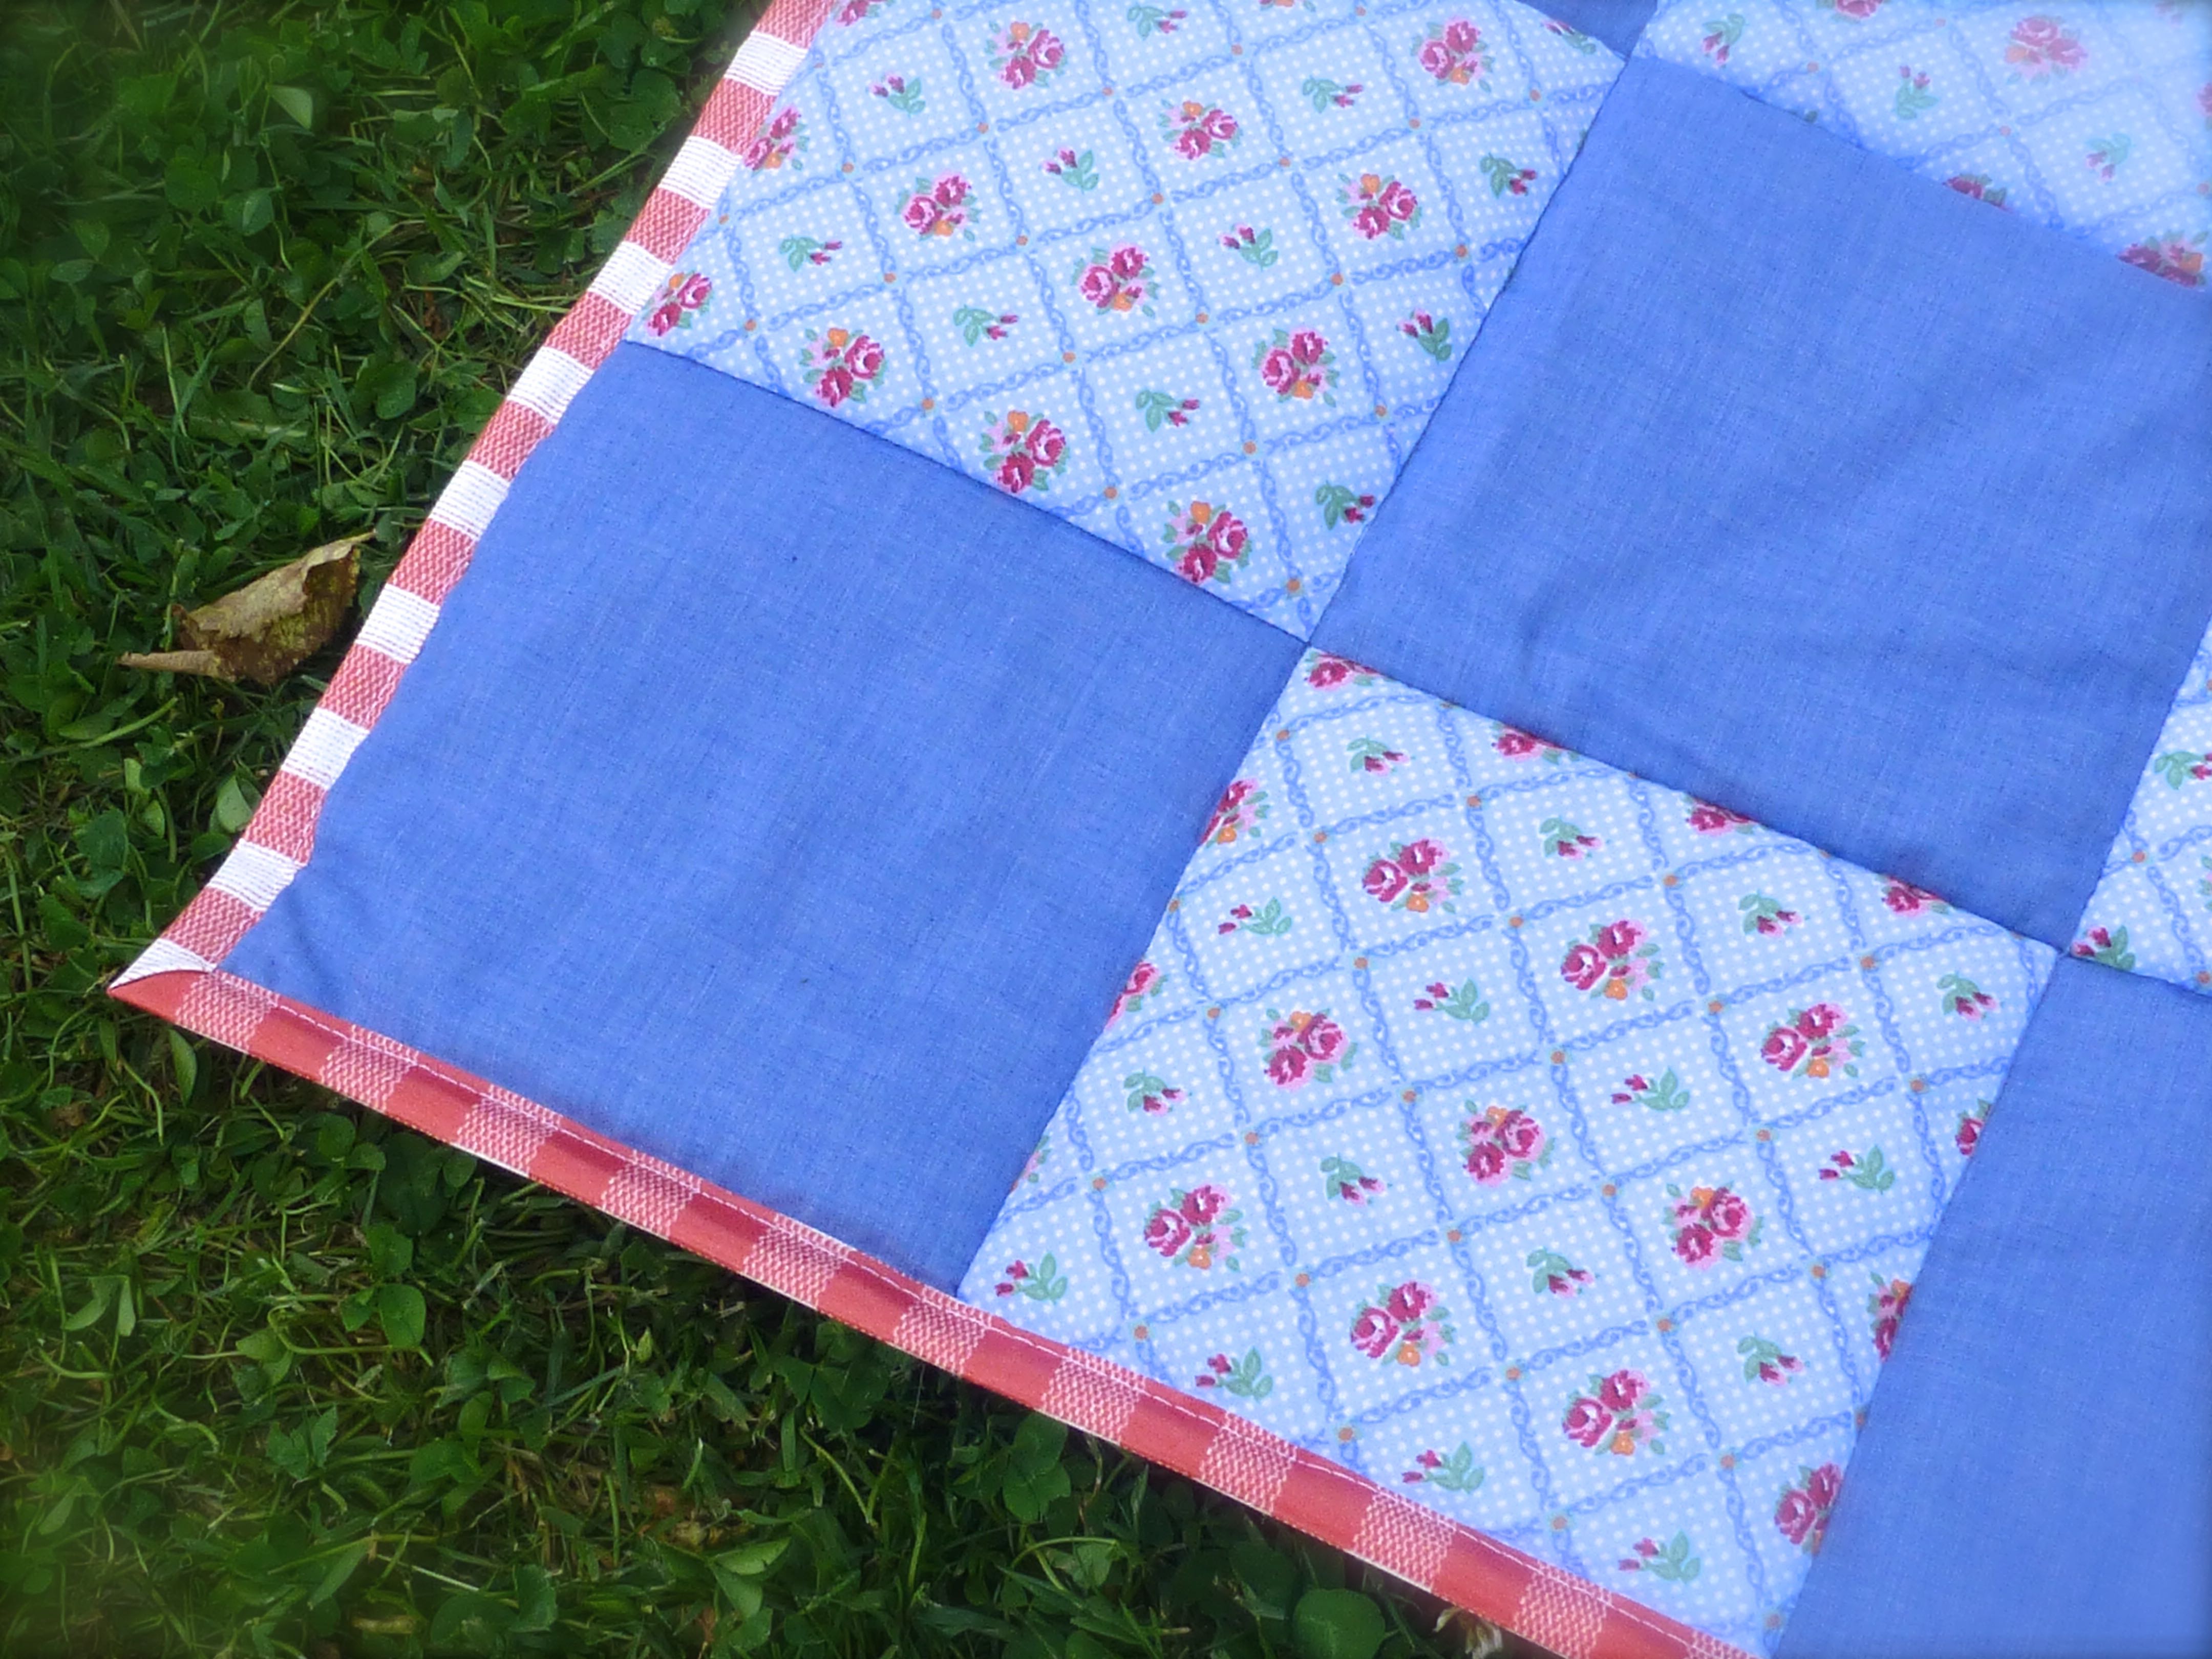
For a picnic in the garden (or anywhere), just add bunting, a squishy cushion and a hamper full of goodies.
Sun is a bonus for a picnic, but not when taking photographs (too much contrast)…
The perfect fusion of girl/boy styling that anyone would be happy to sit on.
No more damp bums!
A lovely layer of wadding for added comfort.
The carry pack with handles means that it’s compact and easy to transport.
Marley was interested to see what was going on – sometimes our hens are just a little bit too friendly!
Now all we need is for Summer to return so we can actually use our lovely new picnic blanket!!
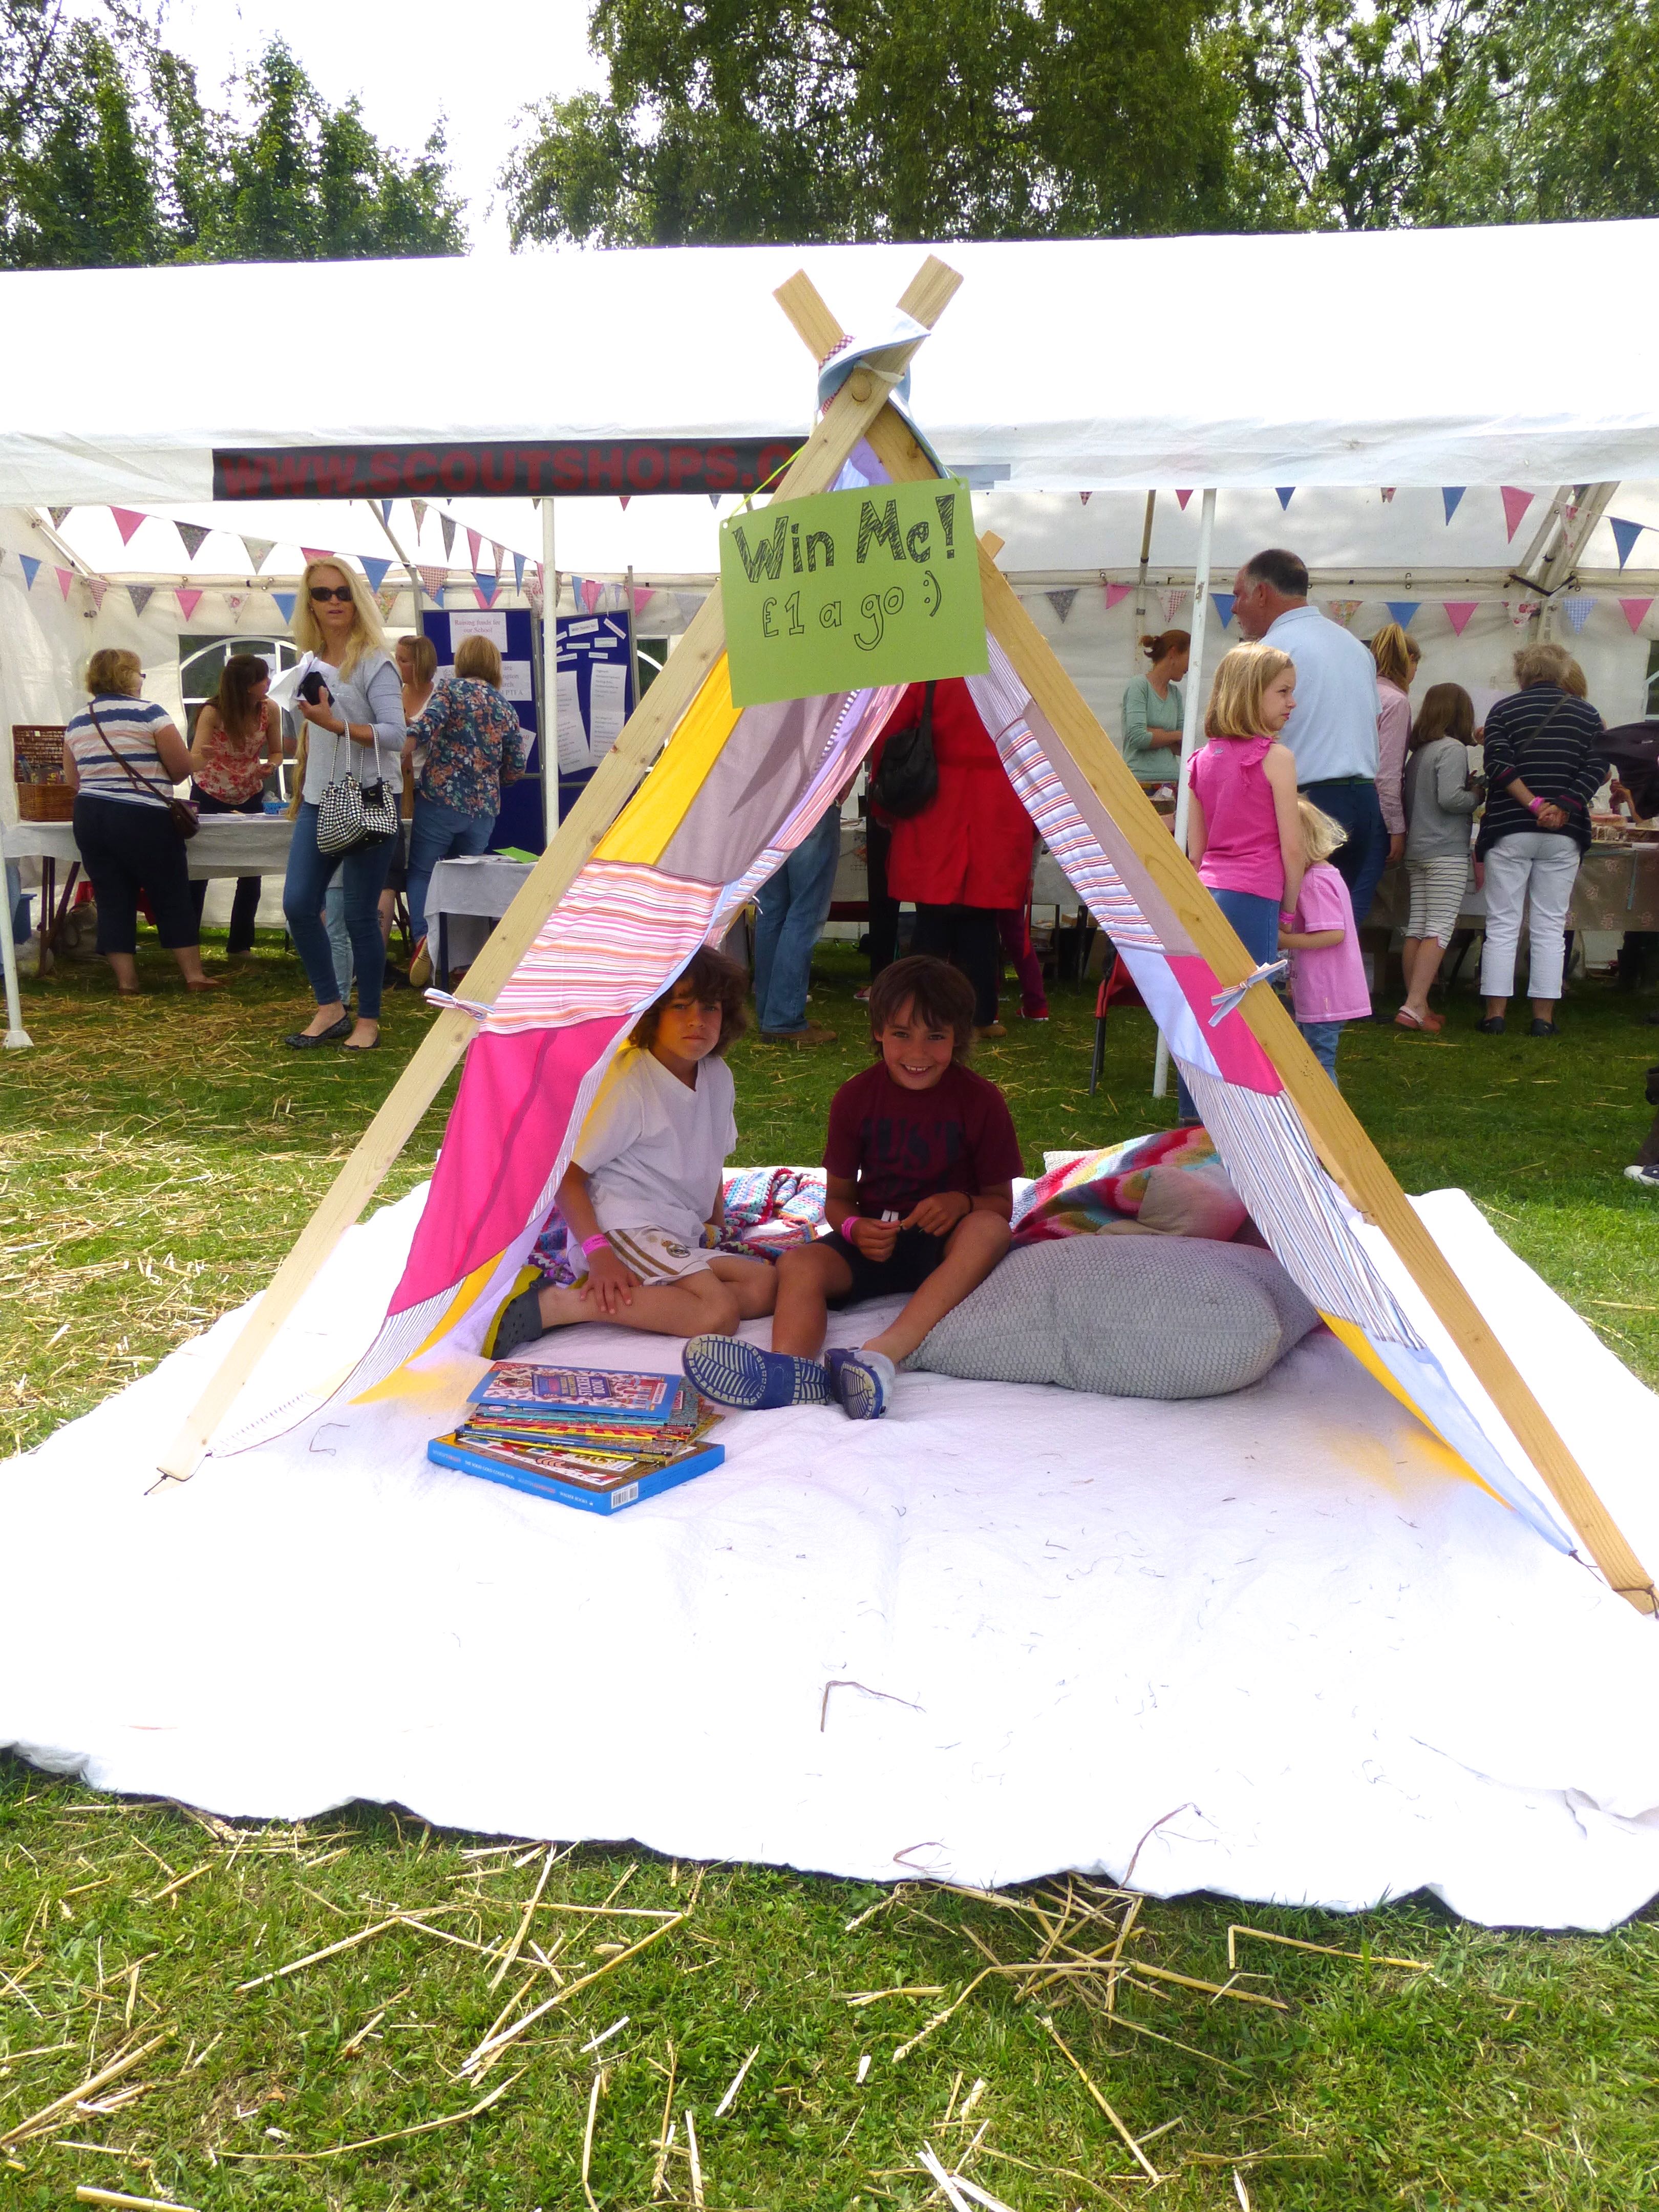
Last week it was our school’s Summer Fête and, as well as many edible goodies, I made a play tent for the PTFA to raffle off for their funds.
All week I had been making jam, marmalade, fudge….
….Elderflower Cordial….
…….and scones.
The day before the fair, Mr H-L had a delivery of some new shirts for work and decided to have a wardrobe clear out resulting in the eviction of nine of his ‘old’ ones.
Some of the shirts had never actually been worn and even those that had were still in great condition so, when he asked me to take them to the charity shop, and idea sprung to mind.
Why not upcycle them and make a patchwork play tent to raffle off for the school funds?
This ended up making far more money than they would have achieved in a charity shop, and the money was still going to a good cause, so off to my studio I went to formulate a plan.
I made a similar tent for The Boys last year which I never got around to blogging about, so I based it on that.
YOU WILL NEED: –
Nine men’s cotton shirts
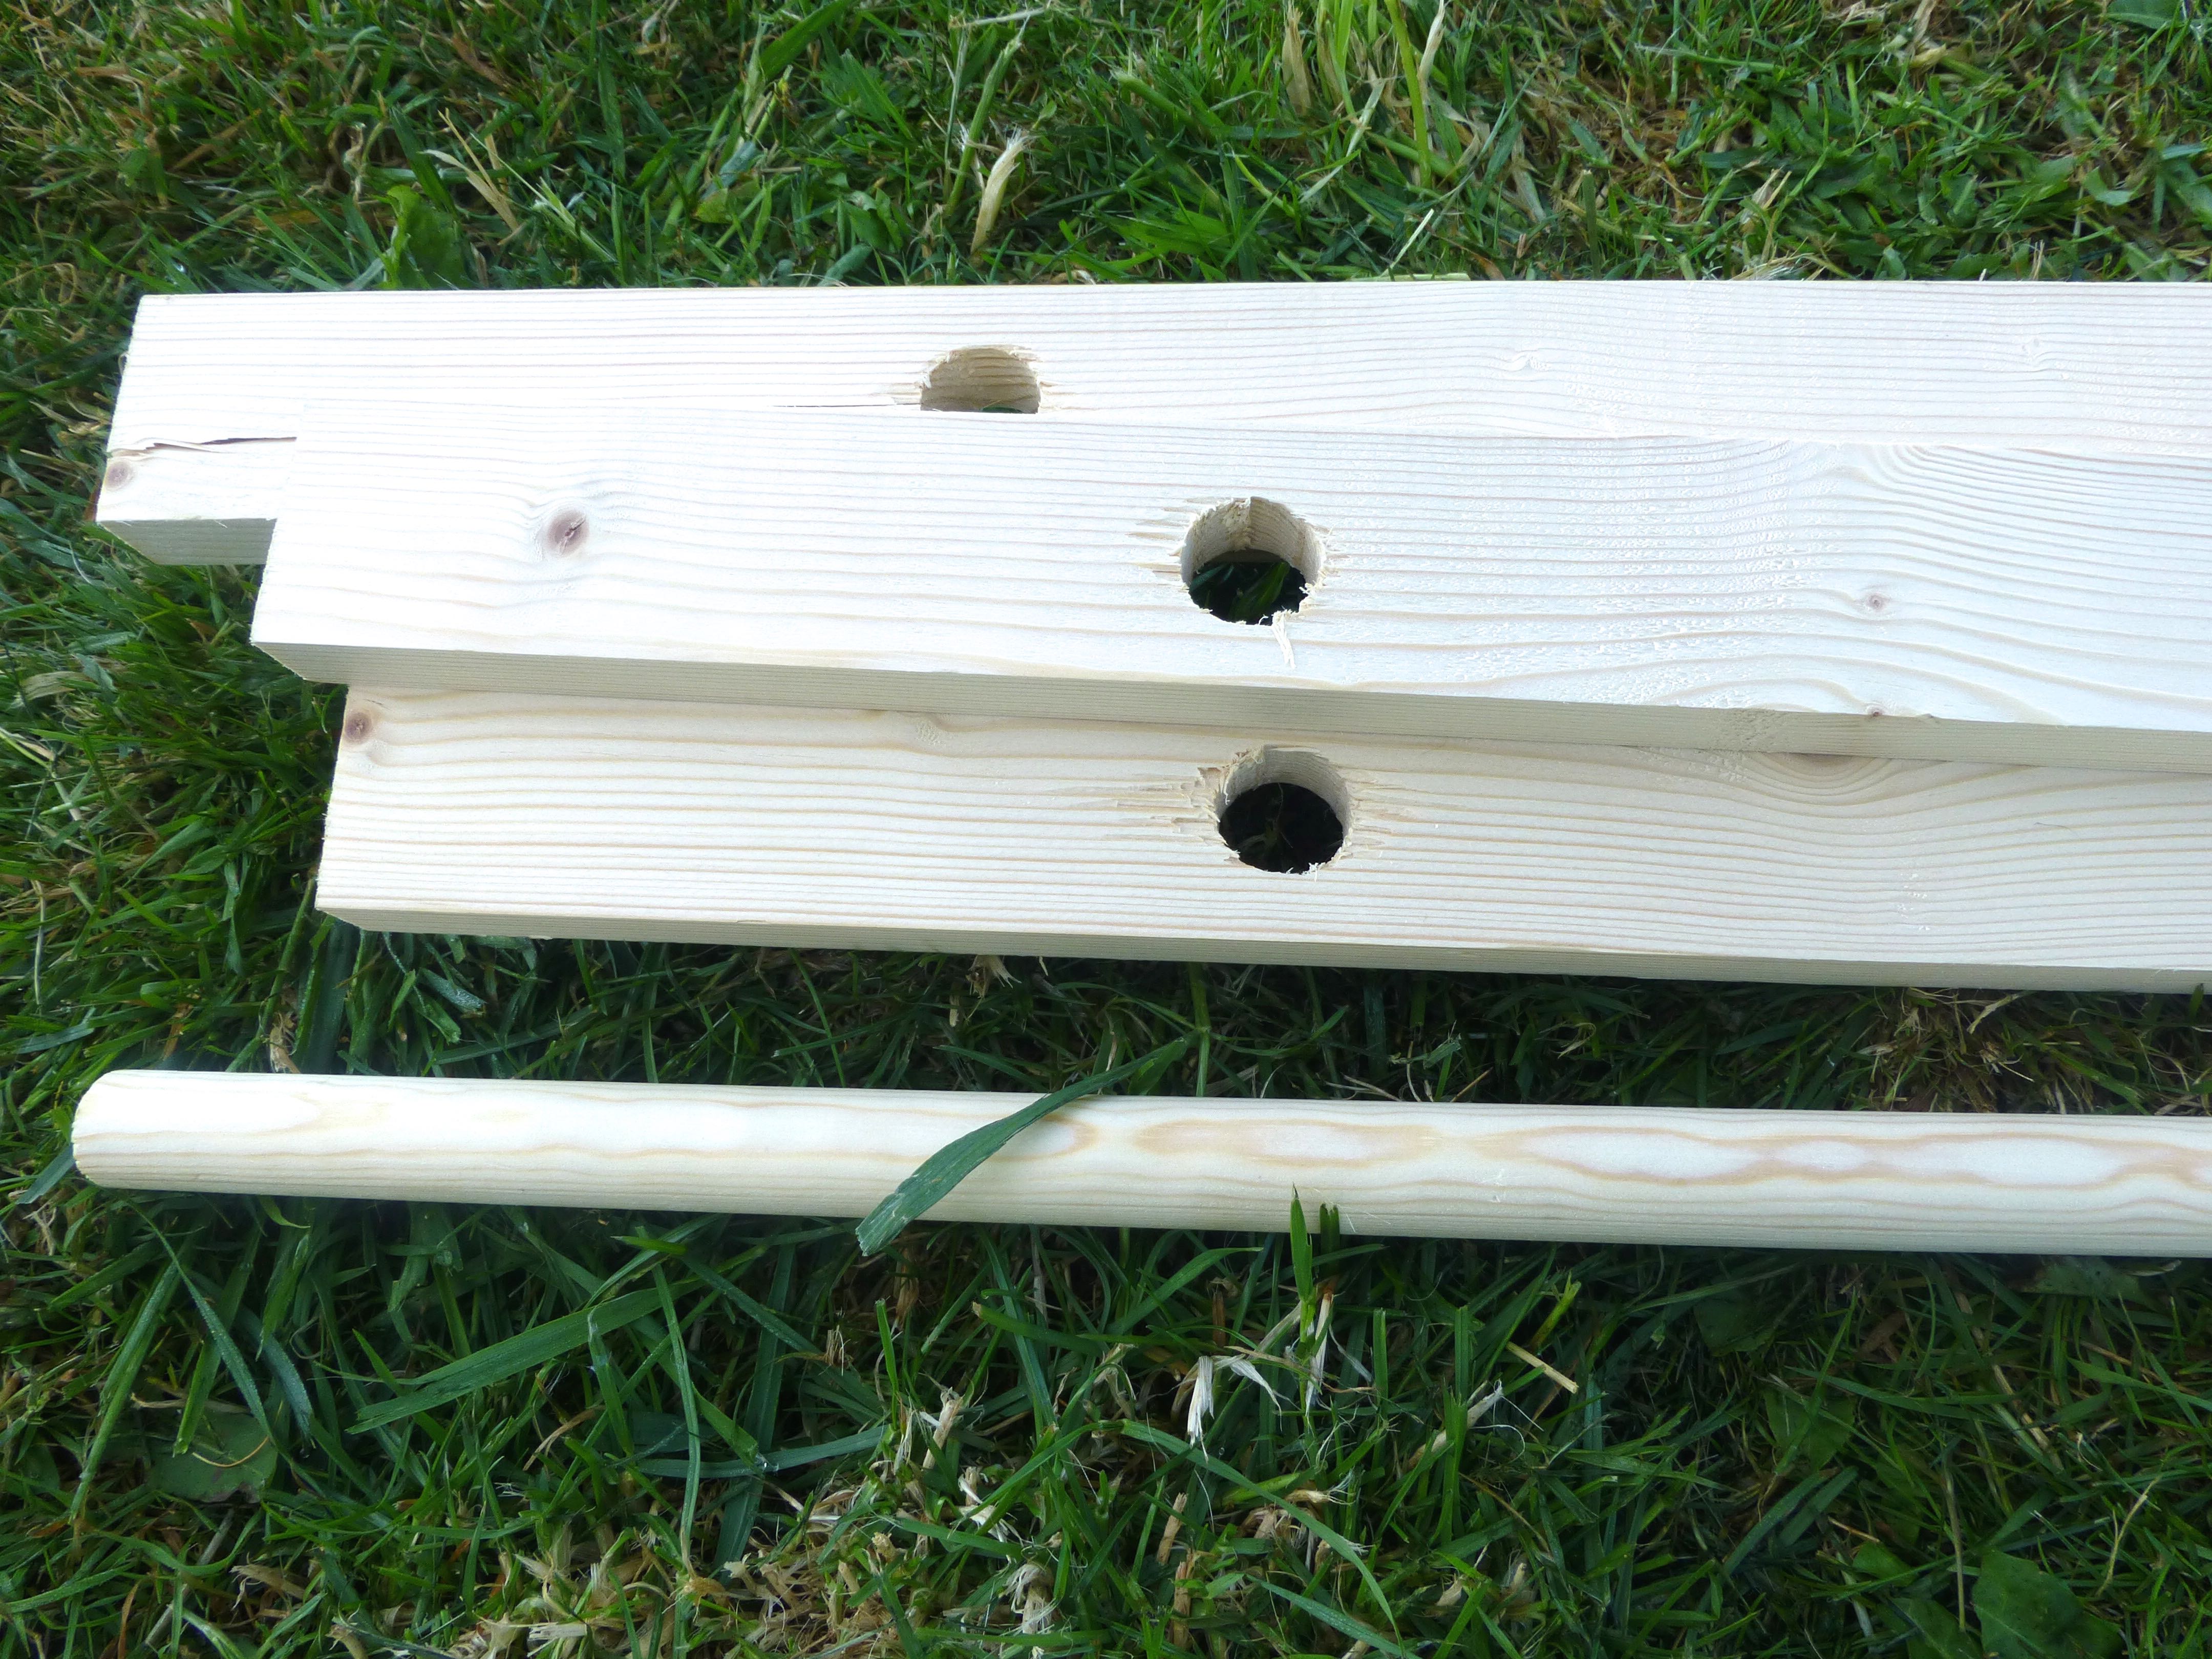
1 x dowelling (2000mm x 25mm)
4 x planed timber (1800mm x 44mm x 18mm)
4 x eyelets
2m elastic cord
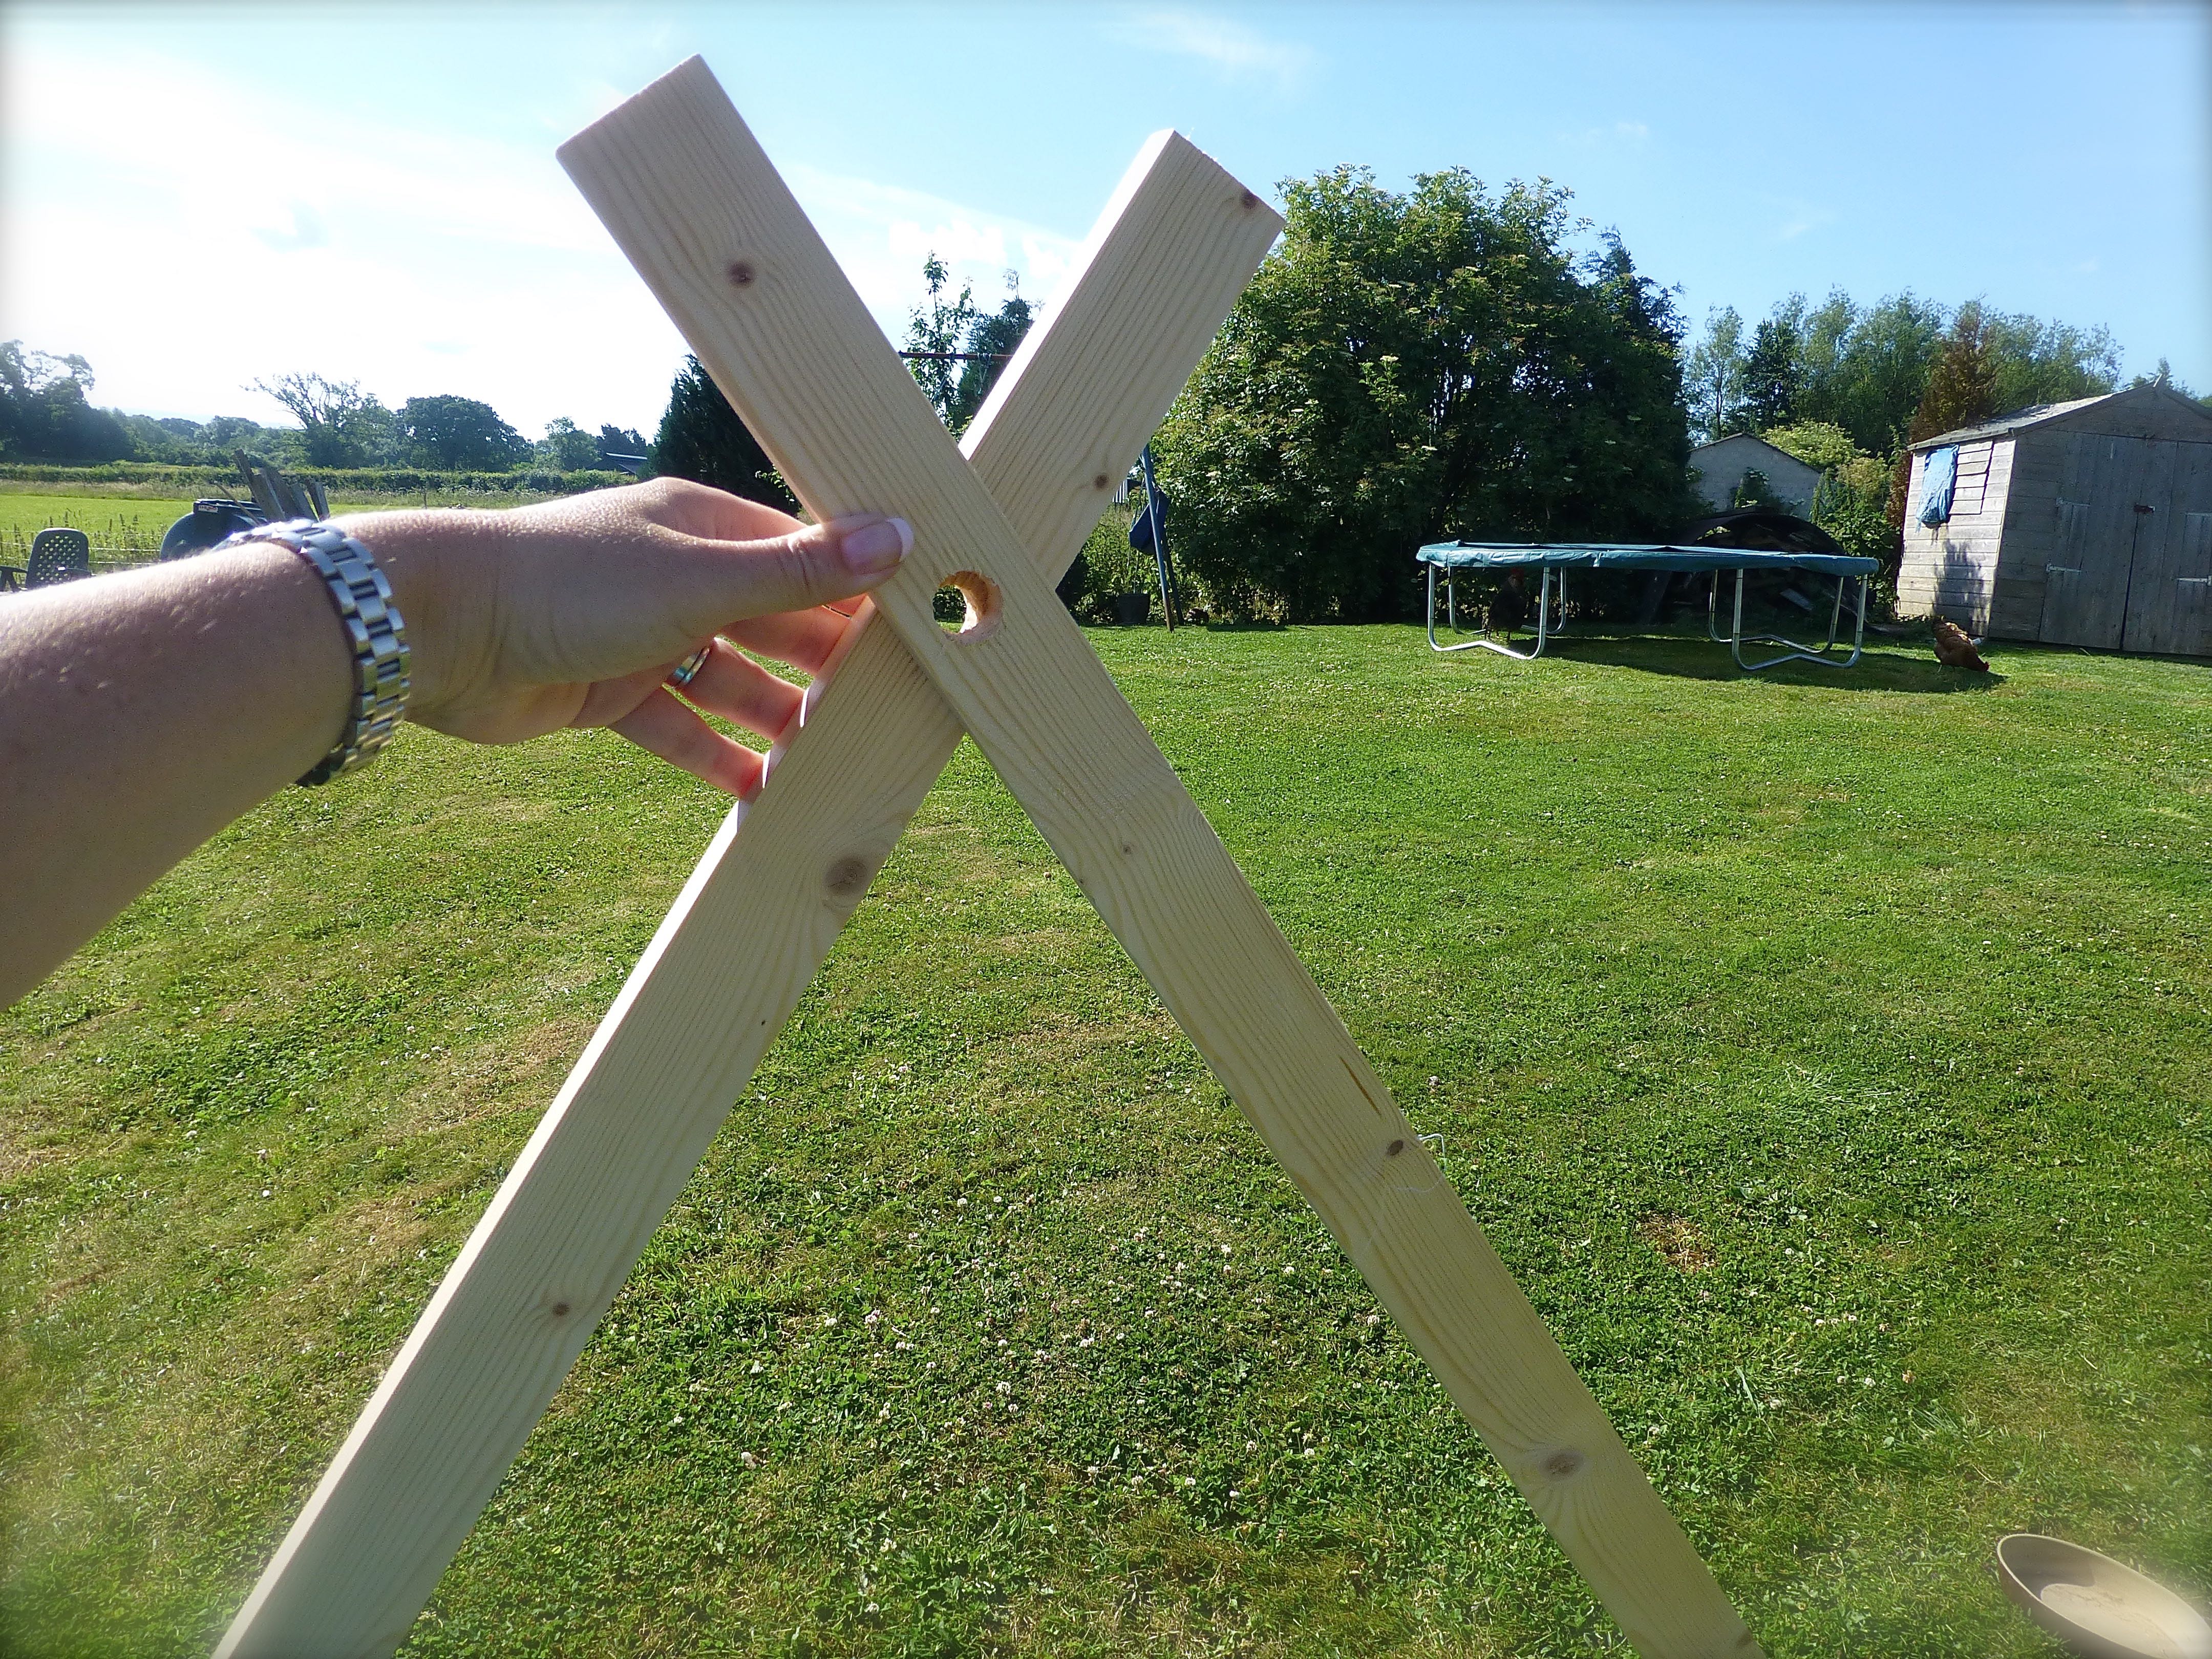
Drill a hole 15cm in from one end of each of the bits of planed timber using a spade bit the same size as your dowelling.
You now need to create one single piece of fabric that measures 1.60m x 3.20m.
The first job was to cut up the shirts into as many usable sections as possible using my rotary cutter for speed.
I started by removing the button flaps, cuffs and collars.
Look at all the buttons I rescued!
I wasn’t at all precise in my cutting as I intended to fit each piece as I went – very liberating and totally the opposite of normal patchwork!
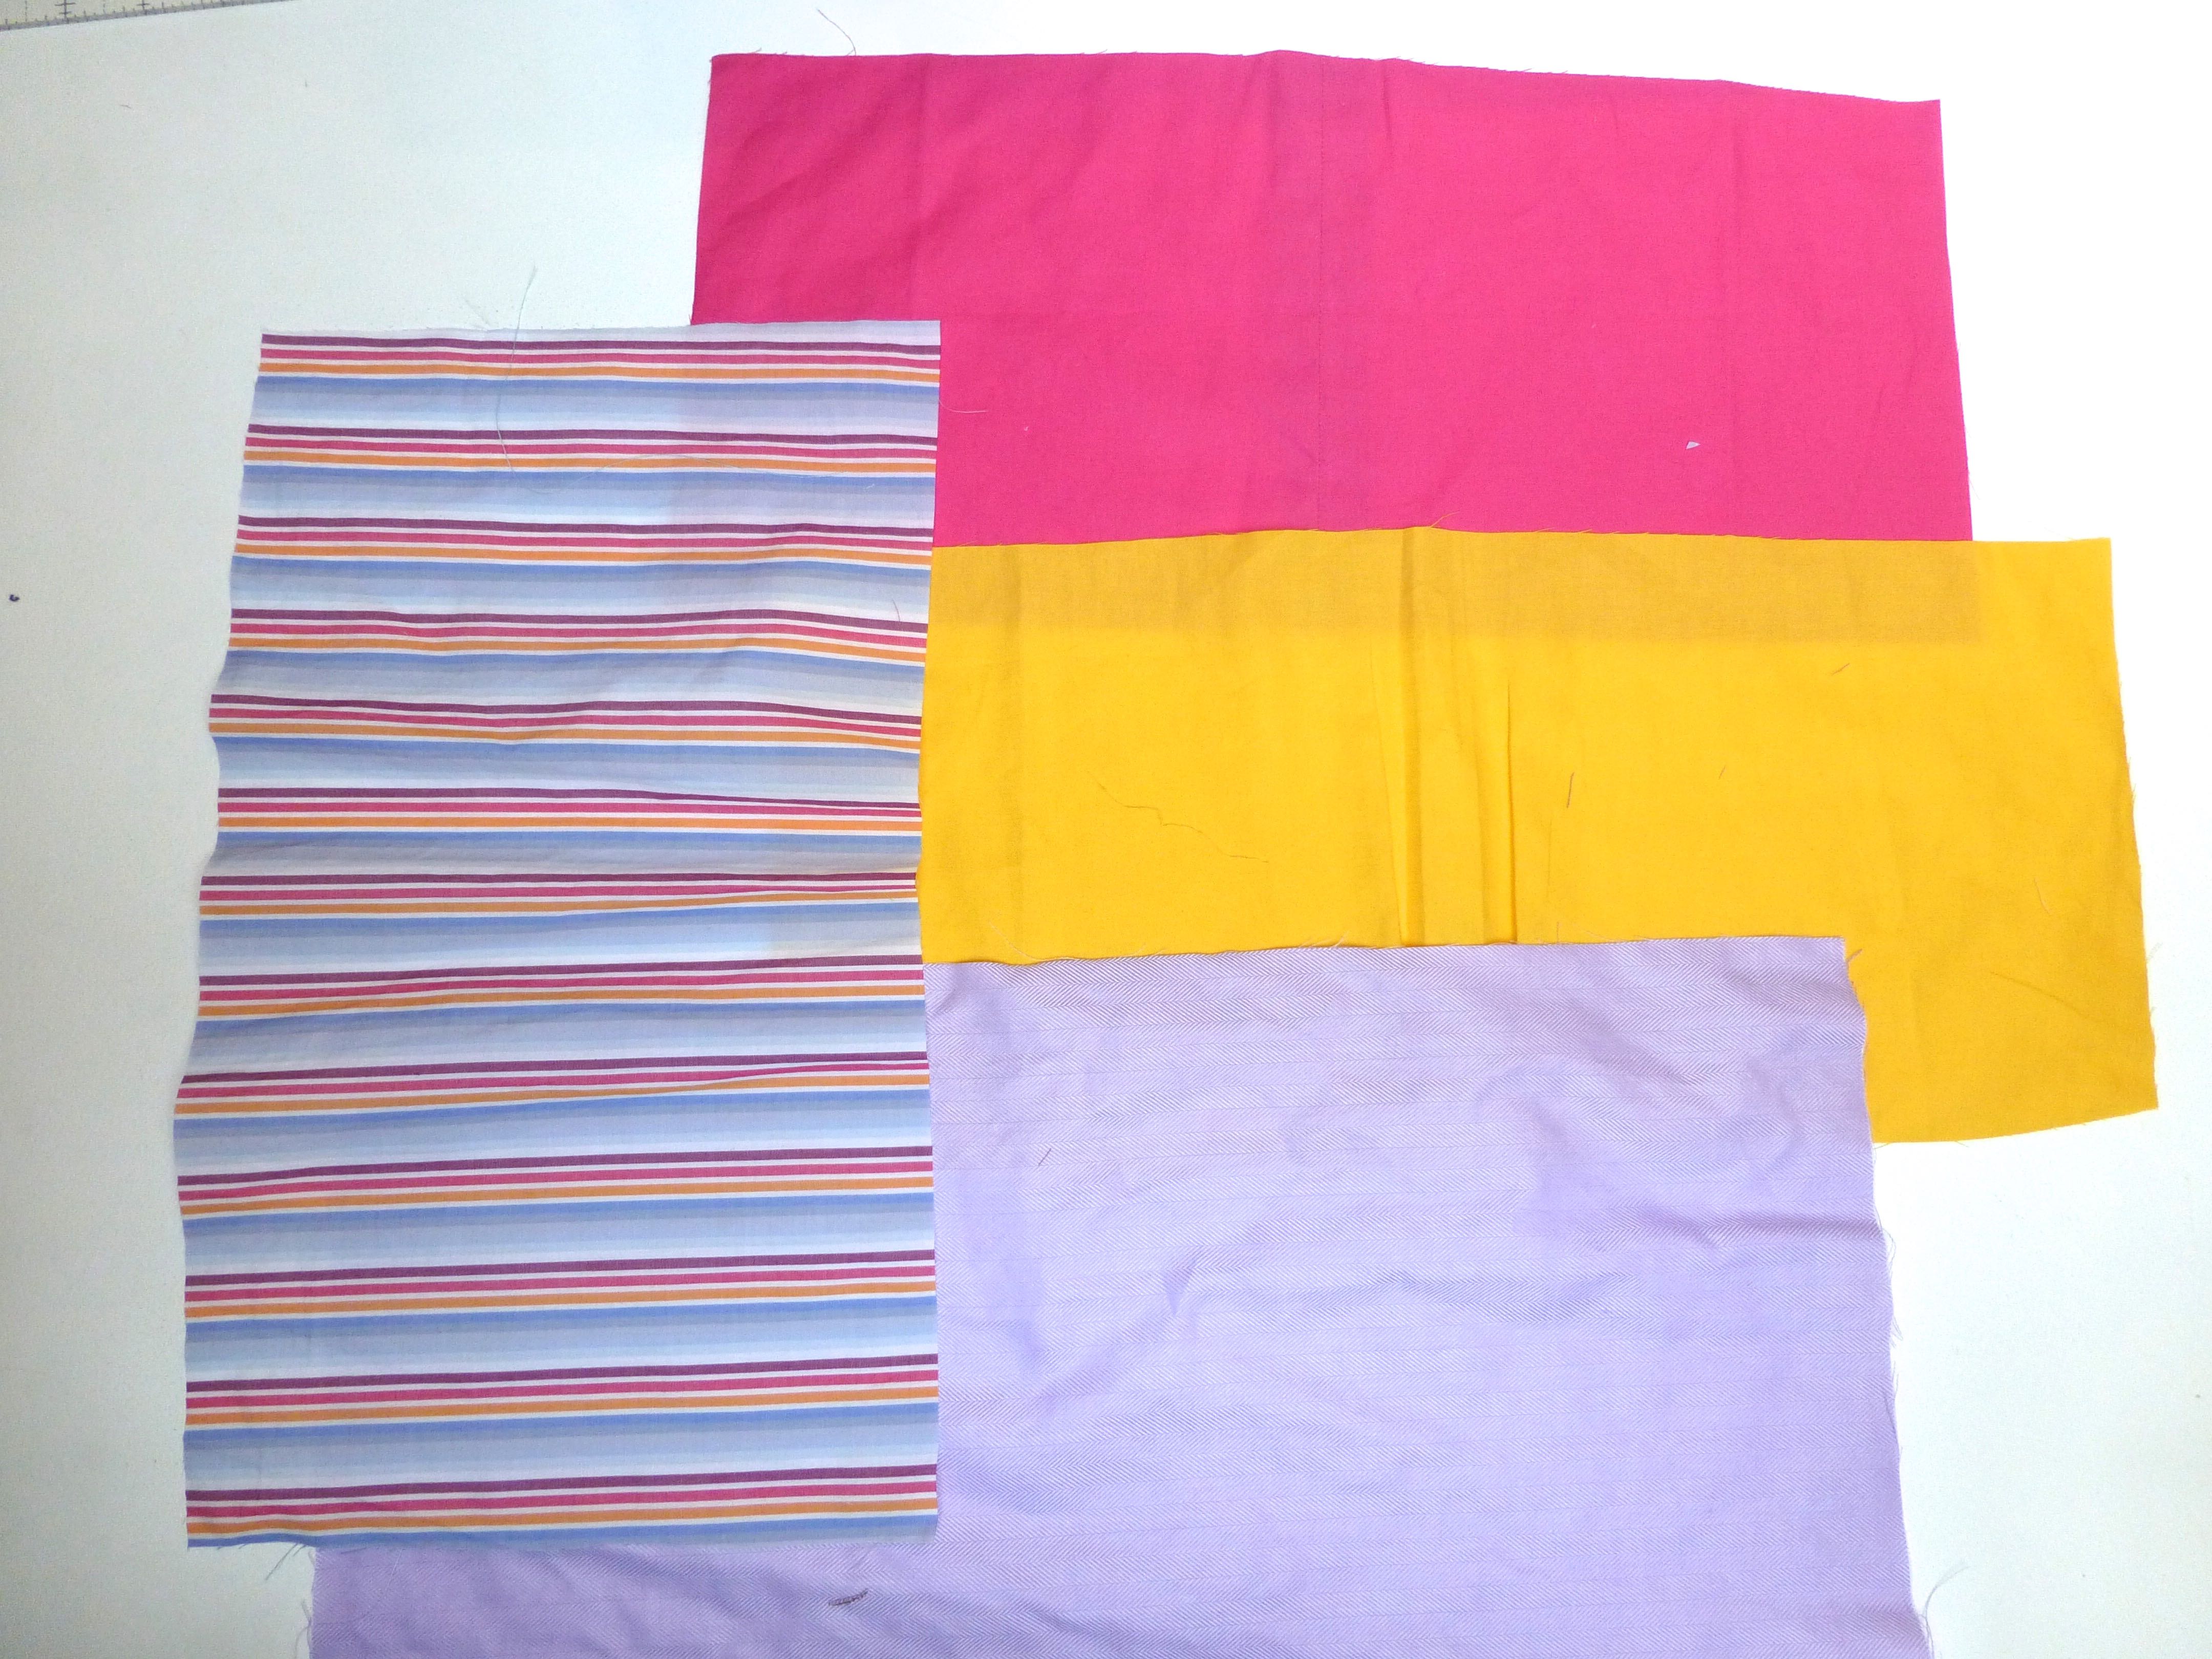
I laid all the bits out on the floor and arranged them in a pleasing order, being sure to space out evenly the more brightly coloured yellow and pink.
This would not have quite the same impact with the more conservative blue or white work shirts, but you could always appliqué onto the patches for added interest.
I didn’t need to – Mr H-L likes a shirt that stands out:)
As you can see from the picture below, I sewed the pieces of fabric VERY roughly together into strips. The edges were then trimmed into a neat line before stitching the strips of patchwork together along their long sides.
As both sides of the tent were going to be visible, I used Flat Fell seams throughout.
This type of seam leaves a smart finish and adds strength to the seam.
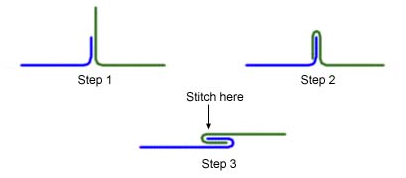
Here’s a line drawing to show the construction: –
Image courtesy of Google images
In photographs, here’s what I did: –
Stitch a staggered seam where the lower fabric (pink) sticks out 1cm more than the top fabric.
Open the two fabrics flat with the raw edges of the seam uppermost.
Fold the seam to the left and tuck the (pink) overhang over the raw edge of the other (striped) fabric, enclosing all raw edges in the process.
Stitch close to the folded edge.
As I said, a very neat finish which I used as the outside of the tent.
Keep going until you have one piece of fabric measuring 1.60m x 3.20m.
Hem all around the outer edges.
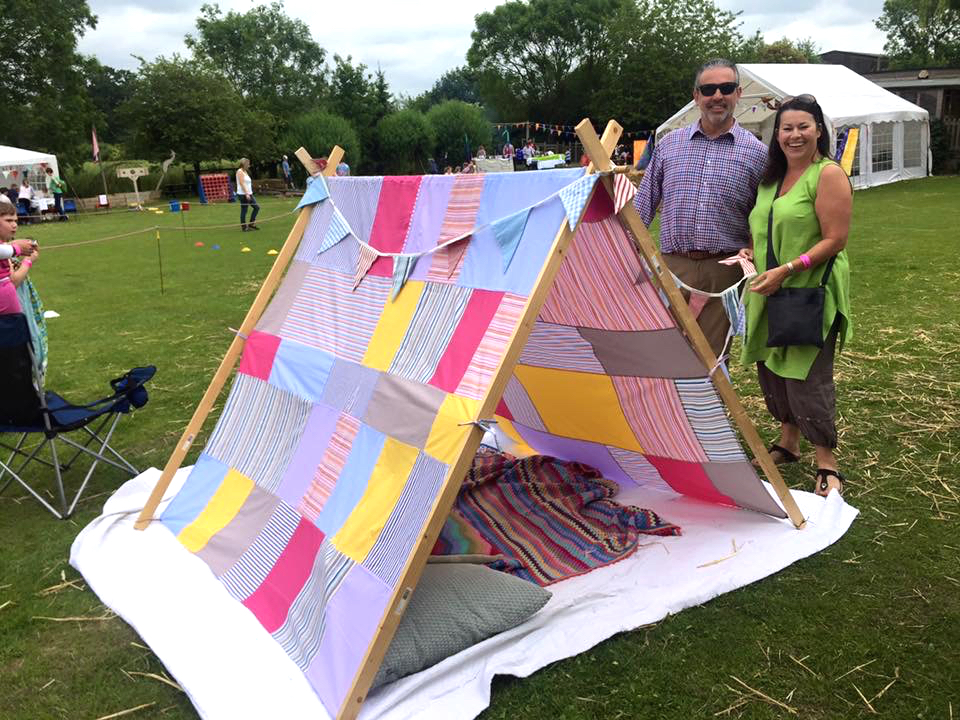
In each of the four corners of the tent, fix an eyelet through which you need to attach a 50cm length of elastic cording as shown below.
Tie the ends of the cord in a knot to form a loop through which the tent poles will pass.
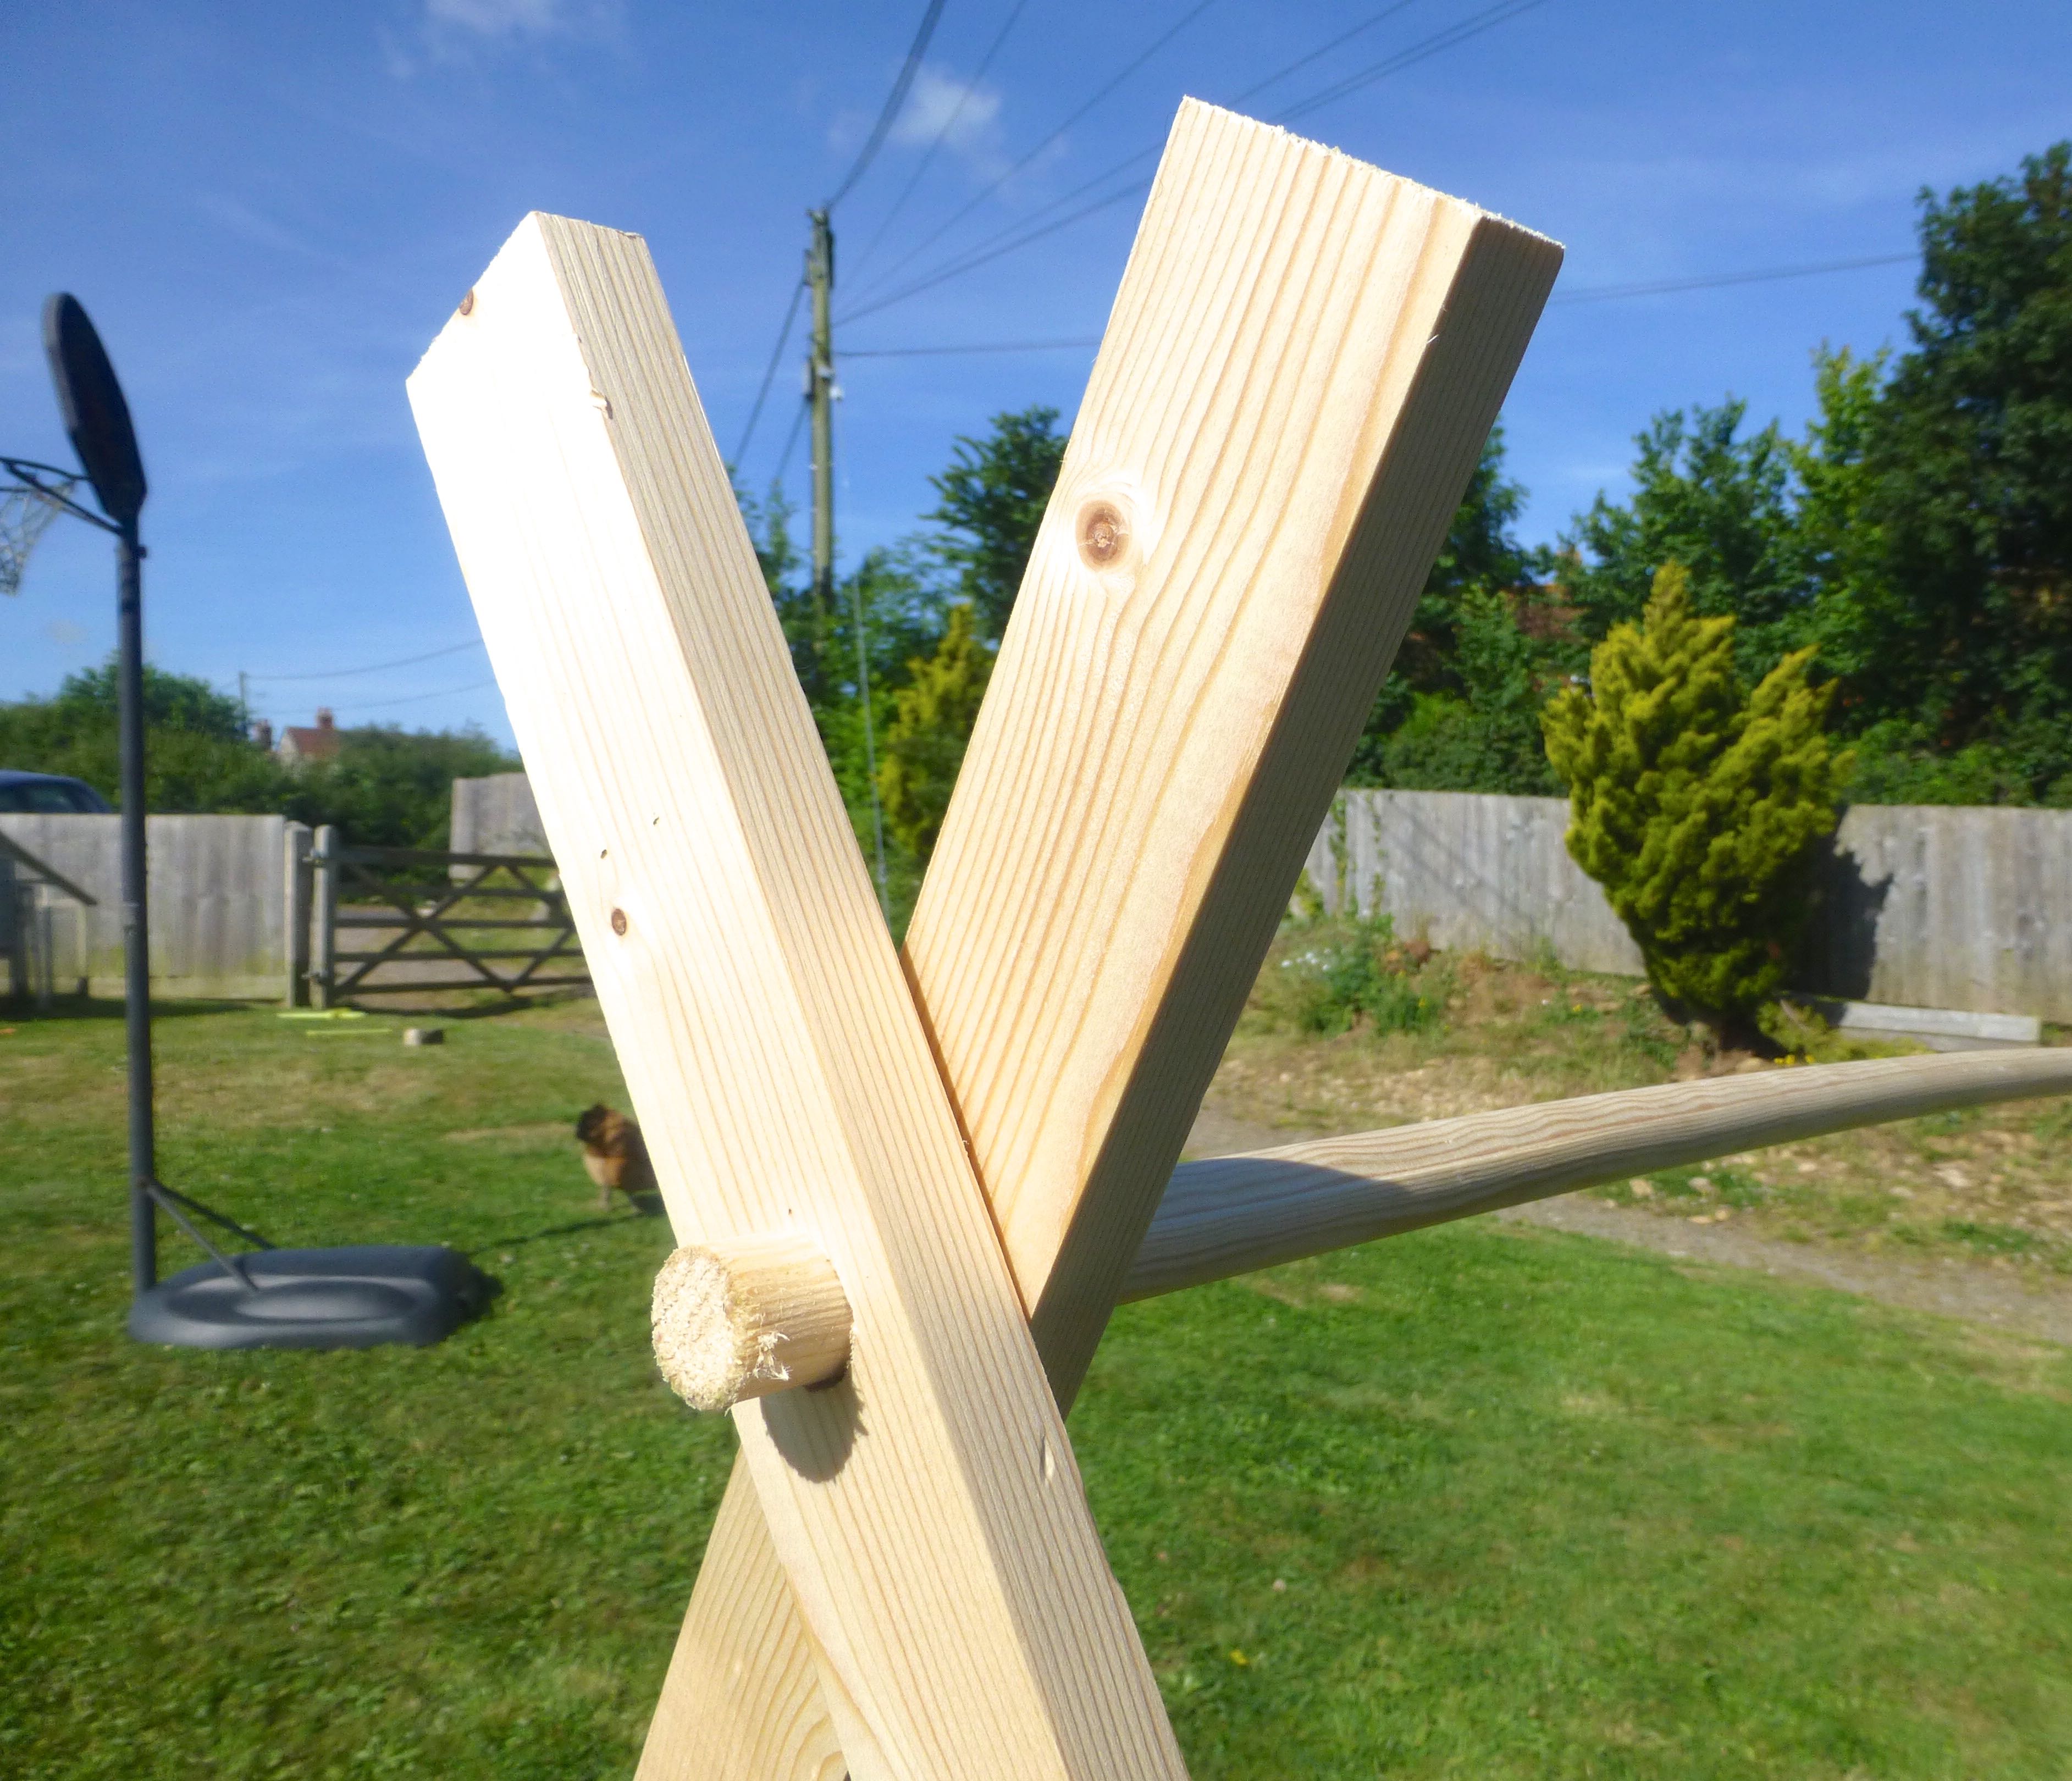
Align the holes in the tent poles….
….and insert the length of dowelling.
Lay the tent over the central dowel and pass the poles through the elastic cords at the bottom edge.
I also added a tie half way up each side of the tent – but, in my haste, forgot to document it. Basically, four 50cm long ties were made using scarps of leftover shirt fabric and sewn to the seam. These hold the tent more tautly to the frame.
We also decided to saw a shallow groove on the outer edge of the pole where the elastic cord sits – this helps stop the cord from riding up the pole.
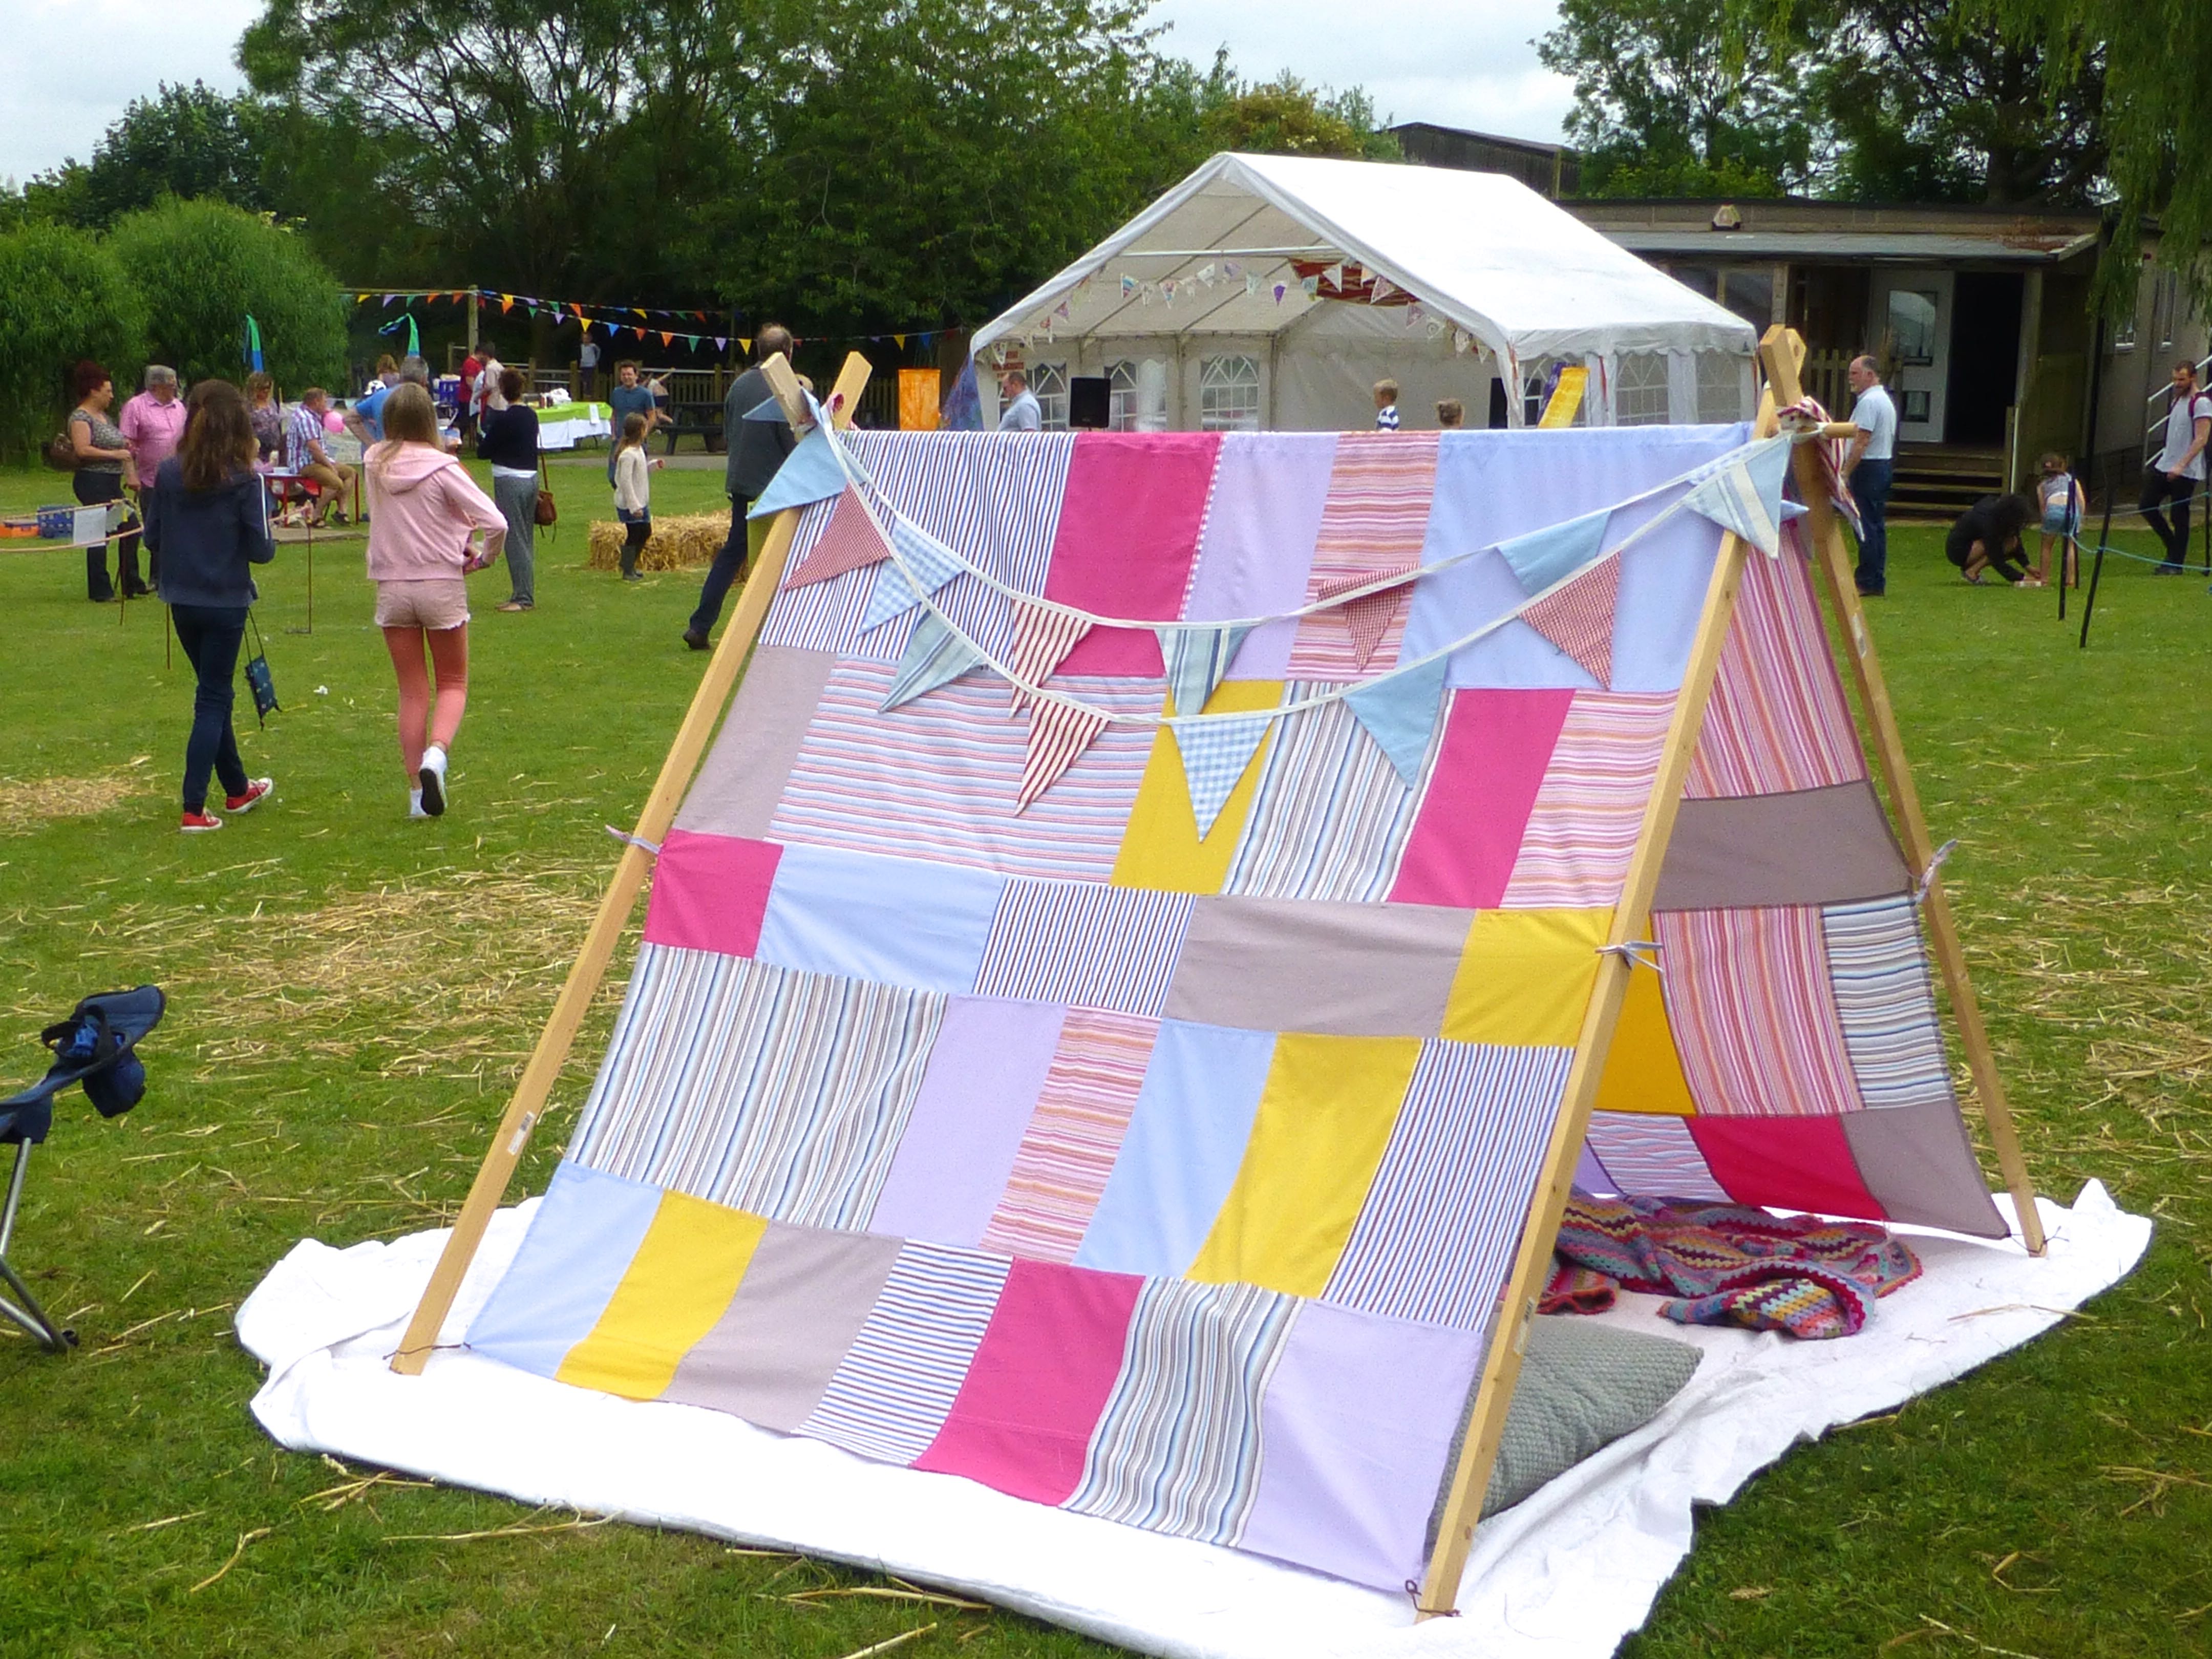
With the addition of some bunting, a blanket and some cushions, it makes a lovely spot for young children to play.
Or the perfect place for No.1 Son to shade his cider from the afternoon sun!
We sold raffle tickets for the tent and raised almost seventy pounds for the school funds!
The lucky winner was thrilled to bits to win it for her little girls and, as it was such a success, I think I’m going to be asked to make one for next year’s fête.
Watch out Mr. H-L, I’ve got my eye on your shirts…..
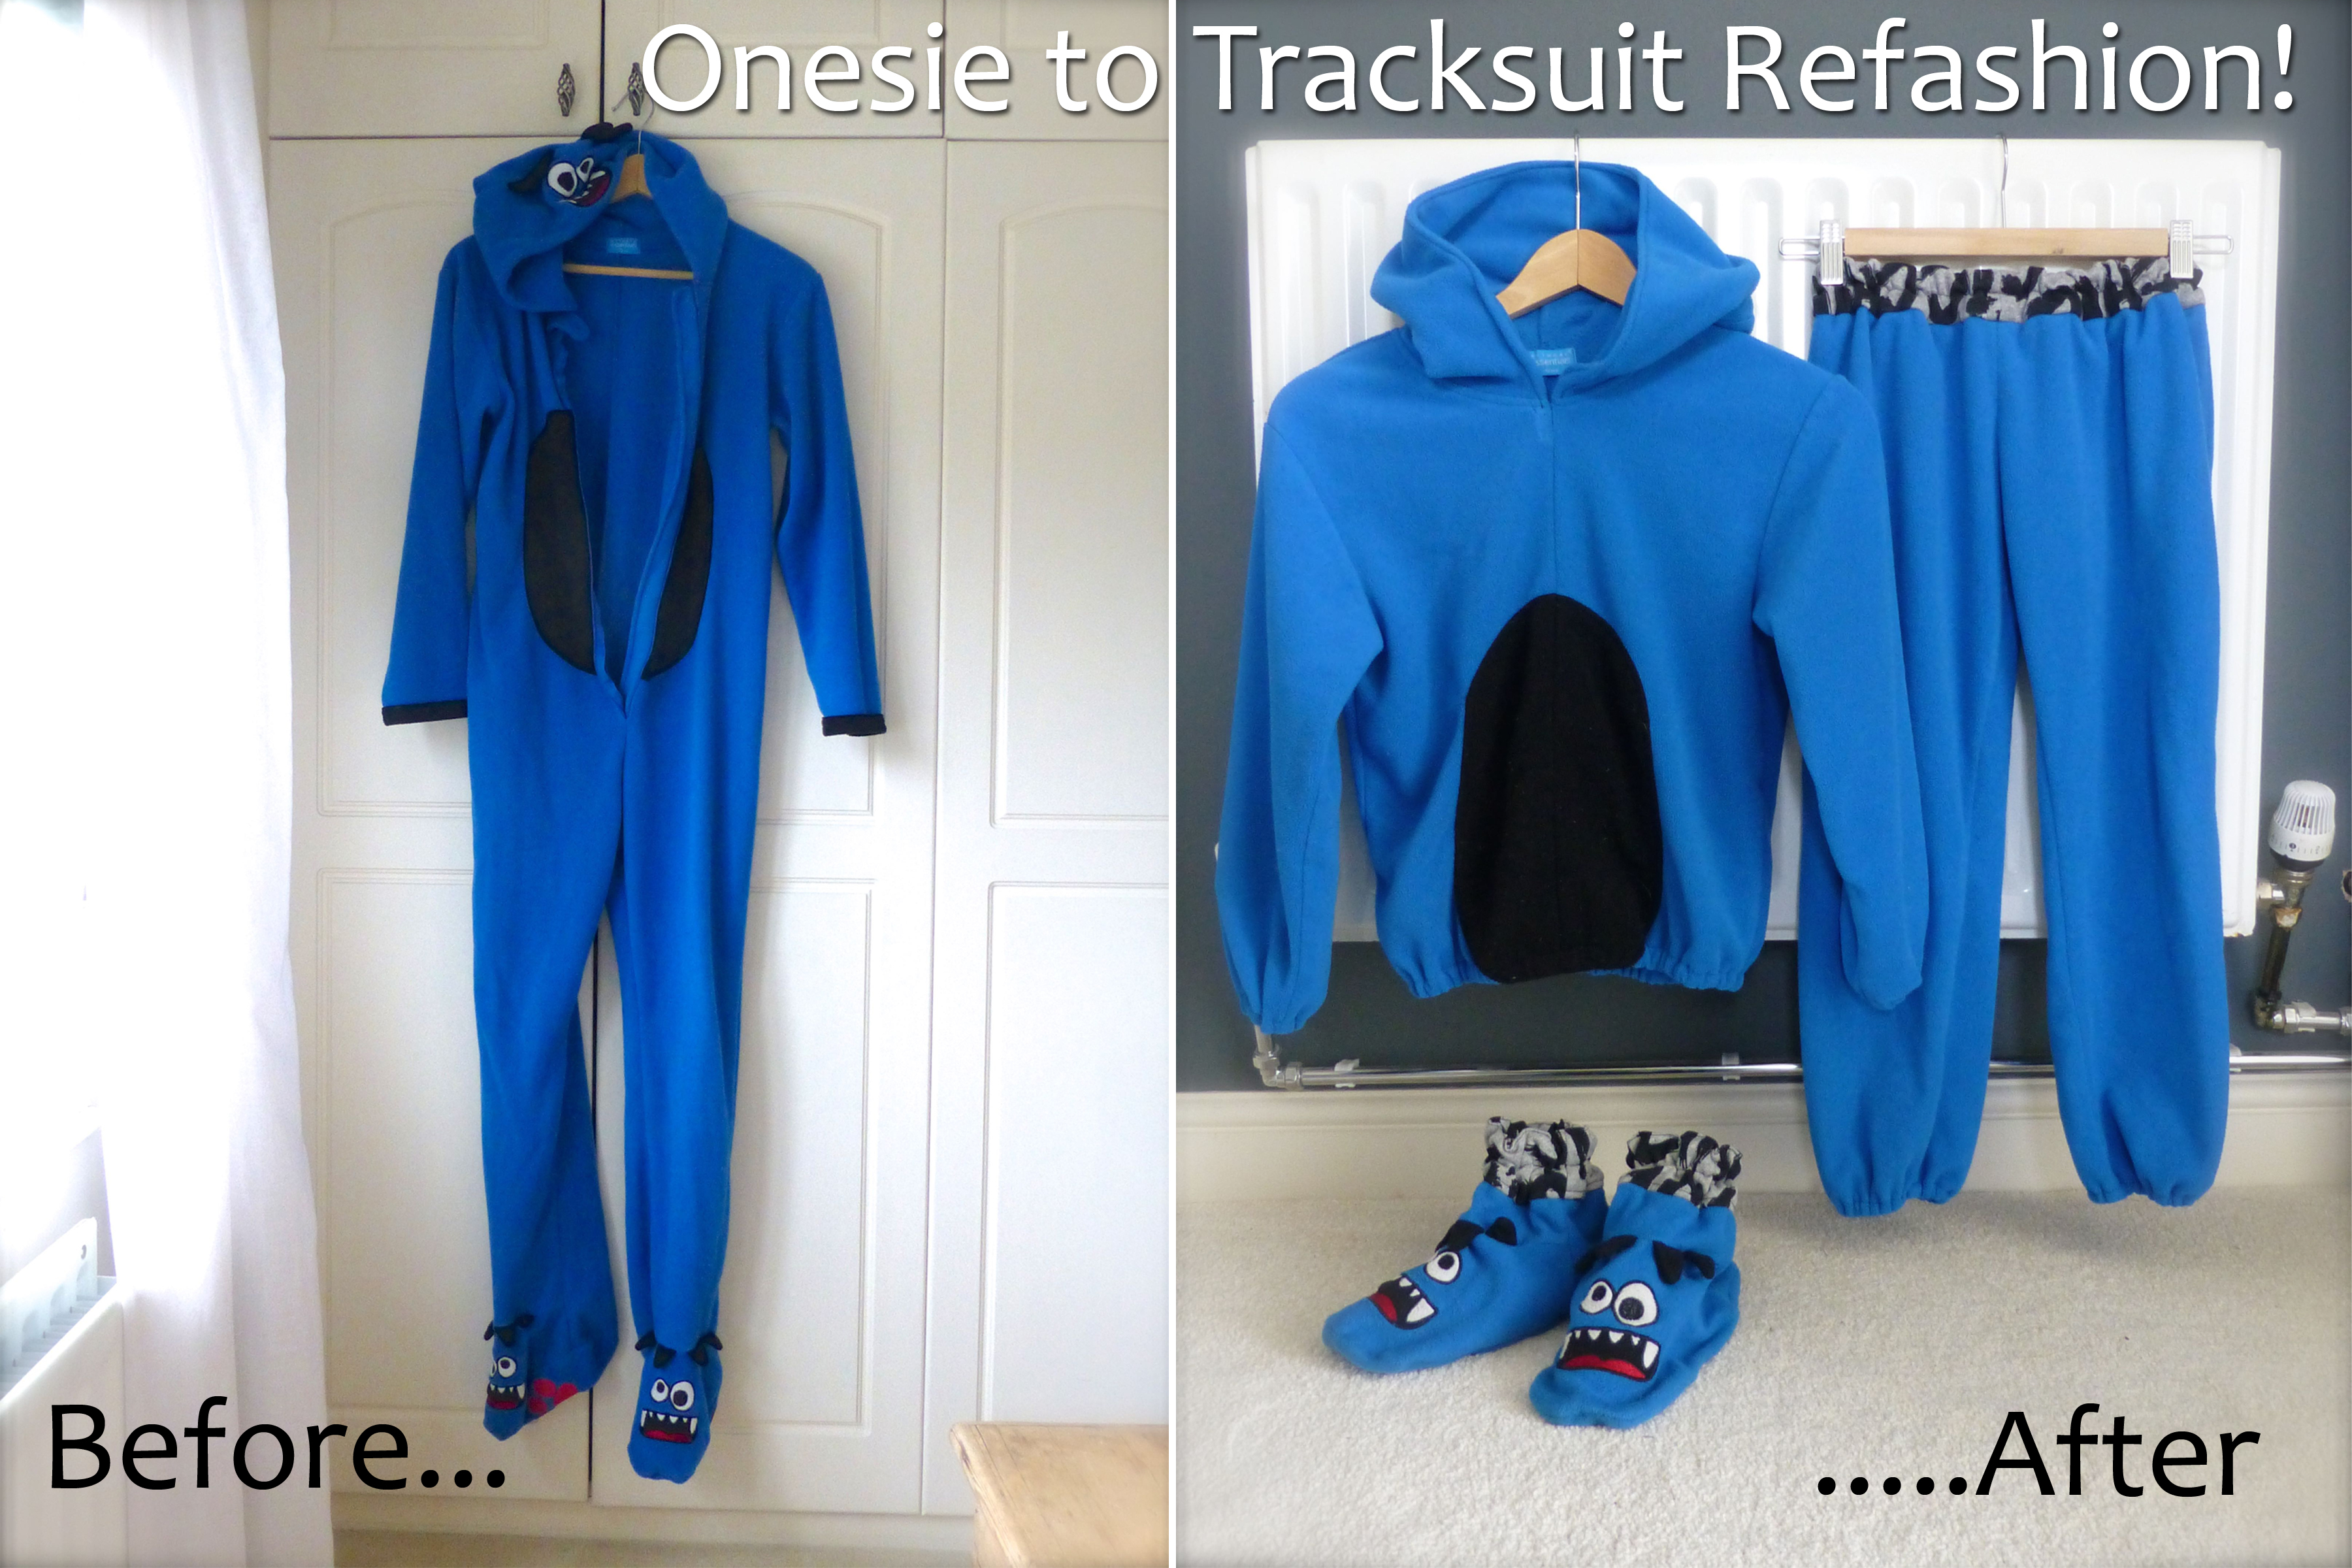
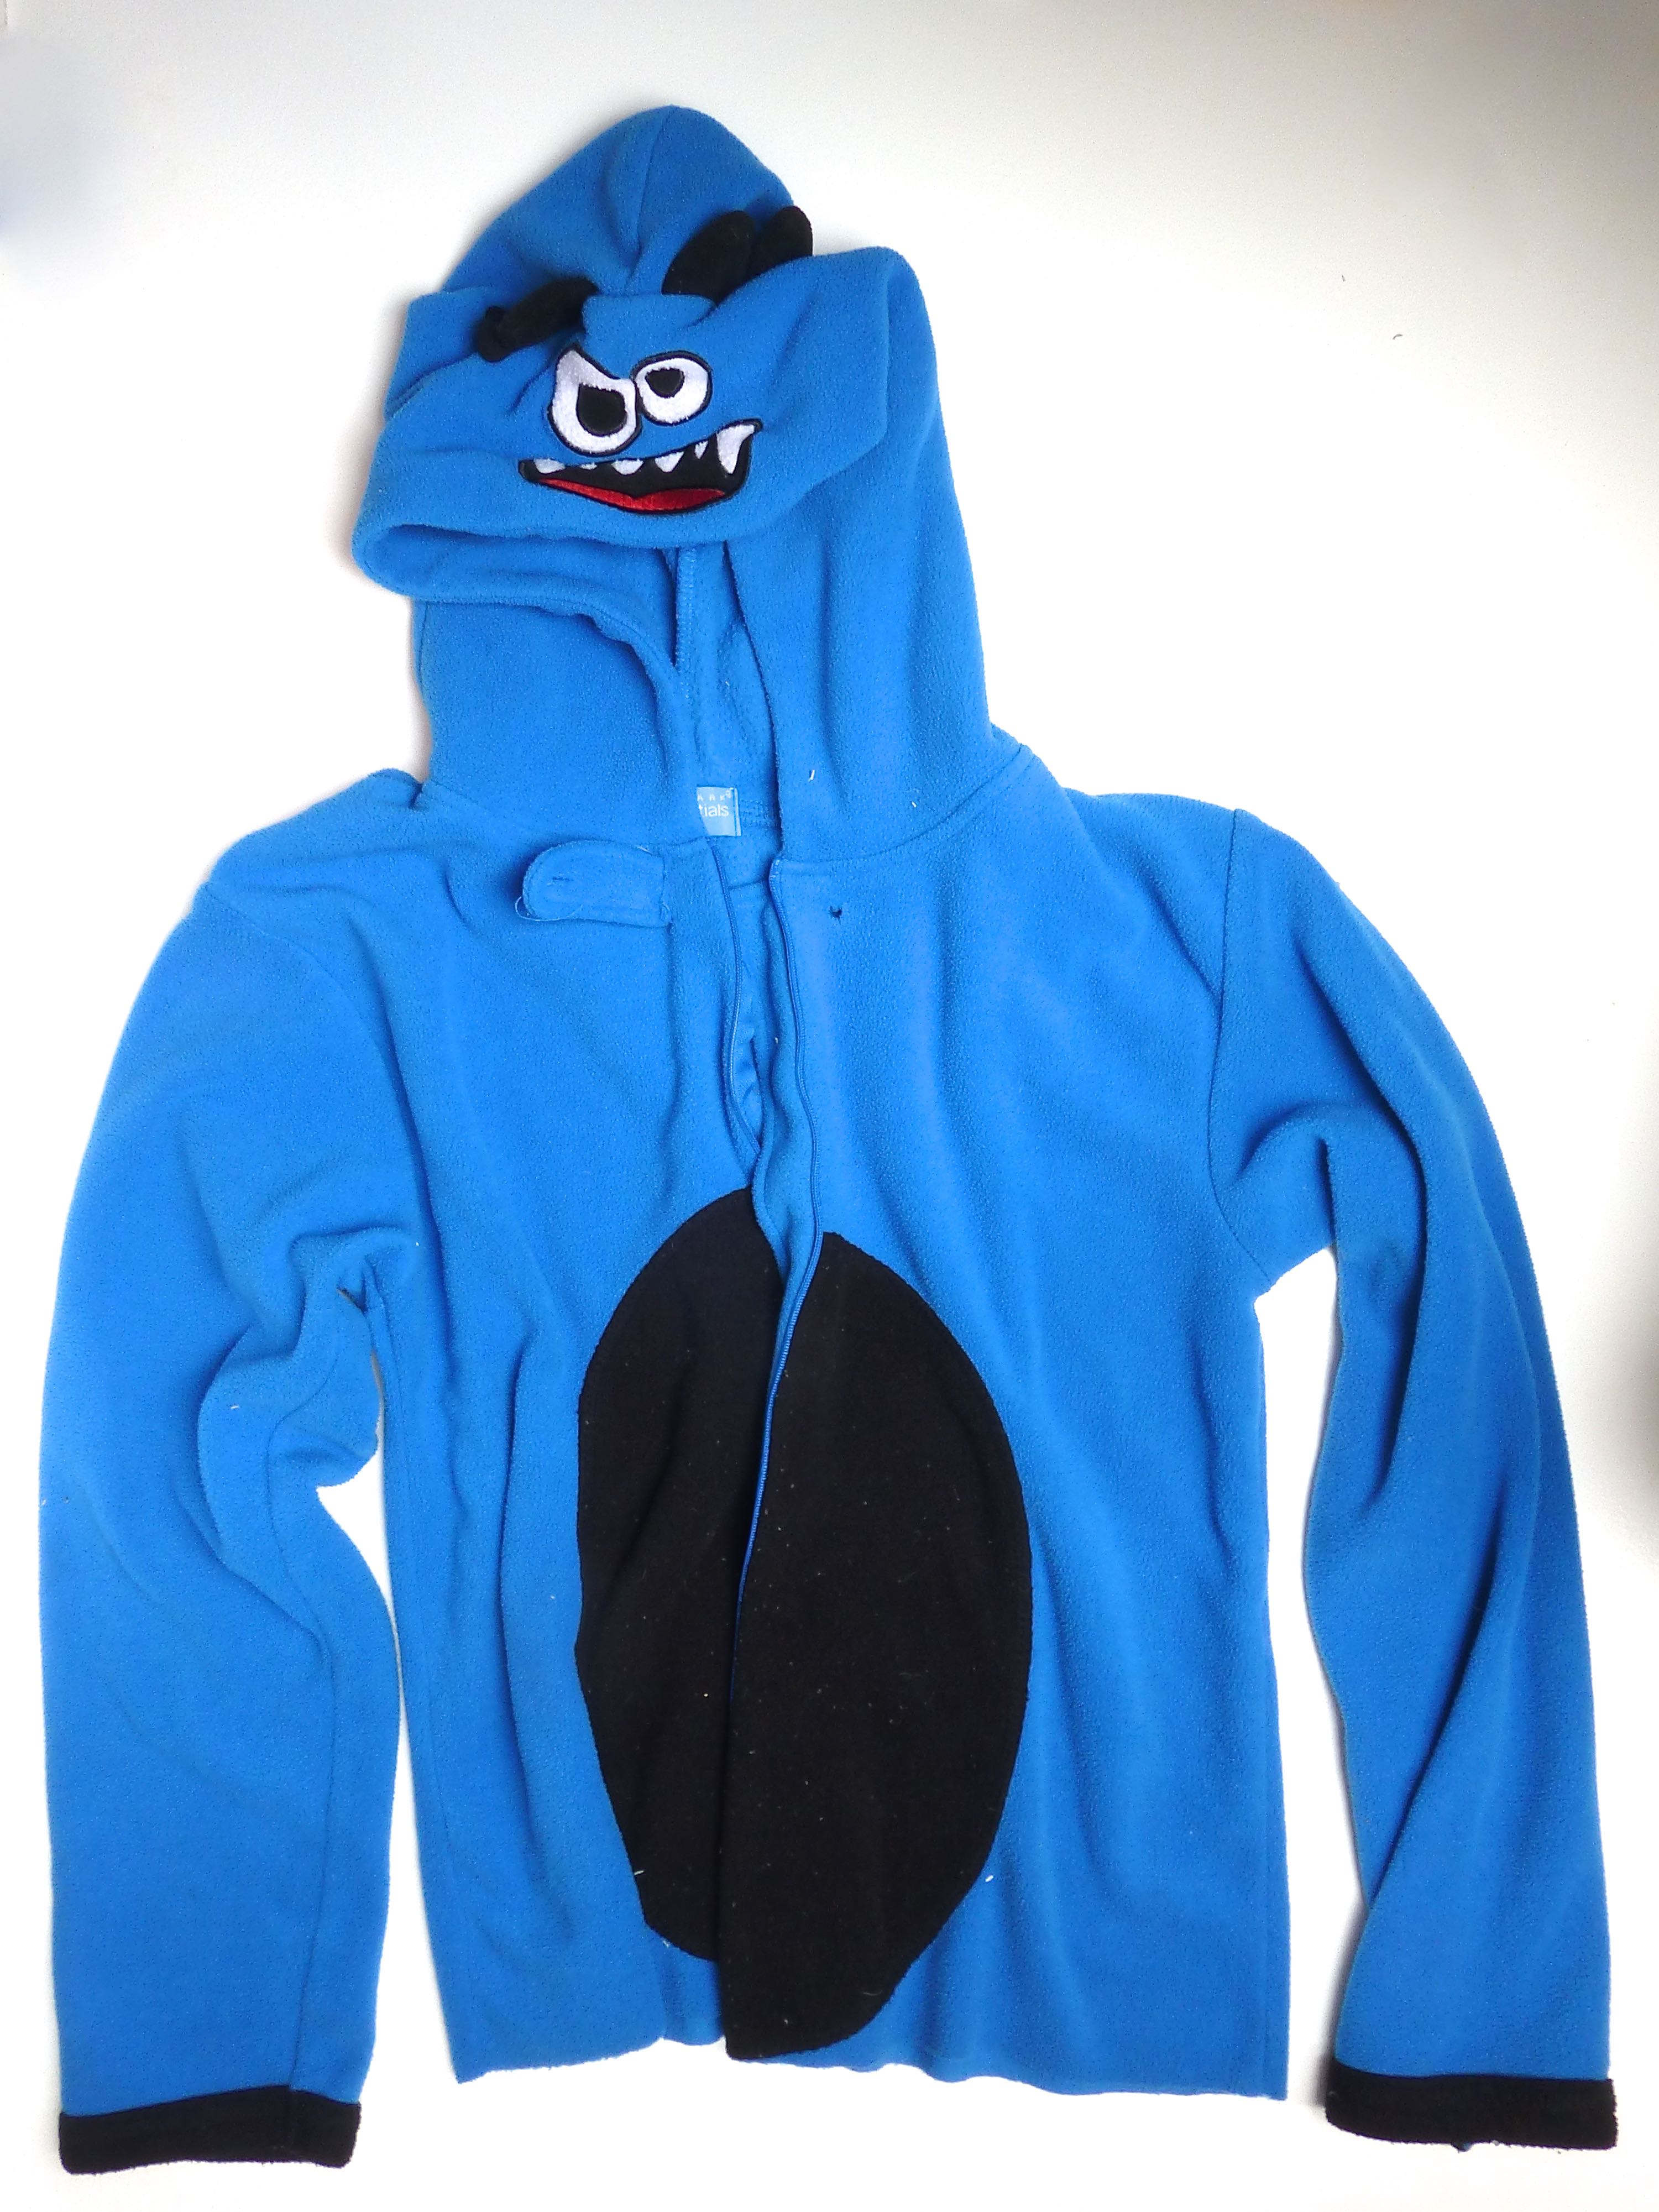
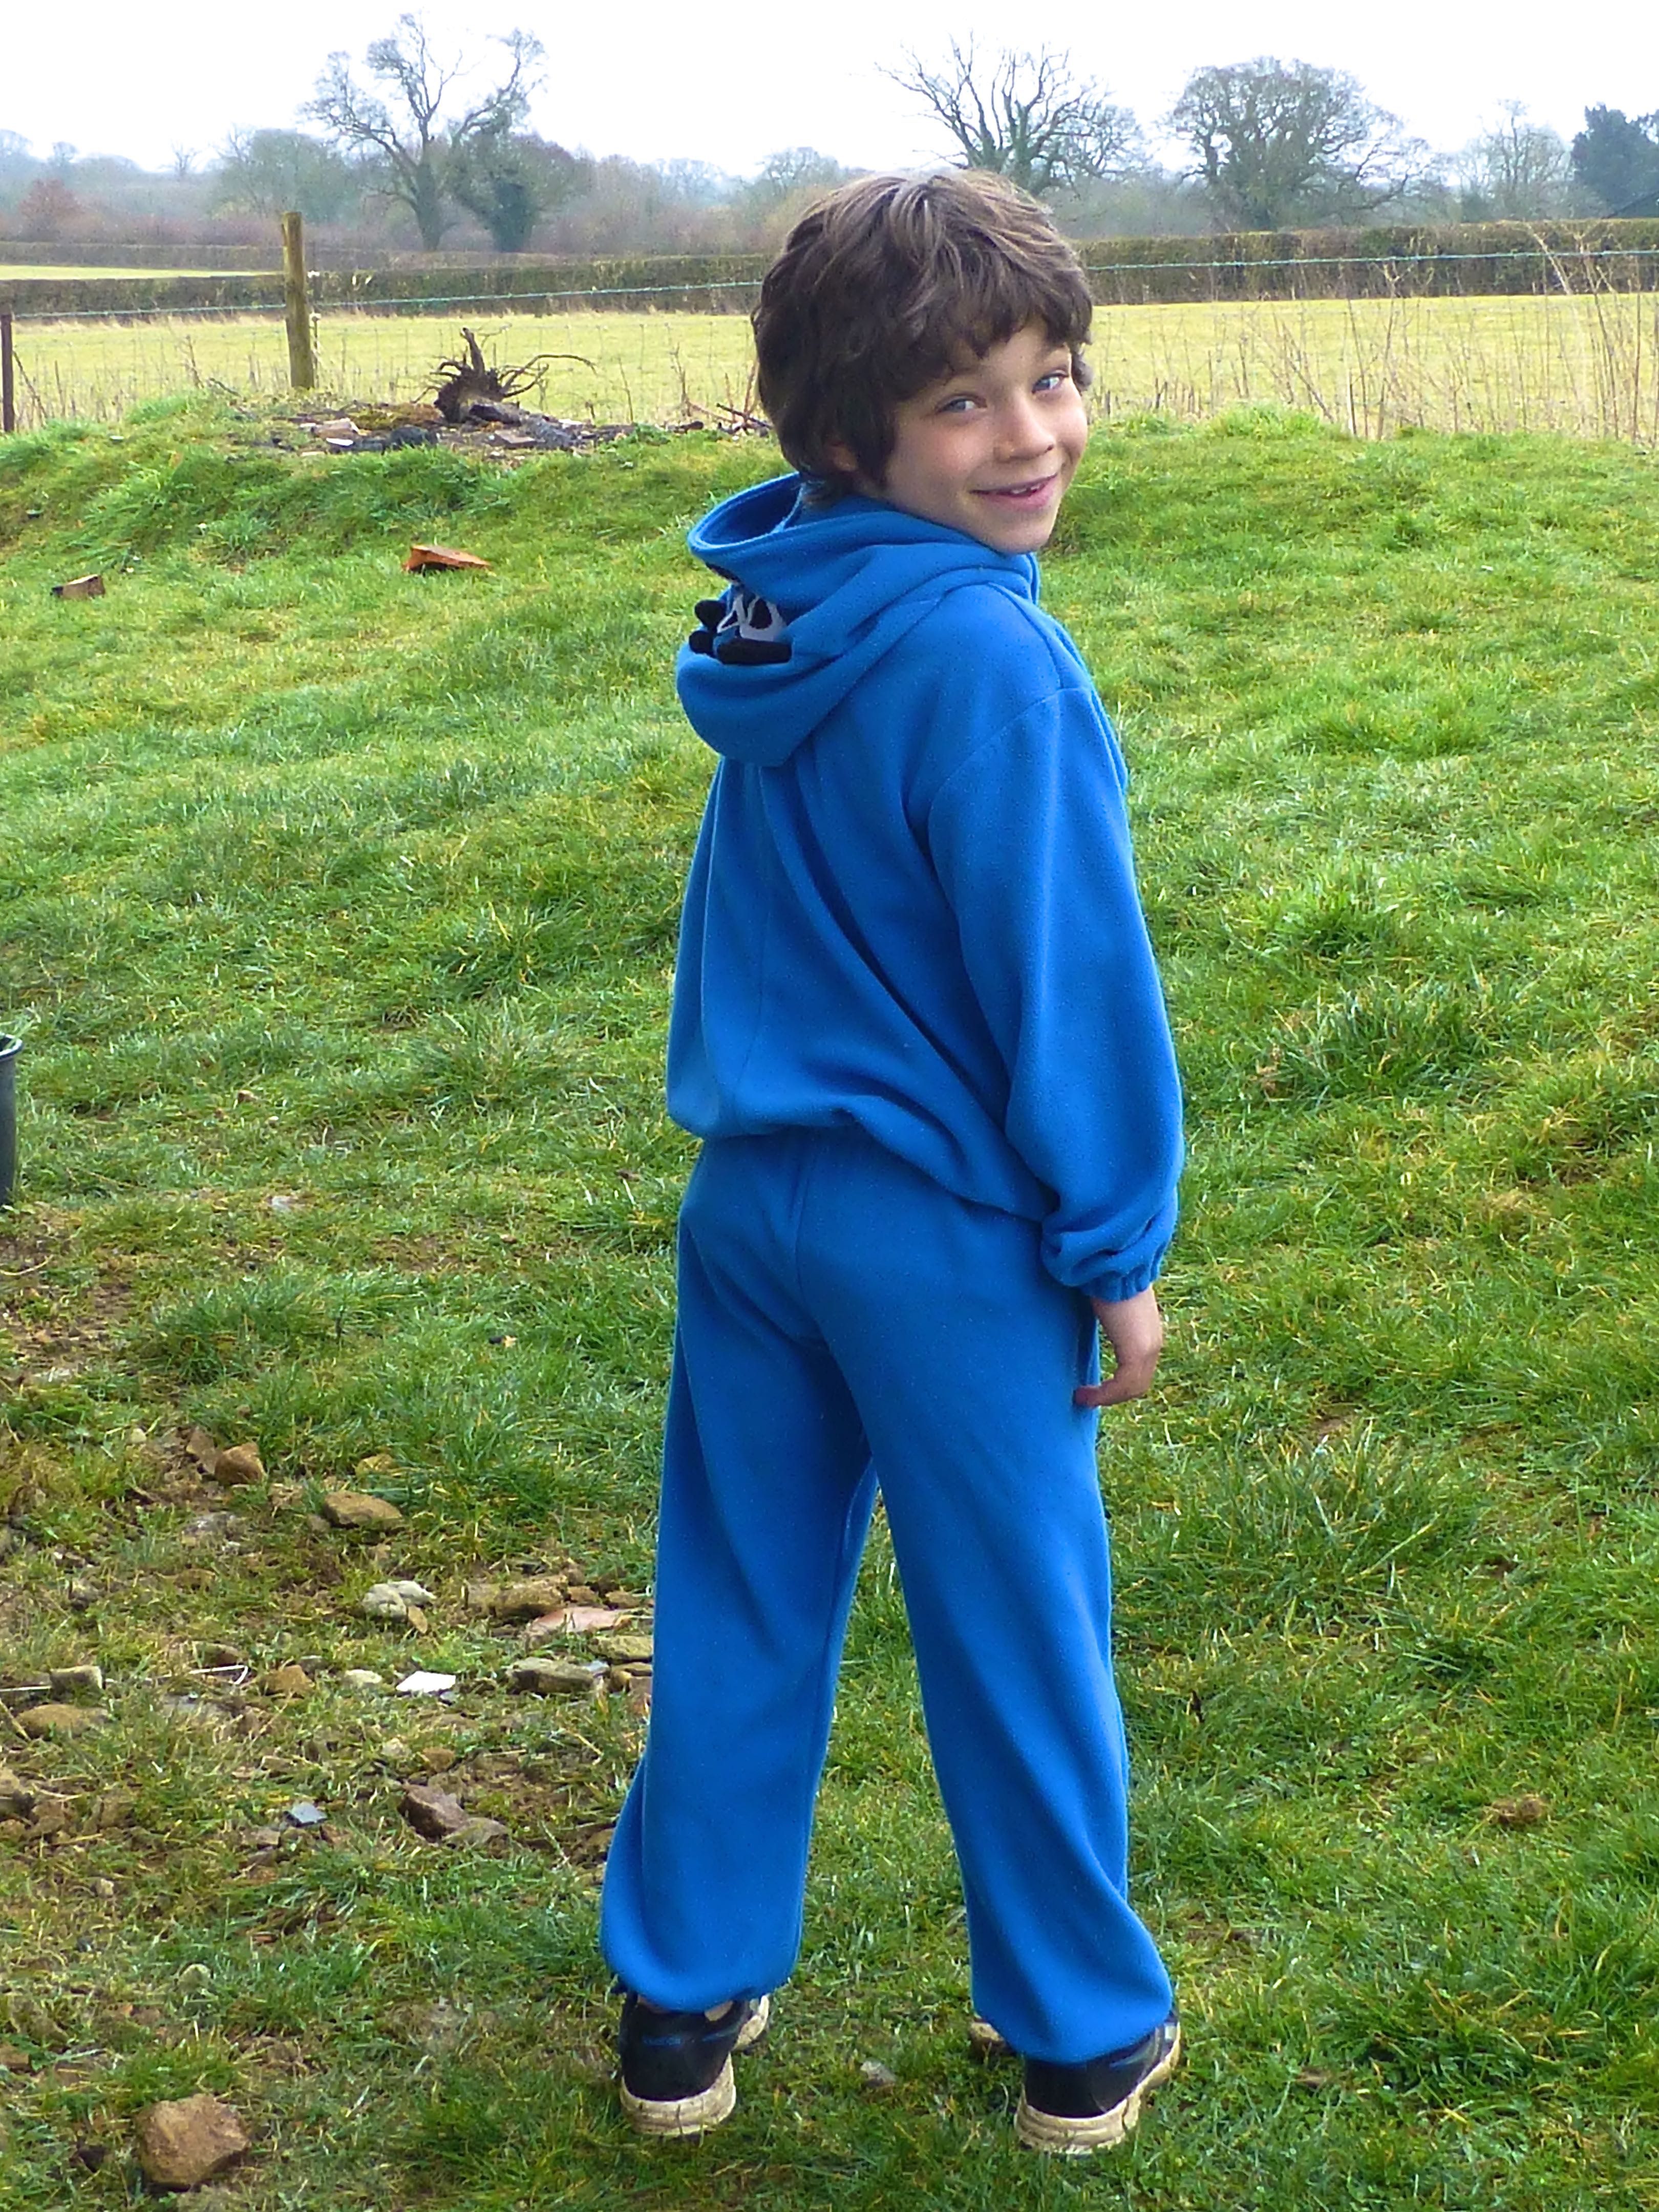
This third and final part shows how to make a pair of slipper boots!
These are the feet of the onesie that were remaining after the rest had been remade into other garments.
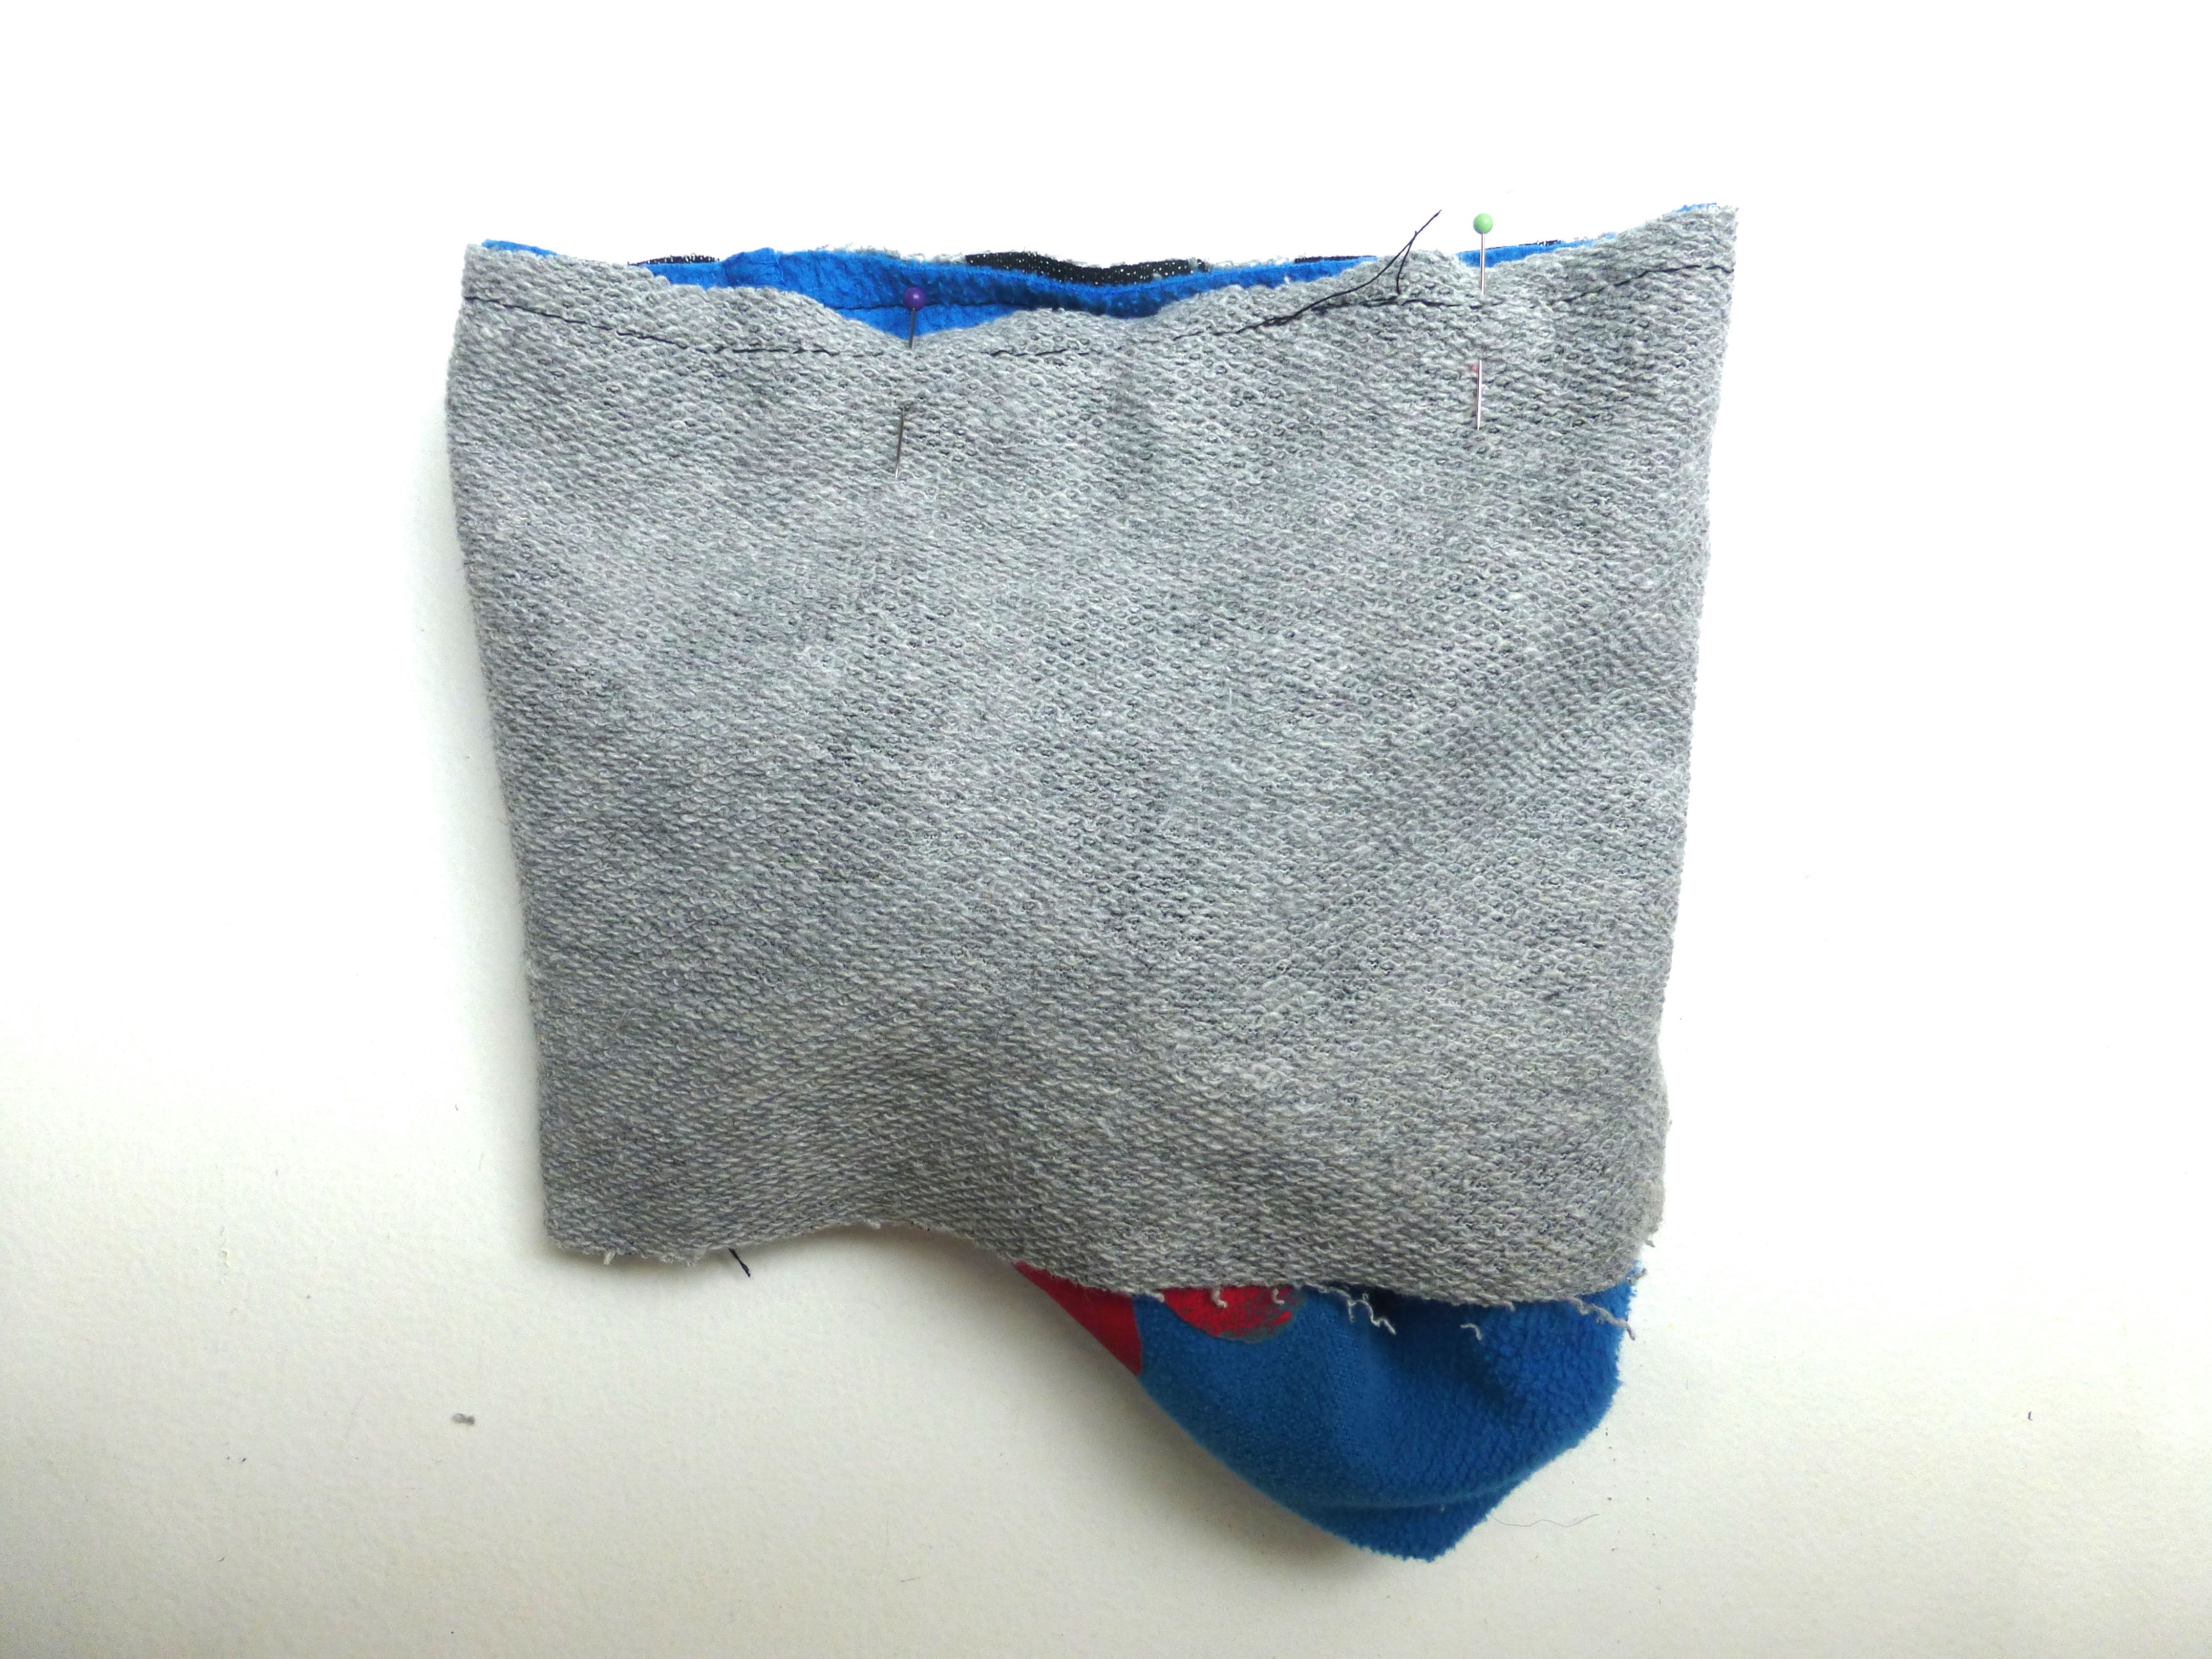
Some more leftover knit fabric was cut into a 5″ strip twice the width of the flat boot top, plus a seam allowance.
After sewing the short edges together to form a circle, pin to the boot top, right sides together and matching seams. Stitch in place.
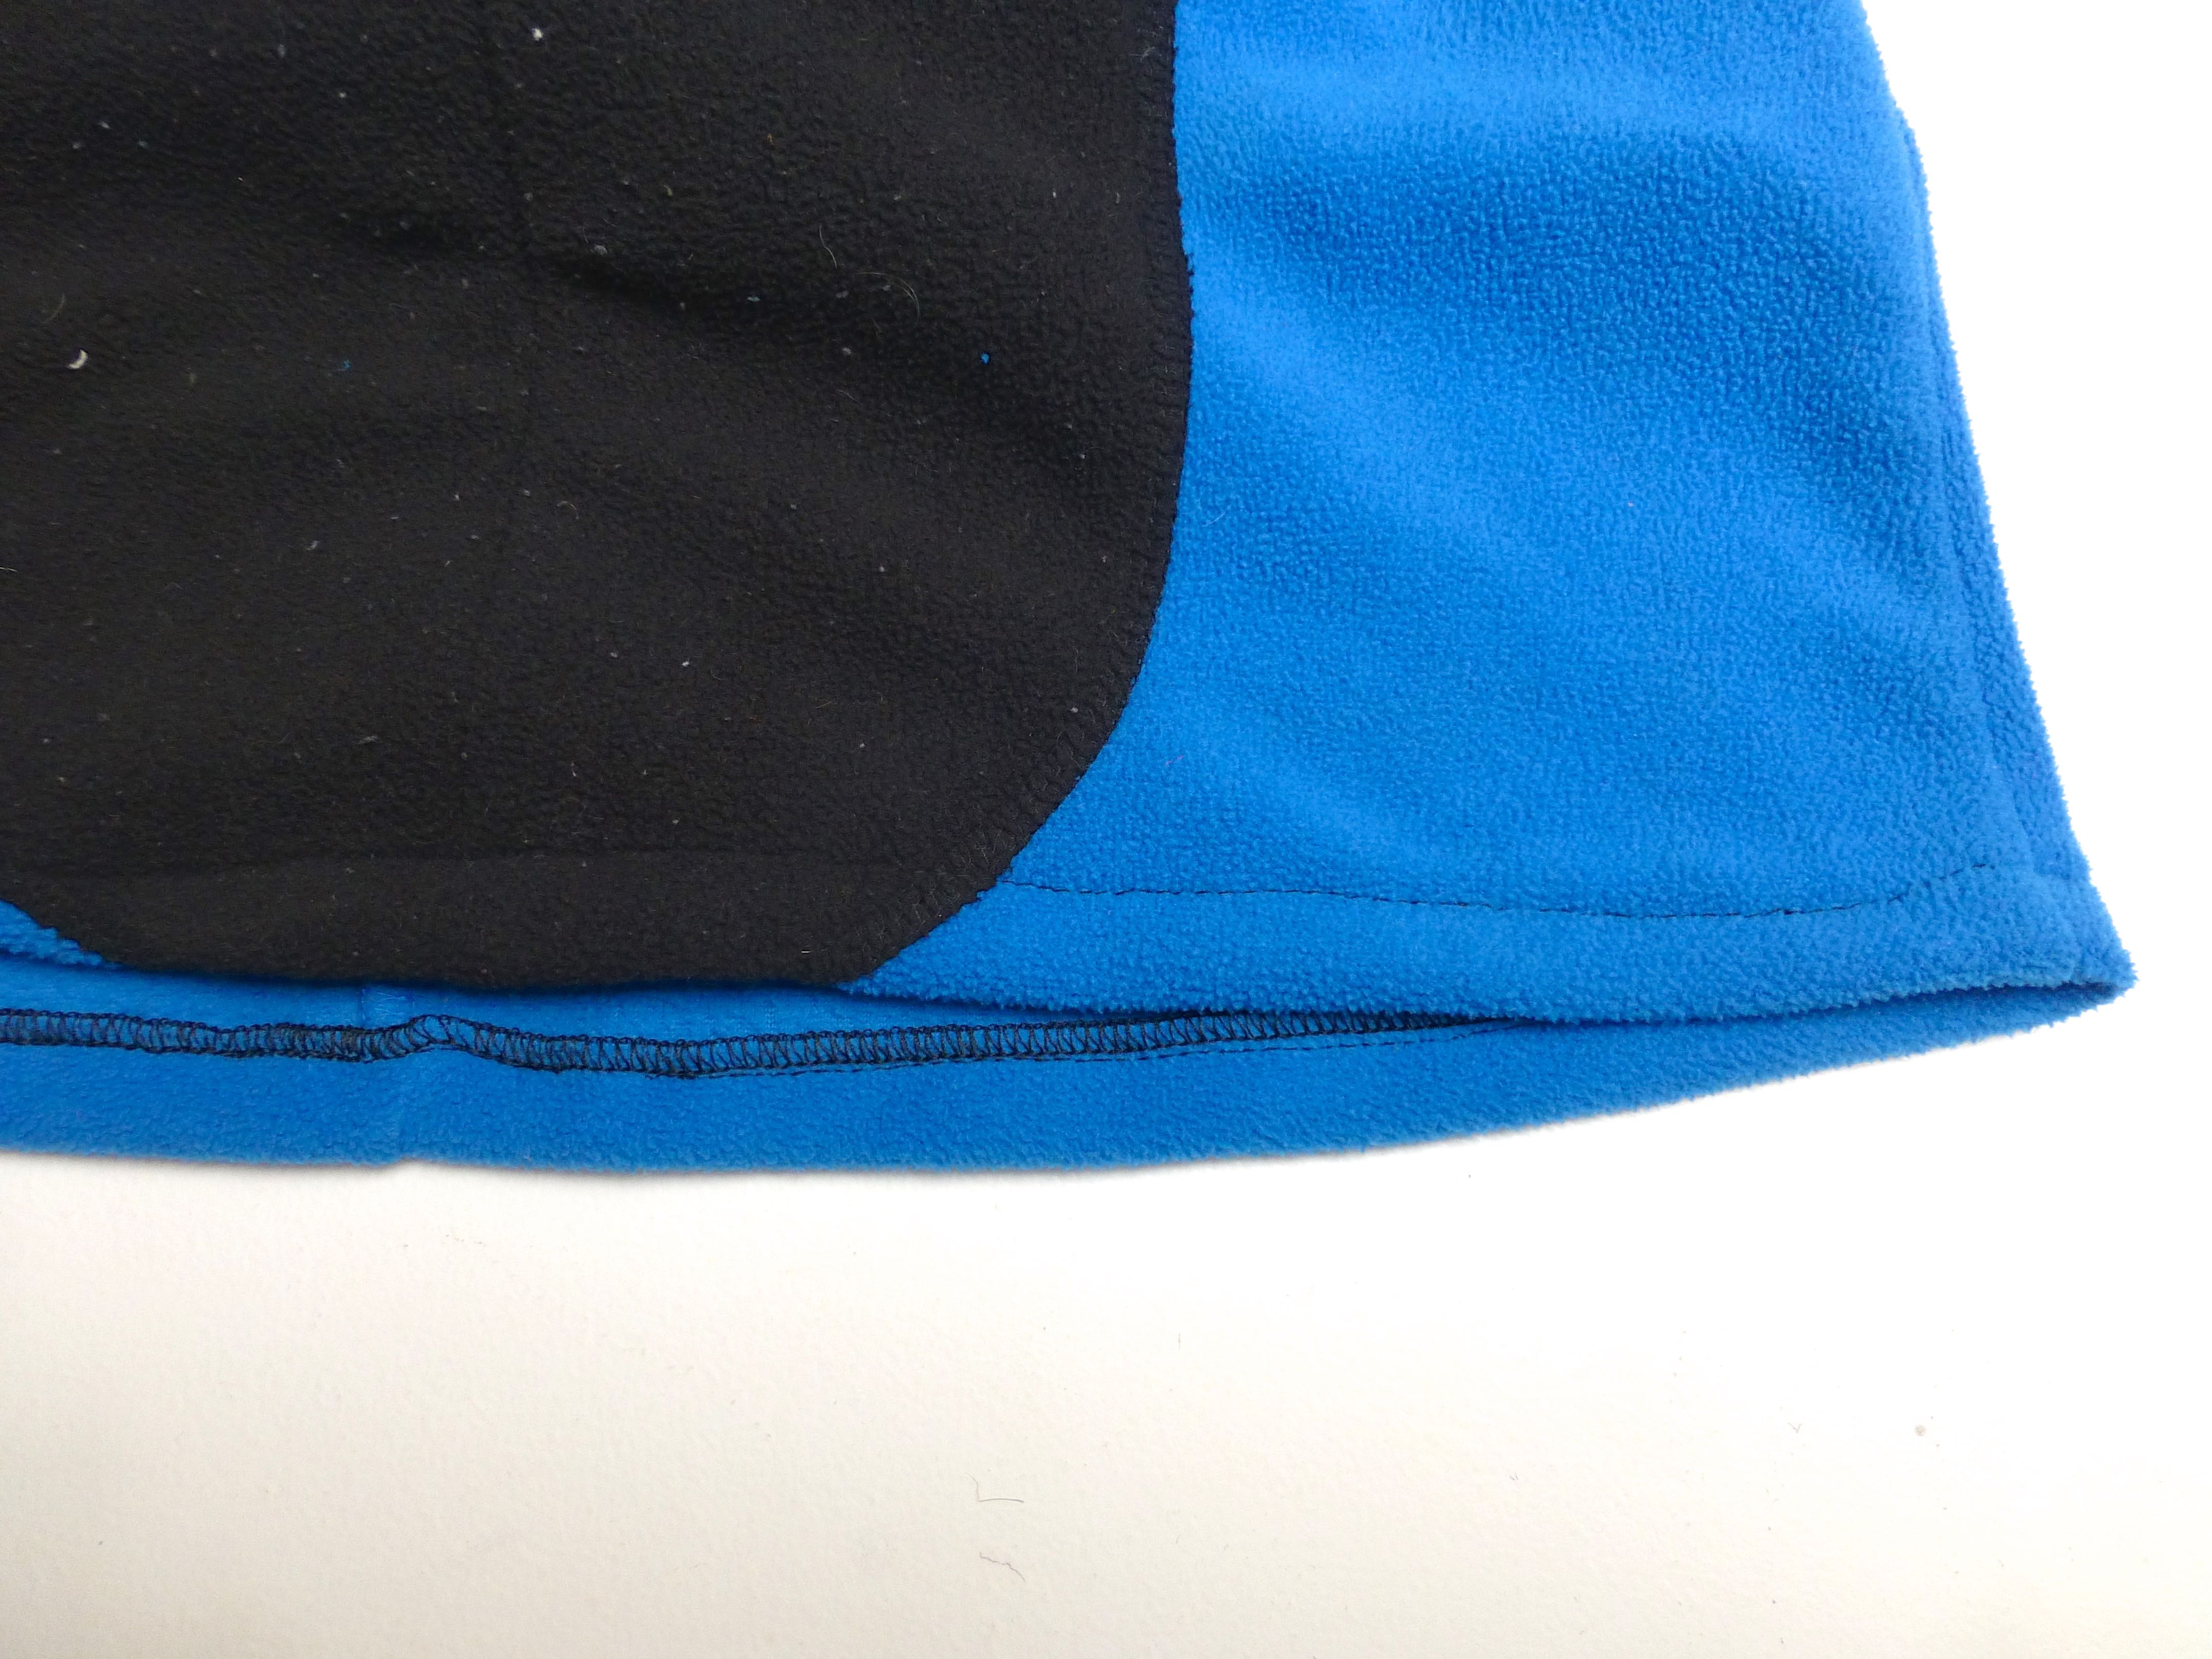
Press seam up towards the cuff and overlock the raw edge.
Top stitch about 1cm up the cuff, catching the seam allowance as you go.
Turn cuff to the inside having the overlocked edge protrude over the seam by about 1cm. Pin in place.
Working from the right side, stitch in the ‘ditch’ of the seam, leaving a gap for threading the elastic.
Stitch again in the middle of the cuff, leaving a gap for the elastic as before.
Top stitch close to the top edge all the way around the cuff.
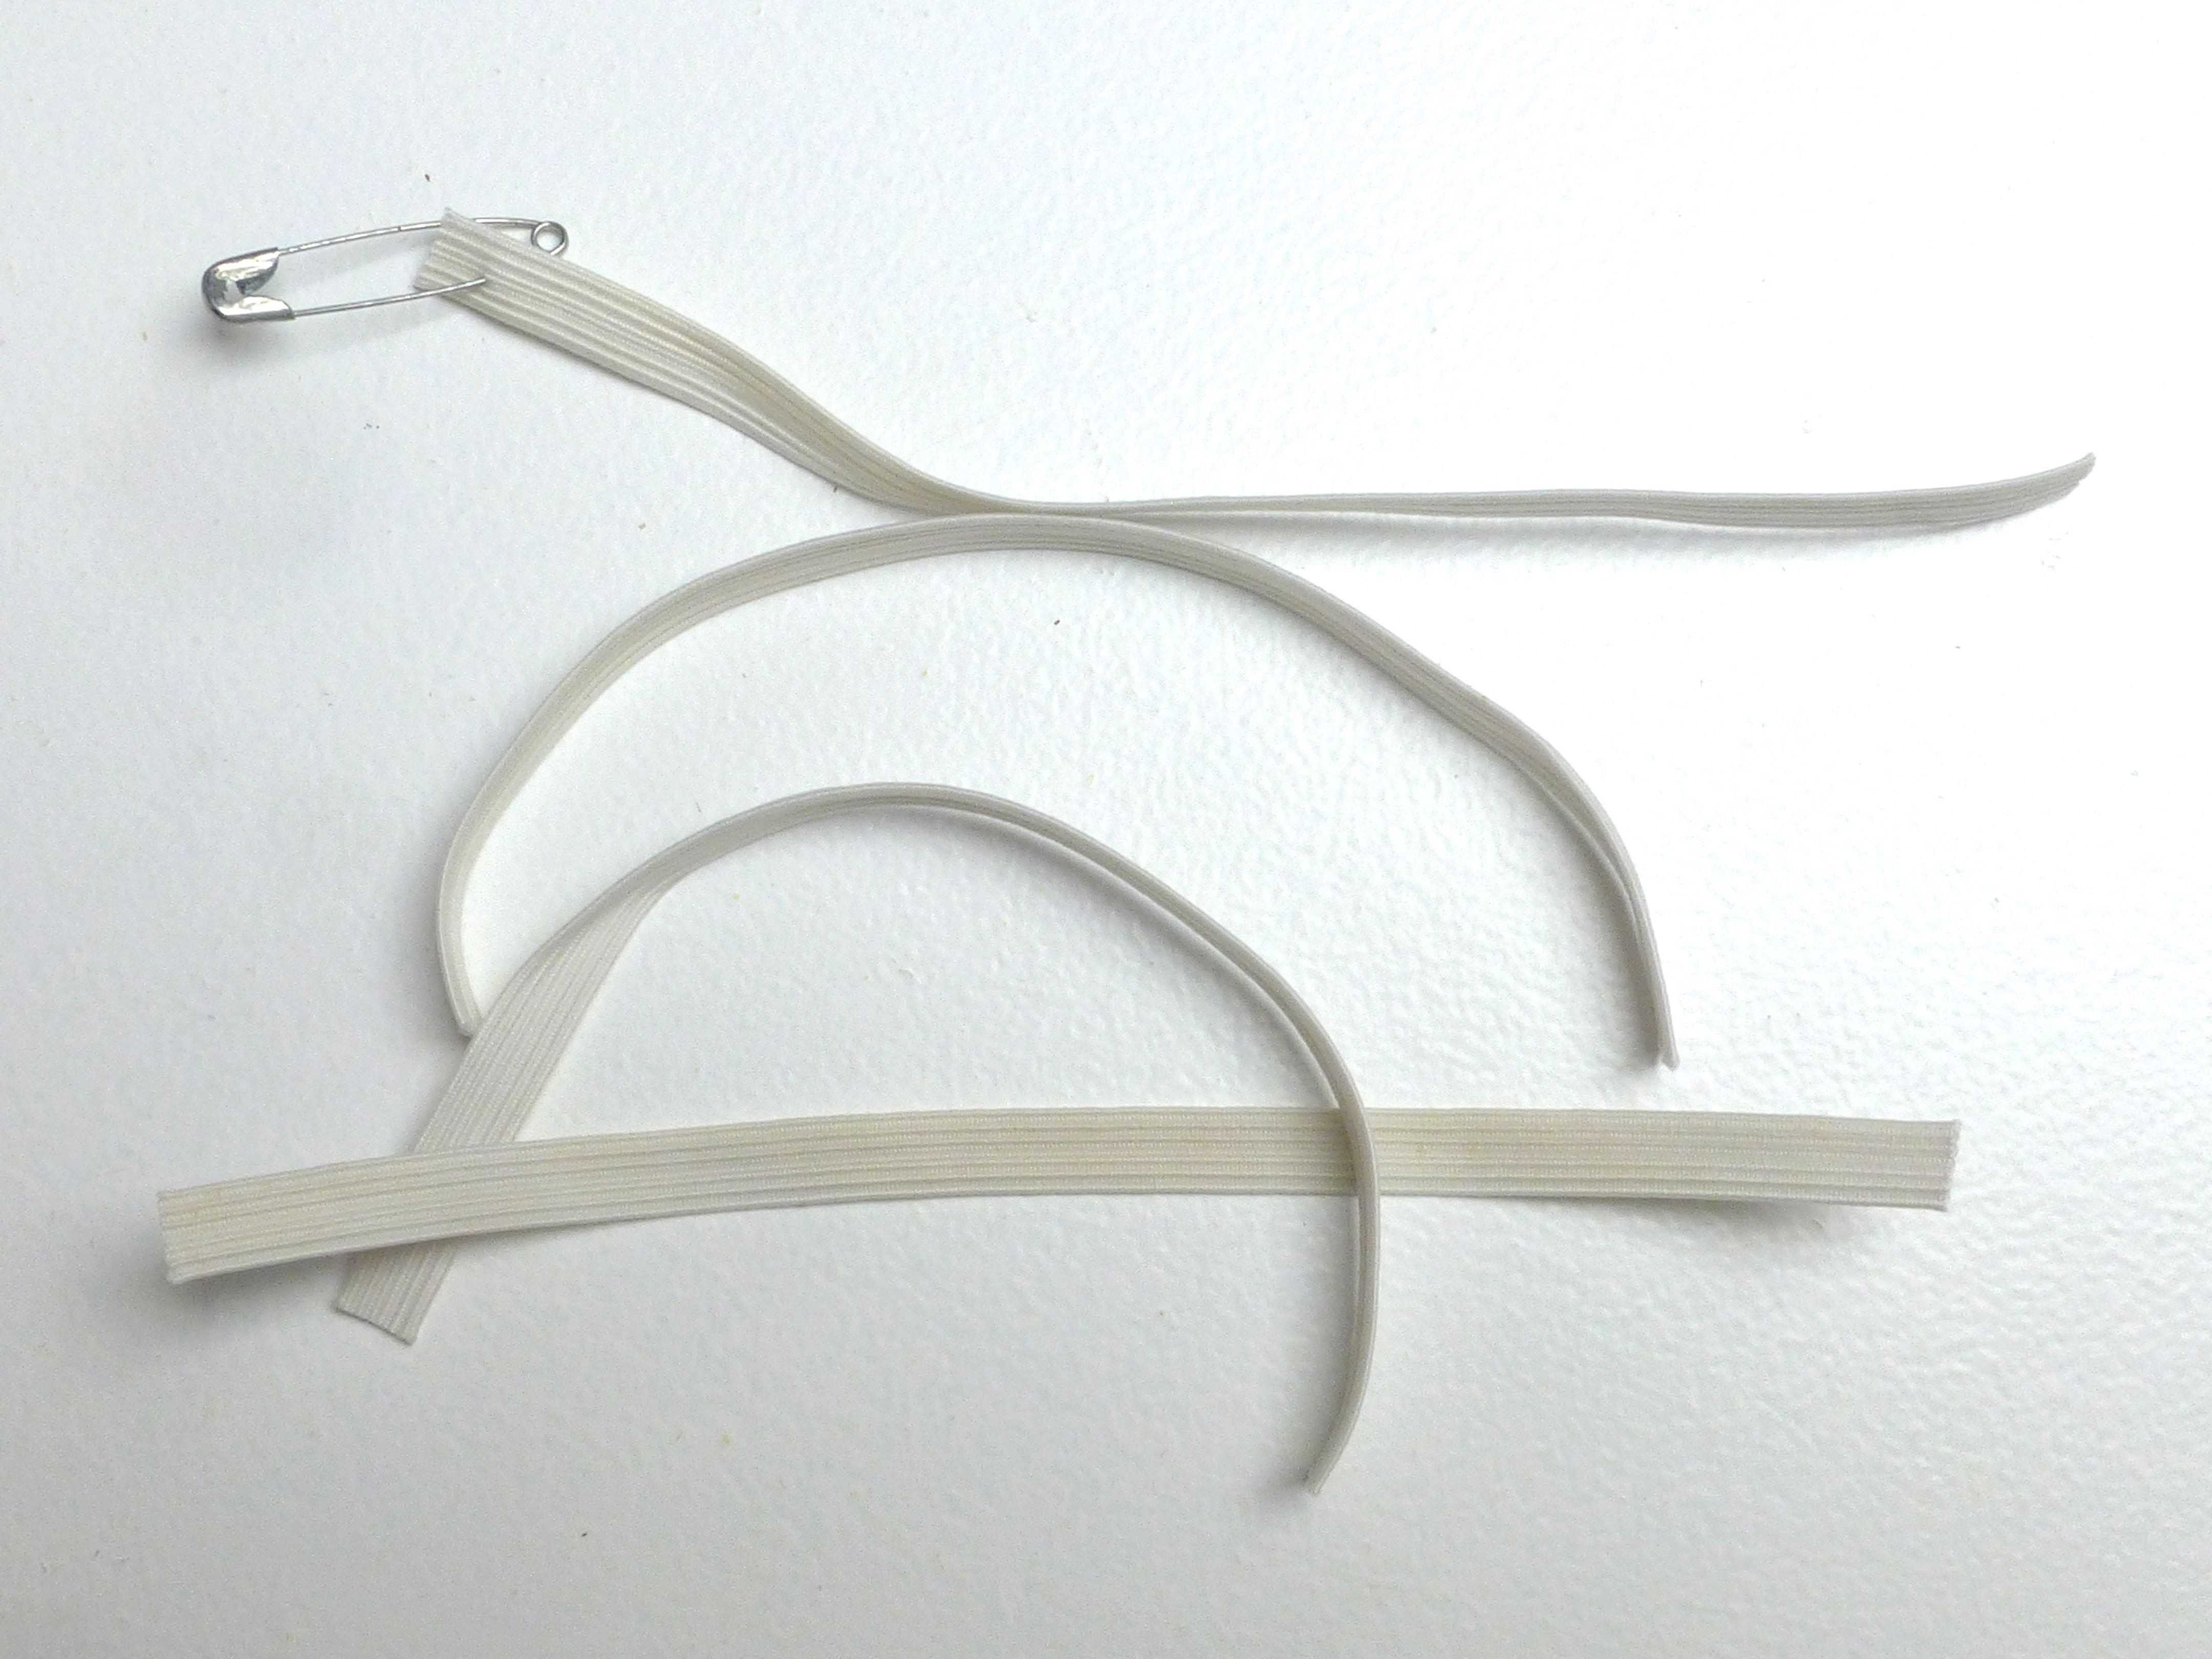
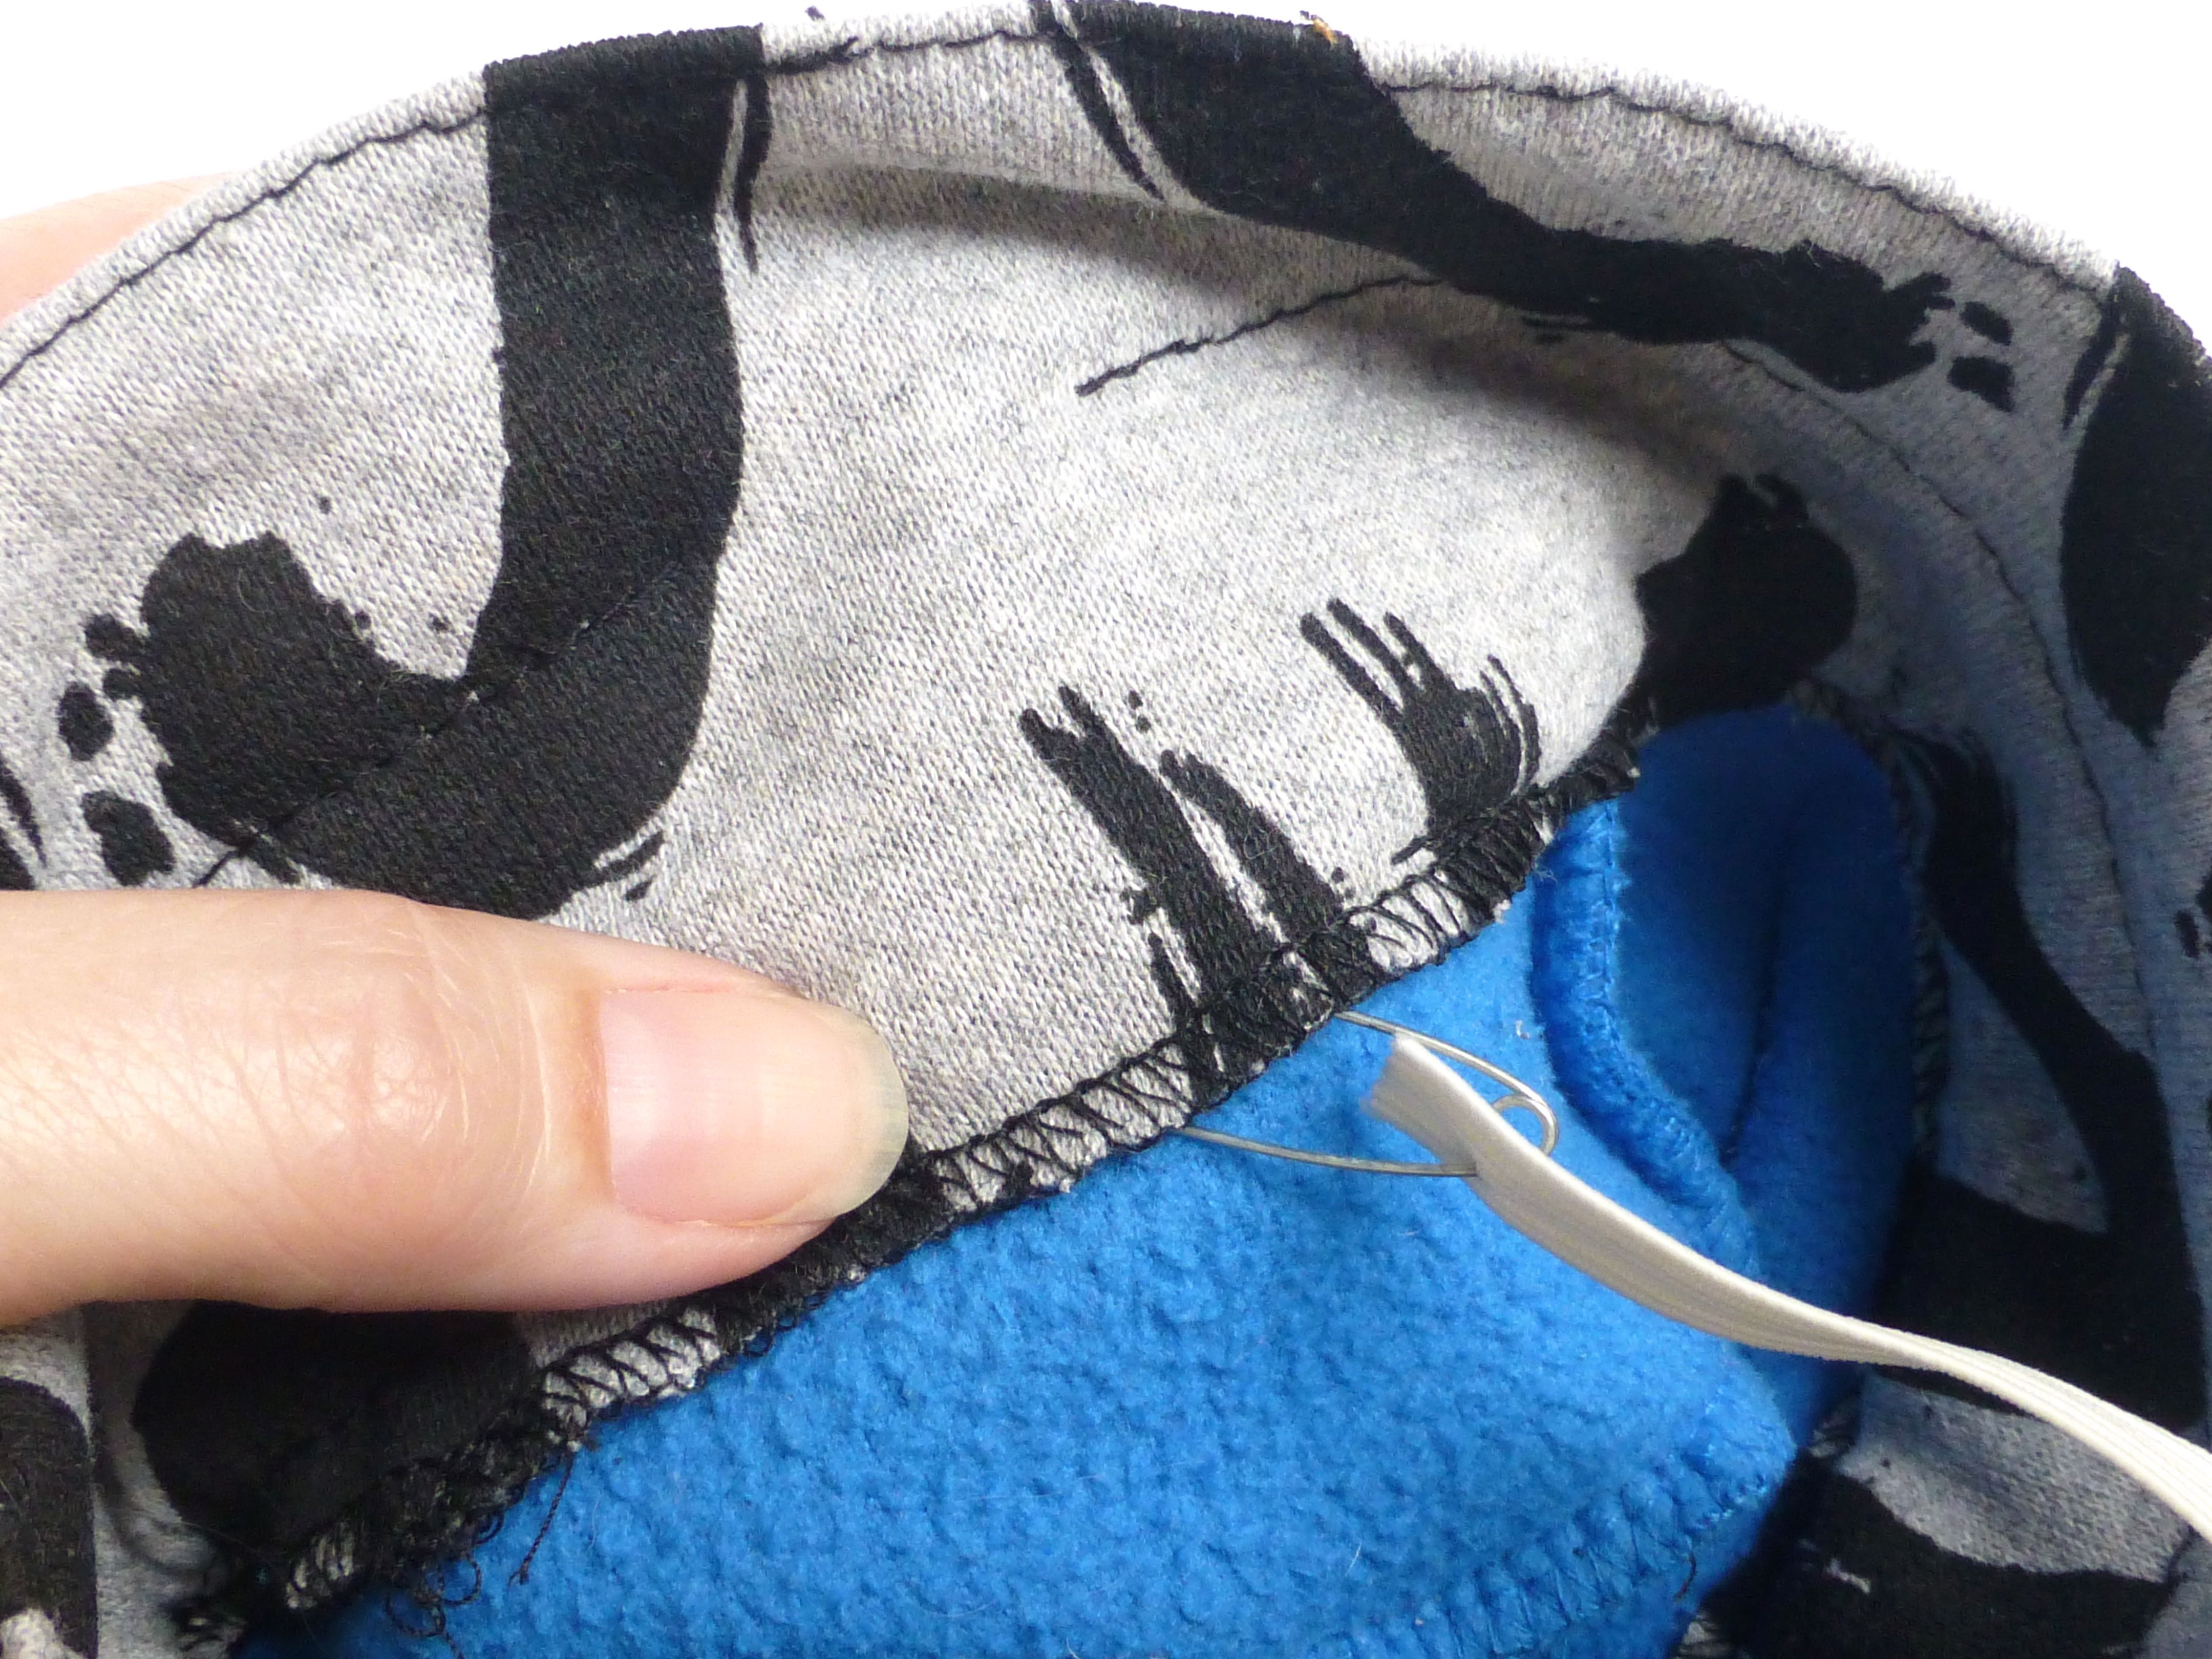
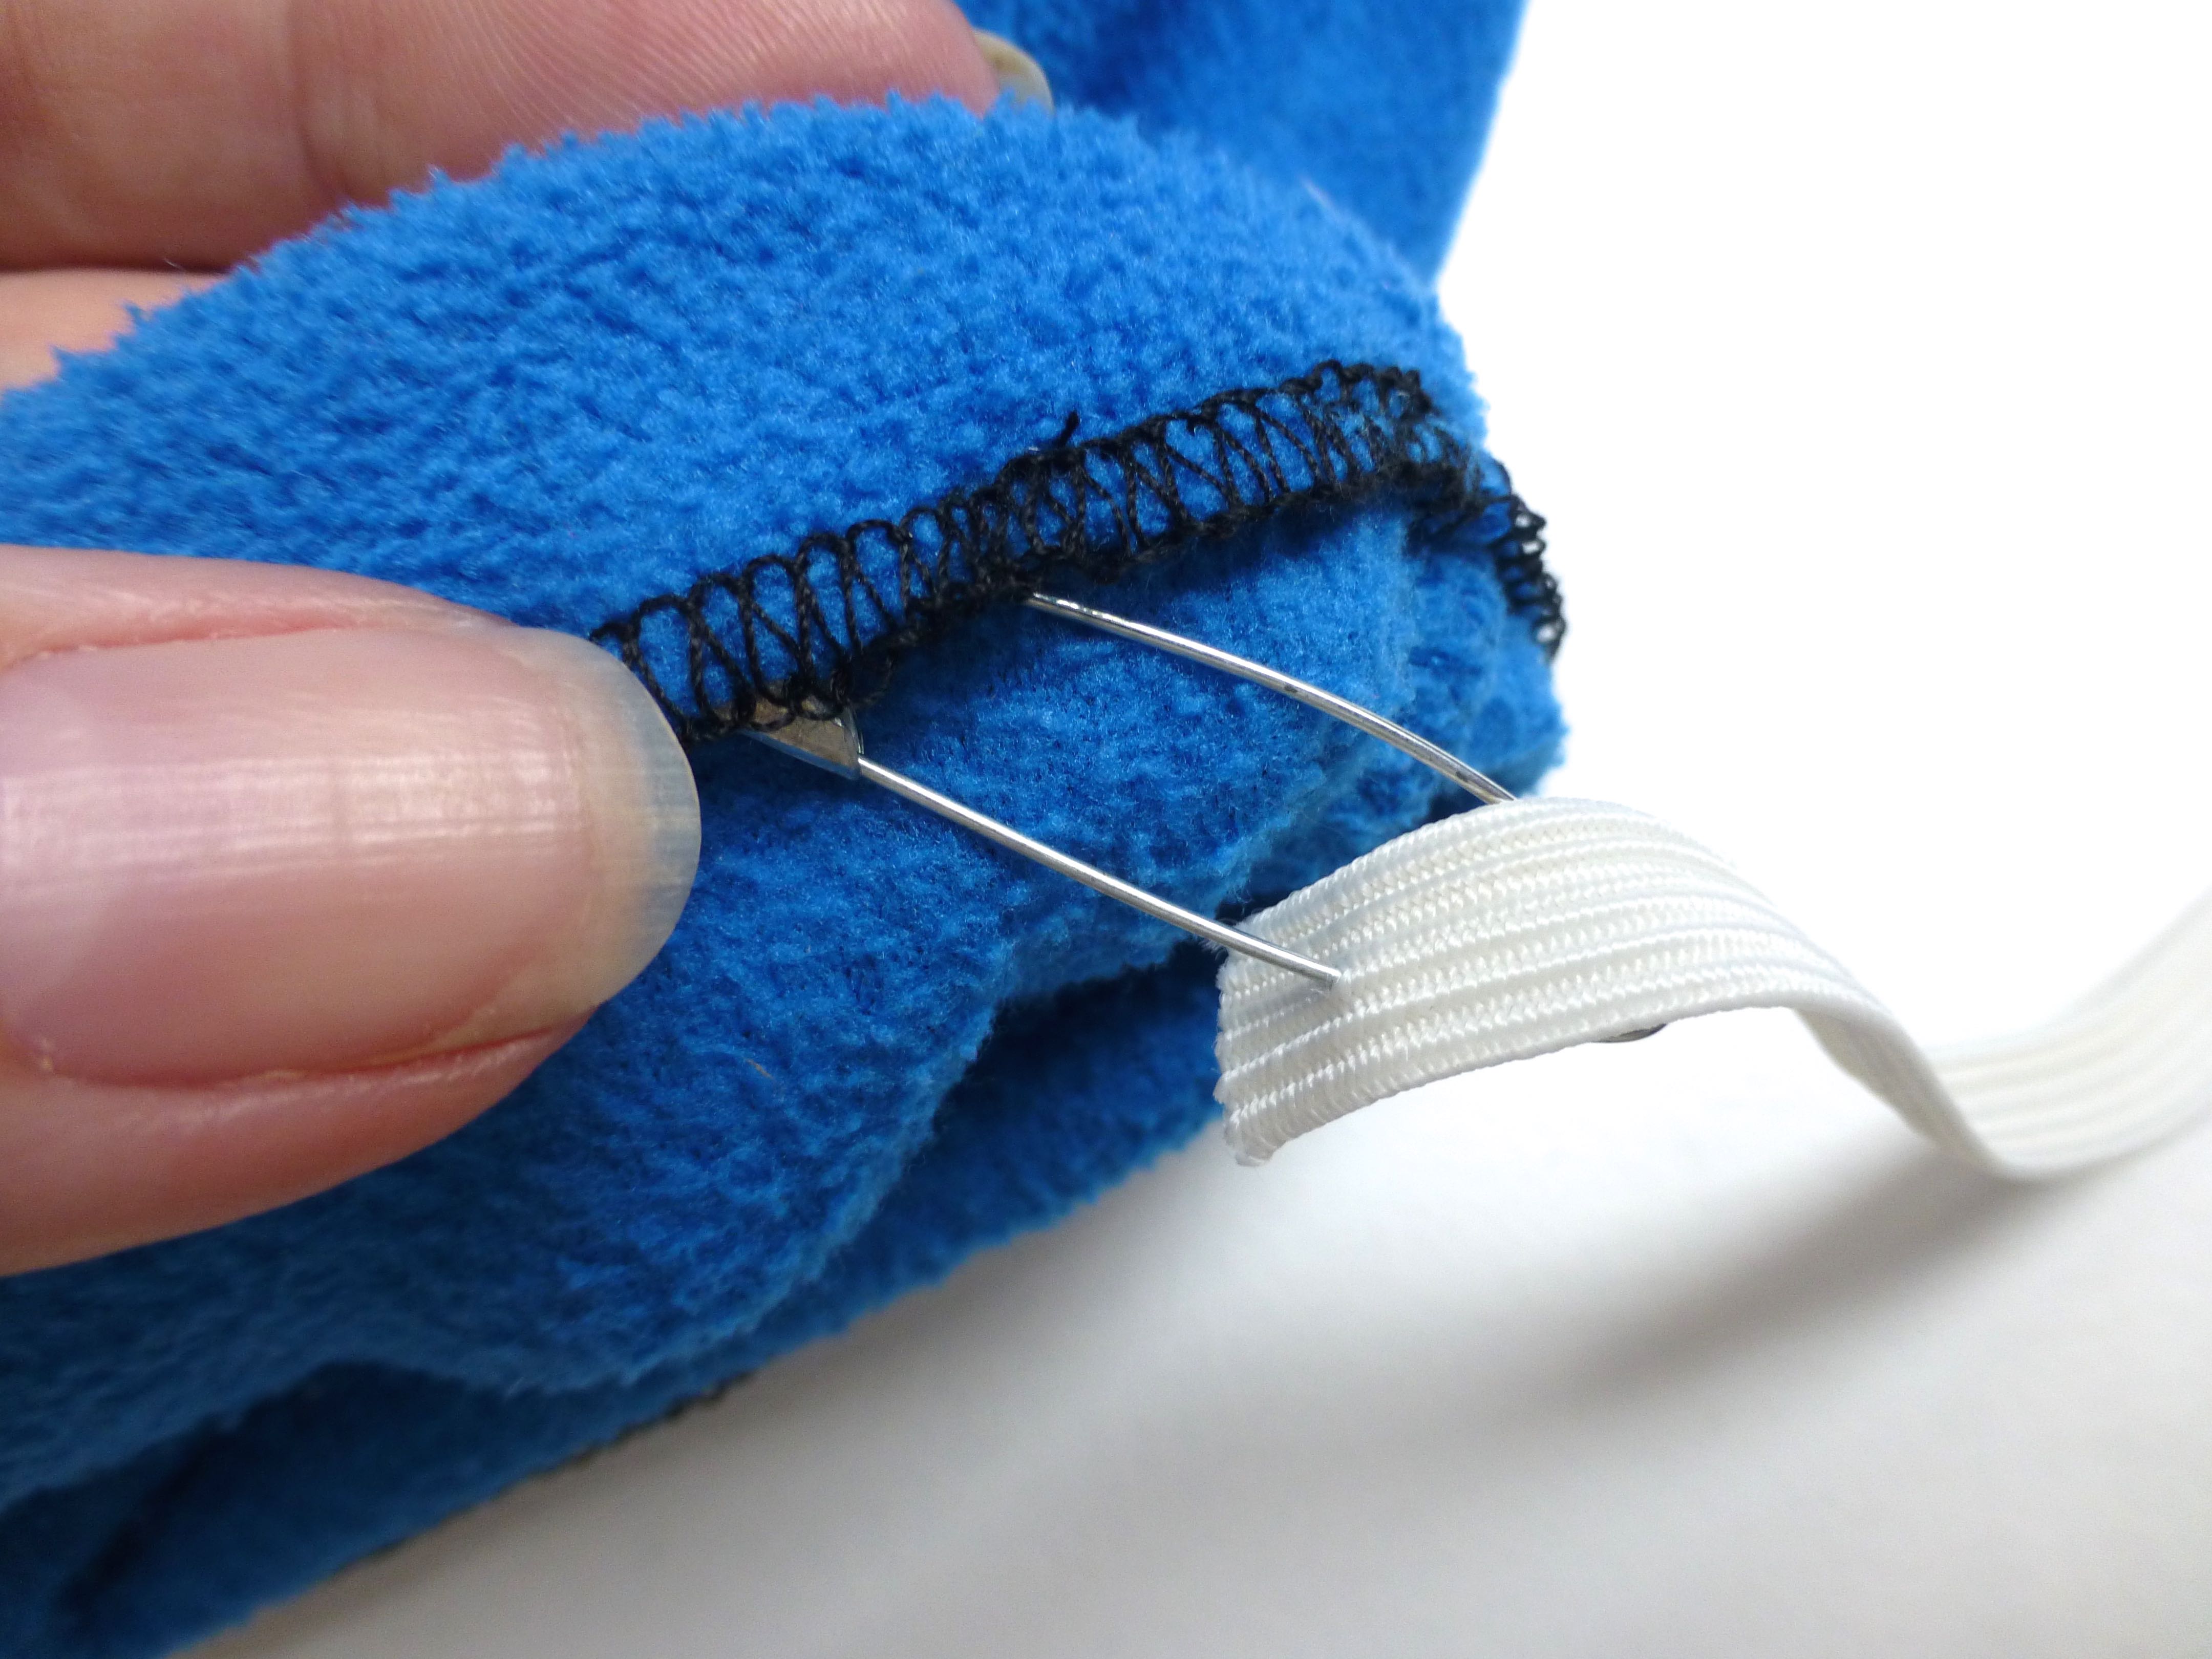
Cut four pieces of 1/2″ elastic to loosely fit the ankle…
…and thread them through each channel on both boots with a safety pin.
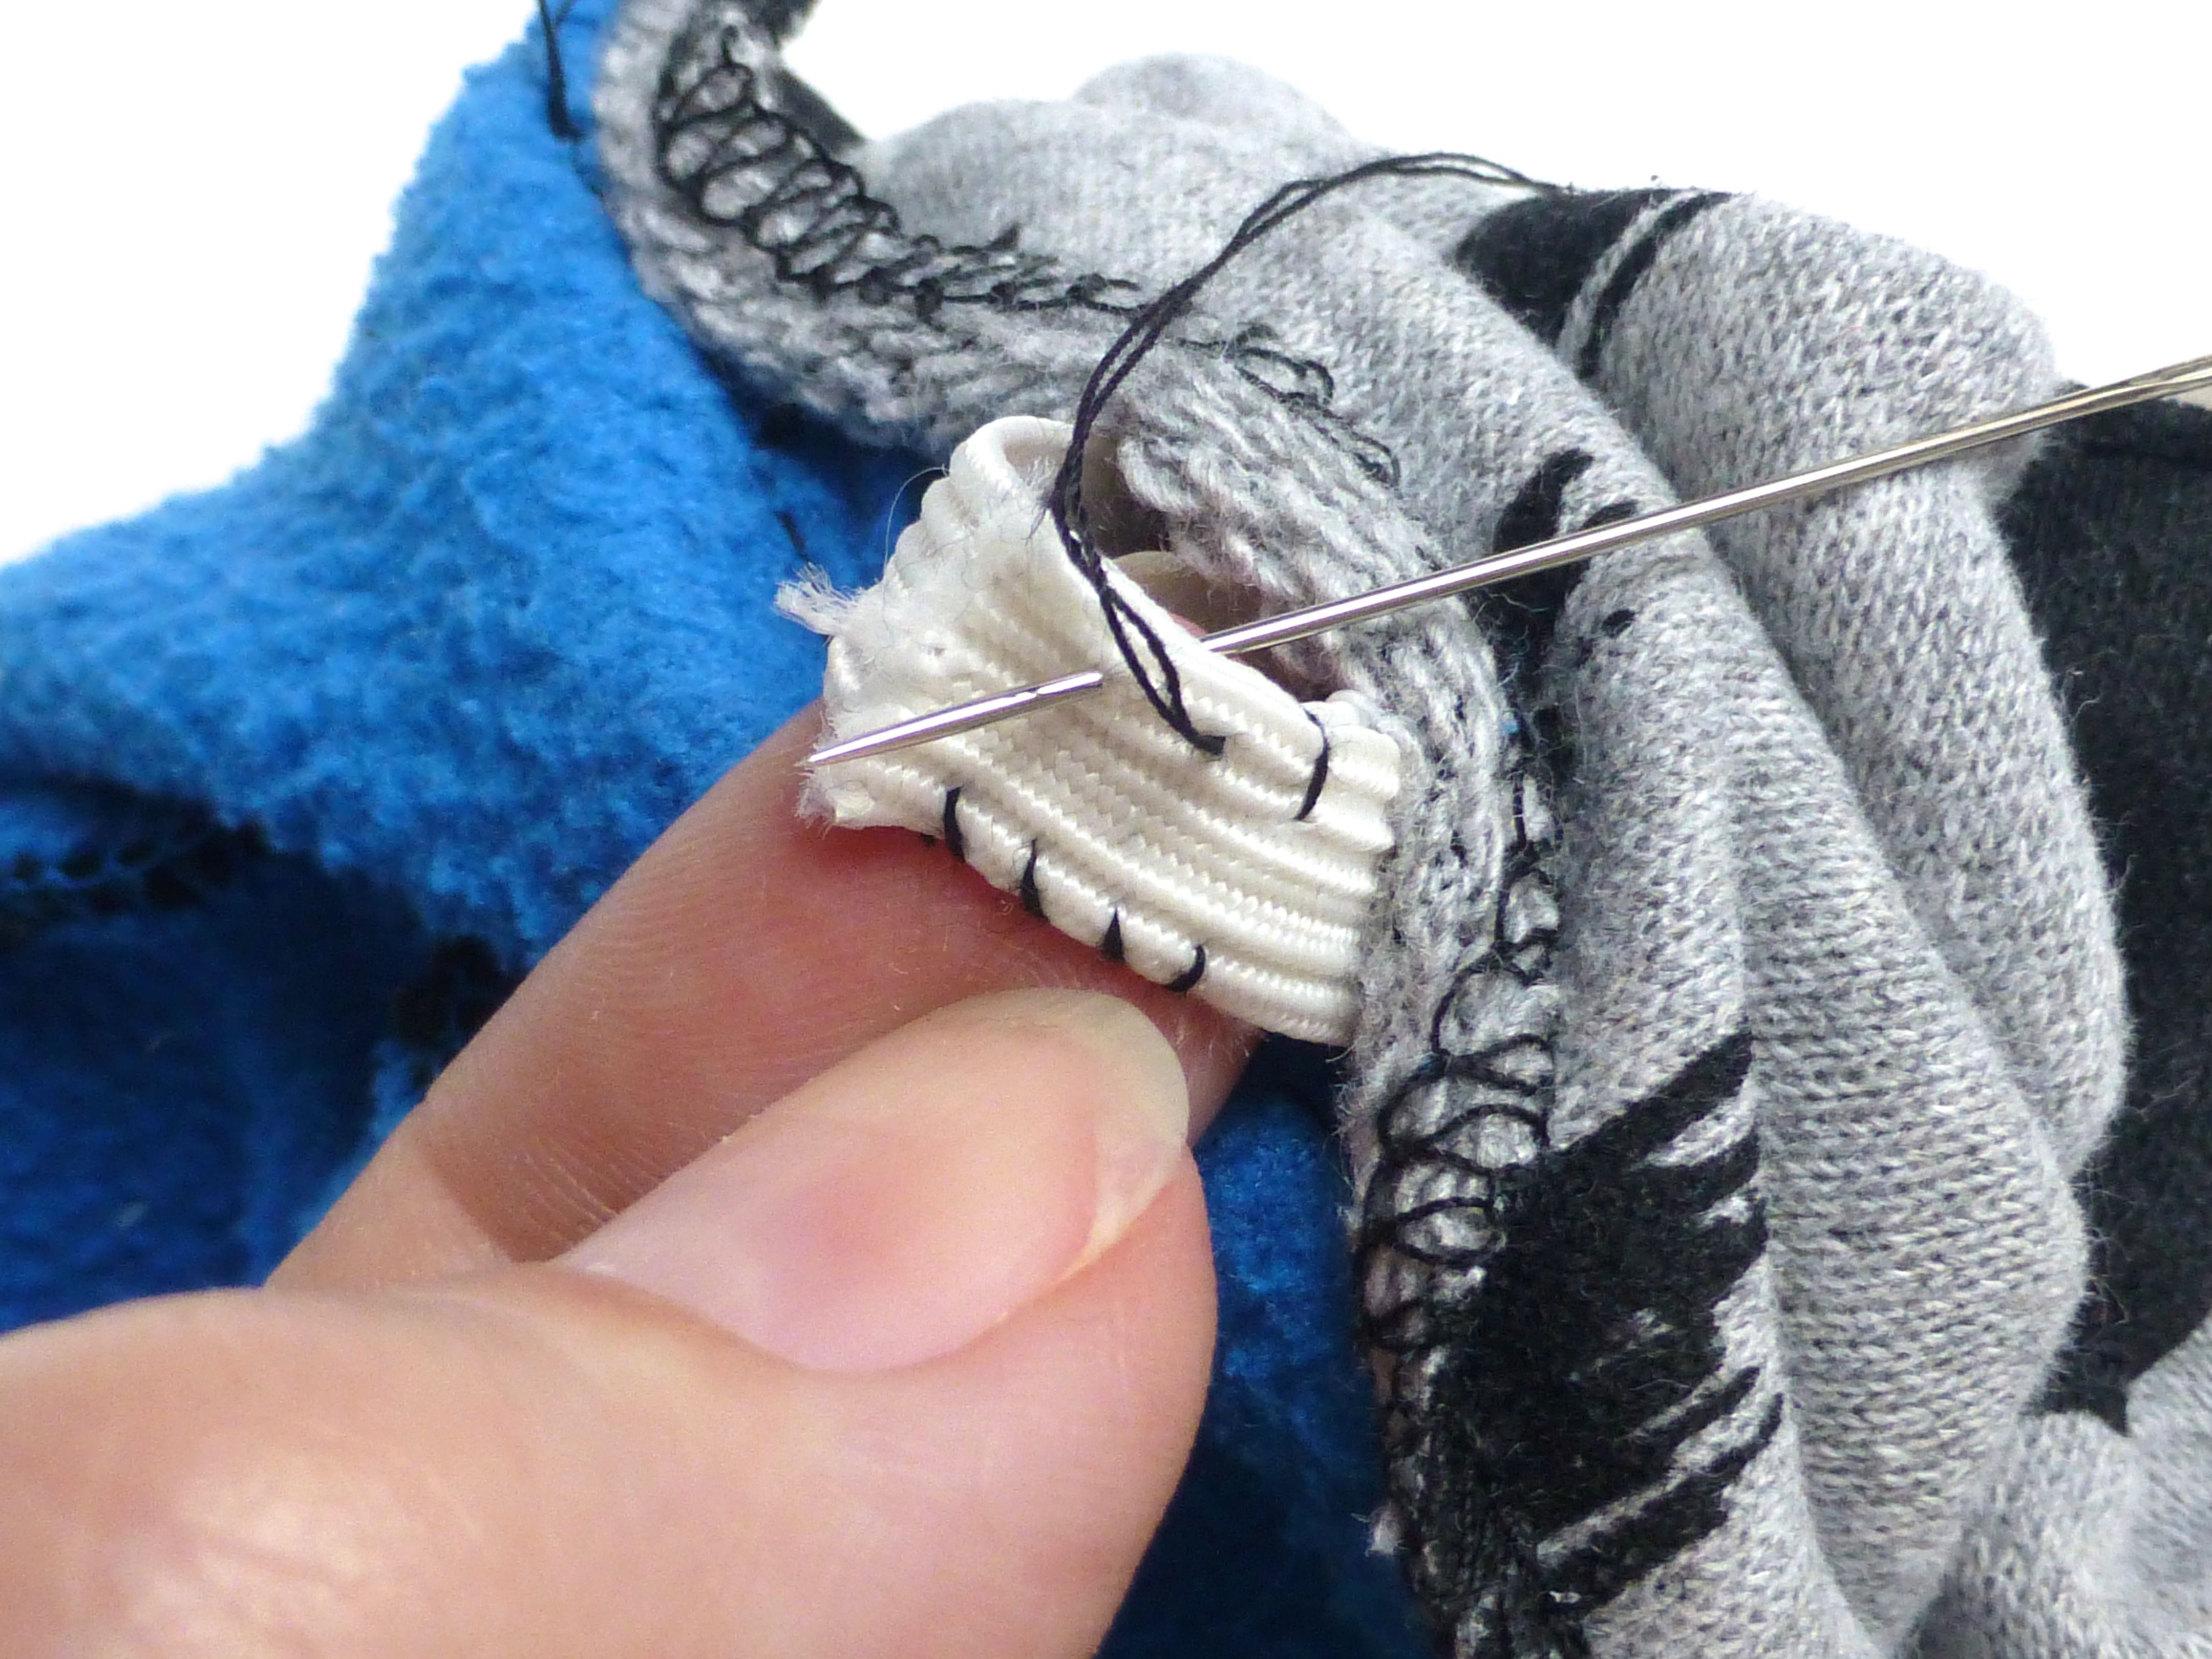
The ends of the elastic are hand sewn together.
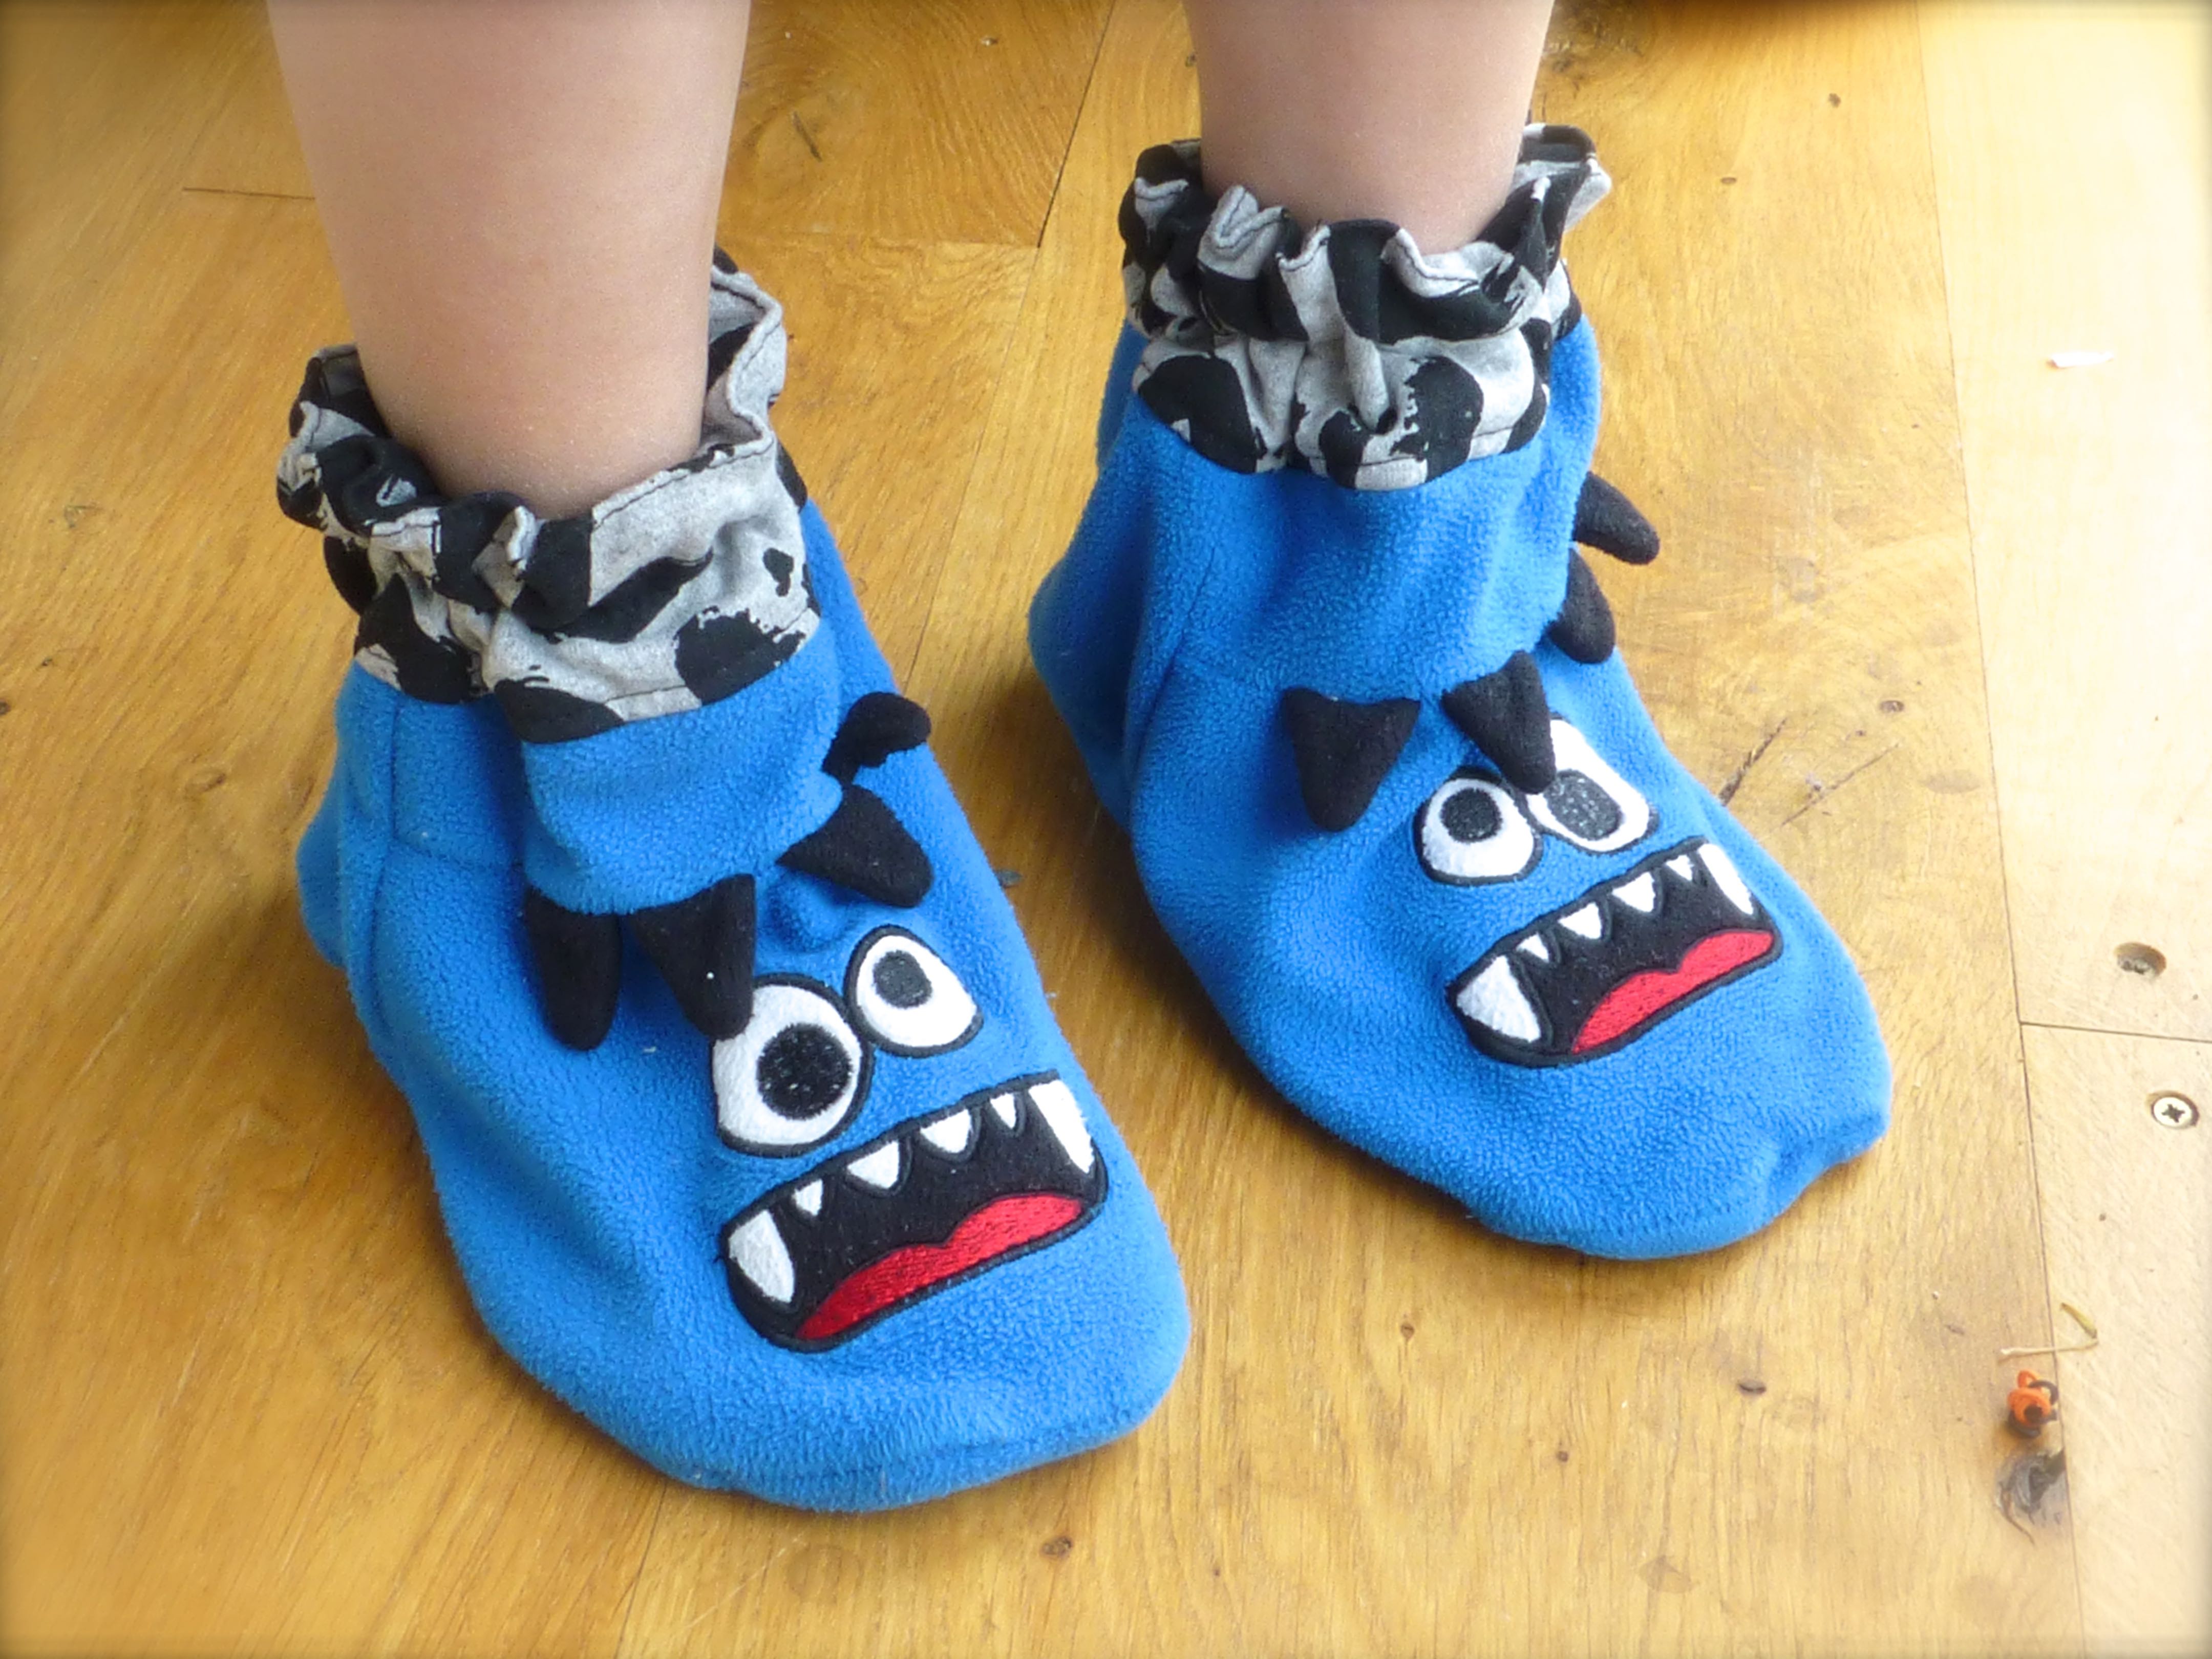
Tadah!
A sweet pair of slipper boots.
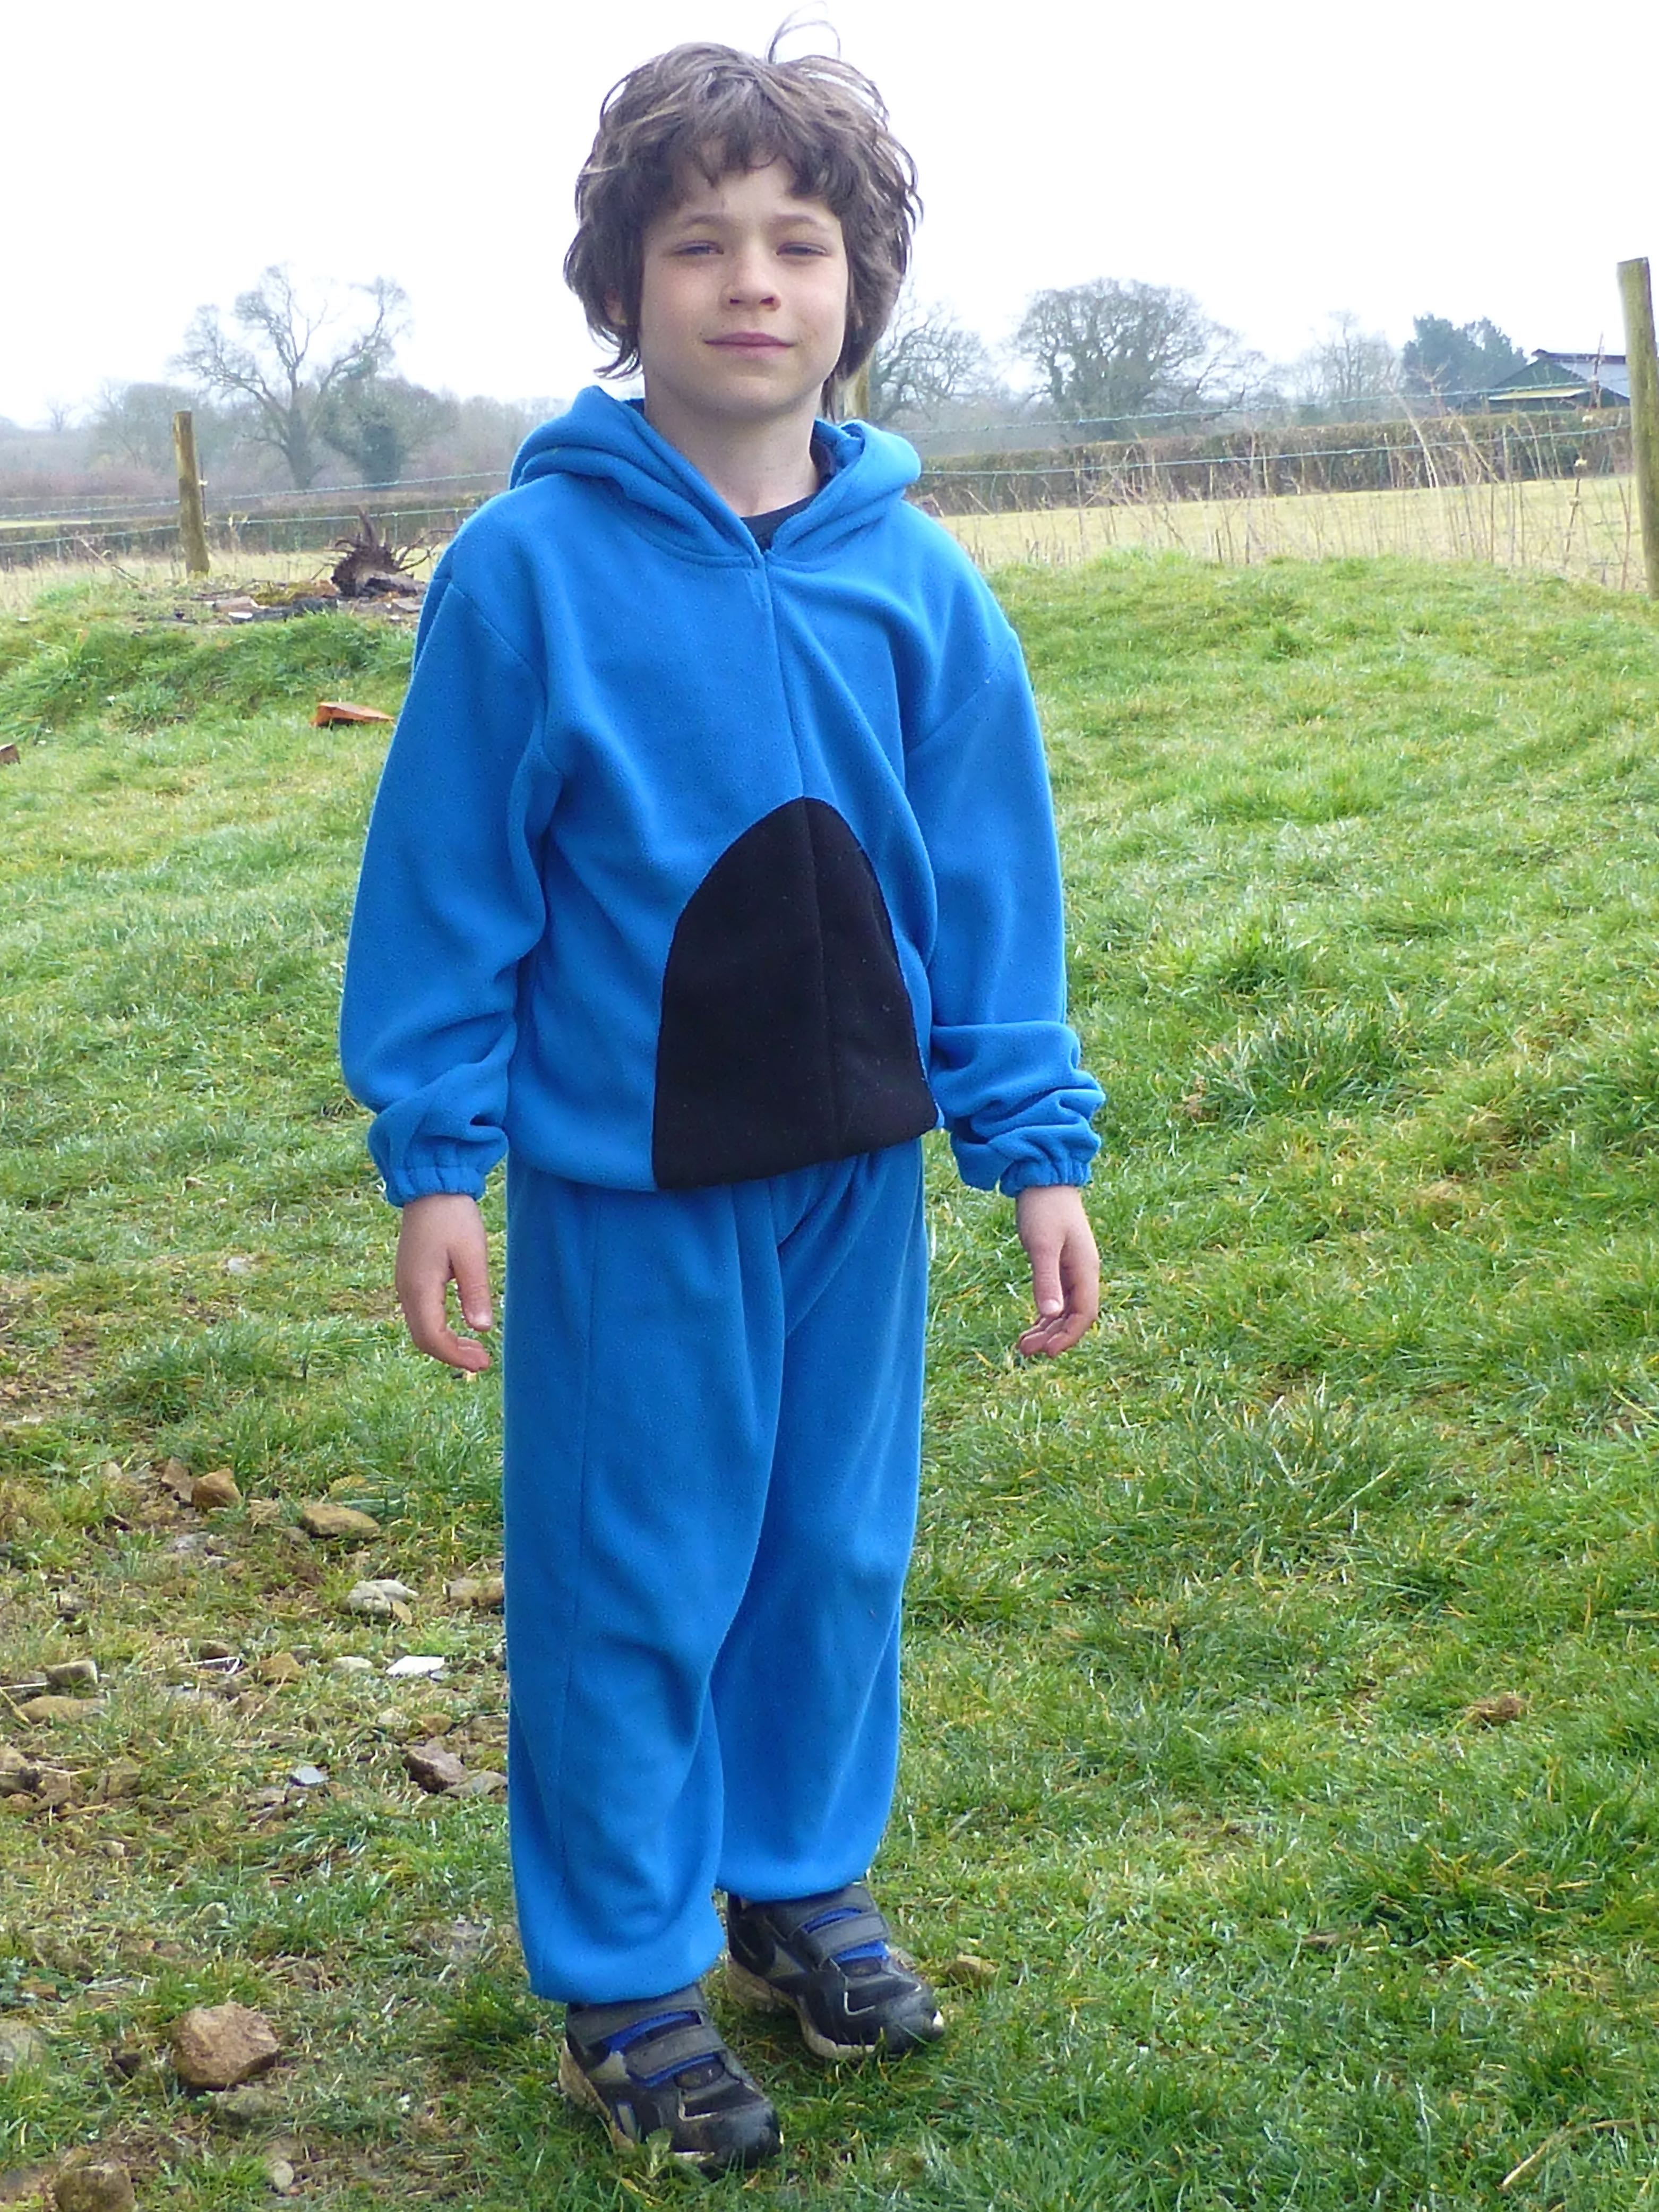
These turned out to be the favourite part of the recycled outfit and are great for sliding across oak floors.
Hmmm, that reminds me of a ‘game’ we used to play when we were kids. Mum used to put wax polish on rags, tie them to our feet and ‘let’ us slide on the linoleum floor in the dining room.
Wonder if I could use that ruse on my boys?
Hope you enjoyed this post, how to make slipper boots from an old onesie – if you’d like to see more;
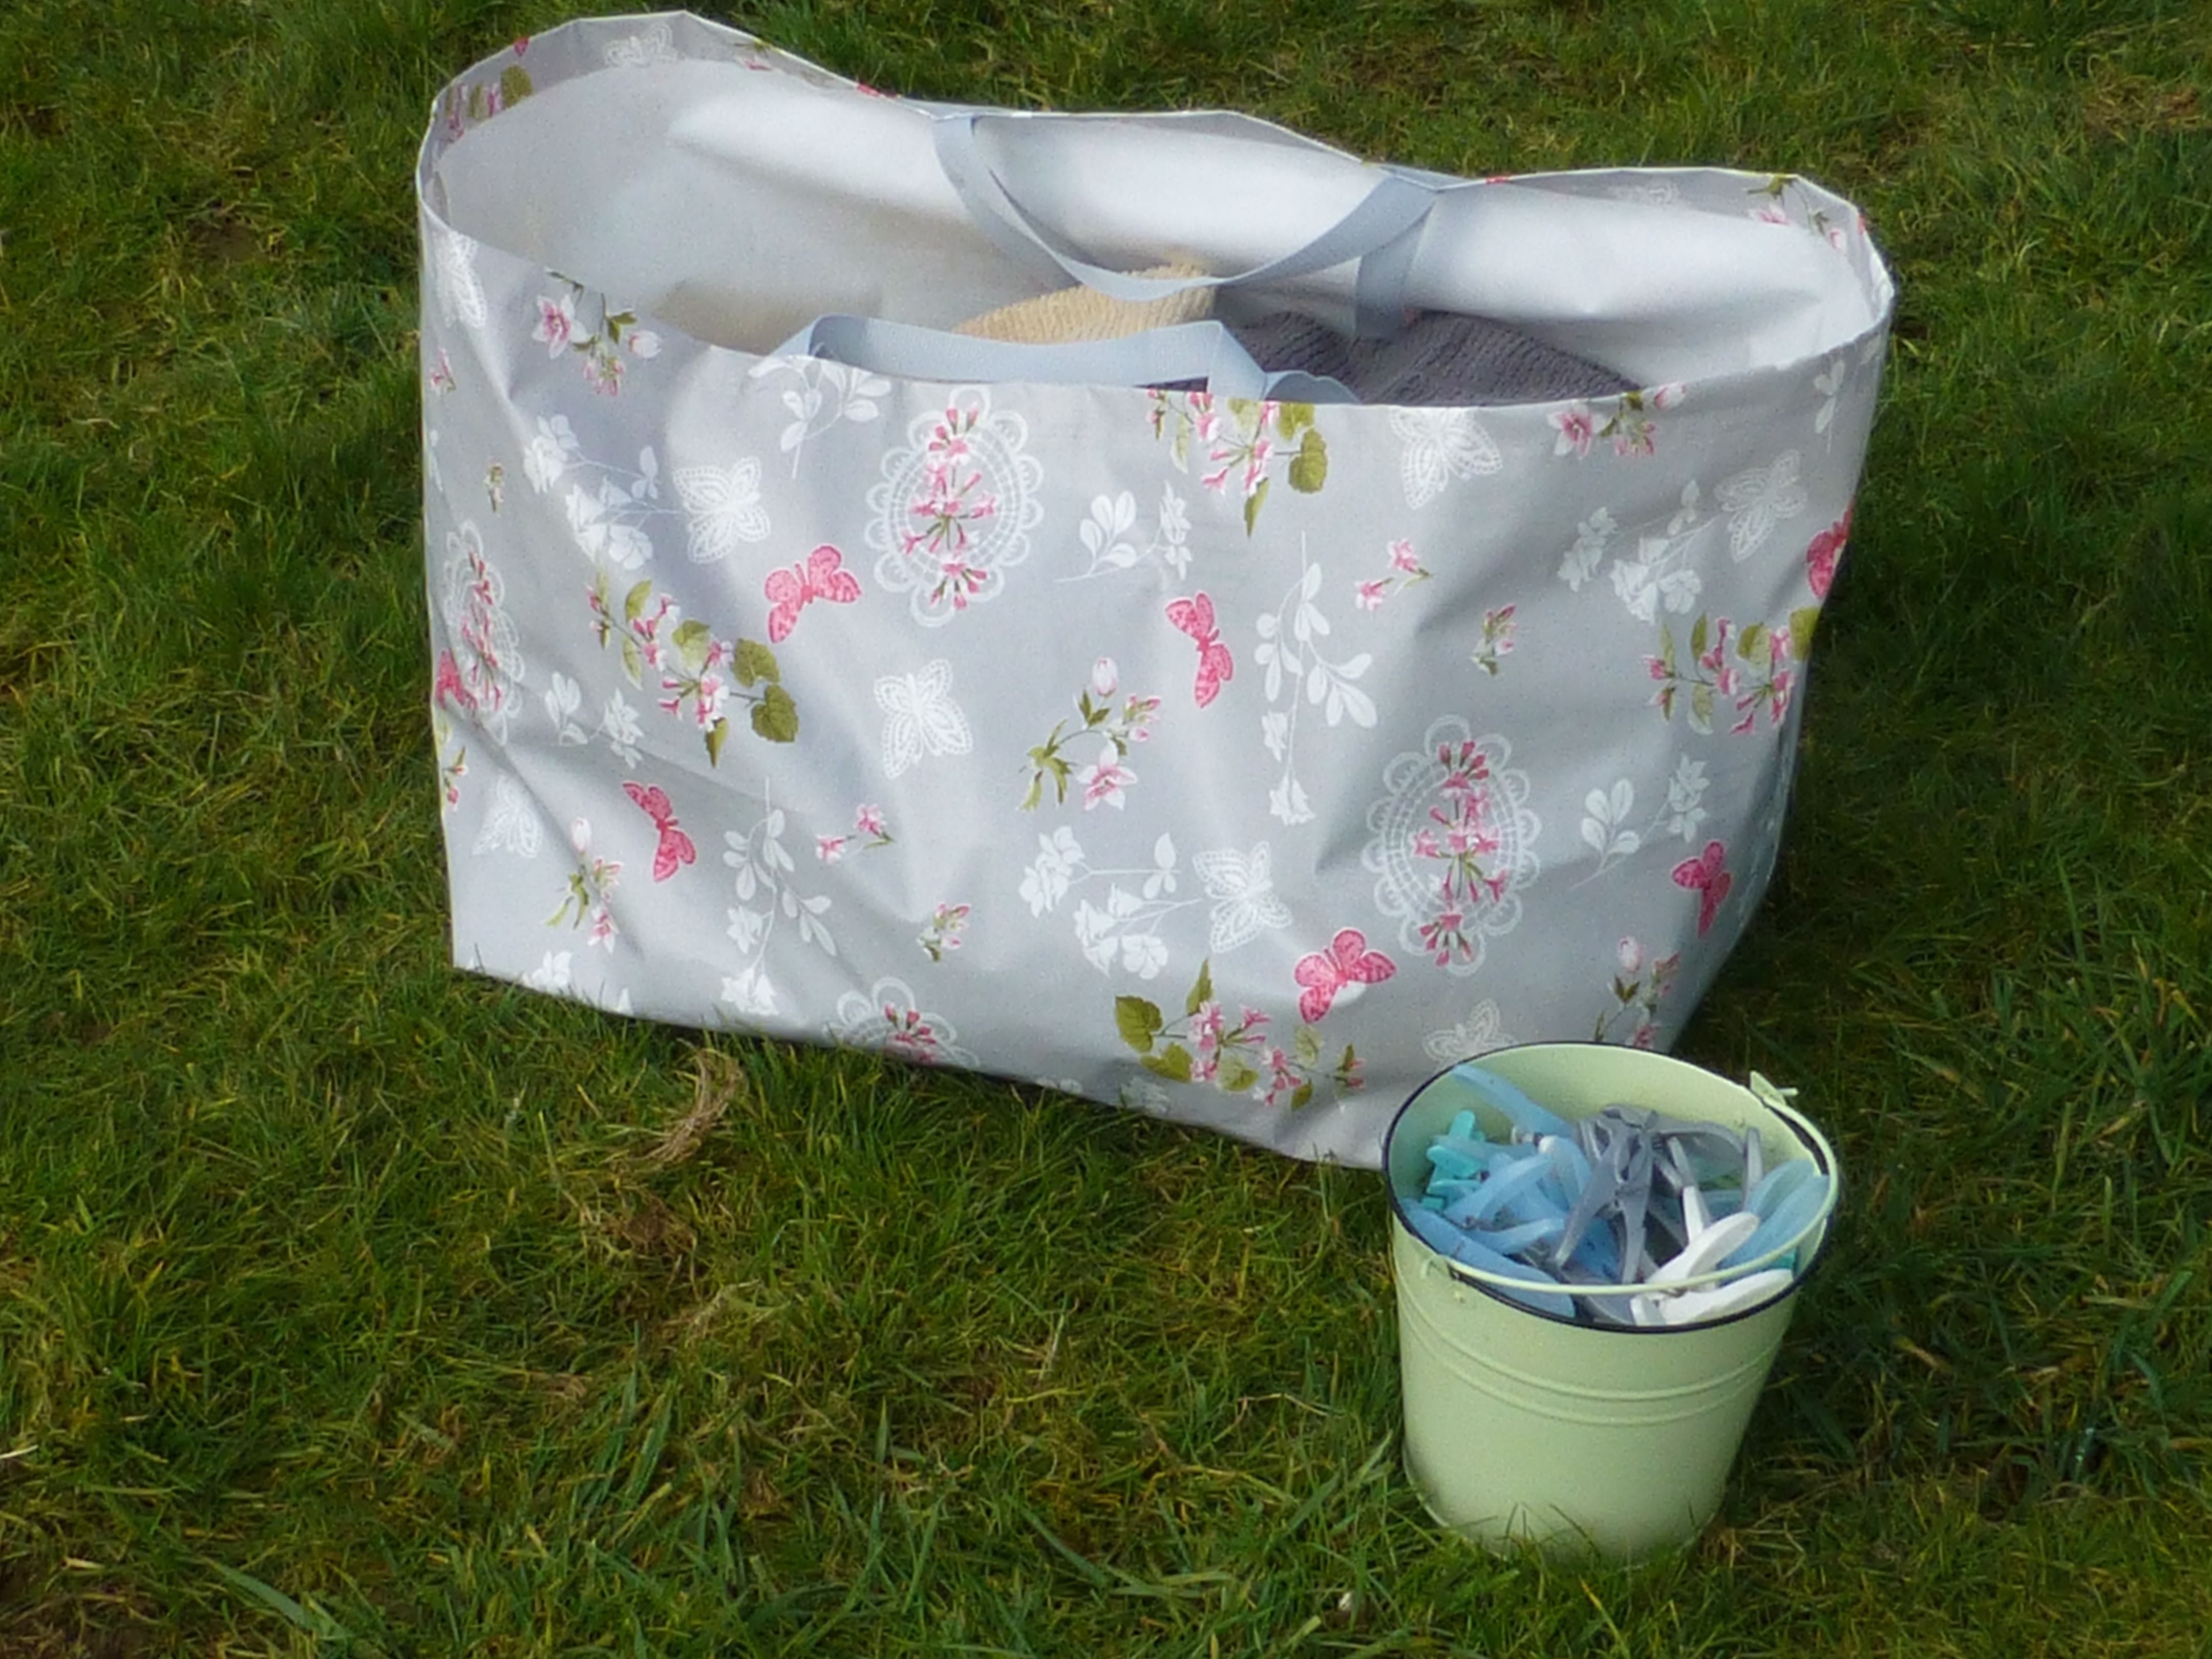
Continuing the theme of ‘One-Hour’ makes (well, it wasn’t really a theme until just now when I realised that this project also took less than an hour to make), I’ve designed a simple pattern along the lines of one of those big blue Ikea bags.
You know the ones; they make great laundry bags, shopping bags, picnic hampers etc., but there’s one major design fault – they’re just so damned ugly!
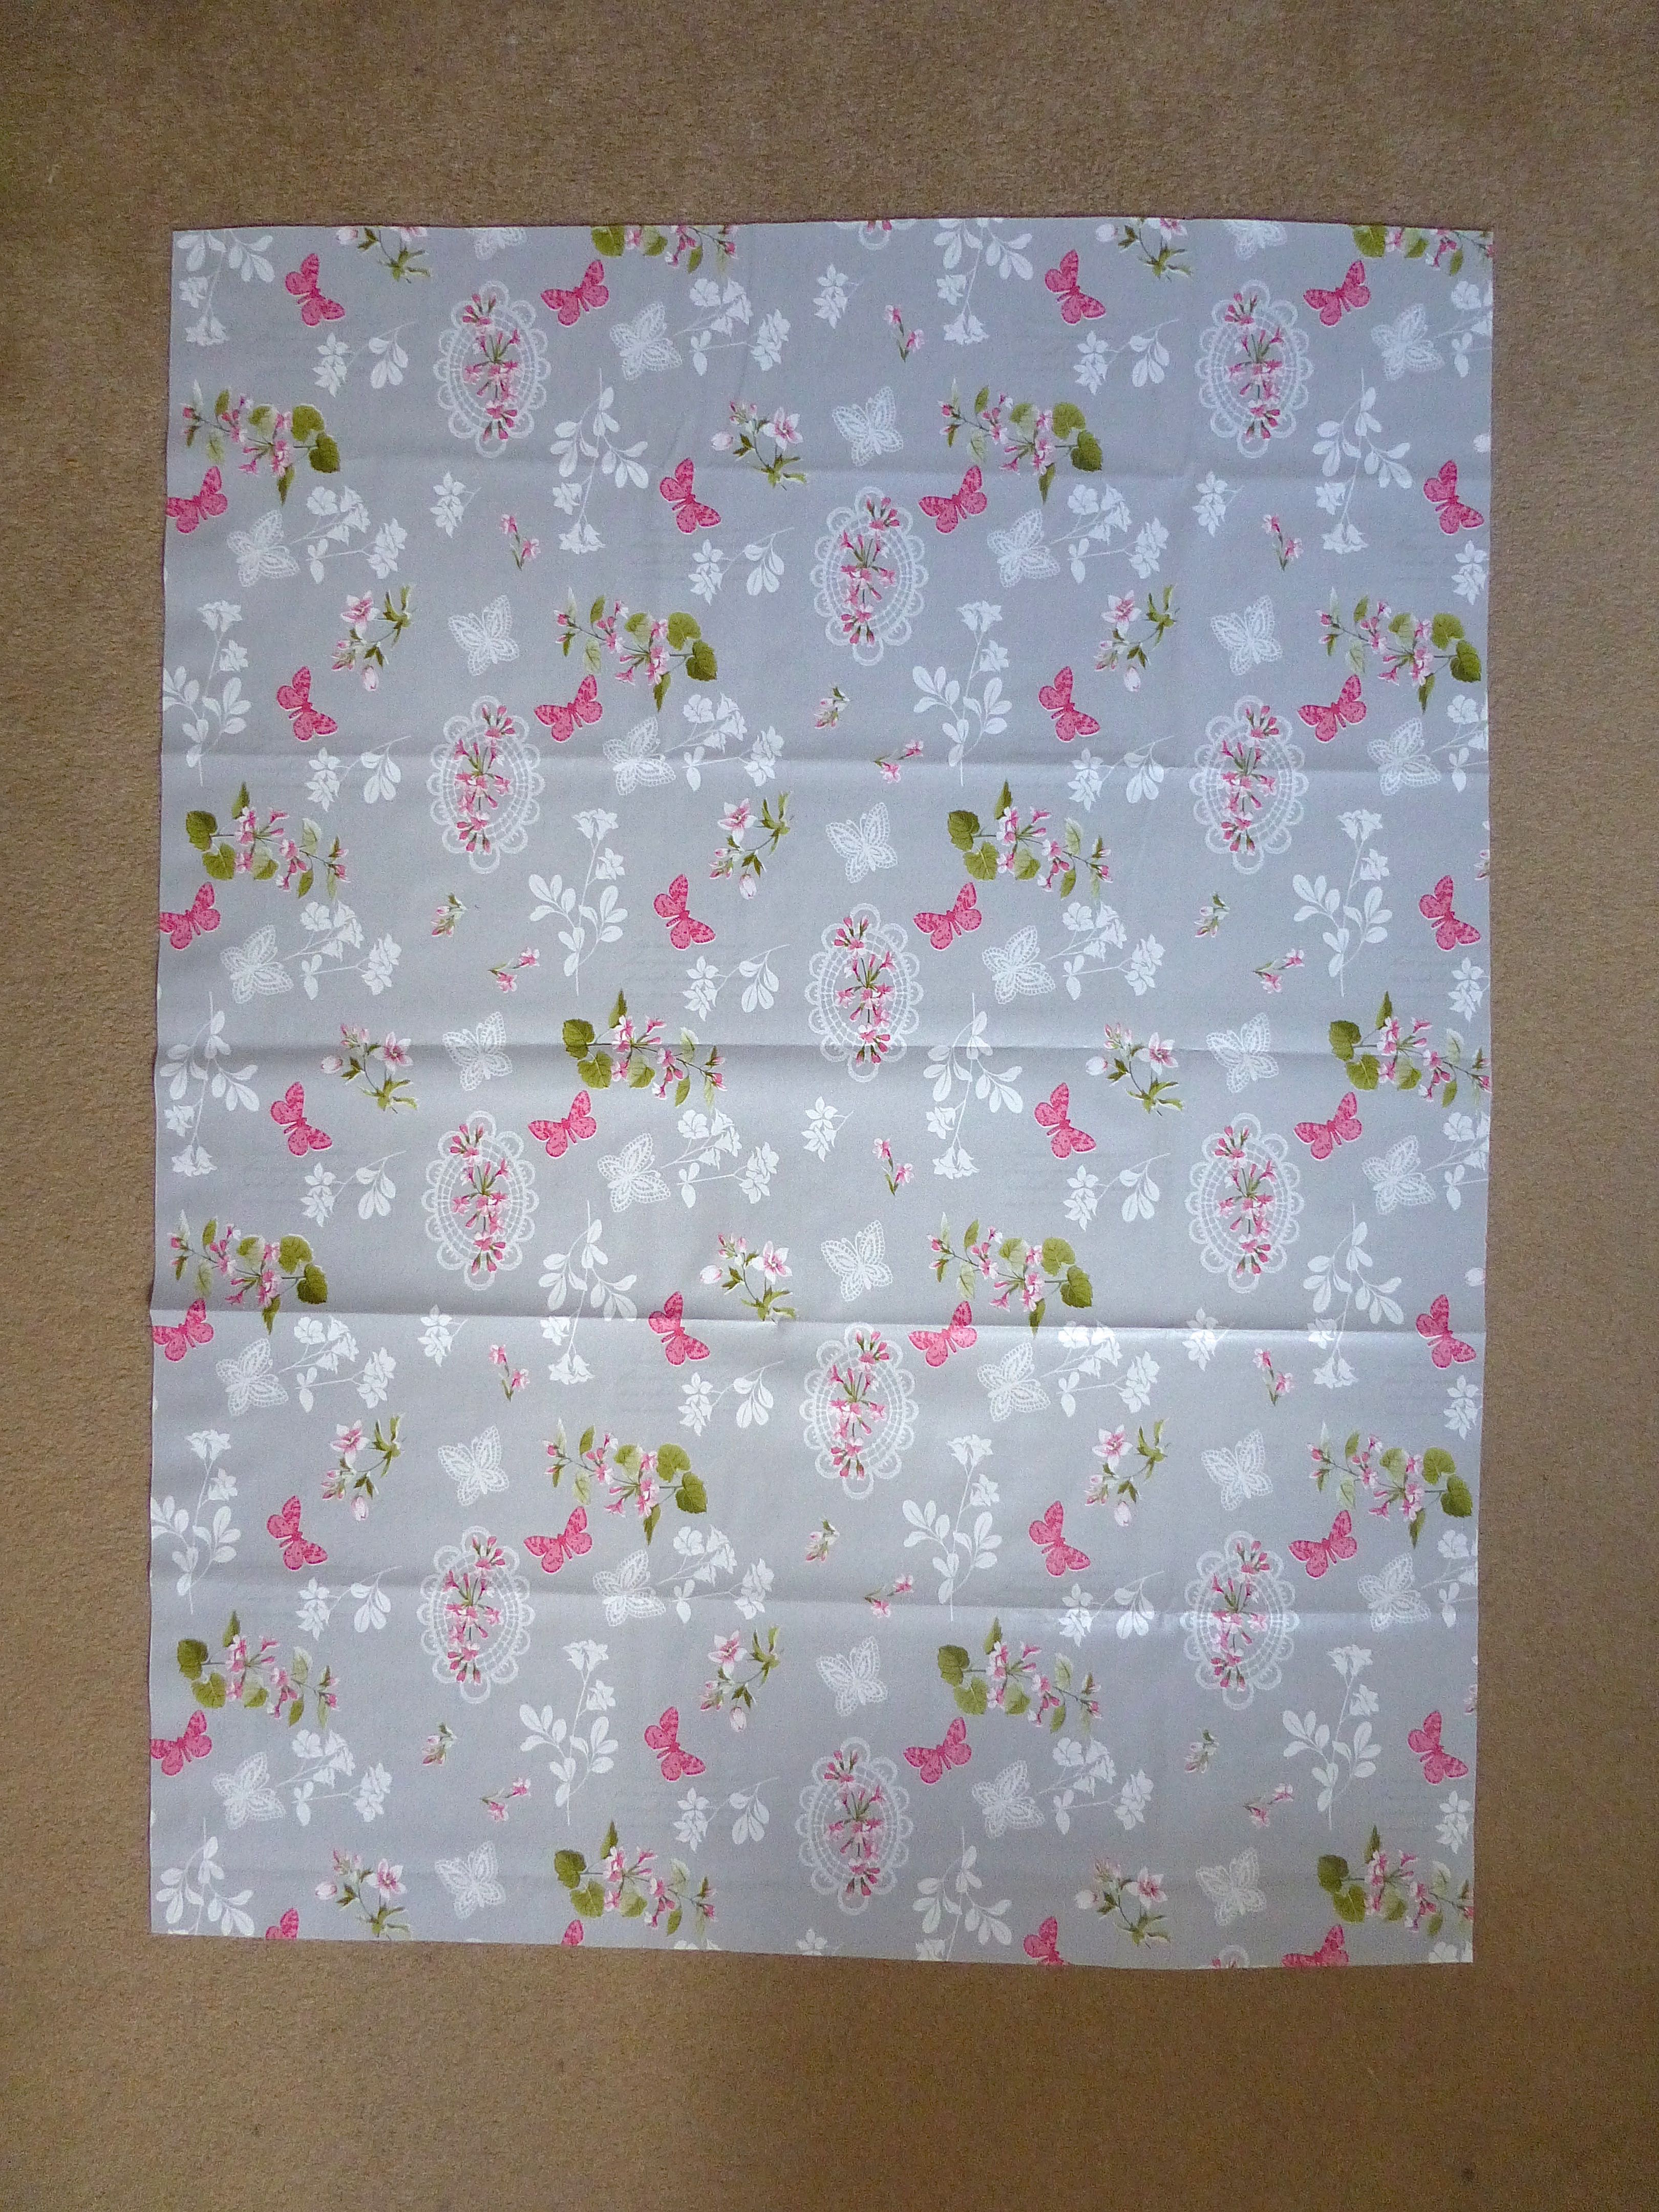
There’s a huge choice of suitable vinyl fabric out there, but I fell in love with this “Butterflies” print and ordered a couple of metres online which turned out to be more than enough.
I did come across a tutorial but it involved printing off a pattern on about twenty sheets of A4 paper, piecing it all together, sellotaping and then cutting out, all of which would take longer than actually making the entire bag!
There had to be a better way so, after hours and hours of head-scratching, making sample after sample and at least a dozen pattern refinements (not really!), here is my somewhat simpler pattern: –
Cut one piece of vinyl fabric 90cm x 120cm.
That’s it.
Now, vinyl is notoriously difficult to iron because, basically, it just melts and welds itself to your iron. So you can either buy it from a shop and ask them to roll it for you or put up with the creases which will eventually disappear. A hairdryer is said to speed up this process.
I didn’t bother:)
The only other supplies you’ll need are 2 1/2m of 2.5cm polyester webbing and some matching thread.
Stitching vinyl needs a little bit of forethought as it can be tricky. Sewing right sides together is no problem but when top stitching you may need to change to a Teflon coated foot or improvise with masking tape on the bottom of your normal foot. Putting a layer of tissue paper between the machine bed and the vinyl works for the bottom layer, with the added bonus of ripping away easily afterwards.
Use clips instead of pins to avoid any tell-tale holes in the vinyl.
A longer stitch length is used too, as a short stitch can weaken the vinyl and it could rip between the stitches.
Start by folding your fabric with right sides together aligning the two short edges and sew a 1cm seam along each side, leaving open along the edge opposite the fold.
Bring the seam to the centre and lay flat to form a corner as below. Mark 18cm from the corner along the seam and draw a line all the way across at right angles to the seam as shown.
Sew along this line.
Trim the excess fabric leaving a 1cm allowance.
Repeat with the opposite corner, then turn the bag right sides out.
Turn down a 2.5cm hem and stitch close to the raw edge.
Cut some webbing: –
2 x 35cm
2 x 74cm
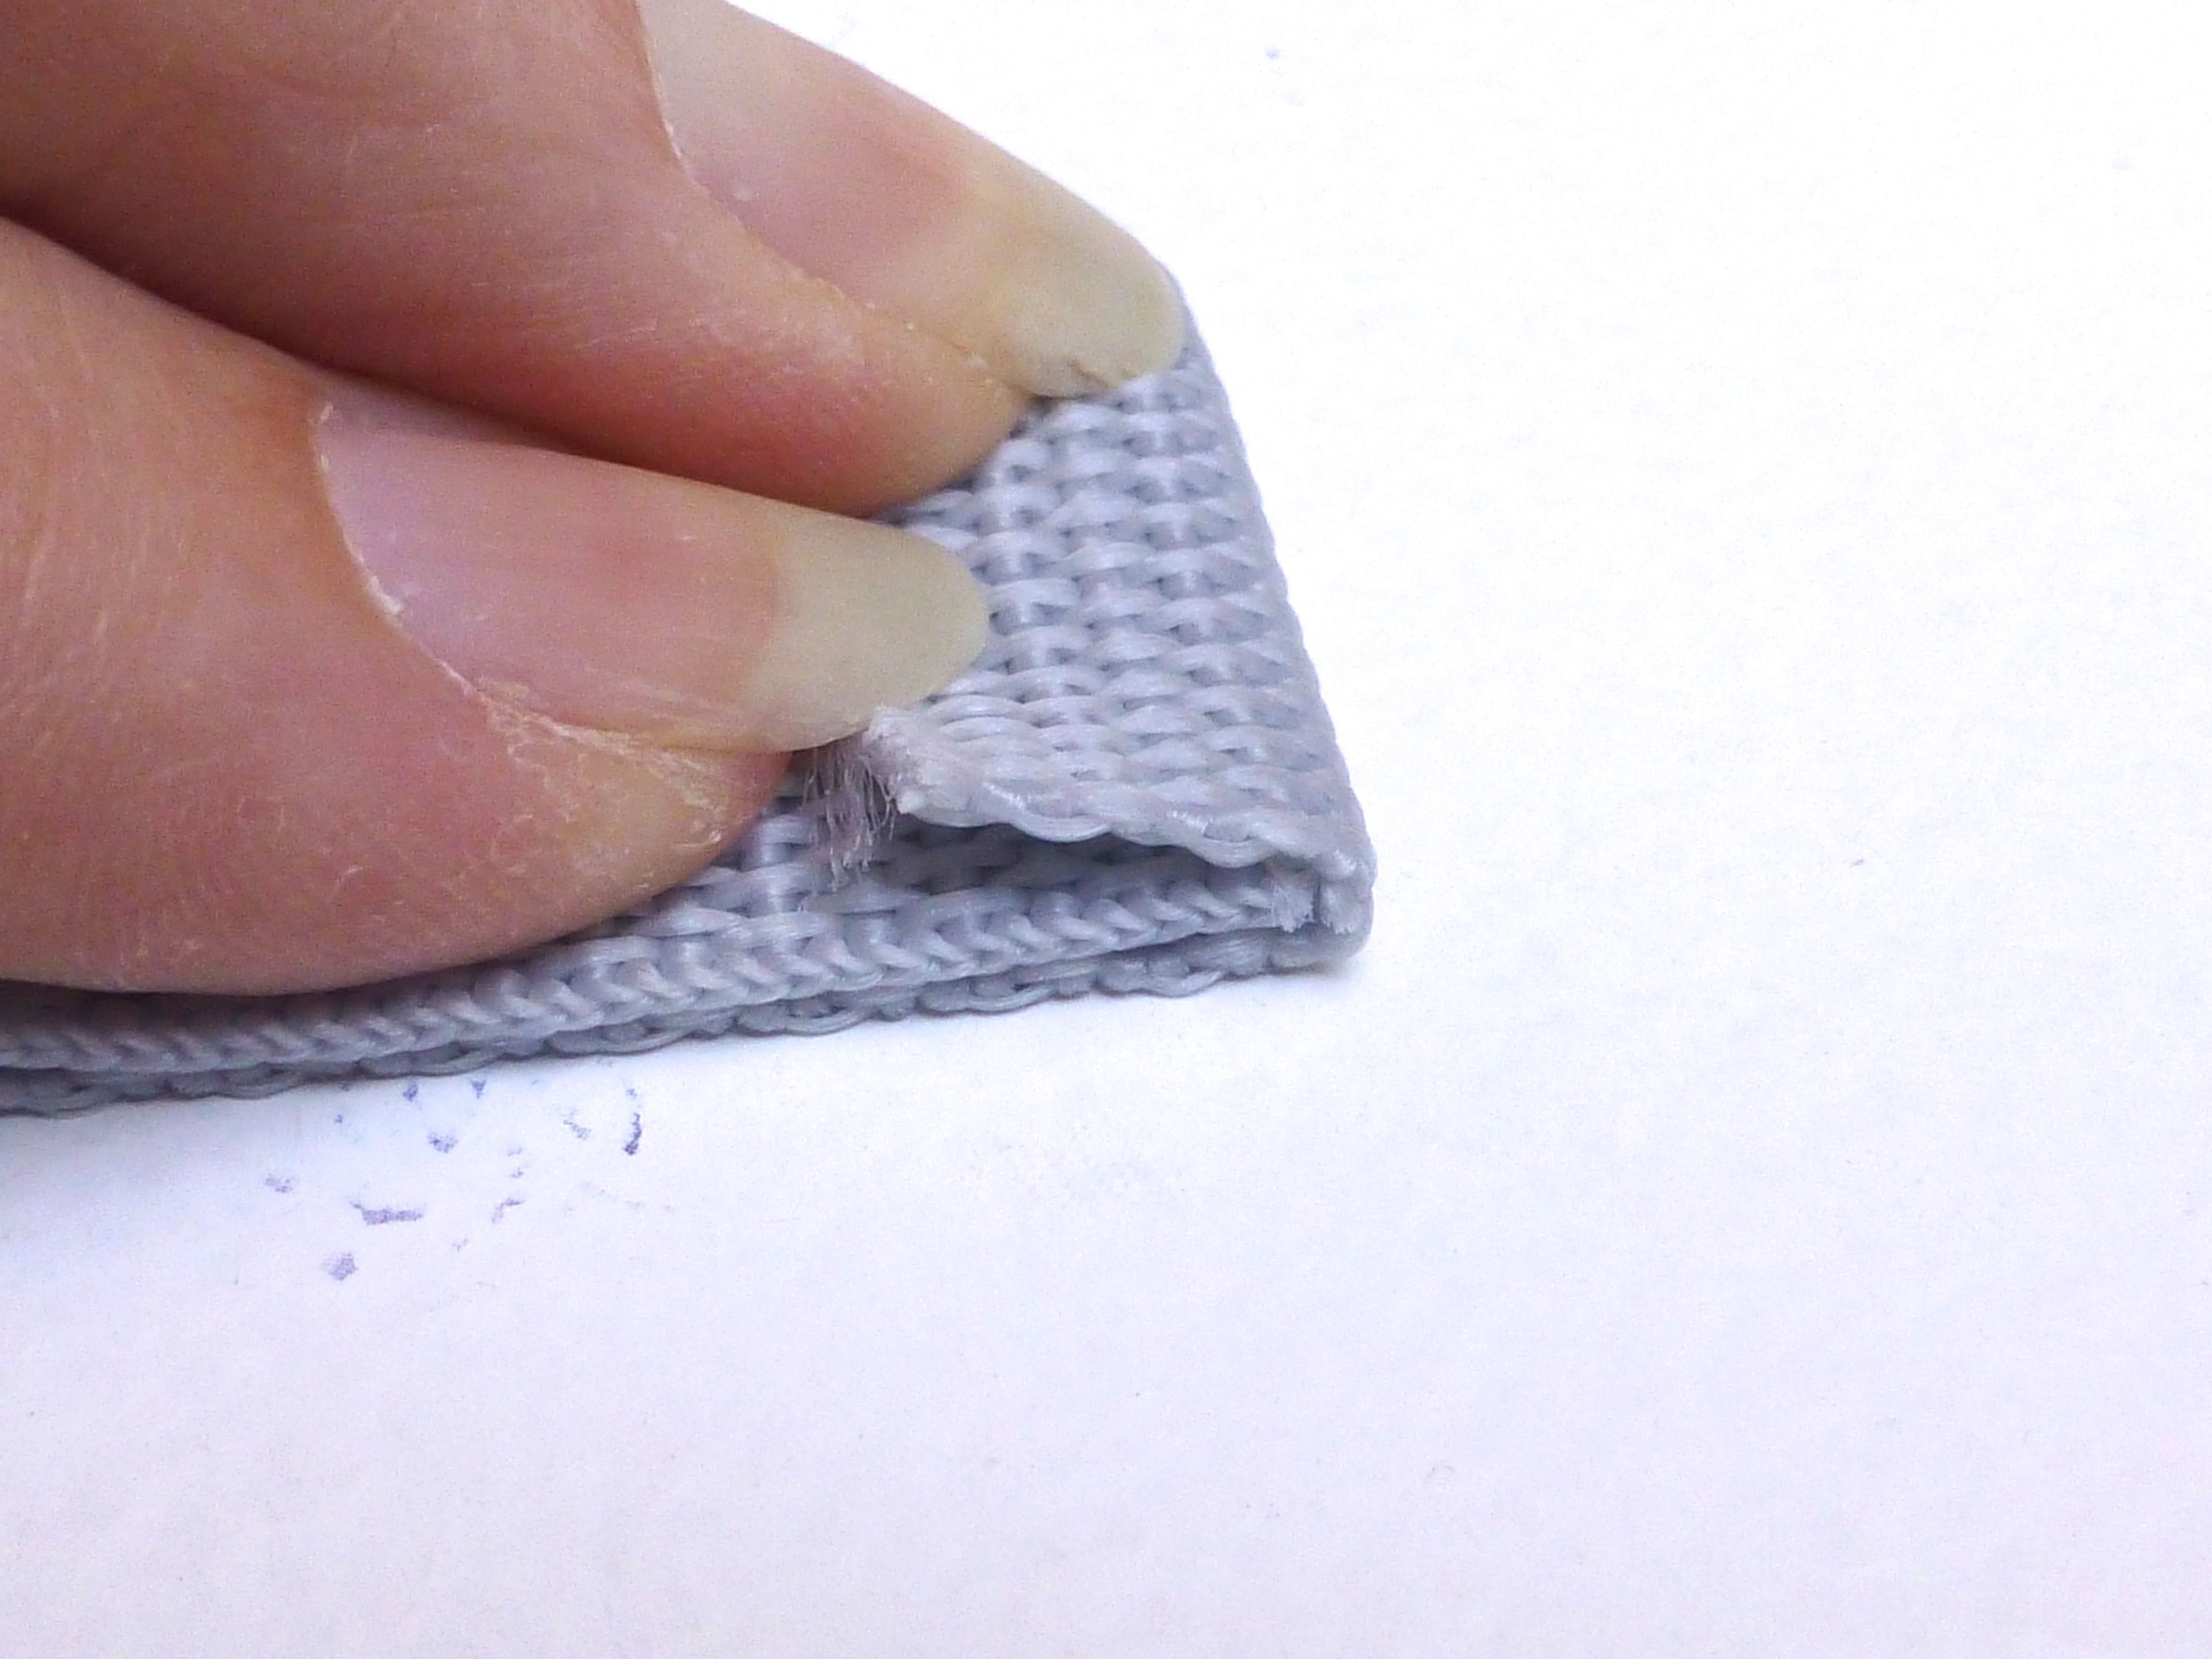
Lay a short length of webbing on top of a longer length about 1cm from the end as shown.
Fold the overhang back over as shown below and tack together through all layers.
Repeat with the other ends of the webbing, being careful not to twist it in the process.
Make the other set of handles in the same way.
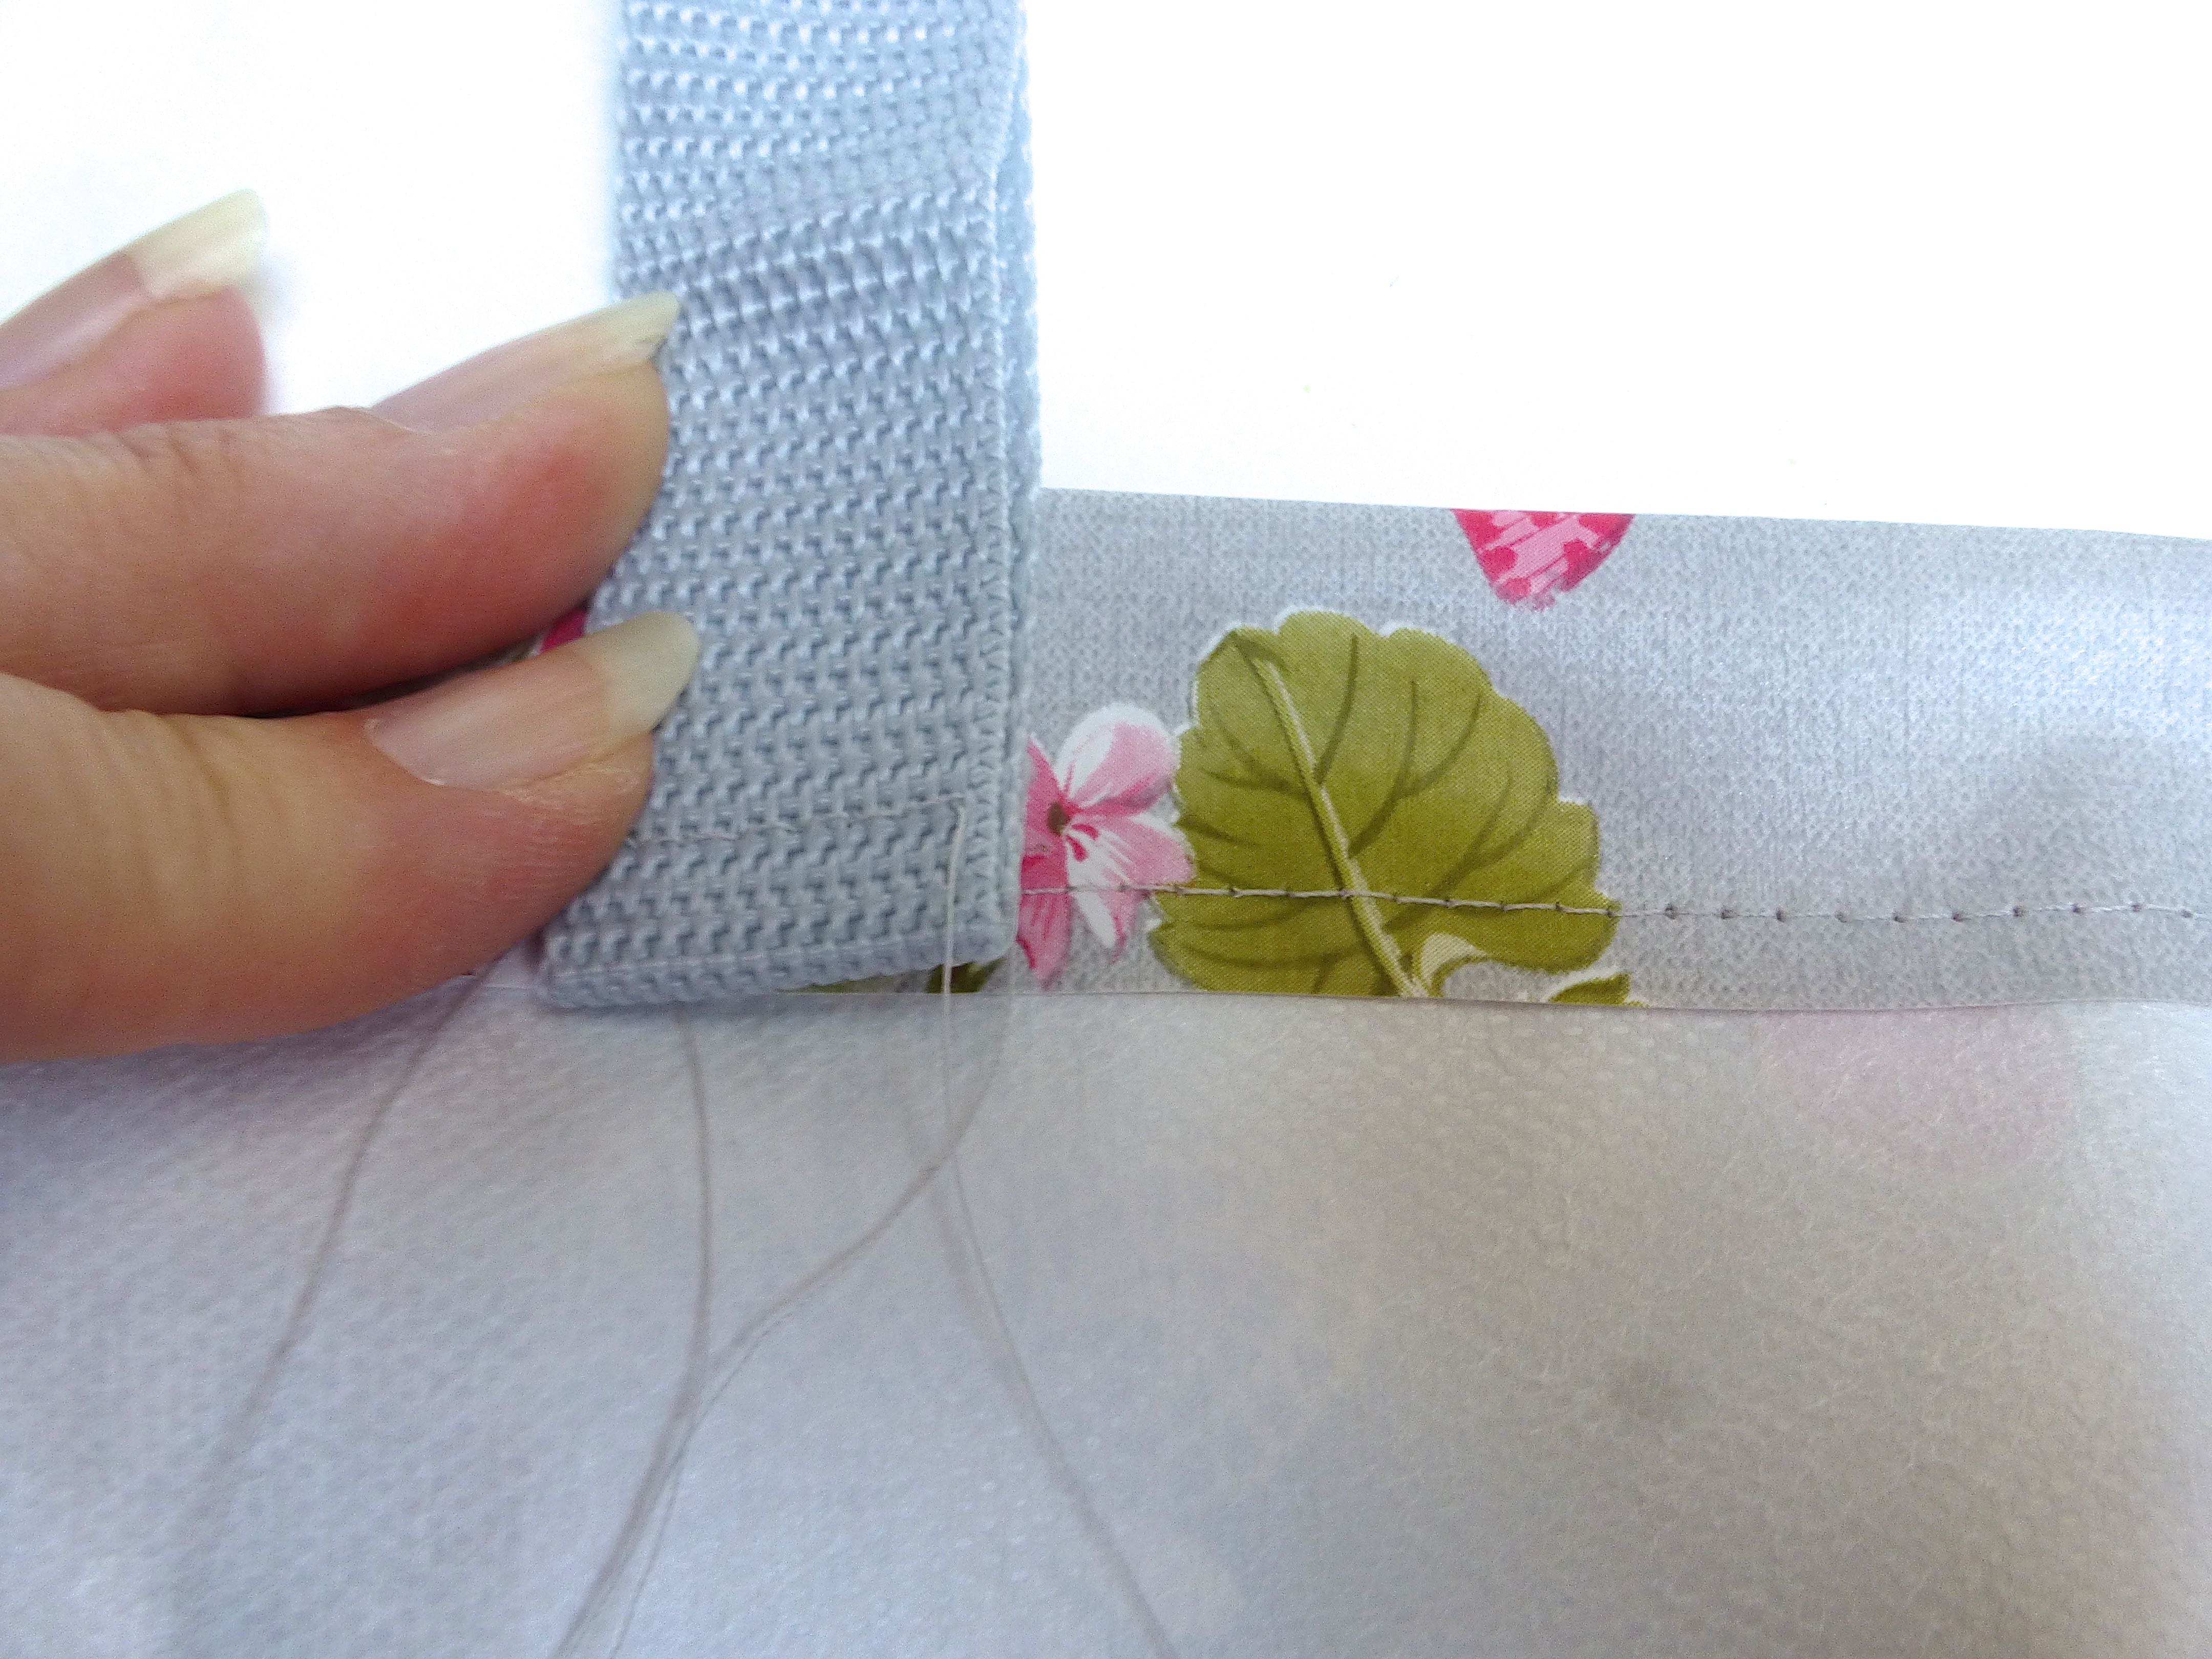
With the raw edges of the handles facing the wrong side of the bag, stitch in place 32cm in from each side seam.
To ensure that there is plenty of strength at the point where the handles join the bag, I stitched a cross within a square as shown in the photo below.
Attach the other pair of handles in the same manner.
Finish with a second row of top stitching around the entire top edge about 4mm in from the first row.
Fill with laundry and go peg your clothes on the line!
Well, the girls seem to approve of the stranger in the garden!
Anyone tempted to have a go at making an Ikea style laundry bag?
I made a rare trip to Lidl the other day, just browsing and looking for nothing in particular.
I’m not a fan of Lidl because they only stock basics and I can never get everything on my list. I loathe the weekly Food Shop and am d*****d if I’m going to go to another shop as well to buy the rest. Once, I had a list of thirteen items and could only buy two of them in Lidl!!
Notwithstanding the above, they have a really good selection of non-food items, especially around Christmas and I’ve snapped up some great things in the past.
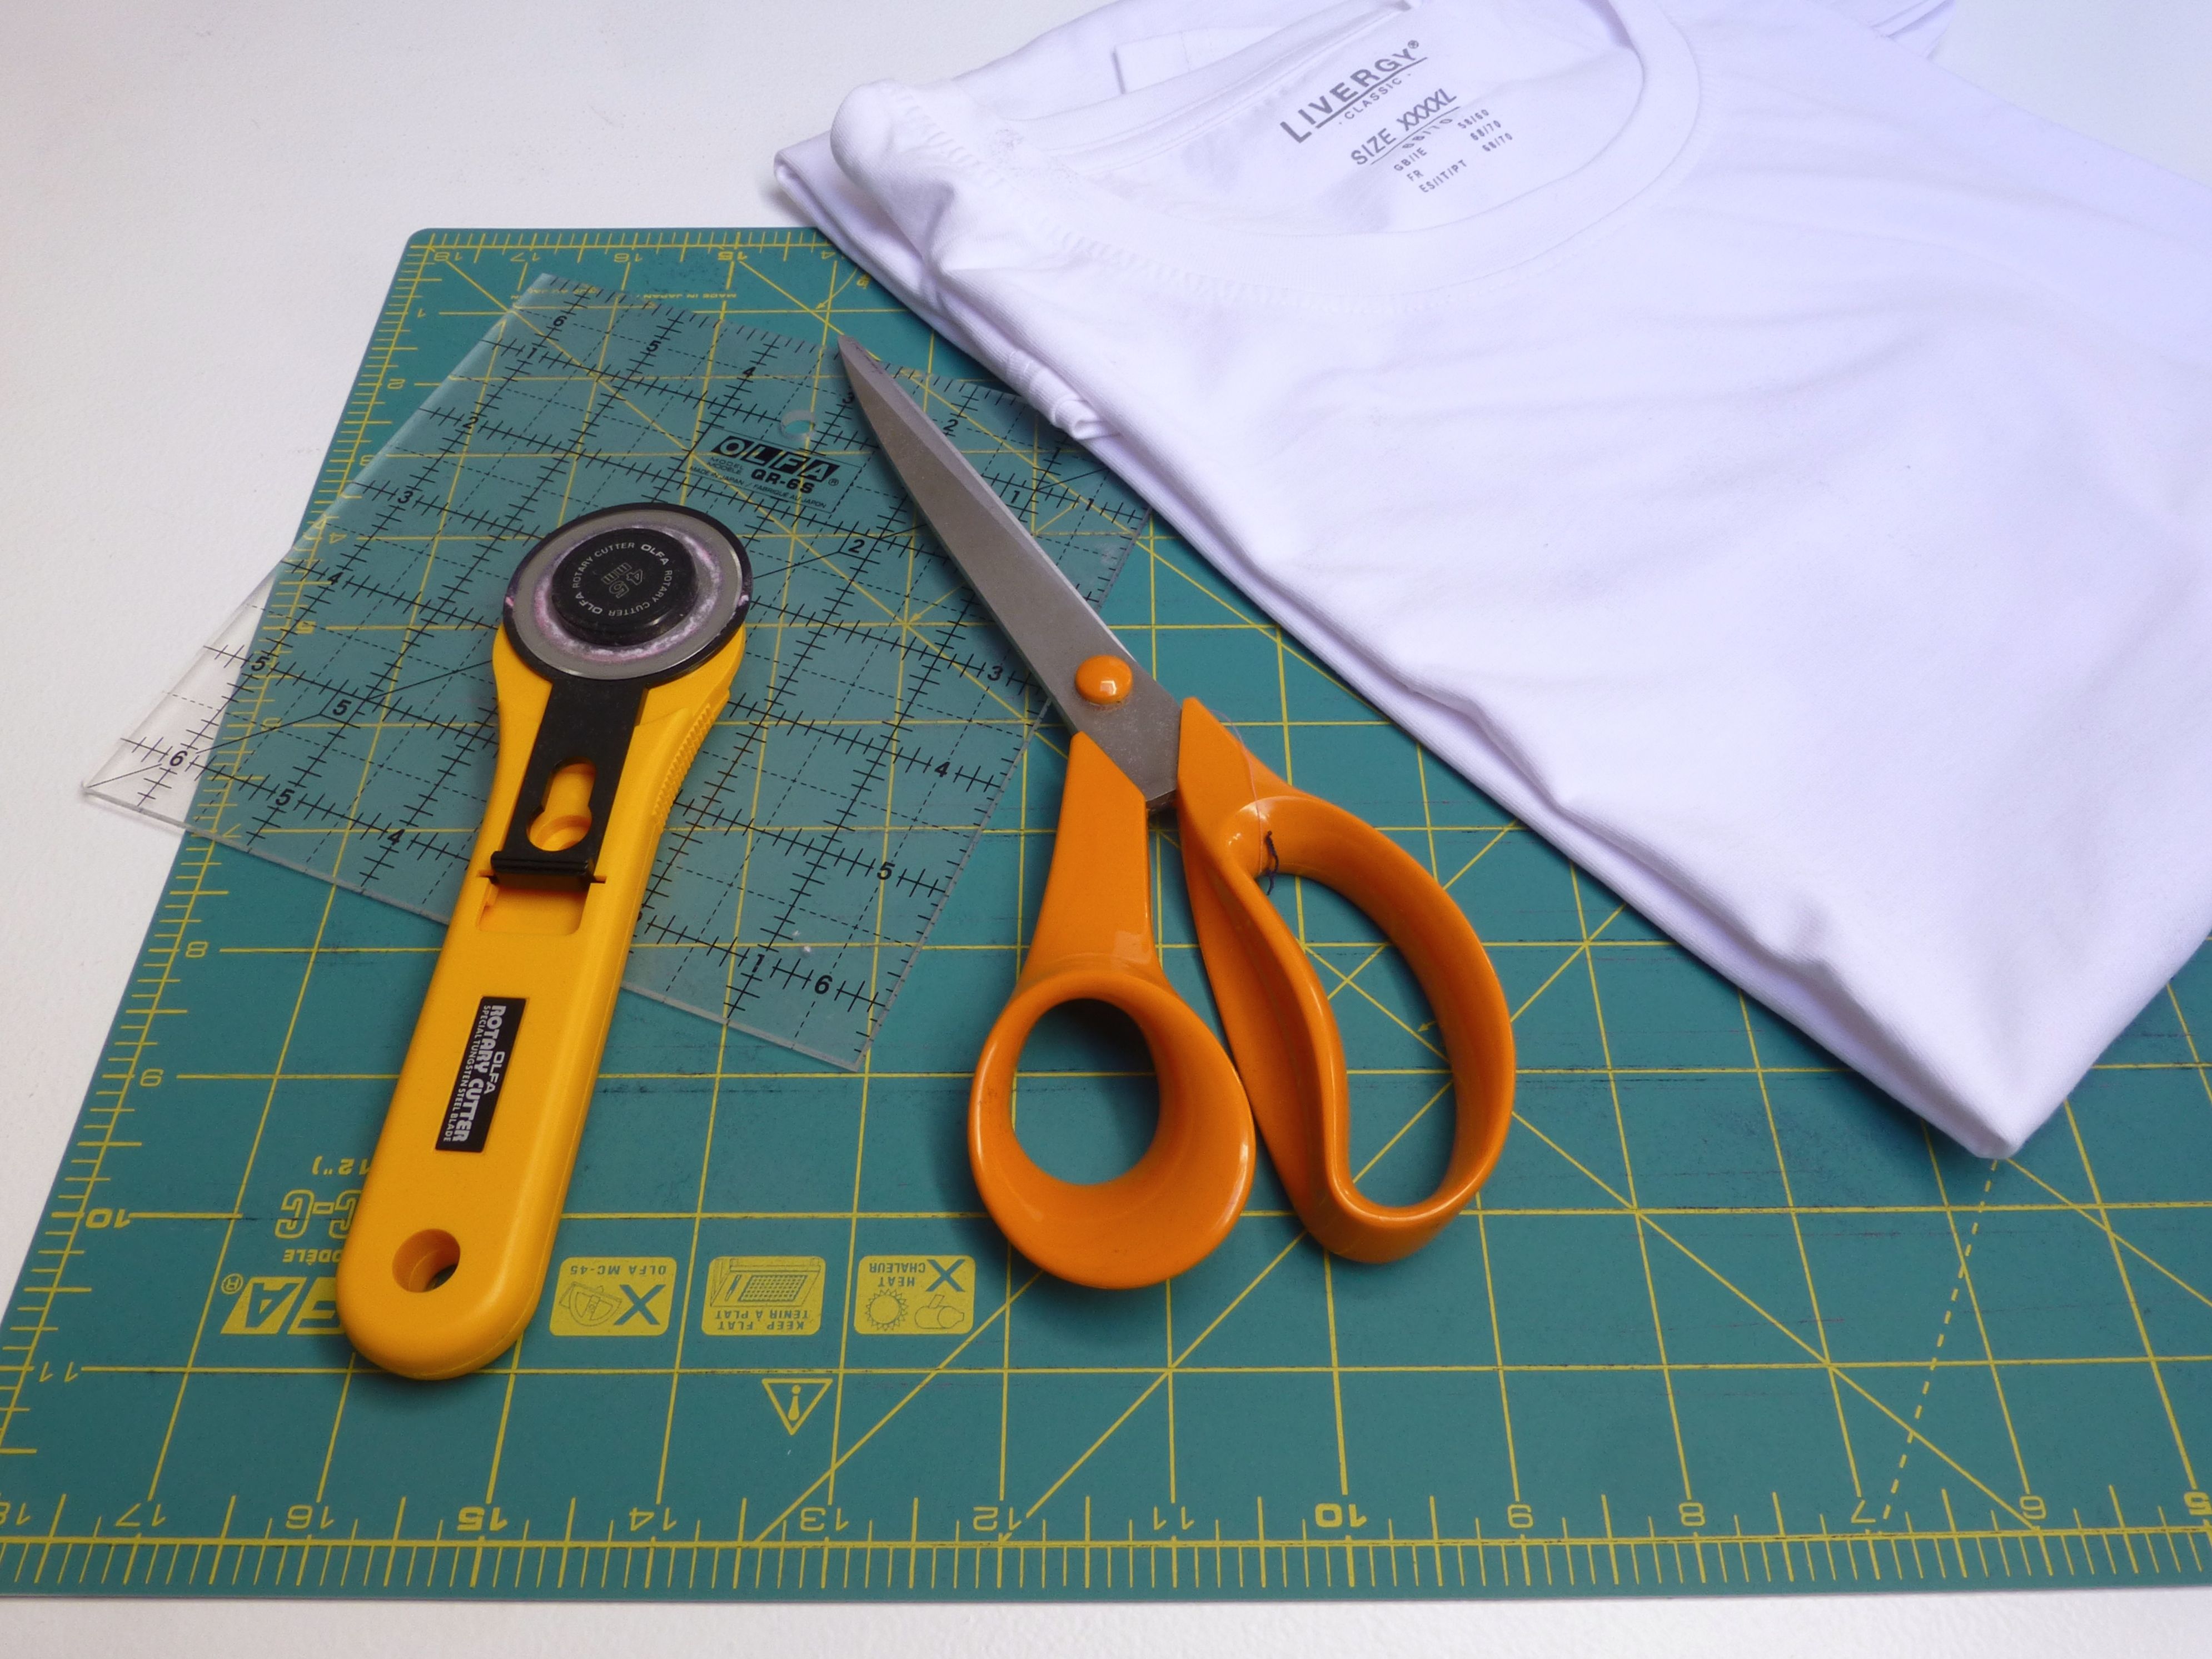
Anyway, on this occasion, I spotted some T-shirts on offer. A two-pack was reduced from £5.99 to £2.99 and, in true Lidl fashion, they were only stocking men’s size 4XXXL to fit 68-70″ chest so there was a huge pile of them left unsold!
I’ve fancied making my own T-shirt yarn for a while now but decided wisely that Hubby would be a bit peeved if he came home to find that I’d ‘recycled’ them without his knowledge, particularly as they are largely stain and hole free as yet. So these outsize bargains happened along at the right time and I snapped up a couple of packs.
For best results, you need to choose logo-free, 100% cotton T-shirts without side seams. Mine had side seams – you just have to be extra careful not to rip them because they will be weakened after they have been cut through.
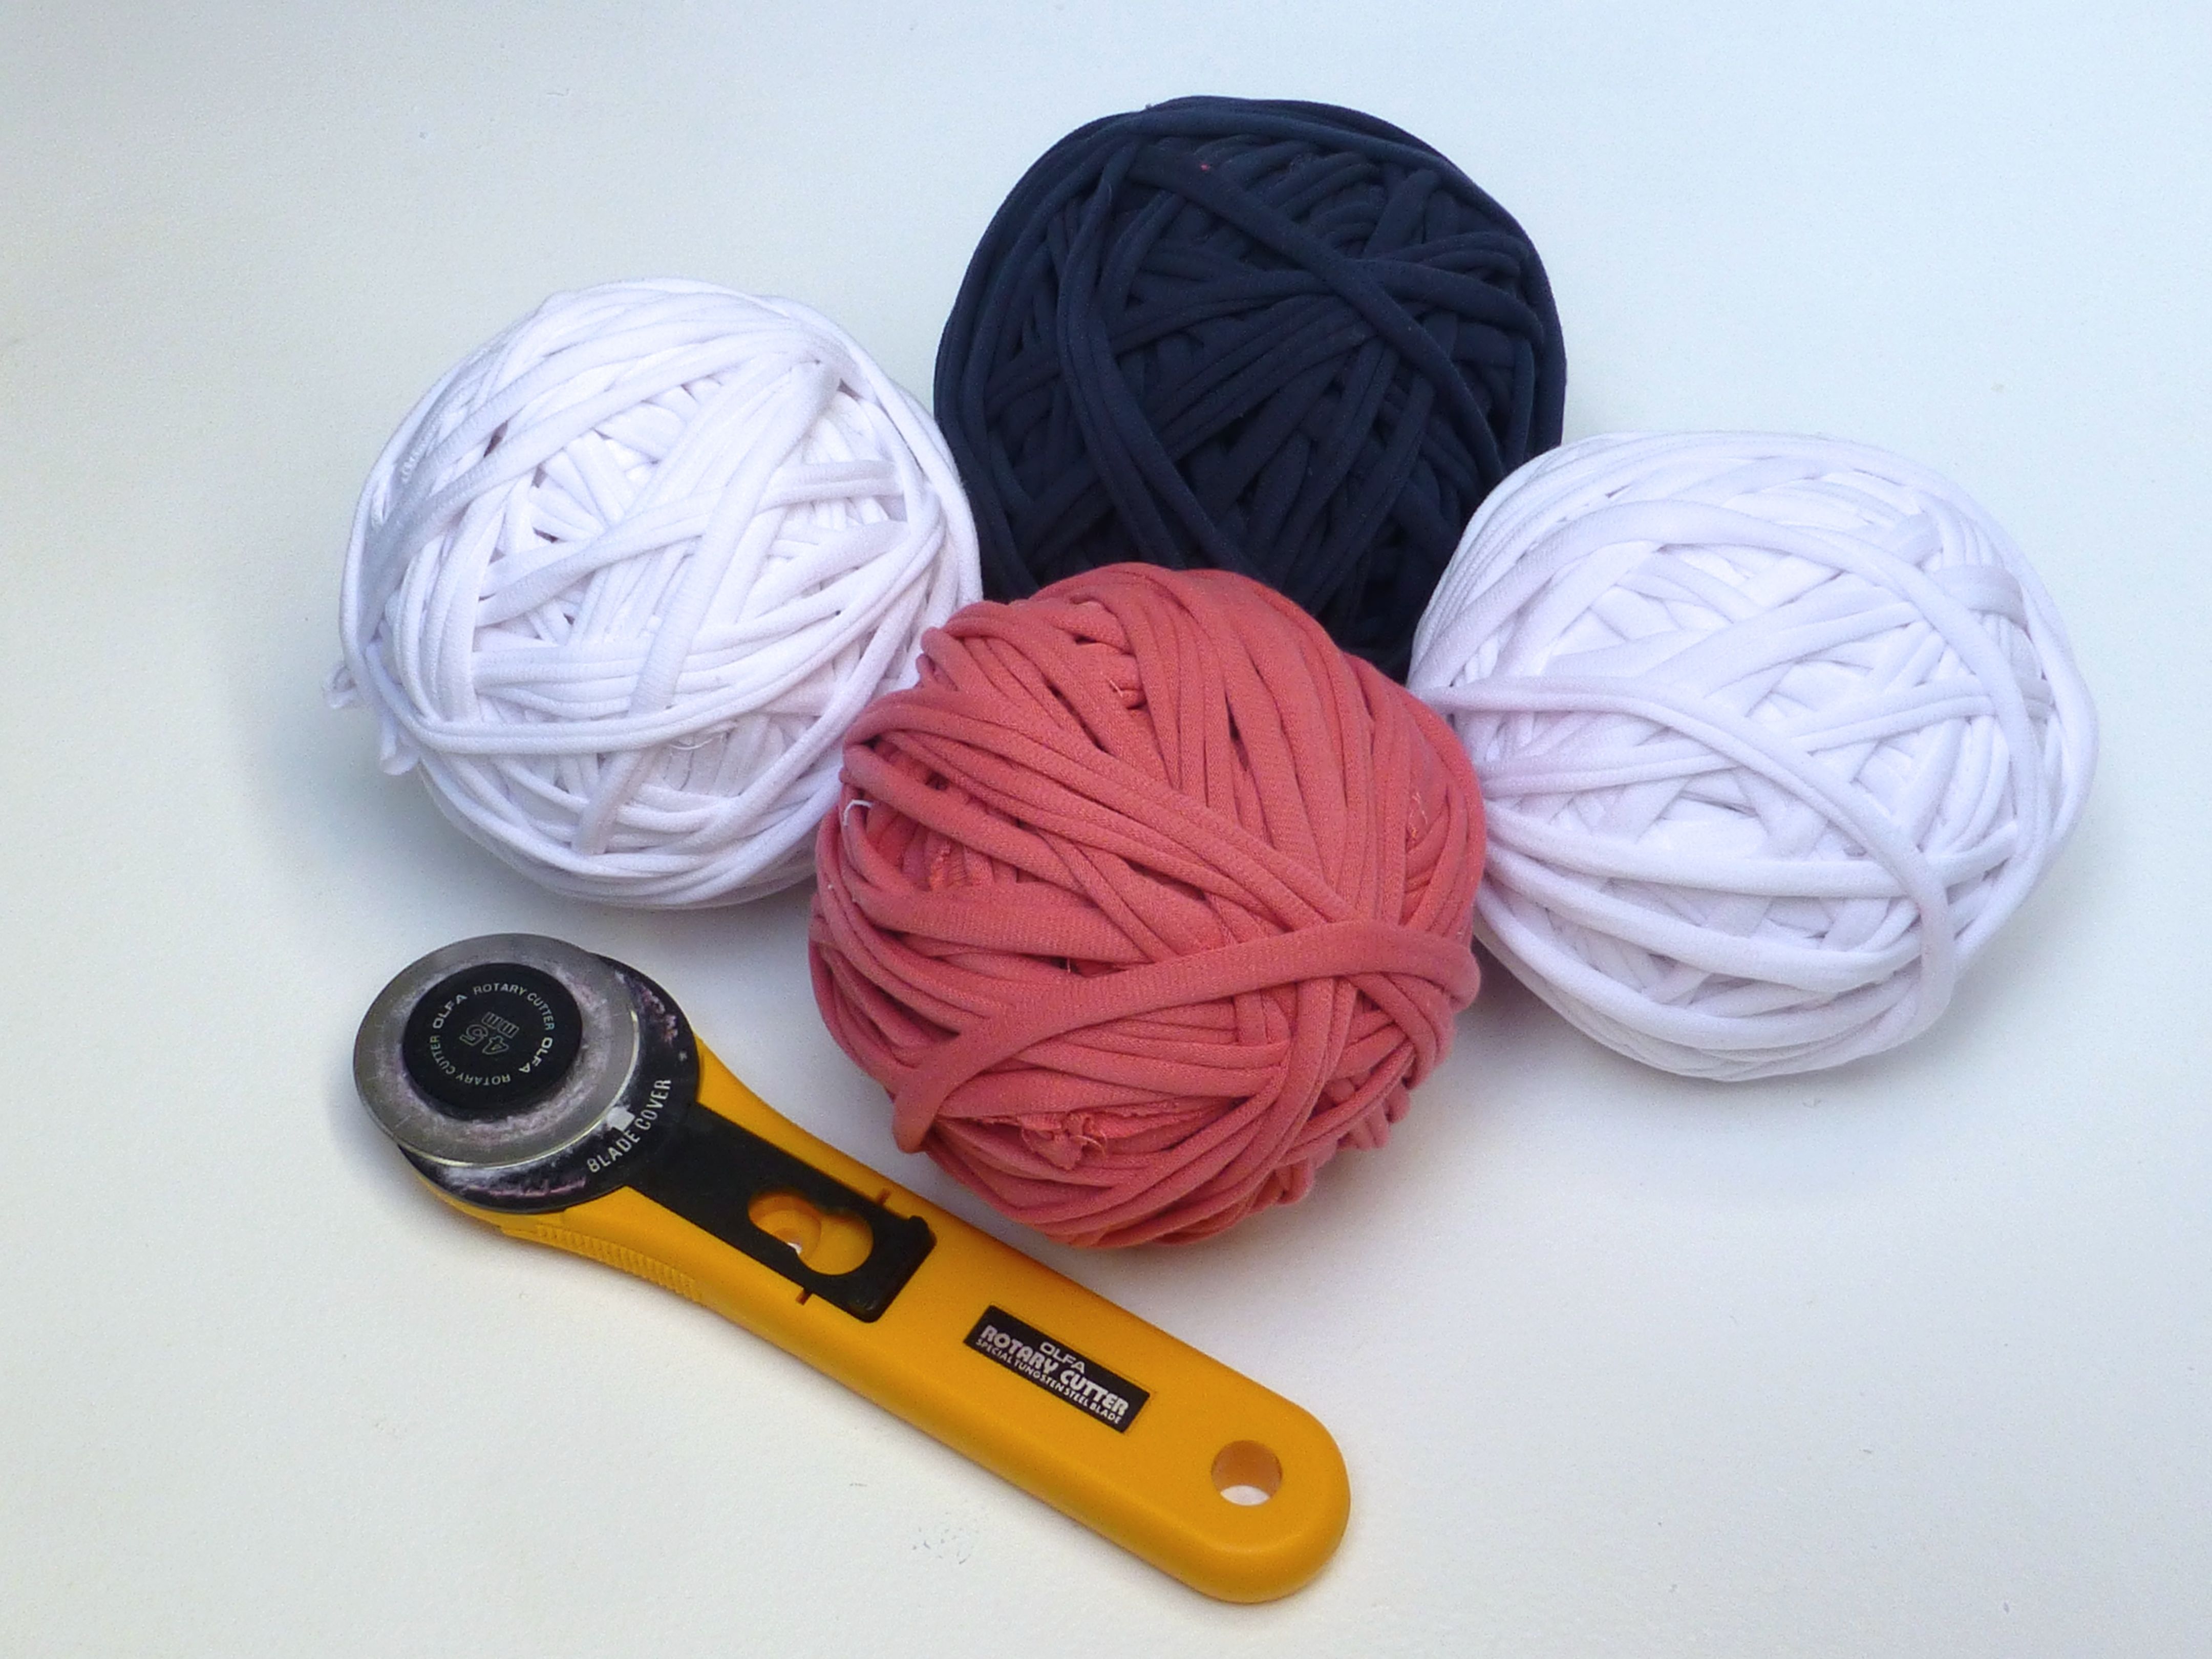
My new Olfa cutting mat and rotary cutter were about to have their inaugural outing – how have I lived my entire life without these?!
You can, of course, use scissors – it is just easier and quicker with a rotary cutter.
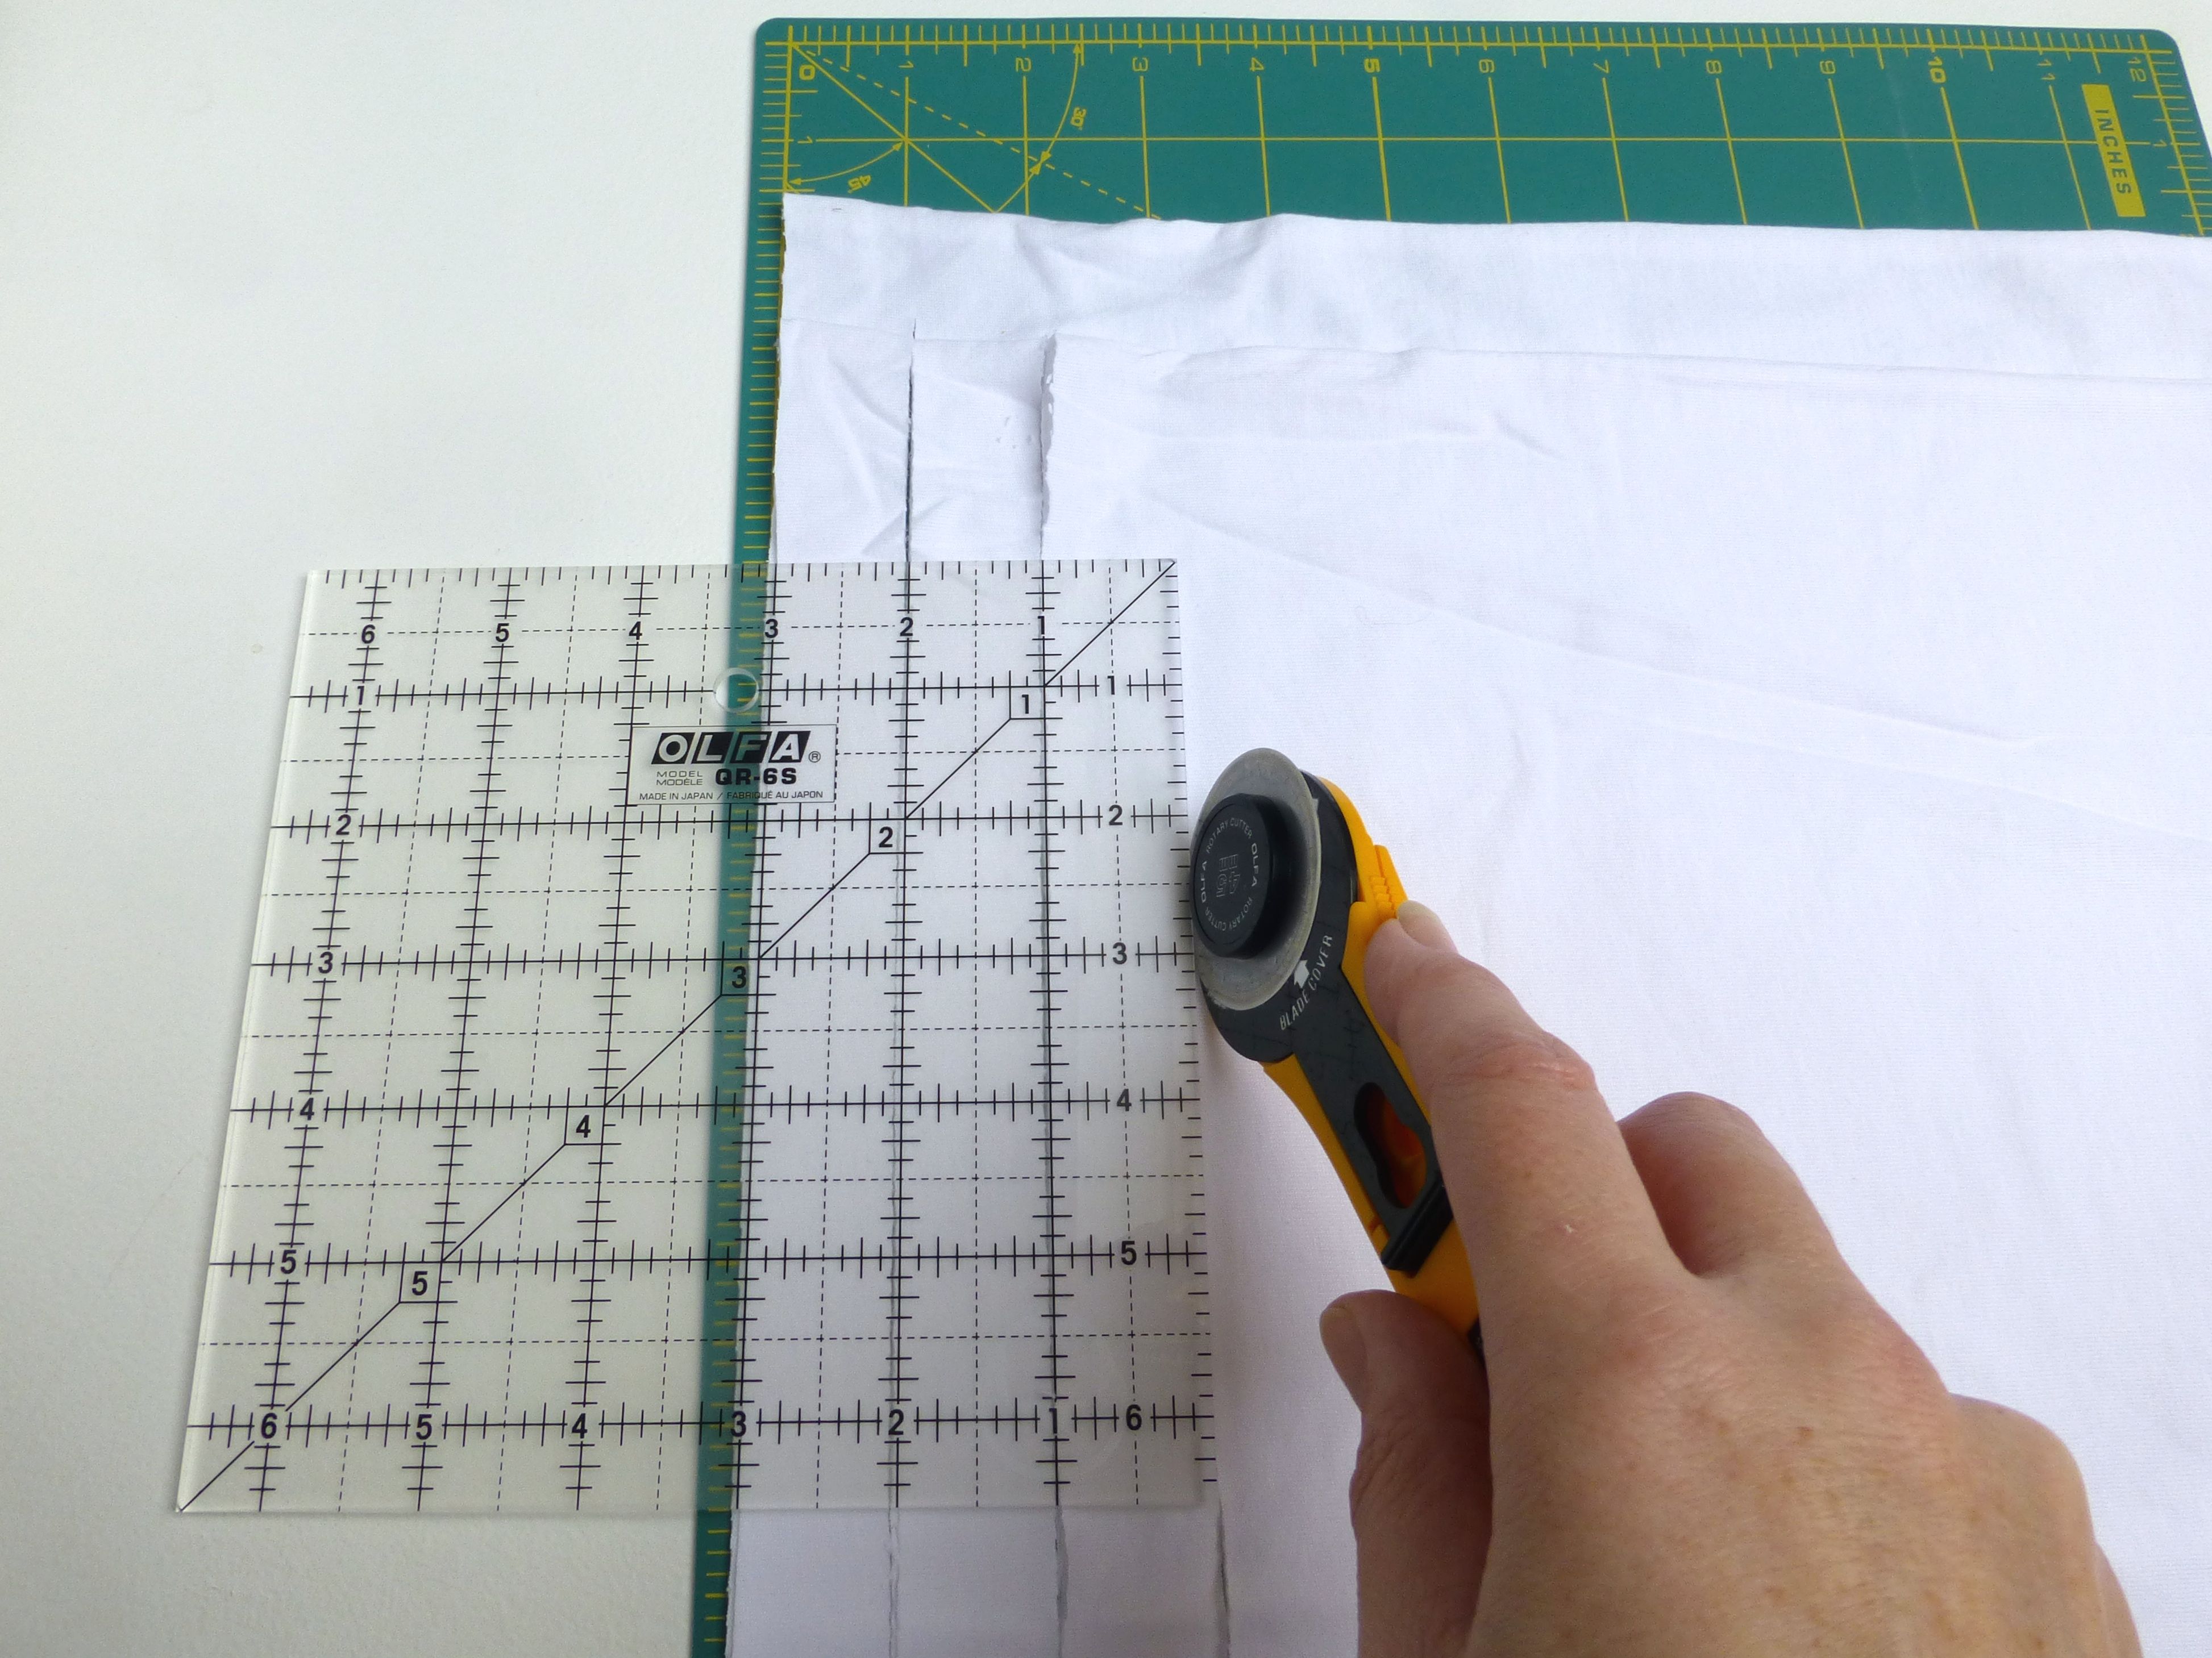
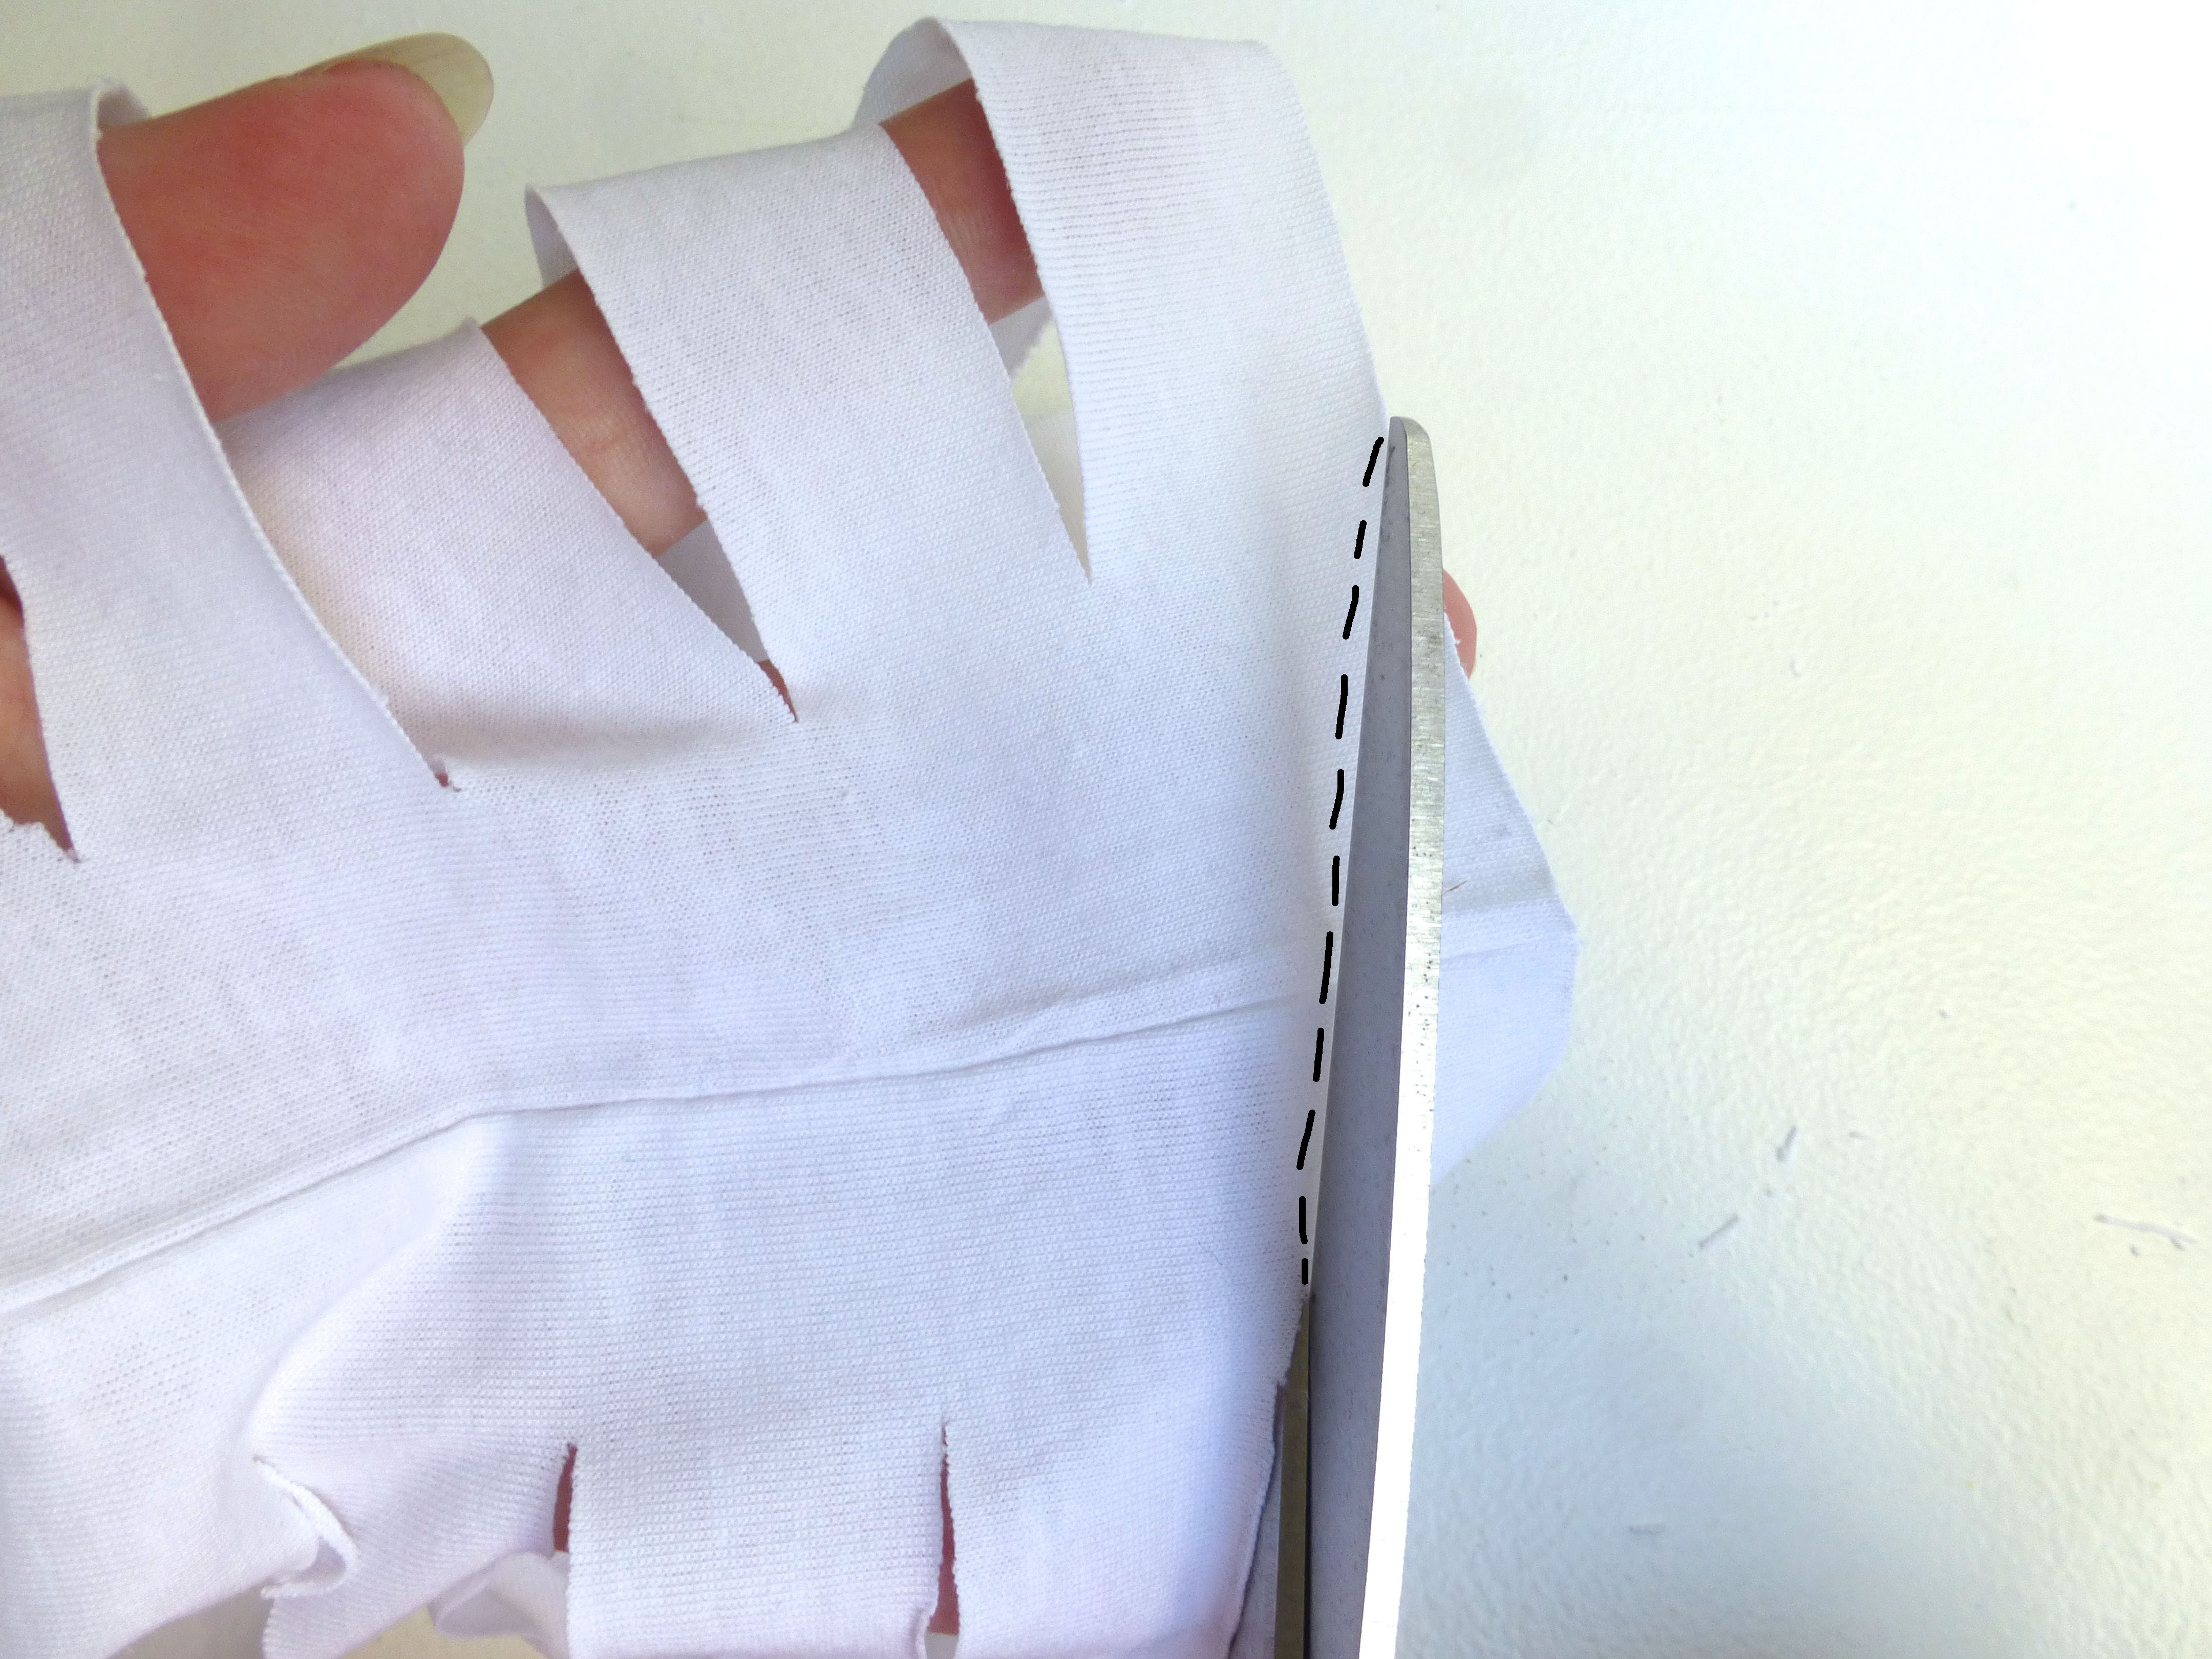
Start by cutting away the main body of the T-shirt below the armholes.
Fold together leaving about 1 1/2 inches between side seams (as shown below) and smooth out any creases.
Place the cut edge to the left of your cutting mat.
Using the quilting square as a guide, cut 1″ wide strips through all layers.
Finish cutting about an inch from the second side seam as shown below.
Keep going until you reach the end of the fabric.
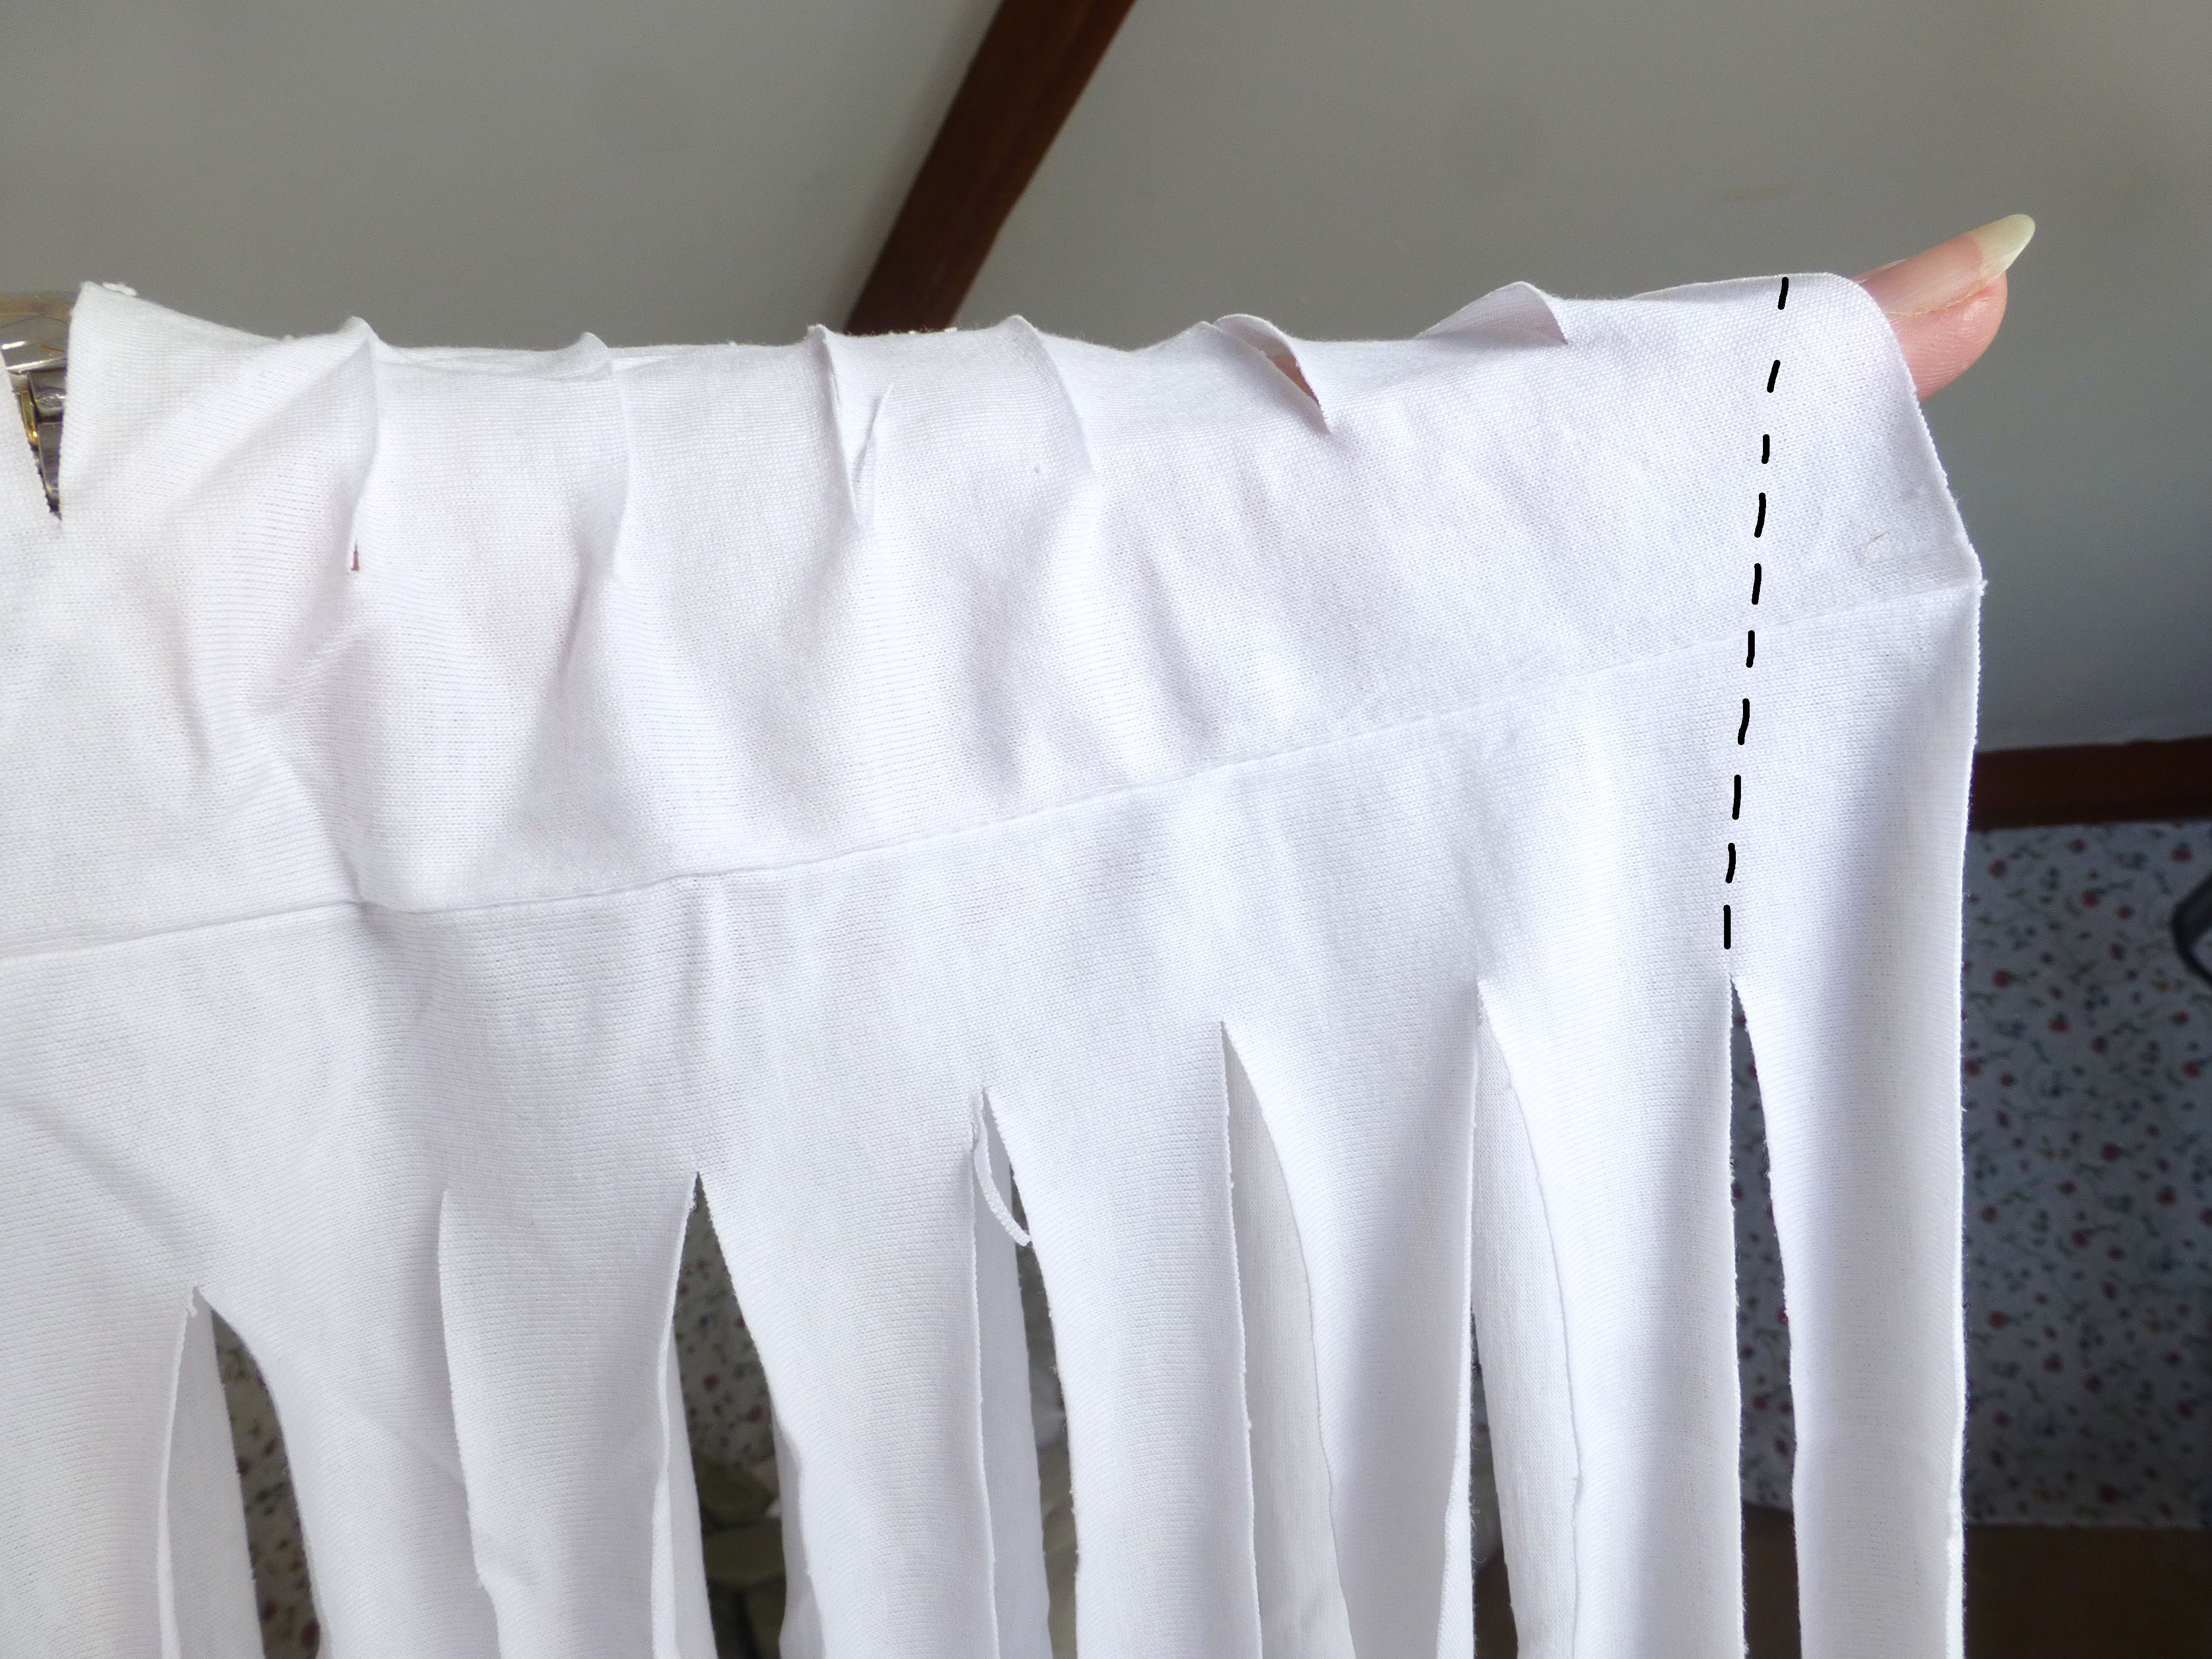
When you get to the end, trim the hem off completely.
Insert your hand into the T-shirt at the uncut side seam through all the loops.
Slide your hand right through to the other end and let the strips dangle.
Next comes the vital bit.
To create one continuous strip of yarn, you need to cut diagonally from your lower last slit, to the edge of the fabric as shown by the dotted line.
Keep cutting diagonally….
…until you have a nice pool of T-shirt strips on the table!
Now for the fun bit.
You need to stretch the strip between your fingers, holding a section and pulling it firmly until it curls, being very careful not to pull the weakened stitches apart at the seamlines.
Can you see the difference?
Your finished yarn will have increased in length by about 50%.
Roll your new yarn into a ball.
Repeat with the other T-shirts.
So now you have all this glorious new yarn, what to do with it?
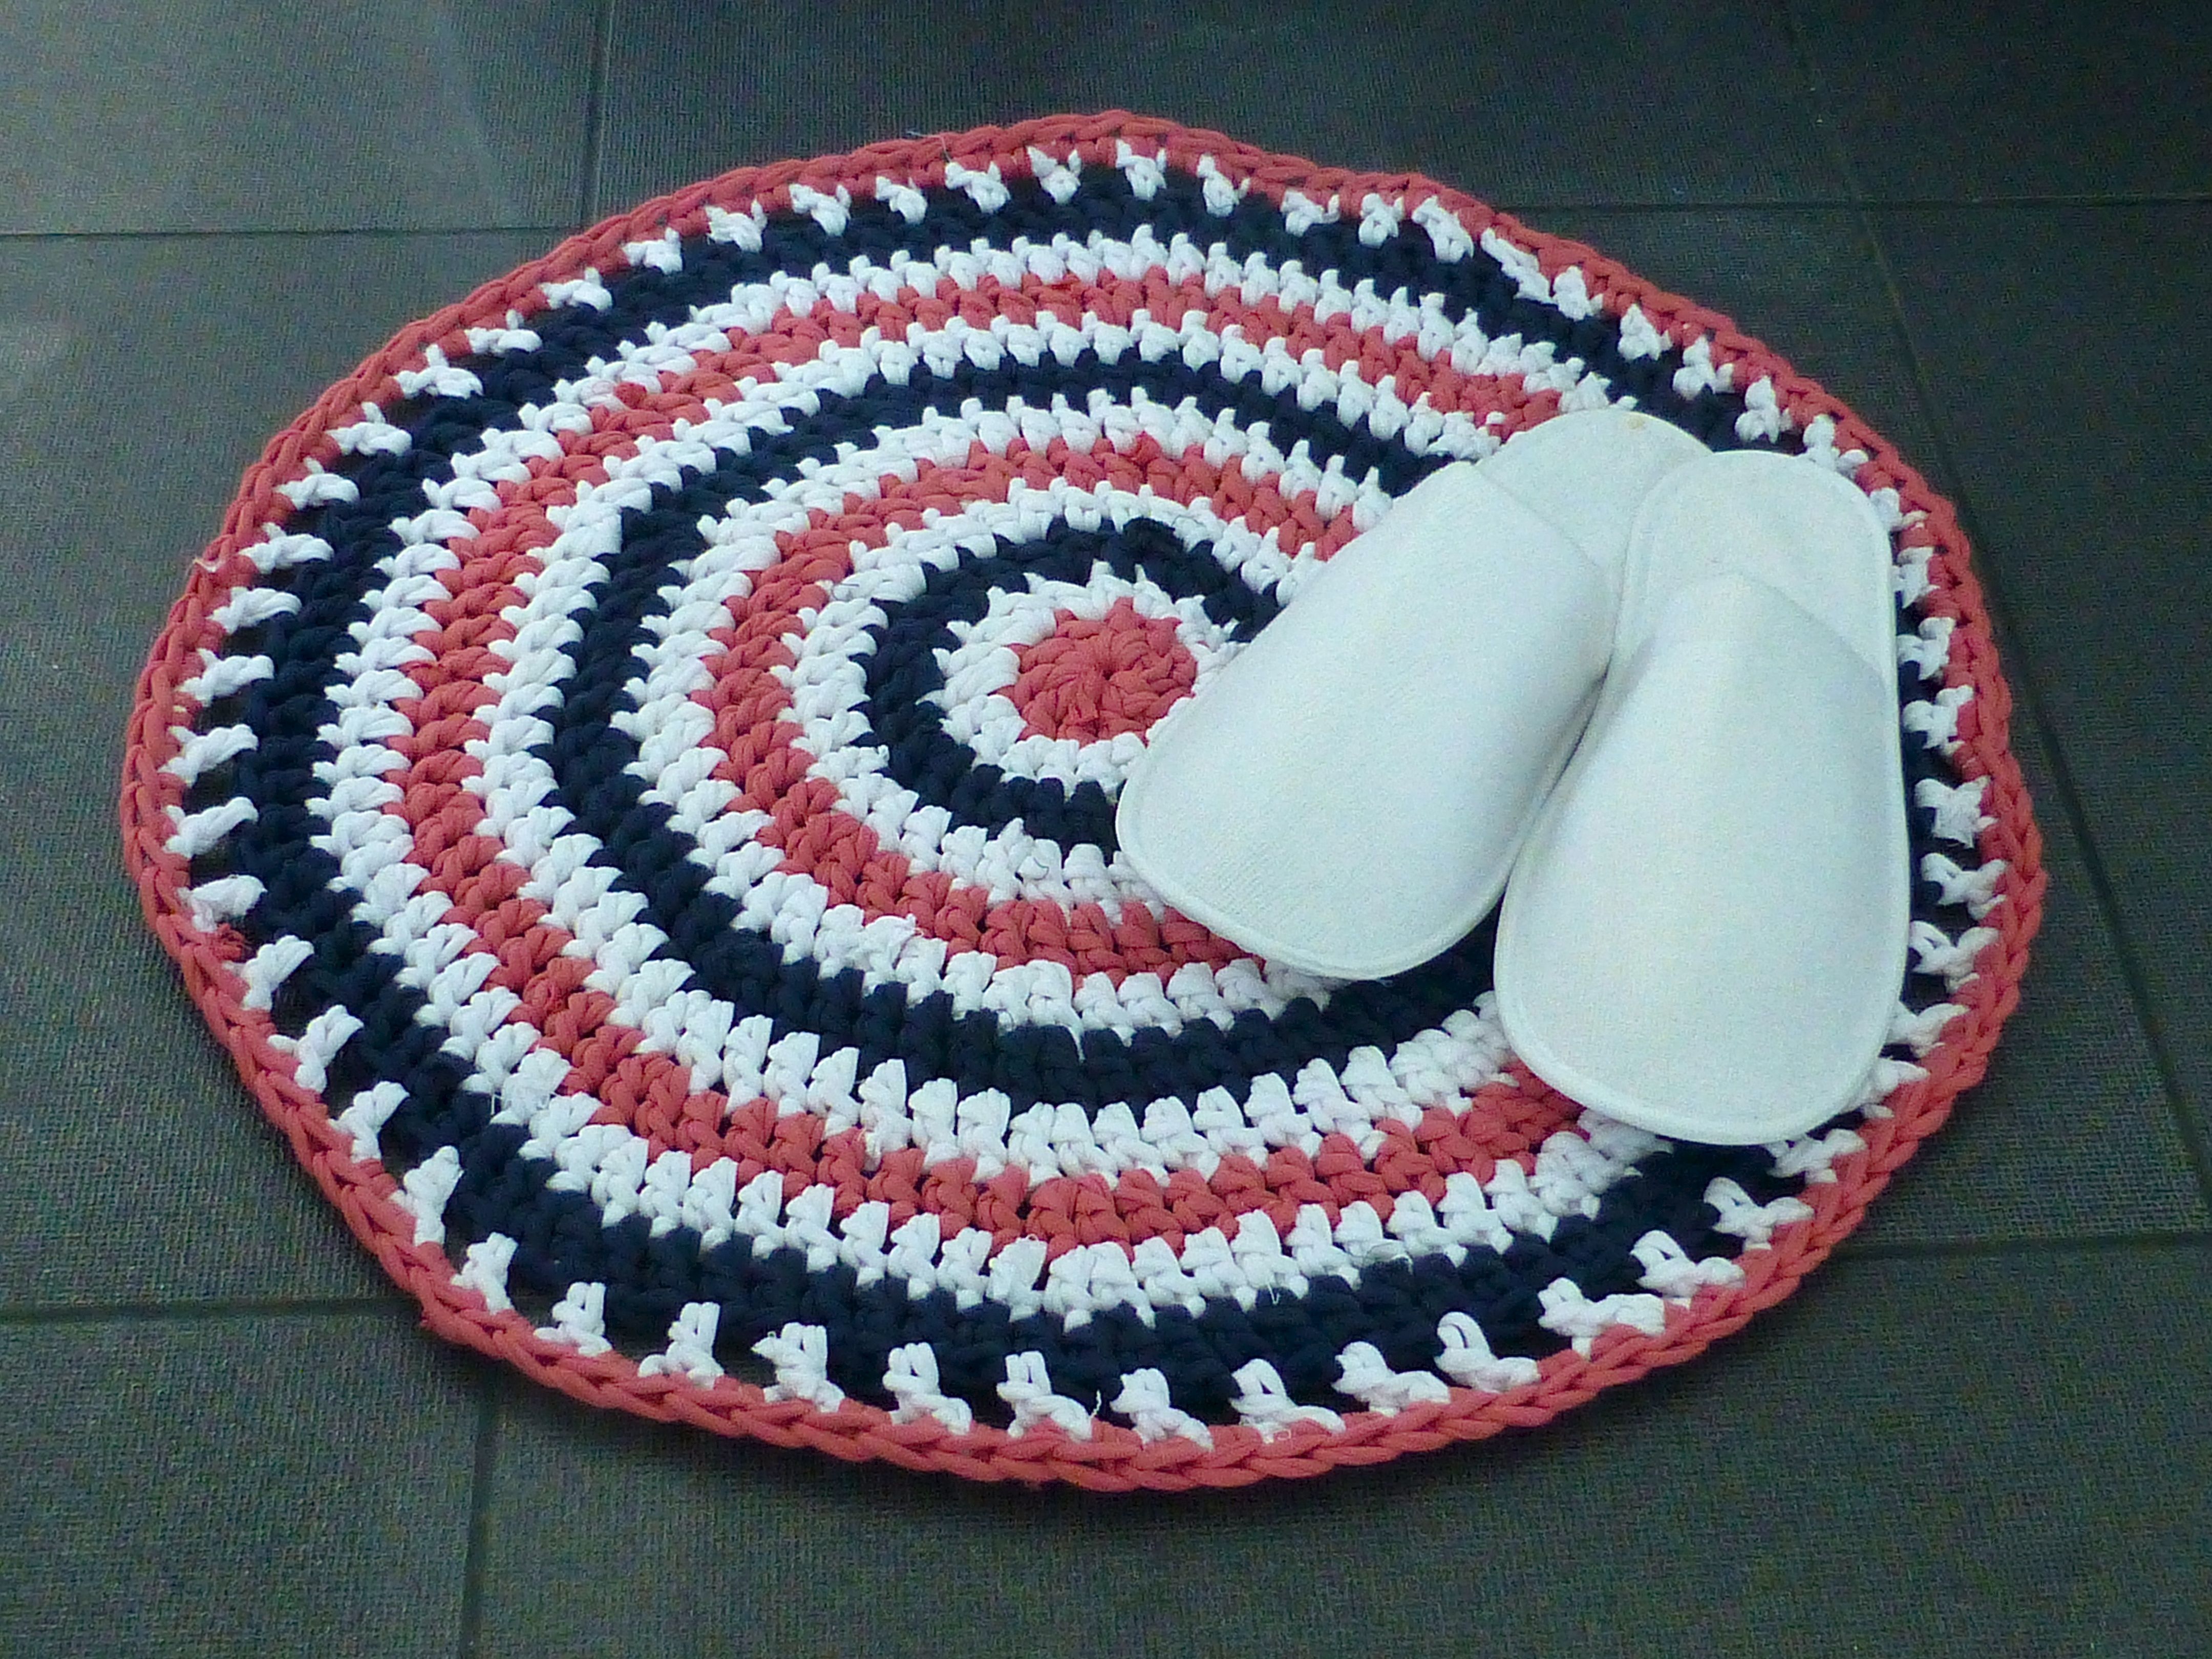
I decided to crochet a bathmat and based it on this pattern here, using fewer stitches (10) in the first round and a smaller hook (12mm). This resulted in a slightly less dense texture which I love.
The rug is nice and cosy underfoot and very absorbant.
It can just be chucked in the washing machine and tumble-dried too – easy!
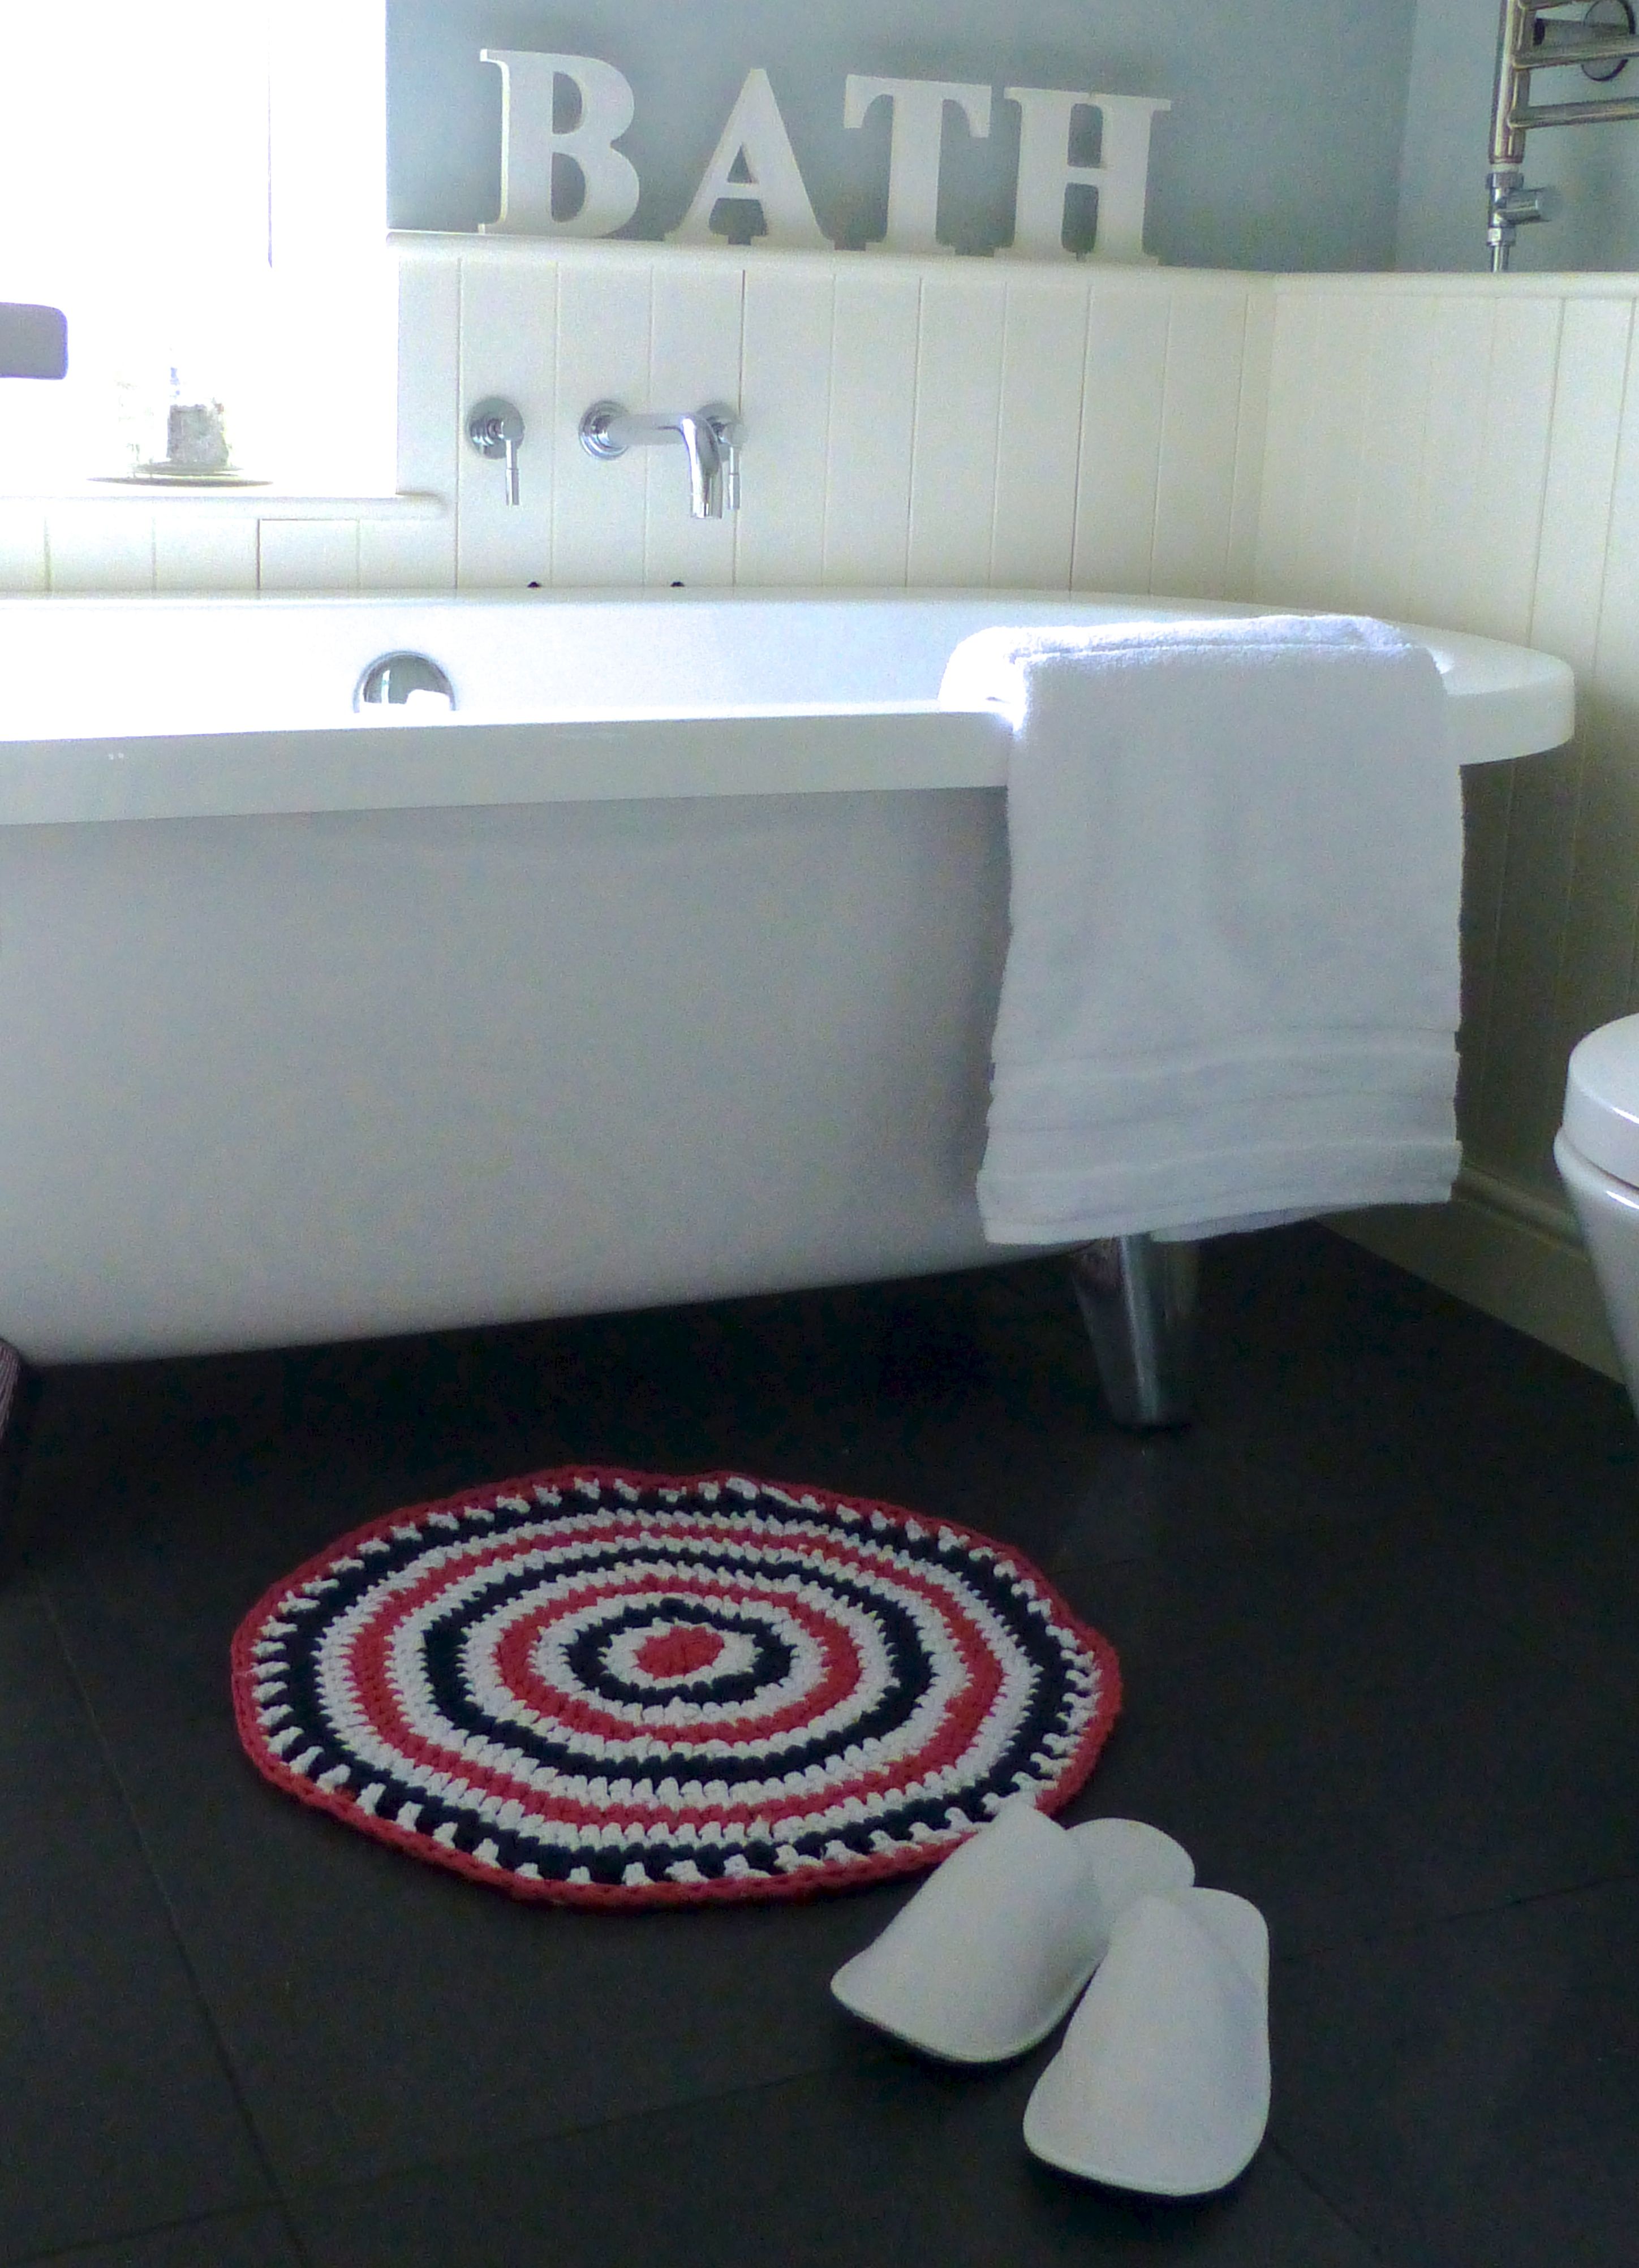
Here’s how it looks in our bathroom. I love the splash of colour it adds.
So, if you fancy having a go at making your own T-shirt yarn – what will you make with it?
I am quietly fuming after being (very kindly) informed that someone is selling my Greengate Style Baby Poncho pattern on eBay, even using the original photograph from my blog!
It’s not just the fact that they are making money from my design, but that people are paying for it when it is available for free. Maddening.
Anyway, being the sharing, caring folk that we Crafters are, I have another tutorial for you – a Bookbound Journal.
I made mine using part of a hide of turquoise leather that I had leftover from a previous project, but you could use boiled wool, felt, cardboard – anything really. This was constructed entirely from stuff I had already so was completely free to make, which was essential as it went into my #sewingsanta parcel and I had already reached my spending limit.
So, here we go.
How To Make A Bookbound Journal
You will need: –
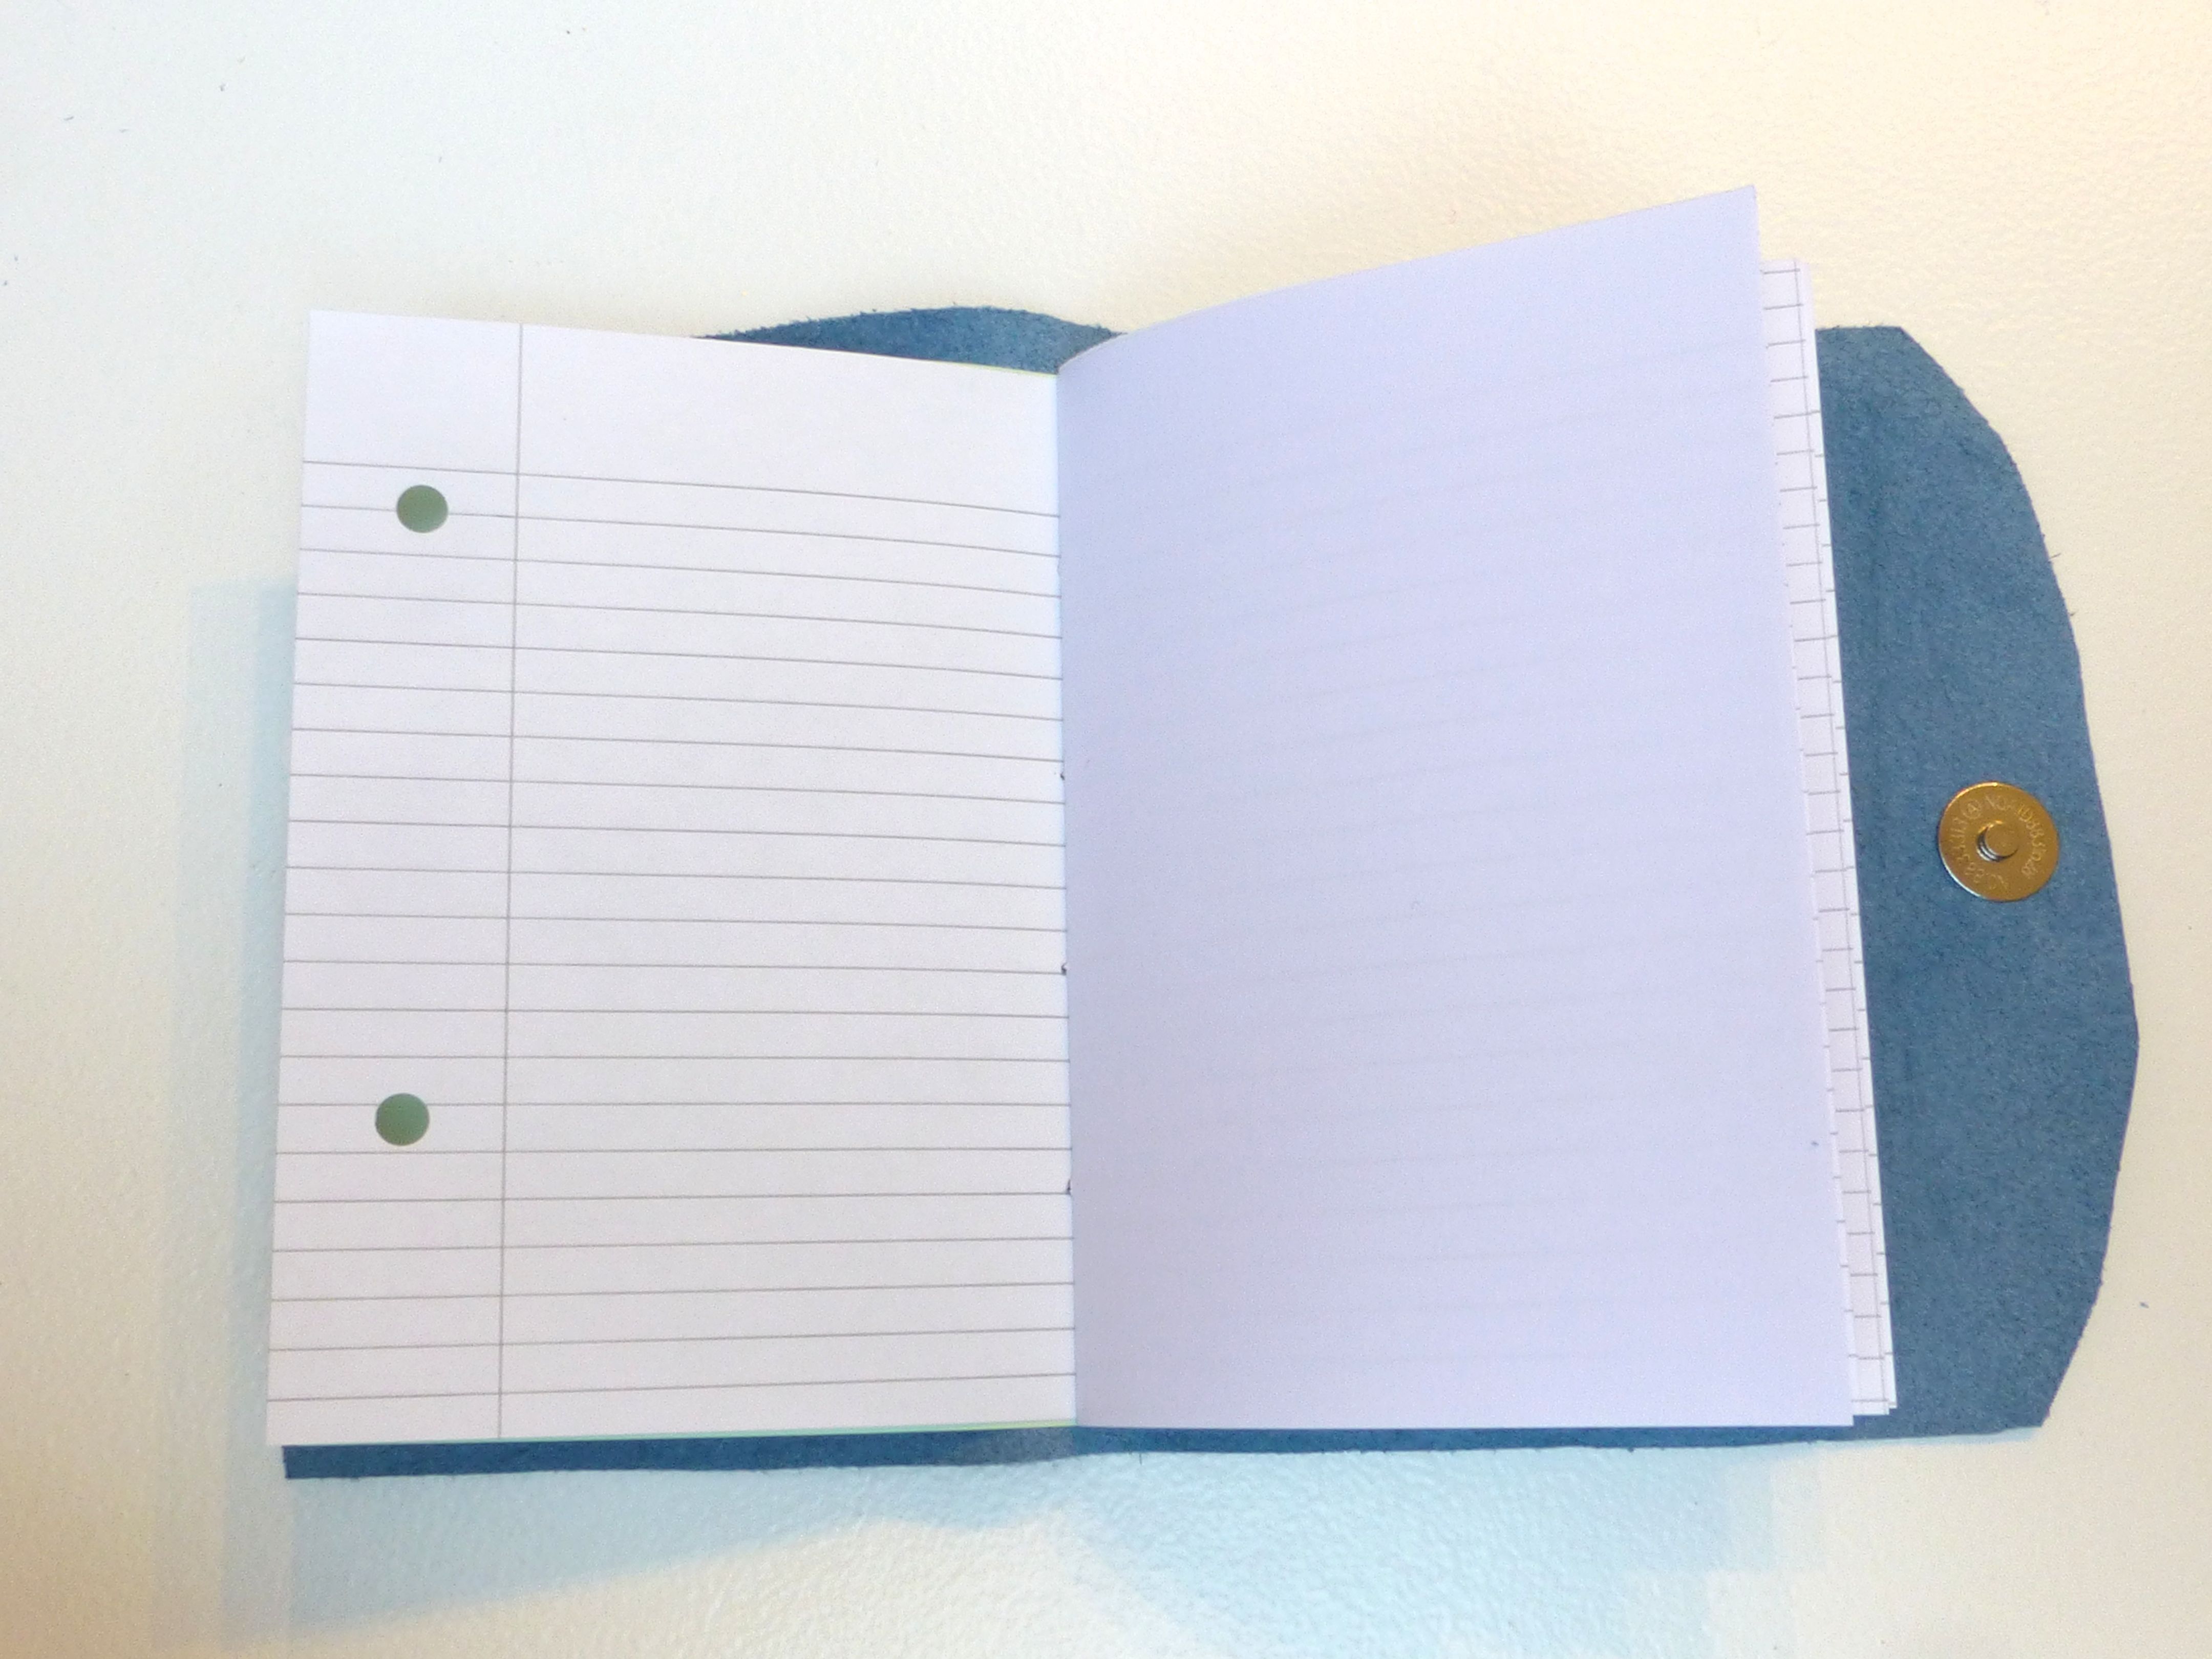
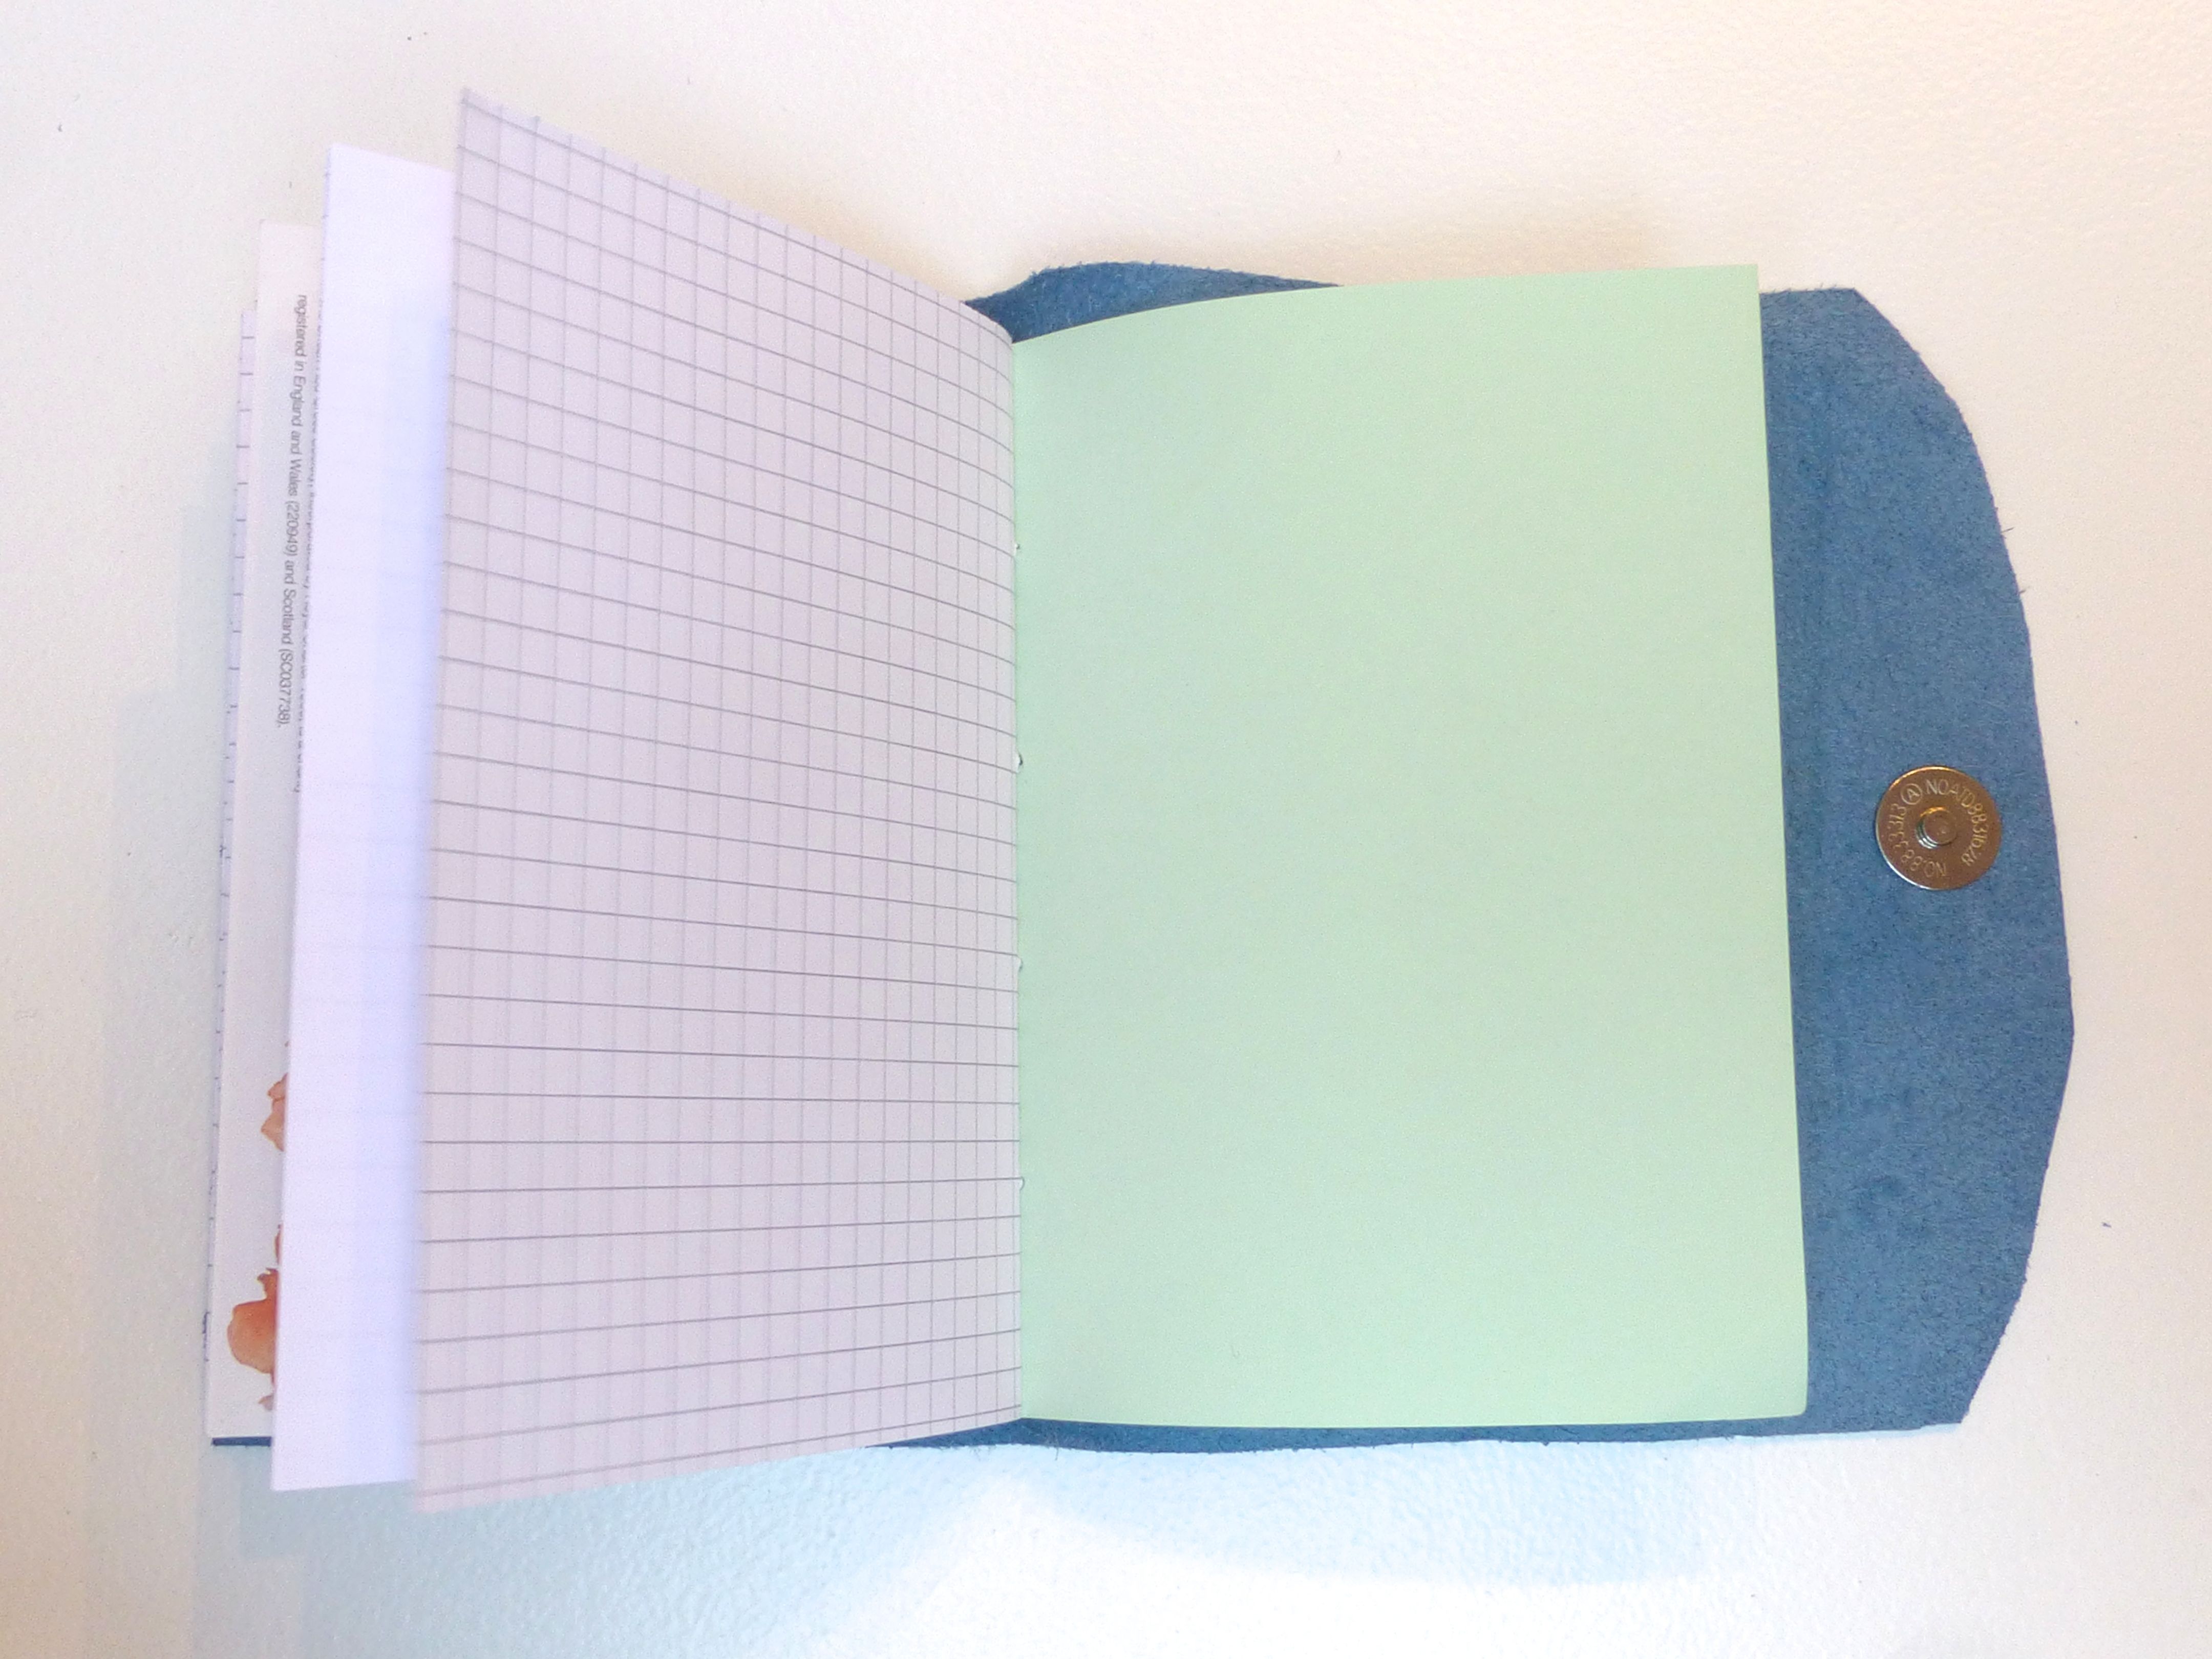
16-20 sheets paper (I used a mix of plain, squared, lined, coloured and notelet)
Cover Material which doesn’t fray (Leather, Cardboard, Felt, Boiled wool etc)
Waxed Cotton/Strong Thread
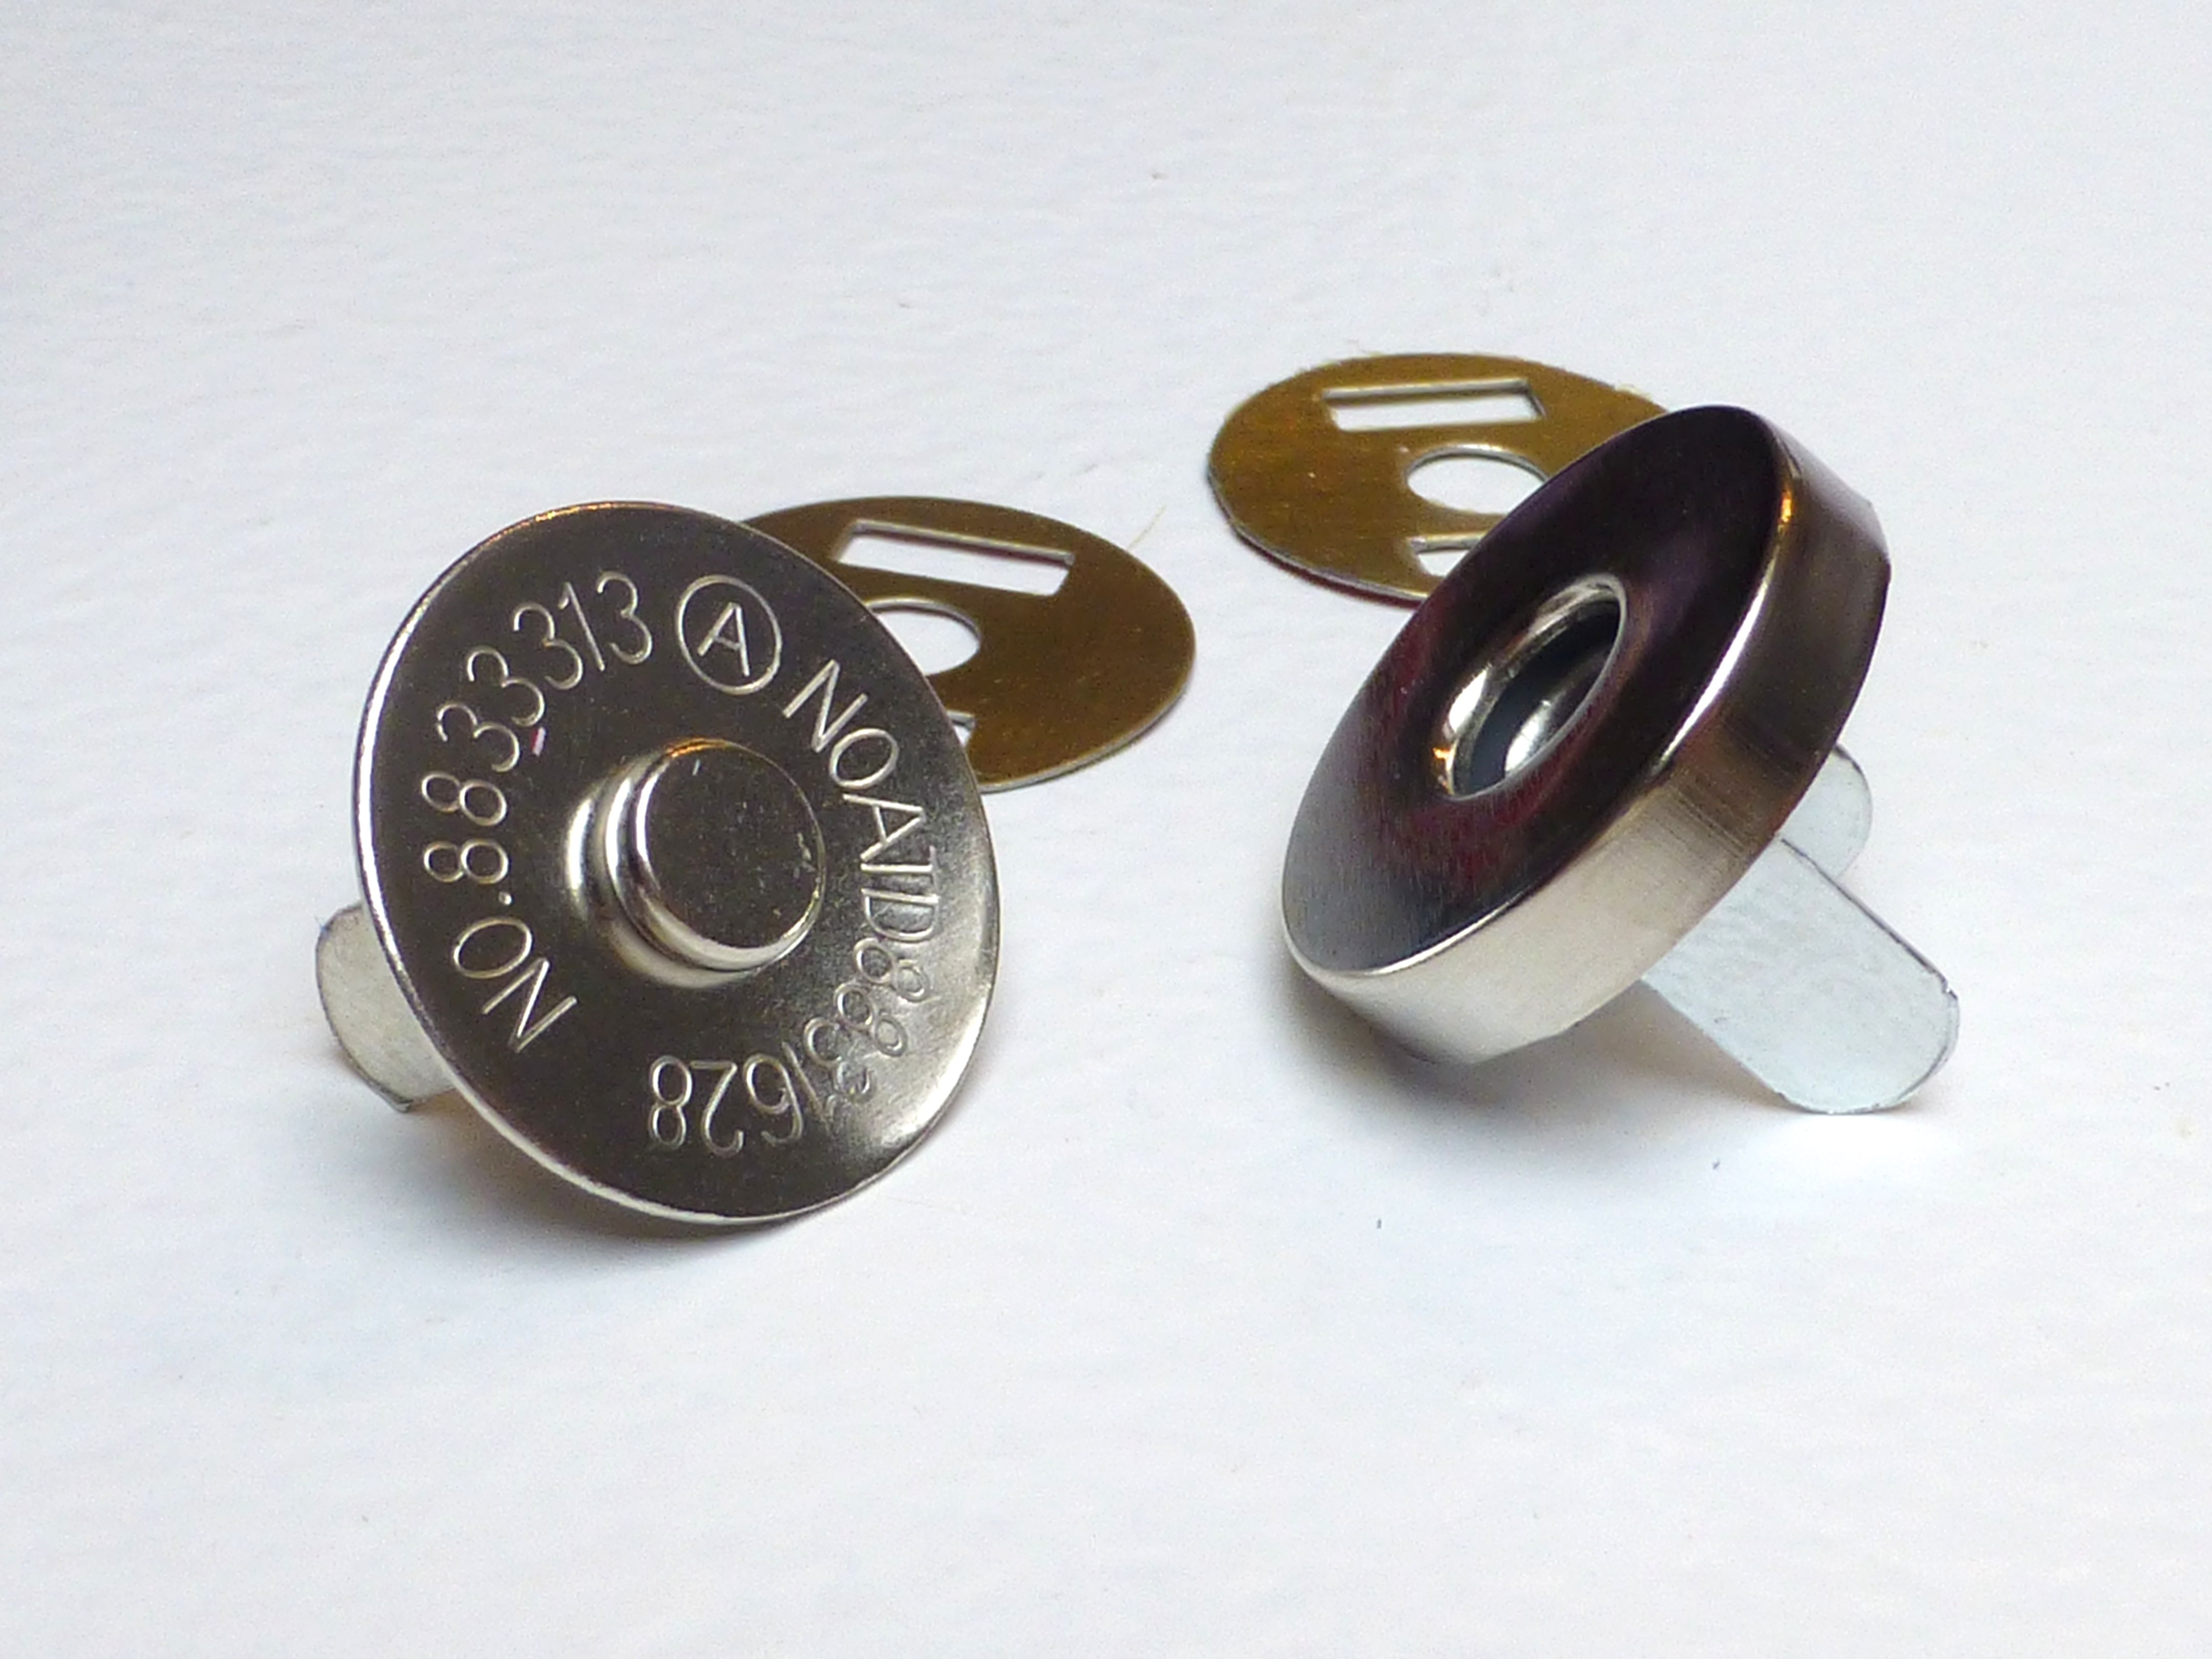
Magnetic Closure
Bradawl/Craft Knife
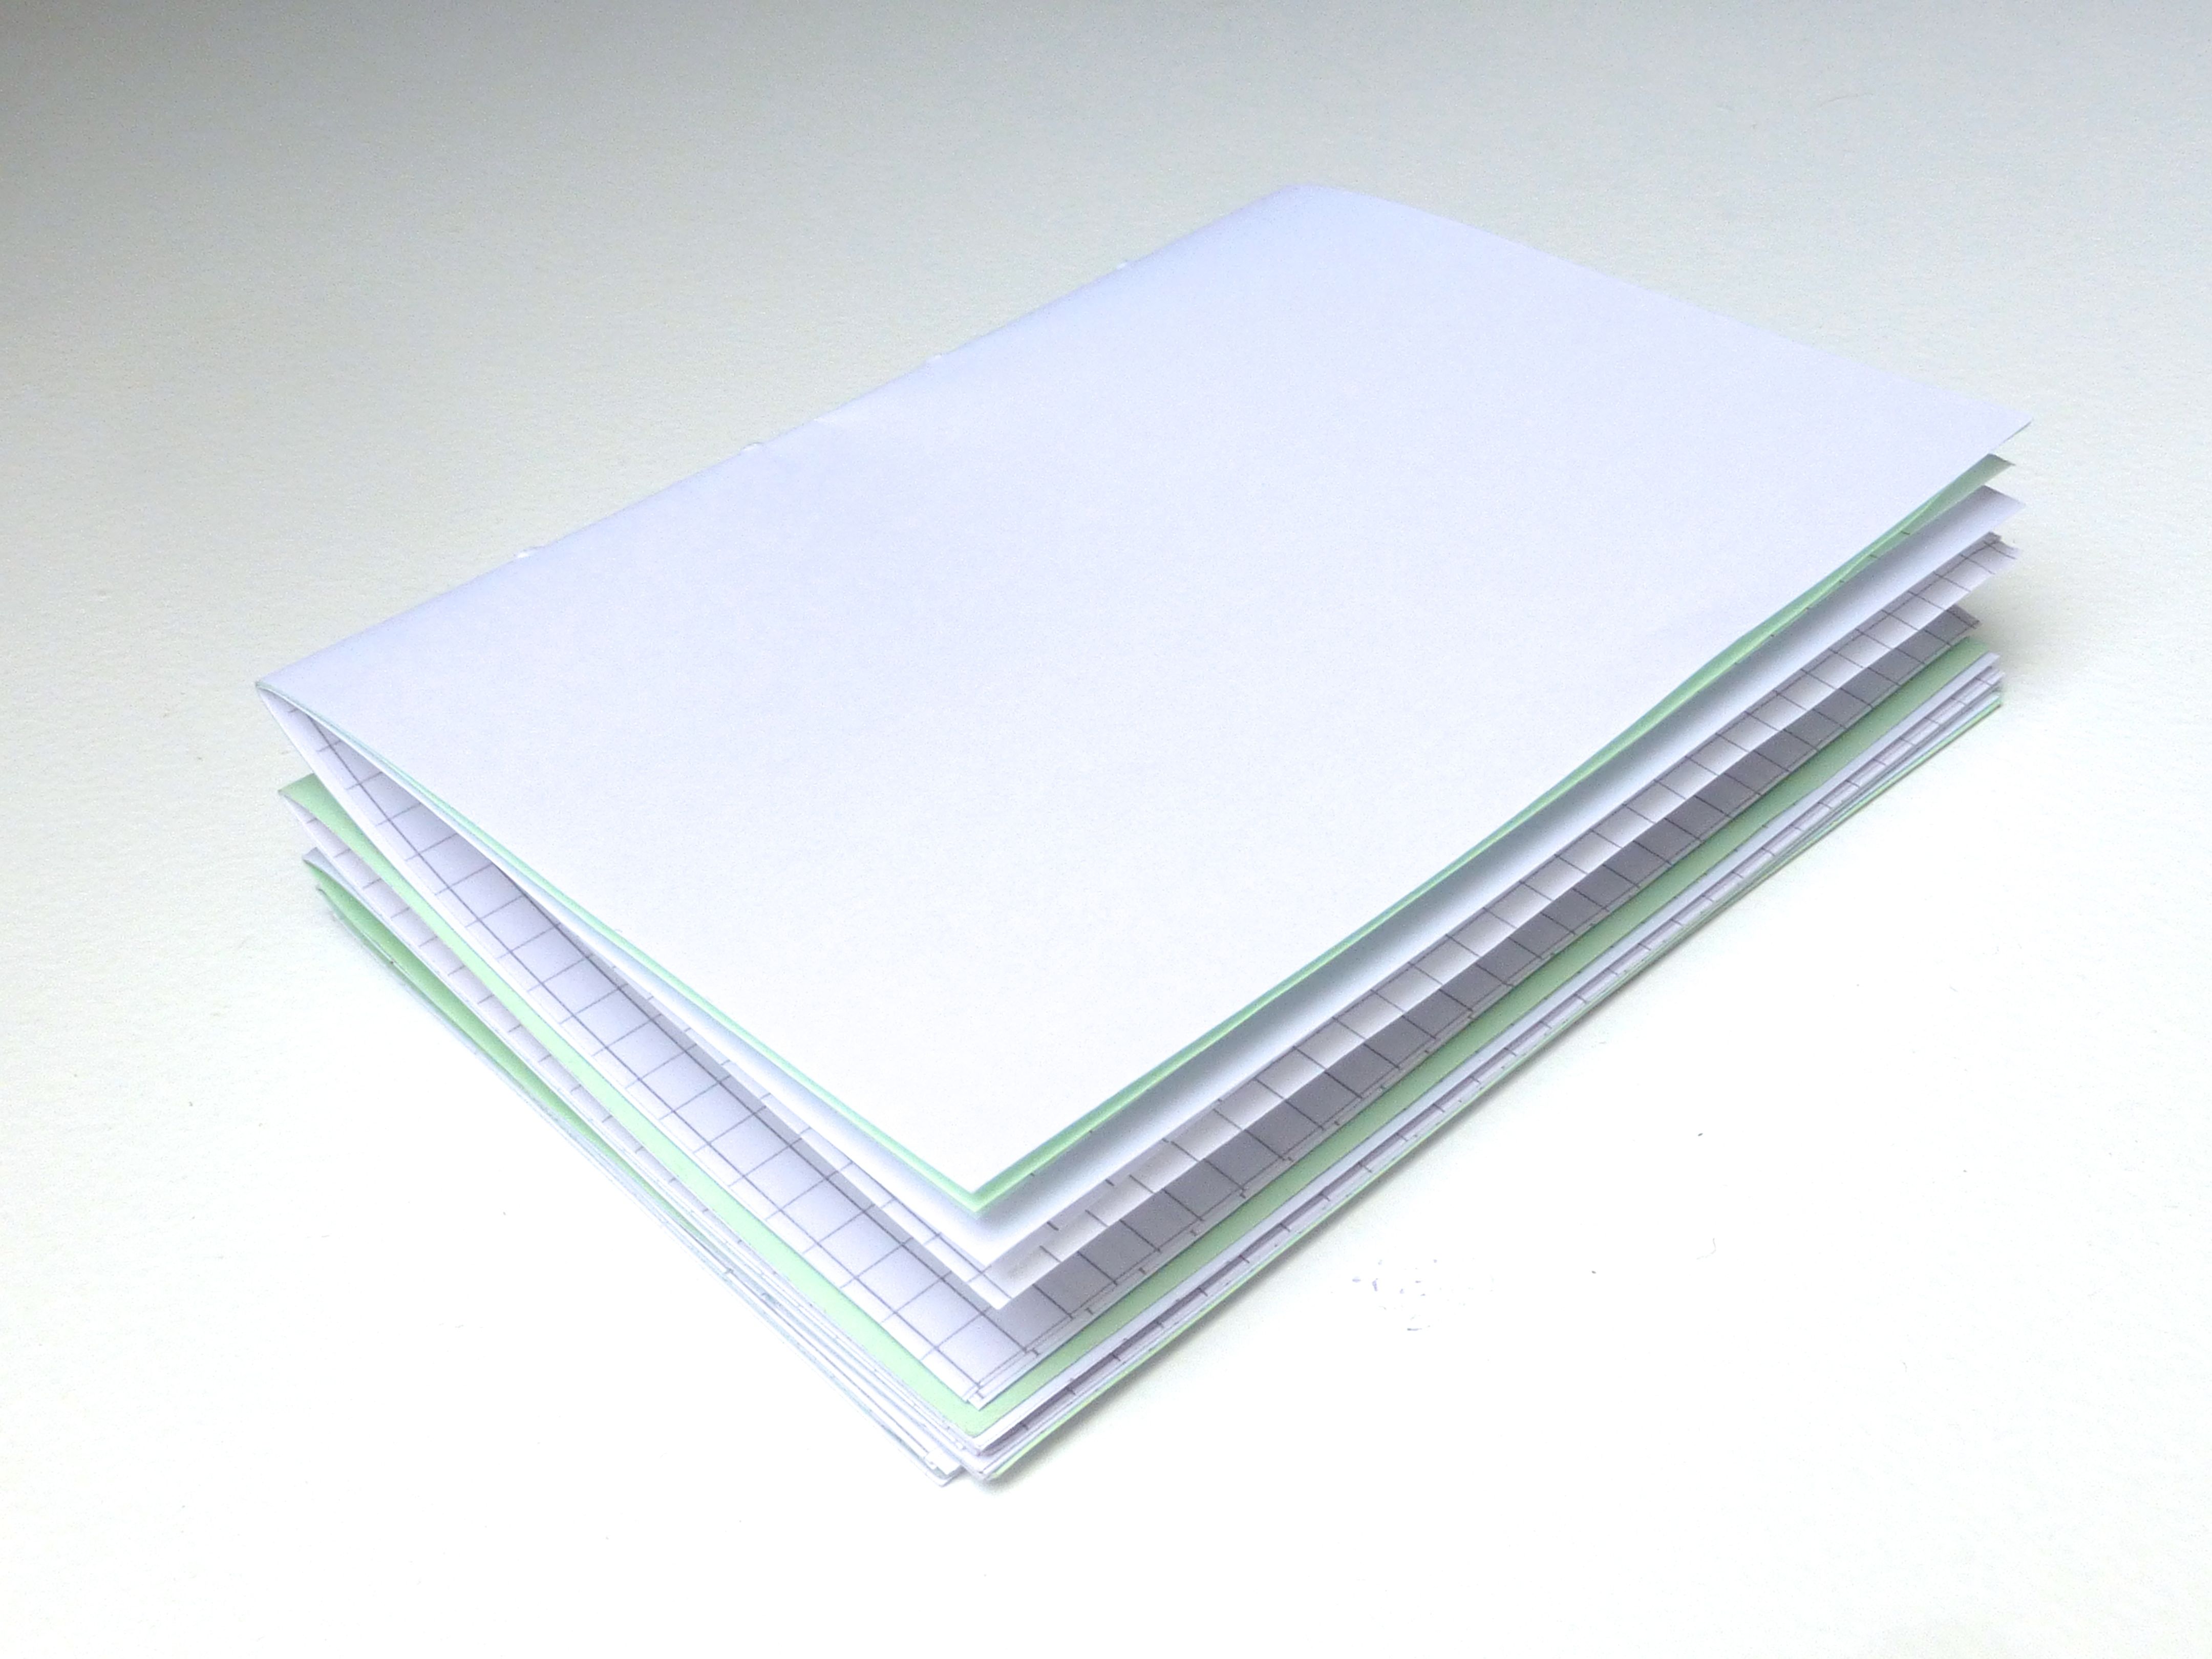
1. Stack your paper in piles of 4 or 5 and fold in half to make a ‘signature’. I made 4 signatures to go in my book.
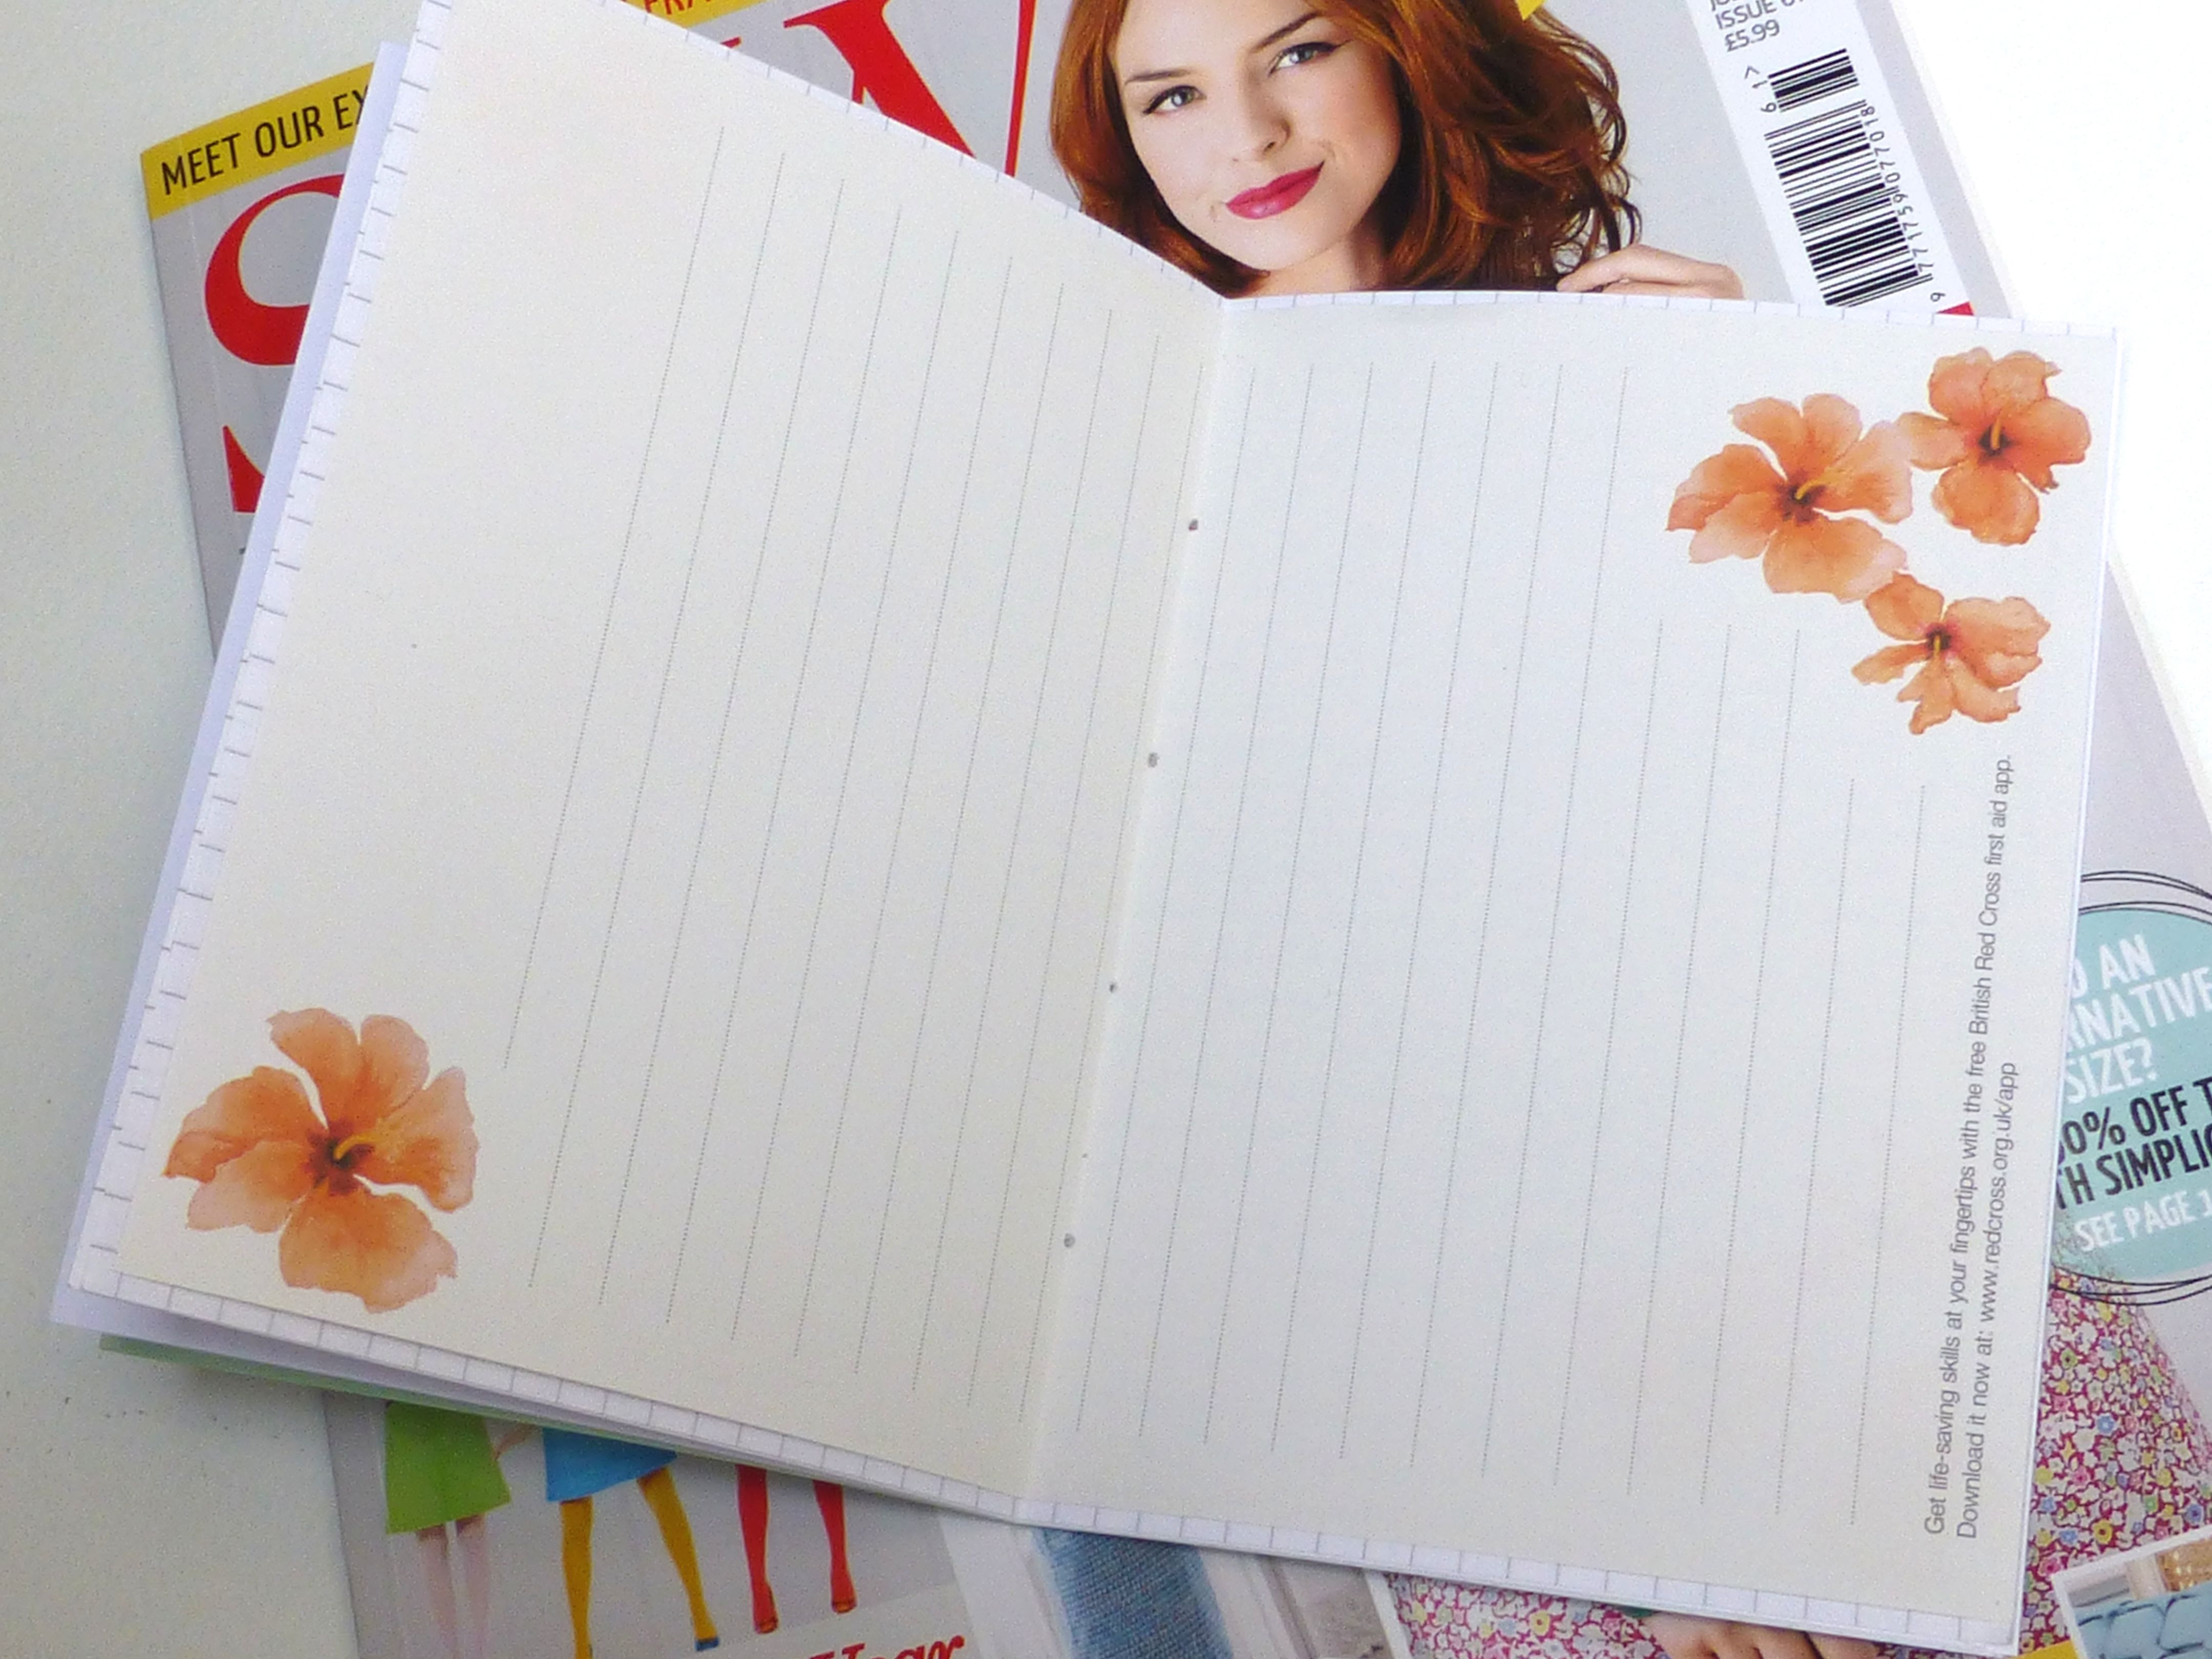
2. Using a bradawl or other sharp pointed tool, pierce four holes through the fold at regular intervals making sure you go through all the layers of paper.
I use an old magazine underneath to protect my table.
3. Fold and stack all your signatures neatly together and lay on your chosen cover material. Cut around leaving about half a centimetre all round.
If you want to make a flap to close the journal, you can extend the fabric as shown below.
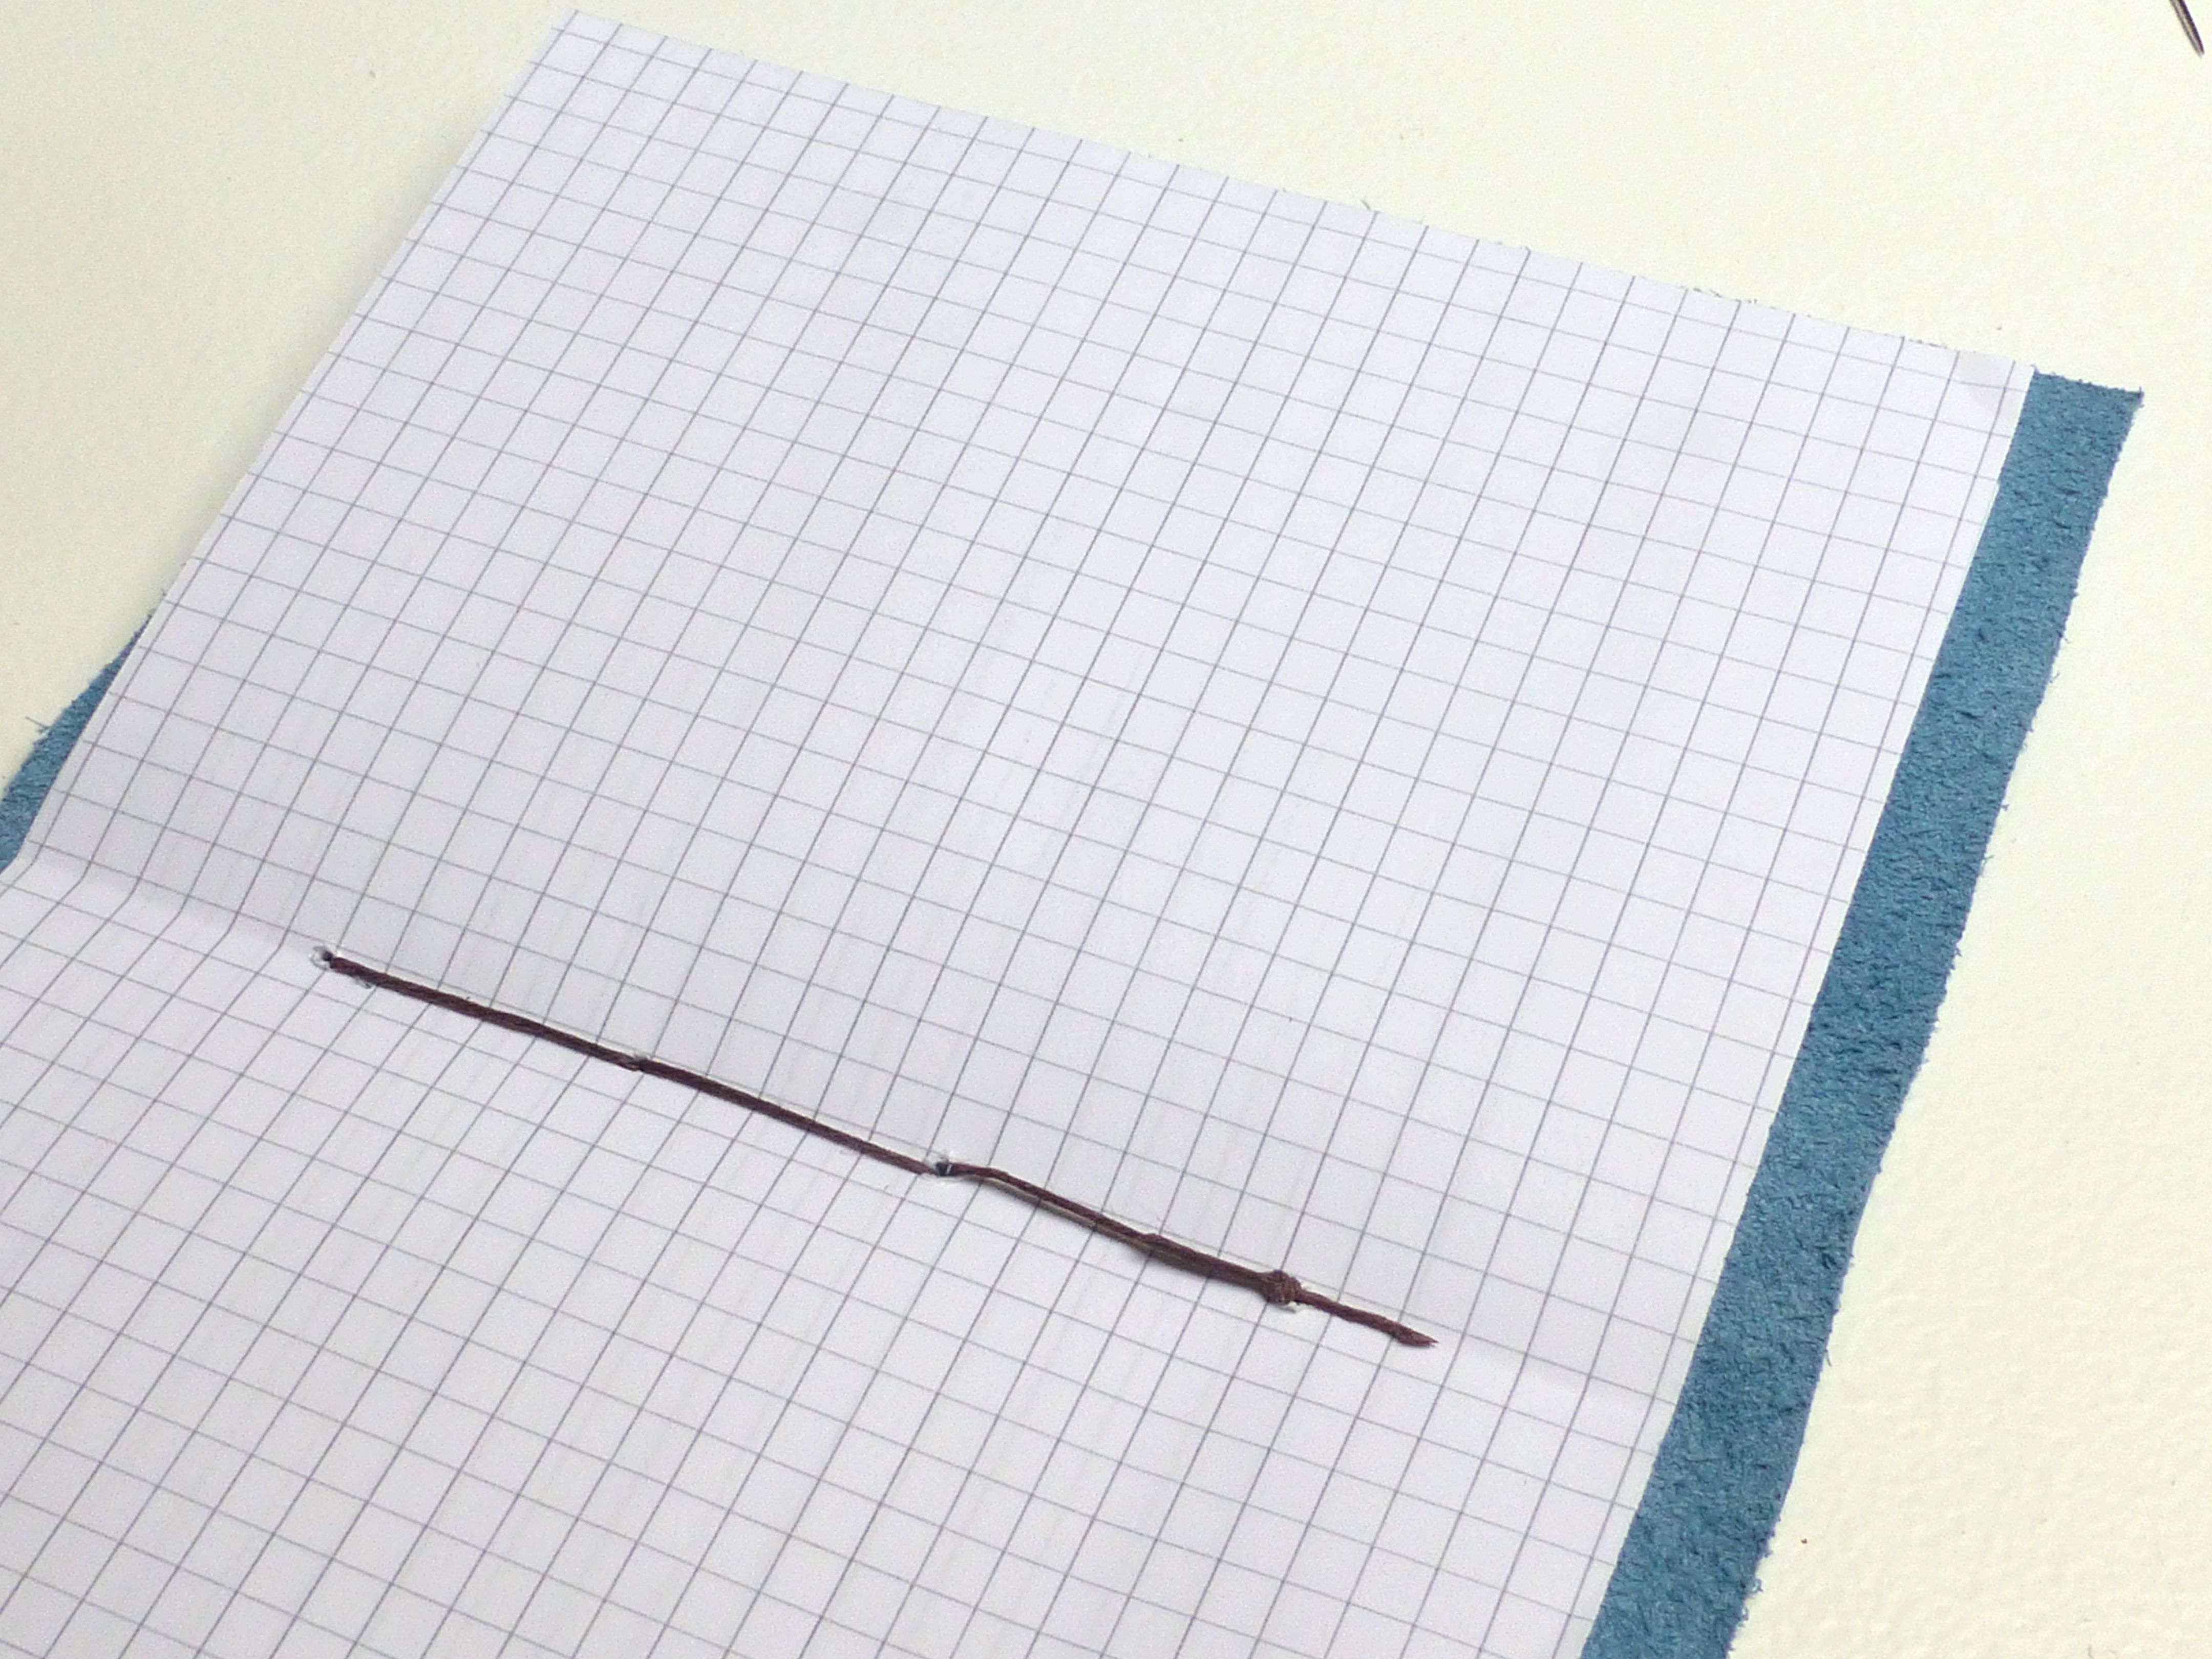
4. Mark a line about half a centimetre onto the fabric, directly in line with the holes in the signatures.
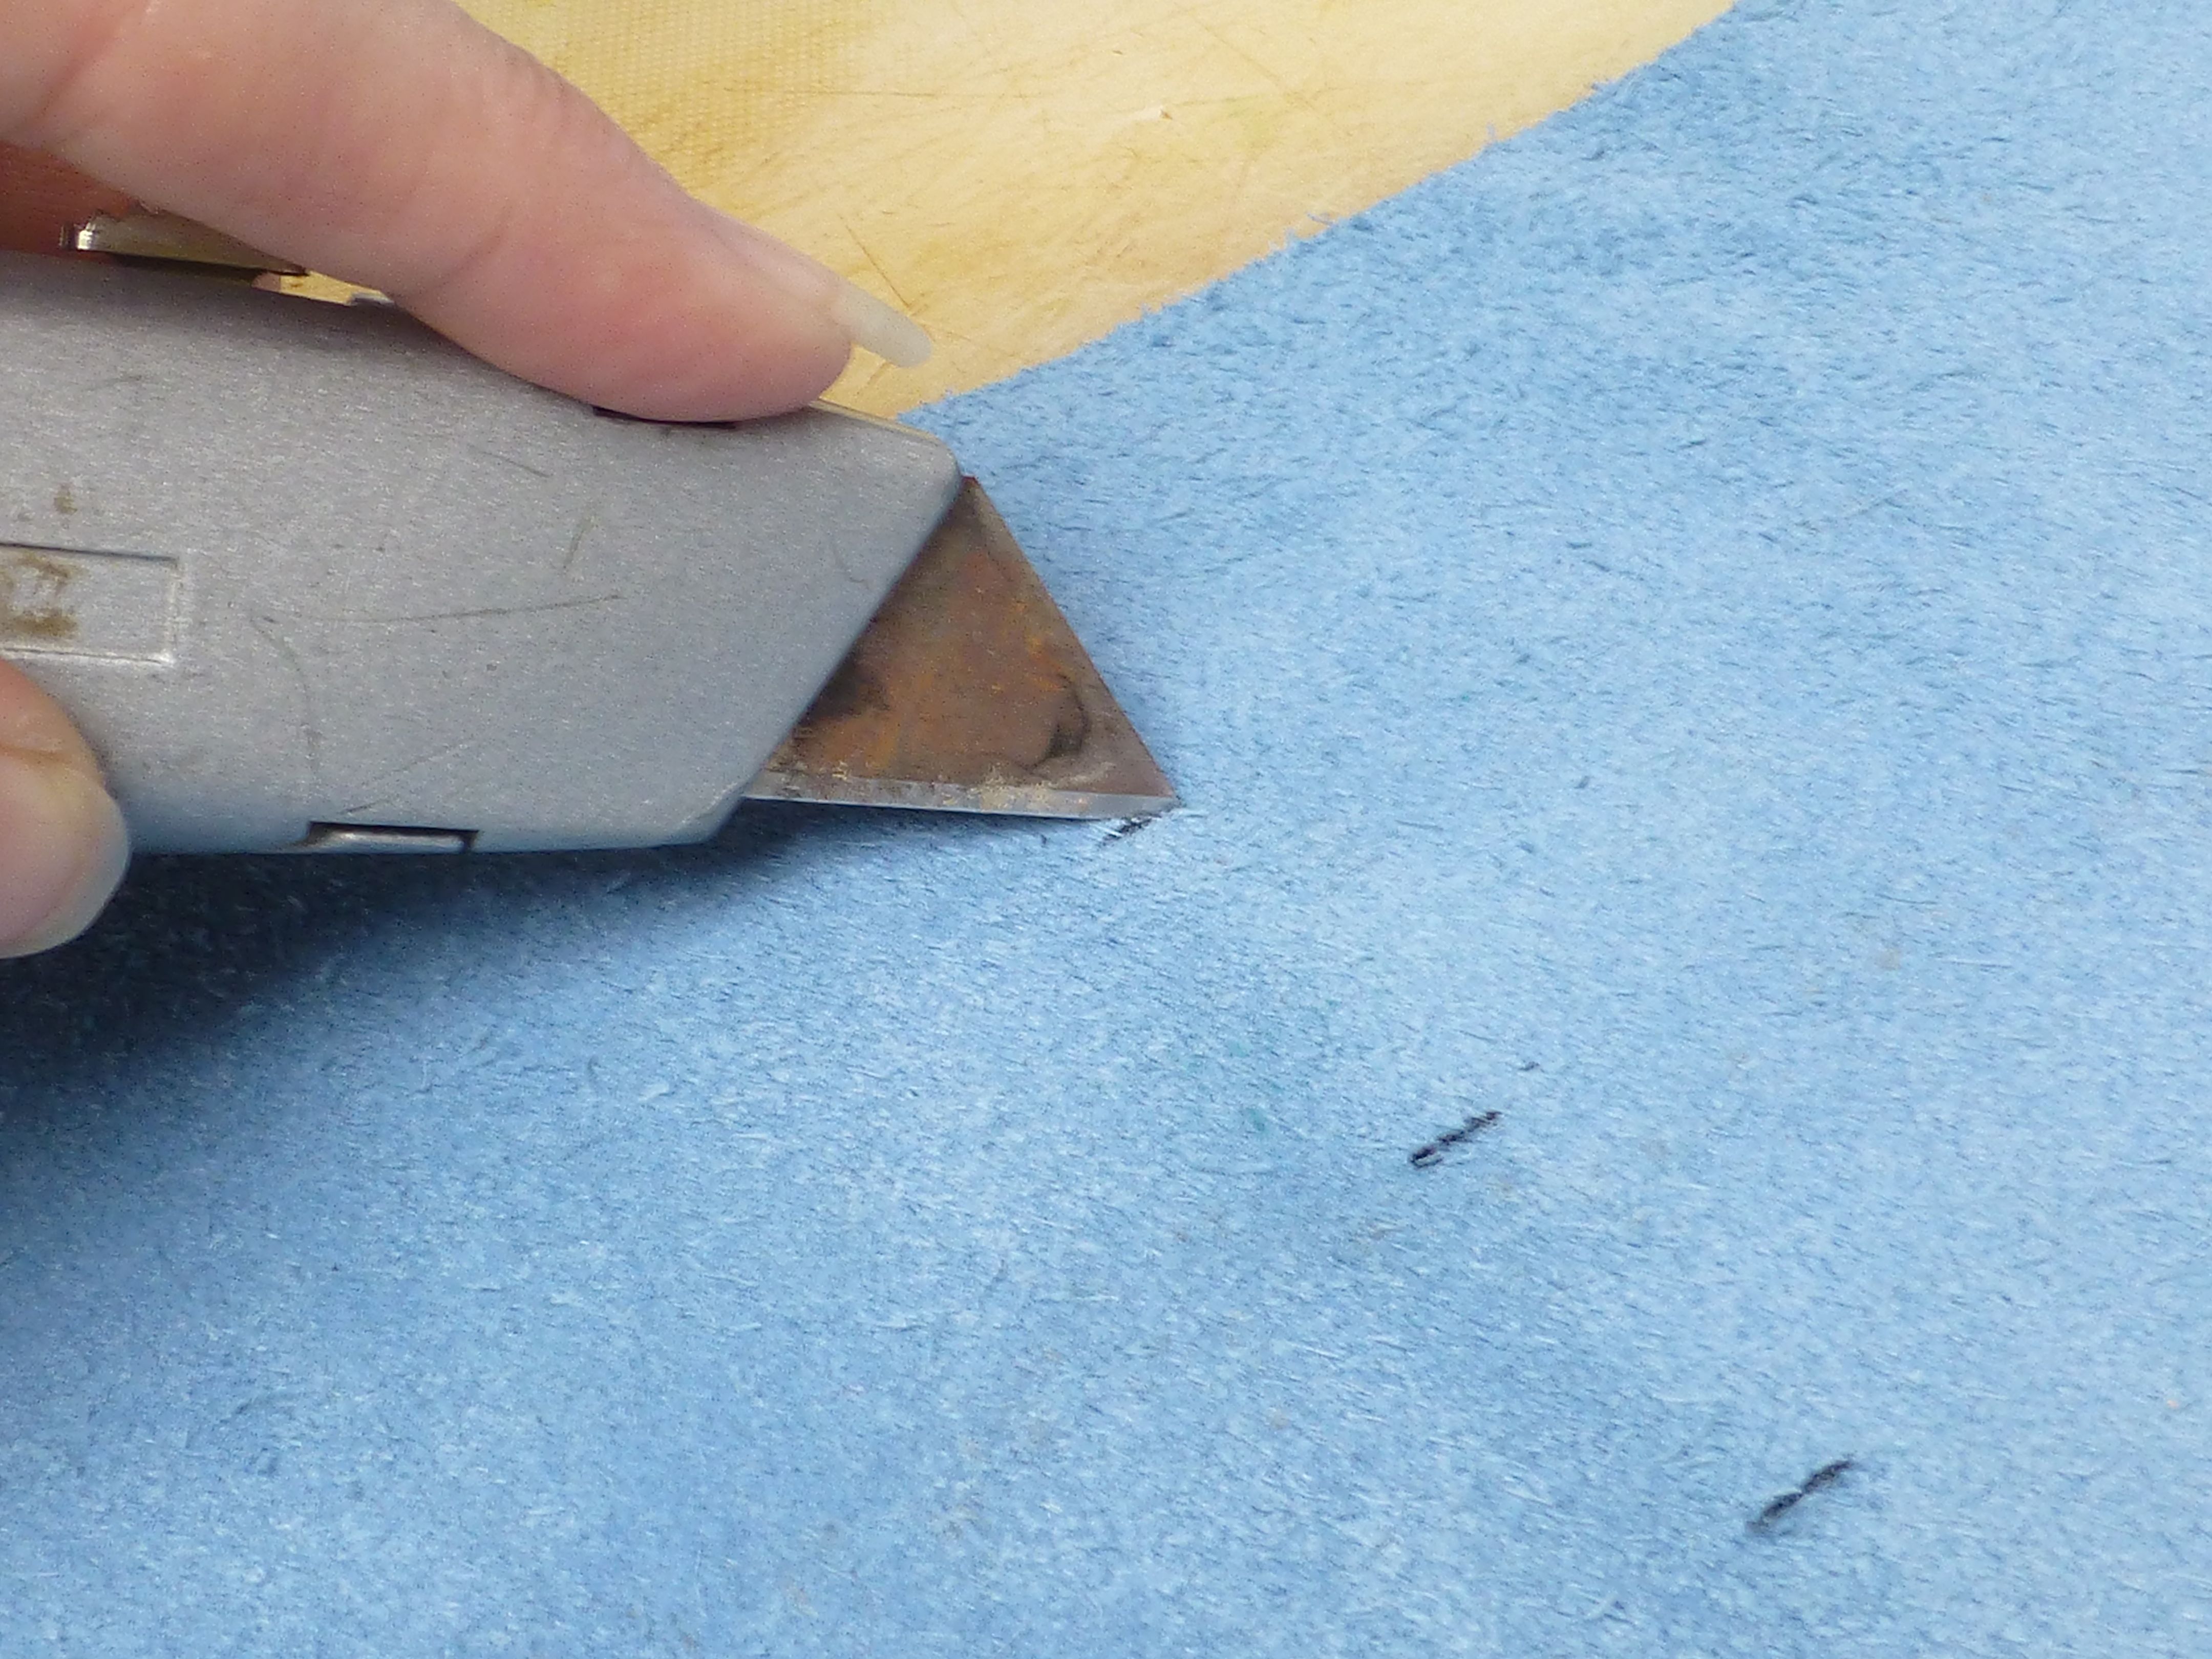
5. Cut through the fabric at these markings using a craft knife.
6. Thread a needle with a length of waxed cotton (or strong thread) twice the measurement of the spine of your journal.
7. Starting at the bottom, pass the needle through the hole in the first signature and the slit in the cover from the inside to the outside as shown below. Leave a tail of thread about 5cm long.
8. Pass the needle back through the second slit and signature.
10. Continue in this way until you reach the top, then weave your way back down to the bottom in the same way.
11. Tie the ends together and trim for a neat finish.
12. Add all the other signatures in the same way.
13. If you’ve added a flap, now is the time to add a closure of your choice. It can be a simple length of leather knotted at one end, slipped through a slit and wrapped around or a magnetic snap fastening as I have used.
14. Attach following the manufacturers instructions and cover the snap with a decorative feature button or piece of fabric. I made a bespoke needle felted button using three colours.
You could use handmade paper with deckled edges to make it really special, or just stick to printer paper to keep it simple, but I rather like using several different types of paper to make it more interesting.
I can’t show you what it looks like from the top because it is personalized with the recipient’s initial, but you get the idea.
I wrapped it up, popped it in the parcel along with lots of other goodies (blogged about here) and posted it First Class today, so somebody should be getting a big box from #sewingsanta in the post tomorrow! How exciting!
Previously Boys and Chickens, I have created a new blog to share my sewing adventure as 2018 is they year I plan to teach myself to sew! There will also be bits of crochet and cooking too.
My challenge: One year - I will not buy clothes - I will upcycle to make what I need - everything from underwear to evening wear! Join me for tips, exclusive BrawHem makes, and inevitably some hilarious disasters...