Sewchet

Sewing, crochet, crafts, accessories, baking, tutorials,


40 Comments

A Glimpse Into Sewing Classes For Kids

Being a (very) new venture, my sewing school has started with a definite ‘bang’. Classes officially start next Thursday but I have already been teaching private 1:1 sessions on a weekly basis and, whilst not full, the half-term sewing camps have been popular too. I though you might be interested to see what we get up to in these lessons so, with permission, I took some photos throughout the day of the students at work.

Today I had the pleasure to teach two friends (kids prefer to come with a friend) aged 9 and 10, both of whom own their own sewing machines and dabble at home quite happily.

P1060843

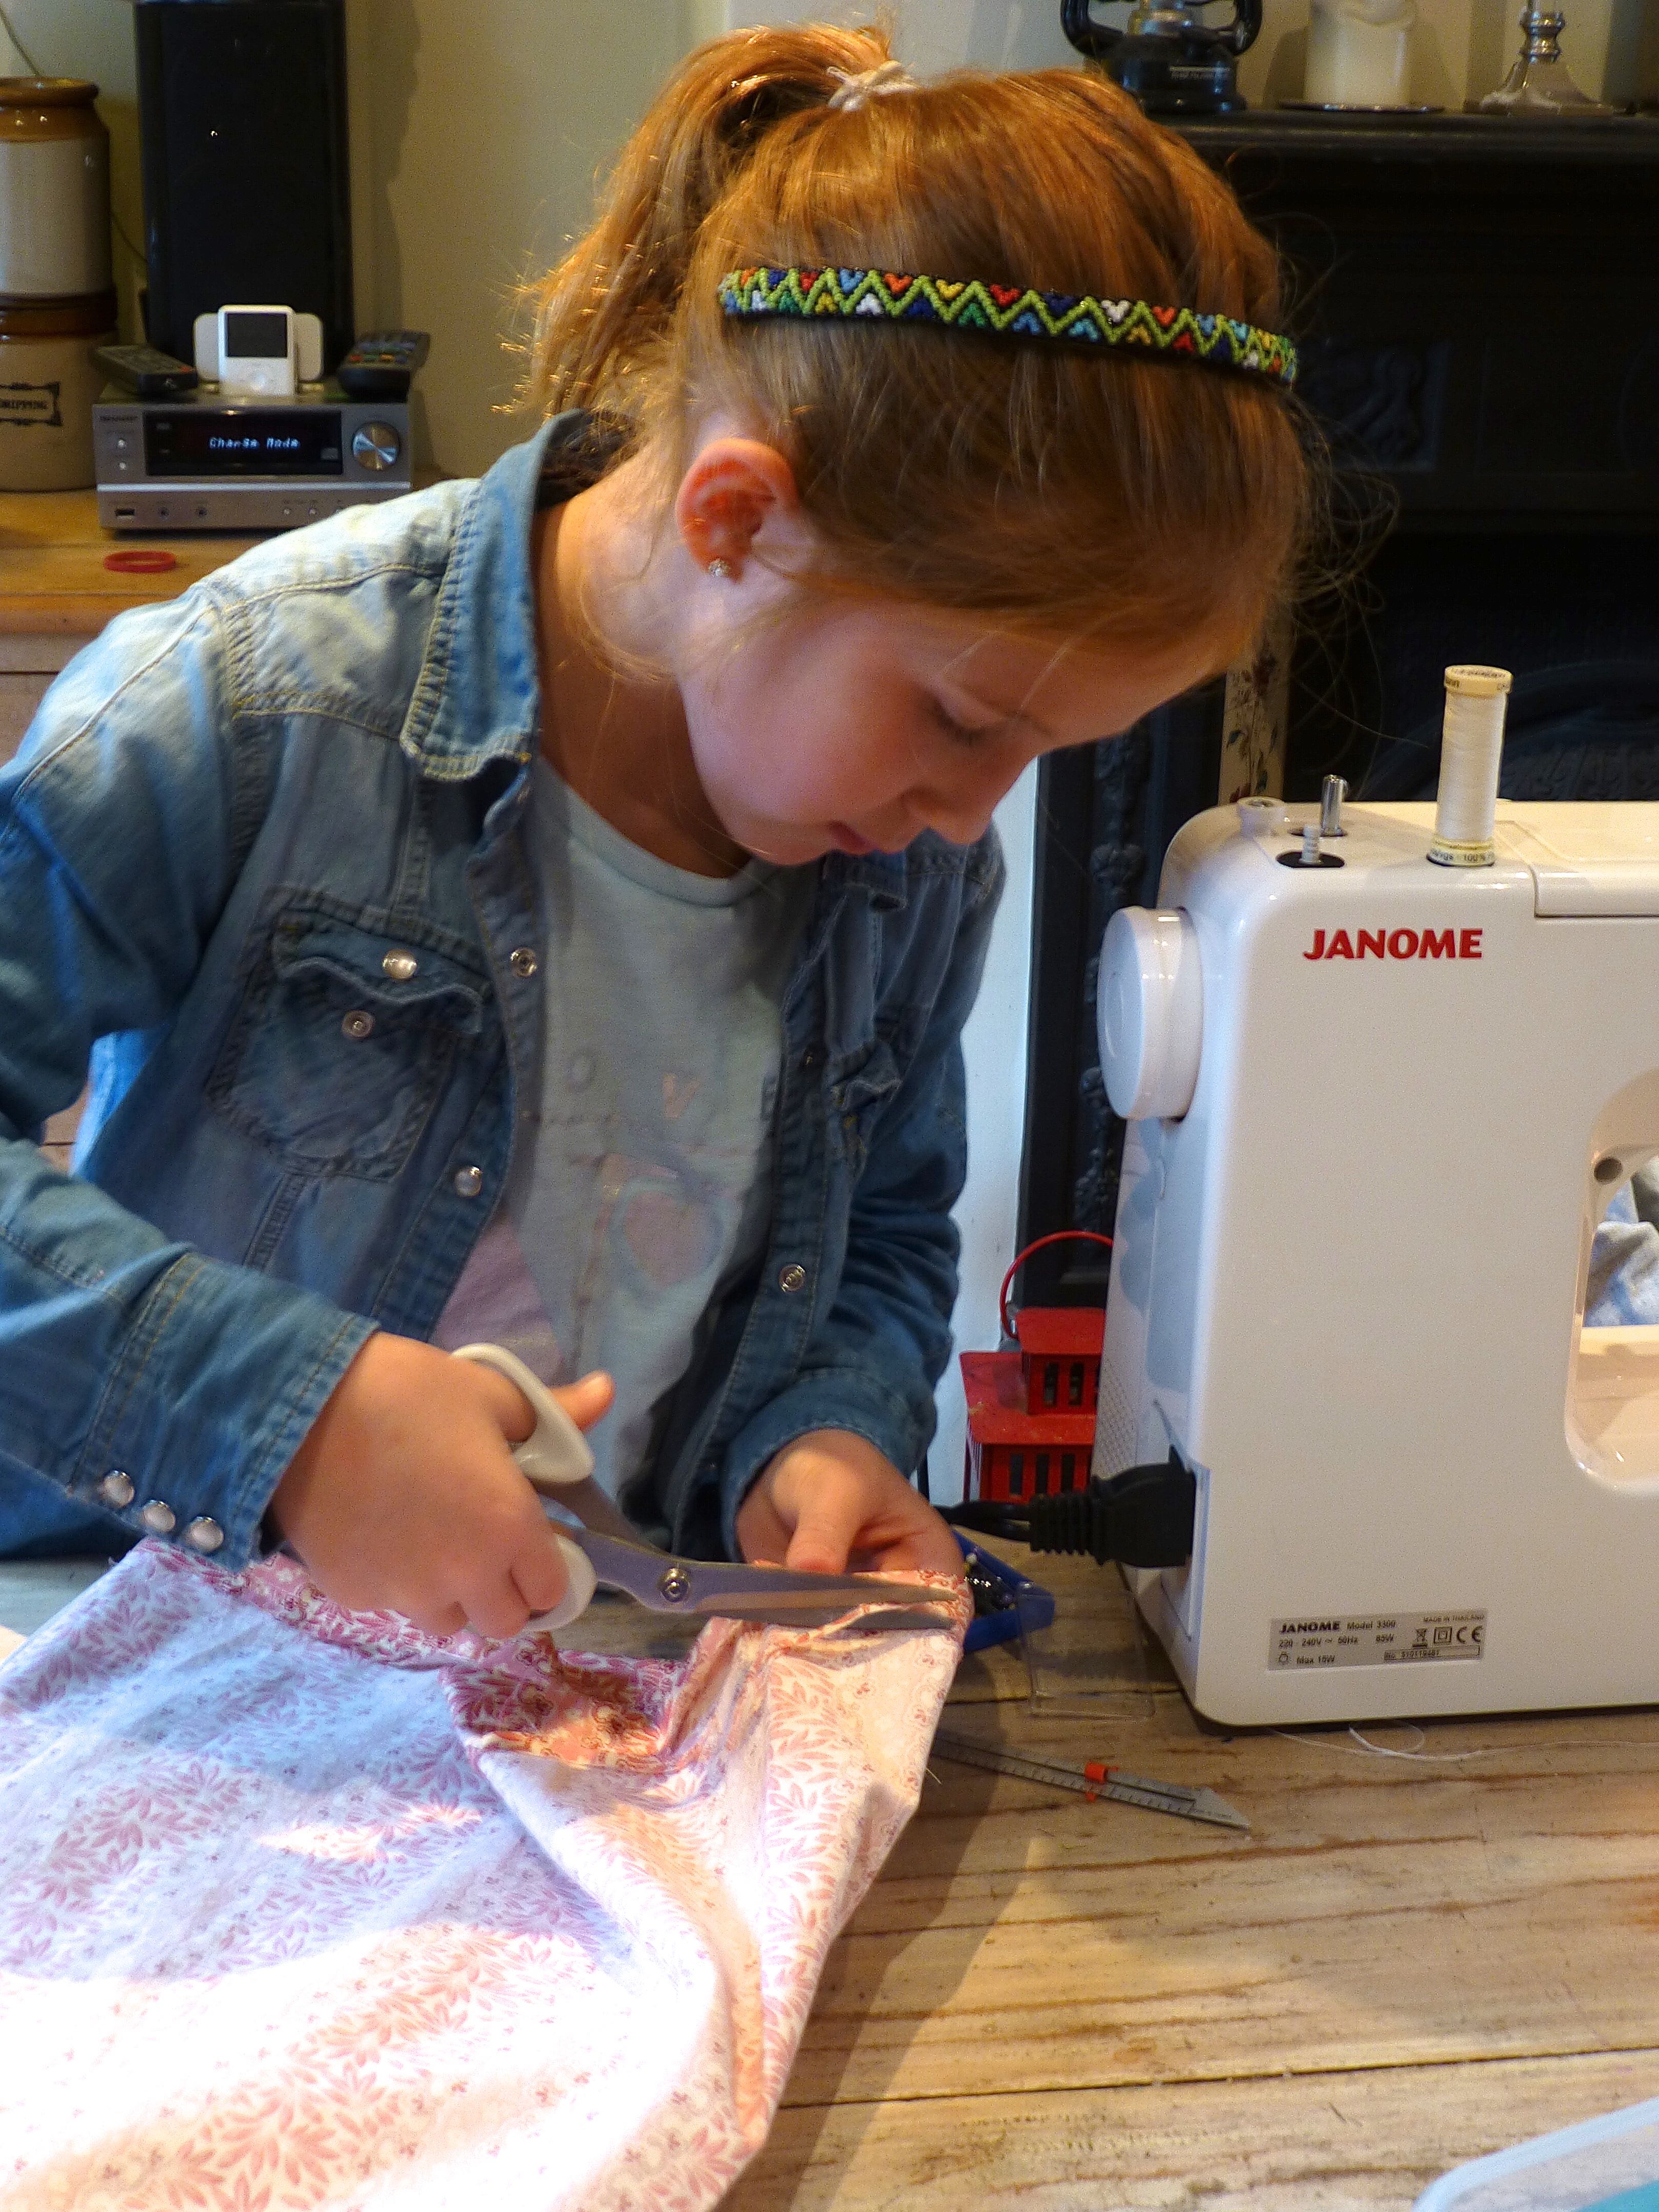
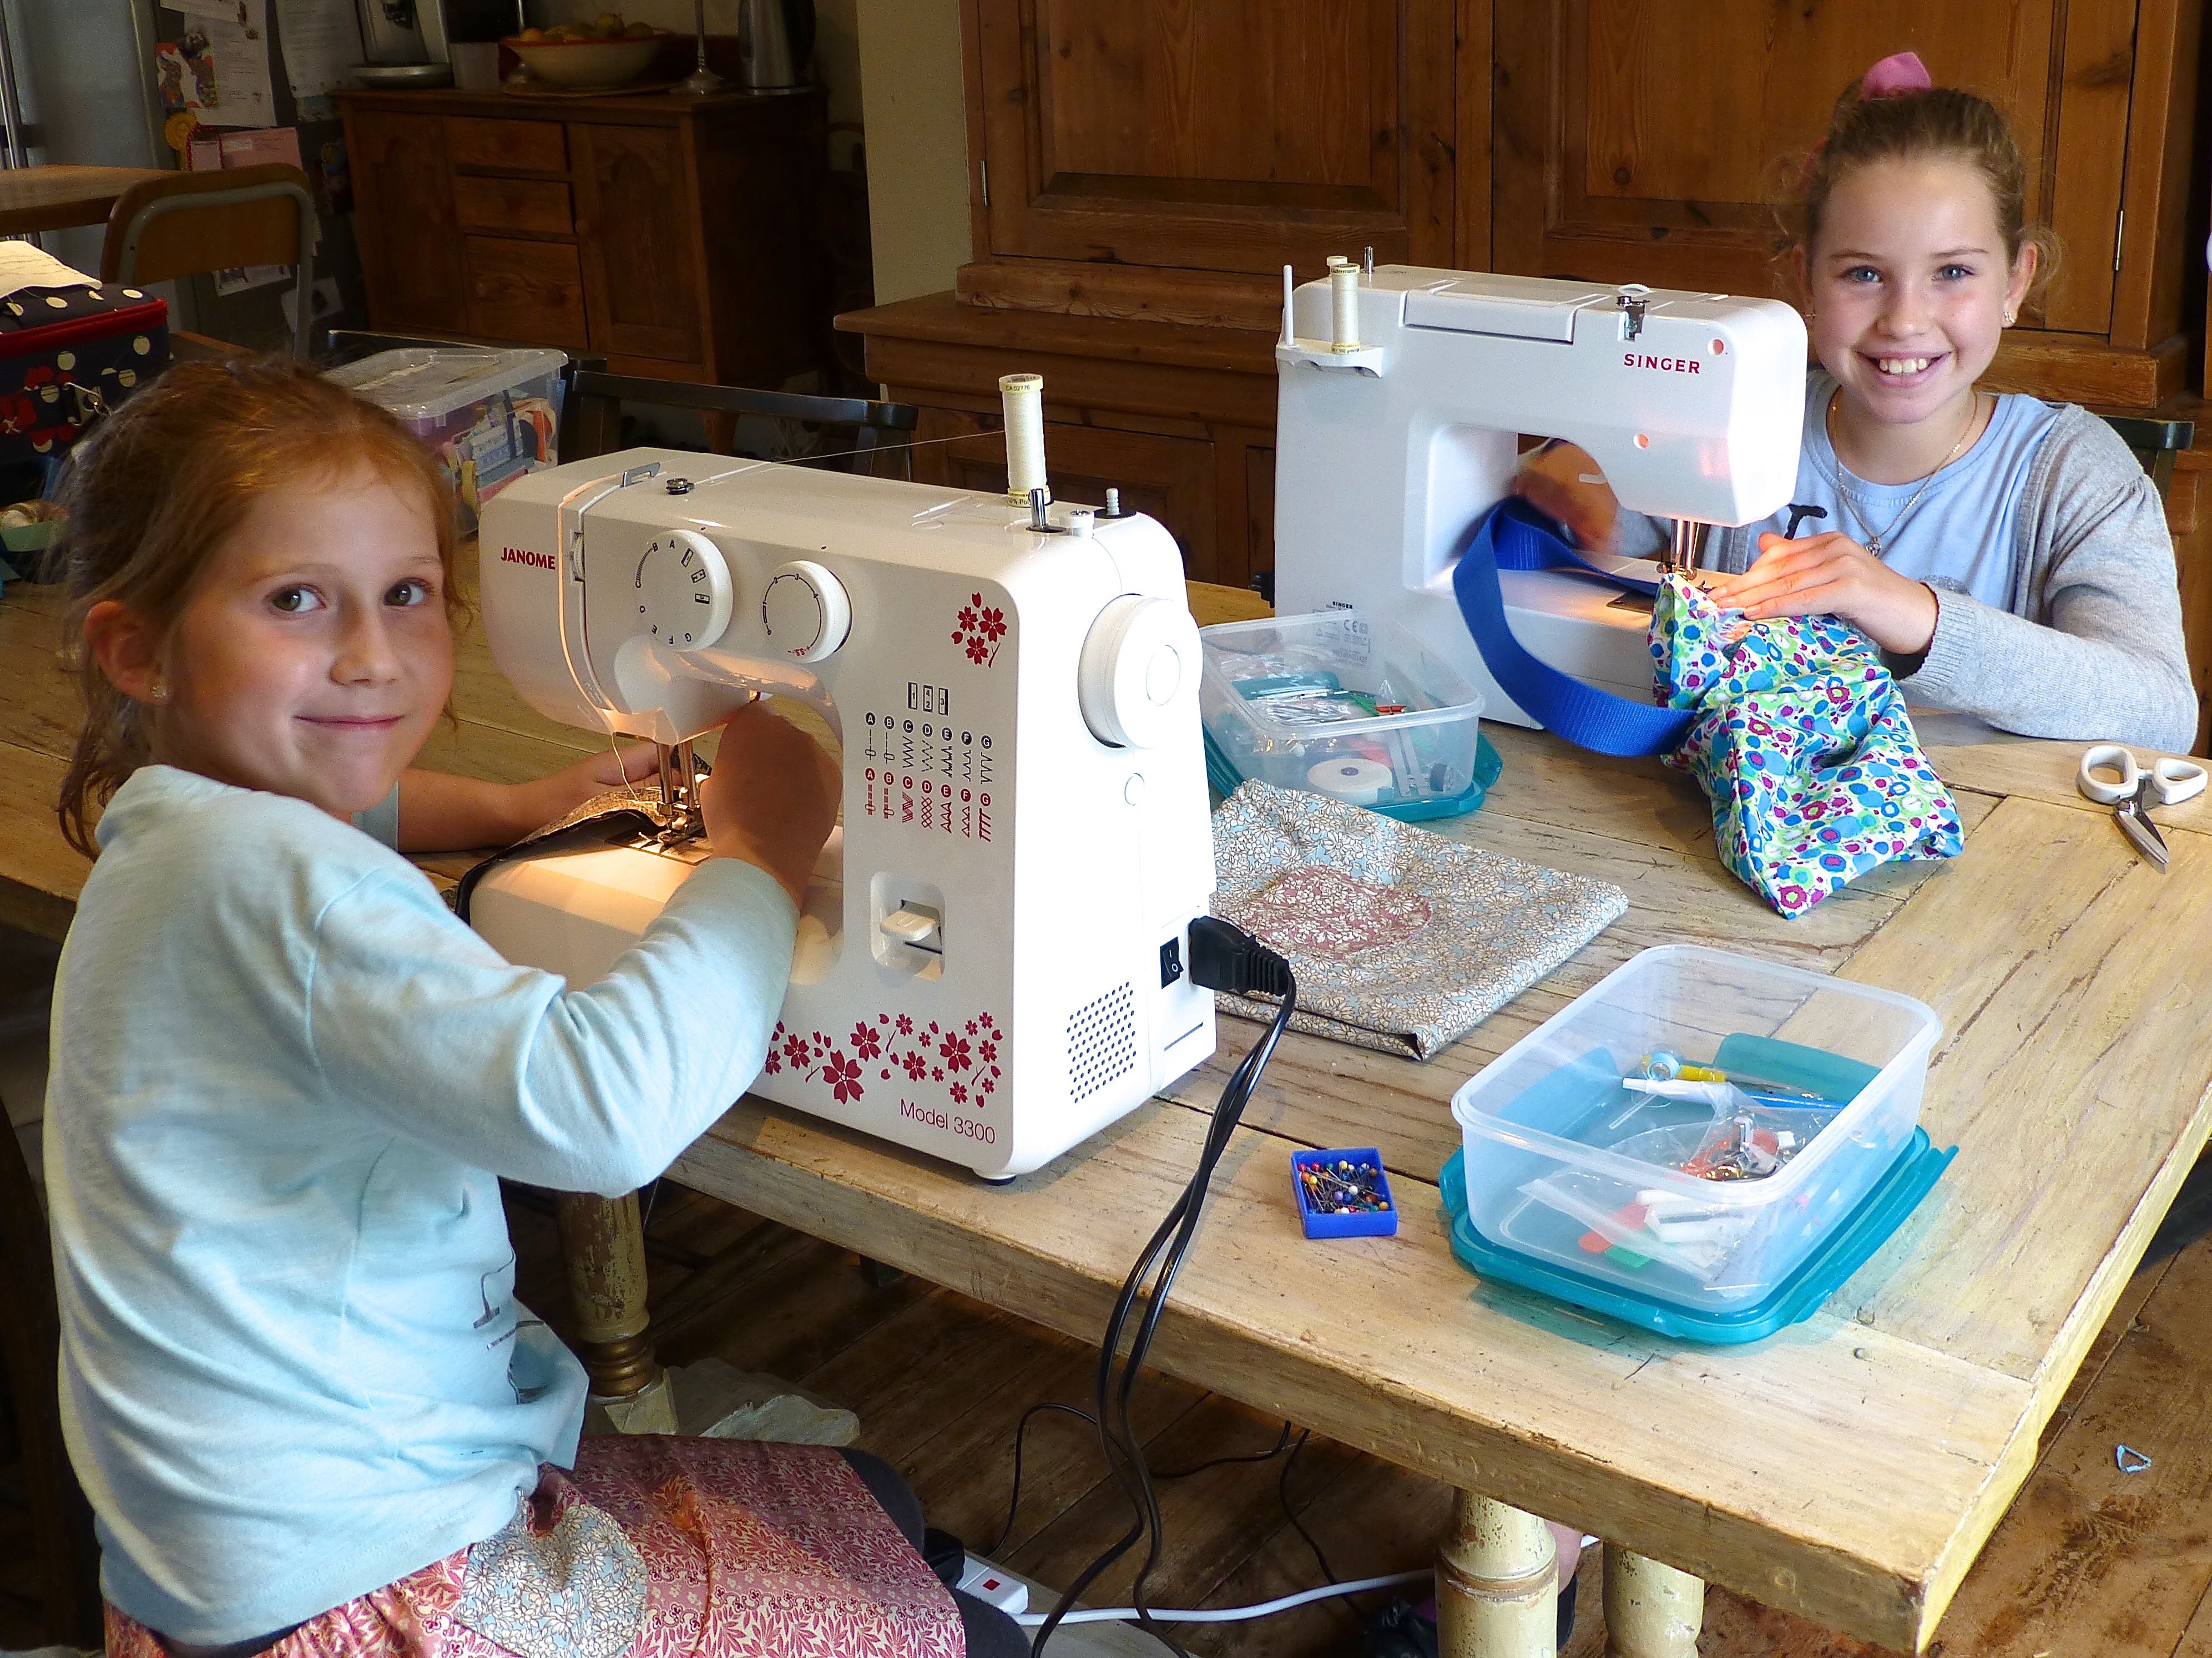
This little girl brought her machine along as she felt comfortable using it and it soon became apparent that she was familiar with machine sewing, already able to thread it (almost) correctly and wind the bobbin.

P1060835

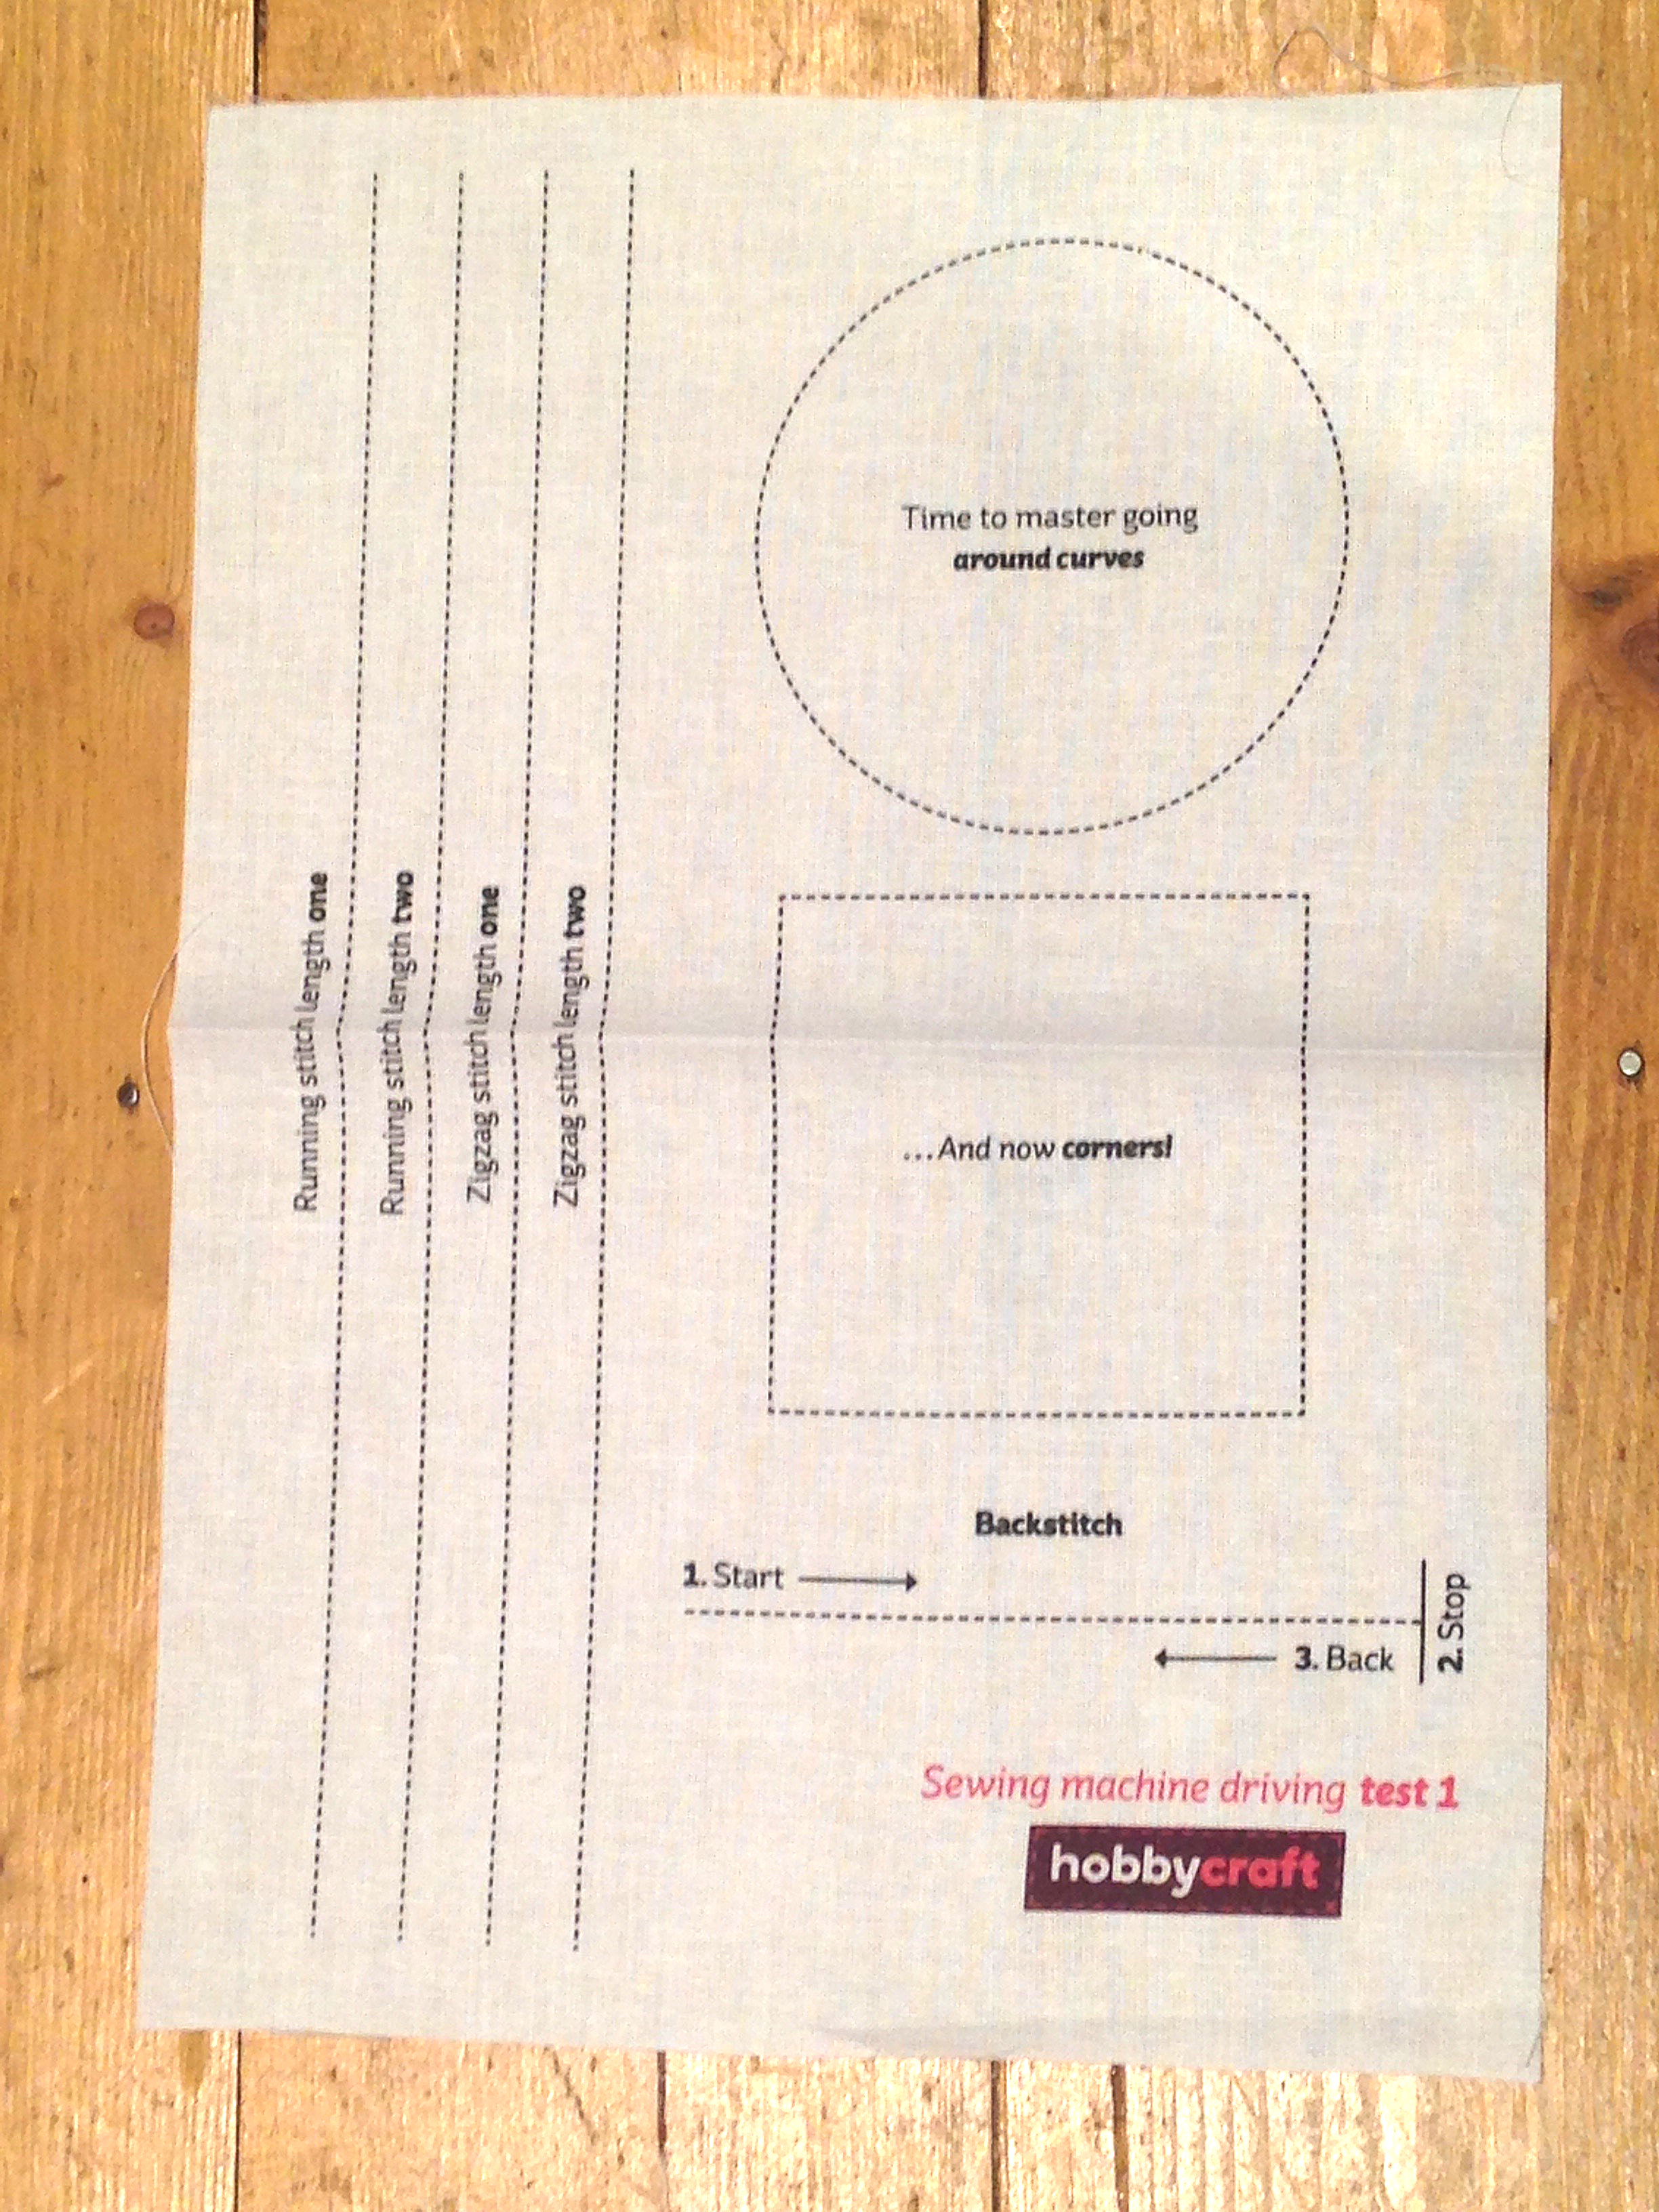
My job was to teach the finer points, good practice and safety, so we went back to basics and practiced running and zigzag stitching in a straight line, circles (harder than they thought), corners and the concept of back-stitching to prevent unravelling. Appropriate stitch lengths and seam allowances were discussed as well – all the kind of things you don’t bother with when you’re a 9 year old desperate to just get on and make something!

Practice sheet

Within half an hour both girls were ready to start a project.

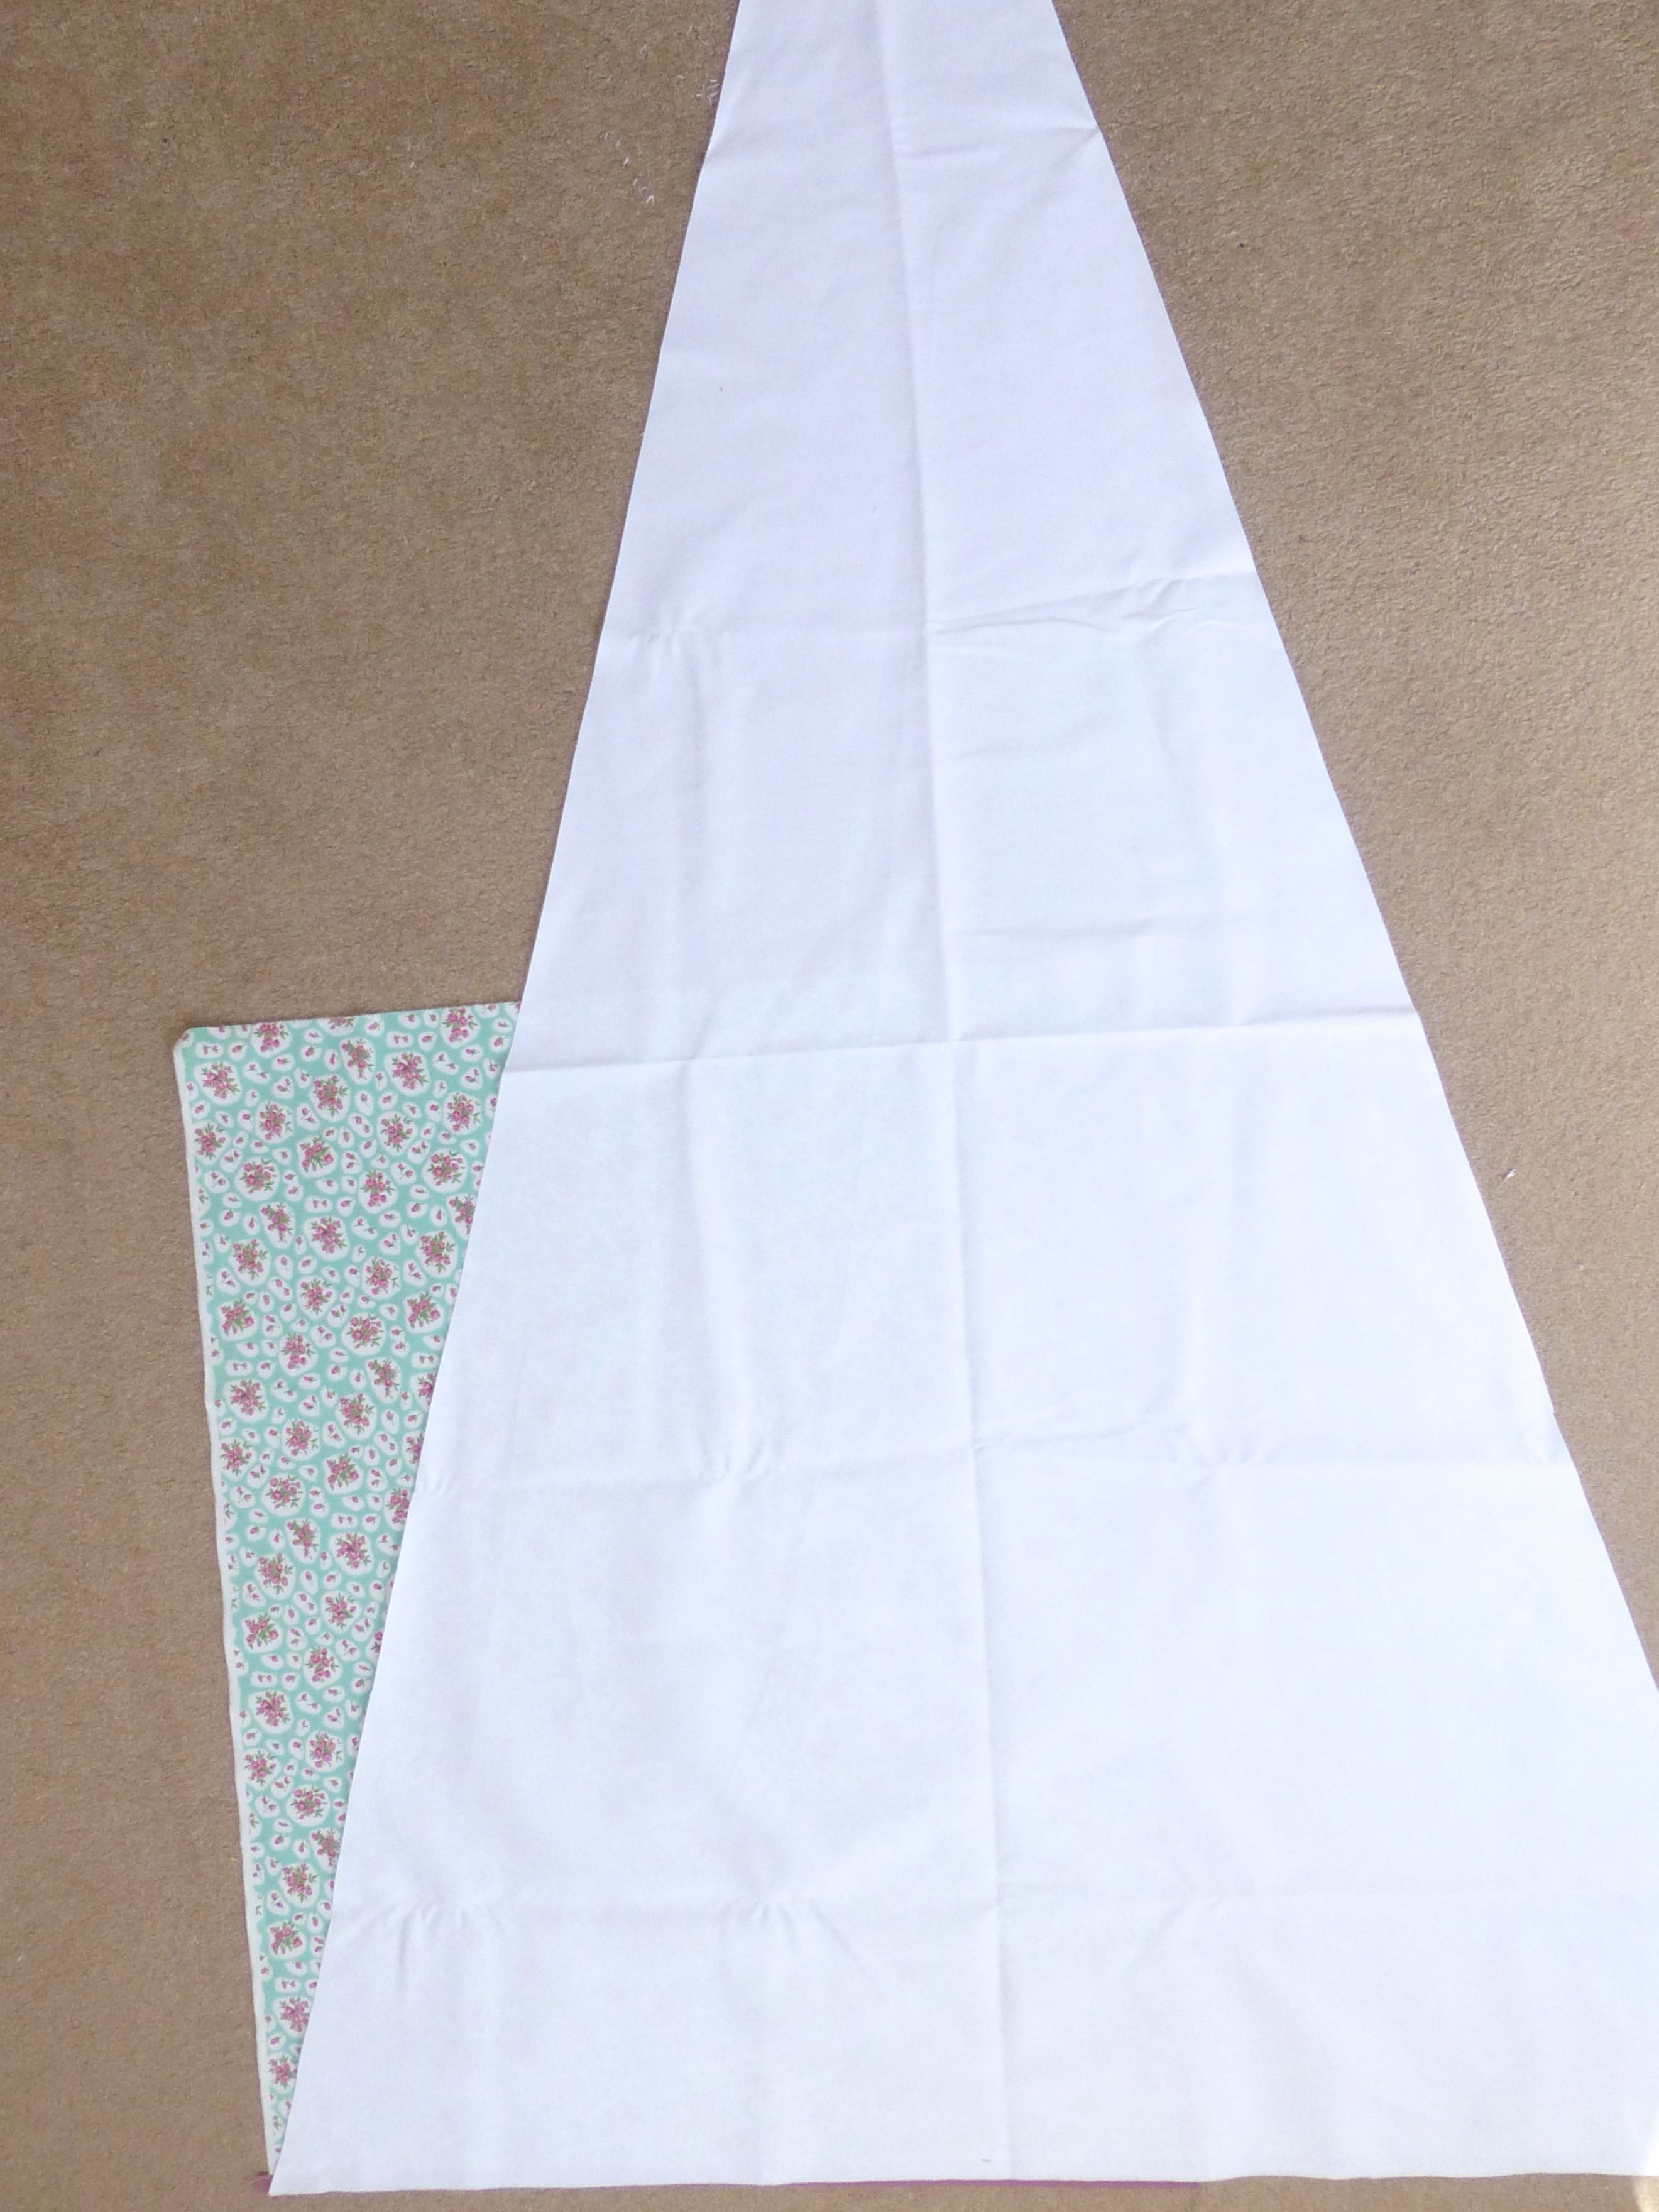
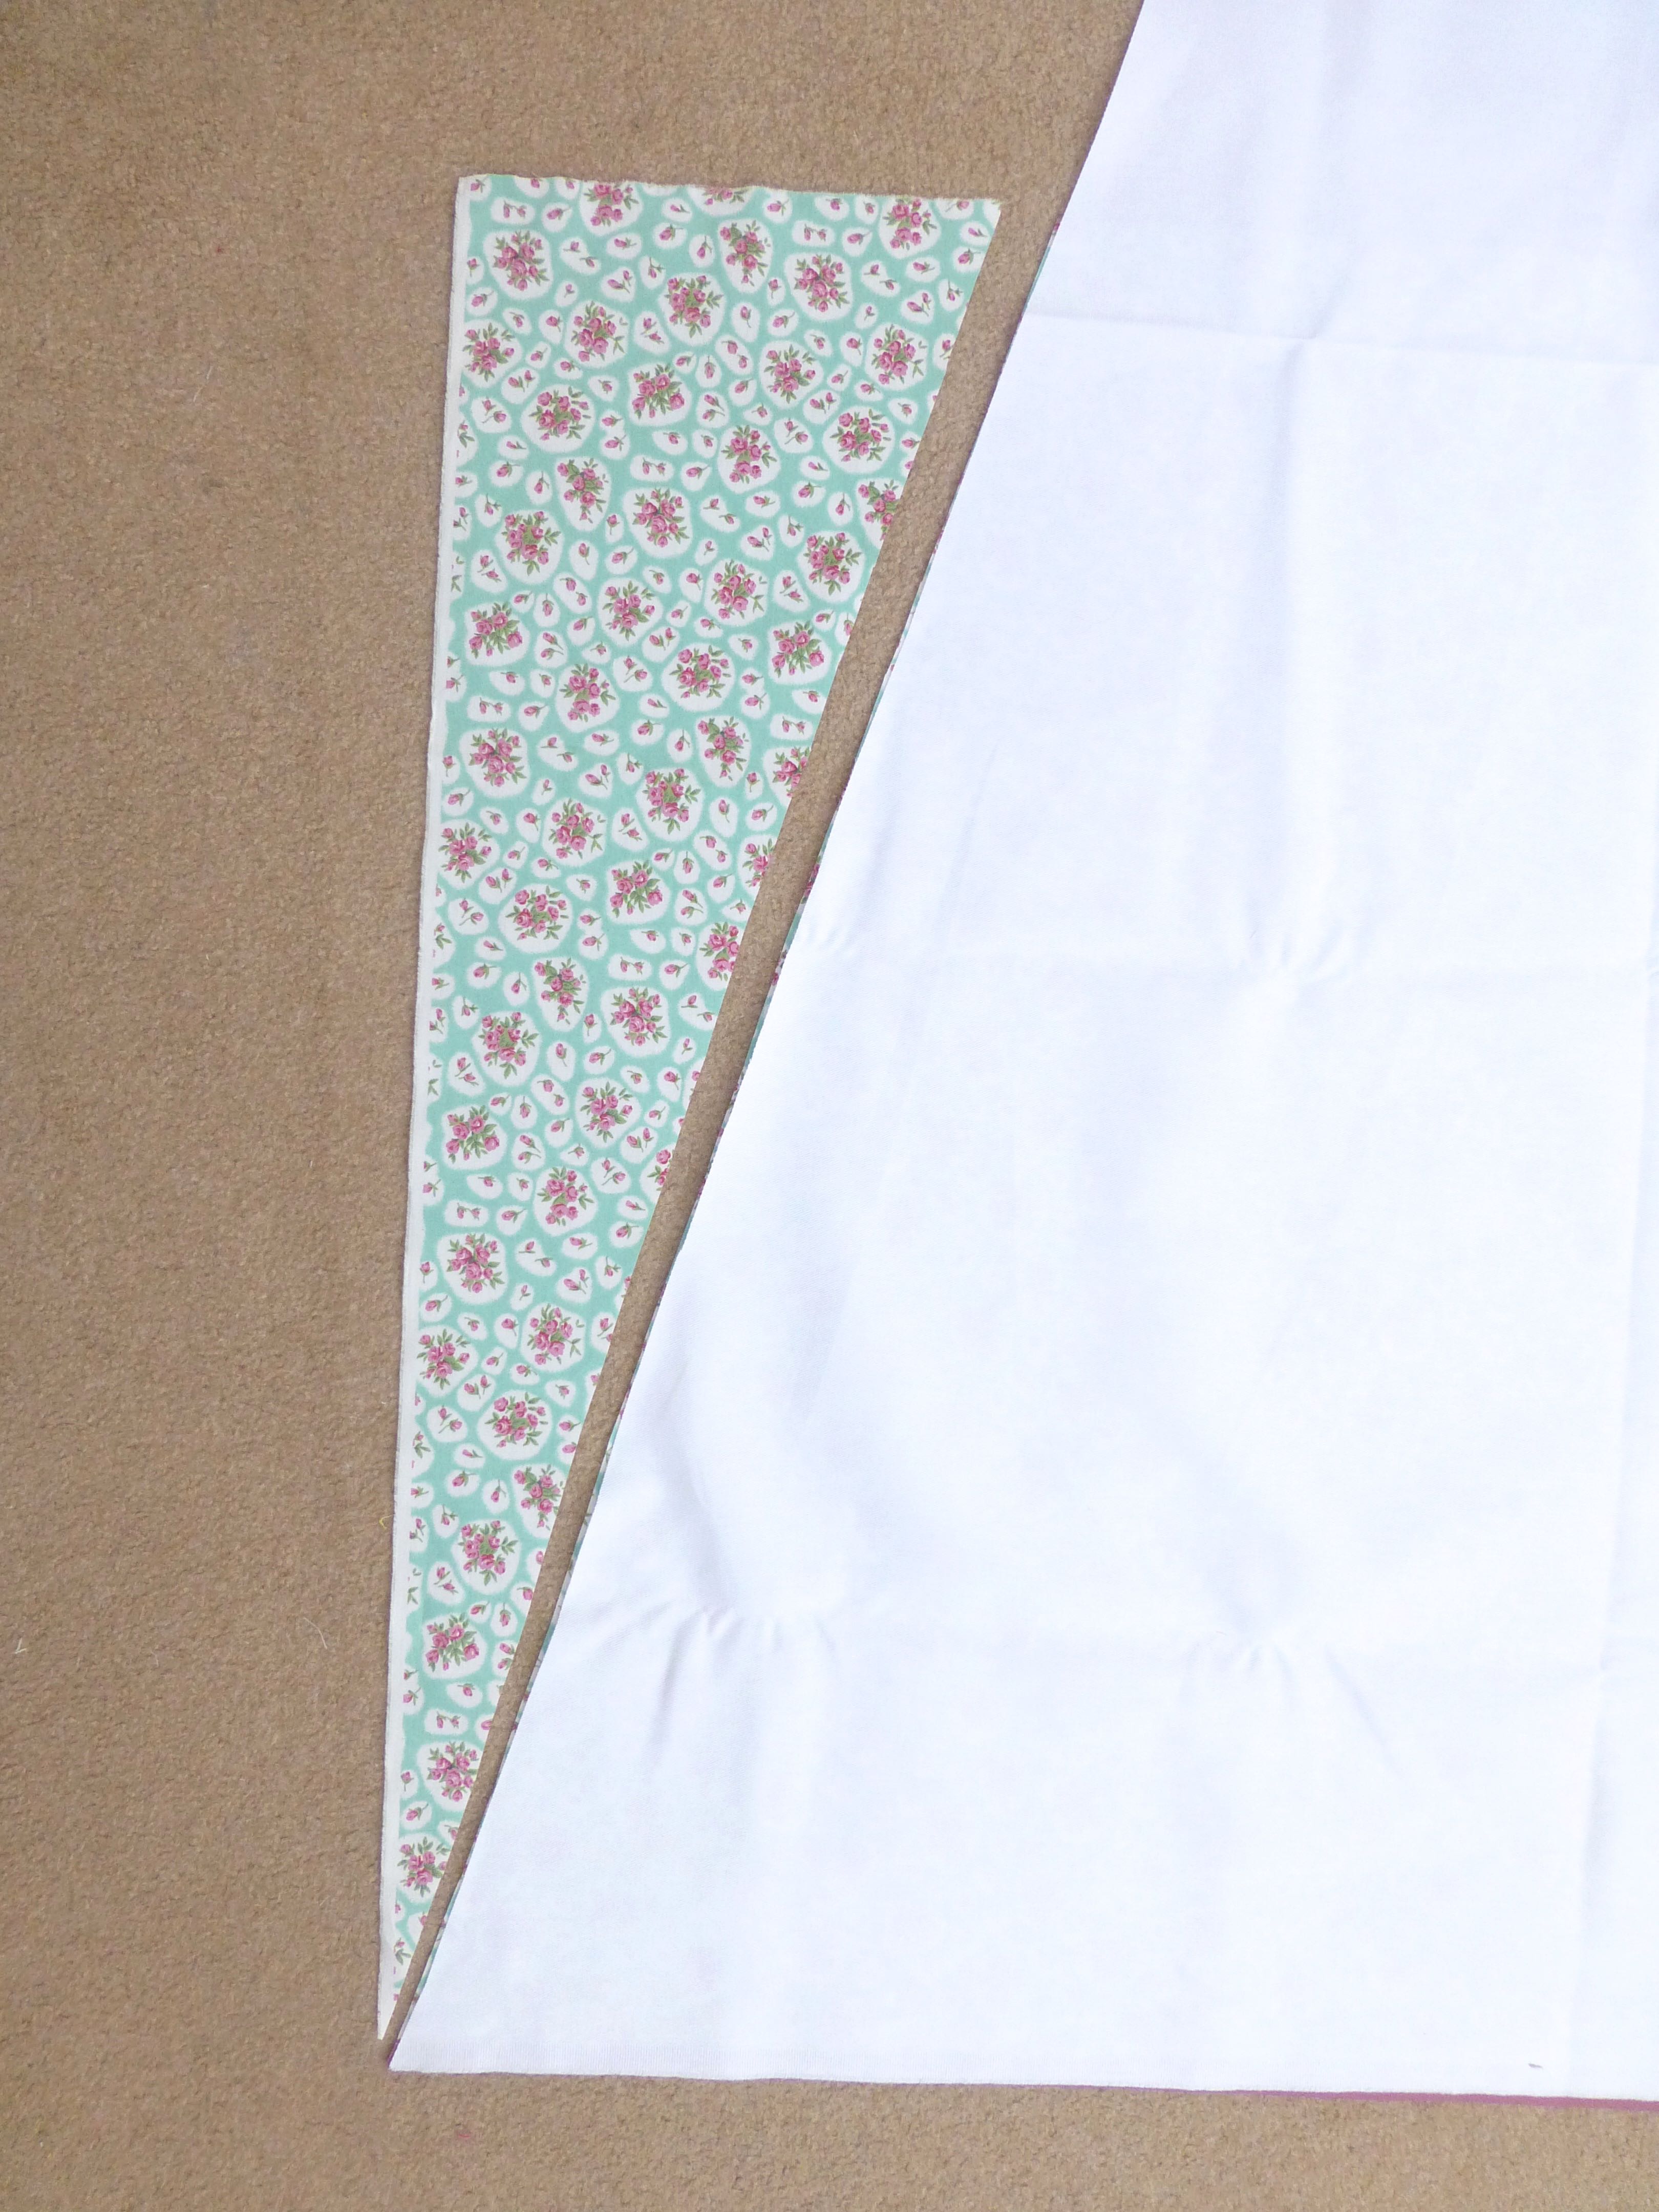
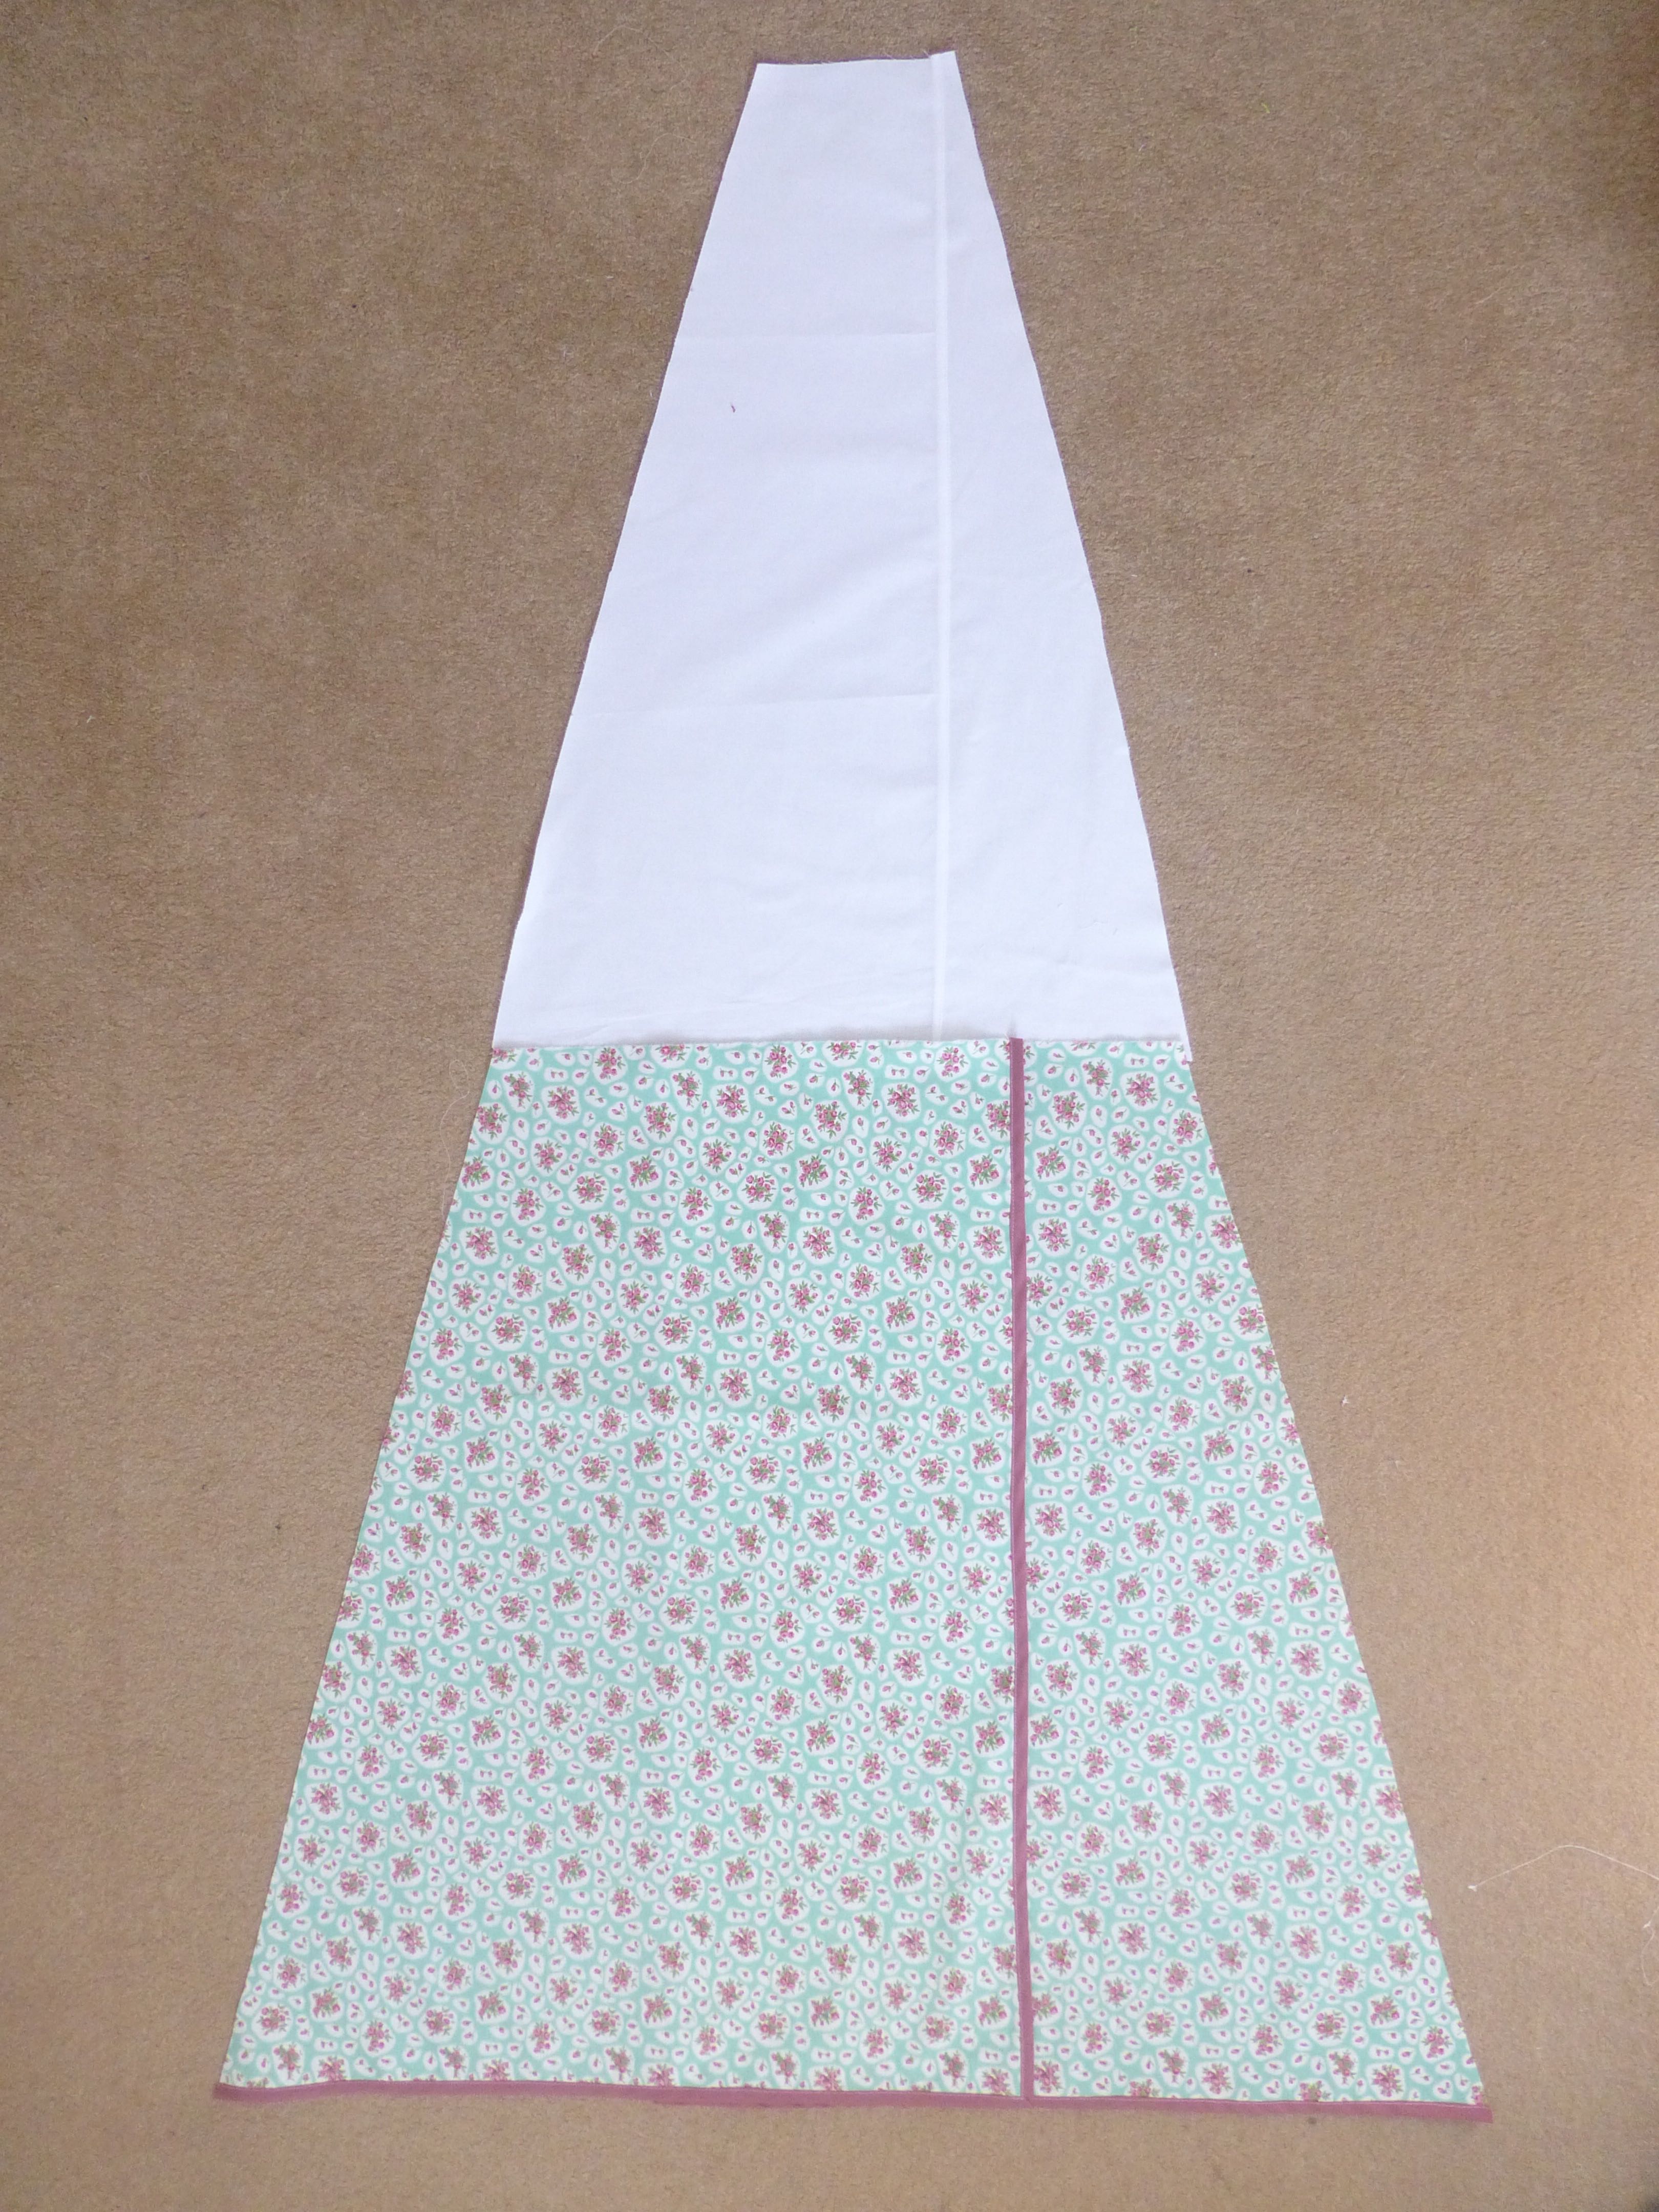
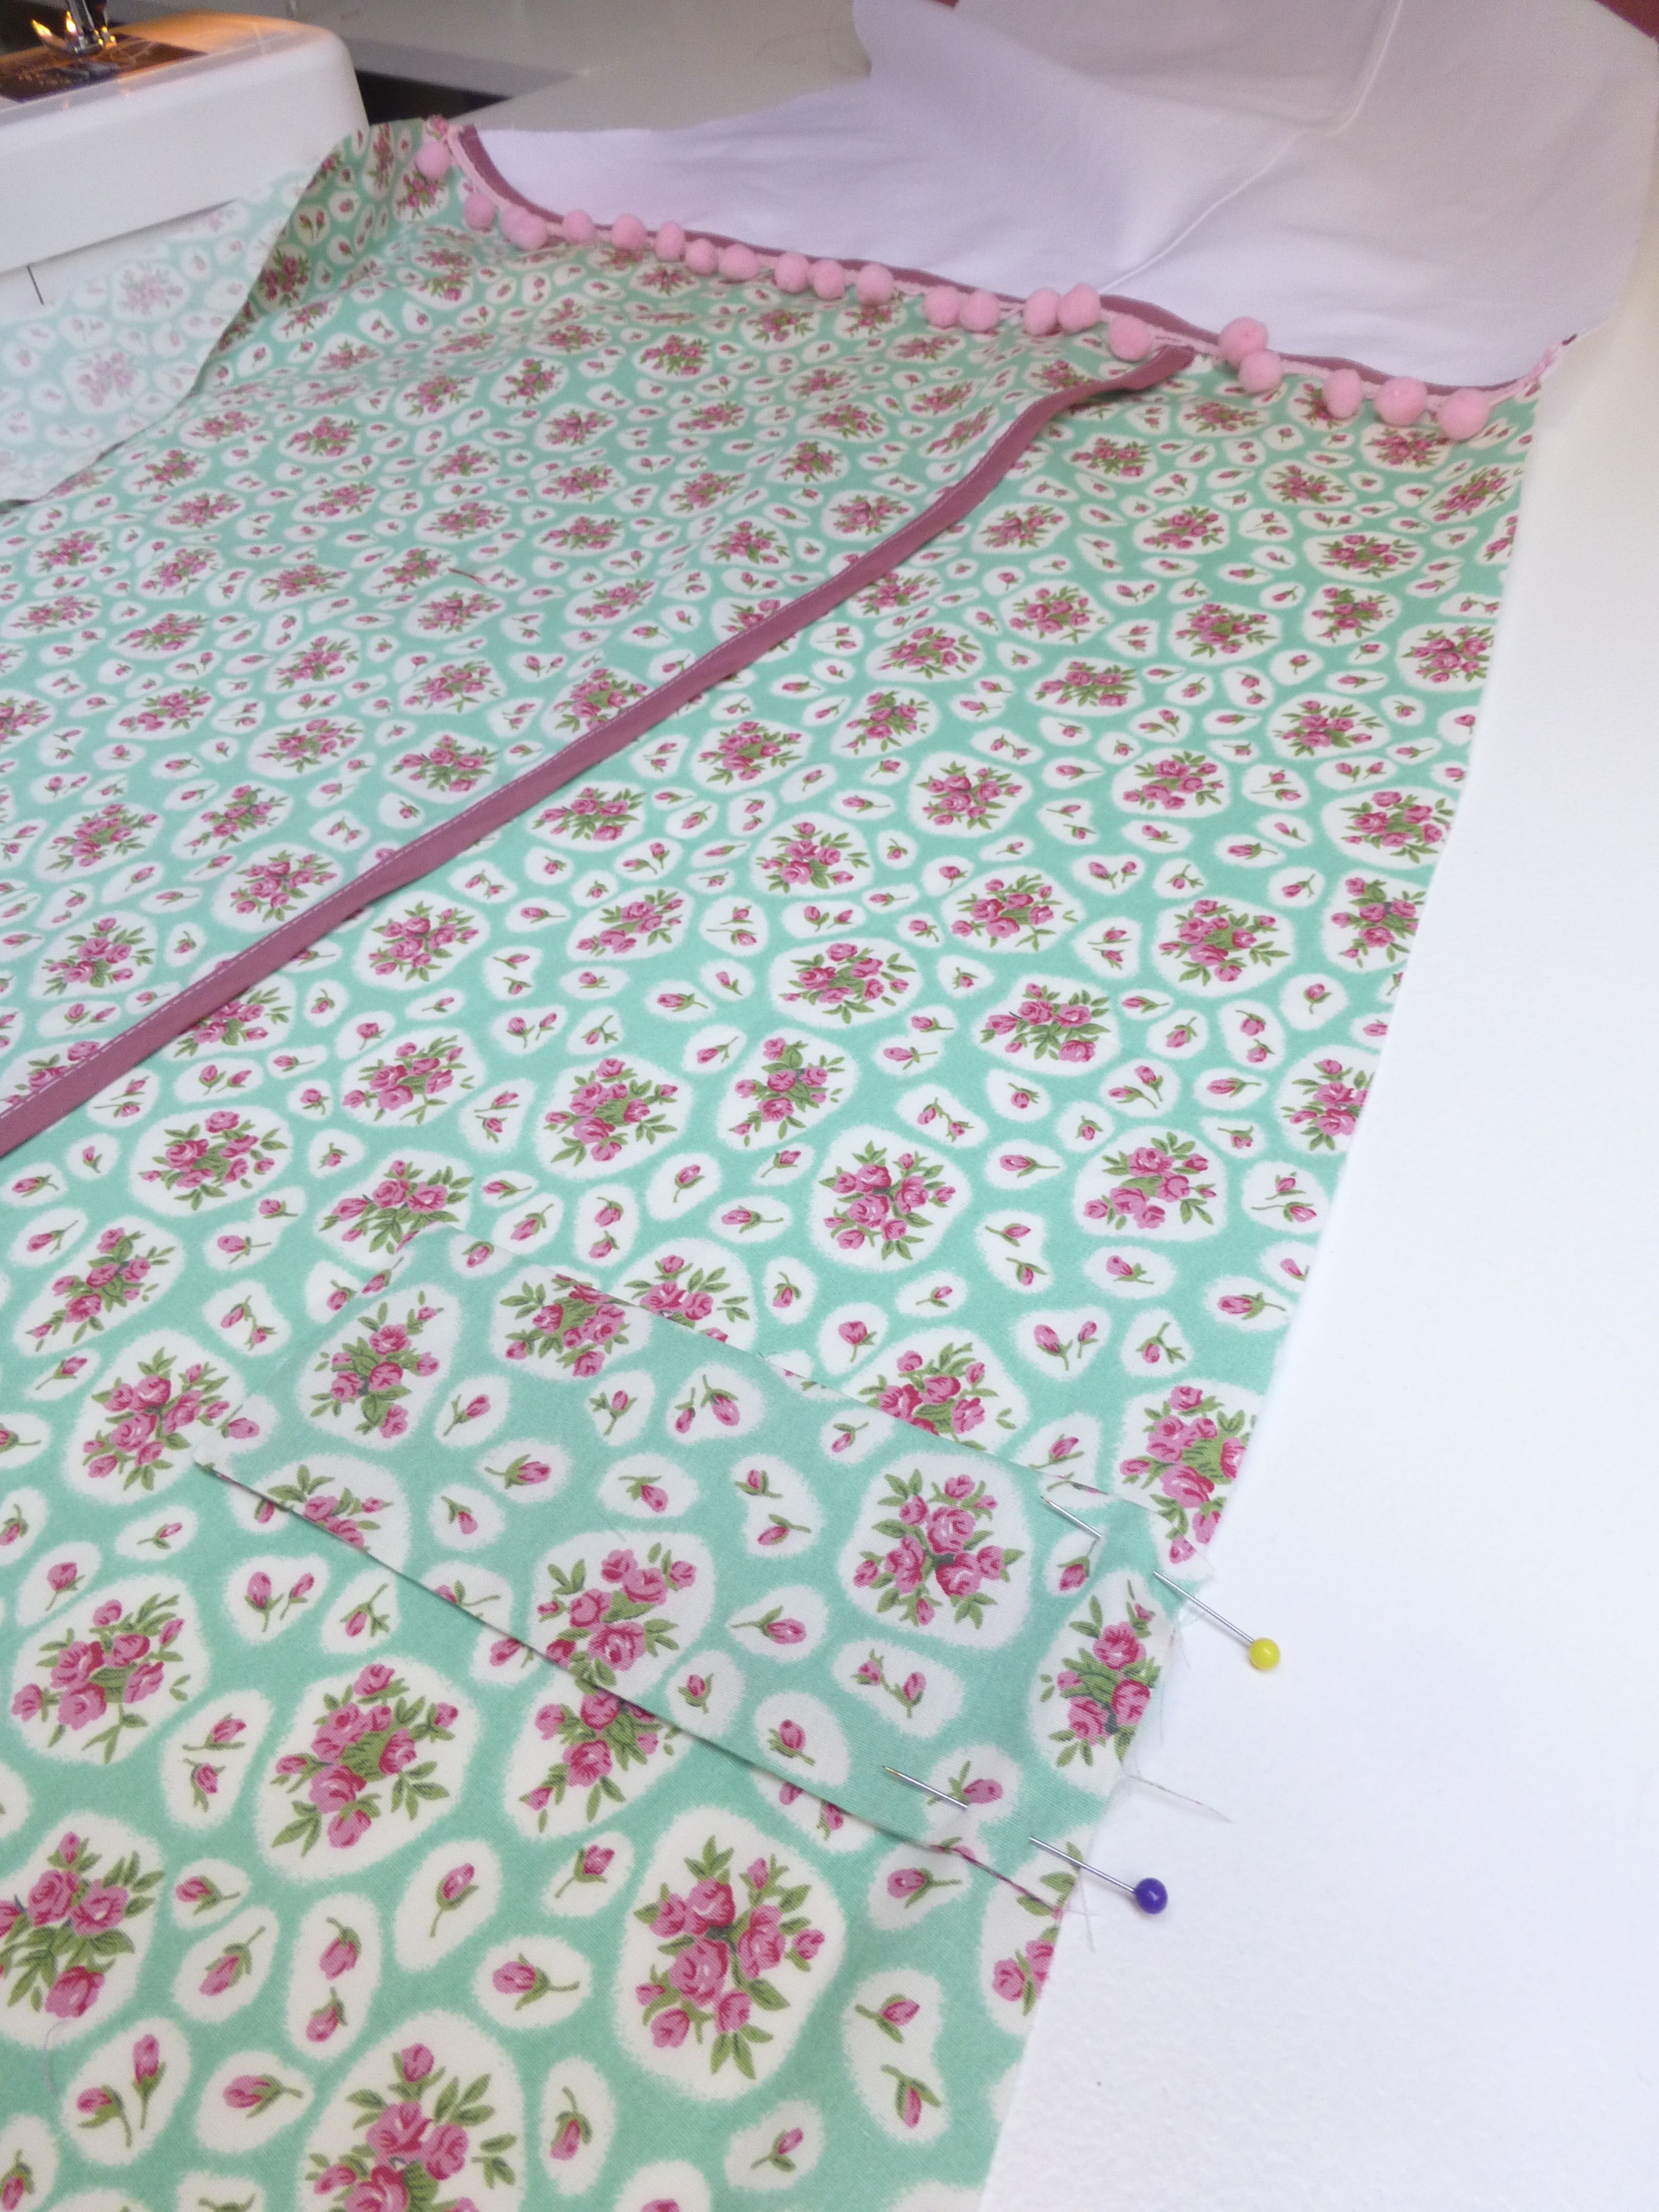
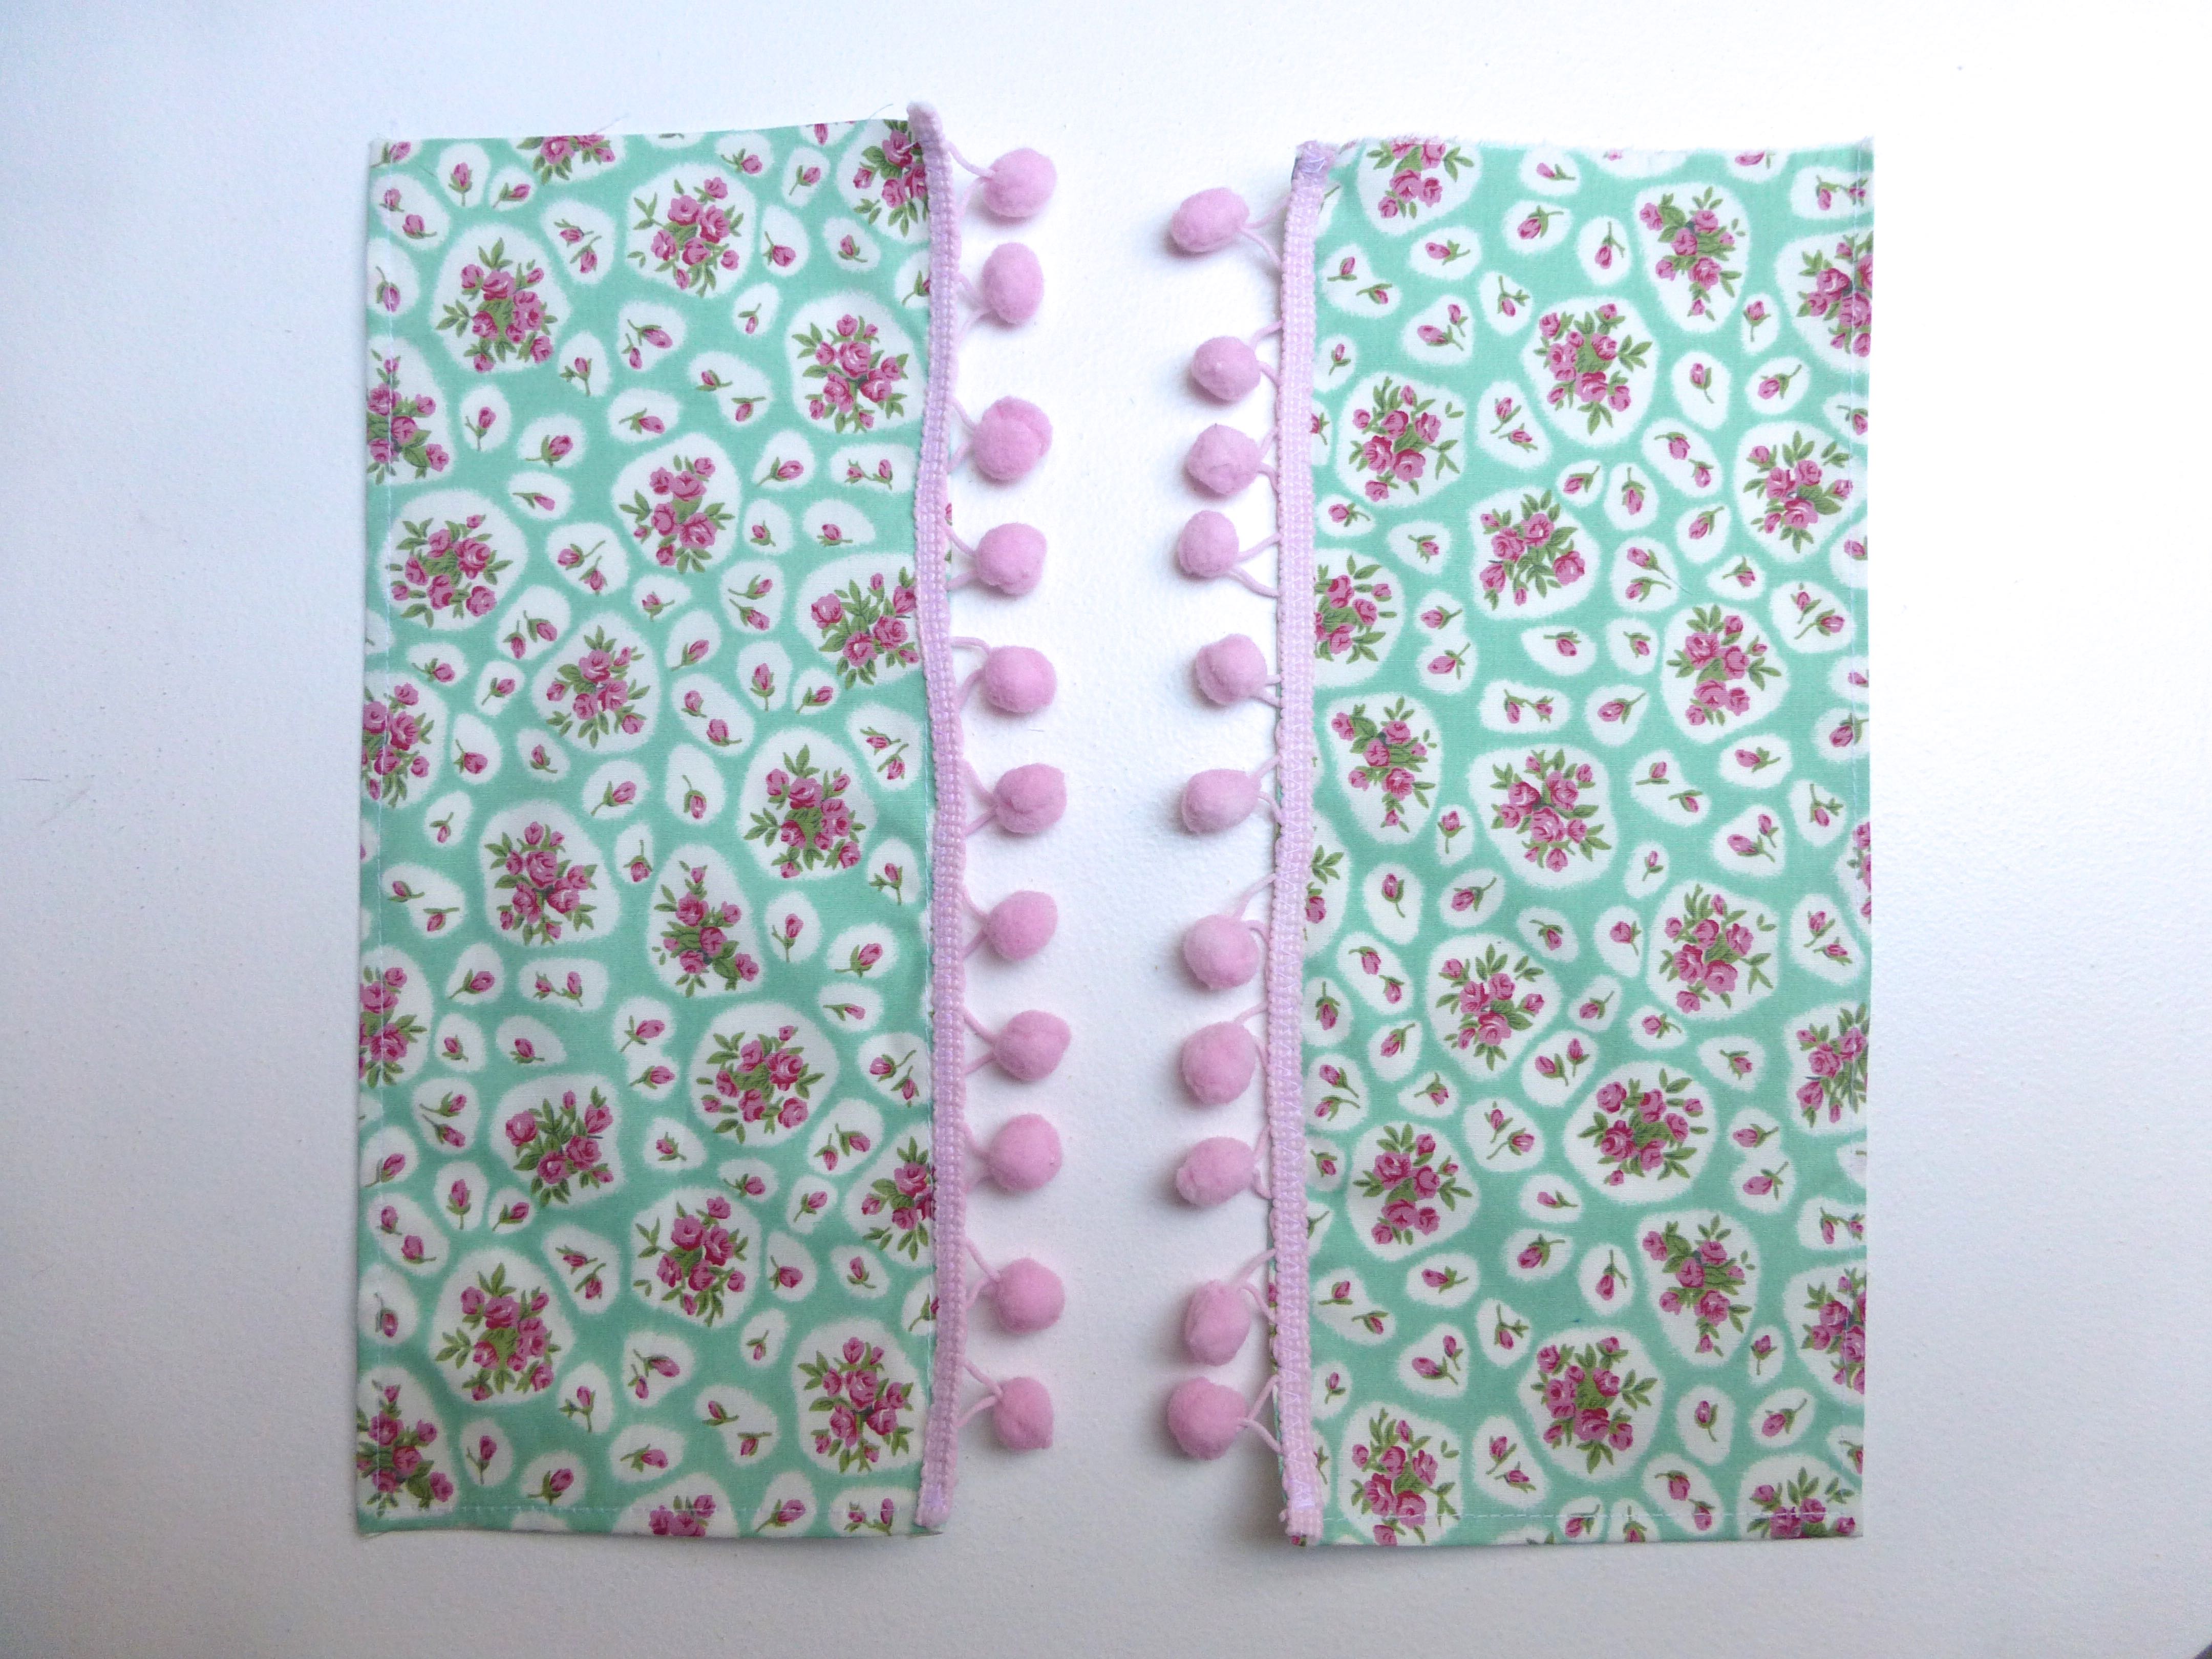
They each chose some fabric from my stash and decided, from the options given, that they would like to make a simple, elasticated skirt.

P1060837

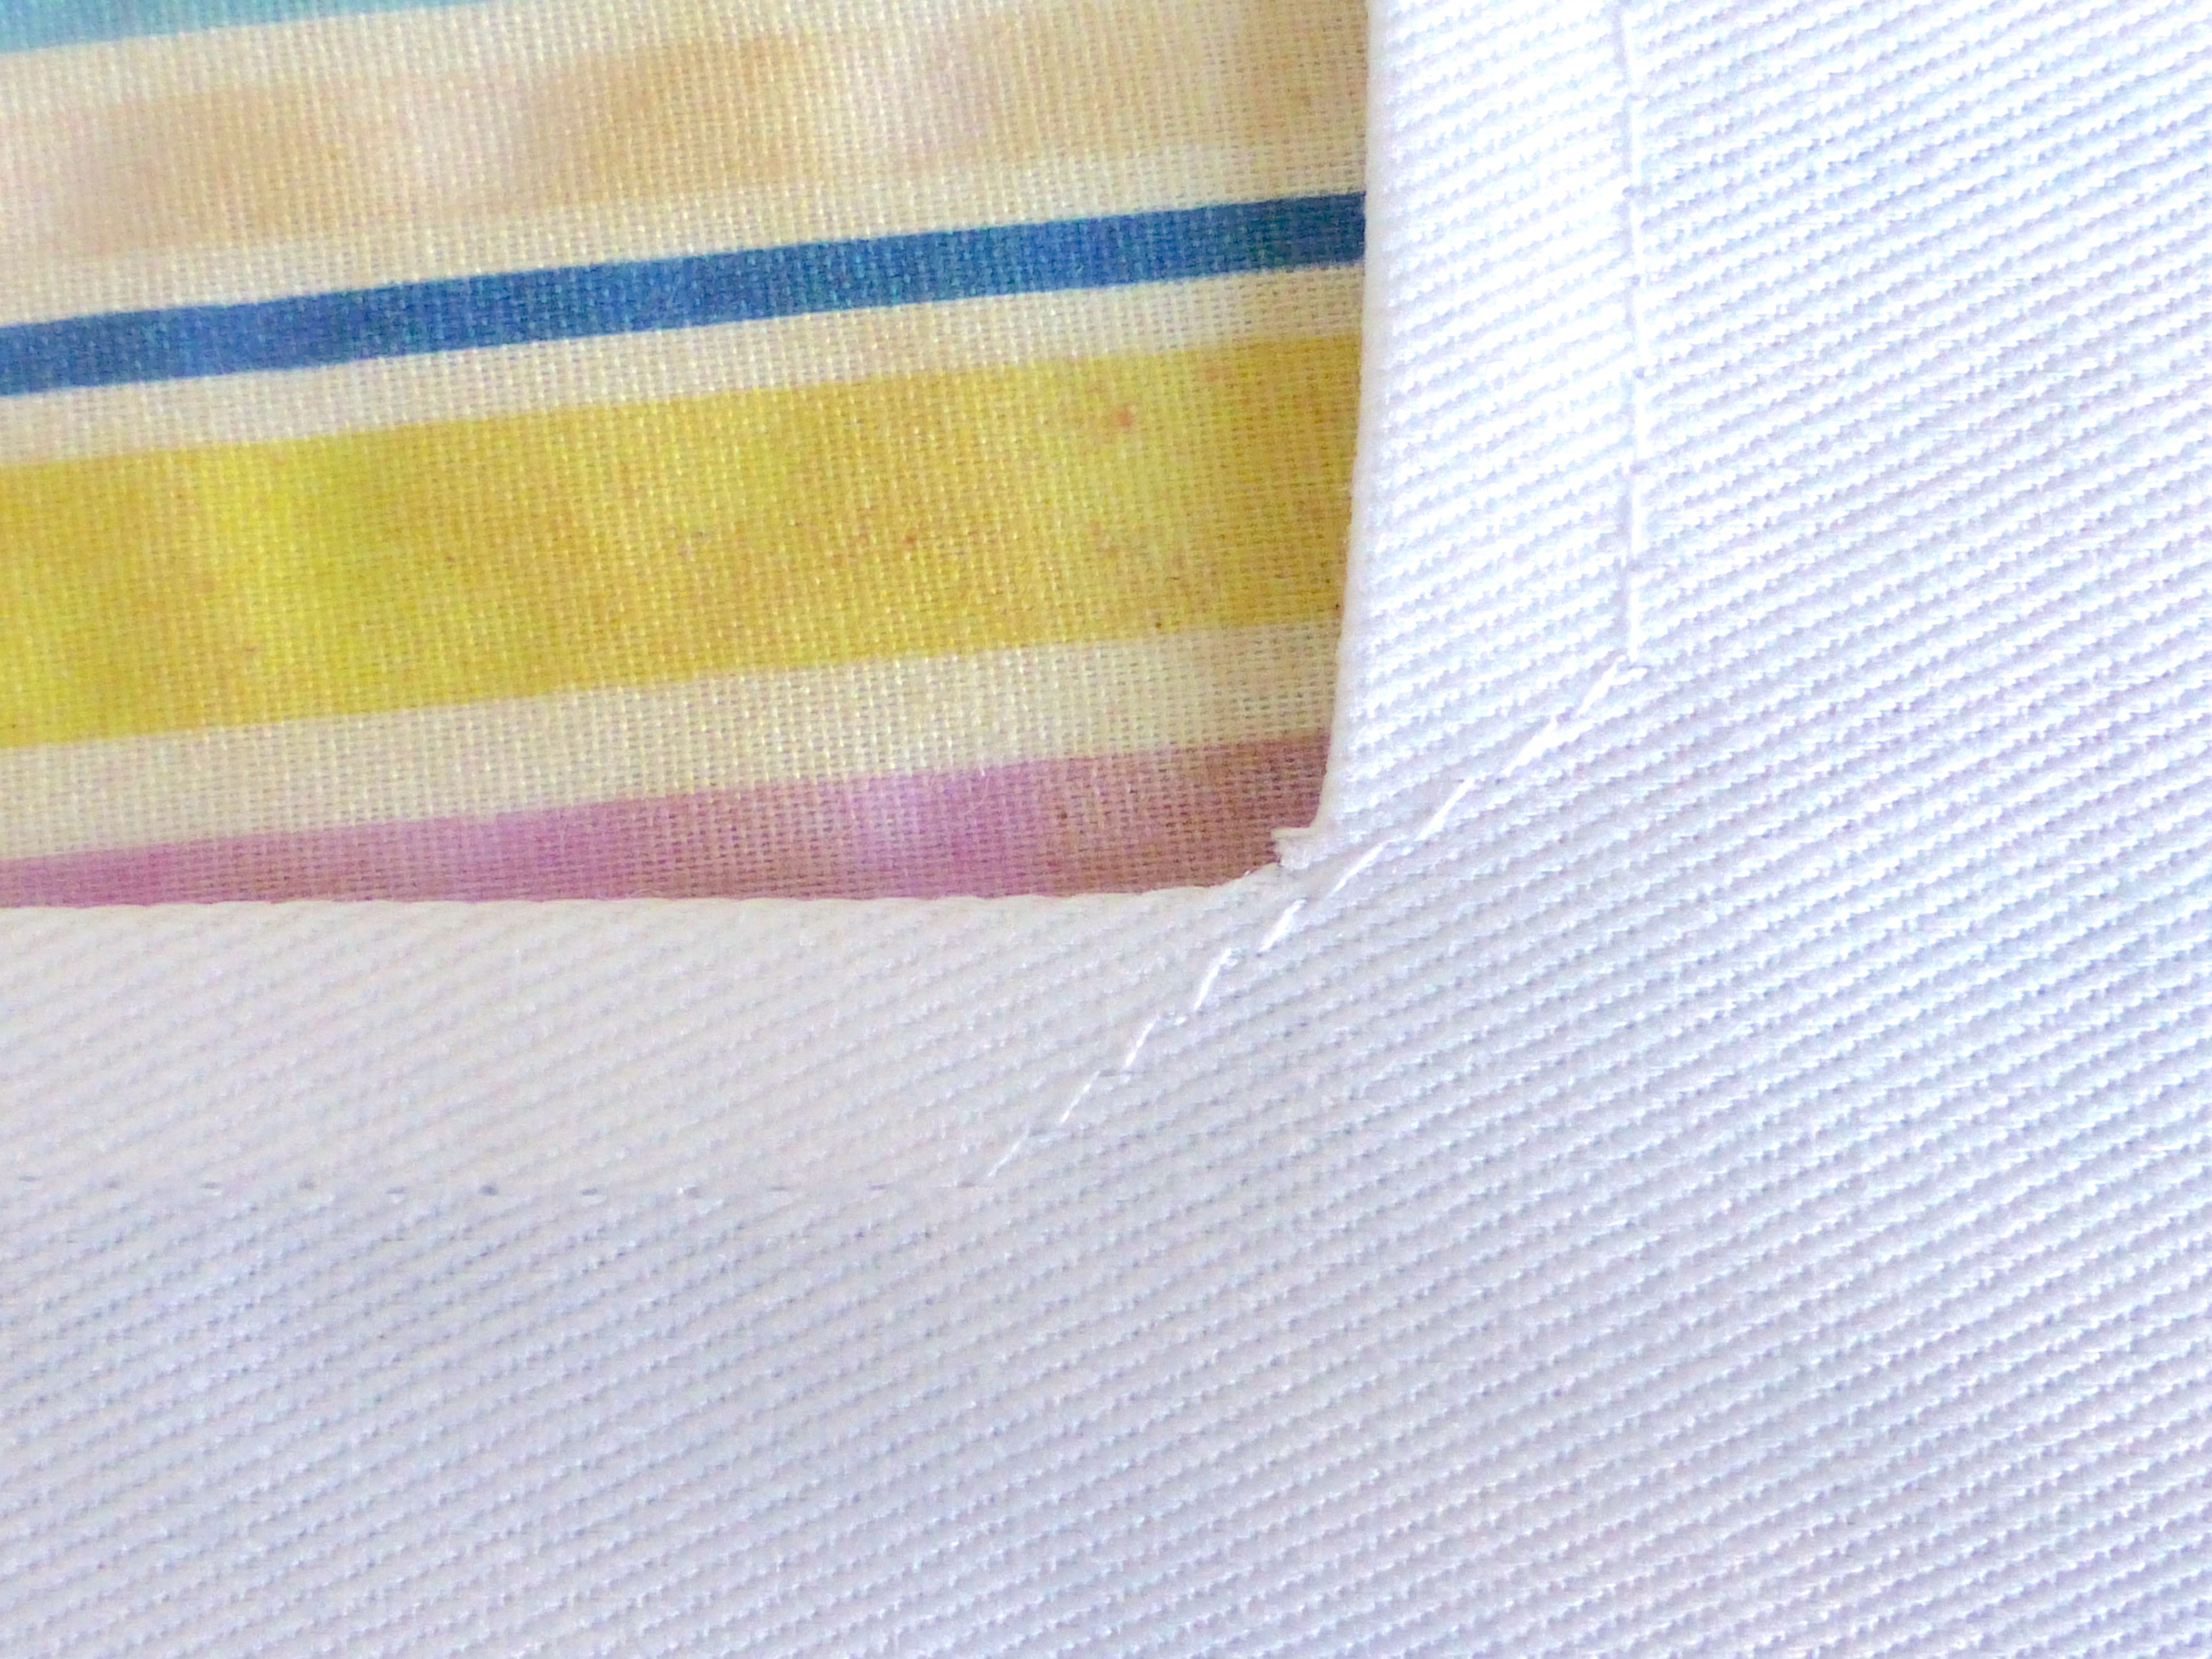
Using the lines marked on the machine bed, they learned how to keep a consistent seam allowance.

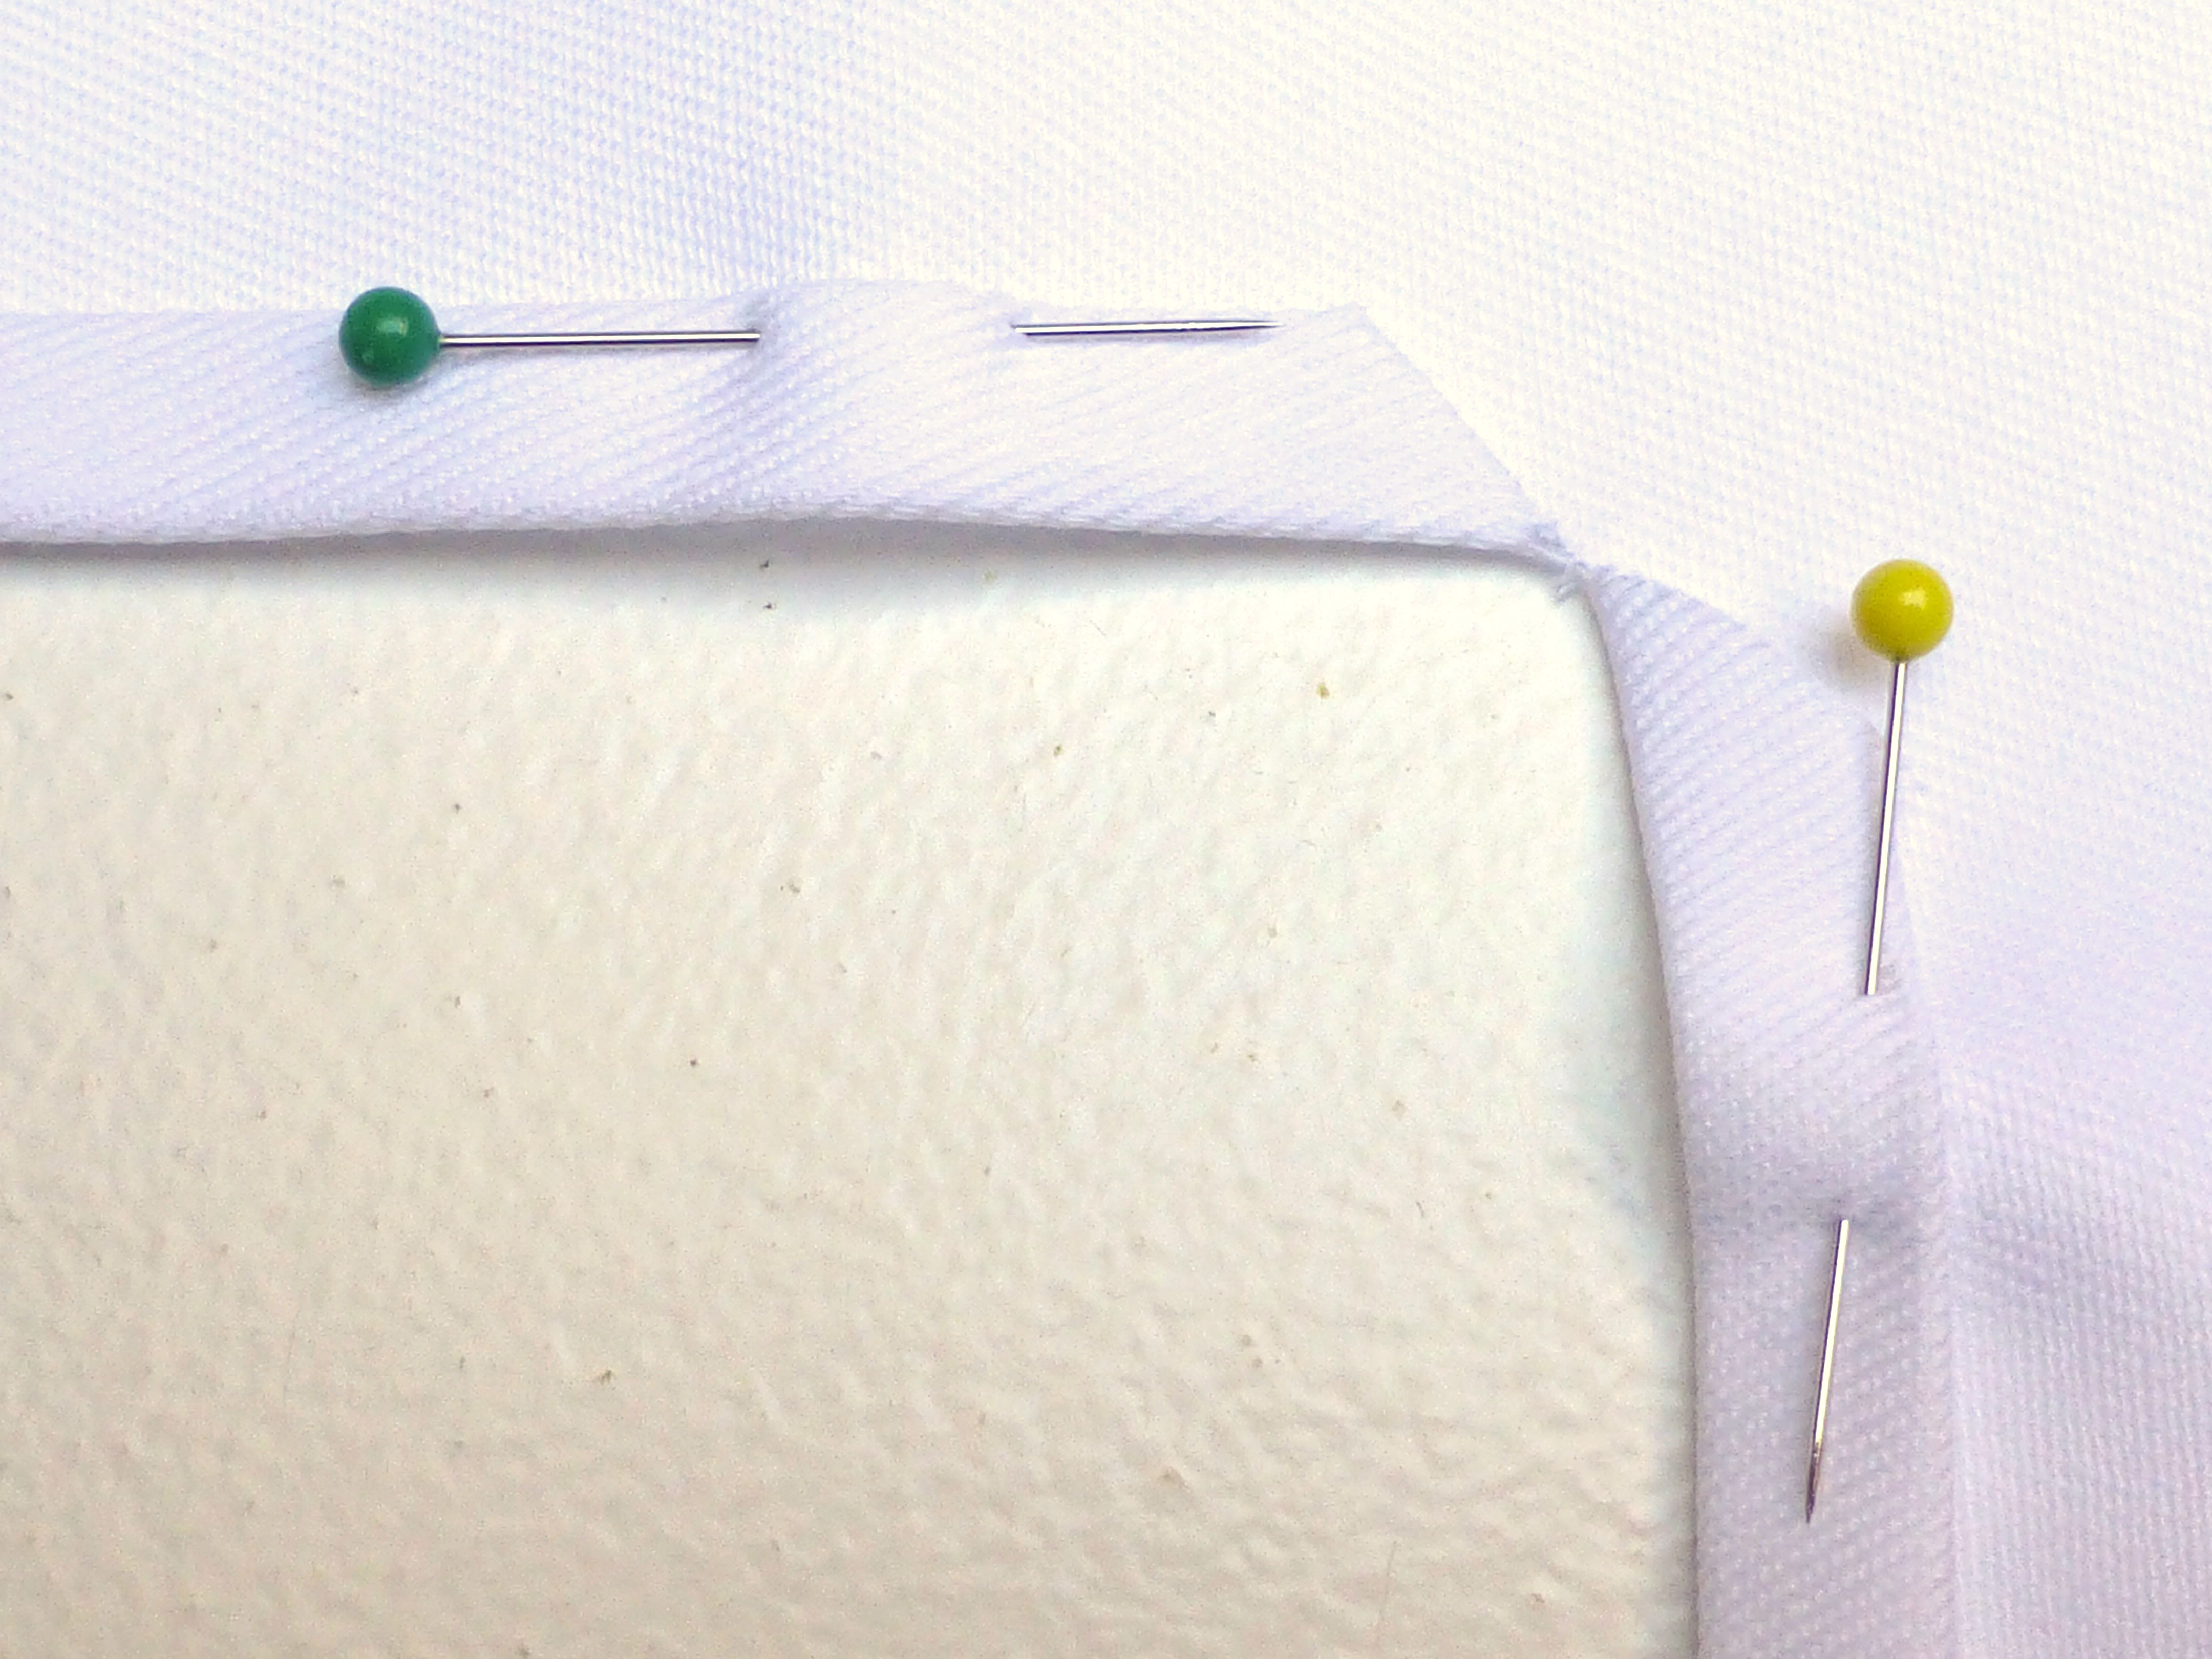
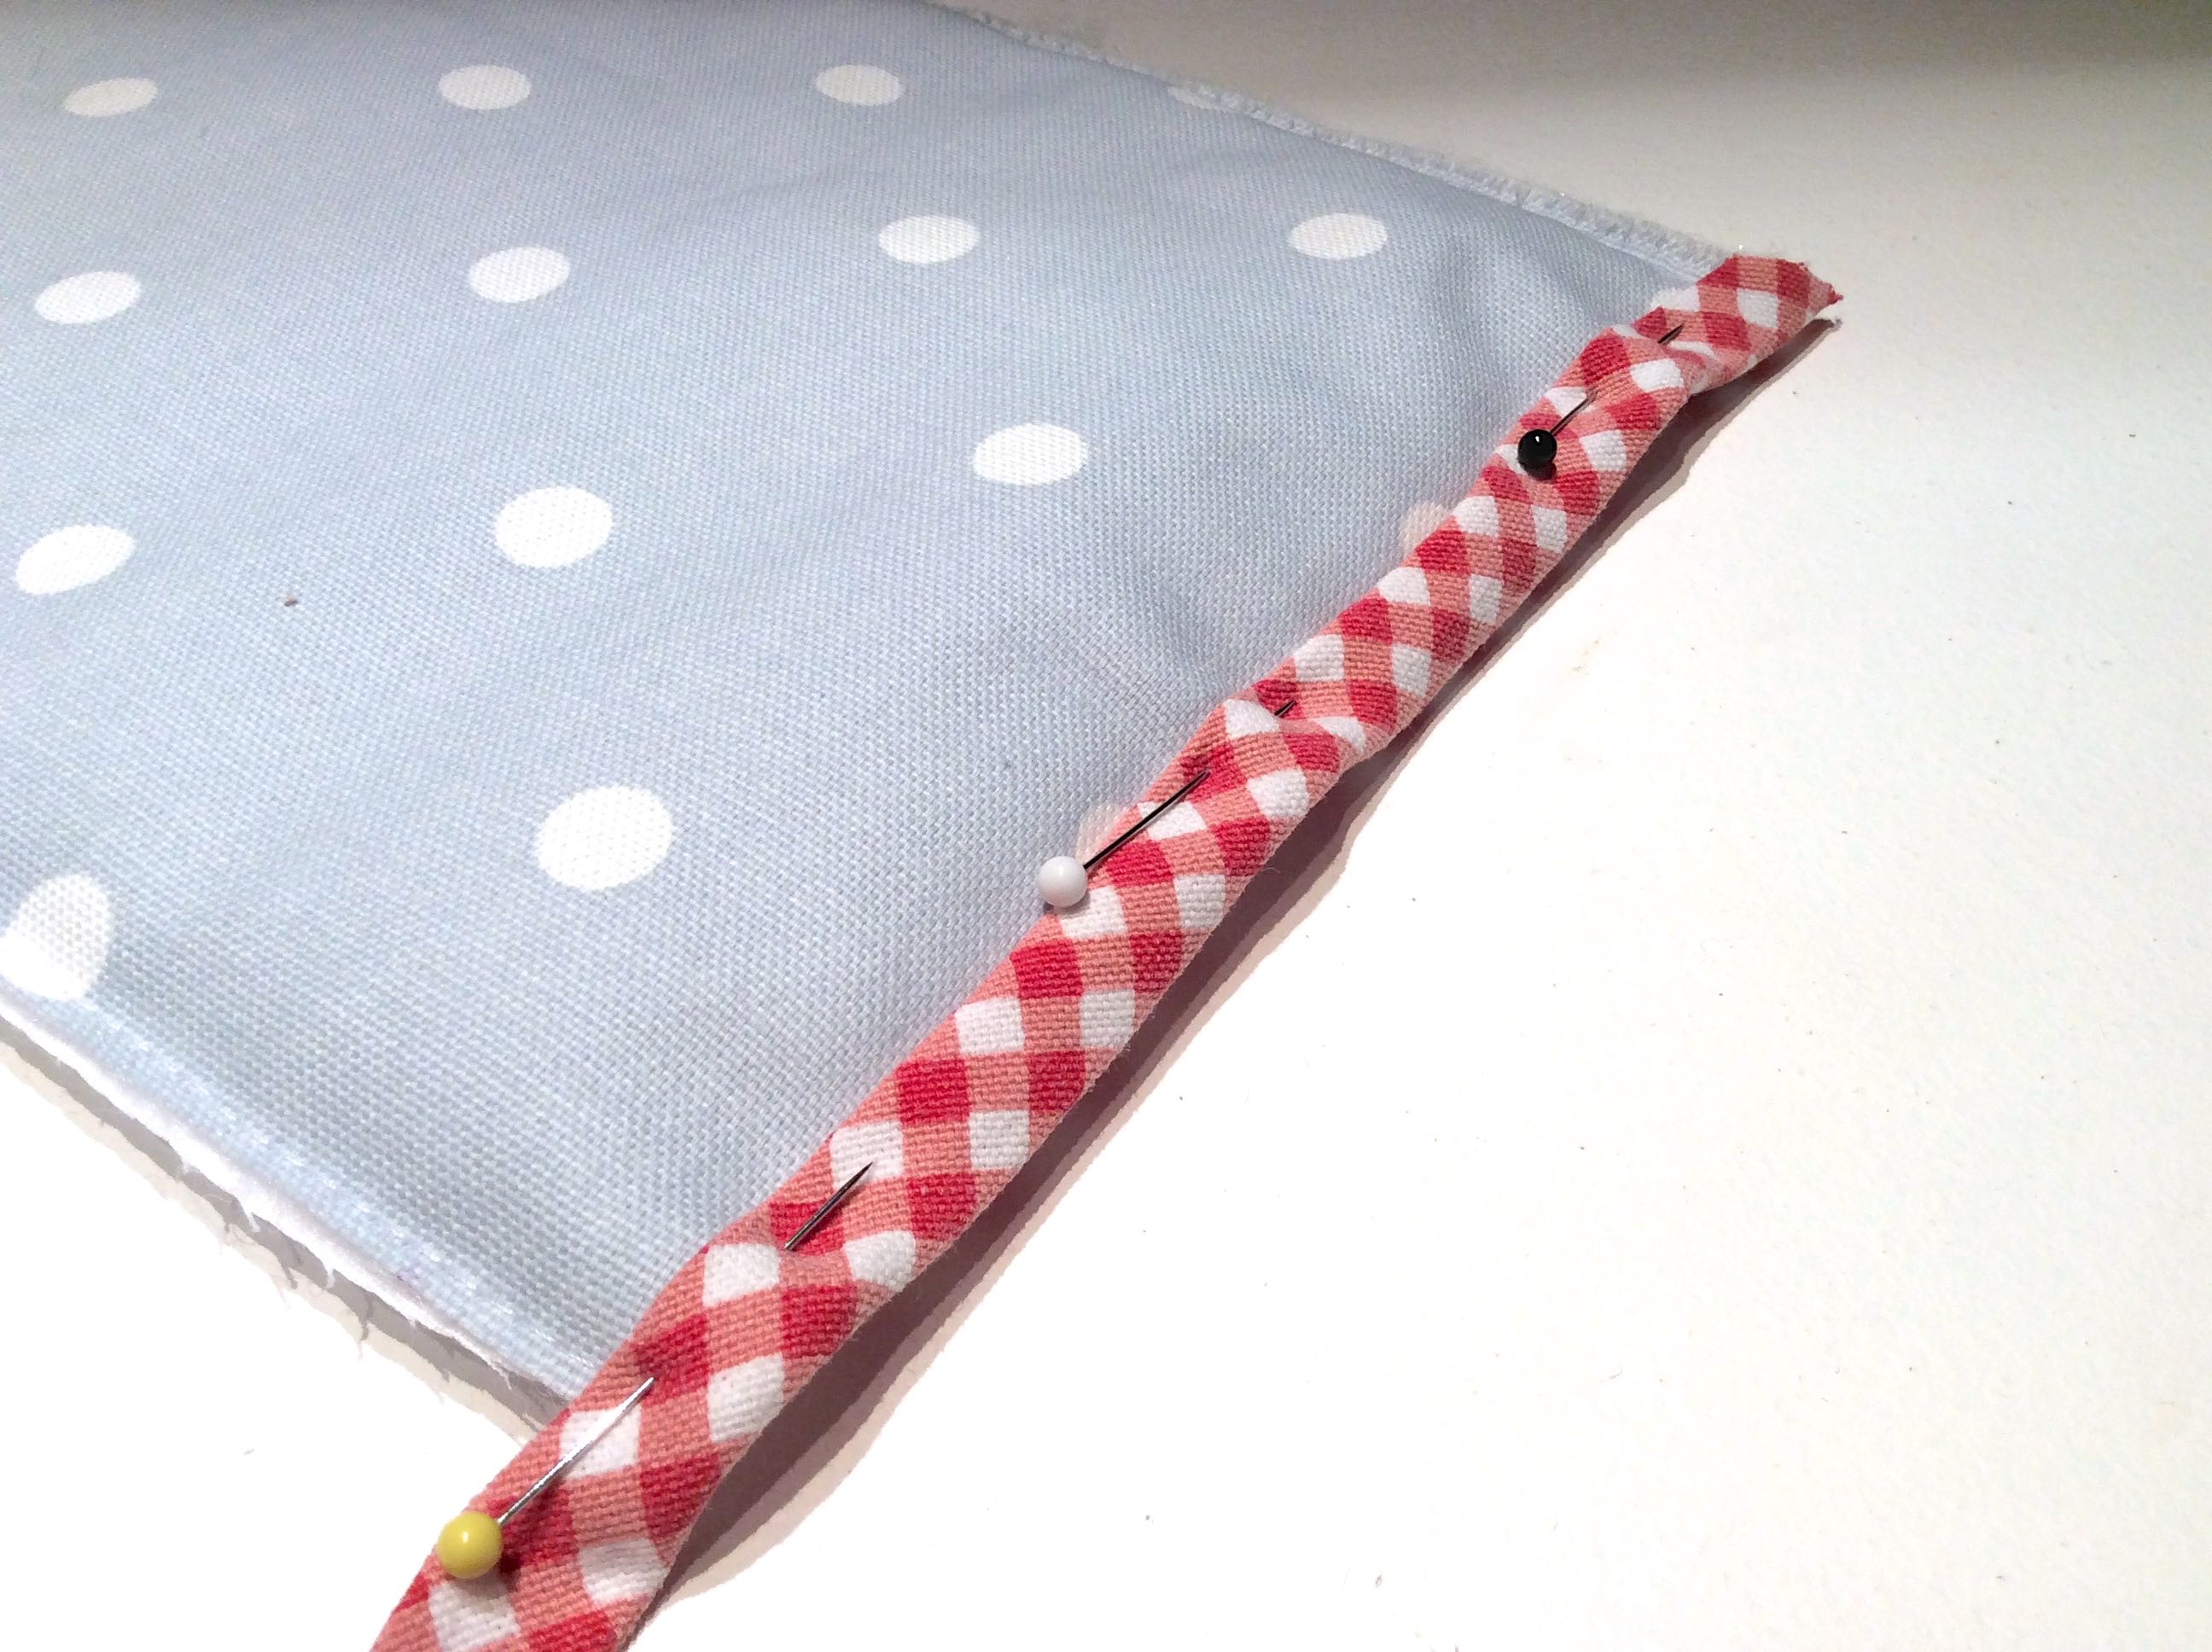
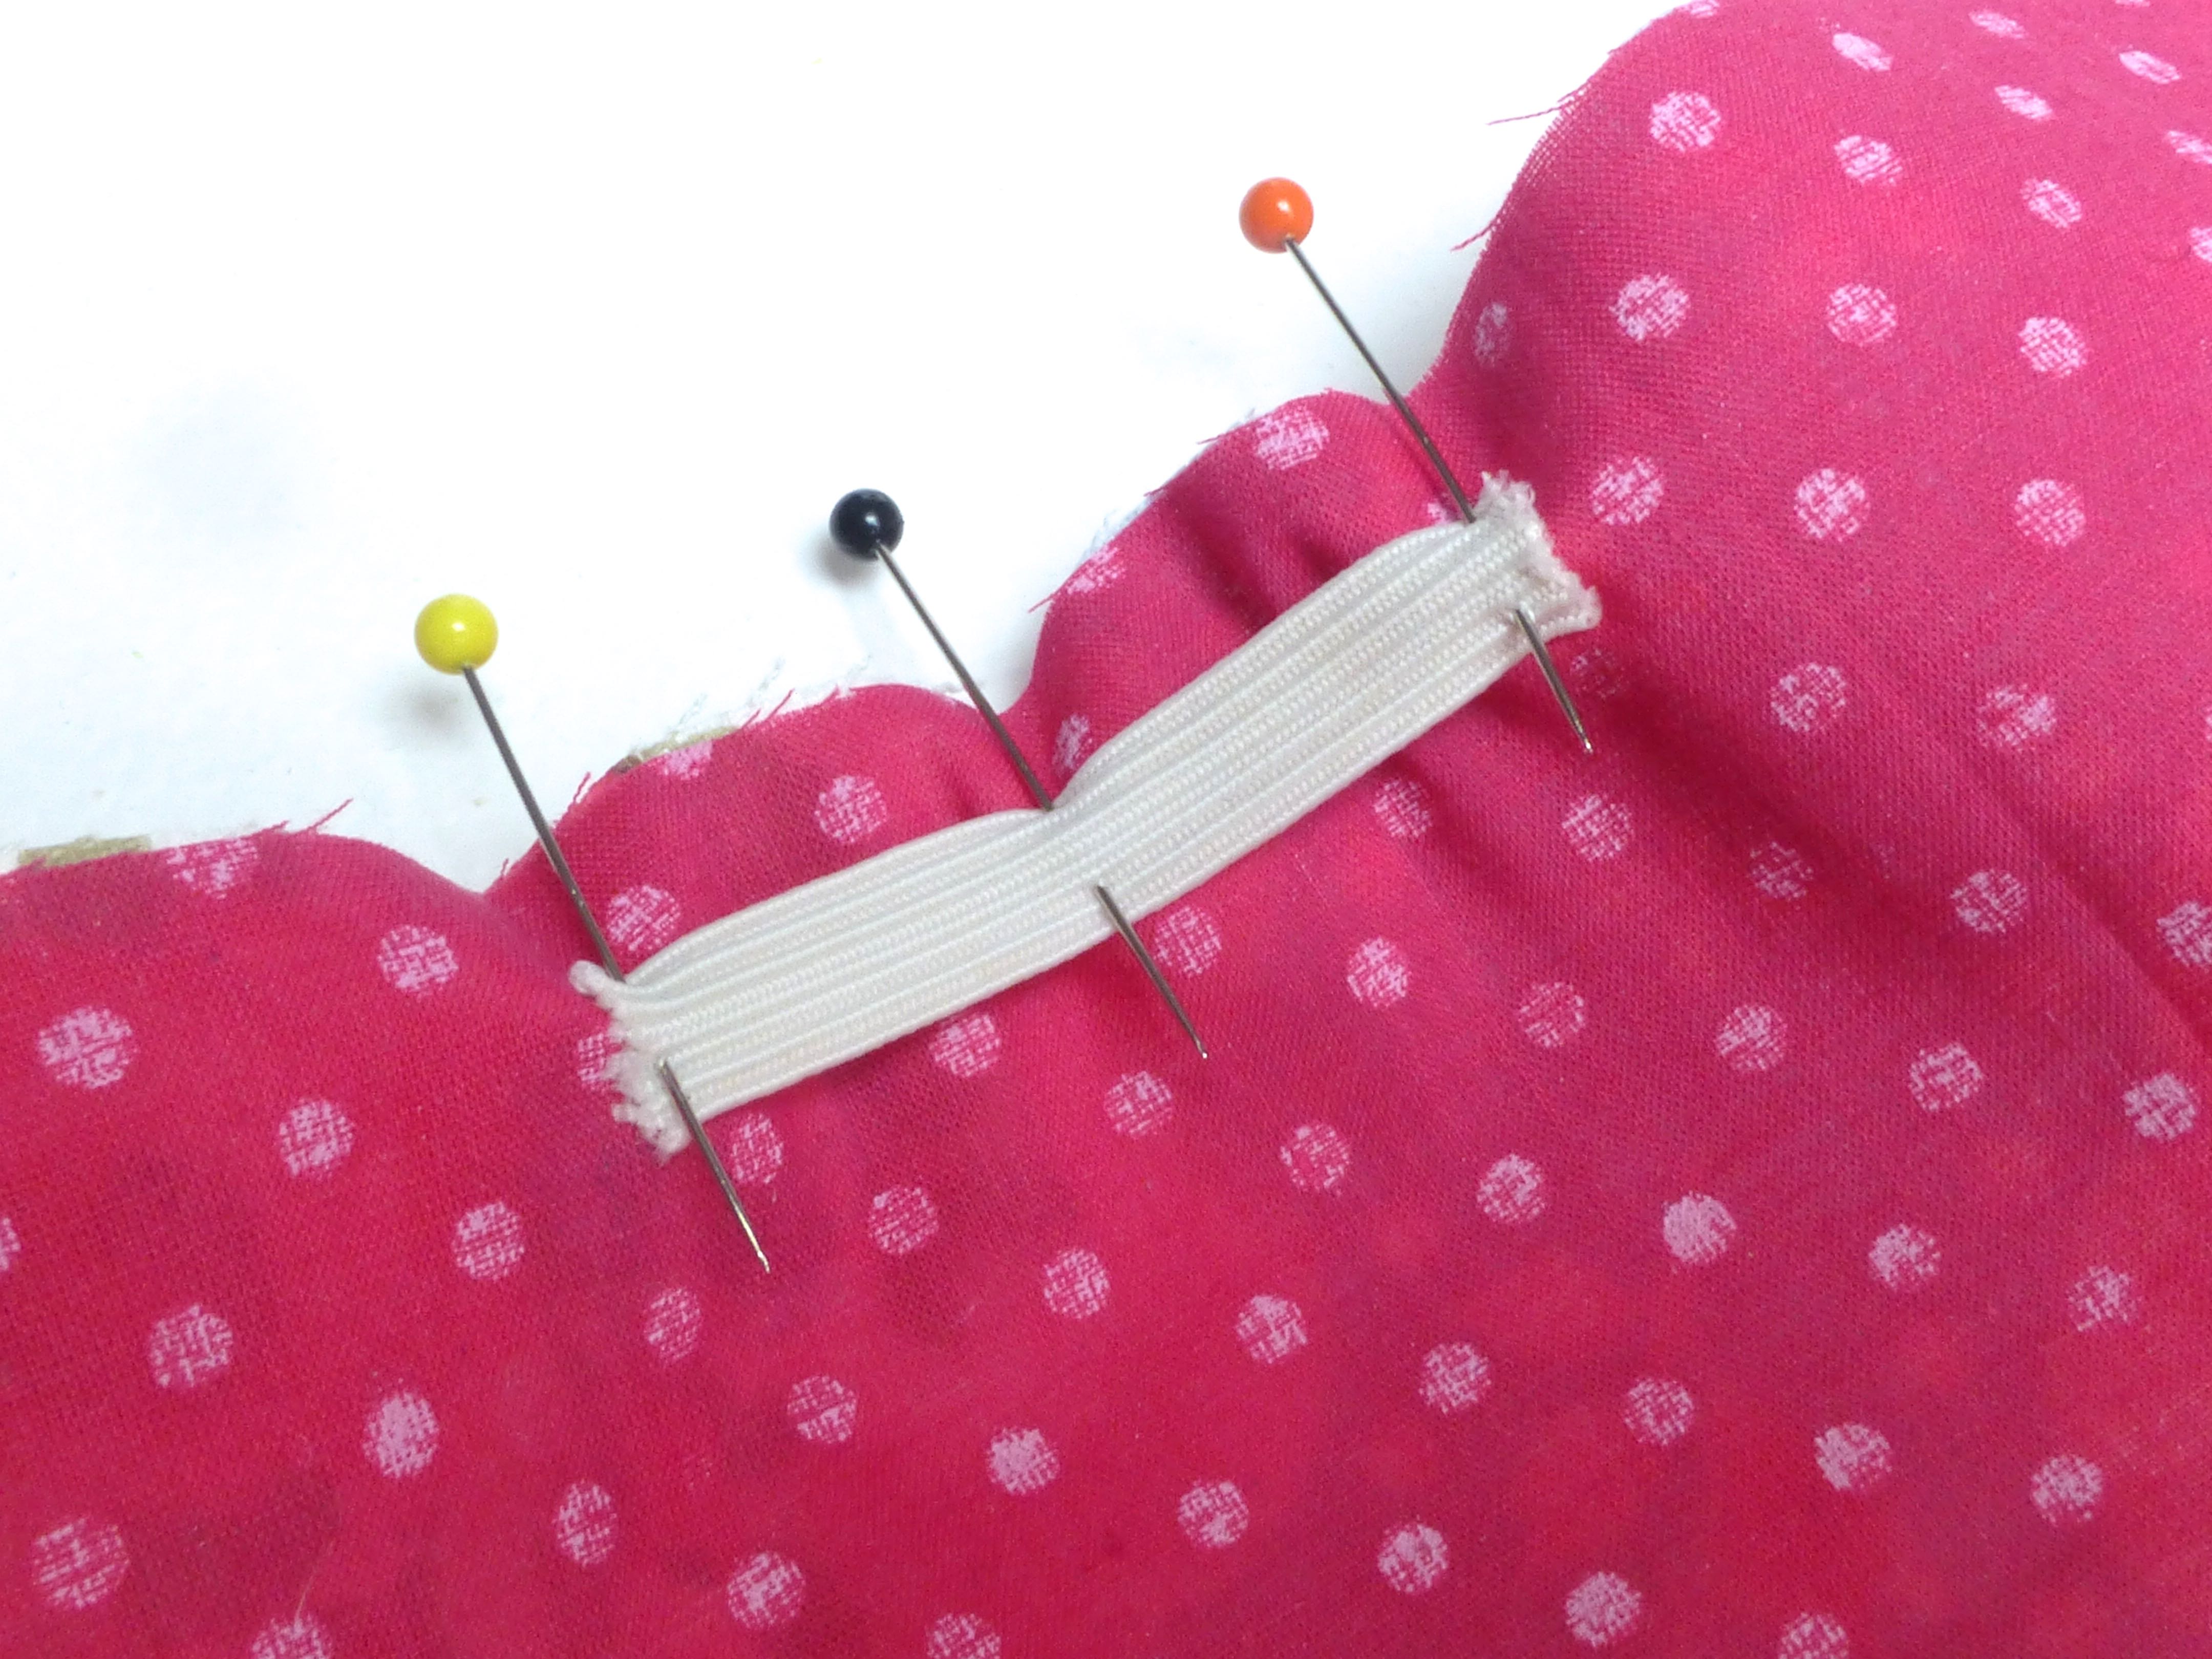
They also learned the best way to put a pin in – all simple things that needed to be taught that they wouldn’t otherwise know.

P1060836

The importance of pressing at every stage was also new to them, the bonus being that there’s no excuse not to do their own ironing at home now that they know how to use it safely!

P1060838

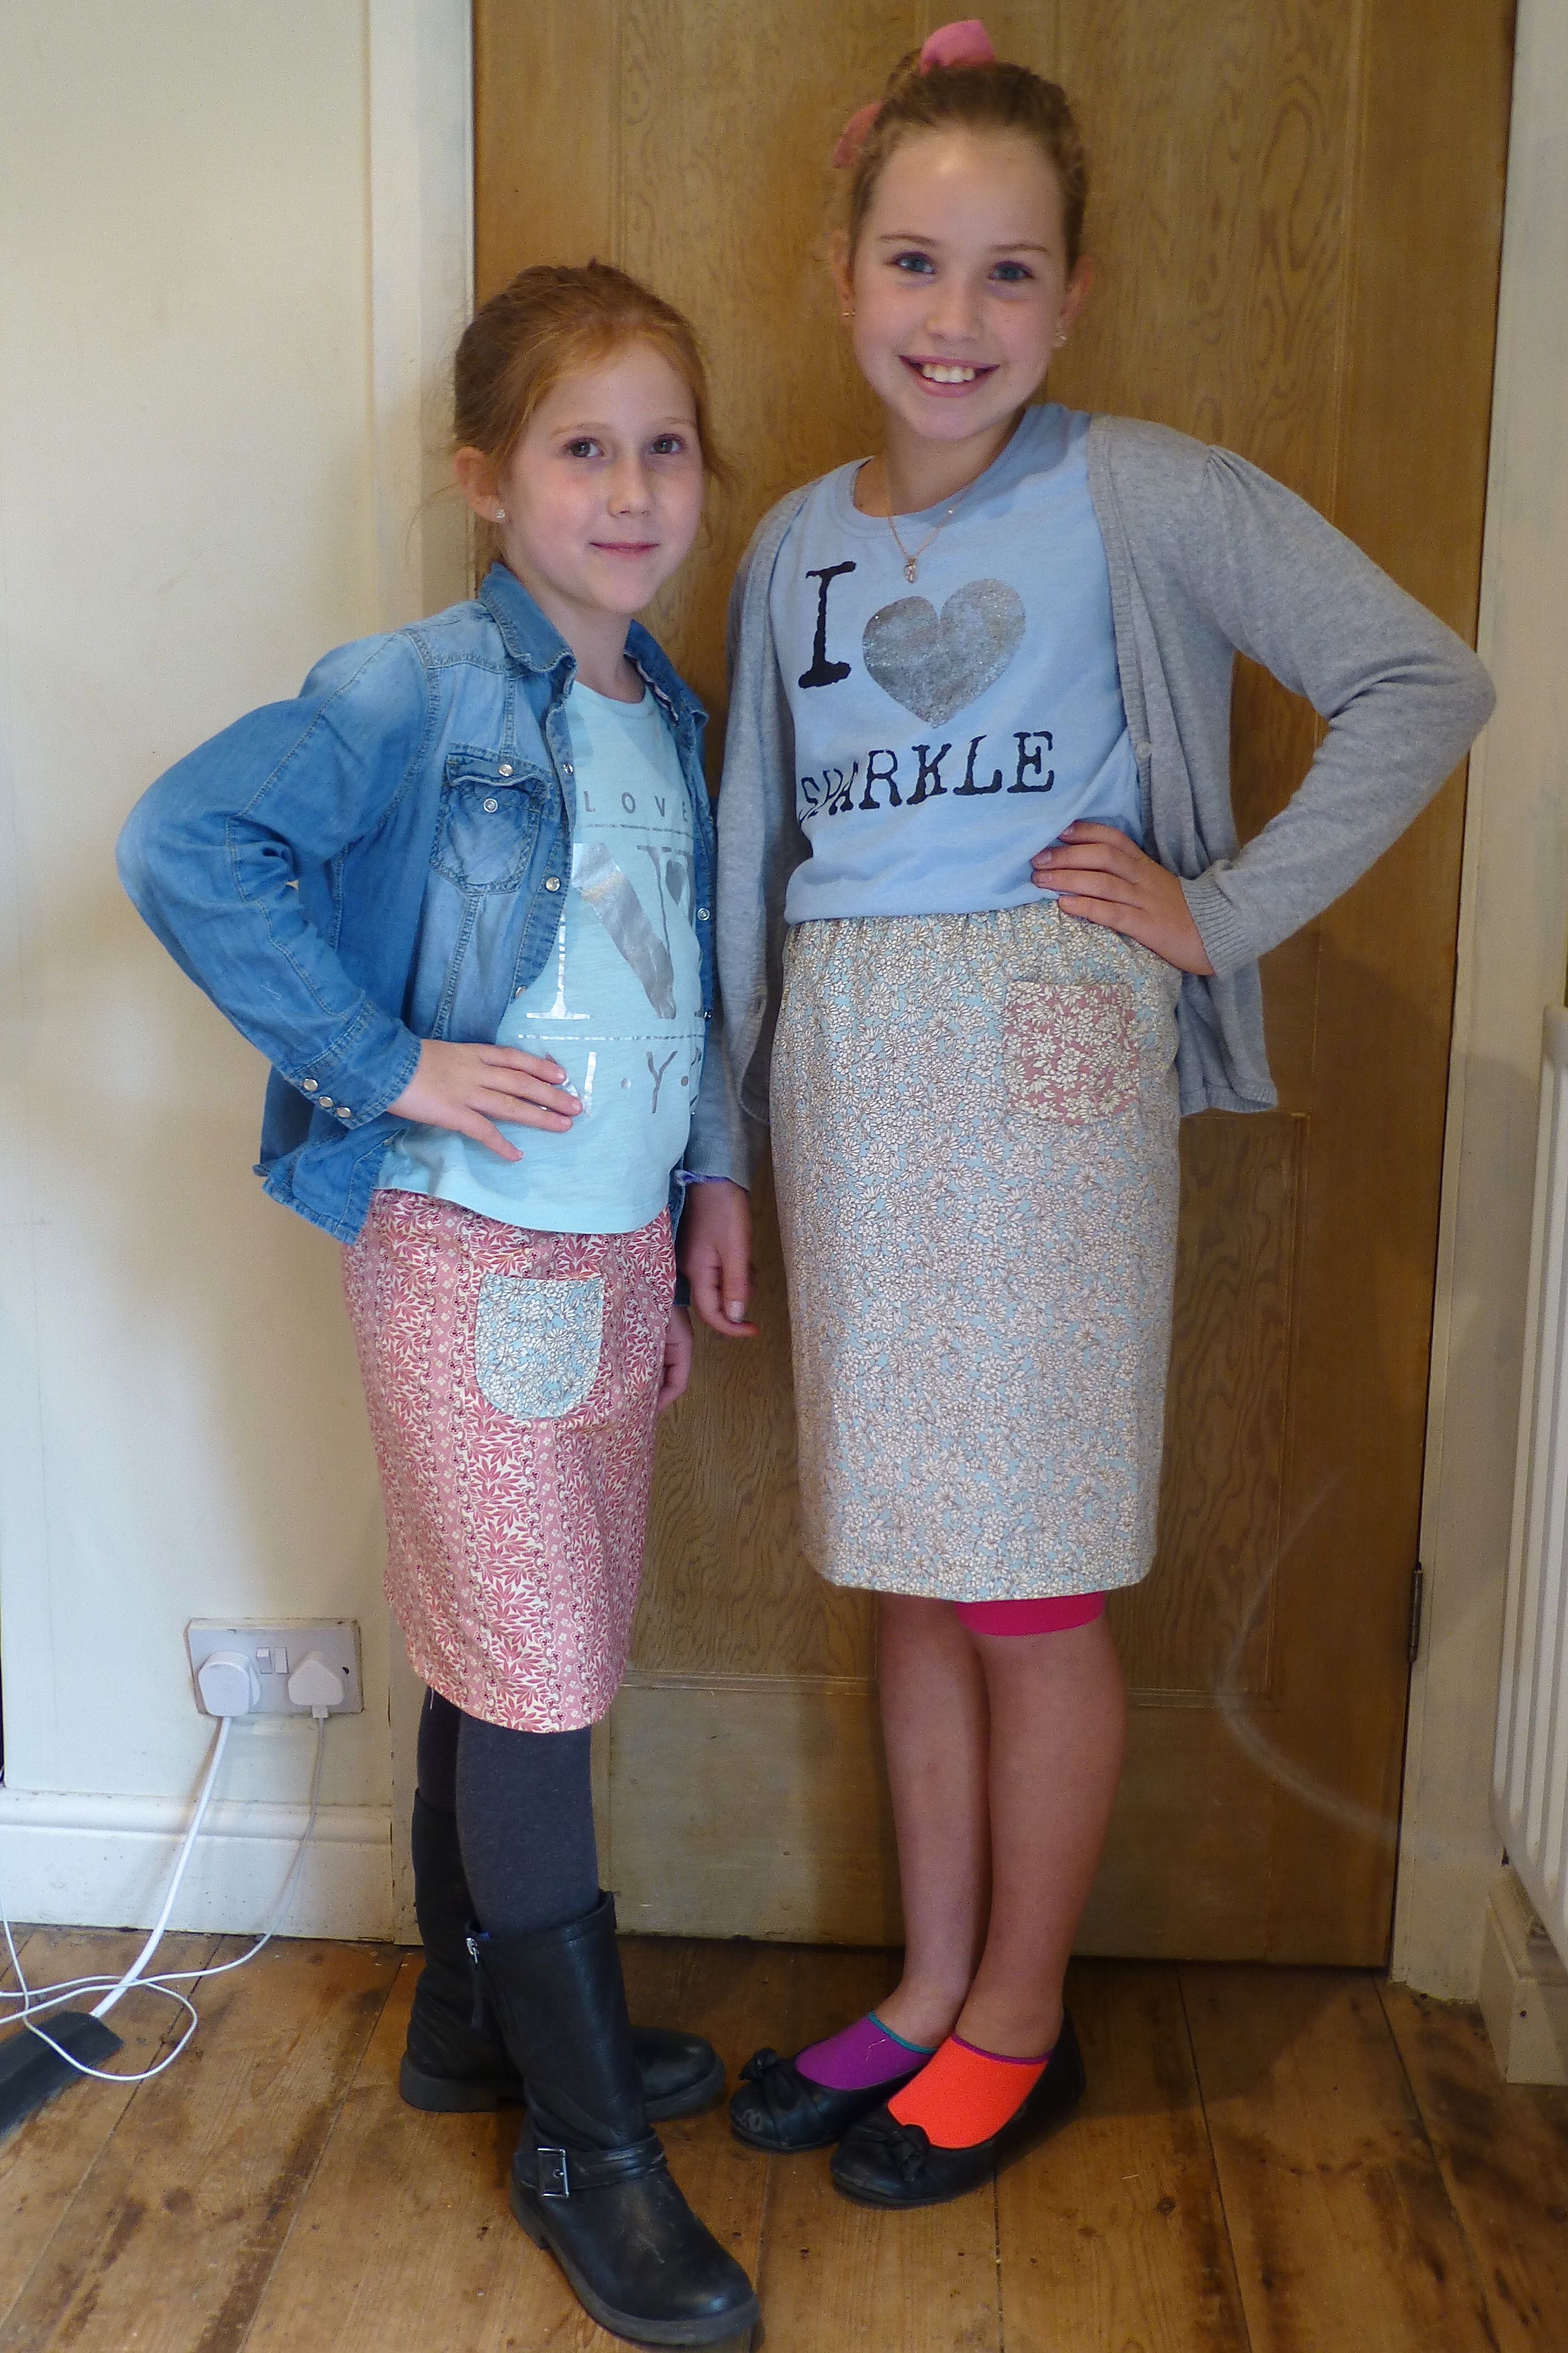
The girls finished their skirts right on the virtual bell denoting lunchtime. A good morning’s work by anyone’s standard.

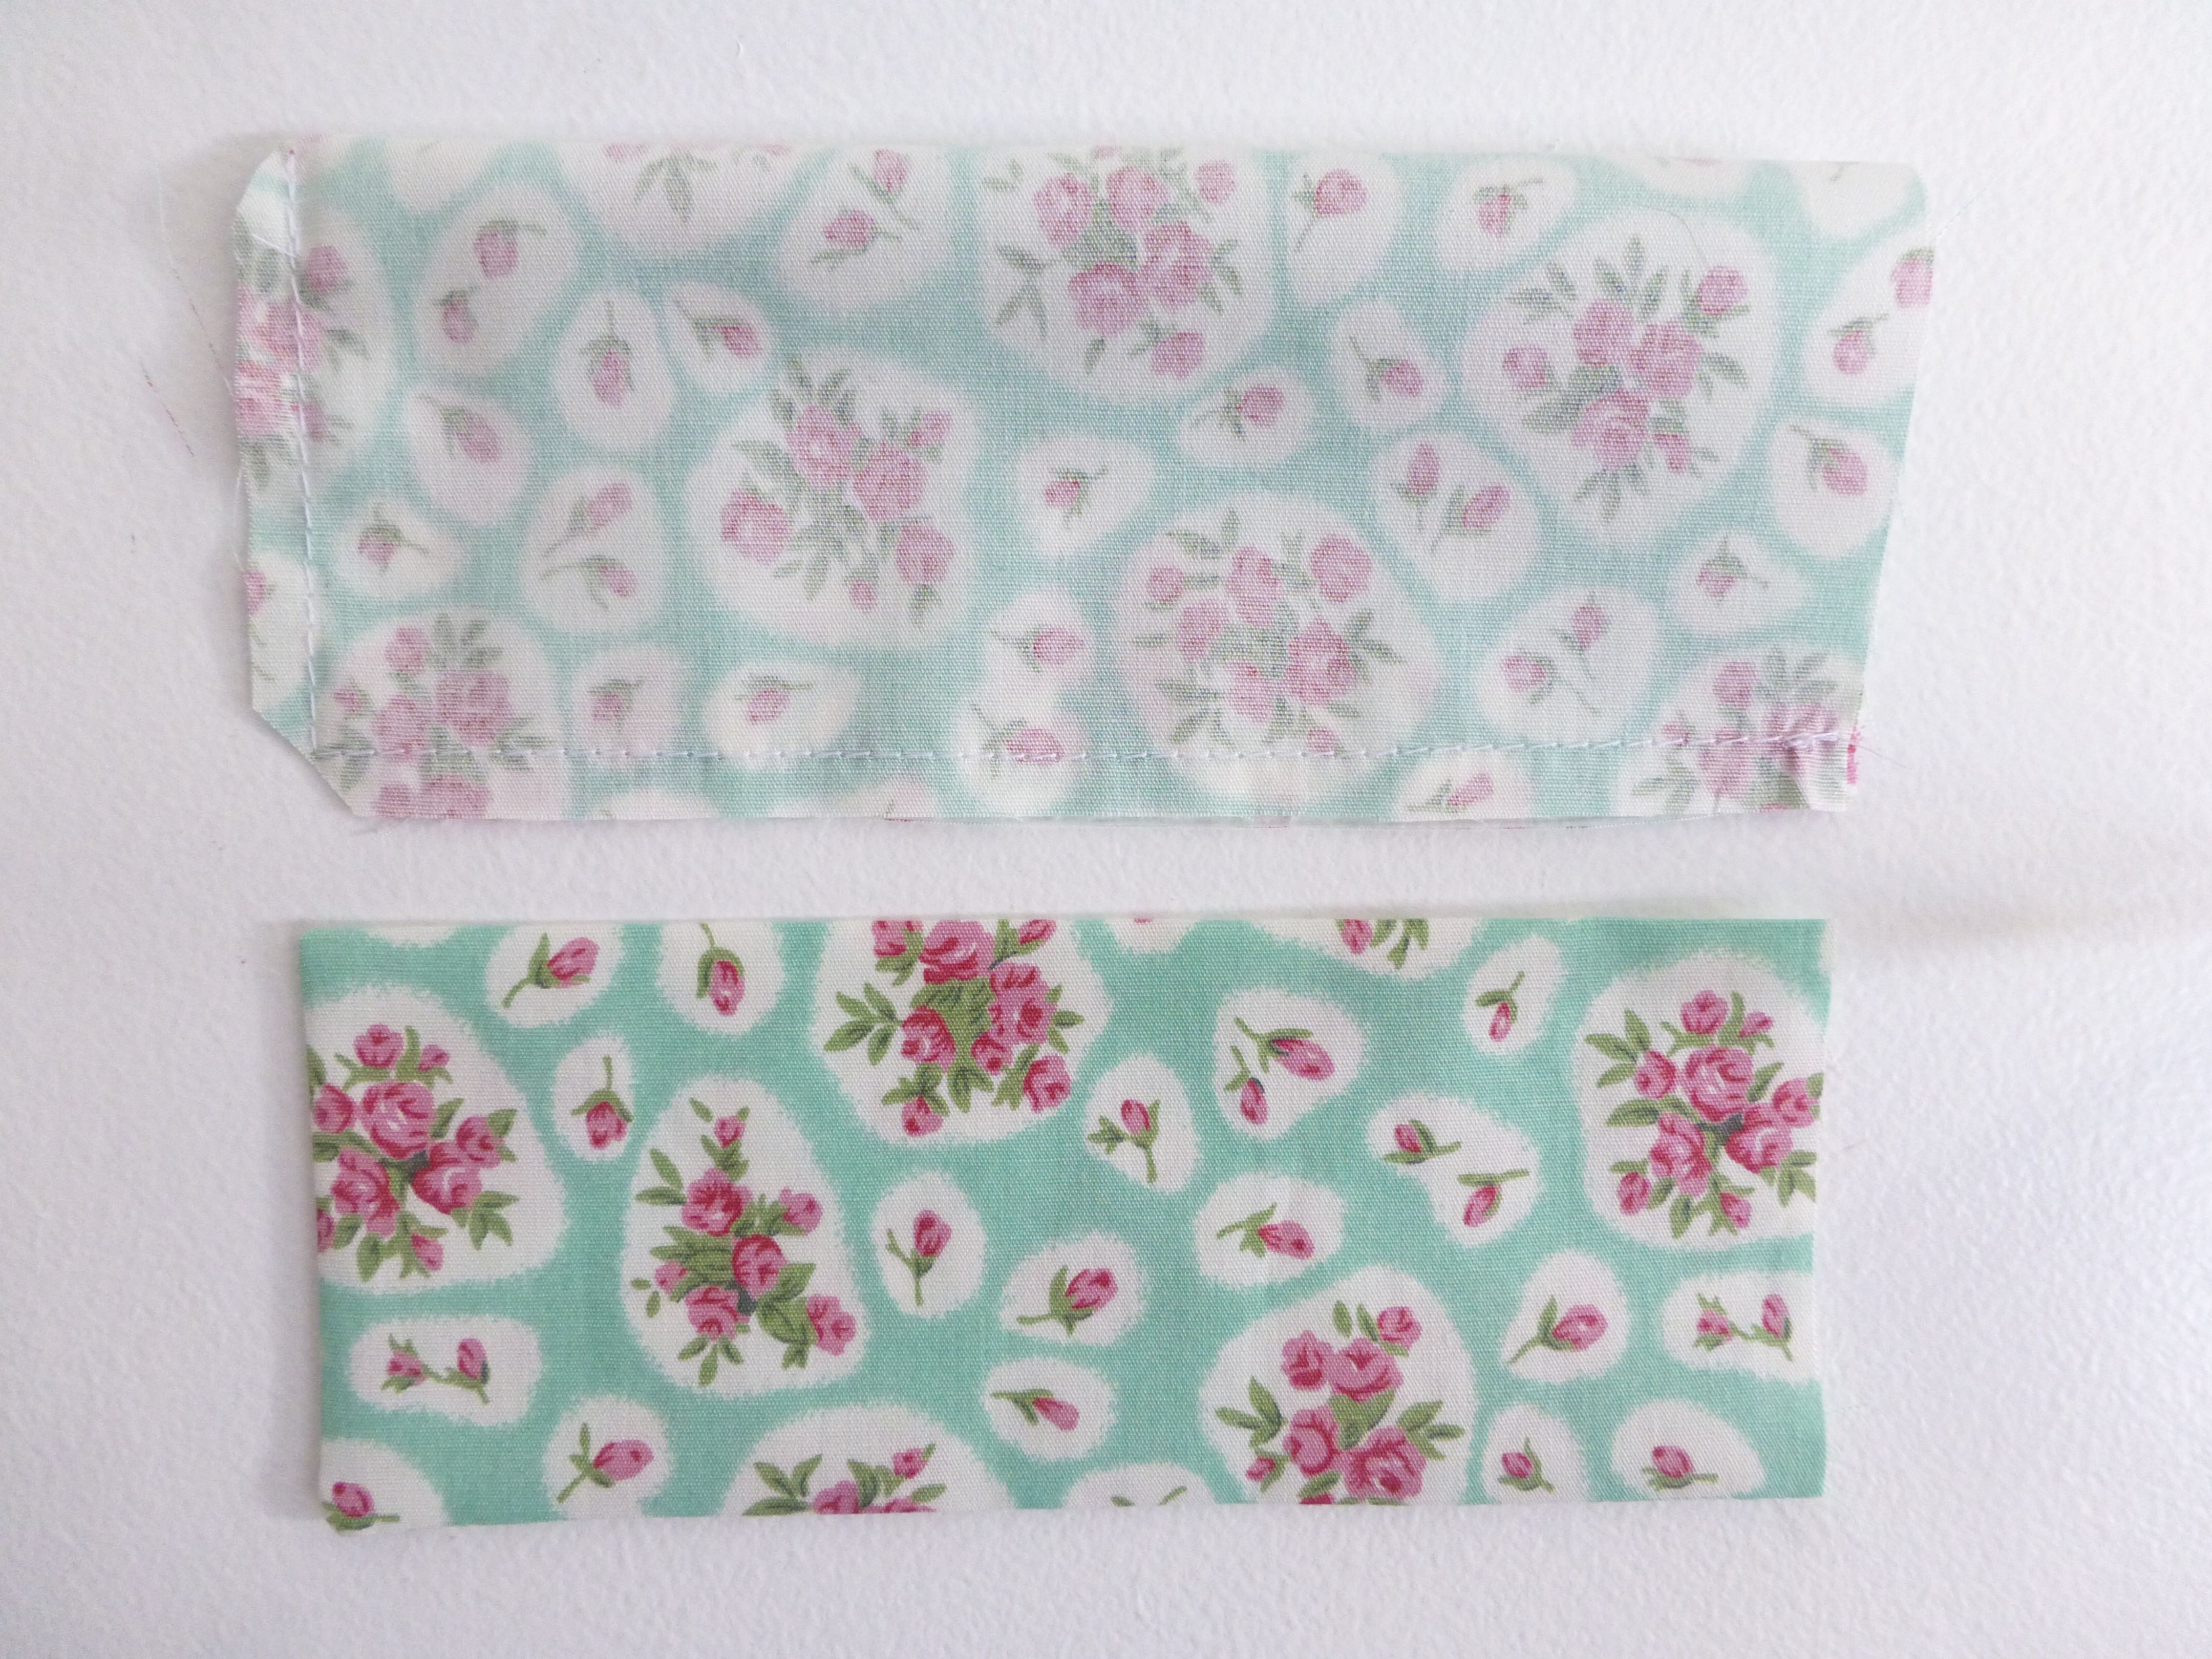
Here they are modelling said skirts, customised at the last minute by their request to add a coordinating pocket in which to keep their toy mice.

P1060840

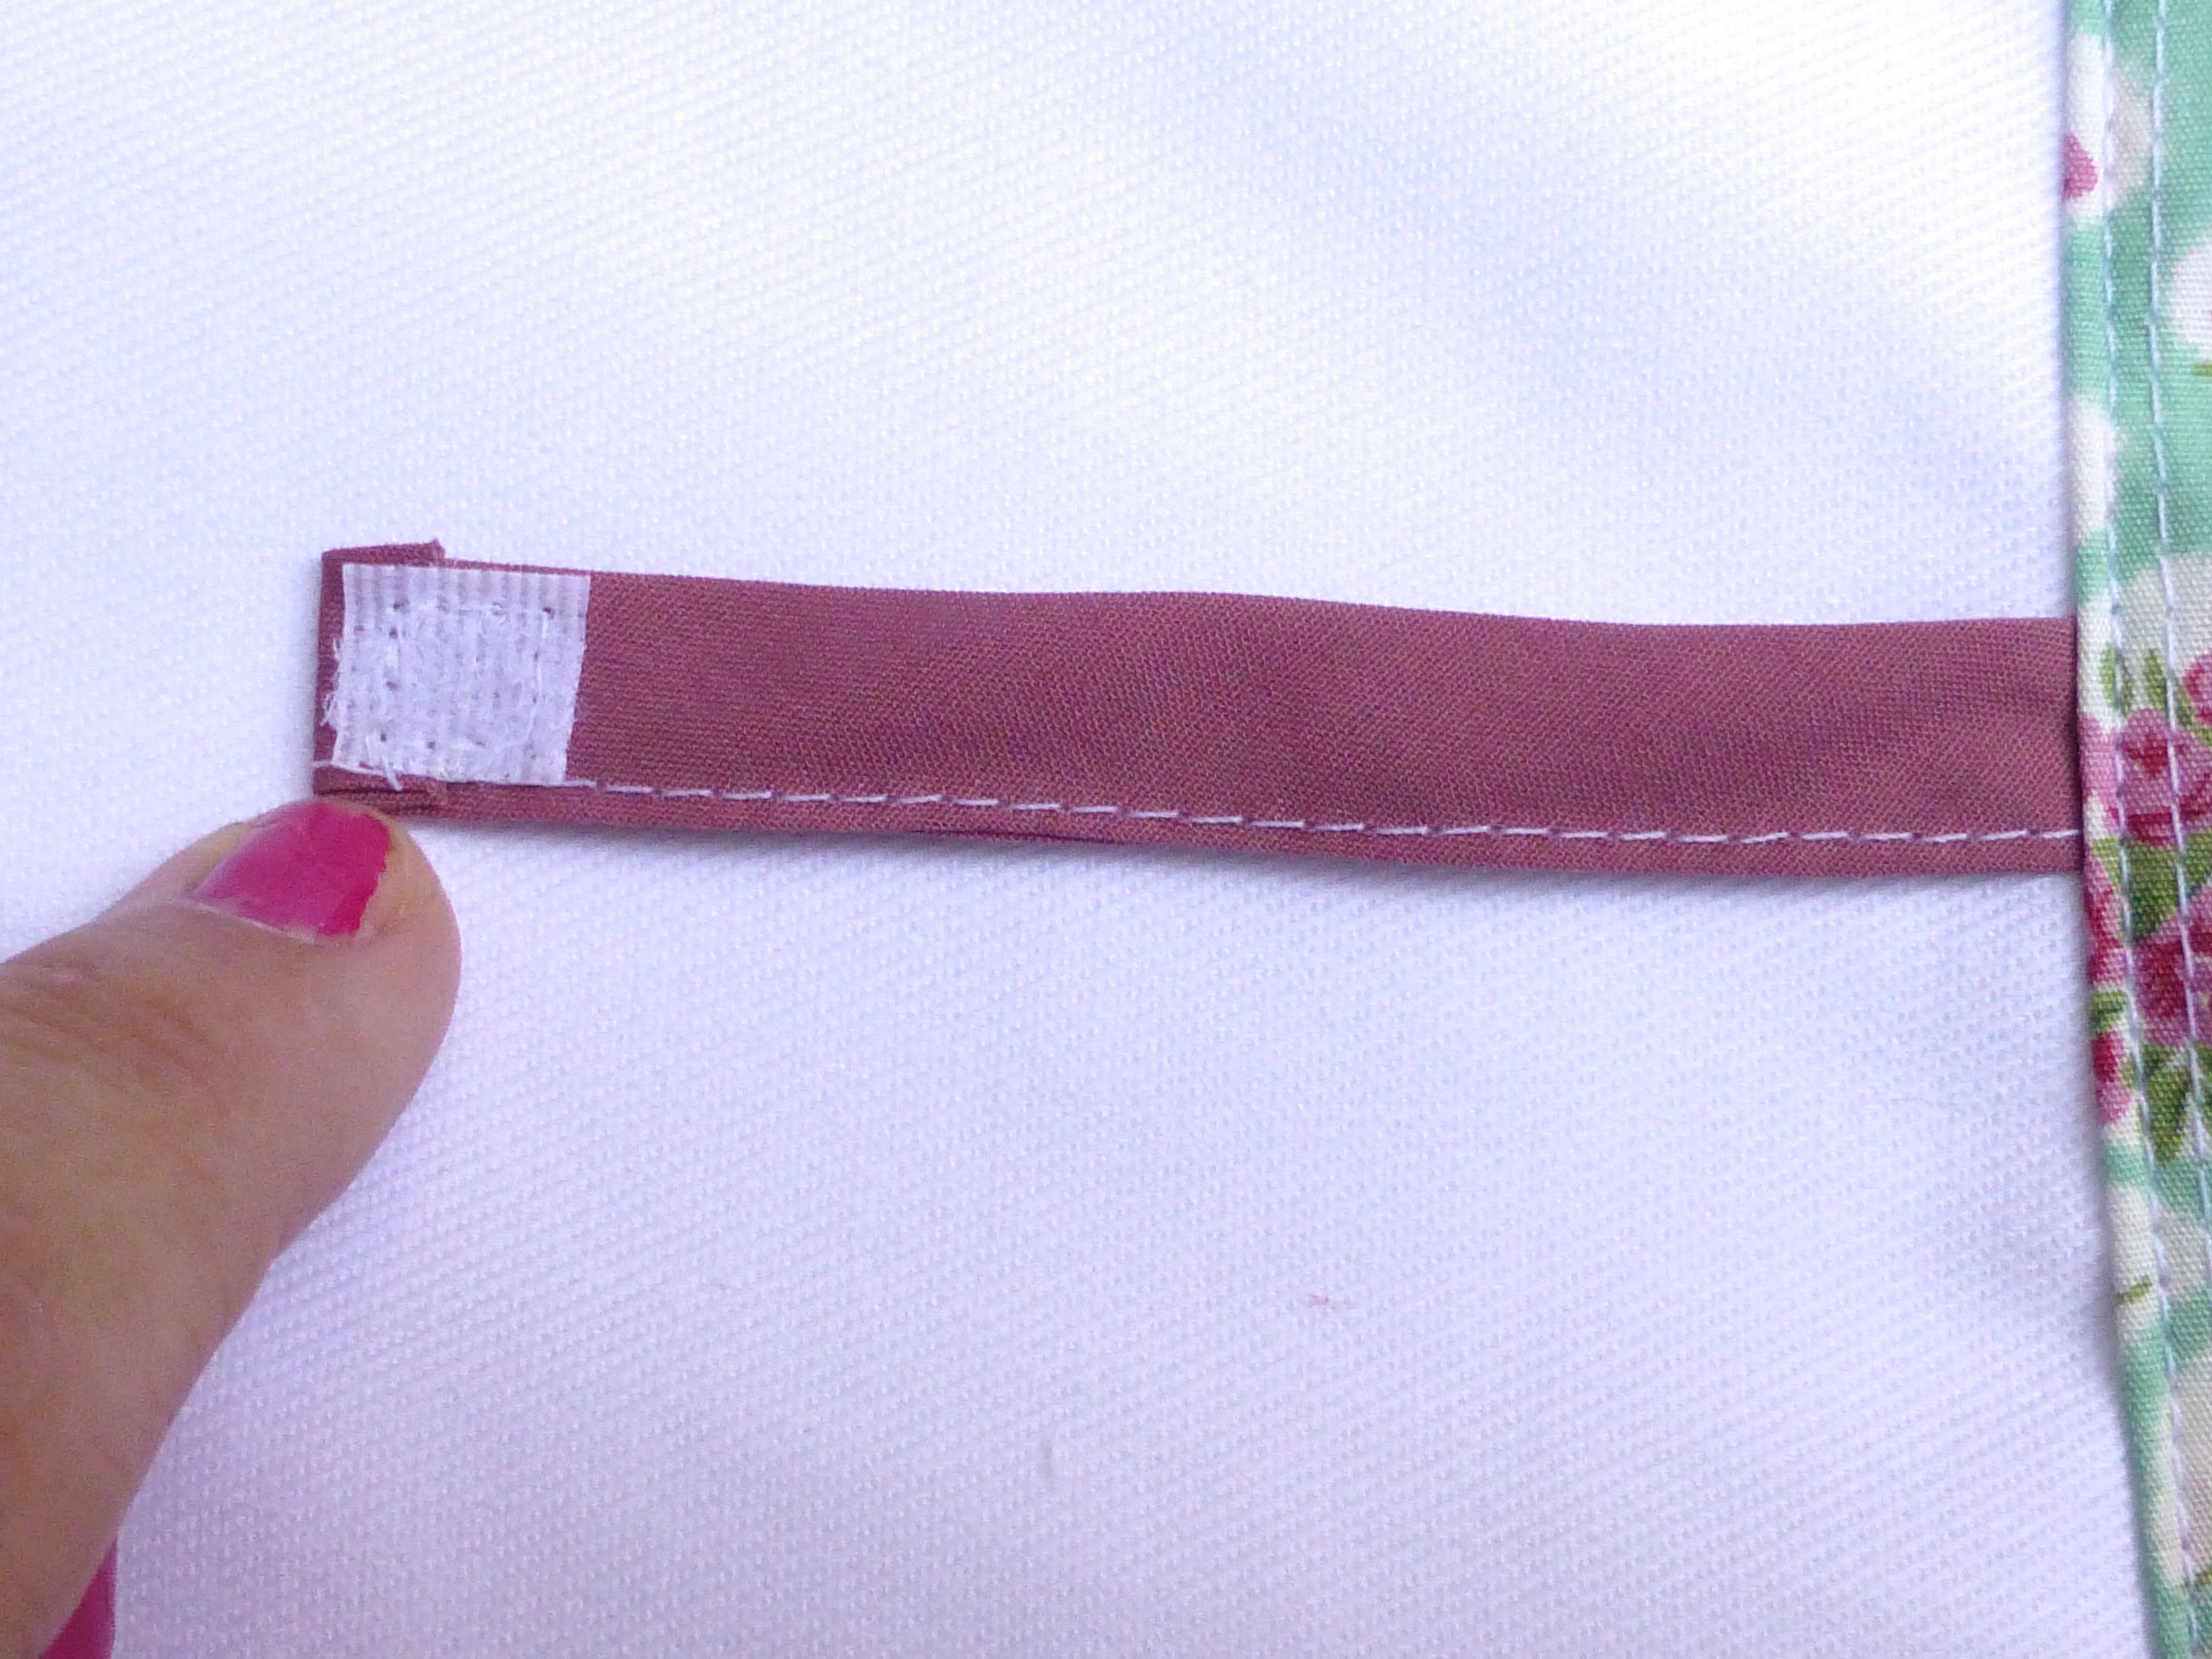
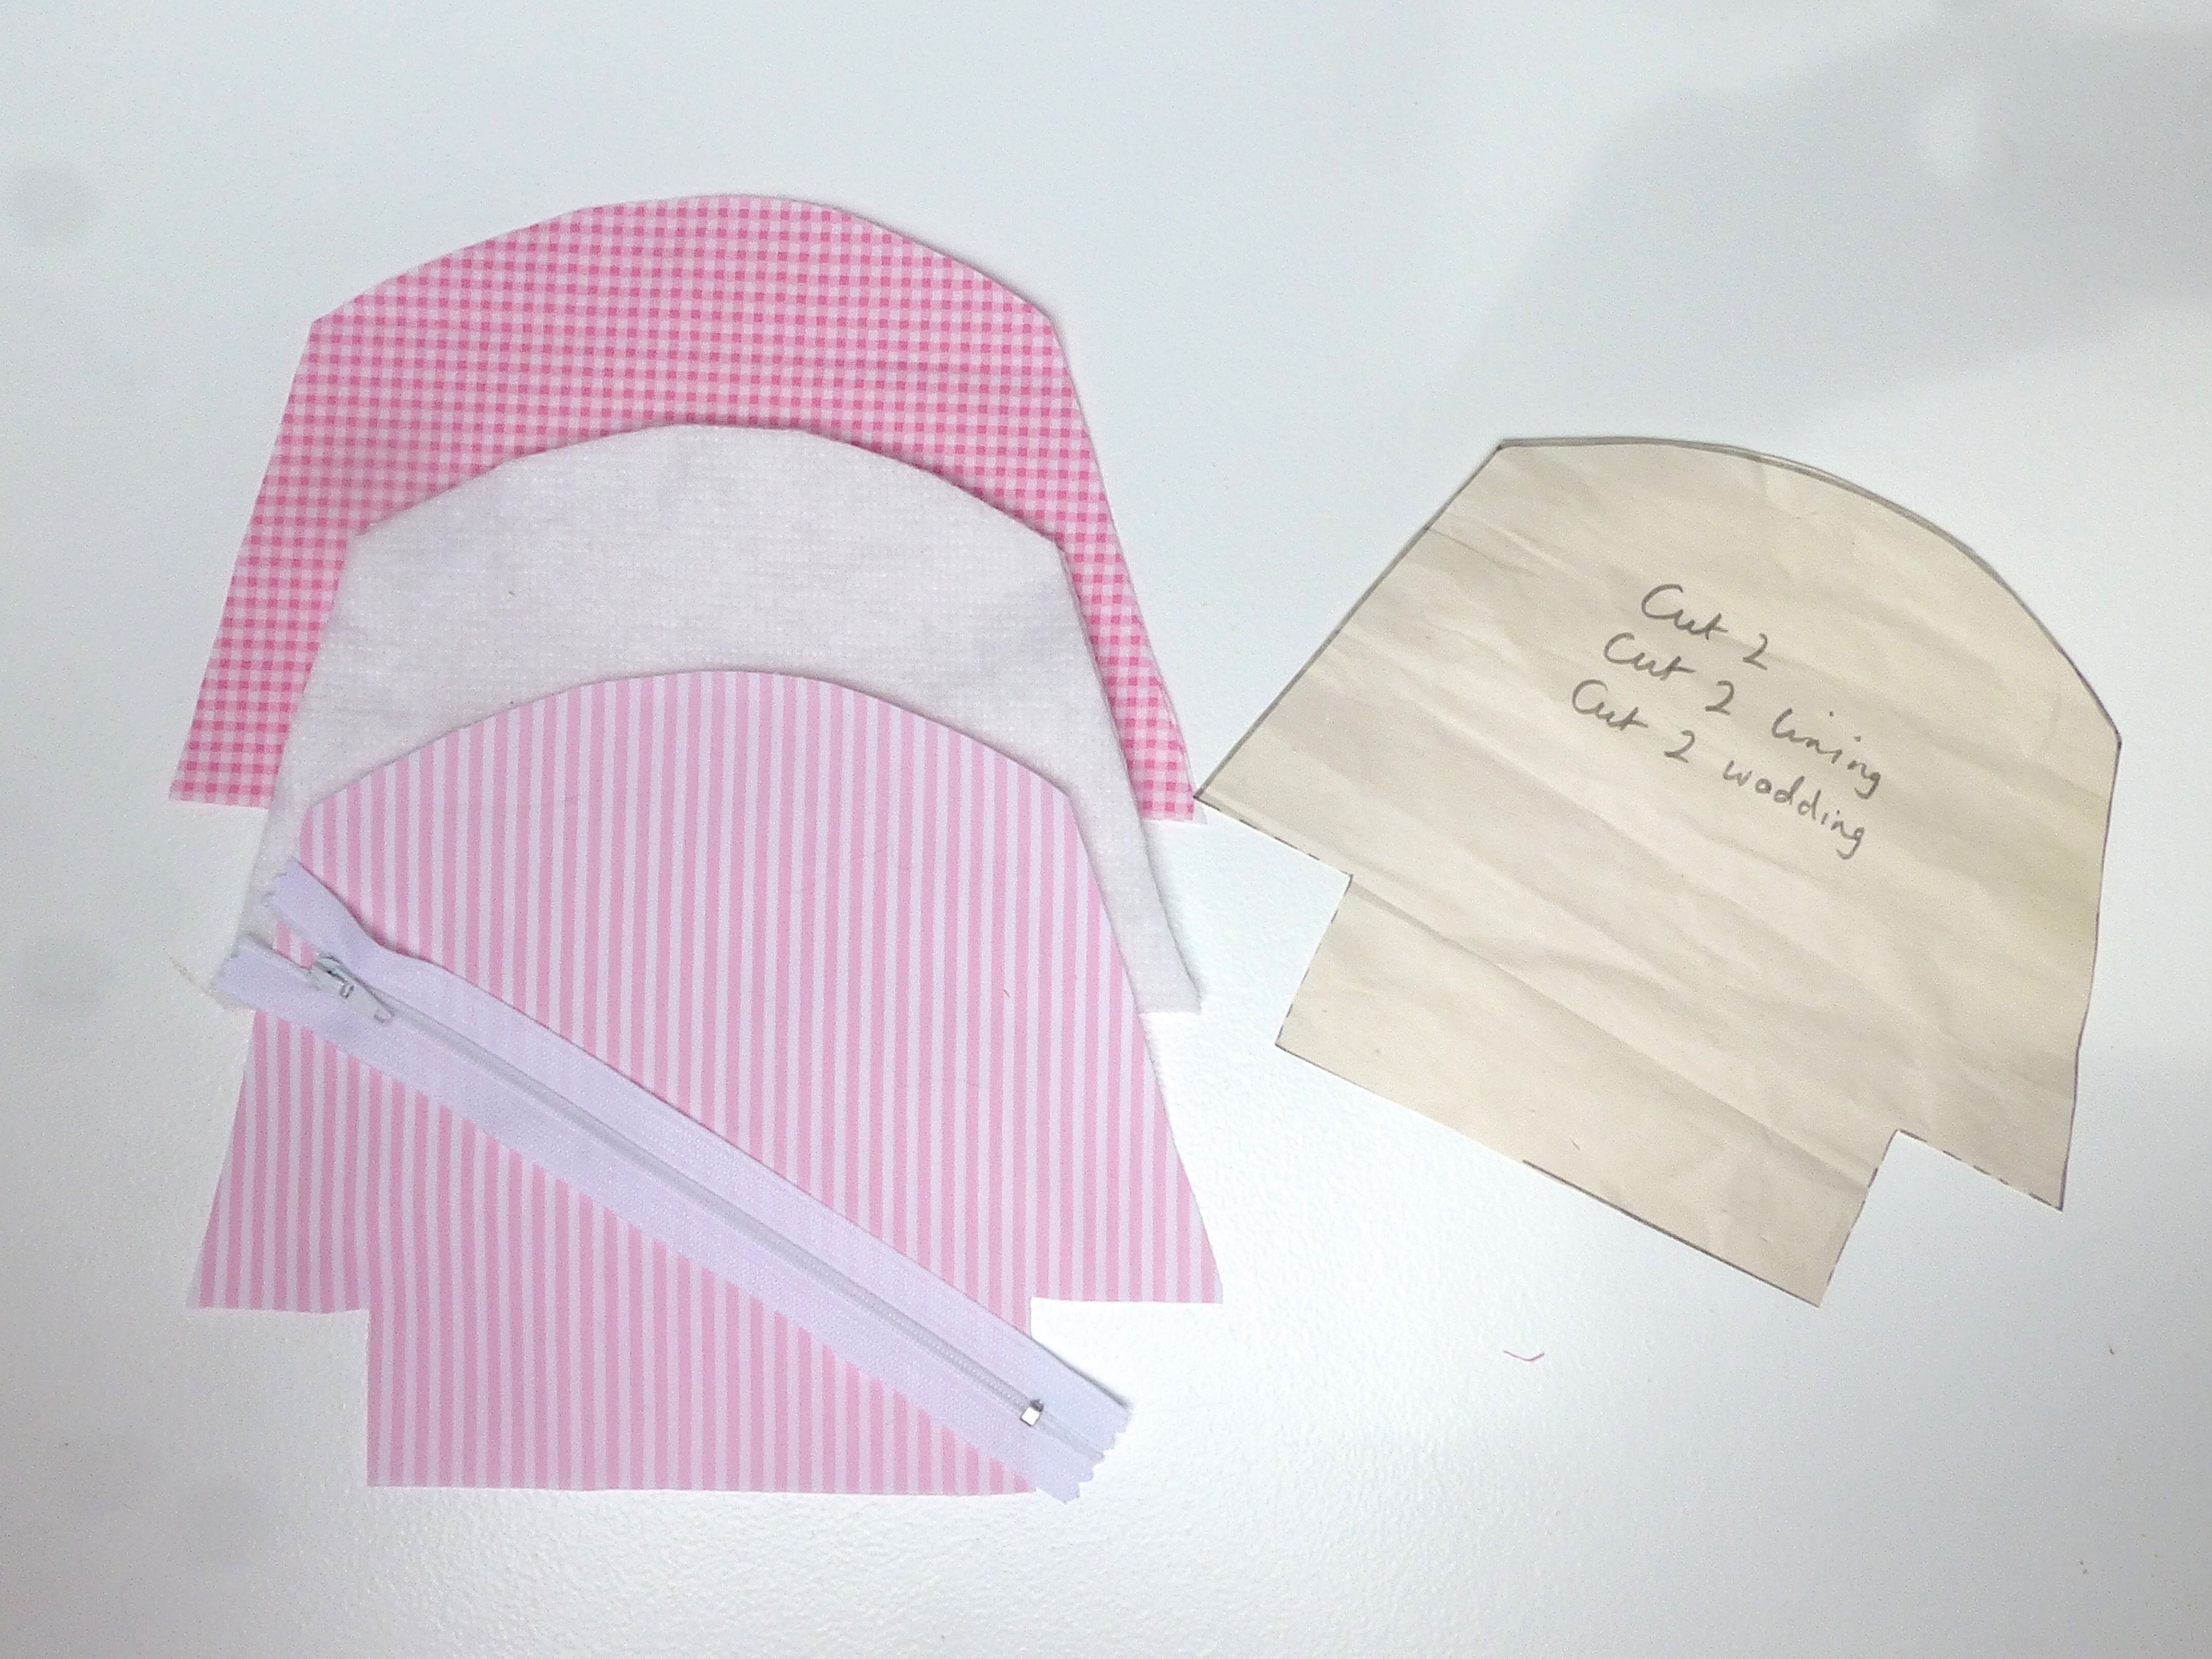
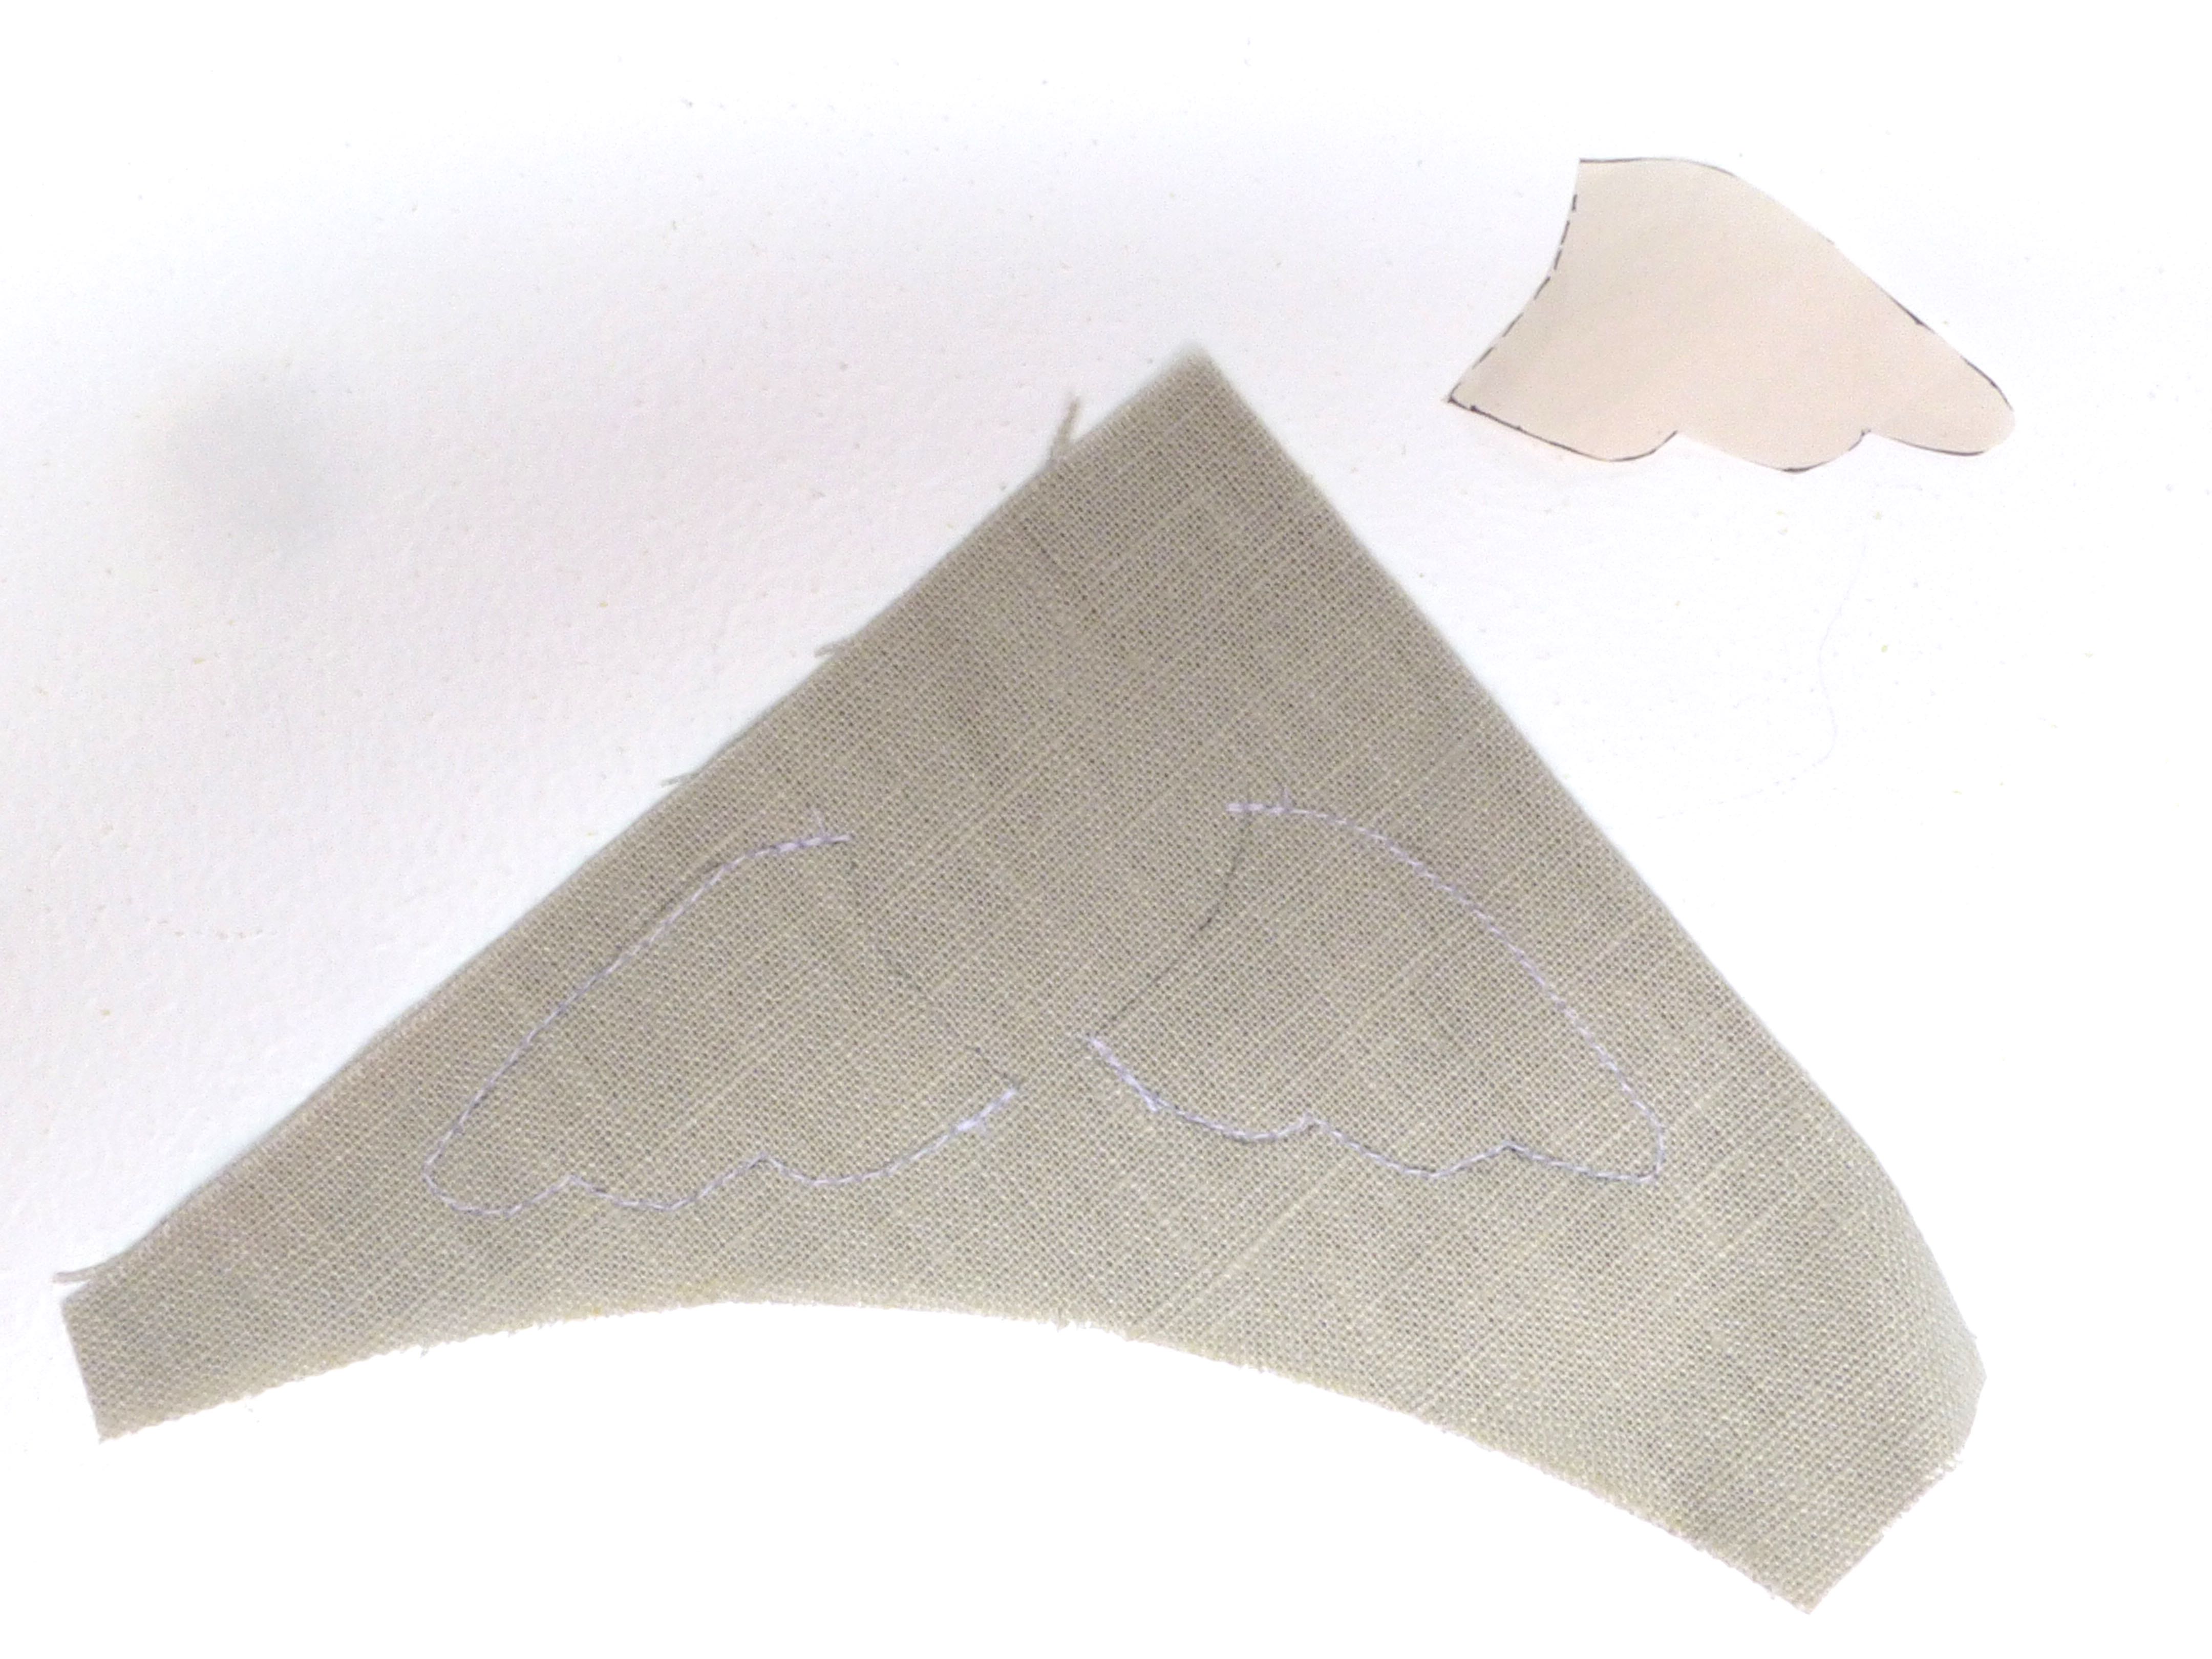
After a 35 minute break for lunch both girls were keen to begin another project, this time a messenger-style bag that is worn across the body.

Concentration was back on track again after a break – 3 hours is a long time to expect full attention from the younger students.

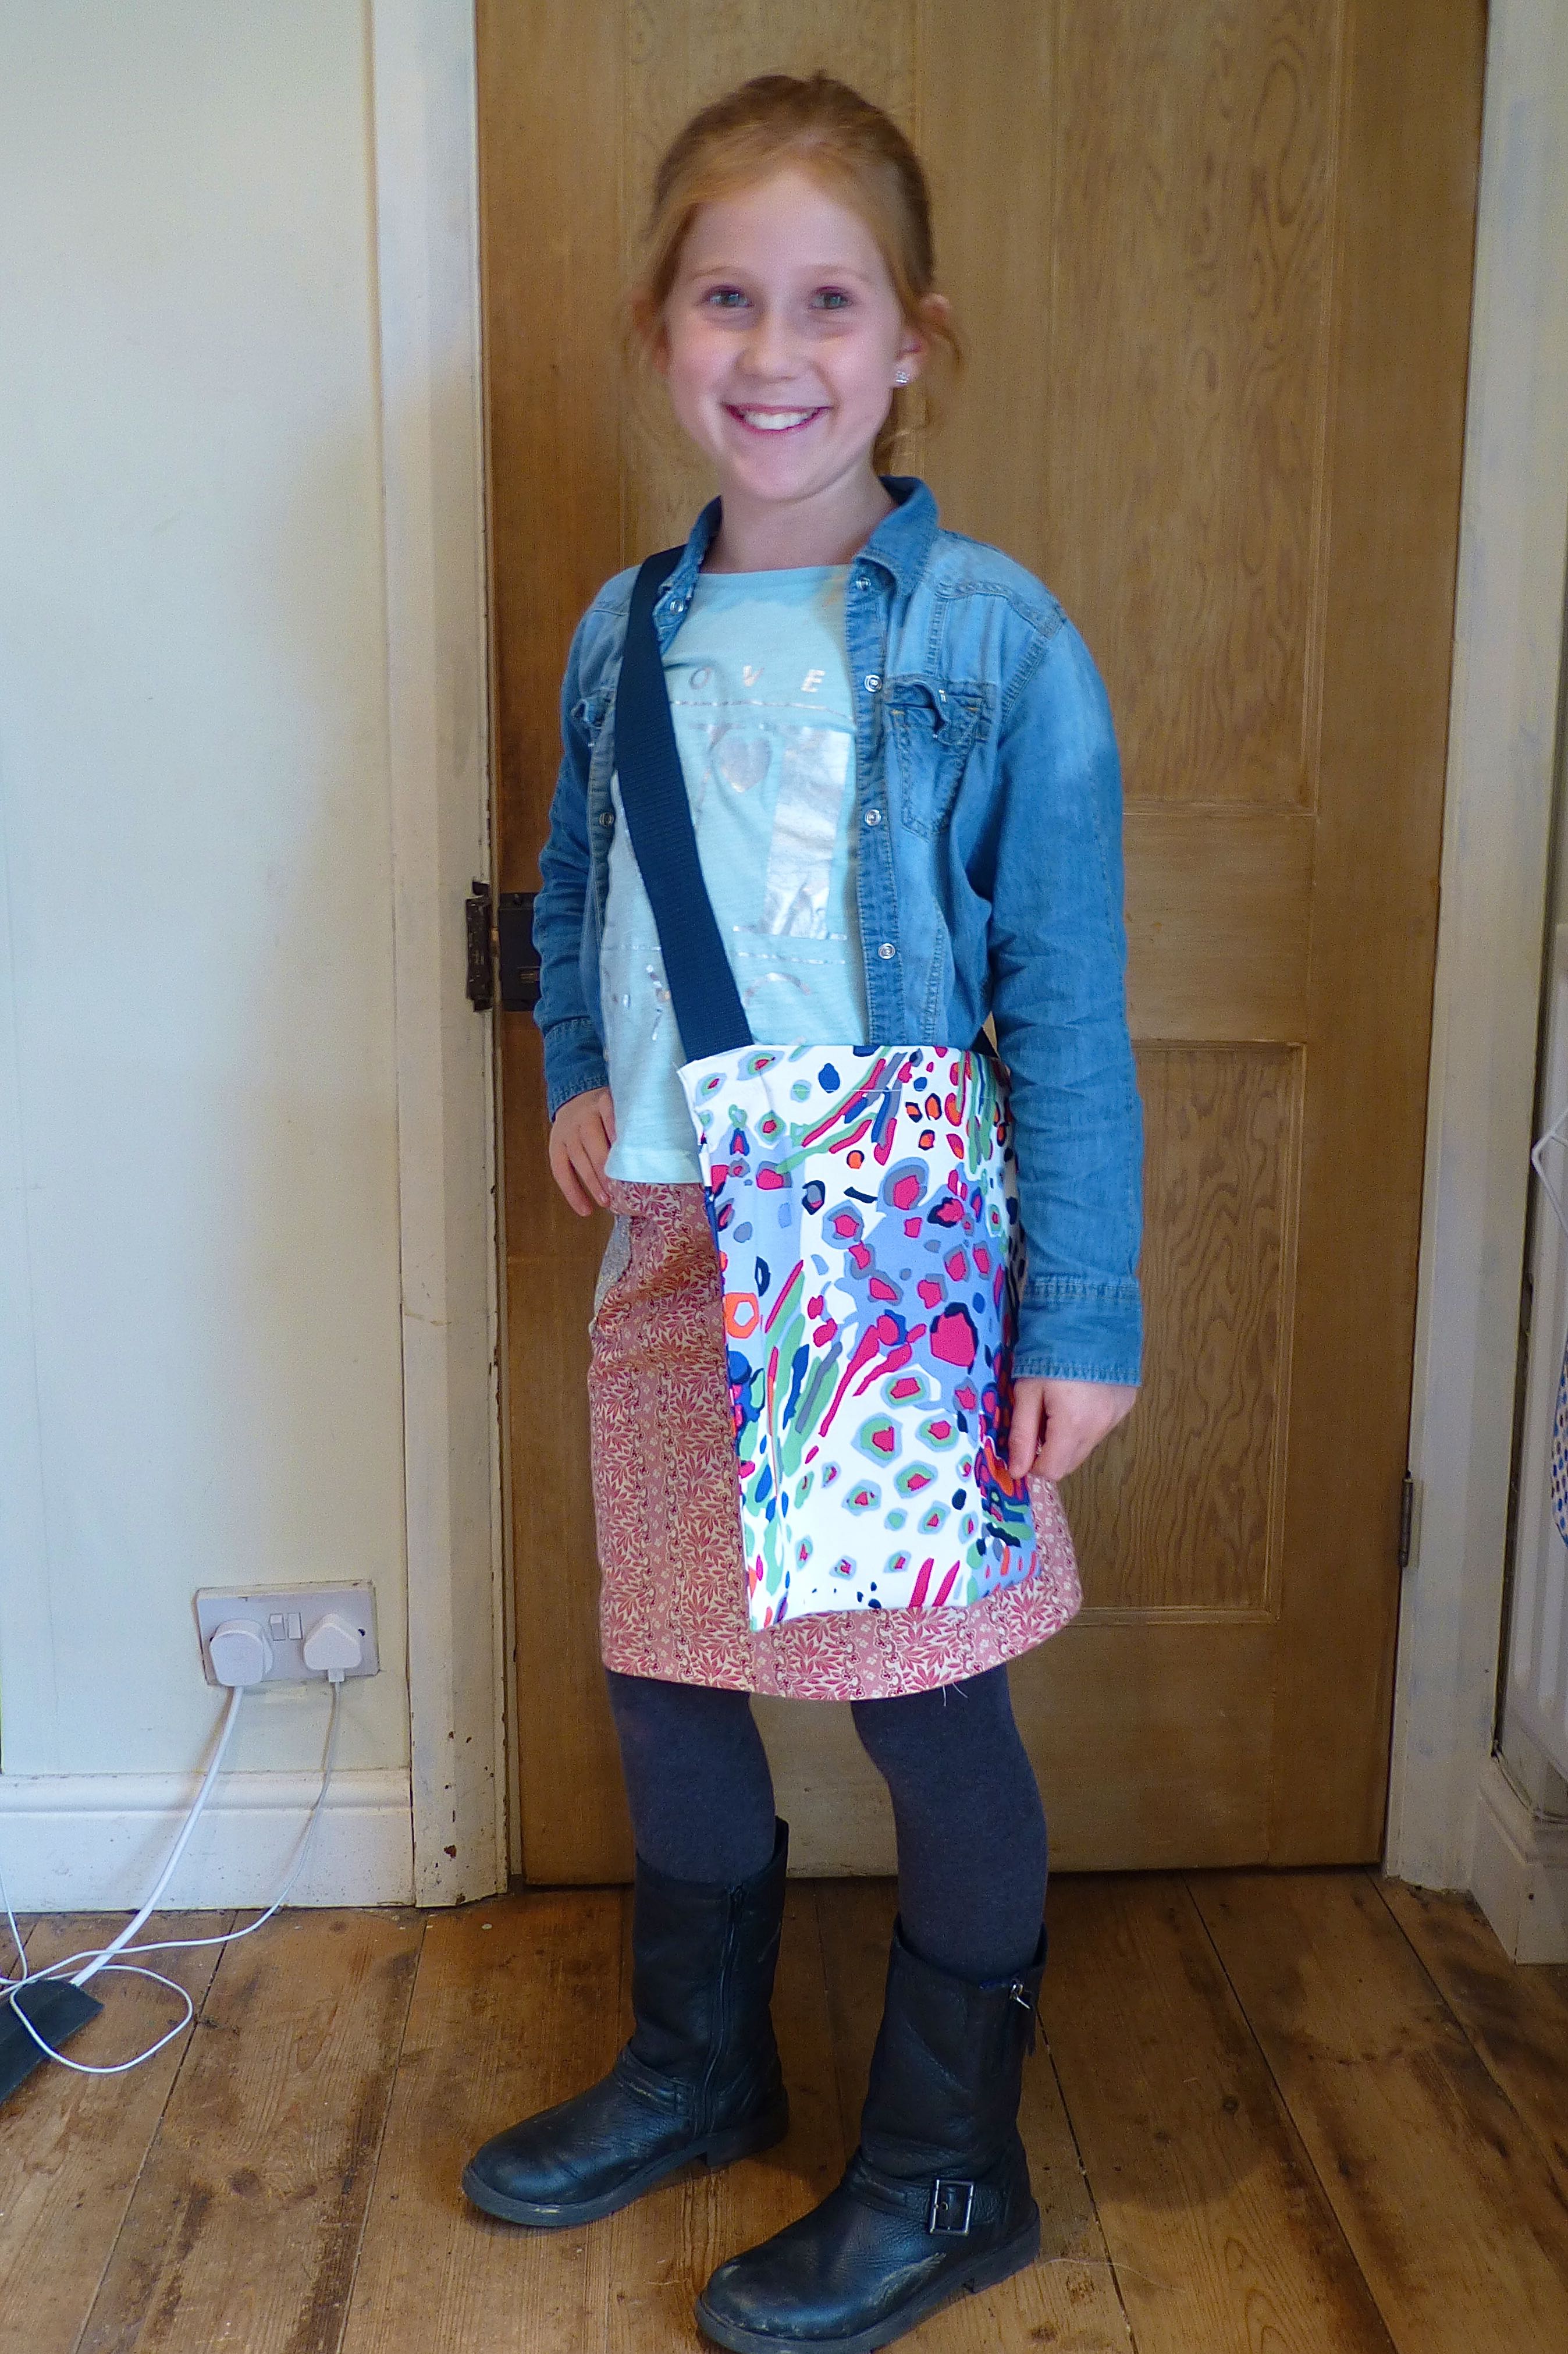
Can you see the student wearing her newly made skirt that she begged me to allow her to keep on for the rest of the day?

P1060843

One look at those beaming faces is enough to tell you how much fun they are having!

P1060844

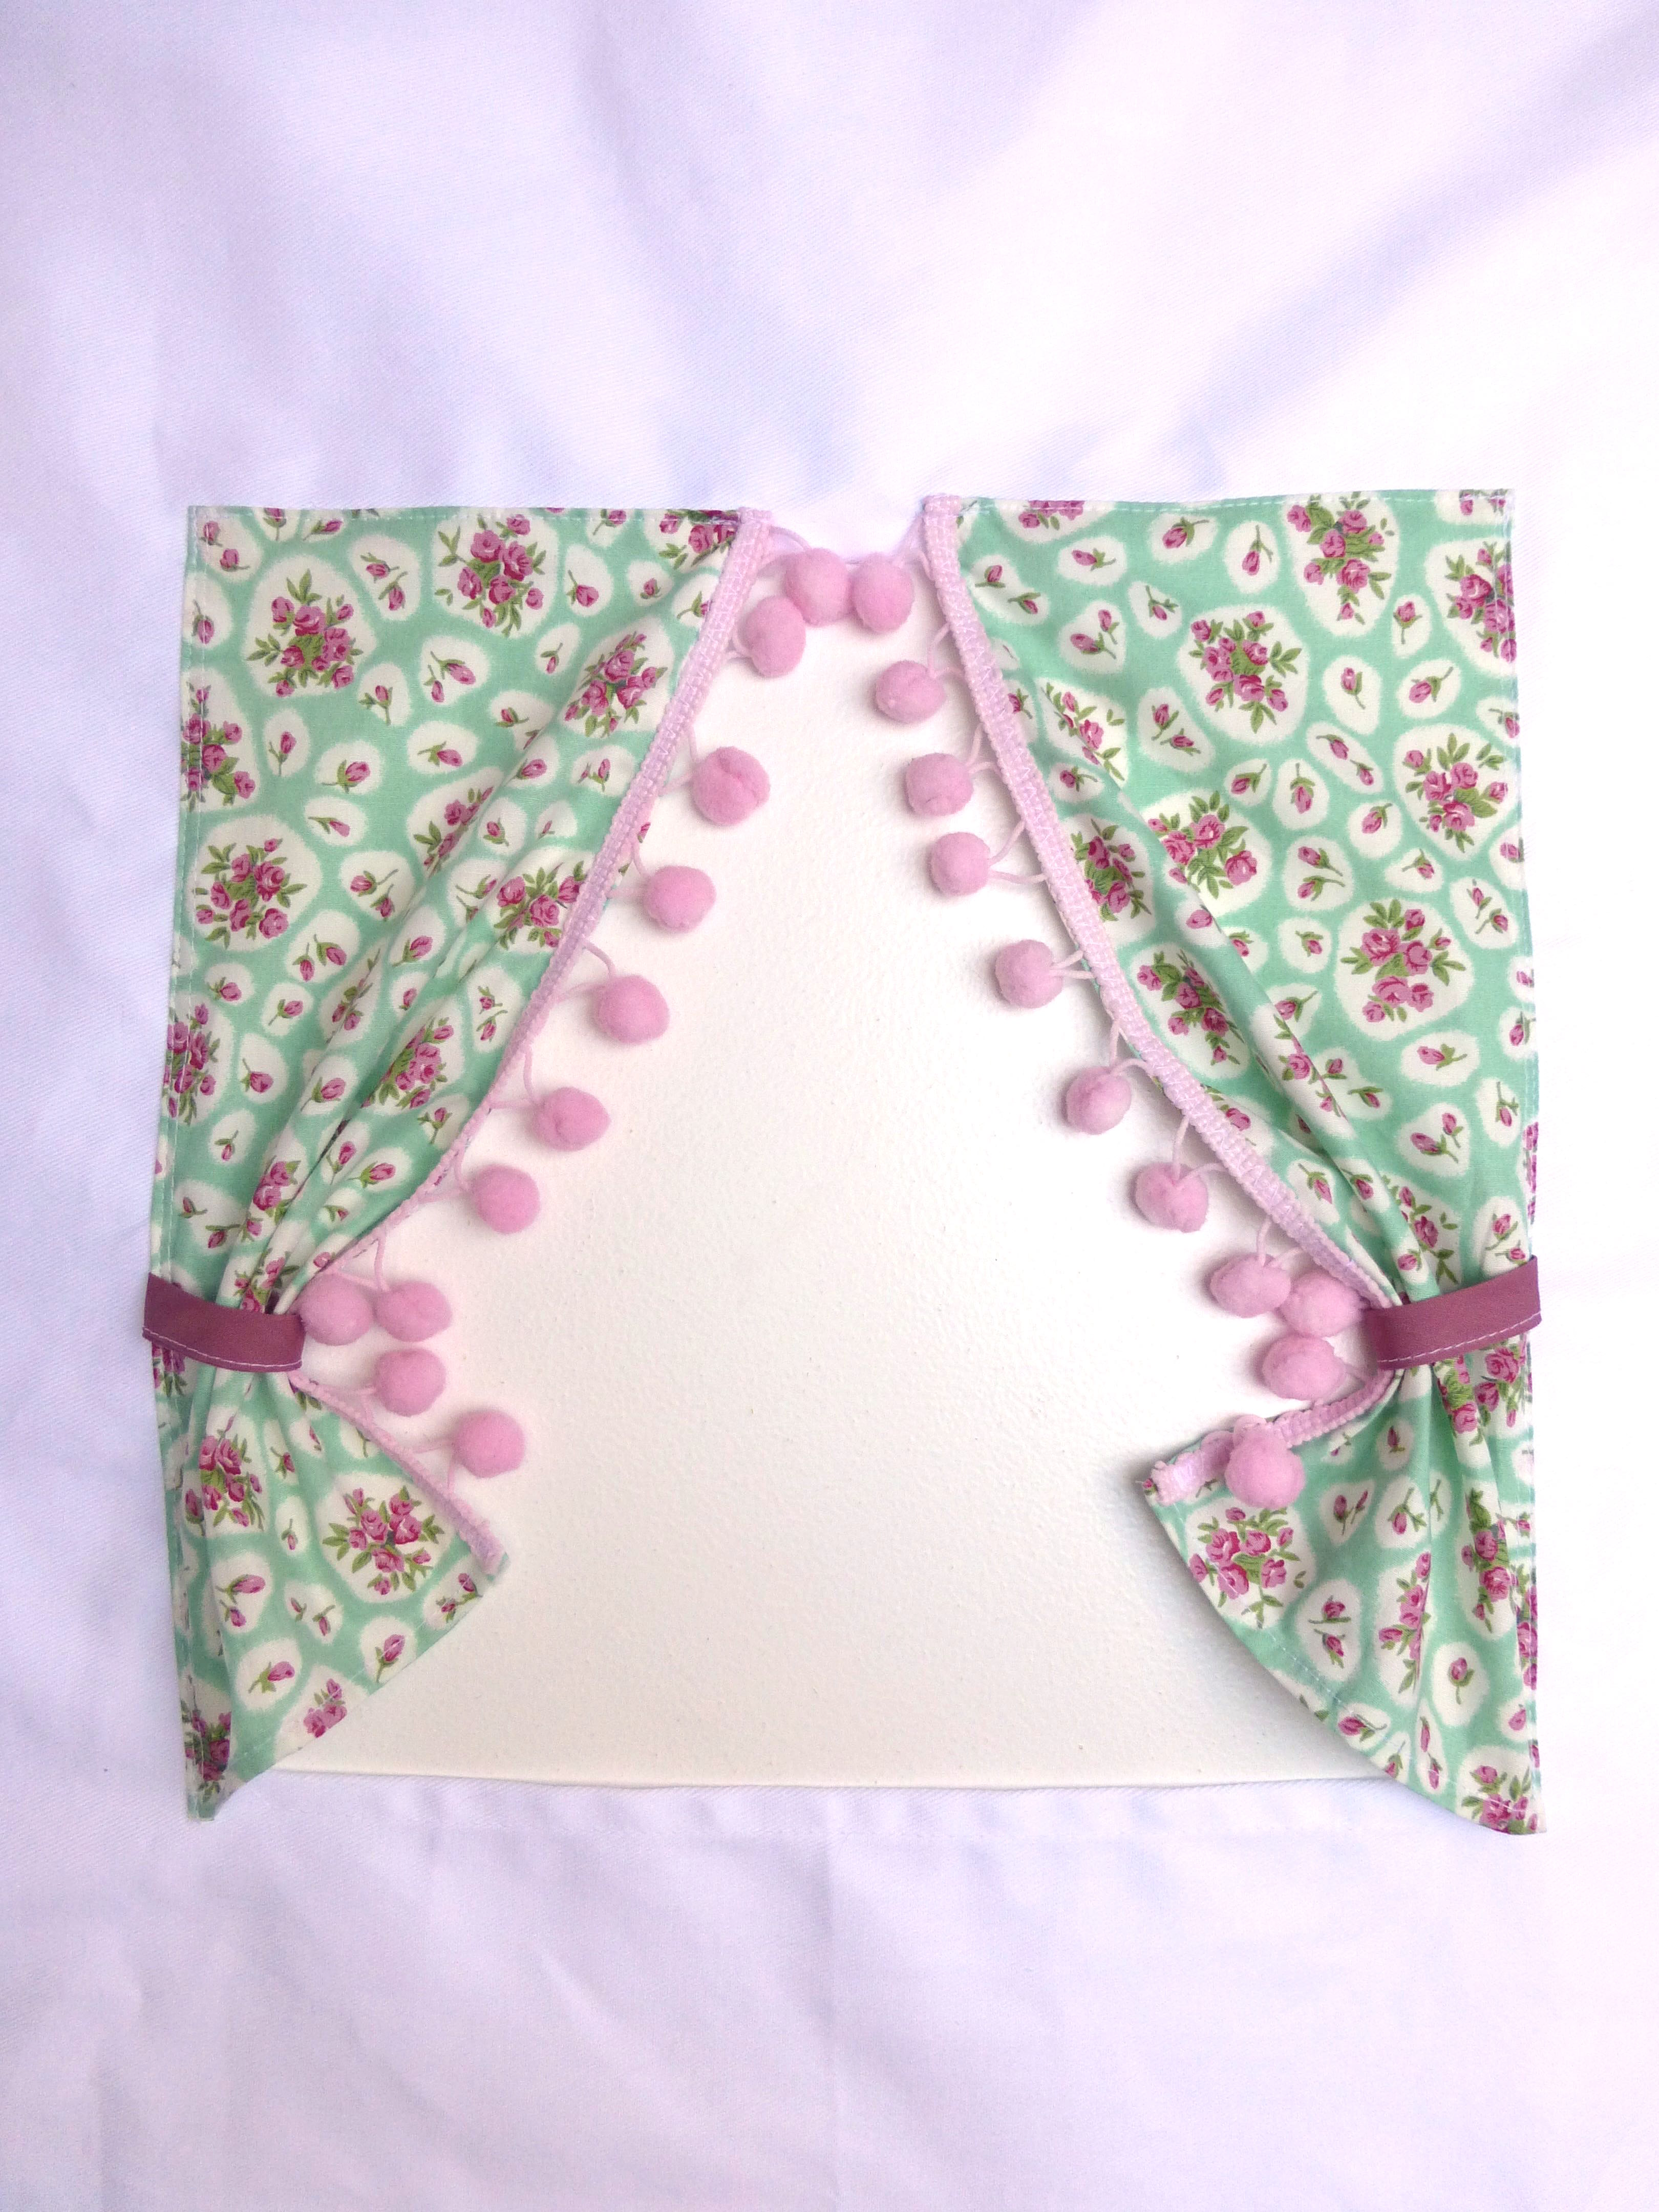
Tadah! Messenger bags completed with 20 minutes to spare.

P1060842 P1060845

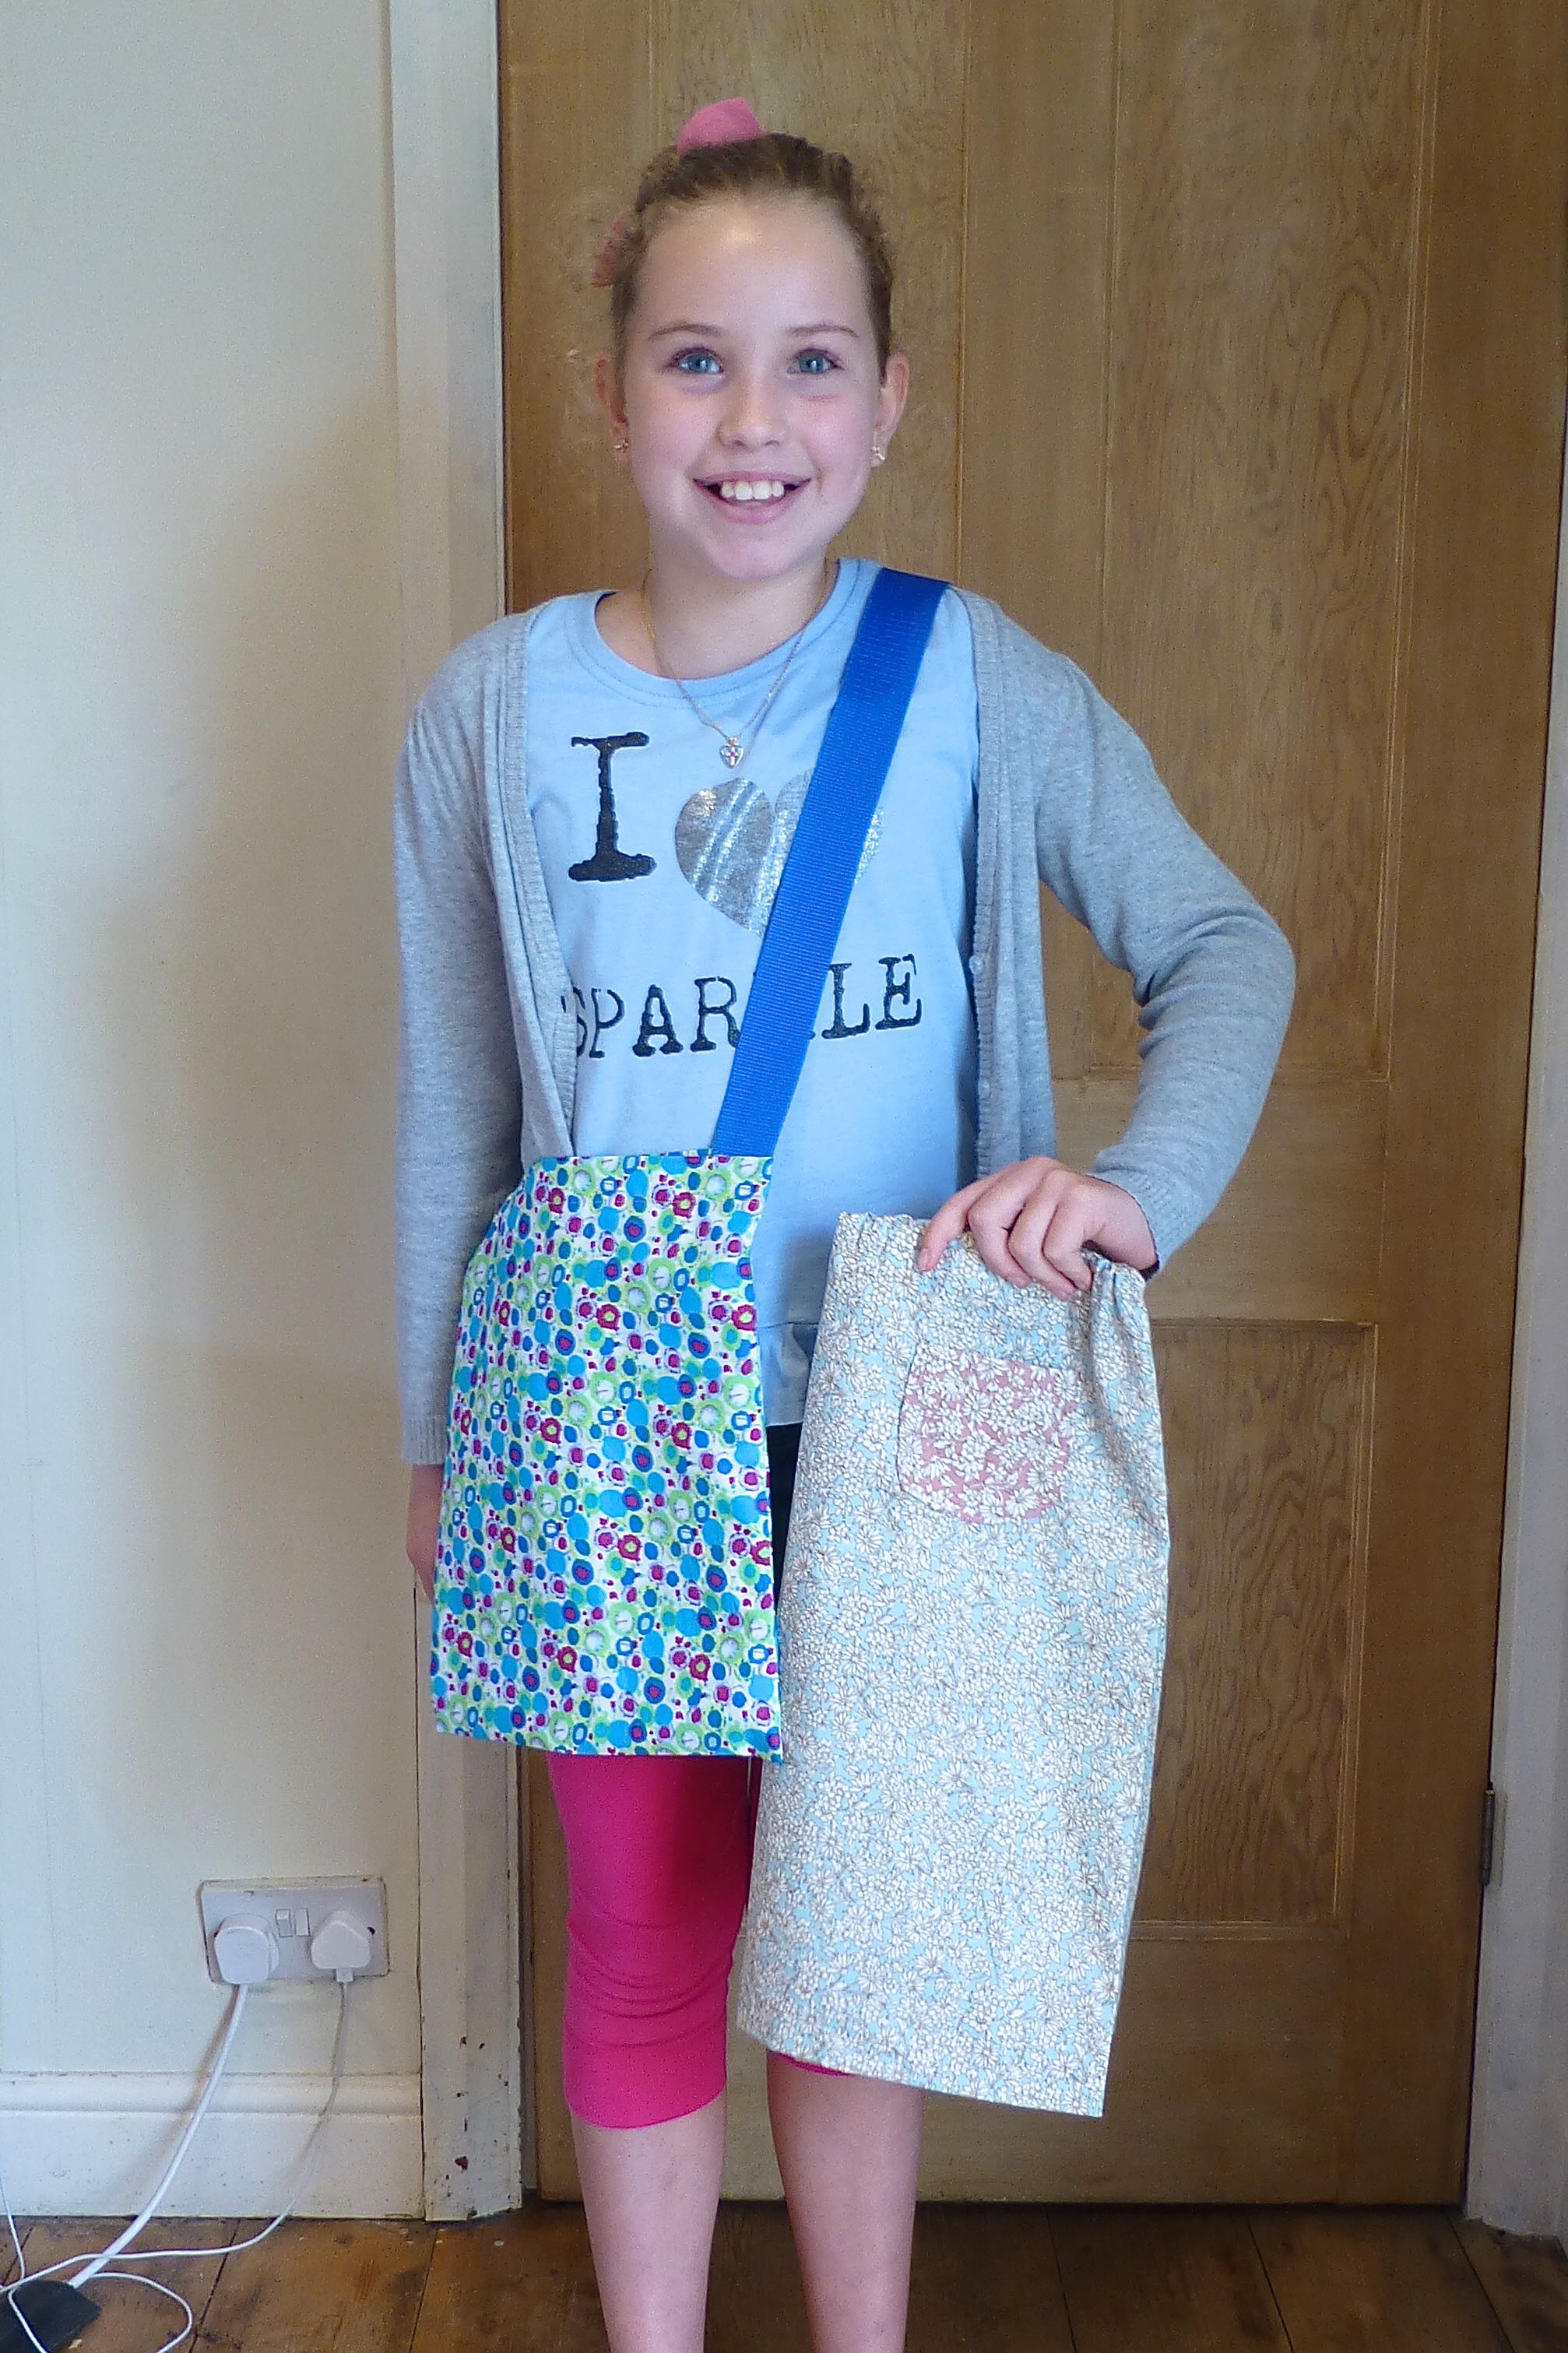
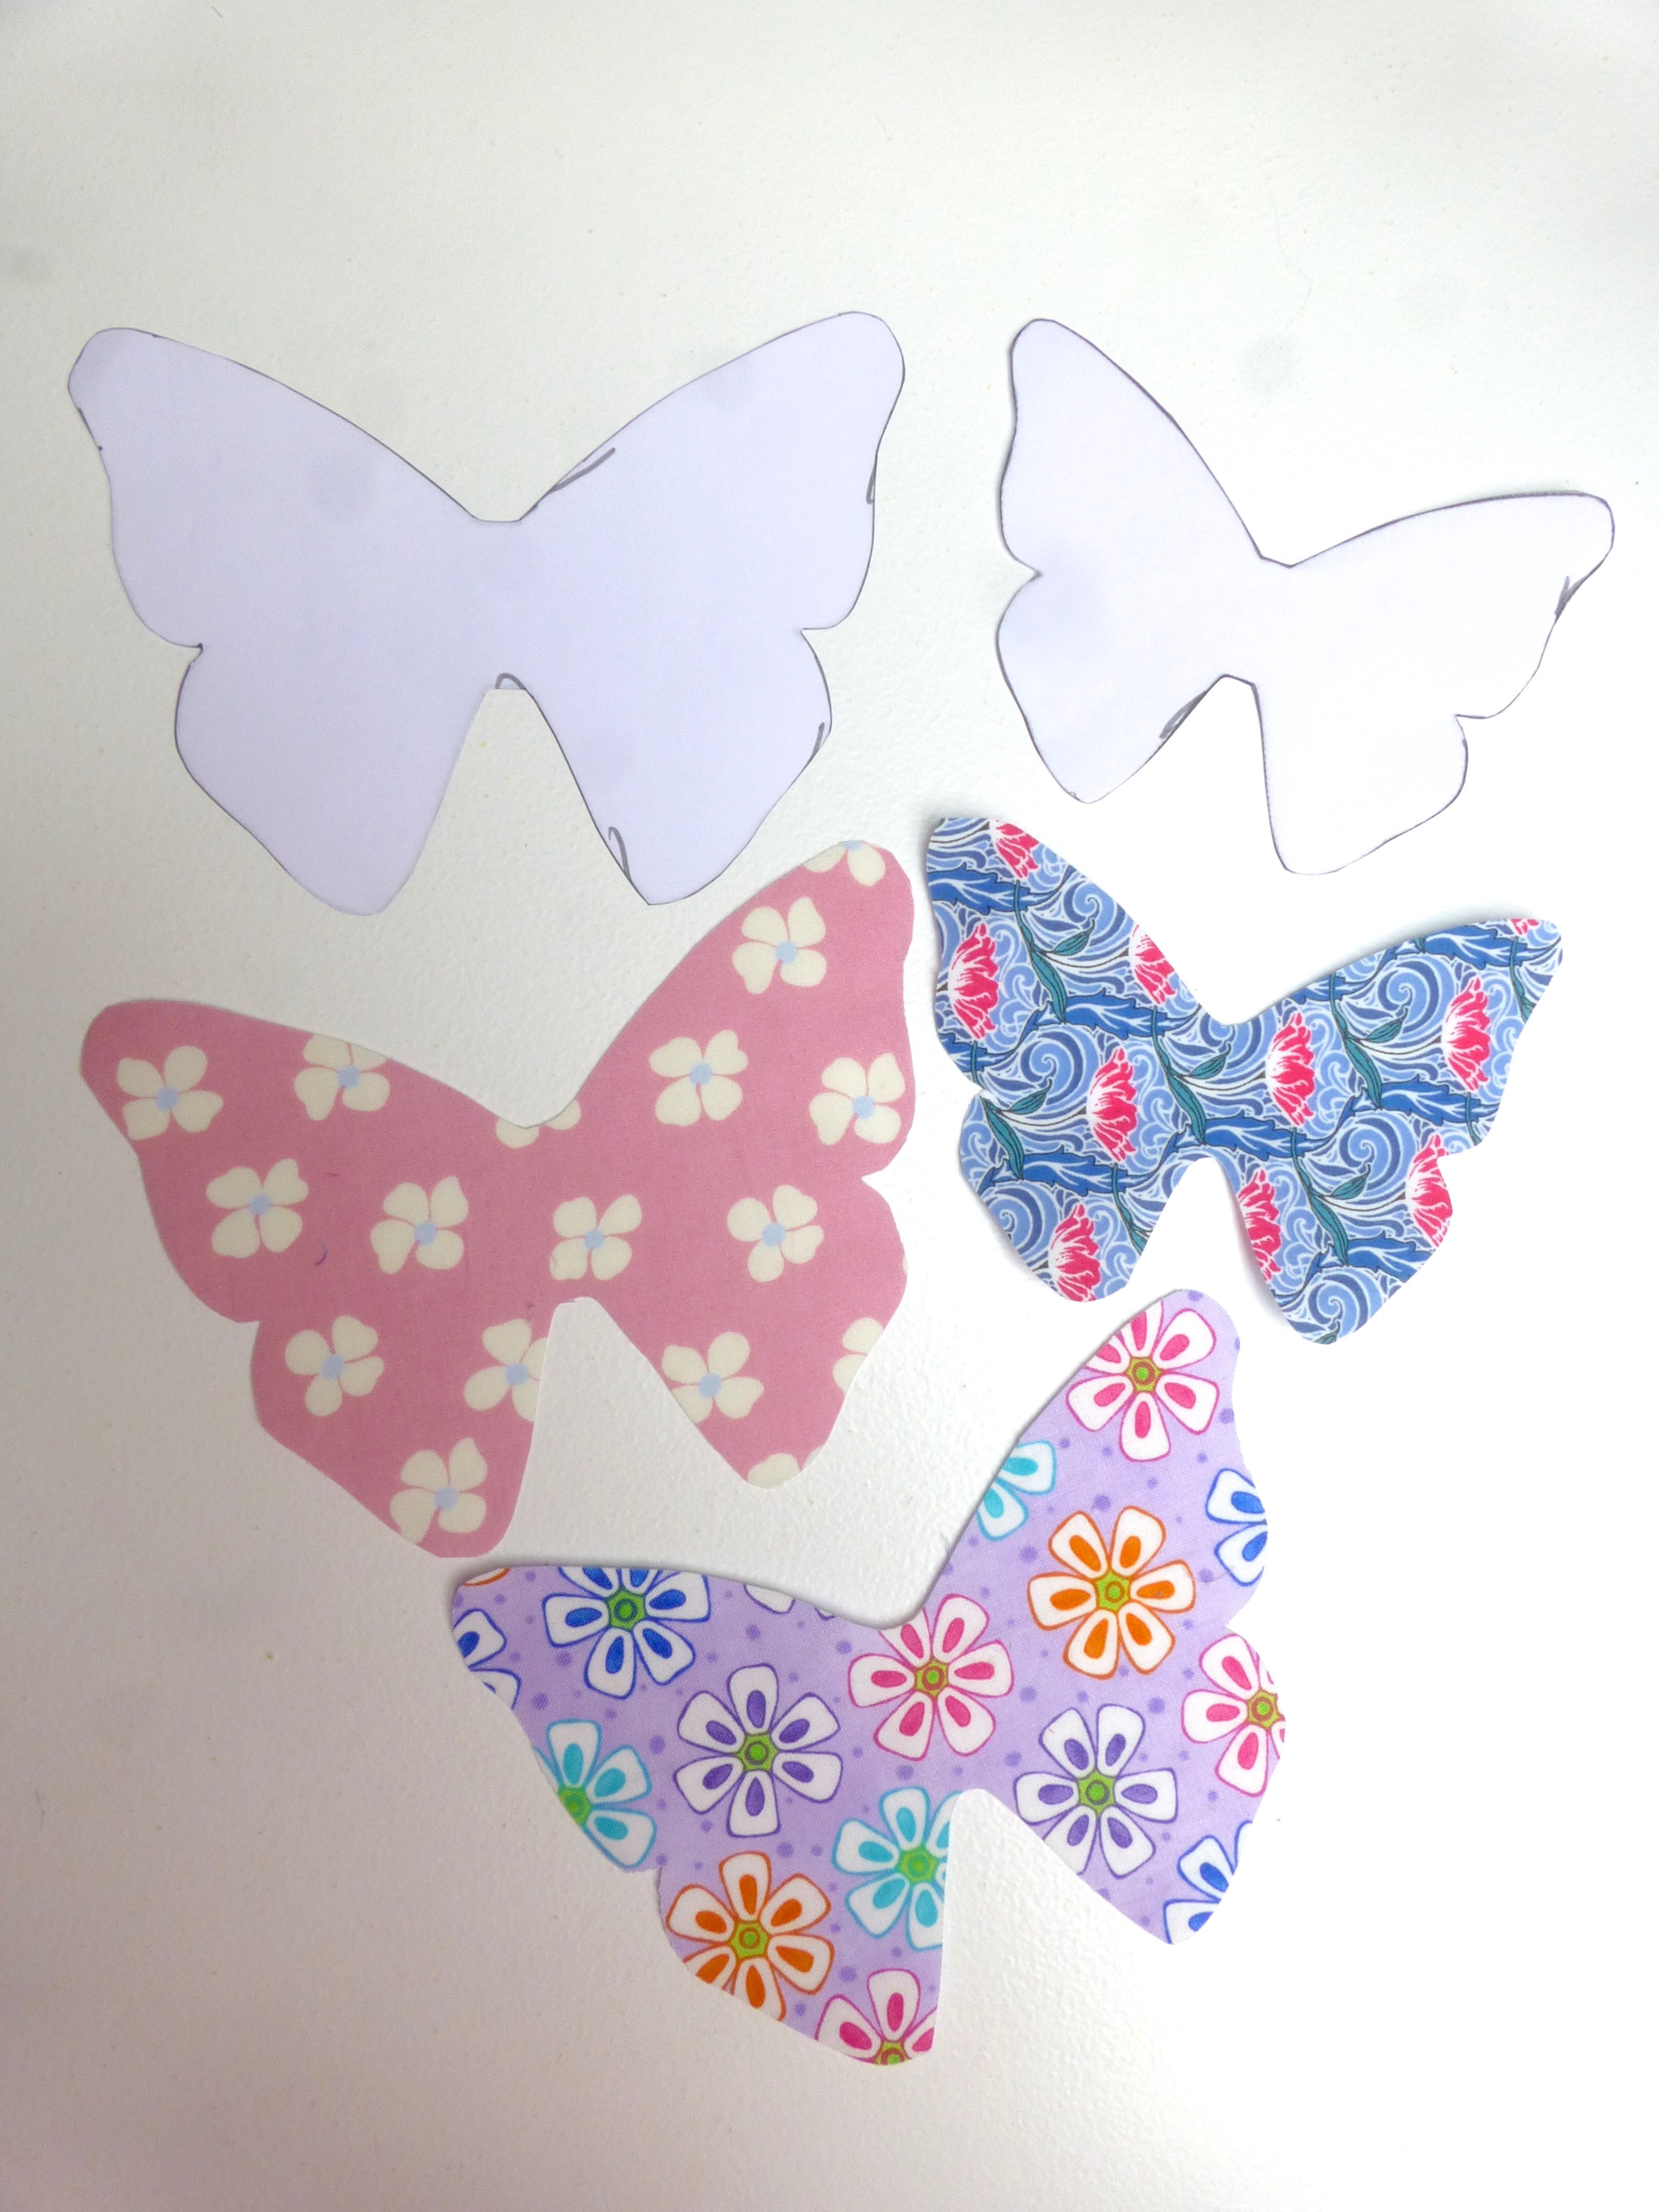
With two projects completed I let the girls rummage through my stash and allowed them to make anything they wanted in the time left. They decided to each make a small drawstring bag.

P1060846

Both girls are desperate to attend the regular weekly classes that start after half term and signed up immediately – that’s the sign of a job well done I think, don’t you?

I thoroughly enjoy spreading the sewing love and it’s wonderful to see another generation being bitten by the sewing bug, a skill that will serve them well in the future and give them endless hours of pleasure no doubt.

What are you doing to encourage kids to make things for themselves?


56 Comments

New Hens And A Look At Needlework

We lost a hen recently, one of my favourites, a Bovan Nera named ‘Marley’ – her sister, ‘Bob’ died a few weeks ago as well. Such a lovely, sweet nature, she was the only hen that stood by Amber while she was recovering from a broken leg and didn’t pick on her. When broody, she would hop up onto the sofa and settle down on The Boys’ laps waiting to be stroked.

I miss her calming presence and gentle ‘clucking’ as she wandered in and out of the house.

OY4B9918

As you may have noticed, The Girls play a big part in our lives so I thought you might like to know a bit more about them.

If not, just scroll down the page to the sewing and crochet:)

There are only two hens remaining from the original flock of six, ‘Ginger’, a Columbian Blacktail, and the characterful ‘Amber’, an Amber Star, whose image has graced many a blog post and who is now fully recovered and integrated back into the flock.

OY4B9914

We raised Cock, Buzz and Woody from eggs that our hens hatched, but we lost Buzz to the fox after she ventured into his domain. Generally we don’t have a problem with foxes because, although they are just yards away in the fields most days, they are happy to feast on the never ending supply of rabbits rather than risk getting shot by trying to steal one of The Girls!

Spot, Bluebell, Bob and Marley were all found dead in the nest box at different times with no obvious signs of injury. However, Cock is twice the size of The Girls and he has these lethal weapons.

Three inch long spurs.

Spurs

Being an amorous youngster, he is not very delicate with his ladies and we suspect that it was one of these daggers that broke Amber’s leg back in the Summer. He may also have accidentally crushed the others in the nest box overnight too, which would account for the sudden nature of their demise.

Having said all that, he keeps the flock from squabbling most of the time and is a brilliant guard ‘dog’, crowing at any poor unsuspecting delivery person who dares to open the five bar gate at the end of the driveway.

Being a country girl born and bred, his thunderous “Cock-a-doodle-do!” at five am every morning is reassuring rather than annoying. I’ll never forget the look on my husband’s face when Cock let out his his first strangled half-crow at six months old as he was feeding them corn, the first time we were certain he was a cockerel and not a hen. The tell-tale huge wattle and comb take up to a year to develop fully and at that point he looked just like the others.

There’s no mistaking him for a hen now though!

OY4B9853

Here’s ‘Woody’, hatched with Cock and Buzz.

OY4B9903

A quiet hen who loves blackberries and will jump quite high to reach the juiciest ones!

OY4B9936

Anyway, with a reduced flock of just four we decided it was the right time to replenish the numbers. After a failed attempt to hatch three eggs under a broody hen (they kept getting broken) we returned to the farm where we purchased the original six and bought four more point-of-lay hens.

You need to introduce new girls to the flock with care and in at least pairs as they will automatically get hen-pecked by the senior birds in a bid to teach them the pecking order. And yes, that’s where those phrases come from!

Do you want to meet them?

No, we haven’t got any less obvious with our name choices!

Here’s ‘Star’, a Sussex Star, looking a little grubbier than usual.

OY4B9861

‘Bluebell’, a, erm, Blue Belle.

OY4B9835

‘Chestnut’, a Chalk Hill, Chestnut Ranger.

OY4B9839

Finally, meet ‘Snow White’, a White Leghorn.

OY4B9901

The newbies are still settling in and they haven’t quite got the hang of roosting in the coop at night yet. We usually find them on top of the run at dusk but, several times, have found Blue Belle asleep on top of the rotary washing line!  Luckily, when they’re dozy they’re really easy just to scoop up and safely relocate on the perch with the older hens.

We still find the odd egg laid randomly around the garden and under the trampoline, but most days they’re in the nest box now.

Chestnut lays dark brown eggs – don’t they look pretty with all the others in the bucket?

P1060699

P1060700

It’s nice to see a decent sized flock free ranging again!  Even the newbies regularly come into the house for a ‘chat’ and a few crumbs of whatever I can find to give them. We have four sets of French windows downstairs most of which are permanently open from April to September so The Girls are used to popping in and out at leisure. Now the air has chilled somewhat, the doors are closed and they don’t come in as often, but opportunist Amber will squeeze through the tiniest gap in a door left ajar and plonk herself down firmly with the dogs in front of a roaring fire!

Hens – if you haven’t got any yet, GET SOME!

girls

Talking of a roaring fire, you may remember that a while ago I found this lovely old fire screen in a charity shop for a few pounds and it has been prettily screening the empty grate all Summer. I shall miss seeing it over the Winter, but logs crackling are a fair substitute!

P1060703

An English cottage garden scene hand embroidered onto linen – isn’t it beautiful?

P1060704

I used to do a lot of embroidery and cross stitch and still dabble now and again. Years ago, circa 1987-88, I spent weeks labouring over these two ladies as a Christmas gift to my mother.  She has since downsized and they were packed away for over fifteen years before she offered them back to me.

IMG_2085

Each lady is about ten inches in height so they’re pretty sizeable. I just need to repair the back of the frames and then I think I might hang them in our bedroom. What do you think? The colours are still as vibrant as the day they were finished nearly thirty years ago – testament to being kept behind glass out of direct sunlight, I suppose.

blue lady green lady

I’m almost three quarters of the way through my Minerva Crafts project for October – good job I started back in July, but I knew I’d need three months to complete the WHOLE book!

dolls

I’ve already got my sights set on another glorious book to work through cover to cover – “Let’s Go Camping” by Kate Bruning.

Untitled 2

You have to check out the caravan – it’s even got crocheted bunk beds!

Untitled

In fact, I may have to go right to Amazon now and order myself a copy because my heart is fluttering just looking at it again.

What’s on your needles right now?


36 Comments

Handmade Gift Exchange

As you may know, Tajana and I had a handmade gift exchange recently – I made her a WIP bag for her knitting and a matching ‘phone case, card wallet and coin purse.

P1040451 P1060411

And Tajana made me……..

…….THIS!

P1060509

A beautifully knitted shawl in a totally gorgeous shade of blue and the sweetest crocheted brooch that matches perfectly.

P1060511

I love them both so much – but that’s not all, she also must have spent ages embroidering this cute sheep and hen. I put it into an embroidery hoop immediately.

P1060514

It now hangs in my studio to inspire me every day.

P1060513

Tajana professes to be a novice when it comes to sewing, so imagine my delight when I unwrapped this to see all those tiny, perfect little stitches in such a pretty design.

P1060515

For a while I wasn’t sure what to do with it but it’s far too nice to just leave as it is, and then I thought ‘lavender bag’ – ideal for my wardrobe and I will be reminded of the lovely Tajana every morning when I get dressed.

So here’s a quick run down of what I did: –

After folding the piece in half, I stitched just outside the outline and cut it out, leaving a small gap in the stitching at the shoulder edge.

P1060685

It was turned to the right side and lightly filled with dried lavender.

P1060687

A cut down wire coat hanger was inserted, then the opening stitched together by hand.

P1060689

It’s already in my wardrobe making all my clothes smell wonderful.

P1060691

P1060692

Thanks a million T!


35 Comments

Marcy Tilton 8813 – Vogue Linen Dress

If you have been following my blog this Summer, you may have noticed my penchant for linen and the ‘Lagenlook’ style of clothing.

Linen is not only comfortable to wear and brilliant for keeping you cool on those long, hot Summer days, (not that we had many of those in England this year) but it also gets better with washing – softer and more drapey.

The pattern I wanted to try was V8813 by Marcy Tilton for Vogue which called for a lightweight linen or jersey. Obviously I chose a linen, and went for a stunning Pillar Box Red 100% linen from Minerva Crafts. It has a subtle sheen to it which is quite unlike the linens I have bought before.

This is what arrived in the post: –

P1060500

As we’re heading into Autumn, short sleeves were not an option so I opted for view B with three-quarter length sleeves.

P1060501

P1060502

Although not immediately obvious on the pattern envelope, the oversized pockets have a pleat in them which is held in place by a button. As the fabric is plain, I decided to make a statement with these swirly patterned buttons which are very striking and quite unusual; they look like they’re hand painted.

P1060504

The dress came together very easily but, although I washed the fabric before starting to sew, it is still stiffer than I’d like. A few more washes will soften the linen more and more though, and those pockets will drape better eventually – they just look a little too structured at the moment.

P1060517

After the main body of the dress has been constructed, the centre front panel is inserted and then the gathered detail is added.

Having read several other blogs featuring this pattern, it seems some people are finding that it is less fiddly to complete the gathers prior to inserting the front panel. However, I am used to using Vogue patterns and decided to follow their instructions which worked for me.

The pattern includes a great way to get really even gathers so I thought I’d show it in more detail as it’s a technique that would transfer to many other projects.

You cut lengths of cord twice as long as the guide lines – I used a baker’s twine but any thin cord will do.

P1060518

Pin the cord in place along the guidelines.

P1060519

Set your stitch width to a wide zig zag.

P1060521

Choose a medium stitch length.

P1060524

Zig zag over the cord being careful not to catch the cord in the stitching. I found that it just stayed in the groove of the sewing machine foot which made it easy.

P1060520

P1060525

When all the cord has been enclosed, secure one end of each of the cords by wrapping it around a pin in a figure of eight motion.

P1060526

Then simply pull the other end of the cord to create even gathers across the entire length.

Secure with another pin at the other end and steam the gathers so they stay in place.

Finally, top stitch from the right side in two rows either side of the previous zig zag stitching.

P1060527

This is my favourite way to create gathers which are nice and even – it might take a little longer than the usual method of just pulling up the bobbin thread, but it’s much more professional looking and well worth perfecting the technique.

P1060546

I amended the design by adding a row of top stitching to the shoulder seams as it’s always a nice finishing touch.

P1060544

I prefer to leave the sleeve hems and bottom hem to the very end so deviated from the instructions at this point.

The very last thing to do was to sew those wonderful buttons in place!

P1060542

Can you see the slight sheen? It’s almost like silk.

P1060535 - Version 2

P1060536

P1060537

It is SUCH a comfortable dress to wear and will drape more softly after a few more washes. I can see myself teaming it with a pair of tights and boots for the colder weather.

If you are tempted to try this pattern, there’s never been a better time as it is half price at the moment!

Here’s the link: – V8813 Marcy Tilton


38 Comments

Folding Travel Photo Frame And Case

I was contacted recently by Craftseller magazine in relation to their “Blogger of the Month” feature and was asked if I would like a free double page spread in their magazine.

Um, let me think a minute…..yeeees!

As part of the feature I designed a free pattern for the readers, which was to be copyright-free allowing full reproduction rights. This was harder than it initially seems, I mean, what could I design that hadn’t been done before????

I came up with the idea of a folding travel photo frame and Googled/Pinterest-ed it…….not a single result.

Not one.

No one seems to have come up with a tutorial for such a thing, unless I just didn’t type in the correct keywords. So that was it, decision made, a “Folding Travel Photo Frame And Case” was going to be the free pattern for Craftseller’s readers.

After finalising materials and method on a prototype, this is the final product: –

Travel photo frame and case

Do you like it?

You may remember the “Postcards” fabric from the “Spring In Paris” collection by Studio Voltaire that I bought earlier in the year (see this post), well I thought it would be the perfect match for a travel themed project.

postcards

So, here goes with the tutorial!

You will need: –

  • A single fat quarter of fabric
  • Medium weight iron on interfacing
  • 1 sheet acetate
  • 1 sheet cardstock
  • 2″ length of hook and loop fastener

Cut the following: –

  • fabric: –                     2 x pieces  12″ x 3.5″

1 x piece 4.5″ x 3.5″

  • iron-on interfacing: – 2 x pieces 12″ x 3.5″

1 x piece 4.5″ x 3.5″

  • acetate: –                  1 x piece 3.5″ x 2.5″
  • cardstock: –              2 x pieces 3.5″ x 2.5″

1 x piece 2.5″ x 2″

P1060336

  1. Fuse the interfacing to the reverse of the matching fabric pieces following the manufacturers instructions.
  2. Place the acetate in the centre of the reverse of your 4.5″ x 3.5″ piece of fabric and draw around it, marking a rectangle. Remove the acetate and stay stitch the corners of the marked rectangle..
  3. Draw a second rectangle 1/4″ inside the first one and cut this section out to create a window for your photograph.

P1060343

4. Clip corners diagonally to the stay stitching.

P1060344

5. Fold to inside along the solid lines. Press.

6. Turn down a 1/4″ hem on the top edge and top stitch close to the fold. P1060346

7. Place acetate on the reverse of the window and top stitch close to the inner edge on all four sides.

P1060348

8. Turn and press a 1/4″ hem on remaining three sides of the fabric, being careful not to touch the acetate with the iron.

P1060351

It should now look like this from the right side.

P1060350

9. To make your frame, take both 12″ x 3.5″ pieces and, with right sides together, sew around three sides with a 1/4″ seam allowance. Trim corners, turn and press.

P1060352

10. With the right side up, place your window on top of the frame aligning the bottom folded edge with the bottom seam of your frame. Top stitch the window close to folded edges on three sides, leaving the top edge open to slip your photo into.

P1060355

11. Insert a 3.5″ x 2.5″ piece of card into the open, unfinished end of the frame and push right down to the bottom.

12. Sew just above the window through all layers of the frame to encase the card.

P1060356

13. Insert the second 3.5″ x 2.5″ piece of card and push down to meet the previous line of stitching.

14. Sew across the width of the frame as before, encasing the second piece of card.

15. Repeat steps 13 & 14 with the smallest 2.5″ x 2″ piece of card.

16.Turn in the raw edges of the frame opening, press and top stitch to close.

P1060358

17. Window side uppermost, stitch the loop side of the hook and loop fastener to the opposite end of the frame as shown below.

P1060360

18. Hand stitch the hook side of the fastener to the reverse of the window along the bottom edge.

19. To assemble your travel photo frame, simply fold into a triangle shape and press together the hook and loop fastener.

P1060361

20. Slide your 3″ x 2″ photo in behind the acetate.

P1060370

For the case: –

  1. Fuse interfacing to a piece of fabric measuring 16″ x 4.5″. Fold in half width-wise and sew a 1/4″ seam on the three raw edges, leaving a gap to turn.

P1060374

2. Turn and press.

P1060375

3. Top stitch close to the edge of the bottom edge.

4. Fold up from the bottom about 3.25″, so the top stitched edge stops 1.25″ from the top edge.

5. Top stitch around the side and top edges to finish.

P1060376

6. Fold your travel photo frame flat and pop inside the case.

P1060378

P1060380

There you have it, a compact and portable, travel-themed folding photo frame – perfect for the traveller or person who works away from home.

P1060379

Look out for my Blogger Of The Month feature in Craftseller magazine soon!


33 Comments

How To Make A Child’s Teepee Wigwam

I know it’s bad form to utter the ‘C’ word while it’s still the school Summer holidays, but my August make for the Minerva Craft Blogger Network is this beautiful Teepee, which is indeed a Christmas present for a little girl in the family.

wigwam teepee tipi play tent

I have to admit that this is not the first Christmas present I’ve made this year as I tend to make them all year round, as and when an idea springs to mind, but it’s definitely my favourite so far.

Isn’t it sweet?

teepee wigwam play tent tipi

There are LOTS of tutorials out there showing many ways to make your own wigwam, but none of them were quite what I wanted, so this is my version which is suitable for a toddler – adjust the measurements upwards to make a larger tent for older children.

It is an amalgamation of several basic designs that I’ve come across which I have then personalised to suit the recipient using various appliquéd motifs and letters.

This lovely fabric bundle arrived from Minerva: –

P1060048

The white base fabric for the teepee is a thick cotton drill which makes a nice, strong tent. I also chose two contrasting fabrics which are lighter weight cottons; a gorgeous ‘Cath Kidston’ inspired floral cotton poplin and a dusky pink polycotton.

You will need: –

  • 2 1/2m of cotton drill
  • 1m floral fabric
  • 1m plain fabric
  • selection of scraps from your stash
  • 4 x plastic overflow pipe, each measuring 2.00m x 22mm (99p each from Wickes)
  • A leather shoelace or similar

Using the large diagram as a guide, fold your 2 1/2m of white fabric in half lengthwise and cut out as shown.

Cutting layout diagram

You should now have three equally sized triangles and two half-triangles. Stitch the two half-triangles together along the long straight edge with a narrow seam to make a single triangle. (I cut mine wrong, hence the off-centre seam!)

P1060052

The bottom edges can be hemmed if you wish, although I left mine as the selvedge forms the bottom.

Cut rectangles of fabric out of the contrast floral fabric as per the two smaller diagrams, then make about 4m of bias binding using your plain fabric.

(See my tutorial here on how to make bias binding).

P1060055

Apply bias binding to one side and lower edge of the two large pieces of floral fabric – these will form your front curtains.

P1060059

P1060060

To shape the sides of the curtains to match the slope of the wigwam, place a large white triangle over the curtain, bottom edges matching and raw edges up the side. Your floral fabric will poke out beyond the edge of the triangle as seen below.

P1060061

Cut off the excess floral fabric.

P1060063

Take a curtain and pin the top edge to the bottom edge of your small white triangle, wrong sides together.

Take your other curtain and pin over the top of the first curtain.

It should now look like this.

P1060065

Sew together using a flat fell seam. (This previous post shows how to make a flat fell seam.)

You can leave it plain as this type of seam leaves a nice neat finish, but I chose to decorate mine with a strip of bias binding and a row of pom pom trim from my stash.

Similar pompom trim can be bought here.

P1060070

Make the curtain tiebacks as follows.

Fold the small floral rectangles in half lengthwise and stitch a small seam along one short and the long side.

Turn and press.

P1060073

With raw edges matching, pin and baste about halfway down the unfinished sloping edge of each curtain.

P1060075

Take a large white triangle and cut a 25 x25cm square for the window the base of which should be about 58cm up from the bottom edge.

Snip diagonally into each corner by 1cm and fold in a 1cm double hem. Pin in place.

P1060099

P1060100

Stitch, sewing across corners as shown.

P1060101

Cut two little curtains, each one 15 x 27cm.

Hem all four edges and trim the opening edges with more pom pom trim.

P1060103

Make two tiny curtain tiebacks: –

Fold a 10cm length of bias binding in half lengthways and stitch close to the edge.

Stitch a 1cm square piece of velcro to one end.

Pin curtain to window at top and side.

Insert tieback under curtain about 10cm up from the lower edge, velcro side uppermost as shown.

P1060107

Stitch curtain in place, catching tieback in seam as you go.

P1060105

Sew the other piece of velcro to the inside of the window.

P1060109

P1060113

You can continue to decorate your teepee or just sew the sides together at this point – just scroll down to the relevant section.

I personalised this one with a name which I first printed out on card using Cooper std font in size 240pt. Separating the letters makes them easier to cut out. For best results use a craft knife.

P1060223

Fuse a piece of interfacing onto the wrong side of your contrast fabric and trace around each of the letters making sure you reverse them first.

(I have plenty in my stash, but you can buy interfacing here at Minerva.)

P1060226

Cut around each letter carefully using embroidery scissors for accuracy.

P1060227

Pin the letters in place and sew above the window using a satin stitch on your machine.

P1060232

P1060230

I decorated the sides of the teepee with a mixture of appliquéd flowers and butterflies – just click the links below to download the PDF for these.

Butterflies

Flowers

Each motif was interfaced before being cut out and sewn on with satin stitch as before.

P1060236

P1060234

P1060238

P1060237

P1060235

They look quite nice on the wrong side as well!

P1060240

Now for putting the whole teepee together.

Start by sewing each of the four sections together at the side seams, wrong sides together, in a 1cm seam.

Turn so that right sides are now facing each other and sew a 4cm seam (effectively just a huge French seam) which will create the tubes through which your pipes will pass.

P1060241

Sew a small square of velcro onto the front door curtains in the same way as before, and a matching piece inside the curtain close to the seam.

P1060242

Cut the pipes to 1800mm in length and thread through the casings.

(You may have to trim an inch or two from the top of the teepee to make room for all the poles like I had to).

Tie a leather shoelace or other cording around the top of the tent to keep the poles in place.

OY4B9829_2

And that’s it!

OY4B9833_2

OY4B9832OY4B9830

OY4B9828

OY4B9816_2

OY4B9826_2

OY4B9825

OY4B9815_2

OY4B9819_2

OY4B9827

I had to get a photo with the chickens!

OY4B9822_2

Hopefully I haven’t ruined the surprise as I’m pretty certain this little girl’s mother doesn’t read my blog!

As this teepee only takes up about one square metre of floor space, it is ideal for indoor use and, I suspect, this one will live permanently in her bedroom as a quiet reading nook.

Teepees aren’t only for girls though – what little boy wouldn’t love his own pirate version using this pirate fabric from Minerva?

Or how about a unisex wigwam to suit a brother and sister with this gorgeous Kite print?

pirateskites

Wouldn’t it look lovely draped with fairy lights and bunting?

In fact I might just go and make some bunting now……


29 Comments

How To Make A Mobile Phone Case

Everyone has a mobile (cell) phone nowadays and cases get tatty pretty quickly what with all that in-out wear and tear, so here’s a quick guide to making a new one.

They use so little fabric and are quick to make that they would make a great present, especially if you personalise it like I have done, with a name and motif.

Here’s how: –

Cut out your motif leaving a little fabric around all sides.

P1060194

Iron a small pieces of interfacing to the reverse of the motif.

P1060195

Pin the motif onto the fabric you are going to make the case out of.

P1060196

Drop the feed dogs, remove the presser foot and free-machine embroider the motif to the base fabric. In this instance, I just followed the curly white lines with white thread.

(You can use Bondaweb or similar to fuse the motif to the base fabric if you would prefer the no-sew option.)

P1060197

Trim away the excess fabric from the motif, cutting close to the stitching.

P1060198

Repeat the process for the back and add any other details at this point too – I also embroidered the name of the recipient using the machine.

P1060200

Measure your ‘phone and add a seam allowance, then cut your appliquéd sections, lining and wadding to the same size.

P1060201

Sandwich a layer of wadding between the lining and main fabric and pin together. Baste through all three layers.

P1060202

With lining pieces facing out and motifs facing in, pin front to back.

Stitch around the sides and bottom, leaving the top open.

P1060203

Trim the seams and finish neatly by enclosing in a thin ribbon.

P1060204

Turn out the right way.

A strip of bias binding is then stitched all the way around the top opening edge to enclose the raw edges.

P1060205

P1060206

This will be winging its way to Italy in a few weeks when I have finished the matching yarn bag.

P1060207

The wooly sheep motif is ideal for a yarn addict like Tajana, but you could easily adapt your design to suit other hobbies or passions.

Maybe a fish motif for a keen fisherman, or a cat/dog for an animal lover?

What would you choose to put on the front if you were making a phone case as a gift?


36 Comments

How To Make A Quick And Easy iPad Sleeve

In my last Sunday Sevens post I mentioned that I treated myself to a little something from the Apple store in Exeter.

IMG_2179

It was an iPad mini, which I’ve wanted for a while now, ever since I injured my neck and had to close my photographic business in November (years of carrying heavy equipment around my neck).

Since I no longer have to sit in my office and turn my huge iMac on every day, I thought it would be nice to have something more portable so that I could blog or browse the web from the lounge/garden/kitchen – anywhere but shut away on my own in the office.

Although I also bought a separate Logitech keyboard which affords a little protection to the iPad, I couldn’t wait to pop into my sewing room and whip up a quick and easy sleeve.

The same method could be applied when making a sleeve for any tablet, mobile ‘phone or kindle.

Here’s what I did: –

Measure the device, add a seam allowance to all sides and cut out the following pieces.

  • 1 front
  • 1 back
  • 2 lining
  • 2 wadding

I used scraps and had to have different fabrics for the front and back.

IMG_0002

IMG_0003

Start by sandwiching a piece of wadding between the front and a lining piece. Pin all layers together and baste all the way around.

IMG_0005

Repeat with the back.

IMG_0006

Trim any excess wadding.

IMG_0007

IMG_0008

IMG_0009

Cut enough bias binding to go around all four edges plus an extra length for the opening edge. You can use ready made or follow my tutorial on how to make your own bias binding.

I used an old tea towel!

IMG_0010

Pin the bias binding to a short edge of the back and stitch in place.

IMG_0011

Repeat with the front.

IMG_0012

Pin the front to the back and baste together around three sides, leaving the top opening free.

IMG_0013

Fold under the raw edge on the remaining bias binding.

IMG_0014

Pin the bias binding to the sleeve around the three sides, enclosing all the layers and stitch in place.

IMG_0015

Not my neatest piece of work as it was only for me and whipped up in a hurry whilst supper was cooking, but it was completely free using bits from my stash.

You could spend more time and make it more polished, especially if it is to be a gift for someone.

P1060136

And there you have it – a quick and easy sleeve for your iPad, iPad mini, mobile ‘phone, laptop, tablet, kindle……….


53 Comments

Make-Your-Own Espadrilles

Another day, another birthday present to make, only this time it is something a bit unusual – a pair of handmade espadrilles!

I’ve made slippers and things along those lines before, but never a bonafide pair of shoes.

P1050948

The soles were by Prym and purchased online from The Makery in Bath.

P1050918

P1050919

The box includes templates for the uppers in various adult sizes, but I heeded advice from others who have previously made them and went down a size when making them. I cut out a UK size 5 for the recipient who has size 6 feet, and they fitted perfectly without slipping off.

P1050920

Although there were no instructions in the box, full step-by-step photographs can be found on the Prym website and it was those I followed.

If you are tempted to have a go at these be aware that seam allowances are NOT included – you have to add your own before cutting out!

P1050922

P1050923

I had a small amount of “Rosetta” fabric left over from making this cushion and make up bag, and decided to team it with a deep pink spotty lining.

The pattern consists of just two pieces – one for across the front and one for the heel.

P1050921

I added some fusible interfacing to the outside sections just to give the shoe some extra strength and stability.

P1050924

I also stretched a two-inch length of narrow elastic at the ankle edge just to make sure the shoes would stay on.

P1050926

The main fabric is sewn to the lining right sides together, then turned through a gap left in the stitching.

P1050929

I top stitched the elastic through all the layers for a strong and neat finish.

P1050931

P1050932

The toe section is sewn and turned in exactly the same way, cutting across the corners and notching around the curves as necessary.

P1050934

Next comes the fun bit!

You will need a leather needle to sew through the soles as the wedged point makes light work of it where a standard needle would hurt your finger after a while.

P1050938

The heel section is pinned to the sole…..

P1050935

….inserting the pins at an angle as shown below.

P1050936

I used three strands of embroidery floss to secure the fabric to the sole, using a blanket stitch.

P1050939

When the heel section is stitched on it should look like this: –

P1050940

Next, the front is pinned on in a similar fashion, overlapping the heel section.

P1050941

P1050942

Blanket stitch is used all the way around the front and also to join the sides together.

P1050952

A “hand made with love” label adds a personal touch.

P1050943

That’s it – finished!

P1050950

P1050949

P1050951

I thought I’d better show you what they look like on – have you any idea how difficult it is to take photographs of yourself wearing shoes?!

P1050946

In the end I put my feet up on the table in my studio……

P1050945

P1050947

I’m pleased to report that the recipient was very pleased with her bespoke shoes and put them on immediately – they fit perfectly!

Has anyone else handmade their own espadrilles before?


41 Comments

Tilda’s Appliquéd Make Up Bag

I’ve had a few birthday presents to make lately, luckily all of them for women, so it was just a case of browsing through one of my many books and choosing something appropriate to the individual.

I find that making a gift for someone you know is very different to making items to sell, in several ways: –

  • For a start, I don’t have to consider how long it will take versus how much I can sell it for, I can put as much time and effort in as I want which usually means it can be more elaborately decorated.
  • I can take the recipient’s personality into consideration and personalise the gift accordingly.
  • I enjoy the process far more, knowing that the thought and effort that I have invested will be appreciated.
  • It’s a one off – I get bored making more than one of things which is often what you have to do when stocking up for your online shop/craft fair etc.

I found the perfect little gift in Tilda’s book, ‘Sew Pretty Homestyle’.

P1060029

A cute little make up bag (cosmetic purse) with appliquéd detail on the front – the sort of added extra that can take hours and couldn’t possibly be done at a profit if making to sell.

After tracing off the single pattern piece, I cut out candy-pink striped fabric for the outside, coordinating checked fabric for the lining and some batting to add structure.

P1060028

This method for appliqué is a good one for tiny items where there’s not much fabric to put under the sewing machine foot.

You start by transferring your design (angel’s wings) onto a double thickness of fabric and stitching around, leaving an opening for turning.

P1060030

Trim close to the stitching.

P1060032

Turn and press.

P1060033

Repeat with all the appliquéd elements and pin to the front of the make up bag.

P1060034

Sew all the motifs on, making sure your stitches are hidden.

P1060035

This type of appliqué gives a raised finish when sewn on and the stitches are almost invisible rather than being a feature.

P1060036

Little swirls adorn the wings, all done by hand with the tiniest of stitches.

P1060037

Add some eyes and hair to the naive-style face together with an embroidered flower and the decoration is complete!

P1060043

Construction was straightforward enough.

P1060041

A row of rustic running stitches keeps the lining from getting caught in the zip as well as being a pretty detail.

P1060044

P1060045

Of course, the process could be sped up enormously if the motifs were stitched on by machine and free-machine embroidery used for the wing swirls and flower.

I chose to do it by the book, so to speak, as it gave a more homespun feel that I was looking for.

P1060046

P1060042

I love the coordinating lining – it makes the inside a nice surprise when you undo the zip.

P1060039

This was the ideal project to use up scraps too, as it uses so little for the body and lining of the bag and the appliquéd motifs are literally tiny pieces you’d normally throw away!

P1060047

Thankfully, the make up bag was very well received, so all that effort was worthwhile – I might even make some more for Christmas presents.