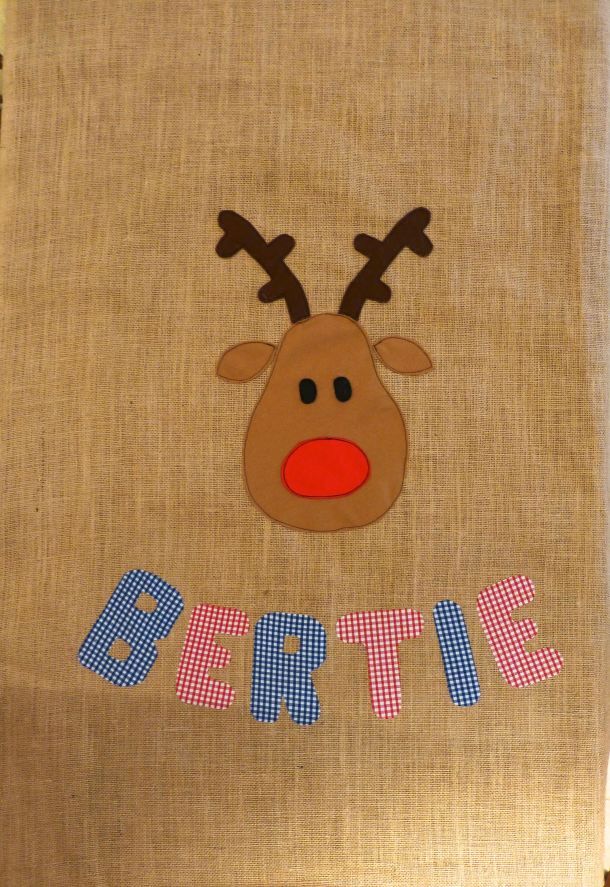
In case you hadn’t noticed, Christmas is just around the corner – nine days, to be precise and I’ve got a great last-minute make for you; a personalised Christmas sack for that special little person in your life.
I’m not joking when I say last-minute as I made TWO personalised sacks yesterday afternoon, each one taking about two and a half hours from start to finish. They’d make great gifts, too, with a little something popped inside and they only cost £12.94 each to make so won’t break the bank.
Trim your gingham fabric to the same size as the hessian – 39″ x 56″.
Put the offcuts to one side as you will use these for the tie and the fabric letters.
Draw a reindeer on a sheet of paper and cut out the individual elements separately.
Cut these out of the felt squares using the picture below as a guide.
Stitch the nose and eyes onto the felt face – I used free machine embroidery throughout to achieve a ‘scribble’ effect which works well on children’s gifts.
Fold your hessian in half and arrange the felt pieces in the centre as shown.
Hessian has an open weave which tends to move quite a lot, so either tack your appliqués on first or use LOTS of pins to keep them in place while you sew them on.
I loathe tacking so I opted for pin overkill instead.
With the reindeer face stitched securely in place, it’s time to move on to personalising your sack.
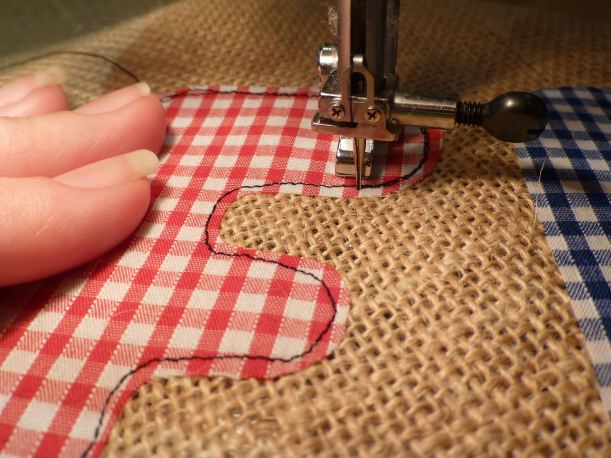
You can download a suitable font or just freehand it like I did onto thin card. As I was making two sacks I had both blue and red gingham offcuts to cut the letters from. I also decided to use some paper backed fusible web to secure the letters to the hessian before stitching them.
Arrange the letters evenly in a curve around the bottom of the reindeer, remove the paper backing and iron in place.
Two rounds of stitching on each letter gives a good effect.
When all your stitching is done, sew the top edge of the sack to the top edge of the lining with right sides together (sorry, no photo). Press the seam flat to create a crisp edge.
Then, lay your fabric out on a large table or on the floor and fold in half lengthwise, right sides together to create a ‘tube’.
Pin all the way around, leaving a gap in the lining where shown through which to turn. (I forgot to photograph this step on the first sack so the lining is shown in red).
Put pins at 8″ from the top edge and 9″ from the top edge – this will be a break in the stitching to provide a channel for the tie.
Sew all the way around the three sides with breaks in the stitching as described above.
Trim the corners and turn the sack through to the right side. Sew the lining closed at the gap through which it was turned. Press.
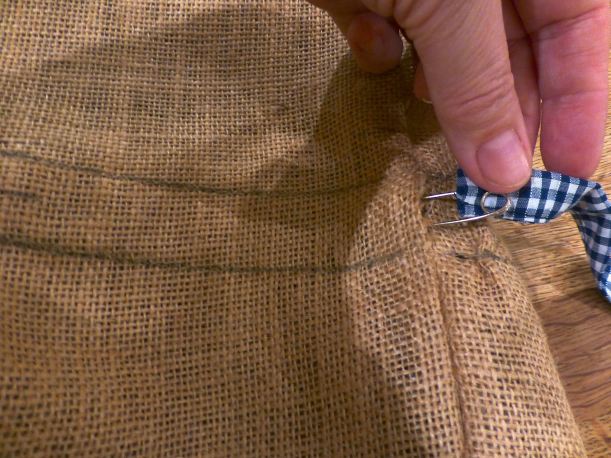
With a soft pencil or tailor’s chalk, mark two parallel lines all the way around at 8″ and 9″ from the top edge of the sack. Pin through both layers of fabric. Stitch along the lines.
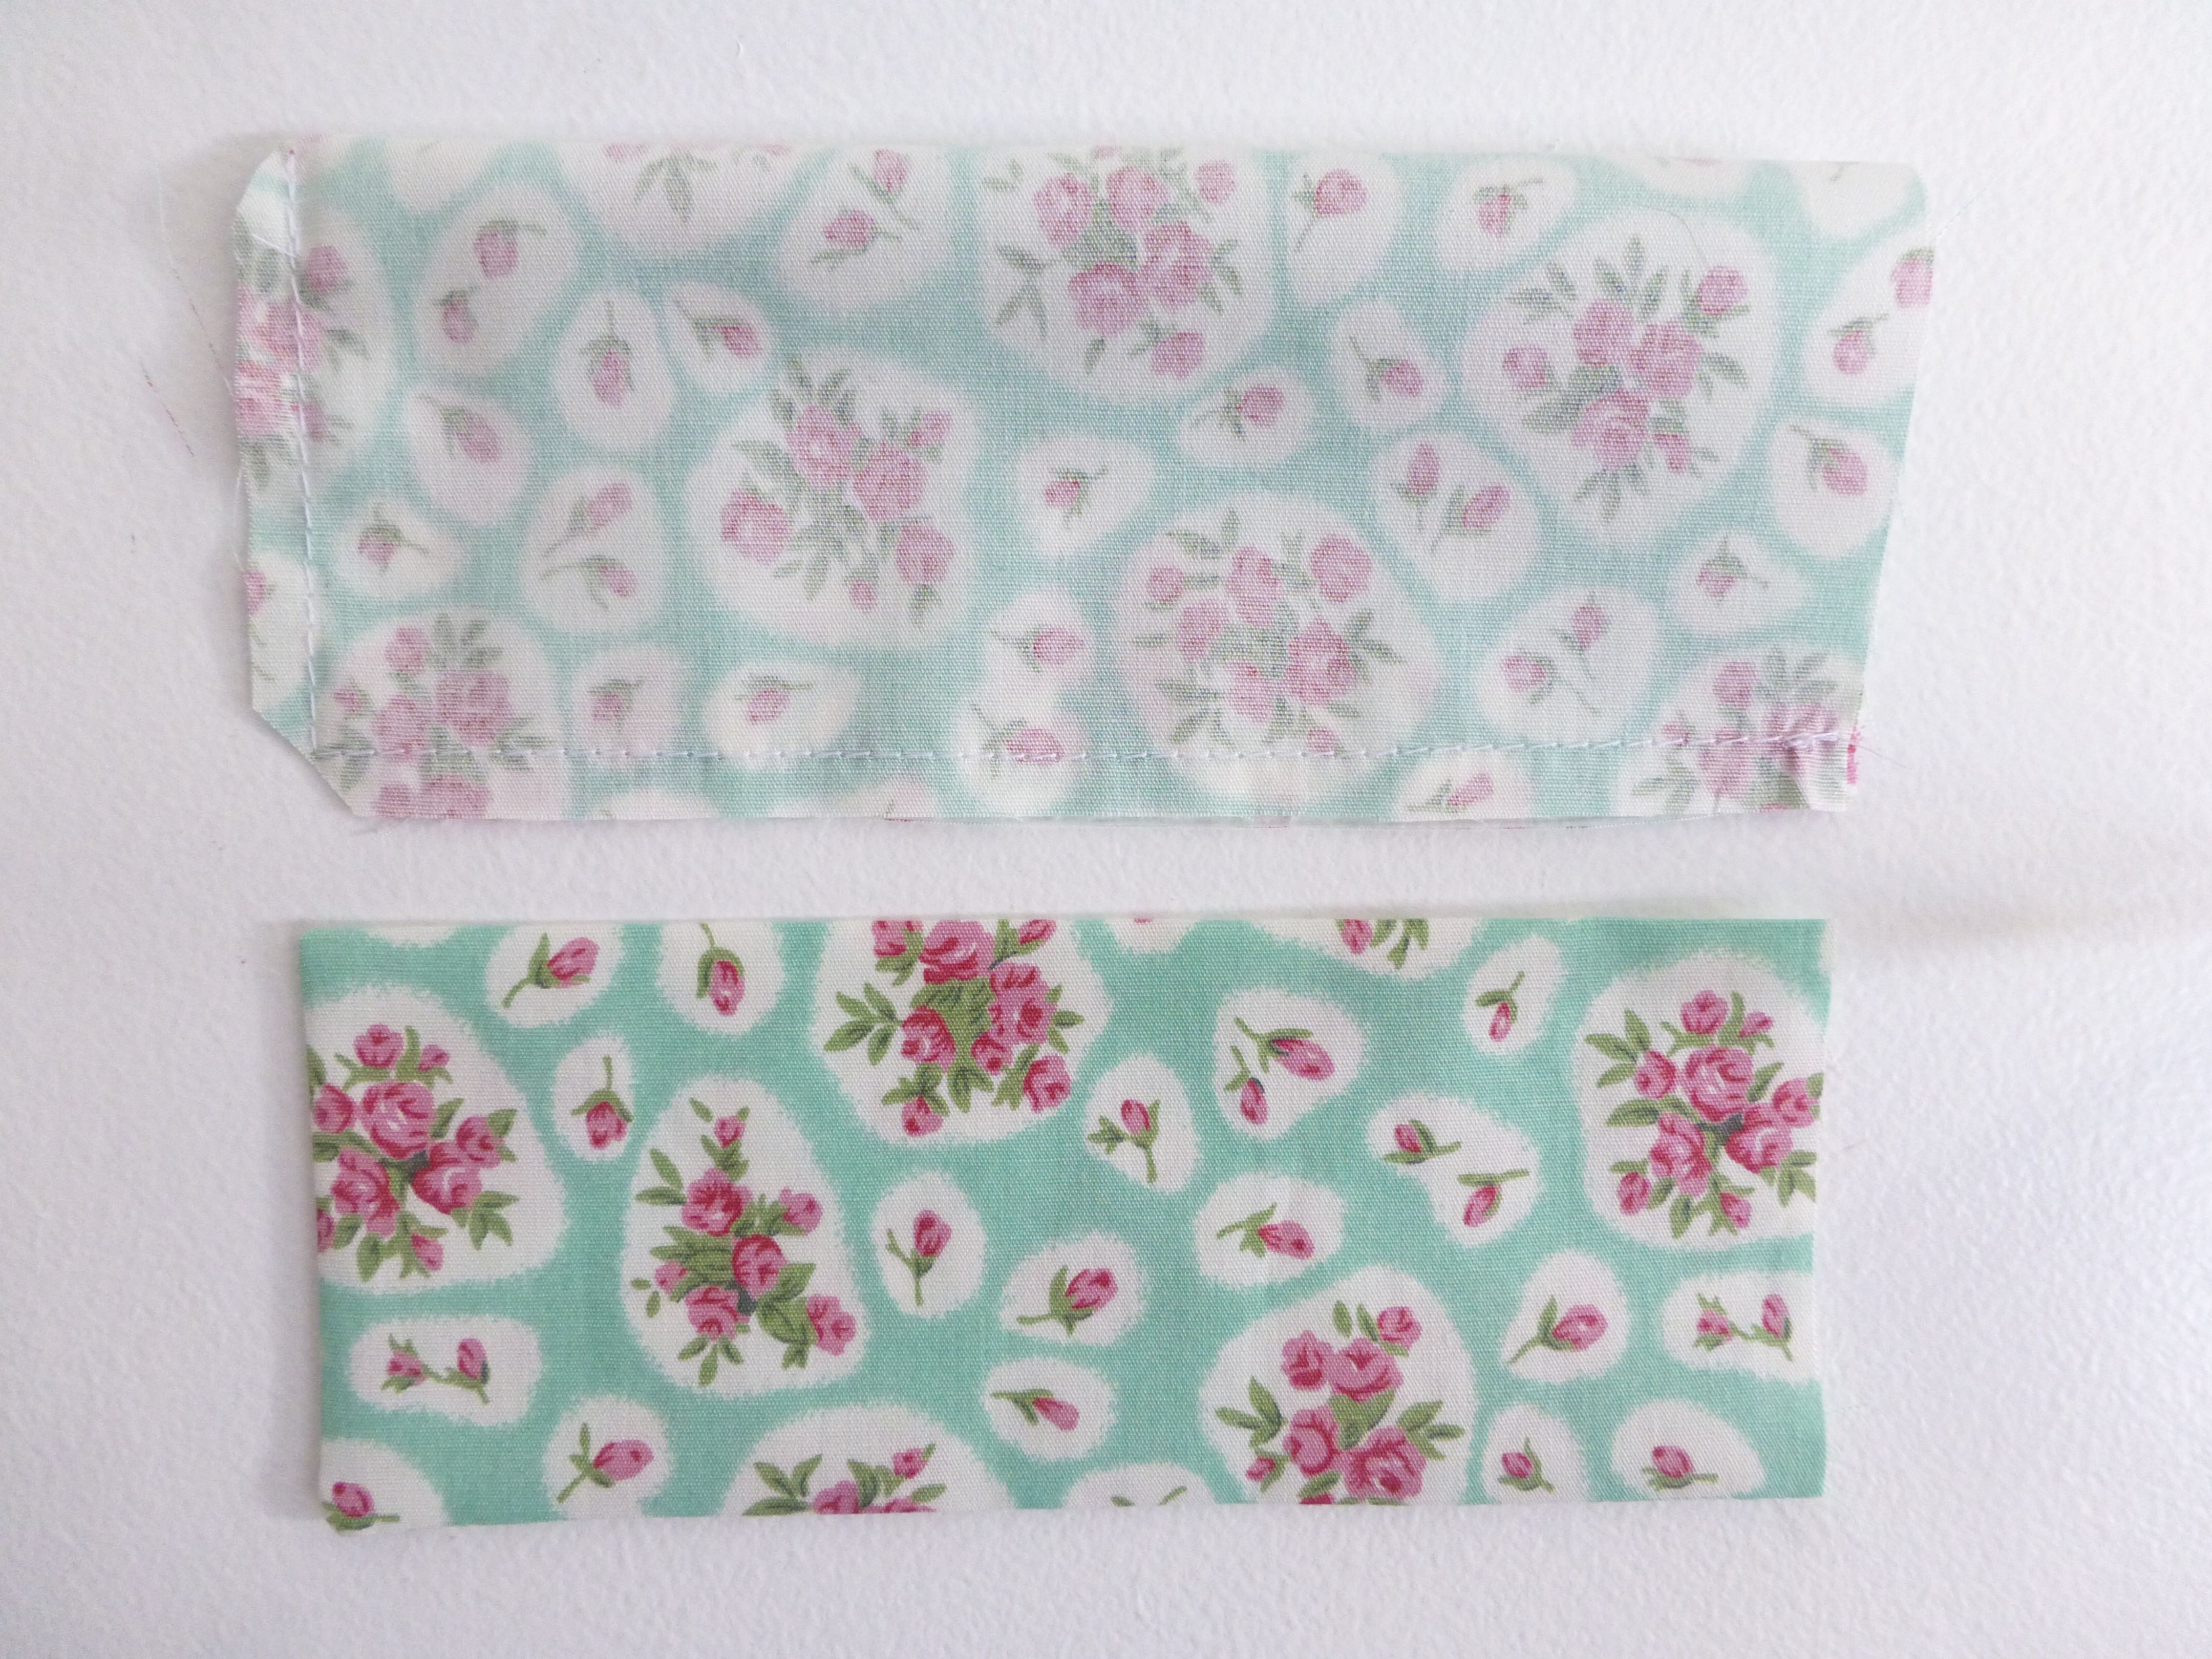
For the tie, use your remaining offcuts of gingham to assemble a length that measures about 70″ x 2″.
Fold in and press 1/4″ at each short end.
Fold in and press 1/4″ along each long edge.
Bring the folded long edges together enclosing the raw edges.
Stitch close to the edge to finish your tie.
Use a safety pin to thread the tie through the channel in the gap left for this purpose.
And that’s it – finished!
A beautiful sack which any child would be delighted to have on Christmas Day to pop all their opened presents into.
They’re huge, too, I would have added The Boys to the photo for scale except that the sacks are a surprise for them.
You’ve still got time, so who fancies whipping up a Christmas Sack for their little boy or girl?
If you have been following my blog this Summer, you may have noticed my penchant for linen and the ‘Lagenlook’ style of clothing.
Linen is not only comfortable to wear and brilliant for keeping you cool on those long, hot Summer days, (not that we had many of those in England this year) but it also gets better with washing – softer and more drapey.
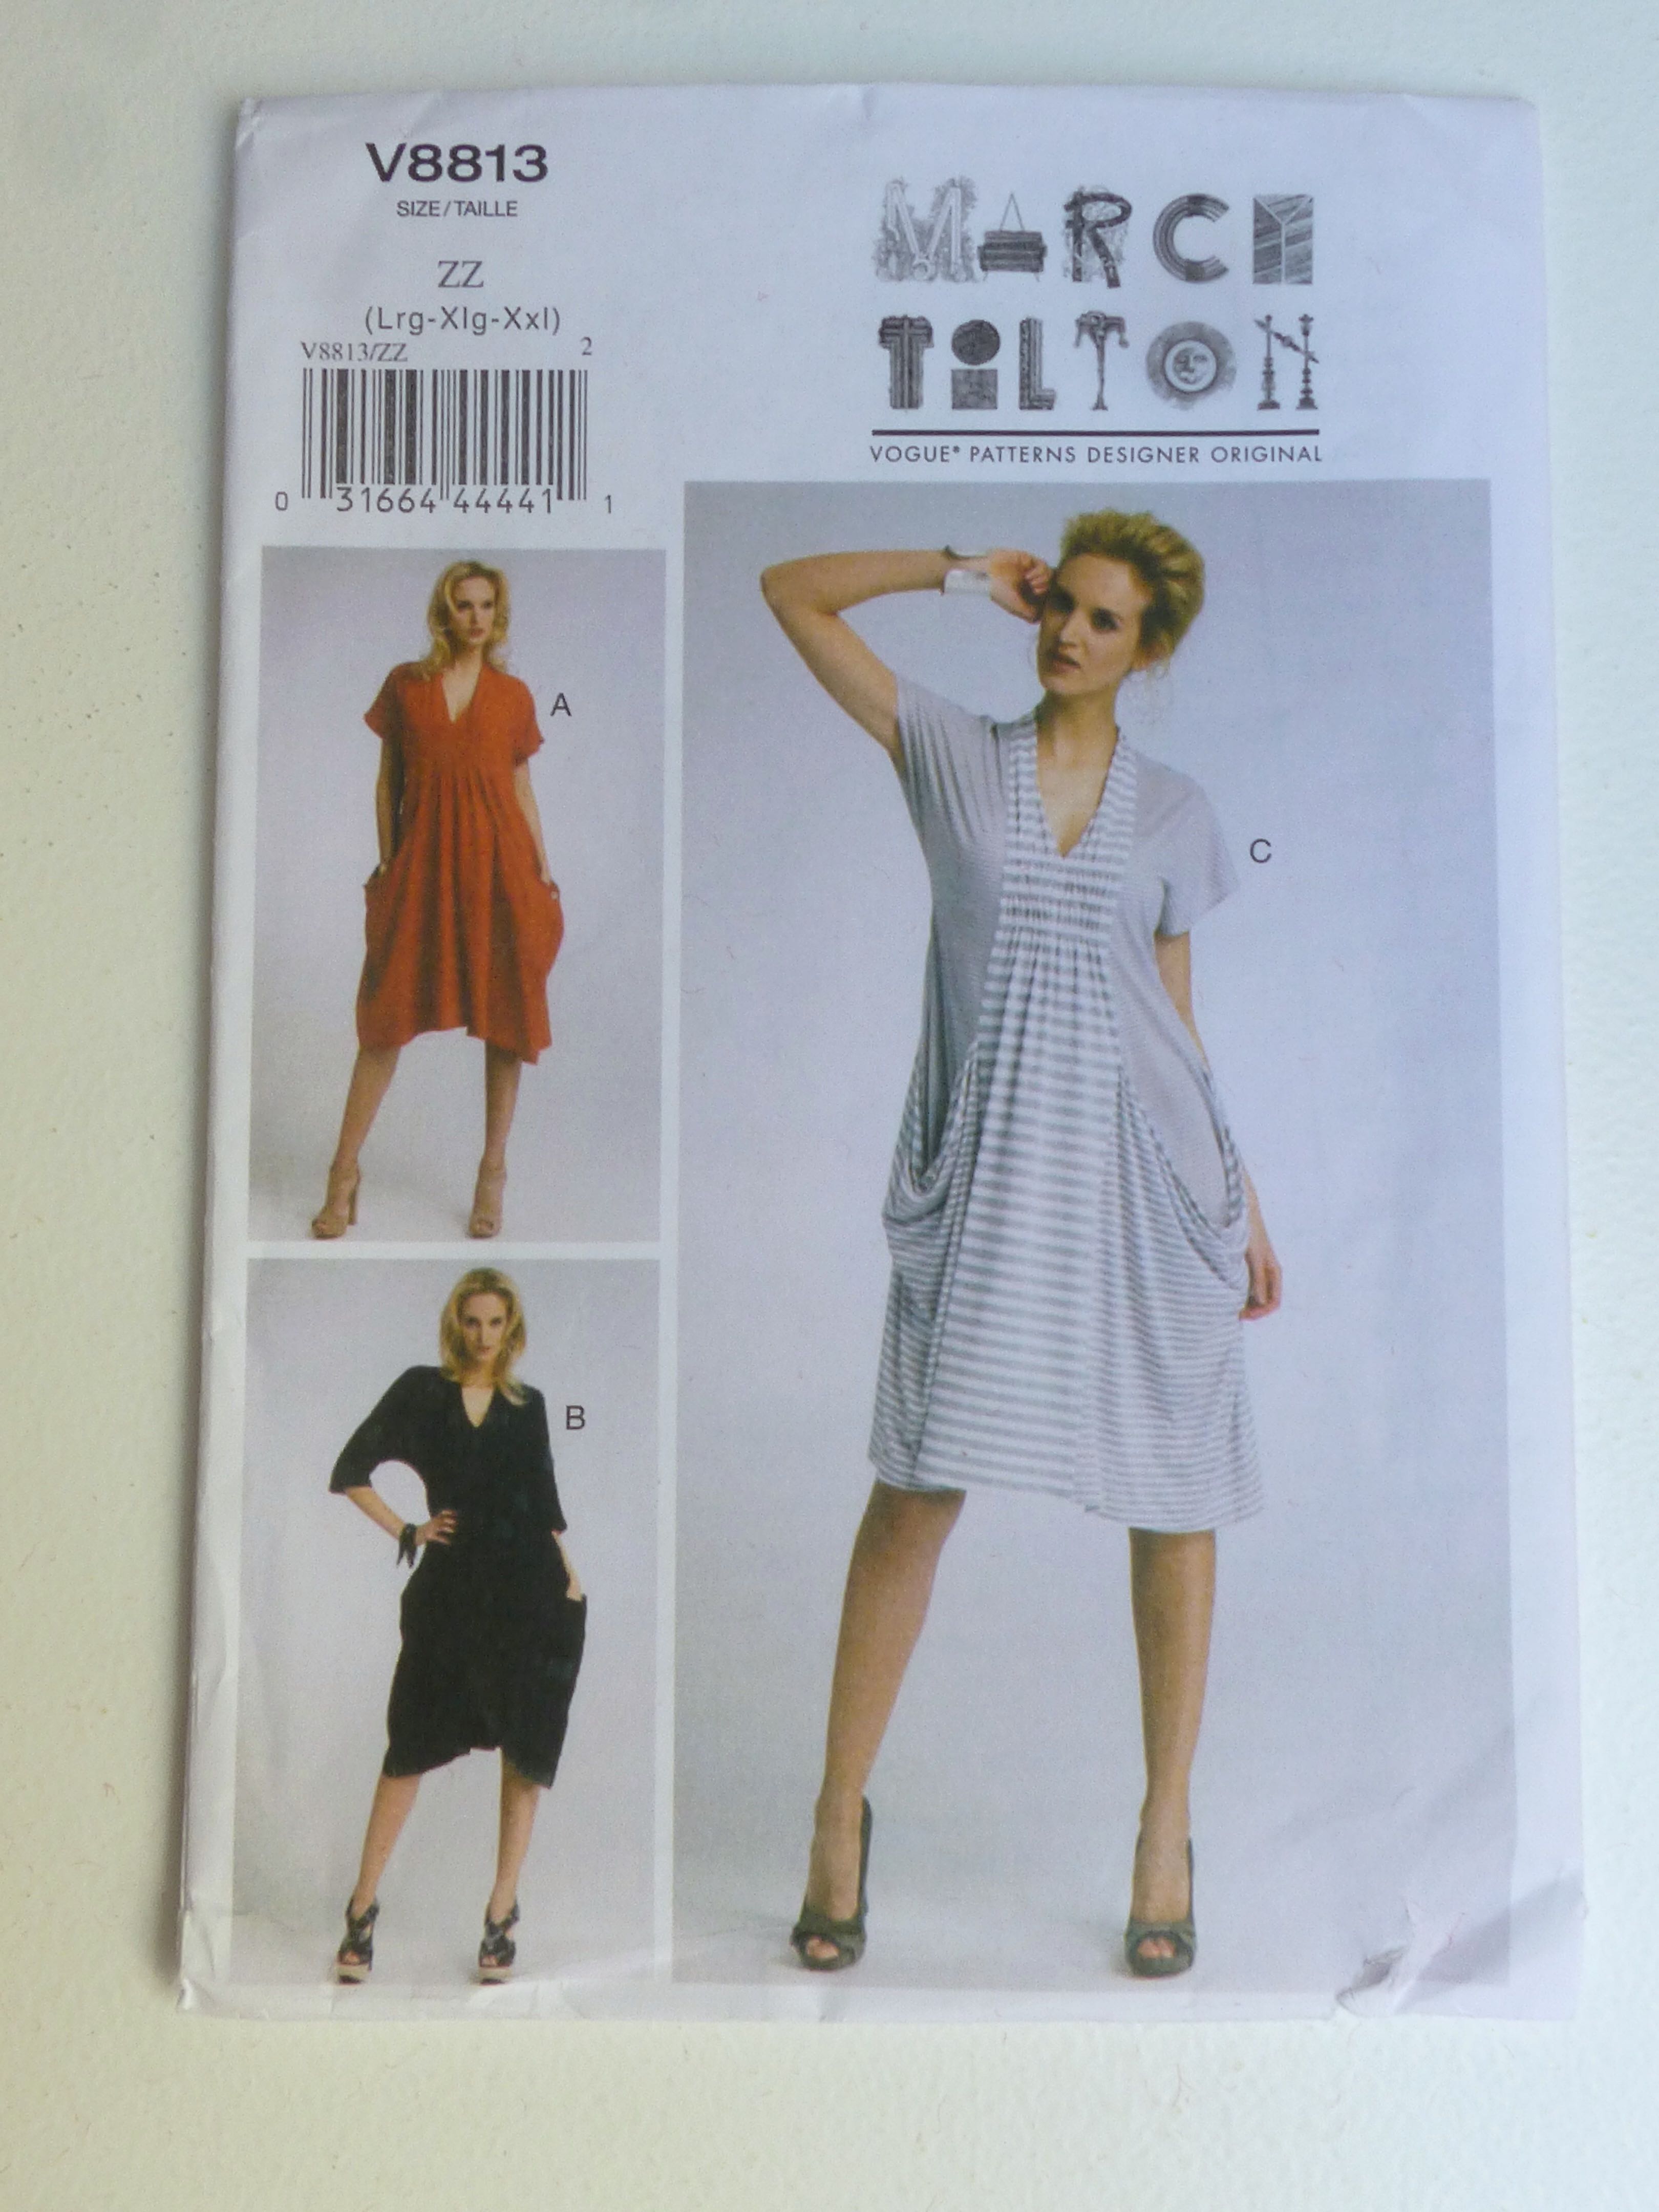
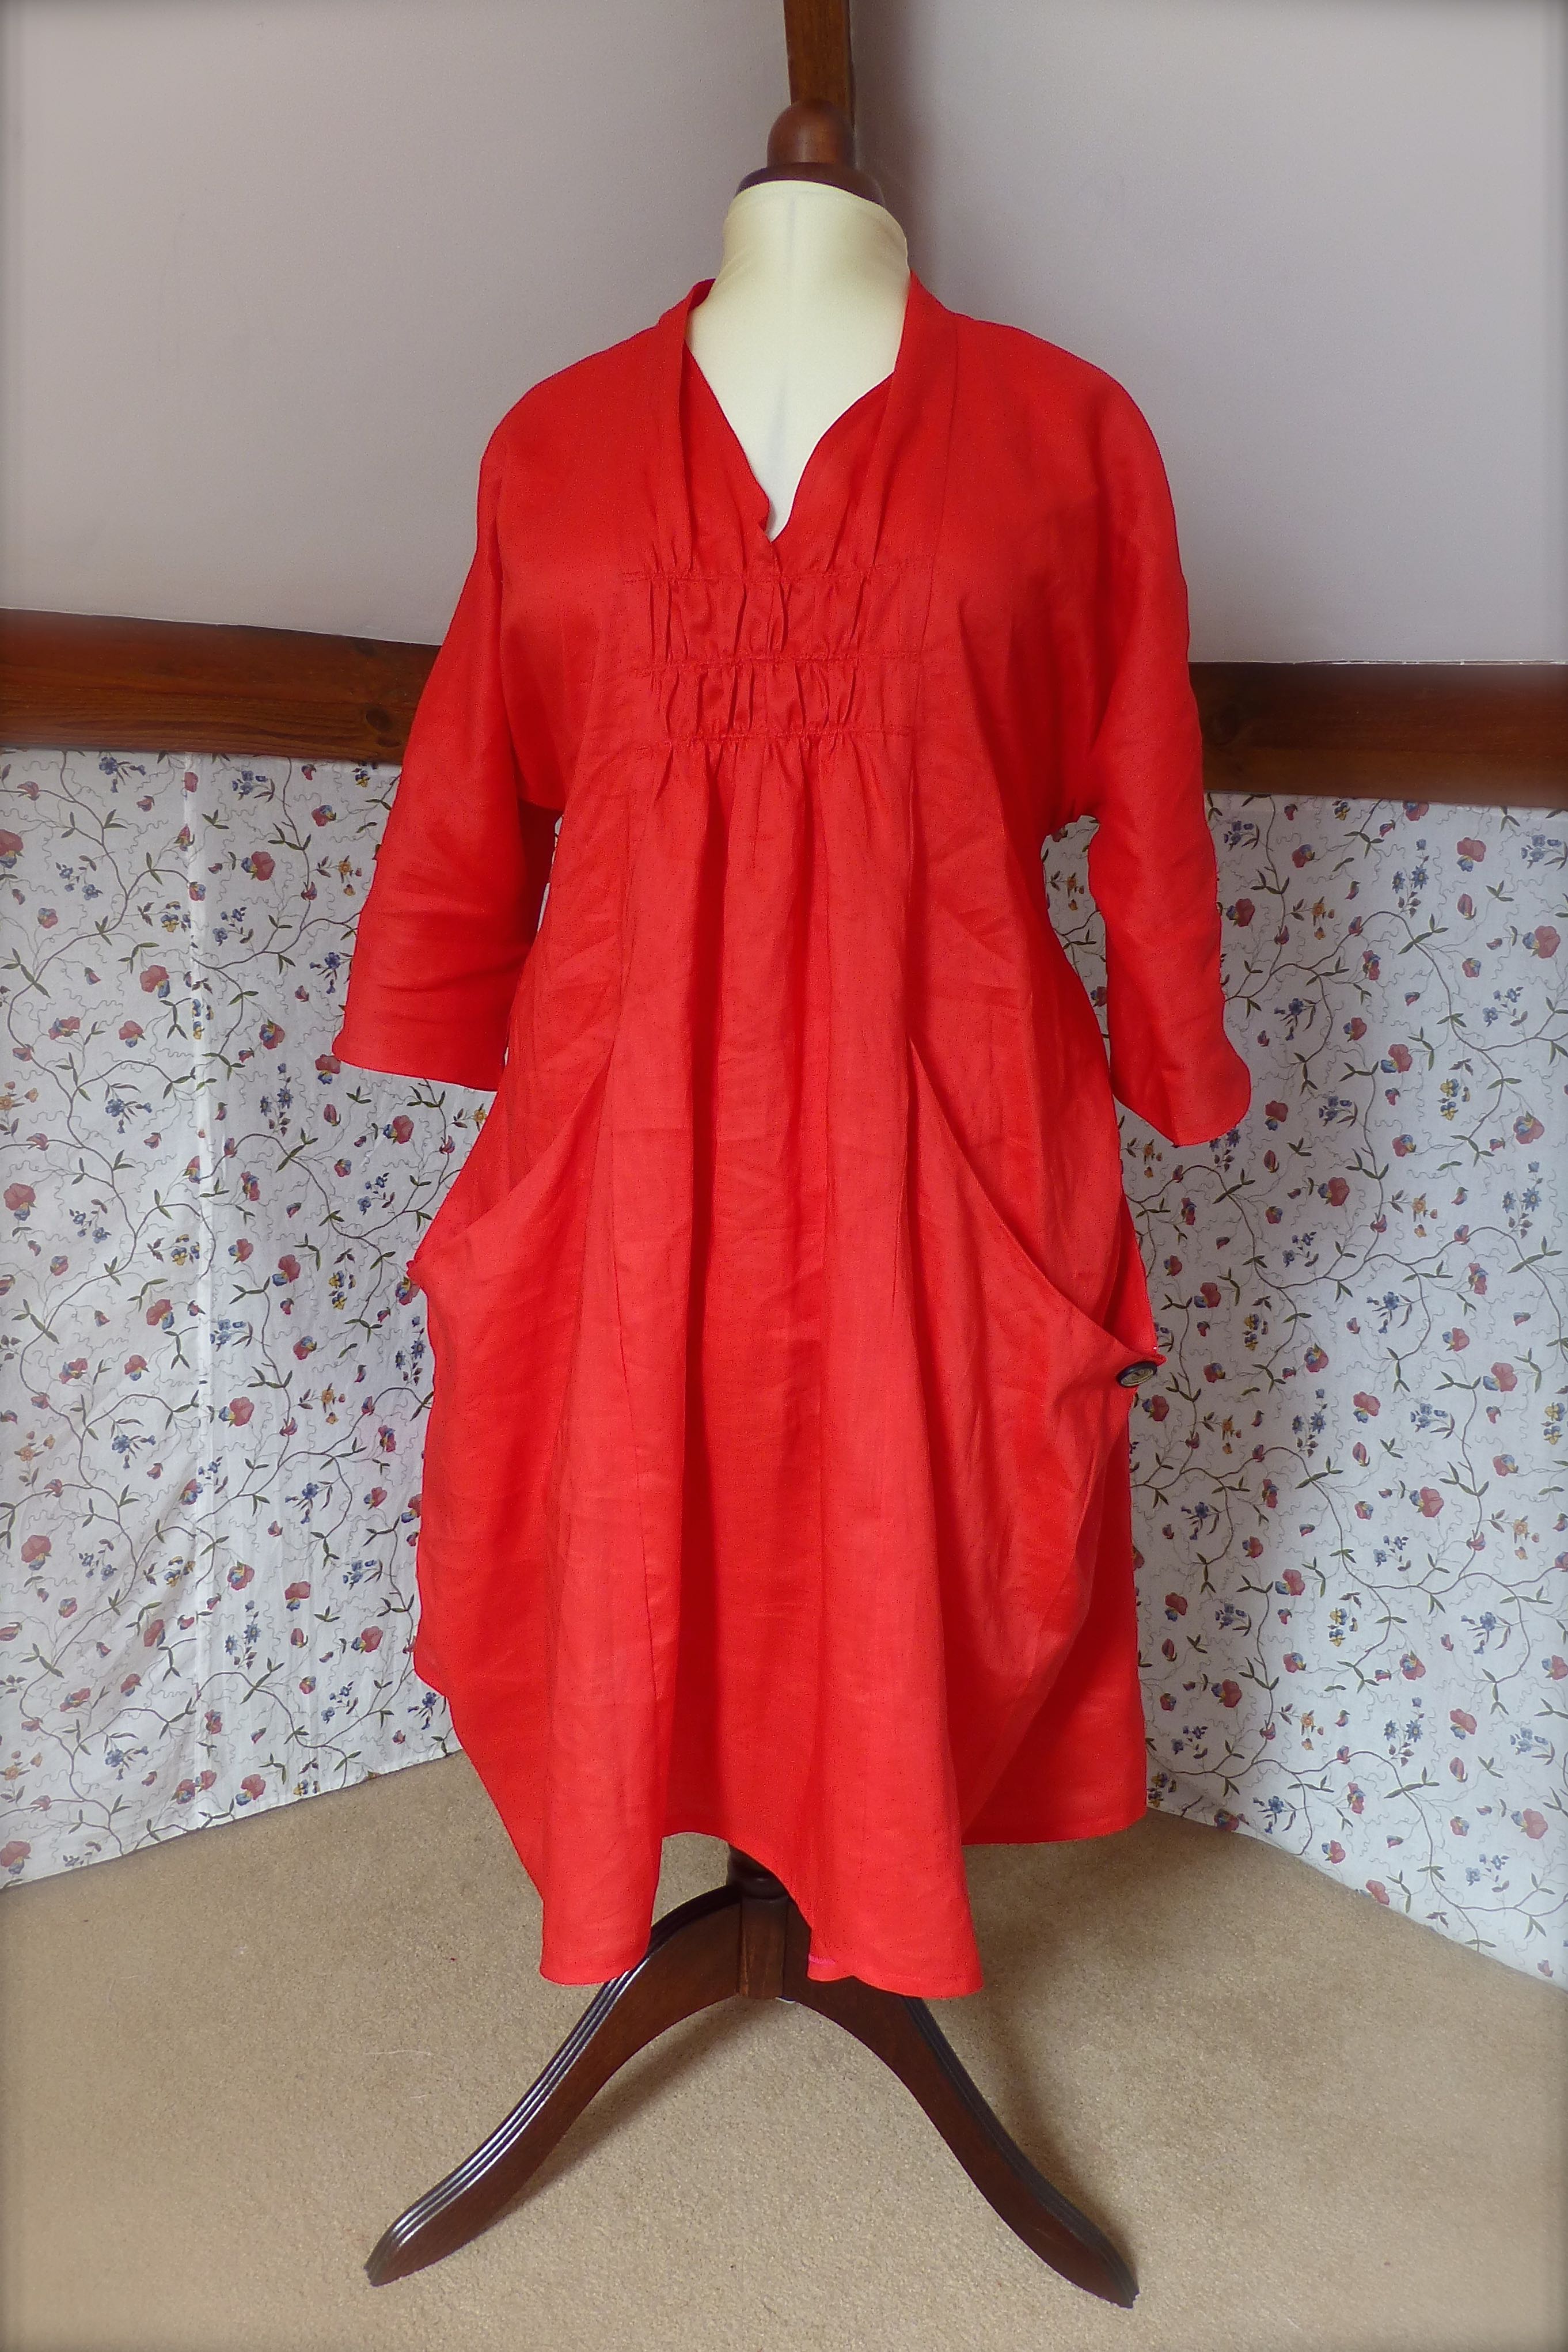
The pattern I wanted to try was V8813 by Marcy Tilton for Vogue which called for a lightweight linen or jersey. Obviously I chose a linen, and went for a stunning Pillar Box Red 100% linen from Minerva Crafts. It has a subtle sheen to it which is quite unlike the linens I have bought before.
This is what arrived in the post: –
As we’re heading into Autumn, short sleeves were not an option so I opted for view B with three-quarter length sleeves.
Although not immediately obvious on the pattern envelope, the oversized pockets have a pleat in them which is held in place by a button. As the fabric is plain, I decided to make a statement with these swirly patterned buttons which are very striking and quite unusual; they look like they’re hand painted.
The dress came together very easily but, although I washed the fabric before starting to sew, it is still stiffer than I’d like. A few more washes will soften the linen more and more though, and those pockets will drape better eventually – they just look a little too structured at the moment.
After the main body of the dress has been constructed, the centre front panel is inserted and then the gathered detail is added.
Having read several other blogs featuring this pattern, it seems some people are finding that it is less fiddly to complete the gathers prior to inserting the front panel. However, I am used to using Vogue patterns and decided to follow their instructions which worked for me.
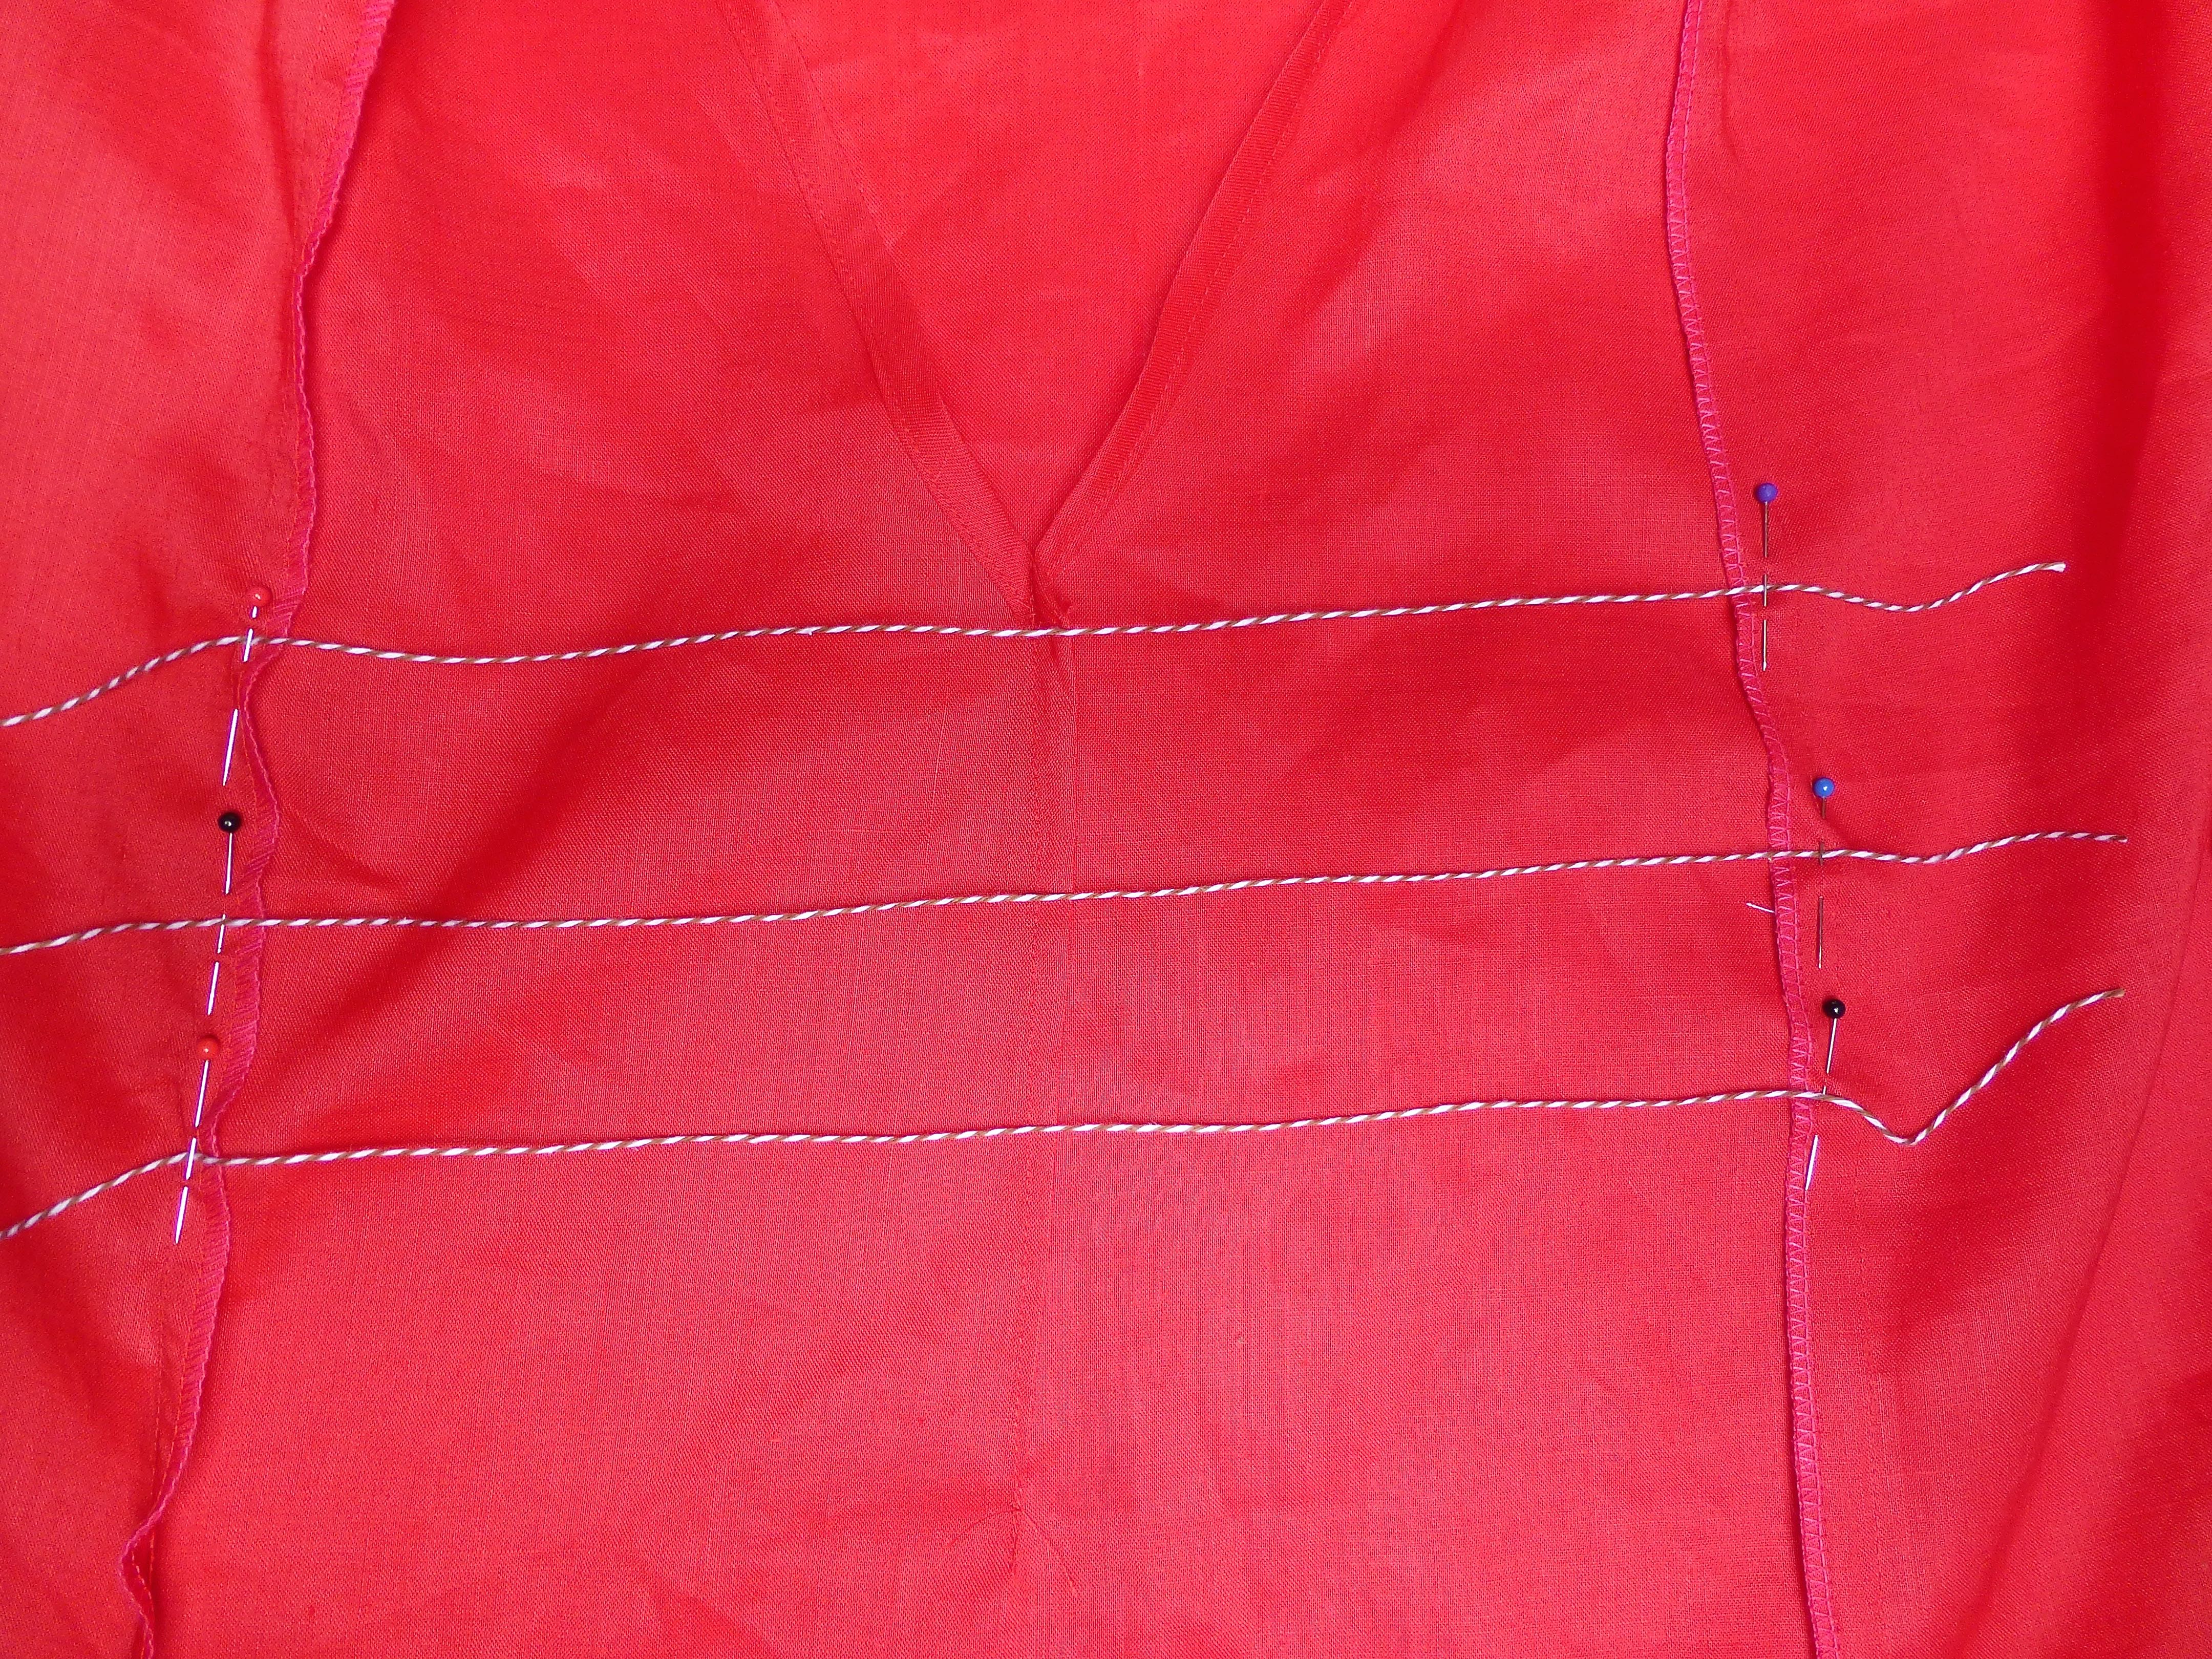
The pattern includes a great way to get really even gathers so I thought I’d show it in more detail as it’s a technique that would transfer to many other projects.
You cut lengths of cord twice as long as the guide lines – I used a baker’s twine but any thin cord will do.
Pin the cord in place along the guidelines.
Set your stitch width to a wide zig zag.
Choose a medium stitch length.
Zig zag over the cord being careful not to catch the cord in the stitching. I found that it just stayed in the groove of the sewing machine foot which made it easy.
When all the cord has been enclosed, secure one end of each of the cords by wrapping it around a pin in a figure of eight motion.
Then simply pull the other end of the cord to create even gathers across the entire length.
Secure with another pin at the other end and steam the gathers so they stay in place.
Finally, top stitch from the right side in two rows either side of the previous zig zag stitching.
This is my favourite way to create gathers which are nice and even – it might take a little longer than the usual method of just pulling up the bobbin thread, but it’s much more professional looking and well worth perfecting the technique.
I amended the design by adding a row of top stitching to the shoulder seams as it’s always a nice finishing touch.
I prefer to leave the sleeve hems and bottom hem to the very end so deviated from the instructions at this point.
The very last thing to do was to sew those wonderful buttons in place!
Can you see the slight sheen? It’s almost like silk.
It is SUCH a comfortable dress to wear and will drape more softly after a few more washes. I can see myself teaming it with a pair of tights and boots for the colder weather.
If you are tempted to try this pattern, there’s never been a better time as it is half price at the moment!
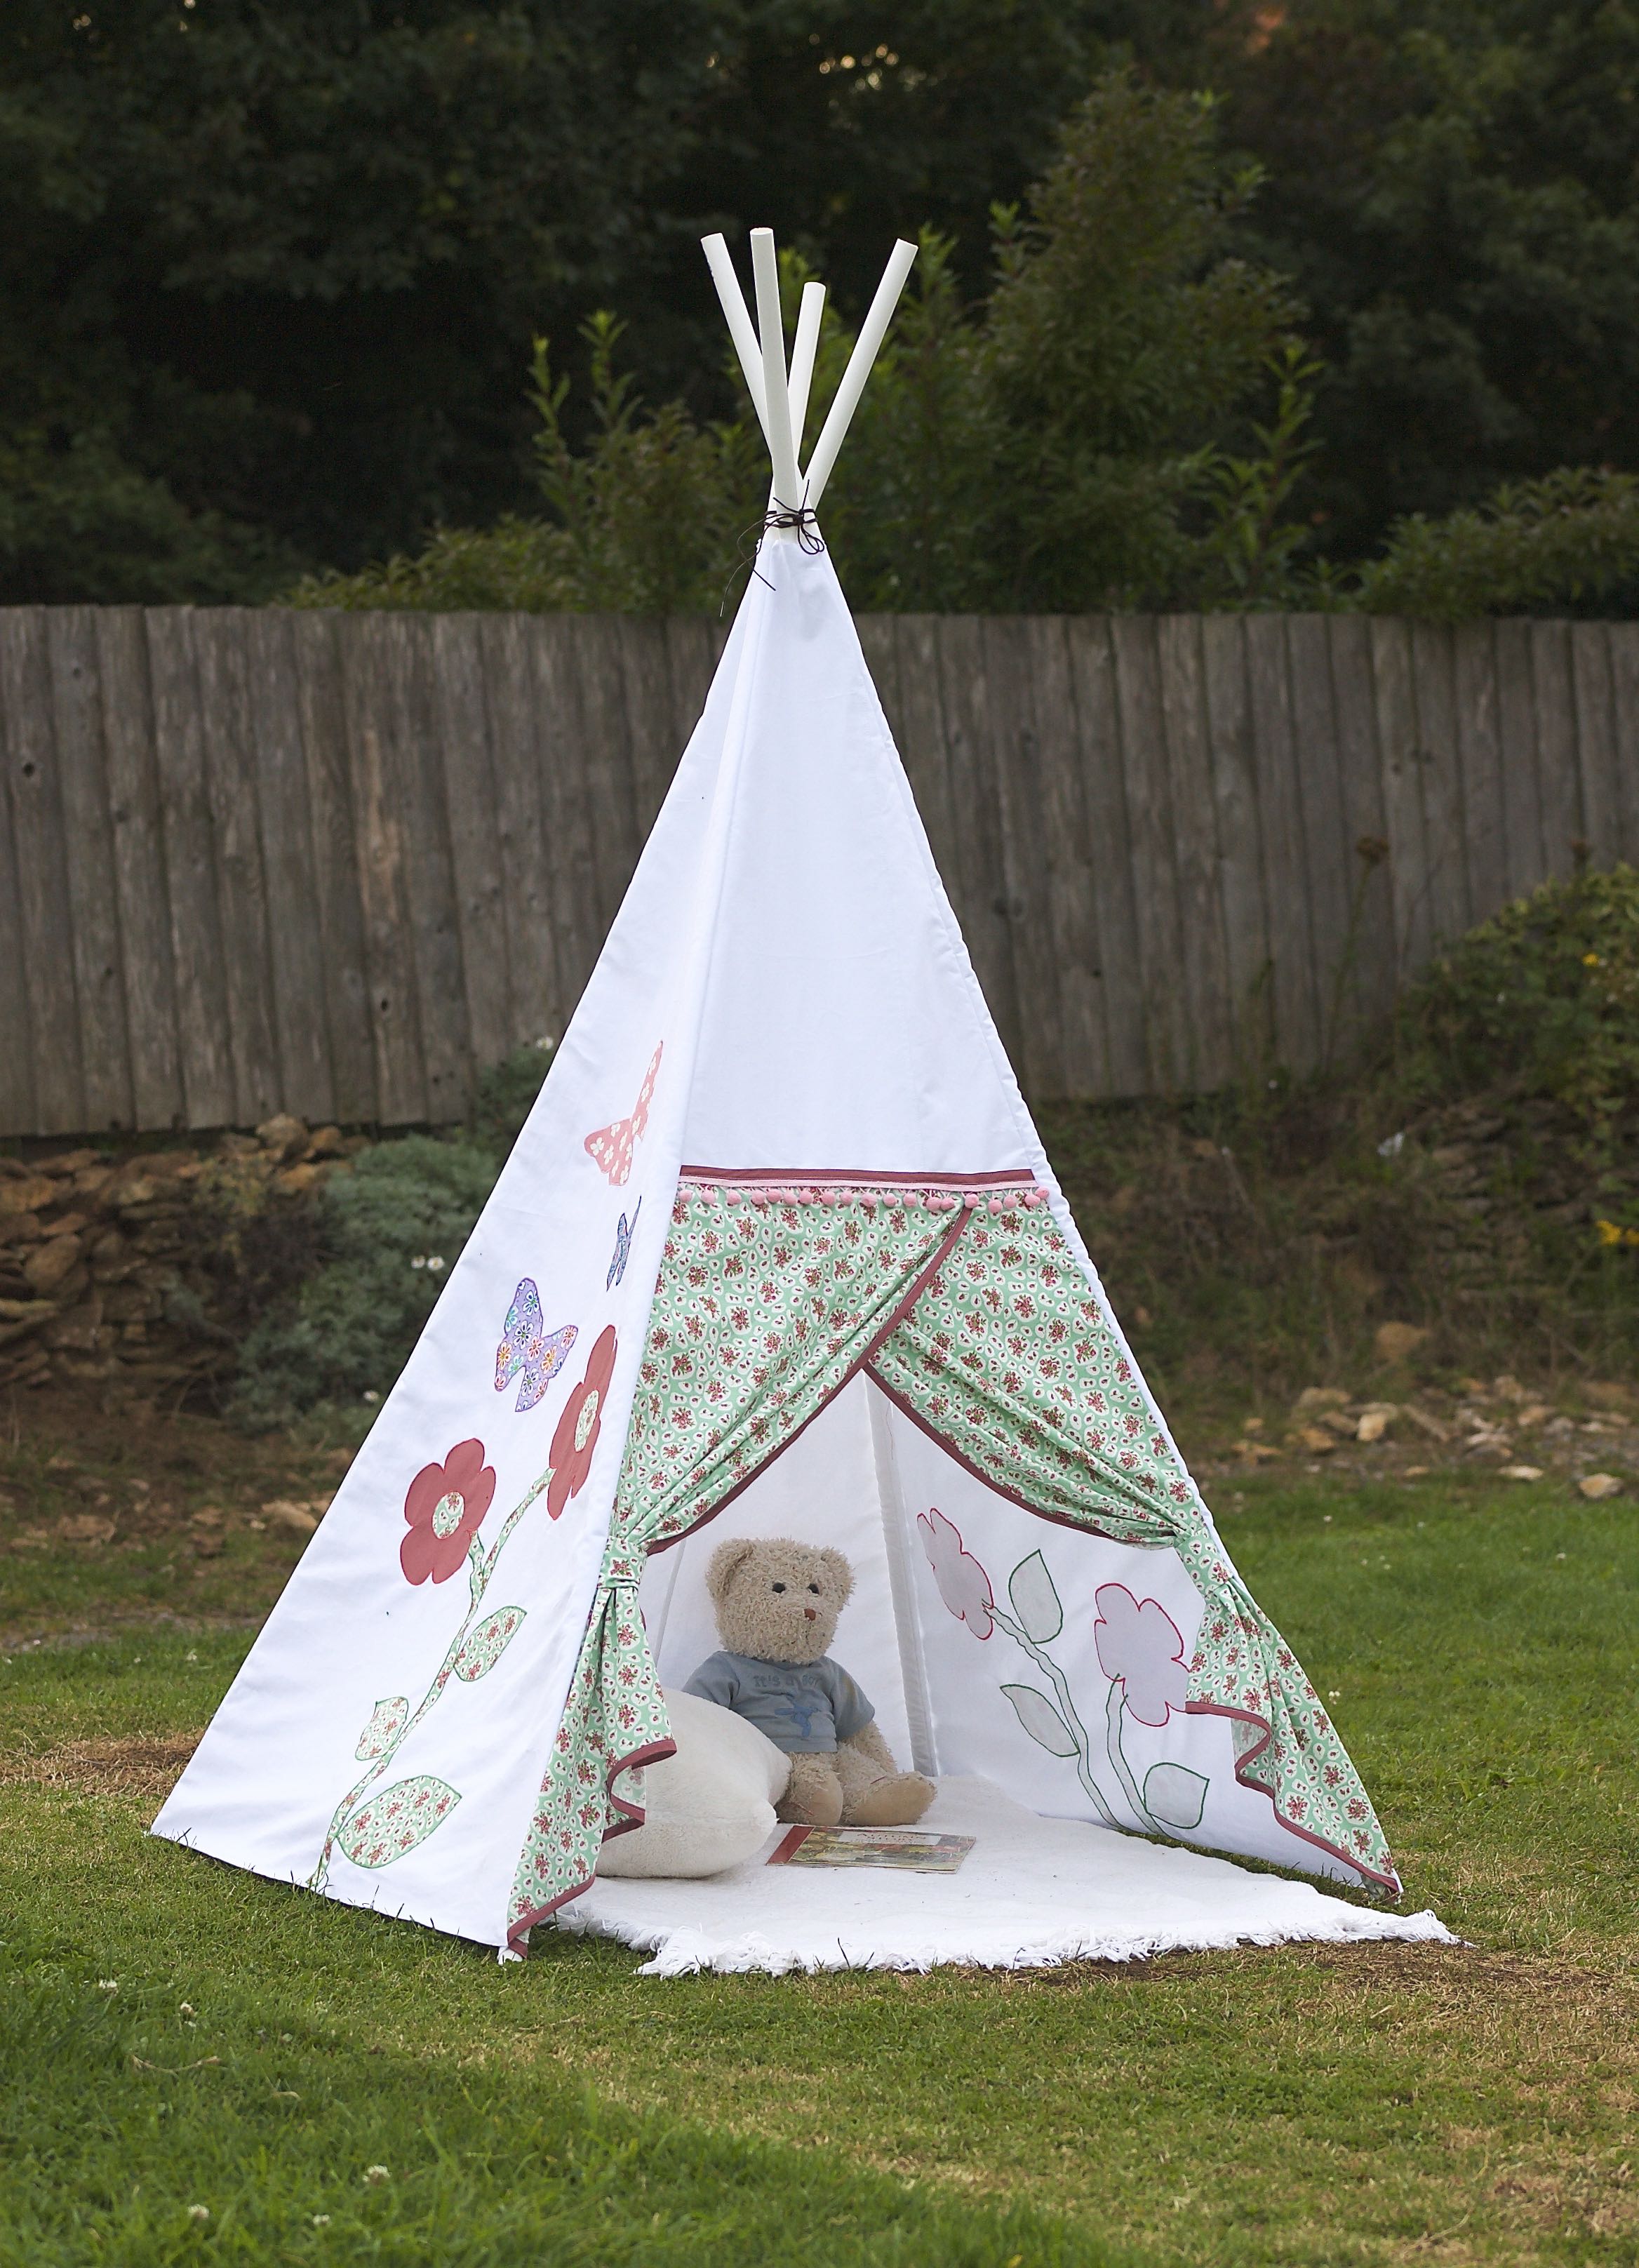
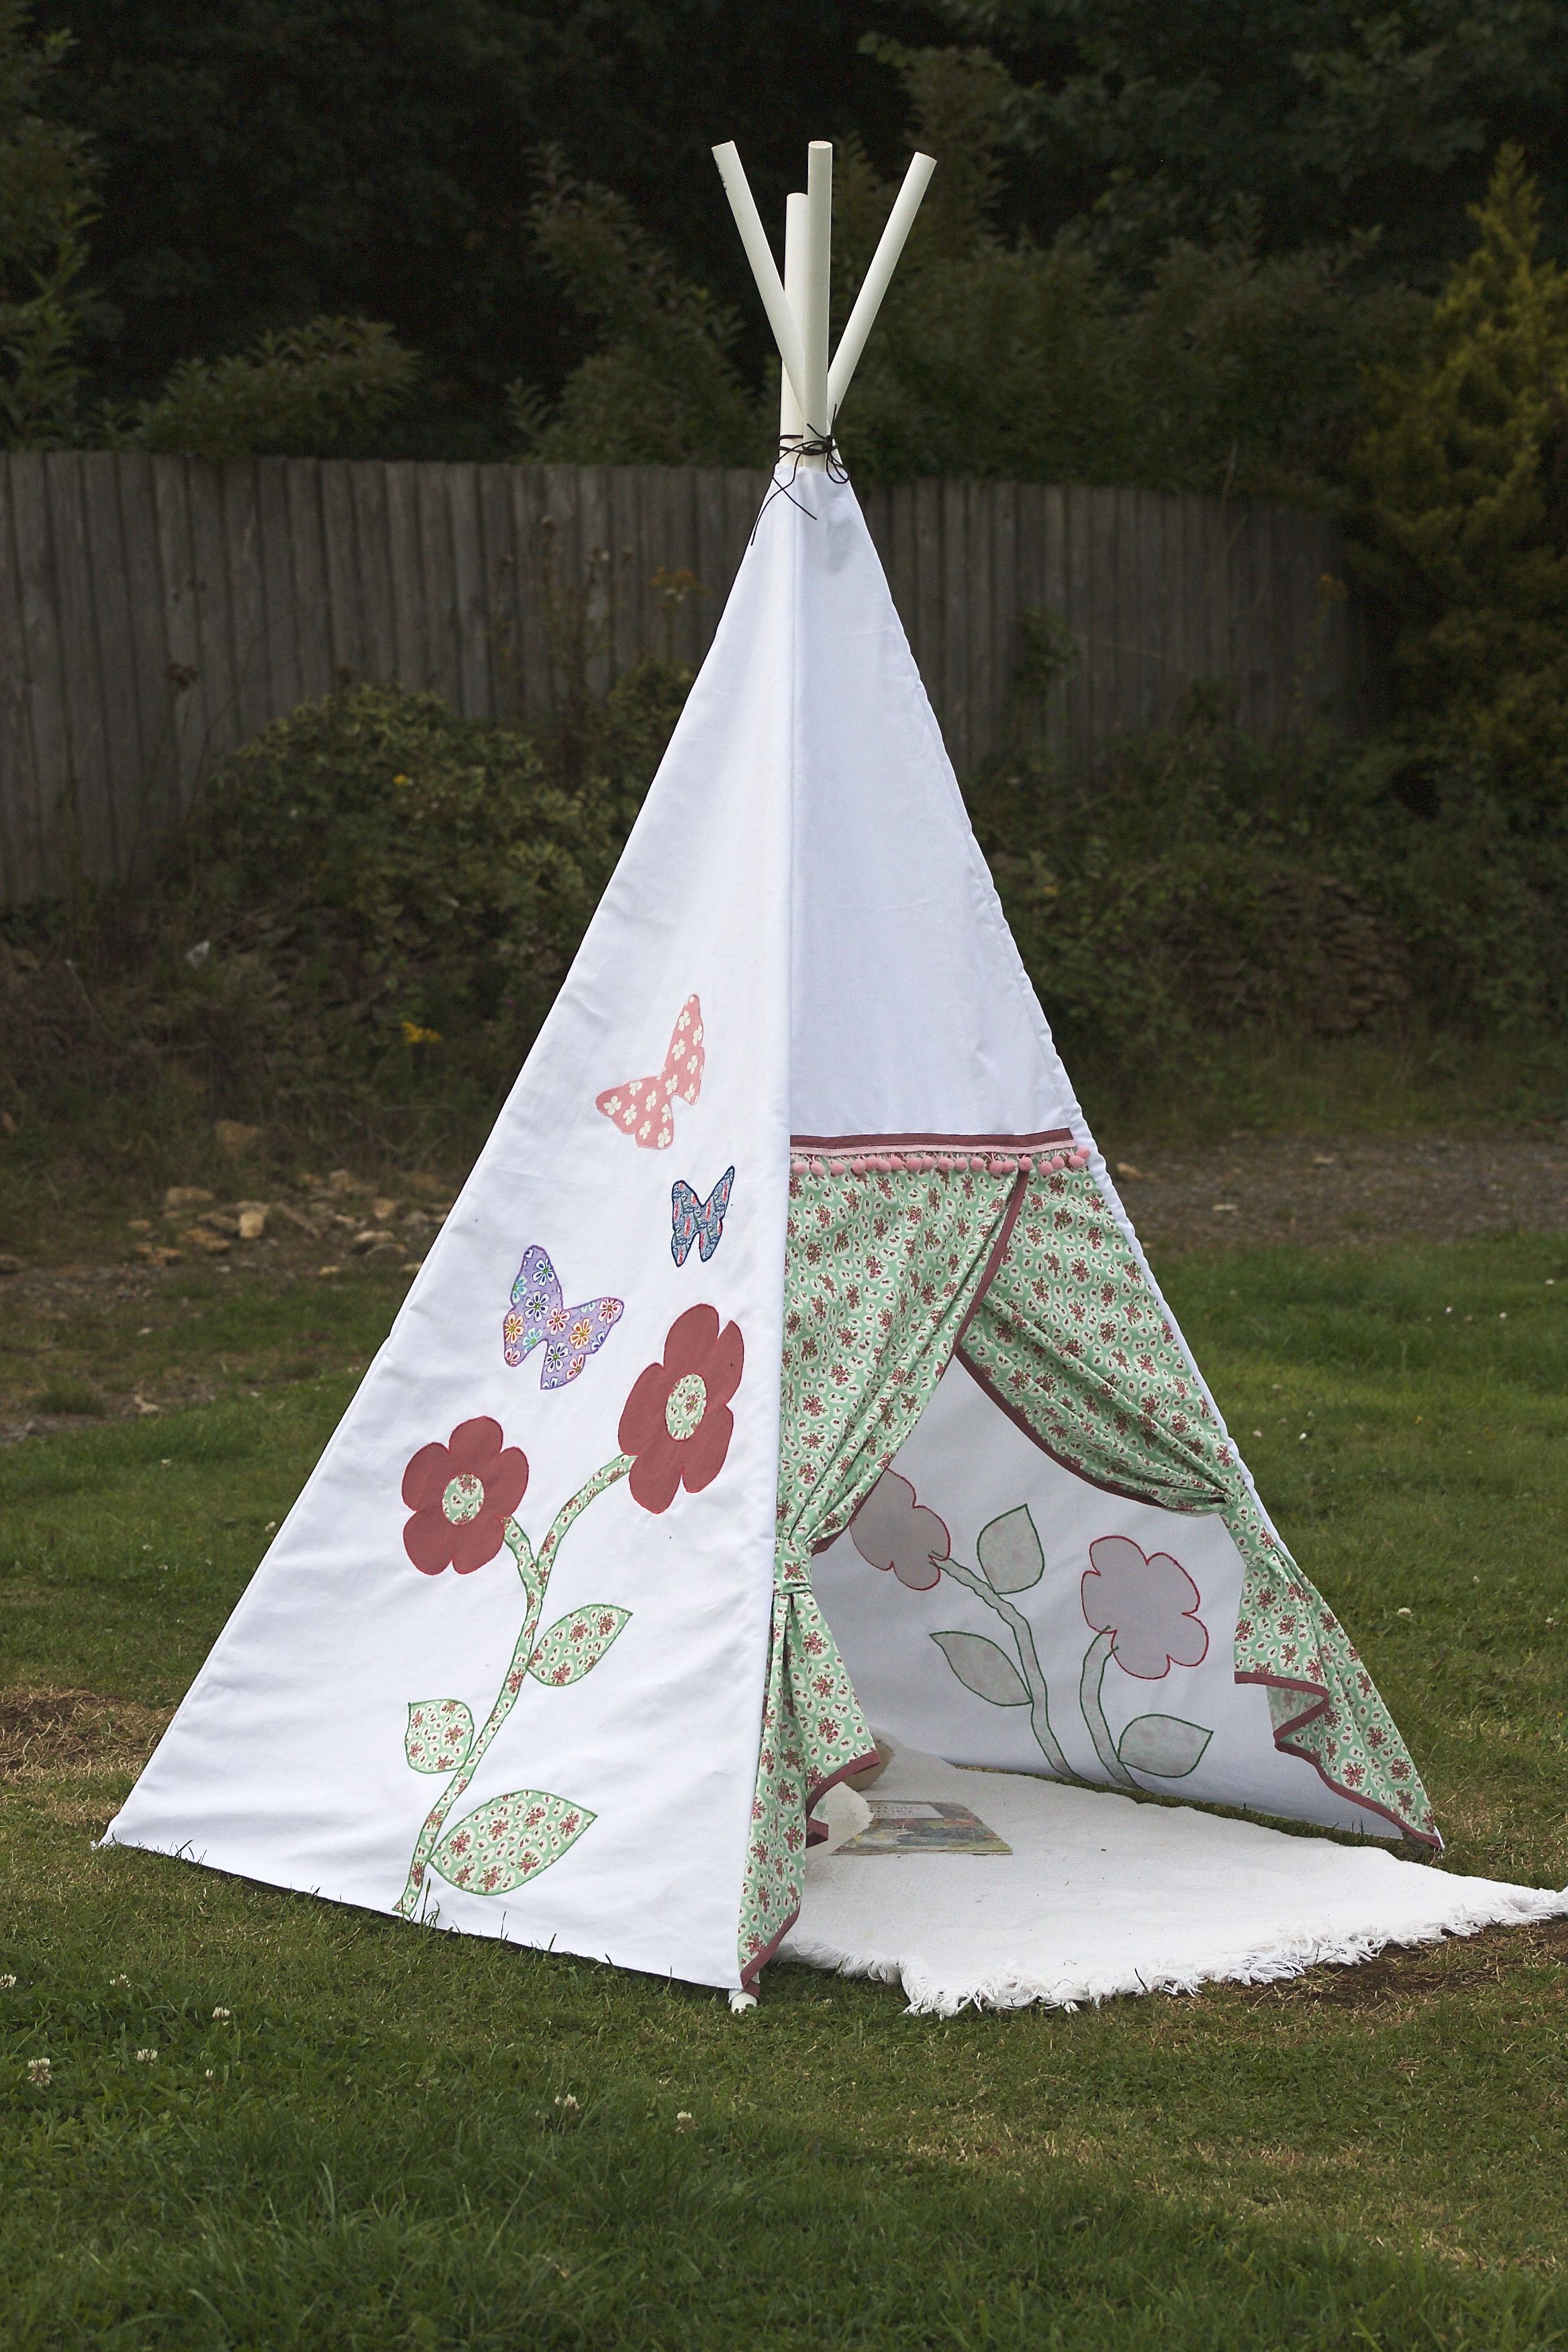
I know it’s bad form to utter the ‘C’ word while it’s still the school Summer holidays, but my August make for the Minerva Craft Blogger Network is this beautiful Teepee, which is indeed a Christmas present for a little girl in the family.
I have to admit that this is not the first Christmas present I’ve made this year as I tend to make them all year round, as and when an idea springs to mind, but it’s definitely my favourite so far.
Isn’t it sweet?
There are LOTS of tutorials out there showing many ways to make your own wigwam, but none of them were quite what I wanted, so this is my version which is suitable for a toddler – adjust the measurements upwards to make a larger tent for older children.
It is an amalgamation of several basic designs that I’ve come across which I have then personalised to suit the recipient using various appliquéd motifs and letters.
This lovely fabric bundle arrived from Minerva: –
The white base fabric for the teepee is a thick cotton drill which makes a nice, strong tent. I also chose two contrasting fabrics which are lighter weight cottons; a gorgeous ‘Cath Kidston’ inspired floral cotton poplin and a dusky pink polycotton.
You will need: –
2 1/2m of cotton drill
1m floral fabric
1m plain fabric
selection of scraps from your stash
4 x plastic overflow pipe, each measuring 2.00m x 22mm (99p each from Wickes)
A leather shoelace or similar
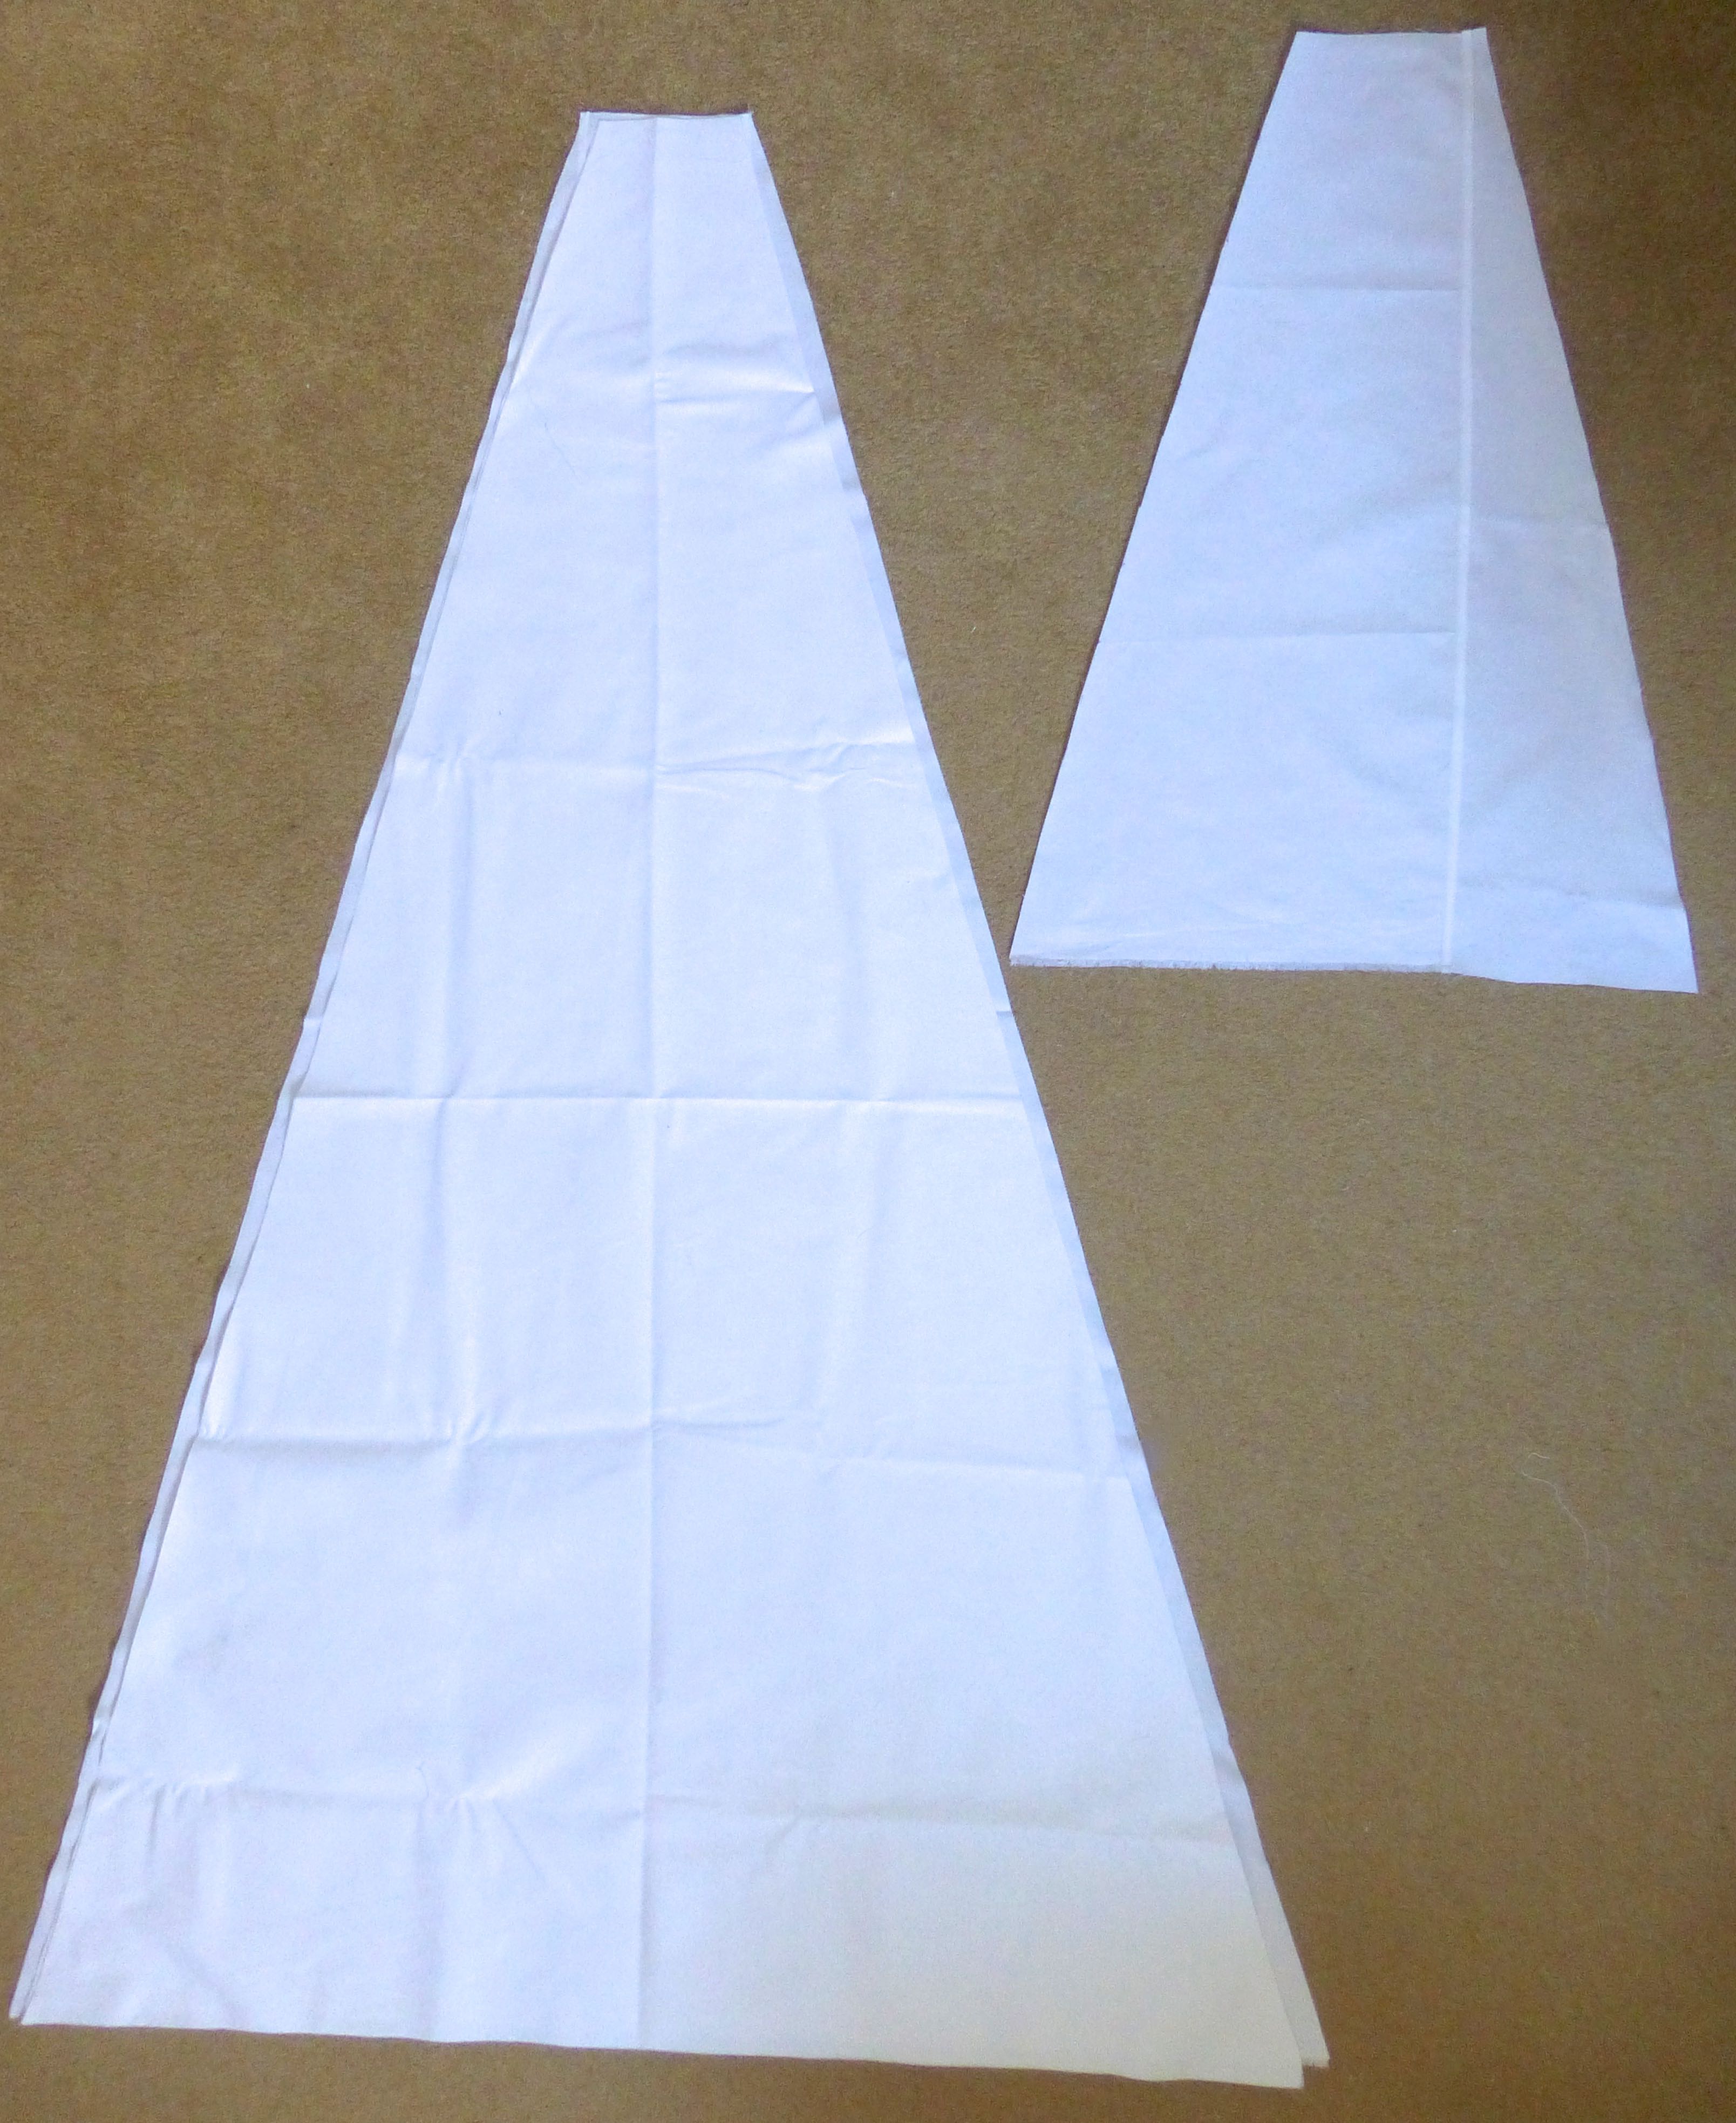
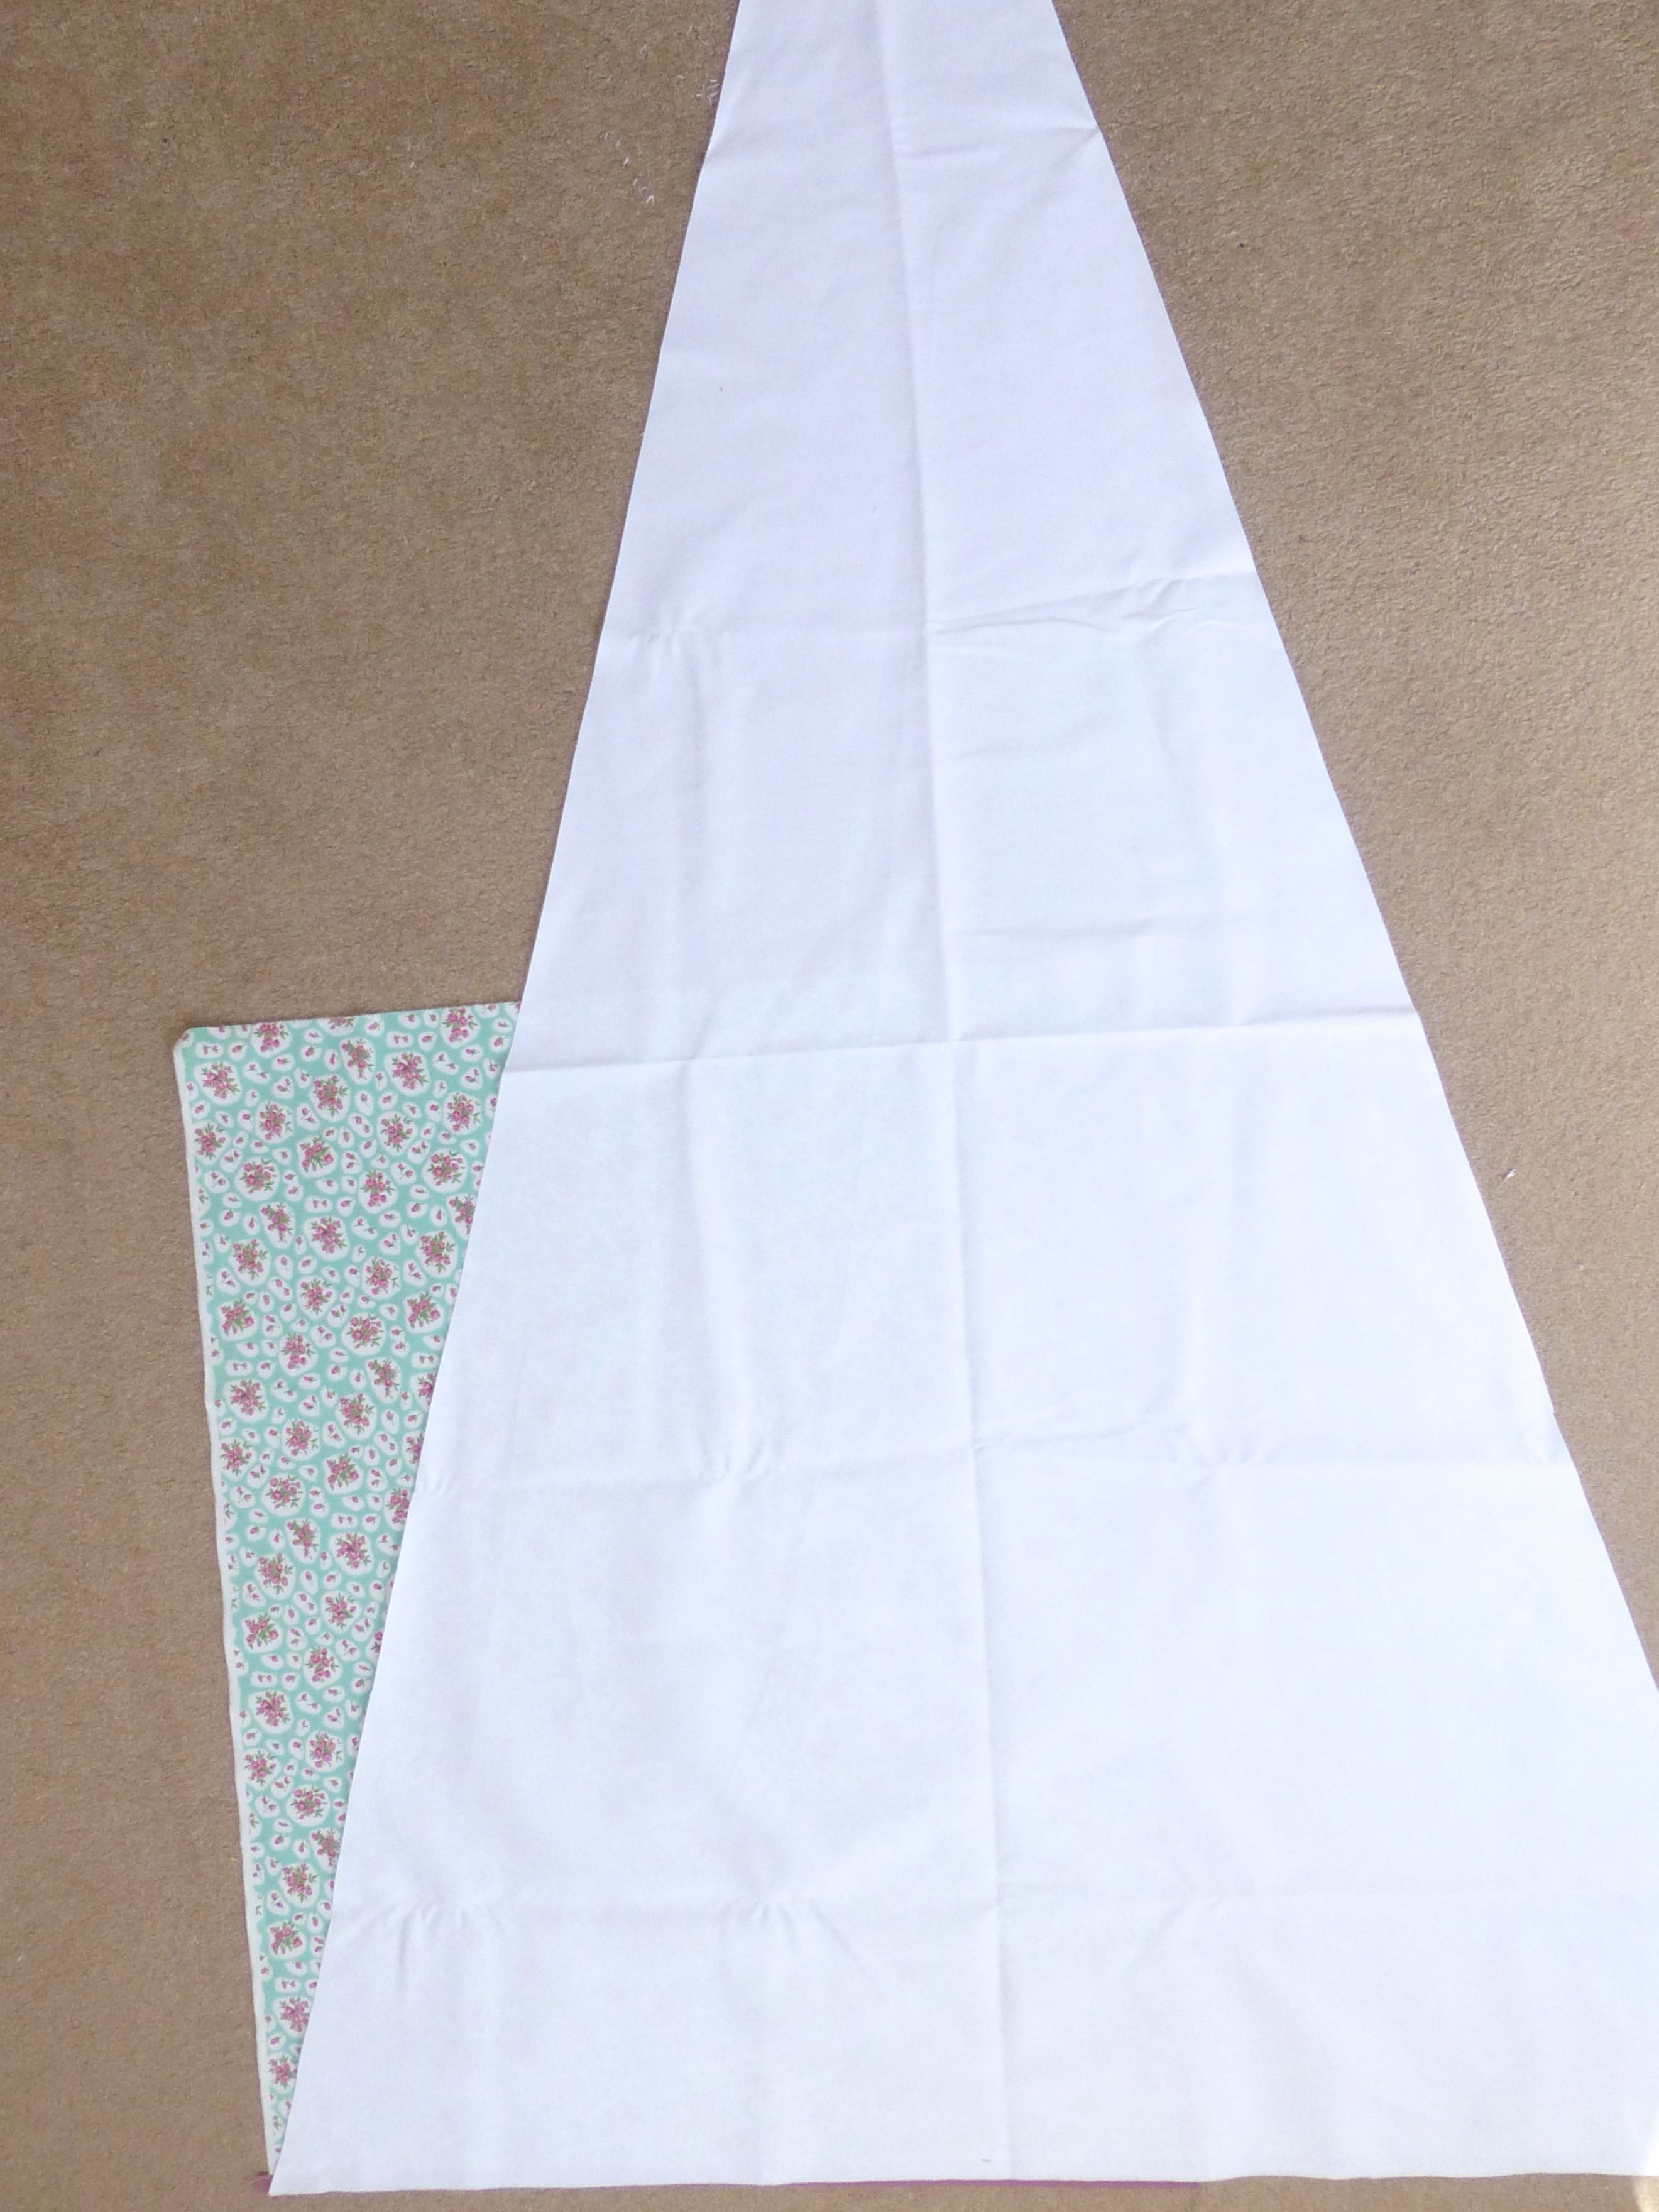
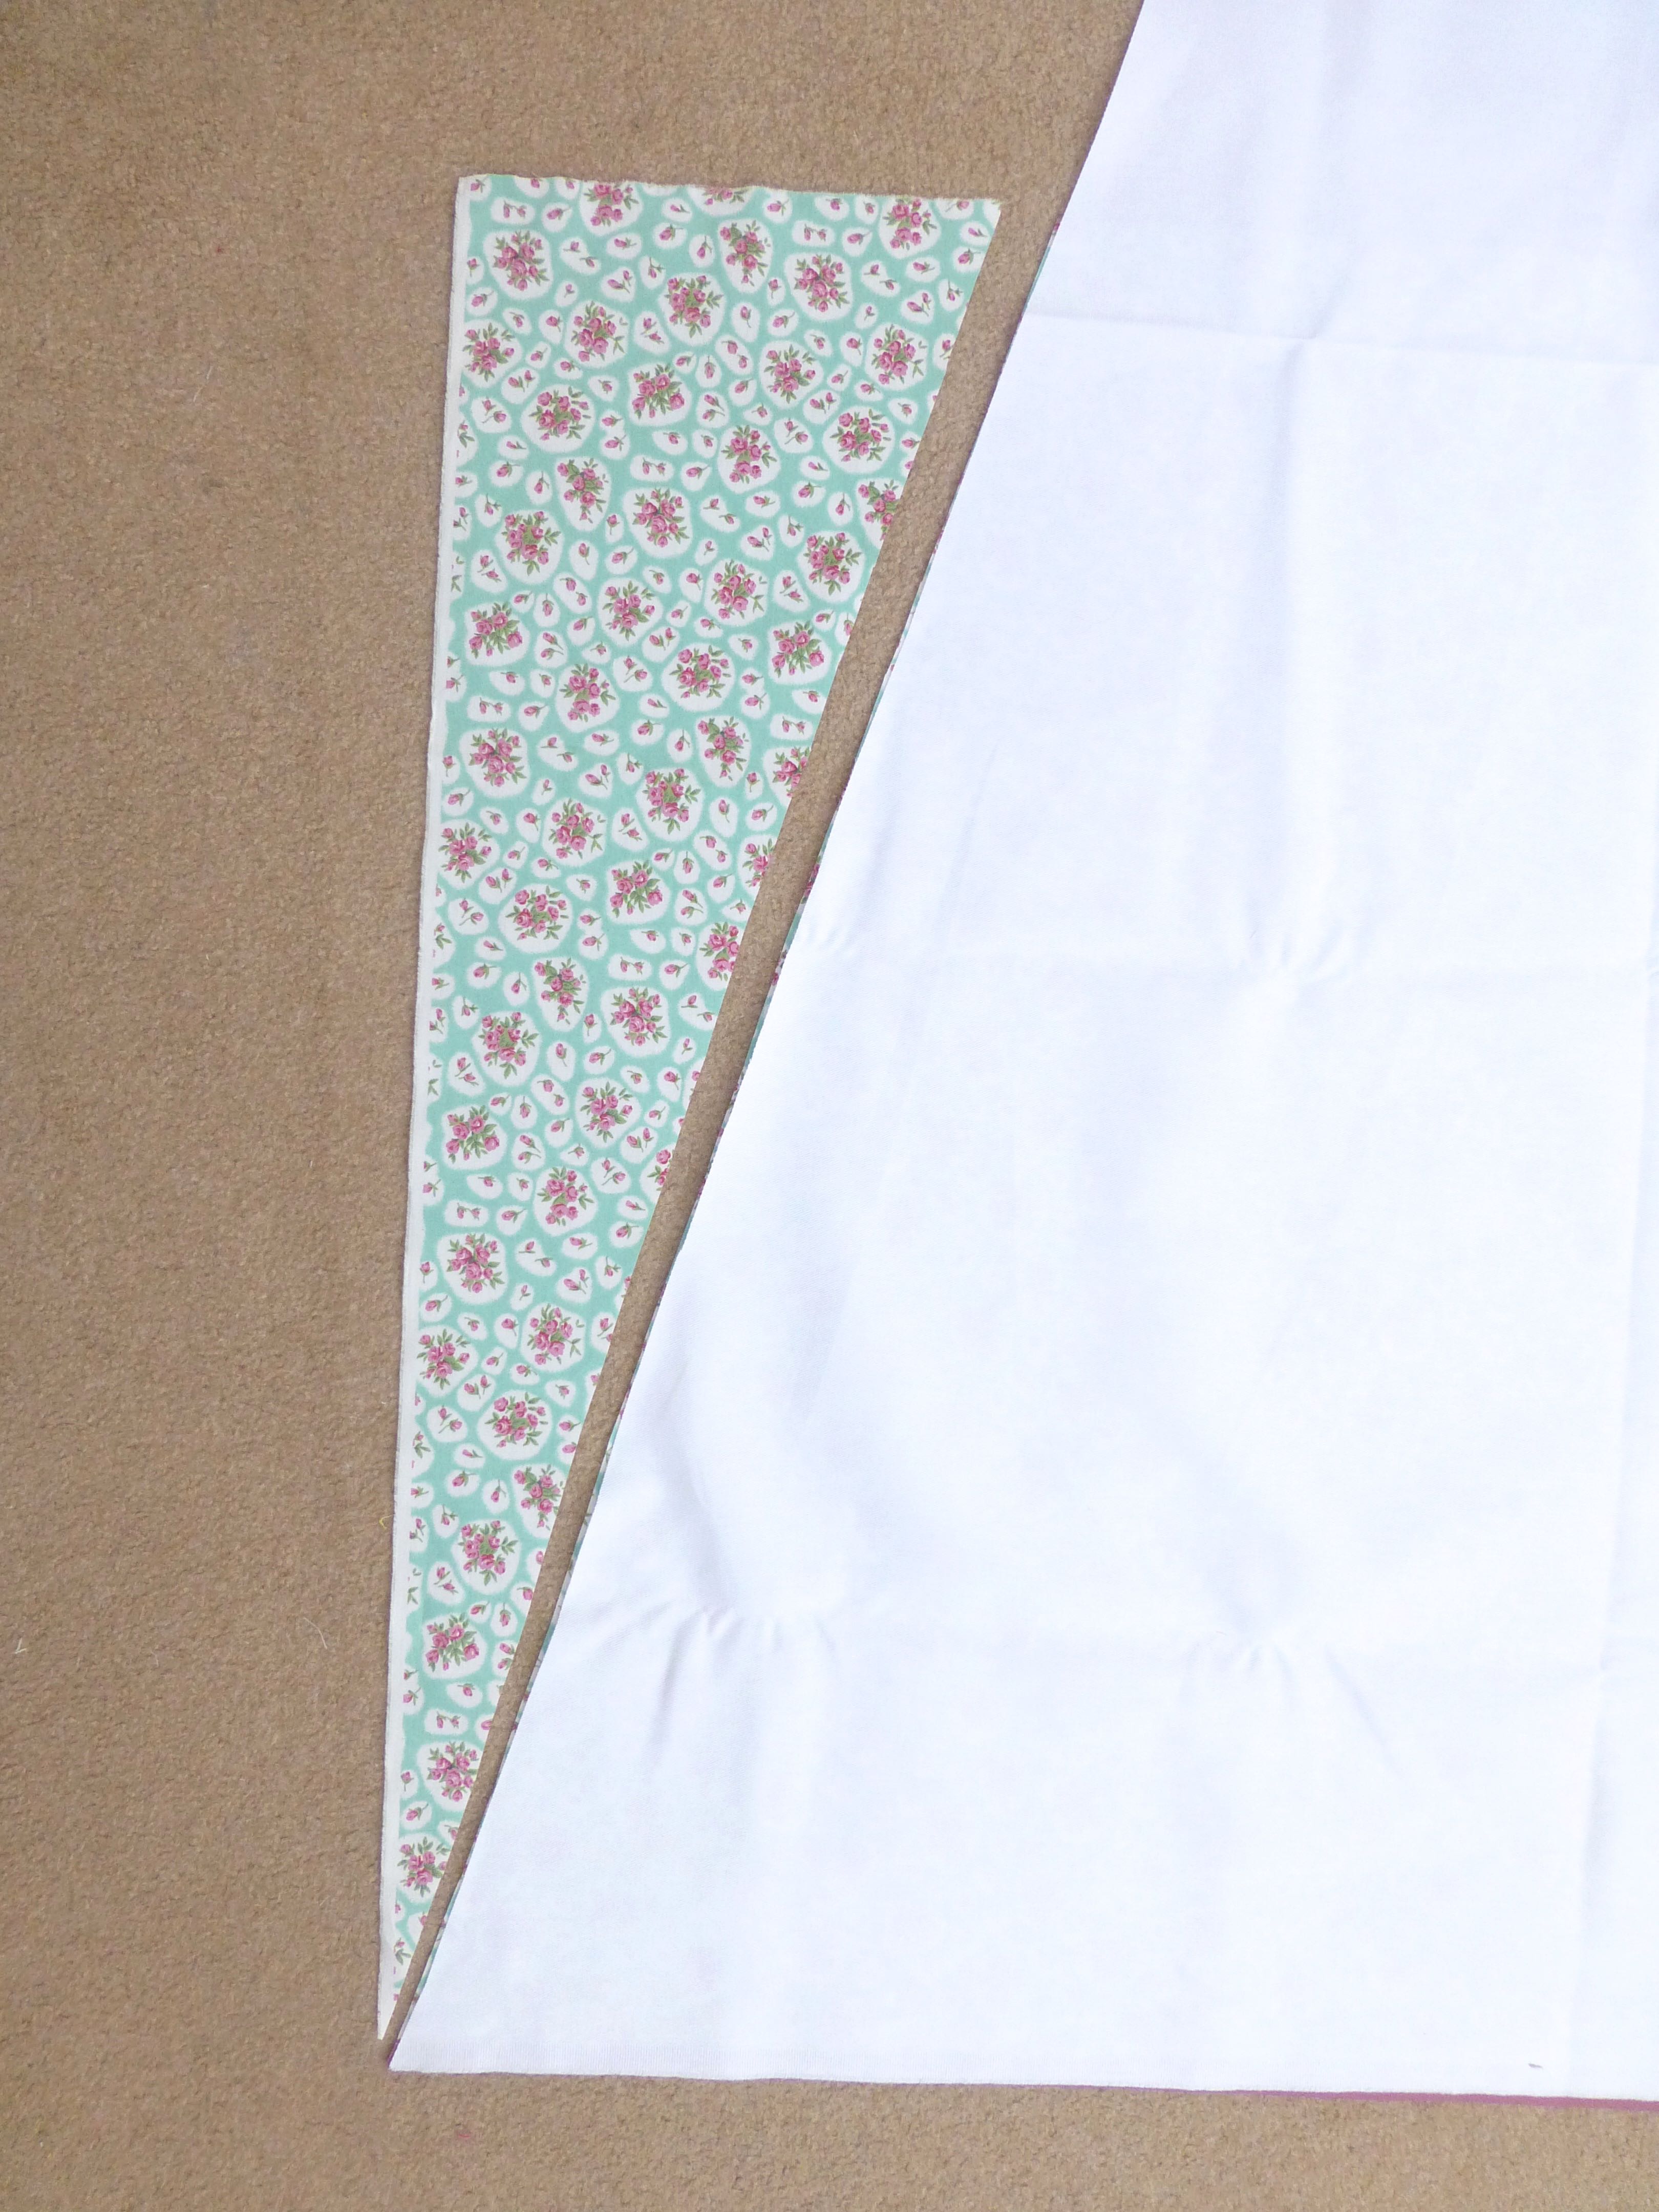
Using the large diagram as a guide, fold your 2 1/2m of white fabric in half lengthwise and cut out as shown.
You should now have three equally sized triangles and two half-triangles. Stitch the two half-triangles together along the long straight edge with a narrow seam to make a single triangle. (I cut mine wrong, hence the off-centre seam!)
The bottom edges can be hemmed if you wish, although I left mine as the selvedge forms the bottom.
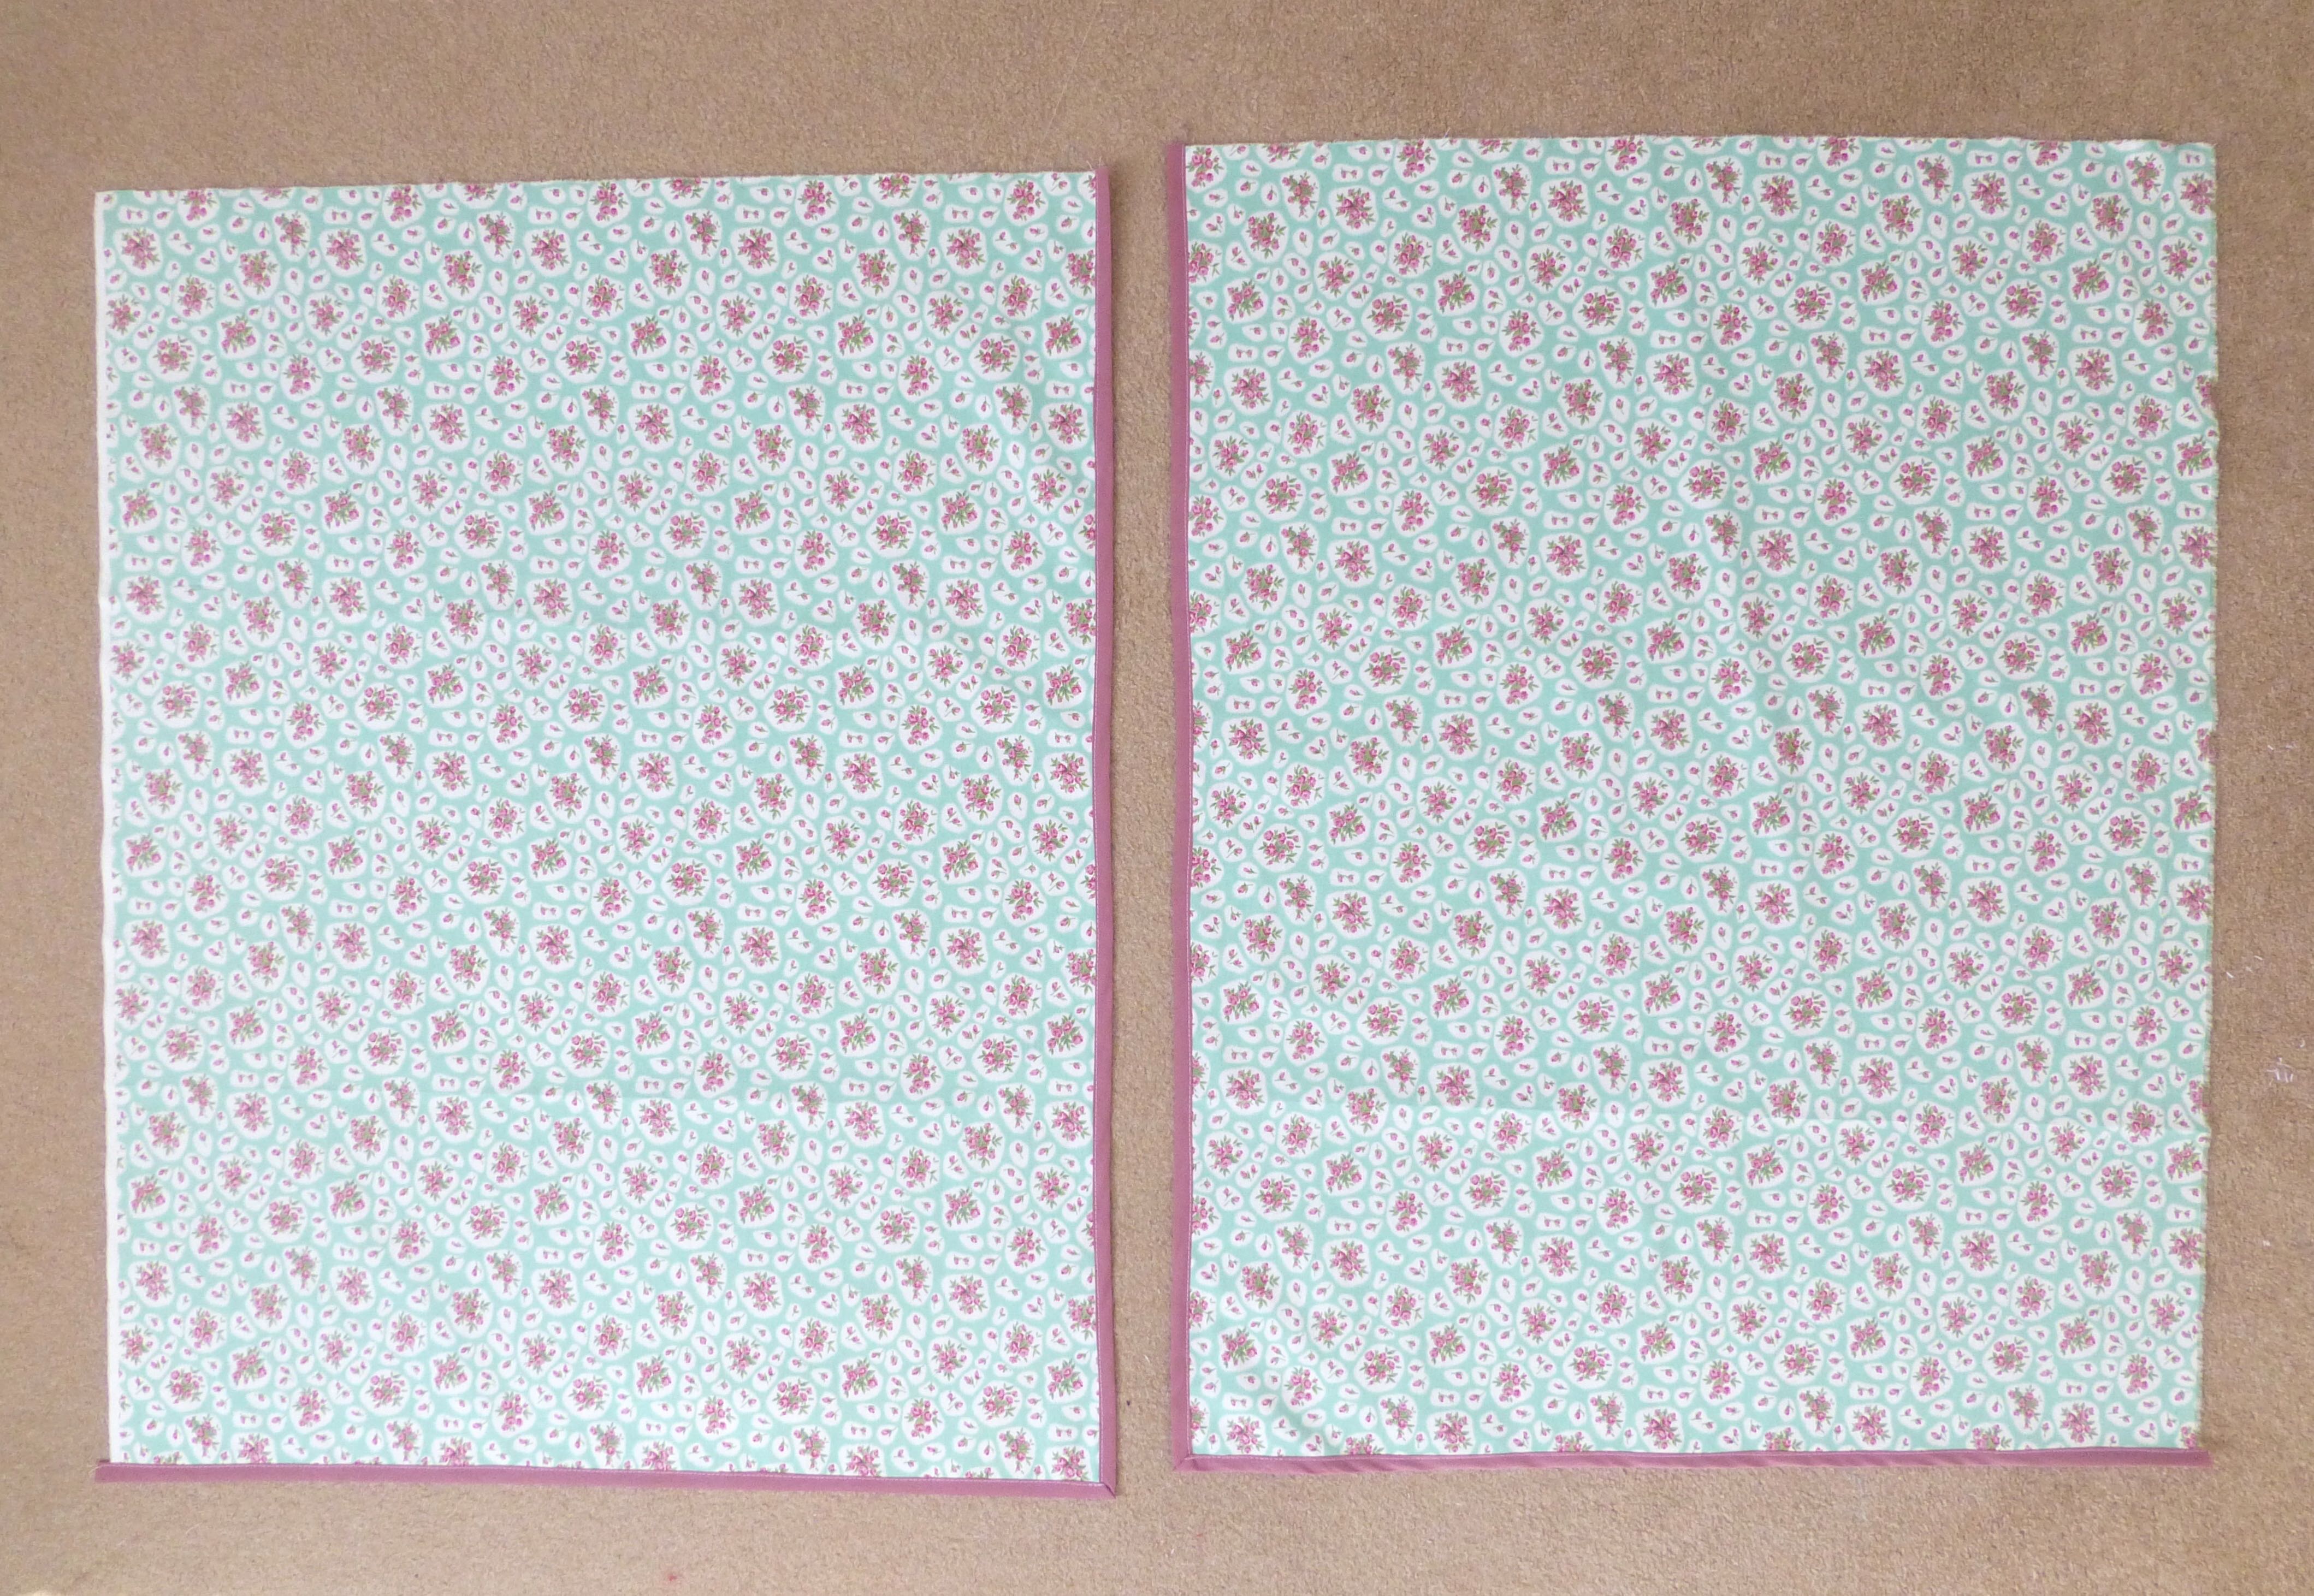
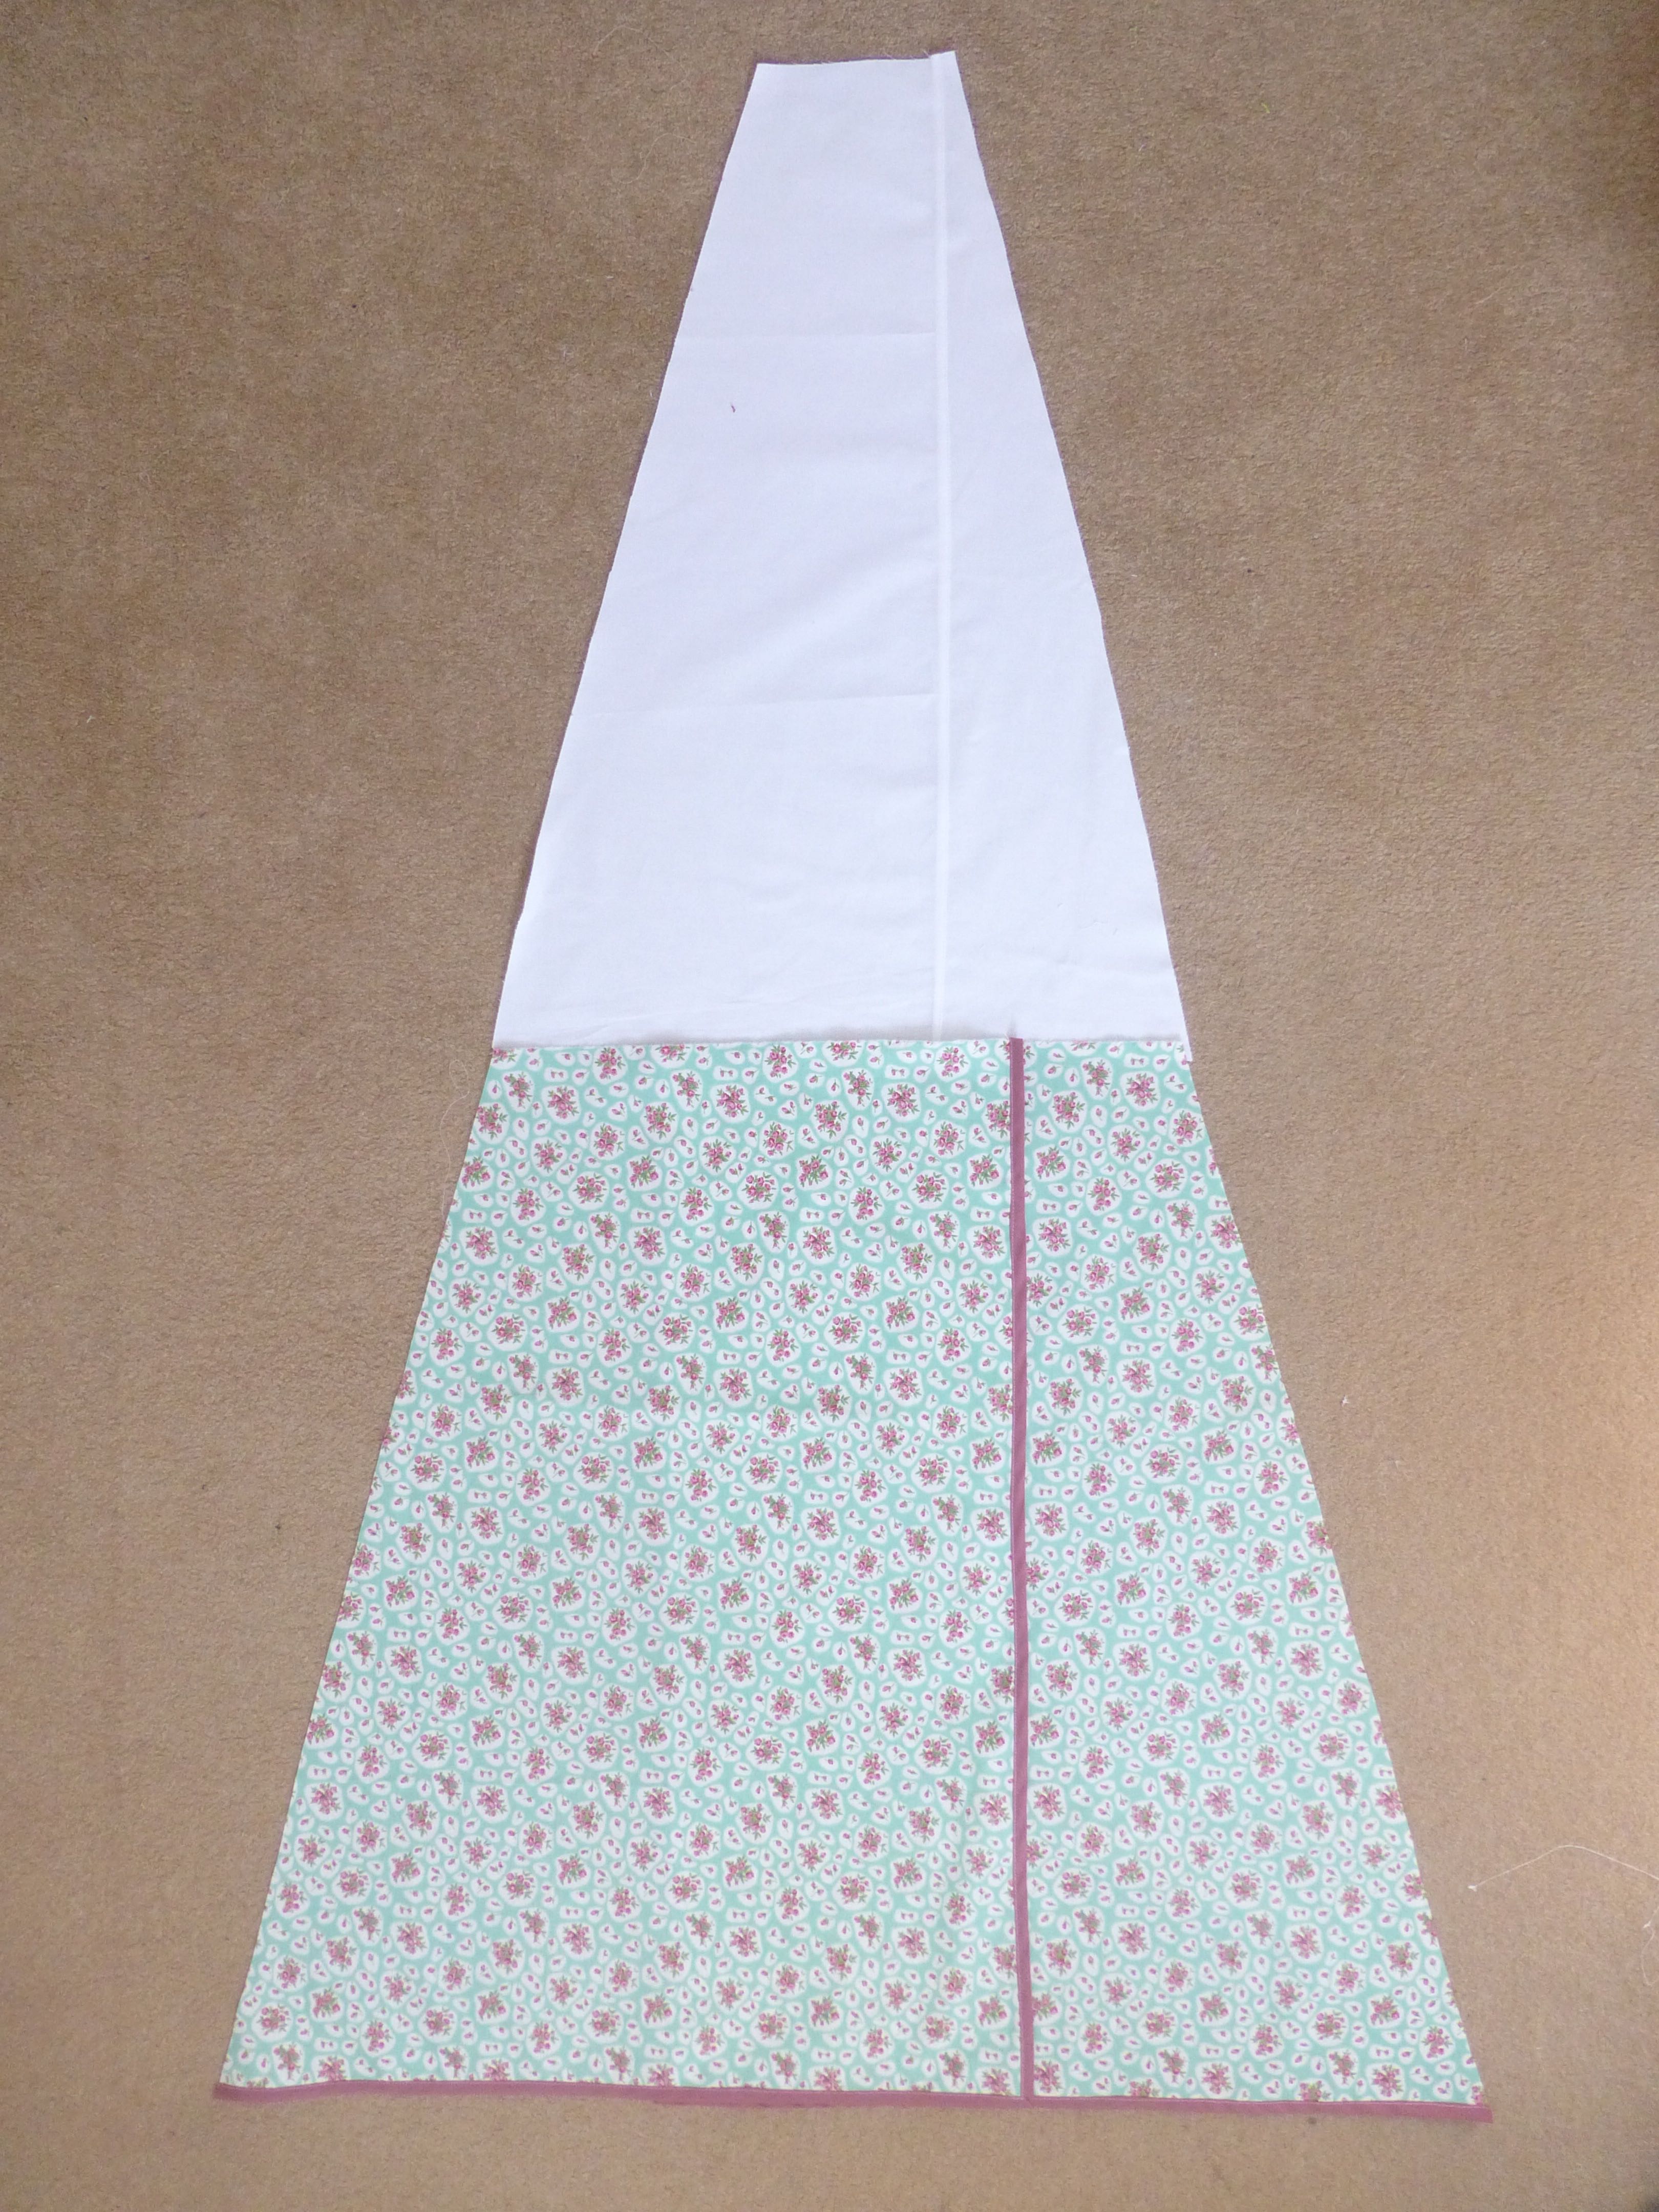
Cut rectangles of fabric out of the contrast floral fabric as per the two smaller diagrams, then make about 4m of bias binding using your plain fabric.
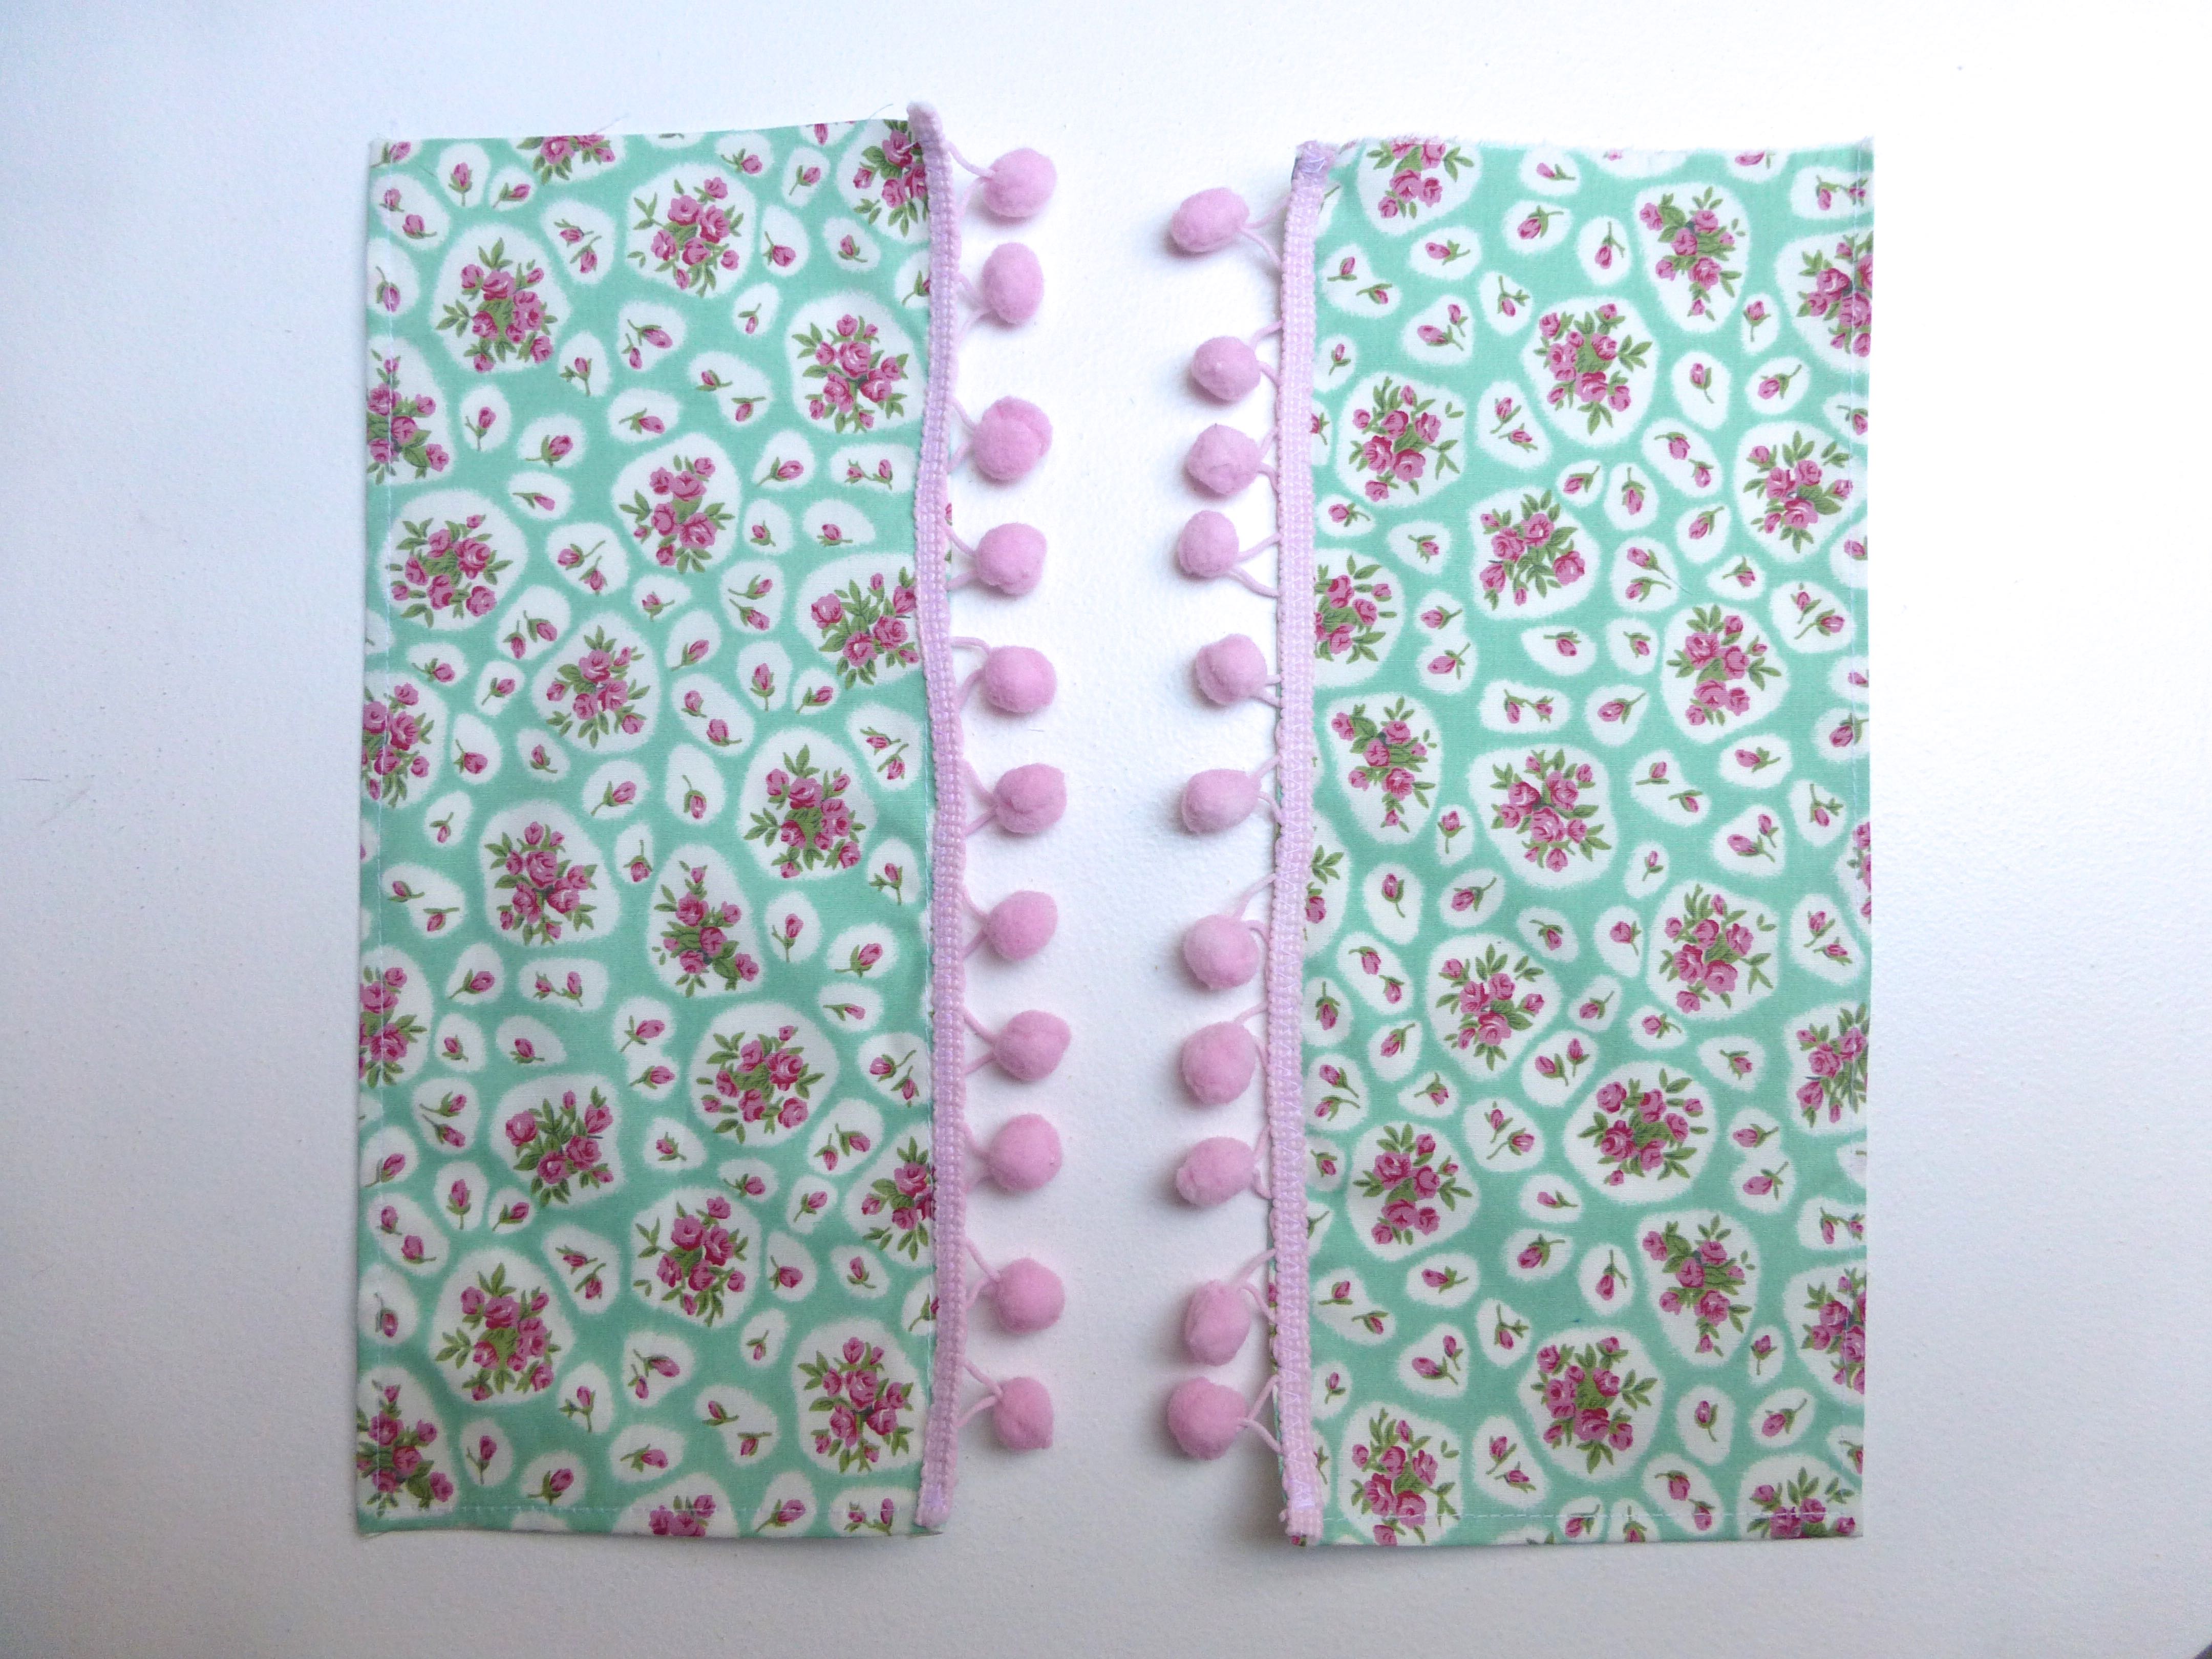
Apply bias binding to one side and lower edge of the two large pieces of floral fabric – these will form your front curtains.
To shape the sides of the curtains to match the slope of the wigwam, place a large white triangle over the curtain, bottom edges matching and raw edges up the side. Your floral fabric will poke out beyond the edge of the triangle as seen below.
Cut off the excess floral fabric.
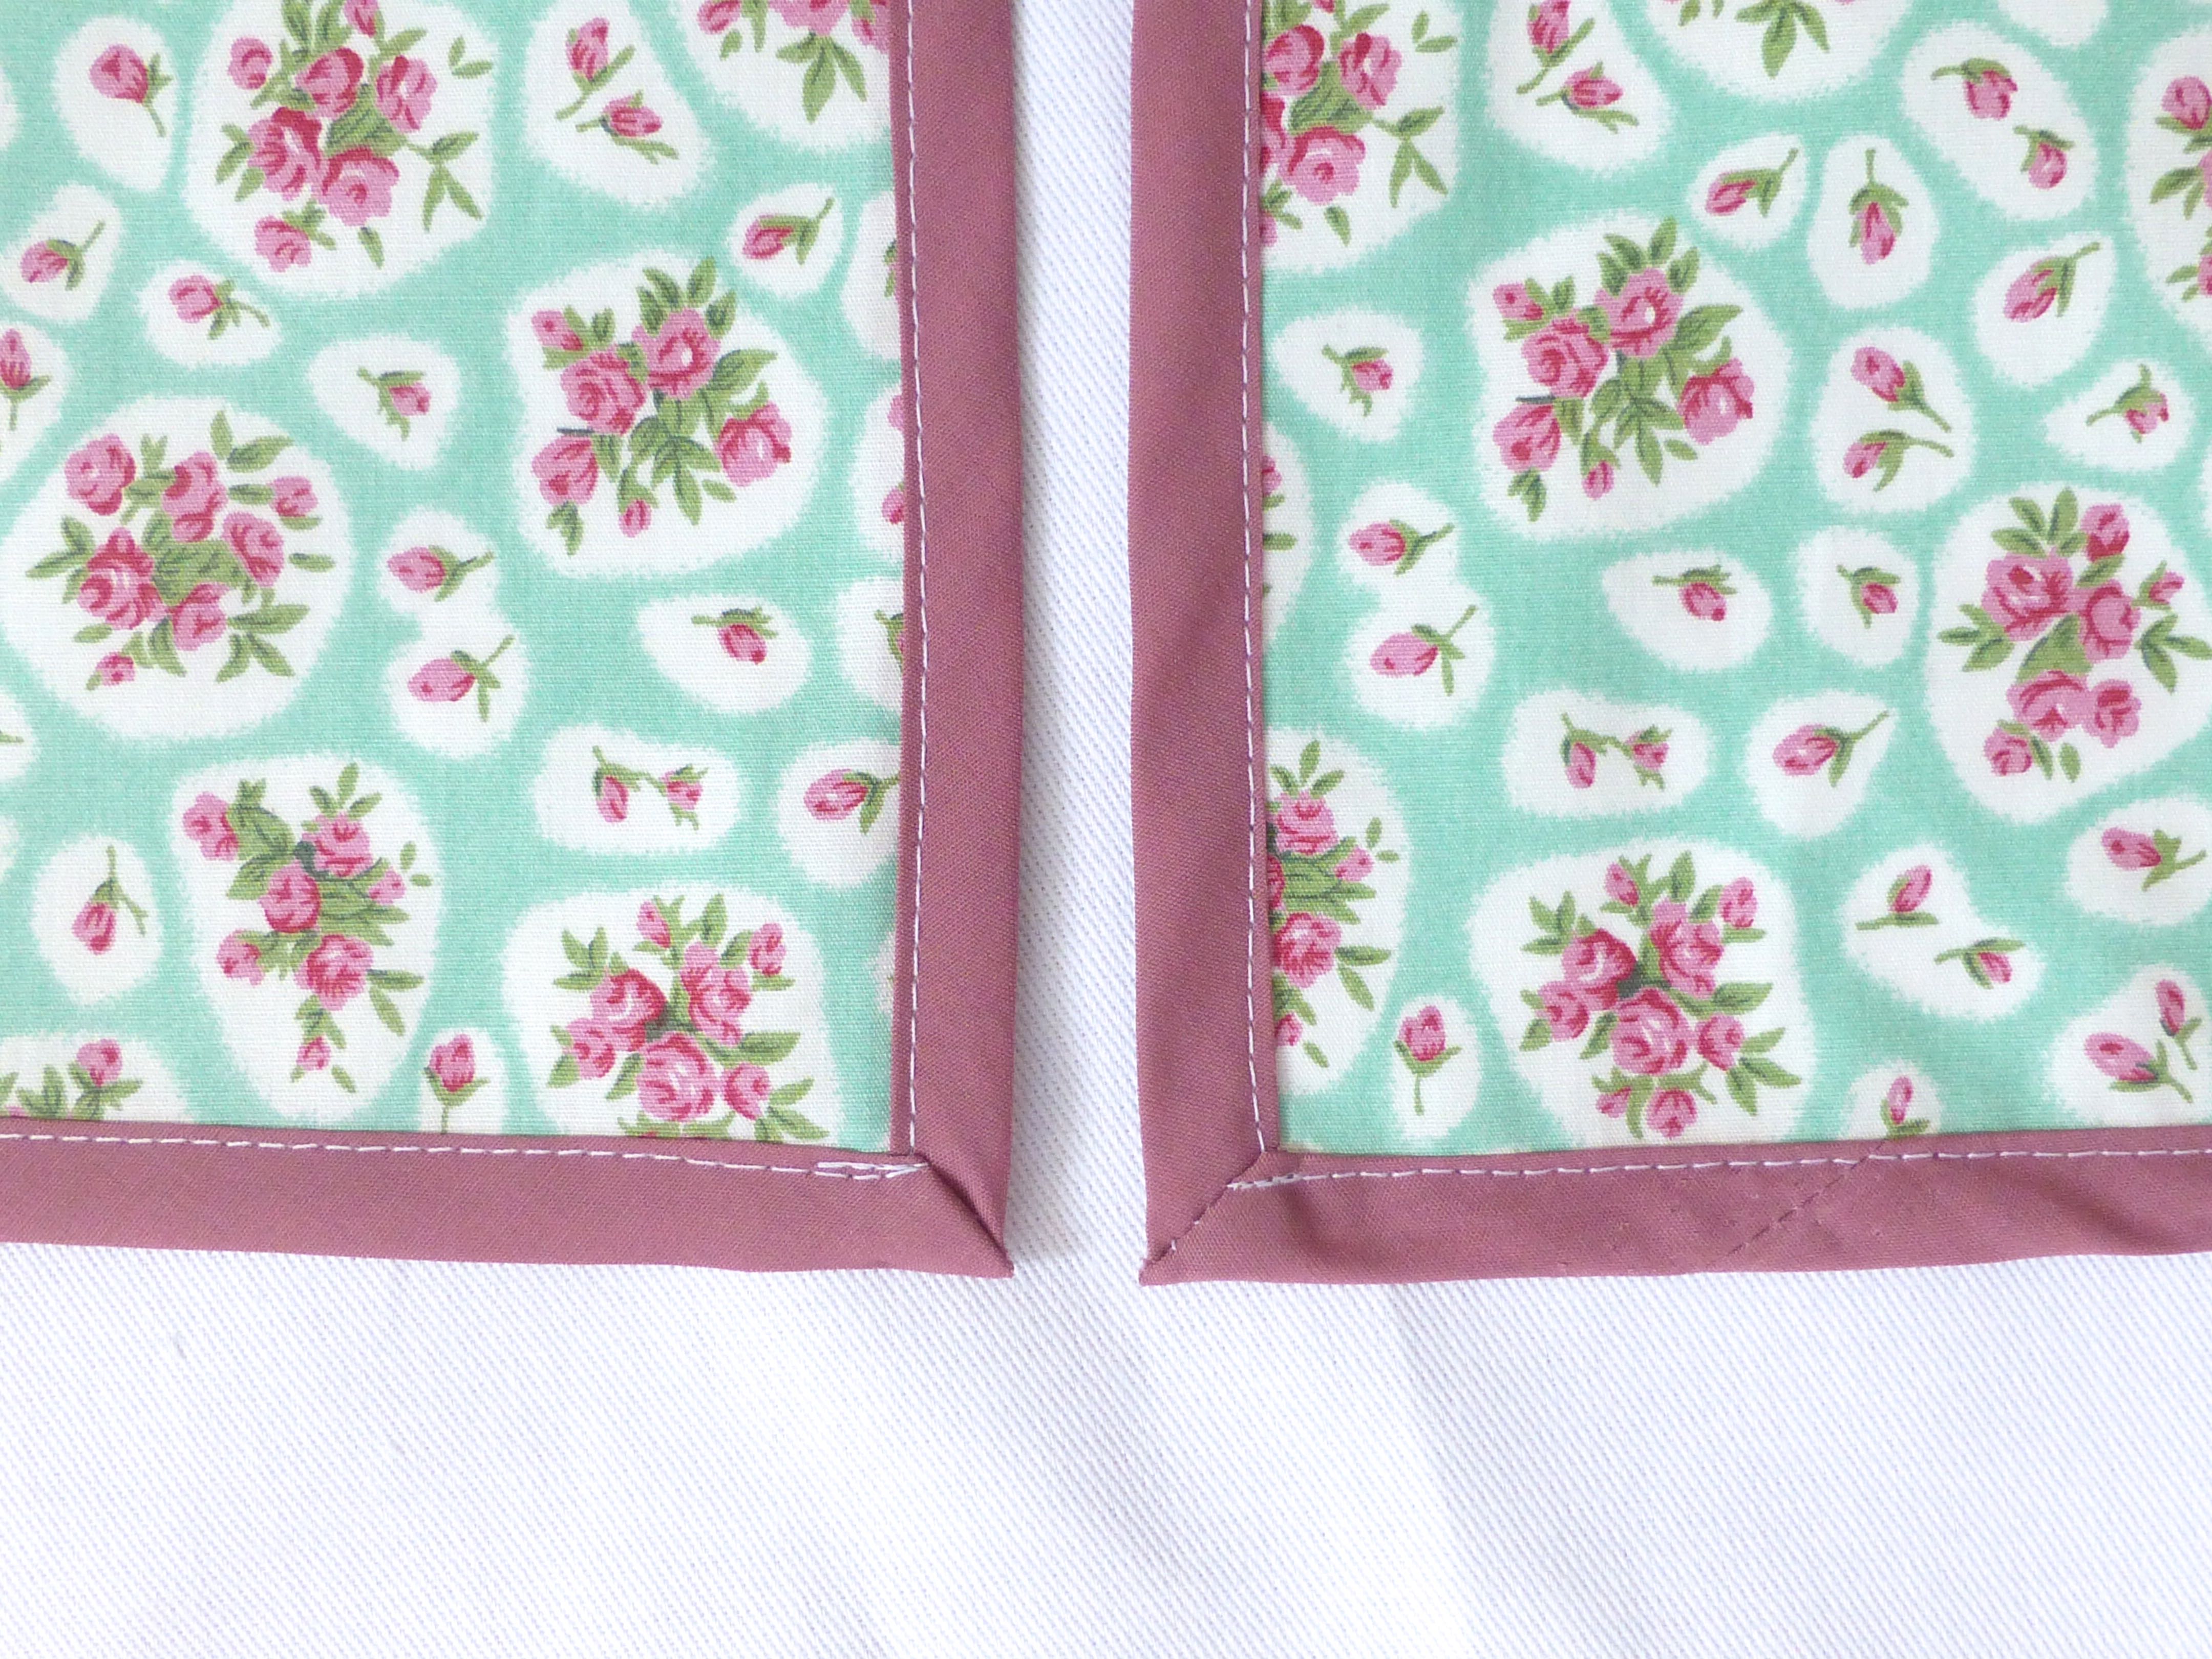
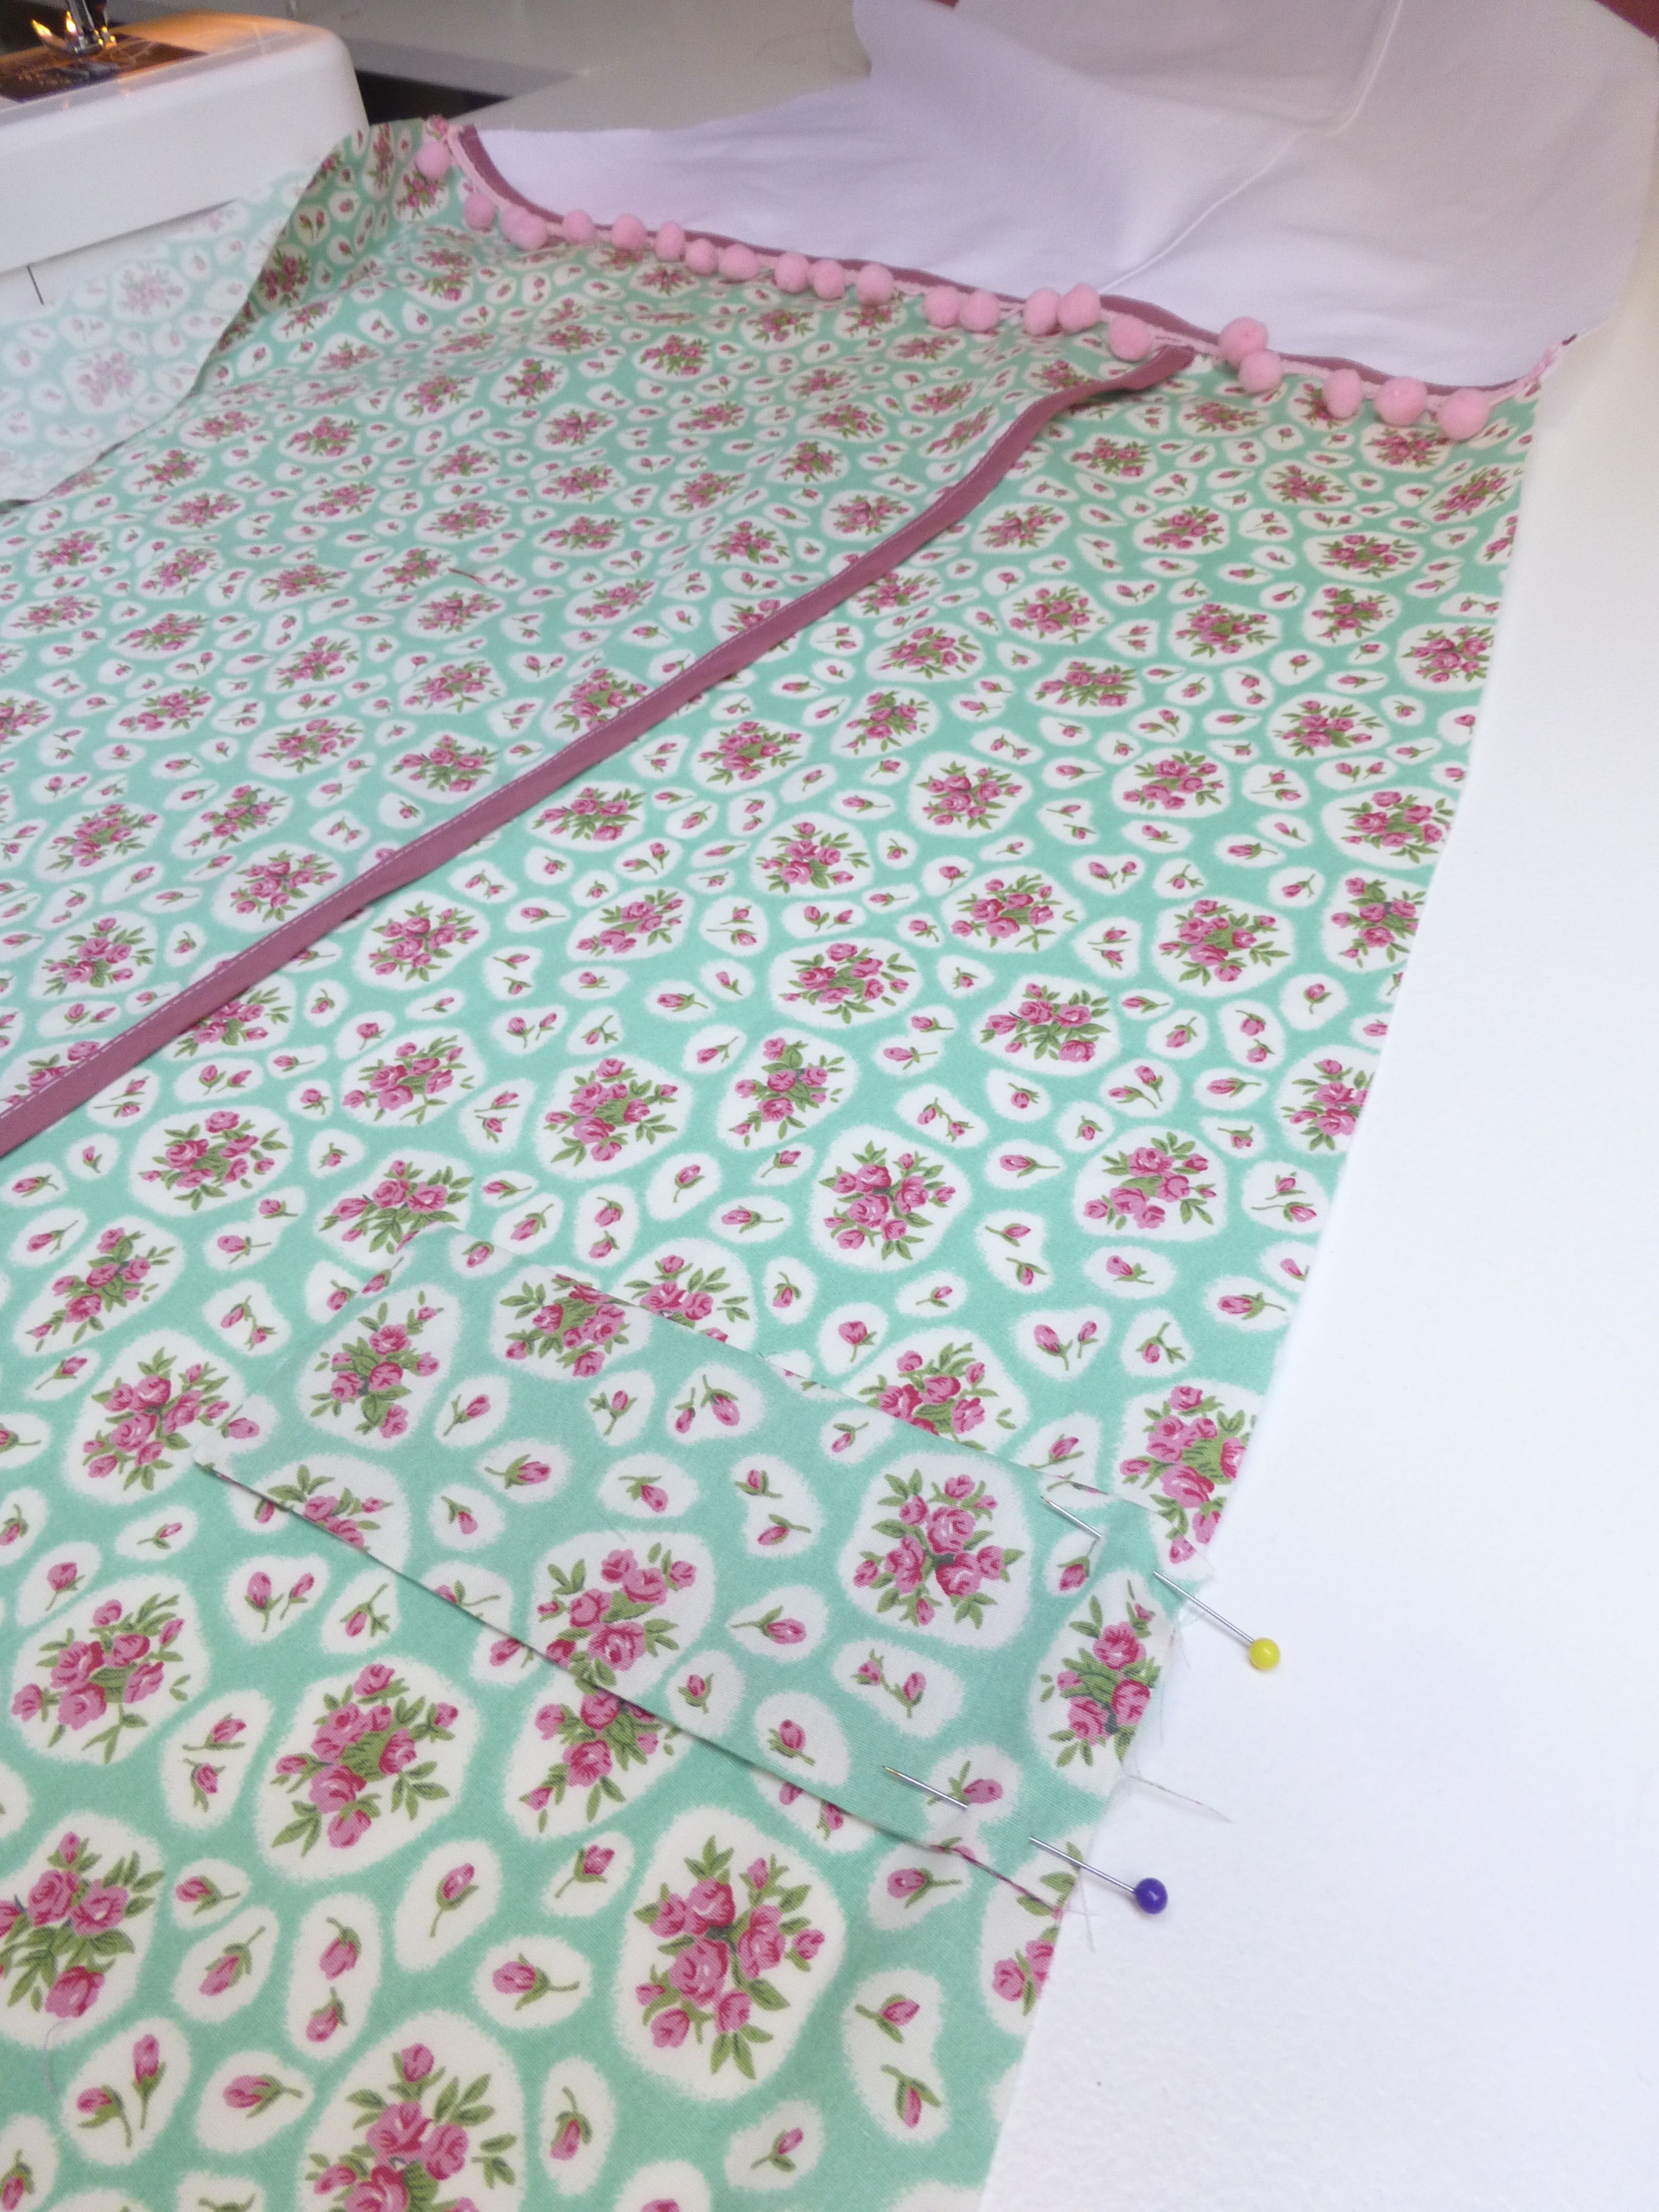
Take a curtain and pin the top edge to the bottom edge of your small white triangle, wrong sides together.
Take your other curtain and pin over the top of the first curtain.
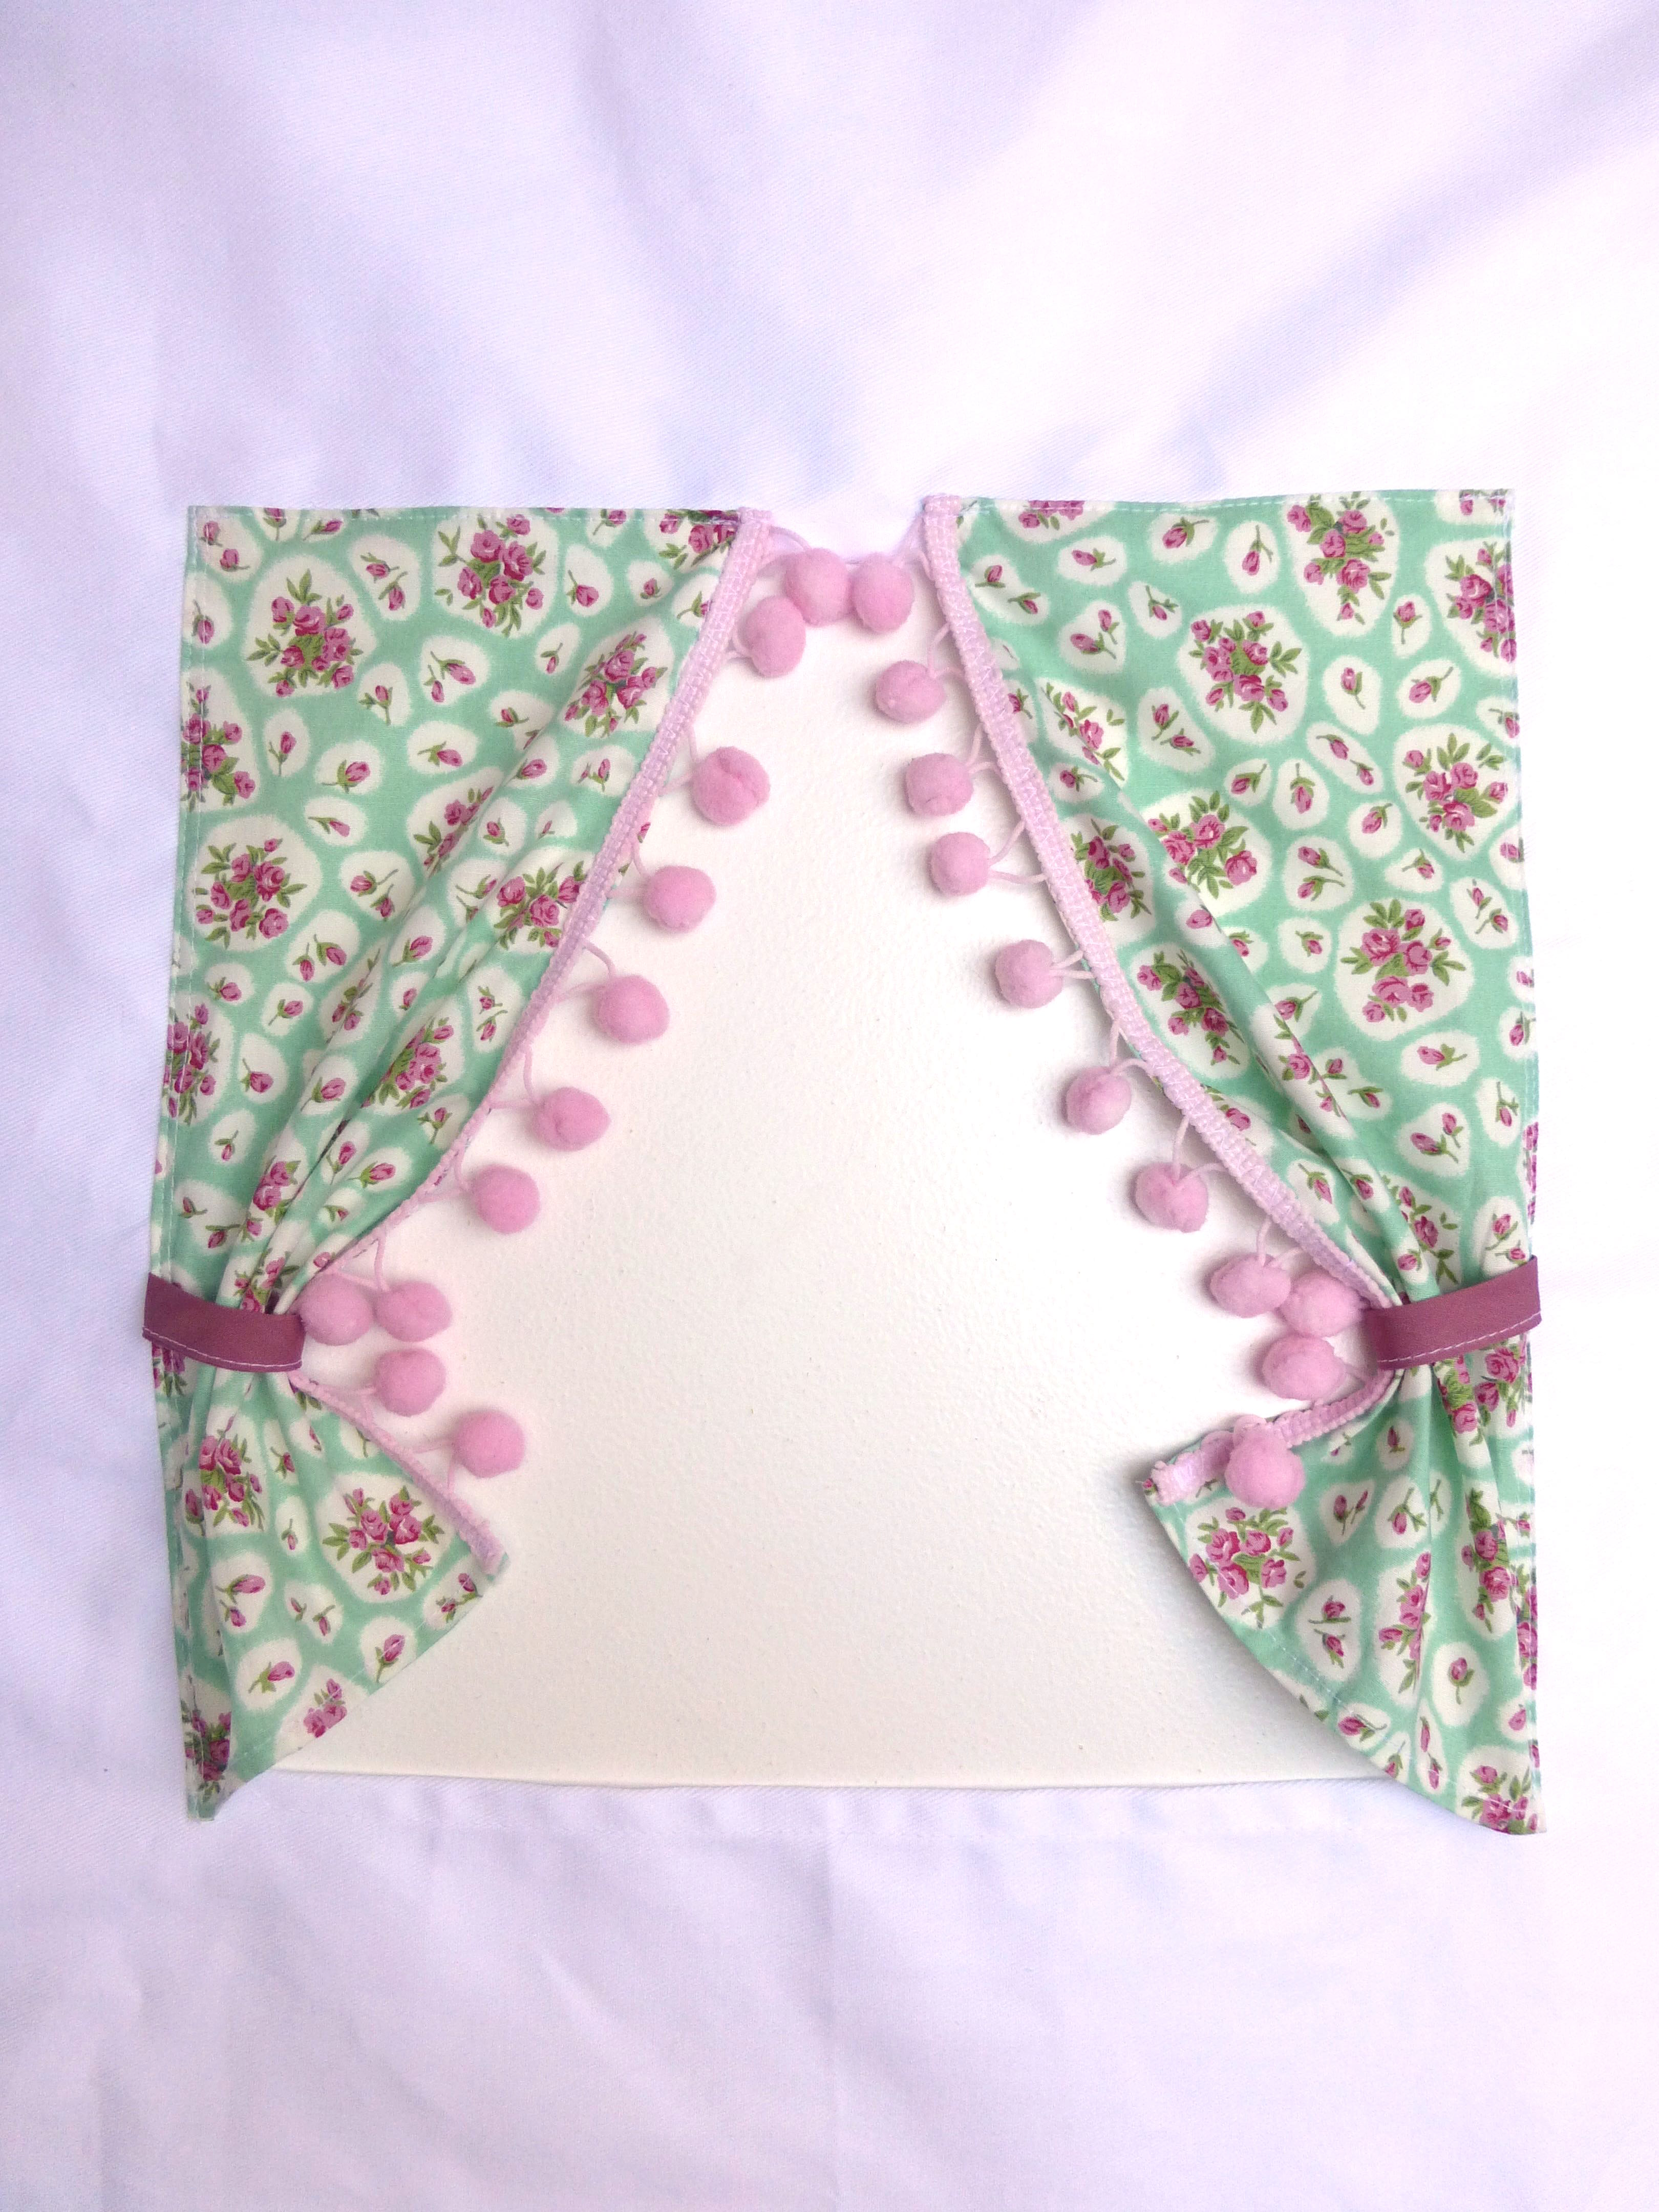
You can leave it plain as this type of seam leaves a nice neat finish, but I chose to decorate mine with a strip of bias binding and a row of pom pom trim from my stash.
Fold the small floral rectangles in half lengthwise and stitch a small seam along one short and the long side.
Turn and press.
With raw edges matching, pin and baste about halfway down the unfinished sloping edge of each curtain.
Take a large white triangle and cut a 25 x25cm square for the window the base of which should be about 58cm up from the bottom edge.
Snip diagonally into each corner by 1cm and fold in a 1cm double hem. Pin in place.
Stitch, sewing across corners as shown.
Cut two little curtains, each one 15 x 27cm.
Hem all four edges and trim the opening edges with more pom pom trim.
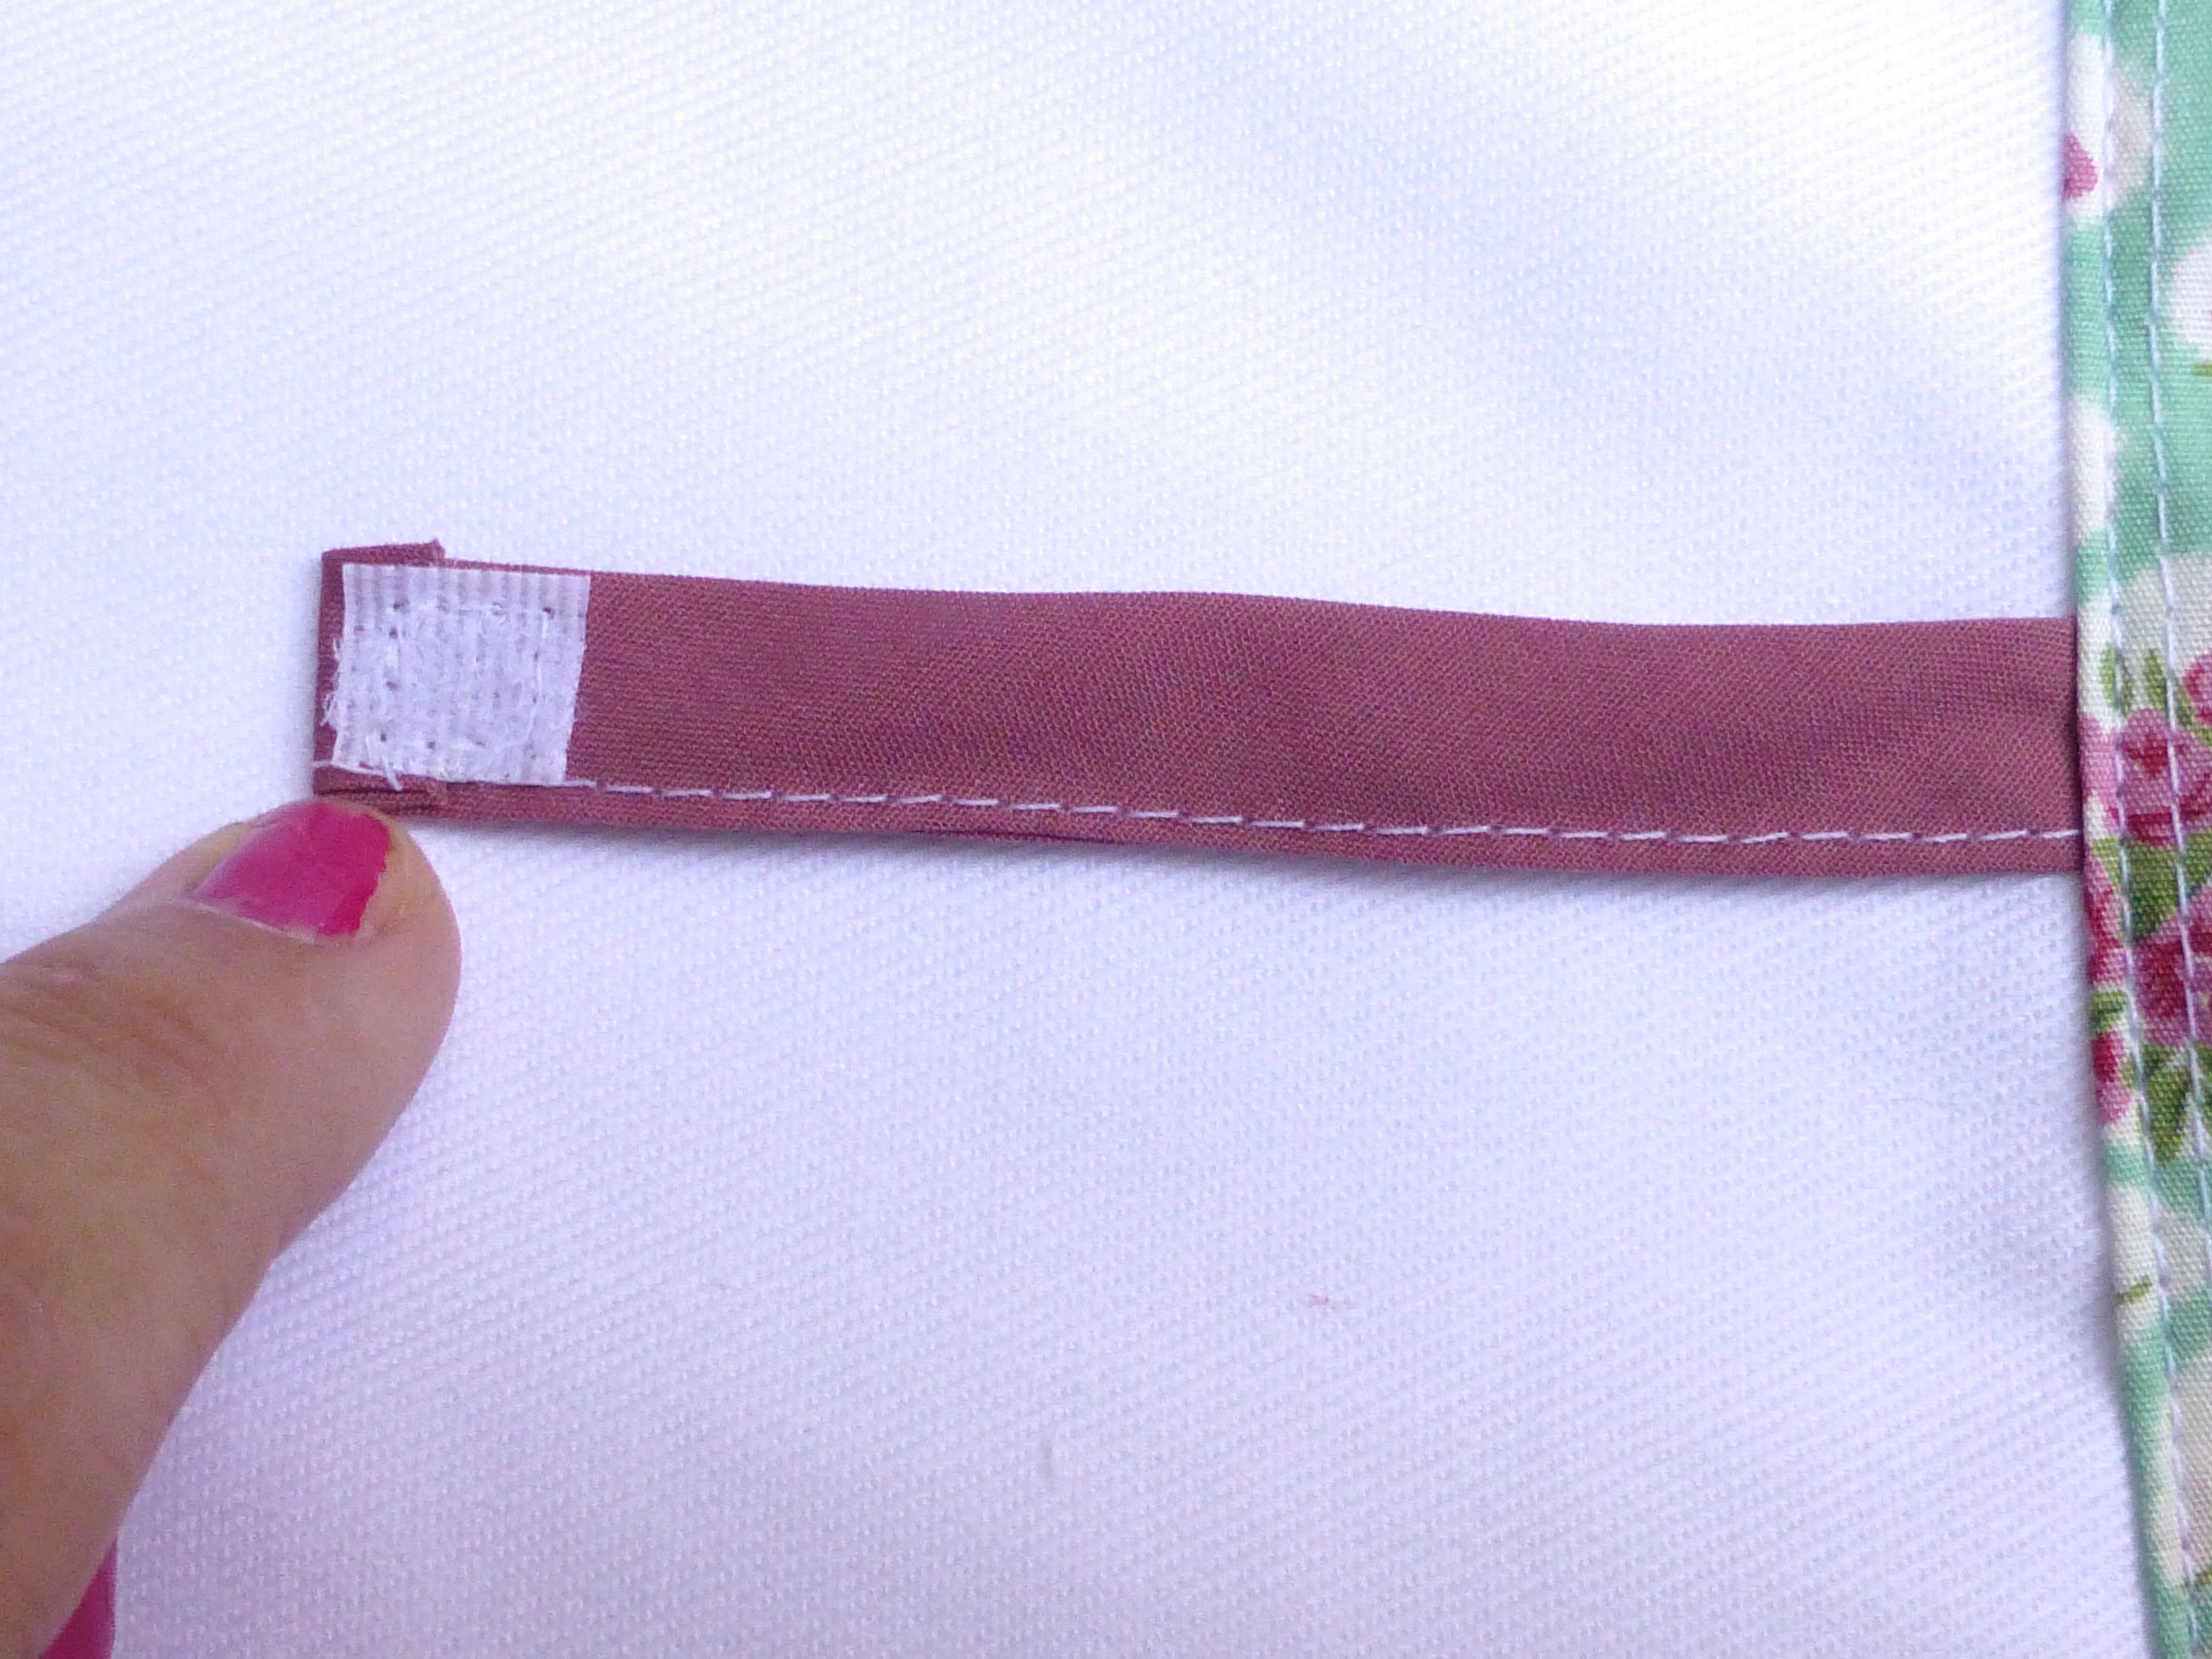
Make two tiny curtain tiebacks: –
Fold a 10cm length of bias binding in half lengthways and stitch close to the edge.
Stitch a 1cm square piece of velcro to one end.
Pin curtain to window at top and side.
Insert tieback under curtain about 10cm up from the lower edge, velcro side uppermost as shown.
Stitch curtain in place, catching tieback in seam as you go.
Sew the other piece of velcro to the inside of the window.
You can continue to decorate your teepee or just sew the sides together at this point – just scroll down to the relevant section.
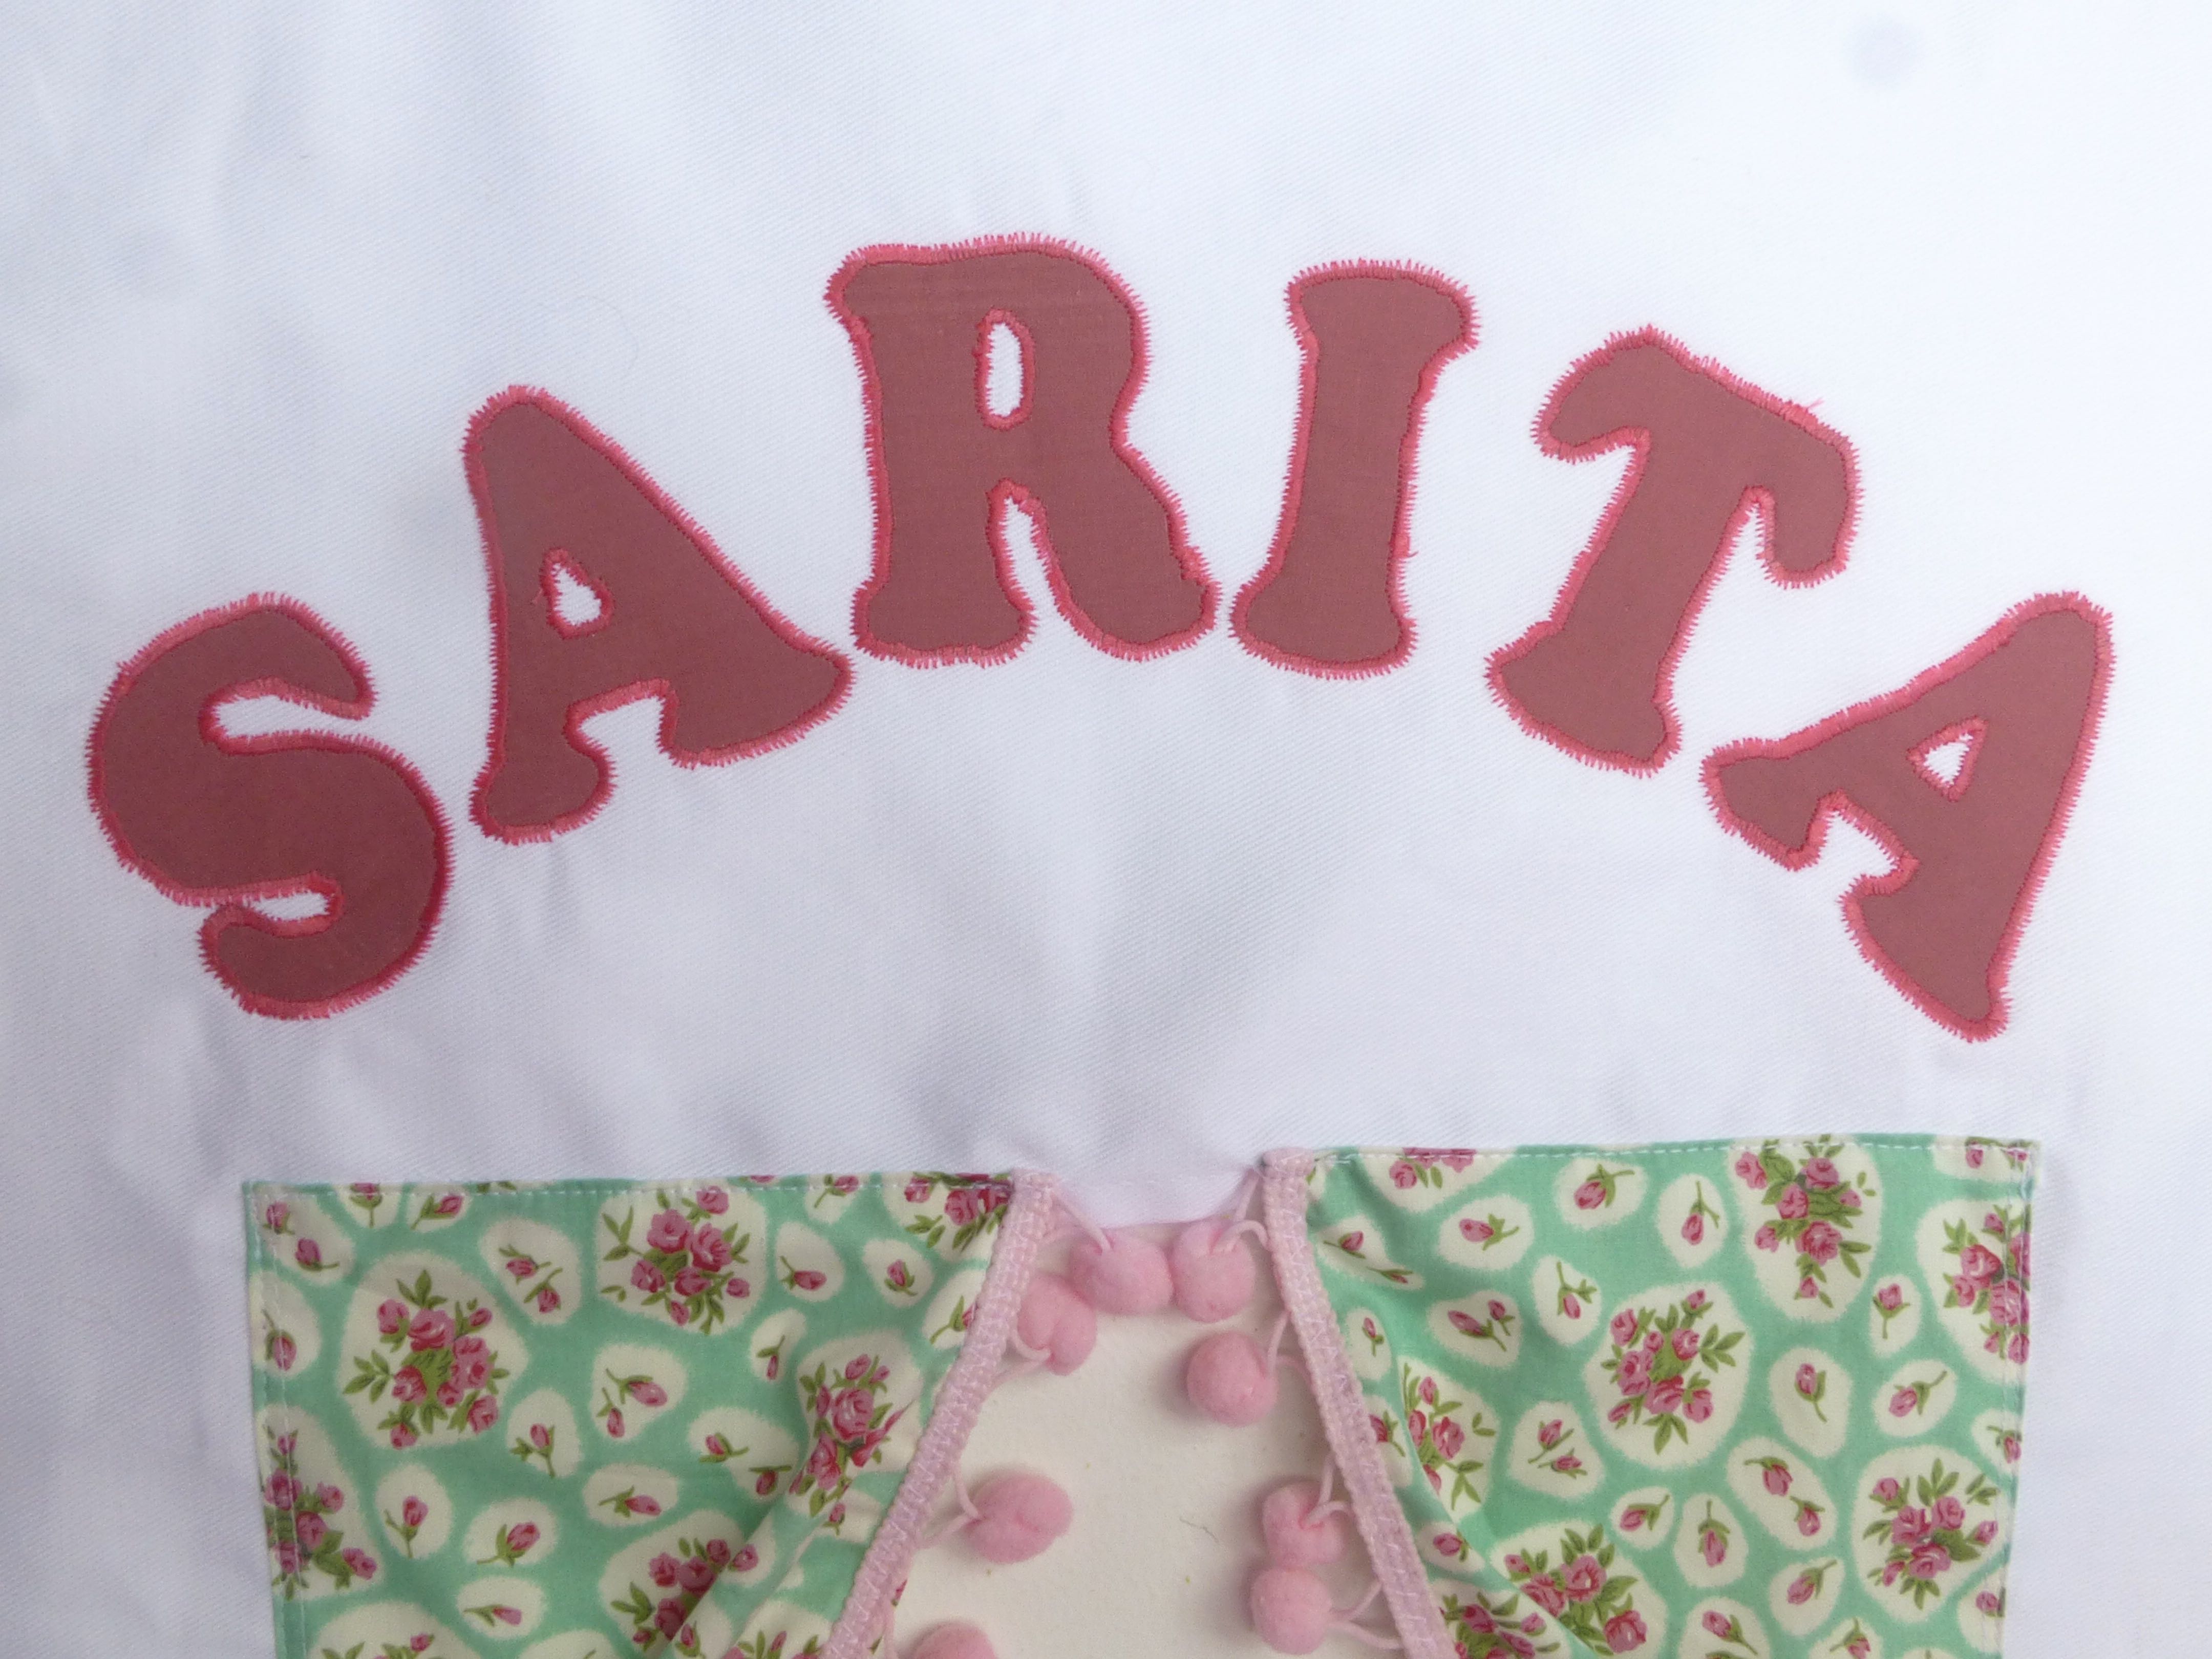
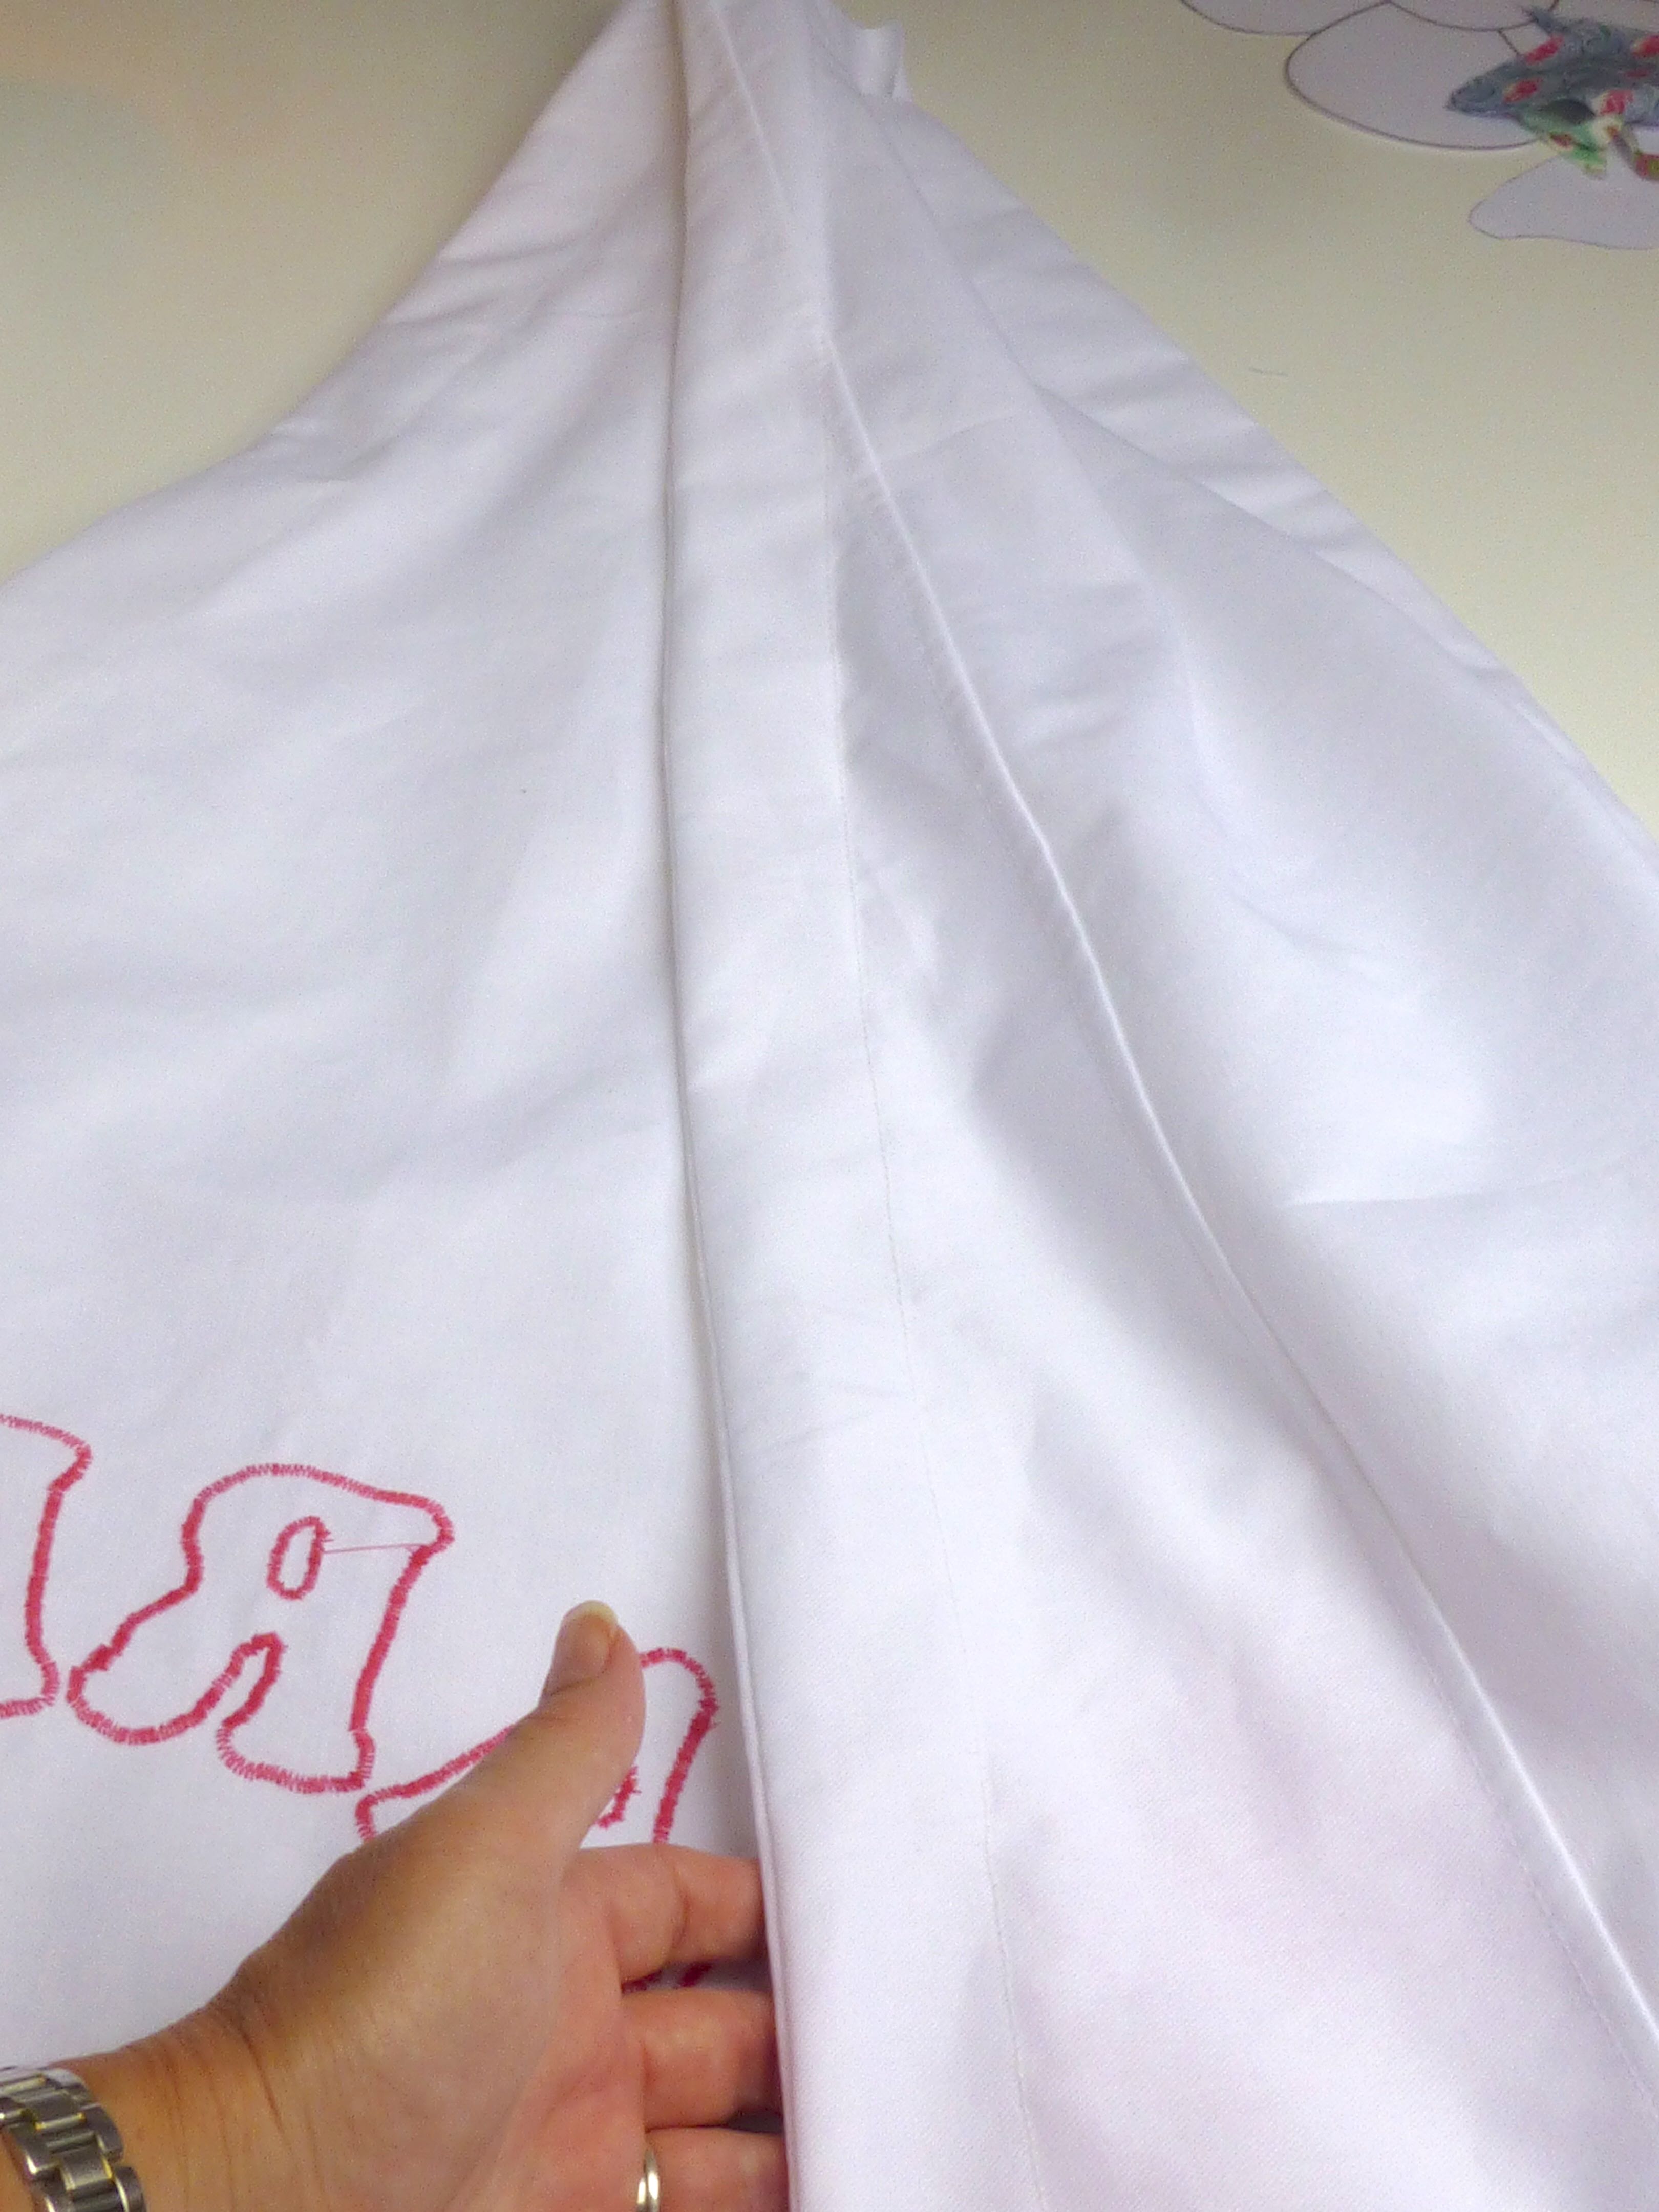
I personalised this one with a name which I first printed out on card using Cooper std font in size 240pt. Separating the letters makes them easier to cut out. For best results use a craft knife.
Fuse a piece of interfacing onto the wrong side of your contrast fabric and trace around each of the letters making sure you reverse them first.
(I have plenty in my stash, but you can buy interfacing here at Minerva.)
Cut around each letter carefully using embroidery scissors for accuracy.
Pin the letters in place and sew above the window using a satin stitch on your machine.
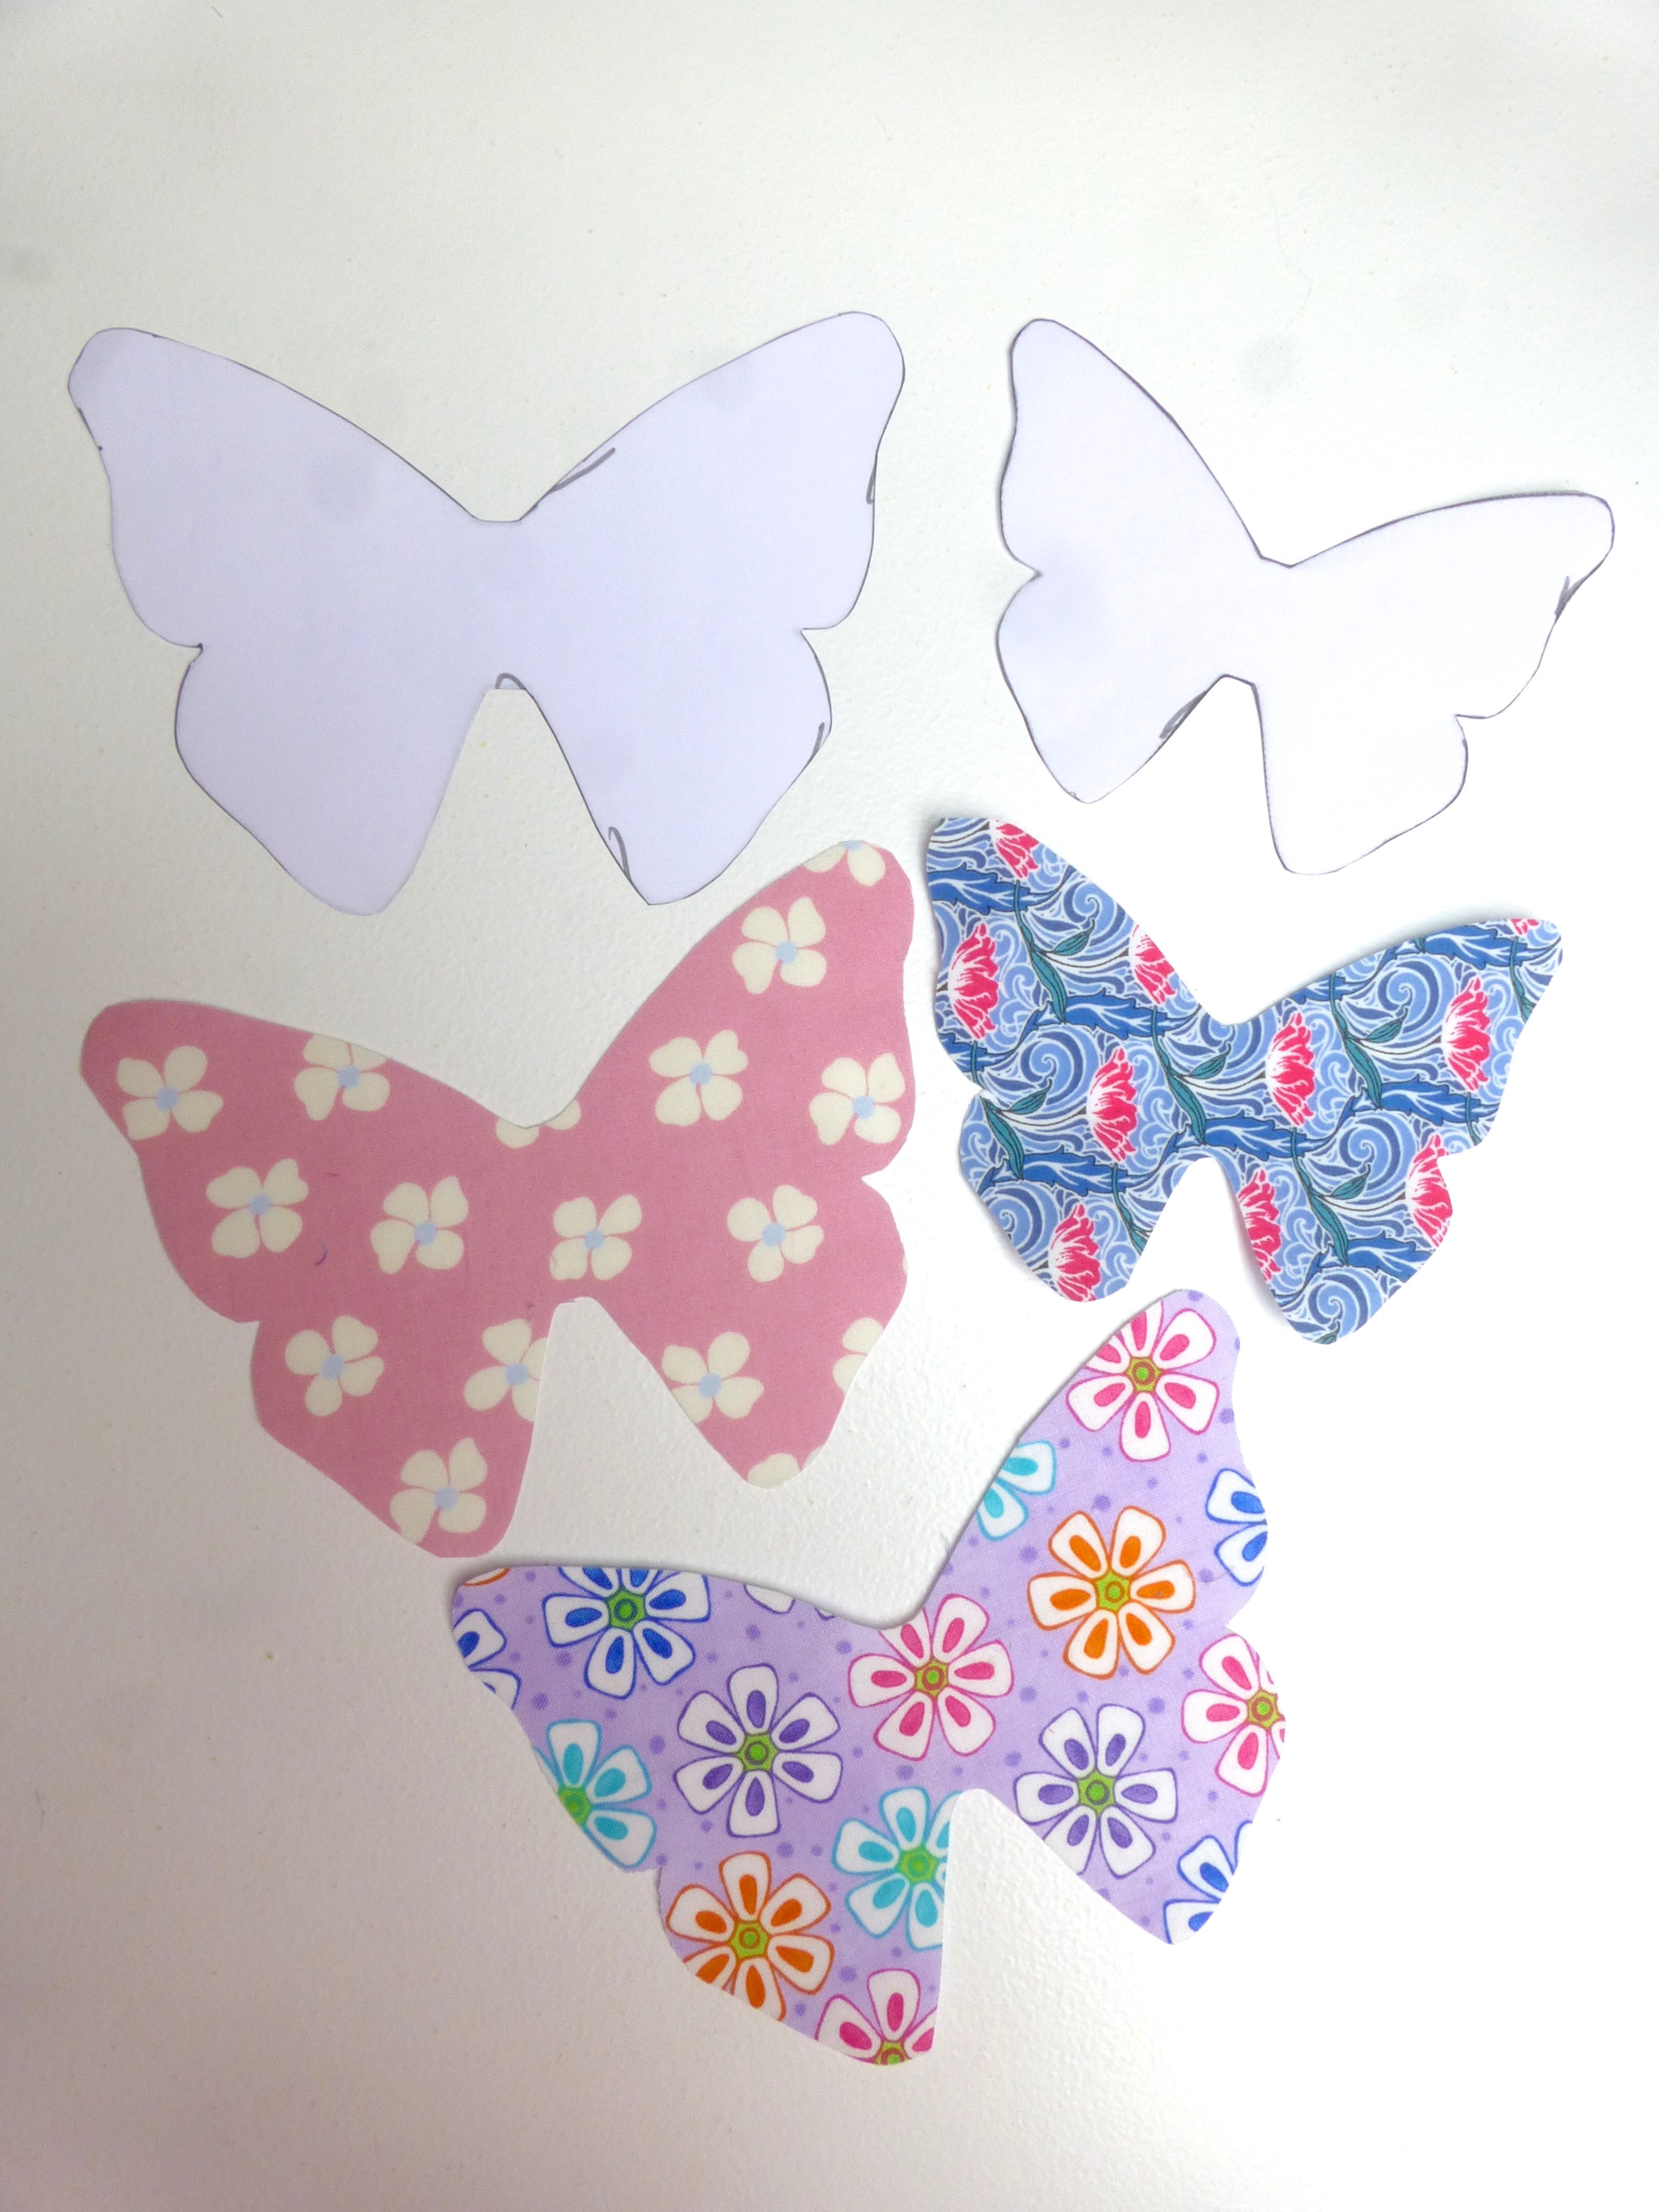
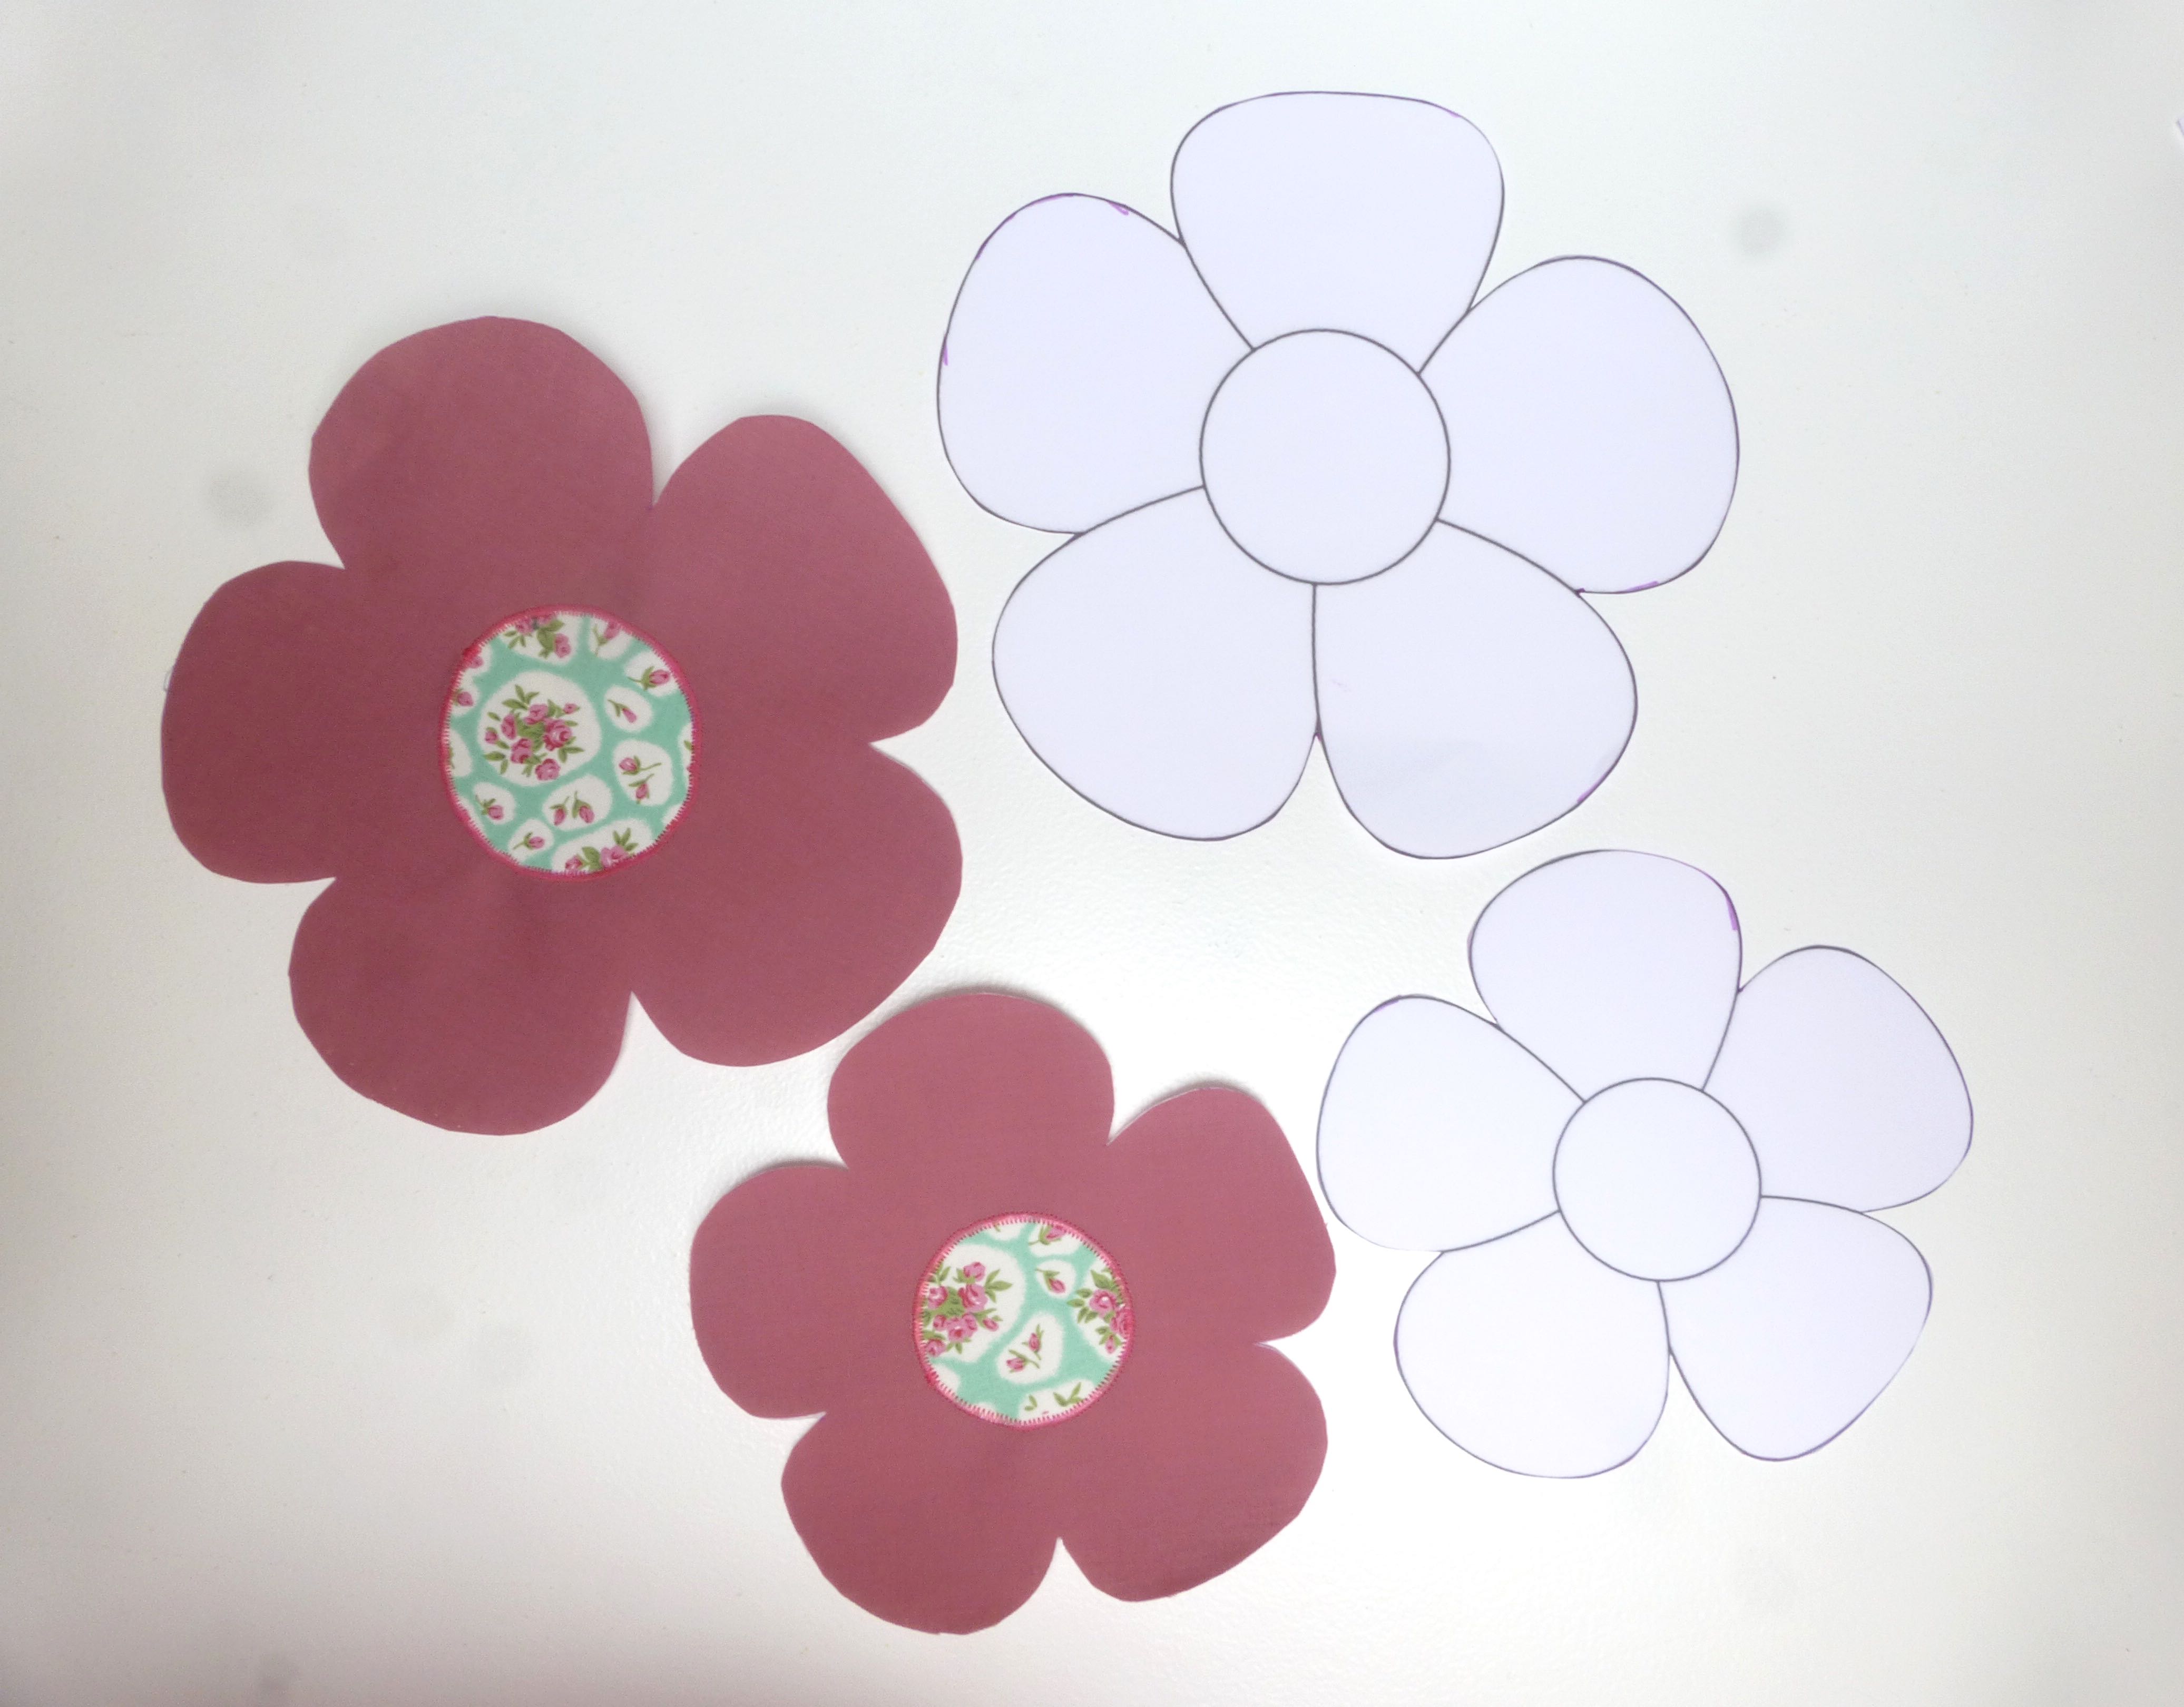
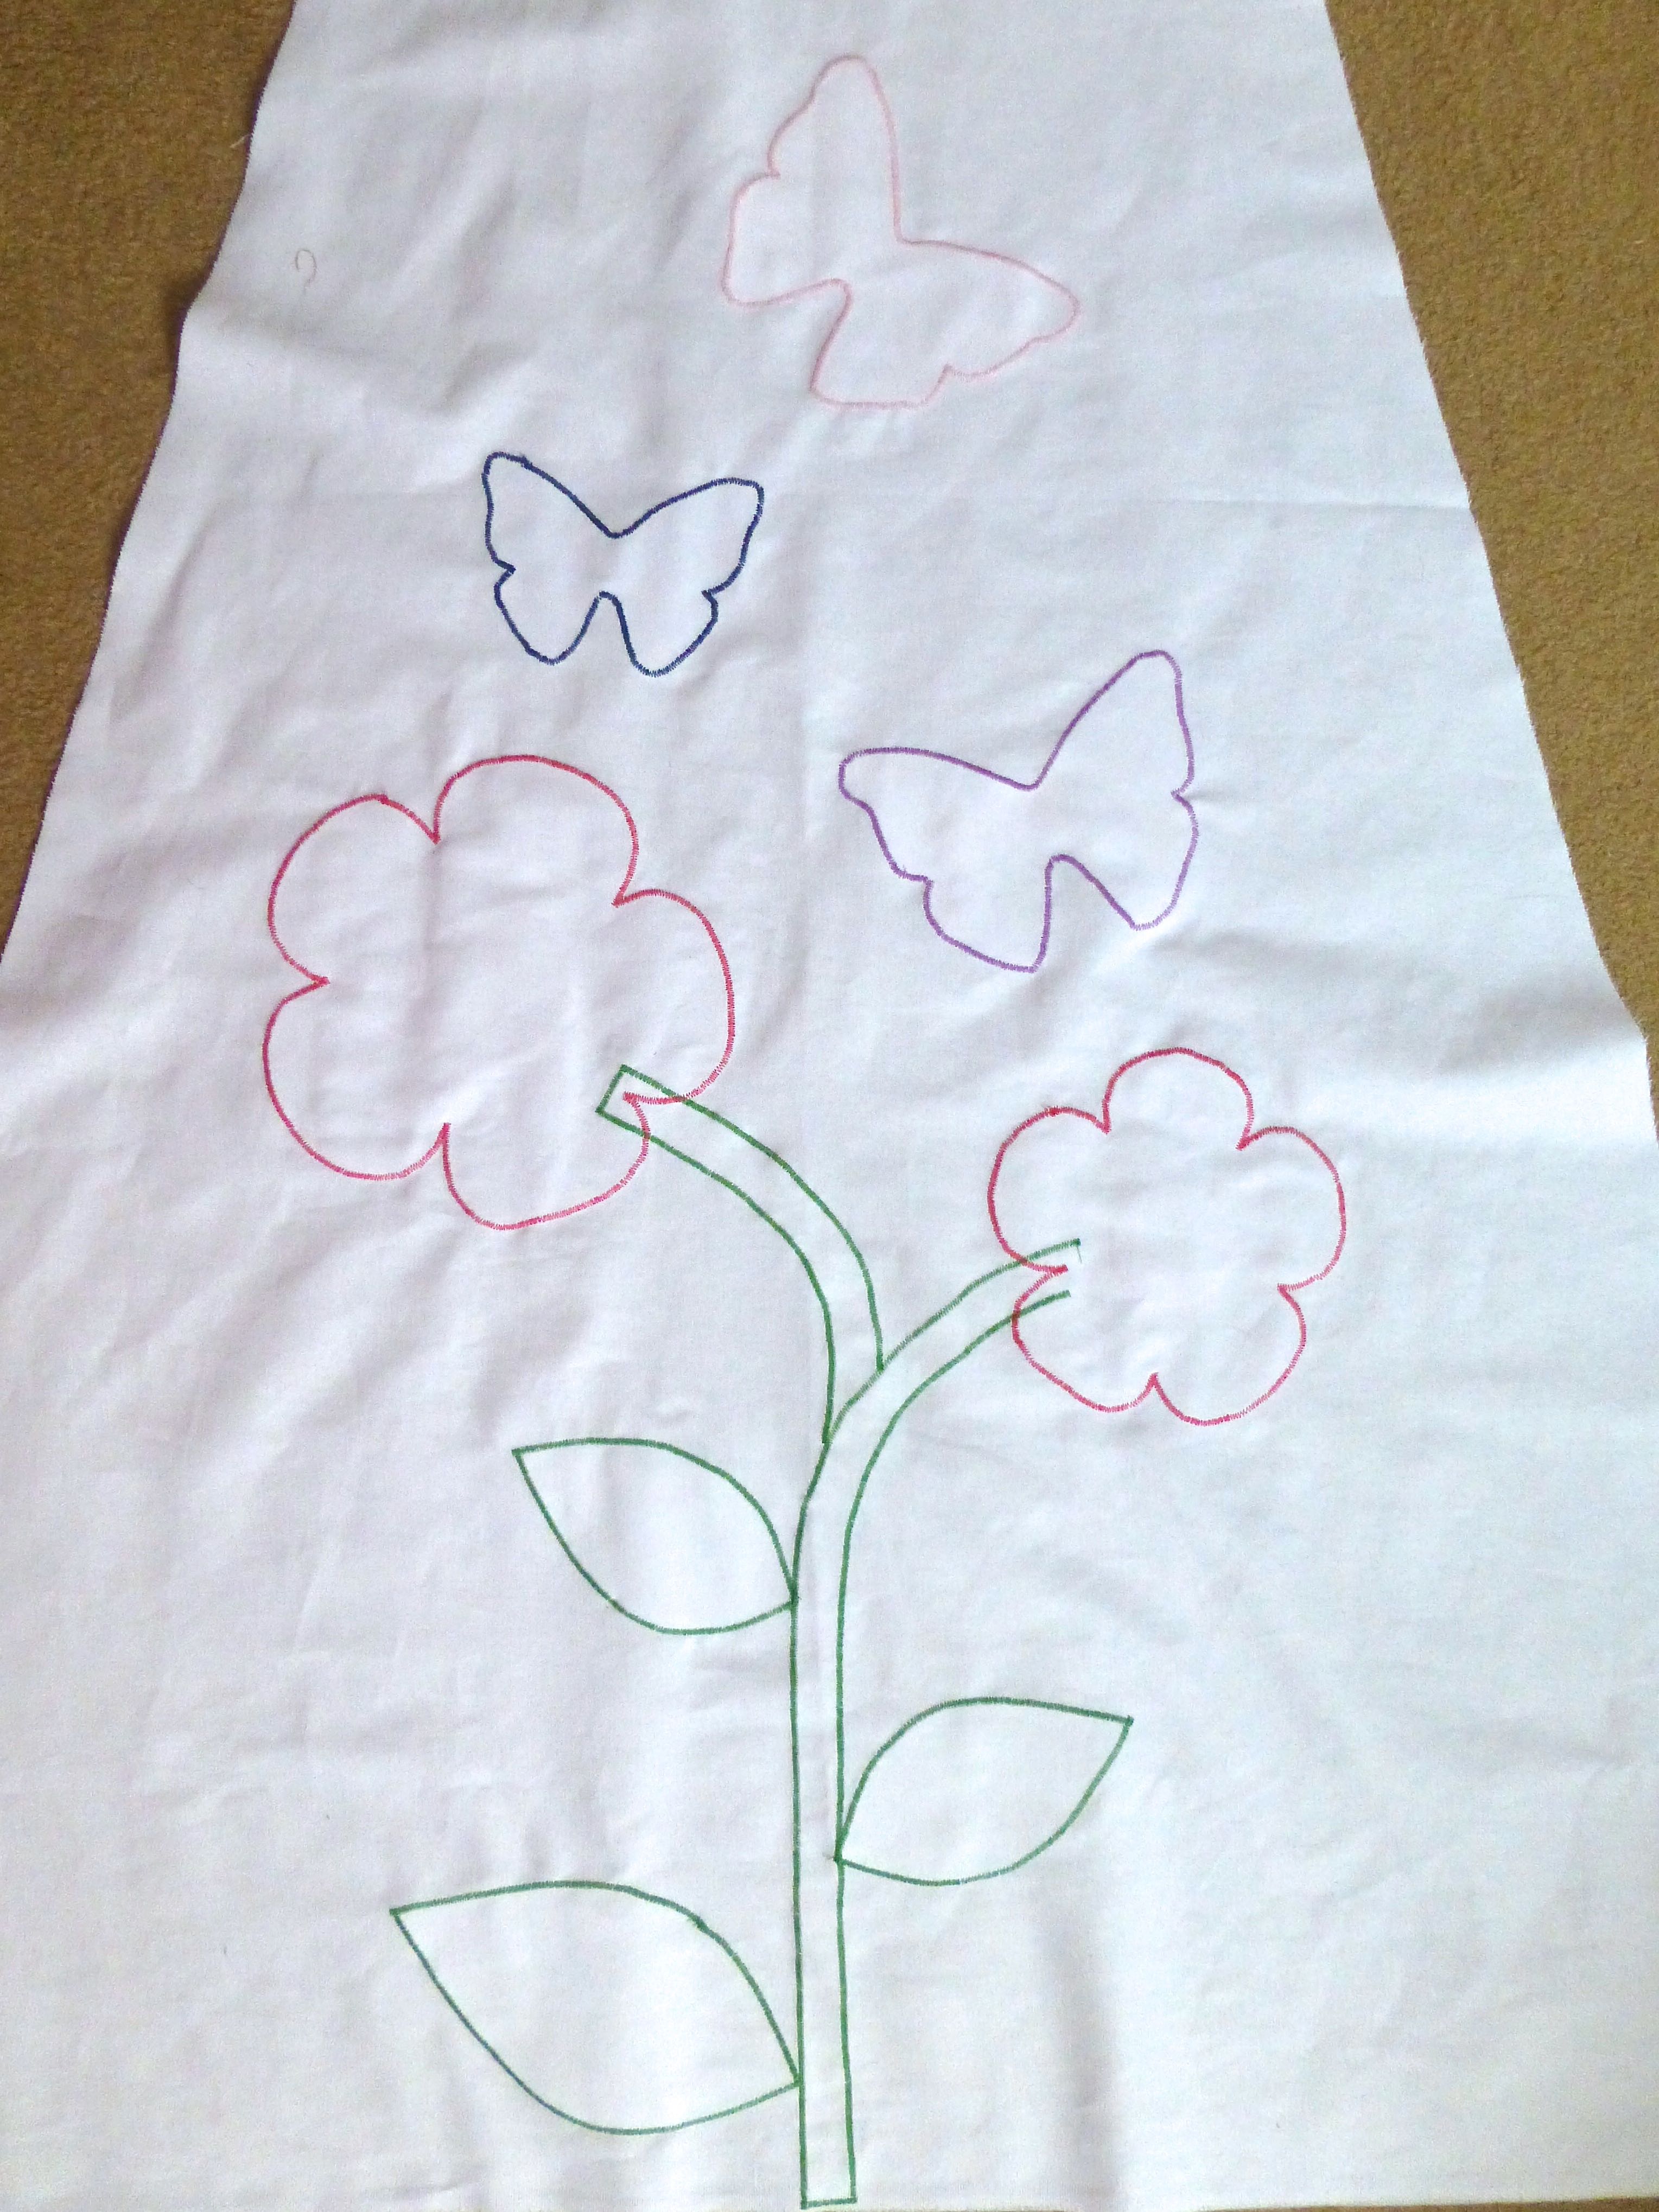
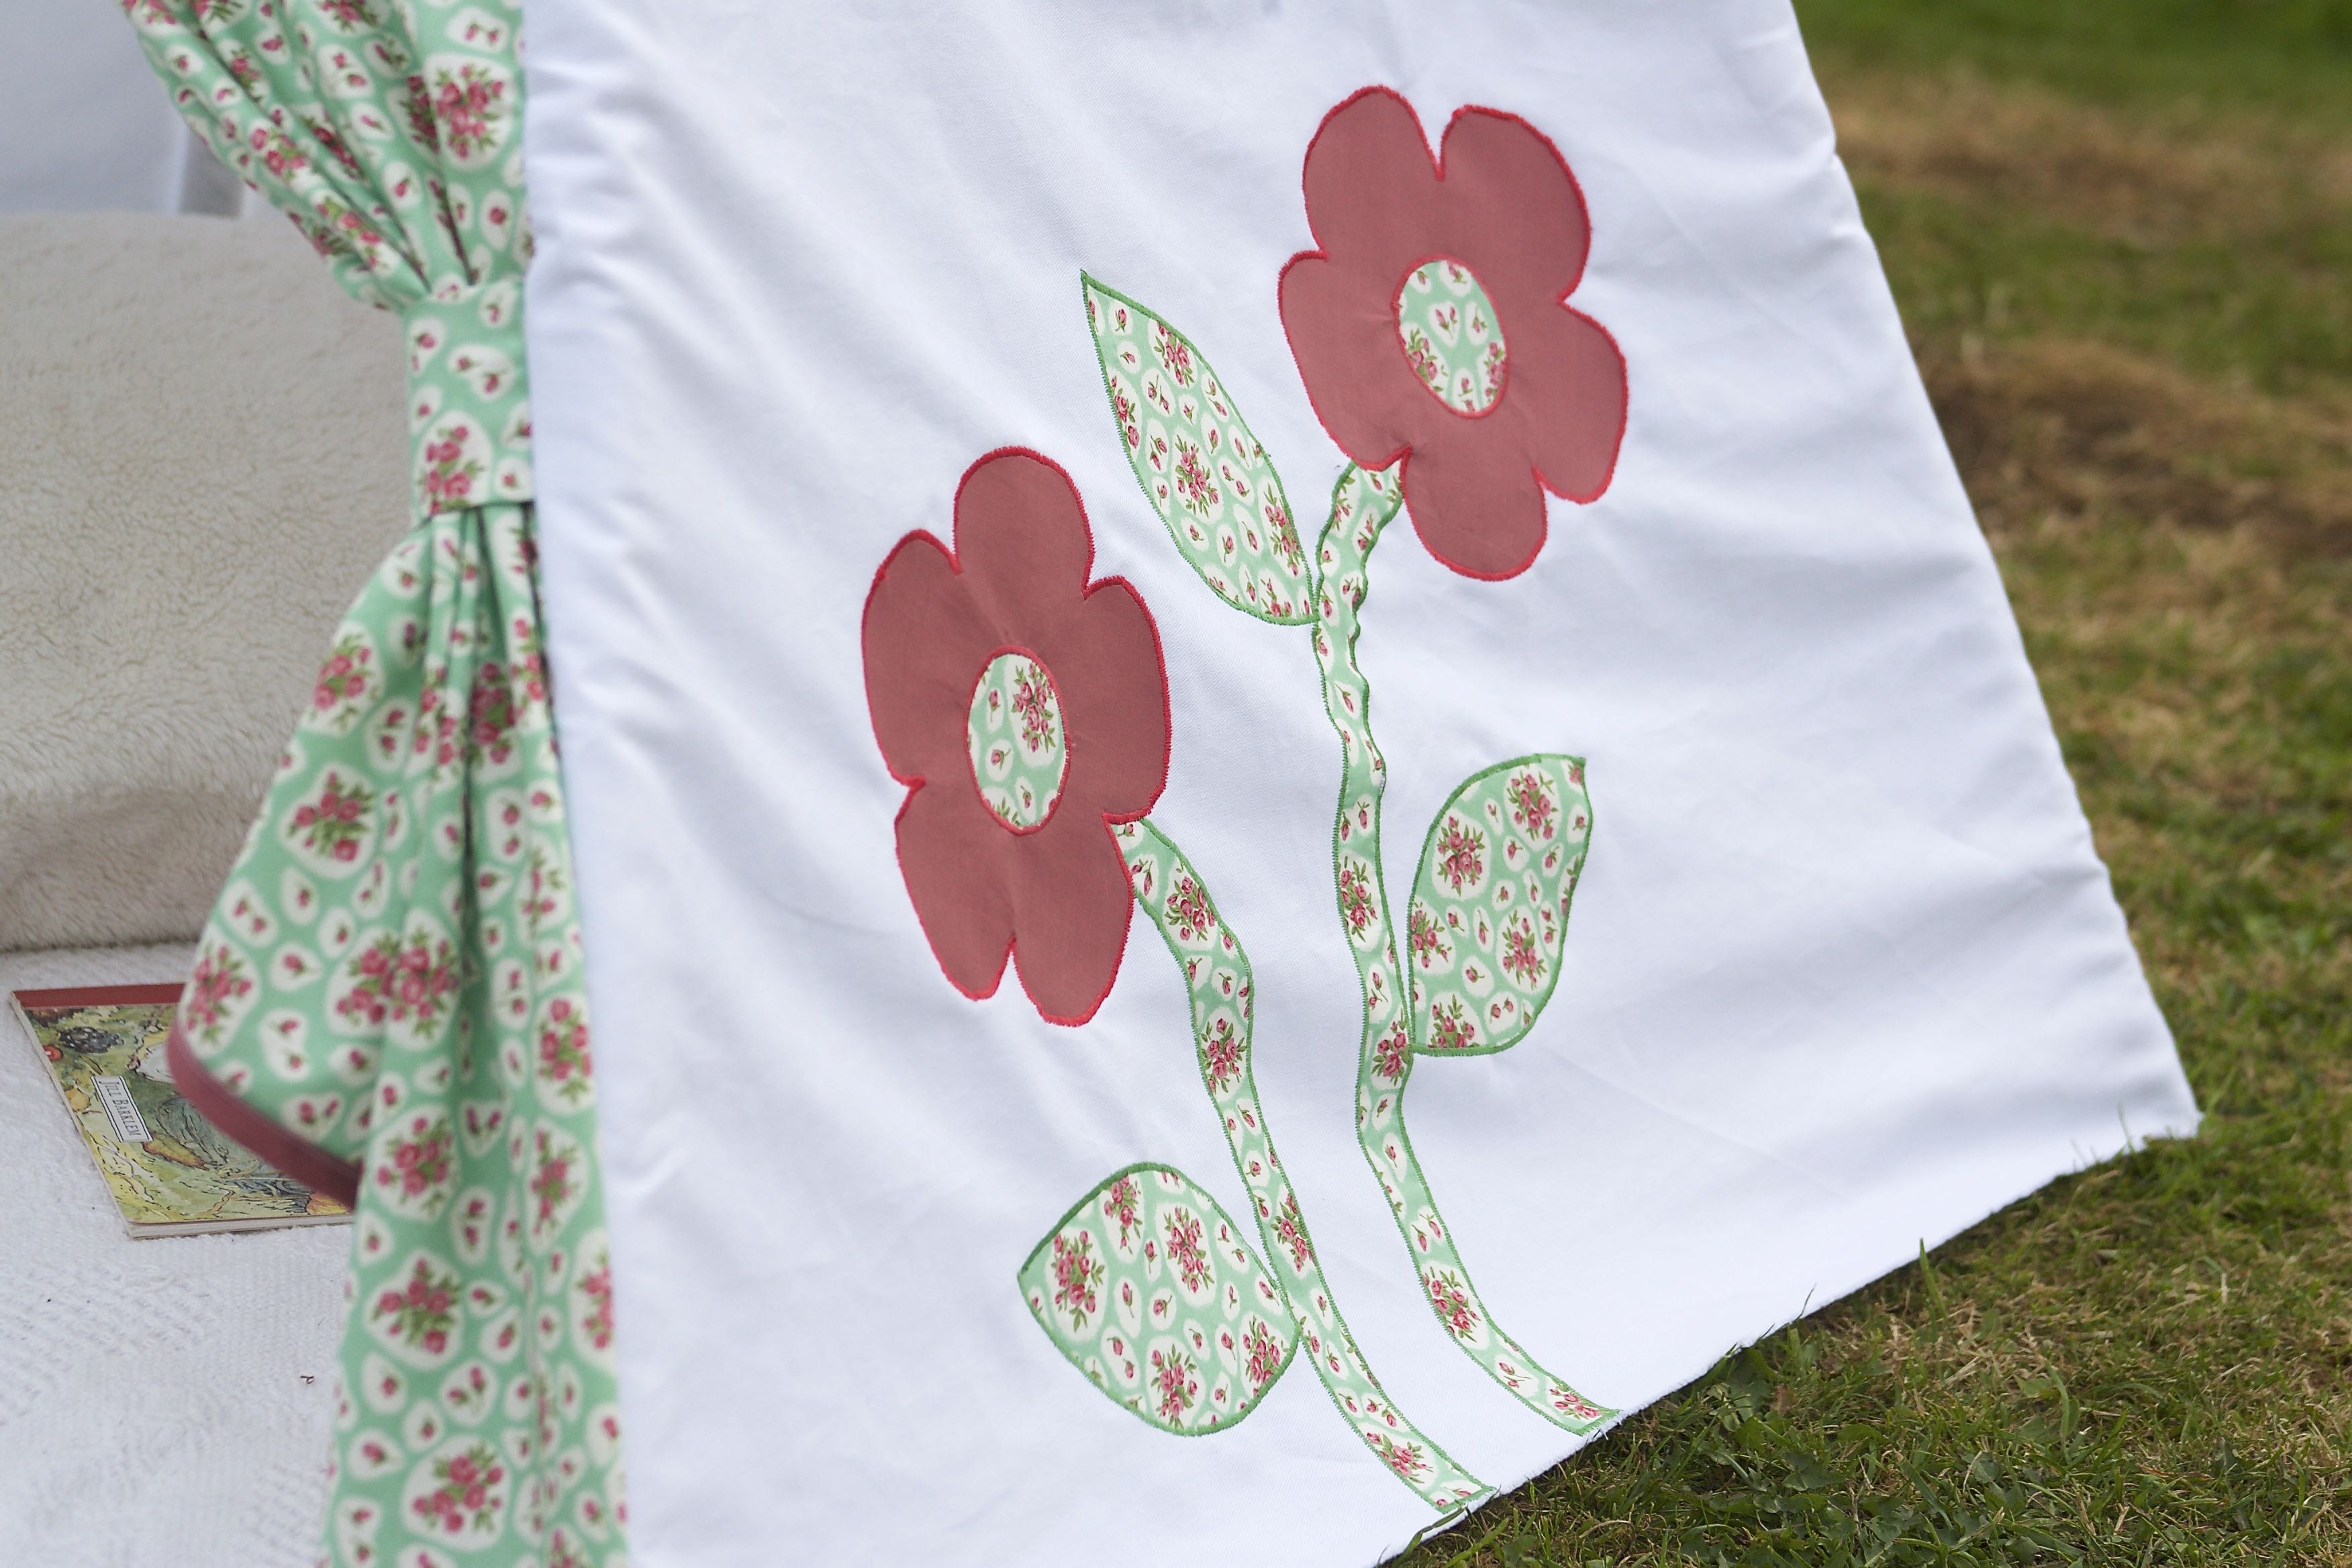
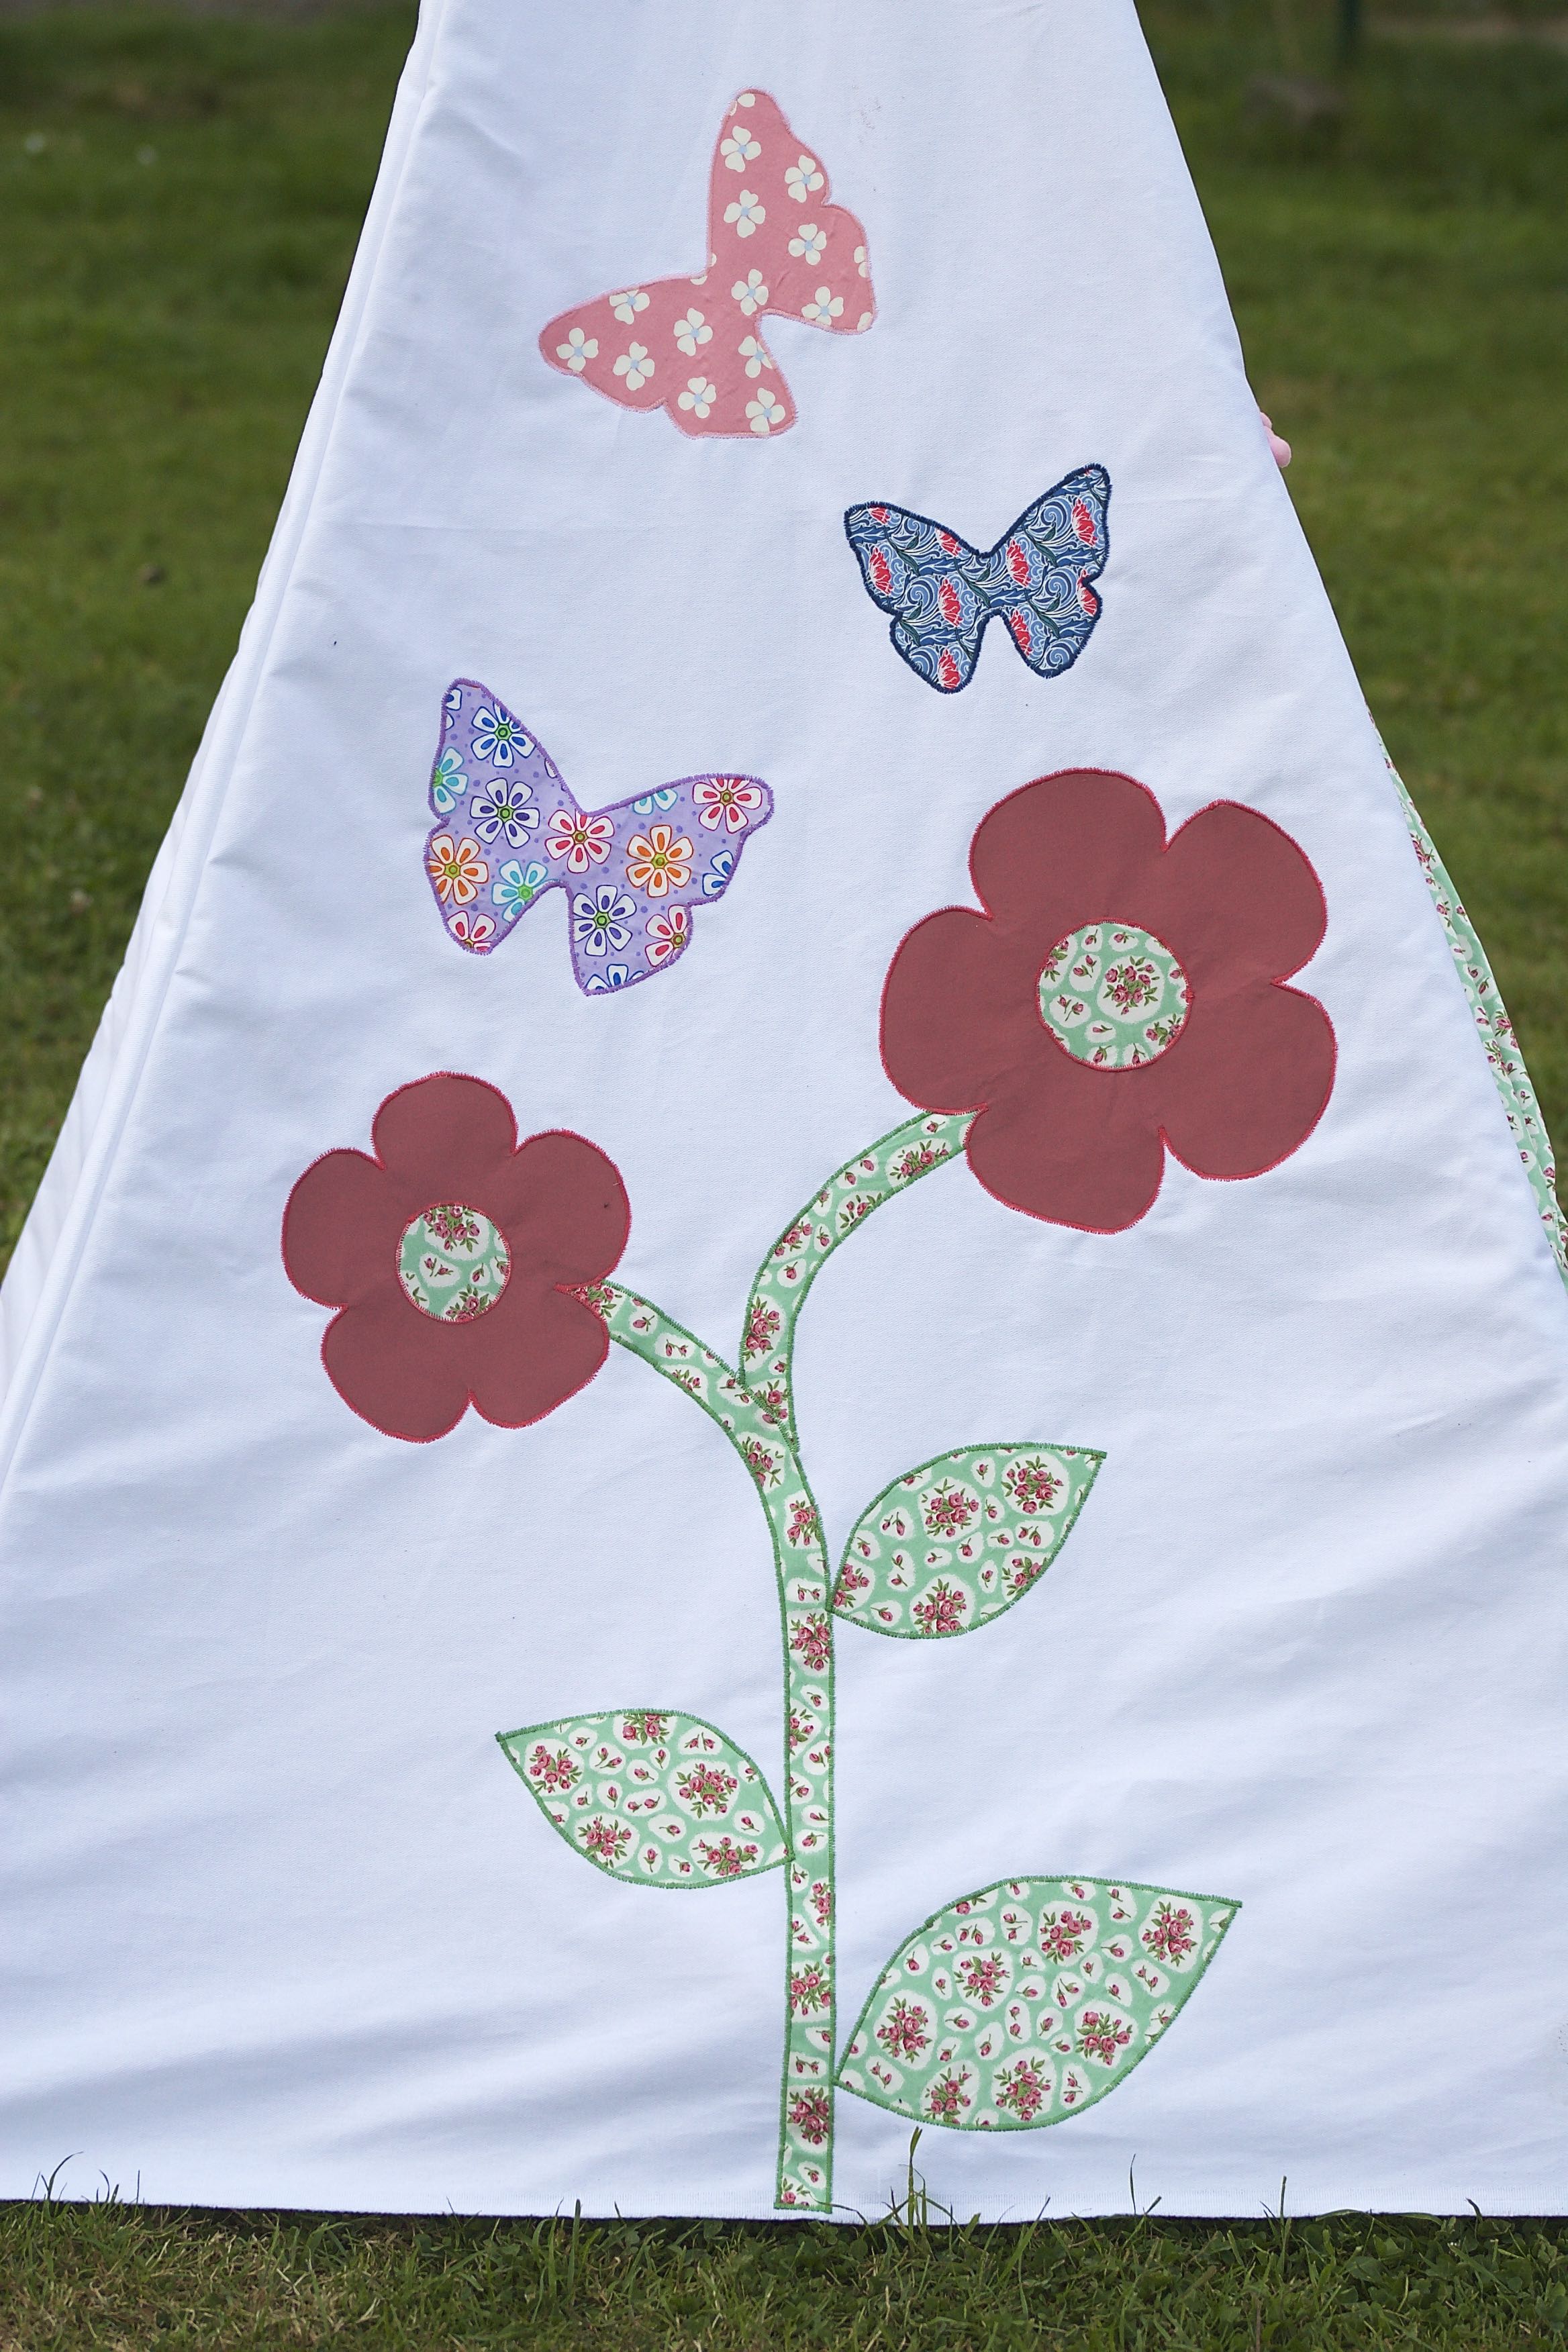
I decorated the sides of the teepee with a mixture of appliquéd flowers and butterflies – just click the links below to download the PDF for these.
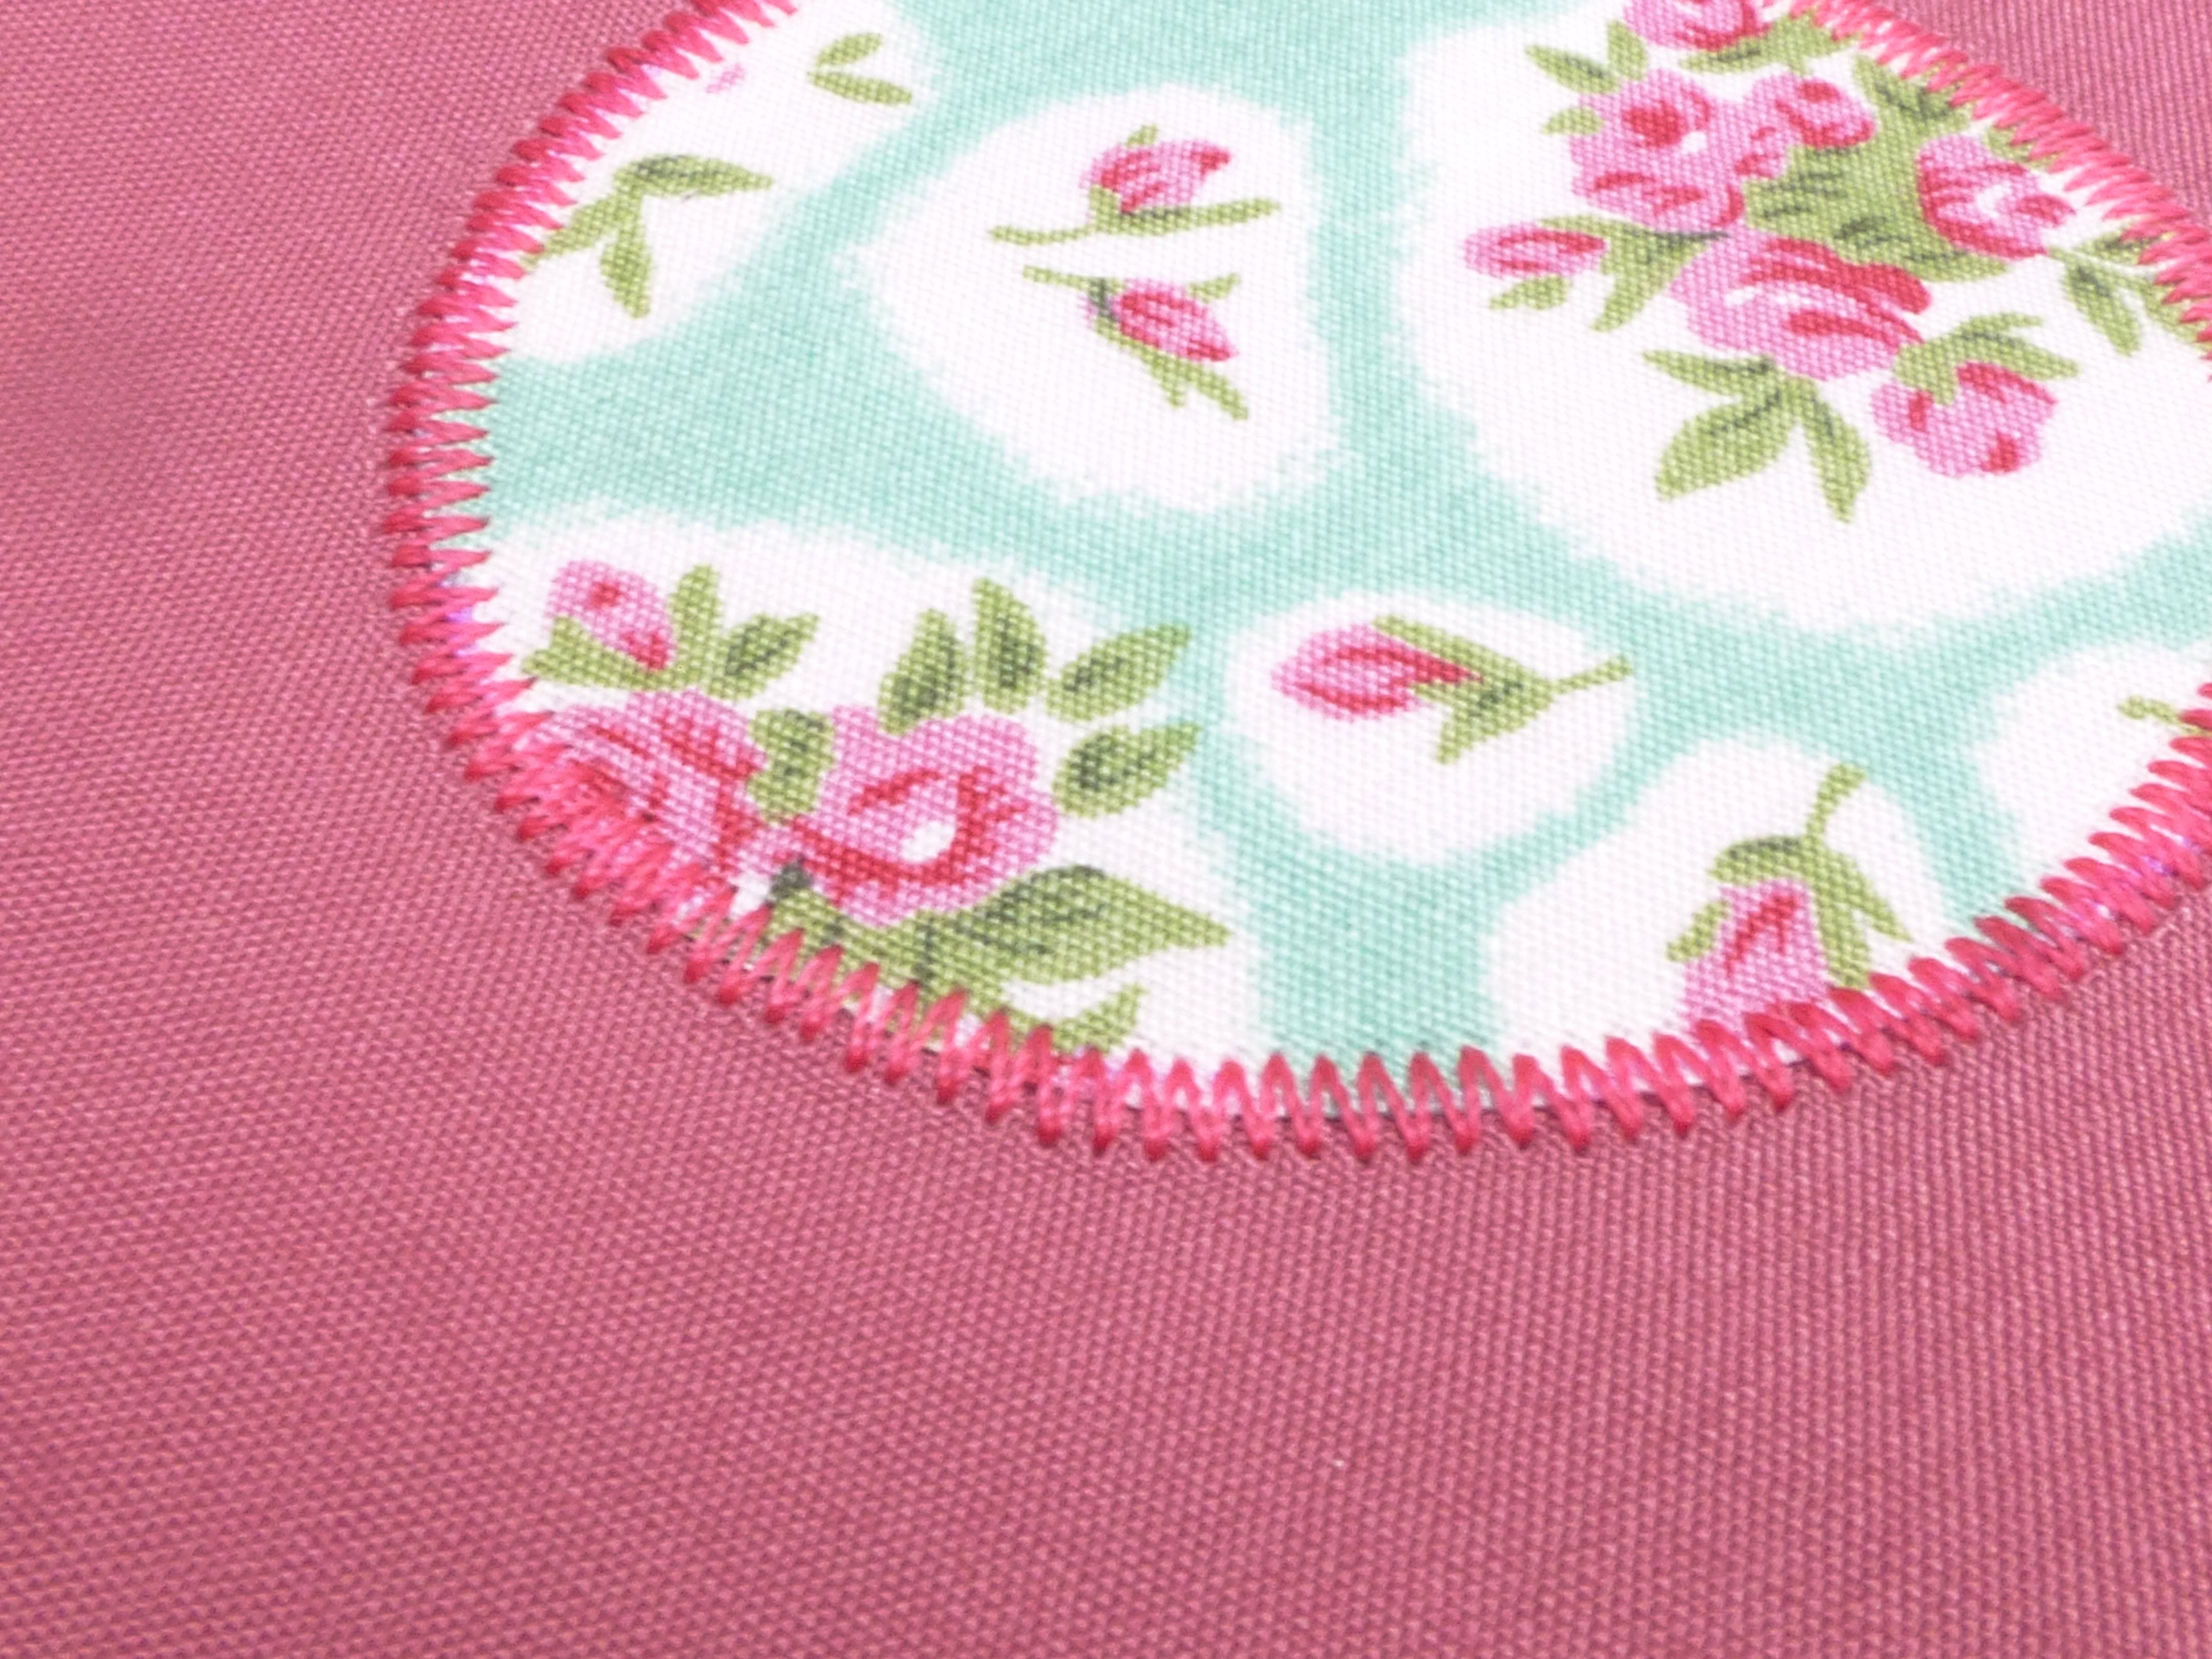
Each motif was interfaced before being cut out and sewn on with satin stitch as before.
They look quite nice on the wrong side as well!
Now for putting the whole teepee together.
Start by sewing each of the four sections together at the side seams, wrong sides together, in a 1cm seam.
Turn so that right sides are now facing each other and sew a 4cm seam (effectively just a huge French seam) which will create the tubes through which your pipes will pass.
Sew a small square of velcro onto the front door curtains in the same way as before, and a matching piece inside the curtain close to the seam.
Cut the pipes to 1800mm in length and thread through the casings.
(You may have to trim an inch or two from the top of the teepee to make room for all the poles like I had to).
Tie a leather shoelace or other cording around the top of the tent to keep the poles in place.
And that’s it!
I had to get a photo with the chickens!
Hopefully I haven’t ruined the surprise as I’m pretty certain this little girl’s mother doesn’t read my blog!
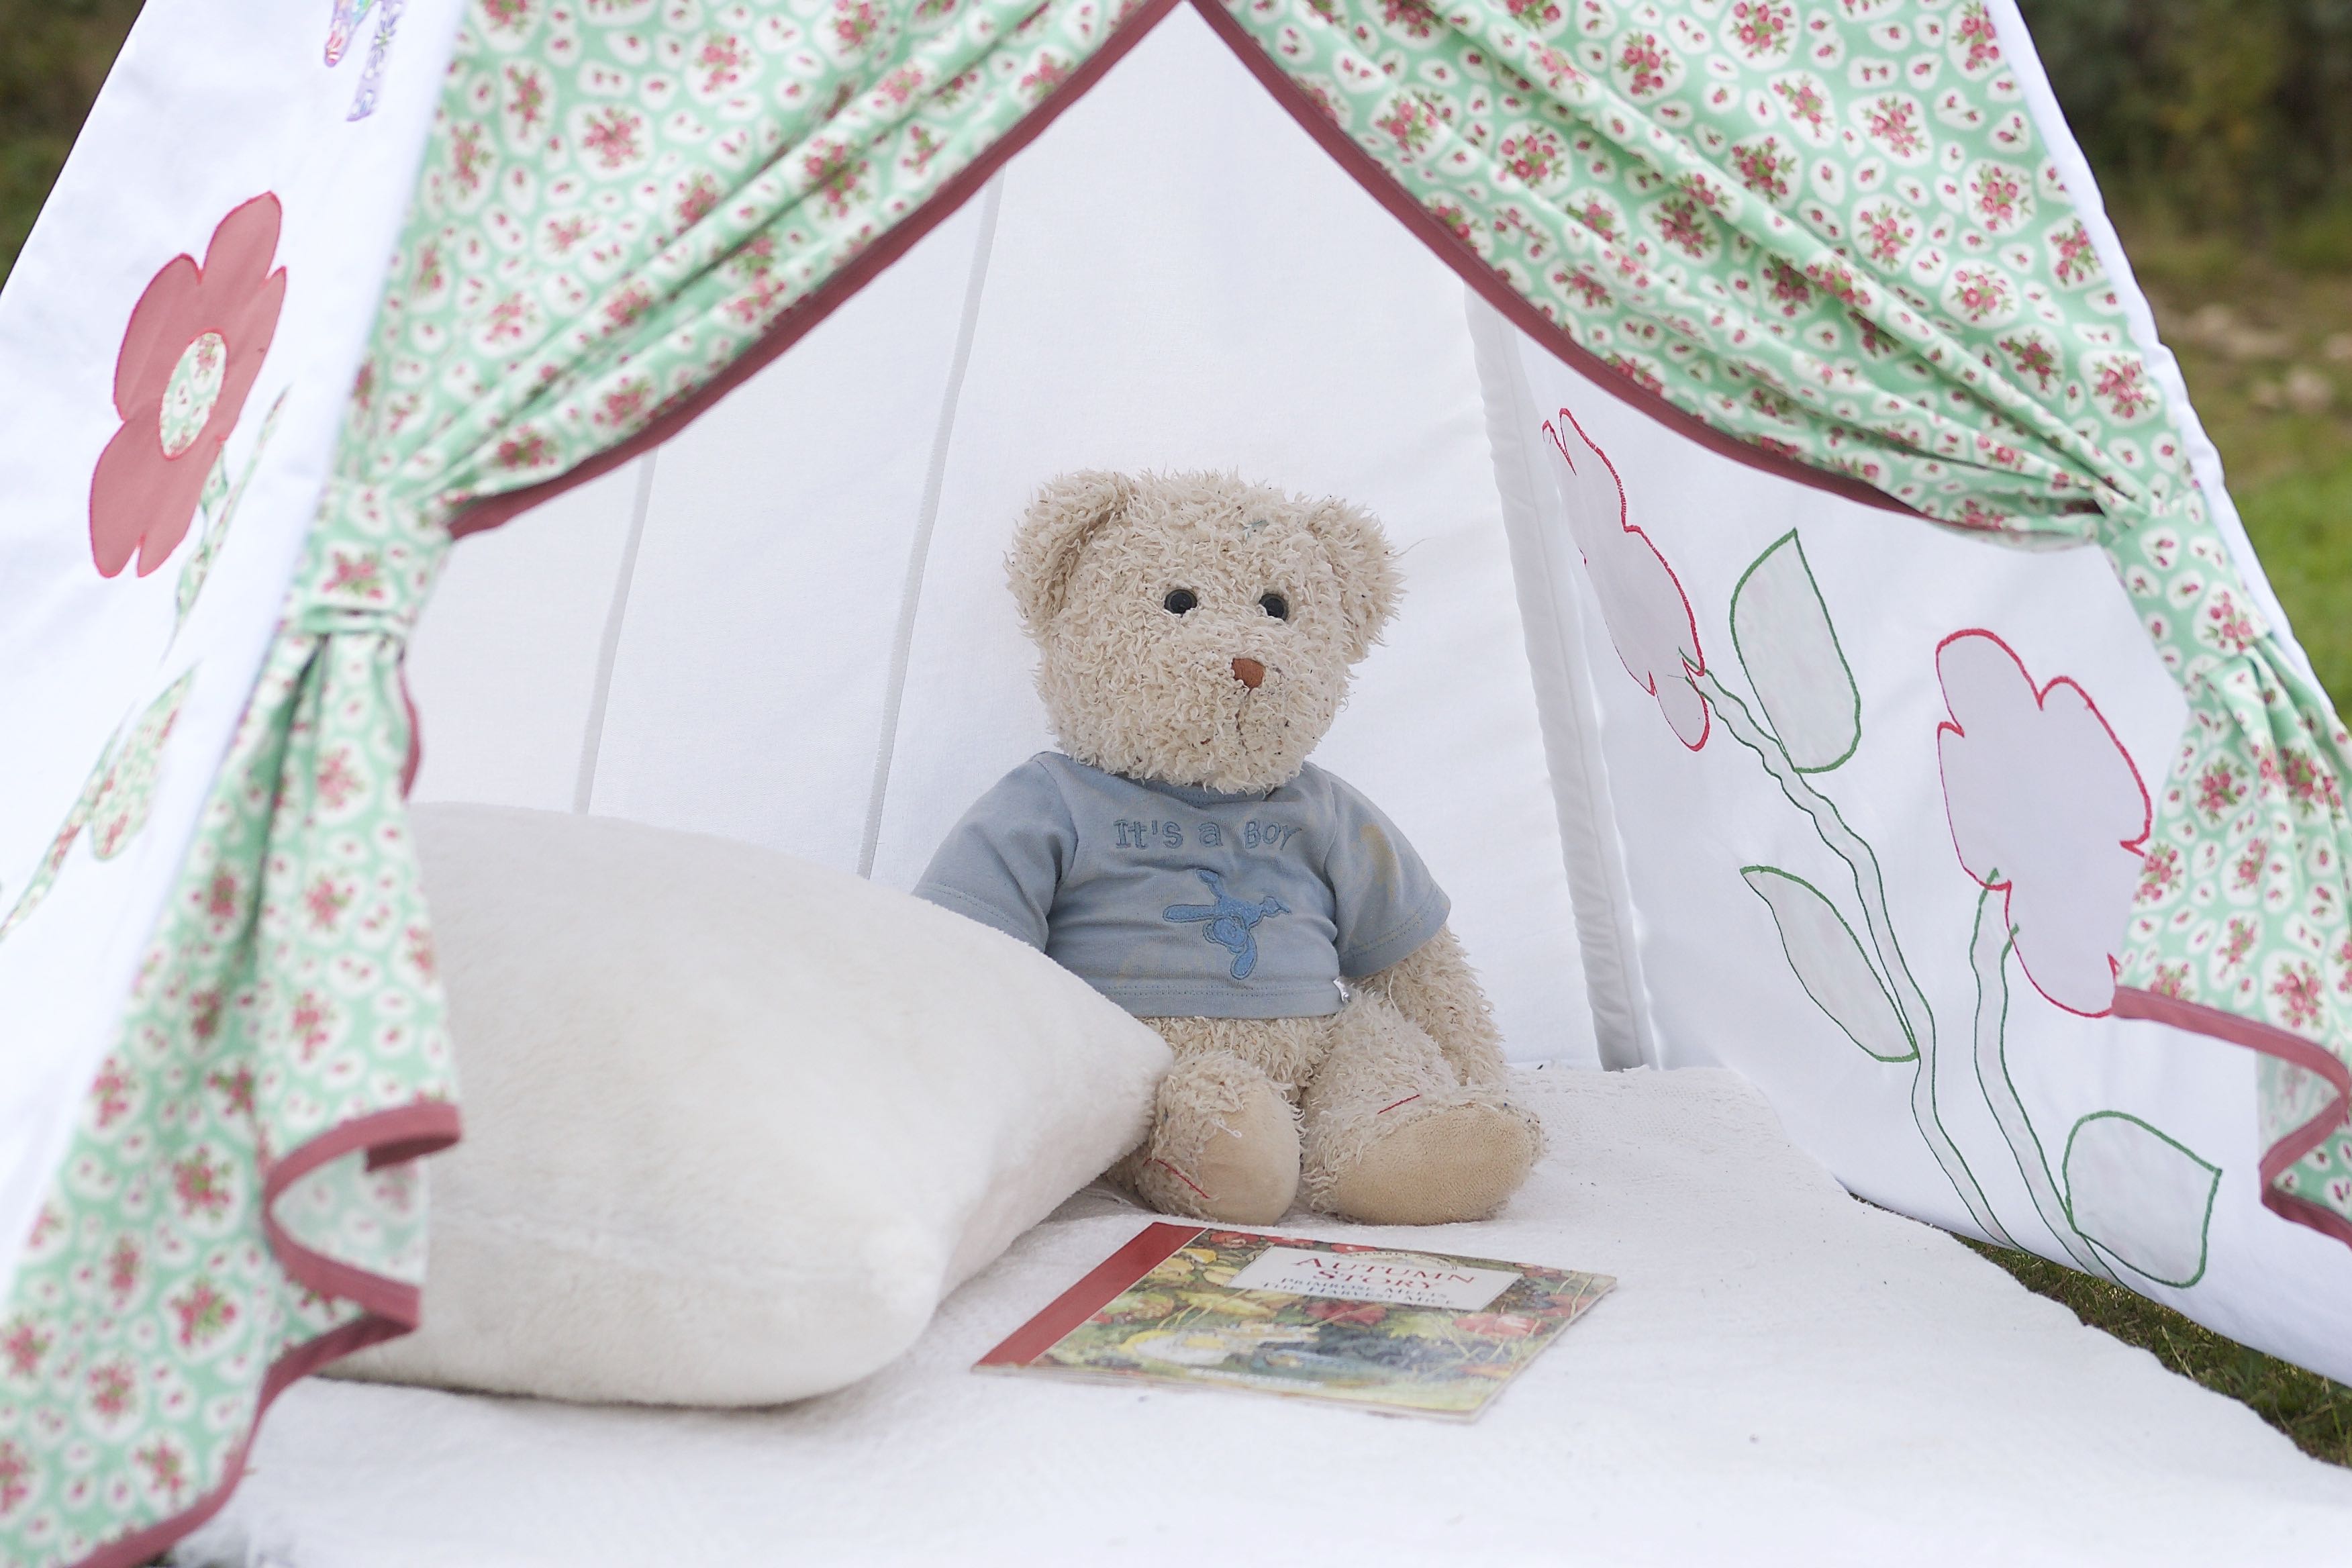
As this teepee only takes up about one square metre of floor space, it is ideal for indoor use and, I suspect, this one will live permanently in her bedroom as a quiet reading nook.
Teepees aren’t only for girls though – what little boy wouldn’t love his own pirate version using this pirate fabric from Minerva?
Or how about a unisex wigwam to suit a brother and sister with this gorgeous Kite print?
Wouldn’t it look lovely draped with fairy lights and bunting?
In fact I might just go and make some bunting now……
For me, it’s day trips to the coast, balmy evenings sat outdoors until after sundown, weekend breakfasts in the garden, outdoor concerts in the grounds of old ruins……in short – being outside.
And being outside is made all the more perfect if you take that most quintessentially English thing with you – a picnic. Dressed down with sandwiches and a flask of tea at the seaside, or glammed up with champagne and a candelabra for a classical concert, everyone loves a picnic, with a soft, warm, waterproof picnic blanket to relax on in comfort…….
……except we haven’t got one.
Well, we didn’t have until recently when I decided to take advantage of being part of the Minerva Crafts Blogger Network and make one.
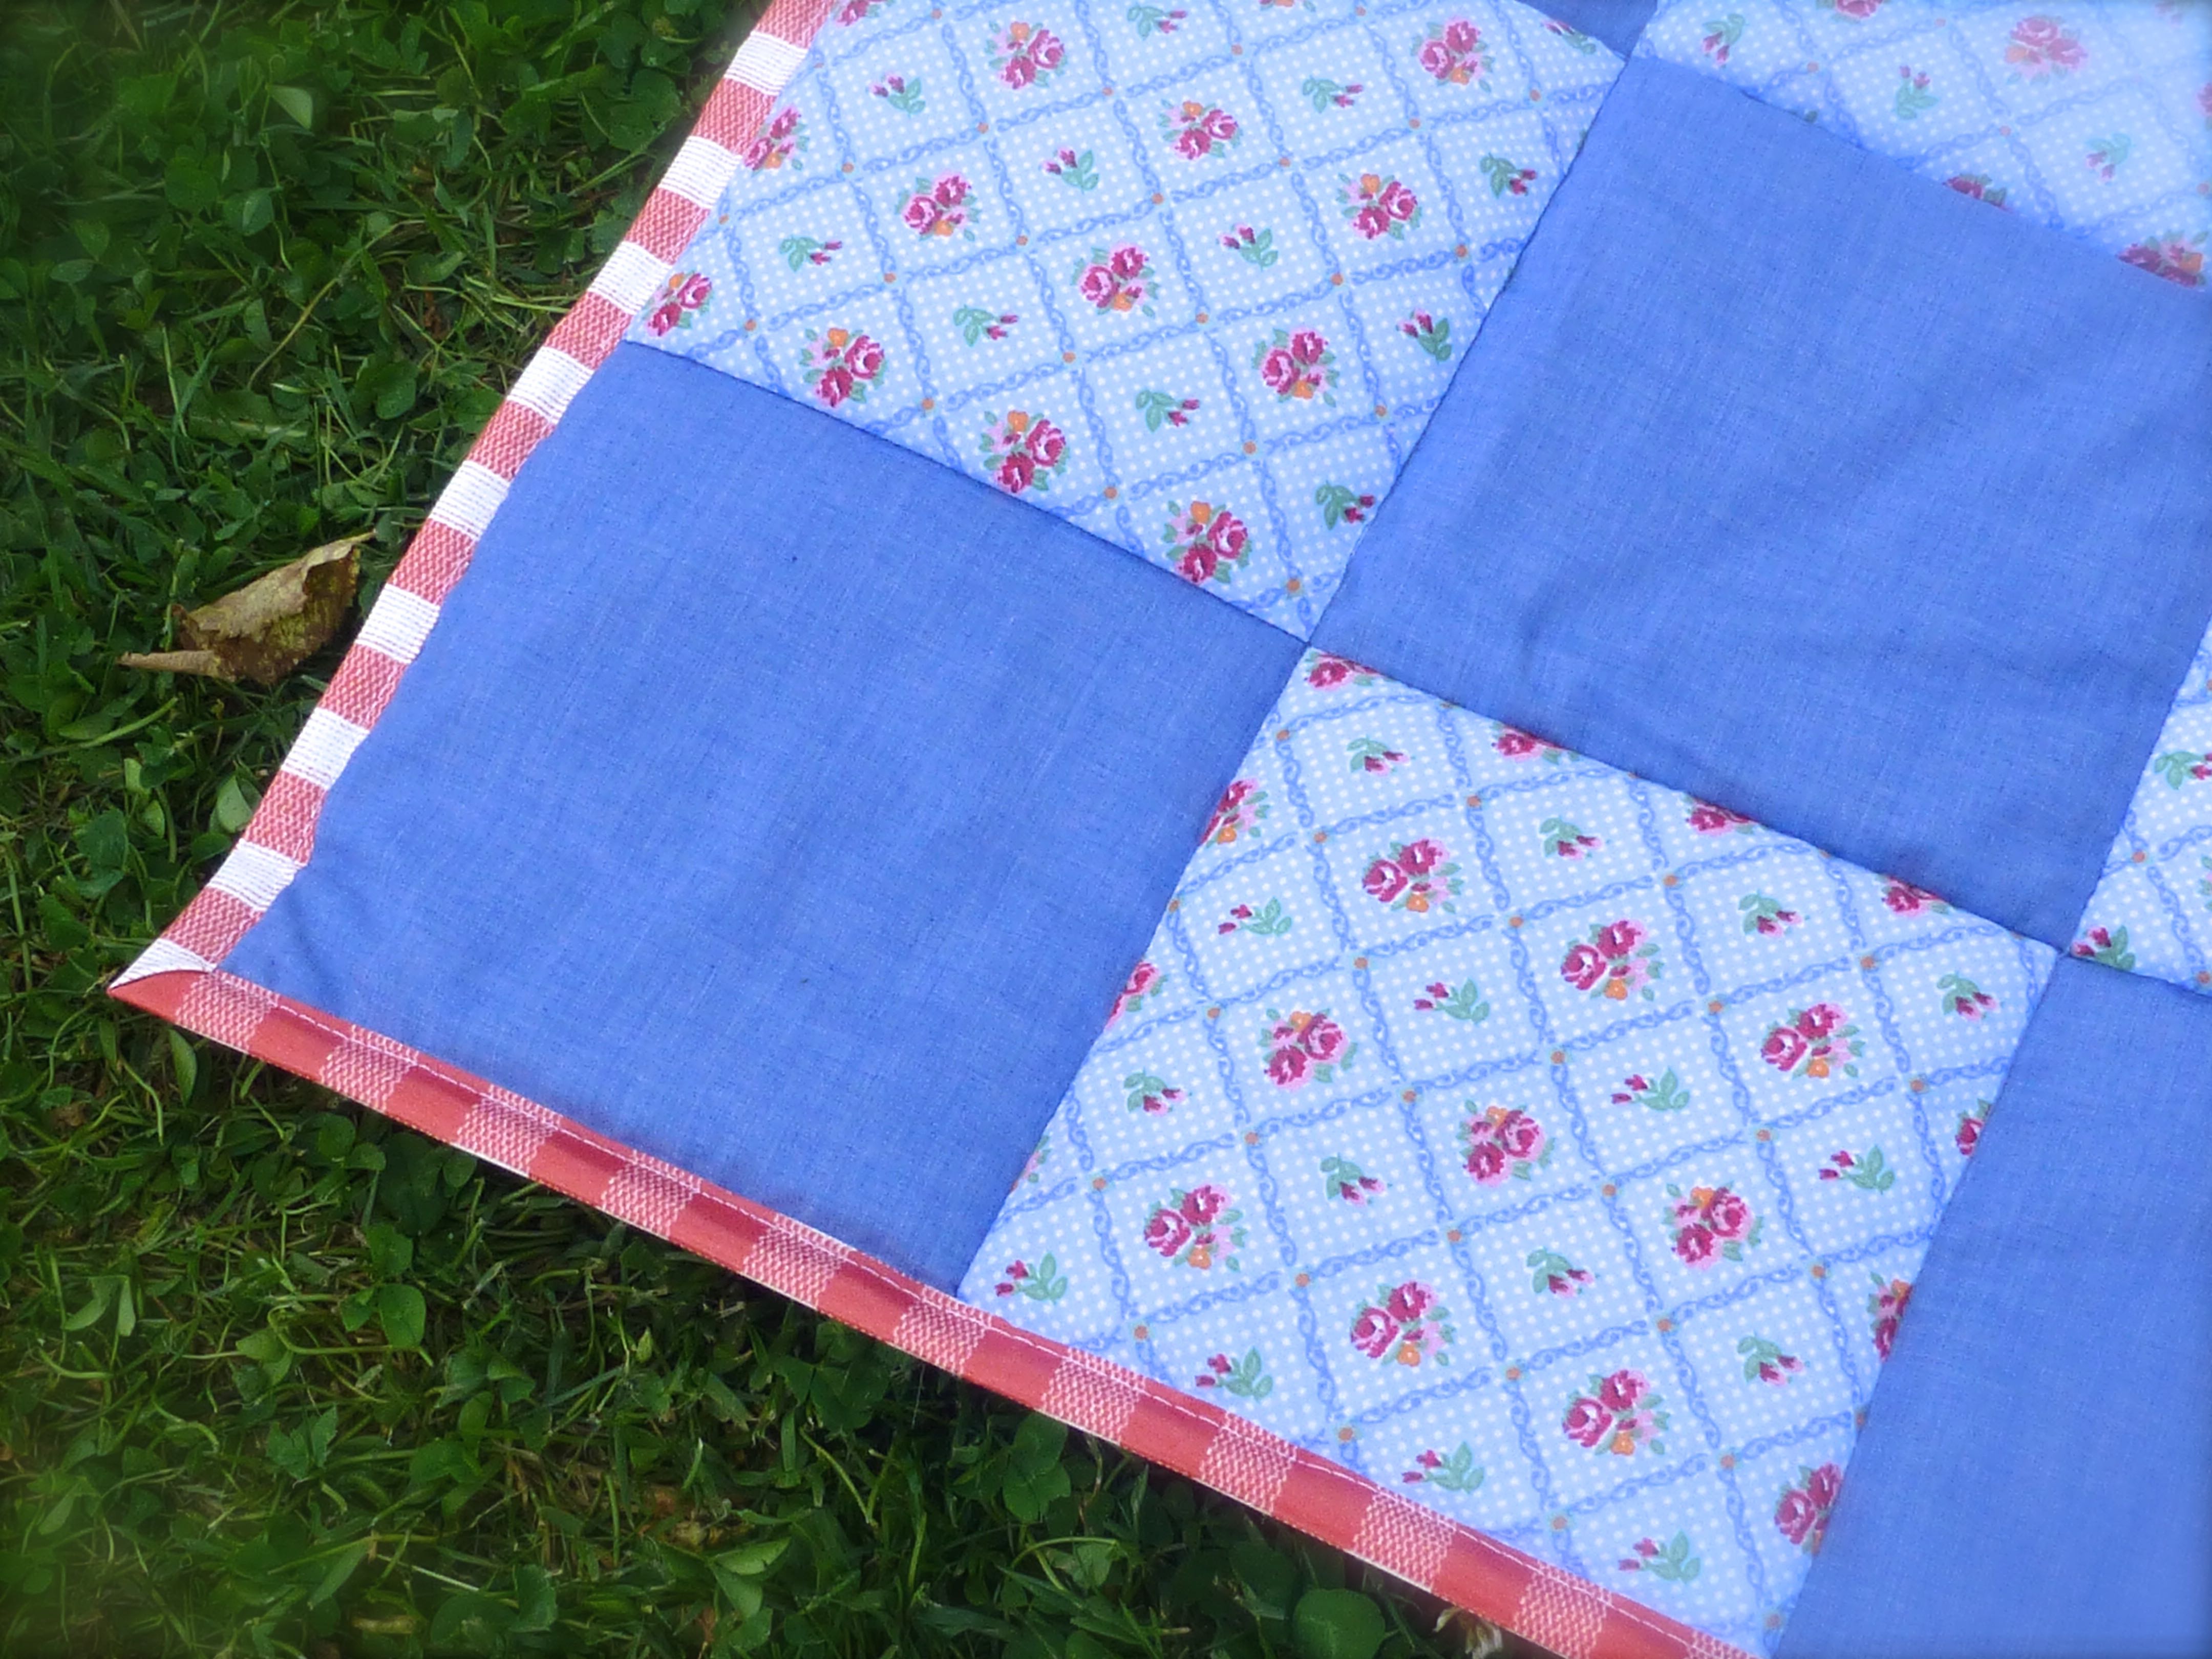
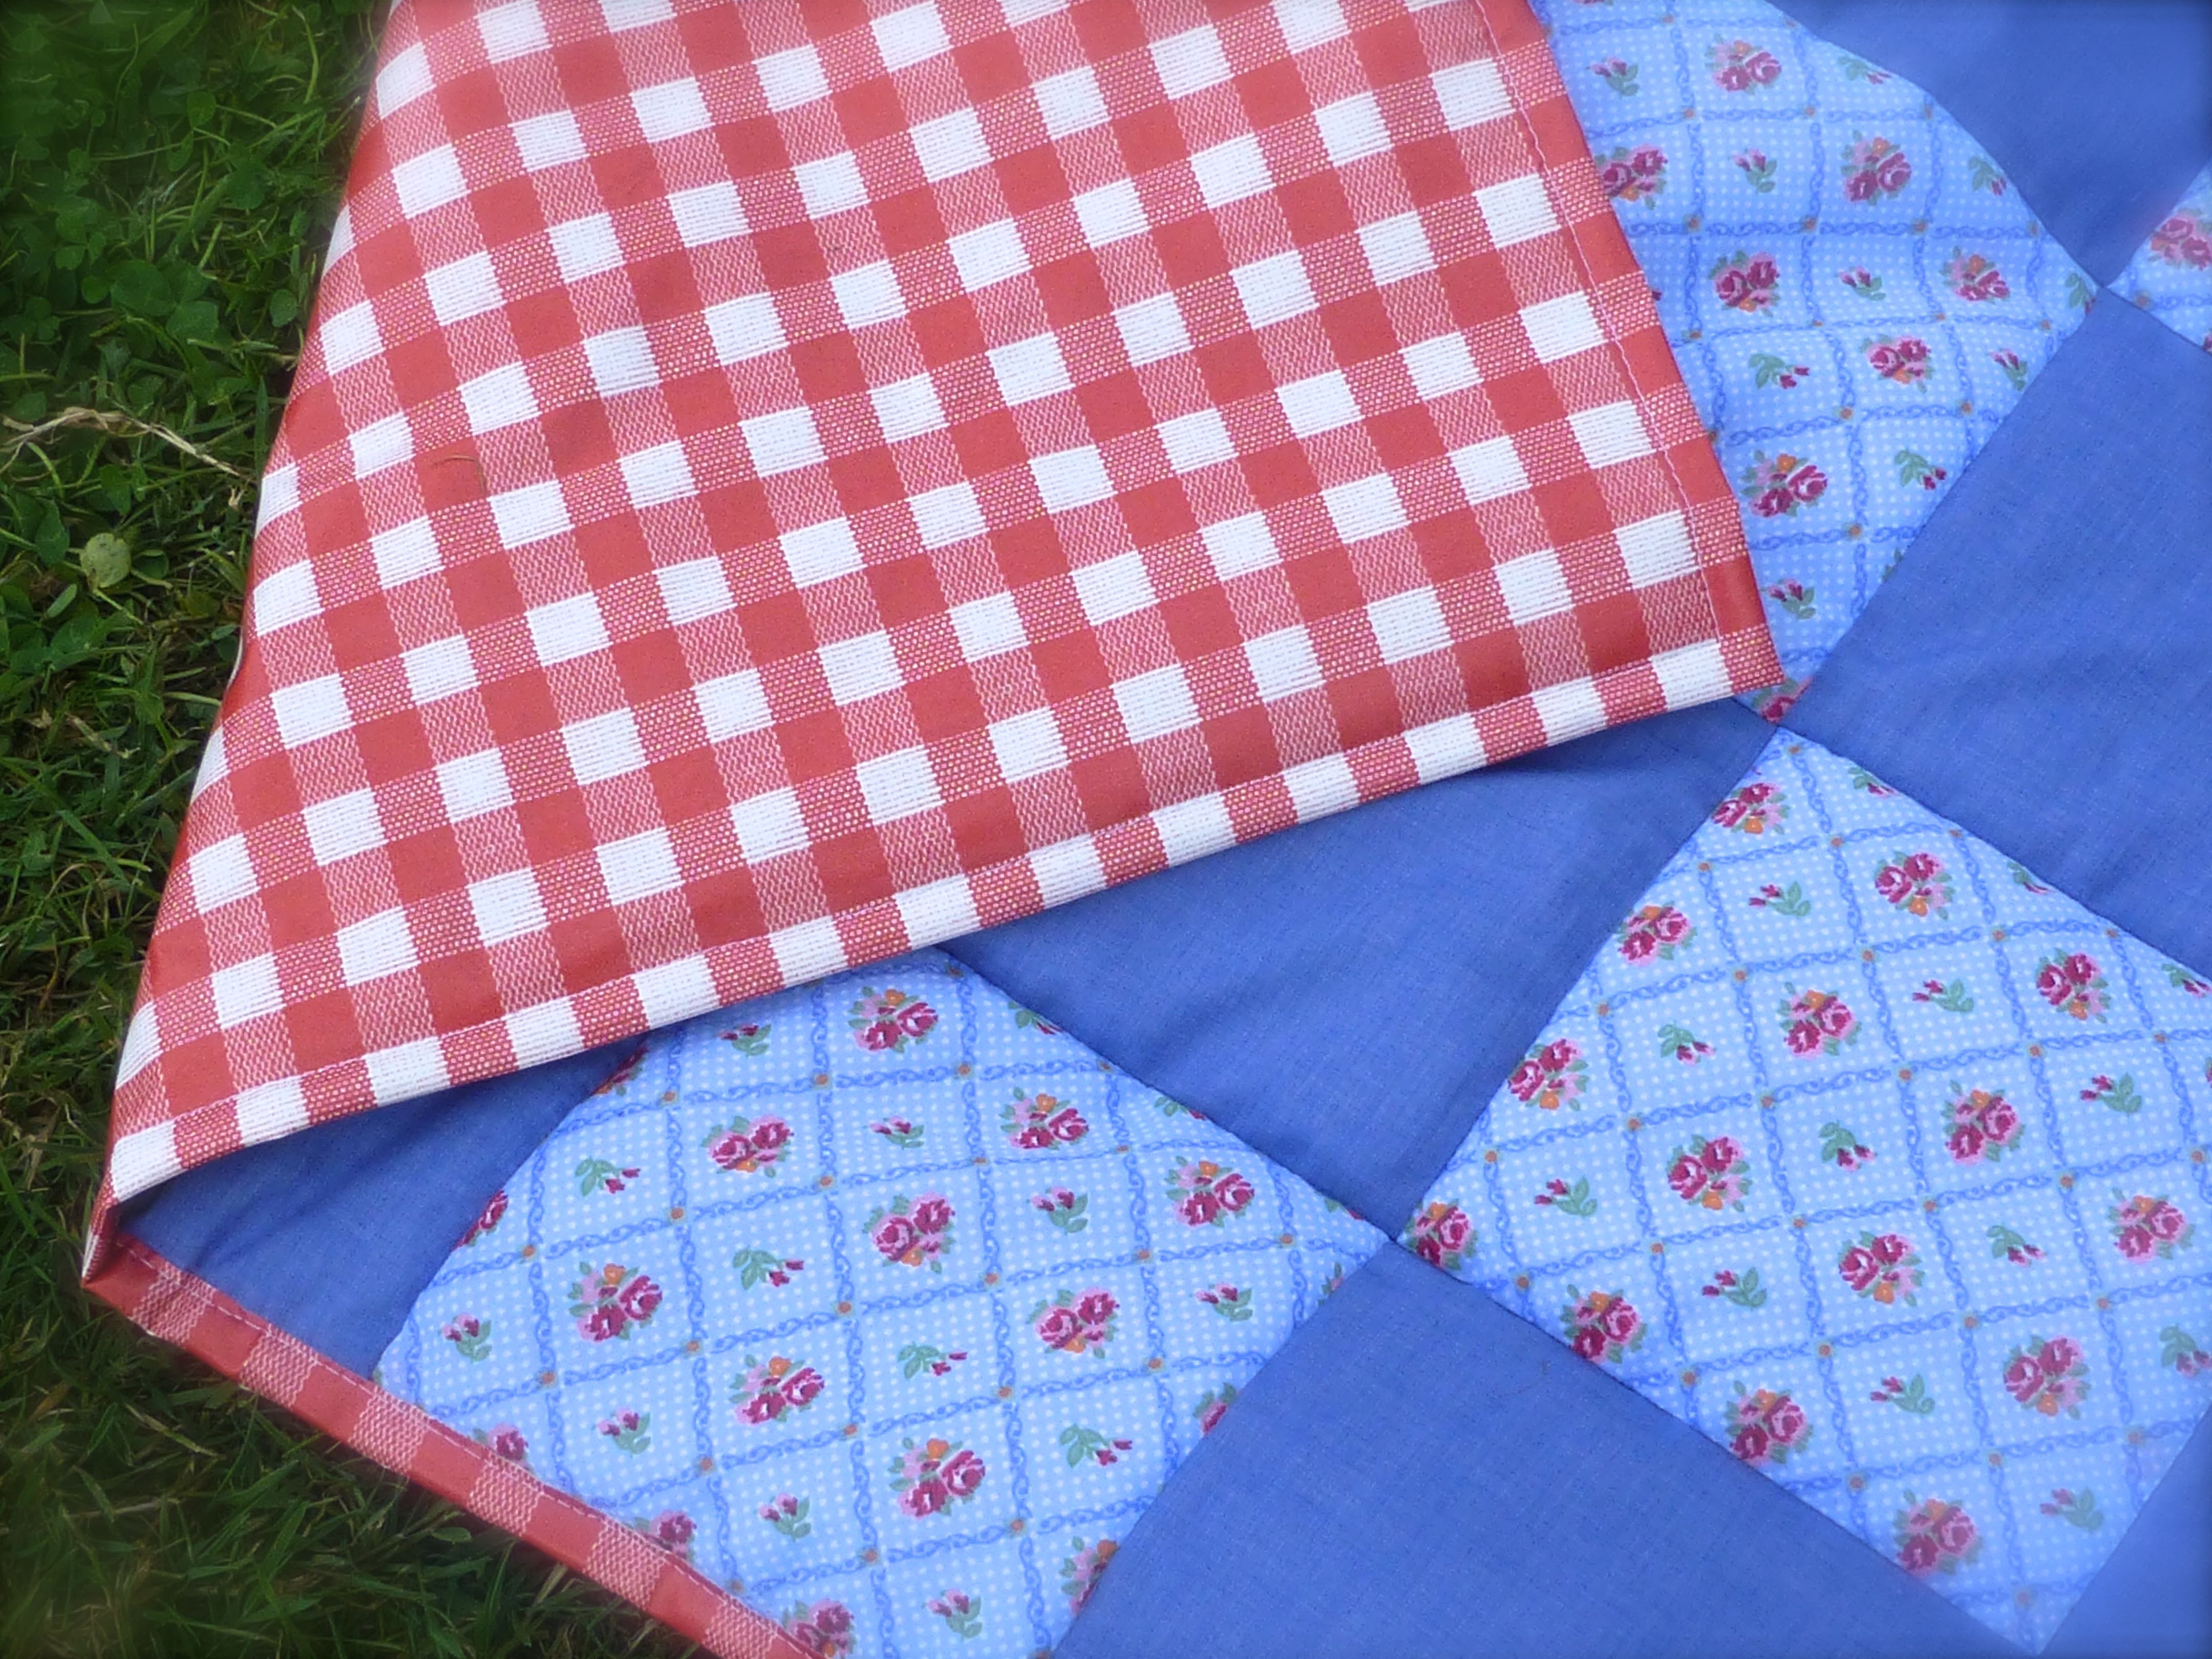
I didn’t want to make just any old picnic blanket, oh no, I wanted the ‘deluxe’ version, something a bit special, so decided to make a patchwork blanket with a waterproof backing and a carry handle. As there are four boys in the house (if you include Mr H-L), anything too pink and girly was out of the question, but I thought I could get away with a small floral print if the main colour was blue.
My Olfa Quiltmaking Kit came with this mat, rotary cutter and 6.5″ square ruler, so I kept things simple by cutting the patchwork squares the same size as the ruler.
Cutting through folded fabric made short work of all those squares as I could cut through four layers at a time – using a rotary cutter and the quilting ruler ensured that they were accurately cut, which is essential in patchwork.
In no time at all I had two piles of neatly stacked patchwork squares, 36 of the floral and 45 of the plain making 81 in total.
The easiest way to keep accurate seam allowances is to line up the edge of the fabric with the edge of the machine foot, the needle in the central position. On my machine, that means a seam allowance of 1cm throughout.
Whilst it may sound obvious, there is a quick way to whizz through all those squares.
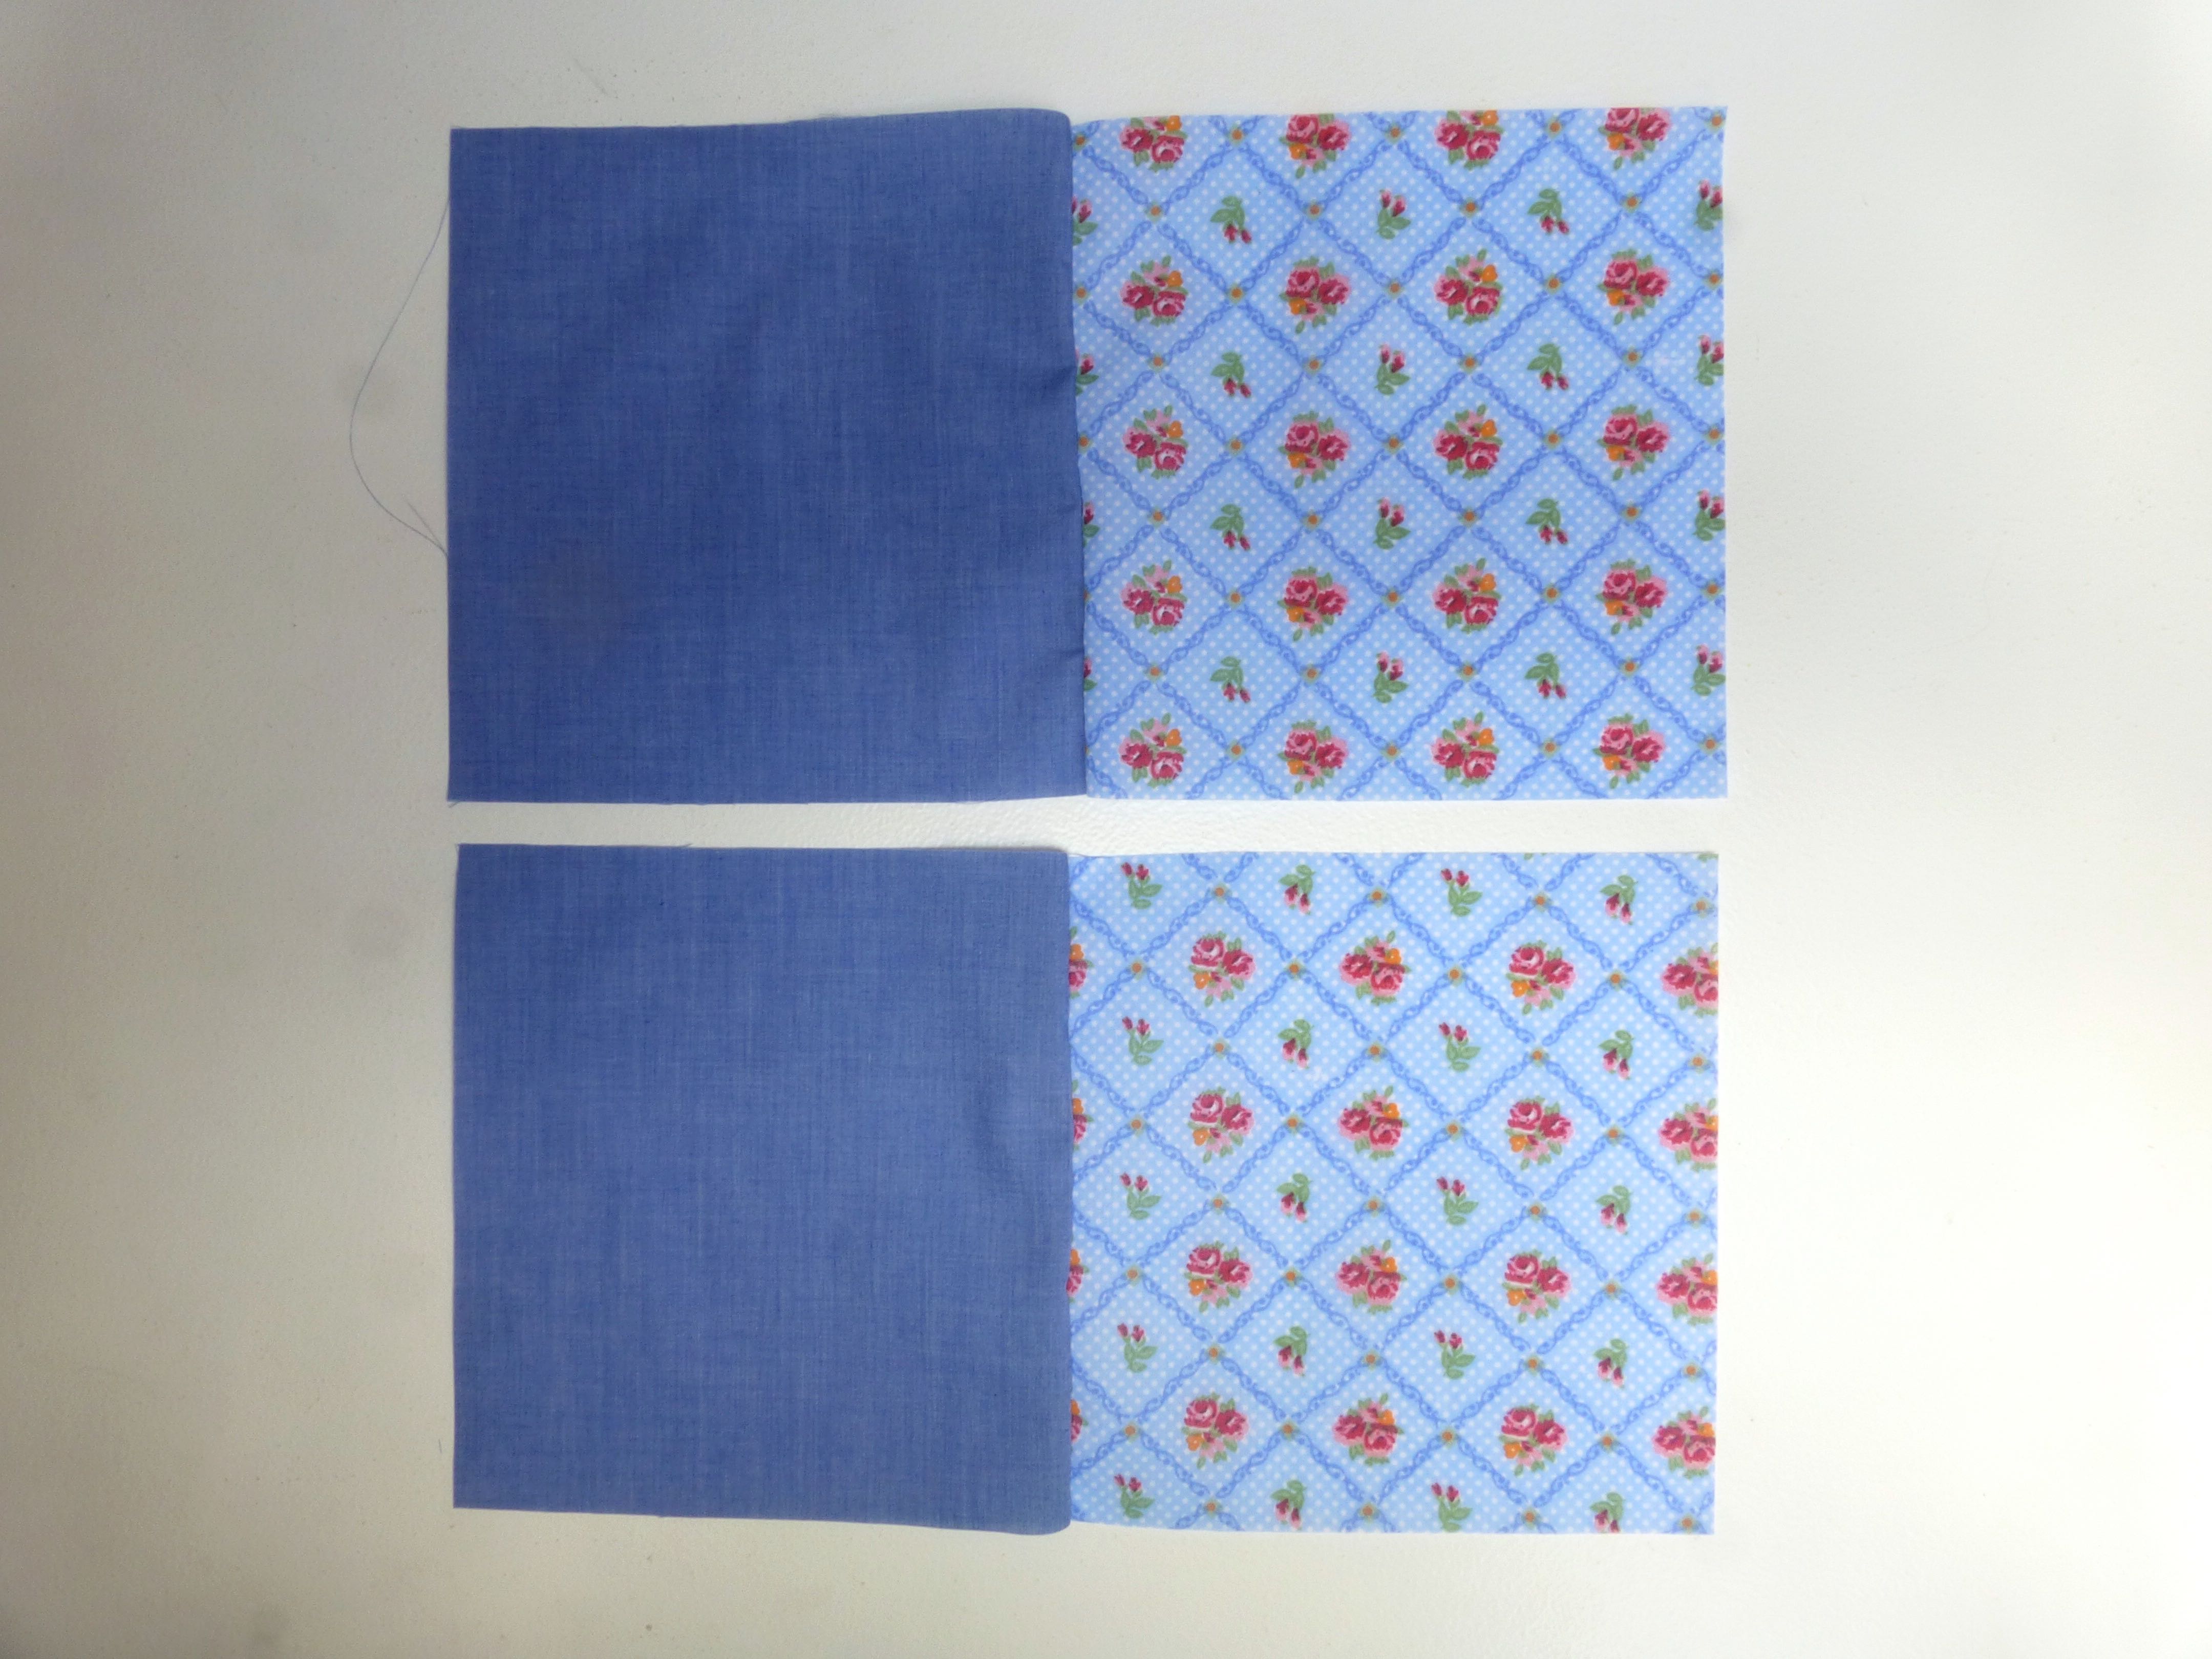
Start by sewing them in pairs, each floral with a plain, right sides together. You will need to make 36 pairs which should leave you with 9 spare squares – 5 plain and 4 floral.
Don’t bother reversing your stitching at the beginning and end of each set, cutting the thread and repeating with the next pair – just keep feeding the pairs through the machine one after the other as shown below.
When all the pairs of squares are sewn, snip the joining stitches to separate them.
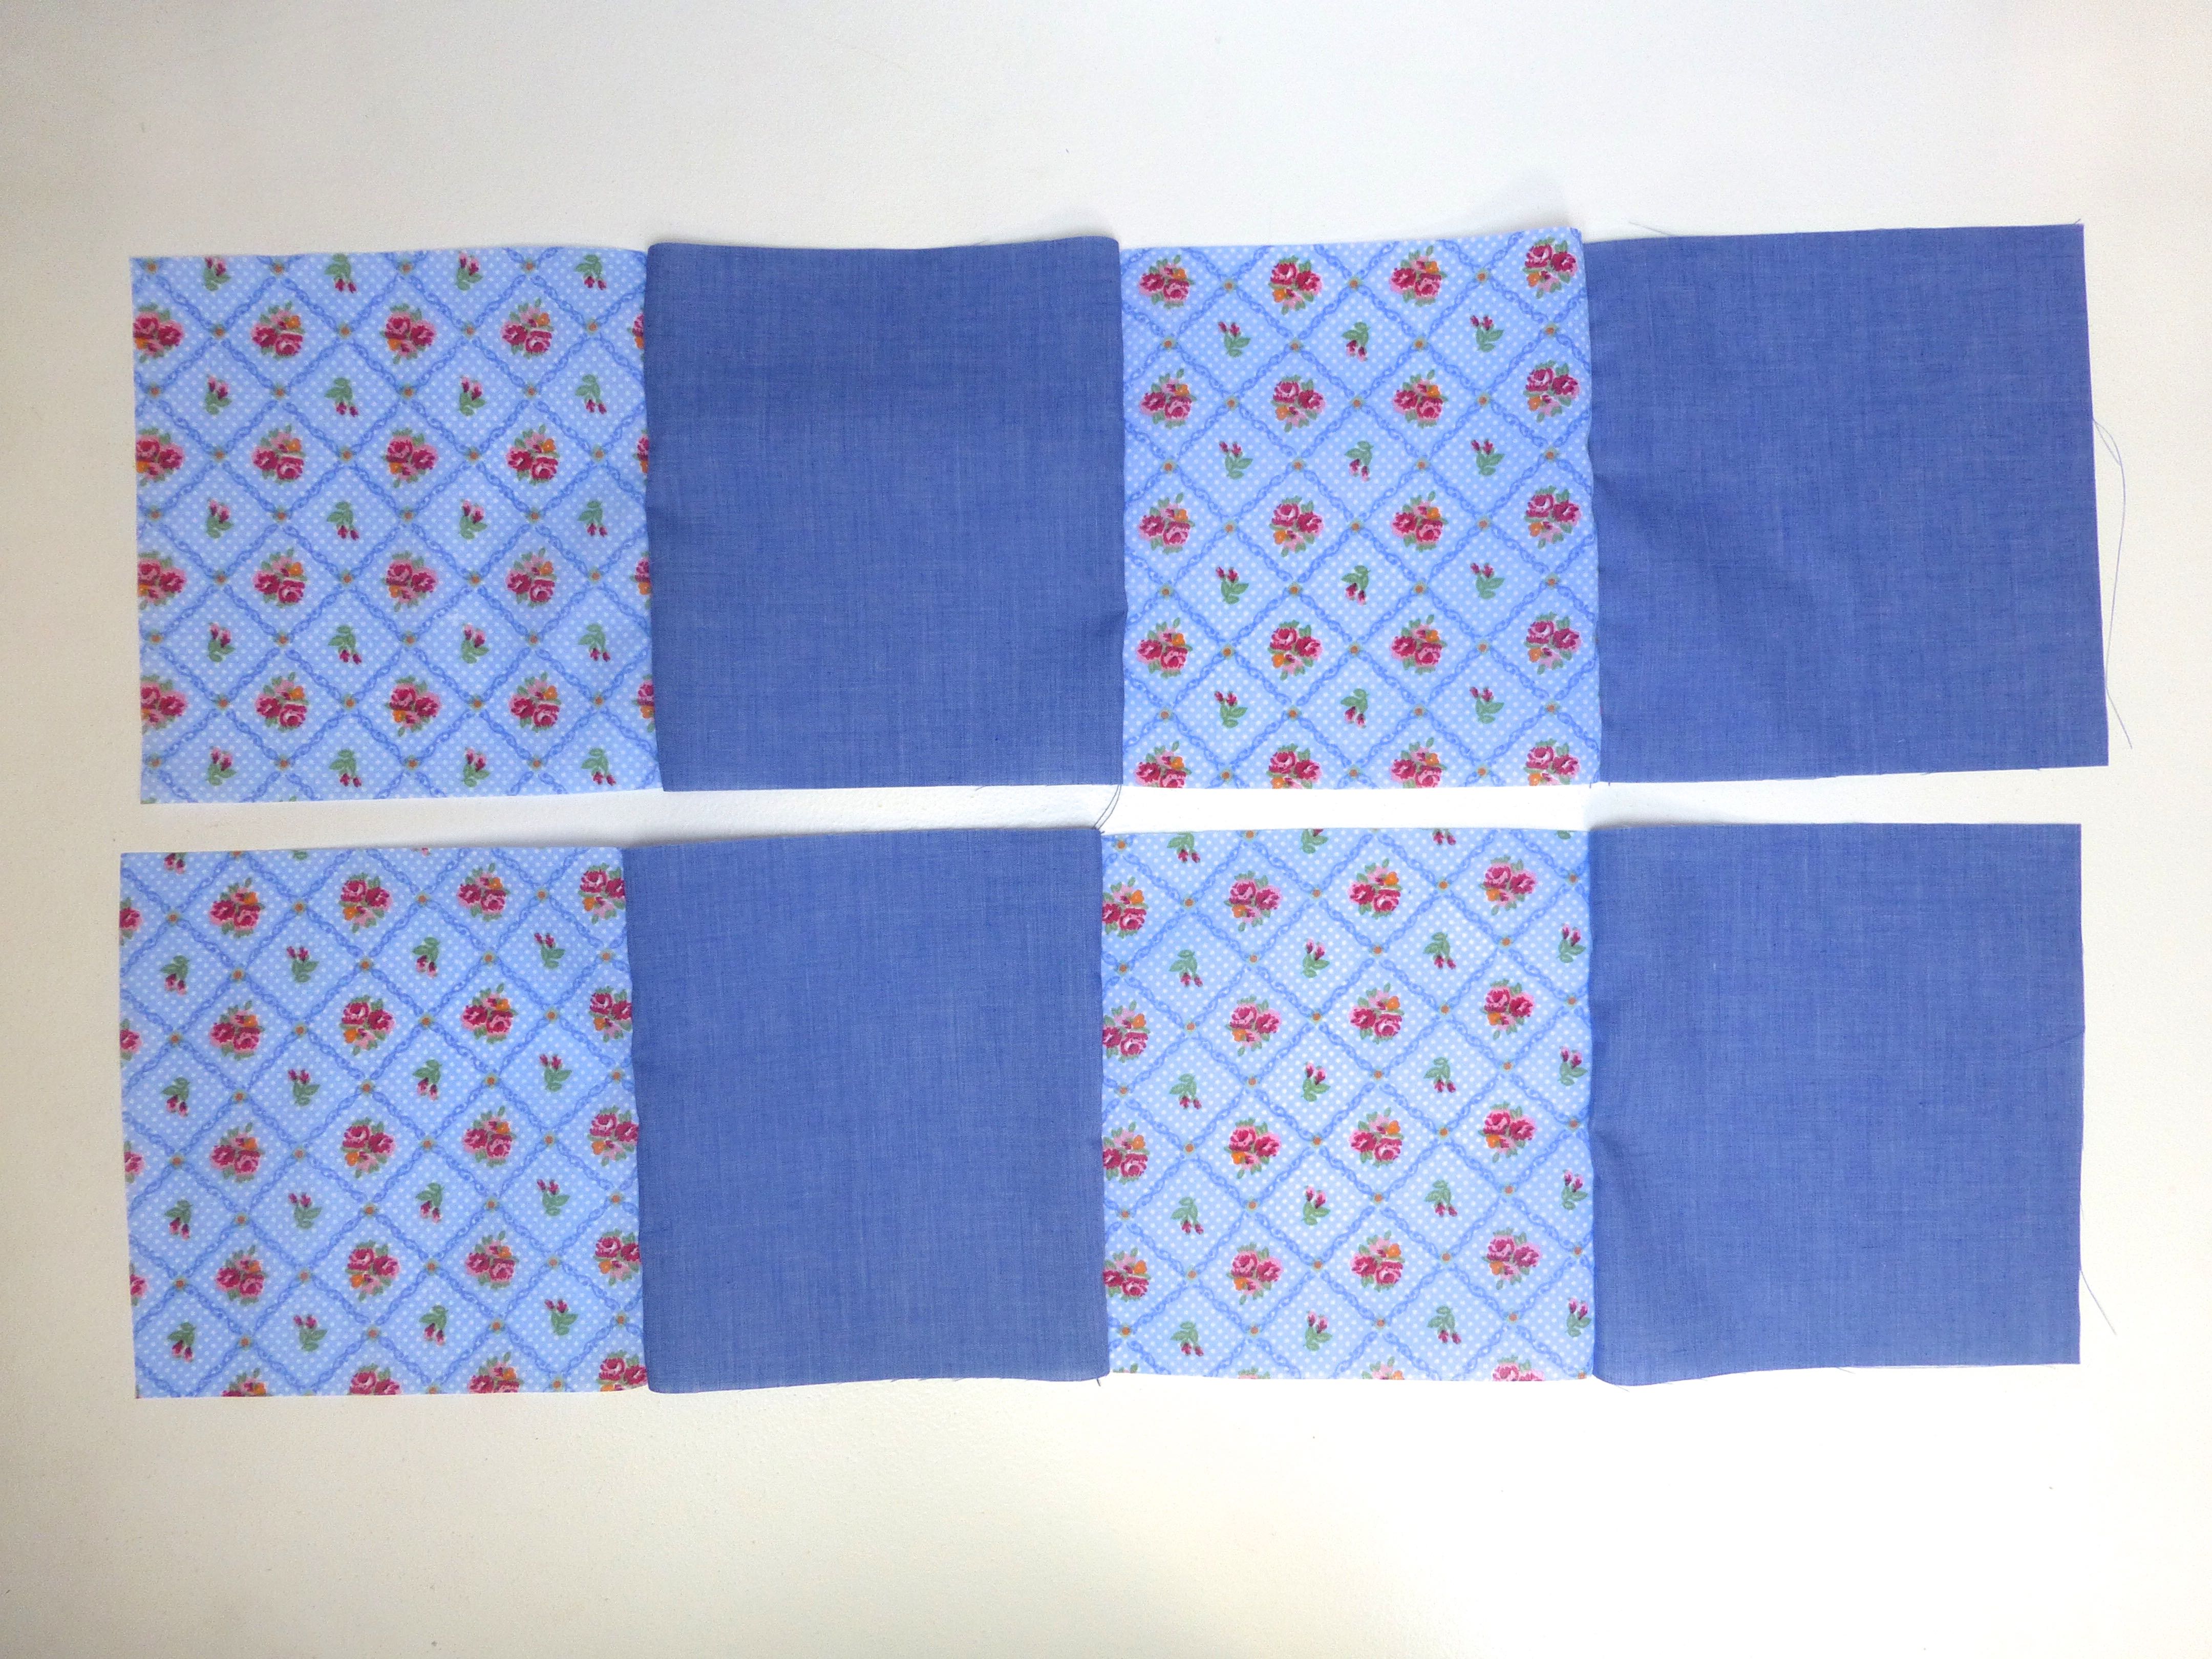
Repeat this process with the pairs of squares…
….until you have rows of 4….
….then sew the rows of 4 together to make rows of 8. Now add one of your left over squares to the end of each row.
You should now have 9 rows of 9 squares.
Press all the seam allowances to one side.
To minimise any bulk at the seams, you may wish to alternate the direction in which you press them flat.
Join these rows along the long edges, matching and pinning the seams as you go.
Continue until all your strips of patchwork are sewn together into one large square.
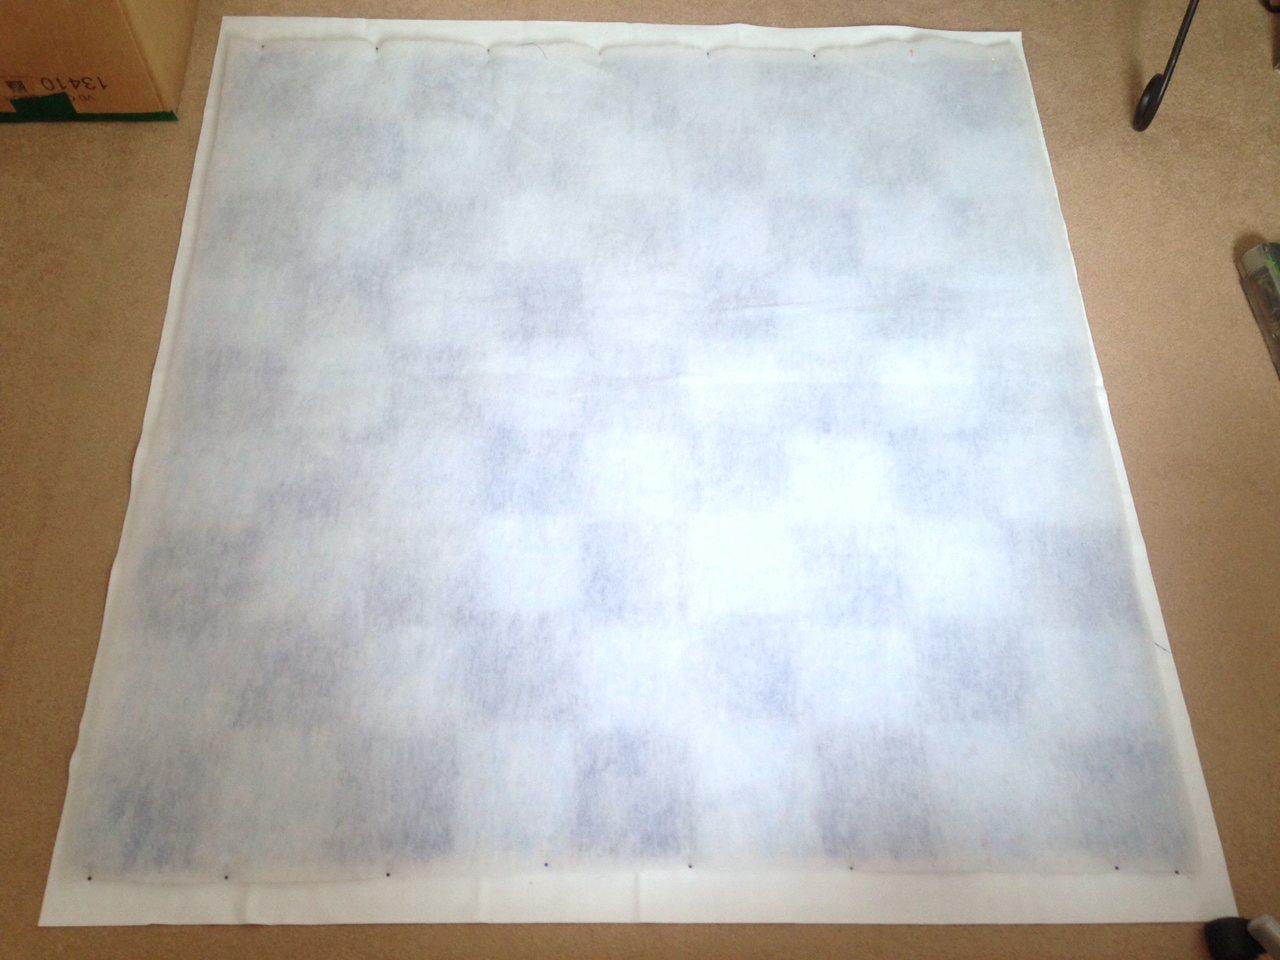
As I reached this stage, I made the spontaneous decision to add a layer of wadding between this top layer and the bottom layer. (I had plenty in my stash, but you can buy it here.)
I cut a square of wadding slightly larger all the way around than the patchwork piece, laid it on top of the wrong side of the patchwork and pinned it around the entire edge.
Stitch close to the raw edges all around the outside and trim the excess wadding as shown.
Now the wadding is secured, you can use large tacking stitches through both layers to stop them shifting whilst quilting.
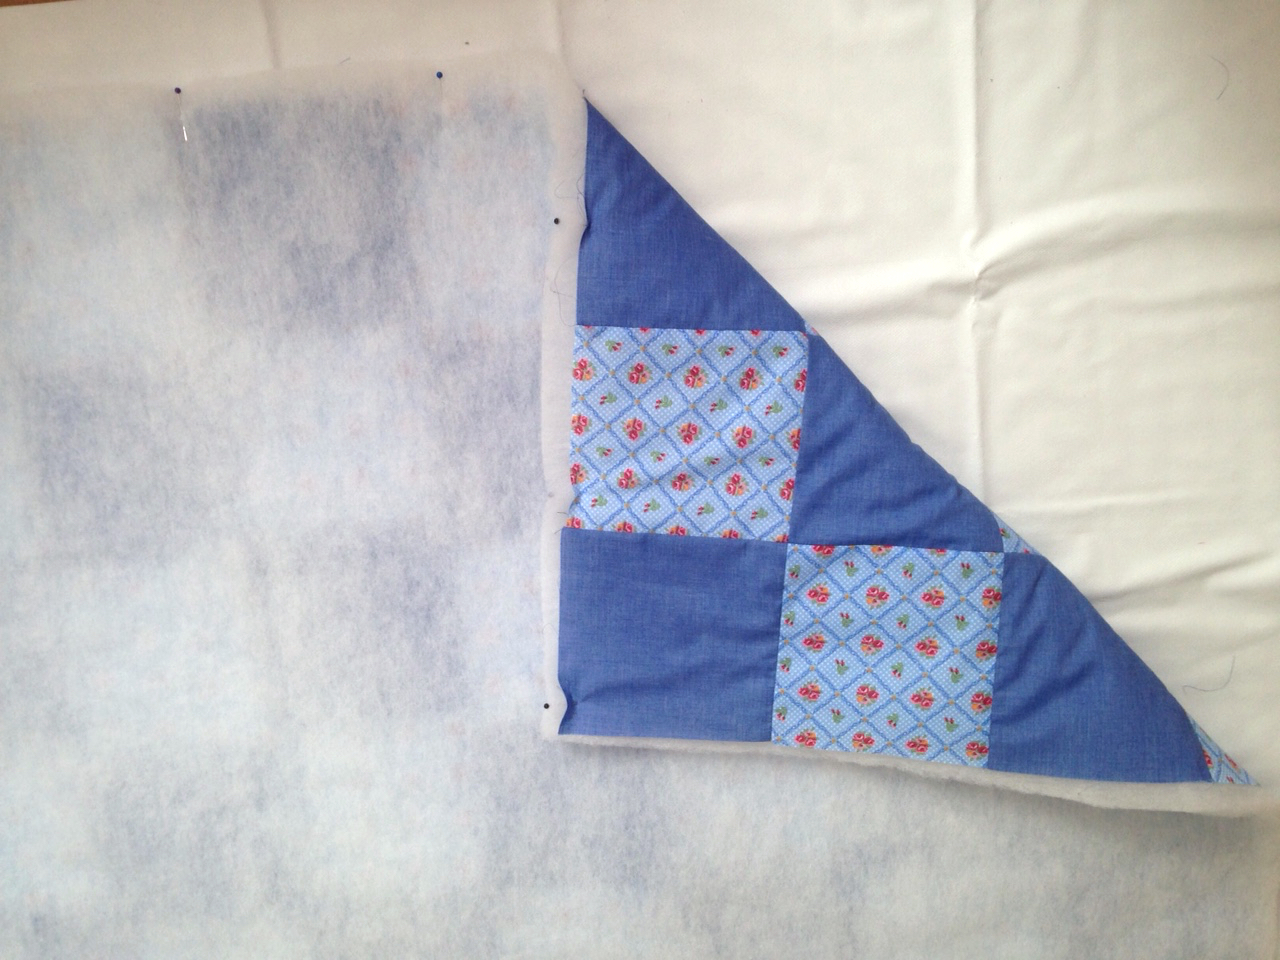
Stitch in the ‘ditch’ using a long stitch length until the whole blanket has been quilted along the seam lines.
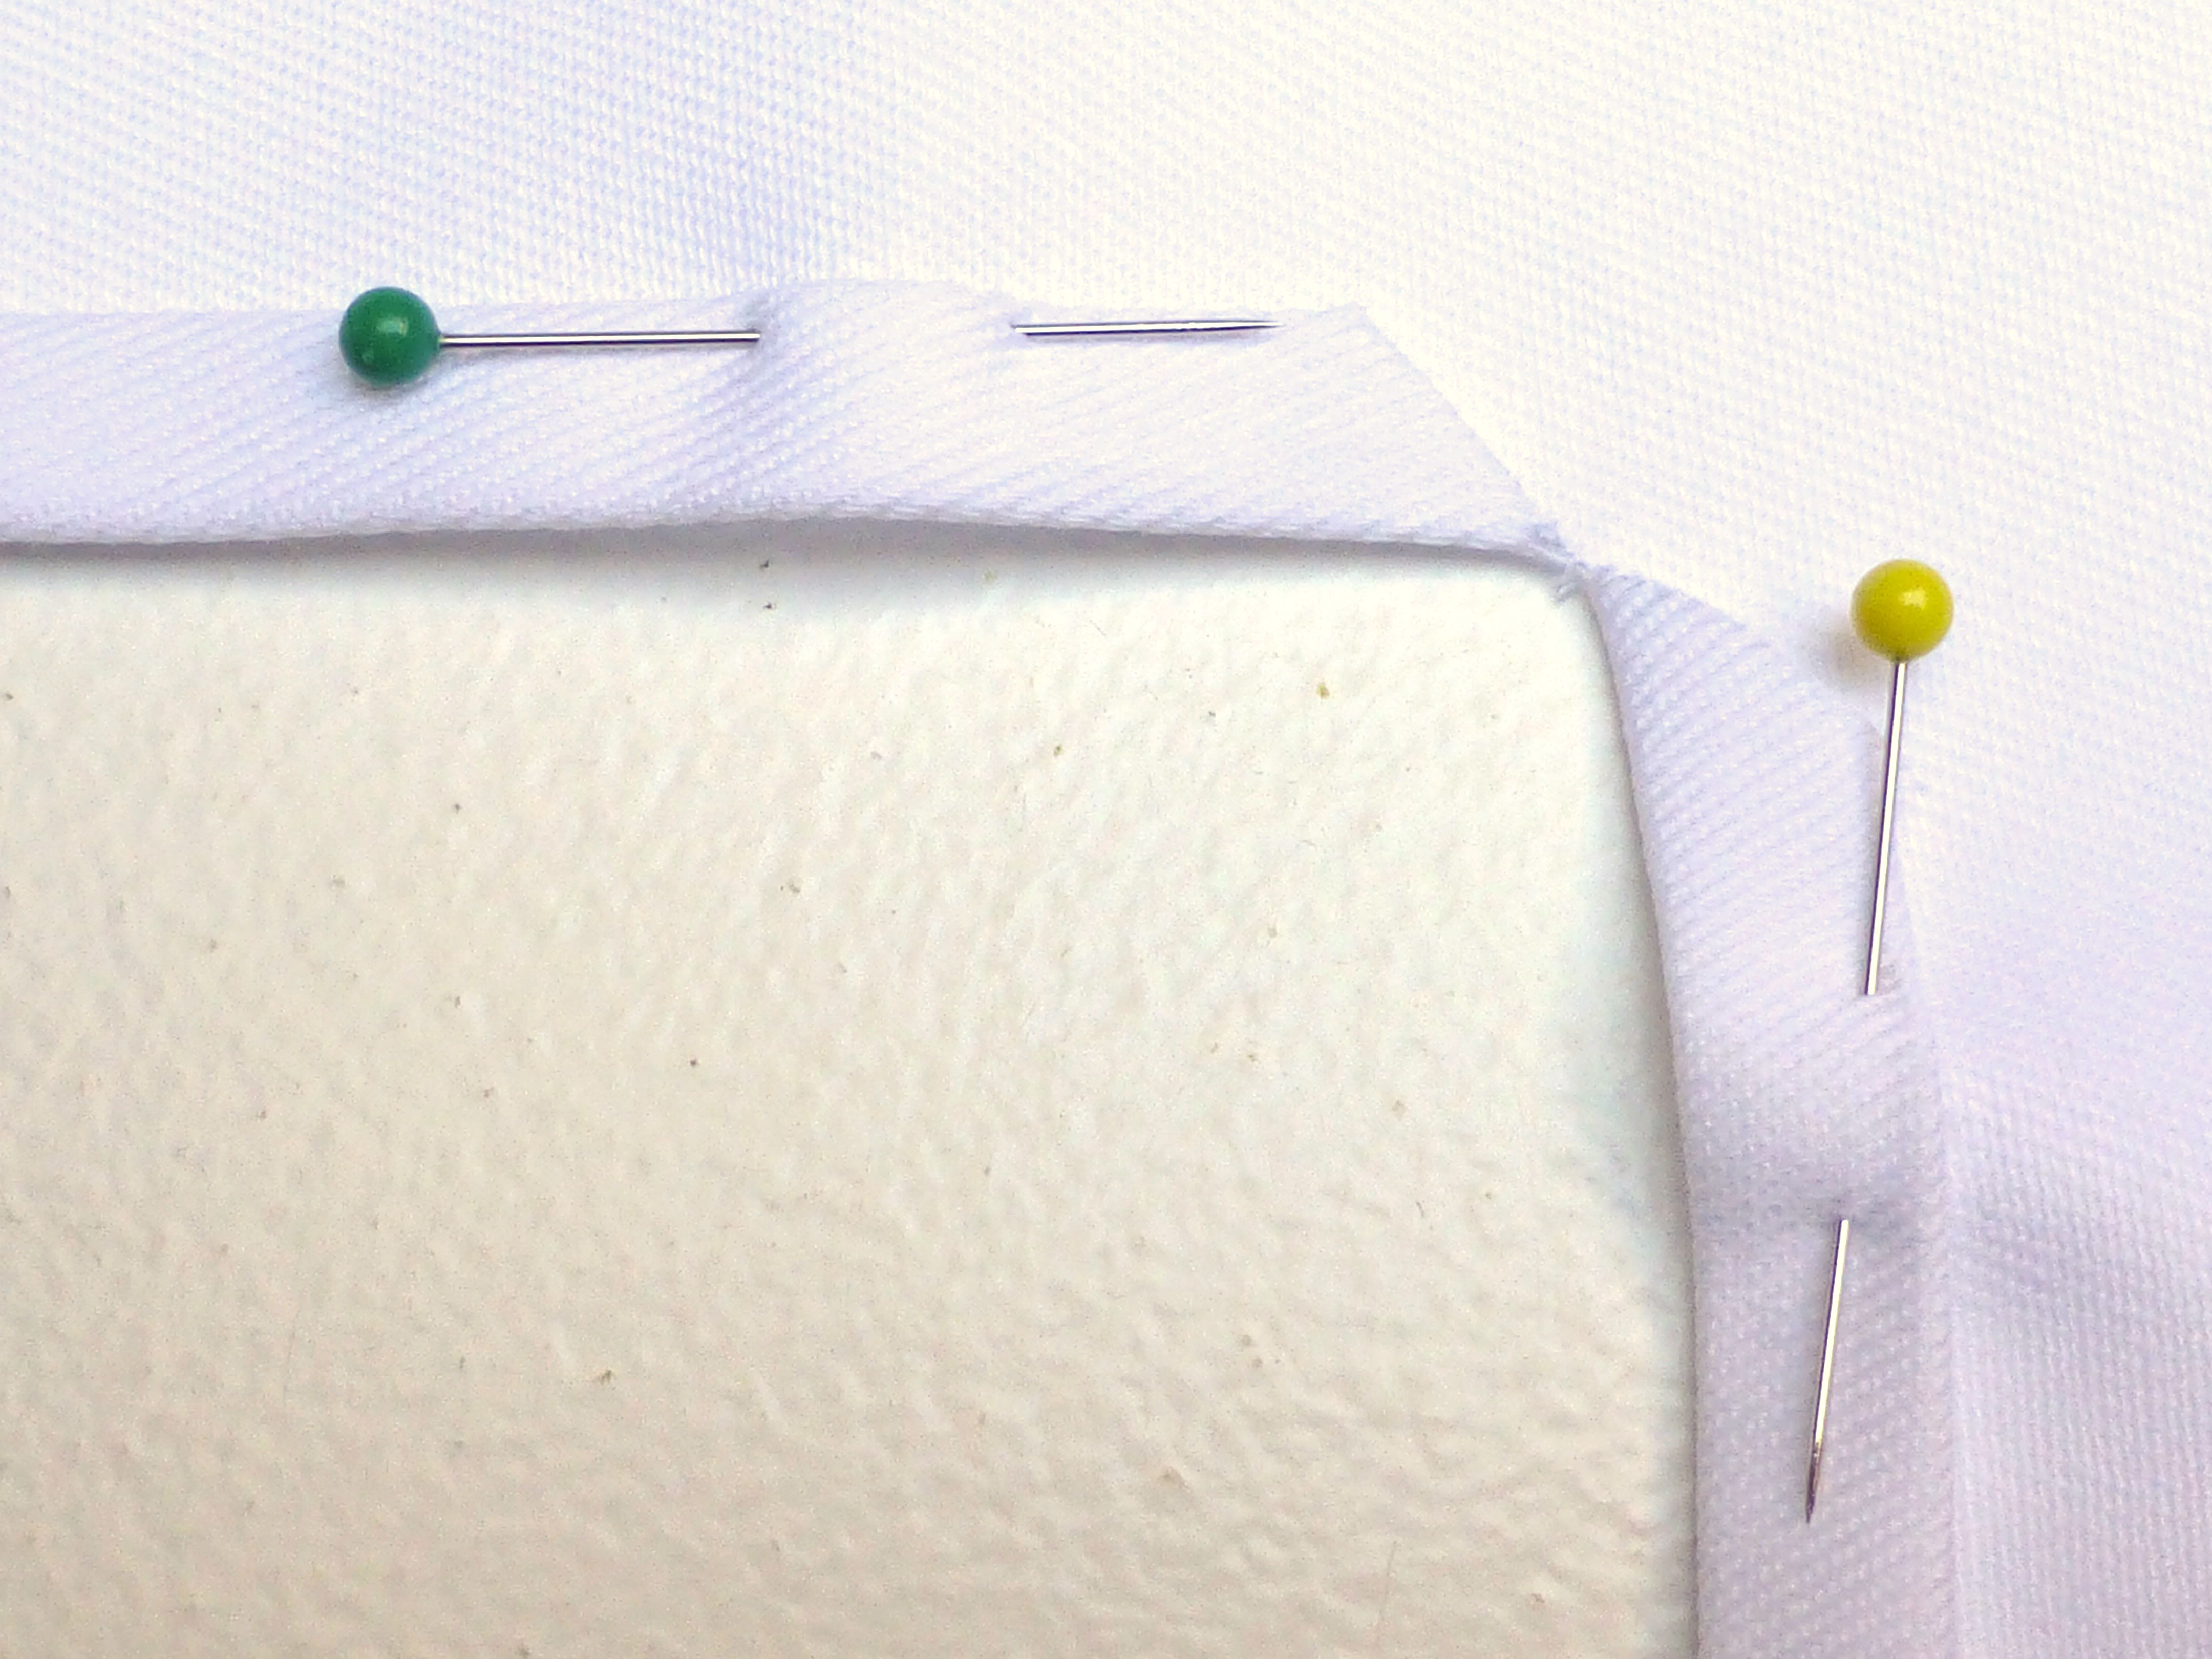
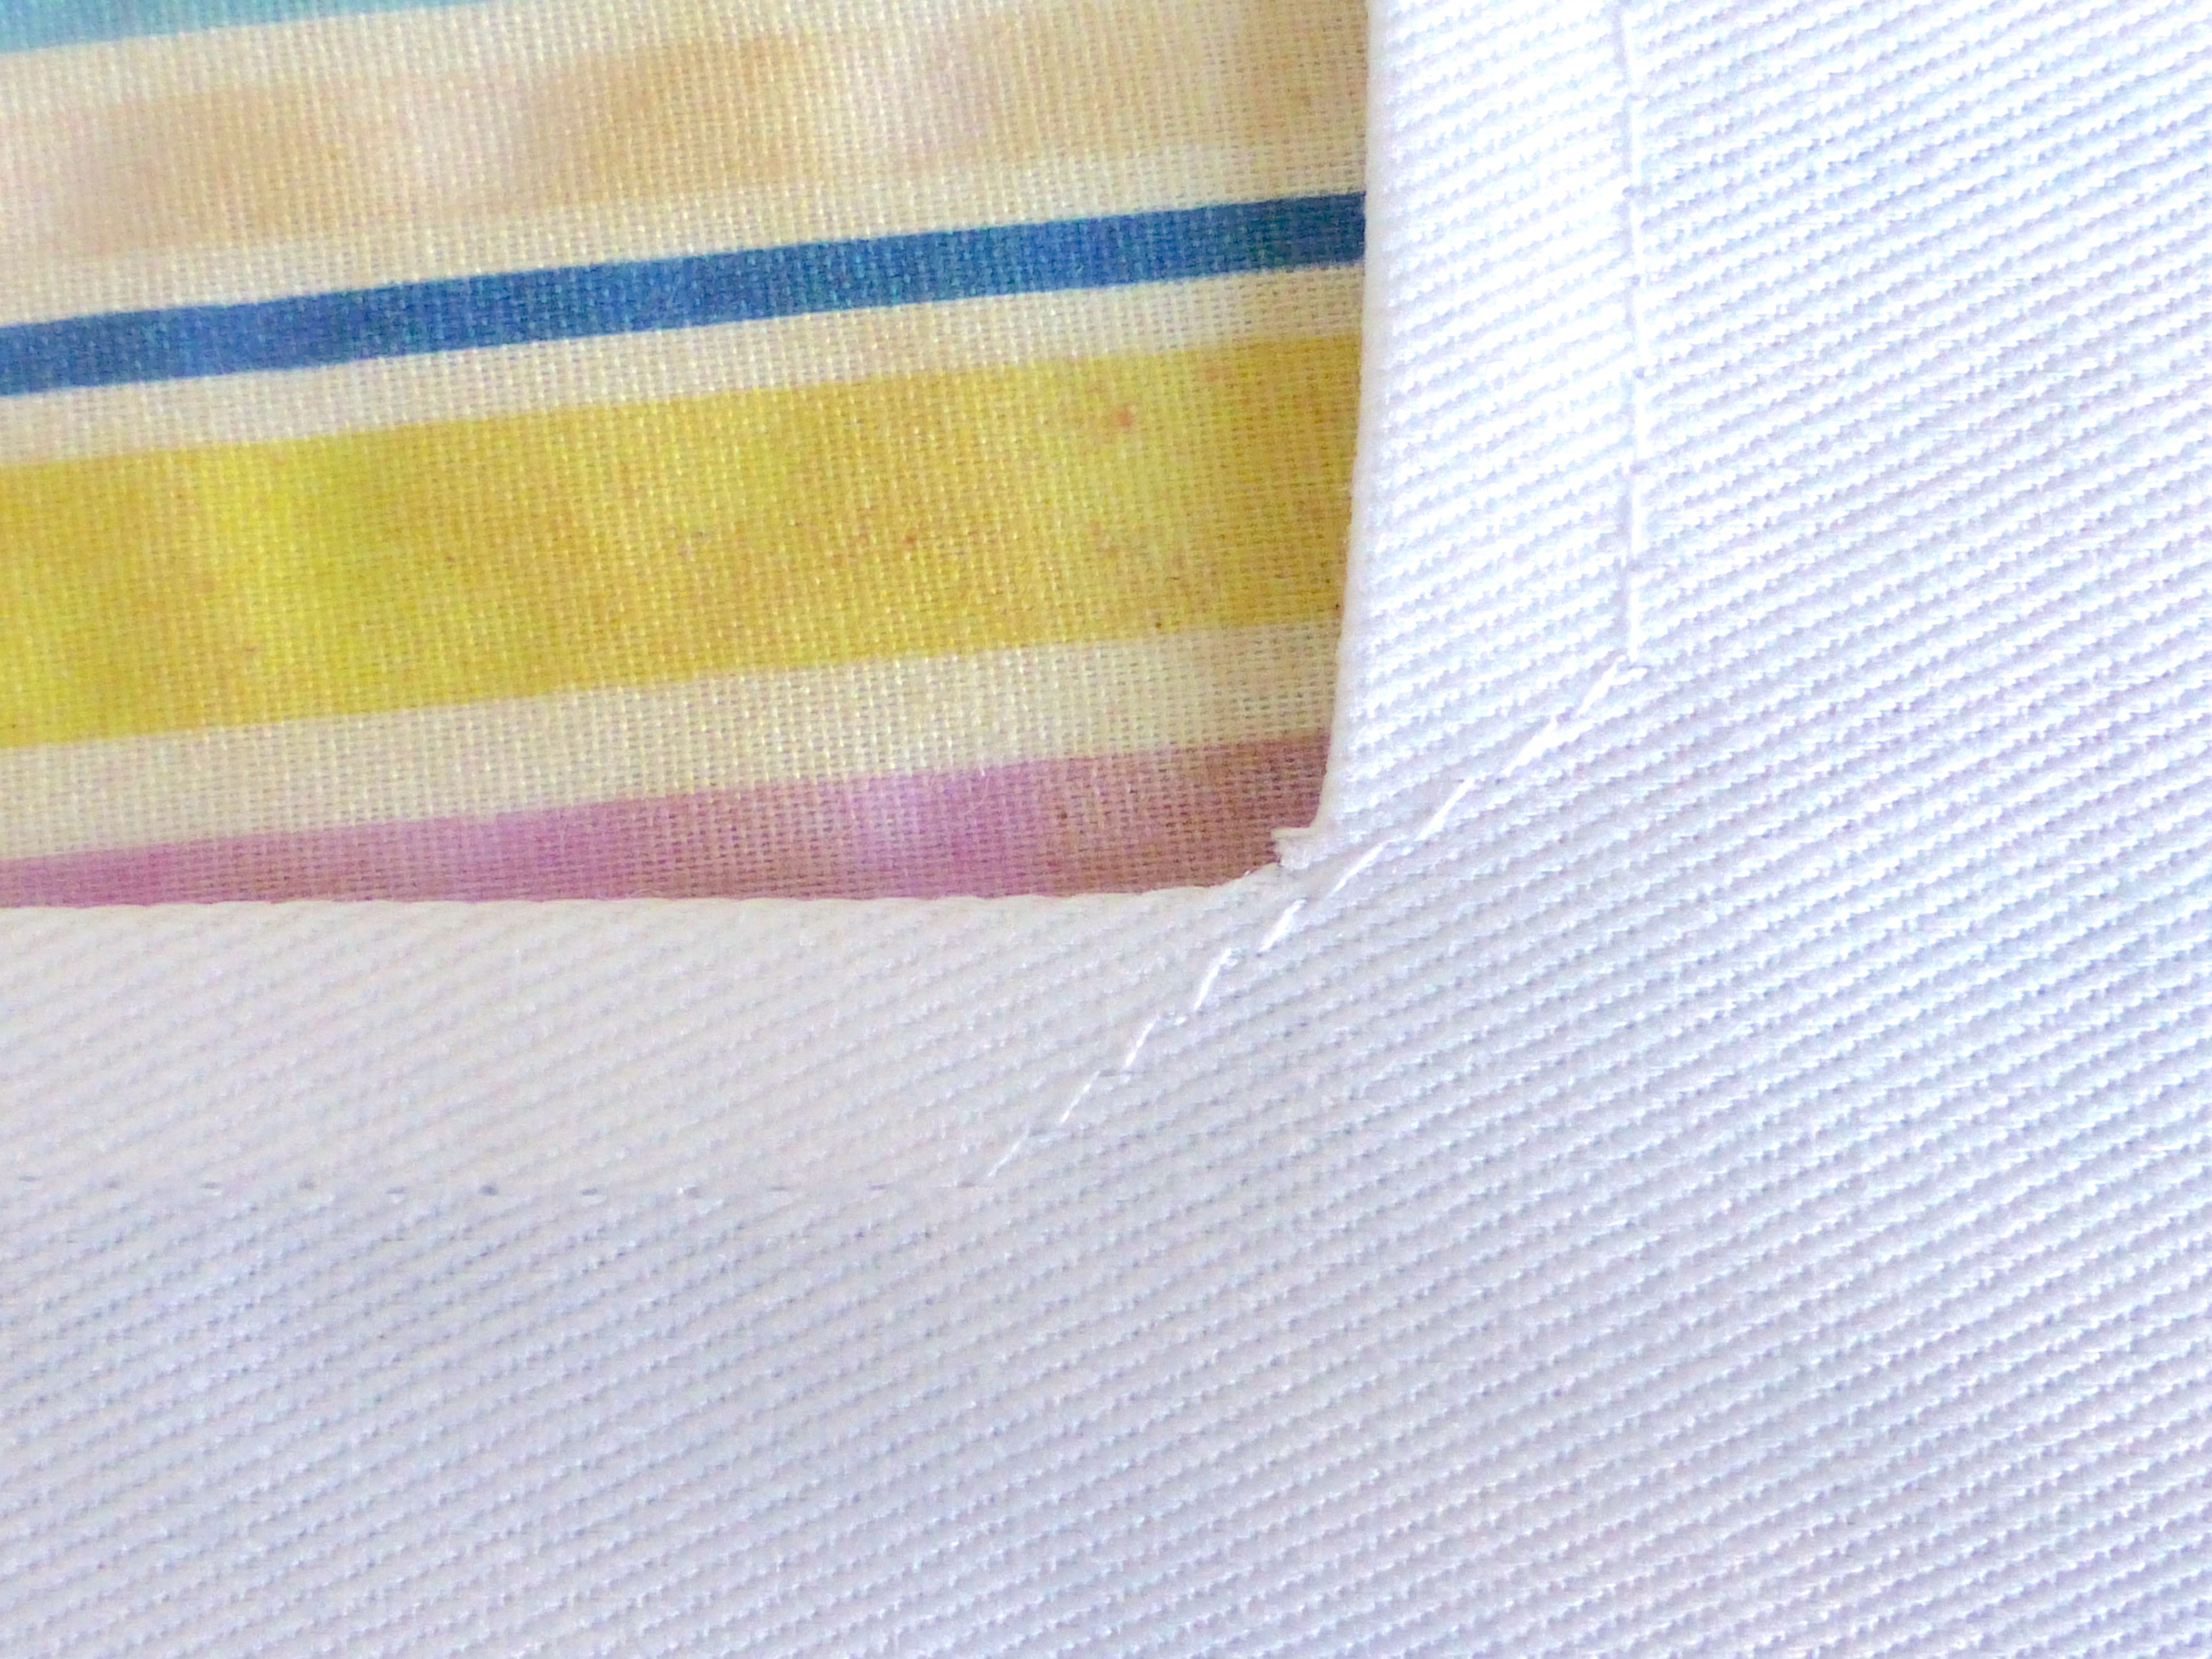
Place the quilted layer onto the vinyl backing, wrong sides together, and trim the backing so that it is 1.5cm bigger than the top all the way around.
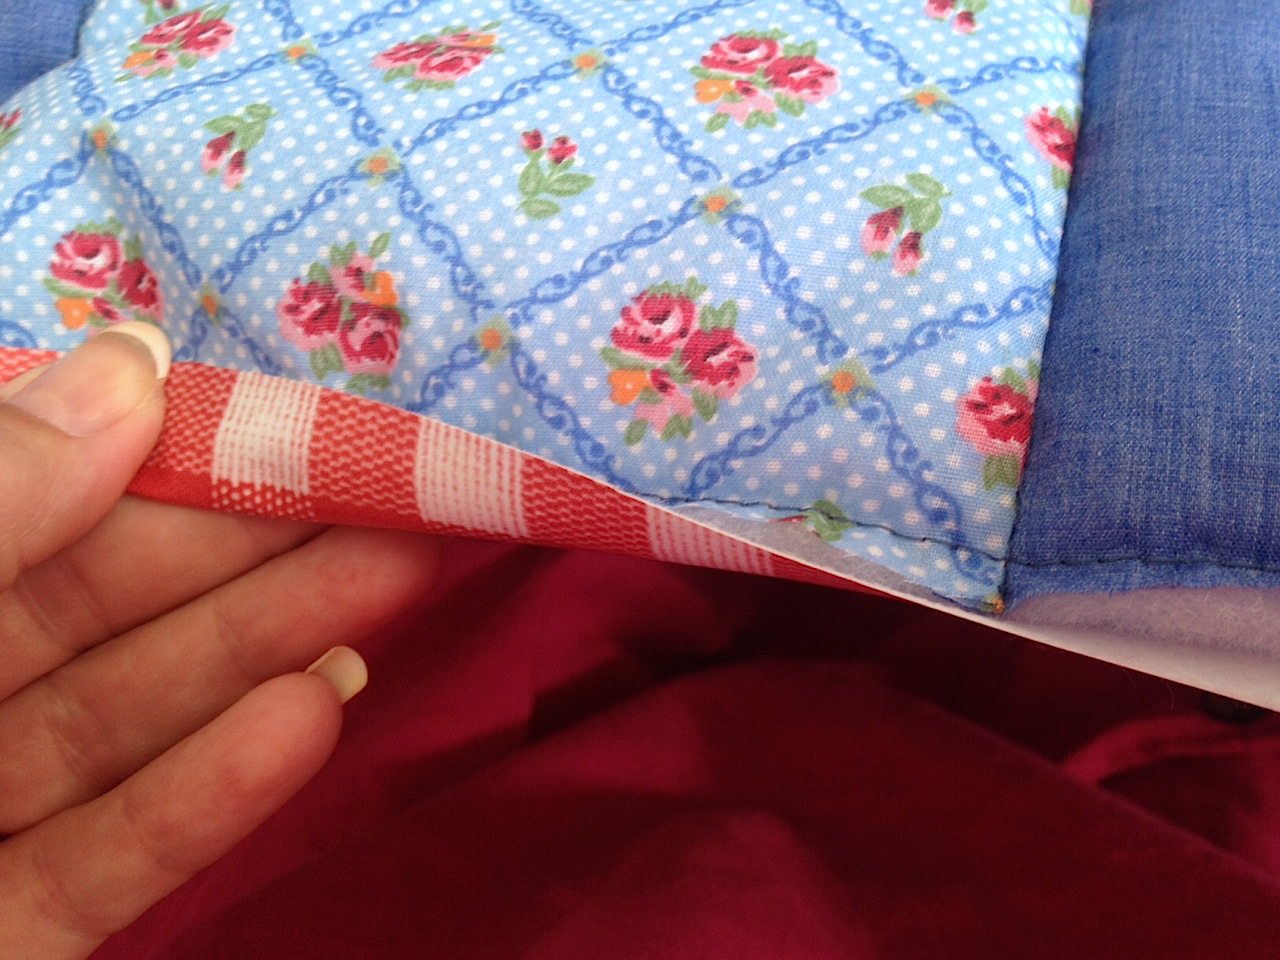
Using clips, fold the excess vinyl over to the right side of the blanket and secure in place.
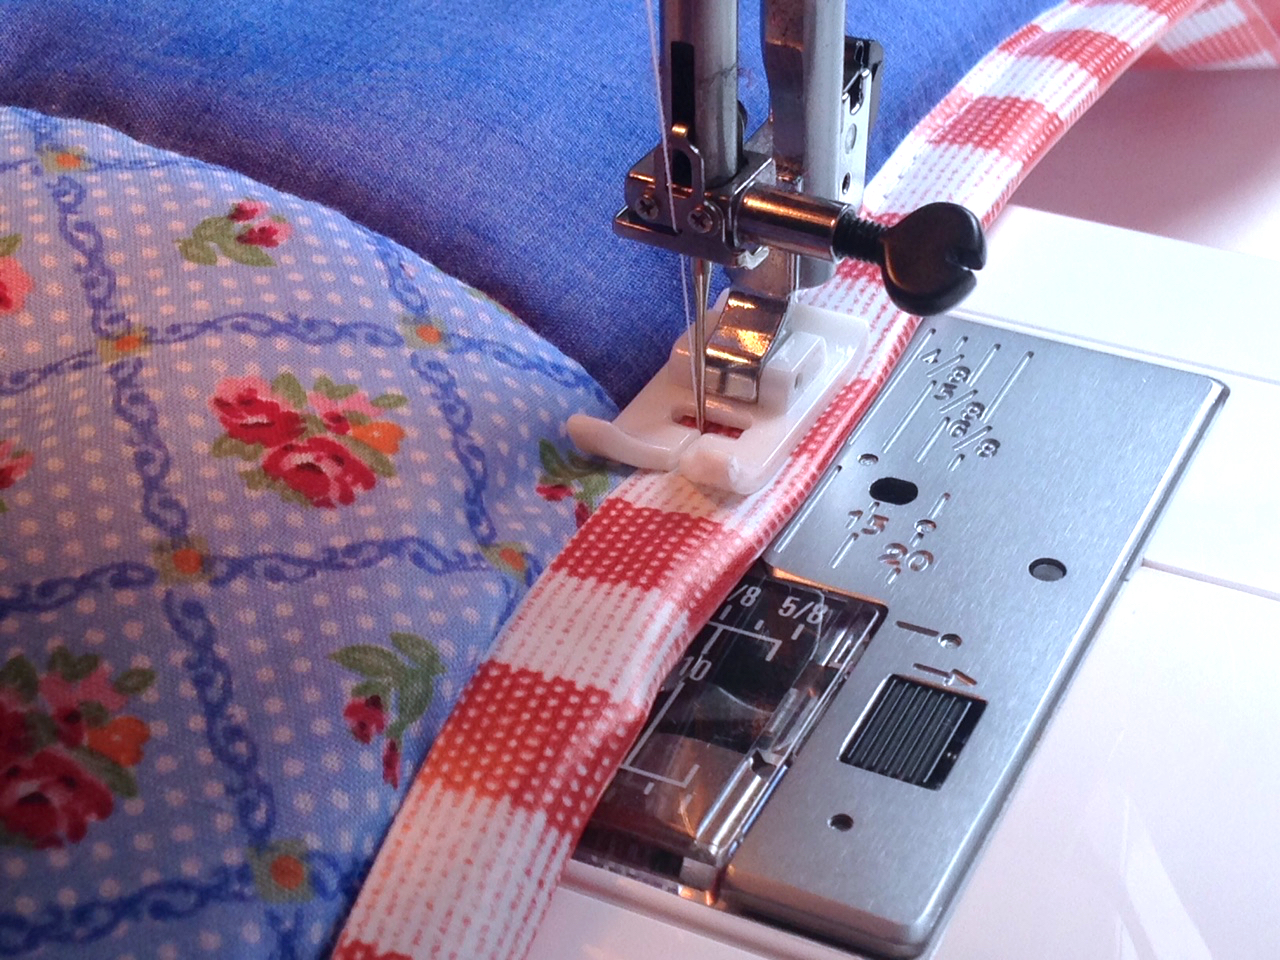
A teflon foot makes the vinyl move smoothly through the machine, and a leather needle with its wedged shape will stop any skipped stitches (discovered through trial and error!)
A simple long straight stitch close to the raw edge of the vinyl is all that is needed.
Mitre the corners as you go for a neat finish.
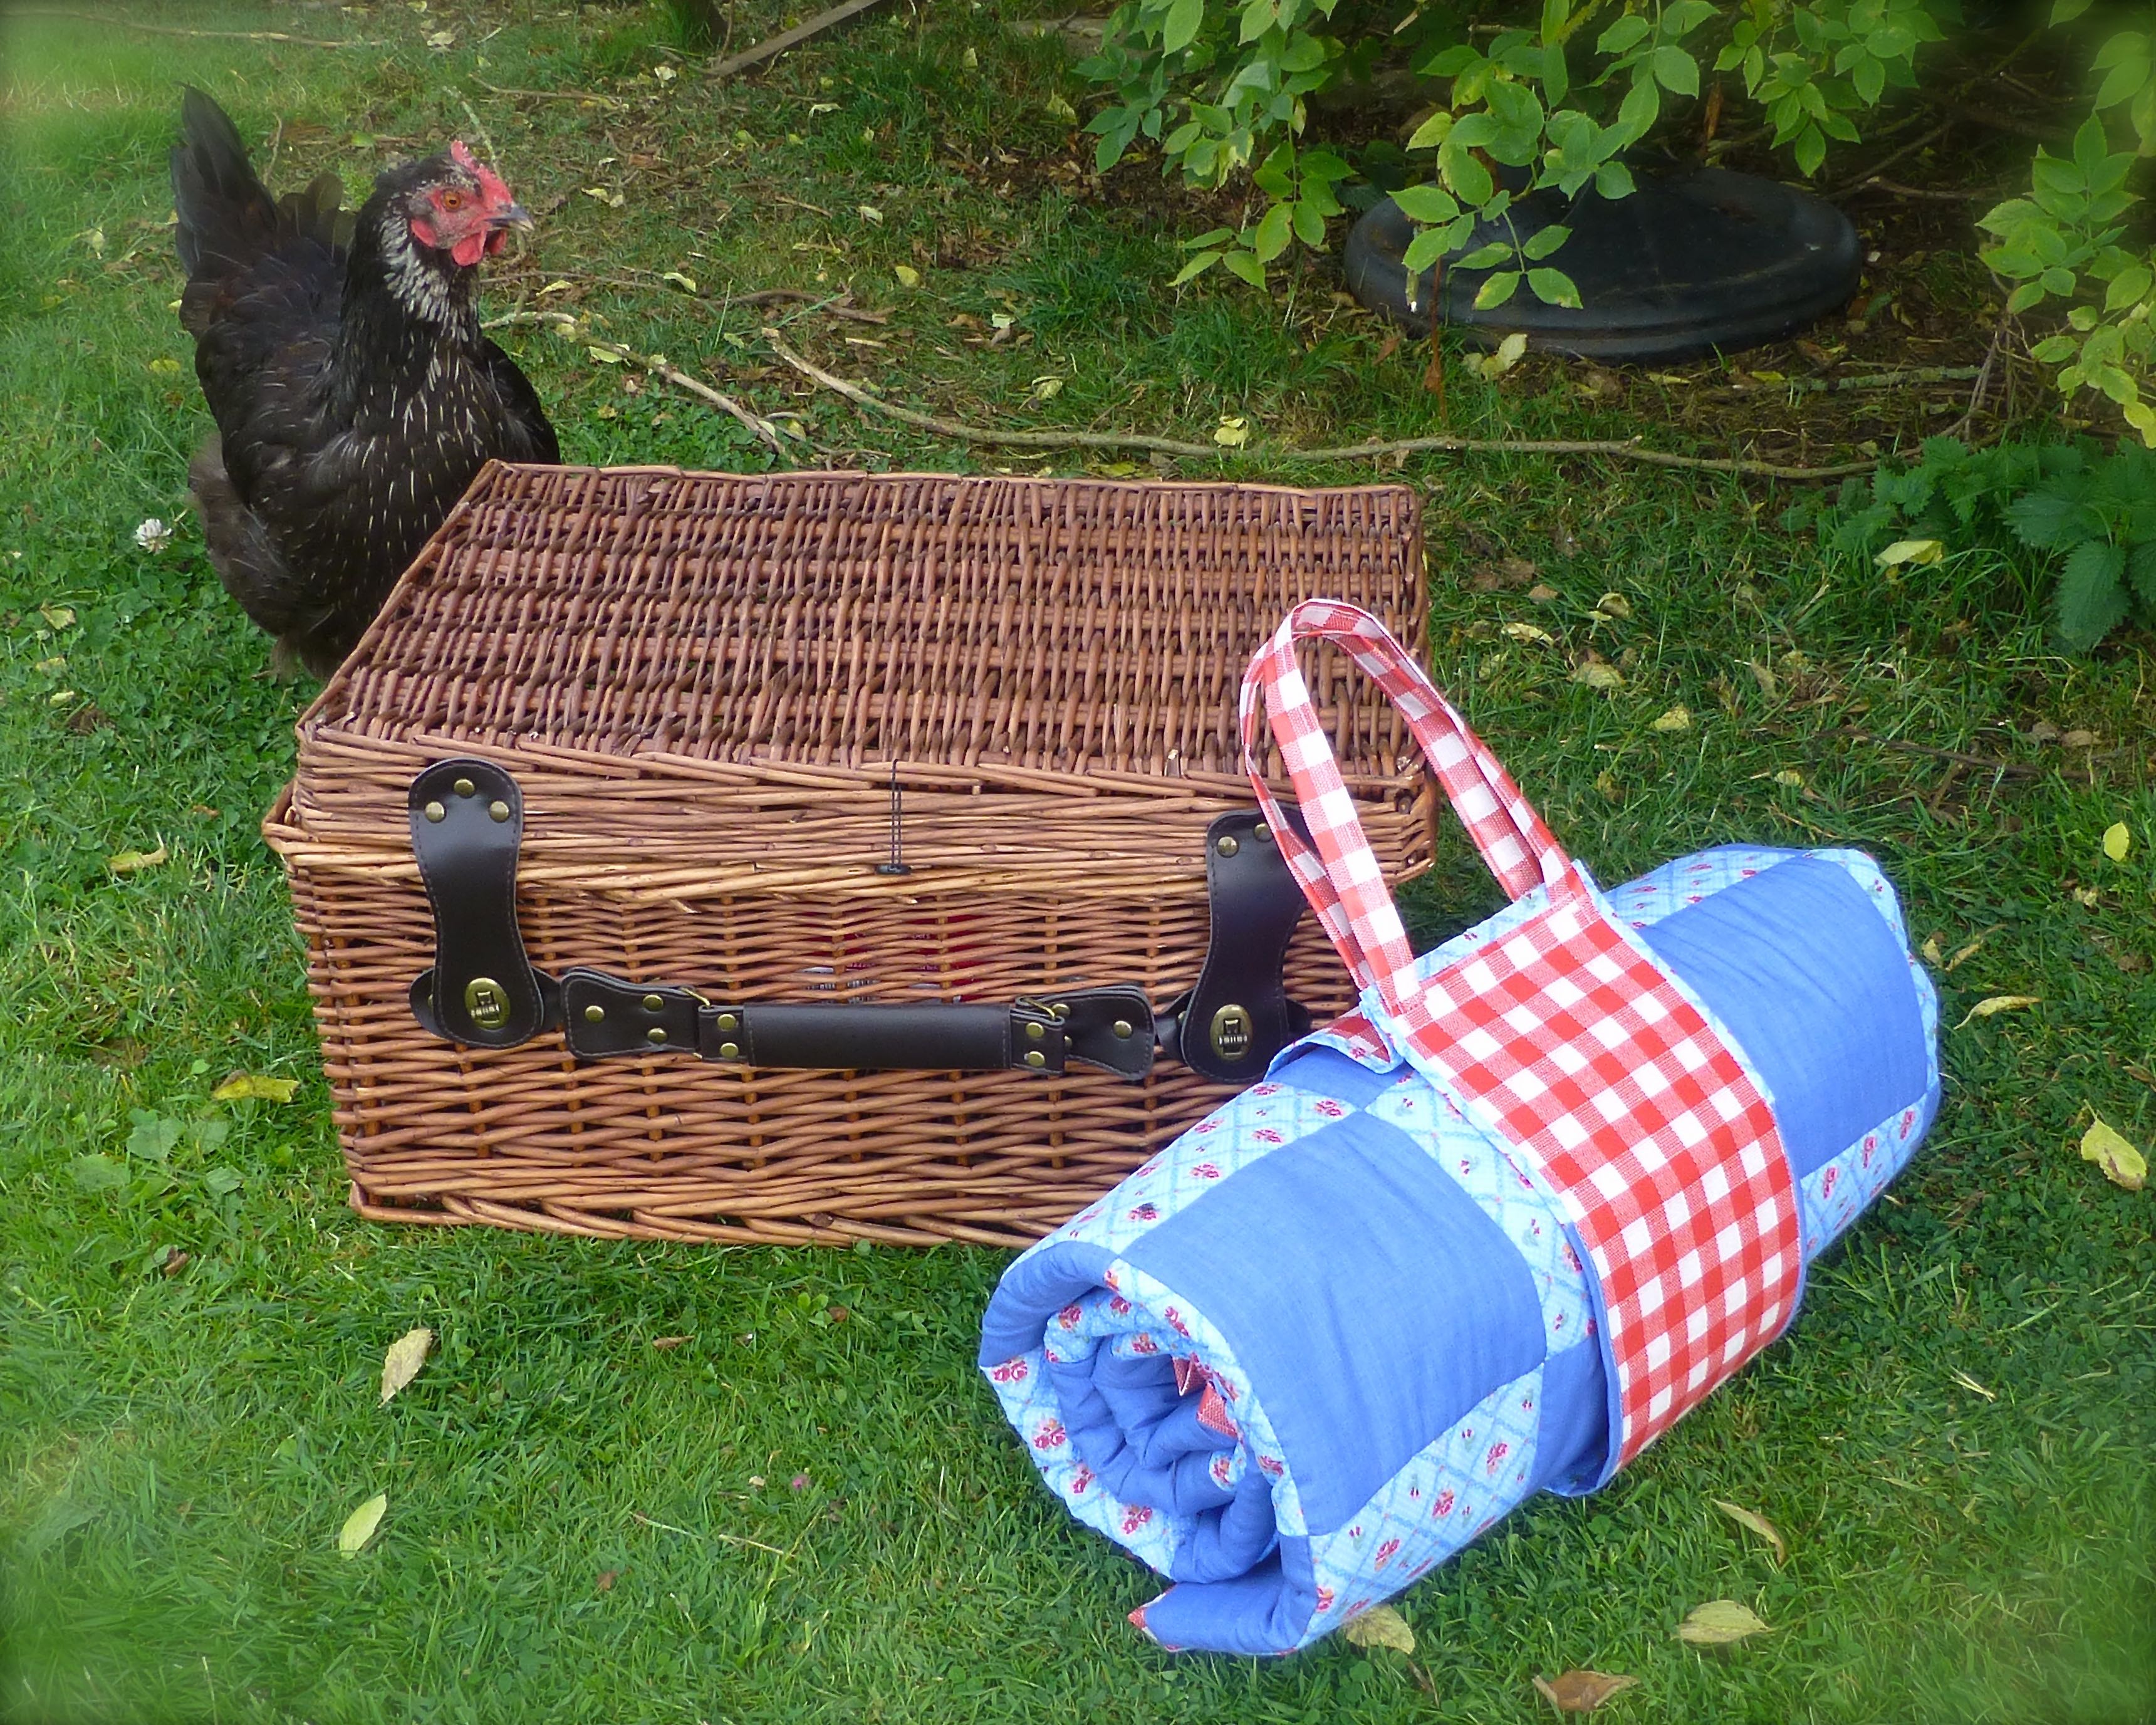
I was left with a few scraps of fabric and vinyl, so I also designed a fabric roll to act as a carry pack for the blanket.
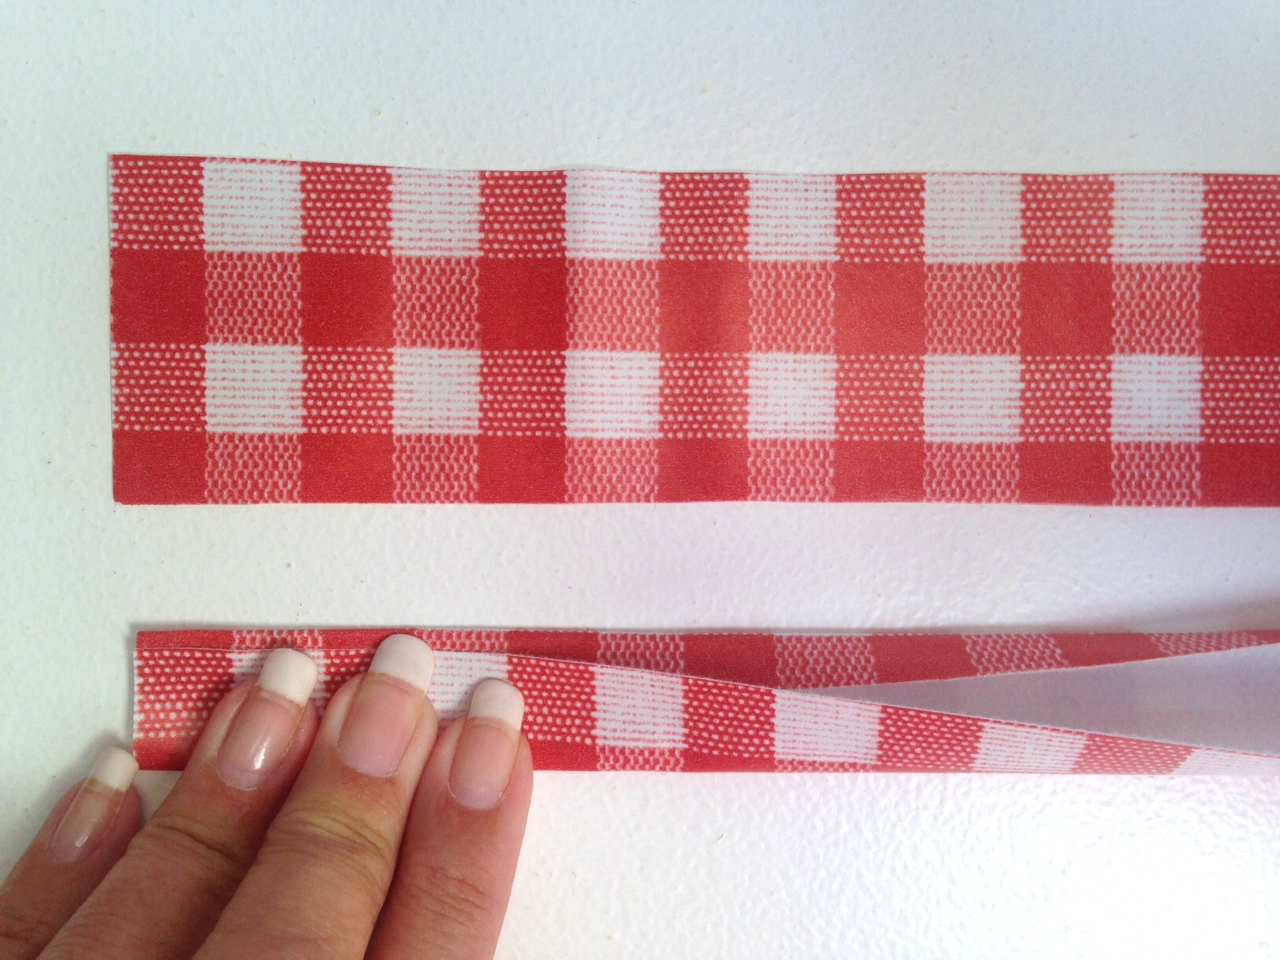
For the carry pack, cut 3 floral and 2 plain squares the same size as before and sew them all together in a single row. Press.
Cut a piece of spare vinyl 1.5cm smaller than the patchwork strip and place in the centre of the strip, wrong sides together.
Turn a narrow hem…..
….and stitch in place close to the inner folded edge around all 4 sides, mitring the corners as you go.
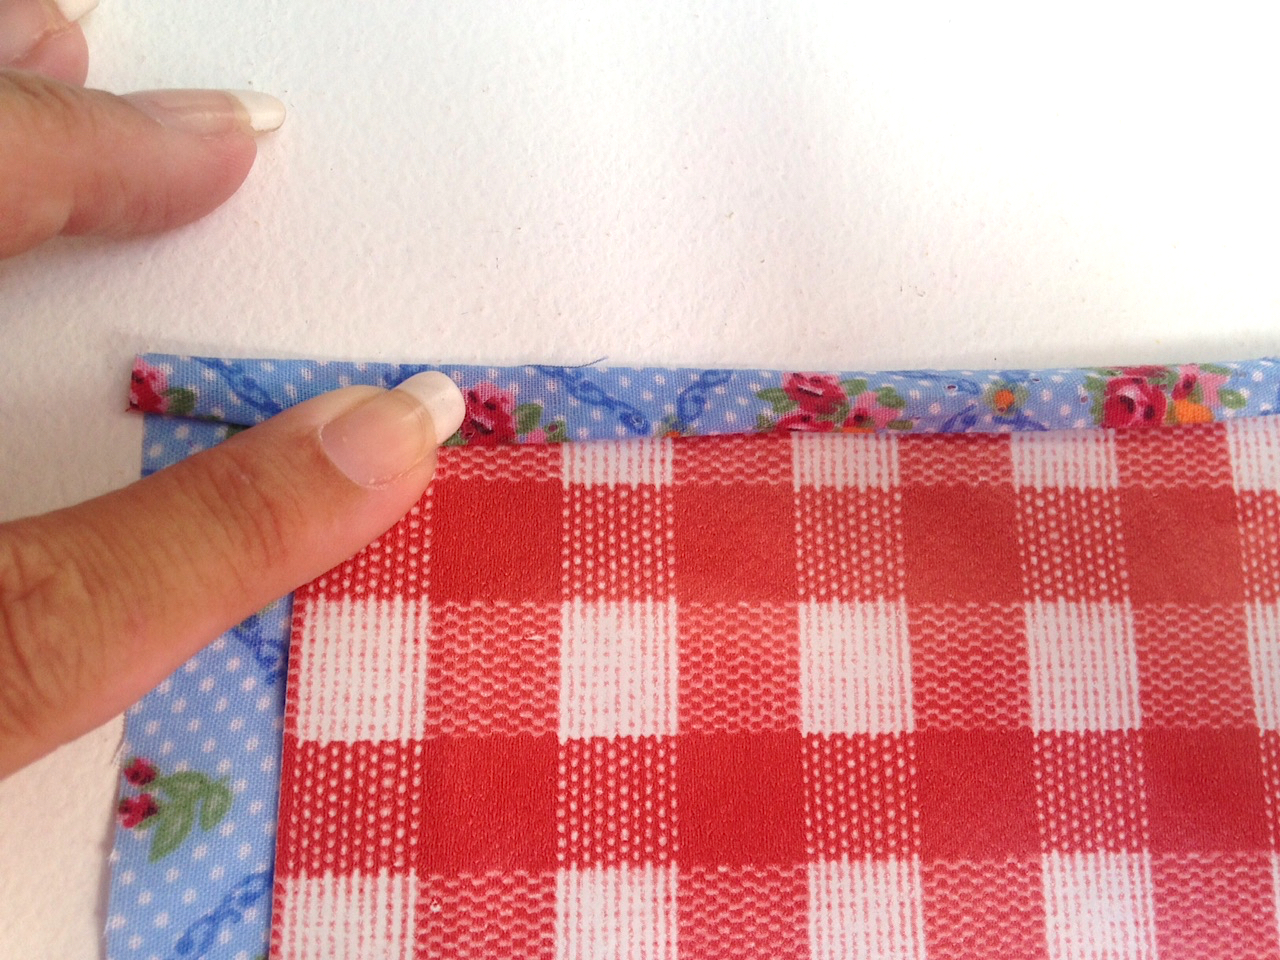
Cut two pieces of vinyl for the handles, each measuring 20cm x 5cm.
Fold the long upper edge in to the wrong side by 1cm, and bring the lower edge up to meet it, overlapping a little to encase the raw edge as shown below.
Stitch close to the raw edge.
Repeat with the second handle.
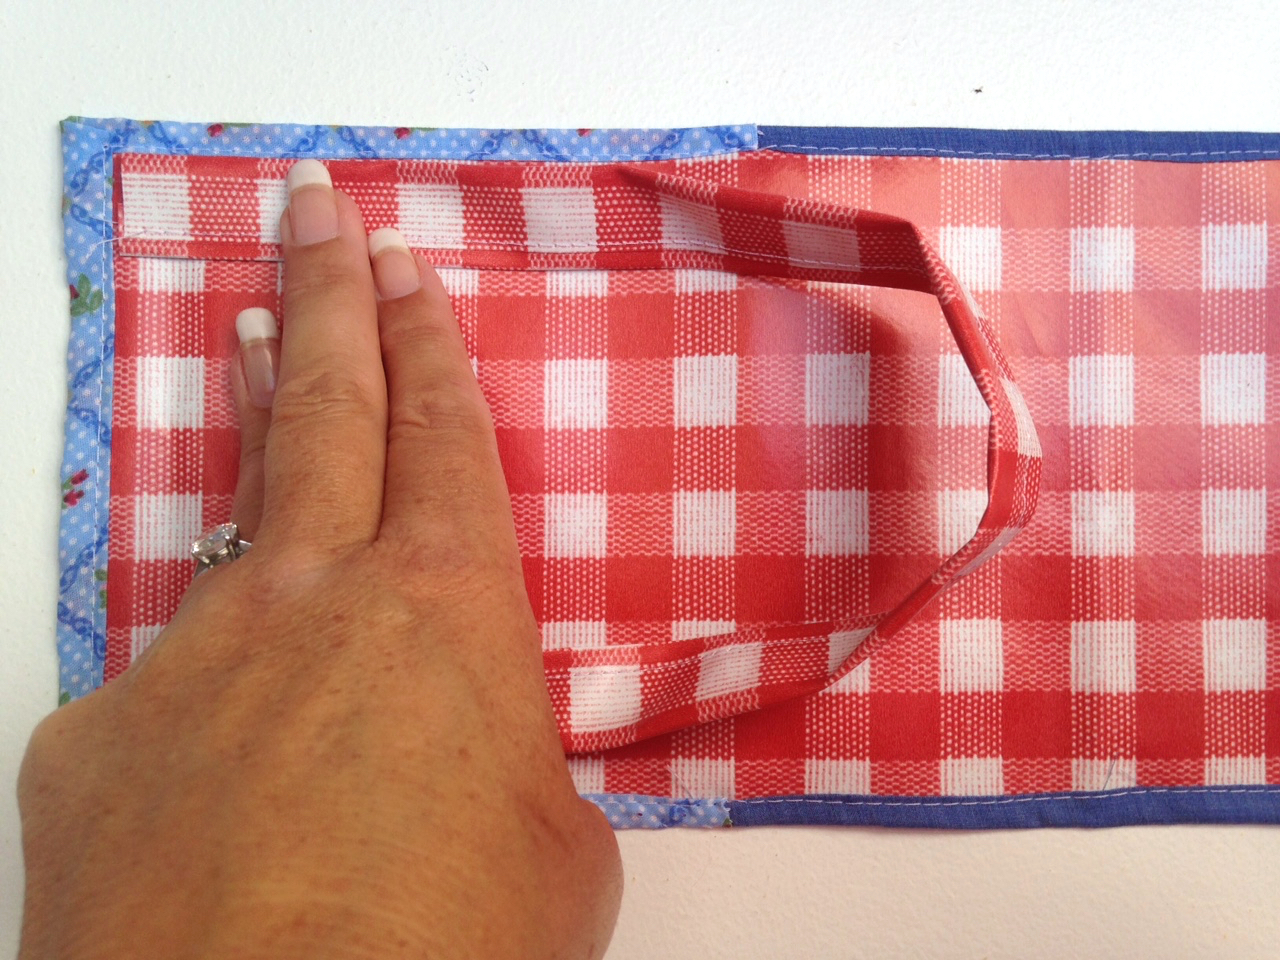
Position the two ends of the handle in the corner of the carry pack using the photograph as a guide.
Stitch in place with a 1cm seam.
Fold the handle to the outside and turn over, vinyl side down.
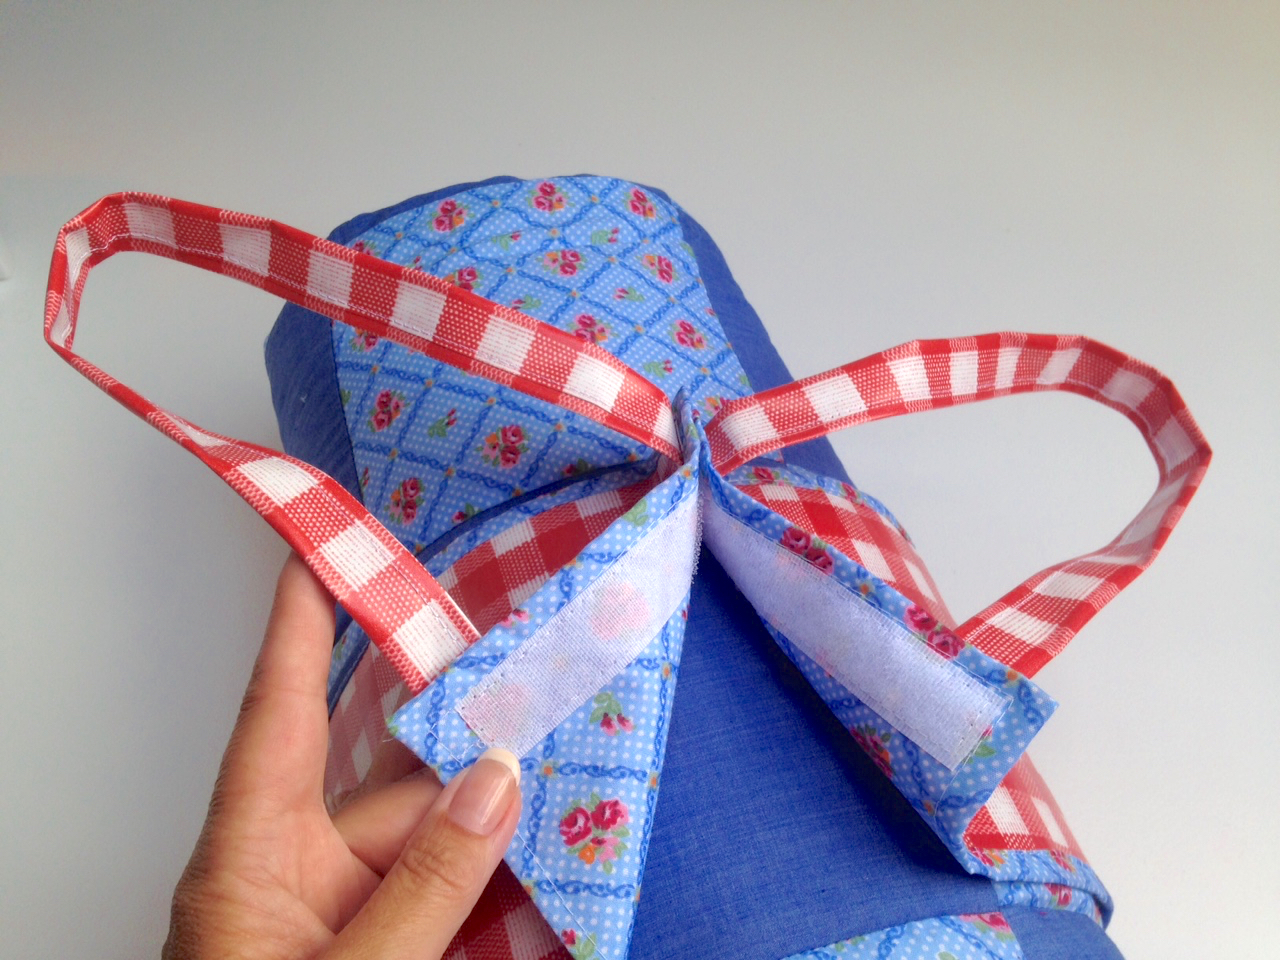
Cut a 12cm strip of velcro hook and loop fastener and sew the hook side to the fabric side of the carry pack, being sure to catch the handle in the ‘up’ position, securing it in place at the same time.
Repeat with the loop side at the other end of the carrier.
When the blanket is rolled up, wrap the carry pack around it and press the velcro strips together.
For a picnic in the garden (or anywhere), just add bunting, a squishy cushion and a hamper full of goodies.
Sun is a bonus for a picnic, but not when taking photographs (too much contrast)…
The perfect fusion of girl/boy styling that anyone would be happy to sit on.
No more damp bums!
A lovely layer of wadding for added comfort.
The carry pack with handles means that it’s compact and easy to transport.
Marley was interested to see what was going on – sometimes our hens are just a little bit too friendly!
Now all we need is for Summer to return so we can actually use our lovely new picnic blanket!!
Ah, the wonders of technology – I’m probably sat around the pool in Andalucia, sunning myself with a cheeky G&T for company as you read this, as I planned ahead and scheduled this post in advance!
If you saw my post ‘Holiday Sewing’, you’ll know that I wanted to make a few new things to wear, so this is the second in the series, so to speak.
You may have noticed over the past year of my blogging journey, that colour is a recurring theme – and lots of it, preferably clashing.
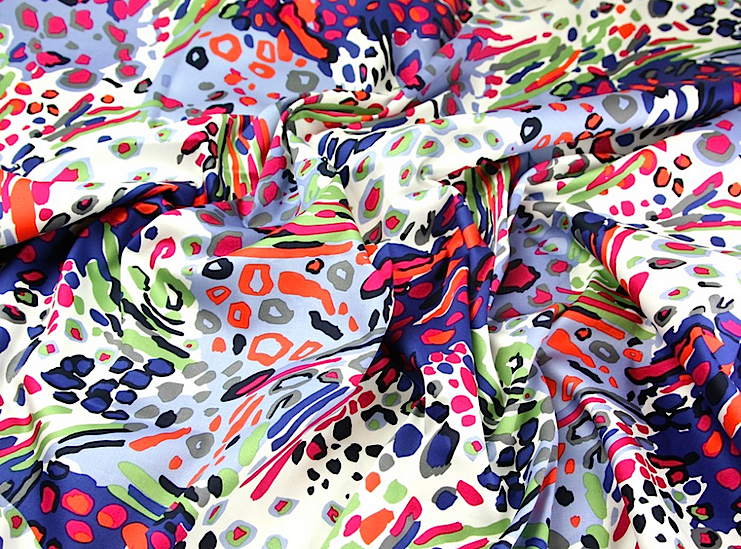
The wackier the print, the more likely I am to want it and, as The High Street doesn’t often float my boat, I source fabrics online to conjure up my own creations.
“Where have I seen that wacky animal print before?” I hear you all cry.
Well, unbeknown to me at the time, Lucie of Love,Lucie had also fallen for its charms and has since used it to make a stunning Summer dress (click here to see the Wow! dress).
It’s a supremely soft textured Stretch Cotton Sateen which has proved so popular that Minerva are having to restock!
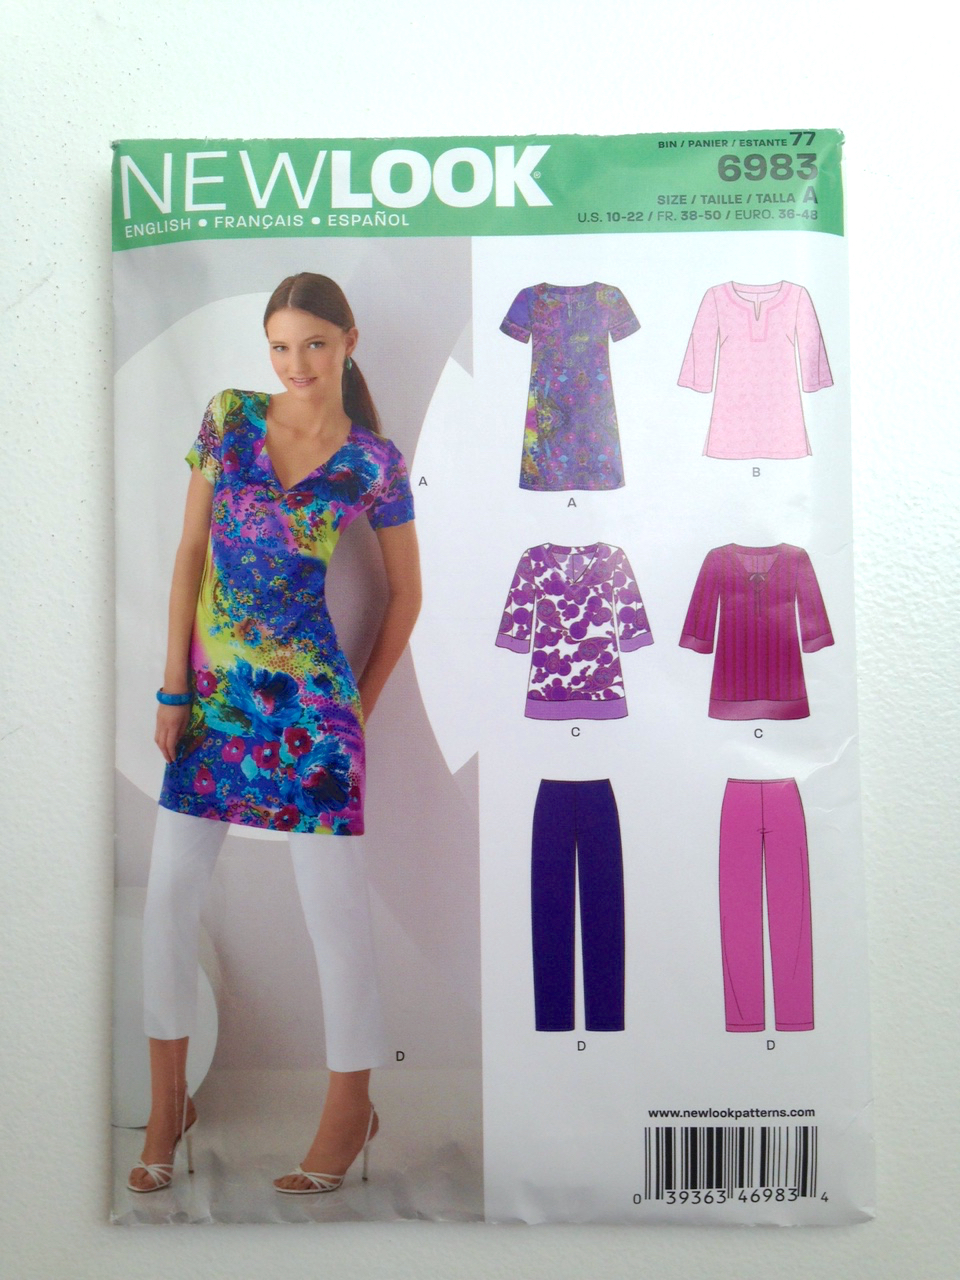
The pattern is New Look 6983 and includes cropped trousers as well as variations on a tunic.
Liking the look of a bold print tunic worn with a pair of Daz-white three-quarter lengths, I also ordered some of the same fabric in plain white.
So, onto the construction of the top which consisted of three basic pieces – a front, back (with facings) and sleeves. Shaping was in the form of two bust darts so, really, it couldn’t be simpler for even a beginner to do.
After putting together the basic shape, including the darts, I always try garments on inside out. This way you get a better idea of how well/badly it actually fits without being distracted by the pattern, and you can also pin any adjustments that need to be made.
Obviously a dressform would be ideal, but I outgrew my old one while I was pregnant ten years ago and have decided the two stone of baby weight is here to stay:)
Again, being a UK size 14, I cut out the US equivalent of size 18.
This time, it really was too big by quite a long way and I ended up taking it in all the way by a whole dress size.
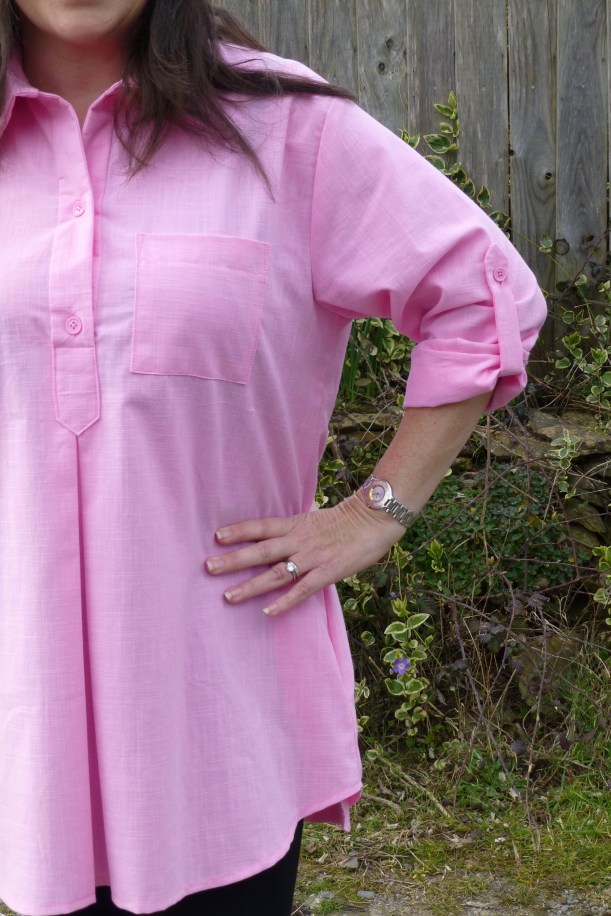
The pattern is very straightforward but included nice details like understitching of the neck facing to create a neater, flatter finish.
I’m really pleased with the way it turned out – it has already attracted many comments:)
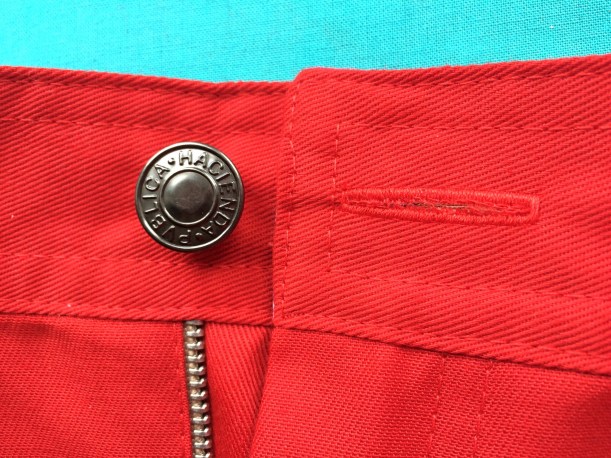
The cropped trousers (well, they weren’t until I shortened them by three inches at the “lengthen/shorthen here” mark!) were also too big initially, so I took them in by a whole dress size too.
There was no waistband for a change, just a facing of petersham ribbon-type tape which lends a clean, minimal look to the trousers and also makes them super comfortable to wear.
The lapped zip is always a neat addition when inserting into a side seam.
A tip is to reinforce at the bottom with several lines of stitching though, as I’ve done here.
They fit well and the stretch in the cotton means that they will be a pleasure to wear – and somewhat smarter than the white leggings that I usually favour!
So, how does the outfit look as a whole?
Just as I had hoped, actually and feels even better due to the stretch in both fabrics.
The New Look pattern was easy to understand and the instructions simple to follow.
The cotton sateen is heavy enough to add structure and the stretch makes for incredible comfort.
Sunnies on and I’m ready to go!
Why not pop over to Minerva Crafts to find your own piece of fabric heaven?
We Brits are a nation of animal lovers, particularly cats and dogs and, generally, we look after them well and love to pamper them just a little.
There inevitably comes a time when we have to say farewell to our loyal companions and, whilst I have lost many a pet over the years, it doesn’t get any easier.
They say the best way to mend a broken heart is to find a new love and certainly the arrival of a new puppy in the family does wonders to heal the gaping hole left by the loss of an old dog.
They also say that a puppy breathes new life into an elderly dog so, when our Yorkshire Terrier reached eleven years, we thought it would be a good time to introduce a puppy.
Yorkies have a life expectancy of 12-15 years so Fifi, who is now 12 1/2, is enjoying her old age with a new spring in her step with the companionship of a younger dog. Tess, who is now an 18 month Yorkie x Chihuahua, has benefited enormously from her older, wiser, calmer and well behaved mentor. When Fifi goes, we will have the comfort of having a dog in the family still. It’s a win-win-win.
Tess has the boundless energy found in one so young and they both enjoy long walks in the country, but recently Fifi has started showing her age. She often turns around and walks back home if we are in the fields behind the house and, if we are doing a lane walk, she plods along slowly unable to keep pace after a couple of miles.
I now get to the point of this story; I wanted to make a dog carrier to take with me on our walks so that Fifi could climb in and rest her weary bones as and when she feels like it and, yes, she does tell us when she wants a carry!
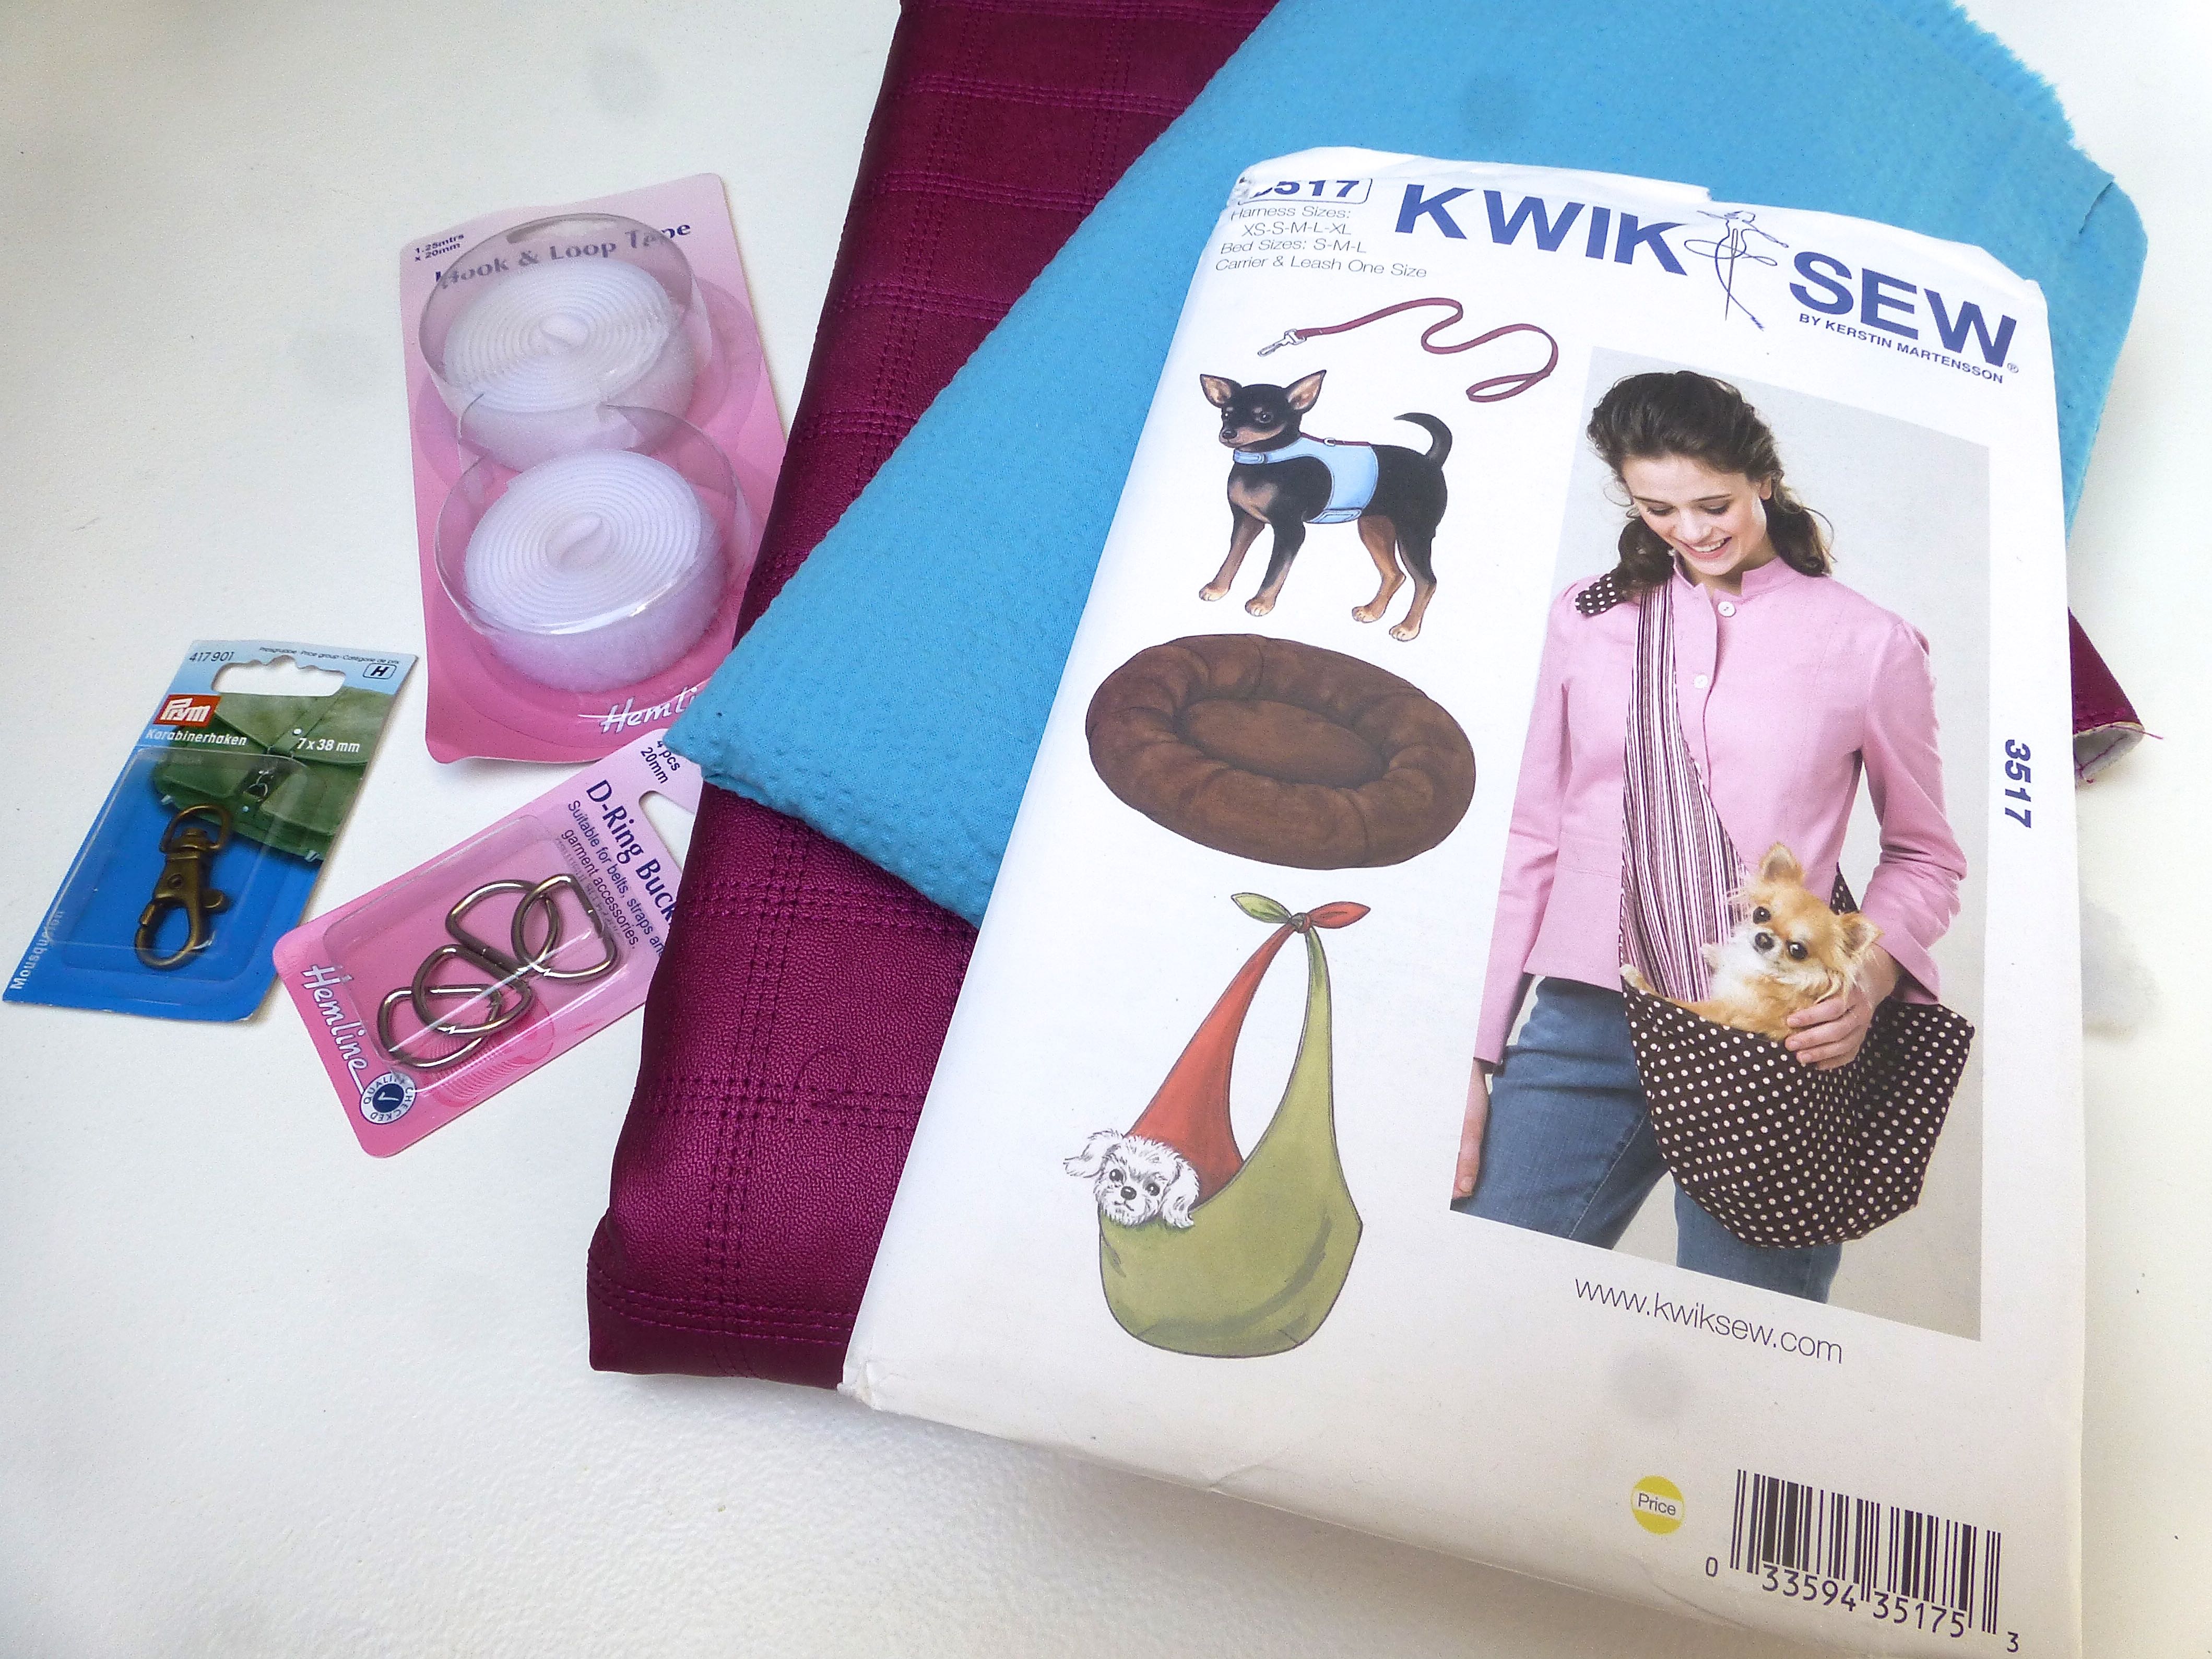
Minerva Crafts had the perfect pattern (Kwik Sew 3517) and fabrics for both a dog carrier and a harness and lead, so I got cracking and decided to make a matching set!
This is the parcel that arrived: –
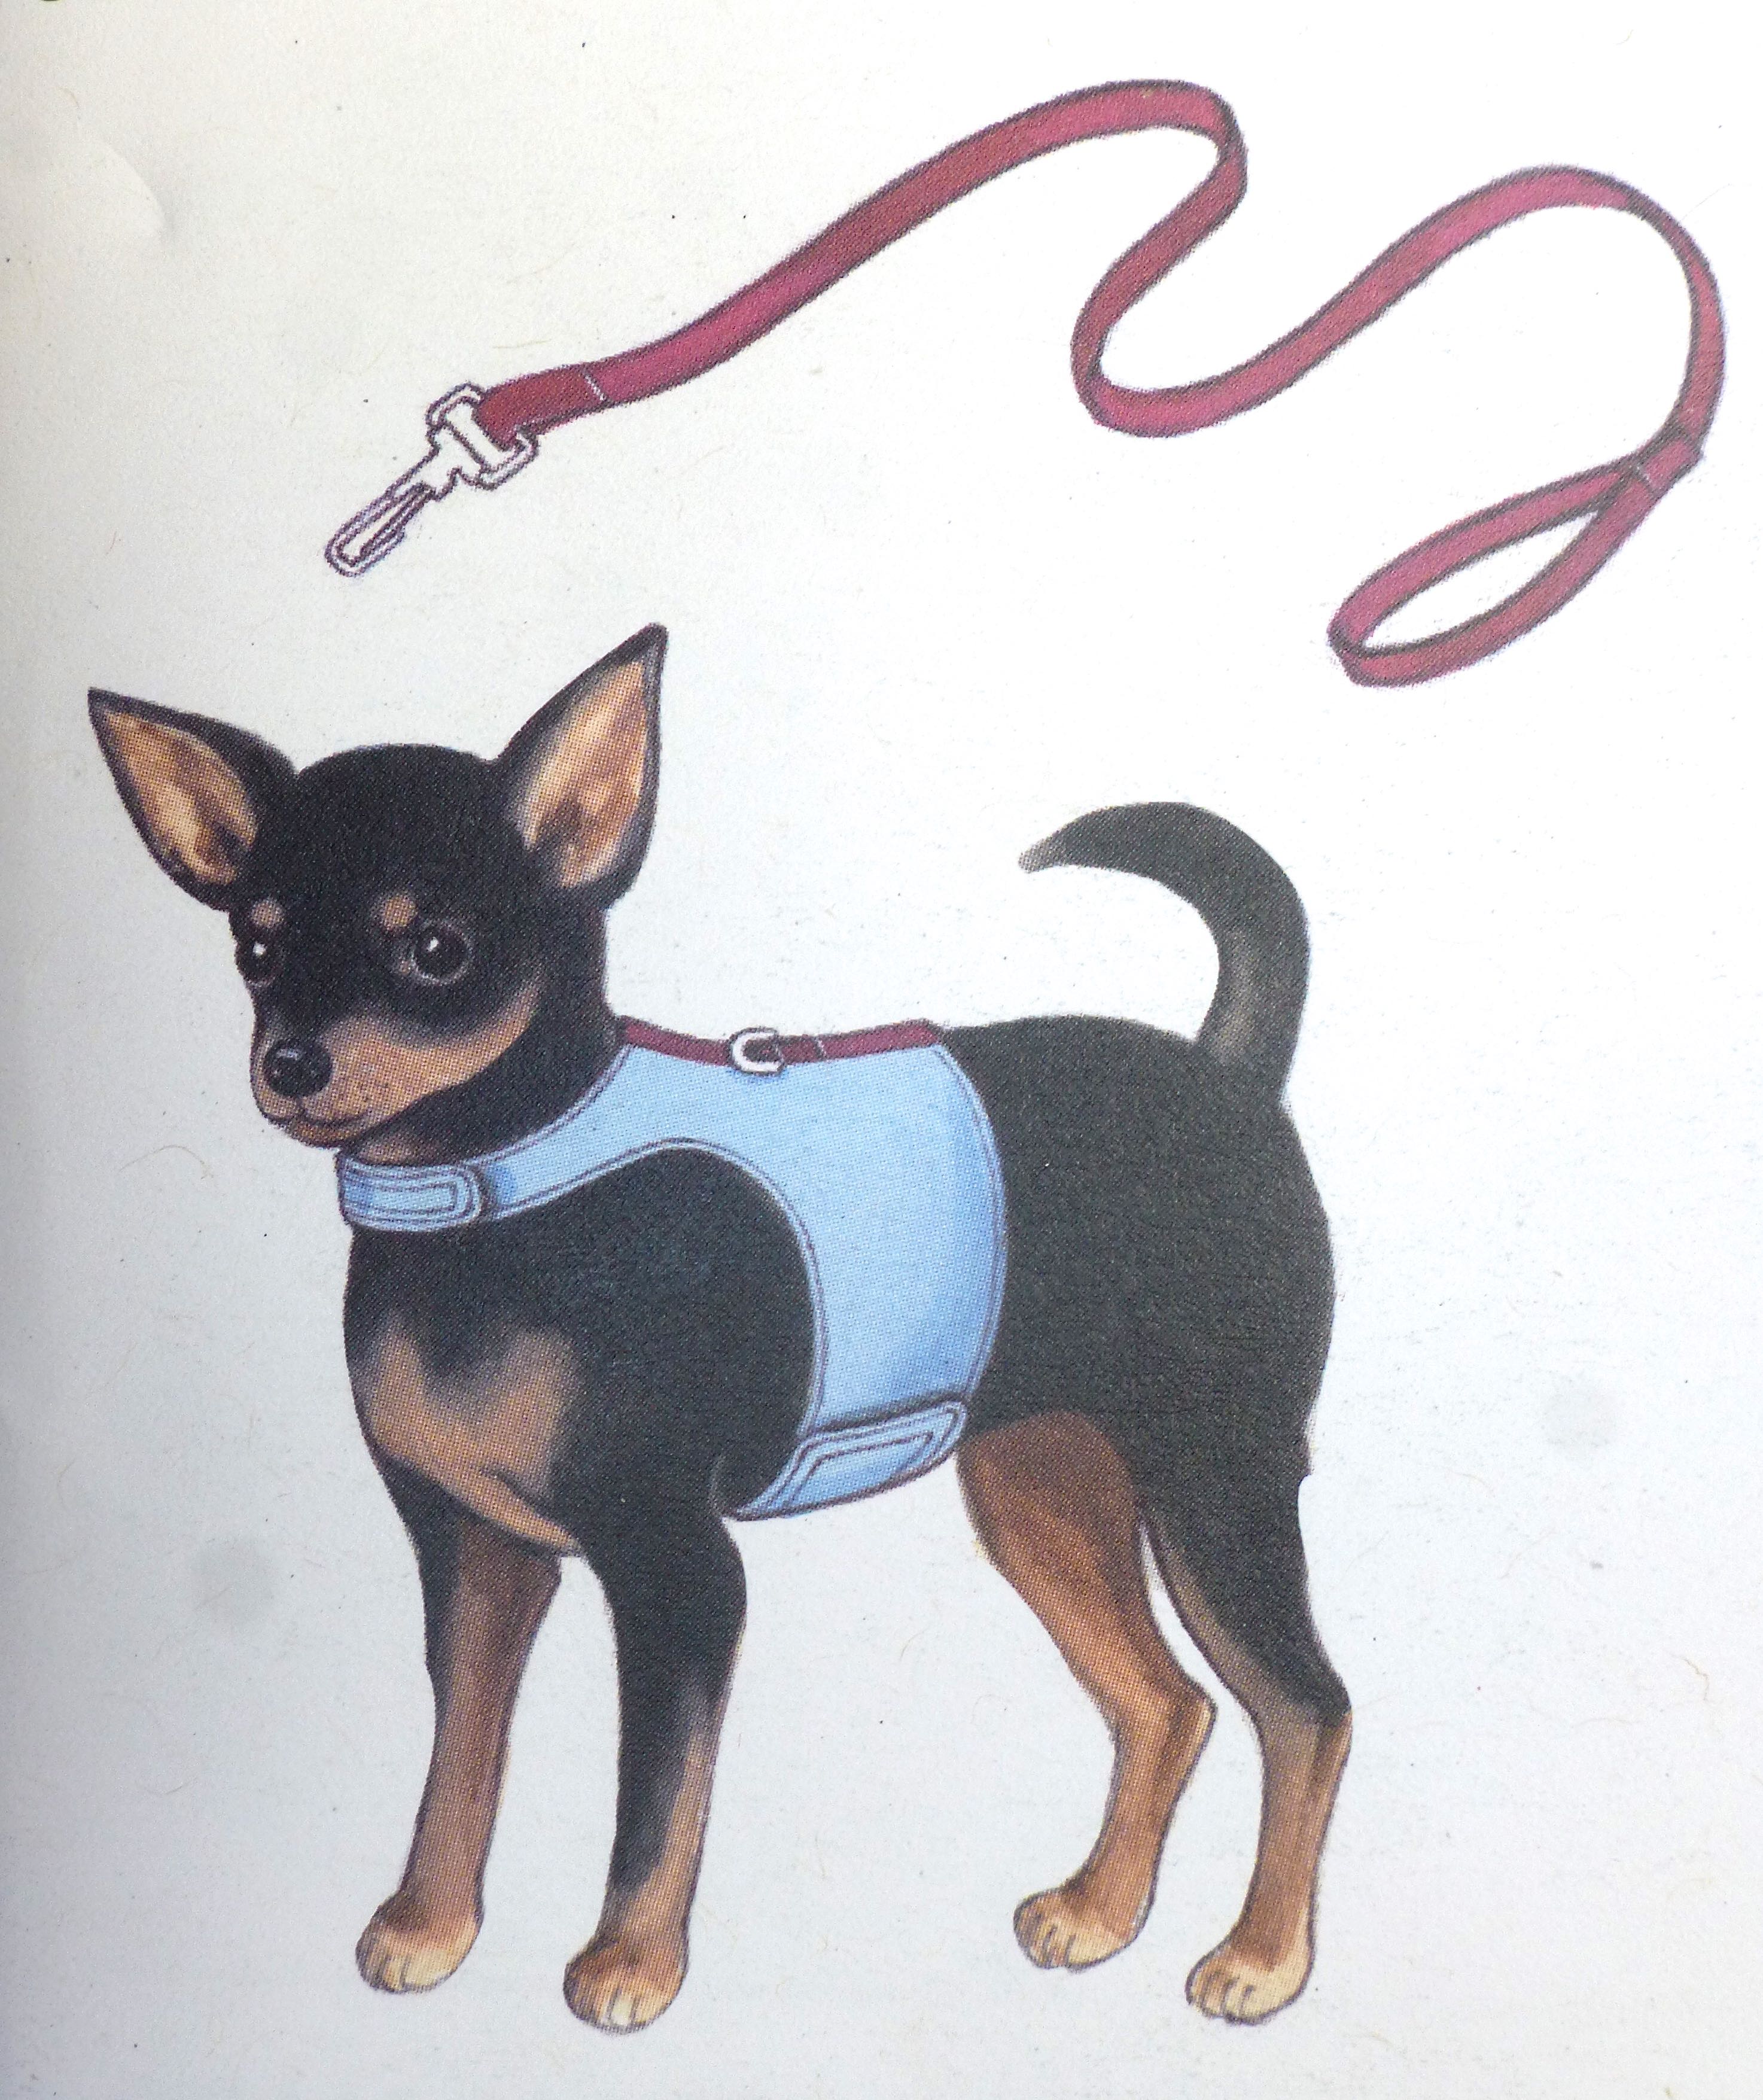
The carrier is lined and padded so is both comfortable for the dog and for you to wear across the body.
It incorporates a swivel clip to secure the dog to the inside of the carrier, but I chose not to include this as Fifi is an old dog and wouldn’t even consider jumping out – being restrained would make her nervous.
I saw the matching accessories and just had to make those too! The swivel clip could be used on the lead instead.
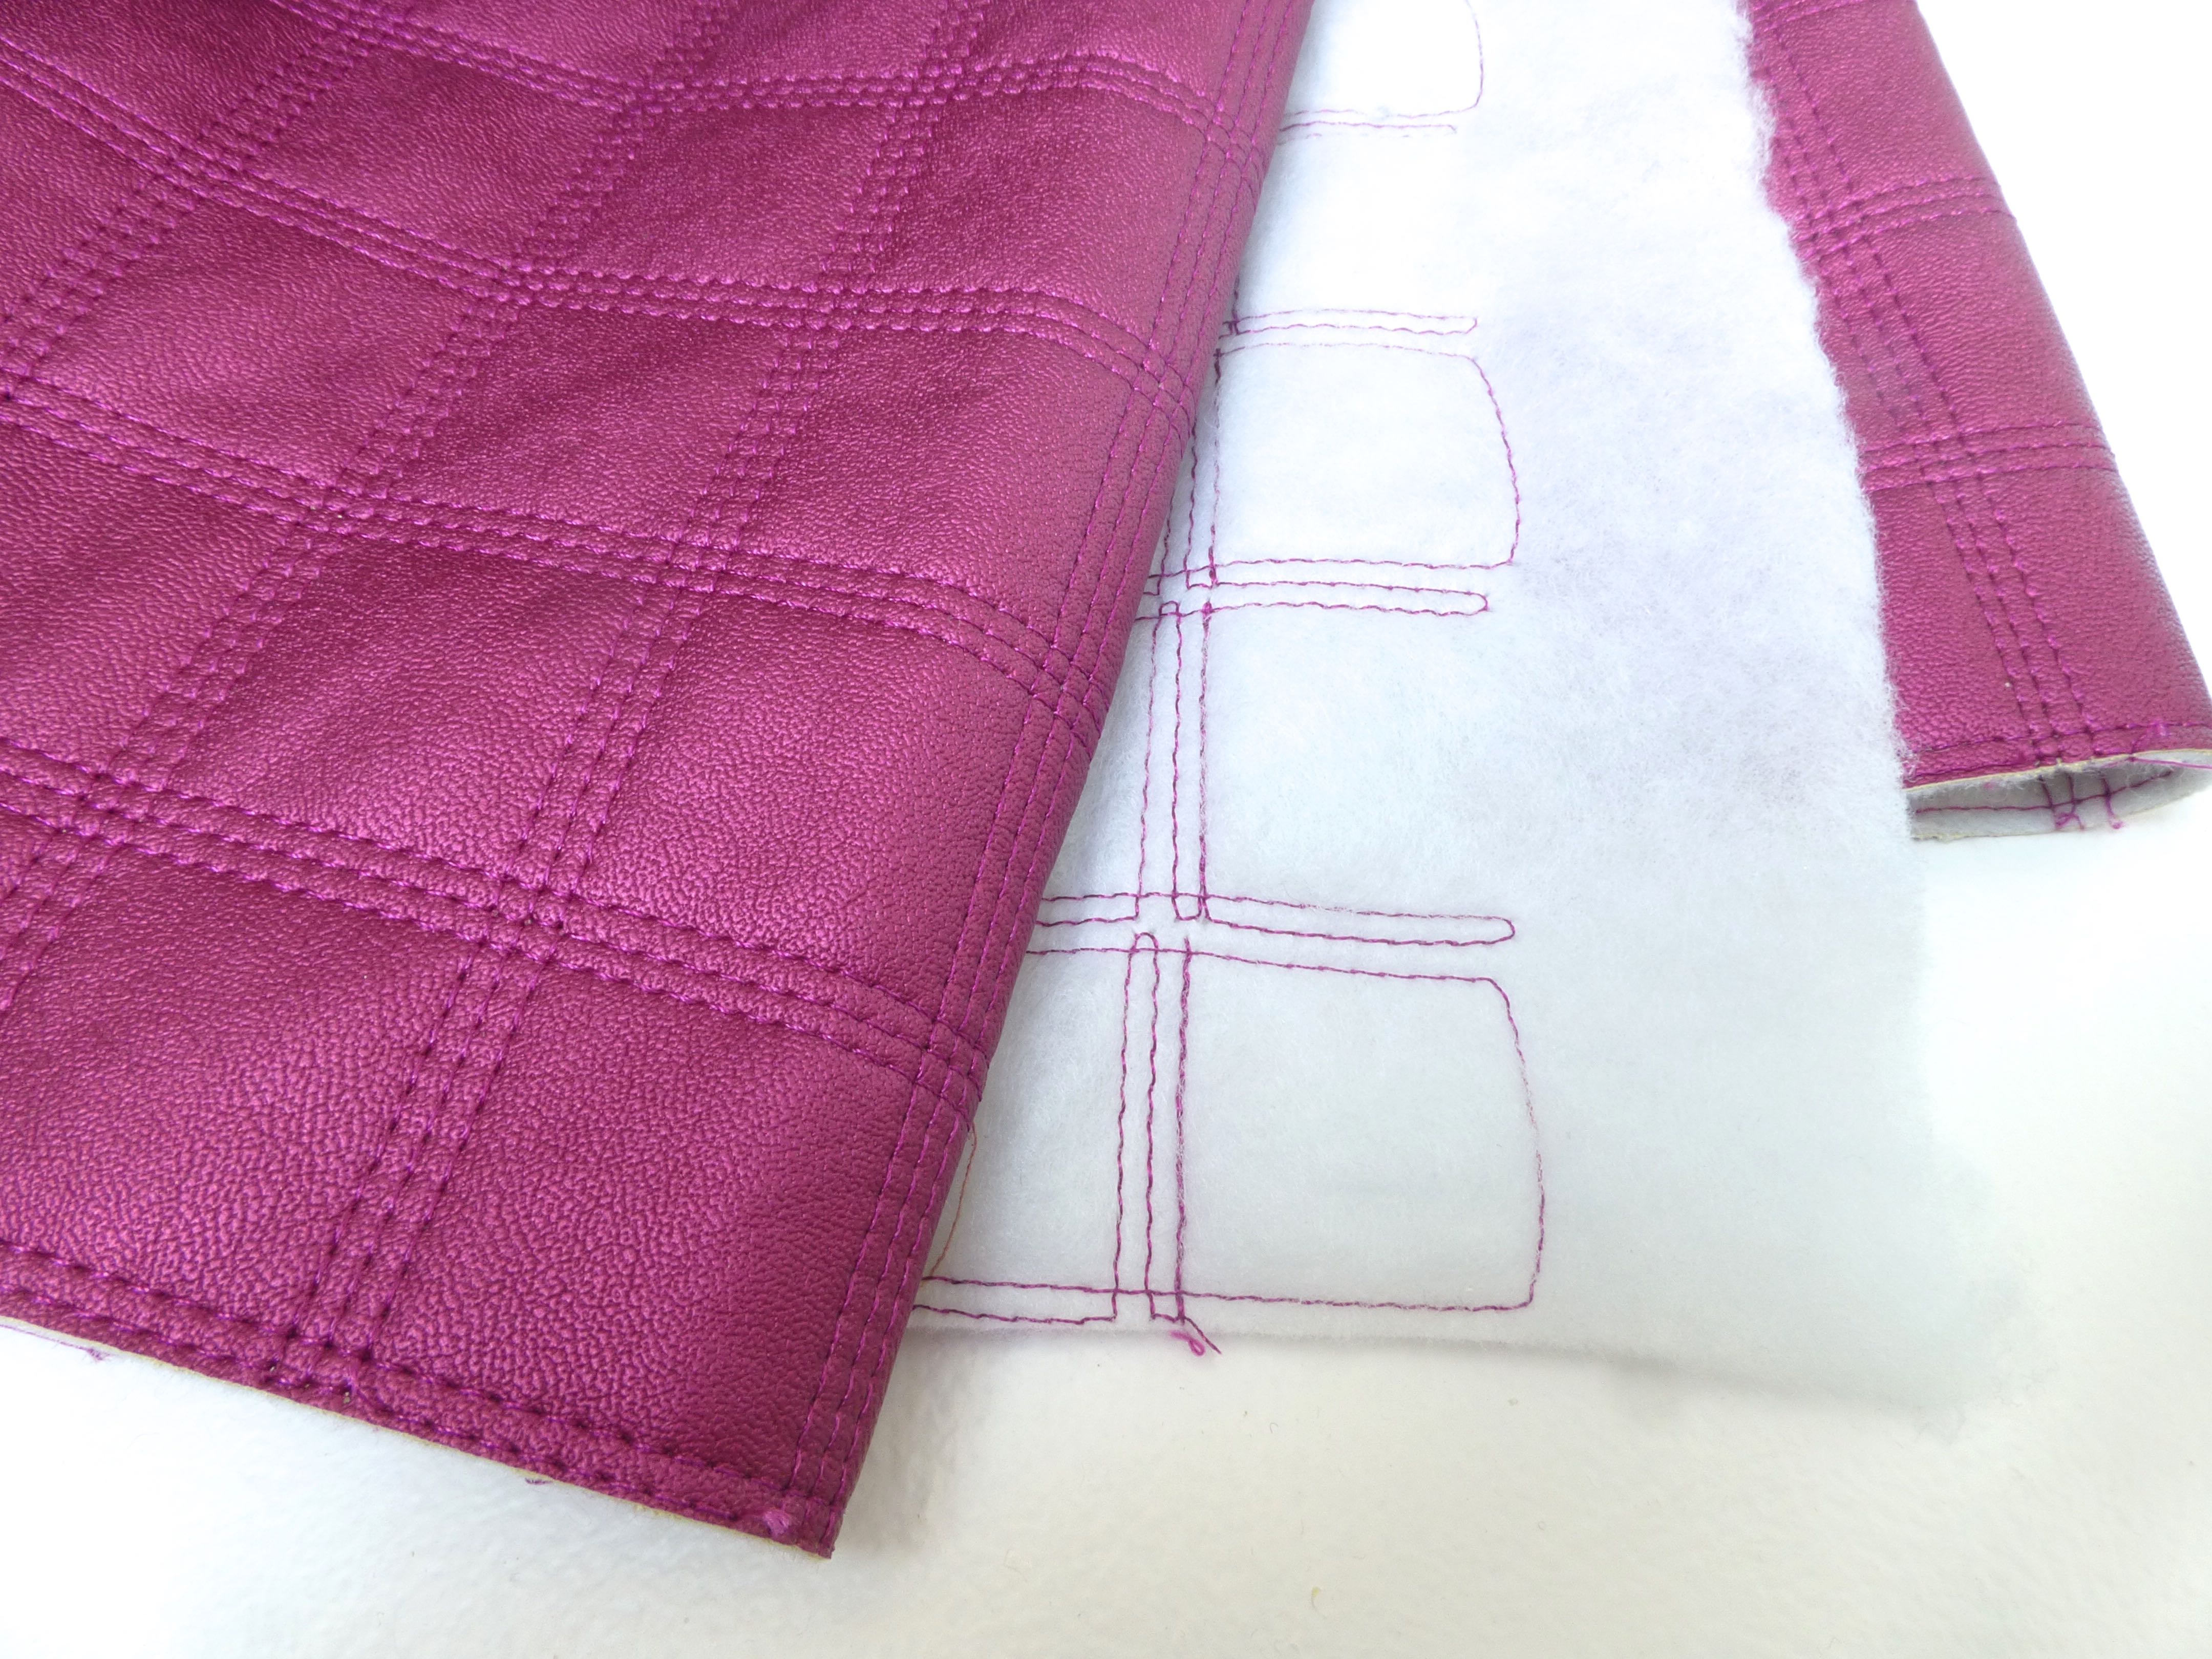
I chose a ready-quilted fabric in a raspberry coloured faux leather which incorporated a layer of wadding so would be the perfect choice, adding structure and warmth to the carrier and harness, yet is also wipeable for practicality.
It also meant that I didn’t need to add the layer of fleece that the pattern called for as the wadding was padding enough.
There was just one single pattern piece for the carrier which made it very simple to cut out.
I have to mention that I was extremely impressed with the quality of the paper used for the pattern – can you get an idea of how sturdy it is from this photo before I ironed it? It’s not transparent or flimsy and therefore doesn’t tear accidentally, unlike the usual brown tissue paper type.
Always iron your pattern pieces!
The carrier made up like a dream – the instructions were simple and easy to follow. You’re required to press at every stage which I couldn’t do with the faux leather in case it melted. When top stitching, it wasn’t a problem just rolling the faux leather out slightly over the cotton to get a crisp edge so being unable to iron it didn’t matter.
Here is the finished carrier….
….and here’s Fifi trying it for size!
She may look a little reticent in this photo, but she actually curled up happily and let me snap away until I got the pics I needed.
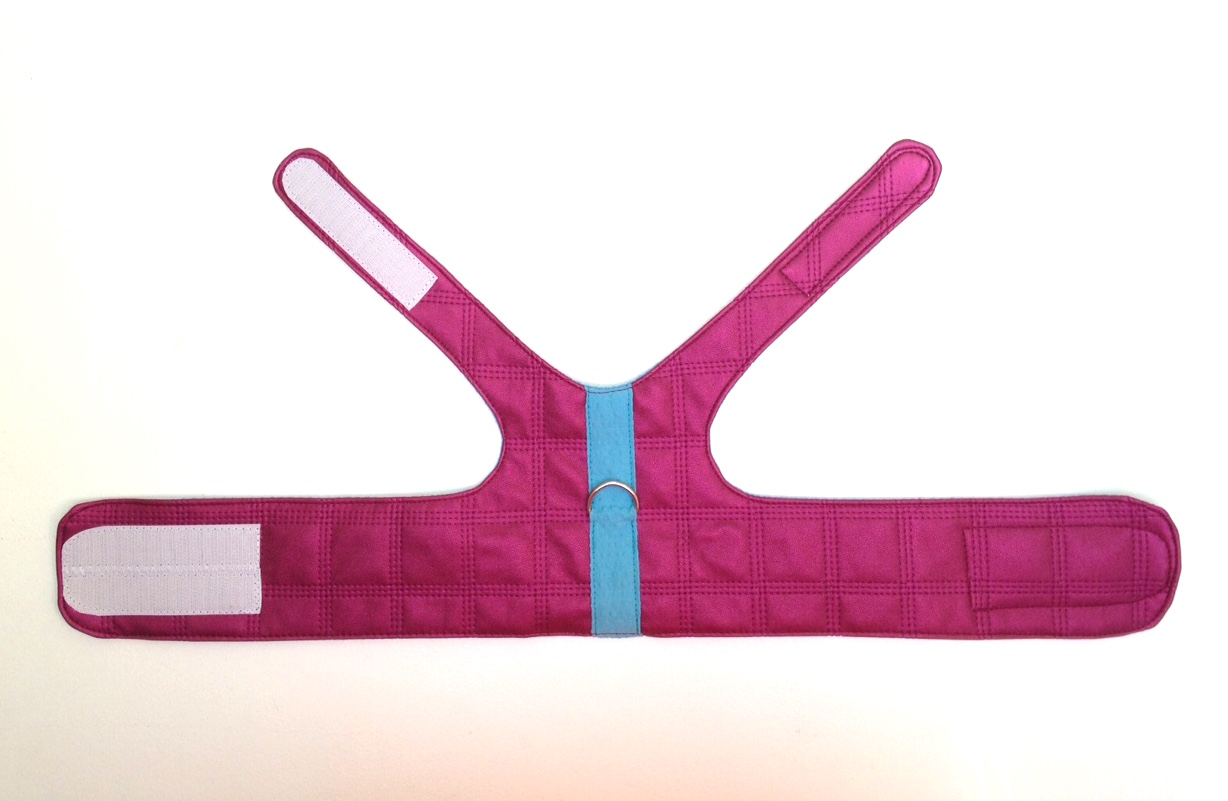
Then onto the harness.
Again, just one main pattern piece (plus a piece for a strap for the D-ring) so the lining and main fabric were simply sewn right sides together before being turned through a gap in the stitching.
Simples:)
Sew the scratchy side of the velcro to the outside….
…and the soft side to the inside lining. We don’t want friction causing any nasty sores, do we?
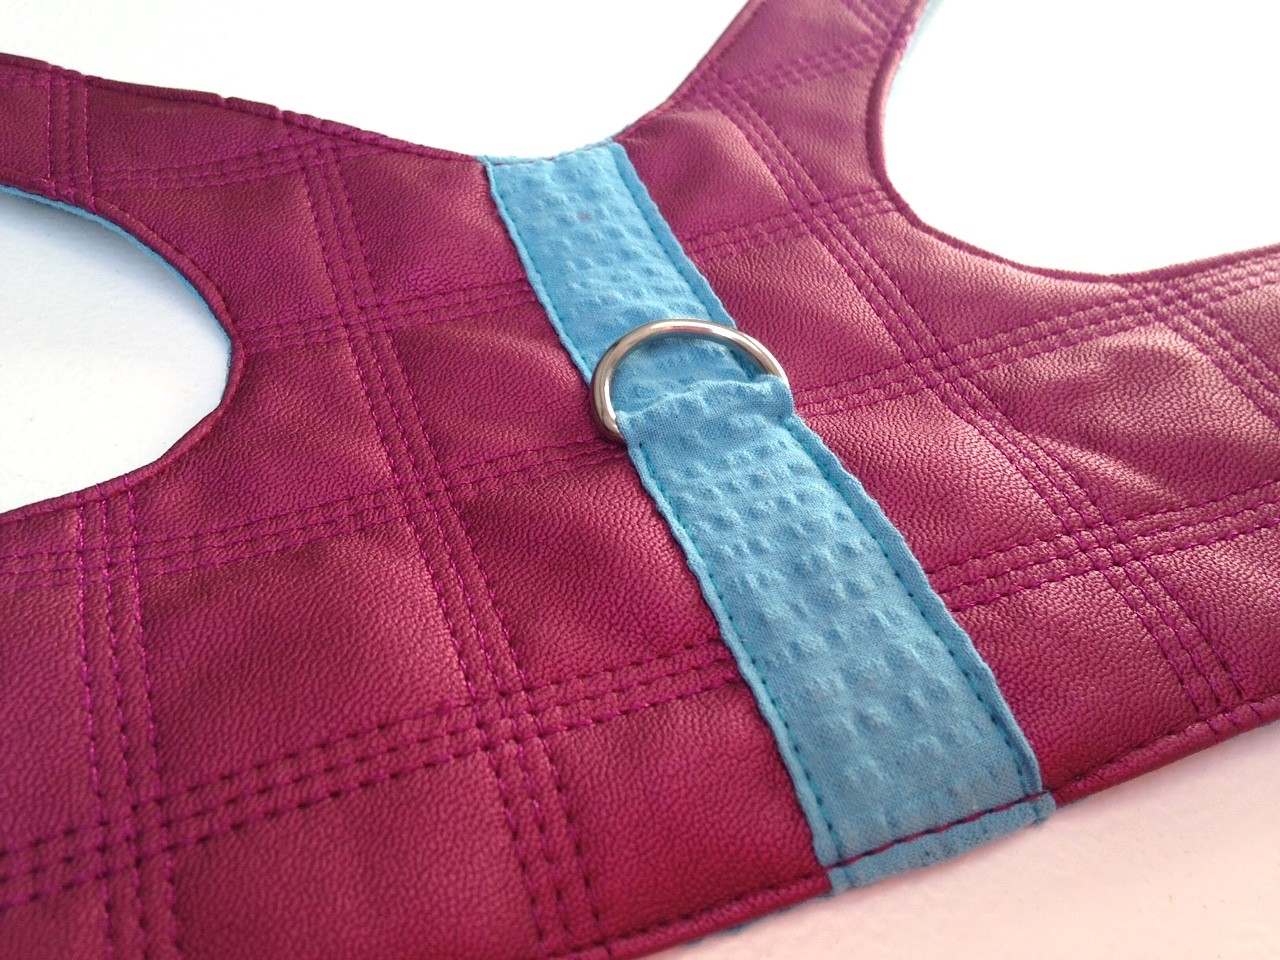
I used the lining fabric as a contrast for the D-ring strap which was top stitched on securely.
Different coloured thread was used for the bobbin for a ‘blend in’ effect but opposite colours would work equally well if you prefer a contrast – turquoise on the magenta and vice versa.
How ‘Designer’ does that look, eh?
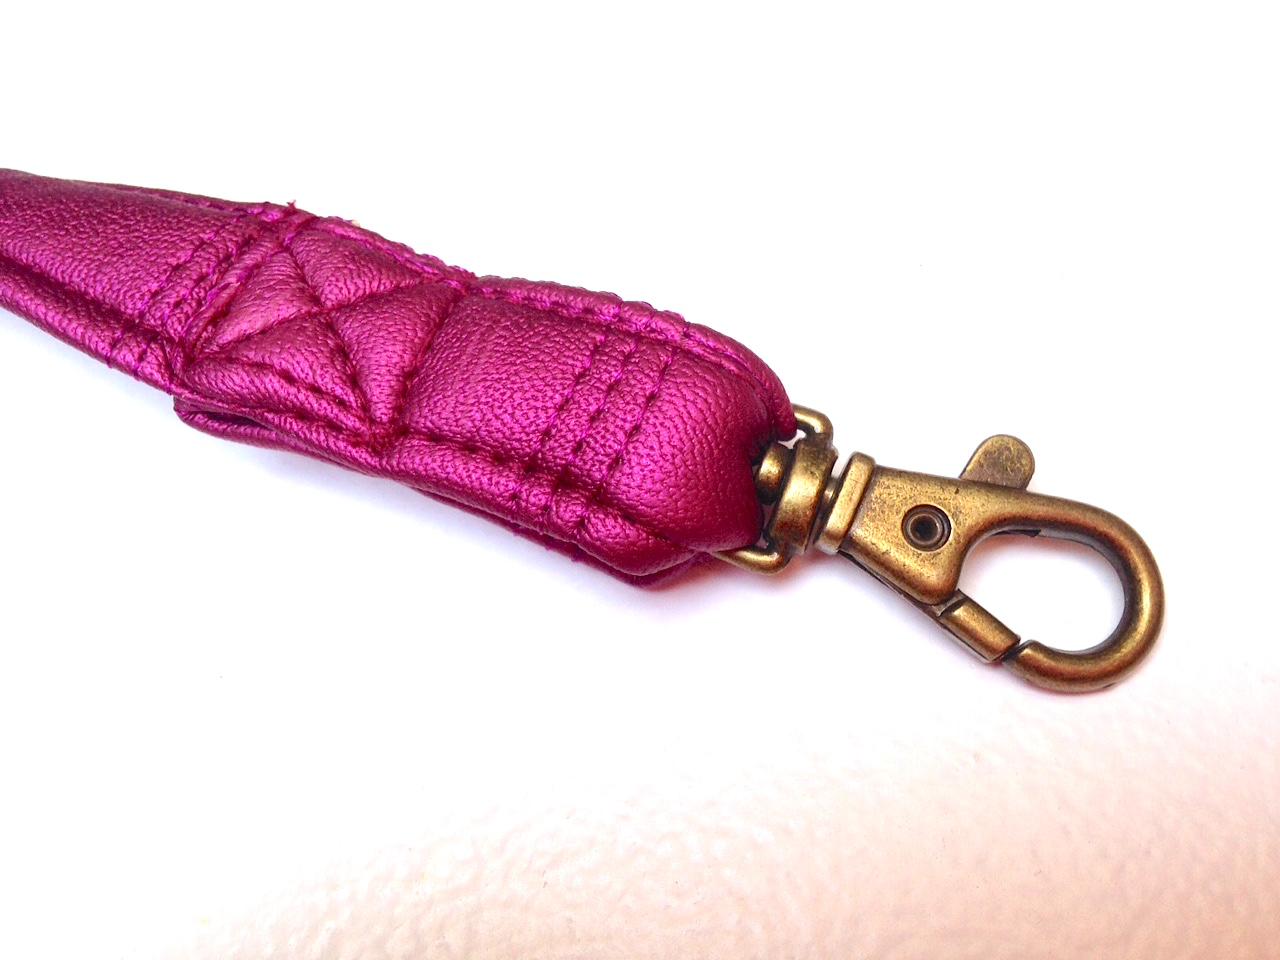
I almost plumped for the turquoise cotton to make the lead, but in the end thought the quilted fabric looked more luxurious.
It was a bit of a pig to fold and top stitch such a narrow, thick strip of fabric though, the cotton would have been a piece of cake to press and stitch but you can’t iron faux leather….
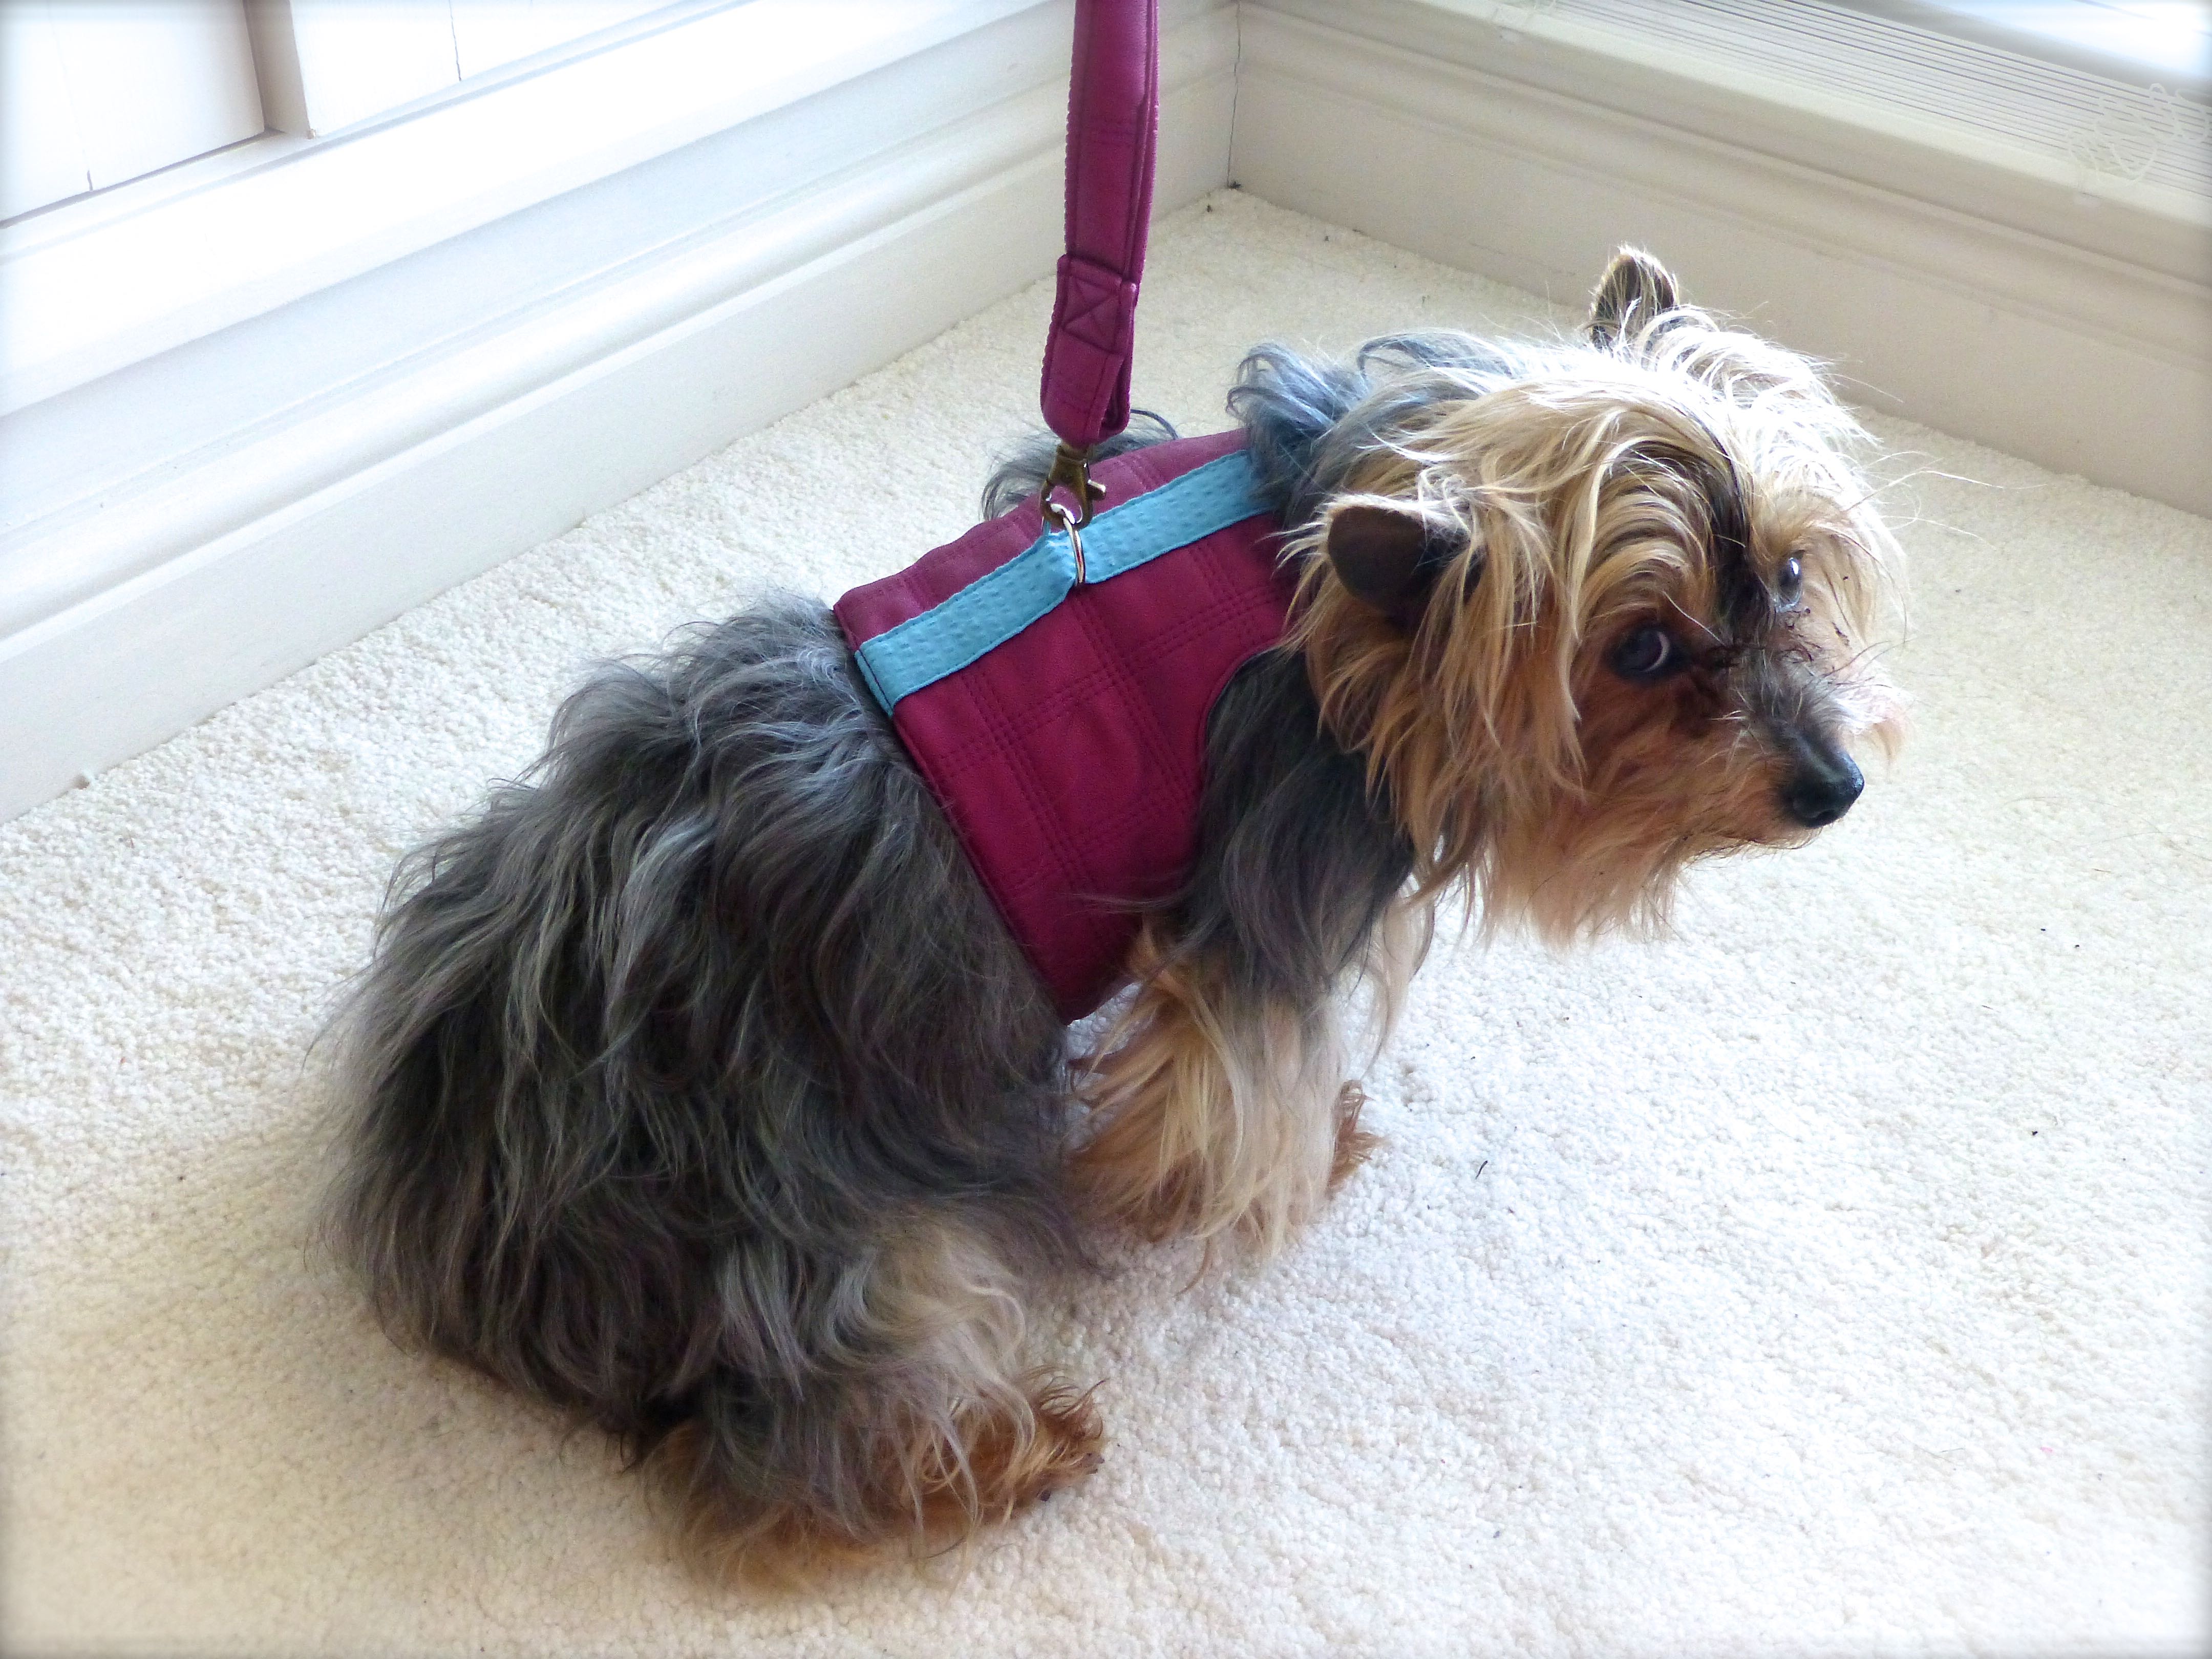
Just look at Fifi’s hang-dog expression! She was itching to come to me but I wanted a photo from the back to show off the harness to best effect, so this is her being patient with me.
I sewed the ‘Large’ size harness believe it or not (Fifi only weighs six pounds!), but there was one larger and three smaller sizes on this multi-sized pattern. I’m guessing the variation in sizes would probably fit from a Chihuahua to a Westie.
Here we all are, ready to go for a ‘walk’.
I think I’ll tie it up a bit higher as I usually carry her under my arm and this feels a little low.
Fifi loved it though – she was almost asleep by the time No.3 Son had finished taking photos!
Thanks go to Minerva Crafts for providing all the materials for these items – why not pop over to visit the others on the Blogger Network and see what they’ve been up to lately?
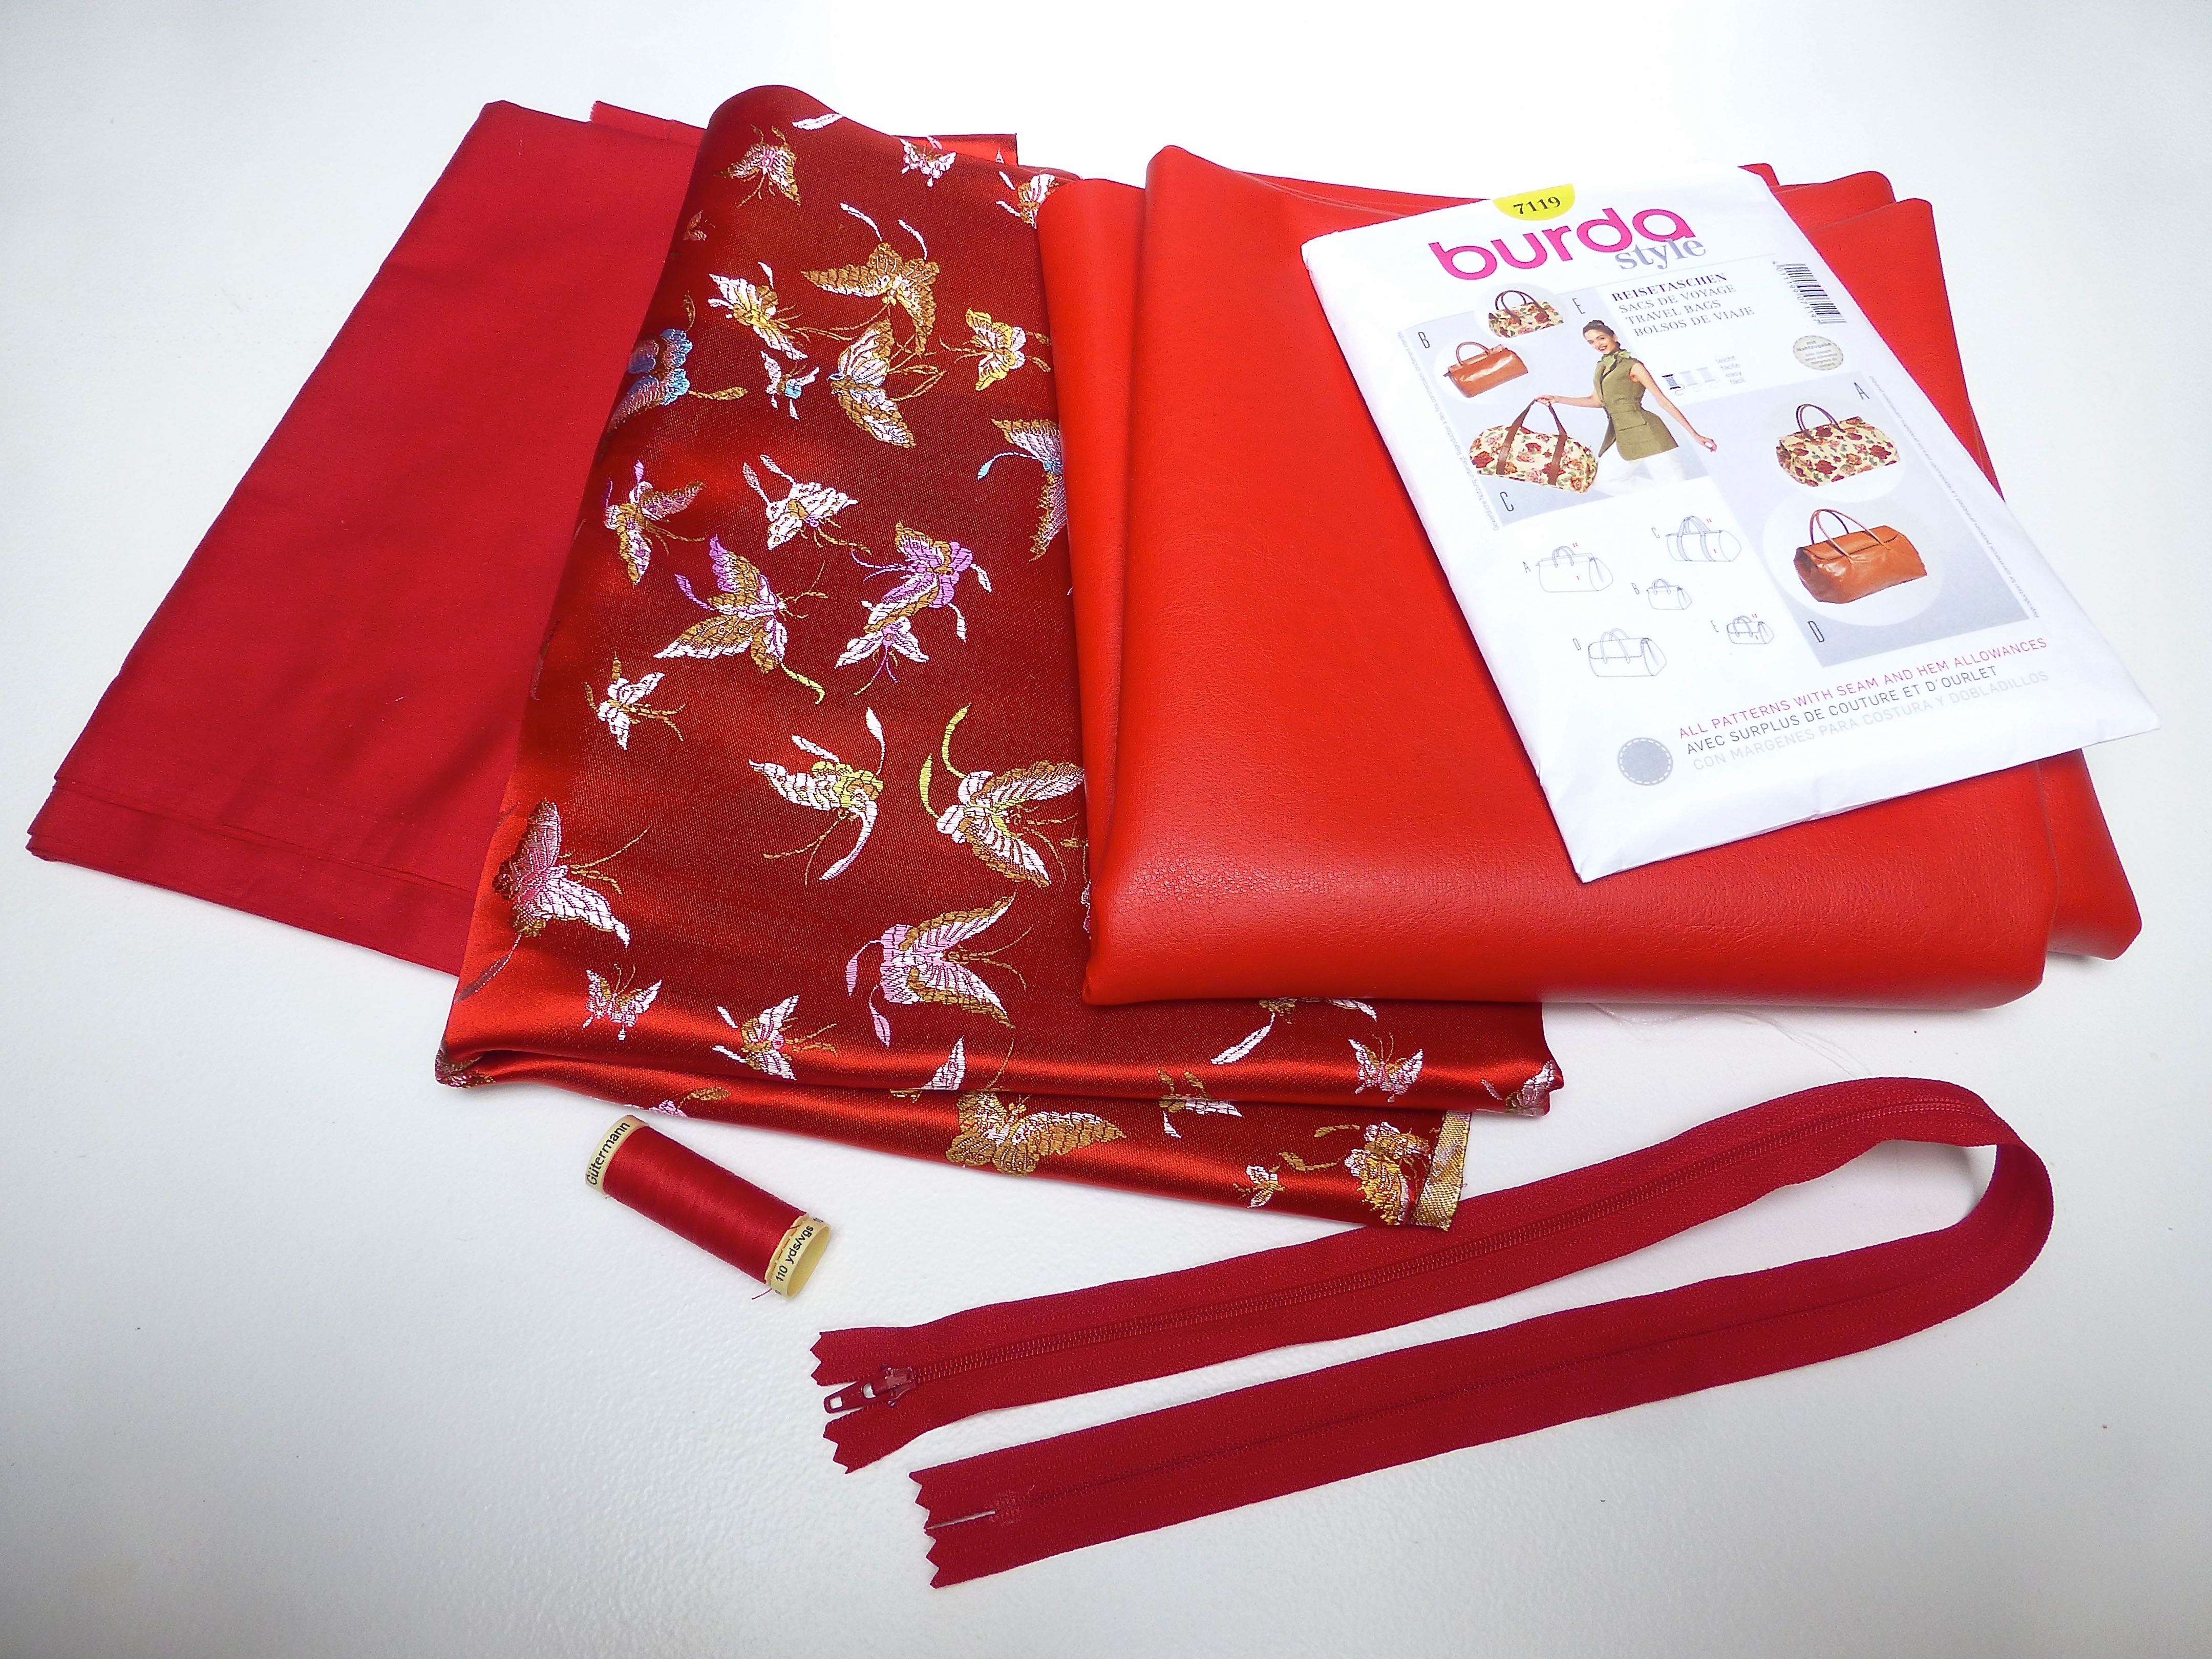
I’m really excited about my Minerva Bloggers project this month especially so because of the totally fabulous Chinese Brocade that I have used. The colour is a vibrant Pillar Box Red and the motif is a repeating butterfly pattern which shimmers in the light due to the metallic thread running through the medium-heavy weight satin.
It can never be said that I’m afraid of colour!
As soon as I saw this fabric I was desperate to use it – I had considered a kimono style dressing gown as kimonos are very ‘in’ at the moment and it would make a very decadent one, but I don’t need another.
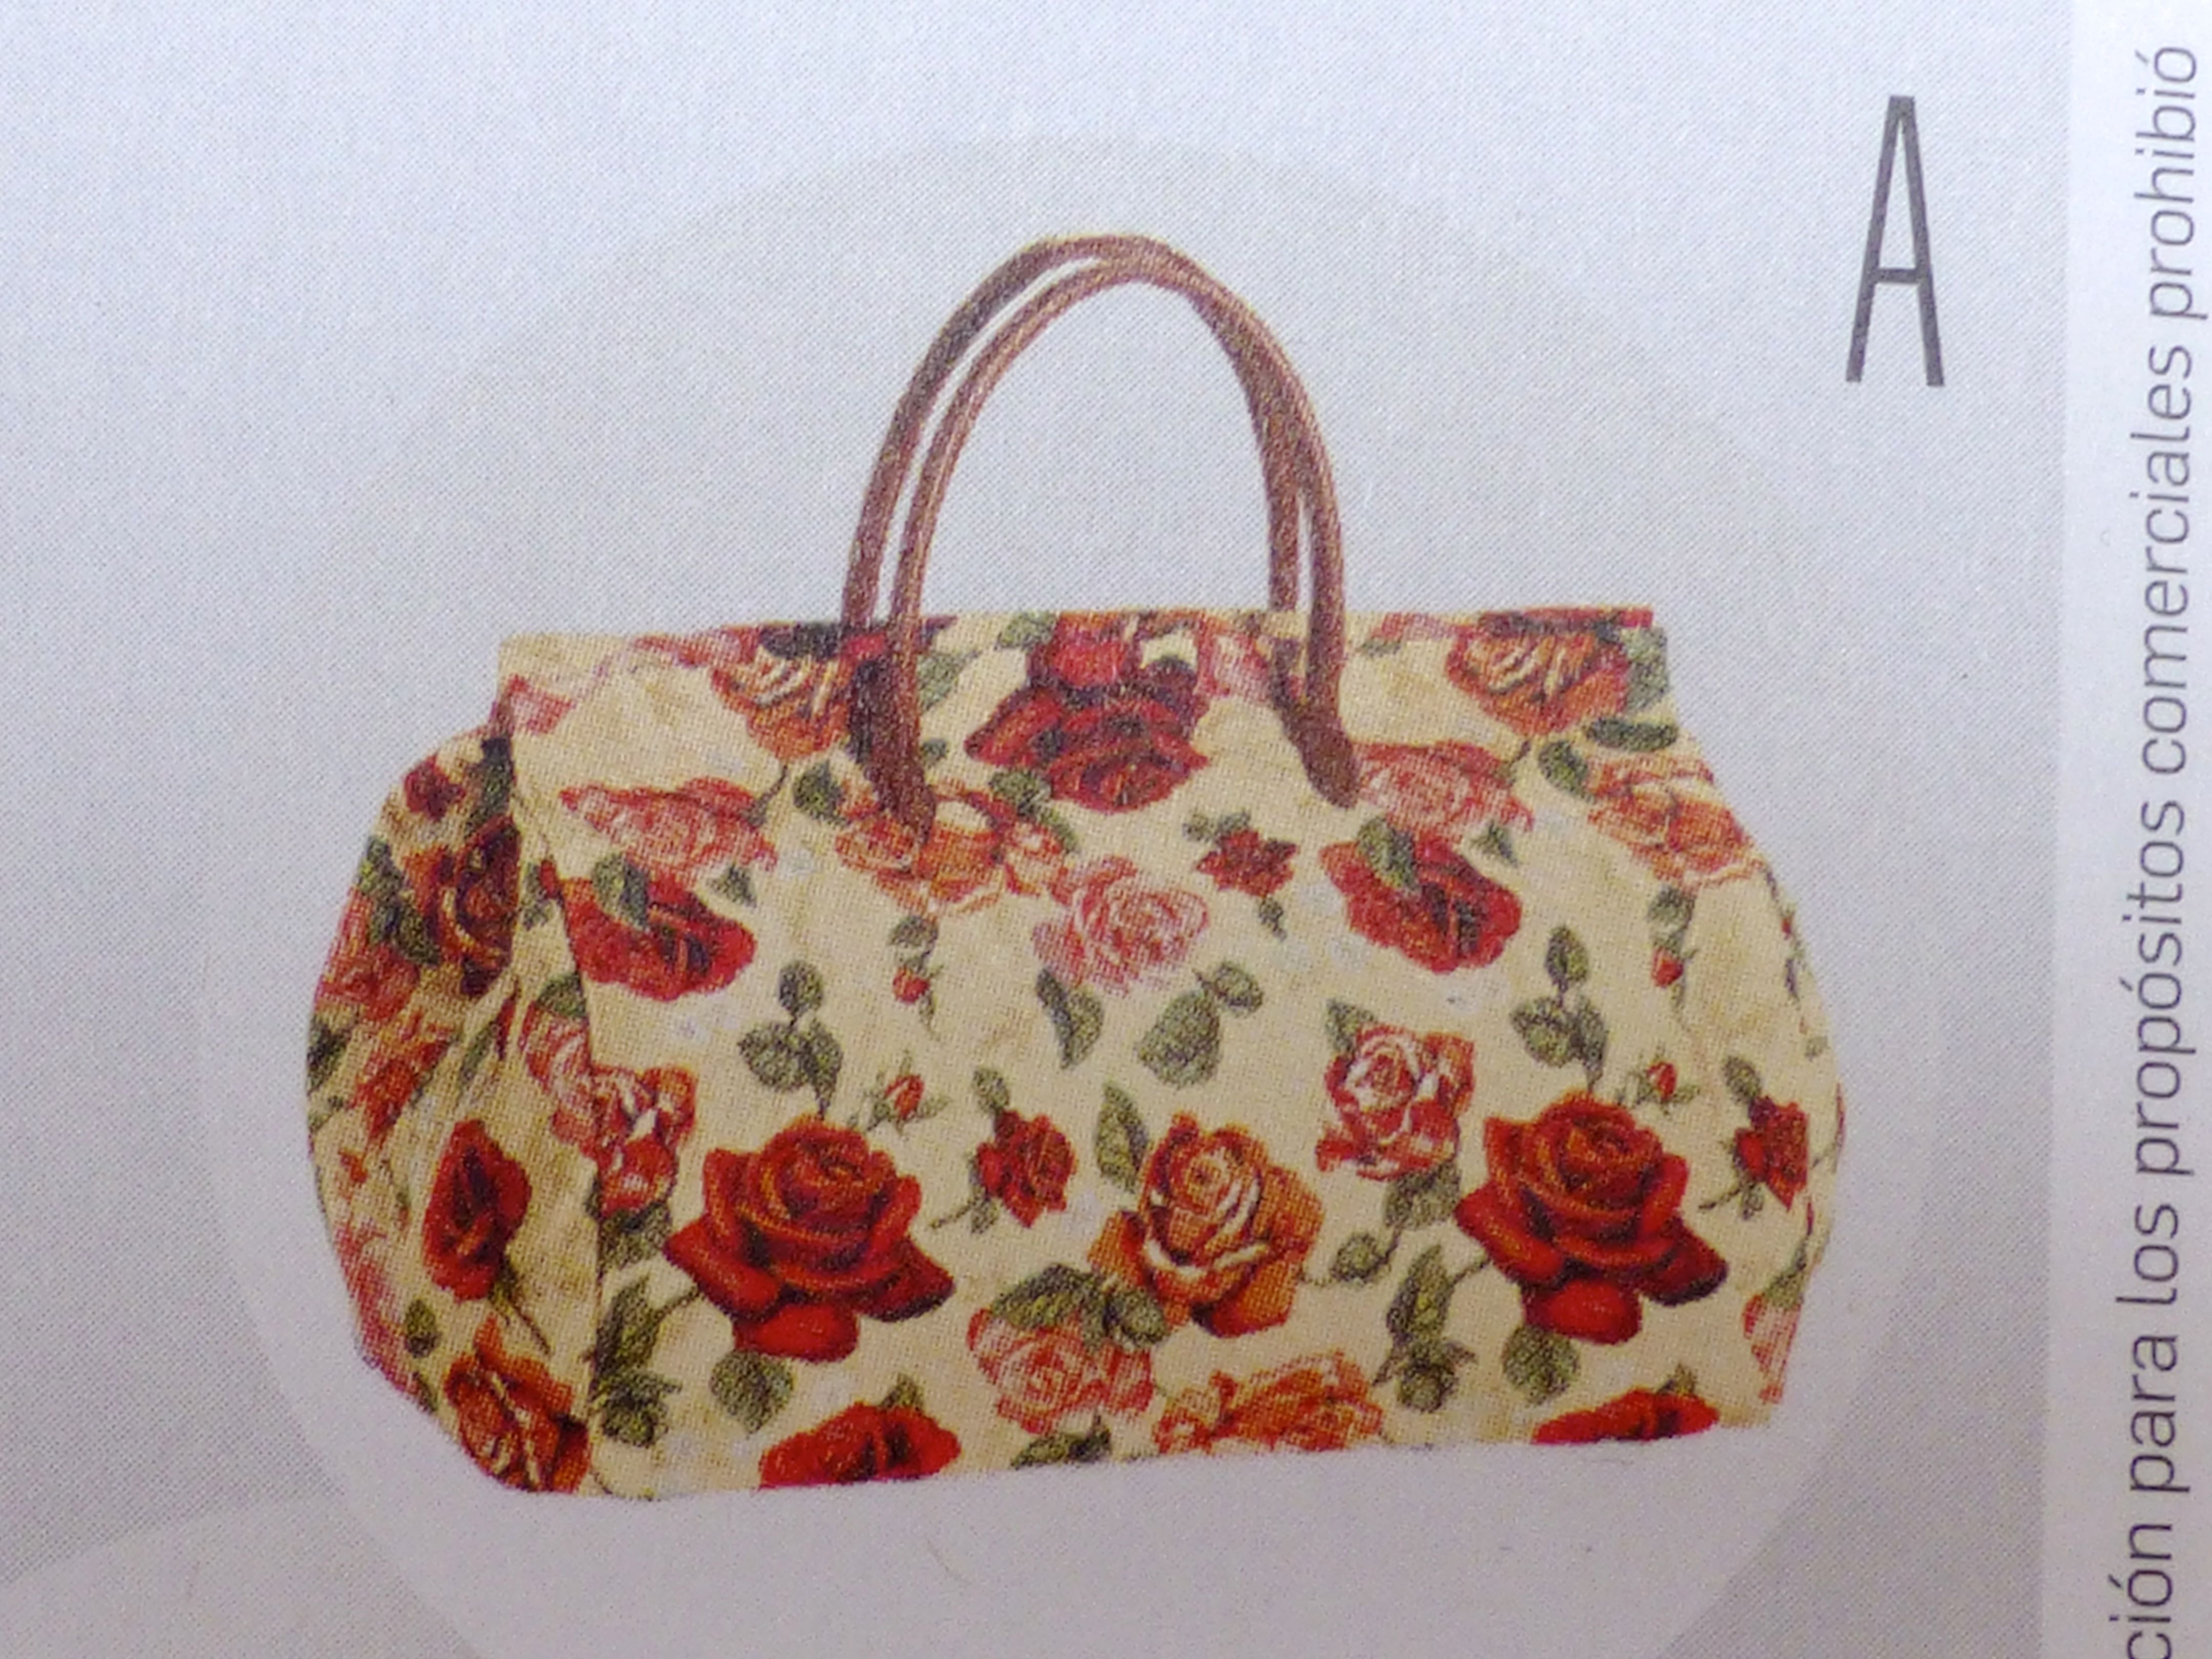
I do, however, need a new weekend bag as my old faithful is falling apart at the seams and looking extremely tatty. I wanted a pattern that wasn’t too fussy or detracted from the beautiful fabric which needs a starring rôle, so I was delighted when I stumbled upon Burda Style 7119.
I chose view ‘A’ which reminds me of the old Doctors’ bags or carpet bags.
The pattern has been classed as “Easy” by Burda and I have to agree, although the handles may prove fiddly for the absolute beginner.
It has been commented that I like a more roomy bag (see my “Sew Retro” bag) and this one is no exception. My fabric choice makes it a softly structured option but I can see it working even better in a leatherette or vinyl.
In fact, although I ordered a metre of bright red leatherette, I only used a tiny amount to make the handles so there is plenty left to make up a smaller version. Maybe a wash bag with waterproof lining?
These are the supplies, including matching red cotton lining, zip and thread. What a happy photo – red makes me want to shout out loud!
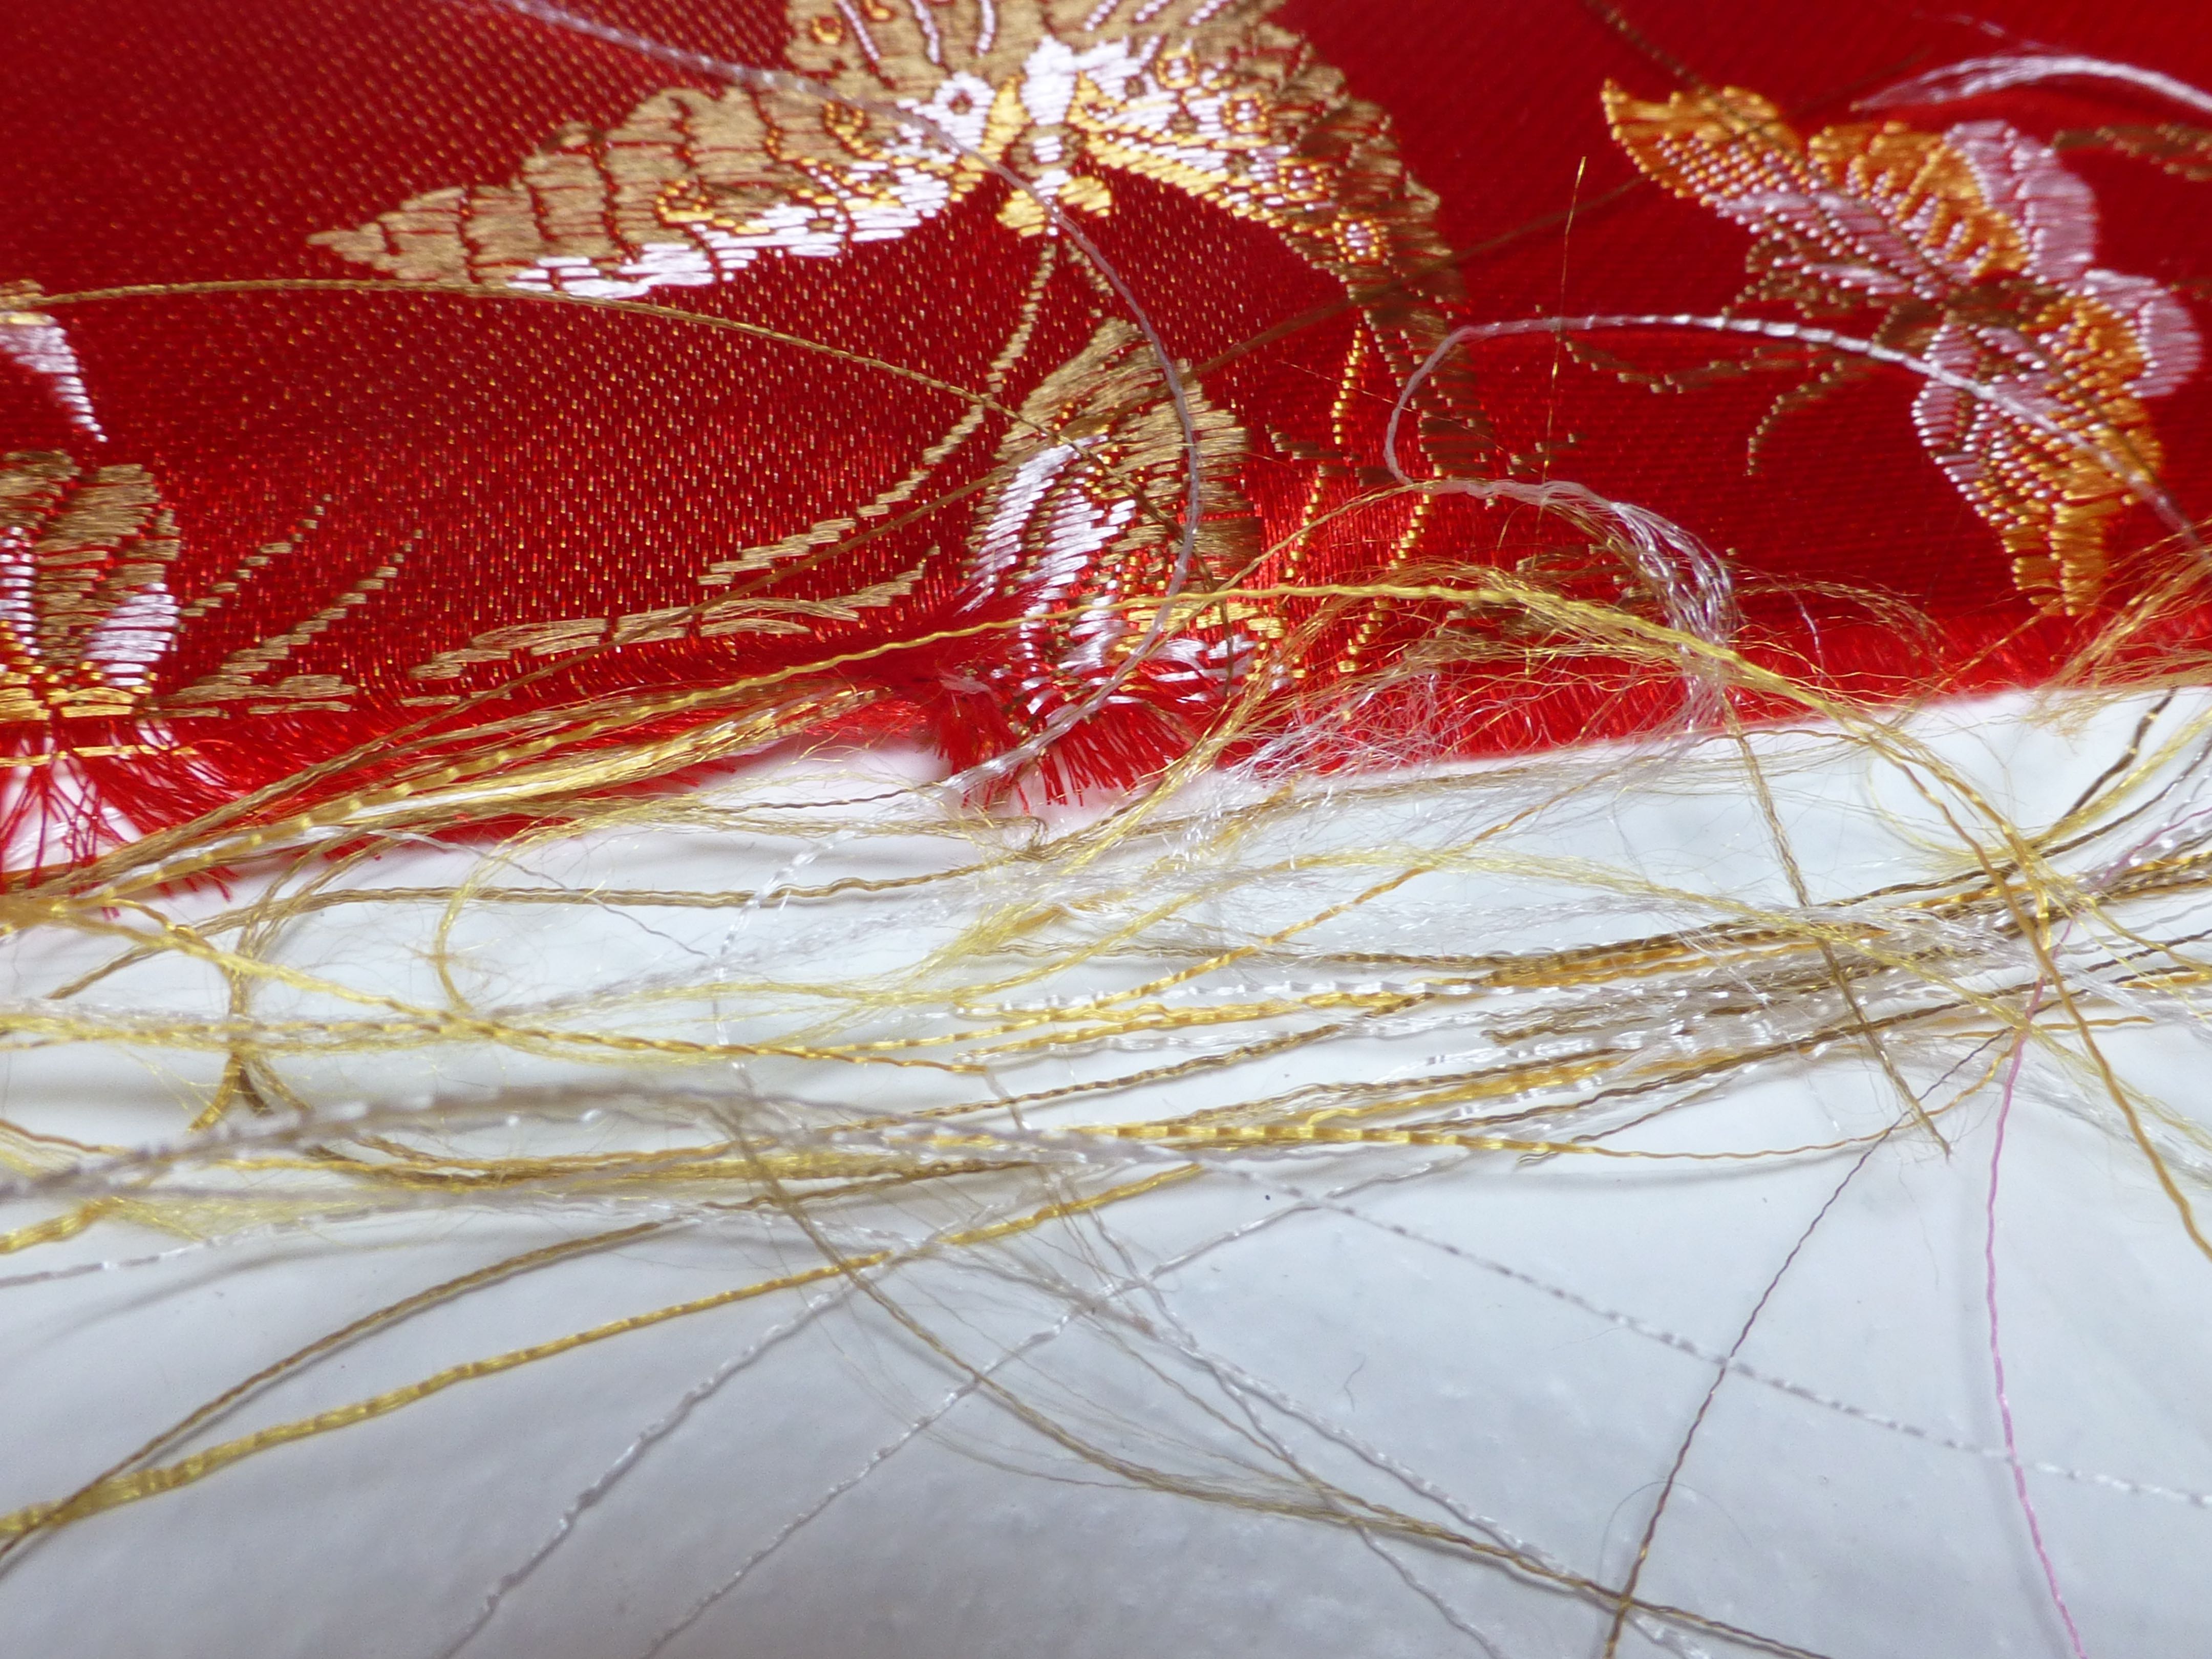
The downside to using brocade is that it frays extremely easily. The pattern is not printed onto the fabric, it is woven with shimmery, metallic threads which are so beautiful (the photographs do not do it justice!) but which slide out at the slightest touch.
To prevent the fraying and to make sewing a much easier experience, I overlocked every single raw edge which I wouldn’t normally do when the edges are encased within a lining.
That’s better!
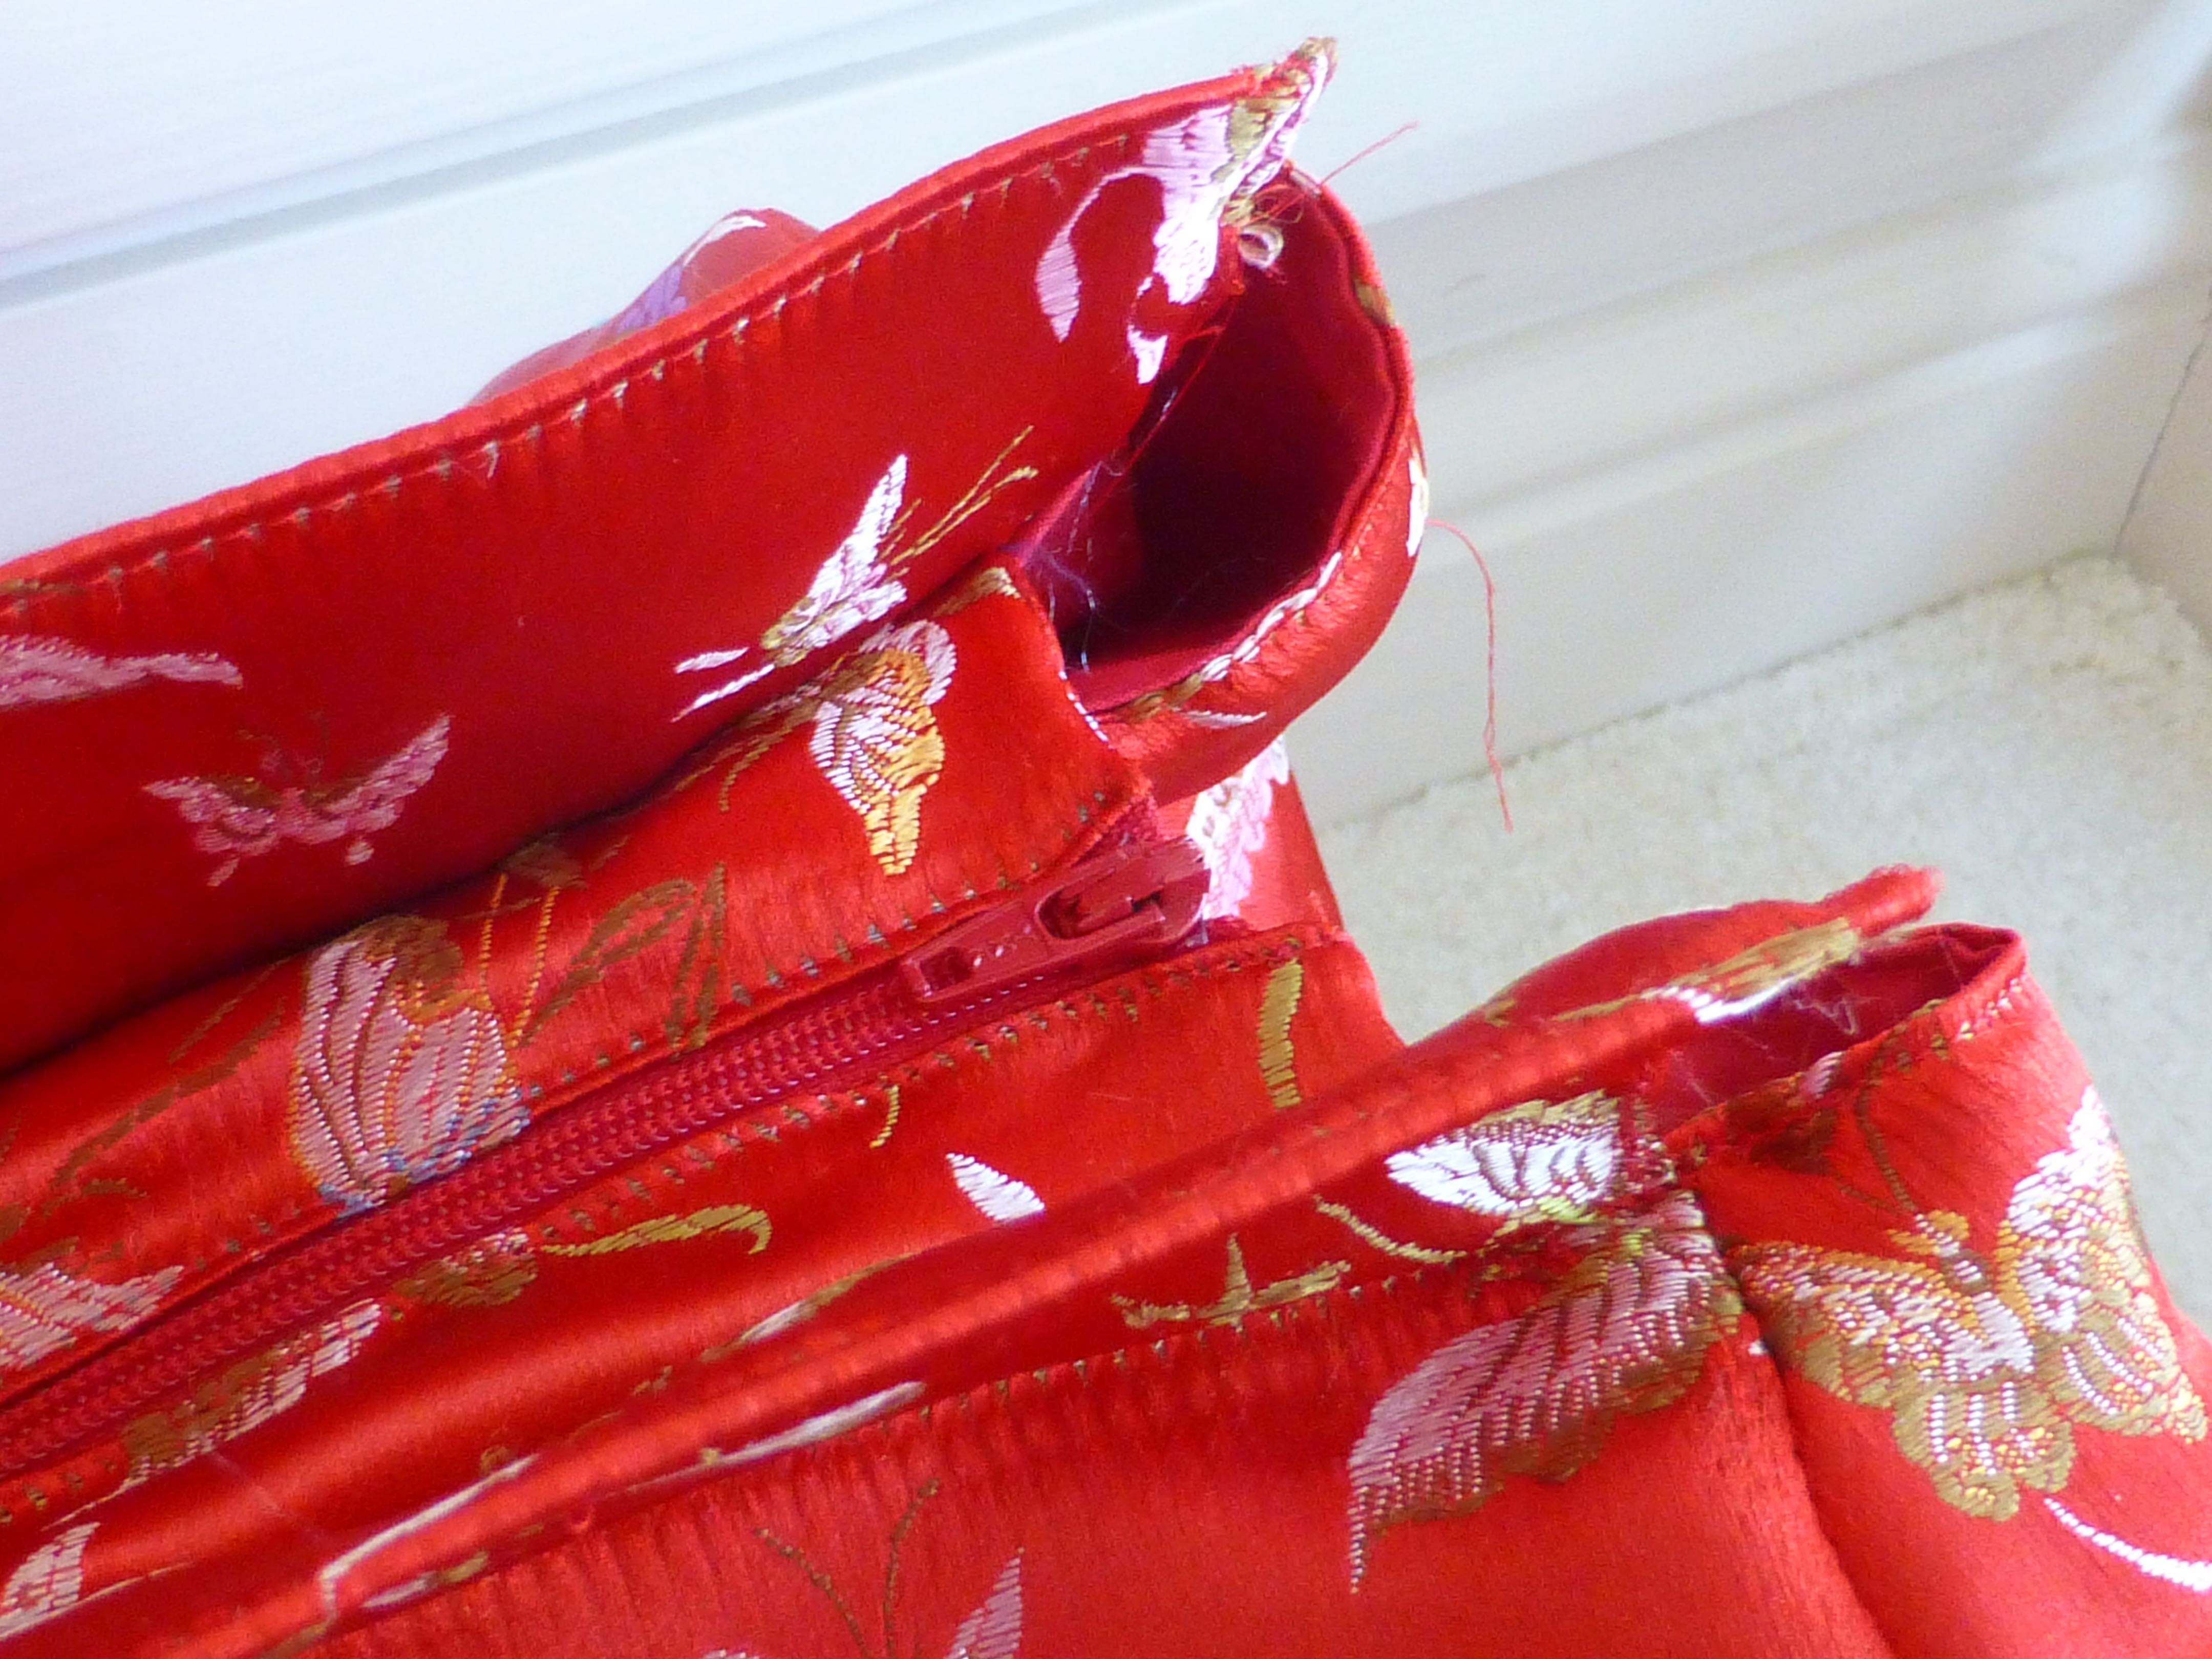
The zip went in easily enough and the placement makes a pleasant change from the norm.
The zip extends past the end of the bag by a few inches and I liked the leatherette detail as a stop tab.
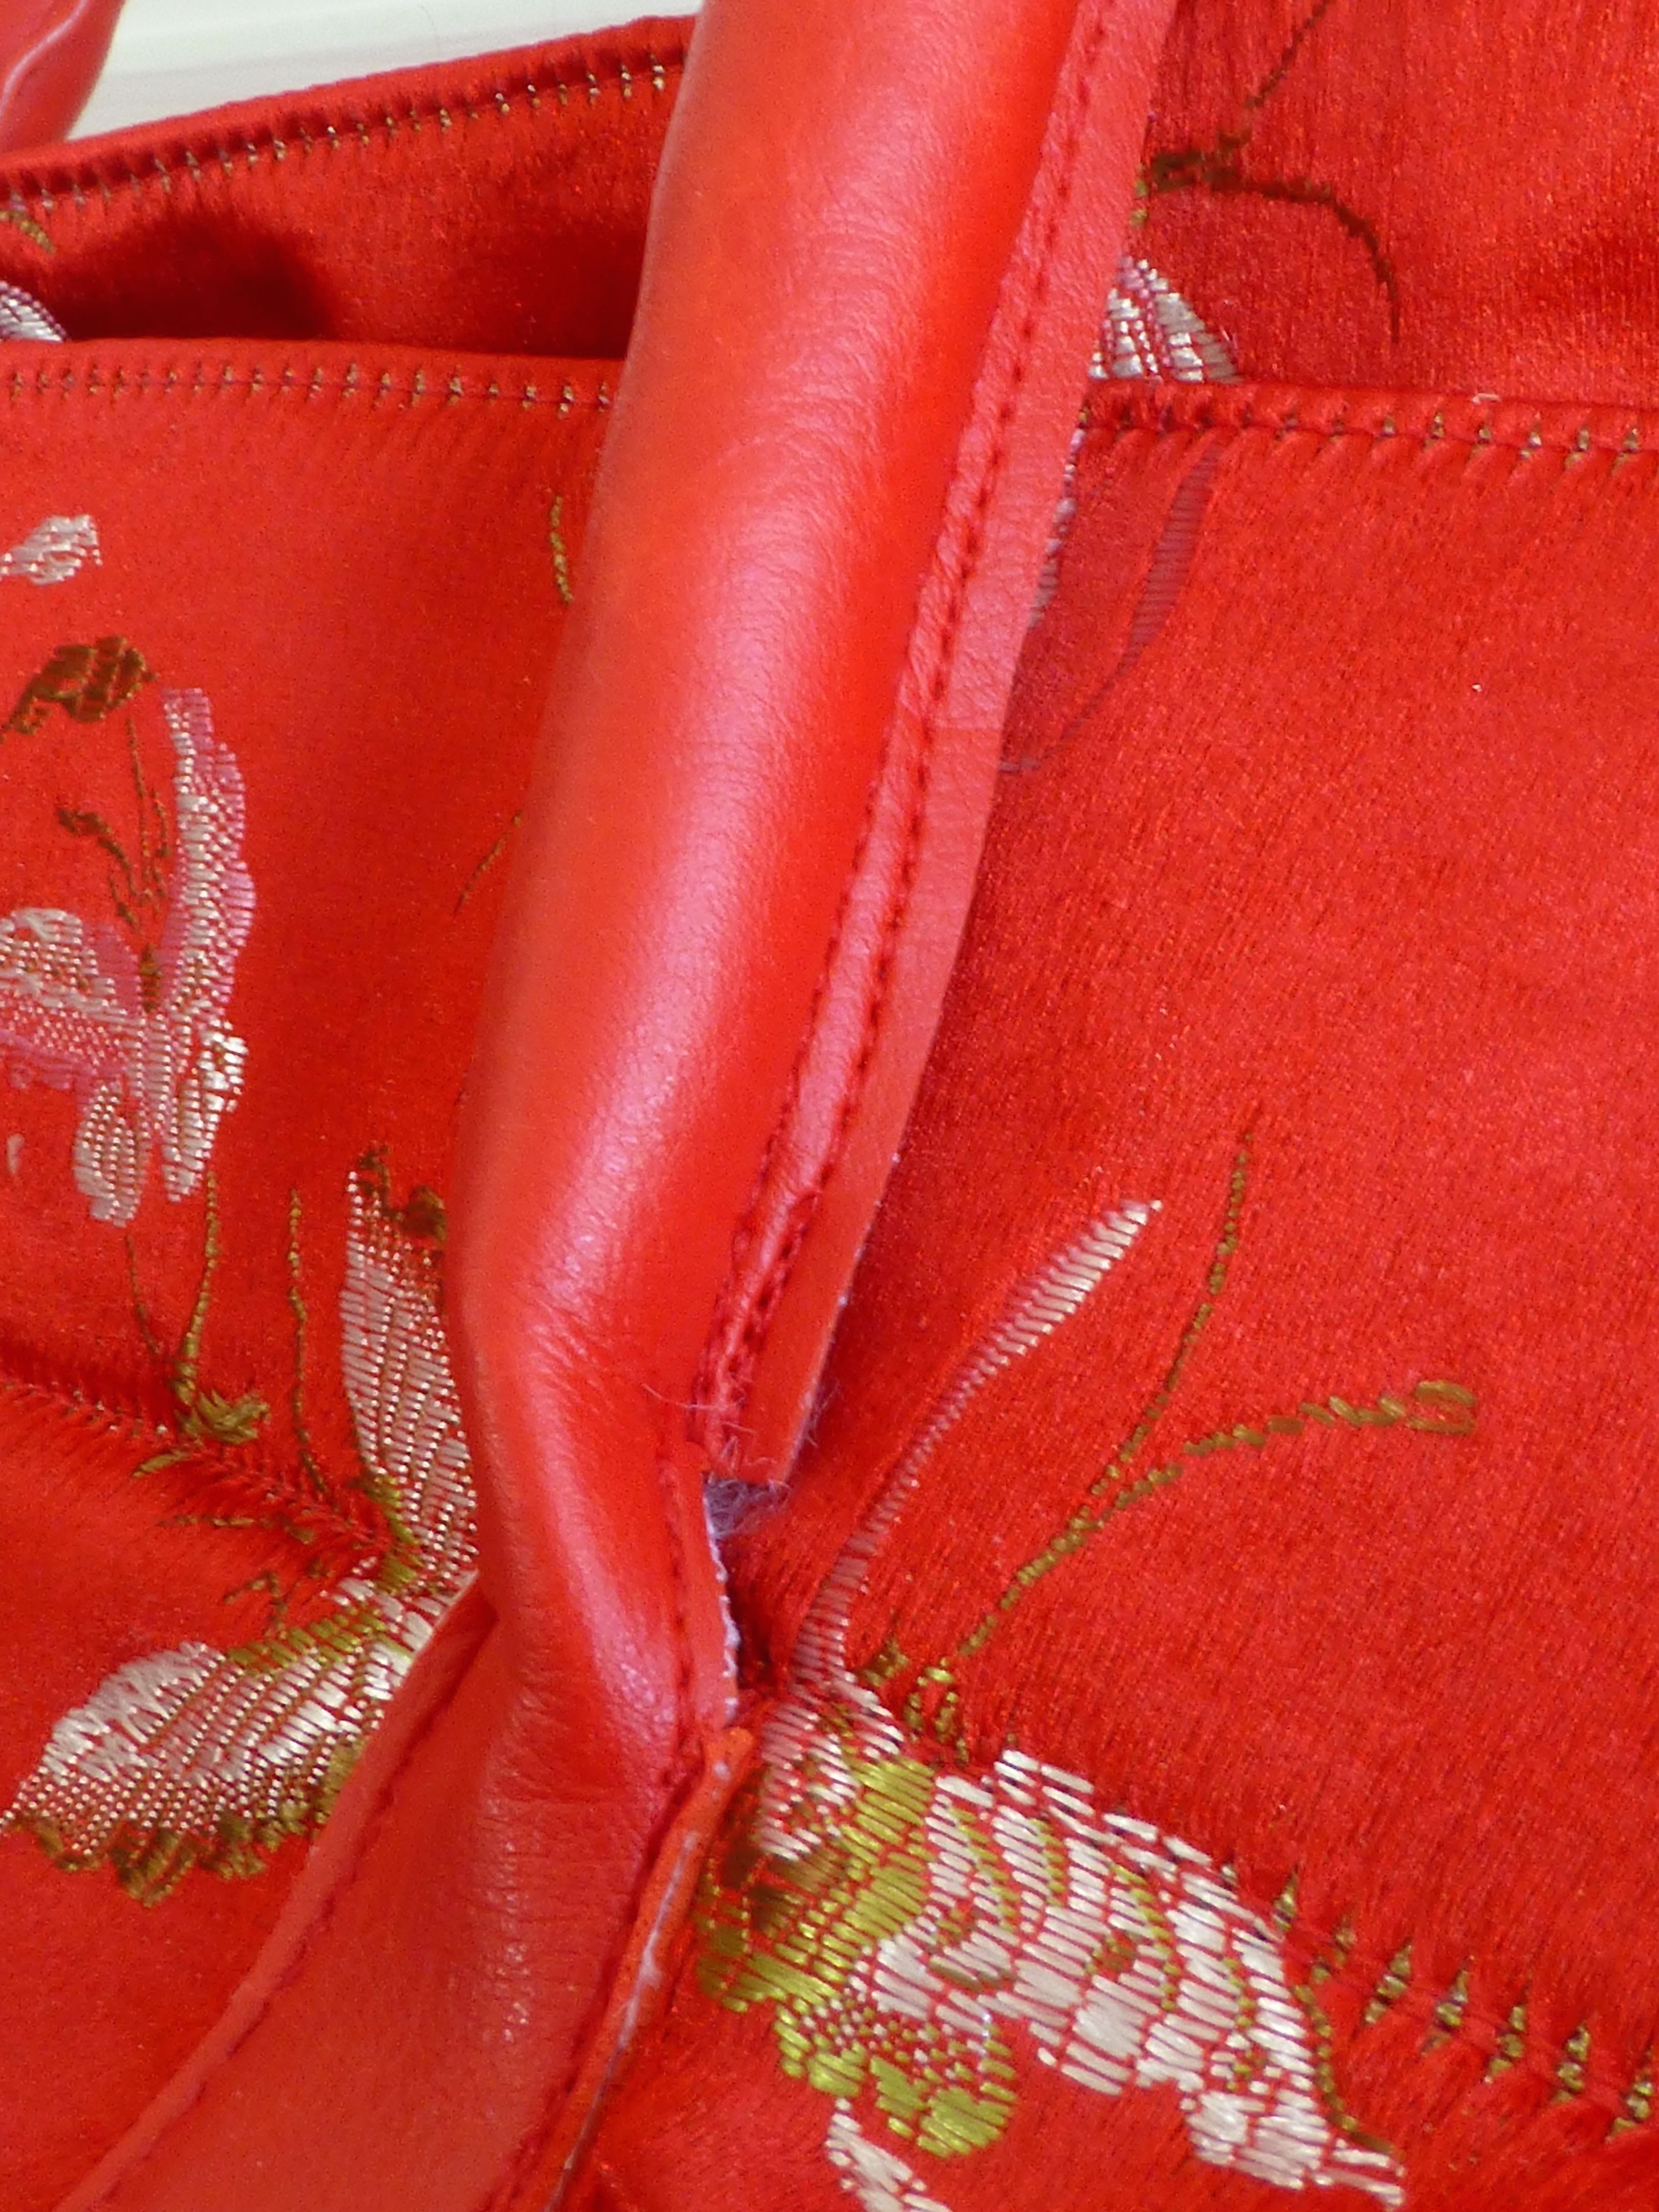
When it came to making the handles, I altered the pattern slightly.
The design called for a tube to be sewn right sides together, turned inside out and tubes of handle wadding to be threaded through. I couldn’t source this anywhere so I improvised. I sewed the handles wrong sides together with two rows of stitching for strength and decoration, then poked some polyester toy wadding all the way through with a knitting needle.
Three rows of stitching adds strength to where the handles join the bag.
The padded handles are really soft and comfortable too, an important consideration which is often overlooked.
The amount of interior space is quite impressive and I love that the lining is just as cheery a colour as the outside!
As I said, it’s a little floppy unless it’s stuffed full of clothes but the benefit is that it folds away neatly when stored. I’m not averse to the less structured look anyway.
Tadah!
I love it!
All in all it was a great pattern with easy to understand instructions and the fabric was a dream to work with after the fraying issue had been dealt with.
I can’t wait to use it – luckily we’ve got several overnight trips planned over the Easter break so it will get plenty of use. My husband has also planned our second wedding anniversary trip somewhere secret so it’s sure to get lots of second glances at the airport – it’s definitely a bag that stands out from the crowd.
It makes a lovely change from the generic overnight bags that you get in the shops and just proves the theory that hand made is best!
If you haven’t checked out Minerva Crafts yet, do hop over and have a look – the fabric selection alone is enormous and worth browsing over a cup of tea:)
Previously Boys and Chickens, I have created a new blog to share my sewing adventure as 2018 is they year I plan to teach myself to sew! There will also be bits of crochet and cooking too.
My challenge: One year - I will not buy clothes - I will upcycle to make what I need - everything from underwear to evening wear! Join me for tips, exclusive BrawHem makes, and inevitably some hilarious disasters...


 For each sack you will need: