Sewchet

Sewing, crochet, crafts, accessories, baking, tutorials,


38 Comments

Folding Travel Photo Frame And Case

I was contacted recently by Craftseller magazine in relation to their “Blogger of the Month” feature and was asked if I would like a free double page spread in their magazine.

Um, let me think a minute…..yeeees!

As part of the feature I designed a free pattern for the readers, which was to be copyright-free allowing full reproduction rights. This was harder than it initially seems, I mean, what could I design that hadn’t been done before????

I came up with the idea of a folding travel photo frame and Googled/Pinterest-ed it…….not a single result.

Not one.

No one seems to have come up with a tutorial for such a thing, unless I just didn’t type in the correct keywords. So that was it, decision made, a “Folding Travel Photo Frame And Case” was going to be the free pattern for Craftseller’s readers.

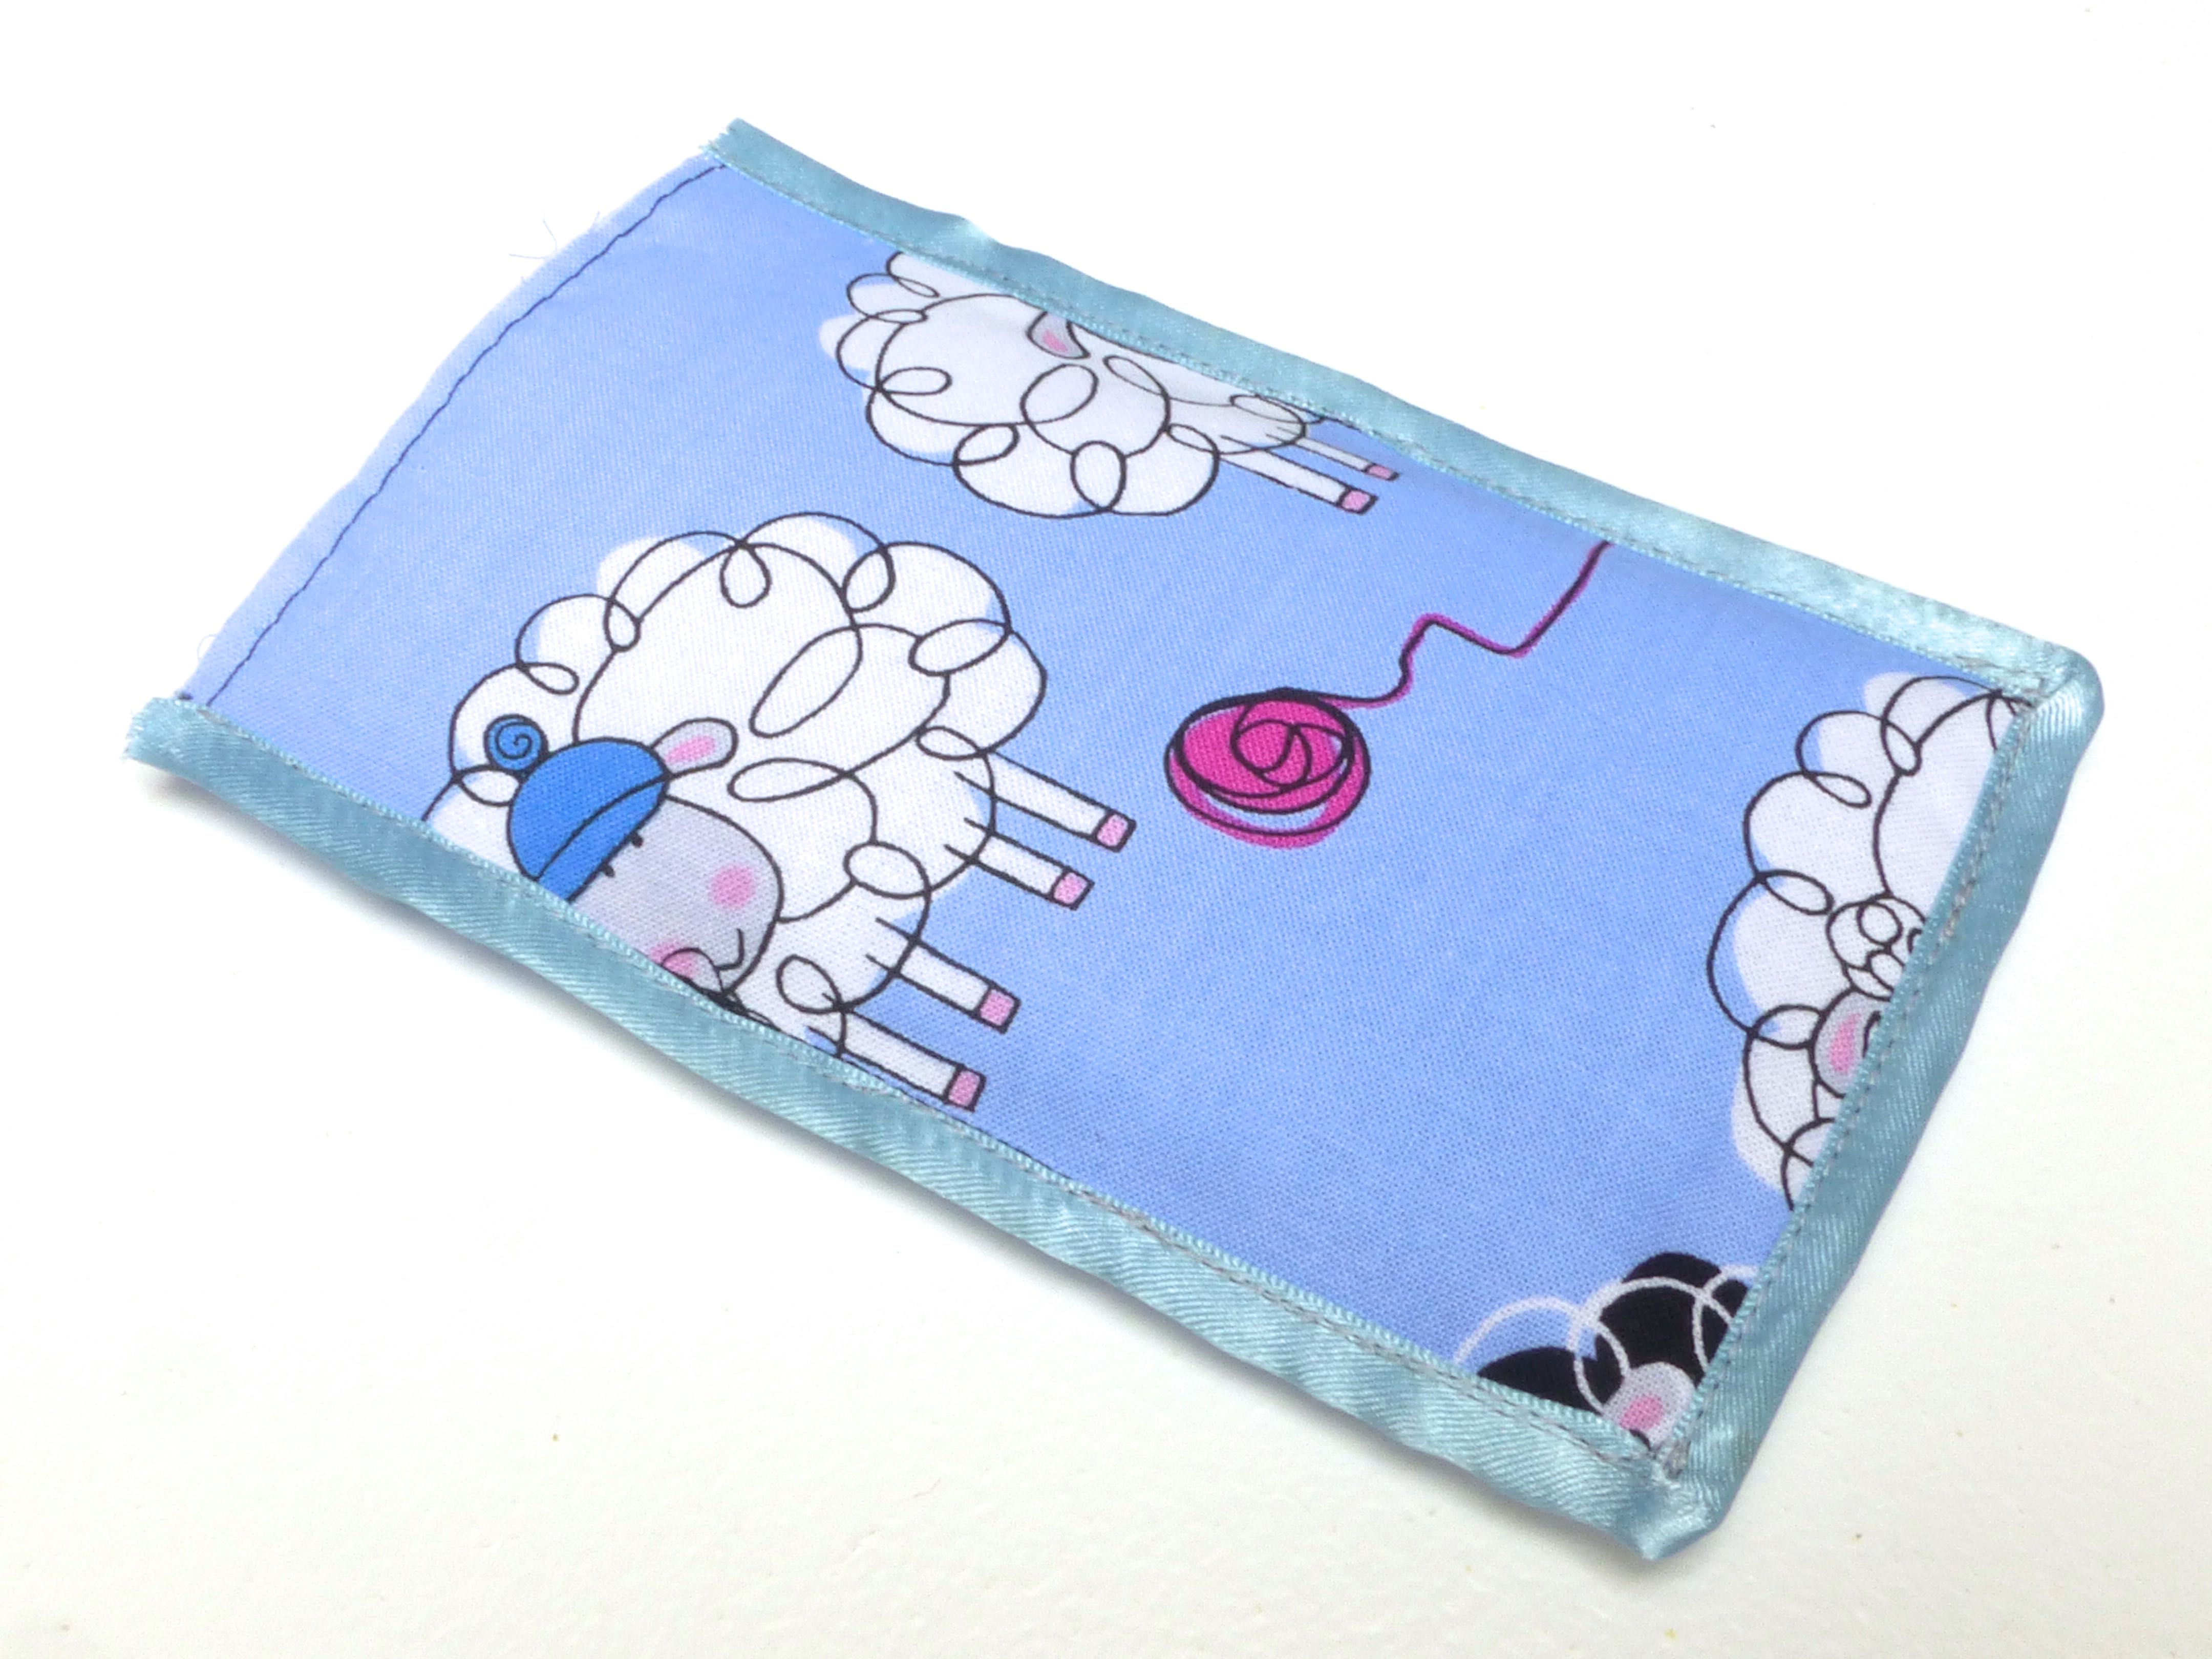
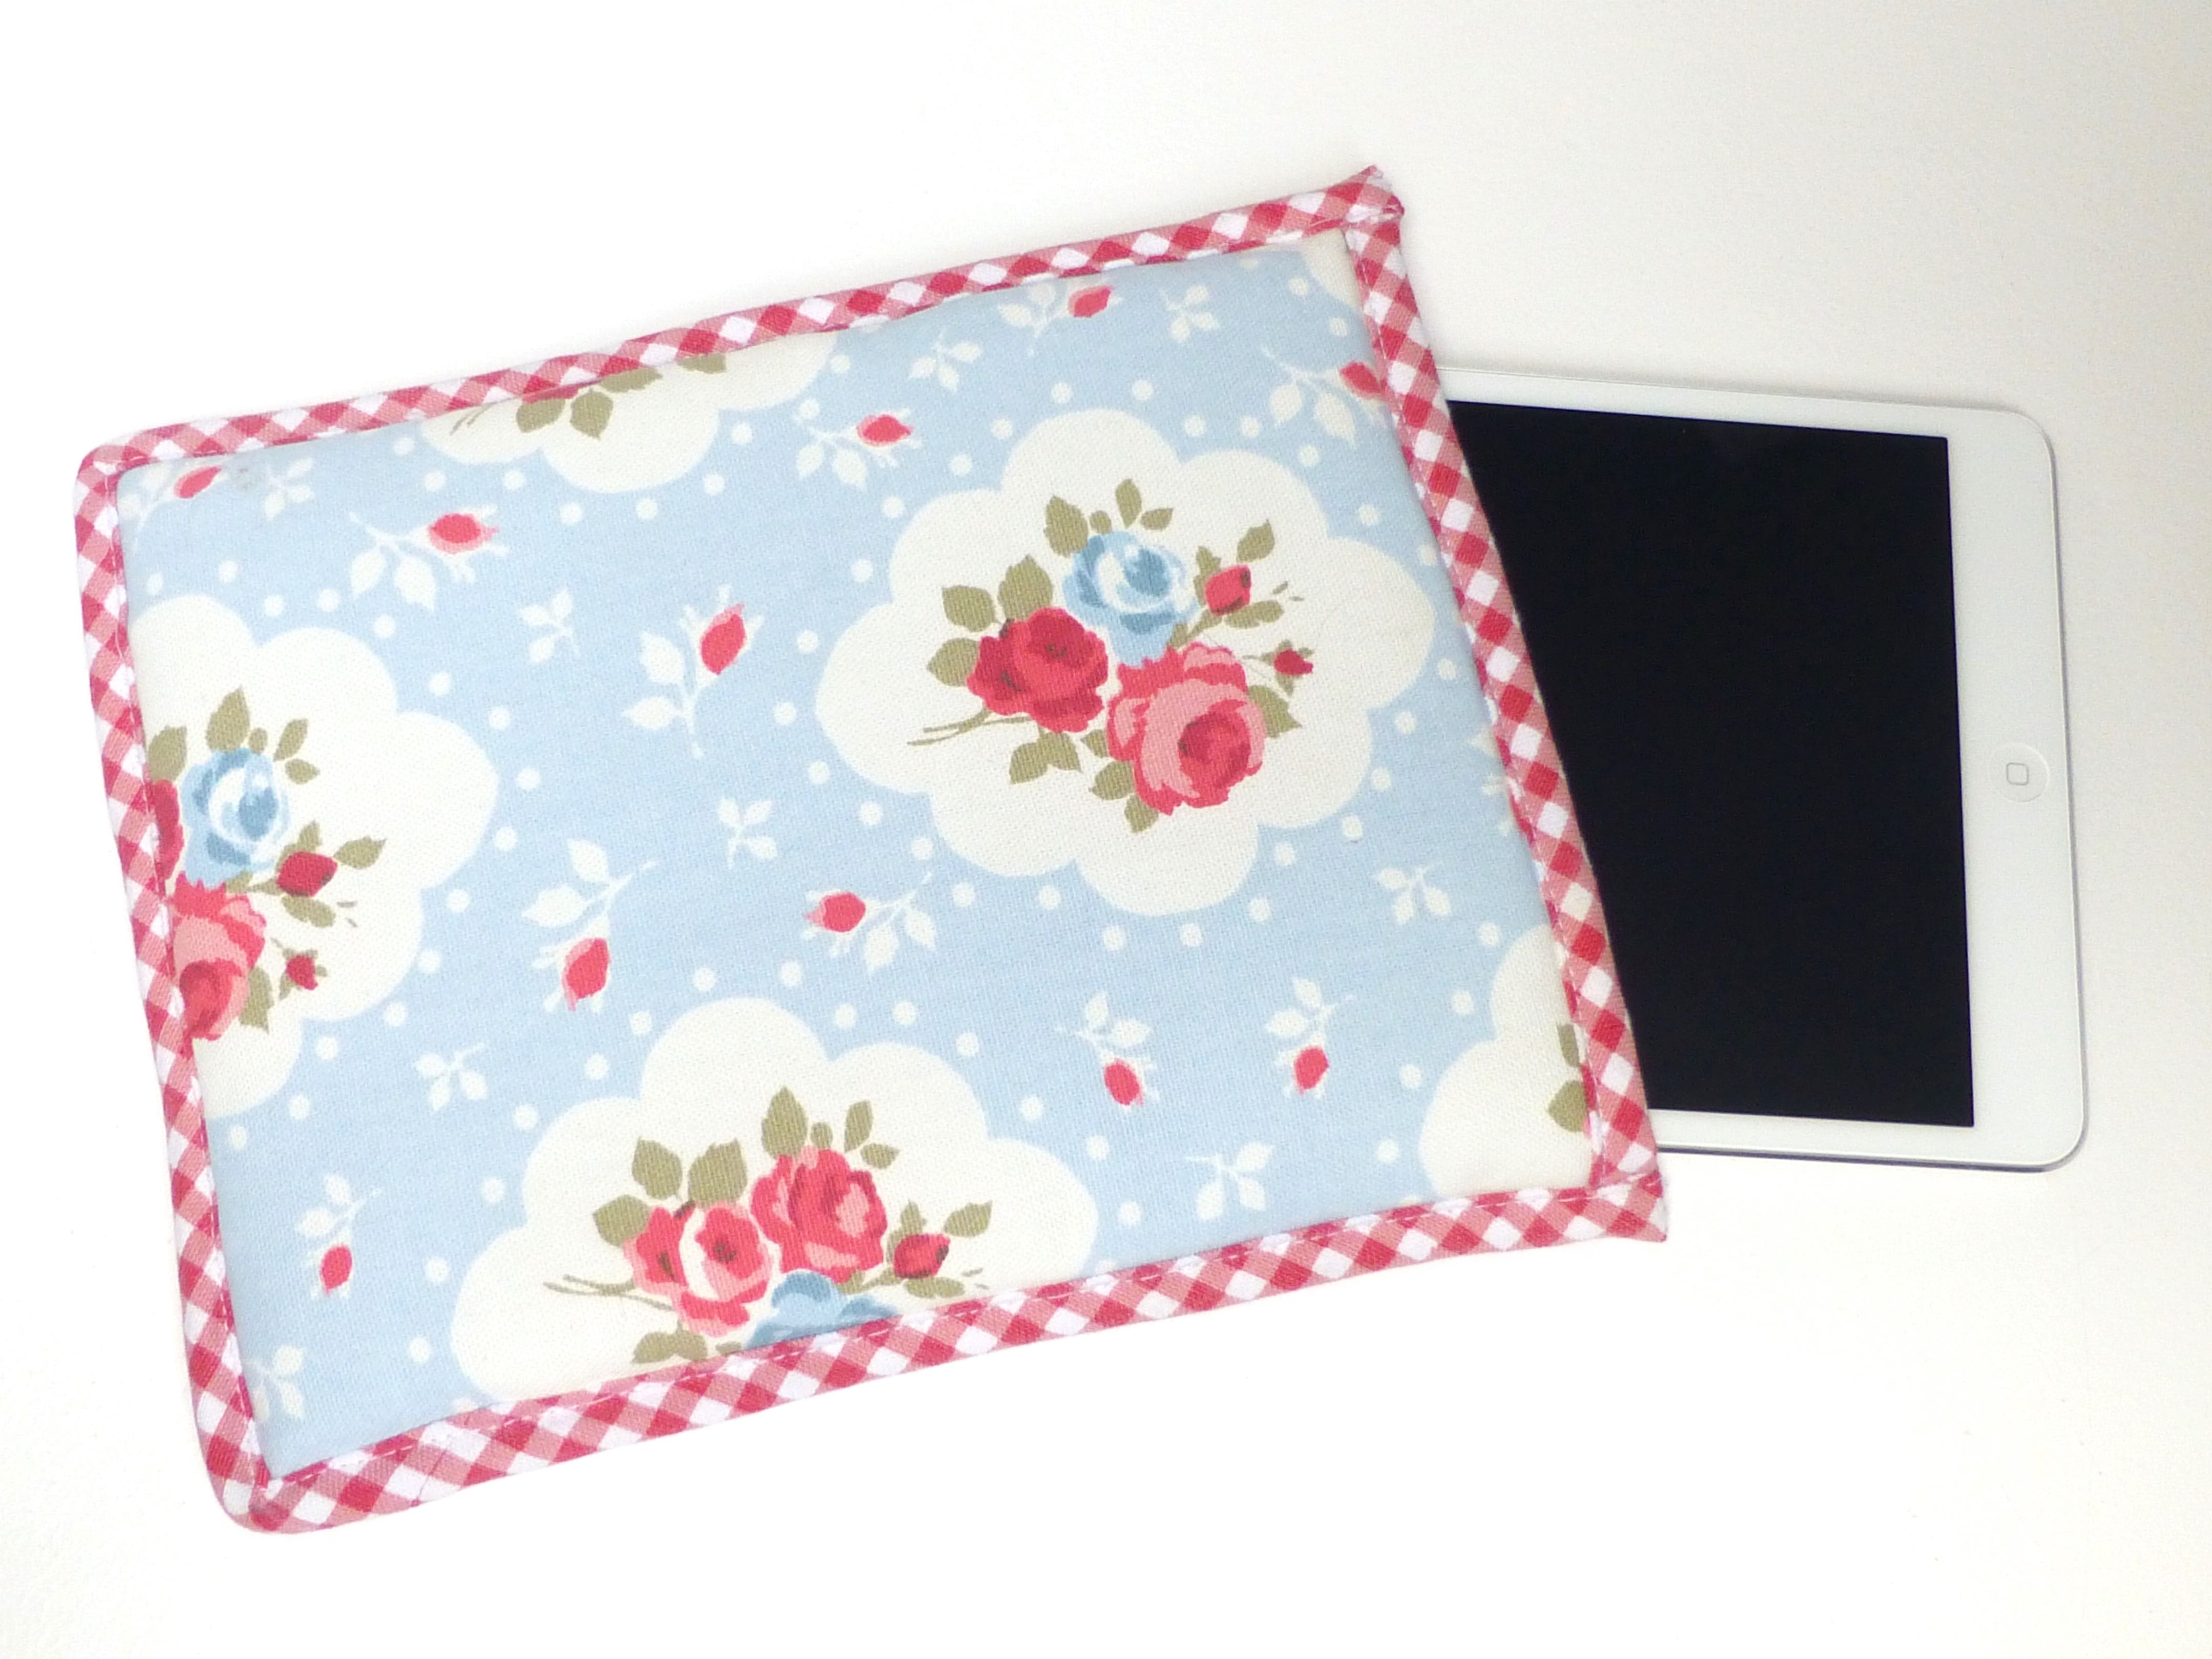
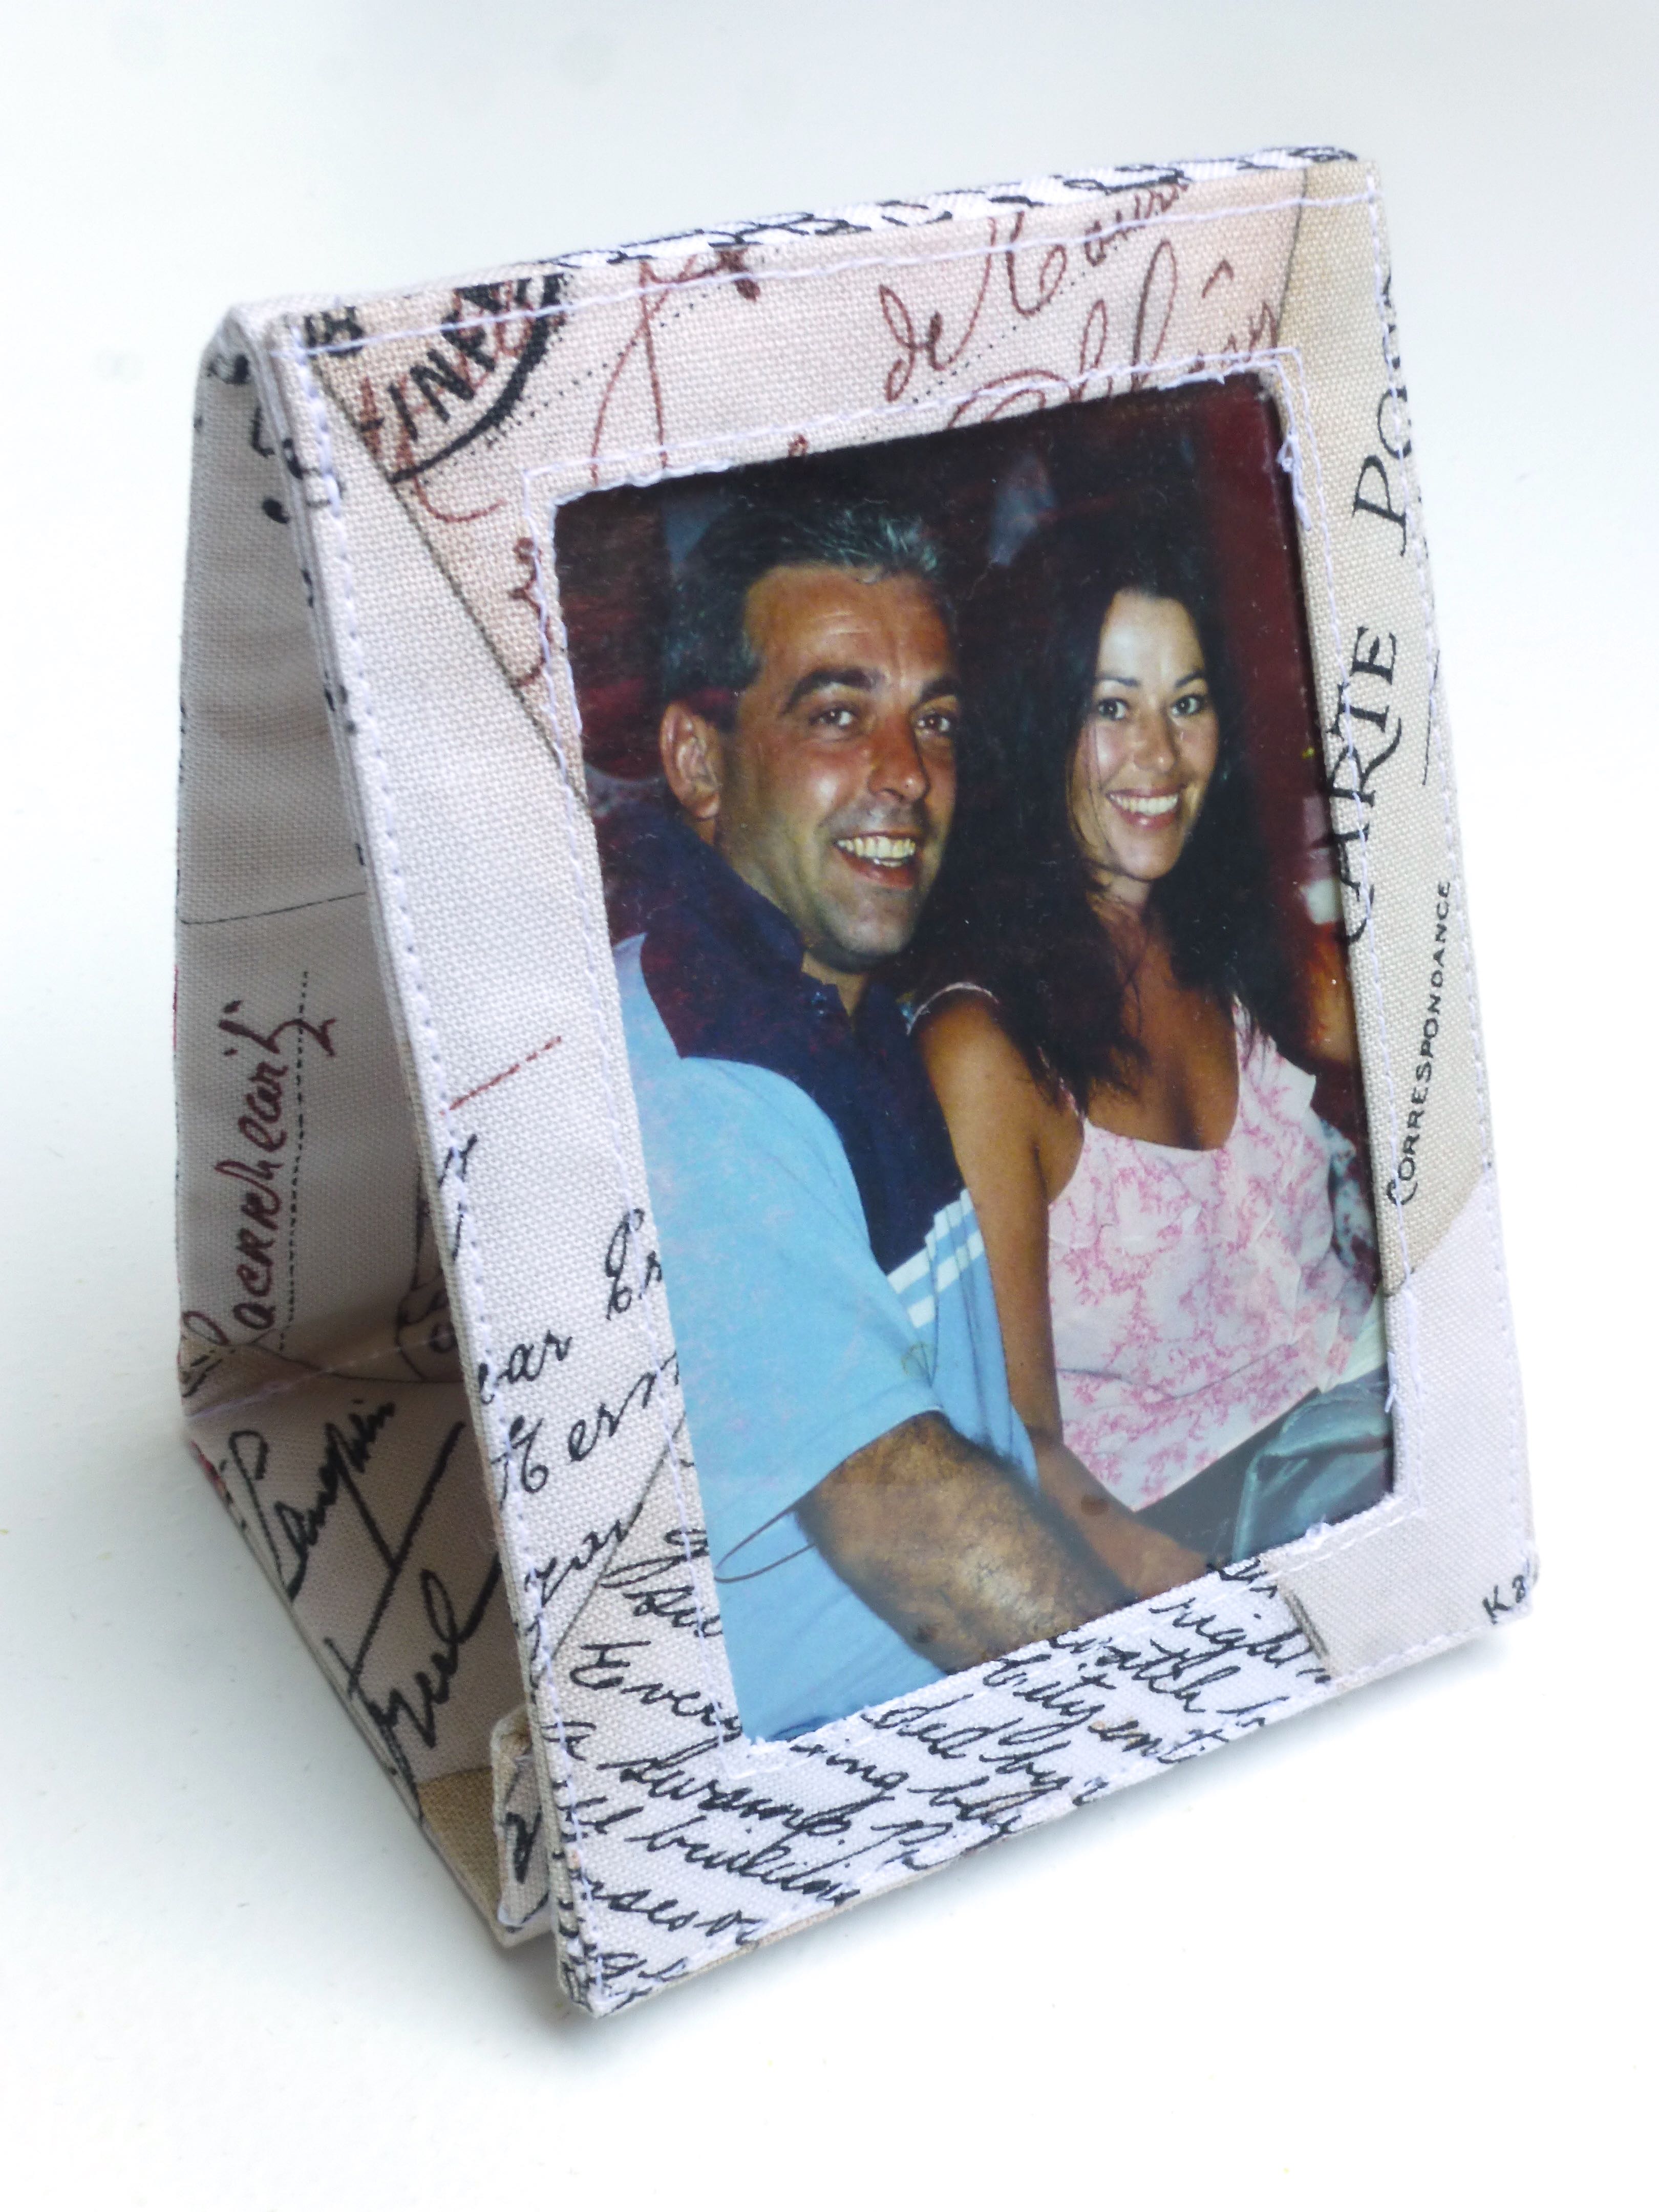
After finalising materials and method on a prototype, this is the final product: –

Travel photo frame and case

Do you like it?

You may remember the “Postcards” fabric from the “Spring In Paris” collection by Studio Voltaire that I bought earlier in the year (see this post), well I thought it would be the perfect match for a travel themed project.

postcards

So, here goes with the tutorial!
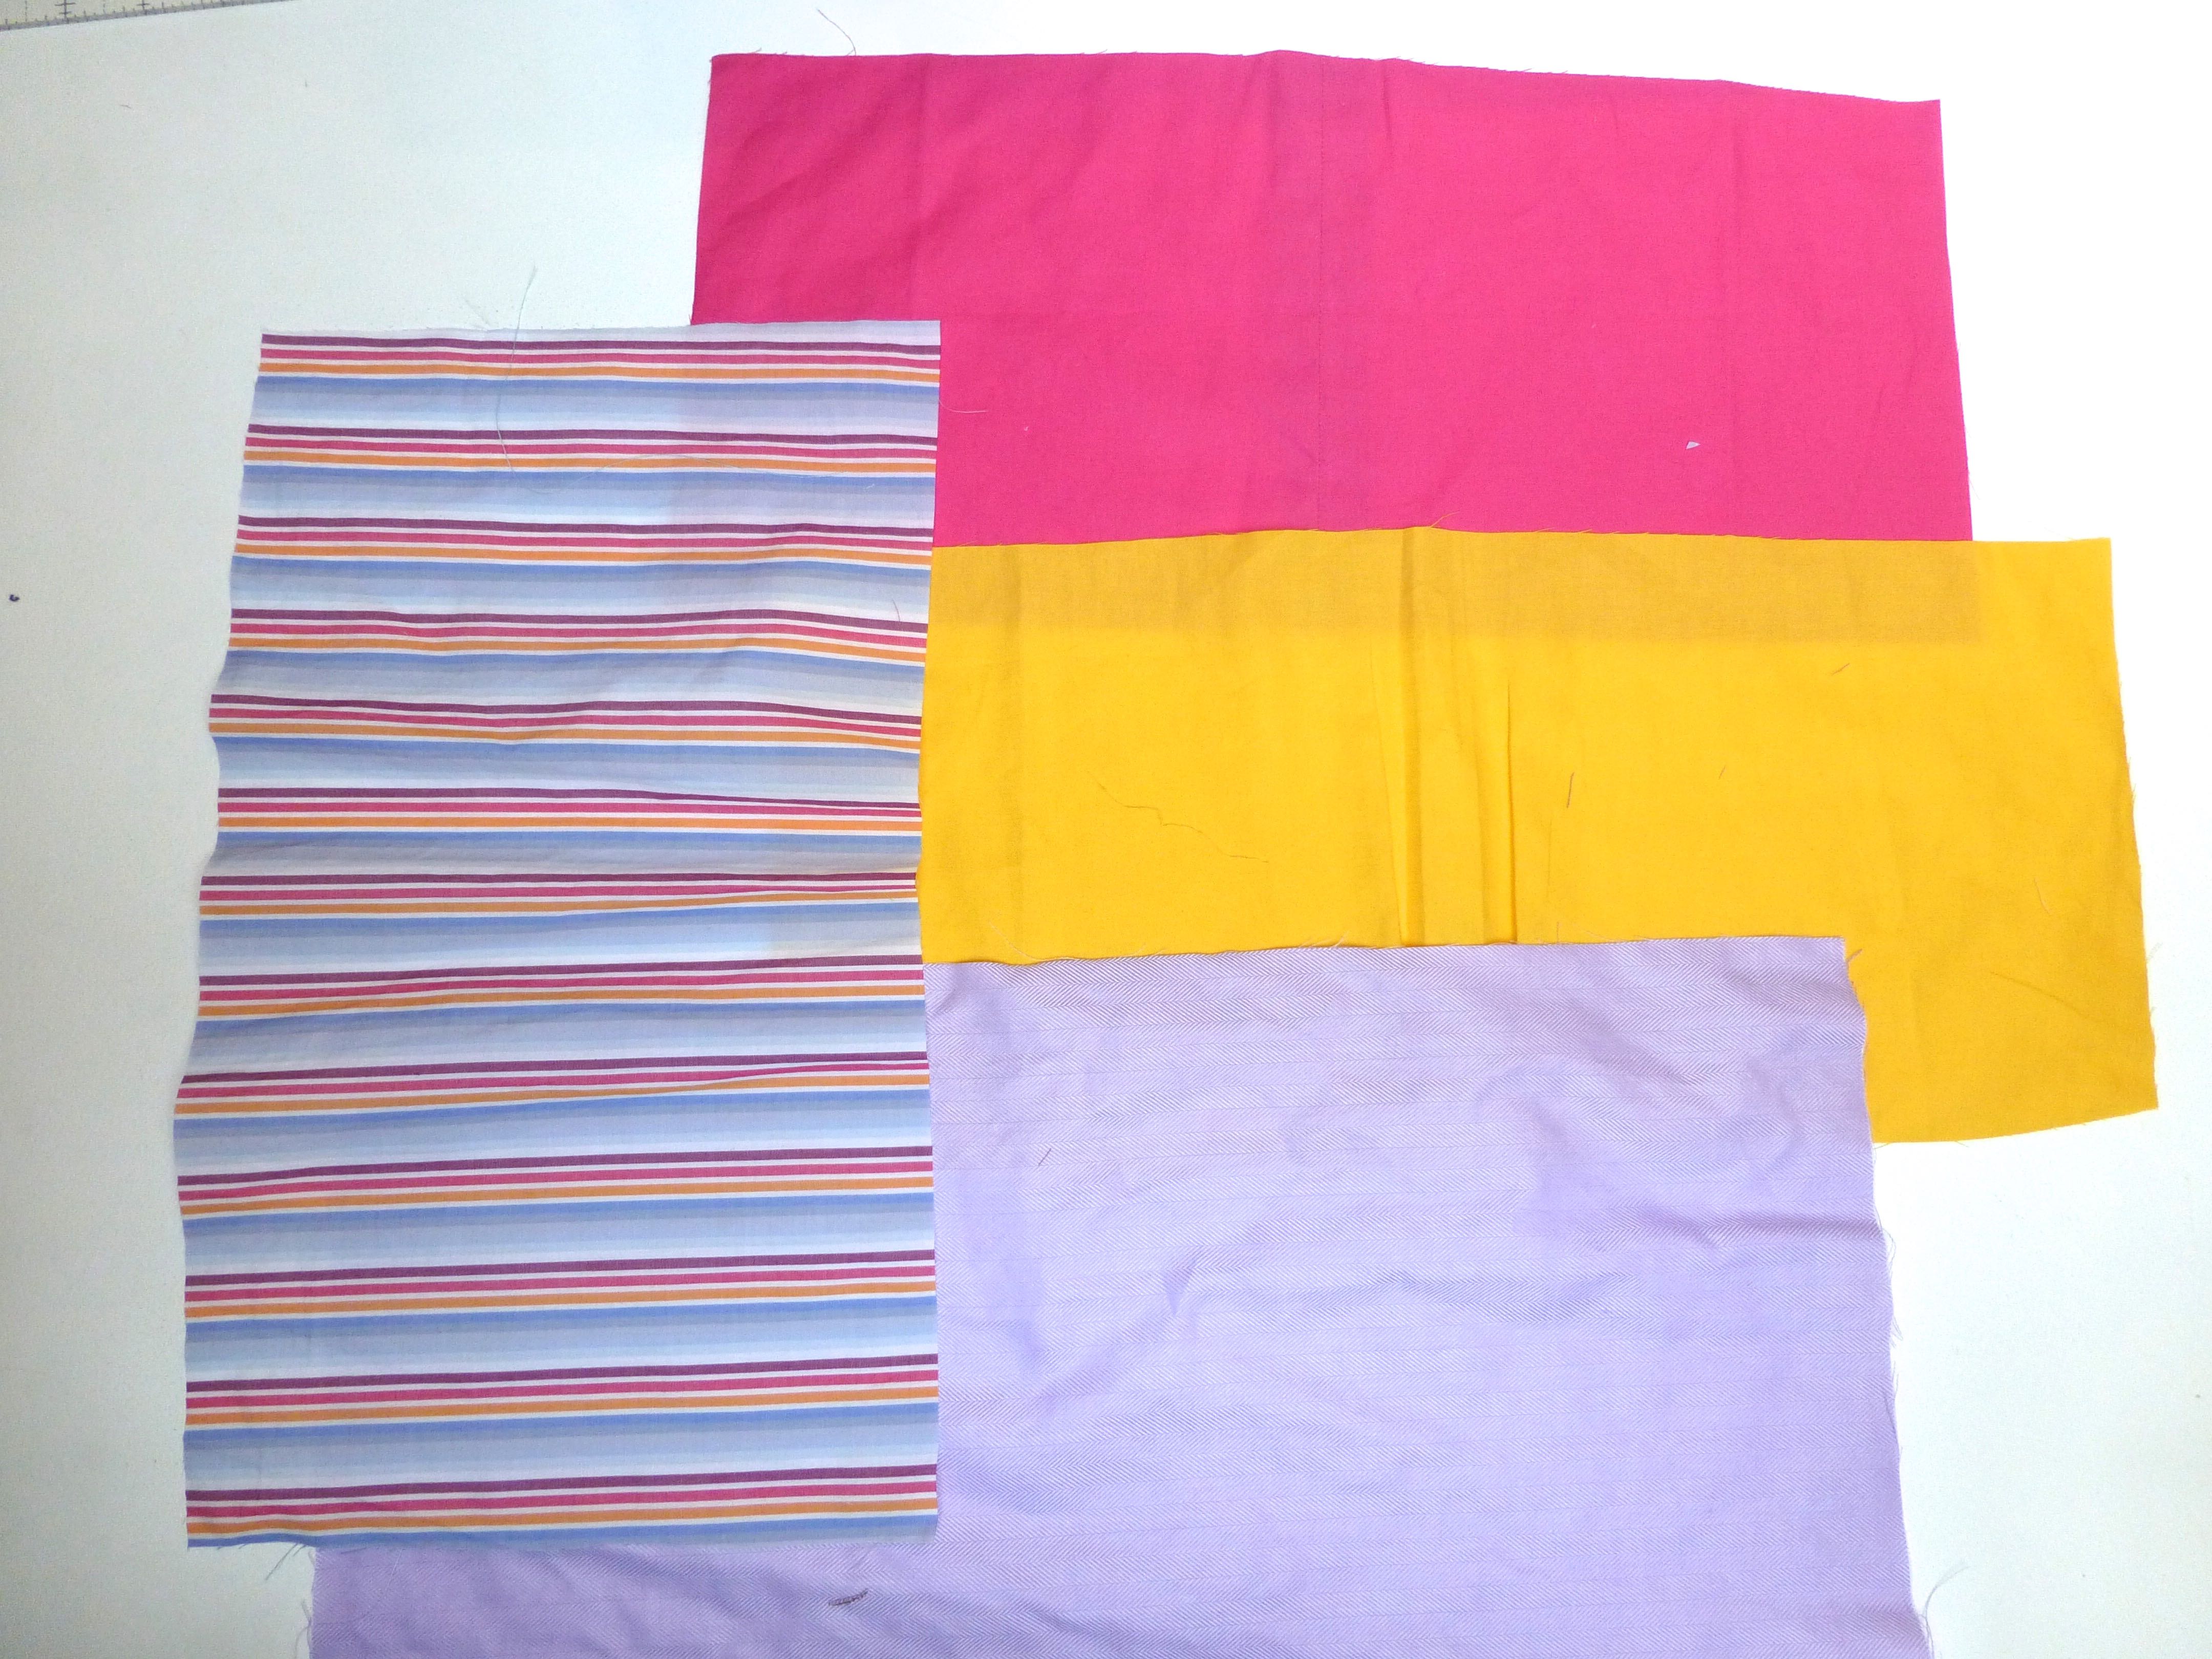
You will need: –

  • A single fat quarter of fabric
  • Medium weight iron on interfacing
  • 1 sheet acetate
  • 1 sheet cardstock
  • 2″ length of hook and loop fastener

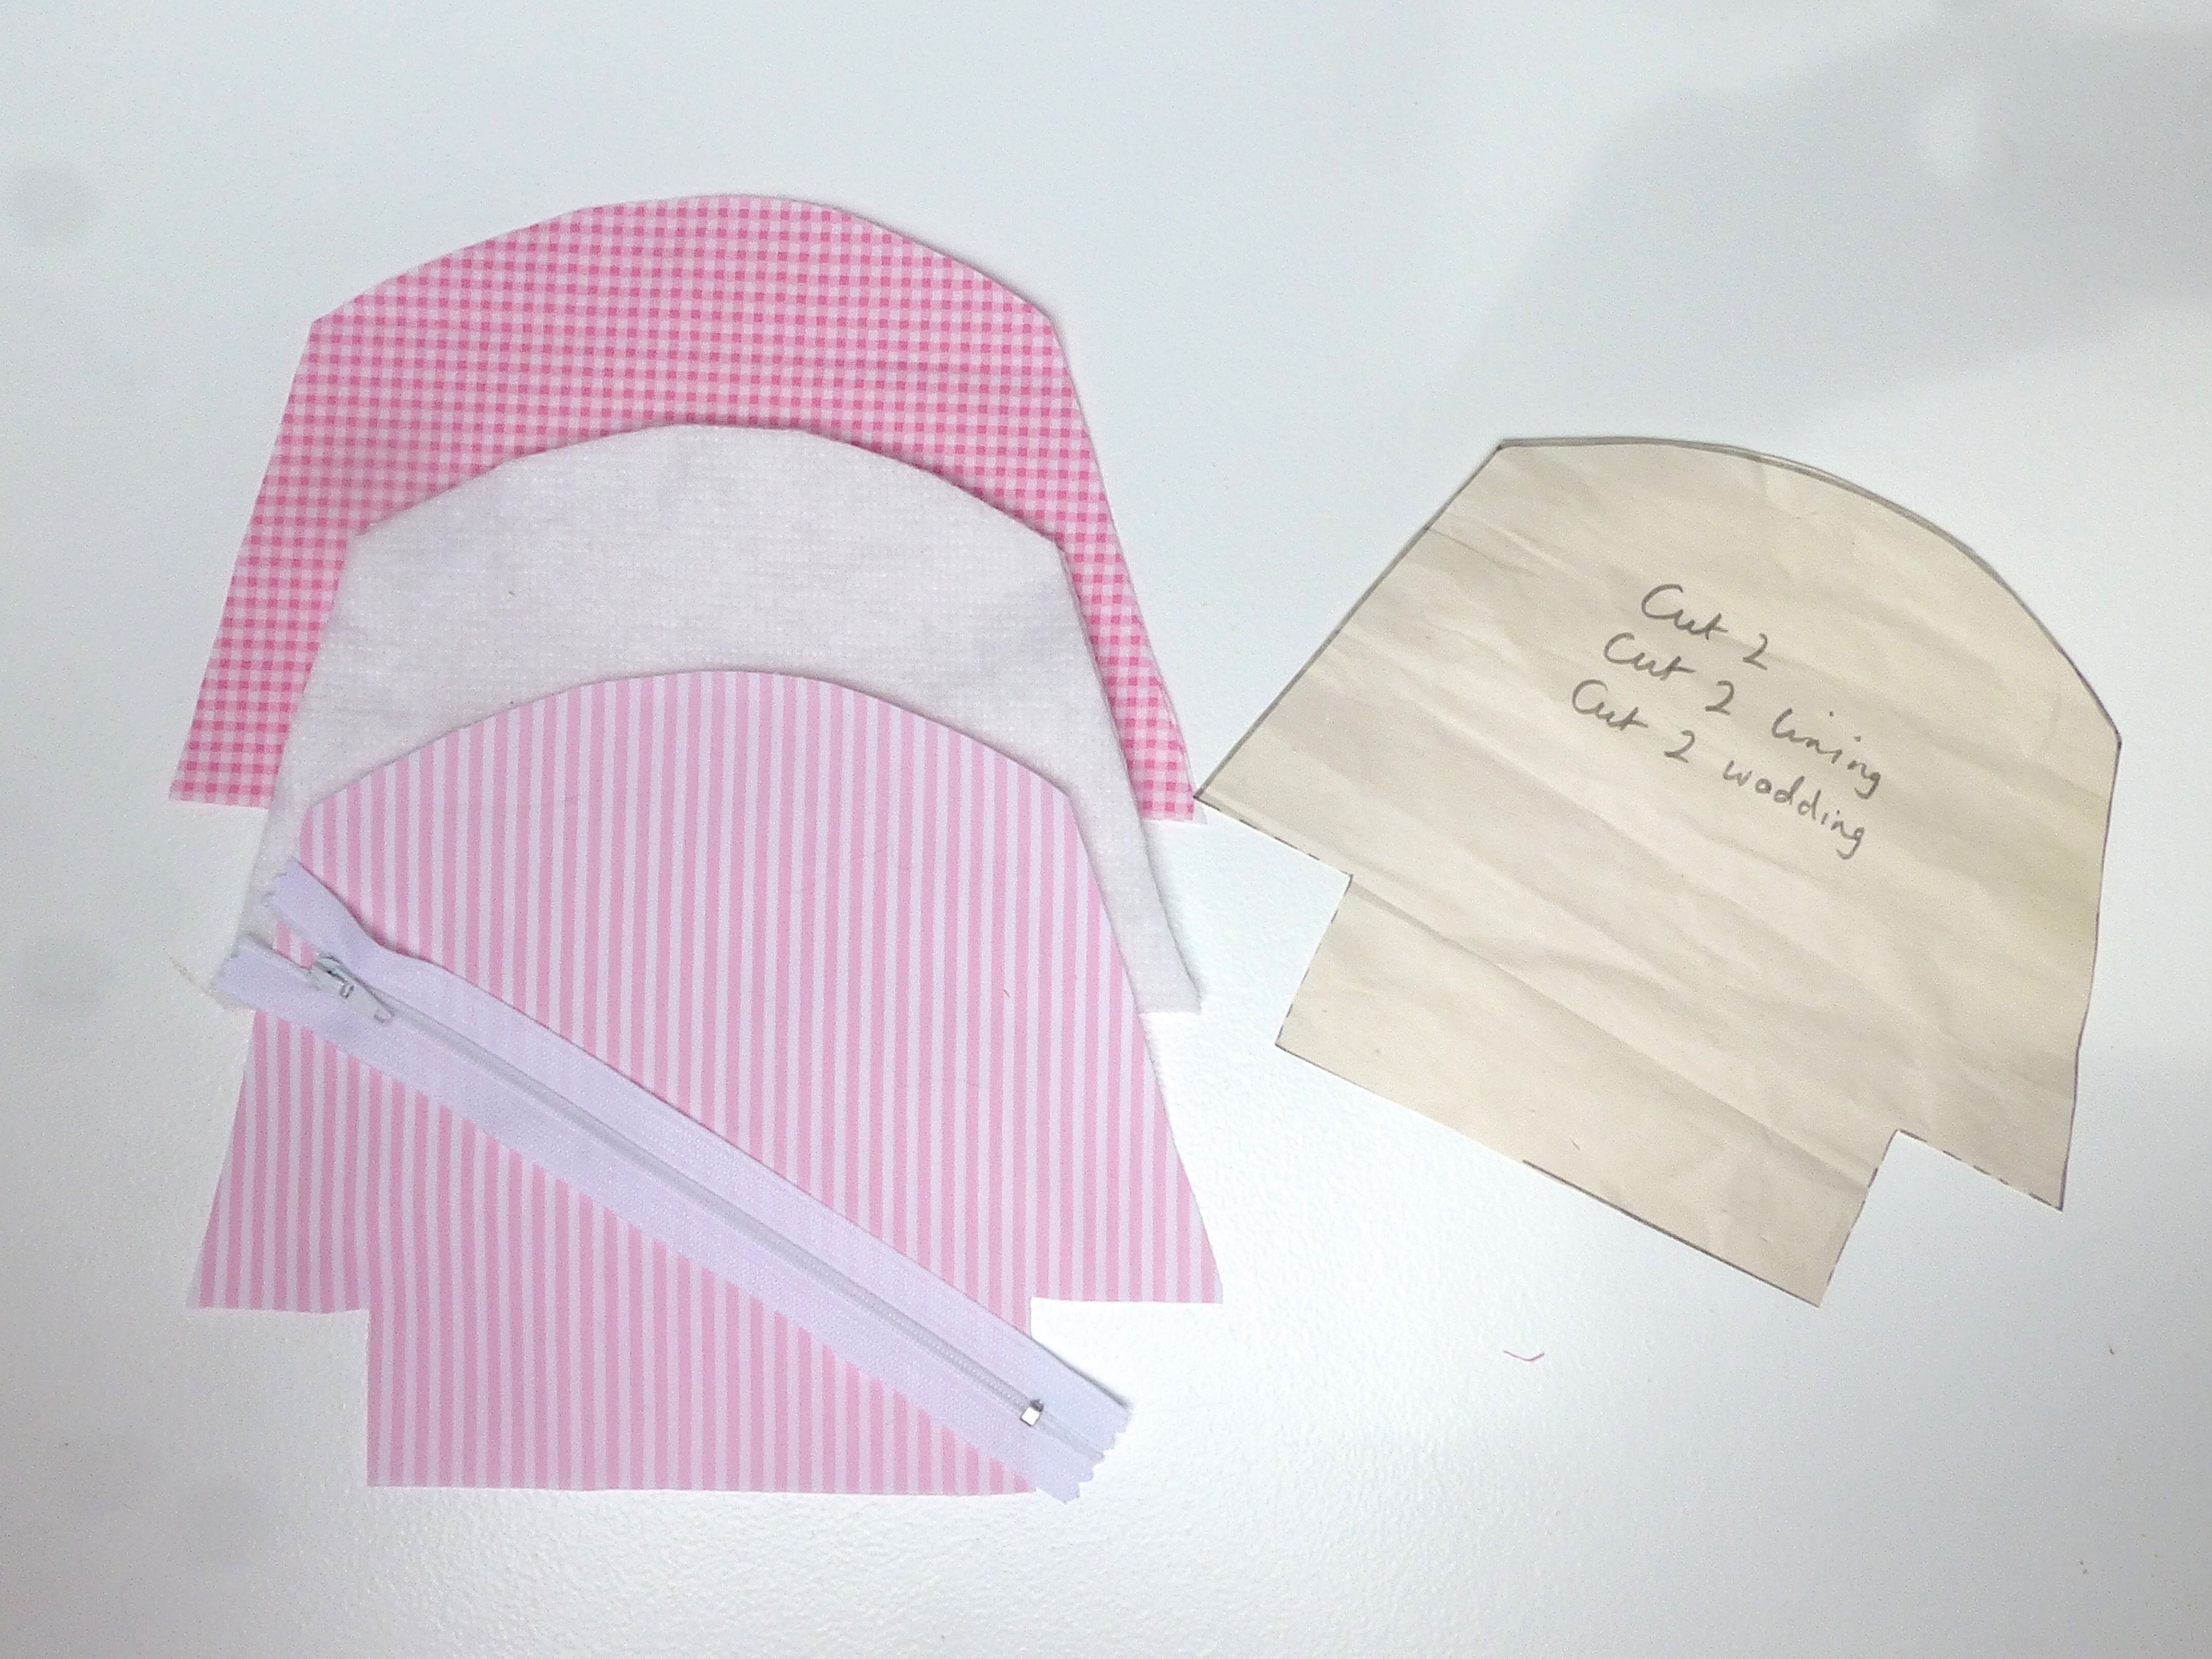
Cut the following: –

  • fabric: –                     2 x pieces  12″ x 3.5″

1 x piece 4.5″ x 3.5″

  • iron-on interfacing: – 2 x pieces 12″ x 3.5″

1 x piece 4.5″ x 3.5″

  • acetate: –                  1 x piece 3.5″ x 2.5″
  • cardstock: –              2 x pieces 3.5″ x 2.5″

1 x piece 2.5″ x 2″

P1060336

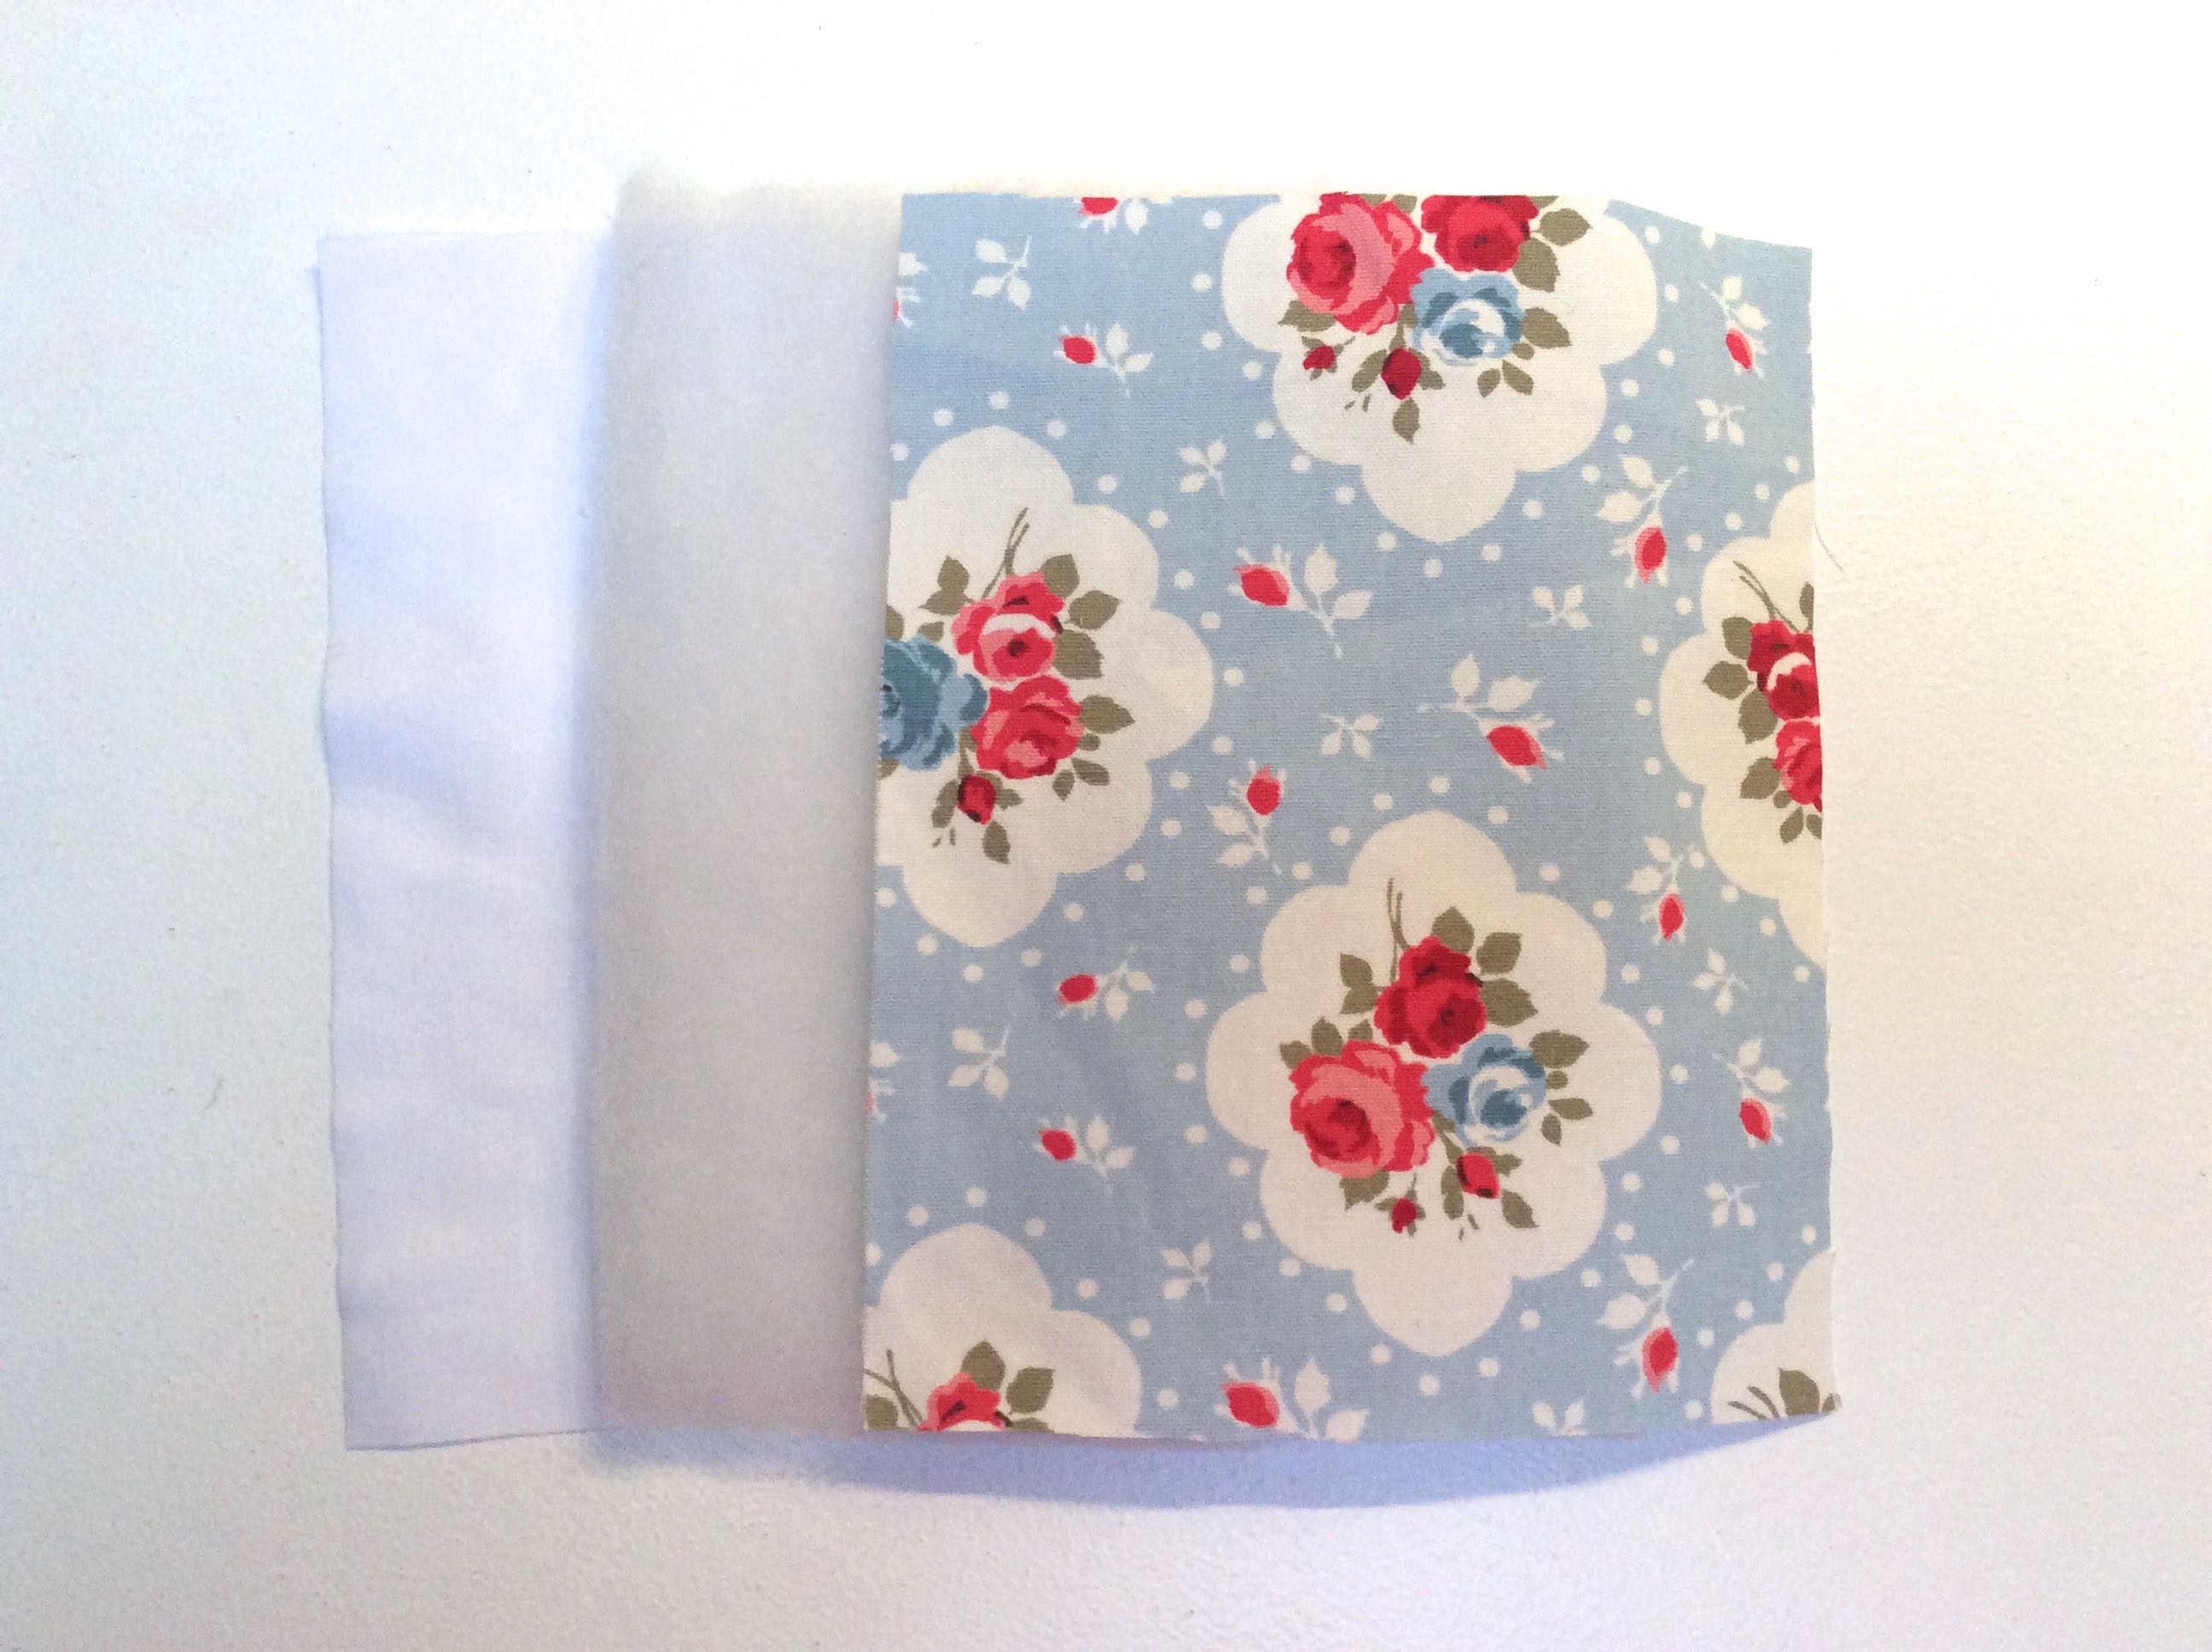
  1. Fuse the interfacing to the reverse of the matching fabric pieces following the manufacturers instructions.
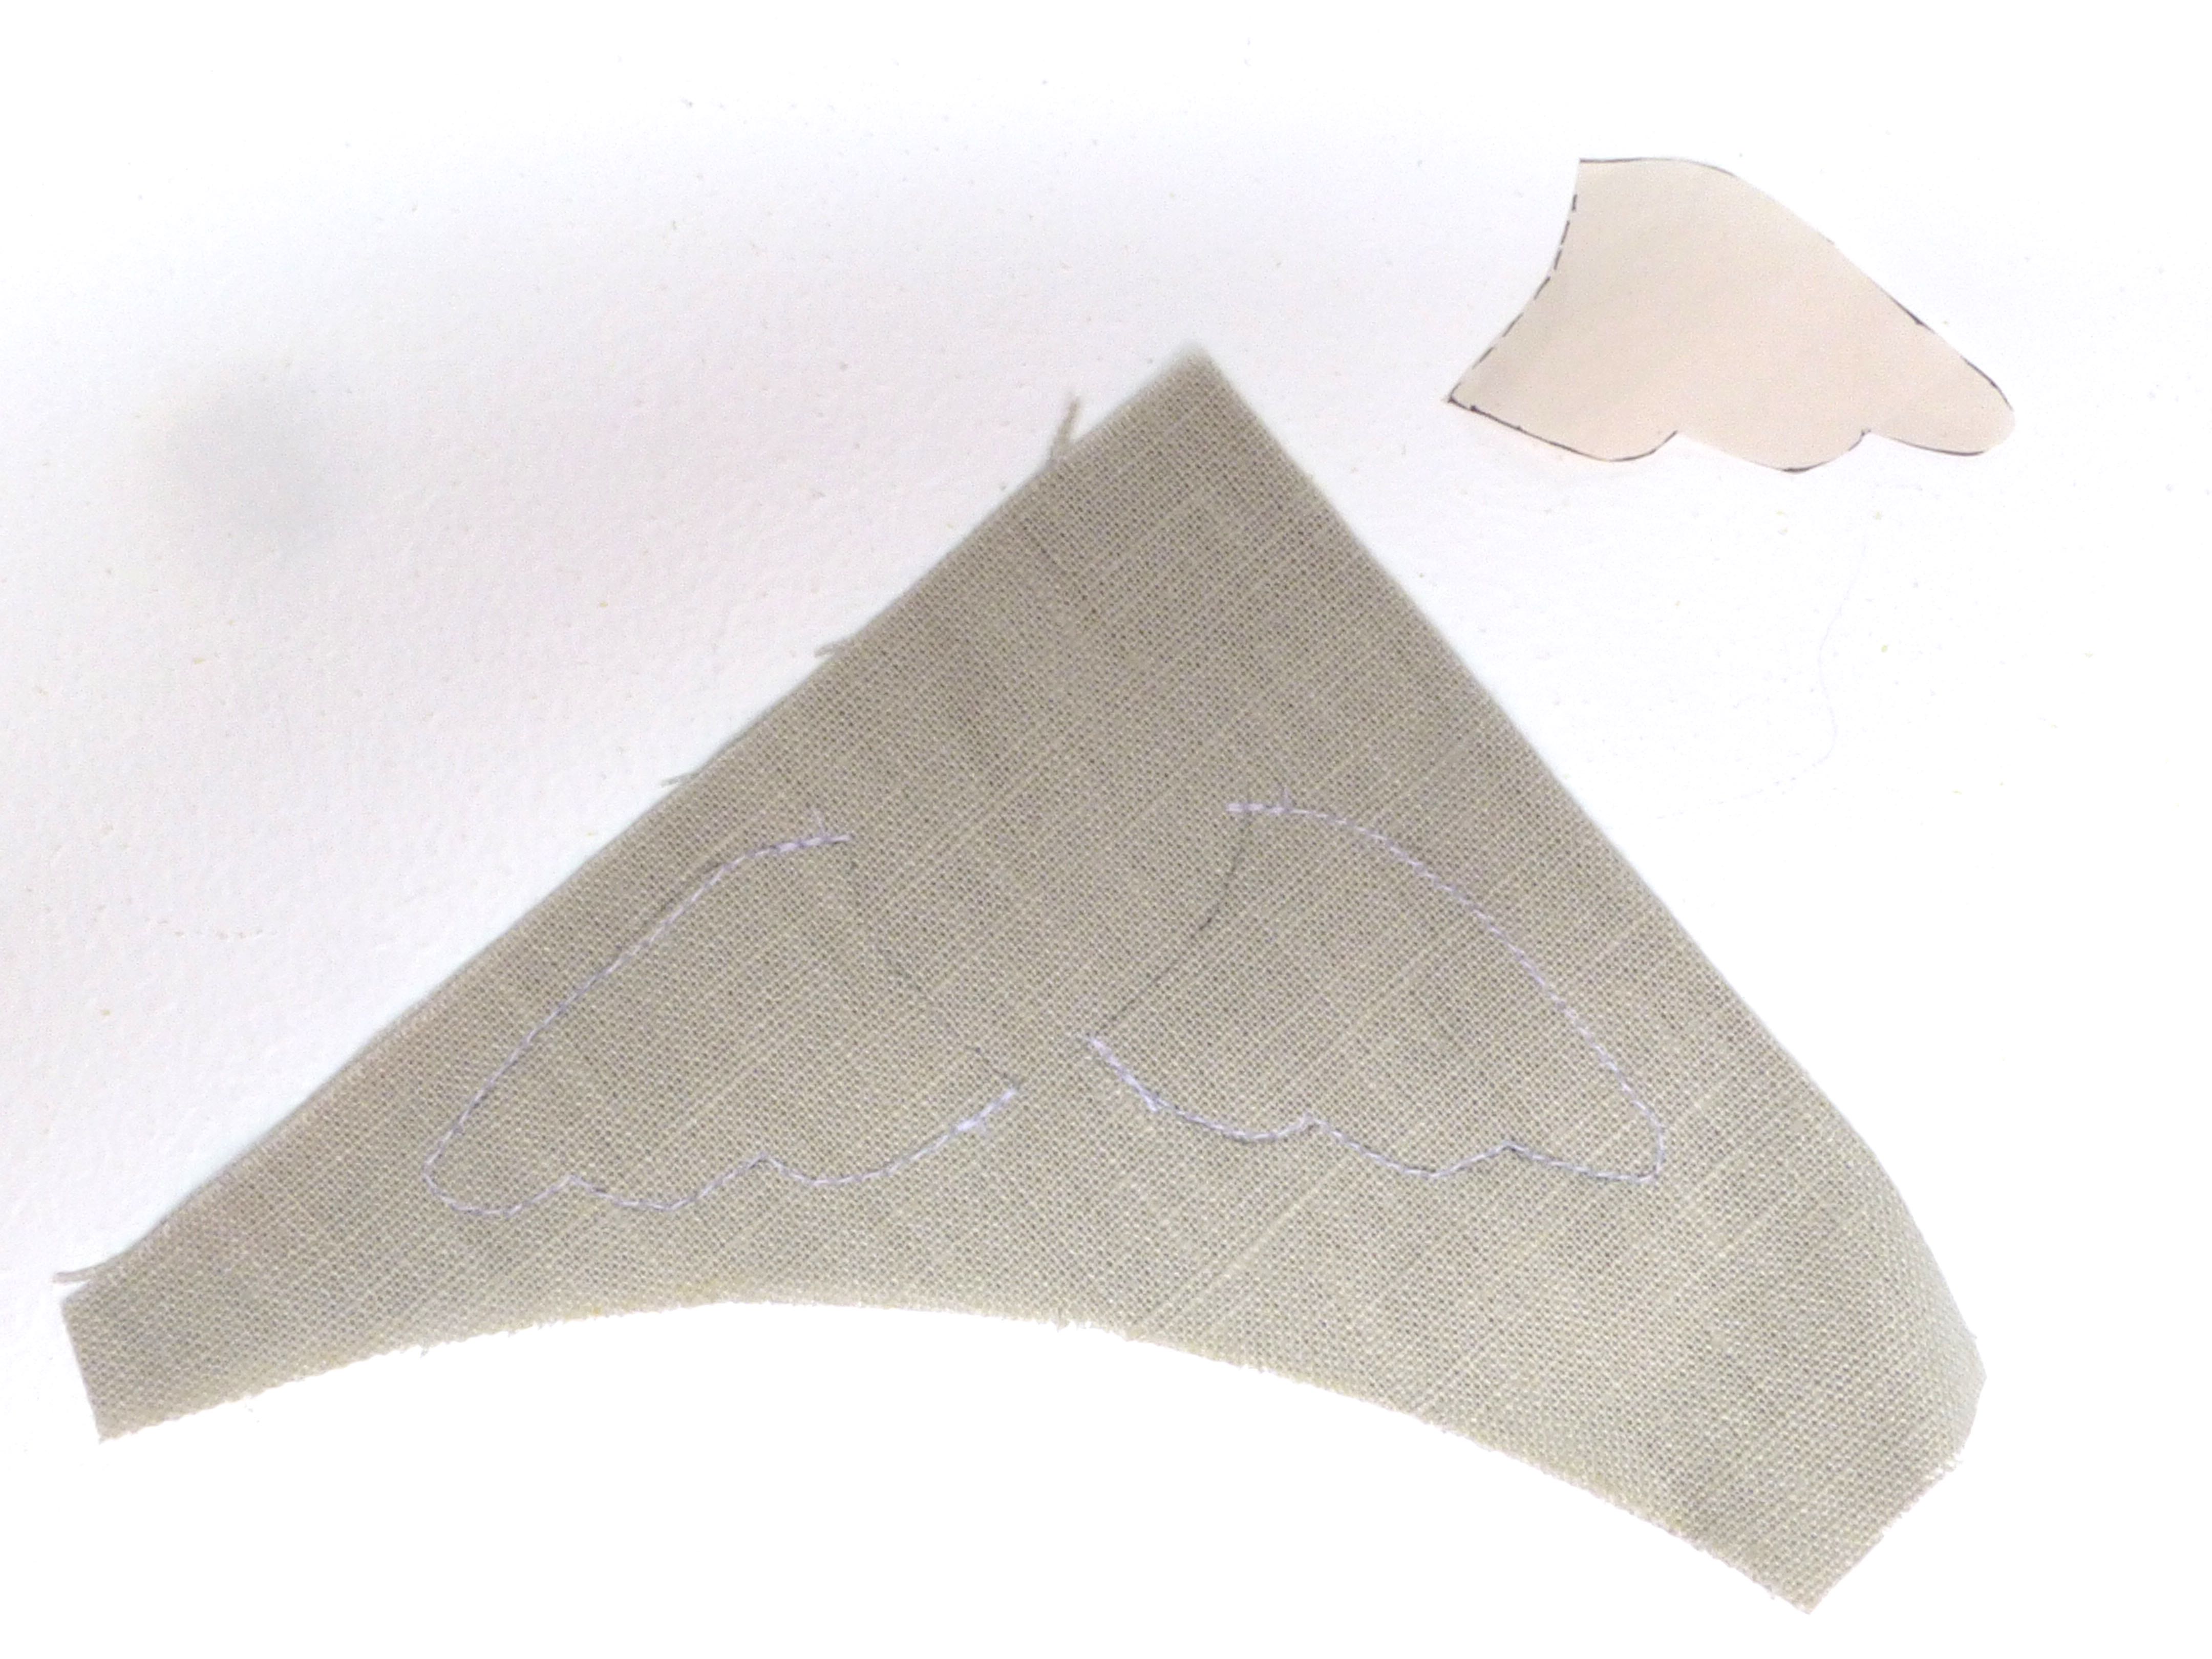
  2. Place the acetate in the centre of the reverse of your 4.5″ x 3.5″ piece of fabric and draw around it, marking a rectangle. Remove the acetate and stay stitch the corners of the marked rectangle..
  3. Draw a second rectangle 1/4″ inside the first one and cut this section out to create a window for your photograph.

P1060343

4. Clip corners diagonally to the stay stitching.

P1060344

5. Fold to inside along the solid lines. Press.

6. Turn down a 1/4″ hem on the top edge and top stitch close to the fold. P1060346

7. Place acetate on the reverse of the window and top stitch close to the inner edge on all four sides.

P1060348

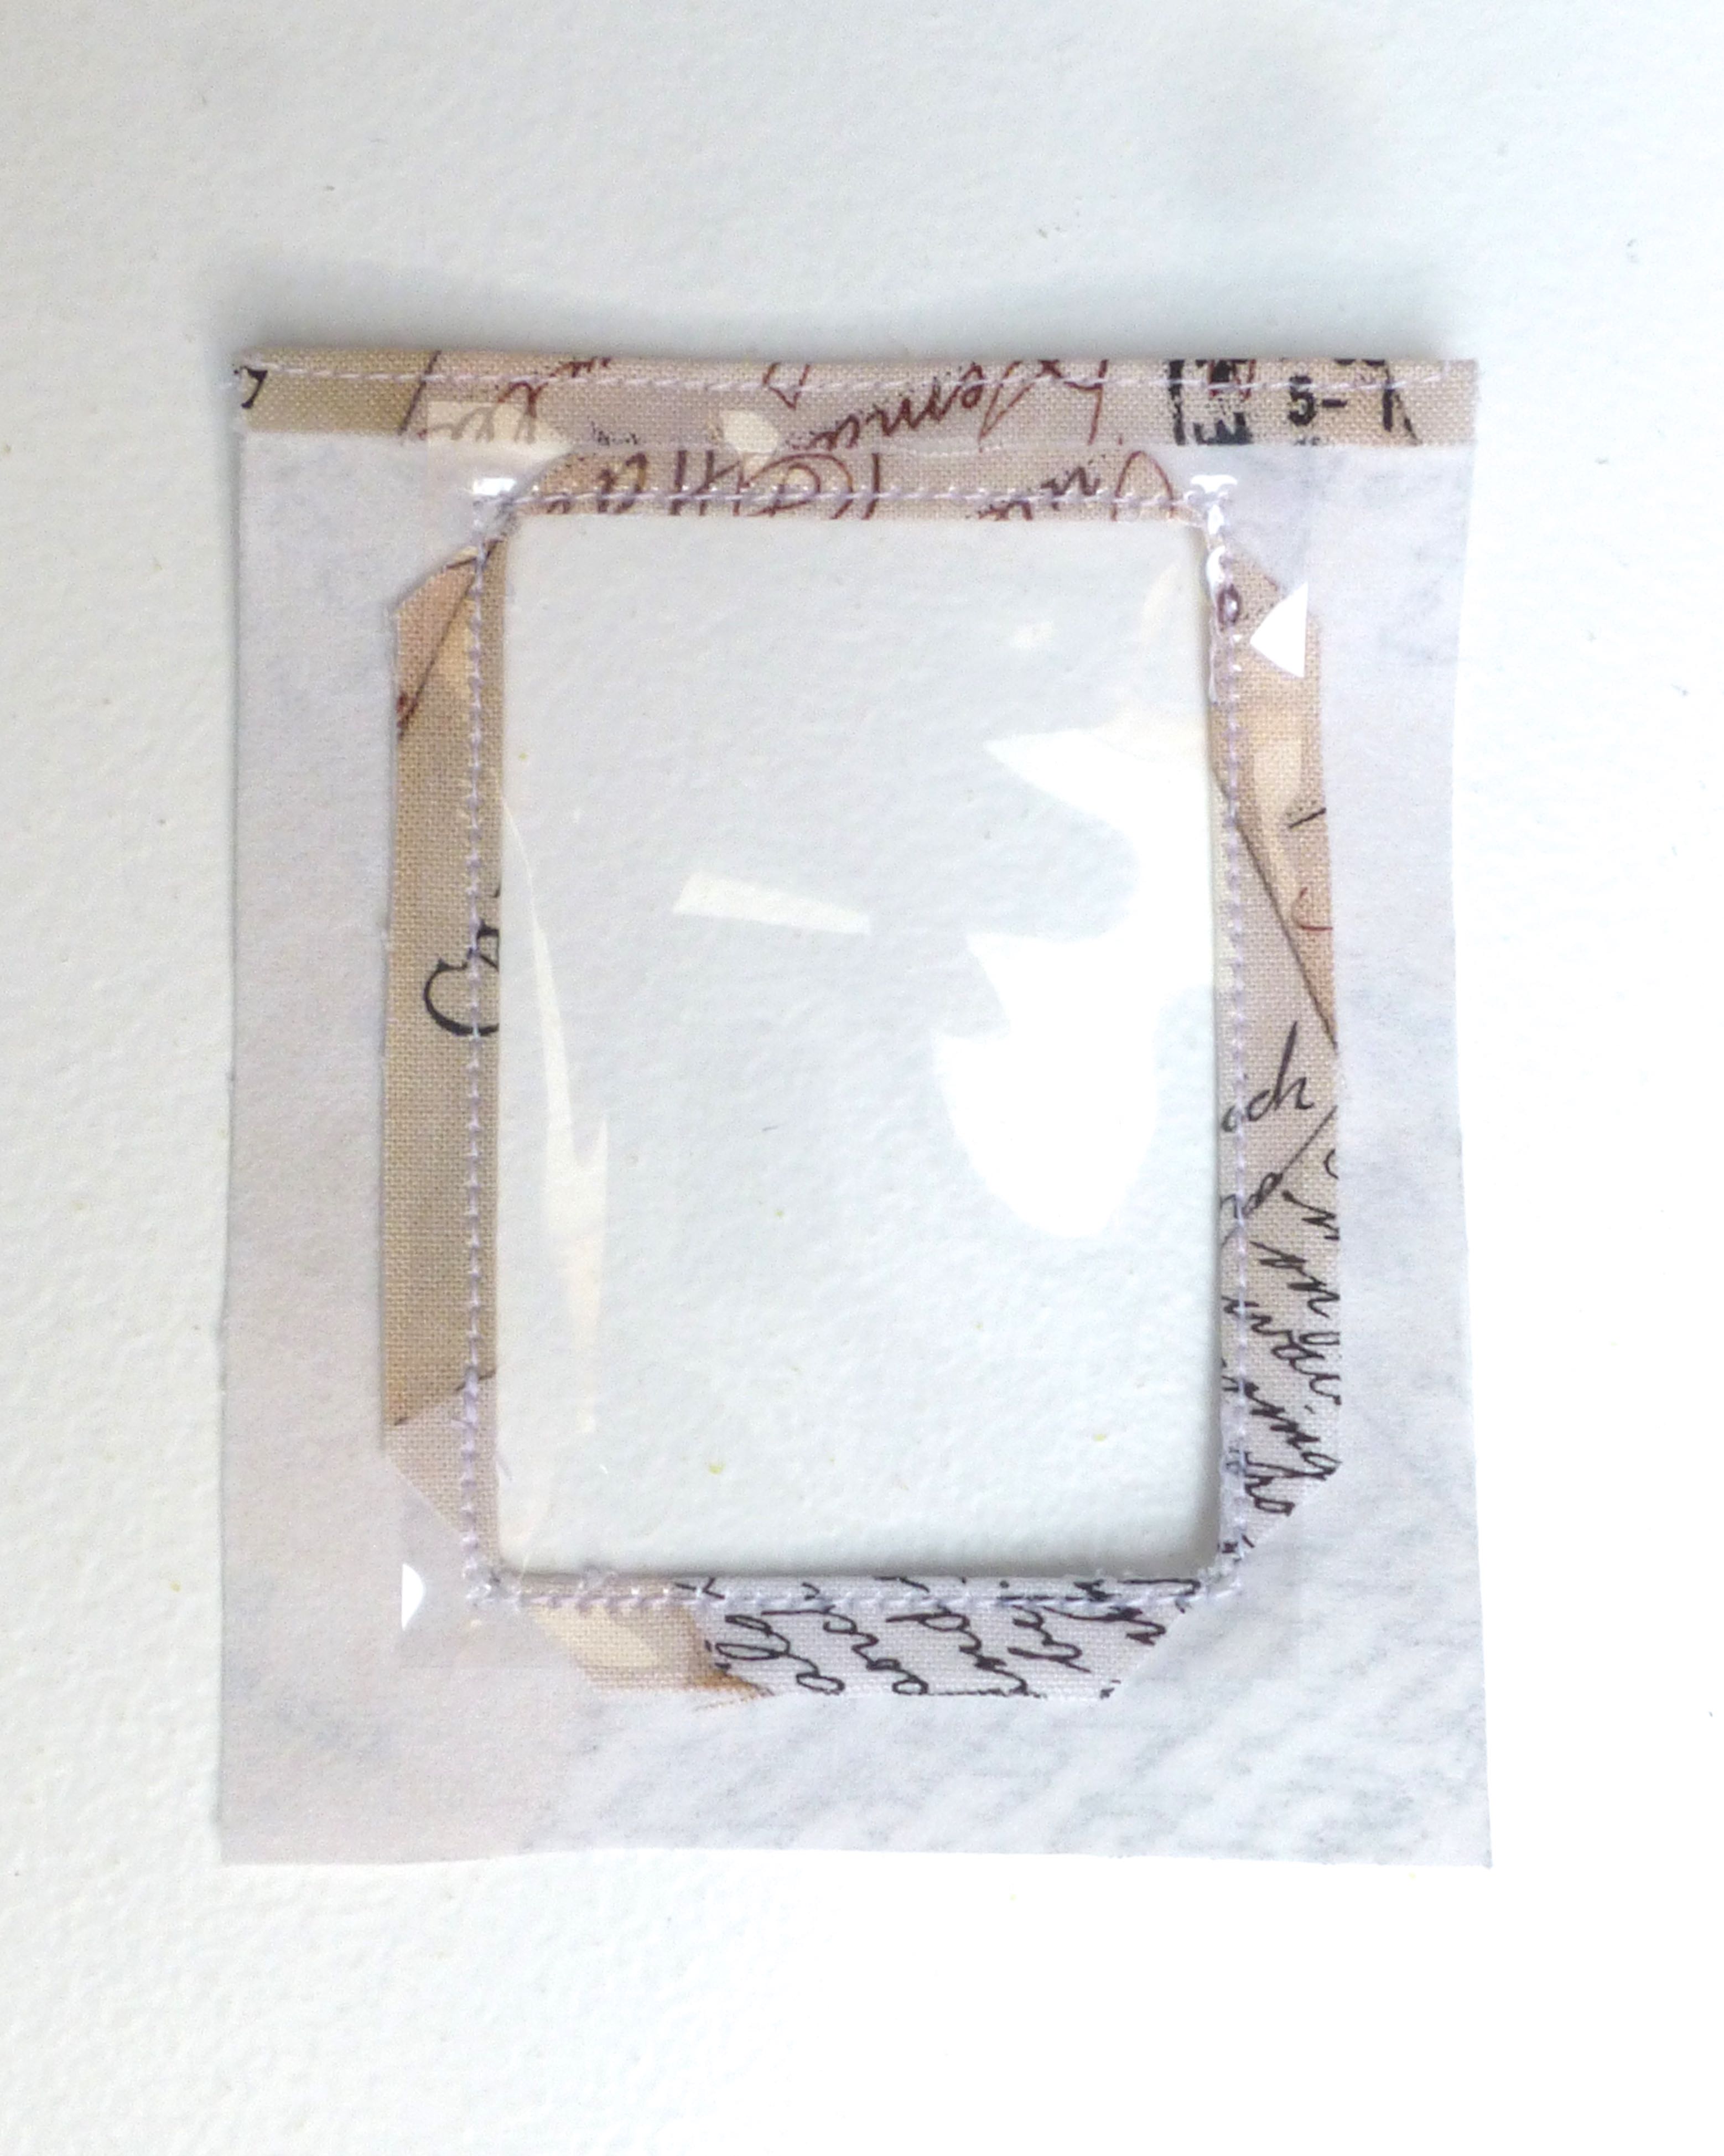
8. Turn and press a 1/4″ hem on remaining three sides of the fabric, being careful not to touch the acetate with the iron.

P1060351

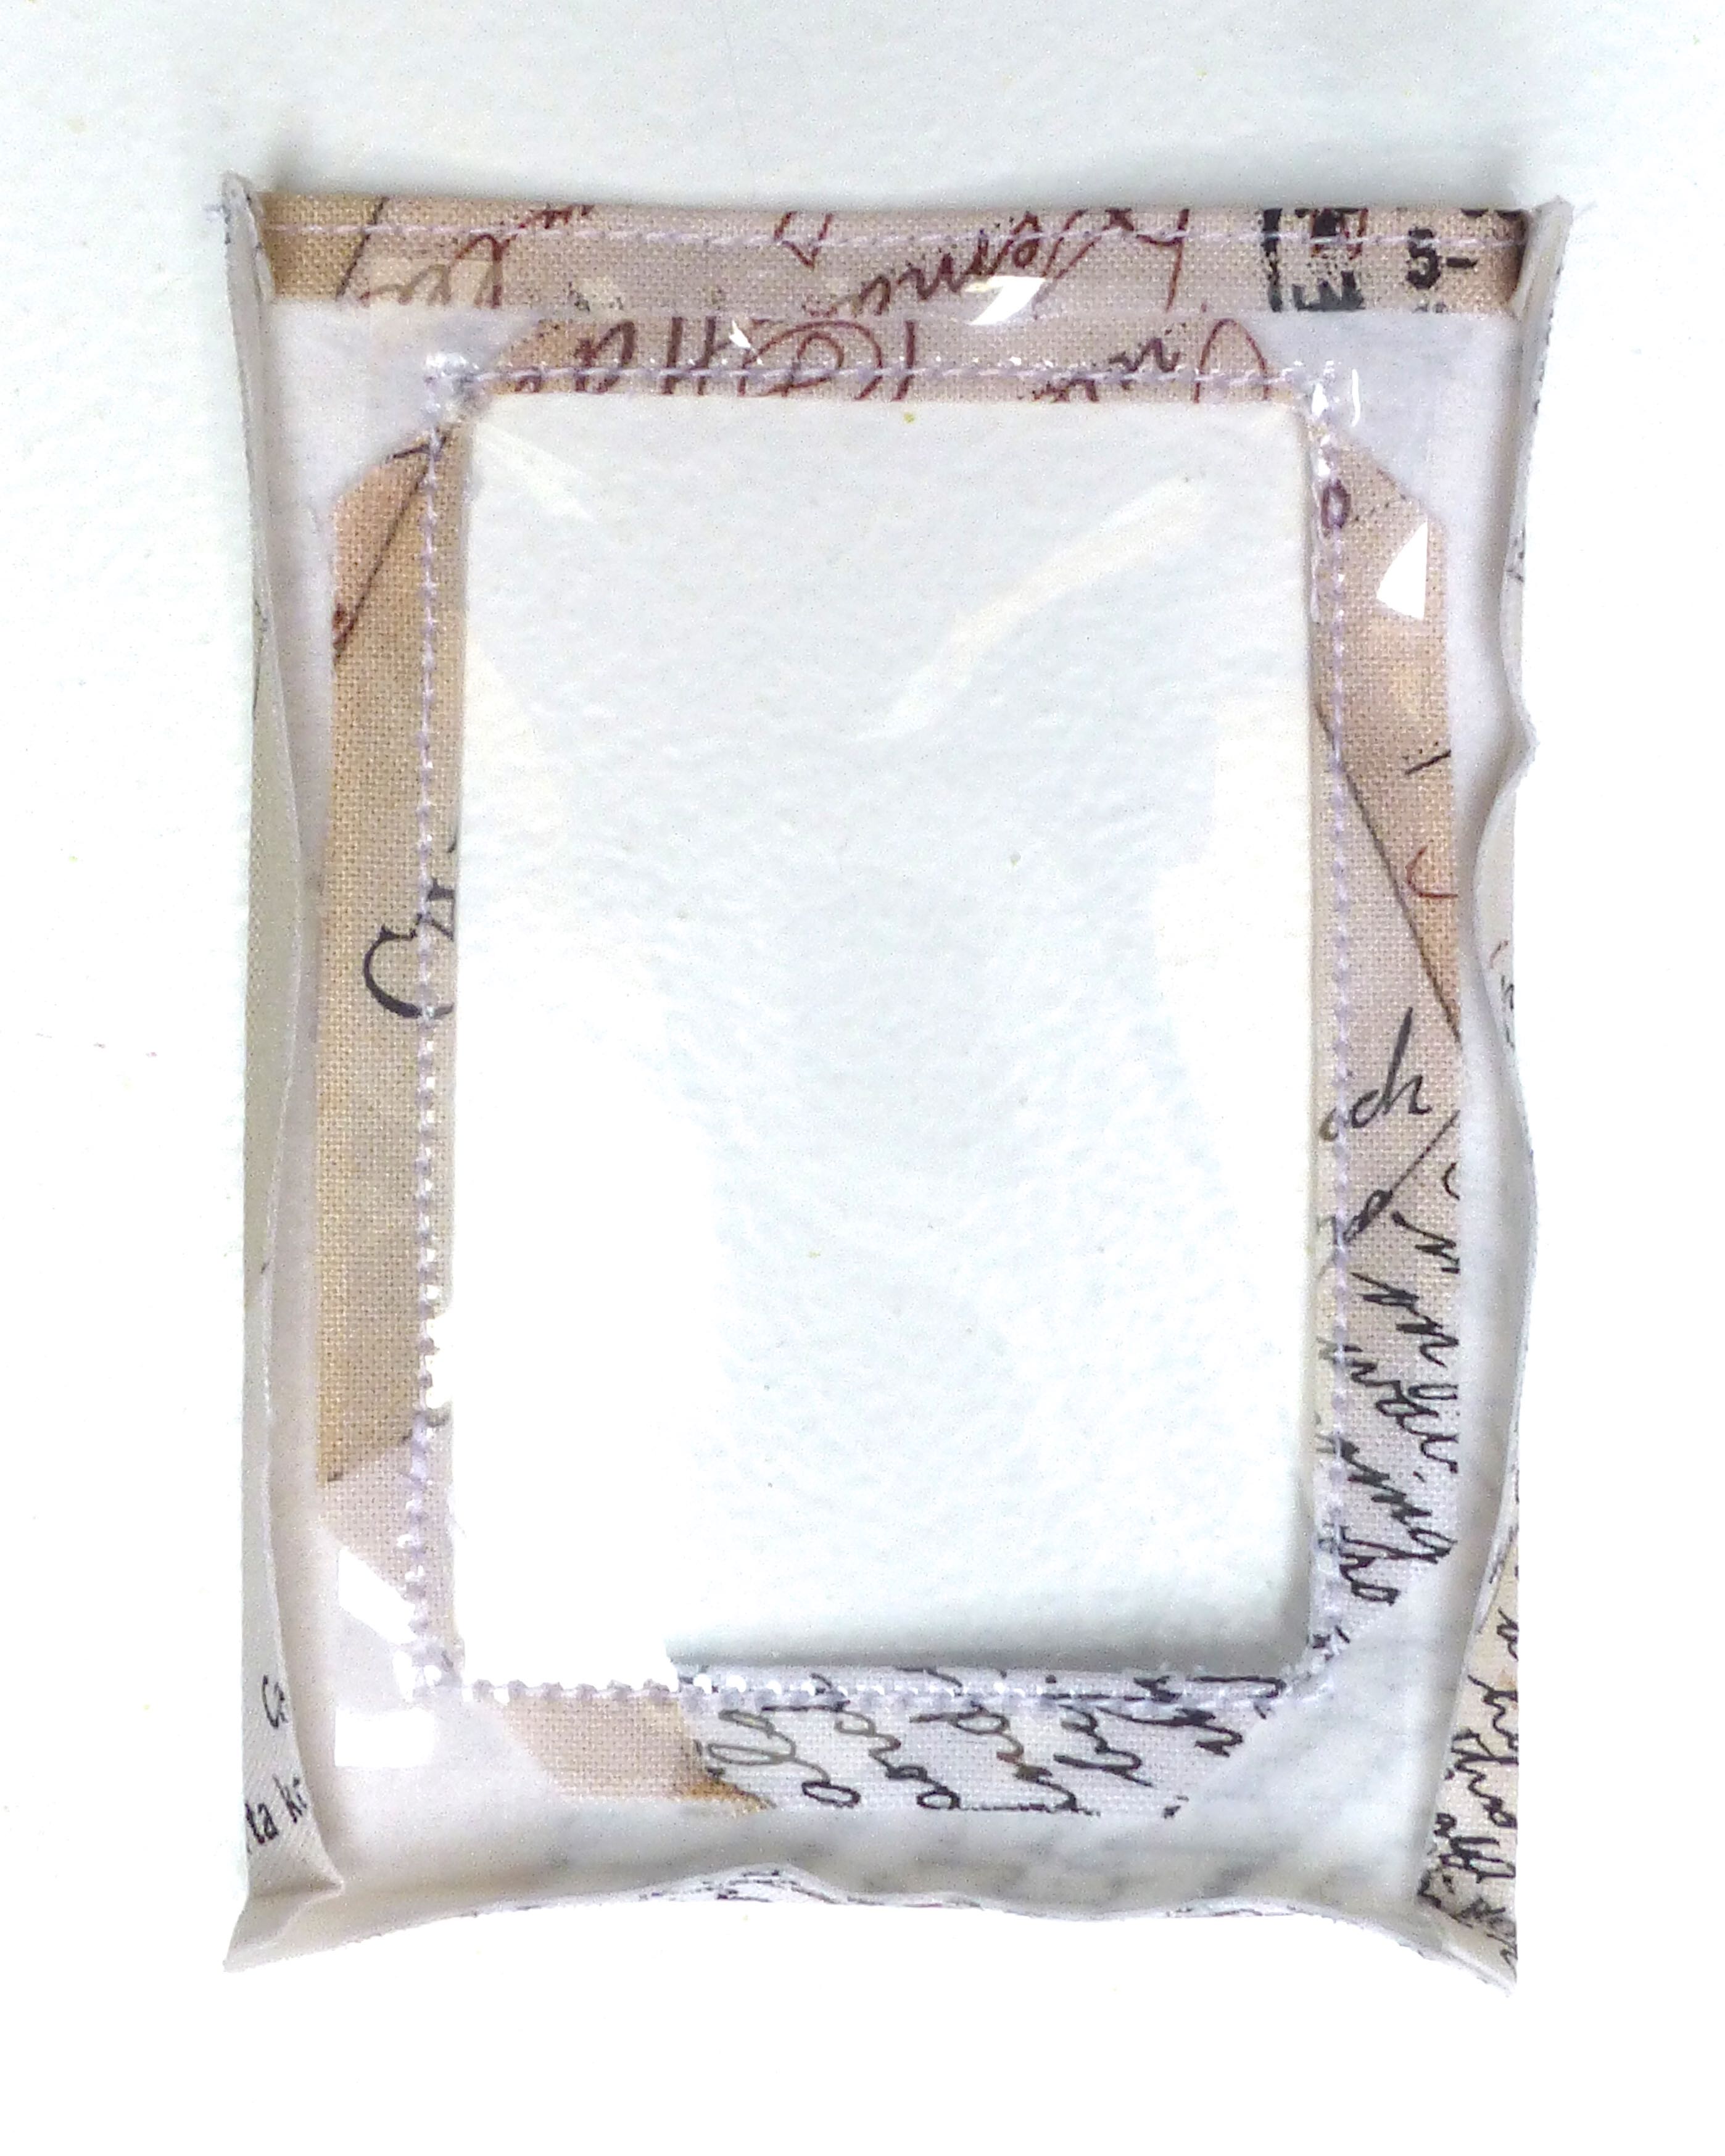
It should now look like this from the right side.

P1060350

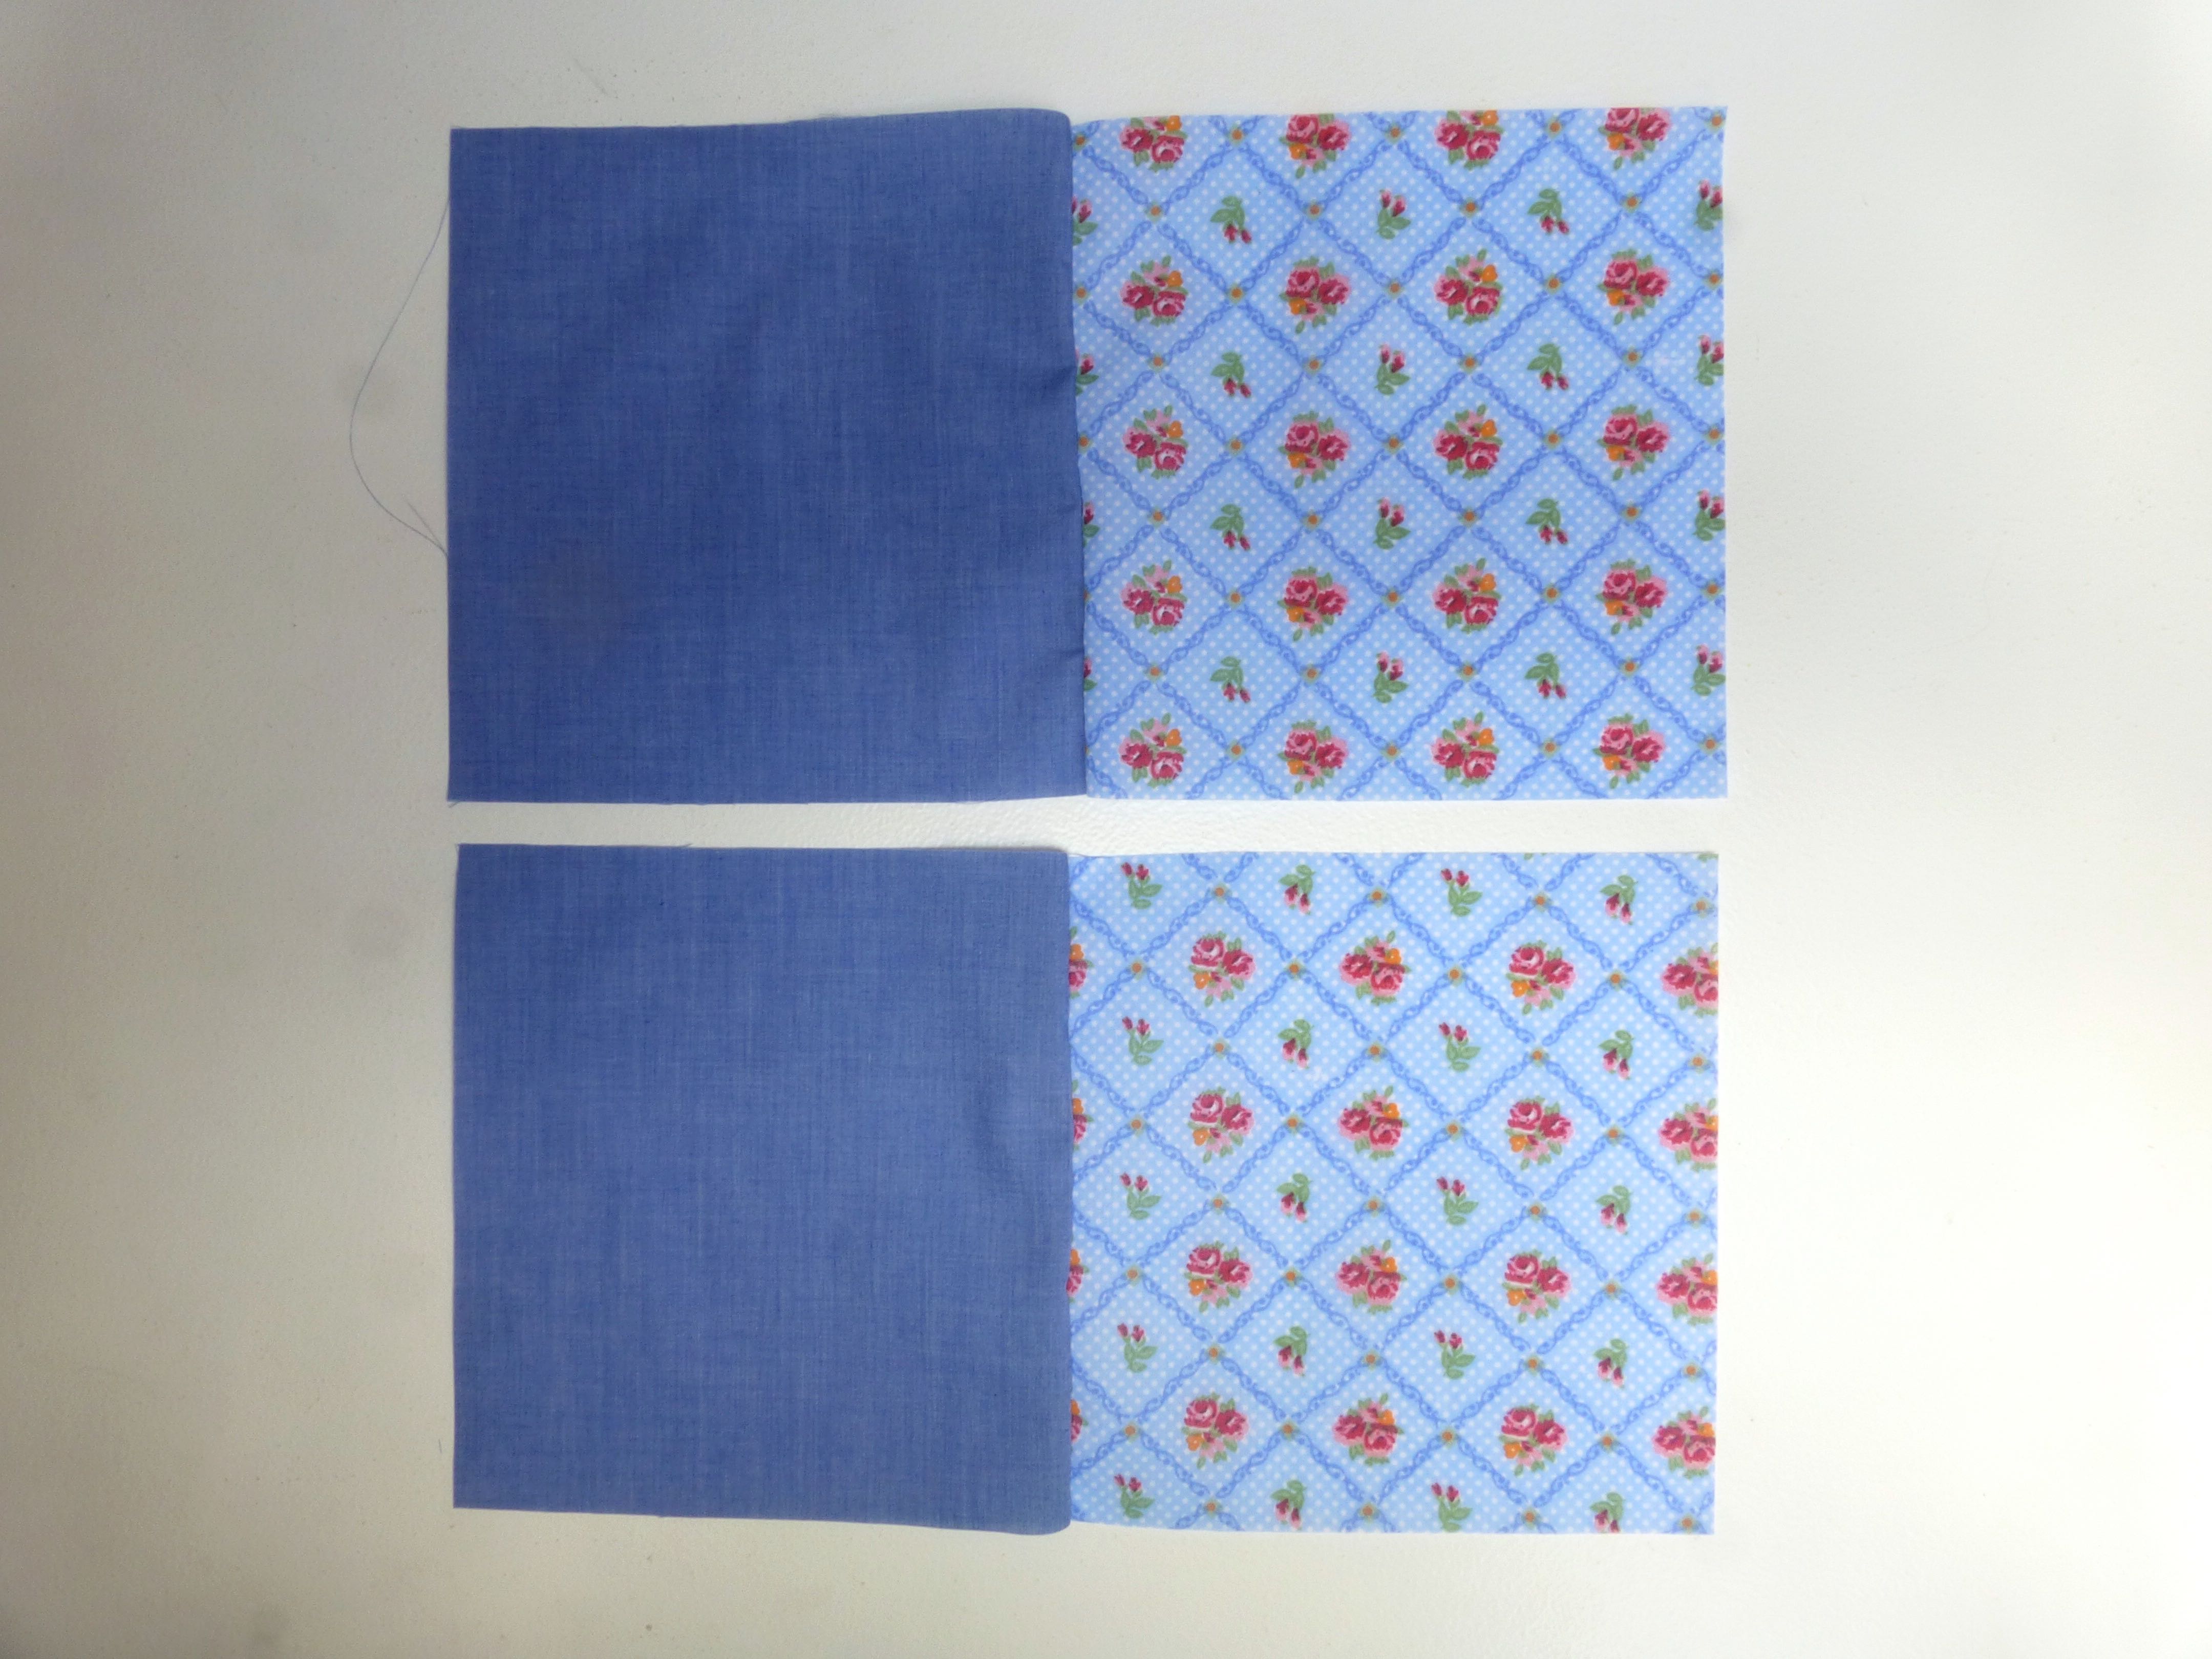
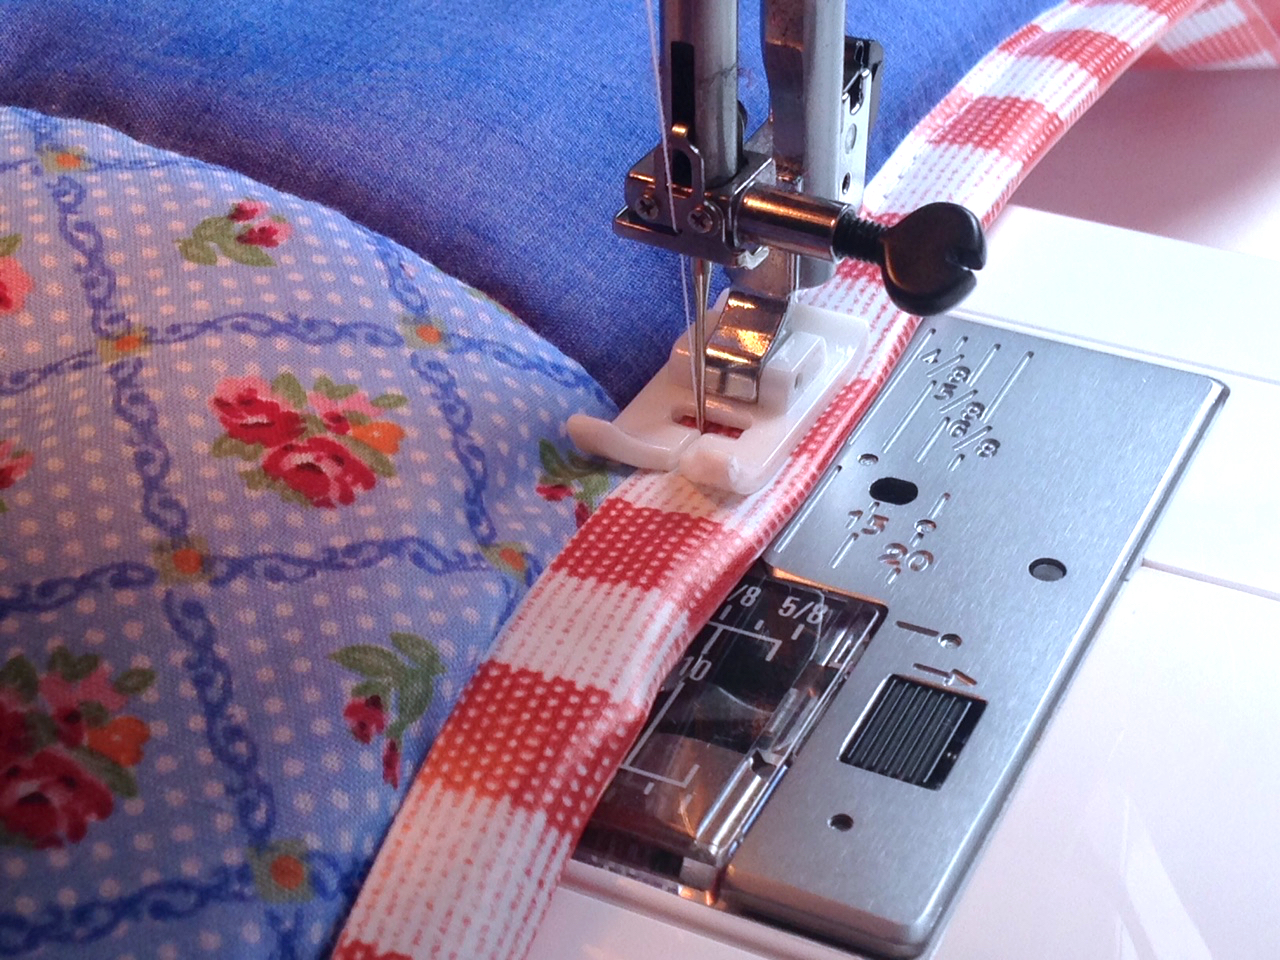
9. To make your frame, take both 12″ x 3.5″ pieces and, with right sides together, sew around three sides with a 1/4″ seam allowance. Trim corners, turn and press.

P1060352

10. With the right side up, place your window on top of the frame aligning the bottom folded edge with the bottom seam of your frame. Top stitch the window close to folded edges on three sides, leaving the top edge open to slip your photo into.

P1060355

11. Insert a 3.5″ x 2.5″ piece of card into the open, unfinished end of the frame and push right down to the bottom.

12. Sew just above the window through all layers of the frame to encase the card.

P1060356

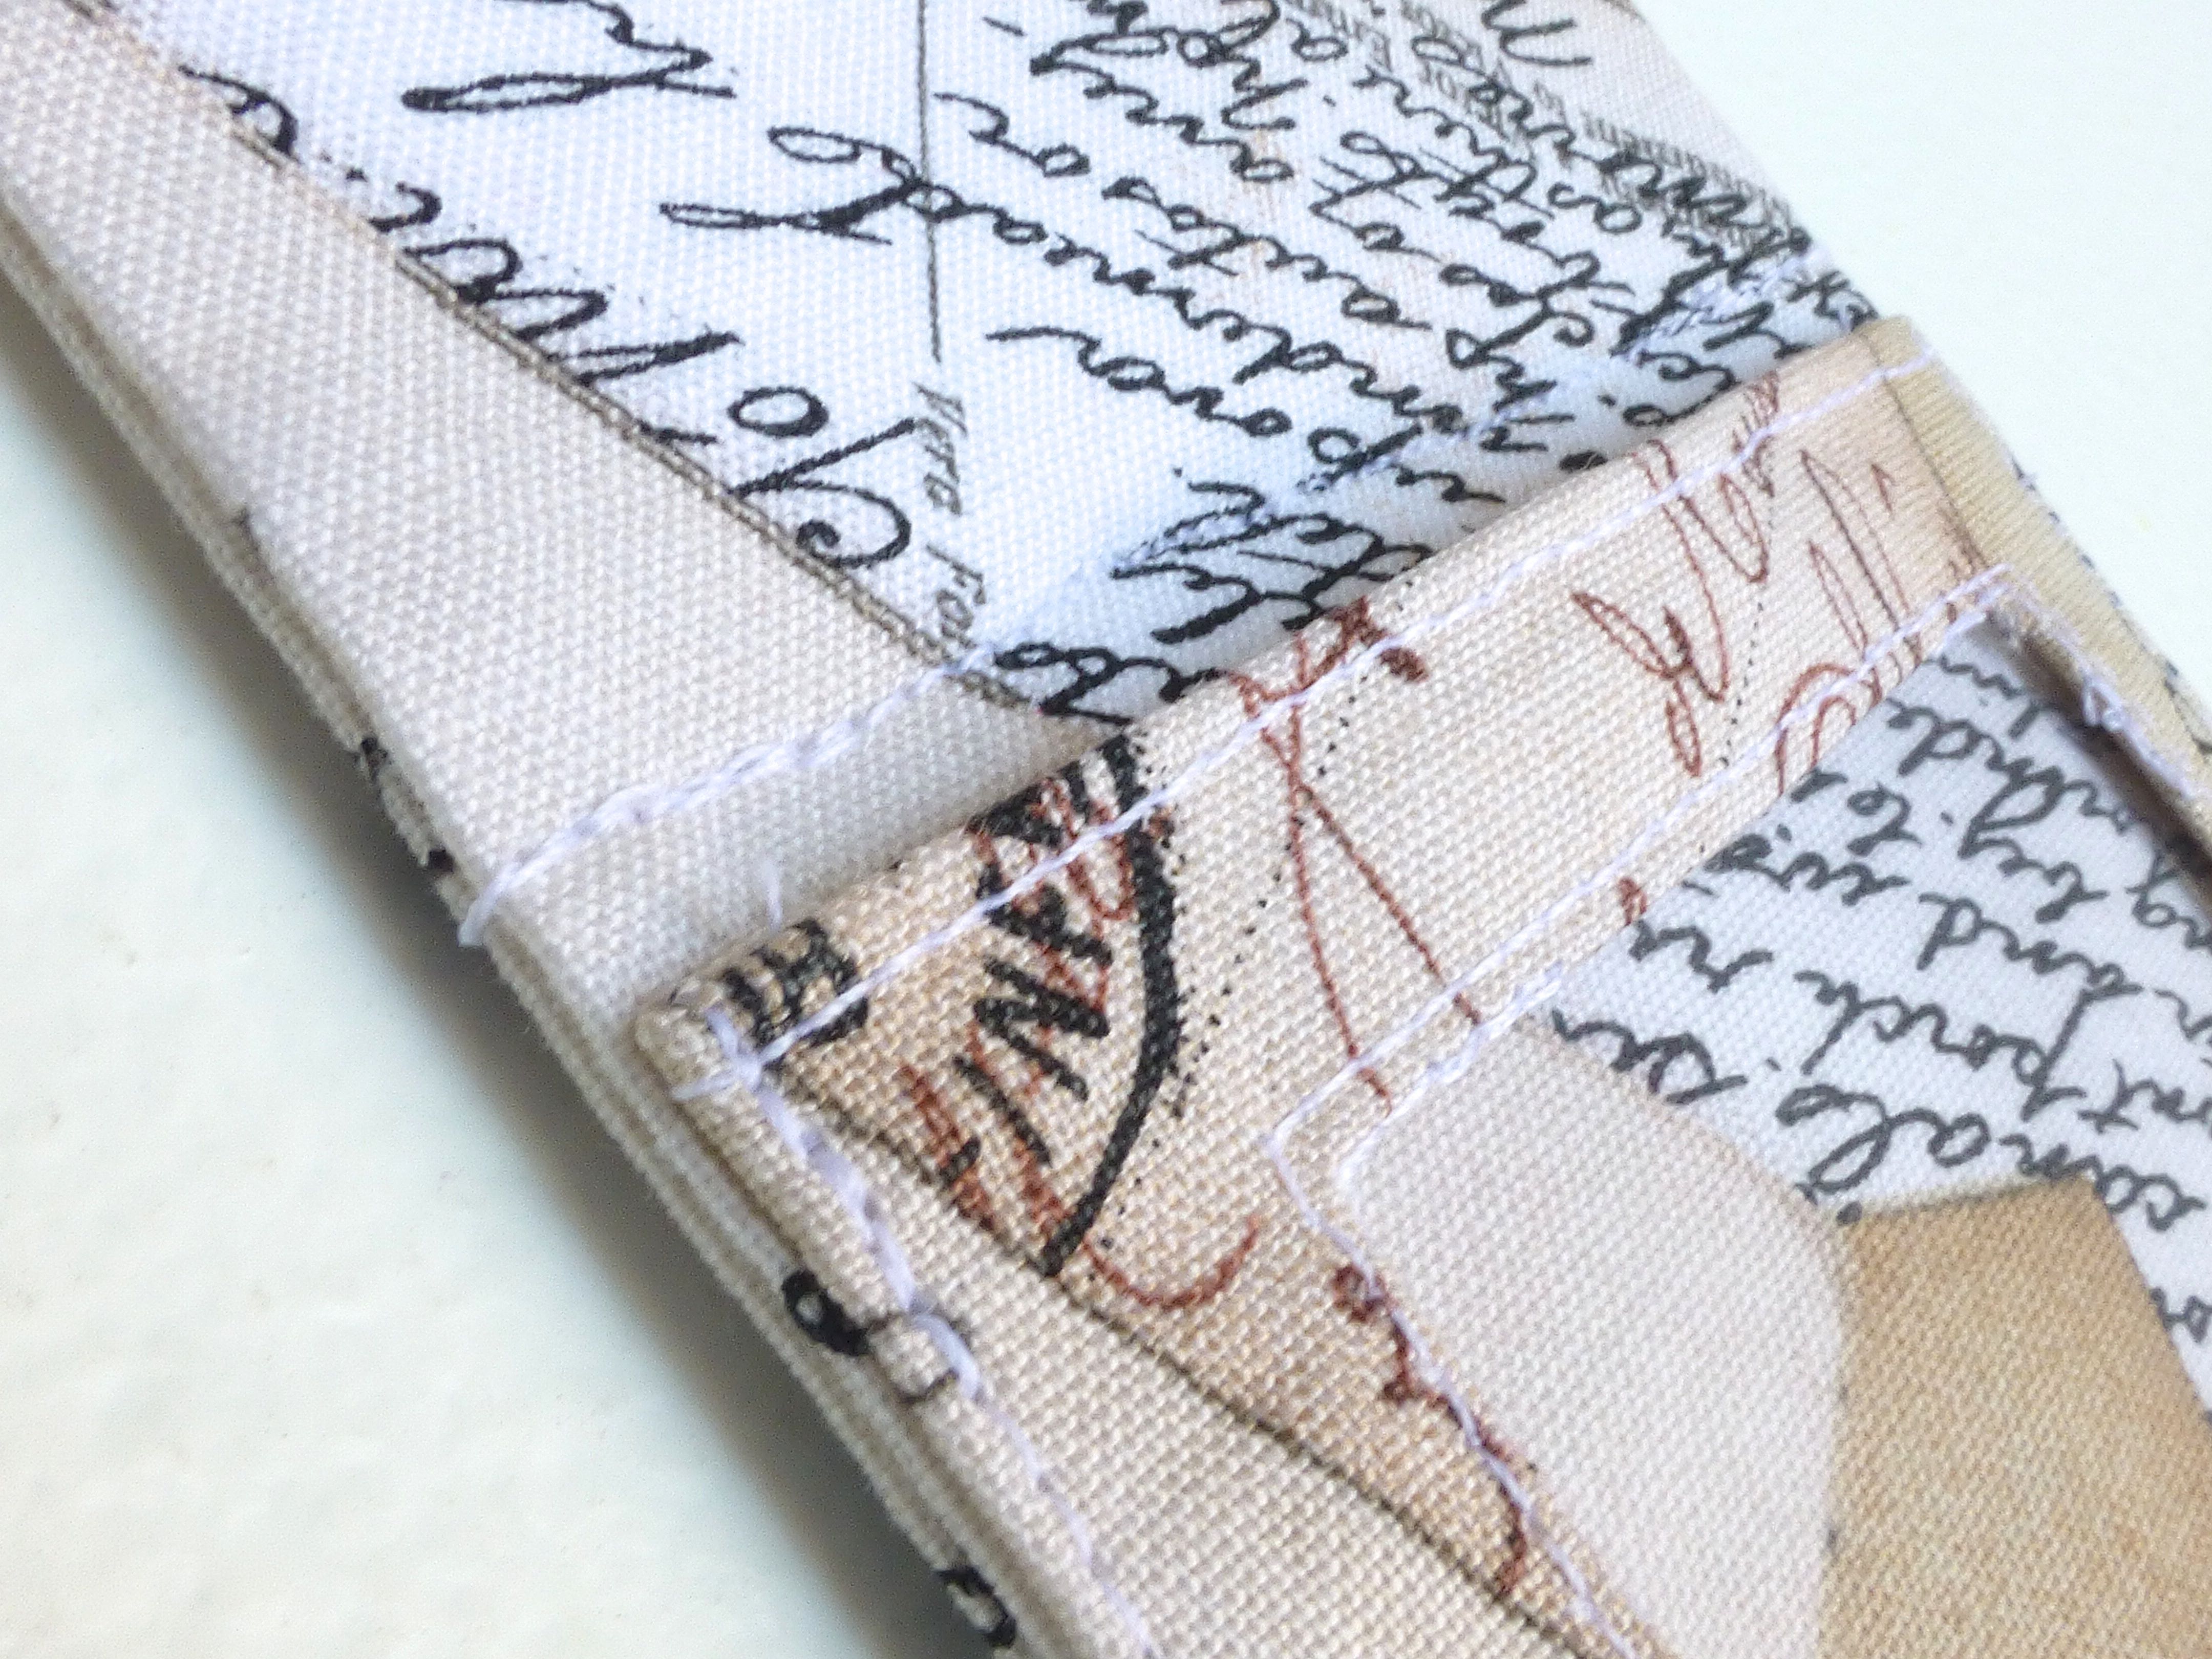
13. Insert the second 3.5″ x 2.5″ piece of card and push down to meet the previous line of stitching.

14. Sew across the width of the frame as before, encasing the second piece of card.

15. Repeat steps 13 & 14 with the smallest 2.5″ x 2″ piece of card.

16.Turn in the raw edges of the frame opening, press and top stitch to close.

P1060358

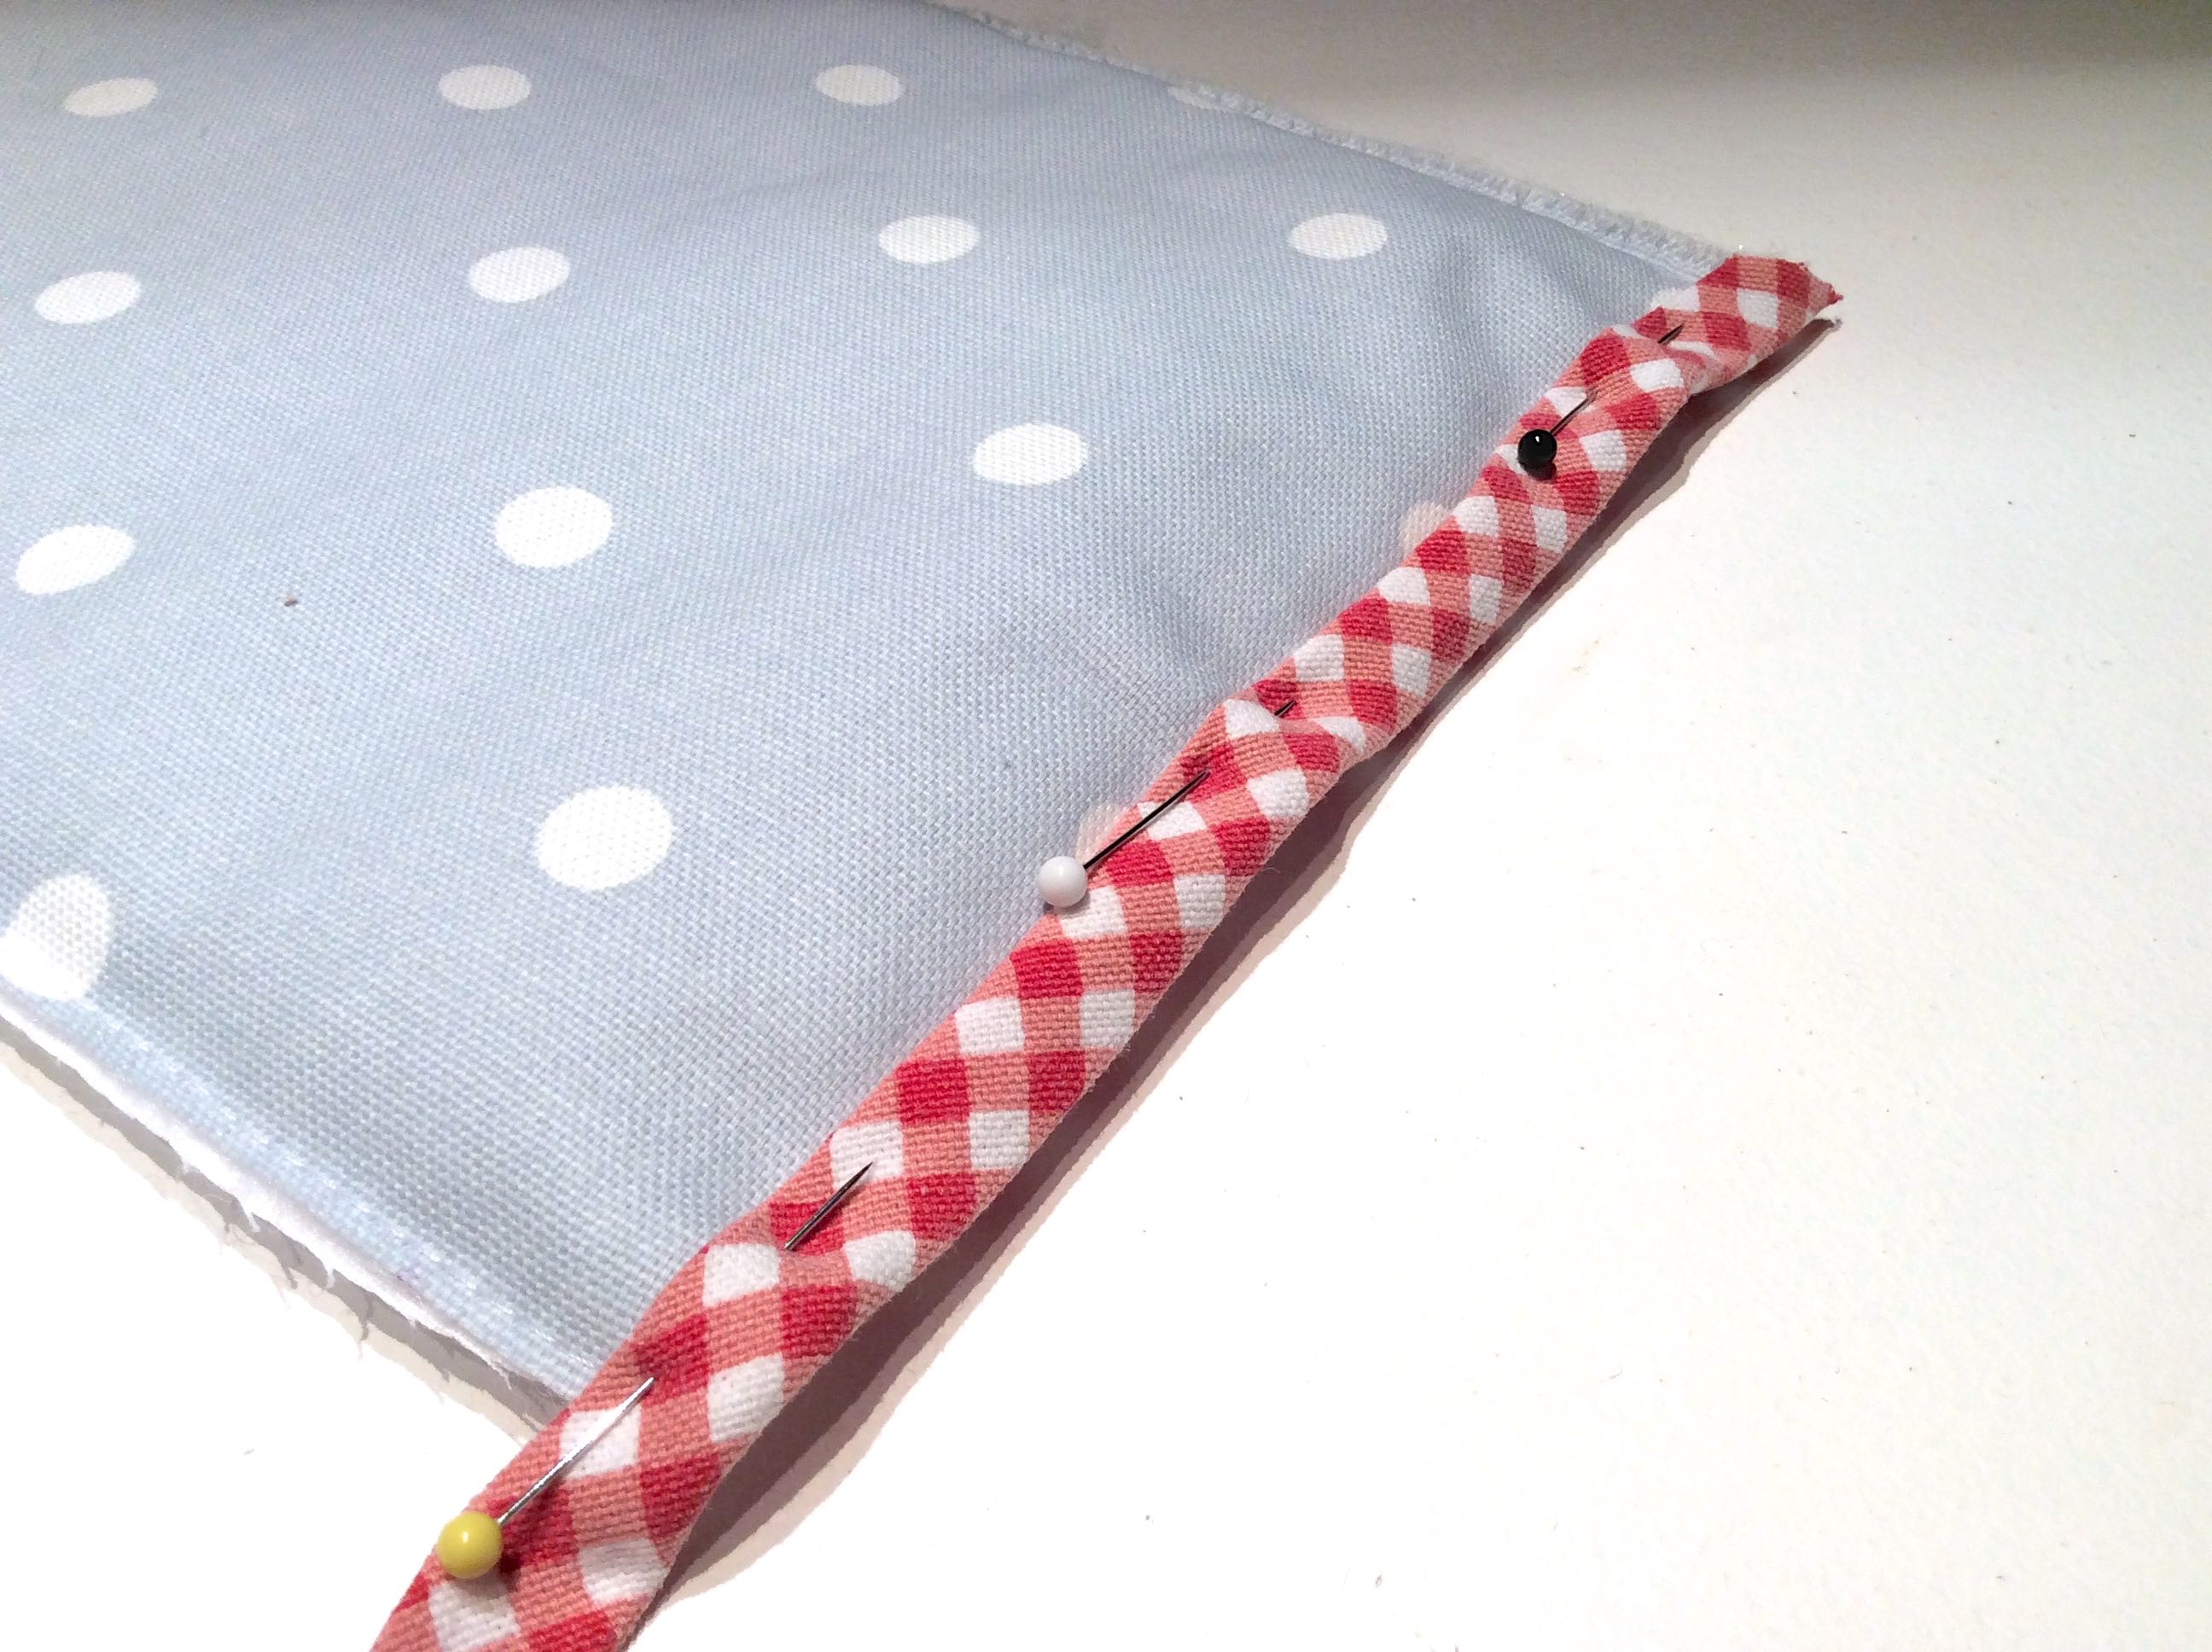
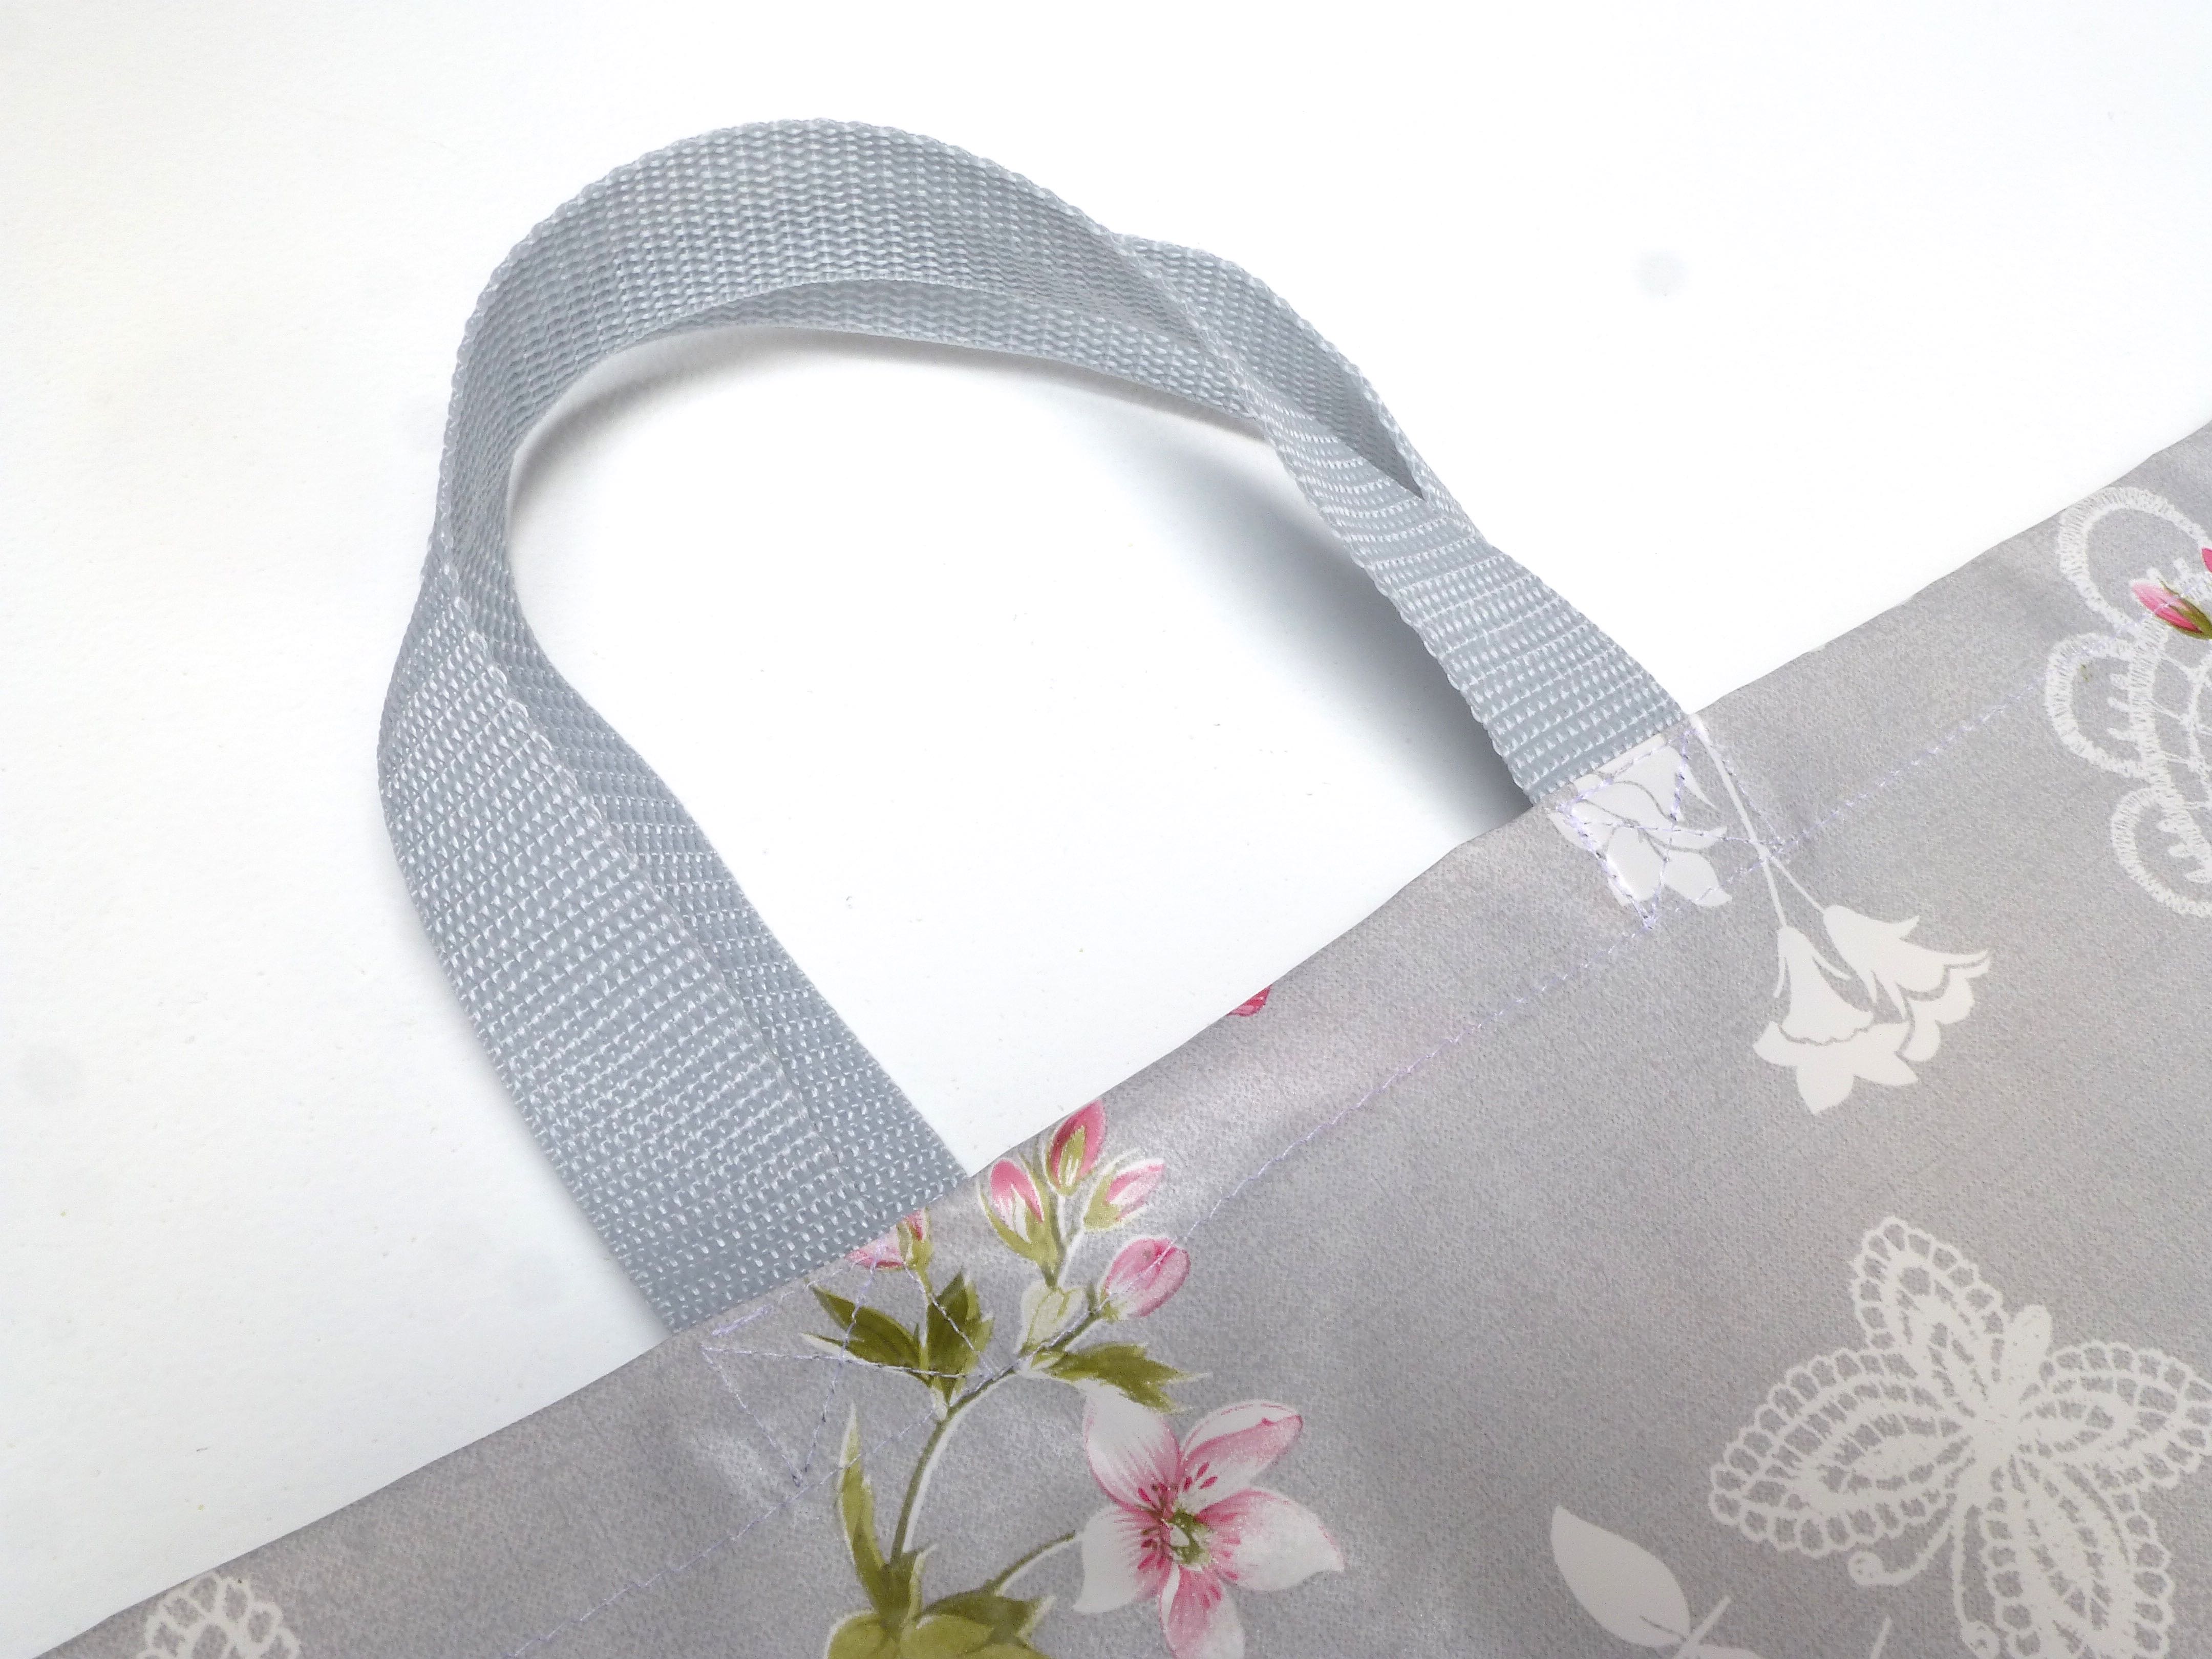
17. Window side uppermost, stitch the loop side of the hook and loop fastener to the opposite end of the frame as shown below.

P1060360

18. Hand stitch the hook side of the fastener to the reverse of the window along the bottom edge.

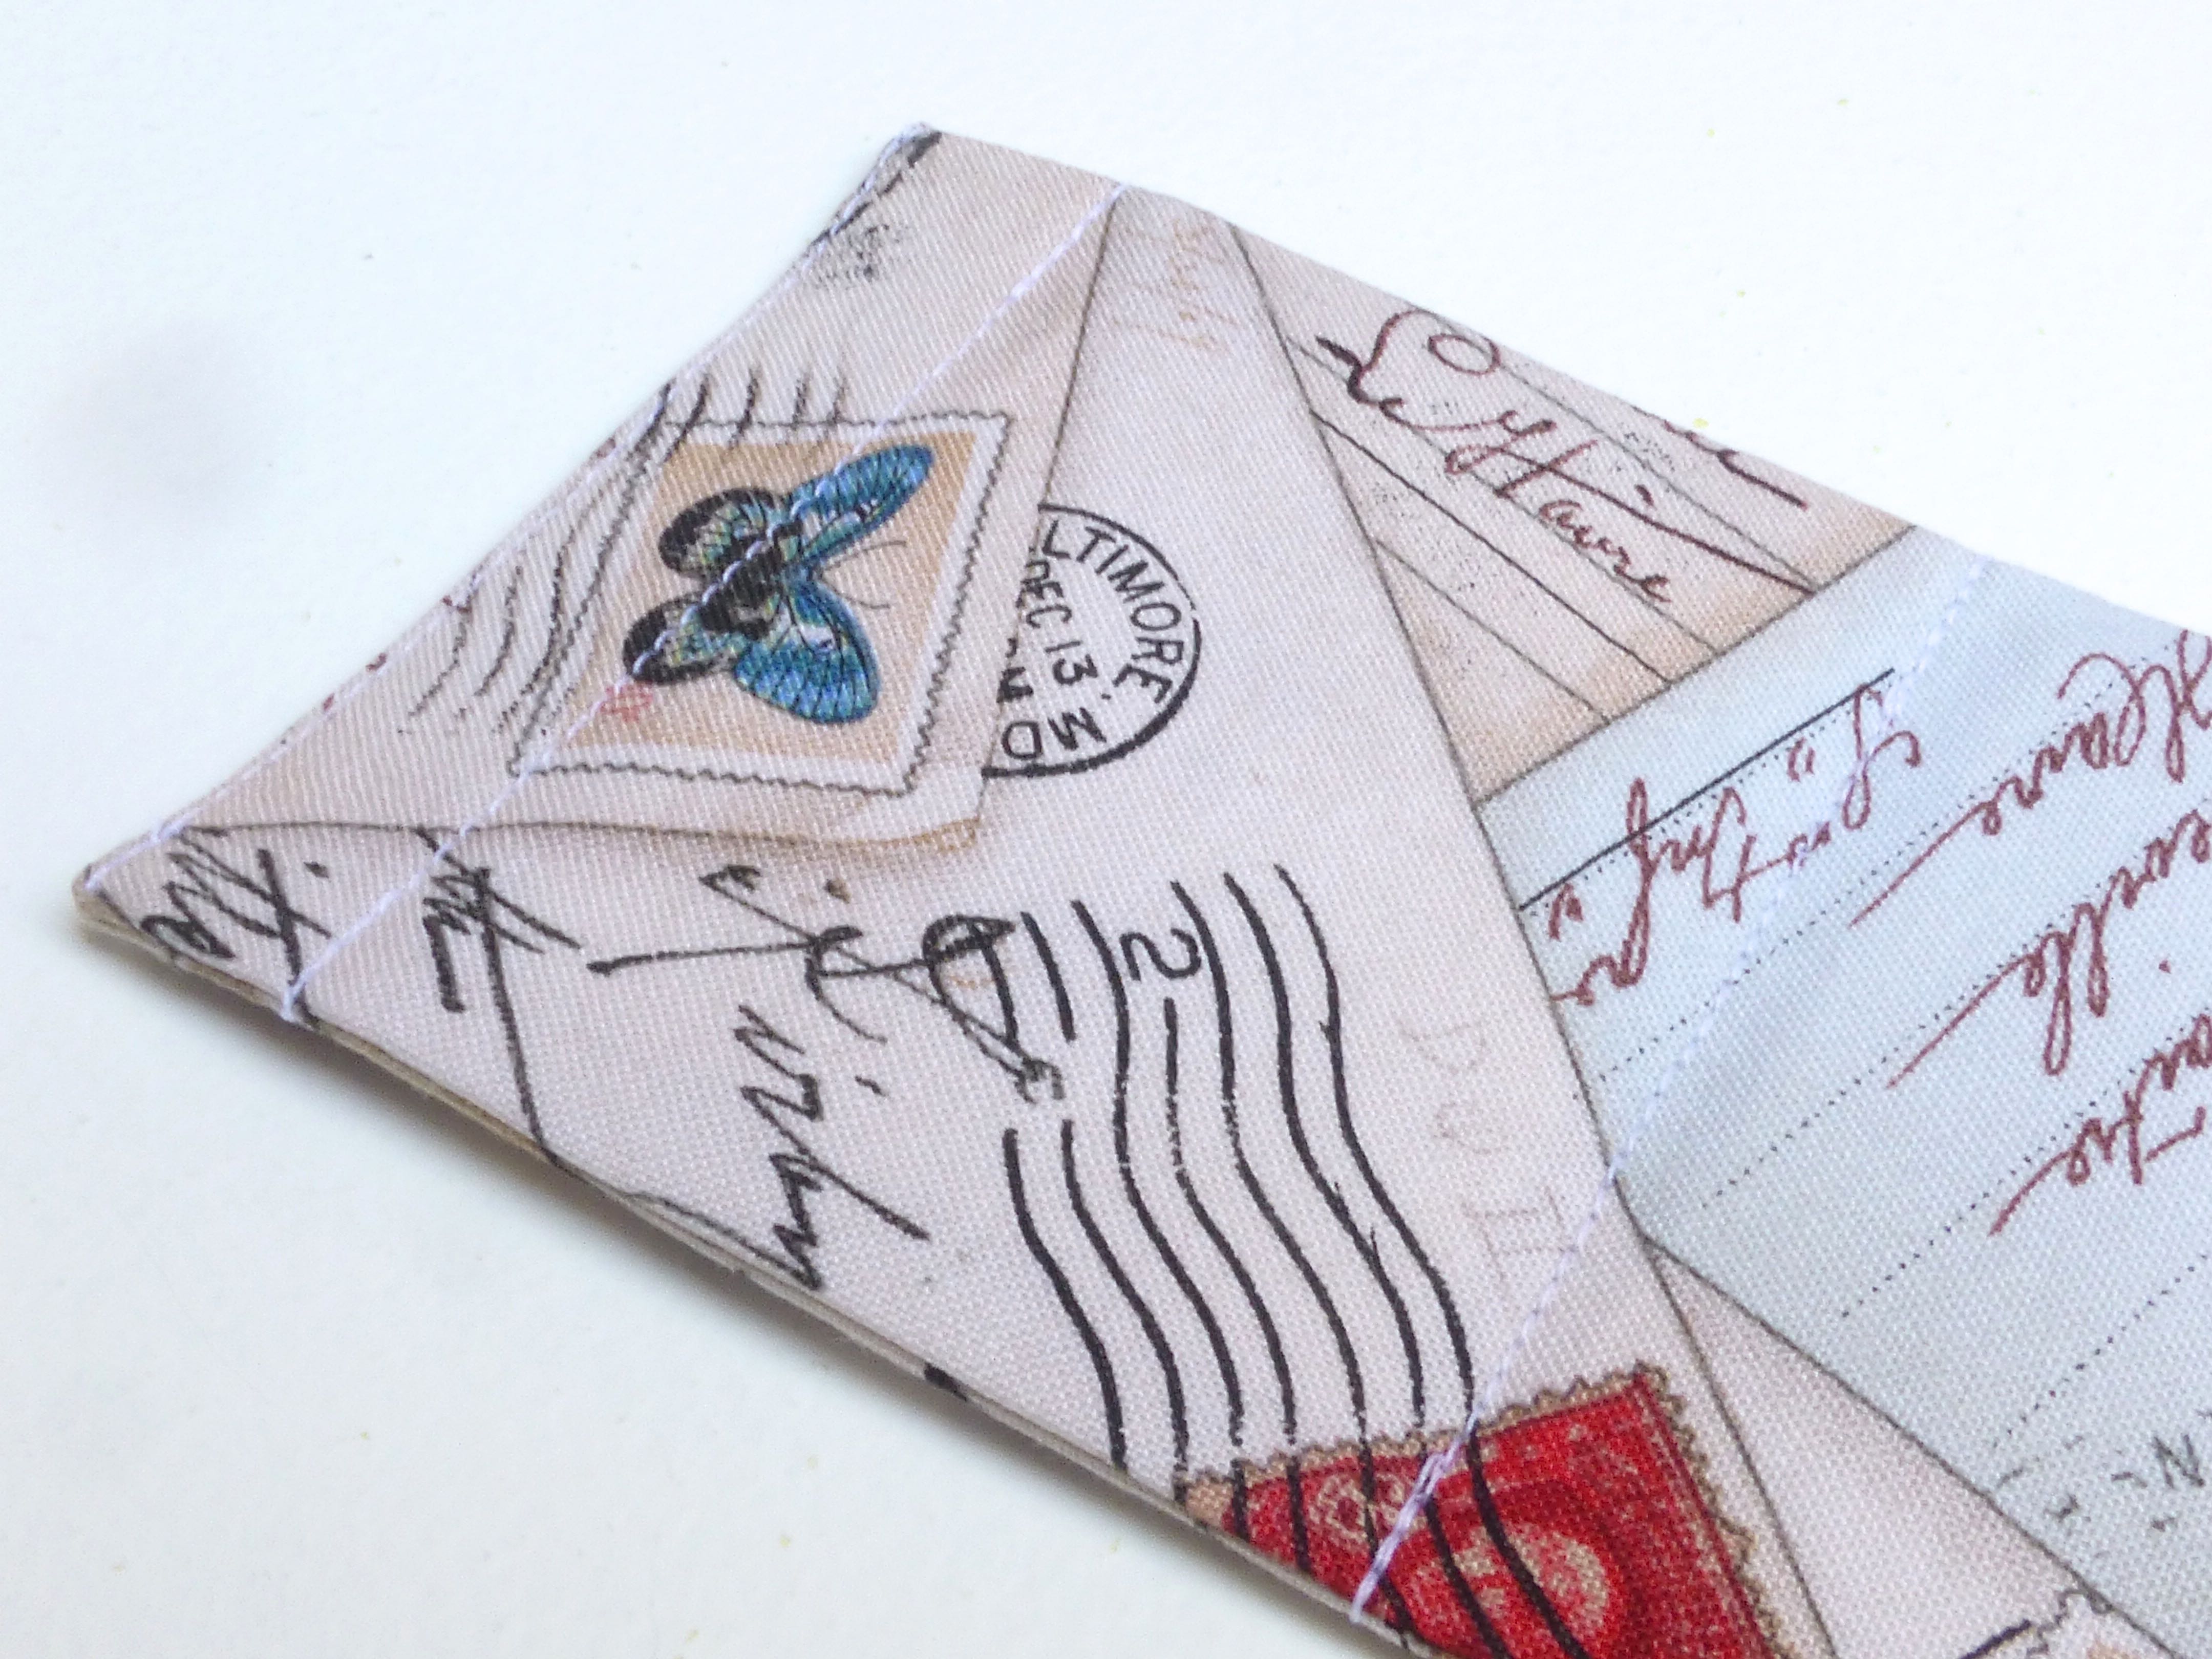
19. To assemble your travel photo frame, simply fold into a triangle shape and press together the hook and loop fastener.

P1060361

20. Slide your 3″ x 2″ photo in behind the acetate.

P1060370

For the case: –

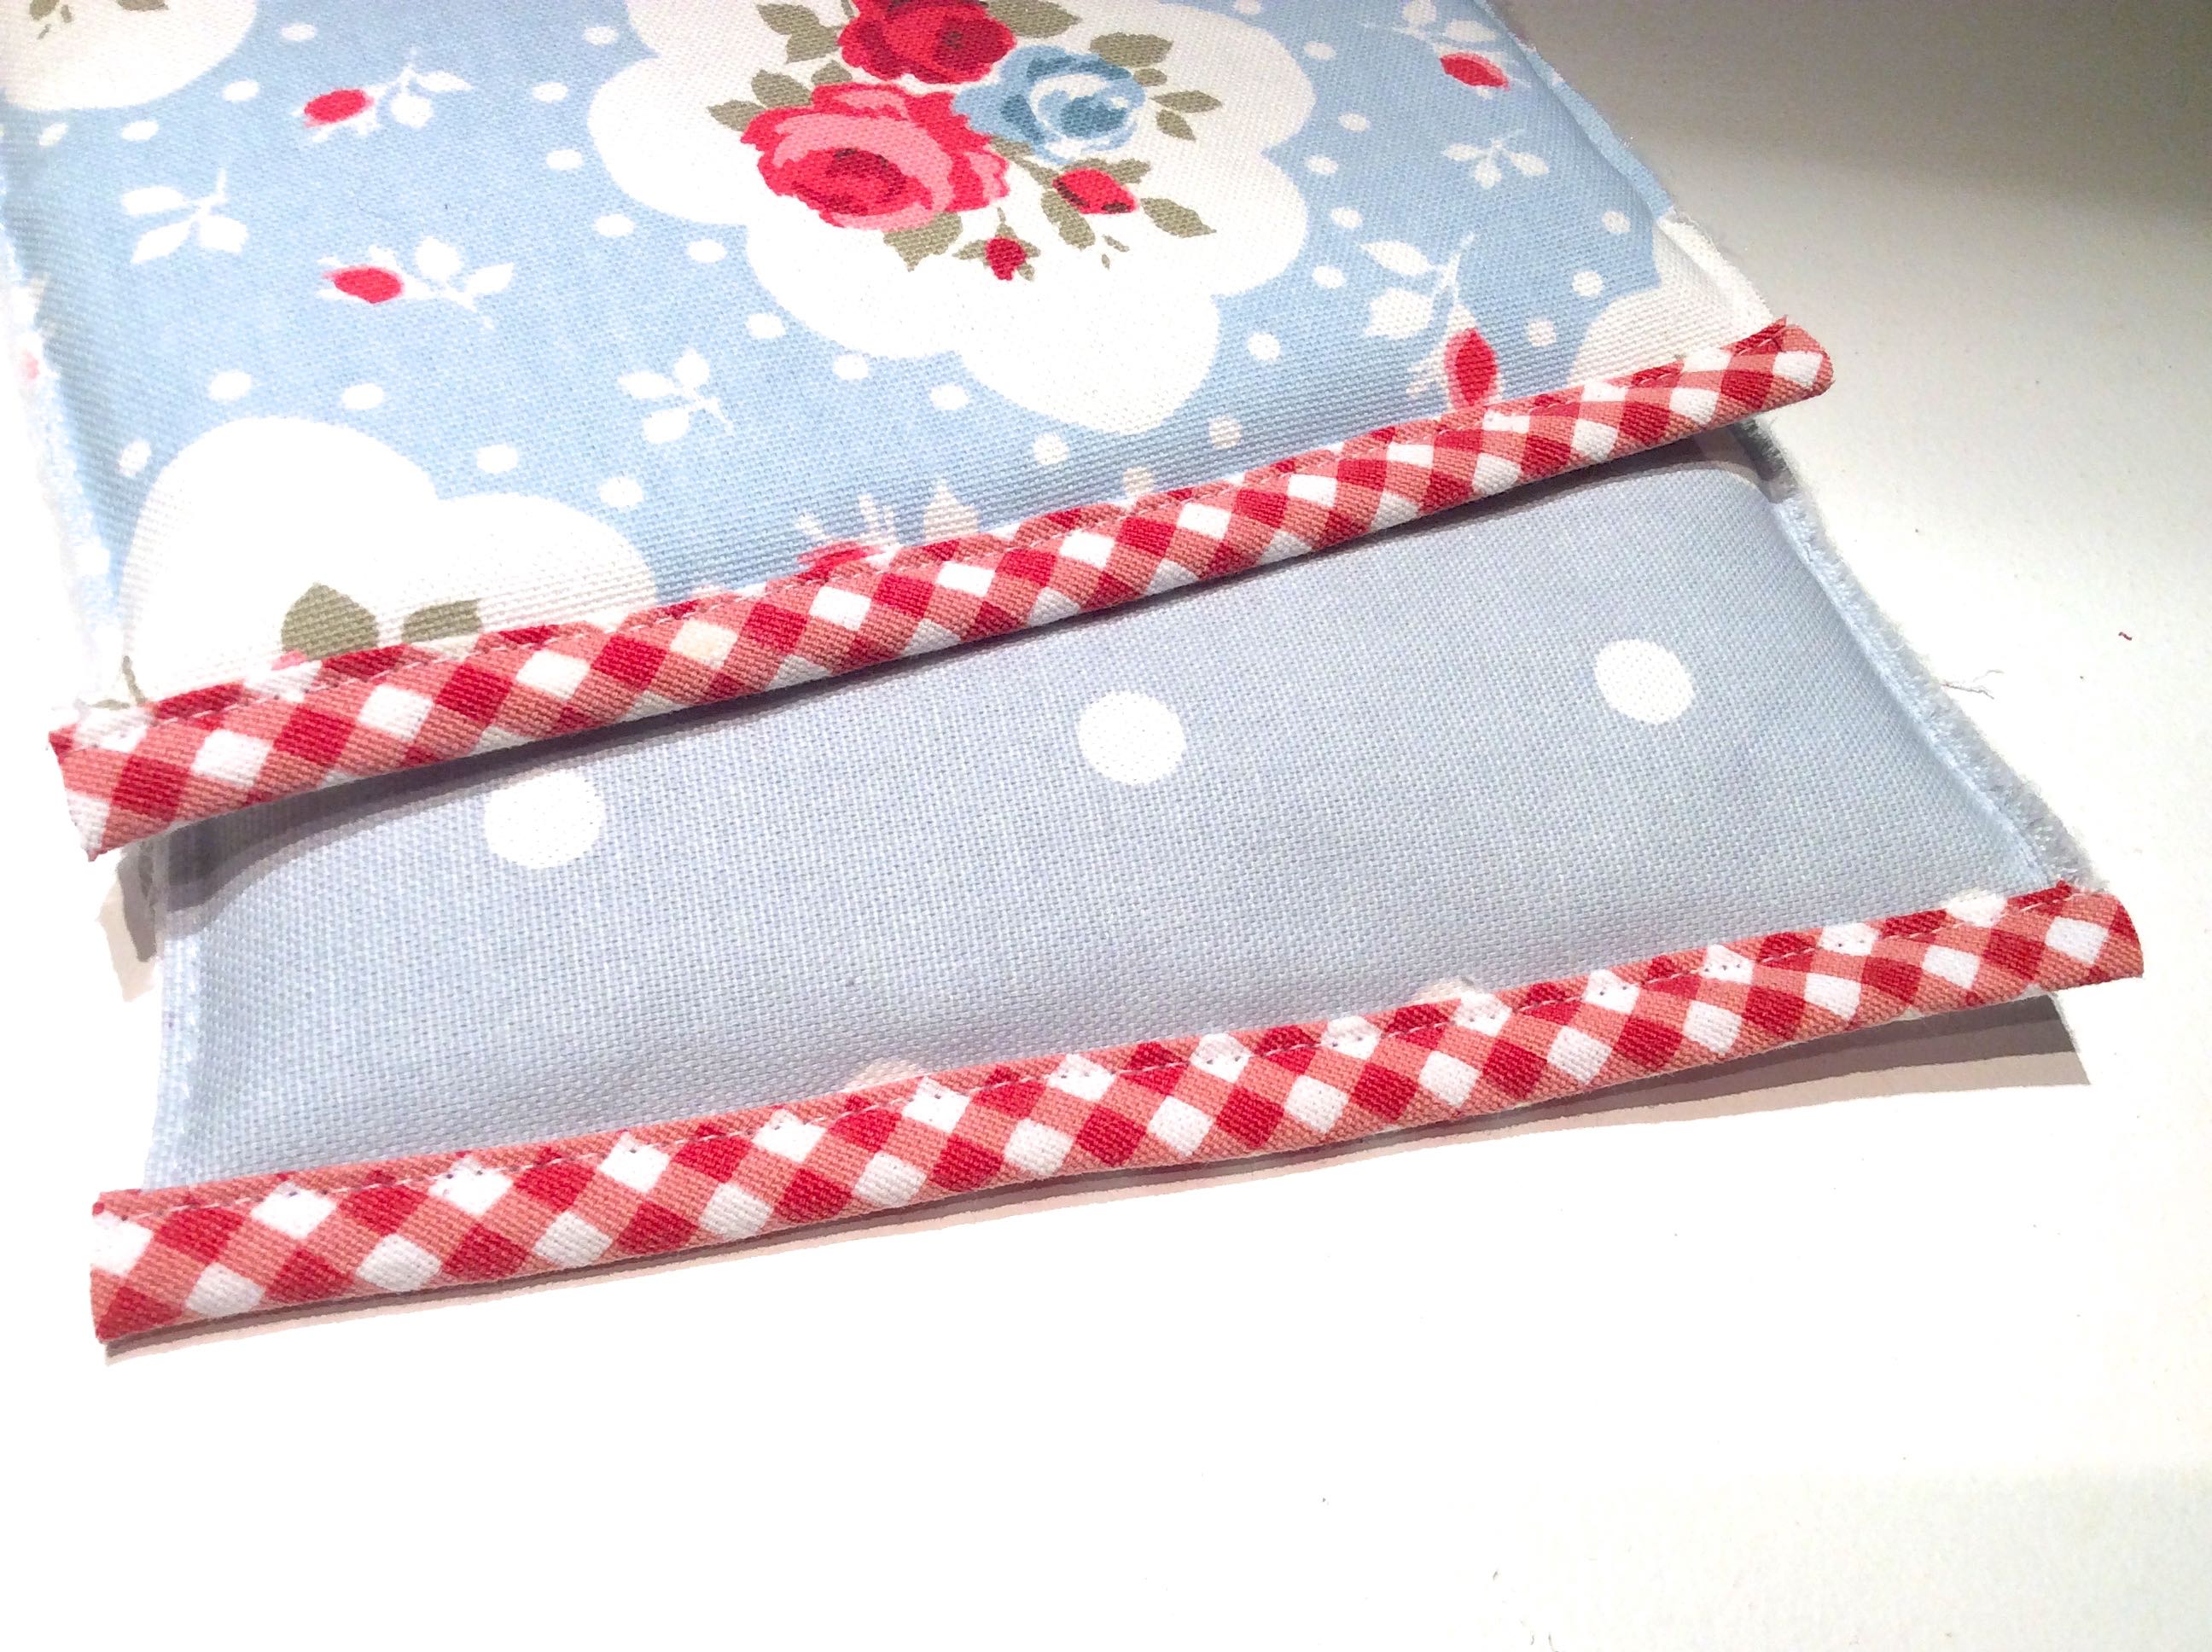
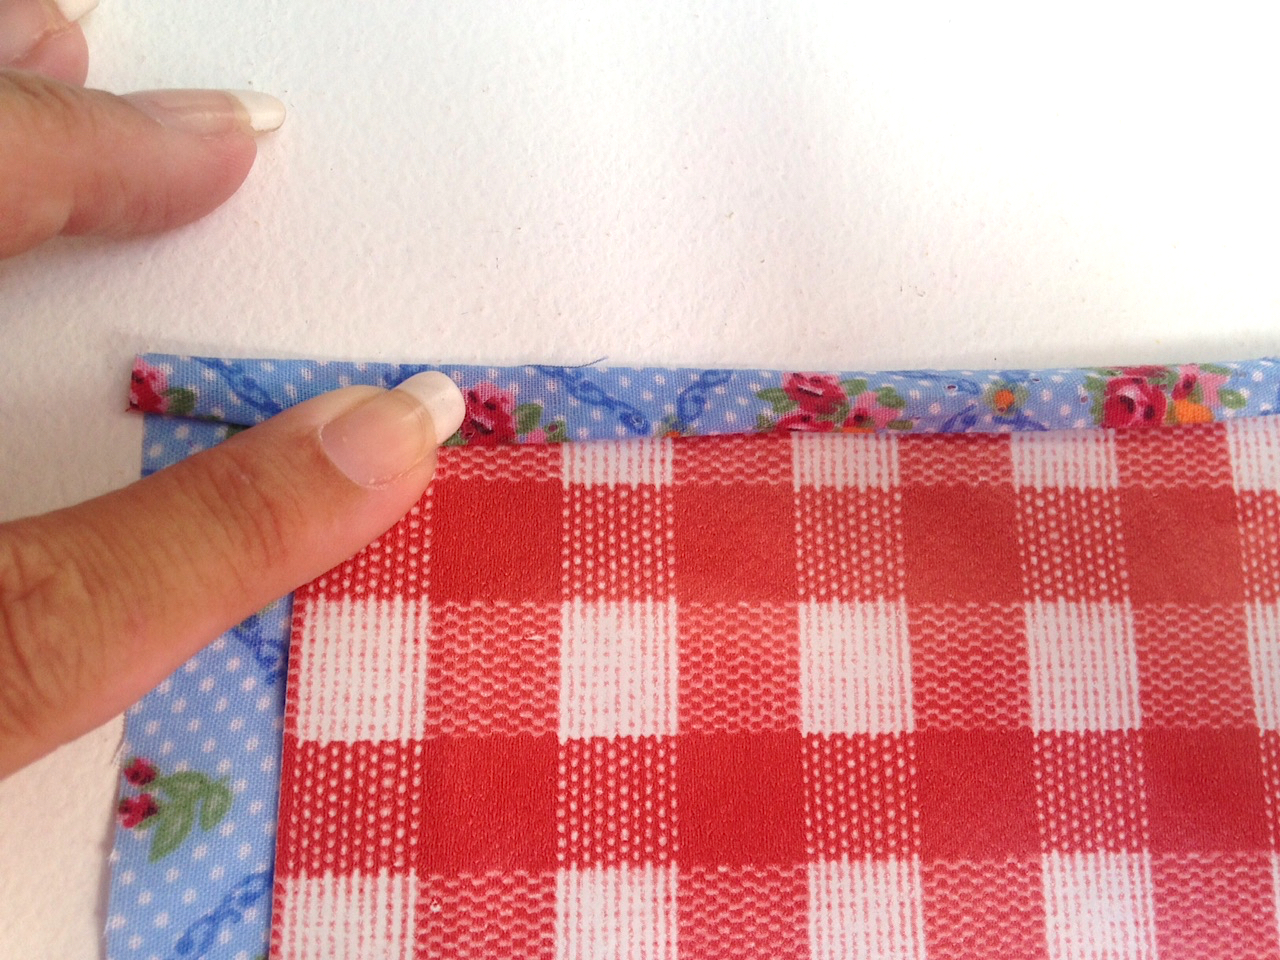
  1. Fuse interfacing to a piece of fabric measuring 16″ x 4.5″. Fold in half width-wise and sew a 1/4″ seam on the three raw edges, leaving a gap to turn.
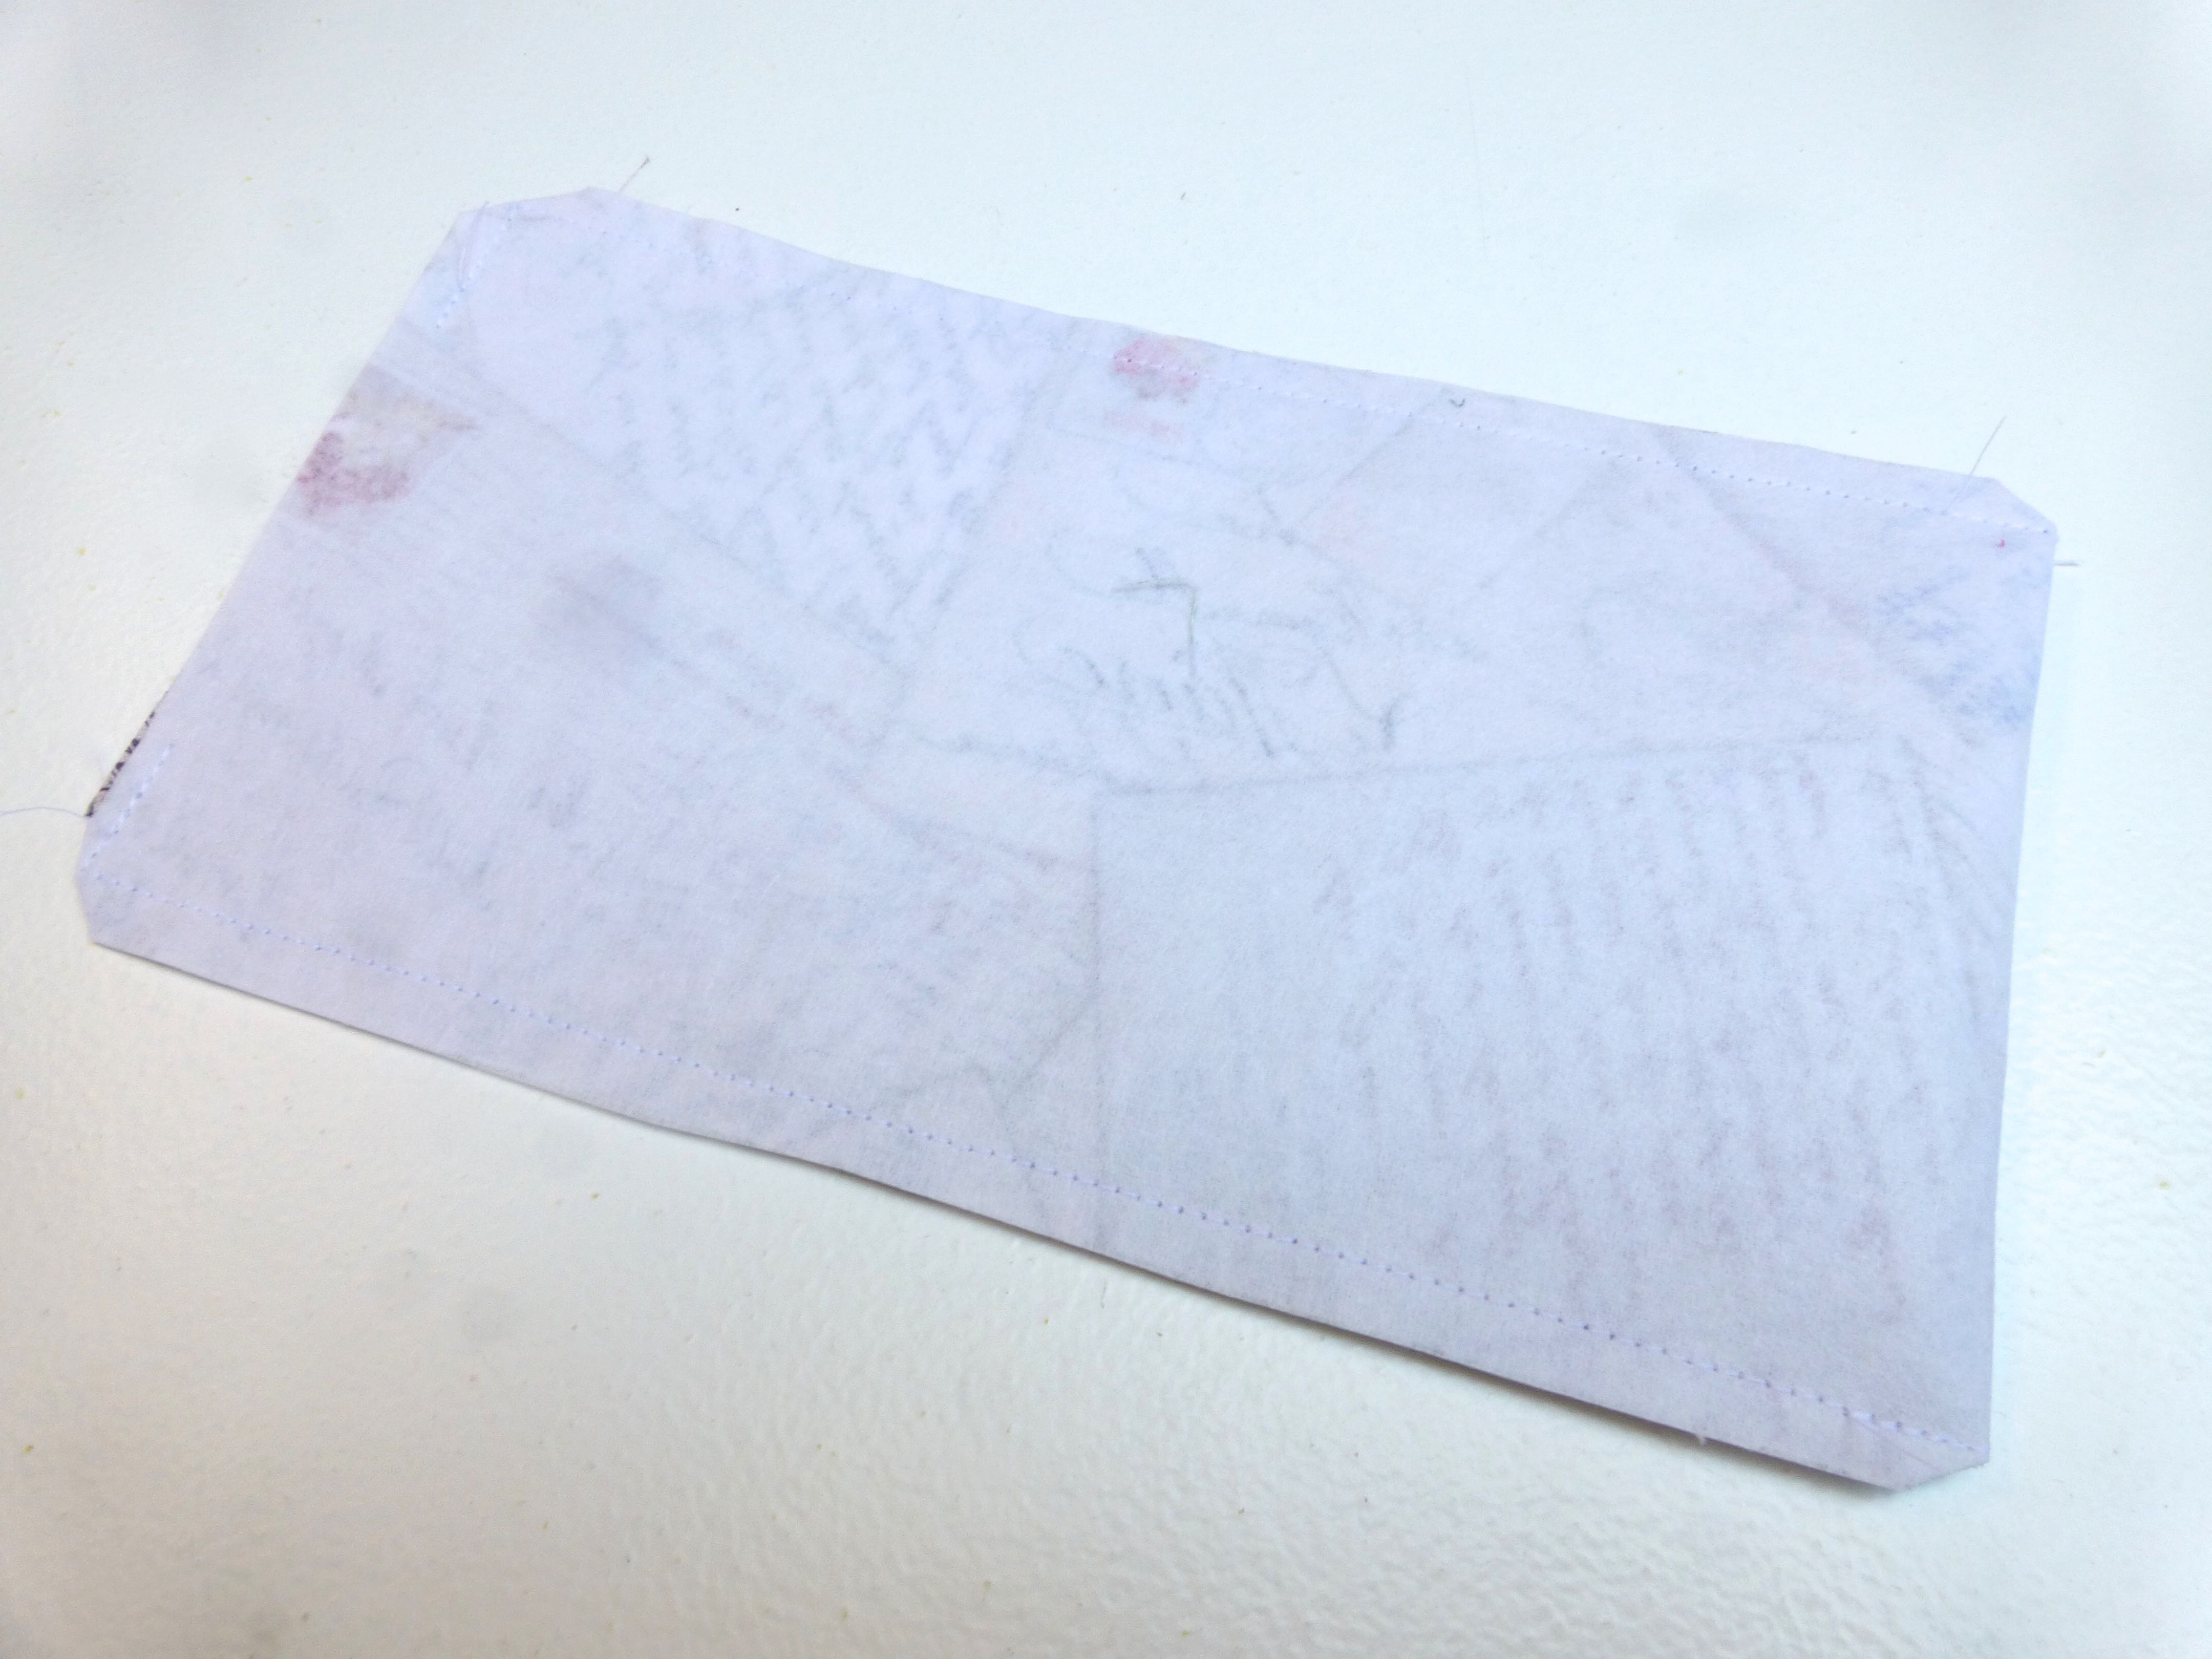
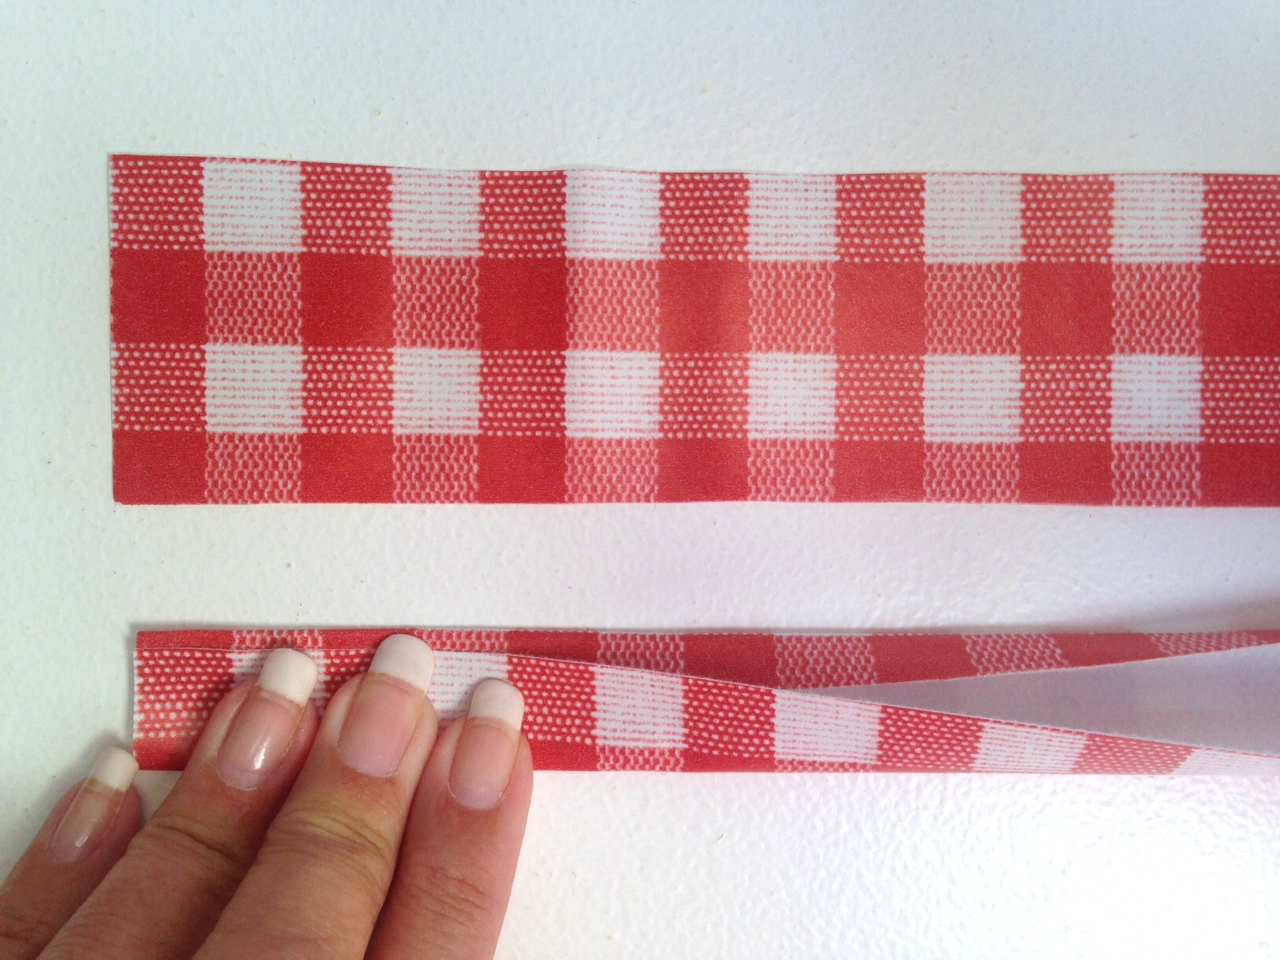
P1060374

2. Turn and press.

P1060375

3. Top stitch close to the edge of the bottom edge.

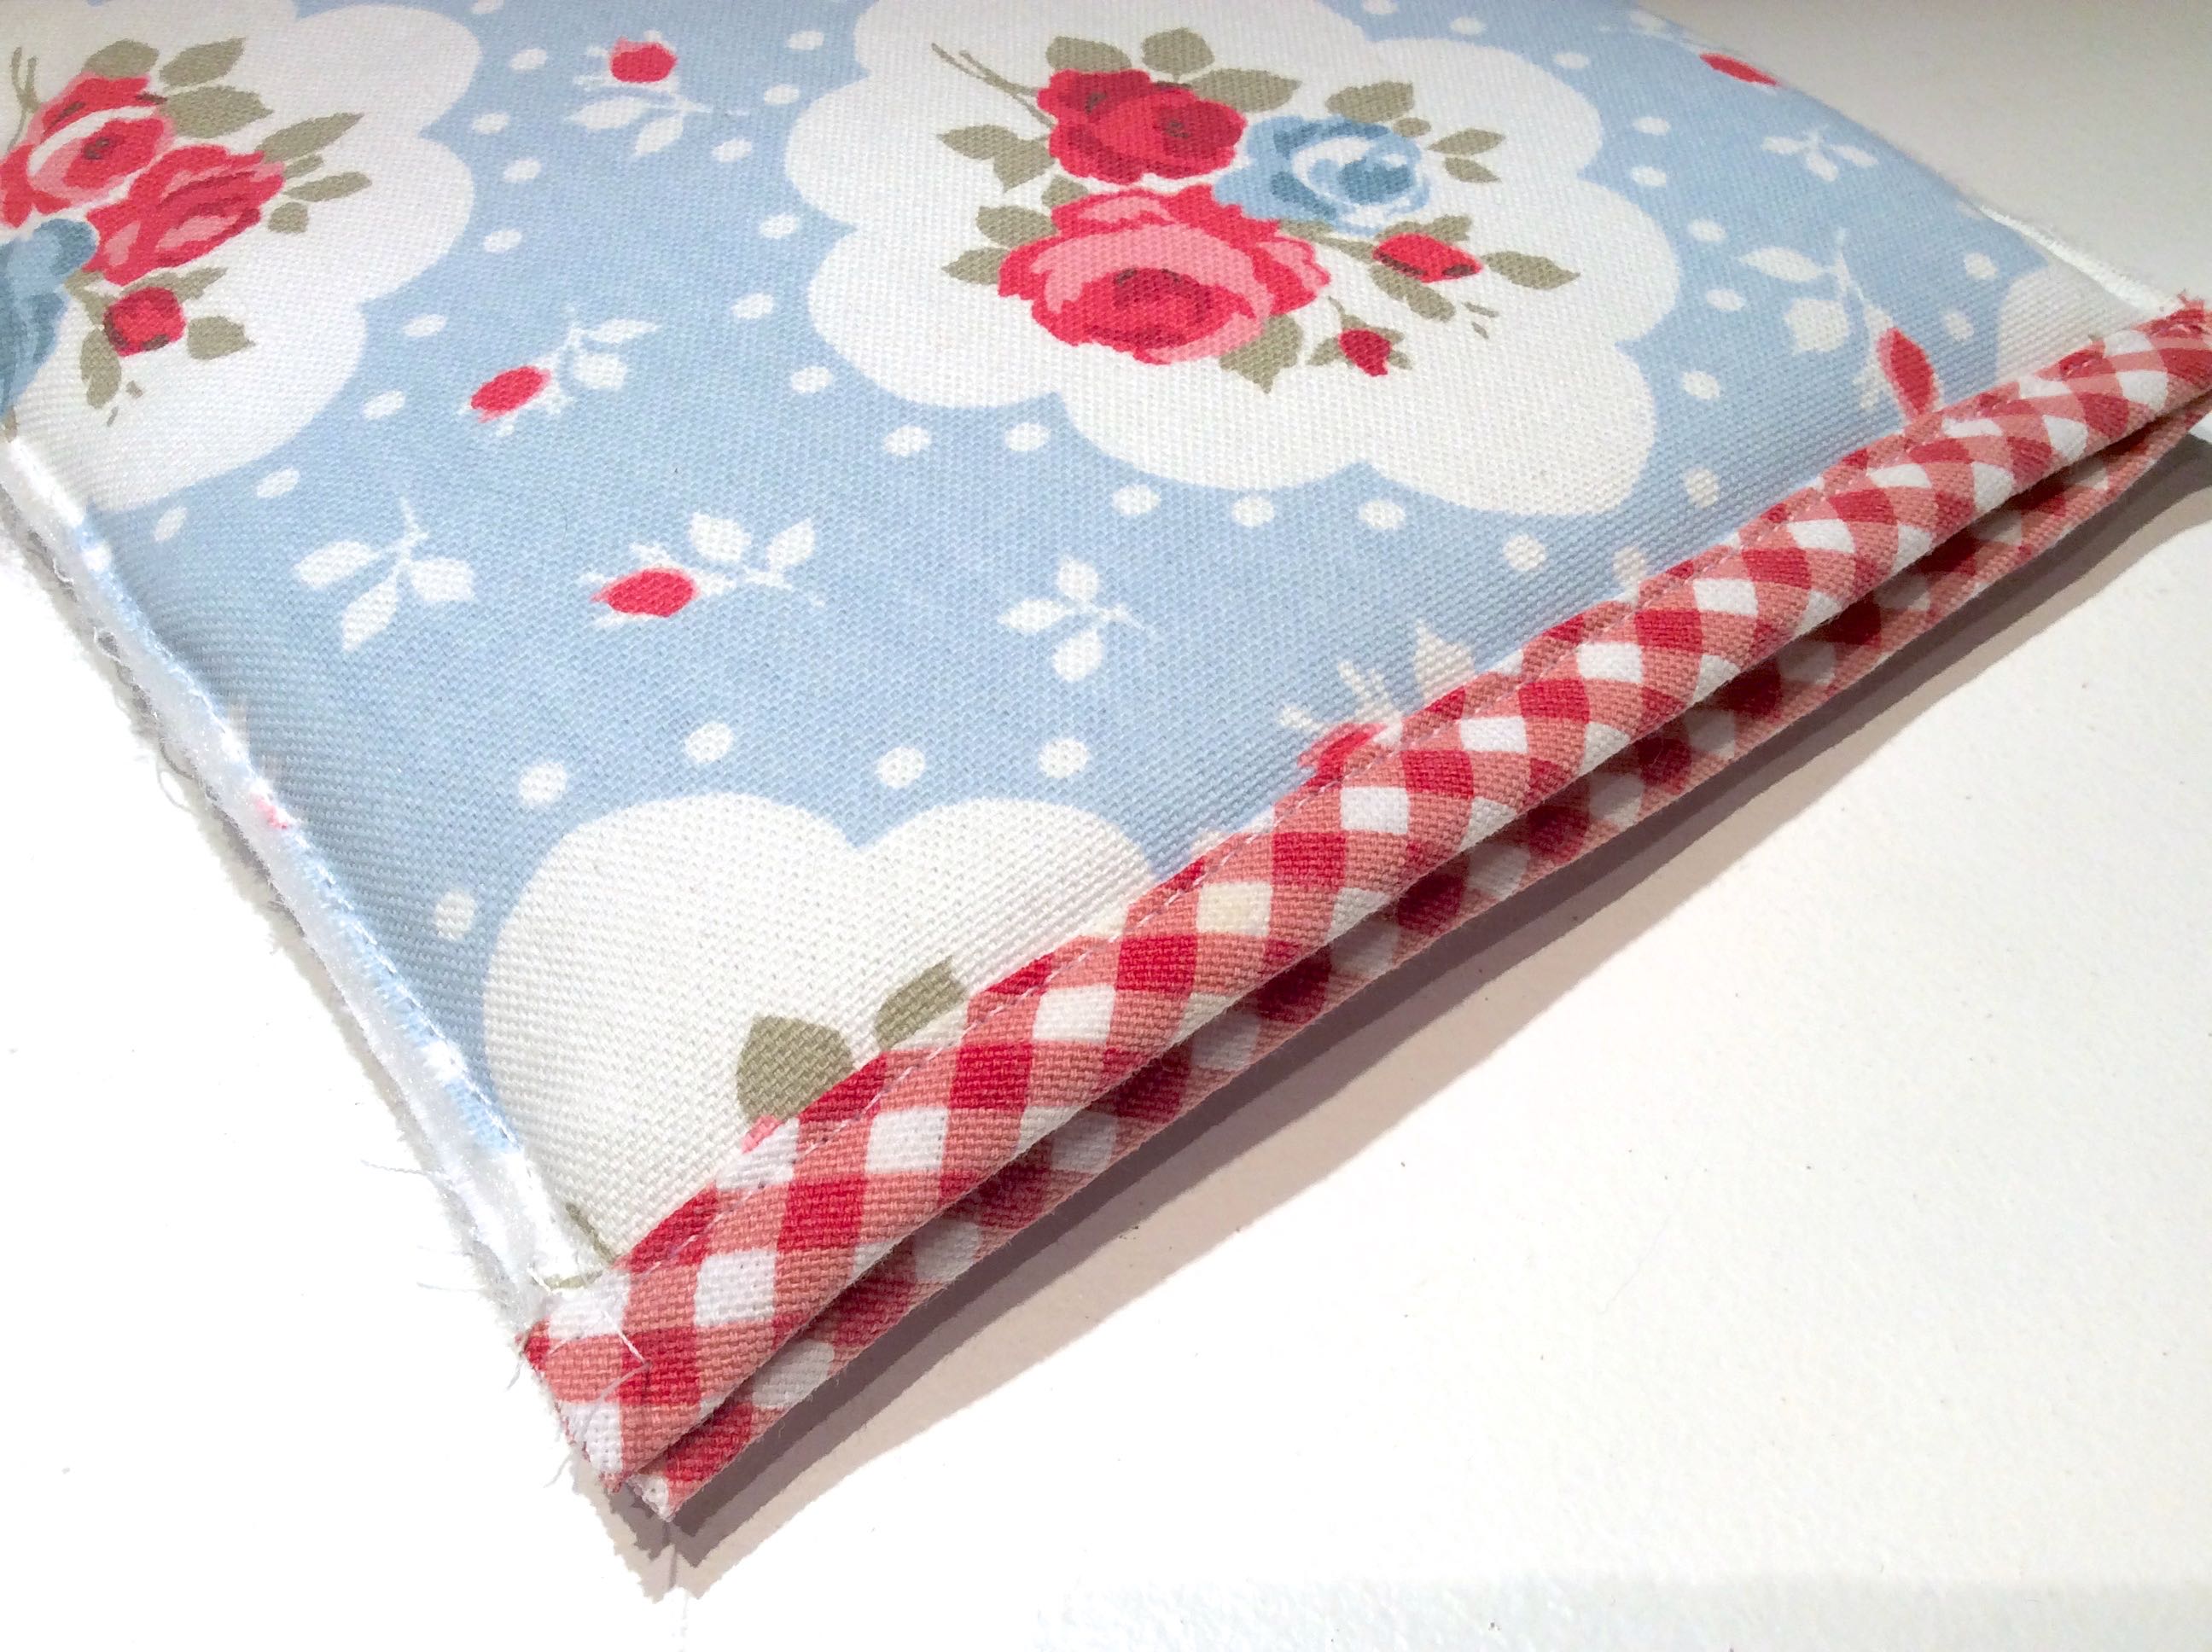
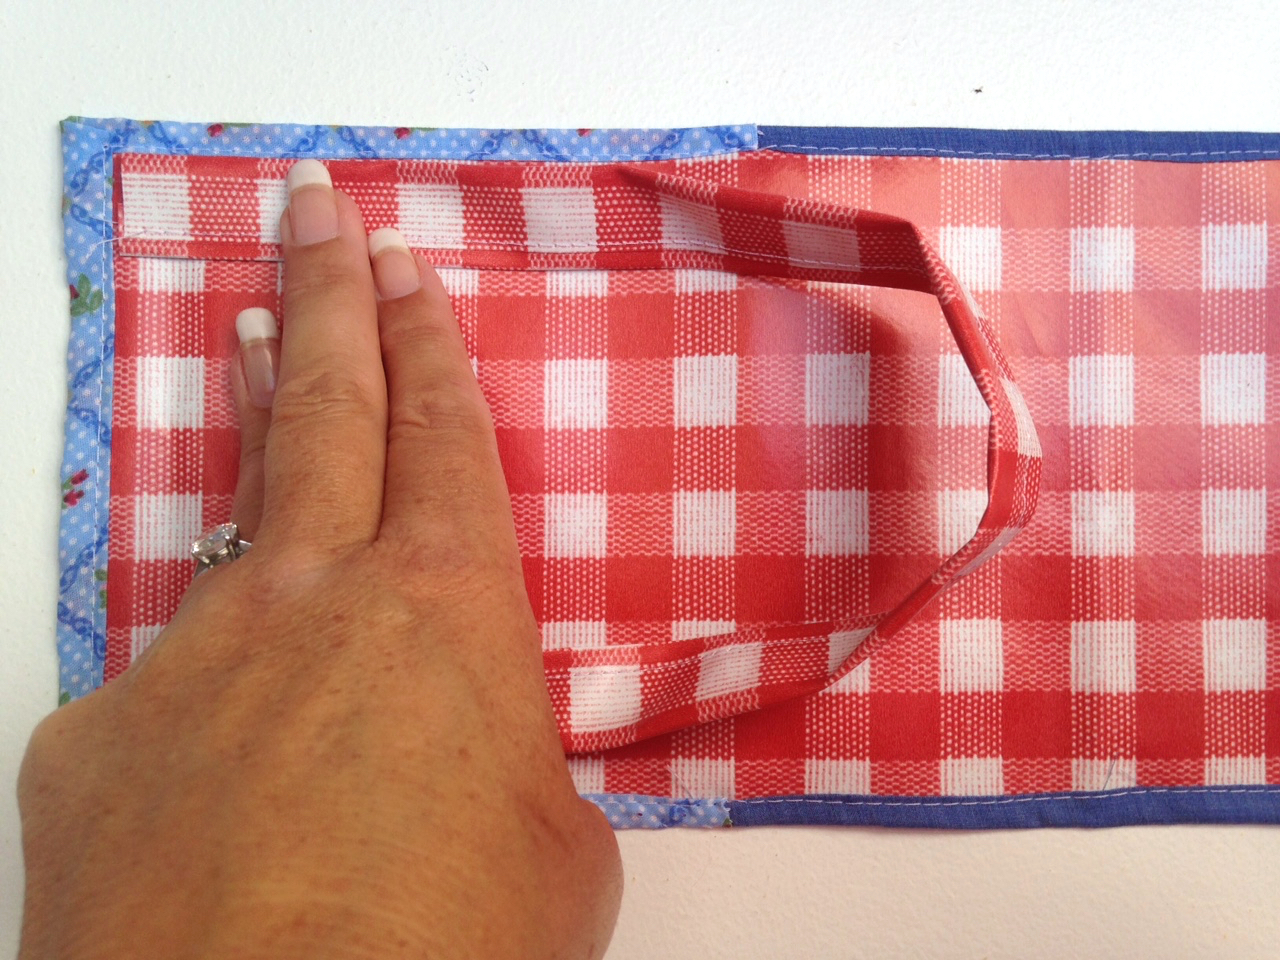
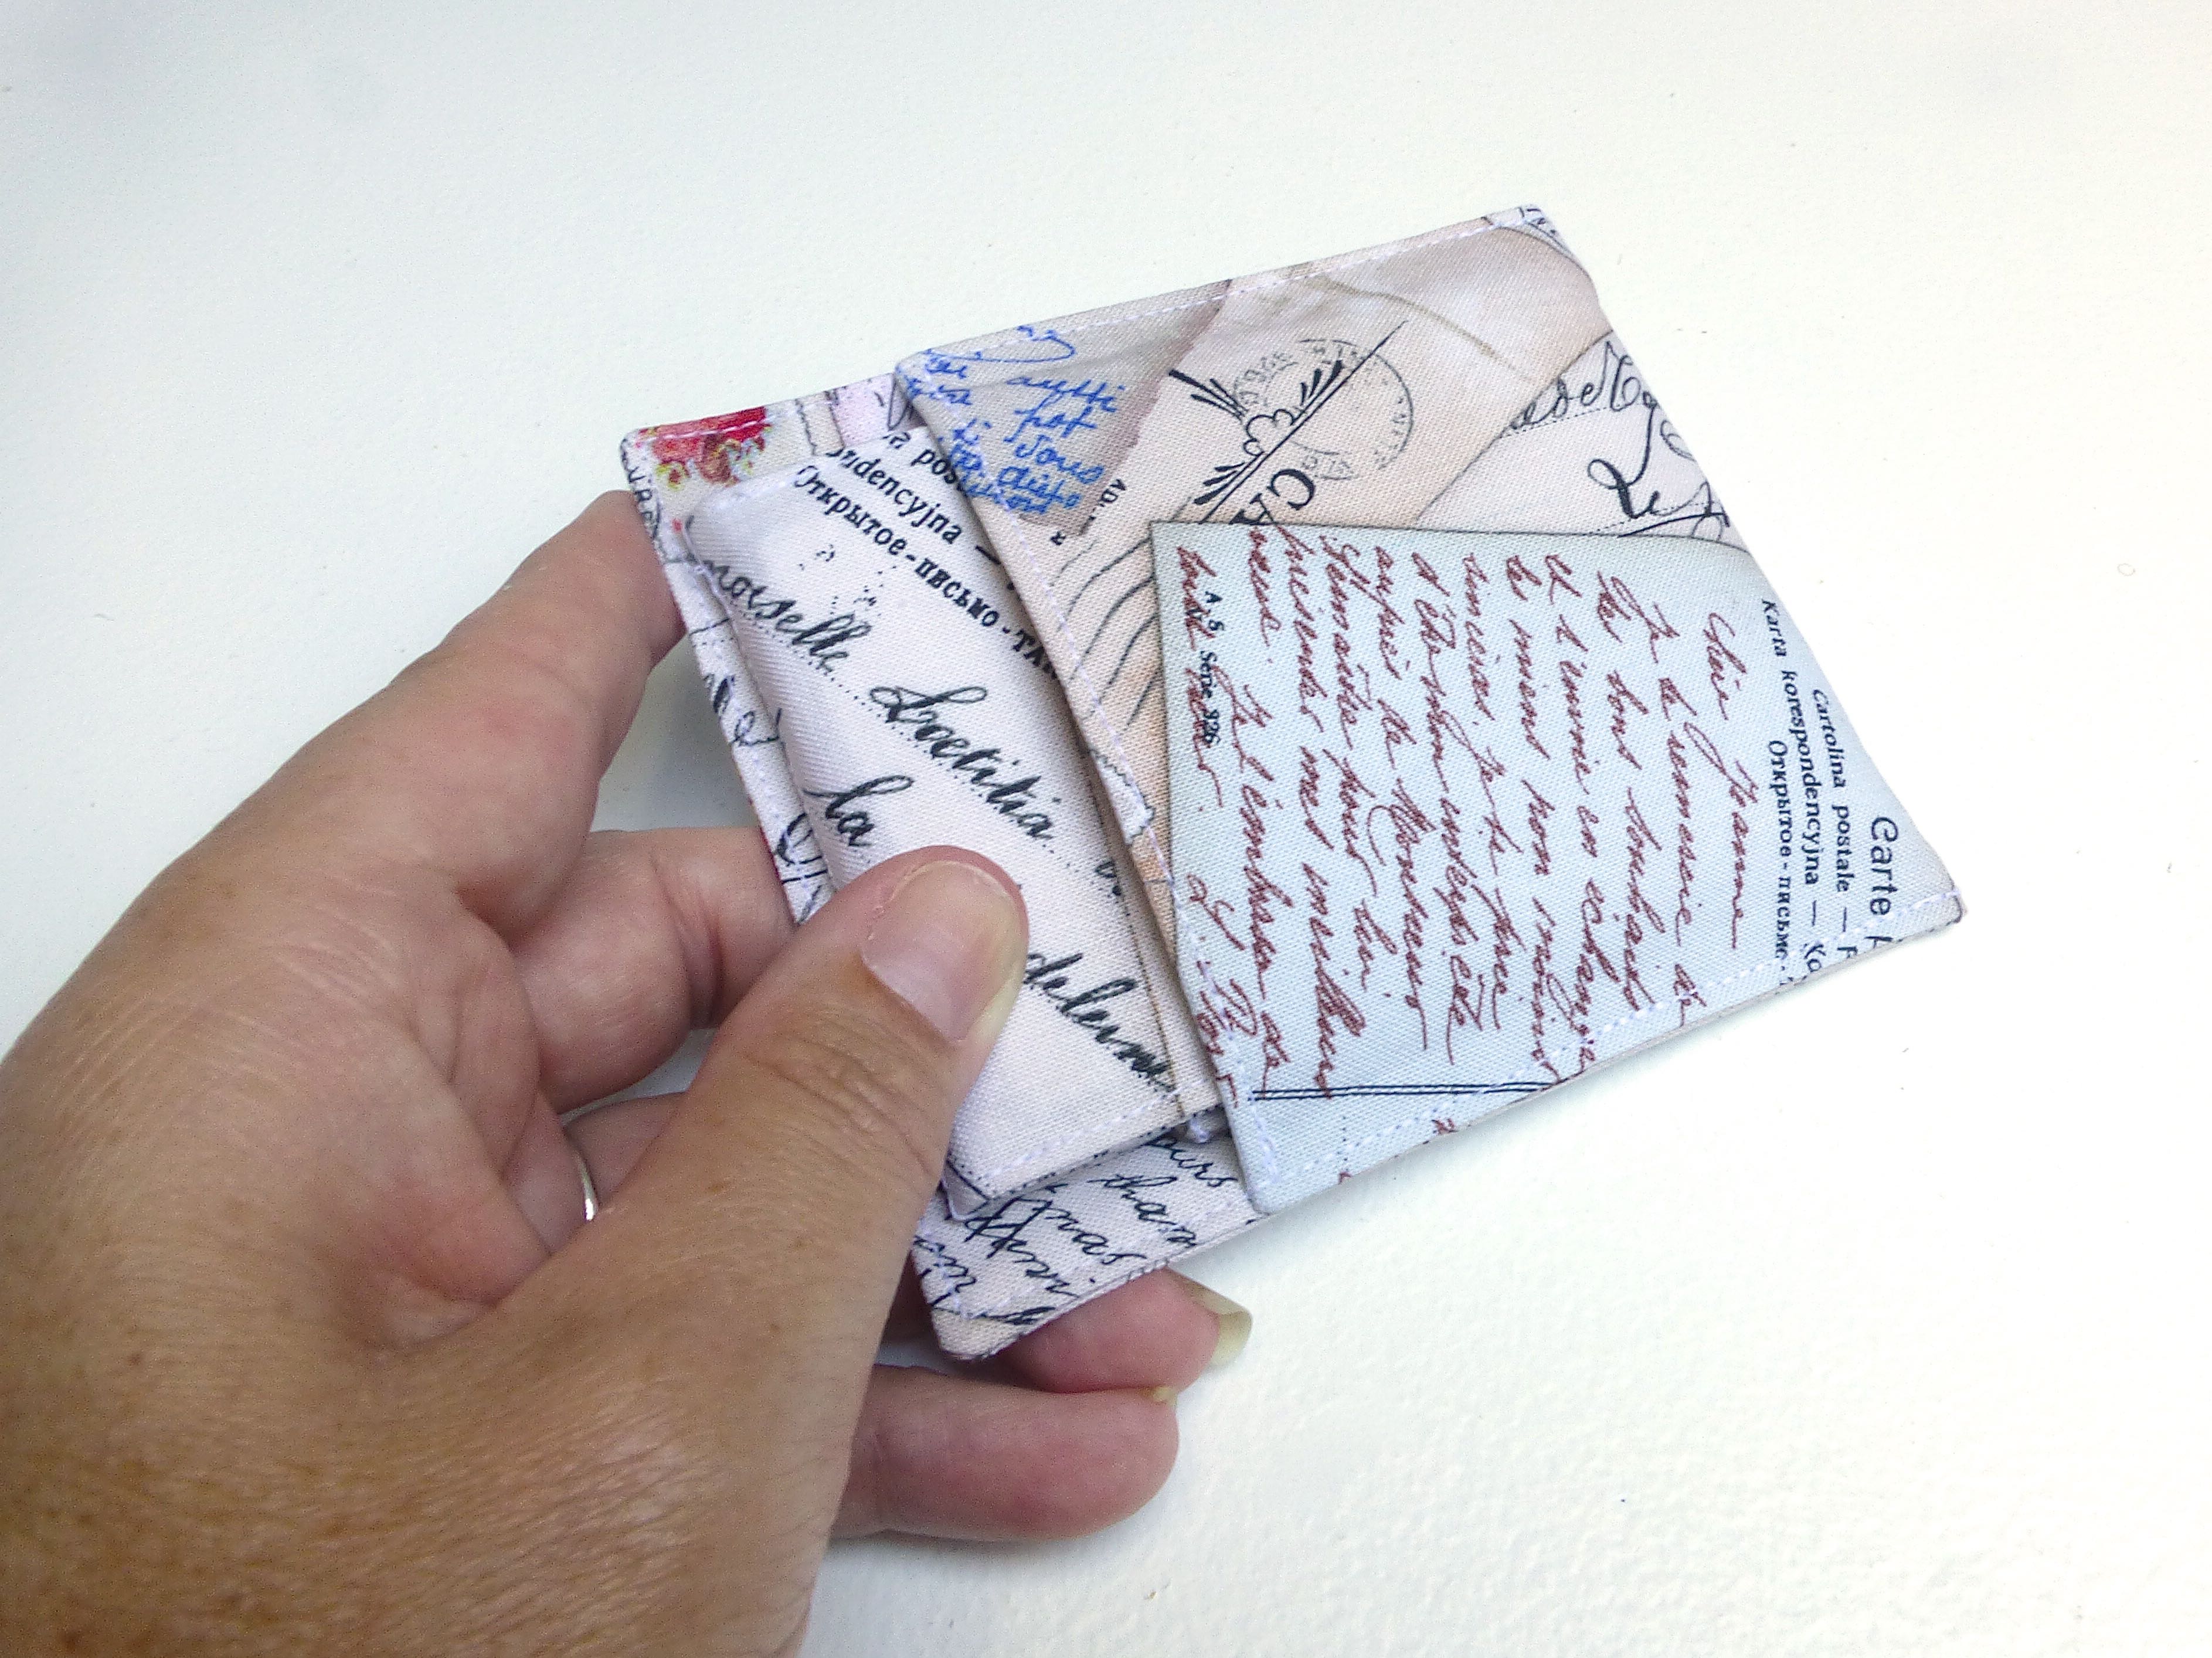
4. Fold up from the bottom about 3.25″, so the top stitched edge stops 1.25″ from the top edge.

5. Top stitch around the side and top edges to finish.

P1060376

6. Fold your travel photo frame flat and pop inside the case.

P1060378

P1060380

There you have it, a compact and portable, travel-themed folding photo frame – perfect for the traveller or person who works away from home.

P1060379

Look out for my Blogger Of The Month feature in Craftseller magazine soon!


29 Comments

How To Make A Mobile Phone Case

Everyone has a mobile (cell) phone nowadays and cases get tatty pretty quickly what with all that in-out wear and tear, so here’s a quick guide to making a new one.

They use so little fabric and are quick to make that they would make a great present, especially if you personalise it like I have done, with a name and motif.

Here’s how: –

Cut out your motif leaving a little fabric around all sides.

P1060194

Iron a small pieces of interfacing to the reverse of the motif.

P1060195

Pin the motif onto the fabric you are going to make the case out of.

P1060196

Drop the feed dogs, remove the presser foot and free-machine embroider the motif to the base fabric. In this instance, I just followed the curly white lines with white thread.

(You can use Bondaweb or similar to fuse the motif to the base fabric if you would prefer the no-sew option.)

P1060197

Trim away the excess fabric from the motif, cutting close to the stitching.

P1060198

Repeat the process for the back and add any other details at this point too – I also embroidered the name of the recipient using the machine.

P1060200

Measure your ‘phone and add a seam allowance, then cut your appliquéd sections, lining and wadding to the same size.

P1060201

Sandwich a layer of wadding between the lining and main fabric and pin together. Baste through all three layers.

P1060202

With lining pieces facing out and motifs facing in, pin front to back.

Stitch around the sides and bottom, leaving the top open.

P1060203

Trim the seams and finish neatly by enclosing in a thin ribbon.

P1060204

Turn out the right way.

A strip of bias binding is then stitched all the way around the top opening edge to enclose the raw edges.

P1060205

P1060206

This will be winging its way to Italy in a few weeks when I have finished the matching yarn bag.

P1060207

The wooly sheep motif is ideal for a yarn addict like Tajana, but you could easily adapt your design to suit other hobbies or passions.

Maybe a fish motif for a keen fisherman, or a cat/dog for an animal lover?

What would you choose to put on the front if you were making a phone case as a gift?


36 Comments

How To Make A Quick And Easy iPad Sleeve

In my last Sunday Sevens post I mentioned that I treated myself to a little something from the Apple store in Exeter.

IMG_2179

It was an iPad mini, which I’ve wanted for a while now, ever since I injured my neck and had to close my photographic business in November (years of carrying heavy equipment around my neck).

Since I no longer have to sit in my office and turn my huge iMac on every day, I thought it would be nice to have something more portable so that I could blog or browse the web from the lounge/garden/kitchen – anywhere but shut away on my own in the office.

Although I also bought a separate Logitech keyboard which affords a little protection to the iPad, I couldn’t wait to pop into my sewing room and whip up a quick and easy sleeve.

The same method could be applied when making a sleeve for any tablet, mobile ‘phone or kindle.

Here’s what I did: –

Measure the device, add a seam allowance to all sides and cut out the following pieces.

  • 1 front
  • 1 back
  • 2 lining
  • 2 wadding

I used scraps and had to have different fabrics for the front and back.

IMG_0002

IMG_0003

Start by sandwiching a piece of wadding between the front and a lining piece. Pin all layers together and baste all the way around.

IMG_0005

Repeat with the back.

IMG_0006

Trim any excess wadding.

IMG_0007

IMG_0008

IMG_0009

Cut enough bias binding to go around all four edges plus an extra length for the opening edge. You can use ready made or follow my tutorial on how to make your own bias binding.

I used an old tea towel!

IMG_0010

Pin the bias binding to a short edge of the back and stitch in place.

IMG_0011

Repeat with the front.

IMG_0012

Pin the front to the back and baste together around three sides, leaving the top opening free.

IMG_0013

Fold under the raw edge on the remaining bias binding.

IMG_0014

Pin the bias binding to the sleeve around the three sides, enclosing all the layers and stitch in place.

IMG_0015

Not my neatest piece of work as it was only for me and whipped up in a hurry whilst supper was cooking, but it was completely free using bits from my stash.

You could spend more time and make it more polished, especially if it is to be a gift for someone.

P1060136

And there you have it – a quick and easy sleeve for your iPad, iPad mini, mobile ‘phone, laptop, tablet, kindle……….


53 Comments

Make-Your-Own Espadrilles

Another day, another birthday present to make, only this time it is something a bit unusual – a pair of handmade espadrilles!

I’ve made slippers and things along those lines before, but never a bonafide pair of shoes.

P1050948

The soles were by Prym and purchased online from The Makery in Bath.

P1050918

P1050919

The box includes templates for the uppers in various adult sizes, but I heeded advice from others who have previously made them and went down a size when making them. I cut out a UK size 5 for the recipient who has size 6 feet, and they fitted perfectly without slipping off.

P1050920

Although there were no instructions in the box, full step-by-step photographs can be found on the Prym website and it was those I followed.

If you are tempted to have a go at these be aware that seam allowances are NOT included – you have to add your own before cutting out!

P1050922

P1050923

I had a small amount of “Rosetta” fabric left over from making this cushion and make up bag, and decided to team it with a deep pink spotty lining.

The pattern consists of just two pieces – one for across the front and one for the heel.

P1050921

I added some fusible interfacing to the outside sections just to give the shoe some extra strength and stability.

P1050924

I also stretched a two-inch length of narrow elastic at the ankle edge just to make sure the shoes would stay on.

P1050926

The main fabric is sewn to the lining right sides together, then turned through a gap left in the stitching.

P1050929

I top stitched the elastic through all the layers for a strong and neat finish.

P1050931

P1050932

The toe section is sewn and turned in exactly the same way, cutting across the corners and notching around the curves as necessary.

P1050934

Next comes the fun bit!

You will need a leather needle to sew through the soles as the wedged point makes light work of it where a standard needle would hurt your finger after a while.

P1050938

The heel section is pinned to the sole…..

P1050935

….inserting the pins at an angle as shown below.

P1050936

I used three strands of embroidery floss to secure the fabric to the sole, using a blanket stitch.

P1050939

When the heel section is stitched on it should look like this: –

P1050940

Next, the front is pinned on in a similar fashion, overlapping the heel section.

P1050941

P1050942

Blanket stitch is used all the way around the front and also to join the sides together.

P1050952

A “hand made with love” label adds a personal touch.

P1050943

That’s it – finished!

P1050950

P1050949

P1050951

I thought I’d better show you what they look like on – have you any idea how difficult it is to take photographs of yourself wearing shoes?!

P1050946

In the end I put my feet up on the table in my studio……

P1050945

P1050947

I’m pleased to report that the recipient was very pleased with her bespoke shoes and put them on immediately – they fit perfectly!

Has anyone else handmade their own espadrilles before?


41 Comments

Tilda’s Appliquéd Make Up Bag

I’ve had a few birthday presents to make lately, luckily all of them for women, so it was just a case of browsing through one of my many books and choosing something appropriate to the individual.

I find that making a gift for someone you know is very different to making items to sell, in several ways: –

  • For a start, I don’t have to consider how long it will take versus how much I can sell it for, I can put as much time and effort in as I want which usually means it can be more elaborately decorated.
  • I can take the recipient’s personality into consideration and personalise the gift accordingly.
  • I enjoy the process far more, knowing that the thought and effort that I have invested will be appreciated.
  • It’s a one off – I get bored making more than one of things which is often what you have to do when stocking up for your online shop/craft fair etc.

I found the perfect little gift in Tilda’s book, ‘Sew Pretty Homestyle’.

P1060029

A cute little make up bag (cosmetic purse) with appliquéd detail on the front – the sort of added extra that can take hours and couldn’t possibly be done at a profit if making to sell.

After tracing off the single pattern piece, I cut out candy-pink striped fabric for the outside, coordinating checked fabric for the lining and some batting to add structure.

P1060028

This method for appliqué is a good one for tiny items where there’s not much fabric to put under the sewing machine foot.

You start by transferring your design (angel’s wings) onto a double thickness of fabric and stitching around, leaving an opening for turning.

P1060030

Trim close to the stitching.

P1060032

Turn and press.

P1060033

Repeat with all the appliquéd elements and pin to the front of the make up bag.

P1060034

Sew all the motifs on, making sure your stitches are hidden.

P1060035

This type of appliqué gives a raised finish when sewn on and the stitches are almost invisible rather than being a feature.

P1060036

Little swirls adorn the wings, all done by hand with the tiniest of stitches.

P1060037

Add some eyes and hair to the naive-style face together with an embroidered flower and the decoration is complete!

P1060043

Construction was straightforward enough.

P1060041

A row of rustic running stitches keeps the lining from getting caught in the zip as well as being a pretty detail.

P1060044

P1060045

Of course, the process could be sped up enormously if the motifs were stitched on by machine and free-machine embroidery used for the wing swirls and flower.

I chose to do it by the book, so to speak, as it gave a more homespun feel that I was looking for.

P1060046

P1060042

I love the coordinating lining – it makes the inside a nice surprise when you undo the zip.

P1060039

This was the ideal project to use up scraps too, as it uses so little for the body and lining of the bag and the appliquéd motifs are literally tiny pieces you’d normally throw away!

P1060047

Thankfully, the make up bag was very well received, so all that effort was worthwhile – I might even make some more for Christmas presents.


50 Comments

Birthday Gifts – A Purse (Wallet) And Matching Tote

We were invited to No.1 Son’s girlfriend’s parent’s house (are you with me?) at the weekend, for a barbeque.

It was his girlfriend’s mother’s birthday (keep up!) so we wanted to take a suitable present, but there was a tiny problem – we’d never met, so I had no idea what she would like.

Obviously I was going to make a gift and, after a little indecision, settled on a purse (wallet, for our U.S. friends) and a matching tote.

I found this great tutorial at Confessions Of A Fabricaholic and got cracking straightaway.

I had some leftover vinyl from the One Hour Ikea Bag and searched through my (massive) stash before whittling it down to these grey and pink coordinating cottons, using just the dotty ones in the end.

P1050993

The tutorial is pretty comprehensive and soon I had put the main pieces together.

P1050995

After sewing the outside to the inside, it was simply a matter of turning through to the right side and top stitching.

P1050996

Et voilá – one (very pretty) vinyl purse!

P1050998

I chose to fit a magnetic snap closure simply because I’ve got loads of them and they really do give the best finish.

P1060001

The inside is a purse of two halves – one side is pink, the other is grey.

P1060003

The grey side holds all the real money.

Coins are kept safe in the zipped pocket….

P1060011

….which is lined with the contrasting pink.

P1060016

Notes are stashed in the open pocket below.

P1060015

The pink side houses the ‘pretend’ money and can accommodate up to eight credit cards or similar.

P1060006

P1060013

Just in case there was any doubt I included a label from Hobbycraft.

P1060012

I whipped up a simple tote using the same principle as the One Hour Ikea Bag but with dimensions and handles more suited to a shopper.

P1060018

Box corners makes for a more spacious interior.

P1060025

Matching grey webbing is perfect for two short handles.

P1060021

I think they make quite a smart set for nipping down to the corner shop for a loaf of bread and a pint of milk. (In my dreams. We don’t have a shop in our village.)

P1060019

All wrapped up and ready to go – complete with handmade birthday card!

P1060027

Update: The handmade purse (wallet) and matching shopper was a huge success fortunately – she loved it!


59 Comments

How To Make A Waterproof Patchwork Picnic Blanket And Carry Pack

Ah, the English Summer! What does it mean to you?

For me, it’s day trips to the coast, balmy evenings sat outdoors until after sundown, weekend breakfasts in the garden, outdoor concerts in the grounds of old ruins……in short – being outside.

And being outside is made all the more perfect if you take that most quintessentially English thing with you – a picnic. Dressed down with sandwiches and a flask of tea at the seaside, or glammed up with champagne and a candelabra for a classical concert, everyone loves a picnic, with a soft, warm, waterproof picnic blanket to relax on in comfort…….

……except we haven’t got one.

Well, we didn’t have until recently when I decided to take advantage of being part of the Minerva Crafts Blogger Network and make one.

I didn’t want to make just any old picnic blanket, oh no, I wanted the ‘deluxe’ version, something a bit special, so decided to make a patchwork blanket with a waterproof backing and a carry handle. As there are four boys in the house (if you include Mr H-L), anything too pink and girly was out of the question, but I thought I could get away with a small floral print if the main colour was blue.

After much deliberation, this is what I finally ordered: – 1.5m each of plastic coated red ginghamfloral patchwork print polycotton, and denim blue polycotton. This makes a blanket approximately 1.25m x 1.25m.

P1050797

My Olfa Quiltmaking Kit came with this mat, rotary cutter and 6.5″ square ruler, so I kept things simple by cutting the patchwork squares the same size as the ruler.

P1050801

Cutting through folded fabric made short work of all those squares as I could cut through four layers at a time – using a rotary cutter and the quilting ruler ensured that they were accurately cut, which is essential in patchwork.

P1050798

In no time at all I had two piles of neatly stacked patchwork squares, 36 of the floral and 45 of the plain making 81 in total.

P1050799

The easiest way to keep accurate seam allowances is to line up the edge of the fabric with the edge of the machine foot, the needle in the central position. On my machine, that means a seam allowance of 1cm throughout.

P1050802

Whilst it may sound obvious, there is a quick way to whizz through all those squares.

Start by sewing them in pairs, each floral with a plain, right sides together. You will need to make 36 pairs which should leave you with 9 spare squares – 5 plain and 4 floral.

Don’t bother reversing your stitching at the beginning and end of each set, cutting the thread and repeating with the next pair – just keep feeding the pairs through the machine one after the other as shown below.

P1050804

When all the pairs of squares are sewn, snip the joining stitches to separate them.

P1050805

P1050806

Repeat this process with the pairs of squares…

P1050809

….until you have rows of 4….

P1050810

….then sew the rows of 4 together to make rows of 8. Now add one of your left over squares to the end of each row.

You should now have 9 rows of 9 squares.

Press all the seam allowances to one side.

P1050814

To minimise any bulk at the seams, you may wish to alternate the direction in which you press them flat.

P1050821

Join these rows along the long edges, matching and pinning the seams as you go.

P1050815

P1050816

Continue until all your strips of patchwork are sewn together into one large square.

P1050817

P1050823

As I reached this stage, I made the spontaneous decision to add a layer of wadding between this top layer and the bottom layer. (I had plenty in my stash, but you can buy it here.)

I cut a square of wadding slightly larger all the way around than the patchwork piece, laid it on top of the wrong side of the patchwork and pinned it around the entire edge.

IMG_2039

IMG_2040

Stitch close to the raw edges all around the outside and trim the excess wadding as shown.

IMG_2046

Now the wadding is secured, you can use large tacking stitches through both layers to stop them shifting whilst quilting.

Stitch in the ‘ditch’ using a long stitch length until the whole blanket has been quilted along the seam lines.

IMG_2041

Place the quilted layer onto the vinyl backing, wrong sides together, and trim the backing so that it is 1.5cm bigger than the top all the way around.

P1050823

Using clips, fold the excess vinyl over to the right side of the blanket and secure in place.

IMG_2049

A teflon foot makes the vinyl move smoothly through the machine, and a leather needle with its wedged shape will stop any skipped stitches (discovered through trial and error!)

IMG_2051

A simple long straight stitch close to the raw edge of the vinyl is all that is needed.

IMG_2047

Mitre the corners as you go for a neat finish.

IMG_2050

I was left with a few scraps of fabric and vinyl, so I also designed a fabric roll to act as a carry pack for the blanket.

For the carry pack, cut 3 floral and 2 plain squares the same size as before and sew them all together in a single row. Press.

Cut a piece of spare vinyl 1.5cm smaller than the patchwork strip and place in the centre of the strip, wrong sides together.

IMG_2054

Turn a narrow hem…..

IMG_2055

IMG_2057

….and stitch in place close to the inner folded edge around all 4 sides, mitring the corners as you go.

Cut two pieces of vinyl for the handles, each measuring 20cm x 5cm.

Fold the long upper edge in to the wrong side by 1cm, and bring the lower edge up to meet it, overlapping a little to encase the raw edge as shown below.

IMG_2060

Stitch close to the raw edge.

Repeat with the second handle.

IMG_2061

Position the two ends of the handle in the corner of the carry pack using the photograph as a guide.

IMG_2063

Stitch in place with a 1cm seam.

IMG_2064

Fold the handle to the outside and turn over, vinyl side down.

Cut a 12cm strip of velcro hook and loop fastener and sew the hook side to the fabric side of the carry pack, being sure to catch the handle in the ‘up’ position, securing it in place at the same time.

Repeat with the loop side at the other end of the carrier.

IMG_2065

When the blanket is rolled up, wrap the carry pack around it and press the velcro strips together.

IMG_2068

IMG_2066

For a picnic in the garden (or anywhere), just add bunting, a squishy cushion and a hamper full of goodies.

P1050901

Sun is a bonus for a picnic, but not when taking photographs (too much contrast)…

P1050886

The perfect fusion of girl/boy styling that anyone would be happy to sit on.

P1050903

No more damp bums!

P1050904

A lovely layer of wadding for added comfort.

P1050907

The carry pack with handles means that it’s compact and easy to transport.

P1050914

Marley was interested to see what was going on – sometimes our hens are just a little bit too friendly!

P1050911

P1050909

Now all we need is for Summer to return so we can actually use our lovely new picnic blanket!!


41 Comments

Fuschia Linen Tunic Dress

Well that’s it, all my lovely linen used up and made into loose Summer garments which have been perfect in this recent spell of hot weather.

Remember these citrus shades I bought from Calico Laine?

P1050496

I made a sleeveless dress from the “Pool Blue” and self drafted a tunic from the “Leaf Green” (Don’t you just love the descriptive colours?)

Linen dresses

I wanted something along the same lines for the fuschia linen, another loose fitting, easy-to-wear item that would be a delight to wander around in on even the hottest day.

In the end I decided to make a dress based mainly on the tunic but, this time, with sleeves, albeit short ones.

P1050847

This is what I came up with for the pockets, the lines marking the placement for an inverted pleat.

P1050851

I used a combination of flat fell seams and French seams for the construction.

P1050876 P1050875

Narrow hems were made throughout, so no need for facings.

P1050871

I really liked the details in the tunic so I applied them to this dress as well.

The parallel pleats on the front and back which draw the centre upwards and allow the edges to hang lower in an interesting shape….

P1050874

…the exterior pleats on the back which add shape as an alternative to darts…

P1050873

….and the inverted centre front pleat adorned with two coconut shell buttons.

P1050867

I added two pockets this time, in a slightly different style….

P1050869

…and this is the finished article!

P1050866

P1050872

P1050857

P1050859

The sides are split to mid thigh level which lets the breeze in to keep me nice and cool!

P1050862

I can also wear linen trousers underneath for a different look (or if it gets cooler).

P1050878

P1050884

Very casual, comfortable and cool – three reasons why I LOVE linen!

montage


41 Comments

Self-Drafted Linen Tunic

You may remember that a few weeks ago I showed you some brightly coloured linen that I bought from Calico Laine.

P1050496

I made this Vogue designer Summer dress from the ‘Pool Blue’ and blogged about it here.

P1050510

The gorgeous ‘Leaf Green’ was destined to become a tunic top of sorts, but I couldn’t find an off the shelf pattern that I liked enough so I decided to draft my own.

I had several features in mind from other tops I own that I wanted to incorporate, so I played around awhile until I came up with this: –

A one-piece front with a centre front pleat and two horizontal partial pleats running parallel to the hem.

P1050540

The back was also to be one-piece and would have some added shape in the form of external darts.

It was also to be shorter than the front and there would be slits on both sides.

P1050541

This is the finished tunic which, from the creases, you can see has been worn quite a bit already.

P1050832

The inverted centre front pleat was reinforced with a line of top stitching….

P1050544

…and a couple of coconut shell buttons.

P1050836

The parallel pleats at the bottom were designed to lift the tunic in the middle leaving the sides to drape lower.

To acheive the desired effect, the pleats were only partial and I only sewed between the pins as shown below.

P1050542

P1050543

I like the darts from the dress I made but was happier after securing them flat against the back, so I did the same with this tunic.

P1050839

Much better!

P1050840

French seams and narrow hems were used throughout.

P1050842

The front pleats hang exactly as envisioned….

P1050838

…and I added a gathered pocket at the last minute, matching the style with a pleat and another coconut shell button.

P1050837

It’s a little bit stiff at the moment but will soften after the first wash.

I love it – the perfect loose, linen tunic to throw on over a pair of comfy linen trousers and mess around in the garden.

So cool and easy to wear and a lovely cheerful shade of lime green!

P1050830

I could have brushed my hair for the photo though – I look like a tree with a bird’s nest on the top:)


42 Comments

How To Make A Play Tent From Old Shirts – A Tutorial

Last week it was our school’s Summer Fête and, as well as many edible goodies, I made a play tent for the PTFA to raffle off for their funds.

All week I had been making jam, marmalade, fudge….

P1050565

….Elderflower Cordial….

P1050566

…….and scones.

scones

The day before the fair, Mr H-L had a delivery of some new shirts for work and decided to have a wardrobe clear out resulting in the eviction of nine of his ‘old’ ones.

P1050553

Some of the shirts had never actually been worn and even those that had were still in great condition so, when he asked me to take them to the charity shop, and idea sprung to mind.

Why not upcycle them and make a patchwork play tent to raffle off for the school funds?

This ended up making far more money than they would have achieved in a charity shop, and the money was still going to a good cause, so off to my studio I went to formulate a plan.

I made a similar tent for The Boys last year which I never got around to blogging about, so I based it on that.

Photoshopped

YOU WILL NEED: –

Nine men’s cotton shirts

1 x dowelling (2000mm x 25mm)

4 x planed timber (1800mm x 44mm x 18mm)

4 x eyelets

2m elastic cord

Drill a hole 15cm in from one end of each of the bits of planed timber using a spade bit the same size as your dowelling.

P1050782

You now need to create one single piece of fabric that measures 1.60m x 3.20m.

The first job was to cut up the shirts into as many usable sections as possible using my rotary cutter for speed.

I started by removing the button flaps, cuffs and collars.

P1050554

Look at all the buttons I rescued!

P1050595

I wasn’t at all precise in my cutting as I intended to fit each piece as I went – very liberating and totally the opposite of normal patchwork!

P1050560

I laid all the bits out on the floor and arranged them in a pleasing order, being sure to space out evenly the more brightly coloured yellow and pink.

This would not have quite the same impact with the more conservative blue or white work shirts, but you could always appliqué onto the patches for added interest.

I didn’t need to – Mr H-L likes a shirt that stands out:)

As you can see from the picture below, I sewed the pieces of fabric VERY roughly together into strips. The edges were then trimmed into a neat line before stitching the strips of patchwork together along their long sides.

P1050561

As both sides of the tent were going to be visible, I used Flat Fell seams throughout.

This type of seam leaves a smart finish and adds strength to the seam.

Here’s a line drawing to show the construction: –

Flat fell seam

Image courtesy of Google images

In photographs, here’s what I did: –

Stitch a staggered seam where the lower fabric (pink) sticks out 1cm more than the top fabric.

P1050557

Open the two fabrics flat with the raw edges of the seam uppermost.

Fold the seam to the left and tuck the (pink) overhang over the raw edge of the other (striped) fabric, enclosing all raw edges in the process.

Stitch close to the folded edge.

P1050558

As I said, a very neat finish which I used as the outside of the tent.

P1050559

Keep going until you have one piece of fabric measuring 1.60m x 3.20m.

Hem all around the outer edges.

P1050562

In each of the four corners of the tent, fix an eyelet through which you need to attach a 50cm length of elastic cording as shown below.

P1050563

Tie the ends of the cord in a knot to form a loop through which the tent poles will pass.

Align the holes in the tent poles….

P1050785

….and insert the length of dowelling.

P1050786

Lay the tent over the central dowel and pass the poles through the elastic cords at the bottom edge.

I also added a tie half way up each side of the tent – but, in my haste, forgot to document it. Basically, four 50cm long ties were made using scarps of leftover shirt fabric and sewn to the seam. These hold the tent more tautly to the frame.

P1050567

We also decided to saw a shallow groove on the outer edge of the pole where the elastic cord sits – this helps stop the cord from riding up the pole.

P1050568

With the addition of some bunting, a blanket and some cushions, it makes a lovely spot for young children to play.

P1050578

Or the perfect place for No.1 Son to shade his cider from the afternoon sun!

P1050586

We sold raffle tickets for the tent and raised almost seventy pounds for the school funds!

childs play tent

The lucky winner was thrilled to bits to win it for her little girls and, as it was such a success, I think I’m going to be asked to make one for next year’s fête.

Watch out Mr. H-L, I’ve got my eye on your shirts…..